In a distant, dystopian future, bloodsport reigns.
Combatants from all over the world join a tournament where they are tasked to slay one another in varying arenas. Although the main players of the tourney are five different mega corporations, only one combatant can be left standing each time. Welcome, new blood, to Overdox.
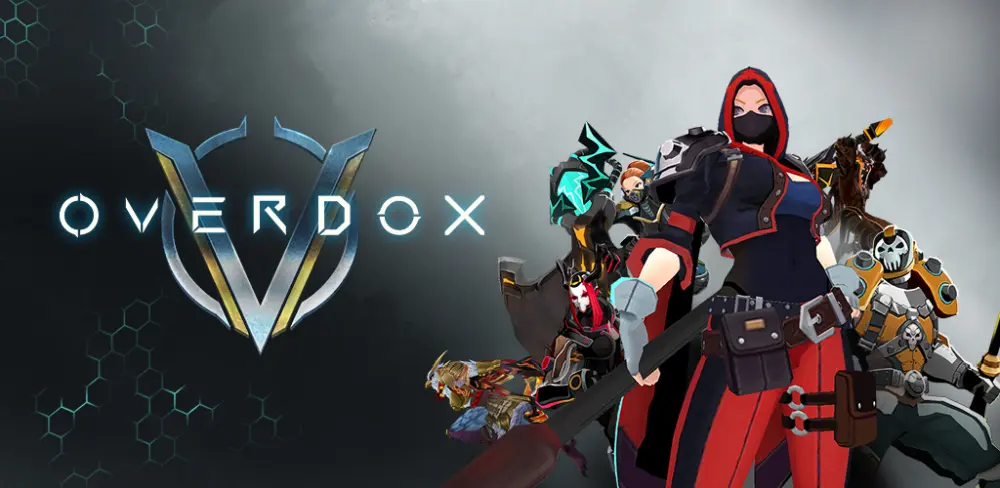
Developed and published by Haegin Co. Ltd., the South Korean developer behind titles like Homerun Clash and Play Together, Overdox (sometimes stylized as OVERDOX), is a battle royale with a MOBA-inspired feel. The game features an array of weapons and armor that the player may take with them to battle. Said player has to strive to outlive all of their competitors in order to be truly victorious. But doing so will take a lot of skill, wit, strength, and preparation.
Have you just entered the tournament yourself? Are you struggling because your win rate is low? Are you an intermediate player looking to hone their skills? You’ve come to the right place. Read our comprehensive Overdox beginner’s guide below and you’ll (hopefully) stop finishing dead last!
Battle Royales at a Glance
The term “battle royale” arguably originates from a 1999 novel written by Japanese author Takami Koushun called Battle Royale, where in an alternate dystopian timeline of Japan, students are selected by what is called “The Program.” Those chosen by The Program are sent on a field trip where they’re shipped off to an island where they have to kill each other. There can only be one student left standing.
The novel became so popular that it spawned a manga and a movie series altogether, further presenting its gloriously horrific setting to international audiences. The Hunger Games books and movies are said to be directly inspired by this work of fiction.
An interesting feature in the Battle Royale story was that there are such things as “safe zones” where the combatants can safely tread. As time goes by in the story, the number of safe zones decrease and anyone caught outside of the safe zones is killed instantaneously by the explosive collar they’re wearing.
Another concept that the story introduced was that each combatant starts with a random item—it could be a mundane item, a completely useless item, and sometimes it’s a working weapon. The combatants have to scrounge about for loot and supplies whilst looting the corpses of their victims at the same time.
These two very prevalent features of the story have been turned into exciting game mechanics in recent times. Popular games that fall into the battle royale genre are PlayerUnknown’s Battlegrounds, Fortnite, and Garena Free Fire. Some games have modes that reflect the battle royale genre as well, such as Zooba, Brawl Stars, and Smash Legends.
So What Is Overdox?
As you may have guessed by now, Overdox is a battle royale.
It shares similar mechanics to most battle royales available in the gamer’s market today, especially the idea of a safe zone and starting out with little to nothing. The only difference here is that each player starts out with a weapon of their choosing. Said weapon has its own Unique Skill, so pick your favorite. We’ll talk about weapon types later in this Overdox guide.
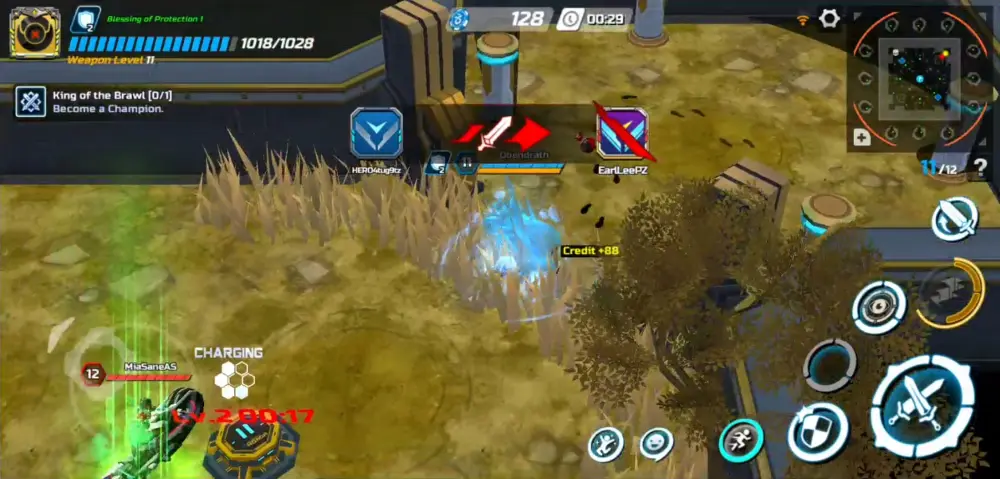
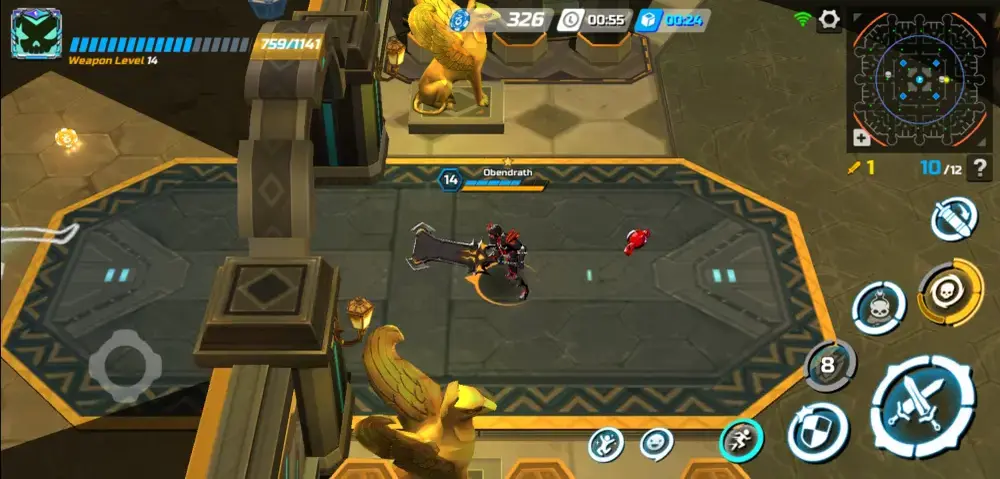
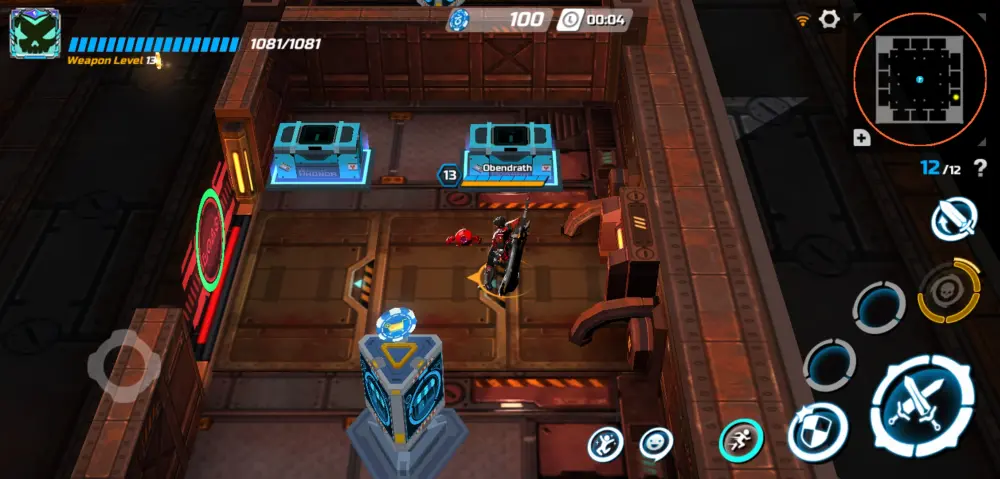
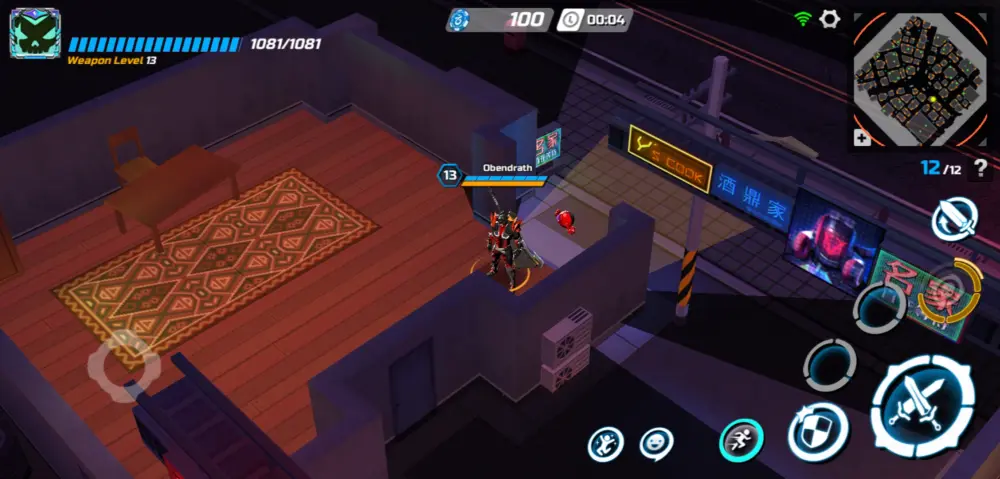
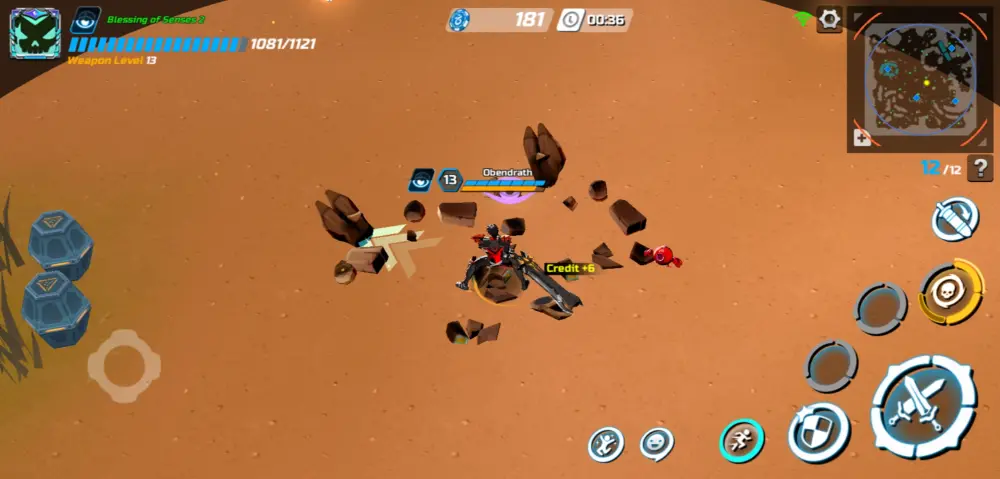
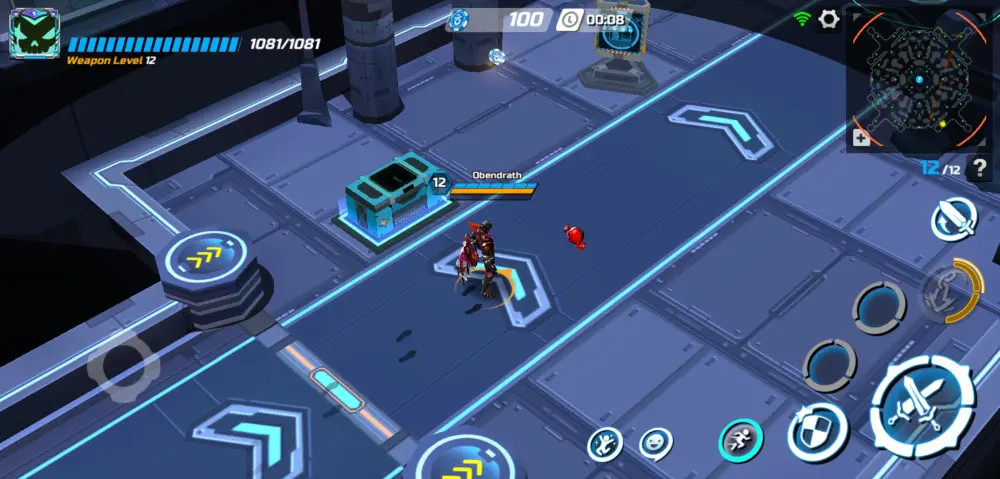
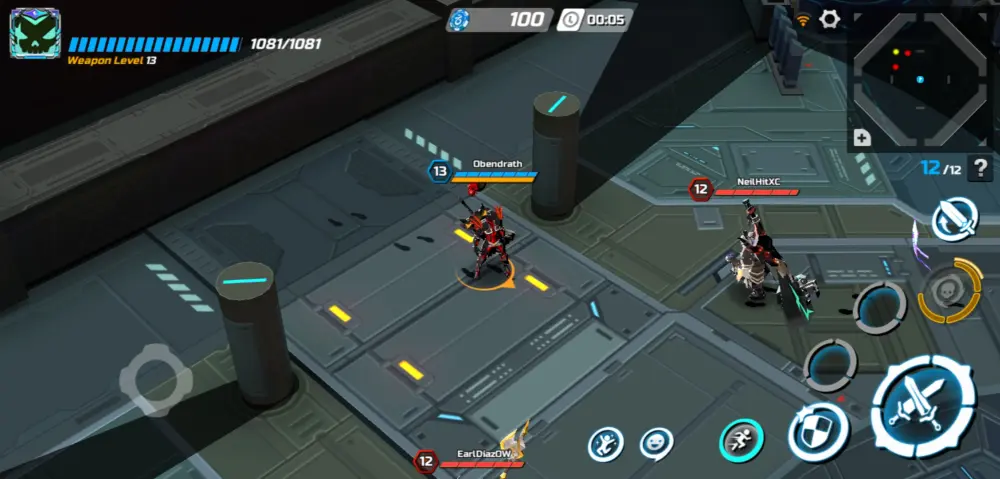
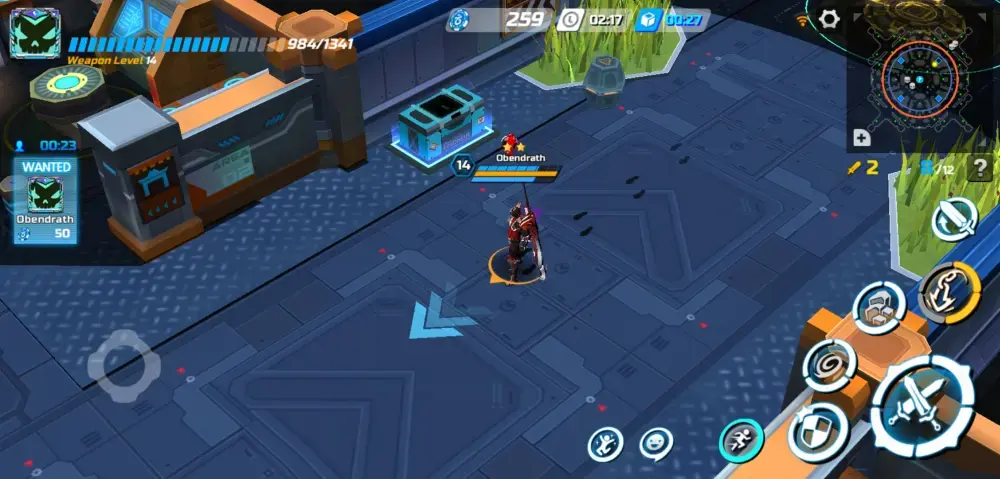
Combatants are thrust into a battlefield where they have to scavenge for Ability Books, supplies, and credits—a currency used only in the Credit Shops scattered all over the map (they’re tiny green blips). Over time, a harmful field called the Veil will close in on the safe zone. Should any combatant be caught in the Veil, they will receive grievous damage. Naturally, nobody can survive the Veil and anyone who even attempts to is a roast turkey. Thus, staying where the safe zones are is quite important for the average Overdox player.
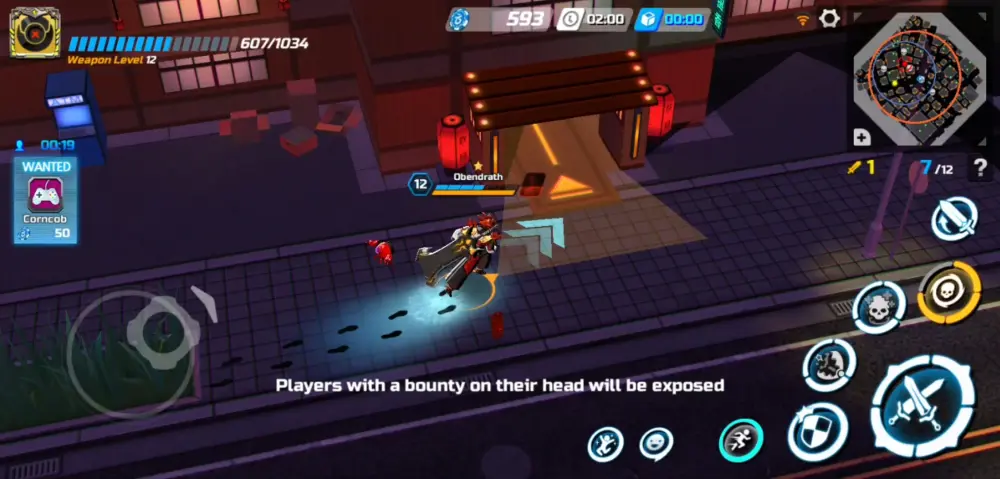
The Wanted Player is named Corncob…? There’s a lot of sick people in this match.
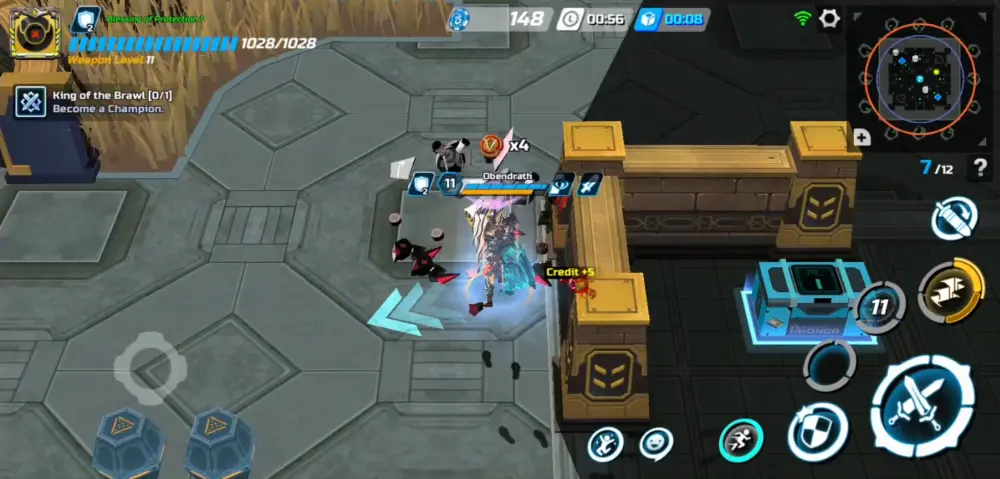
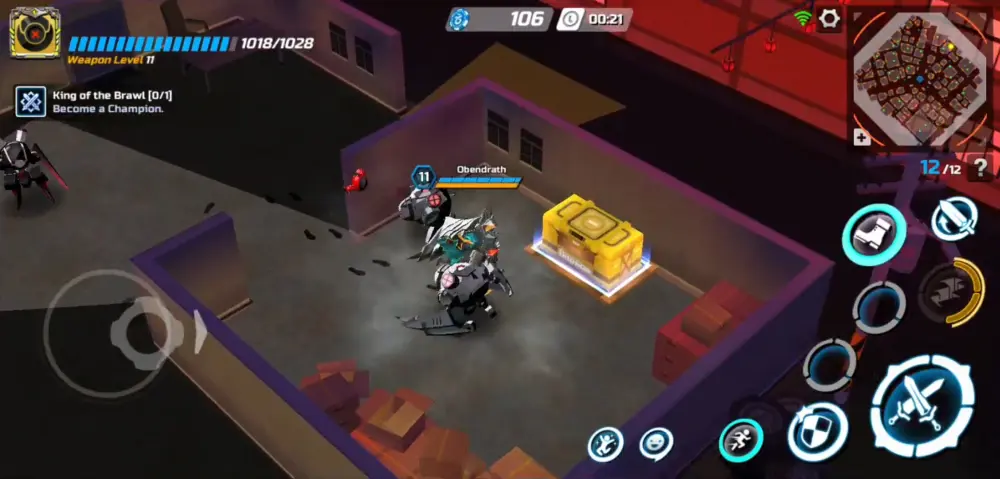
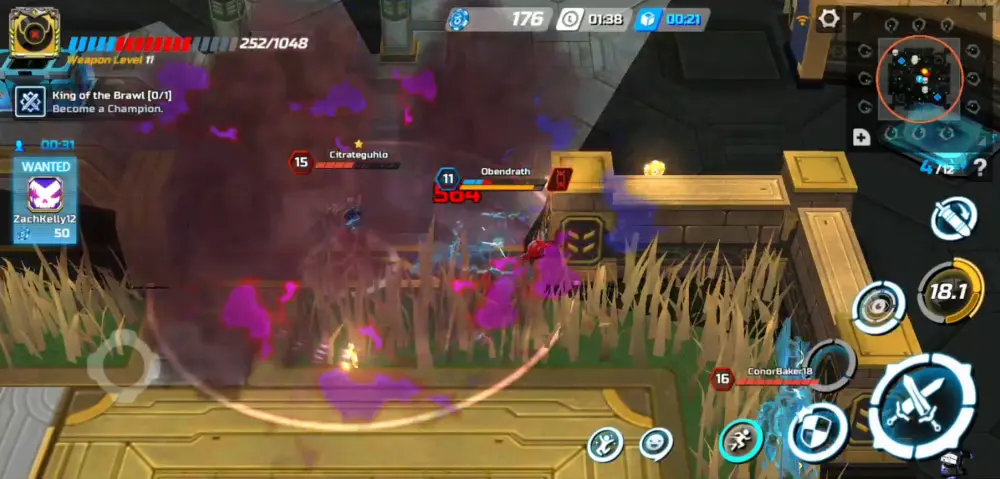
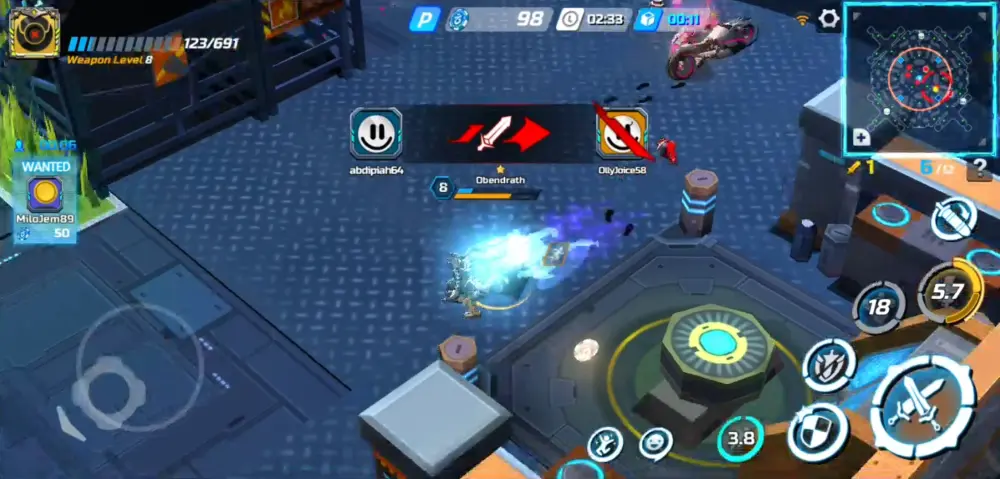
The game tracks down each player through how many opponents they’ve slain. If you happen to have killed more than other combatants, you will become a Wanted Player. Your bounty will then be posted on the side of the screen—anyone who happens to defeat you in this duration will gain a credit bonus. Conversely, if you find that another combatant has become wanted, hunt them down at your own risk.
It’s very likely that this Wanted Player has powerful gear. If nobody has claimed the bounty on the Wanted Player’s head after a few seconds, the Wanted Player’s location will be shown on the map for all to see. This also means that if they’re hiding or have the Blessing of Shadows, they will be automatically exposed.
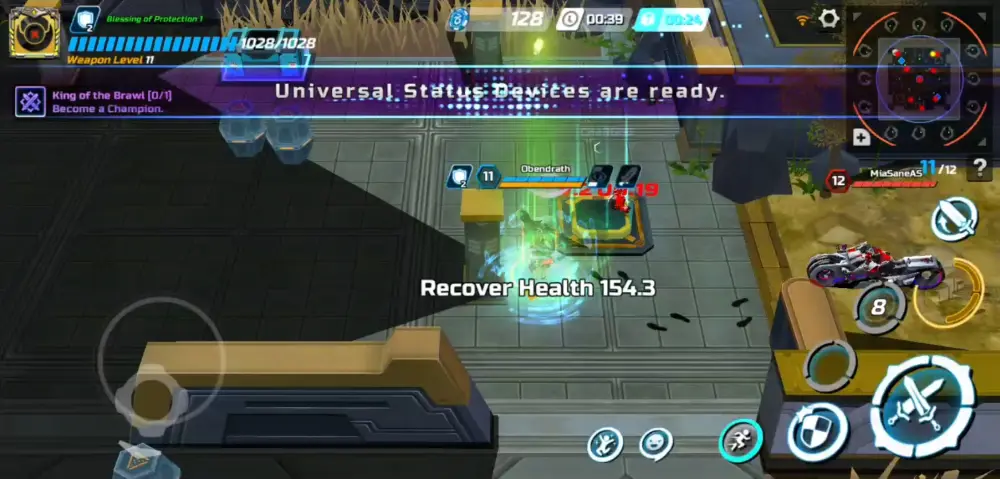
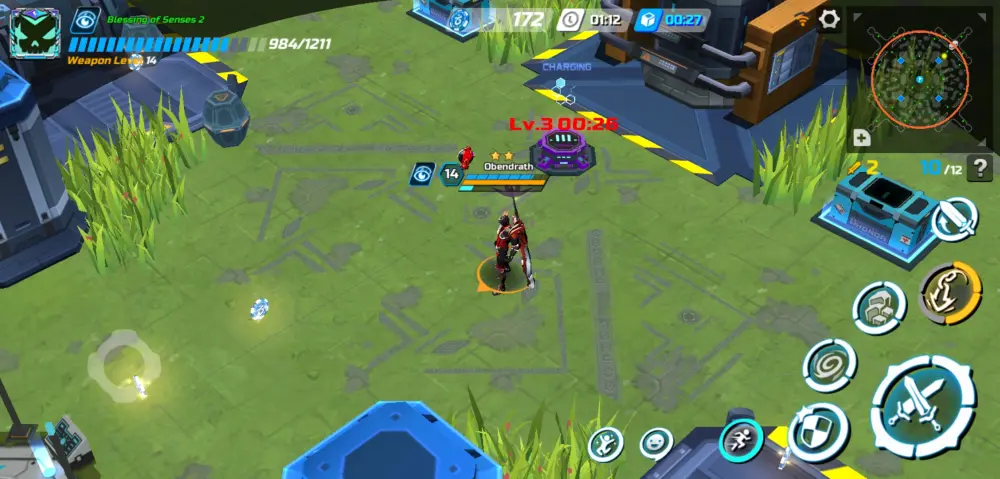
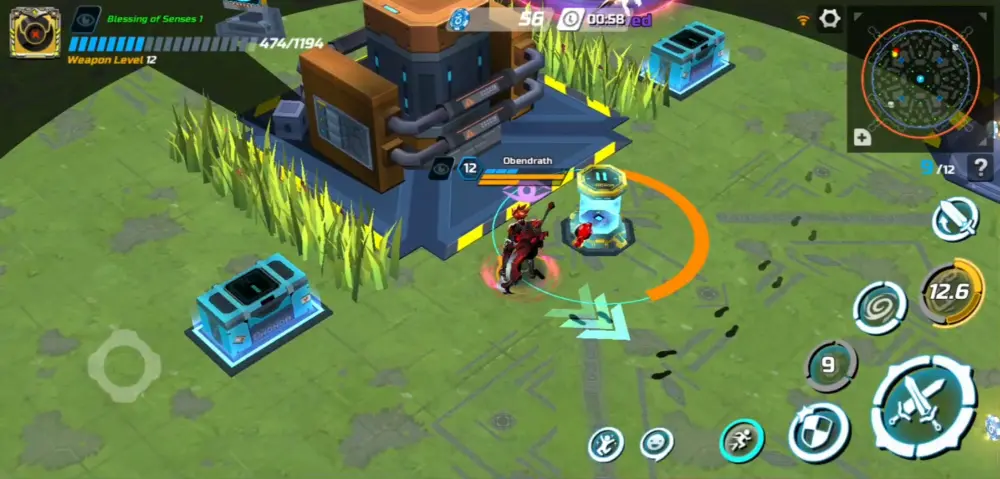
Scattered all throughout the map alongside supplies are Buff Devices, which briefly enhance the combatant with a random powerup (we’ll talk about this soon), and among the Buff Devices are Recovery Devices that heal some of your health back. Whenever these are used, each Buff Device or Recovery Device goes up a tier and this is signified by color: Blue being Tier 1, Yellow being Tier 2, and Purple being Tier 3. Using these devices at higher levels would yield better results. Upon using any of these, the Buff Device or Recovery Device will undergo a brief cooldown before they can be used again, albeit at a higher tier.
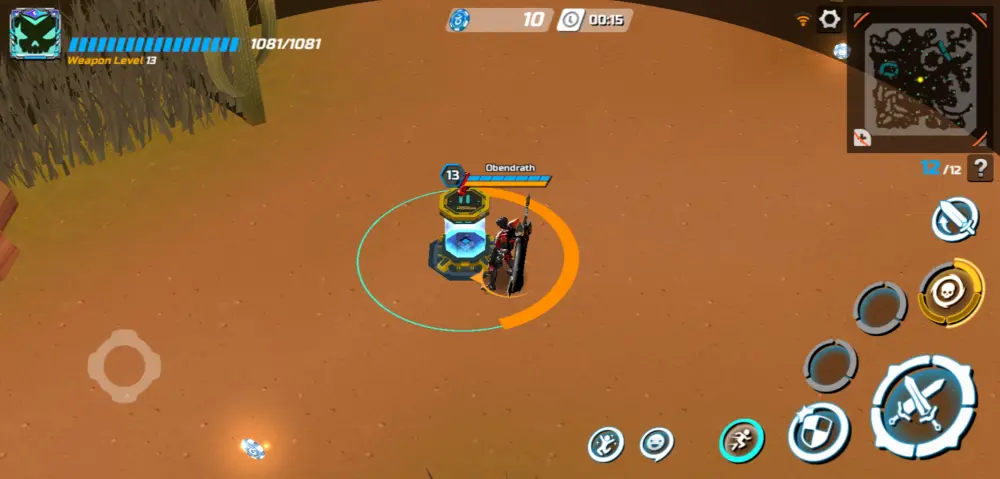
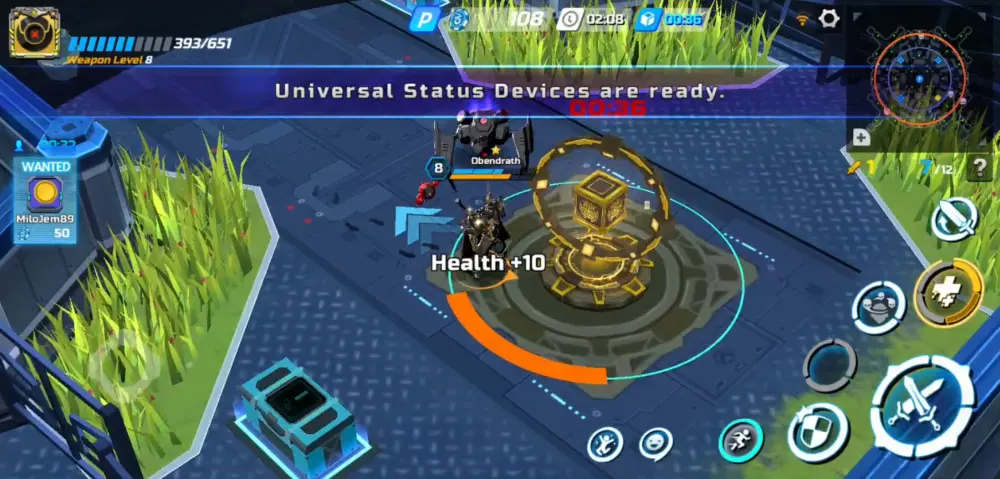
Found in some maps are called Universal Status Devices. They’re massive, mysterious-looking structures that look like a pedestal with a floating cube in the middle. The cube is also surrounded by a gyro ring that floats and spins around the cube as you activate the device. These Universal Status Devices will directly affect all other combatants (meaning everyone but you) currently alive in the match, and the effects can range from dropping all their credits to being completely blind. Using these will certainly spell victory for you if you use them well and often.
The caveat to these is that, while Buff Devices and Recovery Devices are readily available at the start of the match, Universal Status Devices take some time to charge up, so don’t get greedy if the Veil’s closing in on the Universal Status Device you’re trying to activate. The risk isn’t always worth it. To find these almighty devices, be on the lookout for blue, glowing cubes on your minimap.
The combat system is unique as it involves a weapon’s combo string, guarding, dashing, and a stamina system. Each swing from your weapon depletes a bit of your character’s stamina. Successful blocks also deplete stamina. This system alone makes players think carefully of how they will strike their opponent next so as to not waste a swing. We’ll touch upon the mechanics of movement later on in the guide.
Every combatant in the field has to fight their way through players and Watchers—independent robot monsters that show neither conscience nor remorse—and it is every player’s goal here to be the last combatant standing. Do you have what it takes to become number 1?
Ways to Win in Overdox
The road to becoming number 1 is a long one paved with death. Lots of death. Not the deaths of your enemies, but mostly your own. You should be prepared to face this, and each time you jump into the fray, you should always be ready to get offed first out of all the 11 other combatants.
Now, this might be the most frustrating aspect of the game, but this is all part of the process of growing as a player. The very first lesson you need to learn in Overdox is that you won’t always win. You’ll be occasionally pitted against players who have more powerful gear than you albeit being in the same league. We aren’t saying this to discourage you—we’re simply telling you to set your expectations.
Becoming first blood in the game is a normal occurrence and it’s these defeats that should teach you the most things. Were you too reckless? Were you too eager to jump into a fight that isn’t yours? Did you hesitate during a combo? Was your Ability loadout ineffective? These are all questions you should be asking yourself after every defeat.
In finding the answer to these questions, you will find out how to not die early in the next round. As a means of cruel consolation, the game awards you with the Victim badge each time you die first, so let’s try to avoid that.
With the first lesson out of the way, let’s talk about more practical strategies that could potentially boost your win rate.
1. Fight Smart, Not Hard
They say that a warrior should be of both sound mind and body.
This doesn’t mean that you should charge into a fight, swinging your weapon about like a madman (although that does help sometimes). To fight with sheer brute force is one way to win, but it’s not always effective; you might be underestimating your opponent, especially if they can one up you with their Ability setup. This is why fighting smart trumps fighting hard in this game.
You can fight smart in a few but effective ways. Let’s start off by camping in the bushes. In most maps, there are tall bits of foliage that are scattered about. Staying in these bushes will render you invisible from the enemy unless they happen to use the Detection Ability. Popping out of the bushes when you see a dying combatant might give you an edge. This might seem unfair and cheap, but don’t be afraid to pull off tricks like these if you want to get to the top.
Some rounds can be won entirely by you ending it with a single kill and that’s if you’ve been hiding the whole time. Just don’t get carried away doing this as, oftentimes, the last two people left in a match are the strongest. If you’ve been hiding the whole time without a plan, you might end up being second (still not a bad number).

Another way you can fight smart is to learn how to parry. Parrying involves pressing the guard button (next to the dash button) at the perfect moment that the enemy’s strike lands on you. This may take several sessions of practice since landing hits also relies on the latency of your internet connection (low speed internet users beware). To know if you’ve successfully parried an attack, you should see the word “PARRIED!” come from your character, as well as a few rings of dust coming from the parry of your character.
Another indicator of a successful parry is that your opponent has been knocked down. There are some nuances to blocking in general, however. For example, there are some attacks in a combo that you cannot parry. These attacks are called Heavy Attacks and, if blocked successfully, take down a chunk of your stamina instead of a regular amount.
Lastly, take note of the number next to your life gauge. This is your Weapon Level. It has a small chance to increase each time you kill Watchers. If someone is coming at you with a Weapon Level much higher than yours, don’t think twice: run. Run and try to get away. Chances are if you engage them head on, they will most certainly tear you limb from limb like a deranged ape from the pits of hell.
Especially if you’re the underdog, you will have to utilize other means of suppressing them than brute force. If you can wear them down by having them fight a lot of Watchers along the way or another player, that could help. Just don’t expect the stronger player to yield completely, especially if the fight’s just down to the two of you.
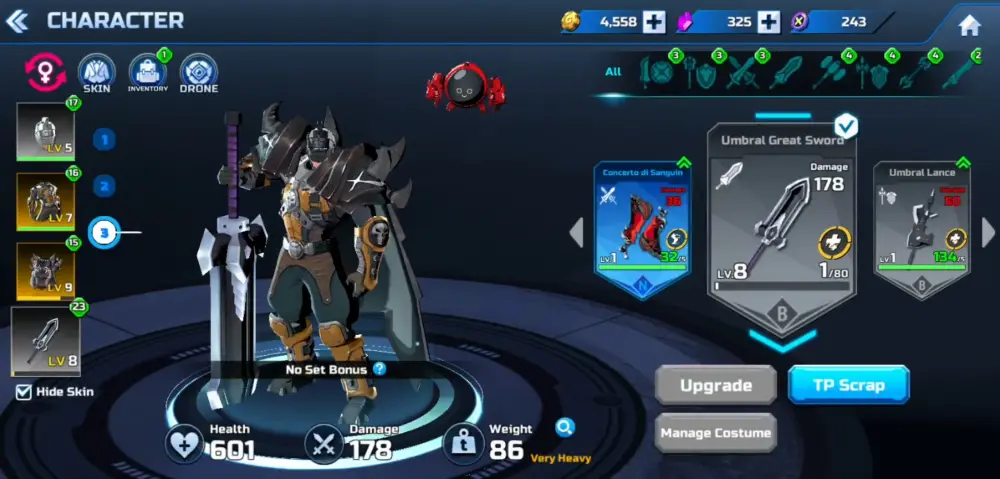
Once you’ve plunged into the battlegrounds, there’s no turning back. So it’s always important to keep your gear upgraded when able.
2. Upgrade Your Kit Before a Fight
Let us first be clear here: you can’t always upgrade your gear—you will be short on gold every now and then.
Gold is the primary resource that you earn in Overdox. You earn gold mostly from matches and it all depends on how well you do in battle. The kills you make, the credits you’ve taken, the badges you’ve earned—they all contribute to the amount of gold you make at the end of a match.
Sometimes, just learning how to play with the hand you’re dealt with might just earn you a decent amount of coin. Other than earning them from battle, you can get them from rewards, which we’ll tackle much later in this guide. Why are we telling you this? Because gold is needed to make your equipment stronger.
Whenever you roll the gacha, be it through using Normal Energy, Superior Energy (again, more on these two later), or the item gacha itself, you will likely get the big chance to obtain duplicates of weapons and armor you already own—especially if the item is of lower rarity. These duplicates get transmuted into Training Points or TP.
Each piece of equipment requires a certain number of TP before it can be upgraded. Once you’ve fulfilled the TP requirement, you will need to pay a sum of gold for the upgrade to go through. Ostensibly, the TP and gold requirements increase the higher the equipment piece goes in level.

Another way you can make good your loadout is by picking a Drone you prefer. This can be accessed by tapping the Drone button in the Character menu. Each Drone has its perks, but the more powerful the Drone, the more battery they consume. Battery is essentially your stamina system for the game; without it, you can’t play a round. Pick whichever Drone fits your play style (or pick the low-end ones and handicap yourself for fun).
So you’ve just leapt into battle. What now?
3. Scavenge for Supplies
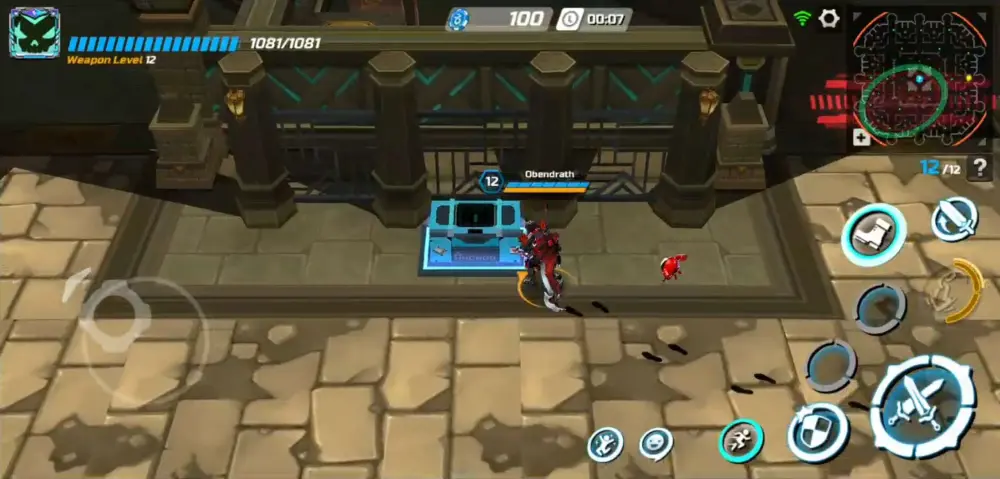
As you move around, you will occasionally encounter large boxes scattered throughout the map.
These boxes contain supplies that may help bring you closer to victory. The most important supplies in these chests are credits, whereas other items you might find are Ability Books and utility items like passes, which help you get past certain gates. The reason credits are the most important supply item here is because they’re quite versatile as we will discuss soon in the guide. The open button (which is shaped like a boot)
only appears when you’re near a box. You may choose to Take All the items inside the box or leave them be. You can choose to exit viewing the contents of the box by tapping anywhere else while the box’s interface is open.
You will notice that some boxes have different colors from one another—that’s because they follow the rarity system of the game. The box colors occasionally give better items than others. For instance, you may obtain better-quality skills from a Purple box than from a Blue box, and the best ones in Red boxes (though, this doesn’t always apply in maps like Land of Solitude). Yellow boxes always give a lot of credits.
The moment that you jump into the fray, you should always make scavenging for supplies your priority—not hunting other players down. However, don’t hang around boxes for too long as some players may take advantage of this moment to launch a surprise attack, especially if it’s the beginning of the match.
That said, being prepared for who might be coming for you will always put you one step ahead of those who blindly rush into a fight with no Abilities ready or no money to buy heals when they need it. Think about it: you’d rather face an opponent with an Interrupt at the ready rather than fight them without any Abilities at your disposal because they might be more prepared than you. Overdox isn’t just a game of skill—it’s a thinking game, too.
Now, about Abilities…
3. Utilize Abilities Properly
You open a box and lo and behold: an Ability Book!
Ability Books are what grant you Abilities—powerful tools that you can use to disorient foes, heal yourself, or even directly harm anything you use them on. You find them in boxes and, sometimes, alongside the corpses of dead combatants. But let’s talk about finding them within boxes since this is the most common way to obtain these.
Pressing the Take All button upon opening any box and gaining an Ability would immediately set it on the Ability slots located to the left of your attack button. If you happen to have full Ability slots, taking an Ability Book from the box means having to replace the other Ability you currently have. You can do this by tapping the new Ability and then tapping the Ability slot you’d want to replace. Be warned that this change cannot be reversed!
With that out of the way, Abilities ought to be used properly and effectively if you want to win. Tapping an Ability will directly make your character apply it on an opponent, but this shouldn’t always be done since certain Abilities require some timing to be used correctly.
Occasionally, players may find purple-colored Ability Books. These are upgraded versions of Abilities, or Special Abilities, which perform better than how they normally would. Look out for Special Abilities—they might just turn a fight around!
Below is a list of all obtainable Abilities in a regular match in Overdox:

Blink — This Ability can be used to gain distance away from your opponent or close the gap between you and them. It simply teleports your character a short distance. Imagine doing this to appear right behind your opponent just as they’re about to swing their weapon. Then you’d be able to strike them from behind. The Special Blink generates a small healing circle at the caster’s feet when they reappear from teleportation. Blink is represented by a curved arrow.

Cleanse — Cleanse should be used when harmful effects are plaguing your character. Consider using this when your character is burning, bleeding, frozen, electrocuted, confused, poisoned, or even immobilized. You’ll be able to make your move right away when you use this. The Special Cleanse will make your character immune to Hit Effects (knock back, knock down, impact, etc.) for 9 seconds. The icon for Cleanse is the upper half of a skull with a few plus (+) signs on it.

Confusion — A powerful Ability that reverses the movement controls of a player. You can use this to throw your opponent off guard or have them run into the Veil instead of run away from it (if you happen to find them close enough to the Veil, that is). The Special Confusion grants the caster immunity to opponents’ Confusion effects for 20 seconds upon use. Confusion’s icon looks like a trio of swirling skulls above the silhouette of a person’s head.

Detection — Your enemies can run, but they cannot hide! Using this will allow you to briefly reveal the locations of every other combatant on the map regardless of their visibility. This means that even if they are hiding in the bushes, they’ll still be seen. Those blessed by the Shadow, unfortunately, cannot be seen using Detection alone. Additionally, Detection grants the caster a brief damage bonus. Special Detection removes the buffs of nearby opponents when used. Detection bears the icon of an eye within a quartered circle.

Dimension — An Ability that is direct but difficult to use. Your character casts a miasma of energy at a targeted location. The miasma spins briefly before violently detonating; anyone or anything caught within the explosion sustains massive damage… except for you! Special Dimension deals double damage. Dimension’s icon looks like a vortex.

Entrap — Entrap is an Ability that may take time getting used to. If used wrong, the caster of the Ability may become affected as well. The caster of Entrap lays down electric trap triplets on the ground before them in a triangular pattern. The traps activate after a short delay and persons will be rendered immobile for a few seconds once they step on any of the traps.
A trapped person can still swing their weapon, guard wherever they’re currently facing, and dash forward albeit unable to move otherwise. This Ability is most easily used for back attacks or getting a person stuck behind the safe zone while the Veil approaches. Talk about a humiliating defeat! Special Entrap increases the time of anyone stuck in the traps and grants the caster immunity to traps until the end of the match. Entrap bears the symbol of a bear trap (ba-dumm-tss).

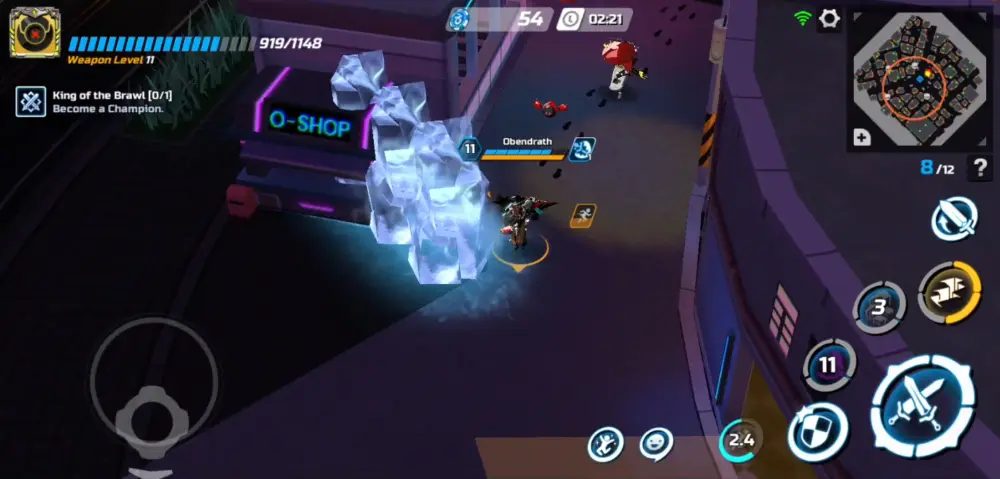
Interrupt — Is your opponent a little too persistent? Try using Interrupt on them. Interrupt does what its name implies: completely halts the enemy player’s activity. It’s similar to Entrap but instant and with a narrower area of effect. Your character conjures three pillars of ice from the ground to stun the opponent. It can be used to keep them from running, ruining their combo, or even keeping them from entering the safe zone when the Veil approaches.
Additionally, the ice pillars can be destroyed, so don’t linger behind them if you don’t want to face your opponent’s wrath. Special Interrupt has pillars that stand for a longer period of time and adds a slow effect to anyone affected apart from the stun it already comes with. Interrupt’s symbol looks like a rocky crag.

Recover — The simplest of all Abilities. Using this heals your character. Special Recover gives the caster a greater amount of health recovery, a temporary state of invincibility to all damage, and a resistance to critical hits for 10 seconds. Recover has the symbol of a plus (+) sign.

Seal — Want a cheap way to take your opponent out? Cast Seal on them. Seal in general prevents them from blocking your attacks for 4 seconds. This means no more pesky shields to keep them fighting. Aside from keeping the enemy from blocking, Special Seal prevents them from performing their Unique Skill for 6 seconds. The icon of the Seal Ability looks like a broken sword piercing down on a shield.

Toxic Mist — Toxic Mist behaves similarly to Dimension, but its effects are instantaneous. The caster of Toxic Mist summons a poisonous cloud within a small radius that slows and deals periodic damage to anyone or anything caught within. The Special form of Toxic Mist generates a larger cloud that has more potent poison in it. Toxic Mist’s icon looks like a skull-shaped flask.
Mixing and matching your abilities could be key to your survival and/or your success overall. Let’s take a look at a few interesting combinations below:
- Blink/Cleanse + Recover — This is a survivor’s setup. Run, blink, heal. Cleanse to get nasty debuffs off of your person after a fight.
- Blink + Confusion — A runner’s favorite. You’ll become quite elusive in any situation except for the final stages of the match.
- Detection + Entrap — Fancy yourself a hunter? Equip these two Abilities together and track your prey down.
- Entrap + Toxic Mist/Dimension — Trap your opponent and then use Toxic Mist or Dimension to wear them down. This should allow you to kill them much more quickly.
- Interrupt + Entrap — A rival combatant’s nightmare. Being constantly stuck or stopped can really mean a death sentence.
- Interrupt + Seal — This one suits your inner duelist well. Stop your opponent from performing their combo and deny them the ability to block. It’s cruel, it’s calculated, it’s cold.
There are many more ways to combine your Abilities and these ultimately depend on your playstyle. Pick whichever Abilities are your favorites and let them complement your means of fighting your way to victory. But that’s discounting the Ability setup of your opponents, so look out and good luck!
Abilities are one way to keep yourself on your toes, but let’s address the Buff Devices we mentioned earlier.
5. Use Buff Devices and Universal Status Devices
We’ve briefly touched upon these powerful fixtures, but now, allow us to enlighten you in detail.
To start off, Universal Status Devices directly affect everyone on the map but yourself. These take a short activation delay, so keep your guard up while you remain in their activation radius—you might have another player try and thwart your attempts, especially if you’ve become a Wanted Player. Use these Universal Status Devices to your advantage and stir some chaos into the match.
As we’ve mentioned earlier, the Buff Devices grant any player a random buff. Below is a complete list of buffs available and their tiers:
- Blessing of Chance — This blessing’s a good warmup for a fight. It briefly increases your crit chance.
Tier I (Blue): Crit Chance +10%
Tier II (Yellow): Crit Chance +20%
Tier III (Purple): Crit Chance +30%
Attack Stamina Cost -50%
- Blessing of Endurance — Want your weapon to feel like there’s not much heft to it? The Blessing of Endurance grants you a couple of seconds of infinite stamina.
Tier I (Blue): Infinite stamina for 30 seconds
Tier II (Yellow): Infinite stamina for 40 seconds
Tier III (Purple): Infinite stamina for 40 seconds and immunity to traps
- Blessing of Protection — Just like Blessing of Chances, this one can help you get an upper hand in a fight. For a set number of hits, you will greatly reduce any damage inflicted by the enemy.
Tier I (Blue): Incoming damage reduced by 75% for 2 hits
Tier II (Yellow): Incoming damage reduced by 75% for 3 hits
Tier III (Purple): Incoming damage reduced by 50% for 3 hits, fills your Unique Skill once
- Blessing of Senses — This blessing is similar to the Detection Ability. Unfortunately, unlike the Detection Ability, it does not show you the locations of your enemies on the map.
Tier I (Blue): See invisible opponents for 40 seconds
Tier II (Yellow): See invisible opponents and see through walls for 40 seconds
Tier III (Purple): See invisible opponents and see through walls for 40 seconds, cleanses all debuffs upon receiving this blessing
- Blessing of Shadows — The Blessing of Shadows will bring out your inner ninja. Start sneaking up on opponents and stabbing them in the back. But be careful—you will still leave footprints behind!
Tier I (Blue): Become invisible for 30 seconds, character’s movement speed -90%
Tier II (Yellow): Become invisible for 30 seconds
Tier III (Purple): Become invisible for 30 seconds, character’s movement speed +120%
- Blessing of Swiftness — This blessing in particular will help you get around the map rather quickly.
Tier I (Blue): Character’s movement speed +120% for 30 seconds
Tier II (Yellow): Character’s movement speed +120% for 40 seconds
Tier III (Purple): Character’s movement speed +130%, dash cooldown decreased by 50% for 40 seconds
- Blessing of Zeal — Much like Chances and Protection, the Blessing of Zeal may also help you get an edge in a fight. Your opponents better be ready to feel pain.
Tier I (Blue): Damage inflicted unto enemies +20% for the next 2 attacks
Tier II (Yellow): Damage inflicted unto enemies +30% for the next 3 attacks
Tier III (Purple): Damage inflicted unto enemies +40% for the next 3 attacks, fills your Unique Skill once
While getting two of these at a time sounds like a dream come true, it is indeed all just a dream. Each buff listed here can only be obtained one at a time. This means that if you choose to use another Buff Device while you currently have a buff on you, the new buff will overwrite the old one. Time these carefully for the best results possible. Who knows? Maybe your Blessing of Shadows will help you skulk about and find a place where you can get a Blessing of Chances.
While you make your rounds through each map, a couple of particular entities will make themselves known to you…
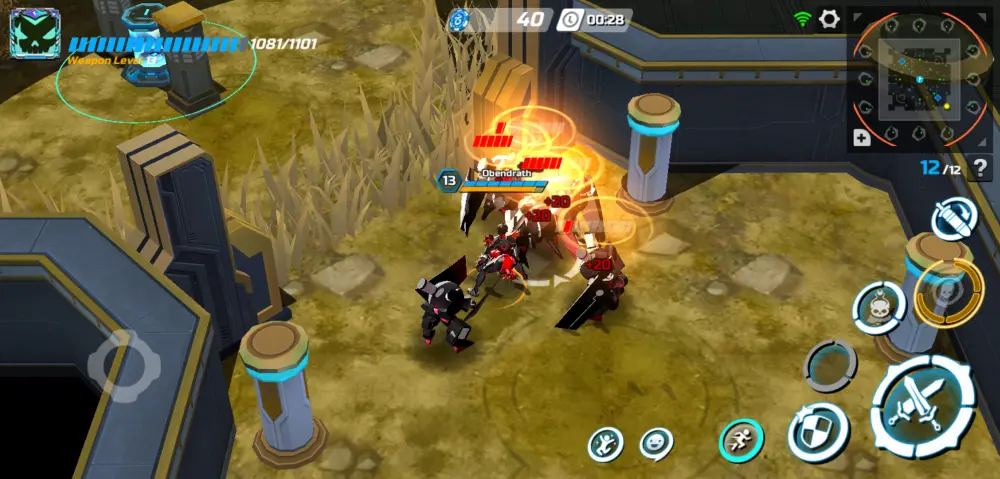
6. Fight Watchers for Credits and Heals
You’re minding your own business and all of a sudden a bunch of robots fall from the ceiling (or sky) to try and stop you! These guys are called Watchers.
Watchers are basically robotic monsters that roam each and every map. Their ability in combat usually varies depending on their size. For instance, bigger Watchers tend to be more powerful and more aggressive than their smaller cousins. In fact, some maps contain a legendary Watcher that’s ginormous and highly dangerous. It stands out because it has a golden paint job while most Watchers are colored black or are covered with rock armor.
Once the Watchers spawn, they will follow you until they lose sight of you completely, but this doesn’t mean that they’ll go elsewhere if you run into a bush right before their very eyes. They will still continue to pursue you into the bush in an attempt to murder you, so always be prepared to fight. If you don’t have the intention of fighting them at all for whatever reason, simply try to outrun them or try getting them to fight another player. The other player could struggle against them if they aren’t properly equipped or if they’re underleveled, but most players should be able to cut them down without any problem. This is, in a way, a means of fighting smart: throwing the enemy a distraction.
While it may seem pointless to kill these metal monstrosities, smashing them to pieces is often rewarding as it provides you with credits and some healing. Take for instance, you’re recovering from a fight with a particularly difficult opponent and you stumble upon some Watchers. Take them down and you’ll recover small portions of your health.
If that isn’t helping, the credit gain might bring you closer to purchasing a heal from the Credit Shop.
7. Buy from the Credit Shop

Shops on the battlefield? Well, how else are they getting this deadly deathmatch sponsors and viewership?
As you roam around, you will notice some kiosks sticking out in the middle of nowhere. Just like supplies, these can be haphazardly scattered about. These kiosks are called Credit Shops where—you guessed it—players spend their credits. You can only find these in a match and nowhere else.
Whenever a match starts, each player is allotted 100 credits. You can gain more credits throughout the match by killing Watchers, other players, or finding credits in boxes. The amount of credits a player has at the end of a battle does not carry over to their next match, but it does add to how much gold they can earn. A particular armor set can increase the amount of credits a player starts with, but we’ll talk about that later.
Each Credit Shop comes with a variety of different products available. They range from heals of varying health percentage (30%, 50%, 100%) to Ability Books, Weapon Level-Ups, Health increases, and a few other items. The prices differ depending on the item, with Special Ability Books often being the most expensive.
Purchasing any of these while you’re safe (obviously, not a great idea to buy anything while you’re in the middle of a fight) may put you at a cut above the rest. For example, the final phases of the round are nearing and there are 3 of you left alive. Buying a heal and altering your Abilities appropriate for the impending showdown might catch your opponents unawares.
Shopping sprees aside, sometimes knowing your terrain will get you to at least the top 3.
8. Know the Map
They say that terrain determines the winner in a fight between a bear and an alligator. This applies to almost any map here in Overdox.
After a couple of matches or so, you will soon notice patterns in the different maps. Be it the humongous Land of Solitude or the teeny-tiny Death Asylum, you’ll notice that each map has its nuances. But if you aren’t sure of what to expect in maps like these, fear not! We’ve compiled a quick reference of all the available maps below:
- Ancient Temple
A middle-sized map with angular turns everywhere. The center of the map is easily accessible. The Veil closes in on the center like most maps.
- Death Asylum
The smallest map in the game. All combatants start inside their own cell with two boxes and a Credit Shop. But they cannot remain in their cells because the Veil forces them out of it. The moment anyone steps out of their cell, all hell breaks loose.
- Downtown
One of the larger maps of Overdox. Downtown is the epitome of urban combat: alleyways, buildings, places to hide, but very little foliage to sneak around in. There is only 1 Universal Status Device and that’s in the town square. The Veil closes in at a random location.
- Land of Opulence
A middle-sized map with treasure in one of its four corners. There are occasional gold boxes lying around, but warping into the map can be tricky because you might immediately run into a rival player. Like Ancient Temple, the Veil closes in toward the center.
- Land of Solitude
Arguably the largest map in the game. You are situated in a wasteland surrounded by canyons that sometimes wind and twist. It’s a combination of open-space combat and combat in narrow areas. Adding to the challenge is the scarcity of supplies and the abundance of Watchers. In fact, this map is where the most Watchers spawn. Just like Downtown, the Veil closes in on a random location here.
- OVER Field
A treacherous map. There are multiple 3-way crossings and there’s always a humongous chance that rival combatants will encounter each other early. The center is particularly annoying since you will need 100 credits to enter the final stage where the Veil cannot fry you. If you can’t pay 100 credits to open the gates, you’re as good as dead, so keep 100 credits handy at all times you’re playing in this map. Here’s a solid tip: if you feel lost, follow the arrows you see on the floor.
- Together
A map rarely used in Normal Mode that’s simply an all-out brawl. No supplies, no shops, no Devices anywhere. Just scramble about and fight until there’s one of you left! The Veil closes in on the middle.
The key to memorizing the maps is exploration. Just be sure to take note of what the map has and what you might need to watch out for in order to keep yourself alive. For instance, one tip we can give you is to never be in the outer reaches of Downtown or Land of Solitude lest the Veil burns you alive.
But how do you know where the Veil’s closing in, exactly? Read our next bullet—it’s quite important.
9. Watch the Minimap Often; Be Observant
Let’s put this into perspective: you’ve just offed your first opponent. You’re ecstatic, confident—you know you can do this. But suddenly, another guy sneaks up from behind you and takes you out. You’re not dead last, but you’re not in the top 3 either. Were you paying attention to the minimap?
That’s right, the minimap. The thing on the upper-right corner of the screen. If you aren’t paying attention to this at all, there’s a huge chance that you’ve already lost. The reason behind this is because you’ll get to see what goes on around you. The yellow blip is you, the red blips are your enemies. Skulls are recent death locations. Because we’ve mentioned recent deaths, there’s something we may also need to point out related to watching the minimap, and that’s to be observant in general.
If you happen to see any chalk outlines on the floor, supply boxes that have been emptied out, or Buff/Healing Devices that have been recently activated, there’s a high chance that someone might be nearby or someone has been here. This could be quite dangerous if you aren’t prepared, so it’s better to play it safe and not pursue this person. Once again, there’s a high chance of fighting someone with better gear than you. Remember, fight smart!
On the other hand, if you have, say, the Entrap ability, and your Unique Skill is at the ready, hanging around where a recent skirmish happened can be a golden opportunity to launch an unprecedented attack against unsuspecting enemies. In this scenario, you may consider using yourself as bait as an opponent may likely return to the same spot where they’ve killed others.
When they emerge from hiding, you can use Entrap and your Unique Skill while they’re immobilized. If you’re extremely lucky, you might even get some Watchers to unwittingly help you out in the fray. But remember that you can still be overpowered if you don’t play your cards right. Use such tactics at your own risk.
Periodically, you’ll notice that the announcer will tell all the players that the safe zone is shrinking. If you ever feel like you’ve nowhere to run or you might have lost your sense of direction, look at the feet of your character—a blue arrow will spawn, guiding you toward the center.
Most of what we’ve covered so far are things we cannot entirely control, but let’s now talk about what you can control, and that’s how you use your weapon and how you move around.
10. Master Your Weapon and Movement
In most martial arts settings, making your weapon an extension of yourself is paramount. Become one with your weapon.
Each weapon in the game has its own set of moves and its own Unique Skill. We’ll discuss all of these in general soon. But the best way to know your weapon better is to play multiple matches with it—especially if it’s your favorite out of its class. Most weapons allow the wielder to move around between strikes and some even grant movement in certain directions through their attacks.
To illustrate, the Giant Sword called Crimson Eye has a third attack that causes the wielder to backflip. This strike is purely a defensive maneuver. Imagine backflipping onto a Healing Device behind you after completing the combo.
There’s one last thing we haven’t tackled yet in detail: the dash button. Your character will always dash in the direction they’re facing. You can use this button to close the distance between you and a rival player, or retreat to safety. Just beware: some gear offers players increased movement speed and/or dash distance, so this is quite tricky to master.
We’ve covered most of the basic means of winning in Overdox, but in the following section, we go into the nitty-gritty. This is where things get really interesting.
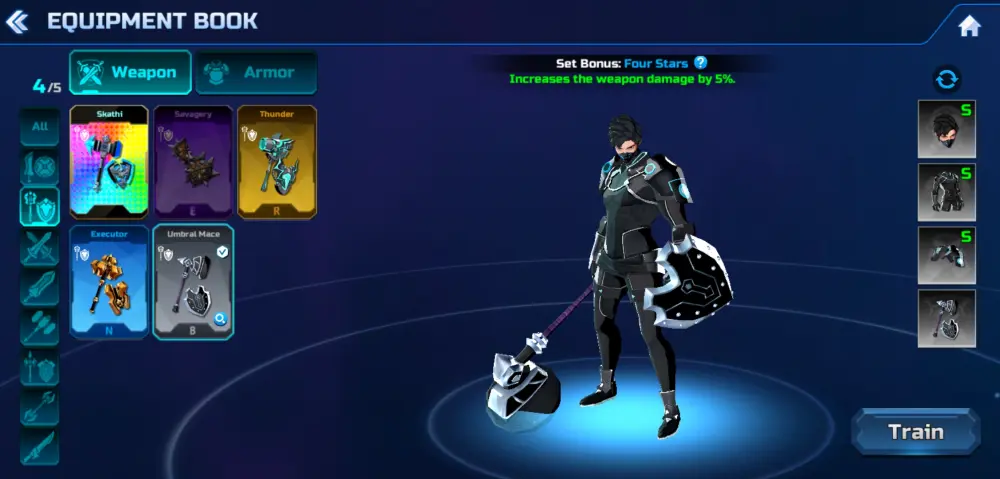
Know Your Weapon
You might be wondering, “There are so many weapon types, but which one should I use?”
As a mirror to most hack n’ slash games, Overdox doesn’t shy away from weapon types and styles. The variety here is enough to make you want to practice all of them, but we highly recommend sticking to one weapon type, especially if it’s one that you like. Just remember what Bruce Lee said: “Fear not the man who knows a thousand techniques, but fear the man who has practiced a single technique a thousand times.”
There’s really no shame in mastering a single weapon type, but if you’re out to get achievements, then feel free to master them all. But for the purpose of this beginner’s guide, we stand by our suggestion to stick to just one weapon type you enjoy using.
Onto the weapons!
1H Sword
This is easily a weapon suitable for beginners, but it’s no slouch in the hands of a veteran either.
The combos are swift with a decent range and it offers good defensive capabilities. It comes with a 4-hit combo with almost every last strike scoring a Hit Effect, giving the wielder momentary reprieve. This means that some of them knock back, knock down, or blow opponents away. Each swing costs a low amount of stamina.
1H Mace
An intermediate weapon that offers a solid defense and powerful strikes.
This weapon is akin to the 1H Sword but slightly heavier and has a shorter combo of 3 hits. This one is favored by people who enjoy one-on-one combat by isolating the wielder’s target. Compared to the 1H Sword, the 1H Mace exchanges low stamina cost for slightly higher damage.
Dual Swords
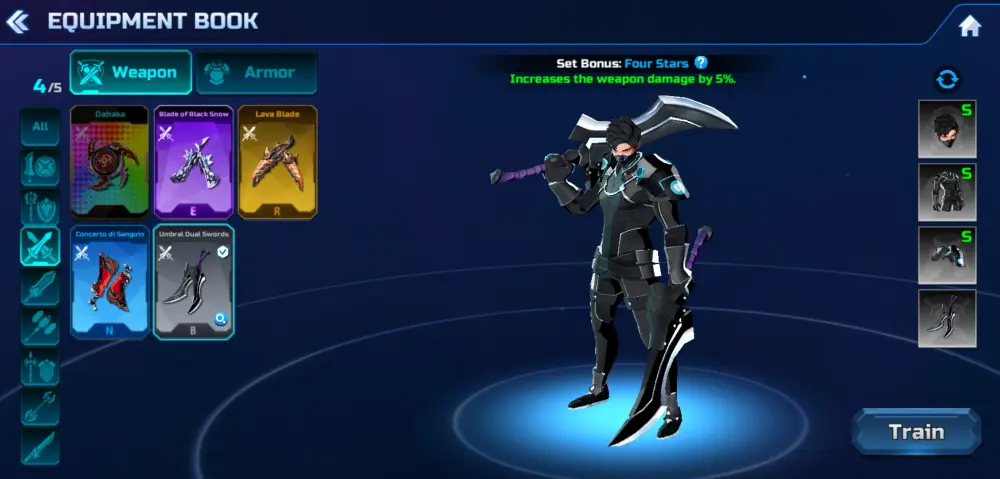
Another intermediate weapon that’s suited for players who love to dance with danger.
Unlike the first two weapons on this list, this one forgoes a shield for an extra blade. Its advantage lies in the user being quick on their feet even if the weapon’s drawn. Unfortunately, the lack of a shield means a narrow guard radius, so Dual Swords wielders will easily suffer attacks from the side or the back while guarding. But the speed at which the wielder moves, strikes, and the stamina cost of every swing from these swords greatly make up for its flaws.
Halberd
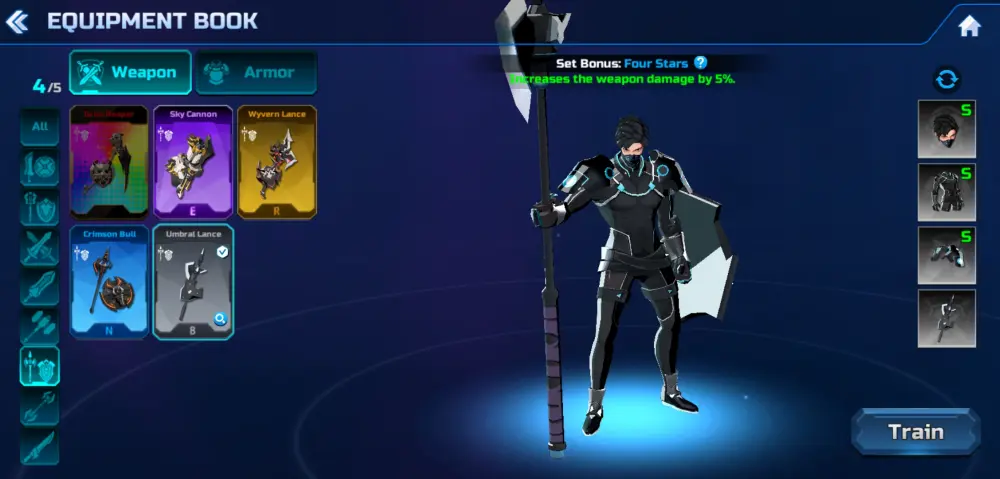
An advanced weapon that grants the wielder security in its attack range.
Halberd wielders are often players of patience and caution. Most of the Halberd’s strikes have a long reach and they tend to keep the wielder at a safe distance. Utilizing a 3-hit combo, striking and backing away is a common tactic used by Halberd players. Another noteworthy thing about Halberds is their wide guard radius, making them the best defensive weapons in the game.
Long Sword
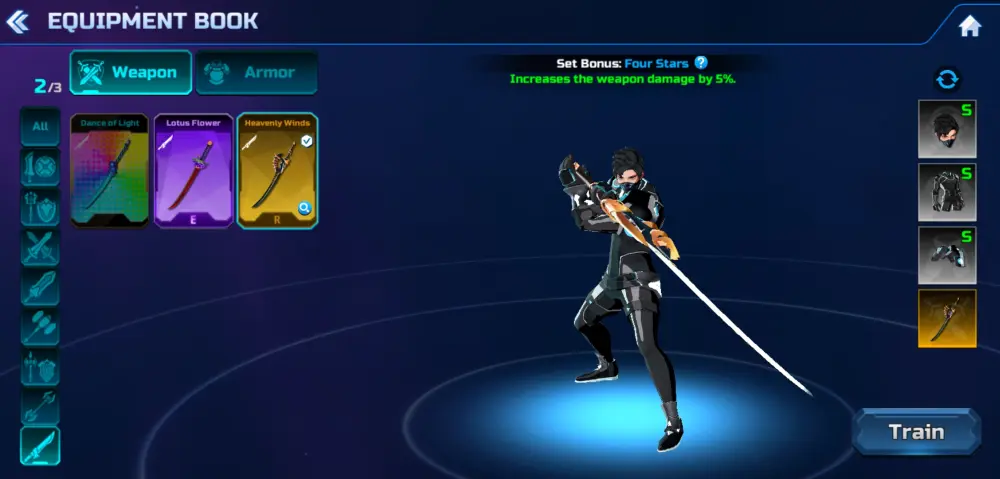
A balanced weapon that caters to newbies and veterans alike.
Its movements and 3-hit combos are flowing and fluid, combining deft grace with deadly strikes. While its reach isn’t as great as the Halberd’s, it can surprise both the wielder and opponent with how far it can slash. One unique feature the Long Sword has over other weapons is that it has two Unique Skills. The first Unique Skill is when it’s sheathed—all Long Swords share this one—a slash dash. On the other hand, each Long Sword’s true Unique Skill can be executed after it has been pulled from its sheath, giving the wielder options on how to approach their opponent. Each strike from a Long Sword may inflict Bleeding.
Giant Hammer
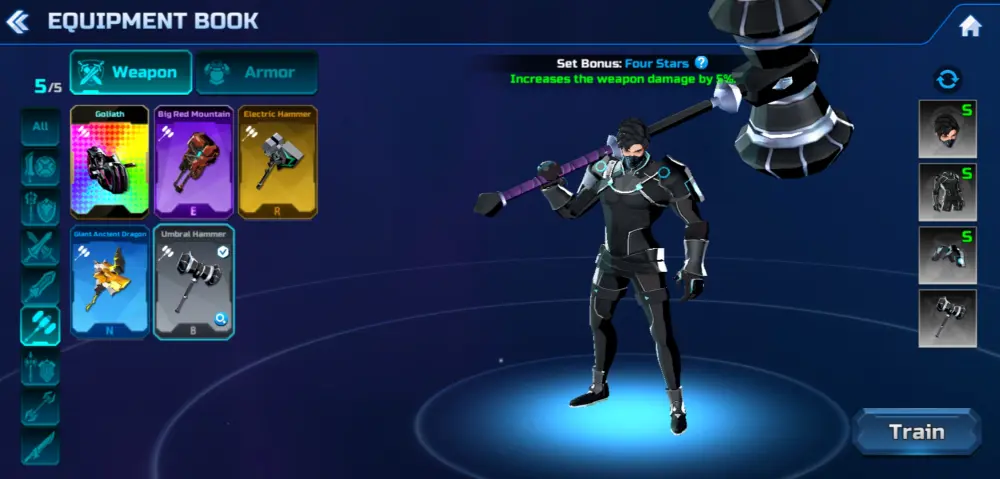
An advanced weapon that causes a great deal of damage with every smash.
The Giant Hammer has a slow 3-hit combo with a wide arc. What makes it stand out is that anyone attempting to block these massive strikes will instantly find their stamina quickly depleted, which renders guarding pointless. They’re also almost impossible to parry.
Giant Sword
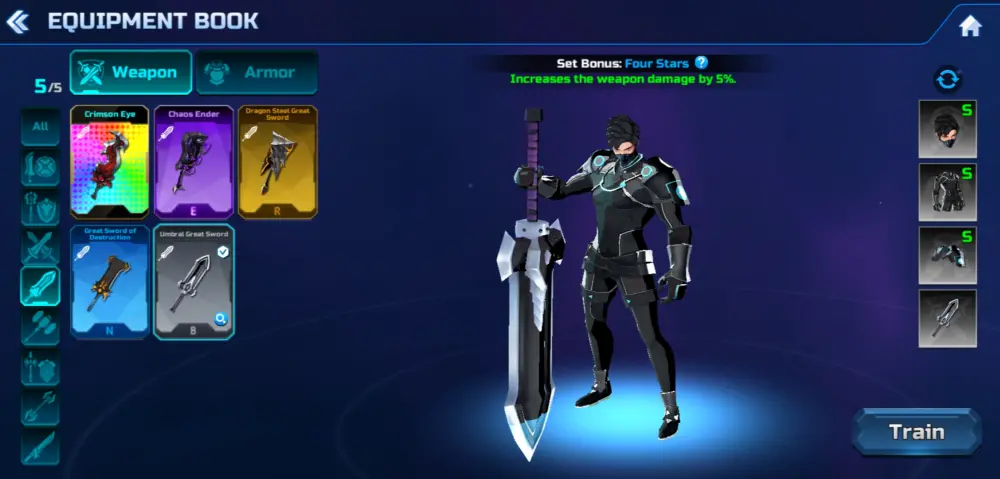
Another advanced weapon that takes pride in its wide swings.
Giant Swords are similar to Giant Hammers in the combo department: slow, 3-hit combos in wide arcs. What makes the Giant Swords stand out is that some of the attacks in its combos inflict dangerous Status Effects like Burning, Frostbite, Bleeding, and even Electrocution. Giant Swords are favored by those who like fighting dirty.
Staff
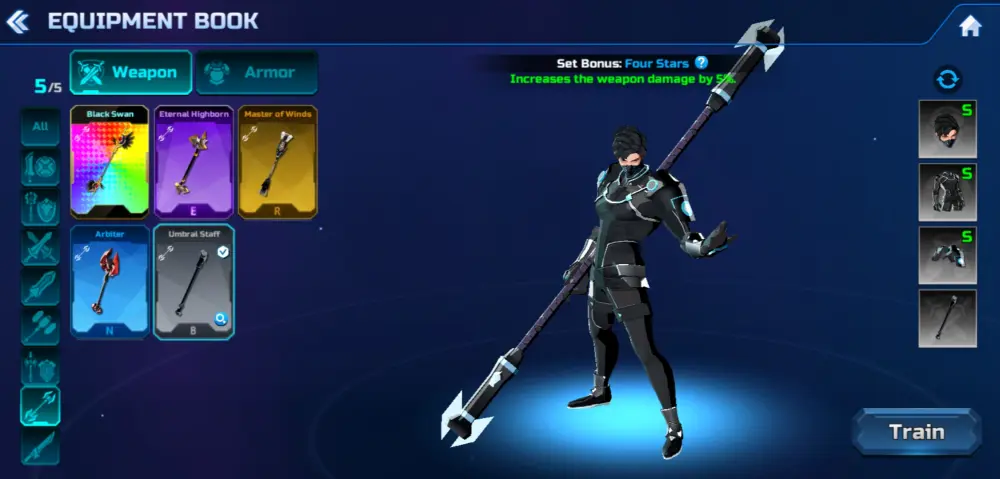
A weapon similar to the Long Sword in terms of mobility and striking range.
The staff might actually be a combination of the Dual Swords, Halberd, and the Longsword: long reach, mobile combos, high-speed strikes. Any wielder using this becomes unpredictable in a one-on-one battle since one of the attacks in its combos will involve the wielder backflipping or moving away from the opponent’s attacks. To any player wanting to be a jack-of-all-trades with a knack for tricking their opponent mid-fight, the Staff might be for them.
Every Overdox combatant is mighty with the weapon they use, but they’re not without their armor sets.
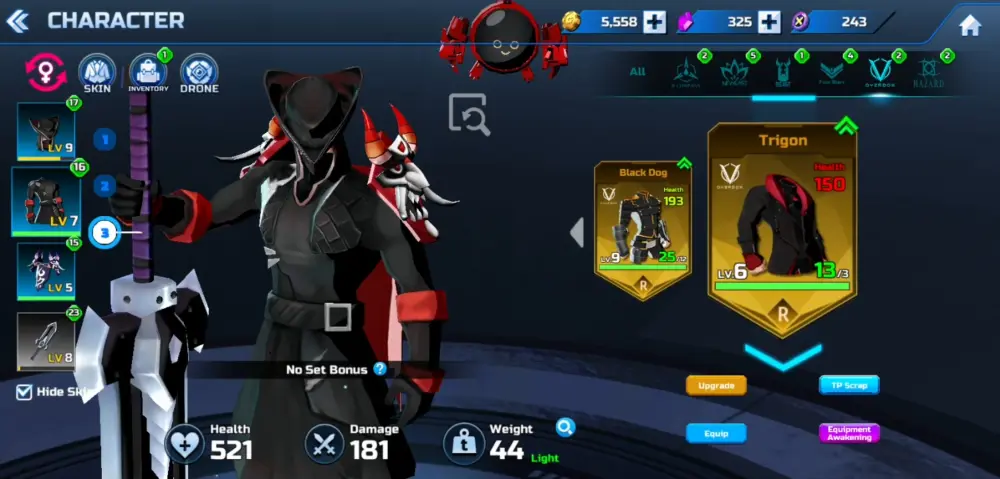
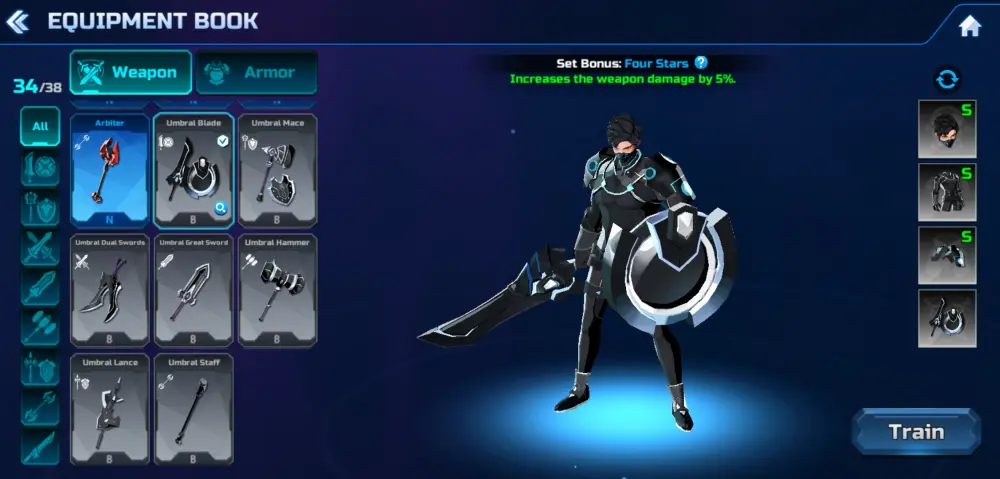
Armor Sets and You
When equipping your character, you’ll notice little emblems on the upper left corner of the armor icons. These are the manufacturers of the armor pieces and they each bear significance.
Mixing and matching armor pieces solely for their stats and what they offer is quite an advanced tactic, so we don’t recommend doing this until you’ve got pieces that you actually like (let’s face it, veterans who are reading this: the Priest headgear is absolutely broken). For now, we encourage you to try putting on armor pieces that match under the same manufacturer.
Four Stars

A set that grants a boost to weapon damage by 5% and offers overall defense with its pieces.
The Four Stars family of armor pieces tend to combine a sleek futuristic aesthetic with old-world elements, making them resemble armor worn by knights in some way. Some of their pieces also offer mobility options like an increase in dash range. If you fancy yourself a cyber knight that fights for righteousness, don a Four Stars set today.
D-Company
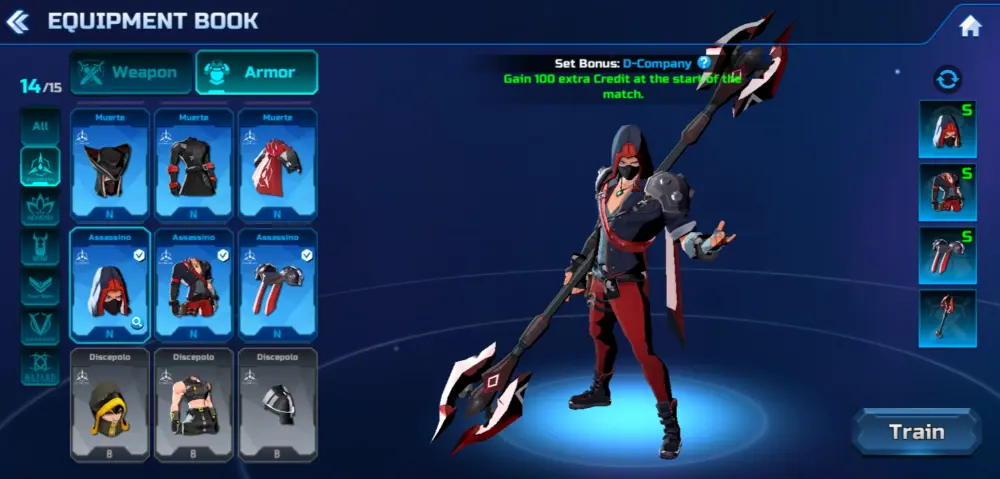
An unusual set that gives its wearer 100 more credits to start with.
Armor pieces from the D-Company may put you ahead of others in some maps where you start off with a Credits Shop—that additional 100 credits can go a long way, especially in the beginning of the match. Monetary boons aside, D-Company armor sets excel in style and flair, giving the wearer very few protective pieces in favor of flowing sashes and lightweight coats. Some pieces even offer dash cooldown reduction or increased damage at low health. Do you feel like flaunting your wealth at your opponents while looking like an anti-hero? Get yourself a D-Company set.
New East
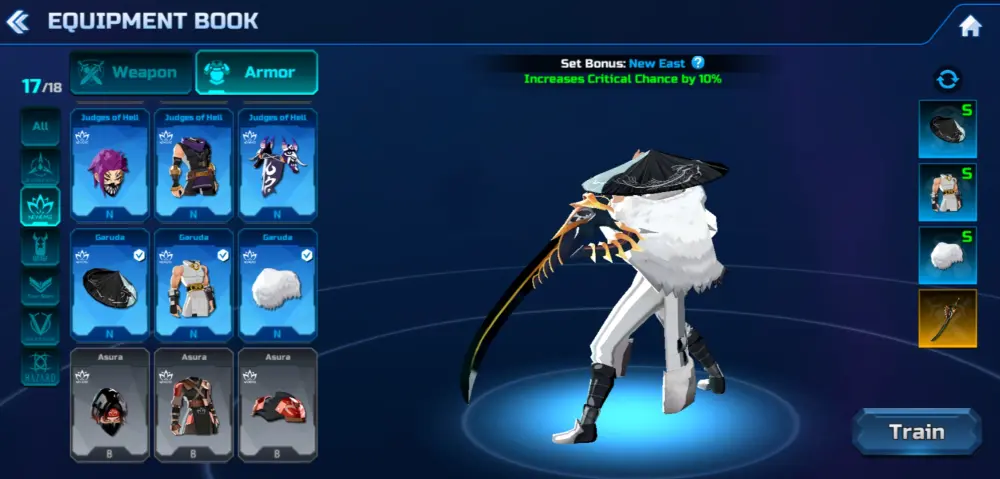
This set combines deft, eastern craftsmanship, and stills the focus of its wearer by giving them a 10% increase in critical hit chance.
Despite its name, the aesthetic of armor pieces from the New East faction look like relics from the old world. These may range from ronin to ninja to demons, gods, or demon gods. While they may look as flashy or impressive as those from D-Company, the New East armor pieces offer mostly offensive bonuses like extra attack damage. Are you here to show the enemy your motivation? Fly the banner of the New East with these duds.
Beast
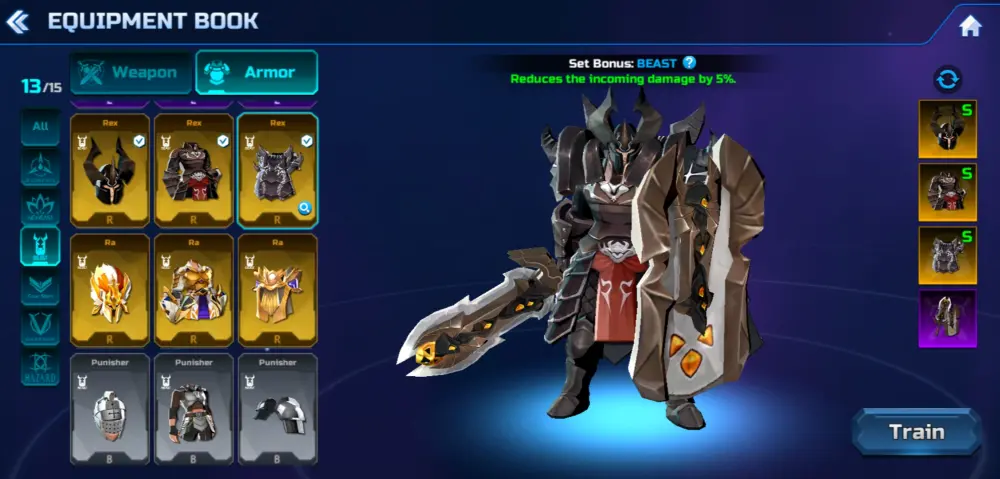
The heaviest set in the game that trades mobility for protection from damage by 5%.
Even older-looking than the armor pieces of the New East, Beast armor is inclined to keep its wearers safe from all sorts of harm. The armor here is bulkier than most, making the wielder look like an impenetrable fortress. Most of the stat bonuses offered with each piece are defensive in nature with a few exceptions. Do you want to feel like an unstoppable armored warrior that easily shrugs off each hit? Go Beast, become a beast.
Hazard
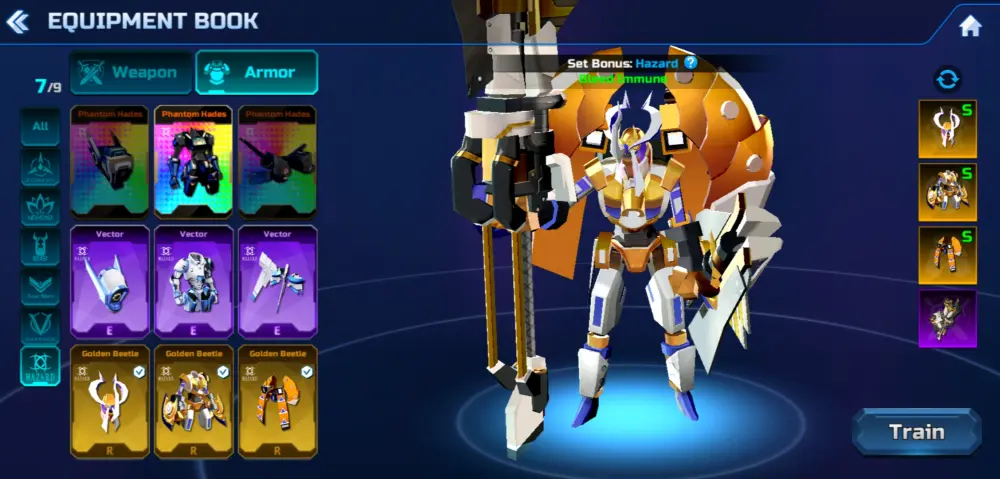
Perhaps the most sophisticated-looking armor sets in the game that offer you the immunity to Bleeding, but are quite rare.
Hazard sets make your character sacrifice their humanity: each part of the armor sets is completely robotic in appearance. Aside from not being able to Bleed anymore, Hazard sets are so advanced that they offer the wearer perks both during combat and out of it. For instance, their Vector set gives your character a steady health recovery for as long as they maintain an out-of-combat state. If you want to warn your enemies of the impending robot overlord takeover, then put on a Hazard set.
Overdox
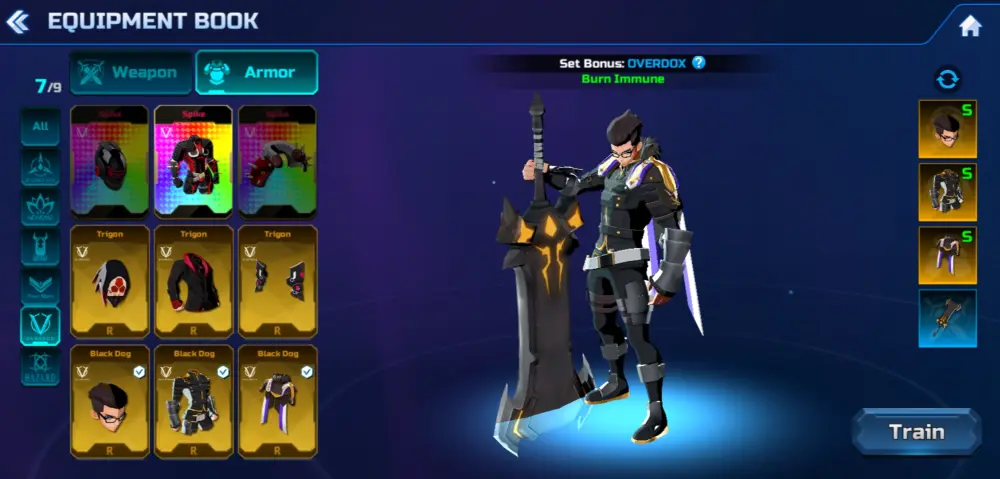
These are balanced, albeit rare armor sets, much like the Hazard sets that grant the wearer immunity to Burning.
Armor pieces from the Overdox faction balance offense and defense. While they look like they’d be worn by cyberpunk thugs from an underground organization, anyone wearing an Overdox set will be promised movement speed gains, critical hit chance, or (if you find the Legendary set), an increase in max HP the longer the duration of the match. Do you feel particularly shady at any given time? An Overdox set might just be for you.
With most of what you need to do in and out of battle now in plain sight, it’s time for you, the combatant, to manage your PR and what you receive in the mail, which keeps you fighting in this deadly tournament. Well, okay, we don’t mean this in the literal sense—no, we mean navigating the lobby.
Navigating the Lobby
If you aren’t fighting, maybe you’d be wondering what to do here in the lobby.
Don’t worry, if you follow what’s written below, we promise that you’ll be swimming in TP, collecting crystals like a crazed crystal hoarder, and more! Let’s just hope your want for crystals won’t eat you alive.
Login Every Day for Rewards
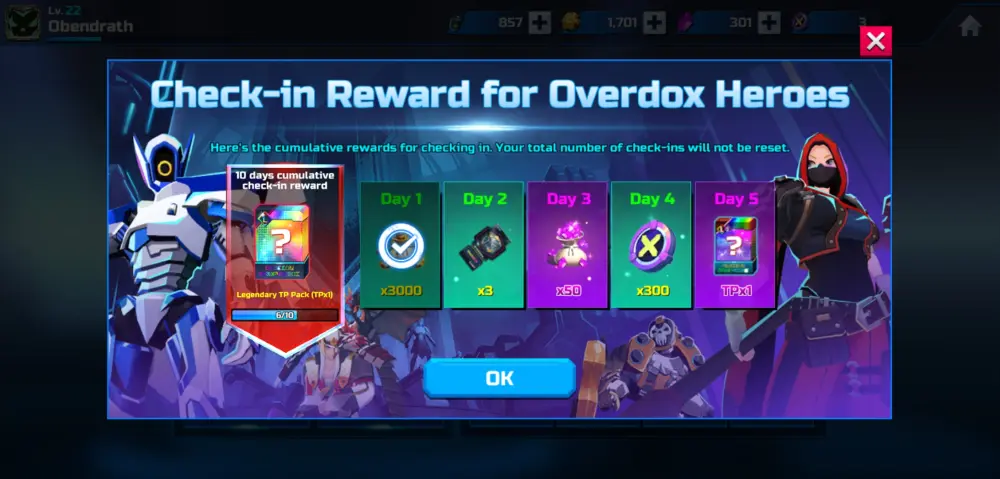
It’s common practice for every game in today’s mobile market to introduce a daily login system.
Sure, it’s a means for the developers to get the players to keep playing their game, but what the game offers in return is just too great to pass up. You’ll be getting all sorts of freebies and rewards: gold, crystals, X-Coins, and at the end of the login week, Legendary TP. Let’s focus on that last one because it’s the most important.
Legendary TP is extremely hard to get. Its rarity in the gacha is bonkers and the only guaranteed way to get this (probably without paying) is to login for 5 days. Given that Overdox has a tiny equipment pool, you have a huge chance of getting a Legendary item that you actually use and possibly something you don’t even own yet. Make it a point to login each day and strive for that Legendary TP. It’ll make all the difference.
We’ve said the g-word, let’s talk about it!
Use Normal Energy to Open Blue Boxes
Gacha is all the rage today, and Overdox is no exception when it comes to pulls.
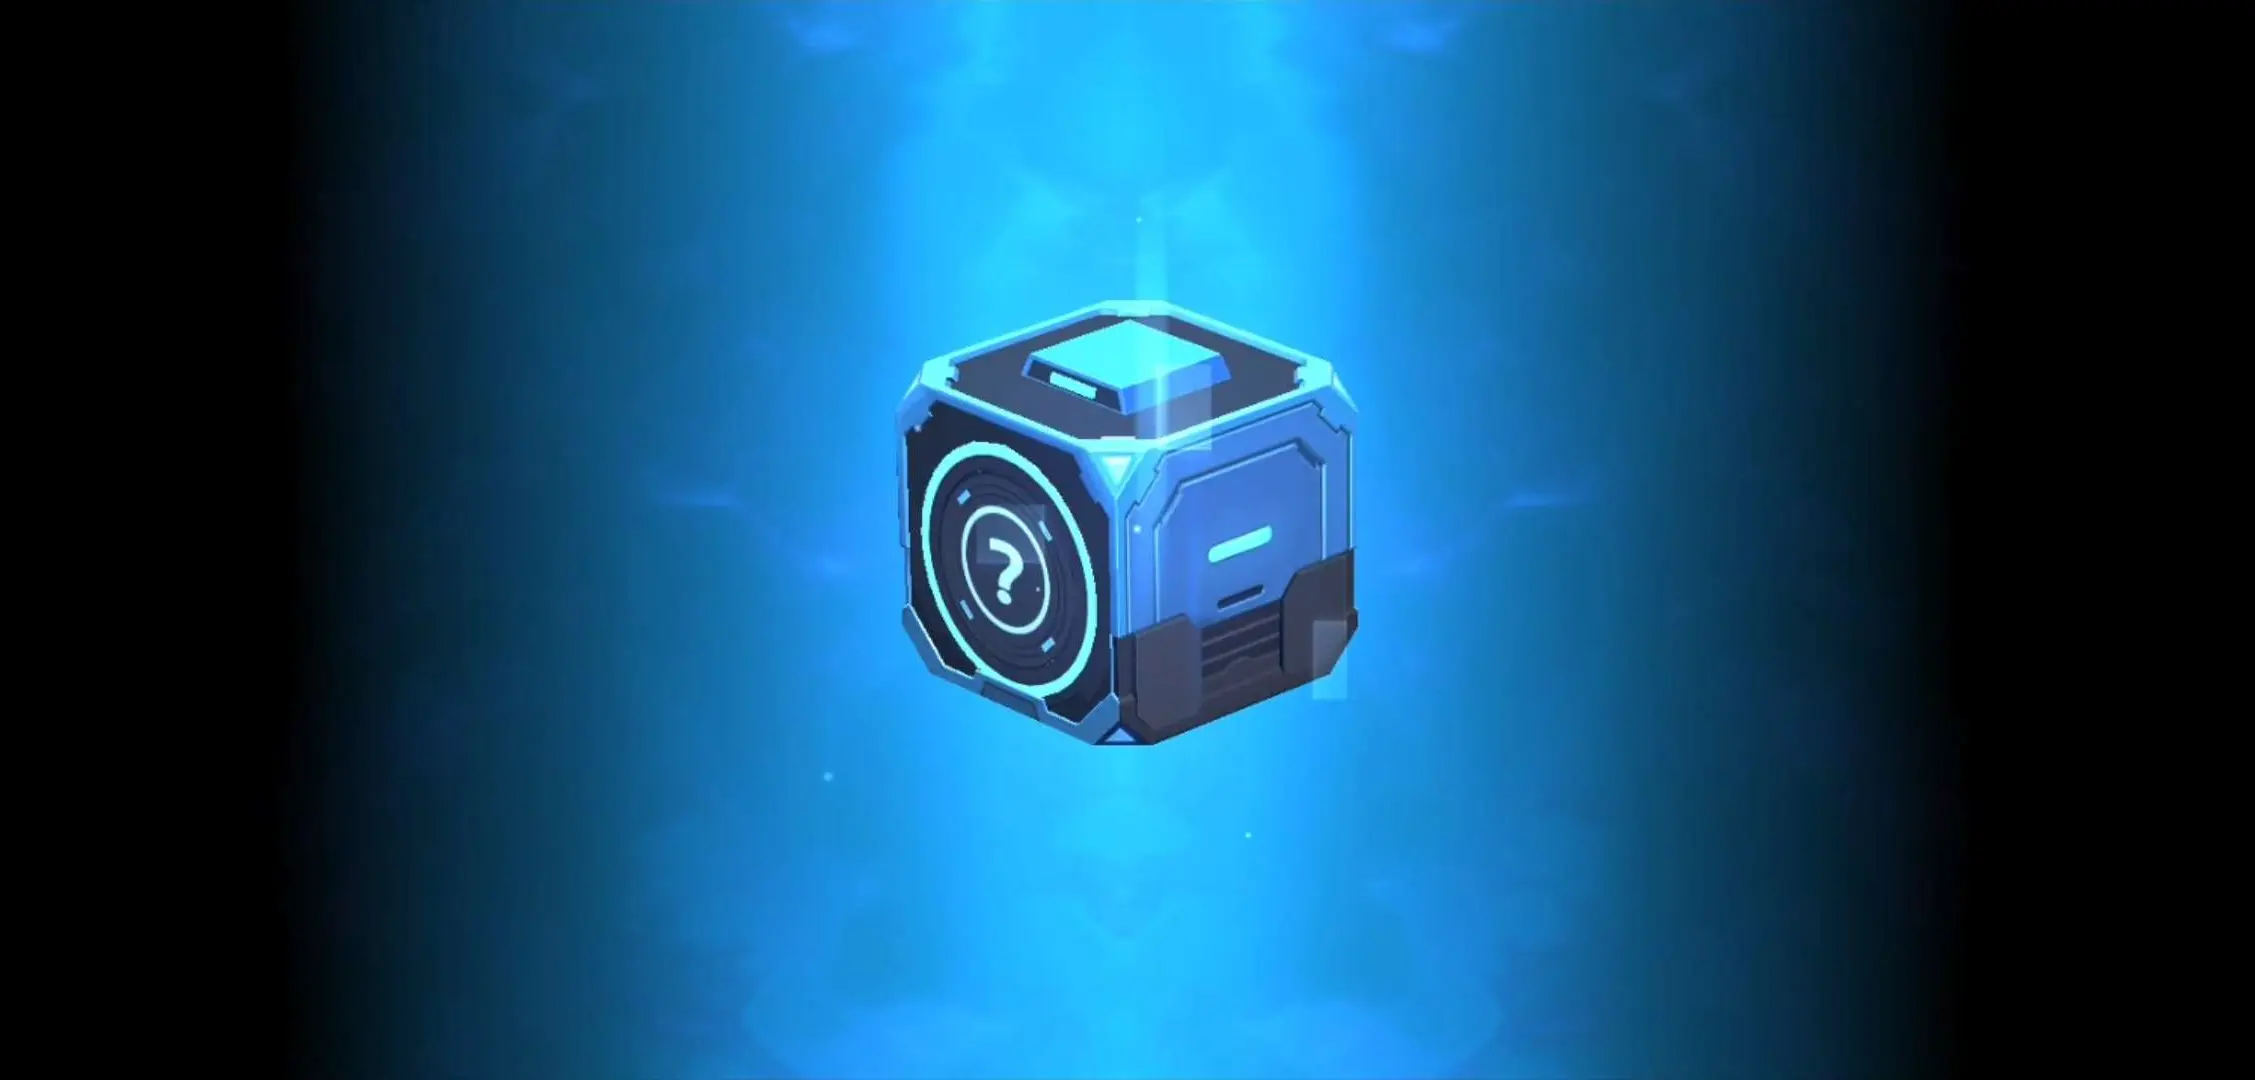
While rolling the actual gacha in the game’s Gacha feature located within the Shop, we’d recommend just doing this in the meantime—opening the blue boxes for TP Sure, the chances of getting a high-ranking item isn’t all that possible, but you’ll at least be able to get duplicates that you need for TP scrapping (more on this soon). Otherwise, item rarity doesn’t always matter; it’s your dedication to using the equipment of your choice, especially because each weapon behaves differently from the ones in its class.
But what is this “Normal Energy” we mentioned in the header, you ask? Normal Energy is what you’re rewarded with after every match. Depending on how you do, you might get more Normal Energy than usual or less if, say, you died first in a match. Normal Energy fills up a small bar underneath the blue boxes in the lobby. Once the bar is filled, you get to open a blue box or a couple of them if you’ve got Normal Energy double the energy threshold (which is 40). Upon opening a blue box, you’ll receive some TP—possibly duplicates, possibly new ones.
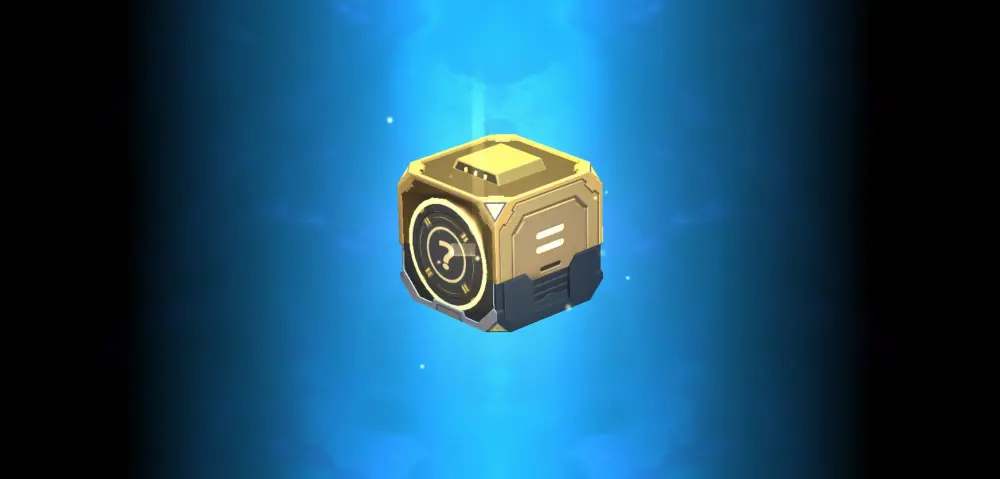
But do you crave even higher-end gear than what the blue boxes offer? Look to the left of the blue box, you’ll see the gold boxes. Opening these is an entirely different animal.
Finish Missions for Crystals and Superior Energy
Missions are a means to keep the player busy. This means that, in a way, you aren’t playing Overdox mainly to win (but don’t let us stop you if you’re out to do that anyway).
To the left of the lobby, you’ll see a Missions button. Pressing this will open up a panel displaying 3 different missions for you to accomplish. Upon accomplishing these, you will be rewarded with what’s called Superior Energy. Though, don’t worry about these being just 3—finishing a mission will open up a new one. In a day, an Overdox player can accomplish up to 6 missions all in all.
If the mission is something you don’t want to do, like not use a weapon with a shield for a few matches, you may change it for free the first time. Be warned that this can only be done for just 1 of the 3 missions you have. After changing it, the game will charge you a small crystal fee per change.
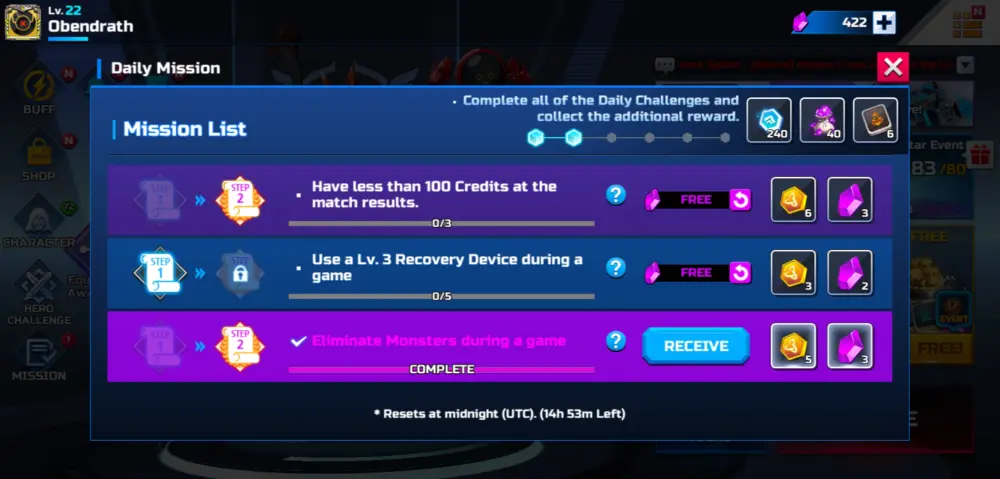
Finishing missions is the easiest way to gain Overdox’s premium currency: crystals. Crystals can be used to purchase different things: high-end equipment in the Daily Shop, gacha tickets, items from the Event Shop, alternate armor color, and more. But we recommend saving your crystals for the gacha tickets just in case you’d like to get extra TP. A 10-draw in the gacha costs 360 crystals and gacha mileage rewards you greatly with TP Selection Tickets, which allow you to get TP of your choice.
Mind you, these aren’t just any TP Selection Tickets—they allow you to pick among the items in the Legendary rarity. Now that’s a win-win. If you aren’t after the gacha, you might want to spend your crystals on gold bundles by tapping the plus (+) sign next to your gold whenever you’re in the lobby. This is located at the top of the screen.
But what if there’s a particularly good equipment piece that you like that’s in the lower rarity tiers? Time to scrap some excess TP.
Scrap Excess TP for X-Coins
Overdox gives you the chance to also “recycle” the TP of unused equipment.
How this works is simple: pick an item that you don’t particularly use, tap the TP Scrap button on the lower right, select how much of its TP you’d like to scrap, and pay a gold fee. As we’ve discussed earlier, gold is quite an important resource, so be sure to save up. Successfully scrapping TP will earn you X-Coins and the amount of X-Coins earned depends on the rarity of the TP you’re scrapping. Naturally, higher rarities yield more X-Coins.

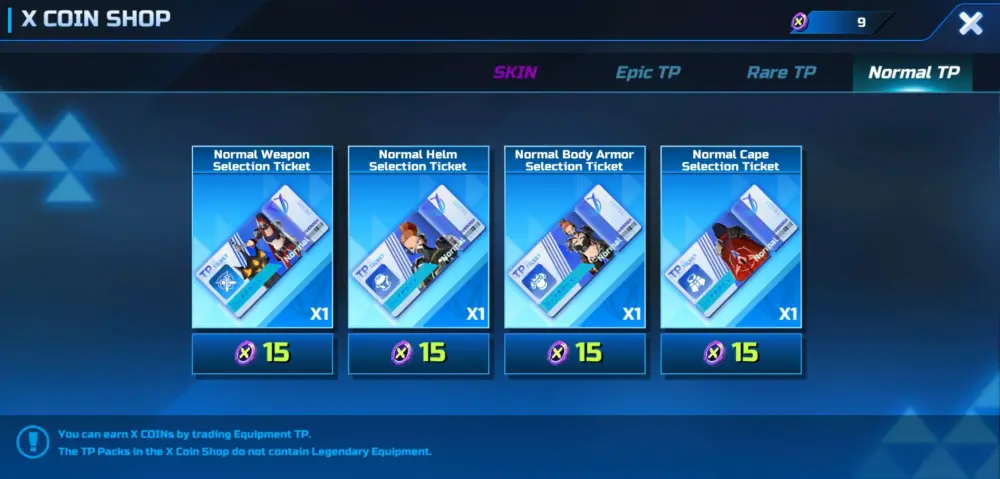
The beauty of doing this is spending the X-Coins in the X-Coin shop, found in the game’s menu (upper right button in the lobby, looks like three orange bars stacked atop each other). In the X-Coin shop, you get to purchase TP Selection Tickets of varying rarities.
Evidently, higher rarities mean more X-Coins. Normal TP Selection Tickets cost 15 X-Coins per TP, Rare TP Selection Tickets cost 150 per TP, and lastly, Epic TP Selection Tickets cost a whopping 3,000 per ticket. If you have enough X-Coins and you’re looking to improve a specific item, you know where to go.
“Is there any other way I can get more of these neat rewards?” you ask. Read on, and the bullet should shock you.
Watch Ads for Extra Rewards
We’re just kidding about being shocked by this revelation, but hey, it’s commonplace in the mobile gaming market, especially today.
Watching ads to get freebies is commonplace in most free-to-play games today. If it isn’t people spending their cash on ridiculous outfits or an abundance in resources that keep the developers afloat, it’s the ad revenue. That’s right, by watching ads, you’re indirectly supporting the devs. They can be tedious and annoying sometimes, but at least these ads can be watched at your leisure.
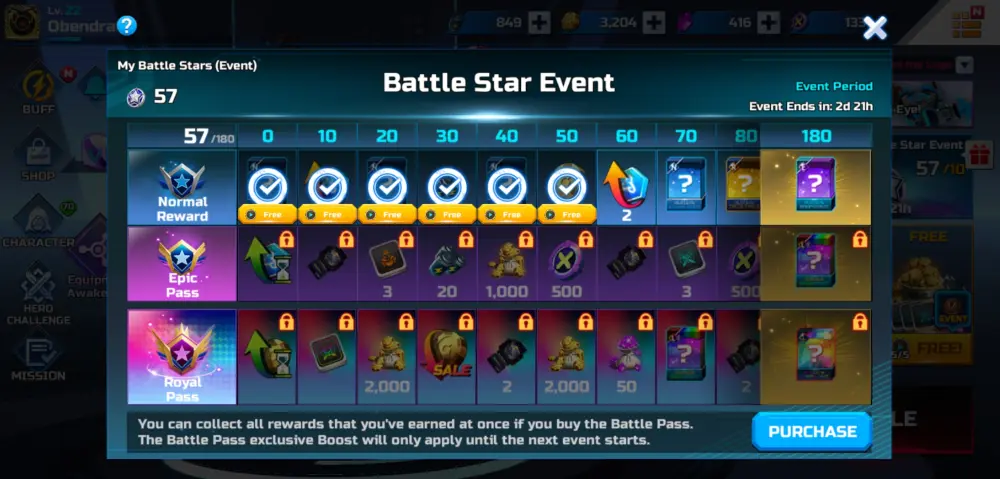
Consider this a break from all the intense fighting that you do. There are a few ways you can watch ads to get rewards: by accessing the Free Rewards on the right side of the screen (next to the blue box) and by participating in the Battle Star Event, which can be found directly above that. The Free Rewards reset every day while the Battle Star Event refreshes after a couple of days. Watch as many of these as you like, but know that the more you watch, the better your rewards get. You’ll even be given crystals!
You are yet to become a great warrior in the arenas of Overdox, but may this guide set a foundation in the path to your success. Just remember first what we’ve tackled here thus far:
- Always assess the situation you’re in before engaging anyone. Fight smart, not hard.
- Your kit has to be upgraded before a fight. If you can’t upgrade it at the time being, you’ll get your chance sooner or later.
- As soon as you jump into a fight, make scavenging for supplies your priority. You can worry about fighting later.
- Abilities are extraordinarily powerful in the right hands. Learn how to use them well and to your advantage.
- Buff Devices and Universal Status Devices can change things up in a fight. Don’t hesitate to use them when you find them.
- The Watchers grant you small amounts of health and credits when you defeat them.
- Knowing the map can put you at an advantage.
- The minimap is your friend. Pay attention to it often, but also be aware of your surroundings.
- Master your weapon of choice and how you get around. It could save your life.
- Pick out a weapon class and stick to it.
- Equipping armor pieces from the same manufacturer gives you a bonus.
- Login every day for a guaranteed Legendary TP.
- Normal Energy opens blue boxes, blue boxes give TP.
- Finishing missions gives Superior Energy, Superior Energy opens yellow boxes, yellow boxes give higher-end TP. You’re also rewarded with crystals by finishing missions.
- Scrap TP that you don’t need for X-Coins. The X-Coin Shop is filled with Selection TP of varying rarity.
- Watch ads at your leisure for crystals, gold, and more swag.
This concludes our beginner’s guide for Overdox. Improvise, adapt, overcome is what we’d say, and maybe after finding what’s right for you in this intense cyberpunk battle royale, you’ll find your place at the top 3. Hopefully number 1, even.
Are you a seasoned Overdox combatant yourself? Do you have other tips that you’d like to give the newbloods of the tourney? Be sure to leave all of your thoughts in the comment section!
Upper1st
Sunday 24th of November 2024
Can farming normal equipment be just as good