NetEase’s latest mobile game LifeAfter has gotten quite a great deal of attention on iOS and Android platforms, and it’s no surprise why — it’s a zombie survival game from the same company behind Rules of Survival, Survival Royale and many more titles. The game takes place in a post-apocalyptic scenario, where the world has been devastated by a virus and, as the game’s description suggests, turned into a “living hell” teeming with Infected. Your objective is to survive for as long as you could in a strange world dominated by zombies, while improving your skills and stats to keep up as the Infected become tougher and harder to defeat.
The book icon on the upper right of your screen is probably the best way to ensure that you’re up to speed while playing the game, as it contains a number of chapters which you are strongly advised to complete in order to advance your character and stay on the right path while playing the game, no matter what your level of experience or ability may be.
So with that said, let’s move on to our detailed LifeAfter walkthrough of the first chapter in the aforementioned book, which is the Survival in the Wilderness chapter. This is generally considered a newbie chapter (the game says as much) for obvious reasons, but not everyone may be able to figure things out immediately, which is why we’ve come up with this LifeAfter walkthrough.
LifeAfter Walkthrough Chapter 1 (Survival In The Wilderness)
1. Fall Forest I
Store Items: As we’ve explained in our previous LifeAfter guide, it’s important to have a cabinet or two for you to store your stuff in. You don’t want to lose precious resources after getting knocked unconscious by the Infected, and your backpack can only hold so many items, so you want to go inside your Manor, keep your most important resources inside your Wine Cabinet or wherever, then head off to explore. Furthermore, we should also explain that you wouldn’t be able to gather new items if your backpack is full — the items don’t lie on the ground waiting for you to claim them, as they just disappear once you’re unable to store them in your backpack.
With that said, this very first step in the very first chapter would require you to approach your Wine Cabinet, open it, and place your items inside. And if you don’t have a cabinet yet, all you need is a fair amount of wood, then use your Material Bench to craft it. (The game will guide you through this anyway, so there’s no need to worry about not having a cabinet, to be honest.)
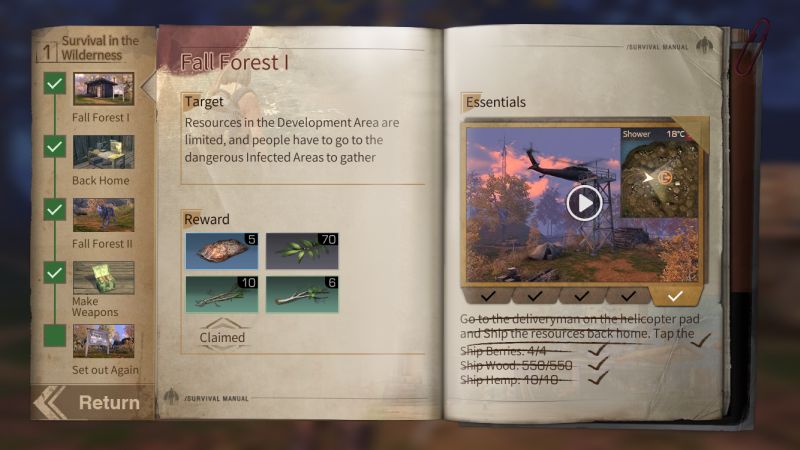

Take The Helicopter: This one’s pretty self-explanatory. If you’re in the Dev Zone, the helicopter will be just a short walk away from your Manor, but if you’re still not familiar with its location just yet, look for the red exit icon on your map and you’ll be able to find the chopper. Choose the Fall Forest from the Pact Zone, and you’re good to go — the helicopter will fly you there, and you’re all good to follow the next few steps.
Gather Wood and Stone: You’ll need an Stone Axe and a Stone Pickaxe for this — the two simplest pieces of equipment you have. Use the former to chop down trees for wood (or use a rock and your bare hands — you won’t be able to gather extra items from the tree through this method, though), and use the latter to dig for stone. It’s as easy as that — gather 700 Wood and 60 Stone and this part is completed.
Gather Hemp and Berries: Hemp is an essential resource as you will need it to create Bandages — nine Hemp equals one Bandage, which could come in handy if you need to heal up after fighting an Infected or lose too much HP due to hunger. Berries, on the other hand, are the simplest form of food available in the game, and they could be useful for a quick pick-me-up in the hunger department. Green points on the map mean there are some berries to be gathered, while autumn leaves designate the places where you can find hemp. Collect 15 Hemp and 6 Berries in order to move on to the fifth and final part.
Related: LifeAfter Walkthrough: A Complete Walkthrough for Chapter 2 (Survival Tips)
At this point, it’s important to remember this, throughout the guide — as long as you’re still in the same phase or stage, you don’t have to complete all of the tasks in order. That means, for example, you can gather your Hemp and Berries and complete the fourth stage in this phase before you’re done gathering the required 700 Wood and 60 Stone in the third phase.
Ship Resources: As we explained in our intermediate LifeAfter guide, going to a helicopter evacuation point allows you not only to fly back to the Dev Zone, but also to ship off the items you’ve gathered so you can collect them at the Manor and not worry about them getting lost after a losing battle against the Infected. This is the task that should introduce you to evac points — you can find them on the map as orange icons (you may need to zoom in if there aren’t any visible when the map is in miniature form), and you’ll need to head to one of the four in Fall Forest and have the Postman ship back 550 Wood, 4 Berries, and 10 Hemp.
Completing this first phase rewards you with 5 Hide, 70 Hemp, 10 Plant Roots, and 5 Twigs.
2. Back Home
Claim Shipped Resources: This is the easiest part of the second series of tasks under Survival in the Wilderness, though when it comes to the even-numbered series in here, they’re pretty much breathers in between the tougher ones. Return to the Dev Zone and go to your Manor so you can access your Mailbox. This is where you can claim the resources you had shipped earlier through the postman, so claim them all to complete the task, then store the stuff you’ve gathered in your cabinets.
Use the Oven: As you saw in our Food Recipes Guide, LifeAfter has a ton of recipes you can prepare in order to satiate your hunger, heal you up, or even boost one or more stats for a given period of time. In theory, there are various things you can cook on your Oven in order to complete this task— for example, if you’ve been productive with your hunting, you could grill some meat and have a nice meal to restore your HP and Hunger. However, the easiest recipe to prepare would be jam, as you’ll simply need a few (four, to be exact) Berries for this.

In the event you still do not have an Oven, you can go to the Furniture Maker store at Hope 101, which is designated on the mini-map by a hammer icon. Enter the store, choose Furniture Maker, then choose Household Grill. This will require wood and iron ore, and once you’re done crafting the Oven, you could then return to the Dev Zone and pick it up by accessing your Mailbox outside the Manor.
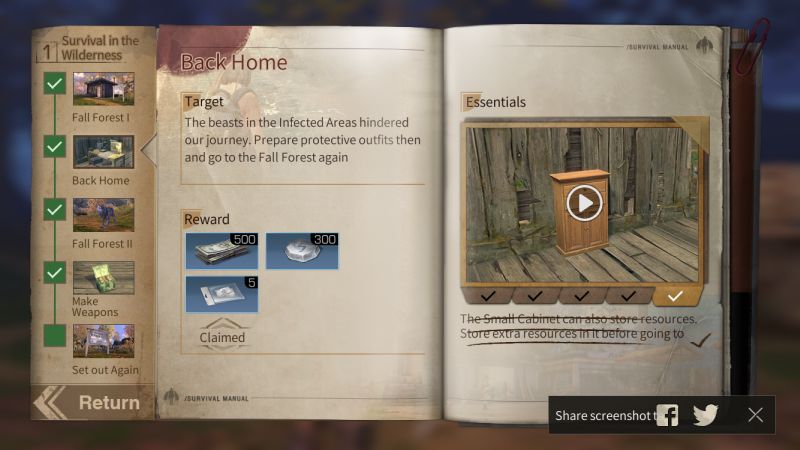
Make Small Cabinet: This task shall introduce you to Wooden Boards, which you can craft with the help of your Material Bench. All you’ll need for this would be some wood (120 per board) and two Twigs, the latter of which you could also get after chopping down trees. Once you have three Wooden Boards, you can then use the Material Bench to create a Small Cabinet, which should be essential going forward, given that your Wine Cabinet eventually won’t be able to hold all the resources and other items you gather while out in the wilderness.
Make Rag/Casual Jacket: Aside from making Bandages to heal you up after an Infected attack or similar mishap, you can also use Hemp (in conjunction with Plant Roots) to craft Rags by using the Gear Workstation. It takes substantially more Hemp for this (15), as well as two Plant Roots each, but you need not worry about the fact that it’s usually harder to find Hemp than it is to spot trees or rocks for Wood or Stone — the previous series rewards you with 75 Hemp anyway.
Once you’ve crafted five Rags, you can then combine this with five Hide (which you can gather after killing wild animals) in order to craft a Casual Jacket, which will automatically be equipped the moment you’re done making it with the Gear Workstation. This gives you an additional Amor boost, plus some extra HP to help you last longer out in the wilderness.
Store Items: As easy as it sounds. You’ve got your Small Cabinet, so store some items in it — there aren’t any specified by the game, so you can place anything in there. You get 500 New Dollars, 300 Skill Points, and five Formula Shards for completing this series.
3. Fall Forest II
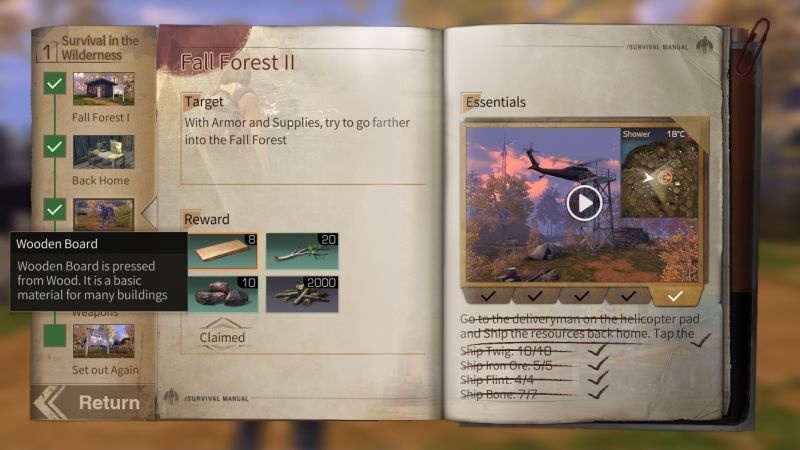
Go Back To Fall Forest: Return to the helicopter point at the Dev Zone, choose Fall Forest, and fly back there.
Make Arrows / Bandages: We already explained multiple times why you need Bandages while exploring in LifeAfter, and you may have already crafted some Arrows of your own in order to hunt for wild animals and fire at Infected from a safe distance. Just create one batch each of Arrows and Bandages with the Make function on the lower left corner of your screen — that’ll do it in order to complete the task and move on to the next one.

Get Bones: Now you probably haven’t thought too much of Bones during those times you’ve been hunting for animals, likely for meat. But as you’ll find out a little later on, they do have a use in the crafting process. We won’t get to that yet, though — as far as this Fall Forest II task is concerned, you’ll need a total of 7 Bones, but if you’re having difficulty finding animals to shoot down with your bow, you have the option of killing Infected instead and gathering their bones. Of course, the former would be the better option, especially if you’re going after harmless fawns and deer. (Watch out for the latter if you’re hunting a herd of three or more — injured deer could gore you!) But if there aren’t any of these creatures to be found, you could go toe-to-toe with single Infected (never multiple, as that’s way too dangerous), make use of the bandages you have to heal up, and collect their Bones.
Related: LifeAfter Food Recipes List: A Complete Guide to Food Recipes
As a quick heads-up for would-be hunters, it’s not always a good idea to hunt in an area where there are other players nearby, especially if they’re a pair/party. You don’t want opportunistic players collecting the meat and bones of the animal you just killed, because in games like this, basketball, soccer, or hockey rules don’t apply — assists are not a statistic! And you wouldn’t want to play dirty either by gathering the meat/bones of an animal someone else killed — it’s just not in good form.
Gather Twigs, Iron Ore, and Flint: Wood and Stone are the obvious byproducts of chopping down trees and breaking rocks, respectively, but you also have secondary resources like Twigs for the former and Iron Ore and Flint for the latter. As such, completing this task is fairly easy, especially when it comes to gathering the required number of Twigs (10), but getting 4 units each of Iron Ore and Flint may take more work, as rocks aren’t as common in the wilderness as trees are. Most of the time, you’ll end up with some Iron Ore while breaking rocks; Flint is considerably rarer, so you’ll want to be patient here.
Ship Resources: Once you’ve gotten the required items — the Bones, Twigs, Iron Ore, and Flint — you can now complete the third series by going to the nearest helicopter evac point, climbing up the ladder, and having the Postman send back the items to your home base. You can then claim your reward of 6 Wooden Boards, 20 Twigs, 10 Iron Ore, and 2,000 Wood, preferably once you fly back home.
4. Make Weapons
Claim Shipped Resources: Again, this phase is a breather in between forays into the Fall Forest, so this is basically receiving stuff and crafting. Go to your mailbox and claim the Iron Ore, Twigs, Flint, and Bones you had gathered earlier, and, just as we said above, claim the rewards for completing the third series.
Make Pig Iron: It may not sound like the most conventional name for a resource, but LifeAfter describes Pig Iron as “simply smelted iron material that is fundamental for making various weapons.” Thanks to your last trips to Fall Forest, you should have enough to make 6 units of Pig Iron, which would be two Iron Ore and four Twigs per unit. Use the Gear Workstation to craft the Pig Iron, then move on to the next task.
Make Mondragon Rifle: After several trips to the wilderness armed with nothing but a bow and arrow and some basic tools, this will serve as your first firearm, and as you’ll see against the lower-level Infected you encounter early on, this weapon will be a godsend, capable of taking out an Infected with just two or three bullets.
To create a Mondragon Rifle, you’ll need 1,200 Wood, 6 Pig Iron, and 4 Bones, and you’ll need to use the Gear Workstation as well to craft it. Don’t worry about the rifle not being loaded right after you craft it; that’s going to be addressed in the very next task we shall be discussing.
Make Gunpowder and Ammo Box: For Gunpowder, the required resources are 600 Wood, 150 Stone, and 2 Flint, so once again, this would be mostly crafted from the fruits of your last Fall Forest trip. Go to the Gear Workstation to create two units of Gunpowder, then use it again to create a Crude Ammo Box, which requires 2 Gunpowder and 8 Wooden Boards. You can then use this ammo box to reload your Mondragon Rifle — that’s 25 bullets per reload, which should be more than enough to take out the Infected as required by one of the tasks in the next, and final phase of the first chapter.
Load Mondragon Rifle: Set up the Crude Ammo Box somewhere inside your Manor, approach it, then choose the Quick Reload option. That’s it. Your rifle is loaded, and you’re ready to conquer the final phase of the Survival in the Wilderness chapter.
As for rewards, you’ll be getting 3 Bandages, 2 Clean Cans, and 500 New Dollars — in other words, stuff to heal you up, satisfy your hunger, and help you buy items at Hope 101.
5. Set Out Again
Go Back To Fall Forest: Yet again, the first task simply requires you to go to the helicopter behind your Manor and fly to the Fall Forest. This time around, though, make sure that you have your Mondragon Rifle with you and ready to use against the Infected.
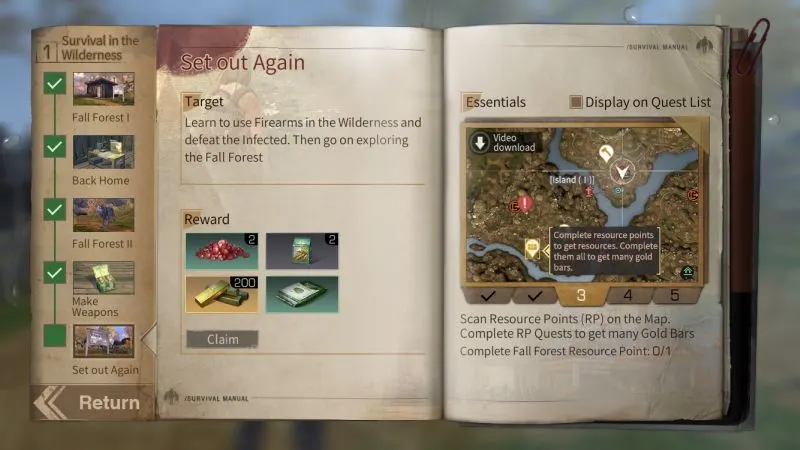
Accept Quests: Upon landing in the Fall Forest, head toward the house and look for the bulletin board outside it. This is actually your Quest Board, and you can use it to view and accept quests. The types of quests could run the gamut from killing a certain number of Infected or gathering a certain amount of a specific resource, but for the purpose of this phase of the Survival in the Wilderness chapter, your best bet would be to choose a quest related to the required tasks for this phase — in this case, killing Infected.

Related: LifeAfter Guide: 10 Tips & Strategies to Collect More Resources, Craft Better Items and Earn Rewards
Visit Resource Points: Check the mini-map and look for the yellow markers above the object you’re supposed to be targeting. These are your resource points for the one quest you had chosen earlier, and once you visit them, you only need to do what’s being asked of you, may it be to gather Hemp or Berries or Rapeseed or to kill an Infected or shoot down a certain animal.
Kill The Infected: This task requires you to kill five Infected, and as we mentioned, you have 25 bullets in your Mondragon Rifle, giving you enough insurance in the event that you miss. Just in case you do run out of bullets, make sure your bow has enough arrows handy — as you may have learned after using your bow-and-arrow to kill Infected, this could take a lot of arrows, even against a level 1 Infected, and you may have to resort to close-contact combat with your Axe or Pickaxe. But just as long as you’re properly aiming the crosshair and not wasting your bullets on animals that you can otherwise hunt with your bow, 25 will certainly be good enough to last you.
Unlock Chests: Finally, you’ll be asked to find two chests near the Helicopter Evac points, unlock them, and open their contents. There are actually chests in various other places in the map, and compared to the other tasks in this phase, this may require the greatest amount of patience. But you’ll get 2 Berry Seeds, 2 Wheat Seeds, 200 Gold Bars, and some Common Fertilizer to use once you begin the next chapter!