For the past few weeks, we’ve been focusing greatly on a game called LifeAfter, a zombie survival game from NetEase. This company is the developer behind popular titles such as Cyber Hunter, Errant: Hunter’s Soul and Legend: Rising Empire to name a few, and if you don’t have it on your iOS or Android device just yet, you might as well check it out. It’s a post-apocalyptic title where you, as well as other real-life players from around the world interact in a world that’s been taken over by “Infected” — this game doesn’t use the “z” word when referring to zombies — and it’ll be up to you to work by yourself, or with other players, to survive as long as possible in the dangerous new world you live in.
Last time around, we took a look at the first chapter of the Newbie quest book, which is basically designed to help LifeAfter players get a feel of the game and gain valuable experience. While the second chapter is still considered a Newbie chapter, you’ll find out in this LifeAfter walkthrough that some of the quests/tasks you’ll be asked to do require more than just newbie-level skills in order to complete. Chapter 2 is all about “Survival Tips,” as the game describes them, so read on if you’re having any trouble with this chapter and how to complete some of the tougher or more confusing quests!
LifeAfter Walkthrough Chapter 2 (Survival Tips)
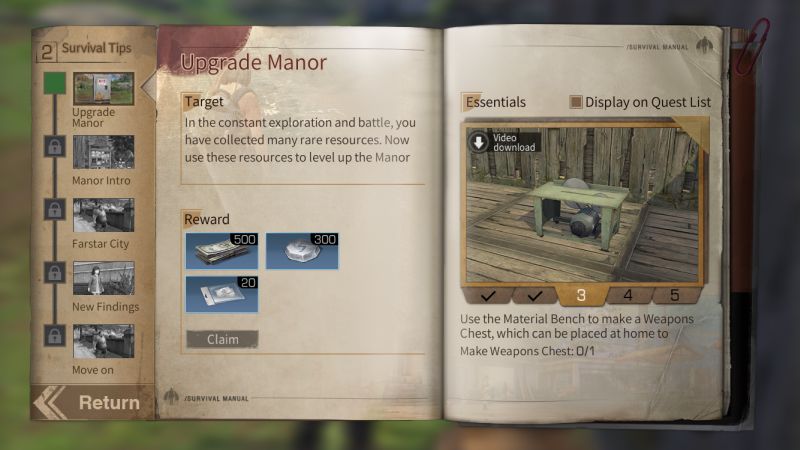
1. Upgrade Manor
Level Up Your Talents: Chances are you’ll be good to go with this task and you’ll already see it checked, assuming you’ve been checking your profile on a regular basis and doing what you could to level up each individual Talent. But in the off-chance you haven’t leveled your Talents up to the required level, tap on the home button on the upper left of your screen to access your profile, tap on Abilities, check which Talent hasn’t been leveled up to 5 just yet, then work on it accordingly — that means gathering more resources, creating more items through your crafting recipes/formulas, and/or fighting more Infected. (We should stress, though, that it’s very rare for players not to be at level 5 for Gather, Craft, and Combat once they reach this point.)
Upgrade Manor to Level 2: If you’ve already upgraded your Manor to level 2 at this point in the game, then you’re all good with this task — it should appear with a check mark and you can move on to the other tasks. But if you haven’t, then let us first explain why it’s important to upgrade your Manor whenever possible — upgrading allows you to add more furniture and other items, make your Manor sturdier to keep it safer from Infected attacks, and unlock more goodies that could help you survive longer.

In order to upgrade your Manor, head to the Controller outside the house, right next to the mailbox. Choose the Manage option, then tap on Manor Upgrade, where you will see the requirements in order for you to upgrade it to the next level. (When we say “requirements,” we’re talking about having a certain amount of supplies and being at a certain ability/Talent level.) For upgrading to level 2, you need to have five Wooden Boards, 200 stone, 400 wood, and as we mentioned above, your Gather, Crafting, and Combat Talents need to be at level 5 or higher.
Once you’ve hit the Upgrade button, don’t be surprised if you notice that your Manor looks exactly the same from the outside and inside. Later on in this walkthrough, you’ll have a chance to spiff up your Manor’s appearance and make it more durable.
Make Weapon Chest: Whereas in past quests, completing the previous series would allow you to earn the resources needed for certain tasks within the next series, that isn’t the case in the first part of Survival Tips. That means there’s a chance you’ll need to go out into the wilderness to gather the materials needed for the Weapon Chest, which would require one Gunpowder and five Wooden Boards. Gathering the wood (600 for five Wooden Boards, 600 for one unit of Gunpowder) and twigs (10 for five Wooden Boards) shouldn’t be a problem in most situations, and the same applies with the 150 stone you’ll need for one Gunpowder. However, you may find it a bit challenging to gather enough Flint (2 for one Gunpowder) — usually, the best time to find Flint while digging for Stone would be whenever it’s raining.
Once you’ve got all the resources — again, that’s one Gunpowder (600 Wood, 150 Stone, 2 Flint) and five Wooden Boards (total 600 Wood, 10 Twigs) — you can go to the Material Bench to craft your Weapon Chest.
Open Up Farmland: This one’s going to cost you a few hundred Gold Bars, but you should have more than enough to do this. Simply go outside your Manor and go around until you see the prompt that allows you to unlock new land for 500 Gold Bars. Once you pay the gold, you will now have access to a small patch of farmland, where you can plant the seeds you had earned as a reward for the last series of quests/tasks.
Plant Seeds: It doesn’t matter if you‘re using the Wheat Seeds you got as a reward or the Berry Seeds you may have picked up in the wilderness or during earlier quests — go to the farmland plots outside of your Manor (there may be a small fence surrounding those plots), plant the seeds when prompted, then water them. You can always go back to your farmland from time to time to make sure everything is growing as expected, but for the meantime, and for the sake of finishing the Survival Tips chapter, you don’t need to prioritize this just yet.
Completing this chapter will earn you 500 New Dollar, 300 Skill Points, and 20 Formula Shards, the latter of which you’ll need for the first task in the second series.
2. Manor Intro
Use Formula Station to Fuse Formula Shards: If you’re like us, you might have played around with the Formula Station a bit prior to the start of this chapter, and if that’s the case, this task/quest will likely be checked once you begin the new series. If not, you will then need to go to the Formula R&D Station in your Manor to fuse the Formula Shards you have — you will specifically need to fuse a total of 20. Once there, select Use, then Formula Composition, then Fusion I, and finally, Compose, to complete the process.
Add Manor Snapshot: You may have neglected the Message Board outside your Manor at this point in your LifeAfter experience, but the board can actually serve as a one-stop shop for updates and information regarding your humble abode. It’s also going to need to have a photo of its owner, ideally standing right outside of it, and hopefully with no Infected trying to do something more than just photo-bomb you while you’re posing for a selfie.

In order to add a snapshot to your Message Board, access the board and tap on the photo next to the Manor Popularity score. Choose the option to Take Aerial Photo, hit the camera button, then tap on the house button in order to specifically save your snapshot to your Manor’s Message Board. All you need is one photo to complete this quest and move on to the next one.
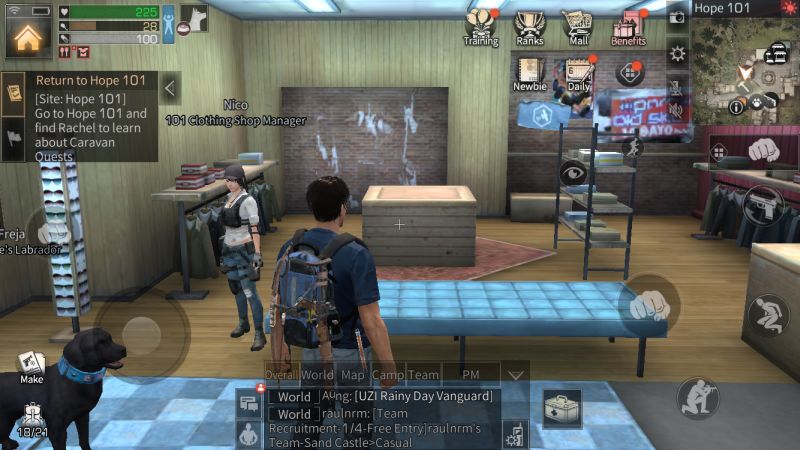
Buy Limestone: This one will require you to head to Hope 101, so you can consider this another “safe” quest where you don’t need to worry about being attacked by anyone — don’t worry, we’ll get to that soon enough! Take the helicopter to Hope 101 and visit the furniture store, which is designated on the map by a hammer icon. Talk to the furniture store manager and purchase 5 Limestone — you’re going to need this for the next quest, which will require you to make some Brick.
Related: LifeAfter Guide: 10 Tips & Strategies to Collect More Resources, Craft Better Items and Earn Rewards
Use Material Bench for Brick/Enhancements: As promised, this is the part where you can make your Manor more durable, while making part of it (at the very least) look much better aesthetically. In order to make one unit of Brick, you’ll need 150 Stone, 2 Bones, and 1 Limestone — for those who may have forgotten, you can get bones from the animals or Infected you kill in the wilderness. Use the Material Bench to make one Brick, and once you’re done, you can use that one Brick, as well as two Wooden Boards, to create one Lvl 1 Enhancement, also with the Material Bench. As we’ve noticed, this should be good enough to “enhance” four parts of your Manor’s walls.
Set Up Enhancements: After creating the Enhancements, you can then use the Build option to set up all four of them, preferably next to each other if you’re looking for the best outcome aesthetically. Obviously, this won’t be able to reinforce your entire Manor, as most of it will still be comparatively flimsy and shabby-looking. But this quest should get you started to truly building a durable, Infected-proof Manor, while also allowing you to complete the second series in this chapter. You can then collect your reward of 10 Iron Ore, 10 Plant Roots, and 10 Twigs, and prepare to experience Farstar City.
3. Farstar City
Take Helicopter to Farstar City: Normally, we’d just say “take the helicopter to Farstar City” and be done with it. But since we don’t want to leave you hanging after just one sentence, we might as well take this opportunity to warn you about this part of the LifeAfter map. Unlike the Fall Forest, Farstar City can be found in the War Zone, and that means Infected and fierce wild animals like bears and wolves aren’t the only creatures that could attack you. Other human players could attack you as well, especially if you’re in War/PvP Mode, and while staying on the default Peace Mode should ideally protect you from being attacked by other players, we’ve found out that that isn’t always the case. We’ve been fired at by human players for what seemed to be no reason whatsoever, but if that ever happens to you, try not to fire back — attacking other players while in Peace Mode could put you on the Wanted List. Best thing to do is to switch to unarmed when there are other players in your vicinity.
Gather Twigs: Assuming you don’t get attacked by Infected, this should be a good opportunity for you to load up on wood. The goal here, however, is to gather 10 twigs. This should be easy in principle, considering that there are many trees to chop down in Farstar City. There are, however, more Infected roaming the woods even in the daytime, and that brings us to the very next task in this series.

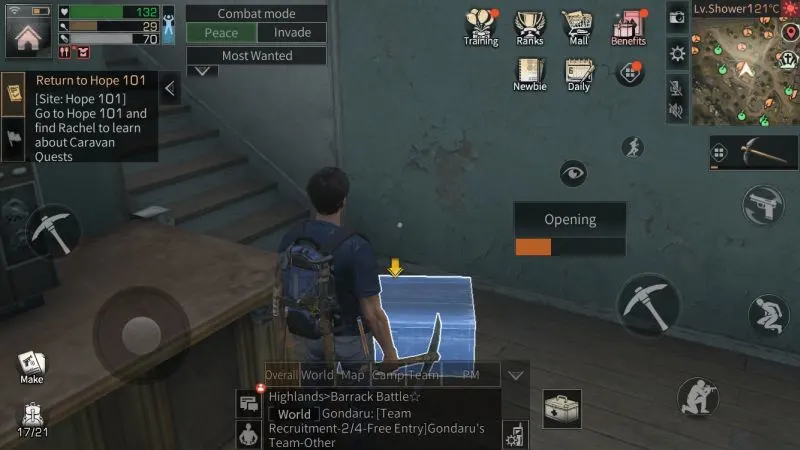
Open Chest: LifeAfter’s description of this quest states that there are “many” chests in Farstar City, but therein lies the catch — most of them are locked and would require that you have a Master Key. Crafting one will require your Crafting Talent to be at level 13, but since there’s a chance you won’t be at that level just yet, the best way to go about this is to be patient, and preferably to save this quest for last. Don’t worry, though — there’s definitely a chest or two out there that won’t prompt you for any Master Key!
Kill Infected: The game will require you to kill five Infected in order to complete this quest, but you should make sure you’ve got more than enough bullets on your rifle, as well as an Ammo Box so you could reload on the spot. The Infected of Farstar City are stronger, faster, and smarter than the ones you encountered in the Fall Forest, and you also won’t have as many opportunities to hide from these ferocious undead creatures. That said, you’ll need to kill five Infected in Farstar City in order to achieve completion.
Ship Twigs: As you may probably surmise, the tricky part of the whole twig-gathering process is the presence of higher-level Infected in Farstar City who, after attacking you, will naturally infect your Twigs and prevent you from shipping them home. Aside from that, Farstar City isn’t like Fall Forest, where you have designated evacuation zones with helicopters; instead, helicopters can either be for evacuation (orange icon with exit sign) or shipment (green icon with wings) and both would only fly to Farstar from time to time. That means you’ll need to make sure you have at least five uninfected Twigs by the time the shipment helicopter arrives. One good way to ensure this is to wait until you see a timer on the map, as well as the wing-shaped shipping icon in white to designate the helicopter’s imminent arrival — go to that point, chop down some nearby trees, then run to the chopper once it arrives.
One other thing to remember is that you need to approach the shipping drone, which is usually behind the helicopter. Don’t open the chopper door, or the helicopter (even if it’s supposed to be for shipping) will fly you back to the Development Zone. Make sure to approach the drone, choose the twigs, then ship them off to your home base as quickly as possible! It’s also important to note that helicopters can only remain in Farstar City for a few minutes, tops, before they fly away.
Completing this series will allow you to collect 500 New Dollar, 500 Skill Point, and one Expand Backpack token.
4. New Findings
Expand Backpack: If you’re looking for a breather series of quests/tasks after the last one, this should be it. As you may have noticed, your quest rewards for the last series include one Expand Backpack token, and you’ll need to fly to Hope 101 and visit the Armor Shop in order to set this up. This shop, of course, is designated on the mini-map with an armor or a shirt icon, and all you need to do here is to talk to the lady in charge of the store to give your backpack a bit of a boost — it won’t be much (21 items/15 food to 23 items/16 food), but a tiny boost is better than none at all.
Make Repair Bench: This could be a tough one if most of the wood you gathered at Farstar City got infected, but in case it wasn’t, then make sure you claim your wood in the mailbox, or gather enough wood in the wilderness before heading off to Hope 101 for this quest. In order to create a Repair Bench at the Furniture Store at Hope 101, you’ll need 600 Wood and 4 Iron Ore, and you’ll also need to wait a good 10 minutes before the item is crafted. Yes, this is going to take a bit of patience, but in the meantime, while waiting for the crafting process to be completed, you can move on to the next quest and talk to the little girl standing near the steps outside the Furniture Store.
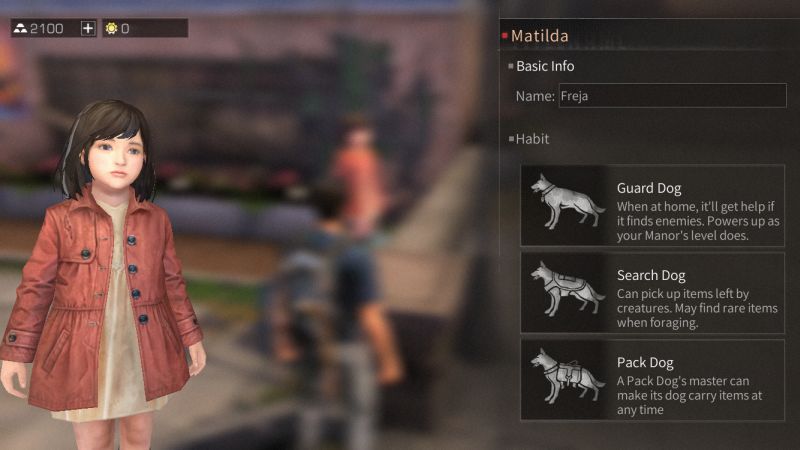

Set Dog’s Habits: The little girl we’re referring to is Matilda, and she’s going to teach you all about the specializations you can assign to your pet. You can either turn your dog into a Guard Dog (gets help if it spots Infected or other enemies), a Search Dog (picks up items dropped by creatures, including rare ones), or a Pack Dog (carries items at any time). Each of these specializations/habits can be quite useful, and it will mostly depend on your usual play style as to which habit you want to assign to your dog. But as long as you assign one habit, you’ll be able to complete this task and continue on to the next one.
Set Up Repair Bench: This quest will require you to fly home and simply set up your Repair Bench somewhere in your Manor with the Build tool. This item allows you to repair damaged equipment, though you should take note that repairing equipment does not come for free! You’ll need to spend some New Dollar even if you’re using the Repair Bench, so make sure you’re only repairing hard-to-craft items such as the Mondragon Rifle or other firearms, and not waiting until they’re severely damaged! For simpler items like your Stone Axe or Stone Pickaxe, you’re better off crafting a new one once the old one gets damaged.
Find More Recipes: While still at your Manor, you can complete this series of quests by going to the Oven and discovering more recipes. By default, you should already have four, though by this point, you should have a variety of items (berries, mushrooms, meat, etc.) to experiment with. You could also buy some Flour or Ice Cubes from the merchants at Hope 101 to add to the possible combinations you can come up with when using the Oven to craft new recipes. On top of the four, you’ll need another two to come up with six, and with this in mind, we could suggest something like Juice (berries + ice cubes) or Jam with Bread (berries + flour) to come up with a total of six recipes and complete this quest.
A complete list of LifeAfter food recipes can be found in this guide, so feel free to check it out if you’re looking for more ideas! Completing this quest wraps up the New Findings series and rewards you with one Crude Ammo Box, 5 Bandages, 2 Clean Cans, and 500 New Dollar.
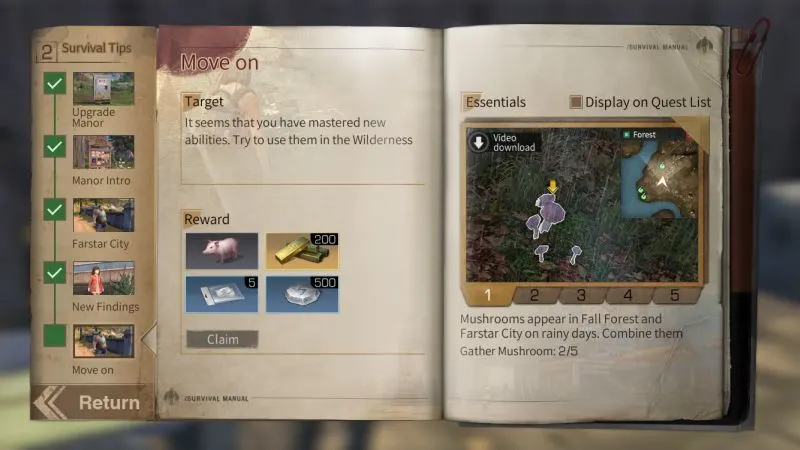
5. Move On
Gather Mushrooms: Fortunately for you, this particular task won’t require you to go to a specific city — you can simply head to the relative “safety” of Fall Forest if you feel more comfortable foraging for mushrooms over there, or you could also go find them in Farstar City. The important thing here is that you’re looking for mushrooms while it’s raining, because that’s typically the best time for you to find them! You’ll need a total of five in order to achieve quest completion on this one.
Gather Hardwood Vines in Farstar City: This one’s another literal quest to save for a rainy day, and would specifically require you to chop down trees in order to get Hardwood Vines in Farstar City. You’ll need a total of 10 to complete this quest, and if you already gathered 10 Hardwood Vines during your previous sojourn to Farstar City, the quest will appear with a check in the Newbie quest book.

Kill Infected in Fall Forest: Exactly as it says on the label, as they say — go to Fall Forest and kill more Infected. In specific, you’ll need to kill 10 Infected in Fall Forest in order to complete the quest. That’s a lot of undead creatures, but by this point, getting rid of these Infected should be a comparative walk in the park, firstly due to your likely experience with Fall Forest, and secondly because of your exposure to the rougher environment of Farstar City.
Open Chests: Yes indeed, it’s those chests in Farstar City once again, and this time, the game is asking that you open five of them. Likewise, you may find it easier to take care of the quest that follows (killing 10 Infected in Farstar) while looking for chests that don’t require a Master Key. Or, if you’ve already reached level 13 in Crafting, you can learn the Master Key skill and craft one in order to open more chests in less time.
Kill Infected in Farstar City: For this final task in the series, you’ll be asked to kill a total of 10 Infected in Farstar City, though if you were able to kill more than five during your last trips to the area, these will count toward your total for the quest. Get rid of those Infected as the game asks you to, and that will wrap up the fifth quest series, as well as the second chapter. Your final reward would be one Piglet, 500 Gold Bars, 5 Formula Shards, and 500 Skill Points.