LifeAfter is the latest survival game from NetEase, that’s making waves in the mobile gaming market. In this game, you get to play as one of the few humans left that have not turned into zombies called the Infected. You need to work together with the other survivors in order to rebuild civilization. There are a lot of things that must be done. The Infected need to be killed and driven off the land, so that settlements can be established.
You will also have to gather resources like food, building materials, and crafting items. Players can join camps where they can help each other defend from zombie attacks. Members of the same camp can also go on boss raids together in order to secure rare loot. Surviving in a post-apocalyptic world will not be easy. Make sure you’re prepared by checking out our LifeAfter guide for some much-needed tips, tricks and strategies to become the ultimate survivor!
1. Choose The Right Pet
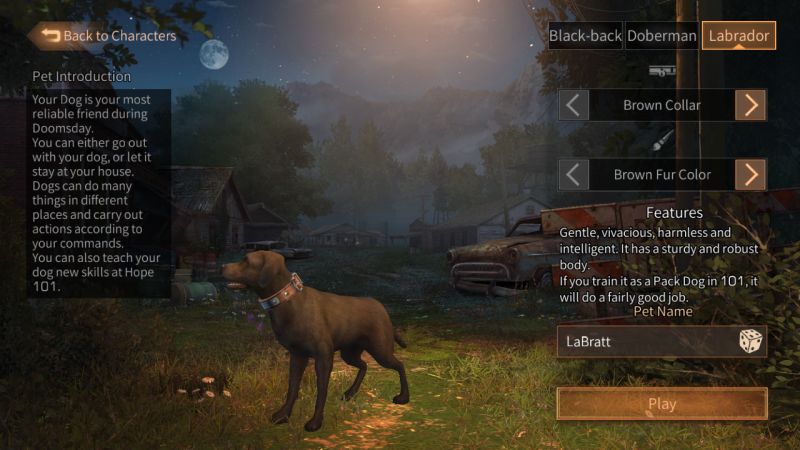

When you start the game, you will be asked to create a character. After that, you will be able to choose a dog companion. It may seem random, but this is the first decision you will make that will have an impact on your gameplay. The Labrador is the only one out of the three options that has an extra two slots in his dog pack. Those two extra slots can make a huge difference in your ability to gather more resources once you are able to register your dog as a Pack Dog. Remember that you only have limited slots to carry resources in. Even just two extra slots can go a long way.
2. Bring A Friend During The Tutorial
Once you have your character and your dog, you will be asked if you want to play the Tutorial, or if you want to answer some questions to skip it. If you are new to the game, the Tutorial is a great way to get a hang of playing the game without having to worry too much about consequences. Just keep in mind that none of the items you get during the Tutorial can be brought to the main game. Don’t go farming tons of resources because all that will be confiscated in Hope 101.

What you should do, however, is to try to bring a friend along during the Tutorial. If you complete the Tutorial in Coop mode, you will earn 300 Friendship points with your friend. That is the minimum requirement for cohabitation, so you could easily move in with your buddy later on. Friendship points would be a bit more difficult to earn in the main game, so it would be good to get a head start on this.
3. Use The Quest Window
As you play the game, you will undoubtedly receive multiple quests along the way. It is sometimes difficult to keep track of all of them. Tapping on the paper icon will give you a new window that lists all the quests you have per location. This is useful for making sure that you have completed all the quests in your current location. Otherwise, you may end up going back and forth between locations.
Related: LifeAfter Guide: 10 Tips & Strategies to Collect More Resources, Craft Better Items and Earn Rewards
Another useful feature of the quest window is the tracker. Tap on a quest that you want to work on, and it will be brought to the top of the quest window. You will also get a yellow indicator on the map that shows your where you need to go for that quest. Tap on each quest on your list to see which ones have trackers closest to you.
4. Customize Your Controls
Before you go running off to your quests, there are a few more things you should do. One of them is customizing your controls. While you can probably get used to playing the game with the default settings, it is better if you move some of the buttons around to where you would be able to reach them more comfortably. When you are fighting for your life, the last thing you want is to fumble with the buttons and accidentally switch to a pickaxe instead of a gun.

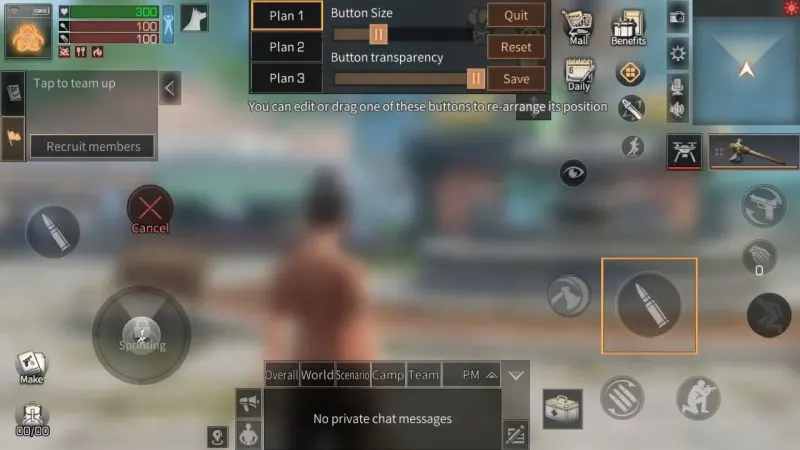
You can enlarge your movement joystick, so you don’t let go by mistake when you’re moving around. You should also try moving the run button to the lower right where your thumb can easily reach it. Placing the grenade button to a more prominent position will help you keep an eye on the number of grenades you have left. Try to move things around and see what the best setup is for you. You can always hit the Reset button if you feel like you messed it up.
5.Complete The Newbie Guide

It does not matter if you are a survival game veteran or an actual newbie. Hit that Newbie guide button at the top of the screen and work through those quests. The Newbie guide will give you step by step instructions on how the game works. All you have to do is follow those steps and you will easily learn the basics of the game. The best thing about it is that you get plenty of rewards for completing mundane tasks. You can get Gold Bars, New Dollars, experience, and more. For the first couple of hours of your life in the game, focus on the Newbie guide and it will give you the resources you will need to jumpstart your journey in the game.
6.Find An Active Camp
Camps are the equivalent of guilds in this game. There are a lot of things you can get out of camps. The first thing, of course, is that you get to play with veterans of the game that can help guide you with some of the more complex tasks or quests. You also get to have teammates to take down bosses with. Your camp will also have its own pond where you can safely fish without the risk of getting murdered by mischievous players. Fellow members of your camp will also usually help defend your home from invasion.
A good camp also has the chance of becoming a Trade City. This will allow you to buy and sell outside of the Central Market in Hope 101. You will need a lot of Gold Bars if you want to be able to trade for the best gear in the game. If you want to learn more about trading and earning more Gold Bars, you can check out our LifeAfter trading strategy guide we have shared before.
7. Do Your Dailies
One of the best ways to earn experience in this game, as well as some rewards, is to complete your daily tasks. Tap on the calendar icon at the top of your screen to see the daily missions that you can complete. These usually include accepting missions from the boards of each area, fishing in the camp pond, running through Miska University, killing the World Boss, and so on. Focus on completing these tasks every day before going about on your own business. These will help keep you on the right track when it comes to progressing in the game.
8. Manage Your Vigor
At the top left corner of your screen, you will see all your stat bars. Beside your stat bars is an icon that looks like a person in a box. The box is your Vigor meter. You earn 10 Vigor every 10 minutes and it is maxed out at 600. You can tap on the icon to see how much you have. When your Vigor is above 200, you will get the Spirited status which gives you double the gathering mastery from your actions. Make sure you take advantage of this status by gathering a lot while it is on.
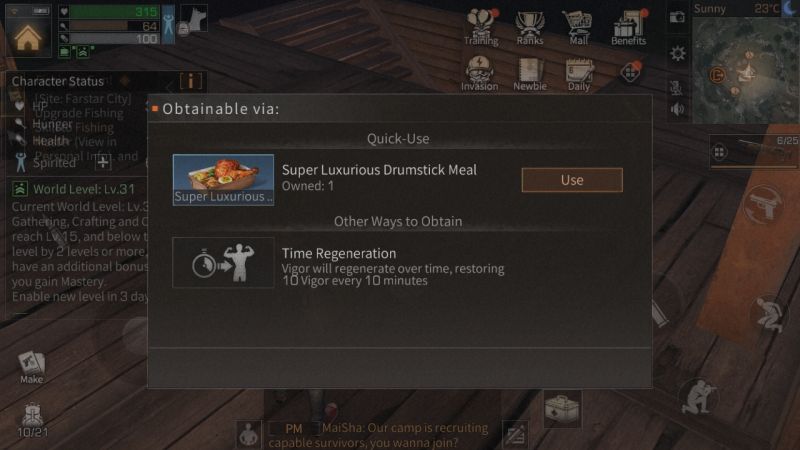
If your Vigor is low, you can just wait for it to regenerate on its own, but it will take some time. The good news is you can restore your Vigor by eating the Super Luxurious Drumstick Meal. You can get two of these for free every day be completing the Furniture Shop Recycle Recovery quest in Hope 101.
9. Complete The NPC Quests

As you explore the different locations, you will sometimes see a blue dot somewhere on the map. This blue dot indicates an NPC that gives out quests. Talk to them and see what they want. Don’t worry because the quests are usually easy. Some of them require you to get certain resources that are just around the area. Others will ask you to take a photo of a monster or animal. These random NPC quests are great for earning additional experience and resources. You will also sometimes get special items while gathering. Hand over those items to the NPCs who need them in order to earn additional rewards.
10. Choose The Skills You Need
As you gain experience, you will be able to learn and upgrade your Abilities. You can find the list of Abilities you have by tapping on the house icon on the top left corner of your screen. If you see a red dot on the menu, that means you have Abilities that can be upgraded. Unfortunately, you need to spend New Dollar and Skill Points in order to learn and upgrade Abilities. You only get a limited amount of these as you play the game. That means you will not have enough to upgrade them all. That is why you should decide early on which ones you want to focus on.
The Abilities you should invest in depends on your play style. In general, you want to at least unlock the gathering skills, so you won’t have to rely on the market for basic materials. If you struggle with combat and find yourself dying often, you can invest more points in combat master Abilities. Make sure you read the descriptions carefully and decide whether or not you want to spend your skill points on them.
11. Think About Your Profession
Aside from the basic Abilities that everyone has, you also get to choose a Profession which will unlock exclusive skills for you. There are several Professions available, and you should think carefully about which one you want because you will have to spend real money to change it later on. Loggers, Miners, Pickers, Armorers, and Gun Makers all have their own ways to make money through trades. How much money you will make depends on how many people on the same server have the same job.
You may want to check out the Market and see which supplies your server has a surplus of. The price of rare materials go down when there are too many of the same Profession in the server. Try to look for which materials are a bit low and go for that Profession. The combat-related Professions are generally for players who spend real money in the game since they will not have anything rare to trade with. Of course, if you still feel like playing a particular Profession, you are free to do so. You will still be able to play the game; it just might be a bit more difficult.
12. Save Your Formula Shards
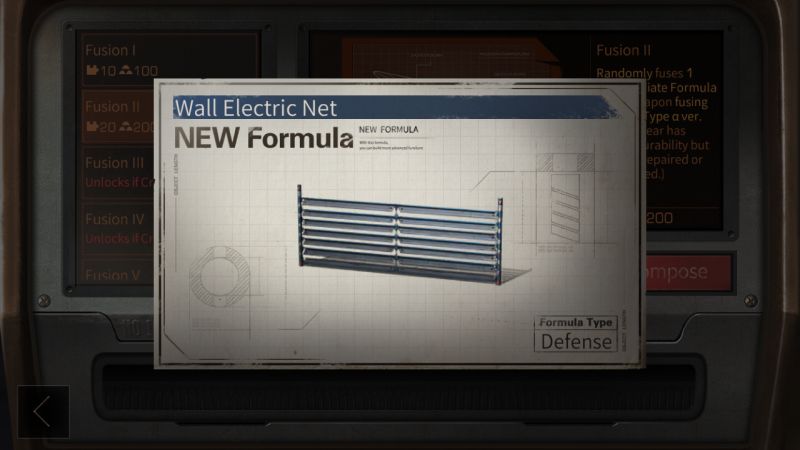
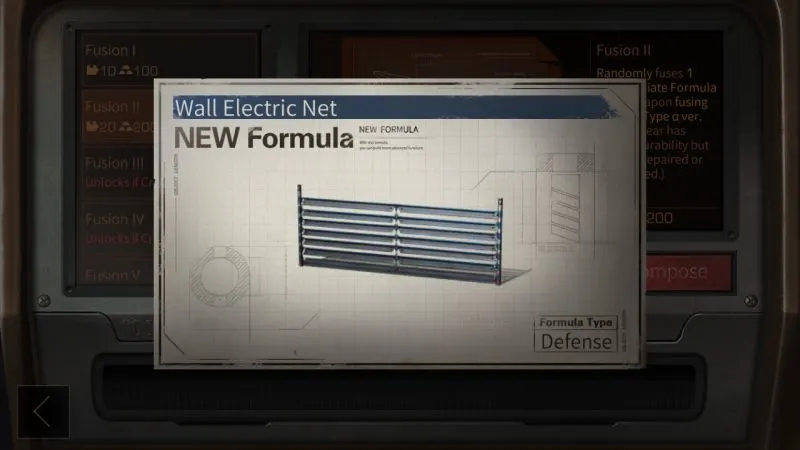
Formula Shards are items that are used for Formula Research. You spend varying amounts depending on the Fusion level. You need 10 shards at level 1, 20 shards at level 2, and so on. The higher the Fusion level, the better chances you have of discovering a rare formula. You can spend a few of your shards to unlock some of the basic formulas at lower levels, but you wouldn’t want to waste too many early on. Hold on to the rest of your shards until you unlock Fusion level 3 or 4, so that you have more shards to spend on getting rare formulas.
13. Build Attachments For Your Gear
The strength of your equipment is not limited to the quality of the armor or weapon formula that you unlock. You can also build attachments for your gear in order to boost their stats. Attachments can be built in the weapon and armor shops in your Camp or in Hope 101. Once you have built attachments, you can upgrade them by combining them with matching components of the same level.
Related: LifeAfter Equipment Guide: Tips, Cheats & Strategies to Get the Best Gear
The higher the number of stars on your attachment, the more components you will need. That means you need 1 component to raise your attachment to 2 stars, but you will need a whopping 1,024 attachments to raise it to 12 stars. Instead of trying to achieve that impossibly high number, it is better if you spread out your components across different gear to make sure you have well-rounded offense and defense.
14. How To Get More Components
If you are looking for components, the best place to look is Nancy Town. Complete all the objectives daily in order to earn enough points to get 3 components. Make sure you are ready for battle because players can get pretty competitive in Nancy Town. You will encounter a lot of players with high level gear here, so try to play safe until you are stronger.
Aside from Nancy Town, you can also buy components from the weapon and armor shops at 3000 New Dollars apiece. If you have a lot of New Dollars, make sure you buy daily because you only get to buy a limited amount per day. Finally, you can spend Gold Bars and real money to buy a few more components from the Mall.
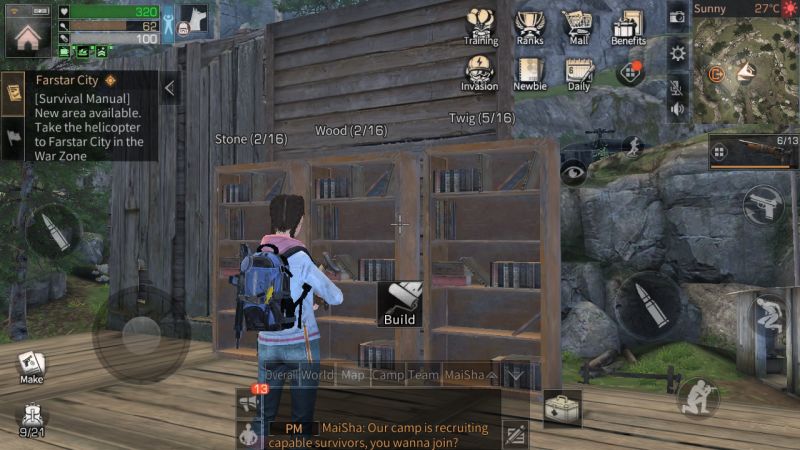
15. Upgrade Your Manor
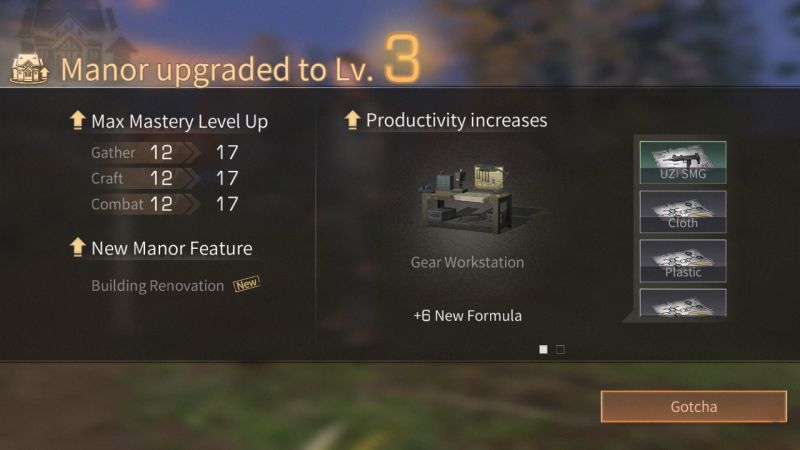
Your Manor is more than just an in-game house for you to decorate. Even if you are not into building a fancy house, you should at least invest some time upgrading your Manor level. Certain new weapons, formula, work benches, and others can only be unlocked when you meet the Manor level requirement. To increase your Manor level, you will need to meet the necessary mastery levels for Gathering, Crafting, and Combat. You will also have to gather or produce the certain materials for the upgrade. The higher the Manor level, the more materials you will need. You can check out the requirements by talking to the Controller right outside your house, beside the Mailbox.
16. Keep Extra Items In Your Pack
Remember that Labrador that you were supposed to turn into a Pack Dog? If you have found Matilda and turned him into a Pack Dog, you should have 12 extra storage slots by now. With the extra slots, it would be a good idea to have an extra axe and pickaxe in your dog’s pack. You should also keep 4 meat, 4 mushrooms, 4 vegetables in there at all times. You would never know when an NPC quest would come up and those three food items are usually needed. It would be too much work to have to scavenge for those items after you receive the quest. You should also fill one slot with little branches, so you have gifts for NPCs whenever you need them.
17. Always Use Better Tools
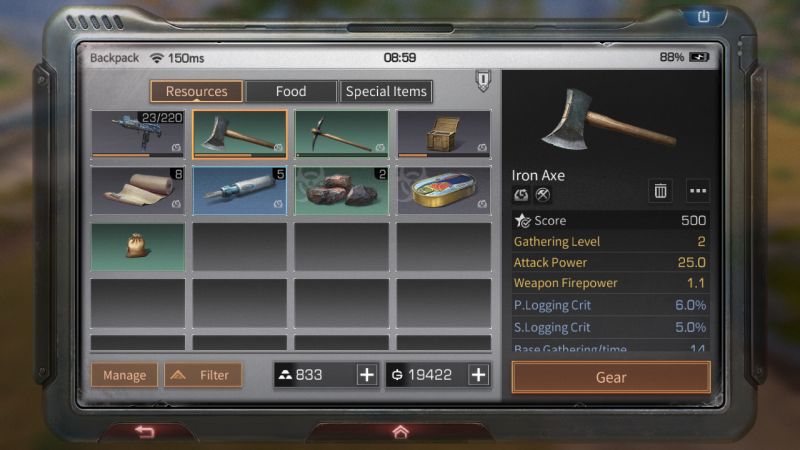

Once you have unlocked the higher-level tools, there is no reason for you to keep crafting the old ones. Even if the new tools require more resources, they also gather more items while giving you more experience per action. It is always more efficient to spend extra resources in crafting better tools than sticking to low-level ones. With that said, make sure you prioritize unlocking the Abilities that will give you access to better tools. You will be gathering for most of your game time, so it is a worthy investment of skill points.
Related: LifeAfter Crafting Guide: Tips & Tricks to Craft Better Equipment
18. Participate In Camp Boss And Invasions
Combat mastery is usually the most difficult to level up in the game because guns are costly to make and using them consumes durability. The great thing about Camp Boss and Invasions is that you consume very little durability when you participate. This is your chance to earn a lot of Combat experience, so make sure you don’t miss any of them. This is another benefit of finding an active camp to join. Camp Bosses only appear once a week. If fellow members of your camp don’t show up, you will have a hard time fighting on your own.
19. Gather What You Can
When you’re sending gathered resources through the Postman, you will notice that you can only send a limited number of Green and Blue items. When you exceed the quota, you will have to spend Gold Bars for every item that you ship back. You might be tempted to just buy resources from the Market instead of spending them at the Postman’s. It is still cheaper, however, to spend the extra Gold Bars in shipping items back than buying from other players. If a material isn’t exclusive to a Profession, it is best if you try to gather or produce it on your own.
20. Unlock Garden Slots Early
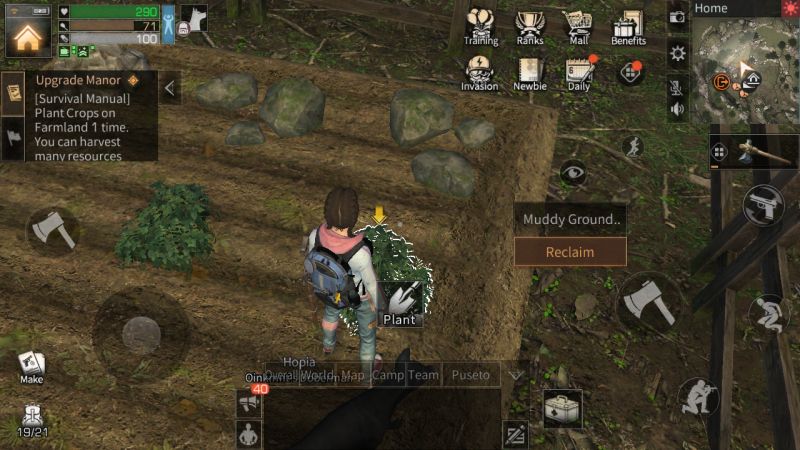

There are several garden plots outside your initial home in the Development Zone. You can plant the saplings and seeds in those garden plots in order to get even more resources without having to go out. However, it costs Gold Bars to unlock each square in the garden plots. Do not be afraid to spend Gold Bars here because all the plots you unlocked will be transferred to your Camp home once you move. Plant different resources in your garden and harvest them easily.
21. Organize Your Resources
When you start out, you will be given a Wine Cabinet and a Small Cabinet for free. These are storage spaces that you can use to dump your resources in. In the beginning, it is alright to just place the resources wherever there is space available. You will find the lack of system a bit frustrating later on because you won’t know how much of each resource you still have.
A cool trick is to craft multiple storage boxes and assign them to your most commonly gathered materials. Have one storage each for Stone, Wood, Iron, and so on. You can rename the storage box to whatever it is supposed to store and put a check on the option to display the name. It’s easier to keep track of which storage to put materials in this way.
22. Check The Zone Information
Each zone has its own set of resources that can be obtained depending on the weather. You can tap on the weather icon at the top right corner of your screen, just above the mini map, in order to view additional details about the resources that are available in that zone. For example, Hardwood Vine and Mushroom only appear in Fall Forest when it is raining. On the other hand, Flint will only appear in Fall Forest when it isn’t raining. Knowing these things will help you gather the materials you need more efficiently.
Related: LifeAfter Fishing Tips & Tricks: A Complete Guide to Fishing
23. Bring Multiple Weapons
Wherever you go, make sure you always have at least two guns with you. Even if the second one is just a Mondragon Rifle, it is still better than fighting with your fist or your tools. When you start crafting Uzi’s, make sure you take note of how hot it gets. You will see a flame icon on your weapon if it overheats. If you continue to use an overheated Uzi, it will lose Durability more quickly and give less combat experience. Since Durability can only be restored so many times, and it takes a whole lot of gathering to craft an Uzi, it is best if you avoid overheating by keeping more than one gun in rotation.
24. Reloading At Occupied Zones
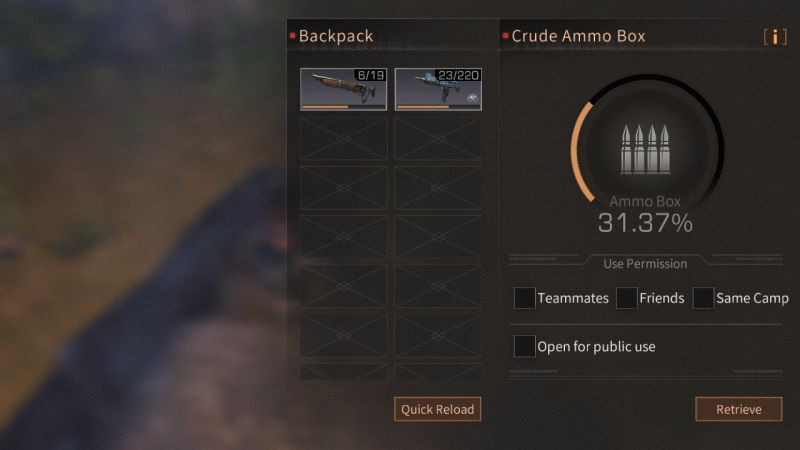
An occupied zone will have a reloading station beside the safe house. You can reload all your weapons for free, but only for the first time each day. If you brought multiple weapons with you, it is best if you deplete all their ammo first before heading towards the nearest occupied zone for your free reload. Your reload is free no matter how many ammo you get, so make the most out of it by reloading several weapons at once. In an ideal situation, you would have four guns on rotation as this will allow you to survive for a long time while gathering a lot of materials.
25. Dealing With Bosses
Bosses drop a lot of good rewards when they are taken down. All players can participate in taking down a Boss and everyone who dealt damage will receive rewards. With this in mind, you can actually get some good rewards from Bosses even if your level is still a bit low. Just hang back and let the higher level players face the monster. Shoot from a safe distance and just come closer when the loot is ready for you to take. Most veteran players don’t mind newbies sniping from afar since the loot isn’t split among participants. Just make sure you start carrying your own weight when you get better gear and do the same for newbies in the future.
26. How To Survive Boss Aggro
If a Boss starts focusing on you during a raid, you might be tempted to run for your life. Do not do this because nothing good will come of it. If you fail to get away, you will end up dead. If you succeed, the Boss will lose Aggro and reset. The best thing to do is to move around in circles until the Boss notices someone else. Of course, if you don’t have armor strong enough to a couple of swipes from the Boss, you shouldn’t have been hanging around too close to get his attention in the first place. Don’t worry too much if you die. Most players are nice enough to revive you and allow you to get the loot you died for.
27. Hunt Down Mini Bosses
Bosses may be too tough to take down early on. If you don’t feel up to the challenge, you can hunt down mini bosses instead. A mini boss is found in the most difficult area of every map. Some of them are weak enough to be taken down on your own if you can find a spot high enough to snipe from. Other mini bosses can be taken down by a single party. Call up some of your camp buddies to help you out if you want to look for mini bosses. The rewards they give out may not be as good as the ones you get from actual Bosses bit it’s still worth your time.
28. Consider Your Combat Mode
If you spent a lot of time in Fall Forest, you may be in for a surprise when you reach Farstar City and other zones. Players can switch between Peace and Invade combat modes in these zones. When you choose Peace mode, your name will be white. Those who are in Invade mode can attack you, but they will be put on the Wanted list if they do. Some players are strong enough that they don’t care about being put on the Wanted list, so be careful.

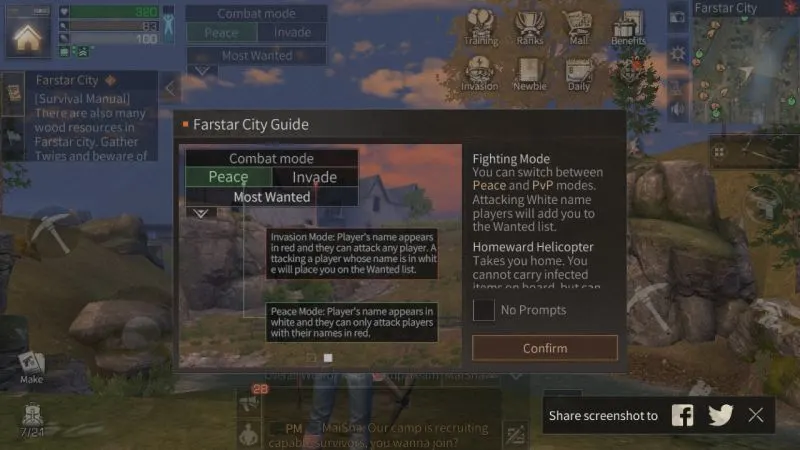
In case you are feeling a bit mischievous, you can switch to Invade mode. Your name will be red and any other player in Invade mode may attack you without penalty. If you choose to attack a white player, you will be put on the Wanted list and other players will be given a reward for killing you. Choose wisely or you may end up in a lot of trouble.
29. Complete Quests During Sandstorms
When you reach Sand Castle, you will encounter a new type of weather called the sandstorm. As you would imagine, sandstorms hit you with a flurry of sand and you will take damage if you don’t find shelter. A good time to complete quests that require you to kill mercenaries would be during sandstorms. Just run around until your lungs get 3 dots and immediately head into a shelter to avoid taking damage. Finding shelter will instantly reset your lung capacity, allowing you to head out into the sandstorm once more.
30. Bribe NPCs With Gifts
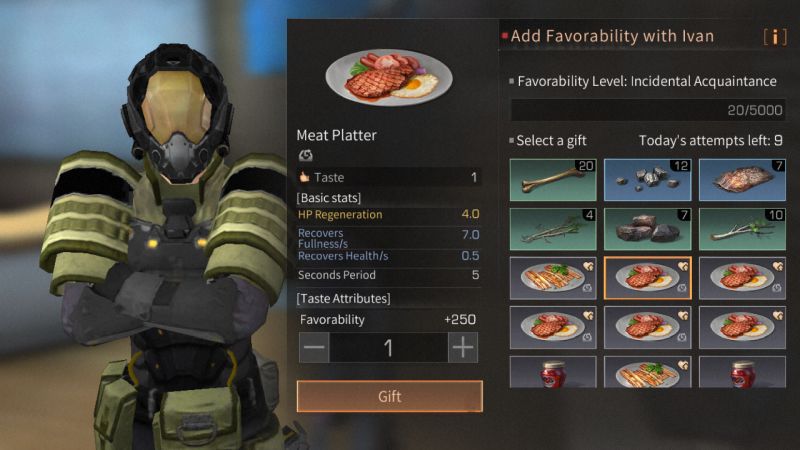

Once you gain access to the second stronghold, make sure you buy a lot of trees there and plant them all in your home. These trees will grow and give you Little Branches which make great gifts for NPCs. You can then go around befriending NPCs you find by bribing them with as many Little Branches as you can stuff them with. Reaching a certain level of friendship with an NPC gives you a chance to receive various gifts from them, including precious skill points.
Succeeding in LifeAfter takes a ton of work, but that’s what makes the game more fun. Hopefully, our compilation of tips and tricks will help you master the game. If you have anything to add, be sure to let us know in the comments below!
Marzena
Sunday 31st of October 2021
i love this article!!! -itsMarz from Obelisk server
Lucifer
Friday 2nd of October 2020
It doesn’t have blood dropped bro zombies do
Musawer
Friday 3rd of April 2020
How to collect the blood of an infected wolf