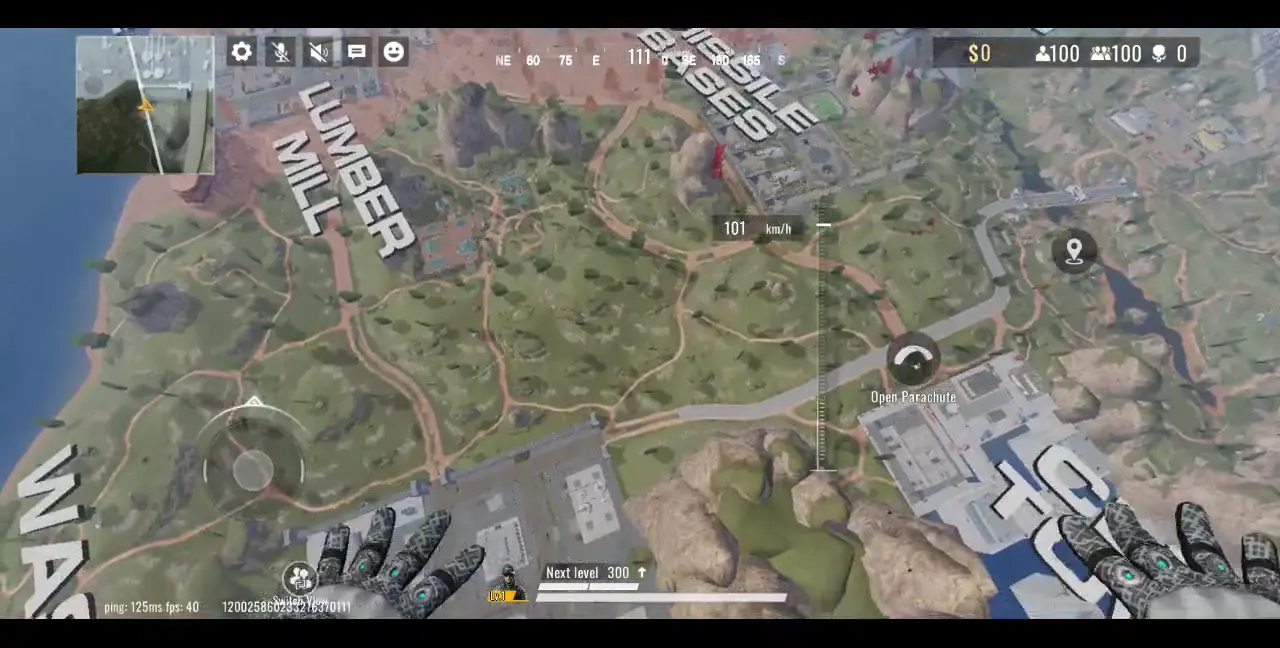
Battle is a sport—and here, you’re playing for keeps. As you parachute from a great height, the terrain of The Valley becomes even clearer before your feet even touch the ground. In the distance, you see the vast expanse of land littered with trees, mountains, and more than a handful of buildings rife with combat supplies.
Upon landing, you feel your senses getting sharper, your vision focusing and your hearing becoming attuned to the environment. Quickly but cautiously, you make your way toward The Valley’s terrain, on high alert for any enemies approaching.
For a while, it’s quiet. As you move along the path, hiding behind trees and abandoned vehicles, you hear nothing but the sound of your own footsteps. Occasionally, you manage to loot some supply crates, picking up better firearms or extra ammunition. But right as you’re starting to feel as though no one’s around, you hear gunfire in the distance.
A mad dash of footsteps makes its way to your ears. Bullets seem like fireworks in the air. Even worse, you see a hazy wall of red rapidly closing in your position. The Safe Zone is shrinking while enemies are nearby—and you’re ready to pick them off and emerge as the last Striker standing in this arena.
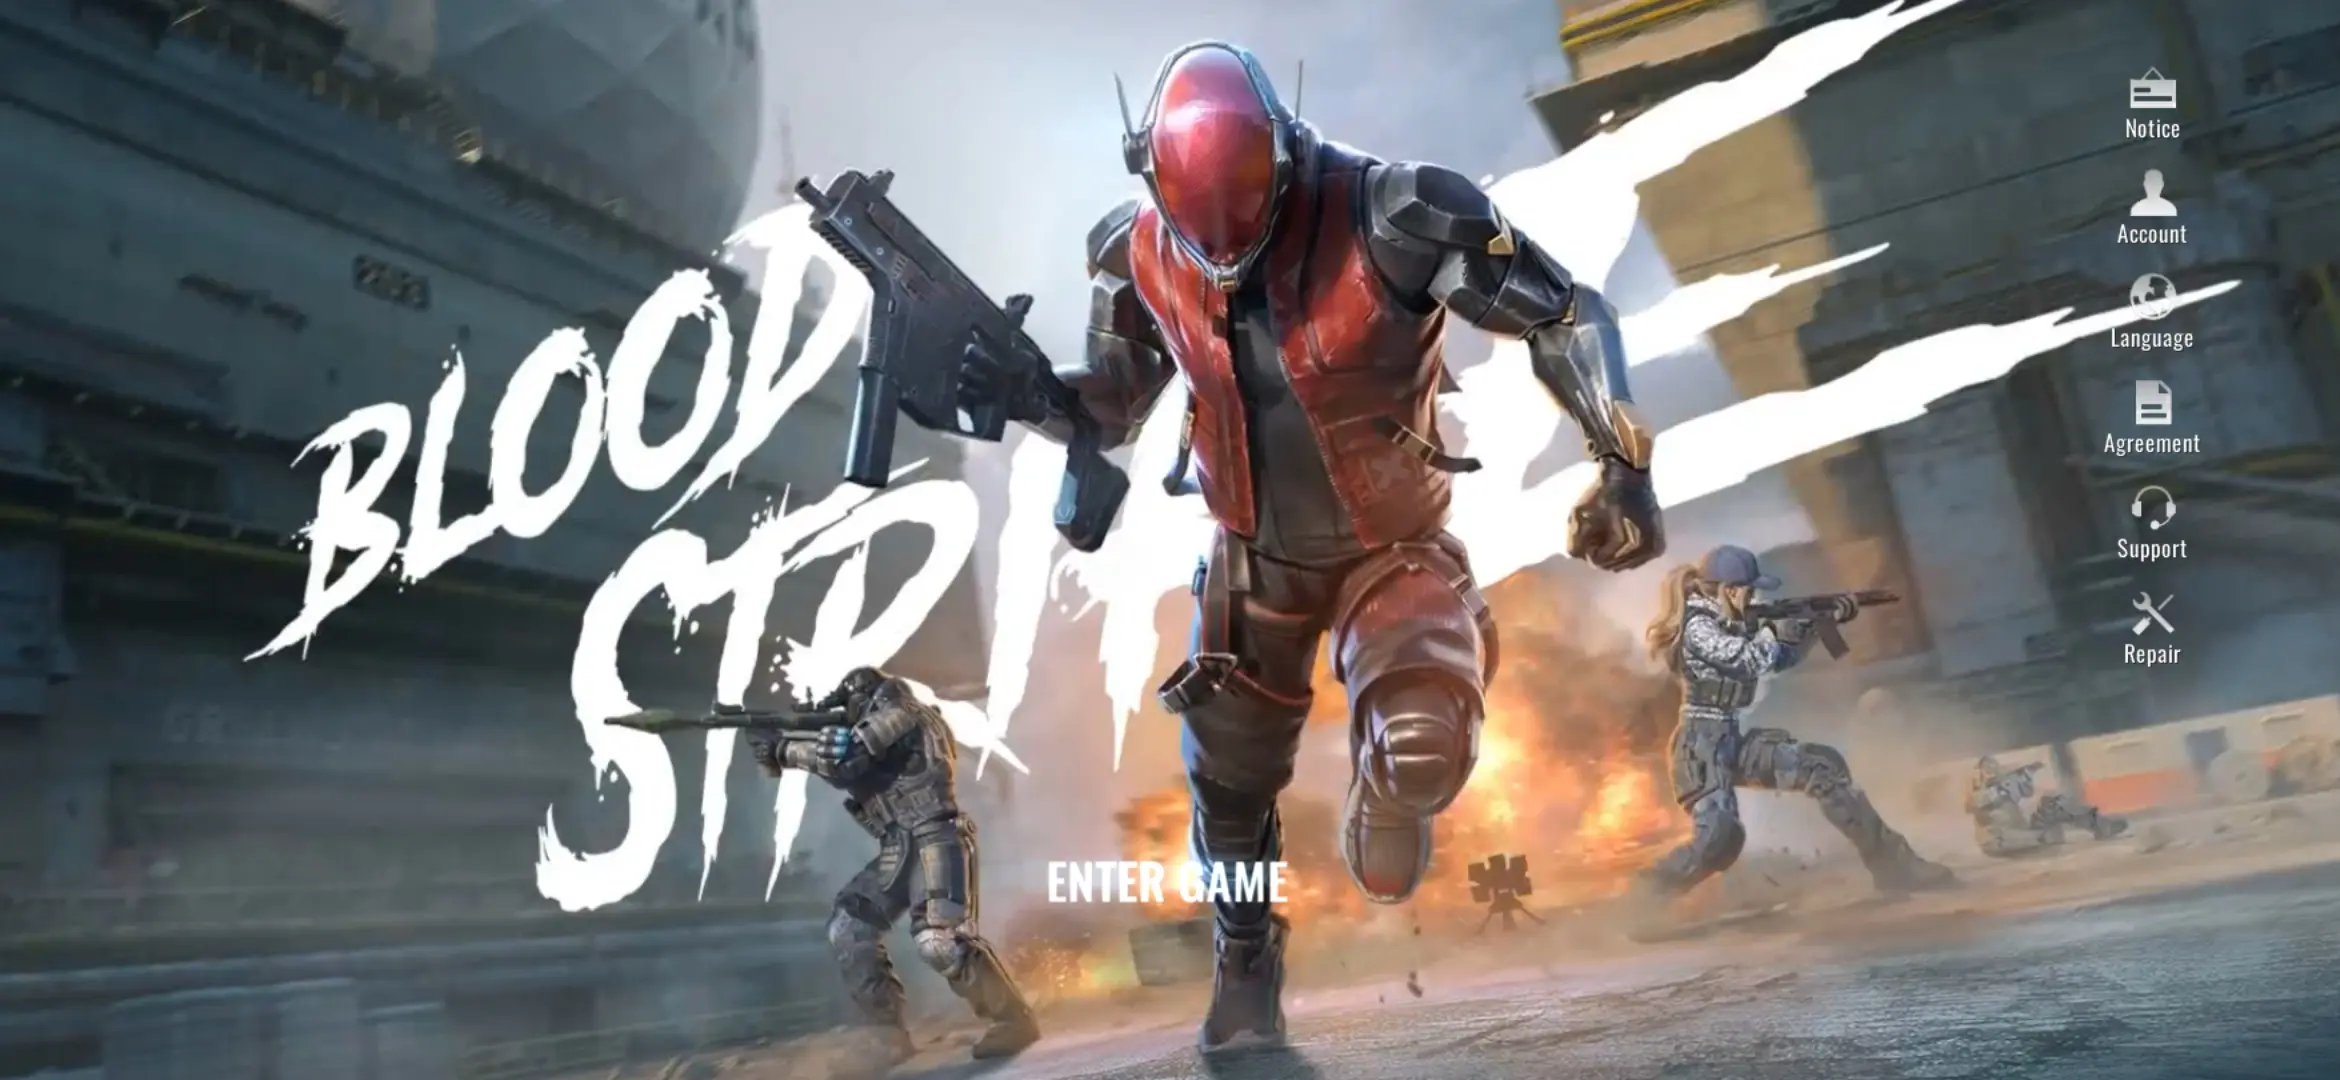
Lock and load as NetEase Games brings you Blood Strike, a thrilling first-person shooter (FPS) from the makers of Onmyoji and Onmyoji Arena. Released in December 2023, Blood Strike joins popular FPS battle royale games such as Garena Free Fire, PUBG Mobile, and Arena Breakout, to name a few.
In Blood Strike, you’ll be playing as any of the different Strikers who not only have distinct appearances but also their own unique skills in battle. You’ll also get to customize your loadout with various firearms and melee weapons, alongside other equipment that will ensure you survive the battlefield while being at the top of your game.
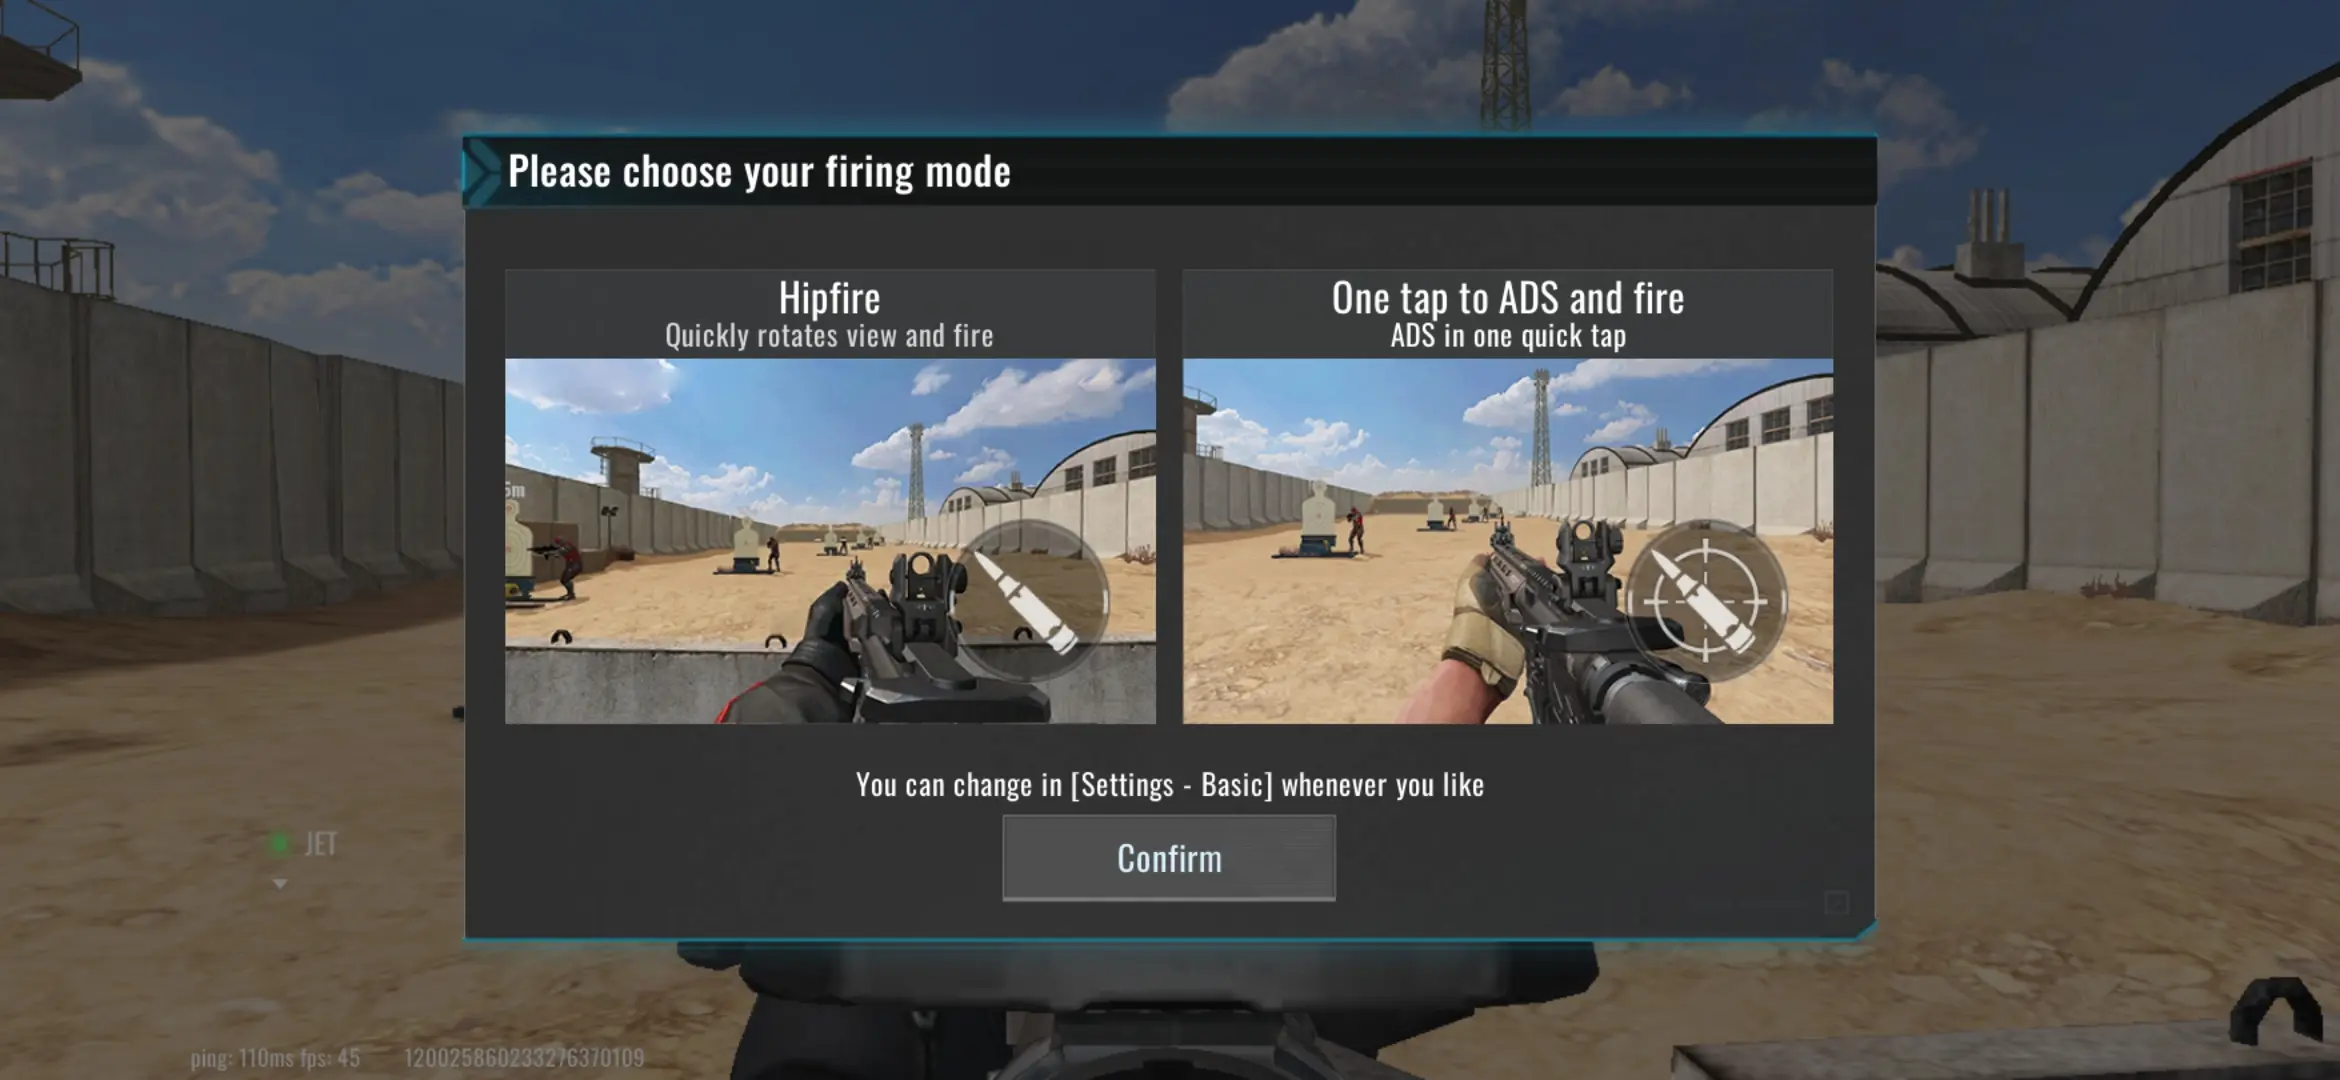
Since Blood Strike is an FPS, you can choose between two firing modes: hip fire and one tap to ADS. Hip firing is recommended for closer targets while ADS mode is recommended for distant targets.
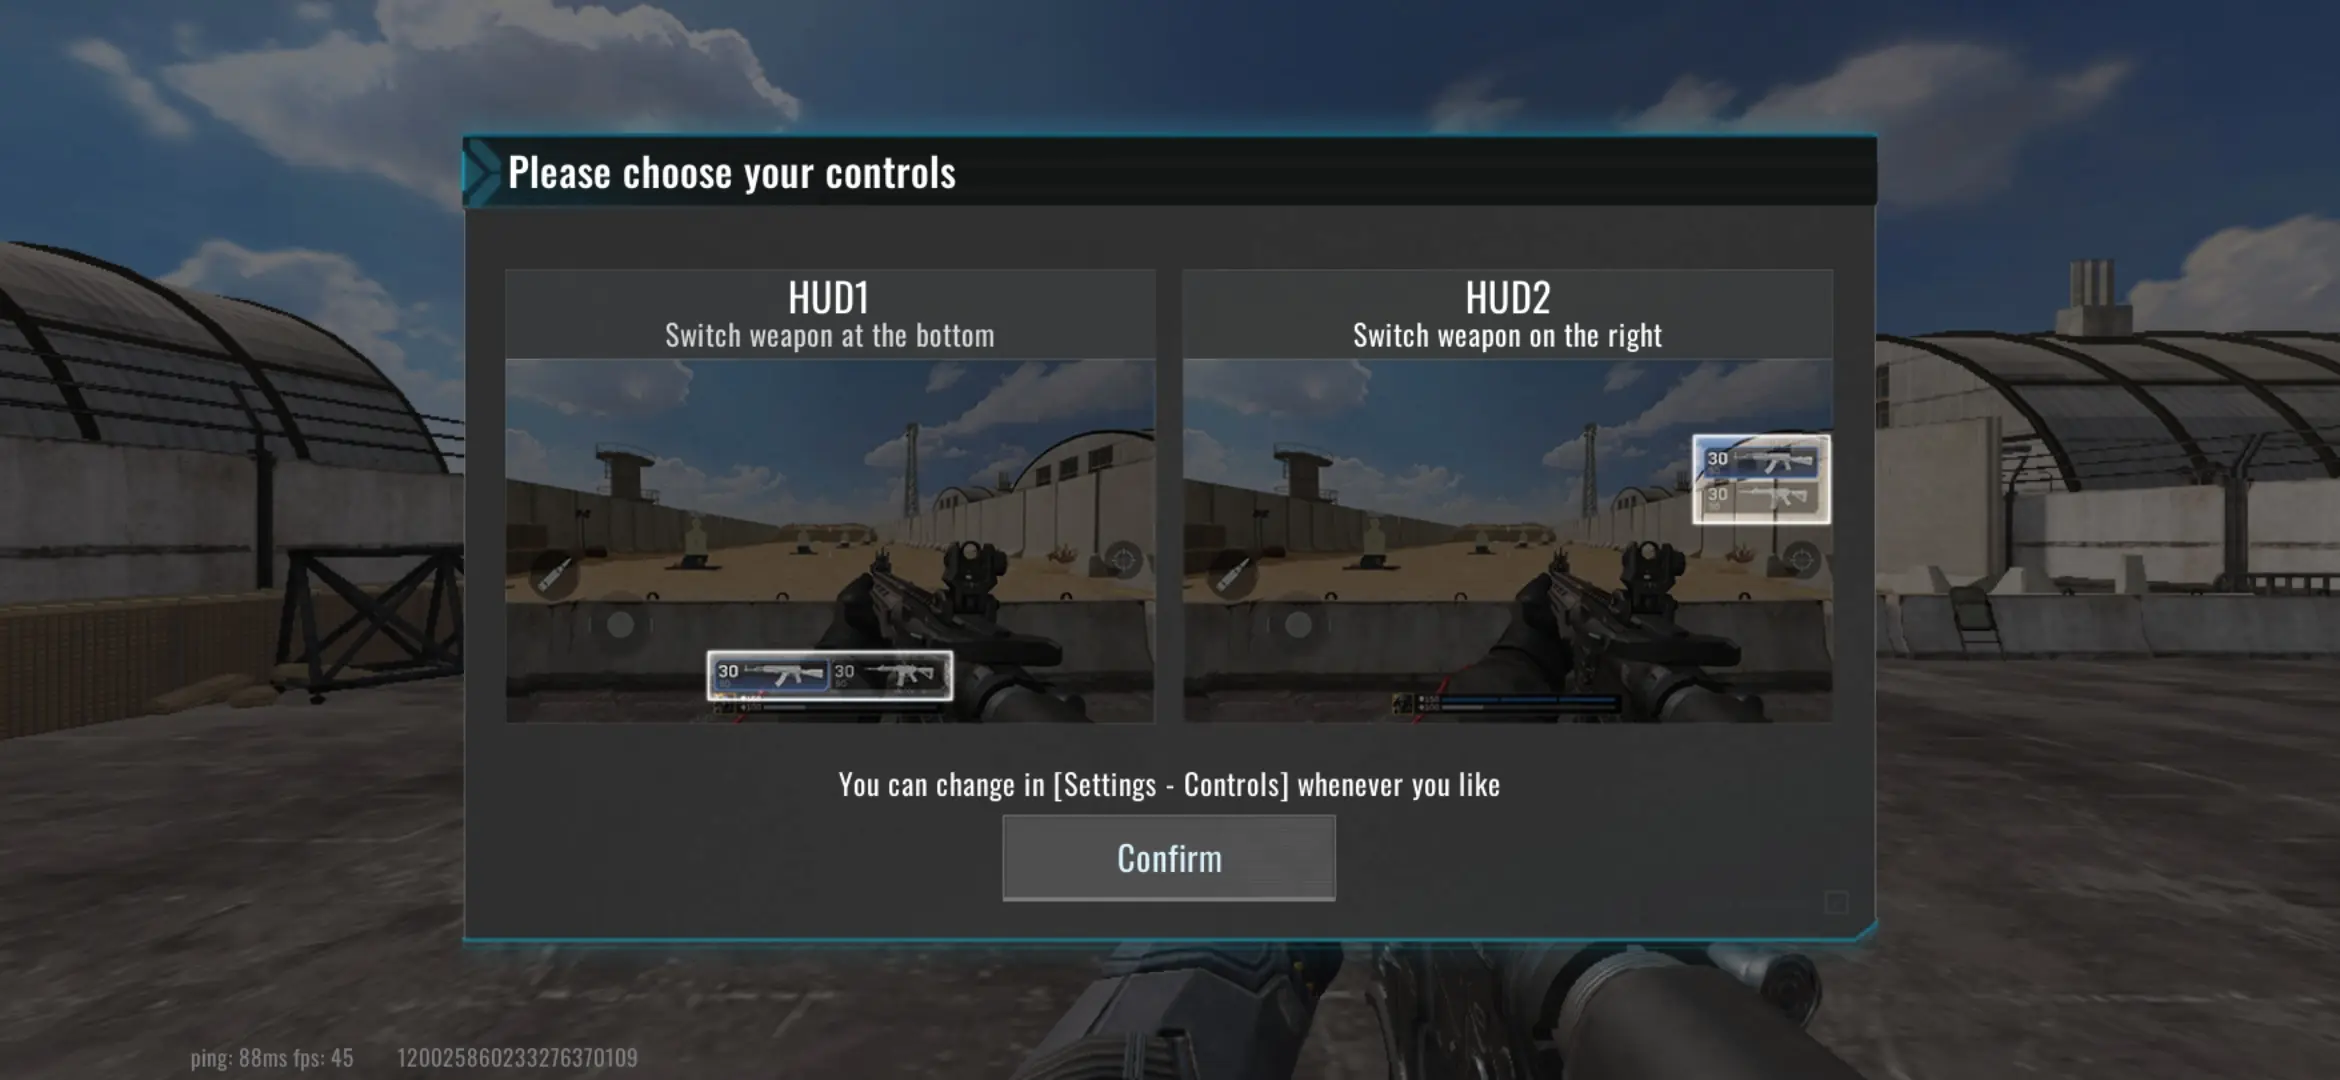
Similarly, you may also choose between two control displays, wherein HUD 1 allows you to switch weapons at the bottom, while HUD 2 allows you to switch weapons at the right side of the screen.
When you enter the game, you’ll be treated to a brief tutorial mode wherein you’ll be able to pick the settings suited for your play style, as well as how to fire, modify your loadout, and even call for airdrop support. The tutorial covers the basics, some of which we’ve already mentioned above, such as picking between firing modes and displays.
But Blood Strike is more than just trailing your sights on an enemy and shooting indiscriminately. Survival is the name of the game and it requires more than just good aim. To be the best Striker, you need to work your way from the ground up, and this is what this beginner’s guide for Blood Strike is all about.
Here, we’ll be sharing how you, as someone new to the game, can rise to the top and best other competitors, as well as what combat strategies you can apply to take advantage of your chosen Striker and their skills, which weapons may suit your play style, and how to emerge victorious in every encounter that comes your way.
Strike while the iron is hot with our beginner’s guide for Blood Strike!
Get Familiar with the Game Modes

In Blood Strike, there are four different game modes that you can participate in. Each game mode has its own objectives and corresponding maps. Being familiar with all the game modes and trying them out will give you an idea of how you should formulate your battle plan to claim victory wherever you fight.
Battle Royale
This mode can either be ranked or unranked. Ranked fights are for more serious players who are more into the competitive aspect of the game. Choosing ranked Battle Royale matches essentially means going the high risk, high reward route. On the other hand, unranked matches are for more casual players who are more into the fun aspect of the game rather than the competitive one.
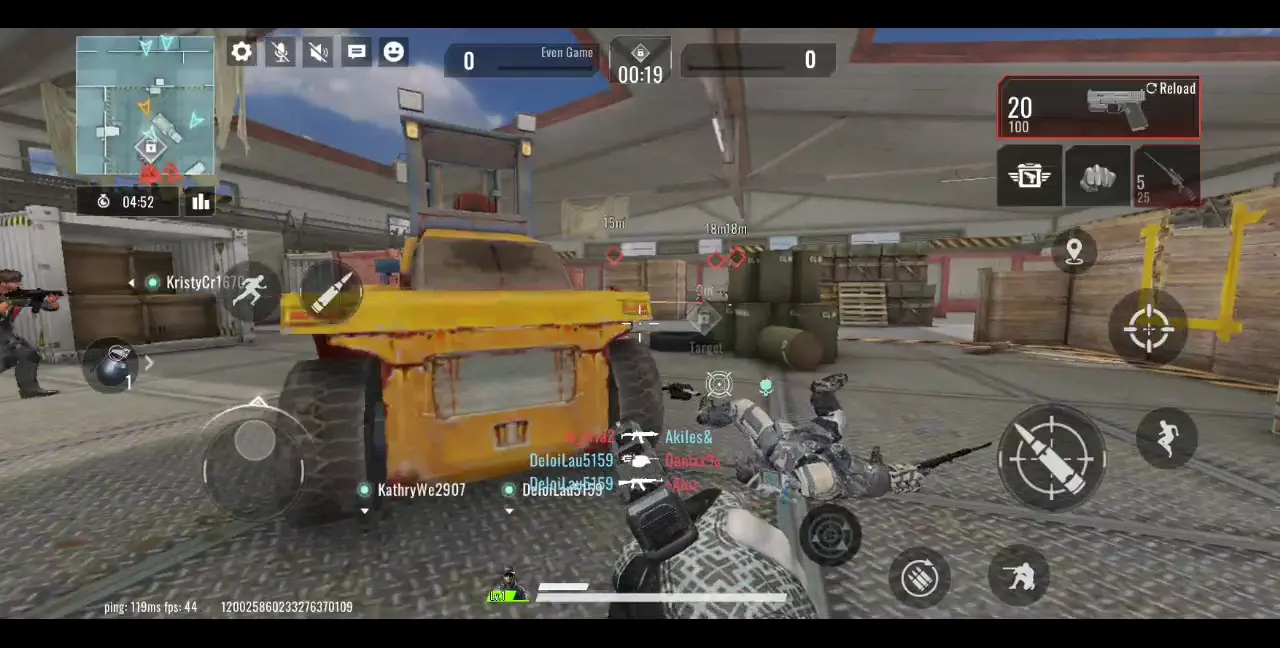
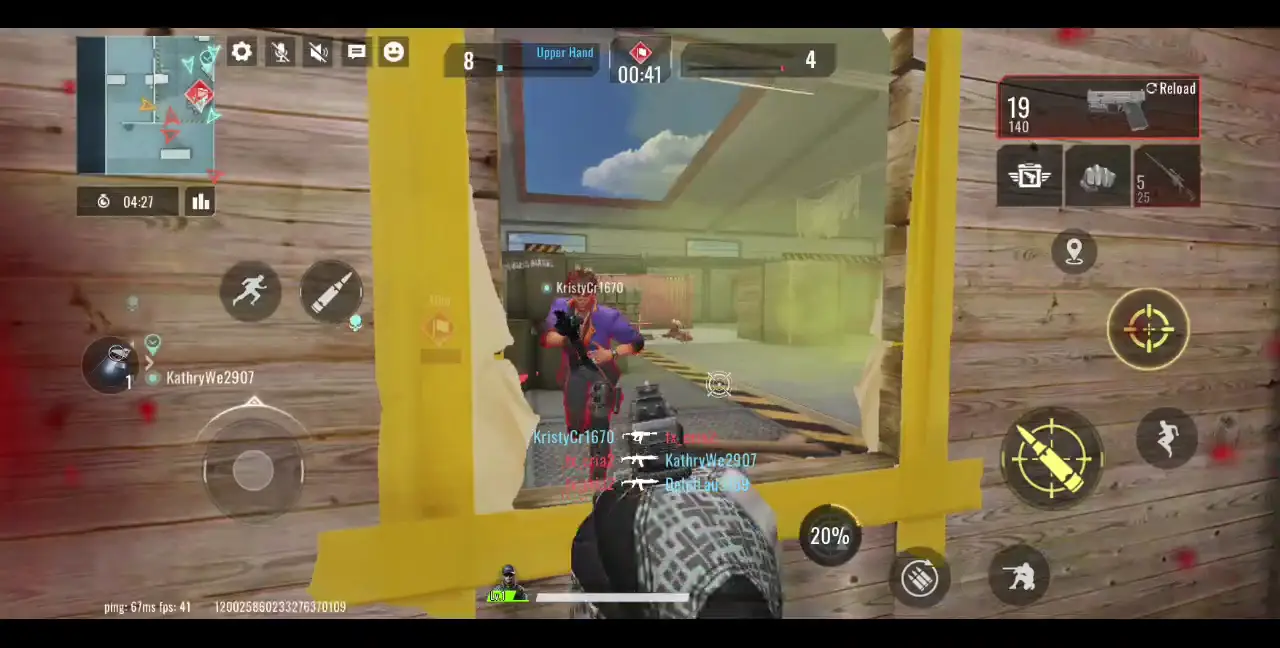
Battle Royale mode, in general, means you have to be the last player or last team standing while duking it out with other players of varying skill, loadouts, and experience. You can play solo or in a team.
When entering this mode, you need to choose a Striker that you will play as. We’ll get into more detail regarding the different Strikers available in the game, but suffice it that picking the right Striker for your skill and play style can affect your chances of surviving, as well as the abilities you’ll be able to take advantage of during the match. If you’re playing with a team in Battle Royale mode, you can’t choose a Striker who’s already been chosen by your teammates. When going solo, you can choose any Striker available.
Once you’ve chosen your Striker, you’ll be airdropped into the map. The default map is The Valley, upon which several points are marked and can be seen while airdropping. You can decide which point you want to be airdropped into for a better vantage point.
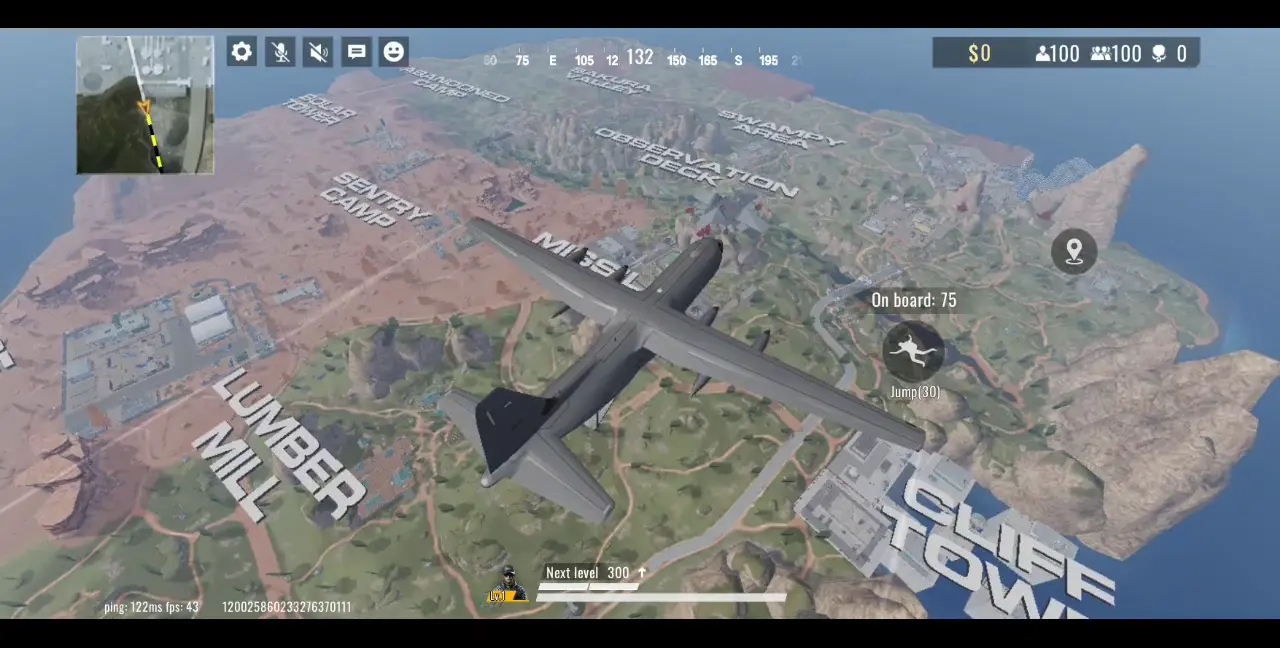
Once you’ve landed, the match will begin and you can start hunting down enemies. While on a team match, you also need to accomplish the following:
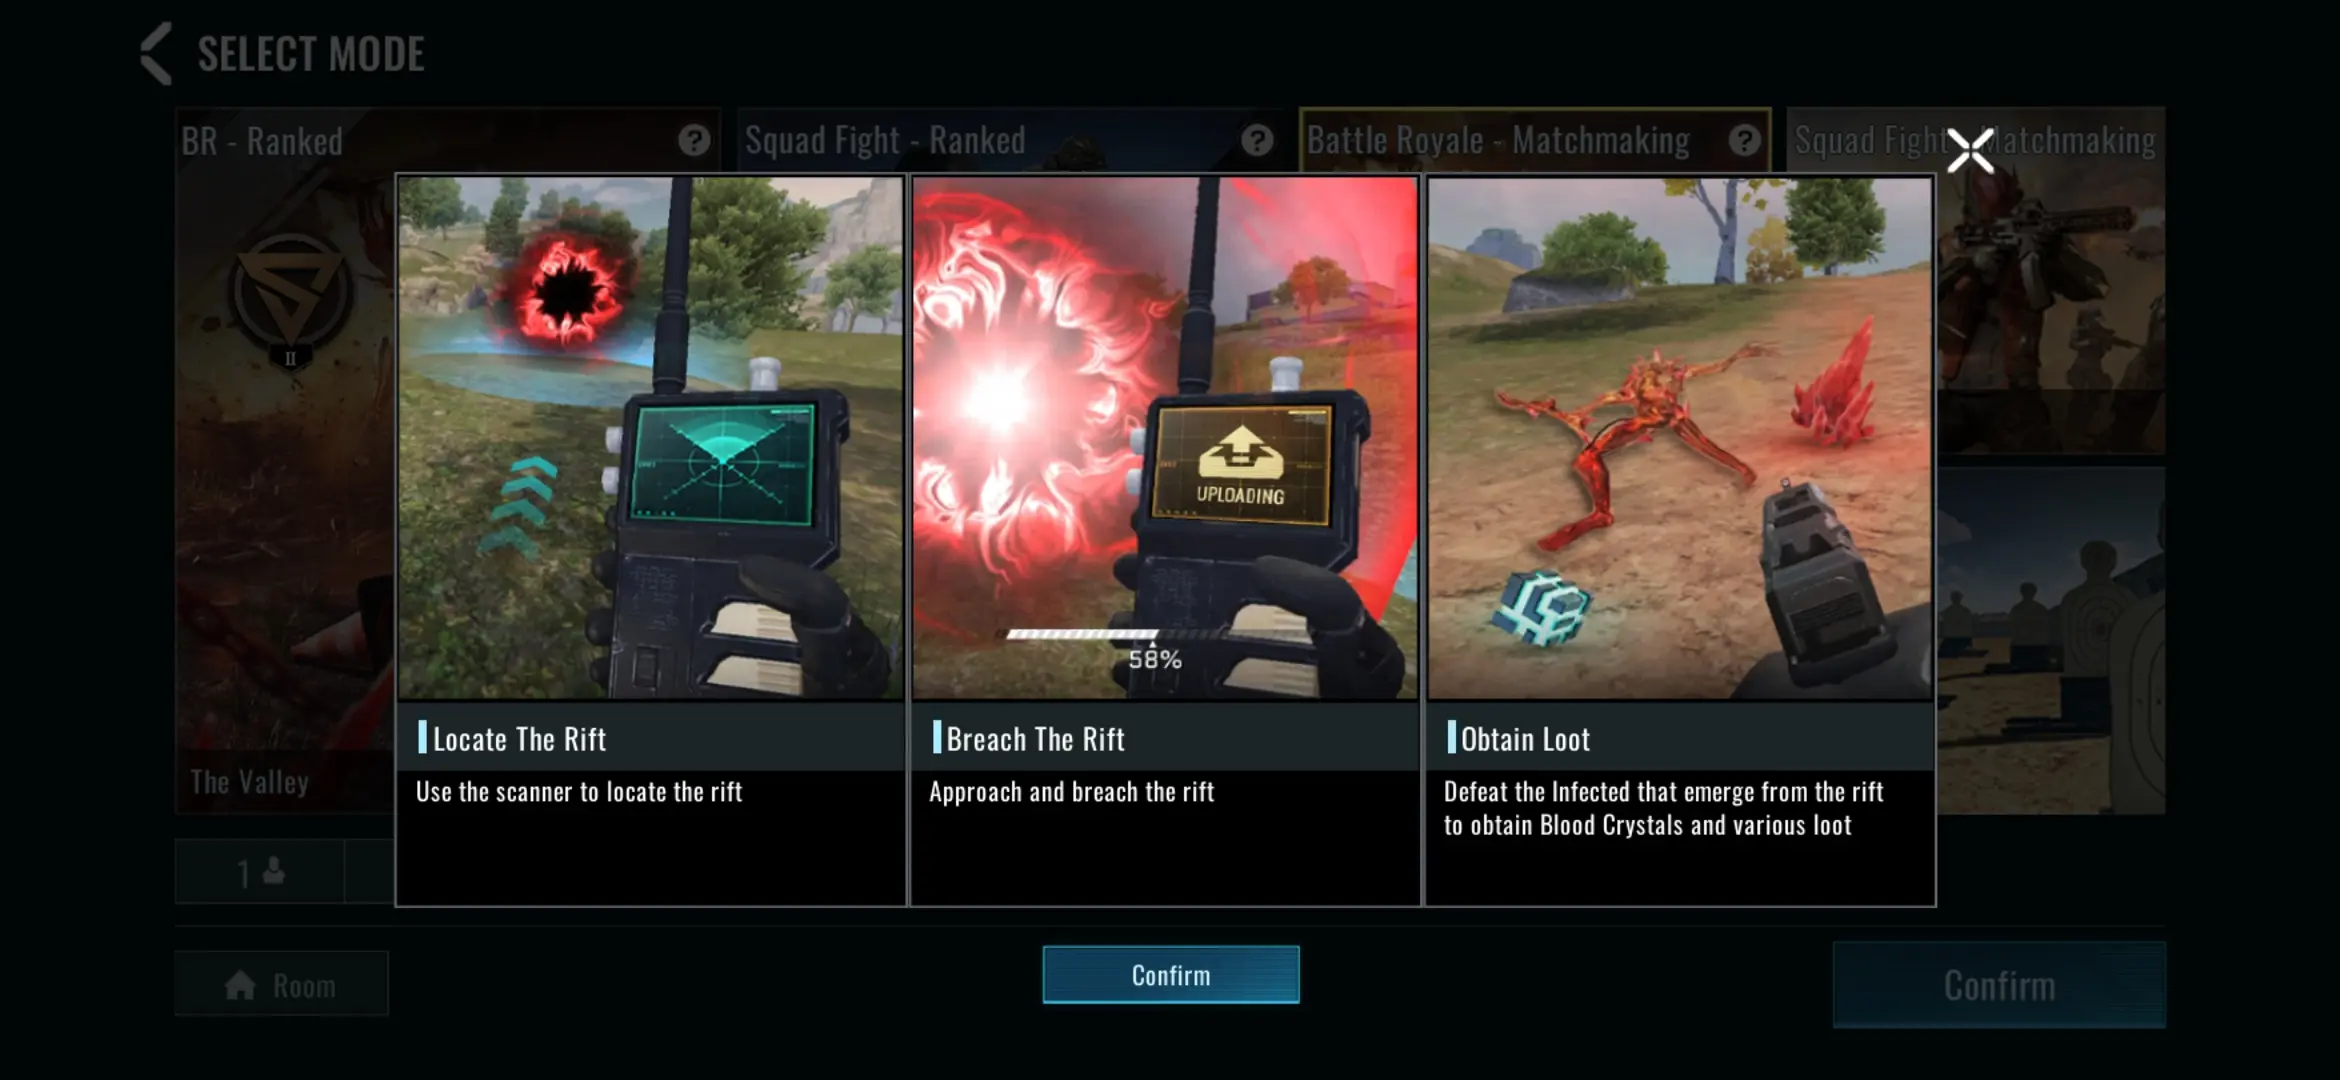
- Locate the rift using the scanner. Rifts are points on the map that look like red portals.
- Breach the rift by approaching it.
- Defeat the Infected that come out of these Rifts so you can obtain various loot like Blood Crystals and other valuable items.
On the other hand, as a solo player, all you need to do is survive and keep getting loot or calling for airdrops to replenish your ammunition or have the opportunity to obtain better guns.
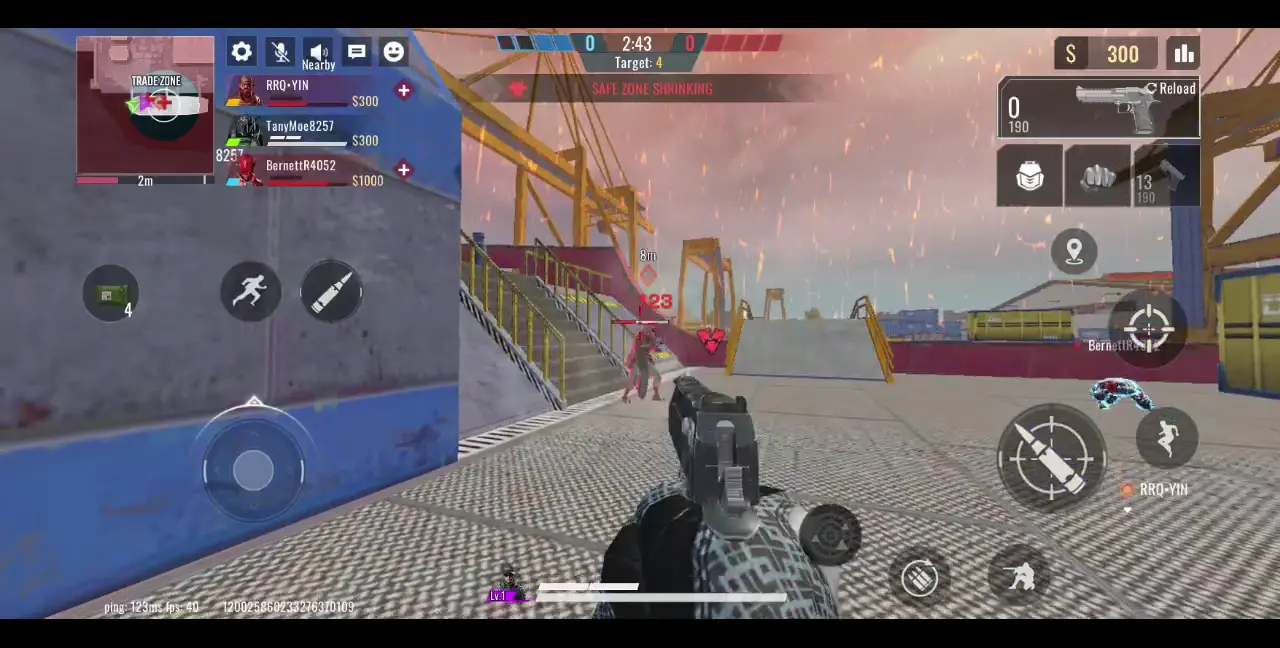
Additionally, you also need to stay inside the Safe Zone, which is constantly shrinking as the match keeps going. As a team, if you locate all the Rifts, defeat your enemies, and stay alive inside the Safe Zone, you win. On the other hand, if you’re going solo, you need to be the last player standing out of 99 other competitors.
Squad Fight
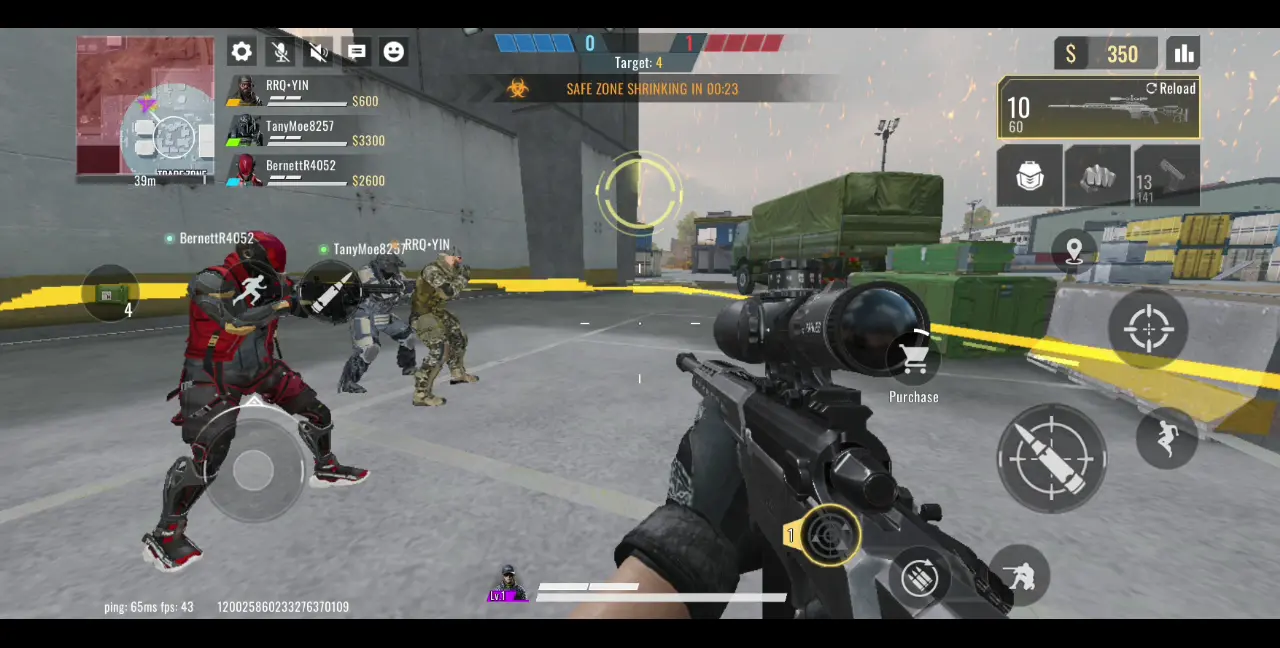
Squad Fights, like Battle Royale matches, can either be ranked or unranked. In a Squad Fight, you’re obviously going to have to work together with three other Strikers in a 4V4 match. Similar to Battle Royale as well, you can’t pick a Striker other teammates have already chosen.
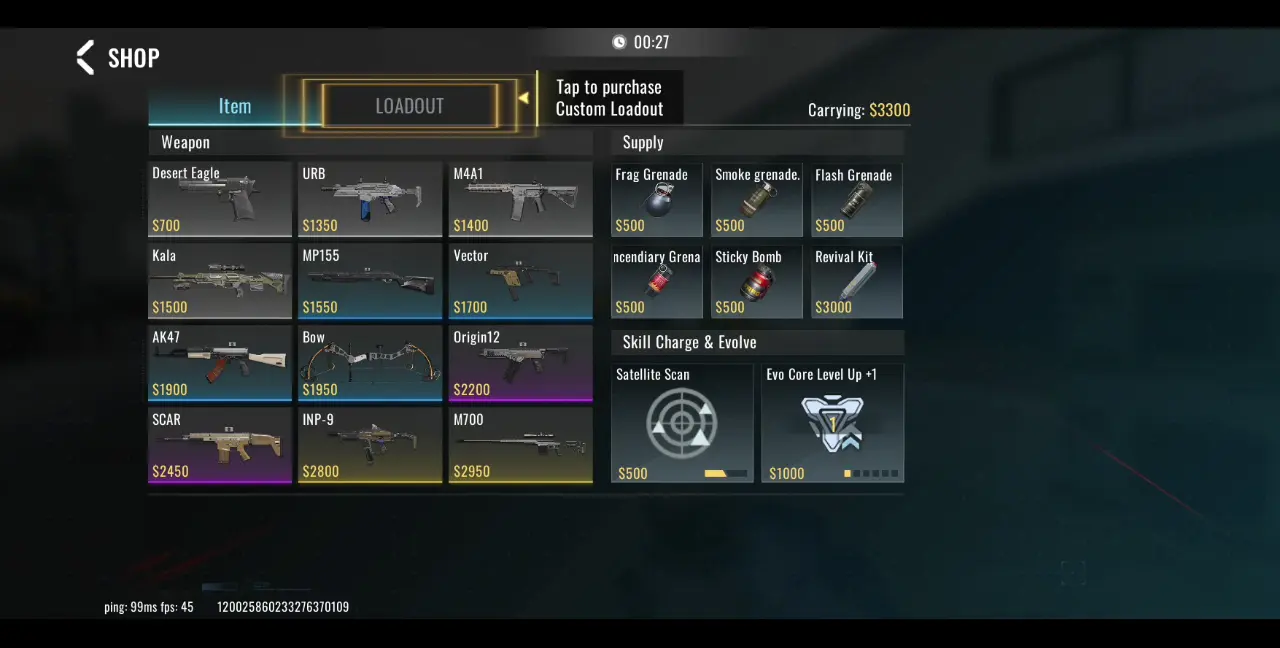
In this mode, your first order of business is to purchase a weapon from the Shop with the limited starting money you’re provided. Killing enemies will then earn you more money, giving you a chance in the succeeding rounds to purchase better weapons.
To win a round, you must eliminate the entirety of the enemy squad, which will gain you a point. The challenge in this mode is that you’re playing in a space that’s much smaller than the expanse in Battle Royale. Additionally, the Safe Zone keeps shrinking as the round progresses. A new round will ensue after all enemies have been defeated. The first squad to get 4 points wins.
Hot Zone
The Hot Zone mode is somewhat similar to a Squad Fight in the sense that you’ll also be working with a team, but with a total of 5 members. In this mode, your objective is to capture a specific point or the Hot Zone. The map is an enclosed space. Upon capturing a Hot Zone, you must defend it for 1 minute and the team who successfully defends the active Hot Zone within that time frame gets a score depending on how many allies are present within that point. You need a score of 150 to win the entire match.
Keep in mind that in Hot Zone mode, the spots you need to capture and defend will keep changing after a zone has been marked closed. You and your teammates need to locate that new specific zone, which will be marked on the map. The good news is that you don’t need to worry about a shrinking Safe Zone, unlike in Battle Royale or Squad Fight. Whenever you get killed, you will respawn at a random location.
Range
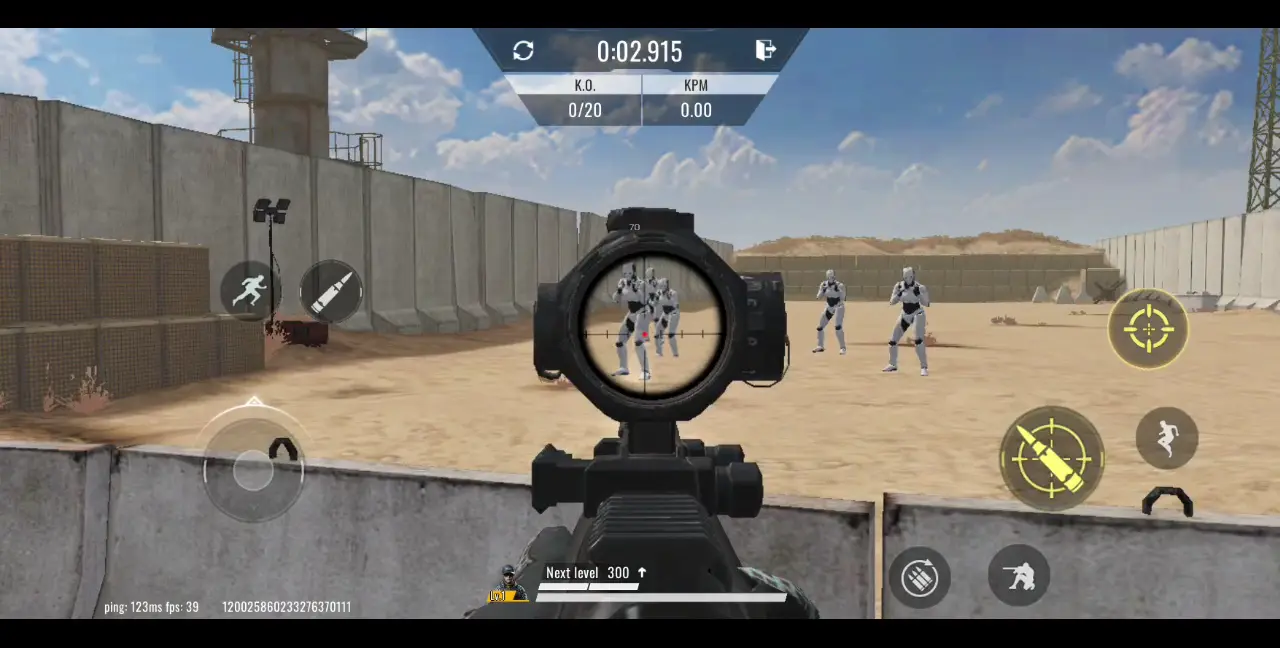
Range mode is a solo challenge that tests your ability in the shooting range. You may choose any gun that’s available to you and your objective is to kill 20 bots in 30 seconds. At the beginning of the challenge, bots will be stationary but will start moving after some time has elapsed. They will stay still for a time until they start moving again. Range mode is a great way to explore the capabilities and efficiency of your firearms in a non-combat area. This also basically serves as practice while challenging yourself to beat your best shooting times.
Know Your Striker
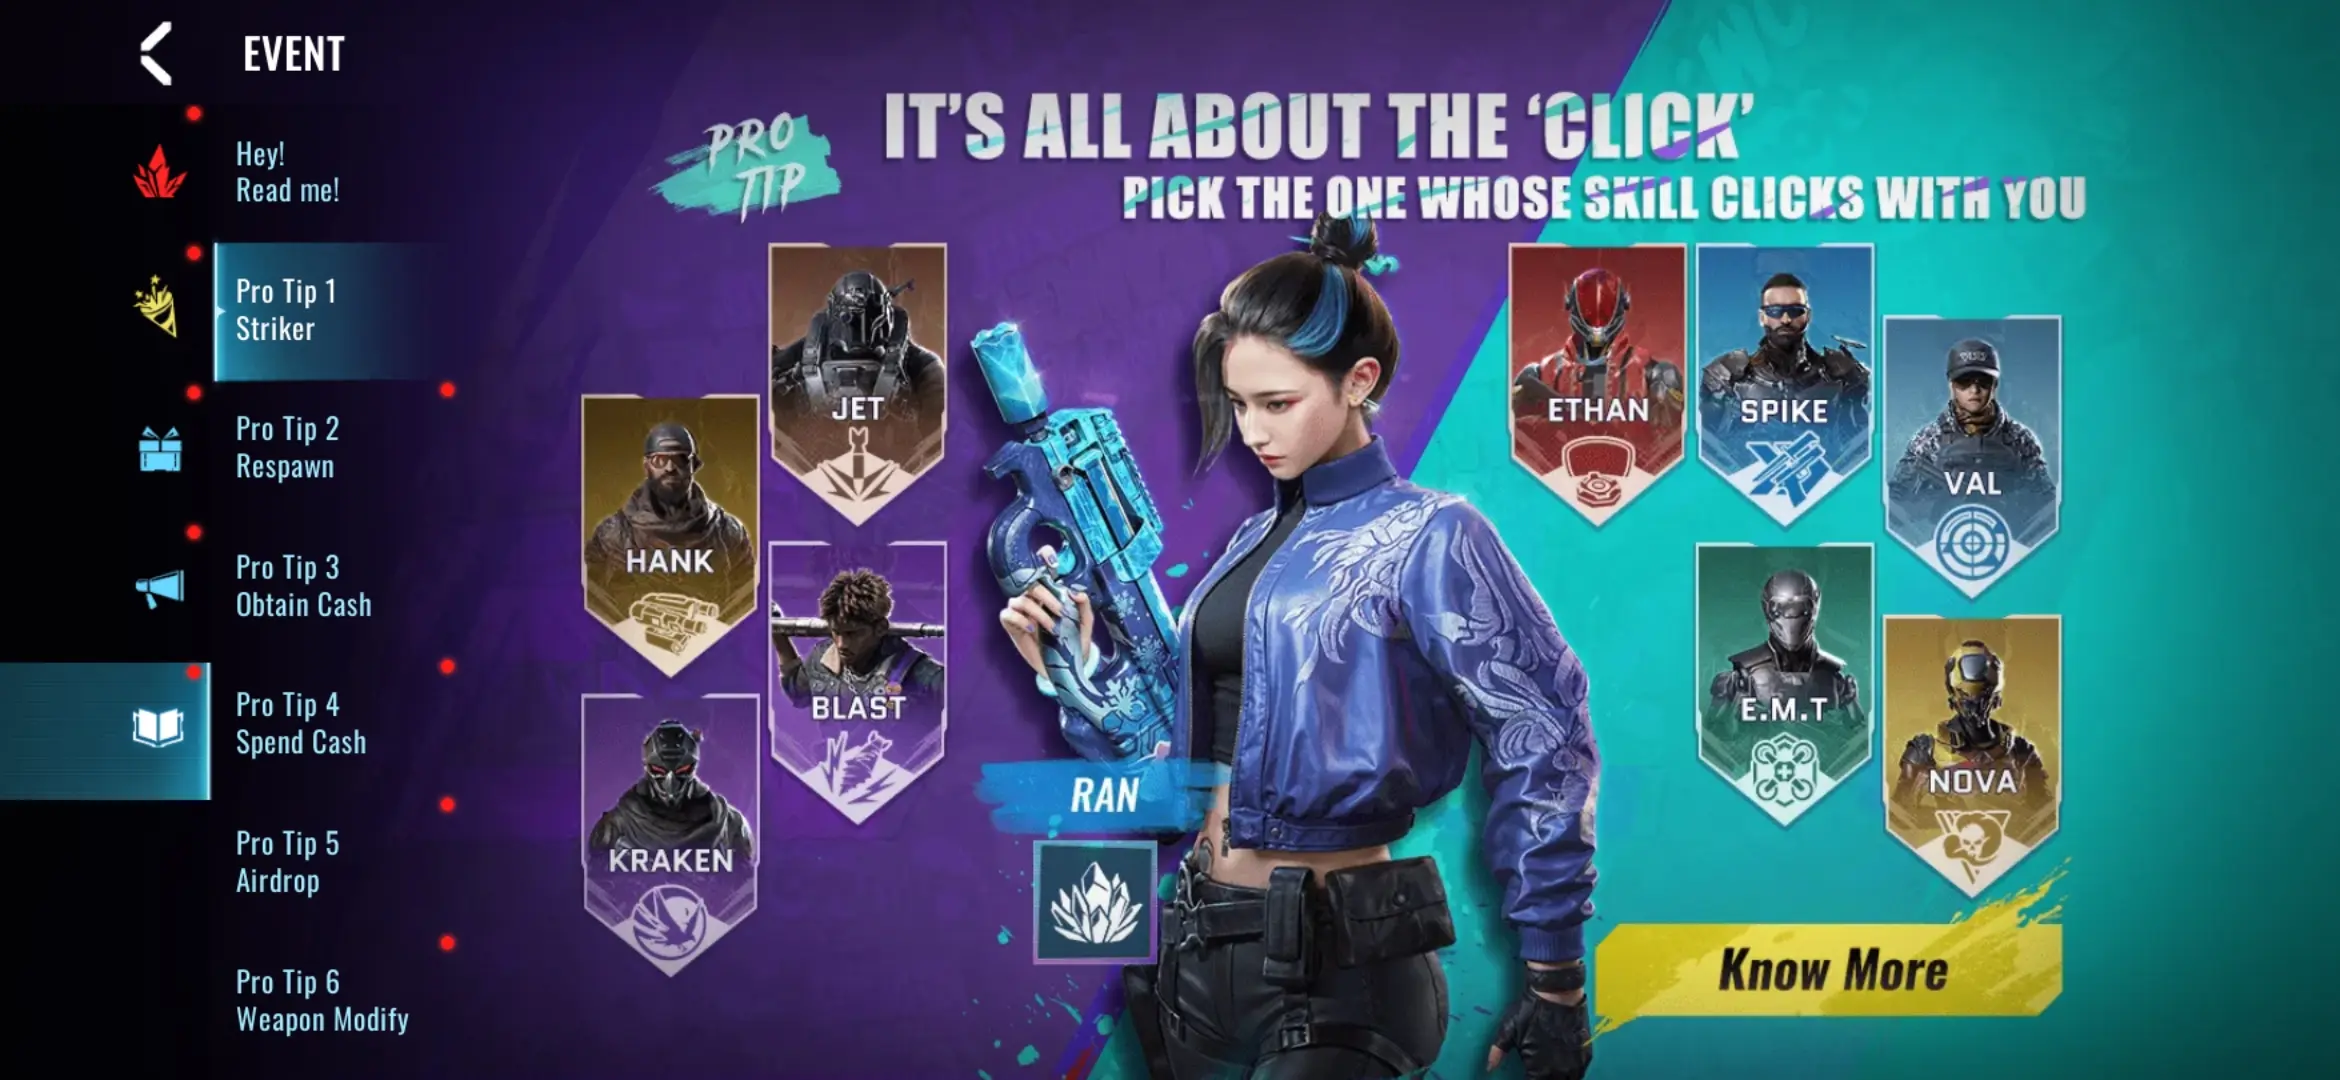
Now that you know the different game modes available, it’s time to become acquainted with the various Strikers you can use to play. Each Striker has different active and passive skills that can help turn the tide of battle, as well as strengthen your team formation and chances for both survival and victory.
Currently, there are 9 Strikers available, with 5 being part of the default options while the other 4 are locked unless you reach a certain rank or purchase them.
To make things easier, we’ve prepared a table below that indicates a Striker’s status (default or locked), their active skills, corresponding bonuses when active skills reach Level 3 and Level 5, and their passive skills.
| Striker | Default/Locked | Active Skill | Active Skill Level 3 | Active Skill Level 5 | Passive Skill |
| Kraken | Default | Vortex: Conjures a murder of crows that obstruct the enemy’s vision (range: 33 meters). One of the crows will auto-track enemies within an 8-meter radius, obstructing their vision for 2 seconds. | Increases vision obstructing duration by 50%. | Adds 2 crows that auto-track enemies and increases the tracking range to 25 meters. | Scythe: Every Kill/Assist will permanently reduce the skill cooldown by 5%, up to 50%. |
| Cooldown: 55 seconds | For Squad Fight and Hot Zone matches, every 4 Kills grant 1 skill charge. | ||||
| E.M.T. | Default | Healing Beacon: Places a medical beacon that restores 10 HP to teammates within a 5-meter radius per second. Duration: 20 seconds. | Increases the HP restored per second by 5. | Armor reconverge by a drone increases by 5 per second. | Virtuoso Medic: Accelerates aid for teammates by 75%. |
| Cooldown: 45 seconds | |||||
| Val | Default | Satellite Scan: Sets up a scanning device that places markers on the mini-map every 6 seconds to show the locations of nearby enemies within 150 meters. Duration: 20 seconds. | Increases the scanning range by 50 meters. | Increases the scanning duration by 12 seconds. | Ferret: Marks enemy teammate on the mini-map after defeating an enemy. |
| Cooldown: 150 seconds | Cooldown: 15 seconds | ||||
| Jet | Default | Missile Bombardment: Calls for 7 intercontinental ballistic missiles to bombard the target area. The first 3 missiles will accurately attack the target area, and the attack range of the subsequent missiles will be increased to a 25-meter radius. Each missile deals 150 damage to enemies within the range. | Enhances the missile damage by 50. | Extra 4 missile bombardment attempts. | Grenade Fanatic: Carries 1 more grenade for every throwable slot. |
| Cooldown: 90 seconds | |||||
| Ethan | Default | Protection Matrix: Generates a one-way bulletproof barrier (does not block throwables) with 400 HP for 30 seconds. Damaging the barrier generator will cause it to malfunction. | Increases Shield duration by 10 seconds and decreases cooldown by 20%. | Expands the barrier coverage. Increases the length by 100% and the height by 40%. | Parkour Master: Increases movement speed by 25% for 3 seconds when being attacked. |
| Cooldown: 45 seconds | Cooldown: 15 seconds | ||||
| Blast | Locked | Drill Bomb: Launches a Drill Bomb capable of penetrating through obstacles under 5.5 meters in thickness. Upon penetrating the wall, it fires a Graffiti Bomb that deals up to 125 damage to enemies within an 8-meter radius. | Carries 1 extra Drill Bomb. | Enhances the Drill Bomb damage by 25%. | Color Mark: Damaging an enemy will highlight them for 2 seconds for you and your teammates. |
| Cooldown: 45 seconds | |||||
| Nacho | Locked | Hellfire: Conjures a wall of hellfire that blocks enemy’s visions for 20 seconds and blinds enemies passing through for 1.5 seconds. The wall of fire is 30 meters in length and 4 meters in height and can be conjured in any direction. | Increases the duration of Hellfire by 10 seconds. | Inflicts a Slow when enemies pass through the Fire Wall. | The Penitent Eyes: Detects enemies in a 66-meter radius with HP below 40%. |
| Cooldown: 66 seconds | |||||
| Ran | Locked | Ice Barrier: Conjures an impenetrable Ice Wall with 1000 HP, blocking incoming damage for 25 seconds. | Increases the Ice Wall HP by 500 and its duration by 15 seconds. | Grants 25 extra Armor for you and your team when positioned 5 meters within an Ice Wall. | Cryomancy: Increases the Shield recovery speed of you and all teammates within the range of 30 meters by 30%. |
| Cooldown: 60 seconds | |||||
| Spike | Locked | Assasination State: Enters the stealth mode and will not make a sound while moving. In the stealth mode, energy will be constantly consumed, and the bigger the movement, the more energy will be consumed. Actions such as firing and jumping consume extra energy. The skill can be reactivated after 10 seconds. | Increases movement speed by 10% when the skill is activated. | Invisibility Camo will be activated under Assassination State. The slower the movement, the better the concealment. | Charm: Remains undetected by UAV, satellite, and other radar scans. |
| Cooldown: 40 seconds | |||||
| Hank | Locked | Defensive Turret: Deploys a turret that will automatically attack enemies. The turret has 100 HP and deals 15 damage to an enemy within 20 meters every 1 second. | Enhances the turret damage by 5. | Upgrades the turret to a machine gun turret, with damage dealt increased by 5 and attack speed increased by 33%. | Head-on Fight: Increased the CQB damage of SMGs and shotguns by 5% if less than 30 meters. |
| Nova | Locked | Toxic Grenade: Tosses a Toxic Grenade that explodes on impact and releases toxic gas over time, dealing 20 damage to enemies in a 7-meter radius every second for 15 seconds. Nova can absorb the toxic gas to increase his combat ability, increasing movement speed by 15% and decreasing Shield Recovery interval by 50% for 15 seconds. | Enhances the toxic gas damage by 50%. | Increases the toxic gas range by 40%. | Poison Master: Immune to poison damage and apply poison to ammo. Firing poisoned ammo has a chance to poison enemies, lowering their Shield Recovery Rate by 40% and causing them to expel toxic fumes upon death for 7 seconds. This effect can only occur once every 5 seconds. |
| Cooldown: 35 seconds |
Knowing what each Striker can do will help you choose one that suits your preferences and play style, as well as the role you want to play in a match. For instance, choosing E.M.T. obviously makes you the healer of the group and you’ll be expected to provide medical support to other teammates. As a solo player, you’ll have the advantage of healing yourself better than competing Strikers.
On the other hand, when you choose Jet, you should be on the offensive as his skills can do some serious damage. Additionally, you can also smoke out enemies in hiding with your missile bombardment. In a team fight, this will work well with a Val as most of her skills focus on detecting enemies through a satellite scan and marking them on the map.
We recommend trying every Striker to get a feel of how they move, what they do, and how they may suit your play style. As a beginner, you’ll likely be playing as default Strikers for quite some time, but that doesn’t mean you’re at a disadvantage. Just as long as you know what your chosen Striker does and how they can boost survival and efficiency, you’re pretty much set up. Play to their strengths and try to mitigate their weaknesses by working closely with your team. If you’re playing solo, take advantage of a Striker’s skills to get ahead of your foes while coming up with several contingency plans that will lessen your competitors’ chances of exploiting your weaknesses.
Besides, picking the right Striker for you is just one part of what makes a successful and enjoyable gameplay. You also have to know your weapons, modify your loadout, and adapt your play style to the match you’ve entered—which we will all be discussing in the succeeding sections.
Modify Your Loadout
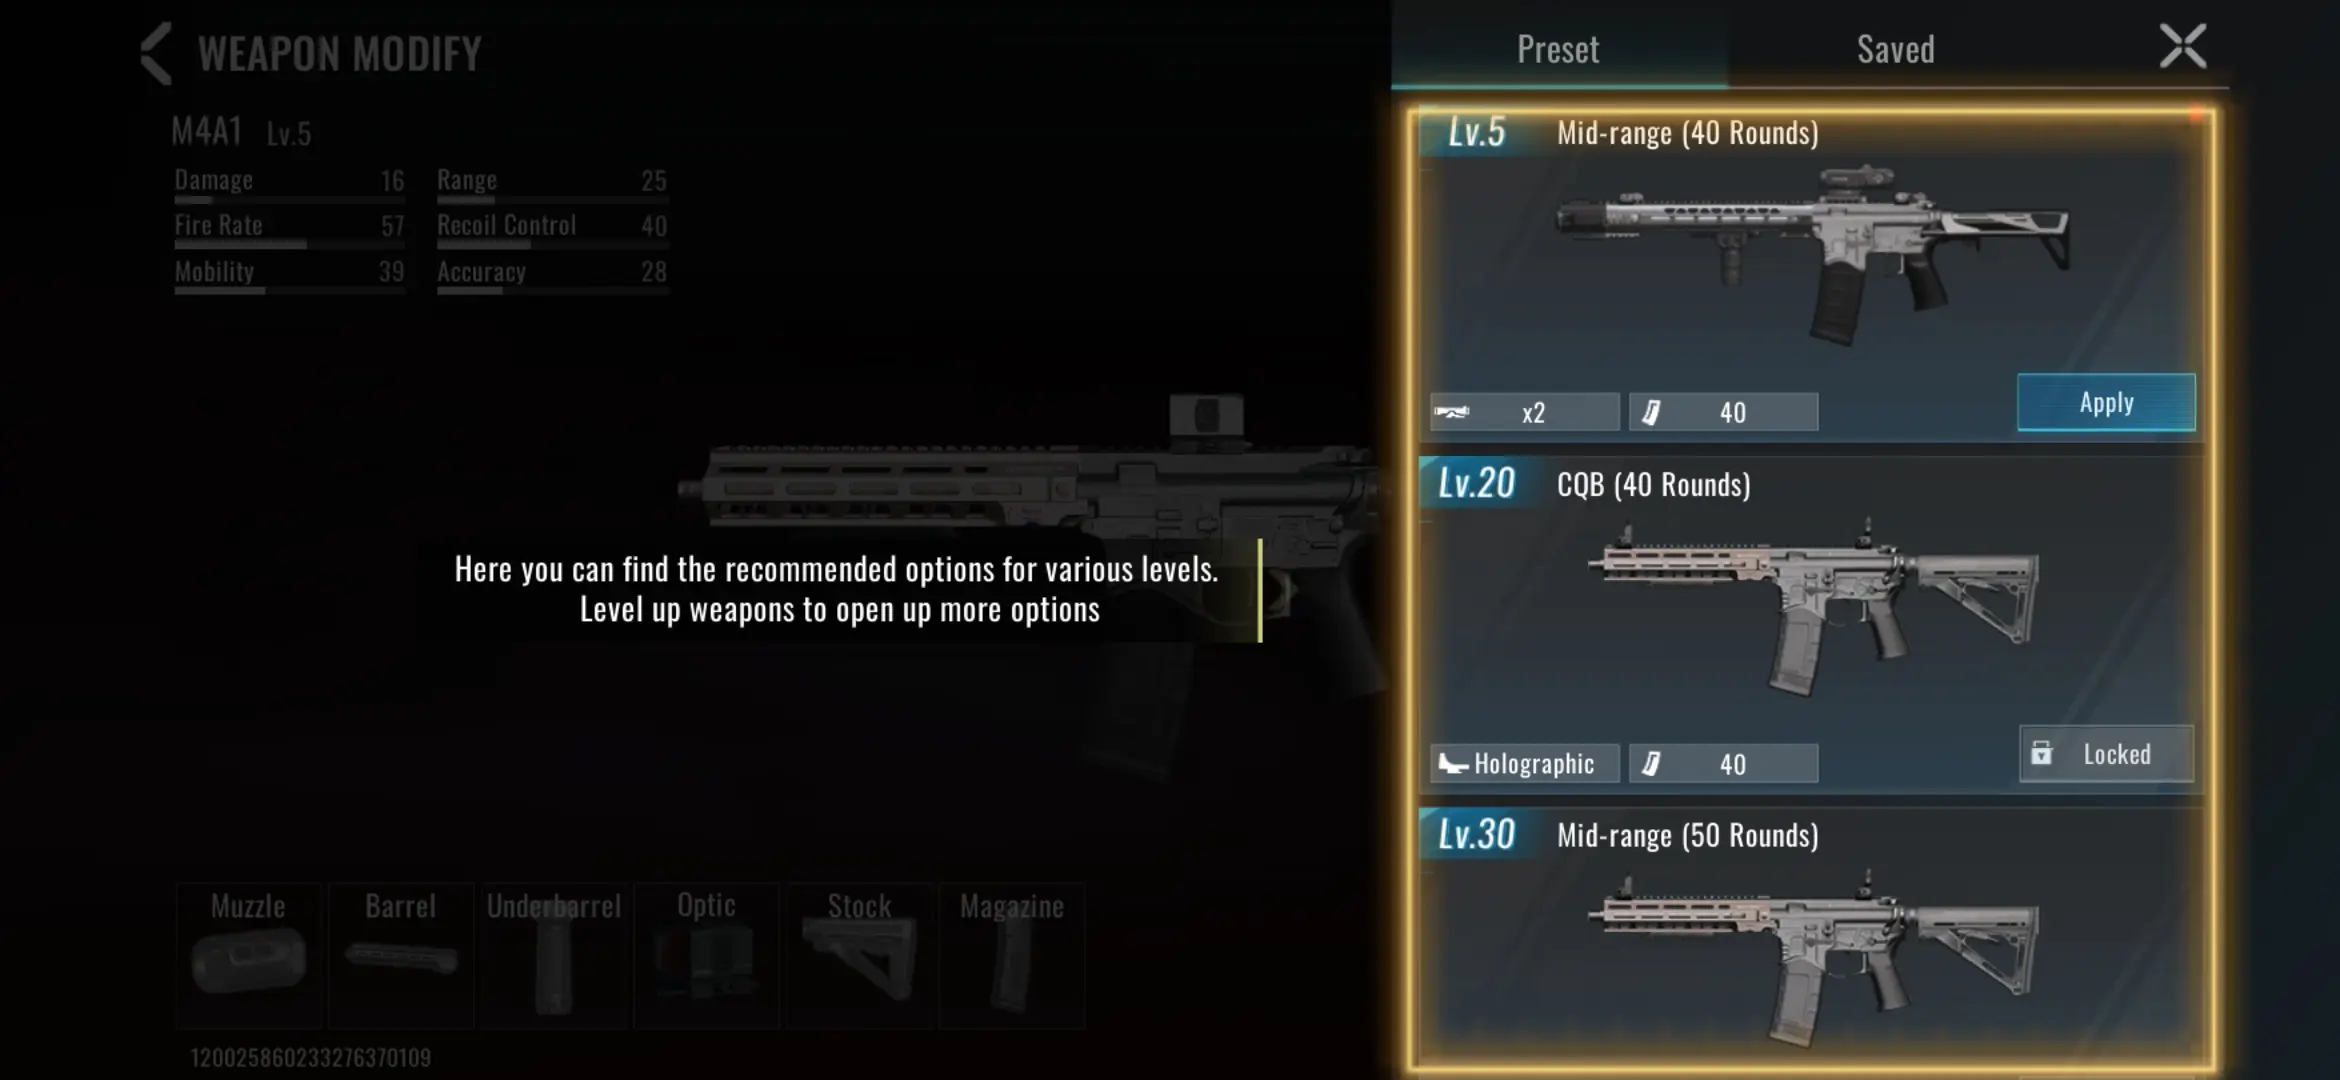
One of the features of Blood Strike is that players can customize their loadout. Of course, this all depends on whether you can afford modification attachments or have the necessary items for an upgrade. Depending on the type of firearm, you can modify their muzzle, barrel, underbarrel, optic, stock, and magazine.
As a beginner, you may choose the recommended options but as you progress through the game, you’ll be able to pick the right equipment modifications to suit how you play. Keep in mind, though, that the number of attachments on a weapon can affect their weight and, thus, your mobility on the field.
Similar to most FPS games, you’ll have a primary weapon, a secondary weapon, and a melee weapon. By default, your melee weapons are your fists as other melee weapons such as the baseball bat, katana, axe, and dagger can be unlocked later on.
The different types of firearms you can access in the game include the following:
- Assault rifle: Good as an all-around gun that can cover all ranges, from close range to mid and long range. Gun types in this category include the M4A1, AK47, KAG-6, and SCAR.
- SMG (submachine gun): Works well for mid-range but may not be too effective for close or long-range fights. For the SMG category, you can choose among the Vector, URB, INP-9, and P90.
- Shotgun: Shotguns, namely the Origin-12 and MP155, are excellent mostly for close-range but may also work for mid-range combat.
- Sniper rifle: The sniper rifles Kala, M700, and Bow should be your weapon of choice when you want to pick out targets from a very long range. However, these aren’t so effective at close range and may be slightly challenging to use for mid-range combat.
- Handgun: This type is best used for close range or even mid-range skirmishes. Your options include the Glock and the Deagle.
- Launcher: If you want to deal massive long-range damage, a launcher like the RPG-7 should be right up your alley. Keep in mind that they may not be too effective against moving targets, but will deal serious damage to vehicles.
Each firearm has base stats that can still be improved when you manage to modify your loadout with additional equipment. You may choose to either enhance a gun’s strengths or make up for its lack, particularly in terms of range, fire rate, or recoil, to name a few.
Similar to Strikers, we recommend trying out as many guns as possible to know which loadout suits you best. Take into consideration the game mode you’re playing in as the size and layout of the map, along with your mission objectives, can influence the type of firearms you ought to bring in the field. You can also pair up different guns for your loadout, wherein you may choose to have a long-range primary weapon while having a short-range or mid-range secondary weapon. It really depends on your play style, which is what we’ll be diving into in our next section.
Pick Your Play Style
Everyone has their own play style, especially in FPS games like Blood Strike. It’s something that’s unique to each player, though they may follow some kind of general technique. Though many players apply the same approach, it basically boils down to skill and/or experience that sets apart a masterful player from someone who has more room to improve. In any case, you can apply a variety of play styles for Blood Strike depending on your preferences, your chosen Striker, and your loadout. Here are some general play styles you can use to approach different matches:
Get in the Enemy’s Face
If you’re the type who wants to get business done quickly, then an aggressive, blitz-style approach is something that could work well for you. For this type of play style, having a loadout that prioritizes short-range combat can give you an advantage. The trick to making this approach work is to move fast and strike decisively. Your enemy will likely be caught by surprise when you get in their face and start shooting or hacking them with melee weapons.
The only downside to this approach is that you leave yourself quite vulnerable to other enemy attacks and panic-shooting will not only drain your ammunition but also render your aim unstable. When blitzing your enemies, stay calm but move fast. It’ll be wise to choose a Striker who also has a movement bonus, such as Ethan. This type of approach can work well for smaller maps, like Squad Fight and Hot Zone as enemies are fairly easy to spot due to the limited space. When applying this to Battle Royale, you need to spot your enemy first then tackle them head-on.
Play It Safe
If you want to play it a bit safe, go for a mid-range combat approach. With this, you have some considerable distance between you and the enemy, allowing you more room to maneuver. This can be quite effective with a loadout that can manage all combat ranges, which means you can choose to stick to one firearm regardless of the situation. Whether you spot an enemy from a distance or see them coming right at you, you’ll be ready to face them with potentially minimal damage.
Pick Strikers that also have more defensive capabilities to greatly enhance the efficiency of this approach. Just remember that you need to constantly observe your surroundings so you can take advantage of your distance from the enemy. With this defensive play style, you’re more likely to survive as a solo player or provide necessary assistance to your team.
Pick Out Targets from Afar
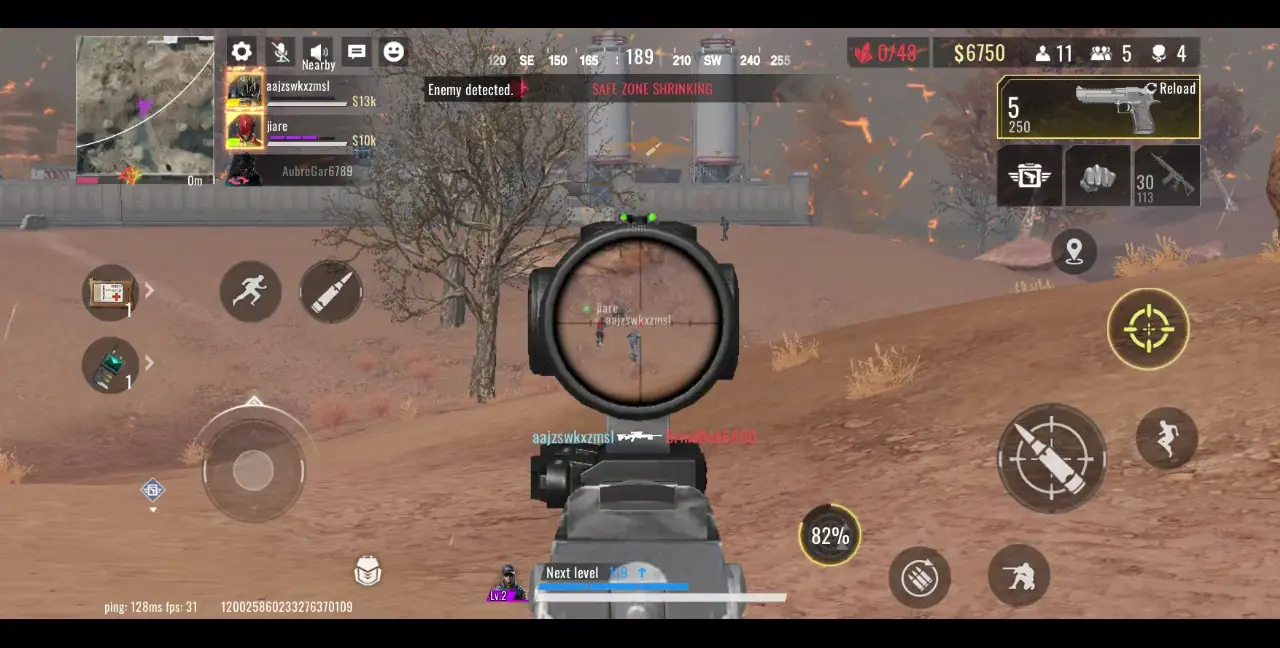
If you like staying behind the scenes, then fighting from an unseen vantage point using long-range weapons is a good approach. With this, you can specifically pick sniper rifles as your firearms. What is challenging about this approach, though, is that you’re going to have to pick a vantage point that ensures your safety and minimizes your chances of getting assassinated yourself. As a sniper lying in wait for enemies, you won’t have much time to escape when someone comes up to you from behind or the side as your sights will be focused on picking out targets from afar.
To be an effective sniper, we suggest picking high vantage points that will give you a good view of the terrain and approaching enemies. It’s also a good idea to have your back to the wall while being able to spot all available chokepoints, thus eliminating the need to watch your six. Of course, this essentially means you’ll be in a corner so when things go awry, you need to be quick on your feet.
Having a teammate covering your blind spots may also help. Val is one Striker who can work well as a sniper as her skills will allow you to do a satellite scan to spot enemies. Additionally, don’t stay too long in one place and find other vantage points to increase your survival rate, especially if you’re on a smaller map.
Switch Up Your Guns
Depending on the situation, you may have to quickly switch up your firearms and approach the match using a play style that’s generally out of your comfort zone. For instance, if you’re used to fast-paced kills, you may need to take a step back and opt for a long-range approach when there’s a greater risk of diving right into the fray because of your wounds. On the other hand, if you’re used to sniping, you may need to switch to a pistol when you’re caught in a corner just to give yourself that chance of escaping.
In short, be prepared to change your guns at the drop of a hat. Remember that your ultimate goal is to survive and having the right weapon at the right moment will make sure of that.
Adapt to the Map
Just as there are different game modes, there are also different maps you’ll encounter. We’ve previously mentioned that Battle Royale has the most expansive map, precisely because the fight can be between as many as 100 players. On the other hand, the Squad Fight and Hot Zone modes are smaller in scale and typically conclude quicker than Battle Royale. Regardless, you should be able to adapt to any map of any mode by keeping in mind a few important things, such the following:
- Take cover. Trees, walls, hallways, and other objects such as stationary vehicles can serve as good covers for when you’re taking fire or stalking an area. Though you may be inclined to fight head-on, it still pays to take cover first to determine your targets before shooting at them even from a close range. Finding places in which you can hide will also prevent you from getting wounded after an encounter, as well as allow you to quickly heal yourself when you’ve sustained damage.
- Keep moving. Never ever stay in one place as once enemies have spotted your location, they can easily overwhelm you. Even as a sniper, you should avoid this as there are many other vantage points that you can constantly transfer to. The longer you stay in one spot, the more you might end up being a sitting duck as you still need to loot different areas to at least replenish your ammunition. Waiting for the enemy to come to you may work for a short duration, but never a prolonged one. This is especially true in smaller maps, wherein you need to constantly relocate to either eliminate enemies or defend specific zones.
- Secure chokepoints. Chokepoints are spots that can give solo players or teams an advantage, such as entrances and exits or openings to particular areas. One example may be a narrow mountain pass or the door to a building. Secure these chokepoints during an encounter as either team can take advantage of them for offense or defense. For instance, if you’re on the defensive side, stationing a sniper in your backline will keep enemies from mobbing a chokepoint. If you’re on the offensive, you can have tankier or faster Strikers enter a chokepoint to get rid of the enemy’s defending forces.
Every encounter is unique and you’ll have to adapt to the terrain around you, whether you’re playing solo or as a team. Observe your surroundings to come up with a solid battle plan that will ensure your survival and the most fatalities from the enemy side.
Stick Close to Your Team
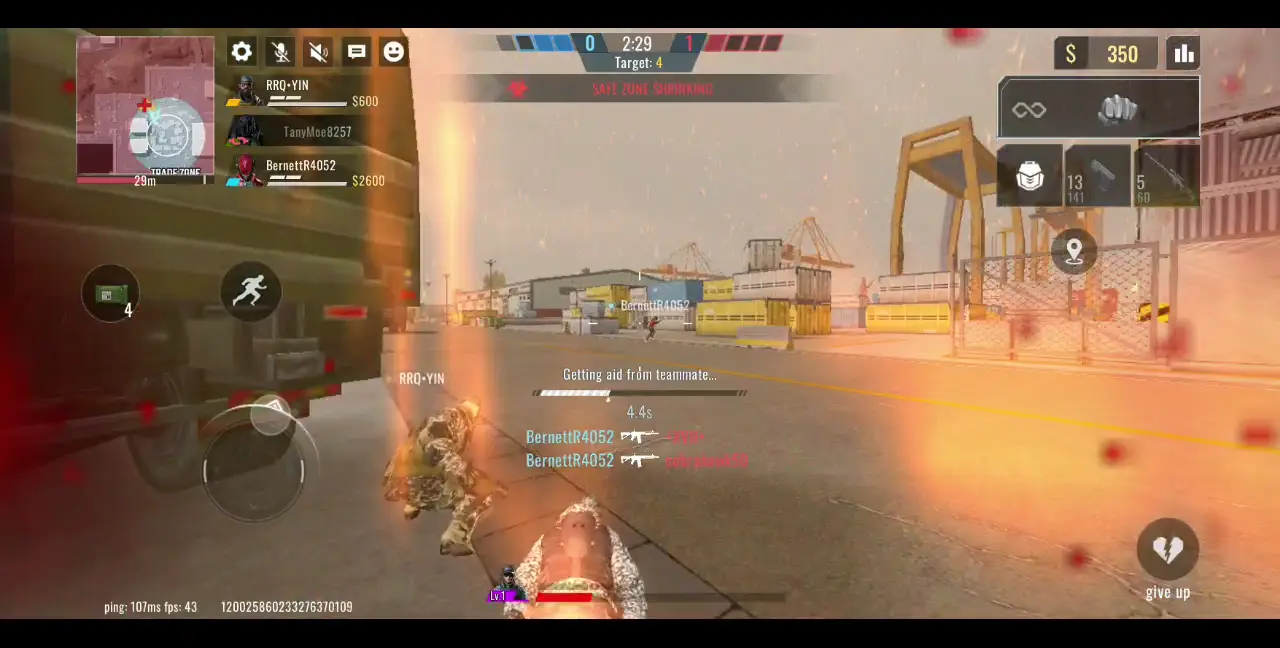
Unless you’re playing solo, it’s best to stick close to your team. This is especially important since you’re a beginner. During your first few playthroughs, following other team members who may be more experienced than you are will ensure both your survival and the accomplishment of mission objectives. If you stray too far from your team, enemies can easily single you out and there would be no one to provide cover fire or much-needed aid when you’re down. Keep in mind that allies can revive you while also keeping you safe in the face of incoming enemy fire.
Additionally, sticking close to teammates can mean more chances of obtaining loot, whether that’s from exploring buildings, from dead enemies, or from an ally who can afford to call a supply airdrop. Working together can all increase your survival rate and potential to obtain money from kills.
Of course, sticking close to your allies will also ensure that you’re on the right track in terms of accomplishing your mission objectives. This can be especially crucial when you’re in a Squad Fight or a Hot Zone. Thus, you need to work together closely as a team so that battle plans will proceed accordingly.
Just as it’s vital to rely on your team, also make sure that your team can rely on you. You can do this by marking loot, reviving those who are down, providing cover fire, or using your chosen Striker’s abilities to boost your team’s chances of winning. Remember that at this stage in the game, there’s more to gain by being a team player than flying solo.
Loot and Call for Airdrops
This tip is mostly applicable for Battle Royale, though it can still apply to any mode you’re playing in. For one thing, looting doesn’t only mean finding crates or airdropped boxes in various spots—it also means taking weapons and ammunition from fallen enemies. If you or any of your teammates have managed to secure a kill, you can approach that fallen enemy and quickly see what type of items you can take from them, whether they’re weapons, ammo, or healing supplies. If you don’t want to get a fallen enemy’s items, you may drag the item to the right to mark it for your teammates instead.
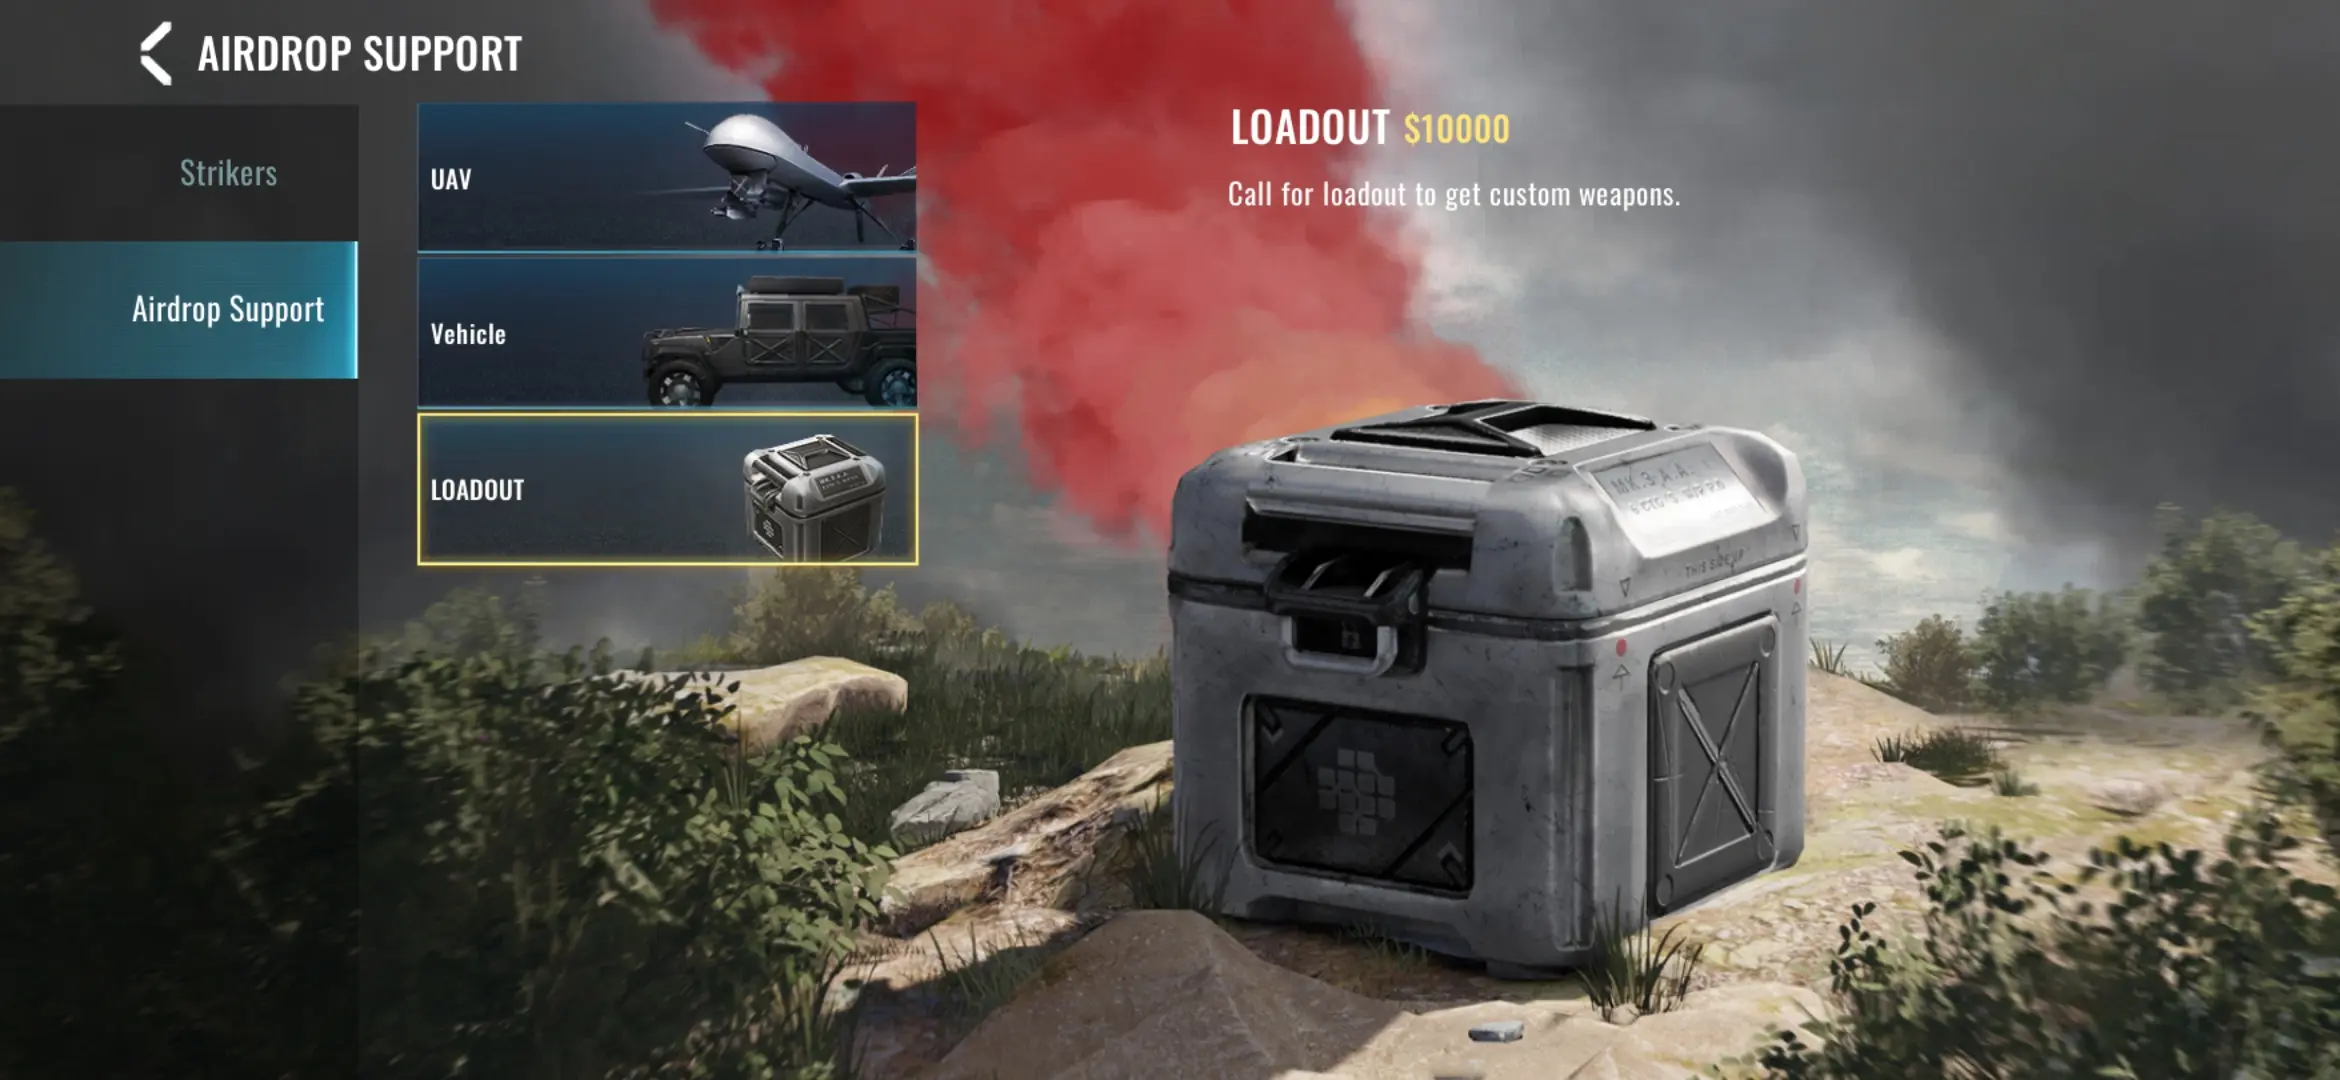
On the other hand, airdrops can also be beneficial in replenishing your supplies, though it can be quite expensive. There are three types of airdrop support you can call for:
- UAV ($4,000): Call for aerial scouting to mark enemies within the target area on the mini-map.
- Vehicle ($10,000): Call for vehicle support to have a vehicle airdropped to the target location.
- Loadout ($10,000): Call for loadout to get custom weapons.
Each of these airdrop support calls cost a lot of money so you likely won’t be able to take advantage of these until after you’ve looted or earned a considerable amount of cash from kills. In any case, they will certainly come in handy during dire situations, particularly if you’re playing solo. Not only will airdrops give you a boost, but these can also help increase your survival rate and even bring you to the top of the match.
Stay Inside the Safe Zone

With all this talk of survival, there’s certainly no way you can get out of any match alive when you’re operating outside of the Safe Zone. The Safe Zone is basically what its name suggests: an area where you can explore and fight while not incurring any environmental damage.
The Safe Zone constantly shifts and shrinks, so you need to keep an eye on your mini-map for the designated Safe Zone, which is marked by a white circle. Outside of the Safe Zone is a reddish barrier of sorts that will deal damage if you’re caught within its vicinity. Failing to stay within the Safe Zone can eventually lead to death. It’s important to note that the Safe Zone shrinks faster during late-game.
Thus, it’s important to heed Safe Zone warnings and check your position on the map, especially when the Safe Zone is shrinking and closing in on you. During the heat of battle, you might overlook the Safe Zone and end up getting cornered in a place where the zone’s edge can catch up to you. This is also one good reason to continuously move from one place to the next to avoid the edge and keep fighting.
Particularly for Battle Royale mode, don’t hole yourself up in a building or in an area surrounded by mountains as it can be hard to find an escape route, especially for the latter as you won’t be able to scale a mountain or any steep inclines. When you’re near the zone’s edge and you see the red barrier moving towards you, run for your life until you receive a prompt that the Safe Zone has stopped shrinking and is being redefined.
Claim Your Rewards—You’ve Earned Them!
After every battle, don’t forget to check on the different tabs of the game that offer rewards for your hard work. There are quite a number of rewards you can collect, whether that’s from accomplishing daily tasks, checking seasonal events or passes, or just plain winning a match. With your victory comes the spoils so claim them as you’ve most certainly earned them!
Even logging in daily can get you reputation points, and continuously playing through the various game modes will earn you money, weapon upgrades, modification attachments, and many more. Though you won’t always have a stellar session, the game is generous enough to reward your effort so be patient and save up for some big-ticket purchases in the future.
With that, we conclude our beginner’s guide for Blood Strike. Who’s your main Striker and what skills did you find the most suited for your play style? Which game mode is your favorite to play, whether you’re going solo or on a team? Do you have some weapon combinations you want to share? Drop your thoughts in our comment section below!
David
Sunday 1st of February 2026
Katya. Her wall climbing ability has saved me from safe zone shrinks alot of times.
Also I prefer mid - range modified weapon as primary with a sniper as secondary.
Oba
Friday 29th of August 2025
Ethan and spike. And for play style I like long rage from high vintage points and aggressive rush in