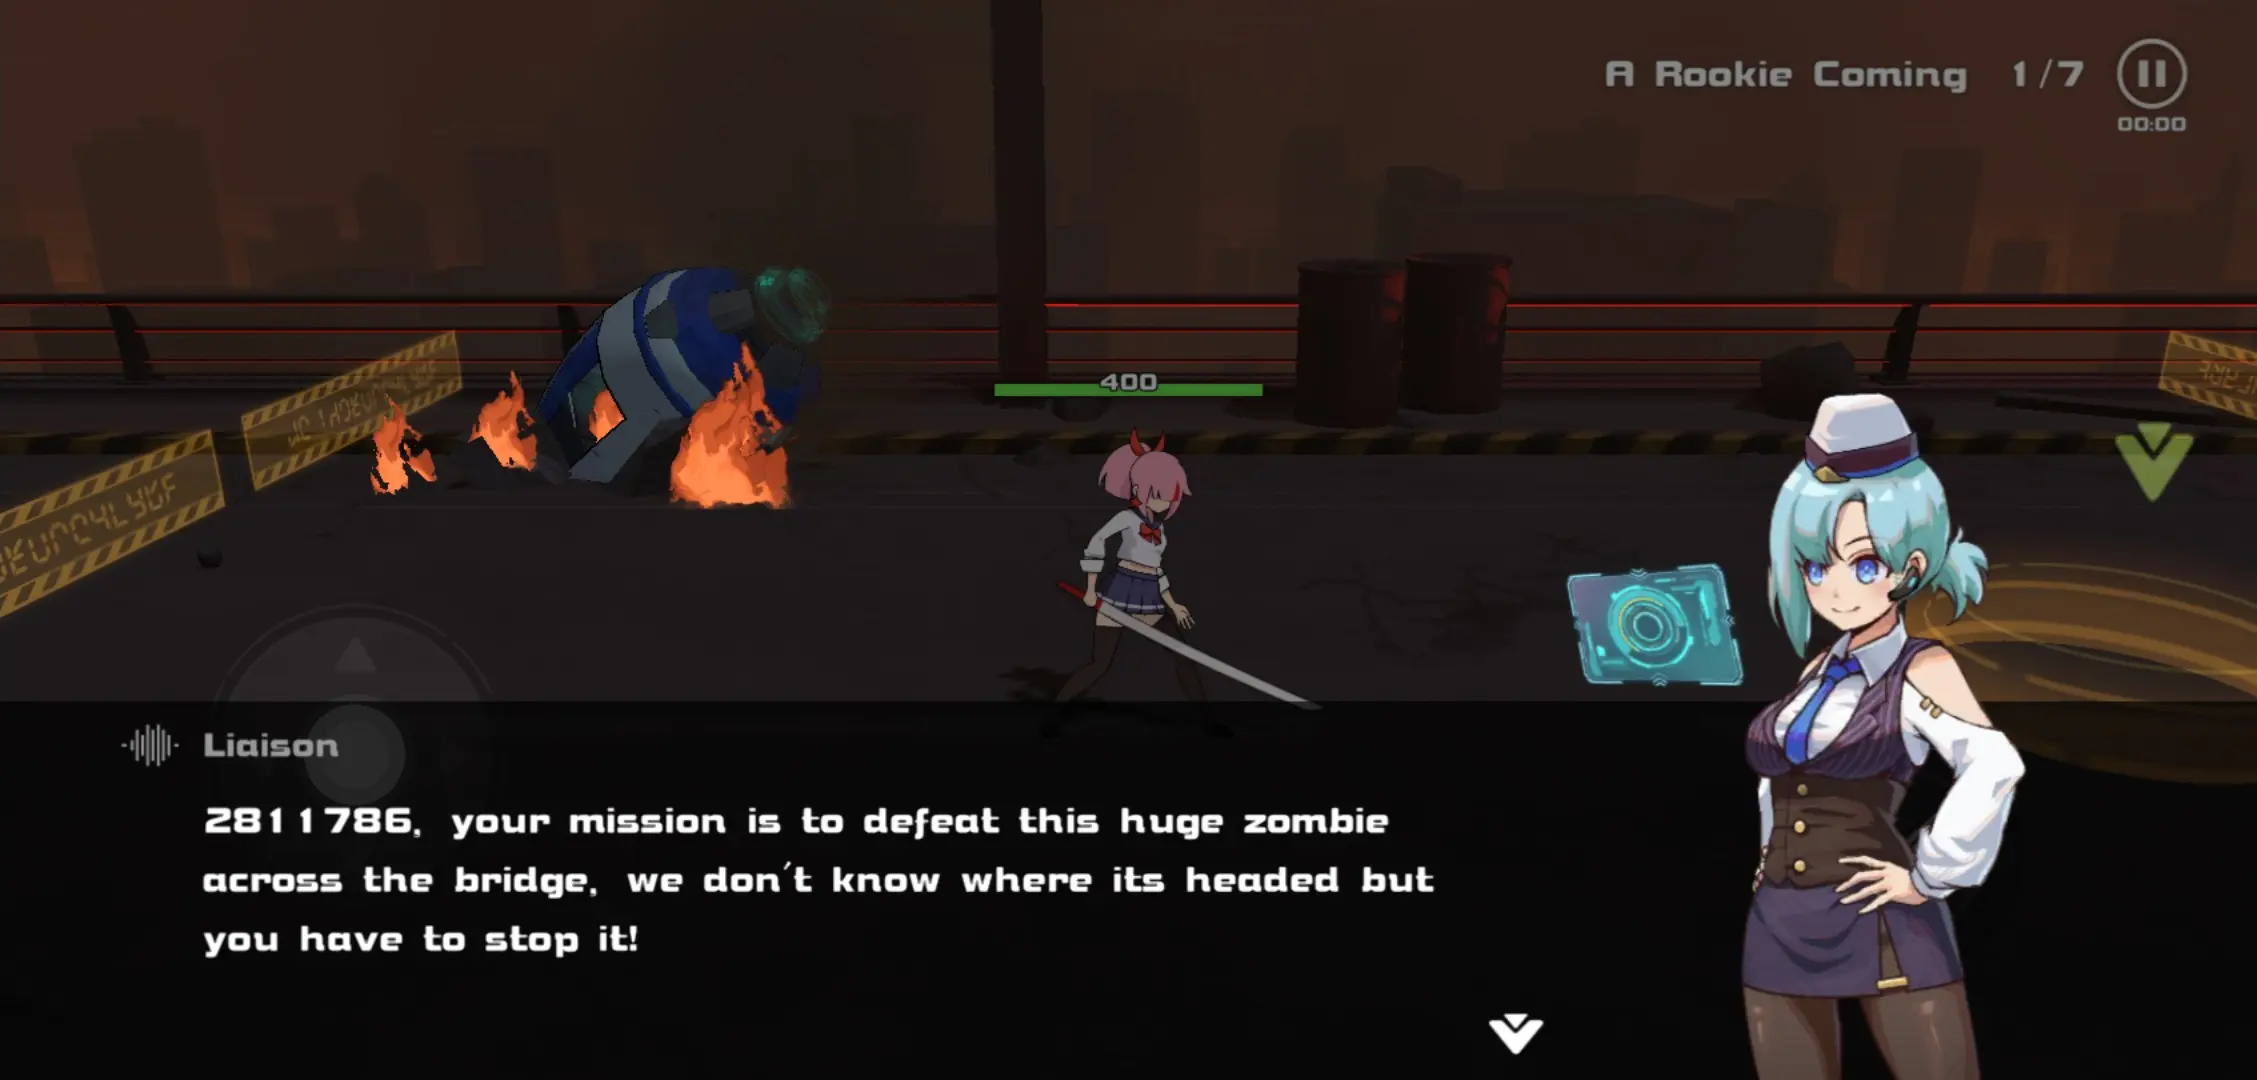
The world has fallen. The undead have come to claim the lands of man and only a few survivors have come forth to put a stop to their rotting advance. Though it’s uncertain of where these decayed shamblers have come from or what has caused them to be, they all need to be put down before the rest of humanity is wiped from the face of the earth.
Among those that survive and fight off the zombie hordes is a young woman named Sanny who works for a mysterious organization. Though seemingly an ordinary girl armed with nothing but a sword, she takes a step forward and gracefully slices the ravenous fiends to ribbons. Can she keep it up? Does she have what it takes to truly survive and find an end to this war against the end of man?
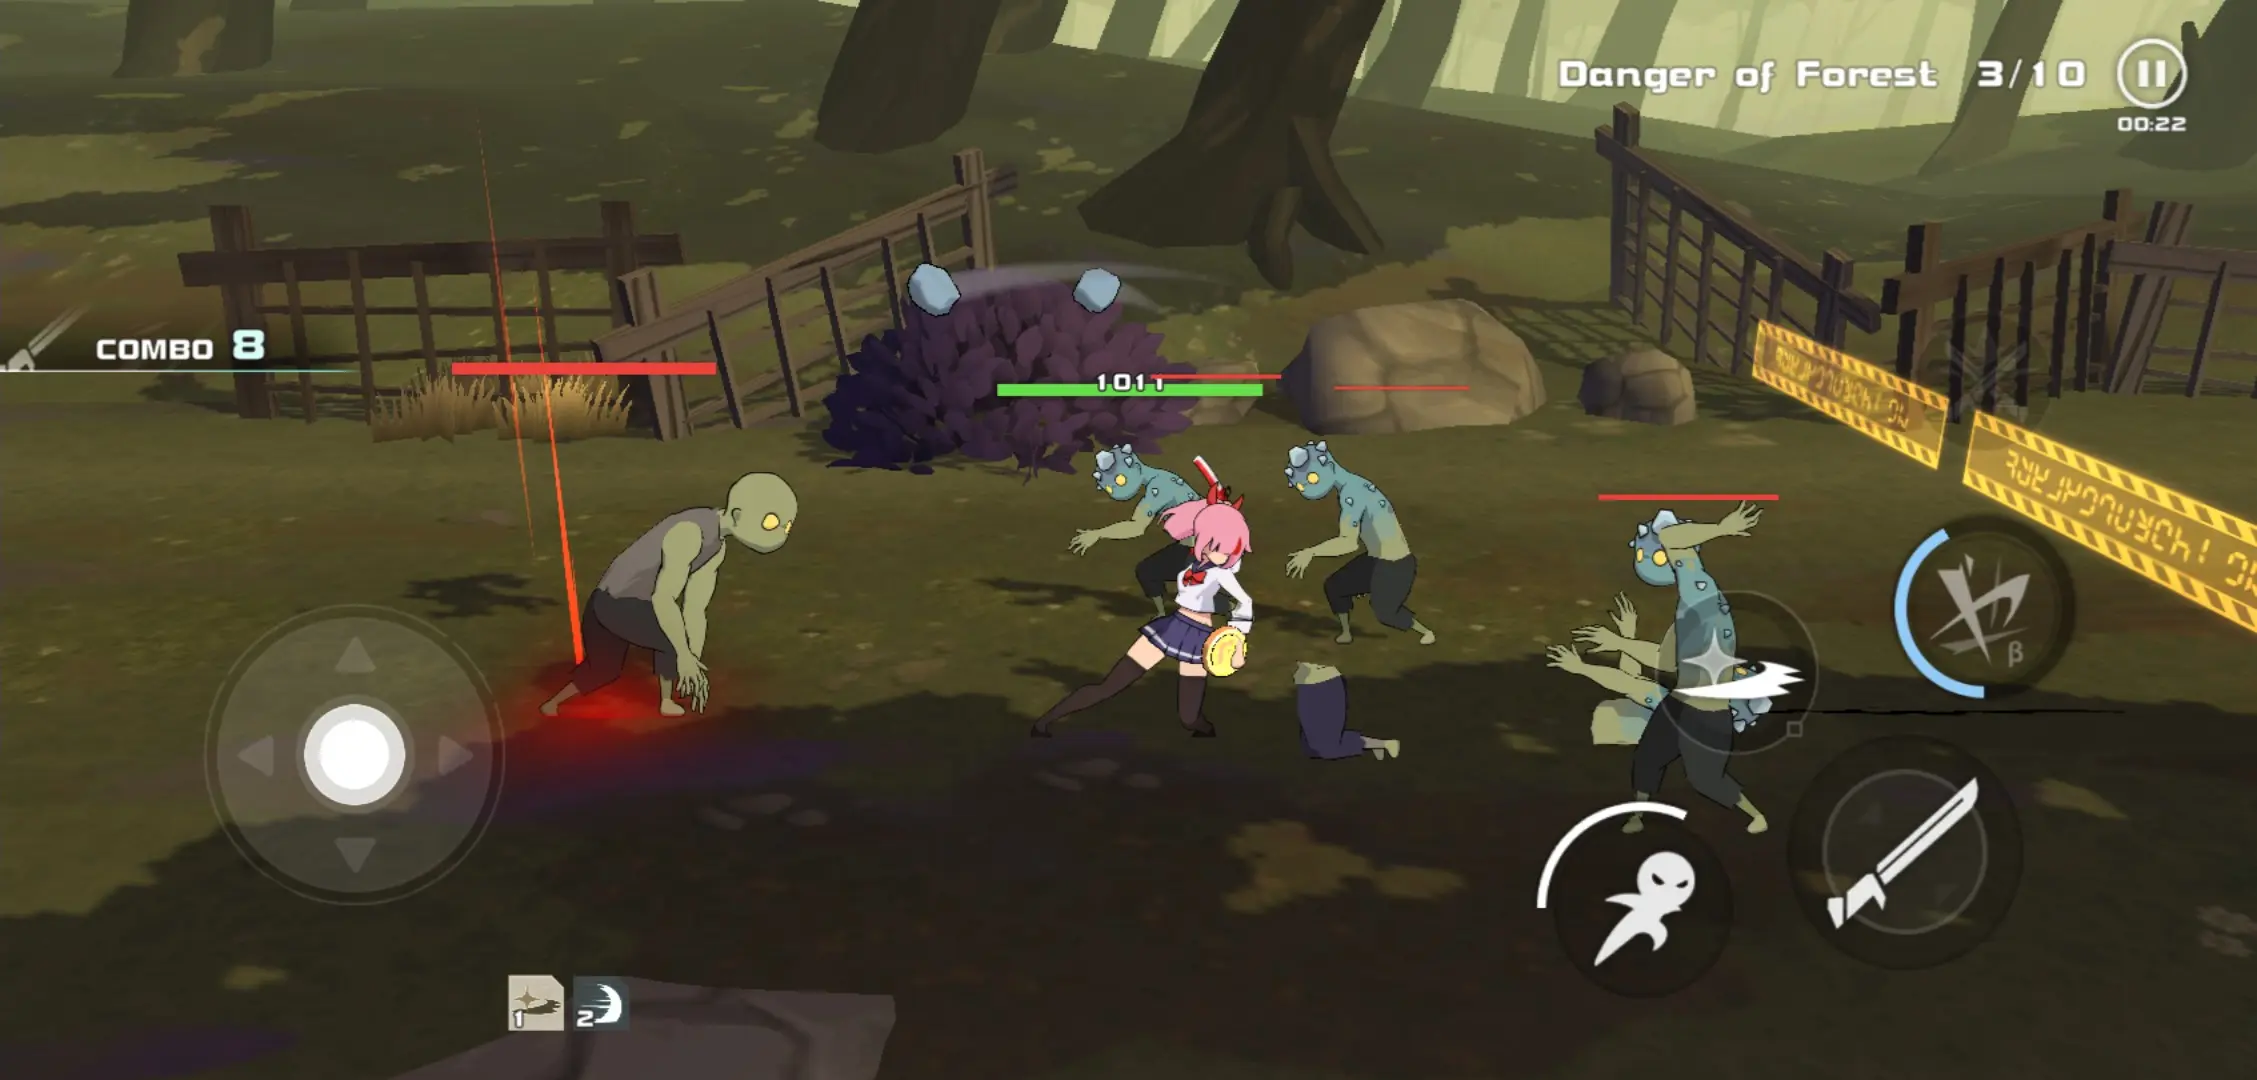
FATTOY’s debut into the mobile market is heralded by the fast-paced, action-packed, cutthroat hack n’ slash, roguelite RPG: Swordash. Assume control of Sanny, a mysterious young woman with improbable fencing skills. With flashy swordplay, lightning-quick combos, and a never-ending torrent of challenges, Swordash is sure to keep veterans and fans of the hack n’ slash genre on their toes each time they pick this game up.
But the zombie hordes won’t easily come to a stop solely because our pink-haired heroine is fighting at the front lines. There will always be bigger, badder goons out there with bigger weapons and tougher hide. It’s going to be a long way in cleansing Sanny’s part of the city of the undead, though she will need your help in doing this.
Have you just started on your Swordash journey? Are you stuck and having a hard time getting past certain stages? You’ve come to the right place! Read our Swordash beginner’s guide below for tips, tricks and strategies and be prepared to slice through the forces of evil!
The Basics of Swordash
Swordash, being a part of the hack n’ slash genre, is a game that requires a lot of practice and reflexes.
It’s similar to games like Ronin: The Last Samurai, Shadow of Death: Dark Knight, ScourgeBringer, Dungeon of Gods, and to an extent, Otherworld Legends wherein the player will be situated against a group of enemies. The player has to slay them all and come out as the last one standing.
Apart from playing similarly to the aforementioned mobile games, it would seem that Swordash takes great inspiration from popular titles from the hack n’ slash genre like Dynasty Warriors, NieR: Automata, and Devil May Cry (especially this last one). Combos are something that Sanny can frequent, and if done right, she’ll be only surrounded by zombie bits.
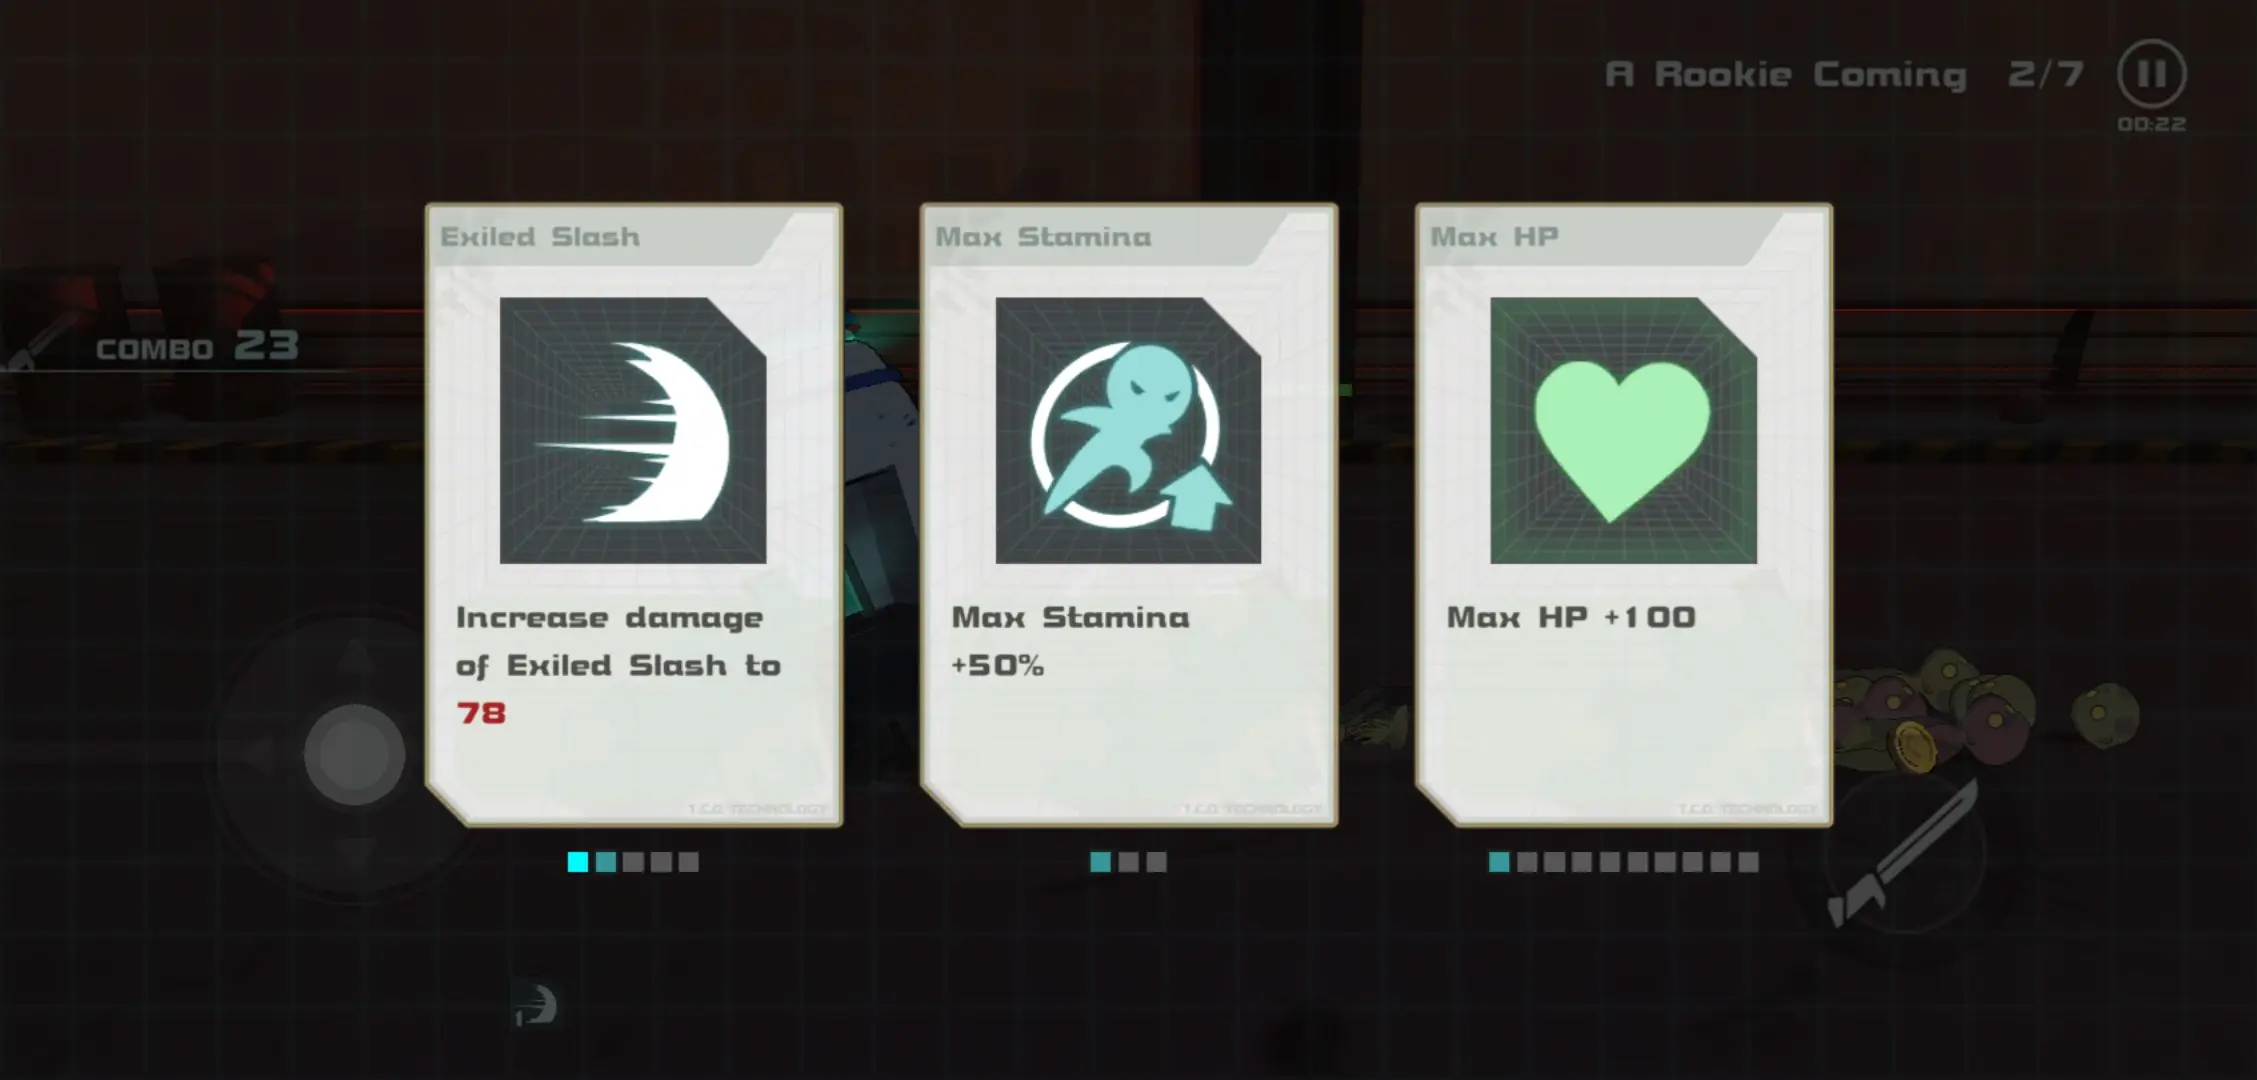
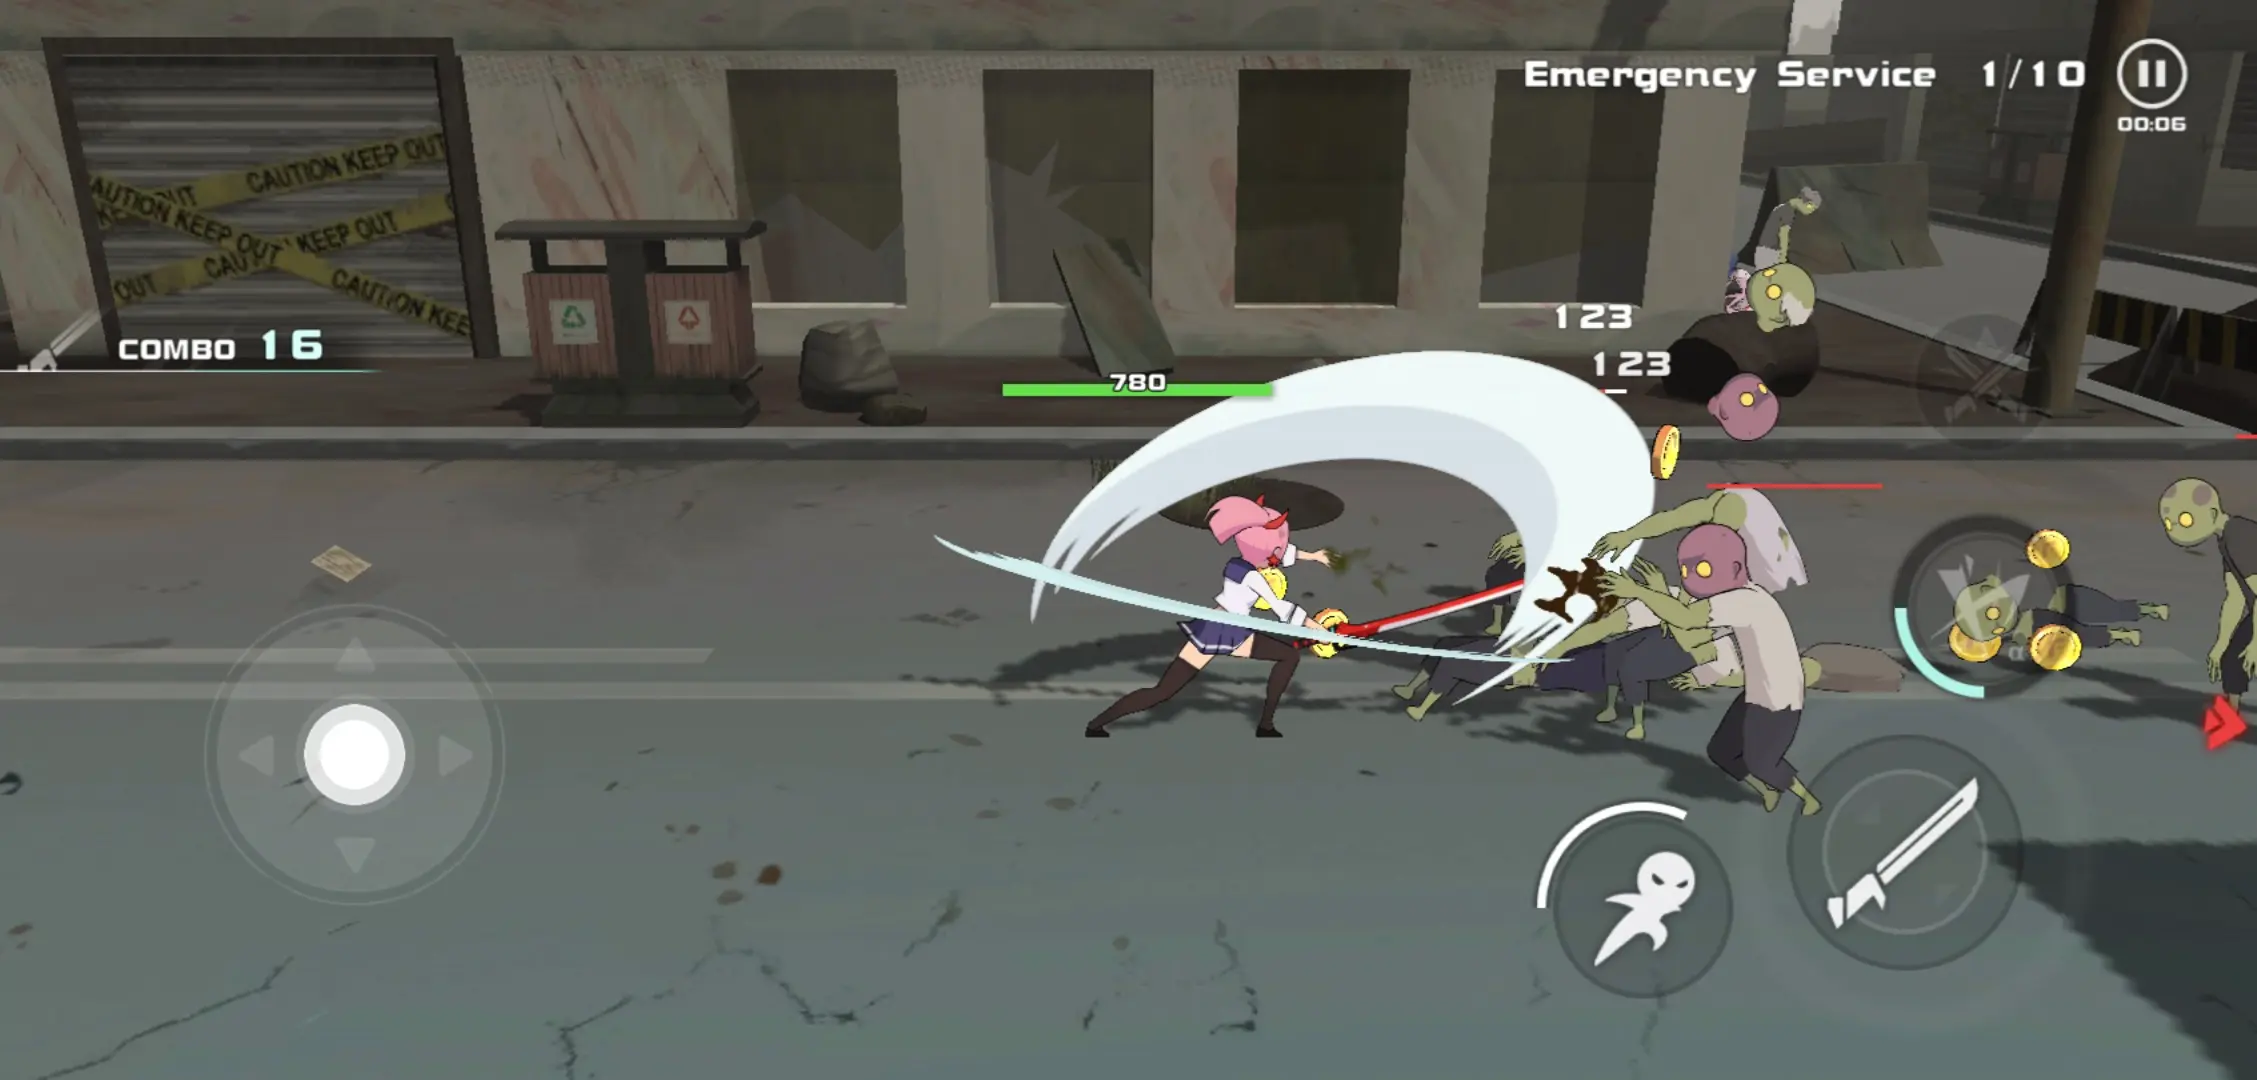
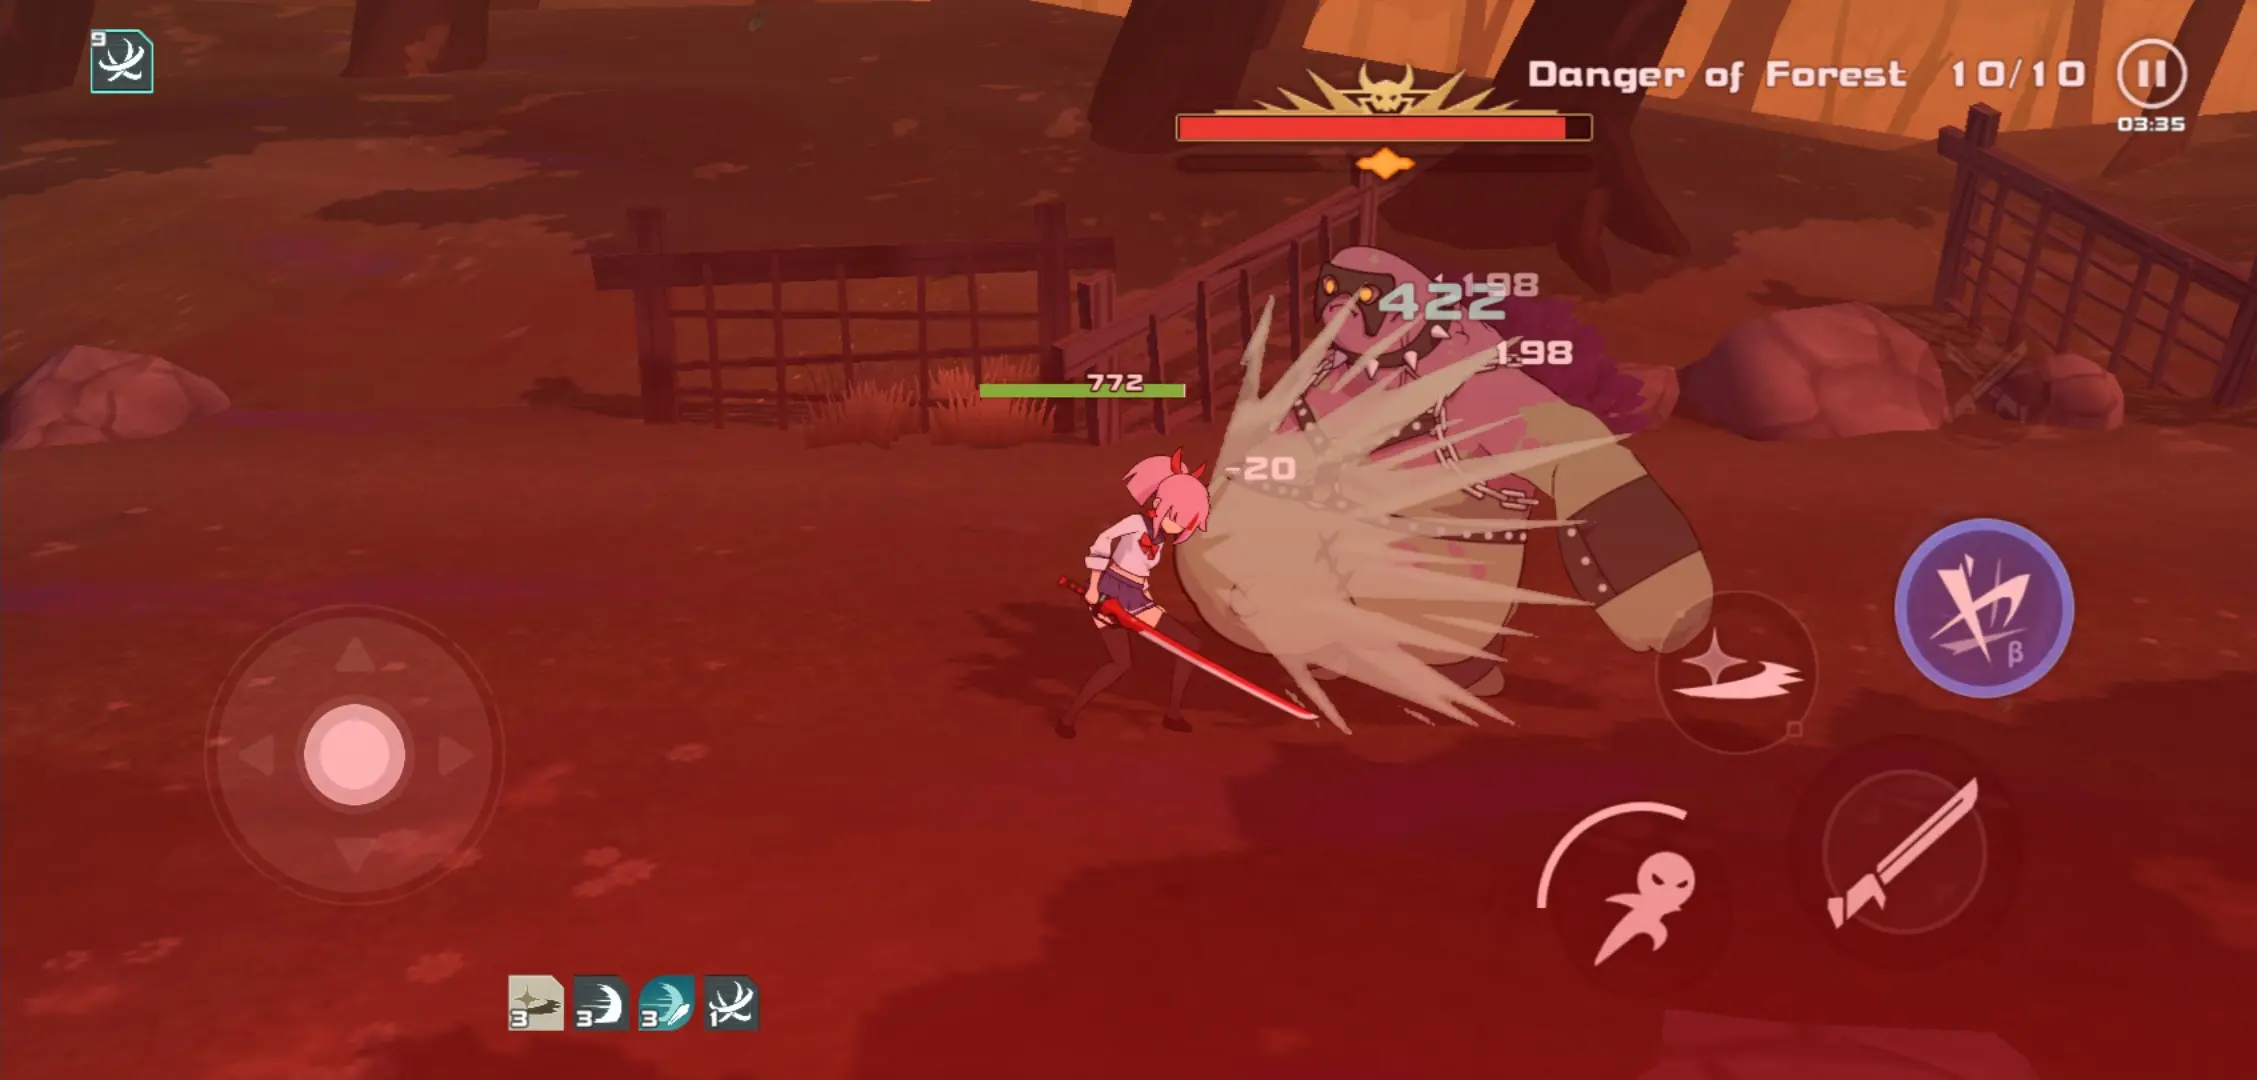
Each level has a total of 10 waves. After each wave, a supply pod drops from the sky to grant Sanny passive perks or an active skill, though she will get a choice among 3 selections at the very first wave. This mechanic is quite similar to games like Archero or Kinja Run. When Sanny has cleared 5 waves, she will fight the level’s mid-boss which is usually a zombie of a slightly higher tier than the ordinary zombies she fights.
Upon reaching the 10th and final wave, she’ll be greeted by a console called “The Assistor” which will grant her the choice between an increase in attack or to be healed by a small percentage of her health—this is all in preparation of the boss. Should she successfully kill the boss at the end, the mission is over and the player will return to the main menu where they can perform other things like improve Sanny’s capabilities.
While Swordash’s gameplay seems simplistic in nature, its nuances are anything but. There are things you will need to unlock to further improve how Sanny fights, improving her gear, fighting in missions other than the main one, and many more. It’s going to take a while before you make her really powerful. The toughest part about this game is that the majority of your success (at least early on) requires your skill.
If you could use a hand in getting ahead, read on—we’re about to get to the nitty gritty!
Swordash Tips and Tricks
1. Perfection Comes Later
What does it take to become the perfect warrior?
Does it mean to get through your enemy’s advance unscathed? Is it how many of your enemies you’ve cut down? What about having the most powerful armor and weapon in all existence? Does this make you the perfect warrior? In the end, what is perfection but a hindrance if you can never improve ever again afterwards?
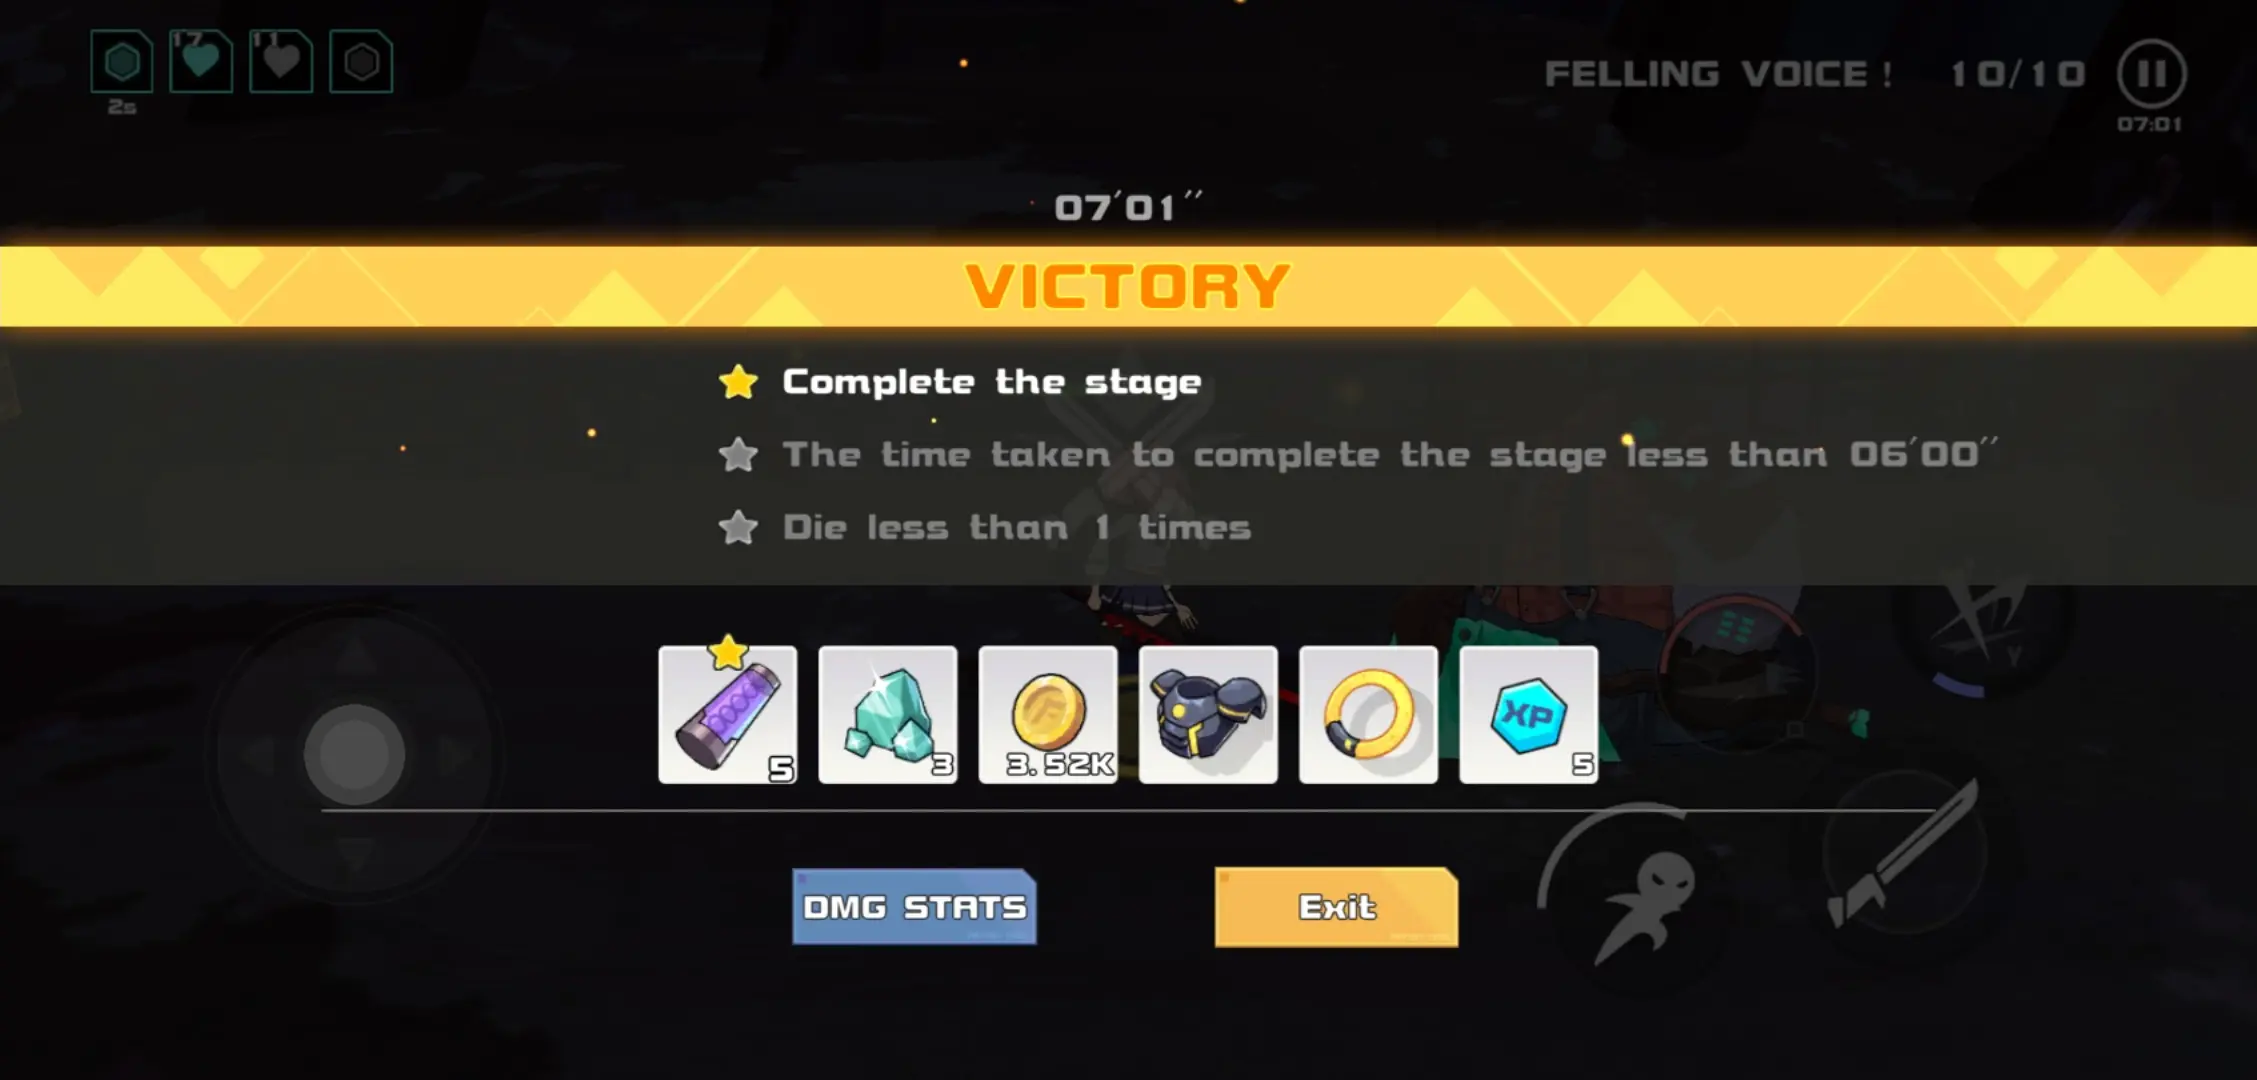
Like most games nowadays, Swordash has a star counter. This counter assesses your overall performance in a mission with each star (a maximum of 3) bearing an objective fulfilled by your skill. For instance, the first star always involves successfully clearing a level whereas the other 2 stars will require a little bit of skill rather than just simply finishing the level. One of them requires you to finish the level within a specific time limit, and the other requires you to complete the level without dying once.
Granted, you can take as long as you need, but each time Sanny dies the first time during a level, she has the chance to be revived at full health if you watch an ad or spend a sum of gems. If Sanny gets slain during her heroic second wind, she dies for good and the mission is a failure. This will happen quite often early on in the game.
Because your gear won’t cut it and with how you’re performing early on, still trying to fully grasp and understand the nuances of Swordash, you shouldn’t let this bother you too much. In fact, what you should do for now is to complete levels as is even if it takes you forever and even if Sanny dies once. Aim for that one star for now and come back stronger to finish the job. There is a purpose to this, after all, since earning stars will give you a lot of good rewards—some of which being tickets for the equipment boxes.
Once again, don’t let death discourage you early on. Instead, let it become your driving force to improve your technique and come back with better gear. Think of it as Sanny overcoming her personal weaknesses and developing into a more learned, more powerful swordswoman who can fell even the biggest zombies put before her. Consider repeating levels as well in order to gain coin and extra materials for upgrades. These will certainly go a long way.
Though, because Sanny shouldn’t be dying in the first place, there is one way you can keep her alive as she fights.
2. Time Your Dodges
Strike as fiercely as a storm that leaves destruction in its wake, only to be completely absent when the sun shines. When it’s time to return, strike with double your strength last time.
In general, dodging isn’t a mechanic that Swordash invented. It’s very prevalent in many action games. The aforementioned Shadow of Death has it and it’s very important. Though, it’s clearly inspired by many games that have a prevalent dodging mechanic such as the Souls and Monster Hunter franchises.
As for our intro to this bullet, we aren’t speaking in riddles here—our metaphor applies to what you can make Sanny do in her adventures. Moving and striking is one thing, but to time her dodges is another; it can save her life and even create some openings in the enemy’s attack. Don’t use this feature haphazardly, it’s best to time your dodges.
To make a proper dodge, observe the animations of the enemy. For the normal, mook zombies that are everywhere, your easiest cue for when they’re about to strike is when they run at you with reckless abandon. Dodge past them and then cut them up after their swipe at thin air finishes. When it comes to bosses, their attacks look a little bit slower than the regular zombie. They’ll often wind up with a raised arm or a similar animation and then follow through with their attack.
The moment you see their arm raised, move away and retaliate when they’re done attacking. Be prepared to dodge in succession, though, since some boss attacks can happen very quickly. Dodging and striking should be done in a rhythm, and if Sanny runs out of stamina, back away.
Sanny’s dodge bar has a small stamina meter above it. Just remember that this is finite and that attempting to make Sanny dodge while her stamina is in the red won’t do anything. In fact, dodging wantonly could put Sanny in danger. If you enjoy dodging, try equipping items that replenish your stamina after fulfilling certain requirements in a fight (more on this soon).
That said, it’s better to catch your breath when the field is bereft of zombies.
3. Prioritize Killing Zombies Quickly
The worst part about zombies in general? They’re everywhere.
They come in droves, in masses that eat away at the living, sometimes running straight for Sanny and wounding her. If there are far too many of them in one place, Sanny could just be eaten alive then and there and you’d fail the mission. There may not seem an end to them, but you can at least mitigate the wounds that Sanny would incur per wave, and that’s through killing the zombies as quickly as possible.
Remember that each time you start a new wave, you’re given a skill? We highly recommend getting high-damage skills or focus on increasing Sanny’s basic attack power. This will allow you to slice through the weak zombies before having to deal with the stronger ones; those can be killed later once the herd has been thinned out. In fact, there are a handful of skills that we recommend using and those that we strongly suggest you to avoid.
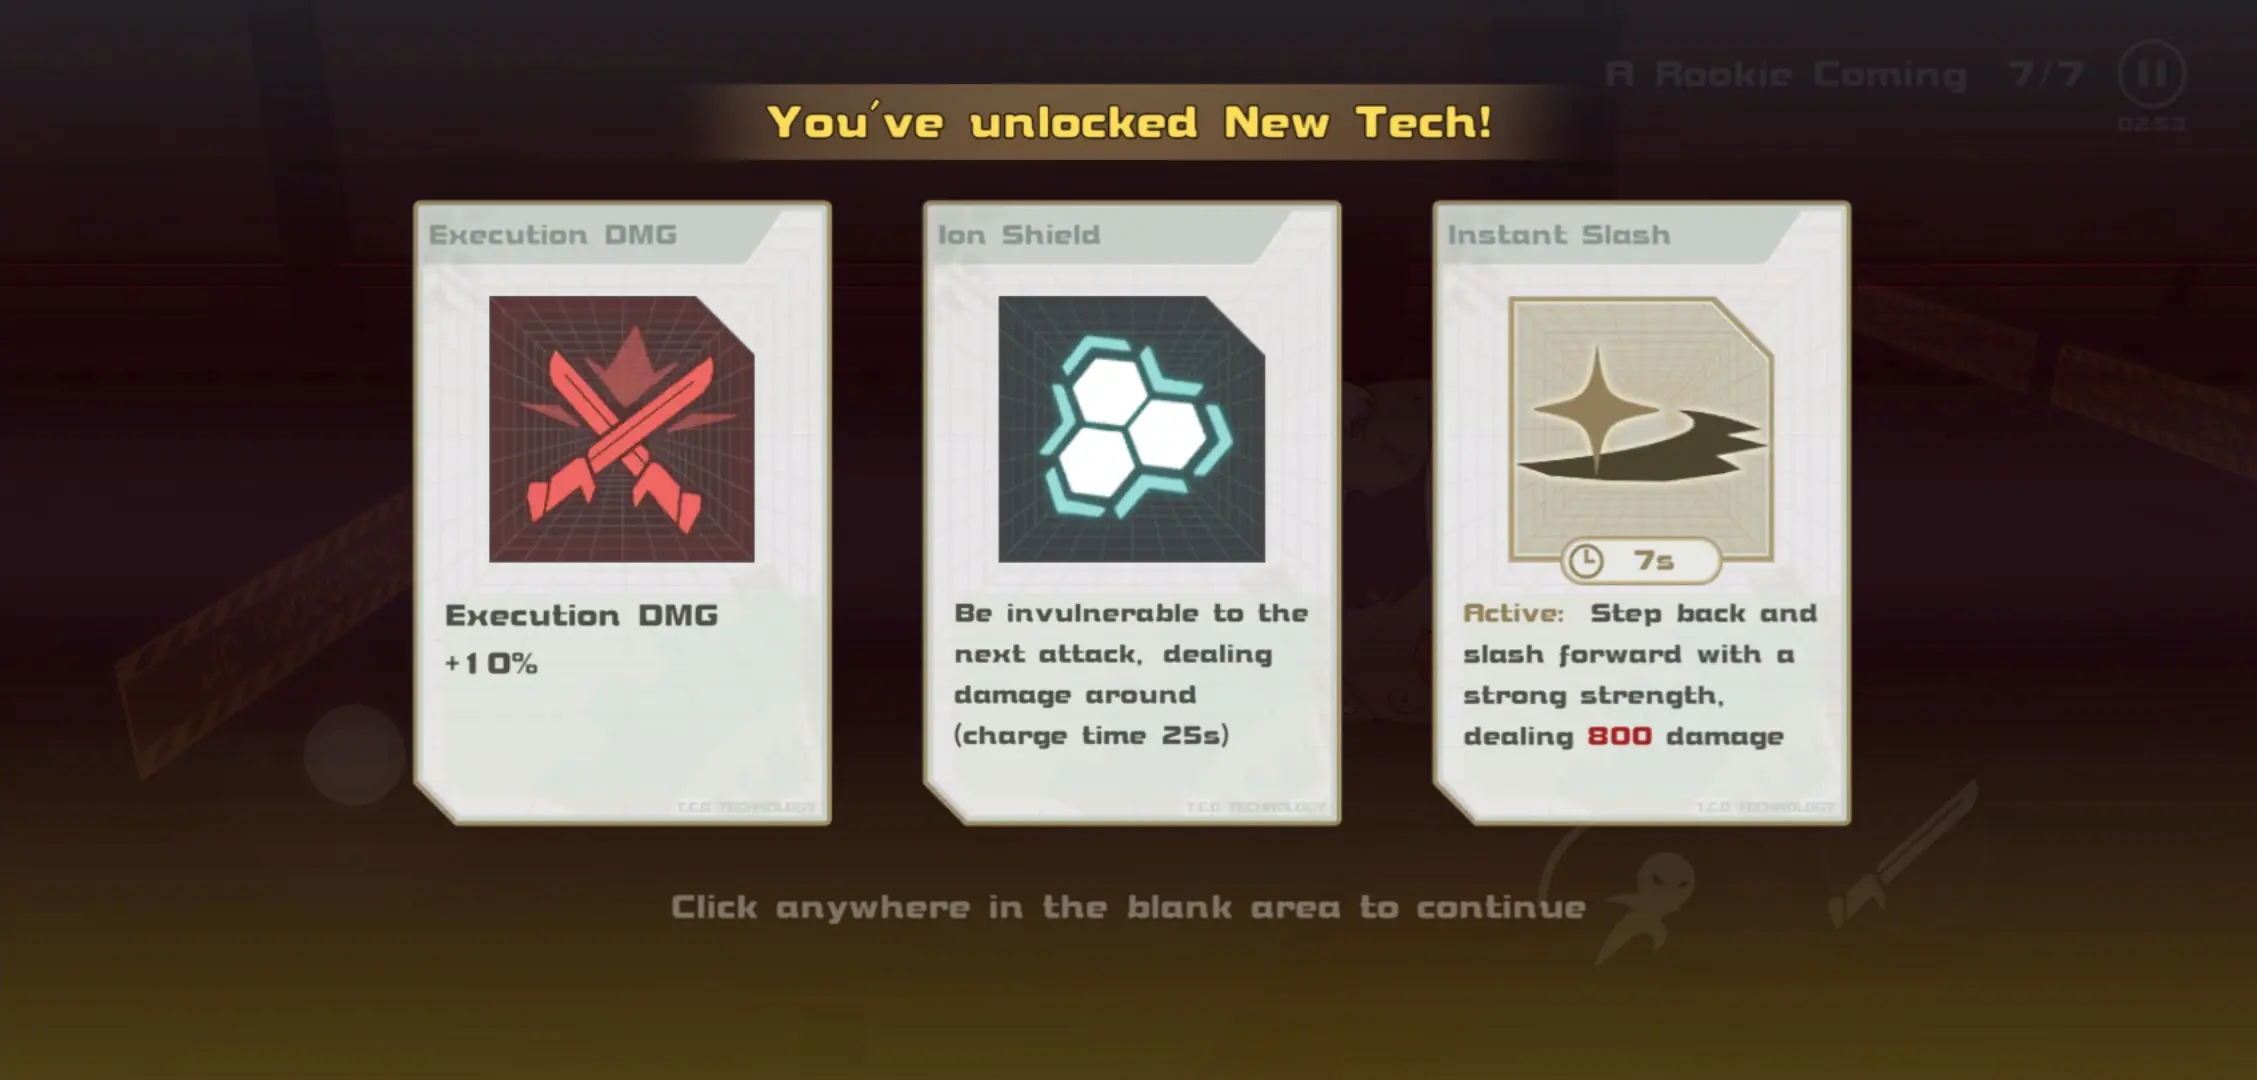
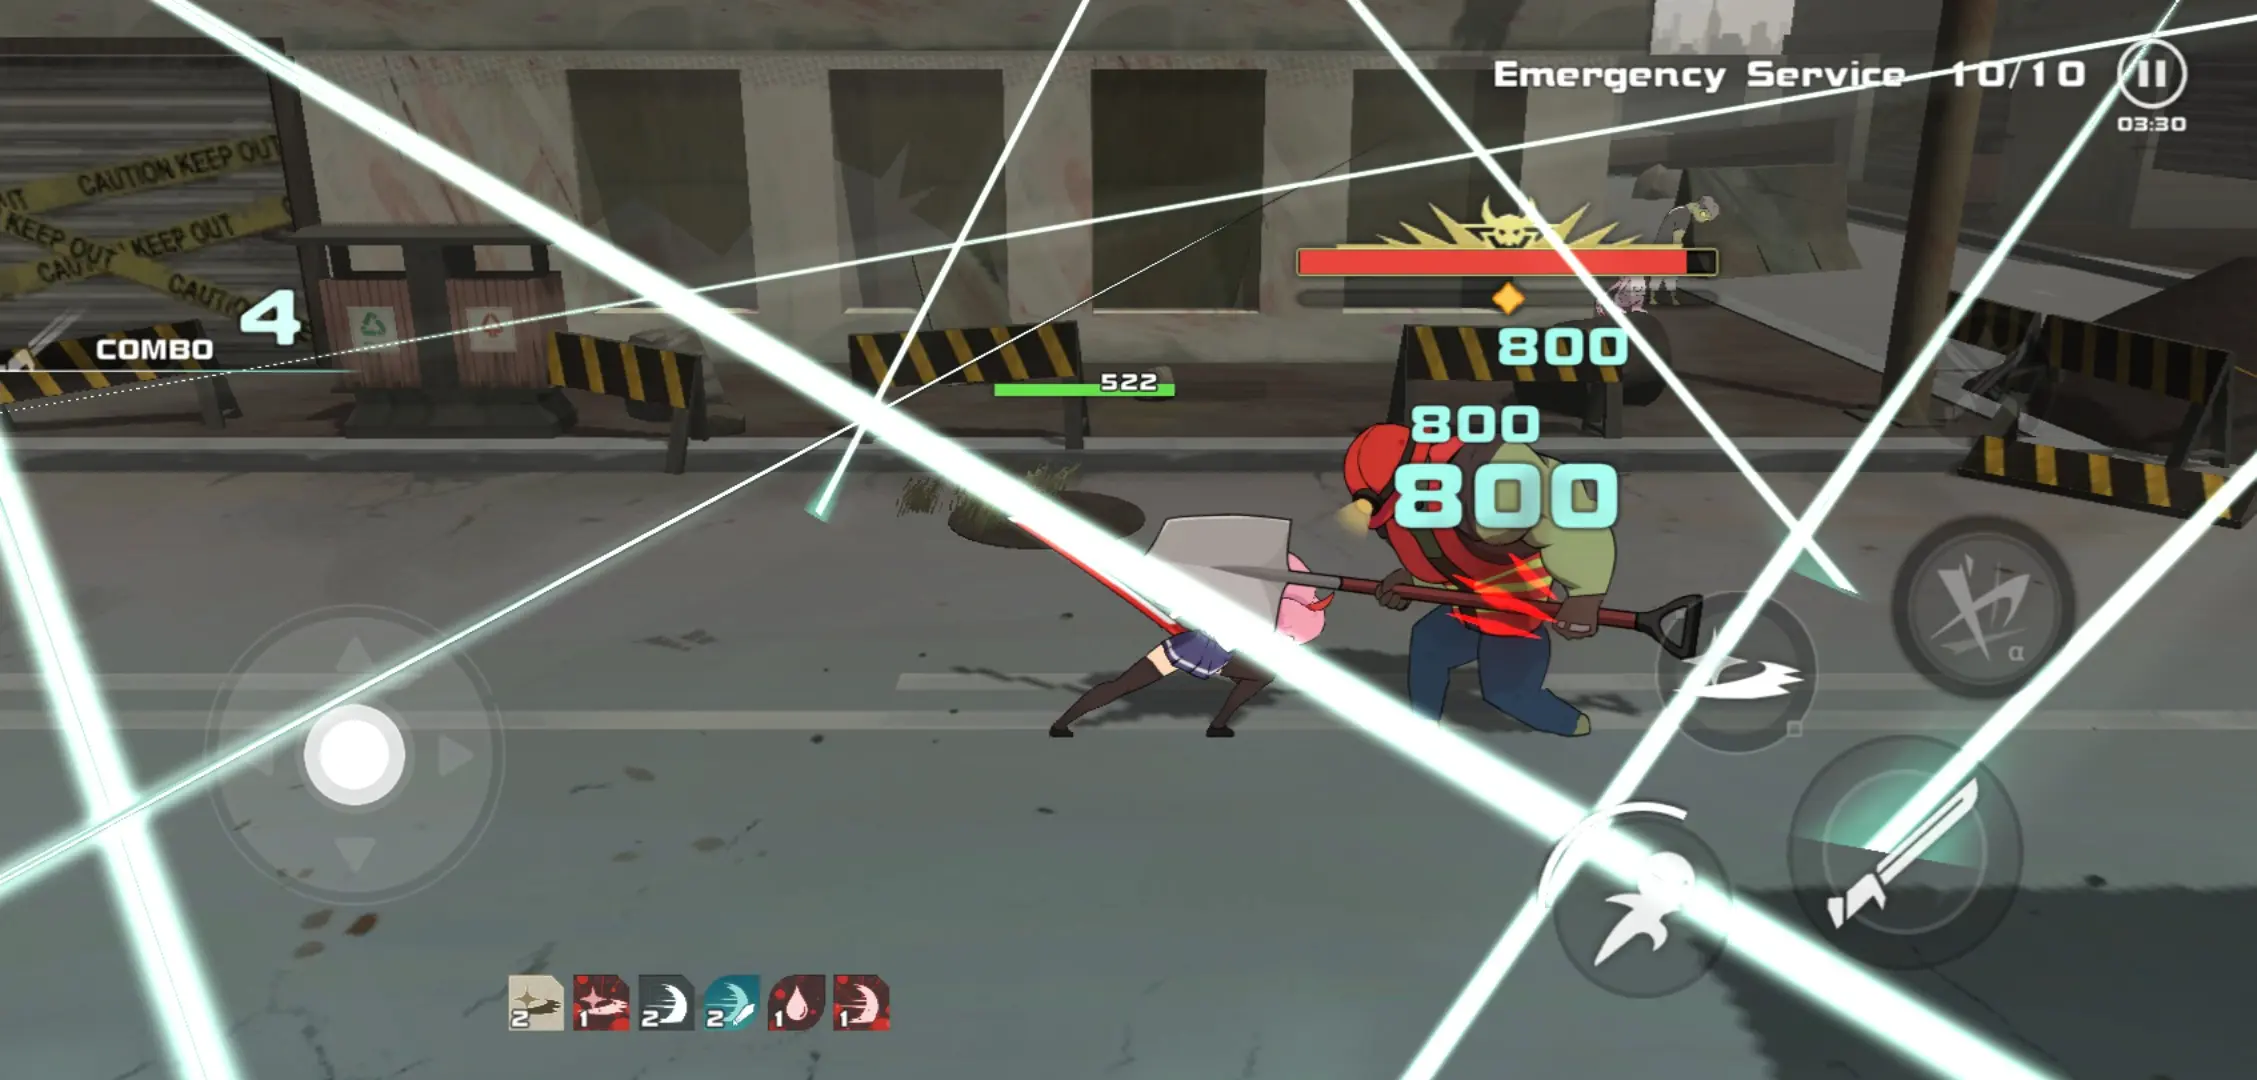
Skills like Instant Cut are extremely useful in killing weak zombies en masse. With an evasive maneuver that acts as a dodge without consuming any stamina, Sanny will return with a massive slash that will almost certainly kill weaker zombies, if not gravely wound them. When they’ve been damaged enough, they can be felled with basic attacks afterwards. The best part about Instant Cut is that it has a low cooldown time in exchange for a high amount of damage in a moment’s time.
Consider also the Exiled Slash passive which will allow Sanny to project razor-sharp winds to cut through the enemy from a safe distance. While this won’t hit as hard as her basic attacks, this should whittle the enemy’s HP bars down enough that they’ll crumble to pieces the next time you actually hurt them. It helps with bosses as well, but it won’t fill the Execution Meter, unfortunately (more on this later).
Conversely, avoid skills like Slash Dance Back or Infinite Slash. For one, Slash Dance Back will hurt a small number of zombies in a tiny radius around Sanny. It sounds great on paper, but trust us that it doesn’t really do much. Infinite Slash might be good as a secondary dodge, but we don’t recommend it either since its overall damage output is rather low. It also may put Sanny in danger if used erroneously. This isn’t to say that these are bad skills, however, we instead recommend using them when you’ve developed a better understanding of them.
You can make these skills much more powerful. This is through the wonders of Elemental Damage… if the RNG is kind to you.
4. Take Advantage of Elemental Damage
Fire, Lightning, Blood—the three elements have lived once in harmony… Until the zombies attacked.
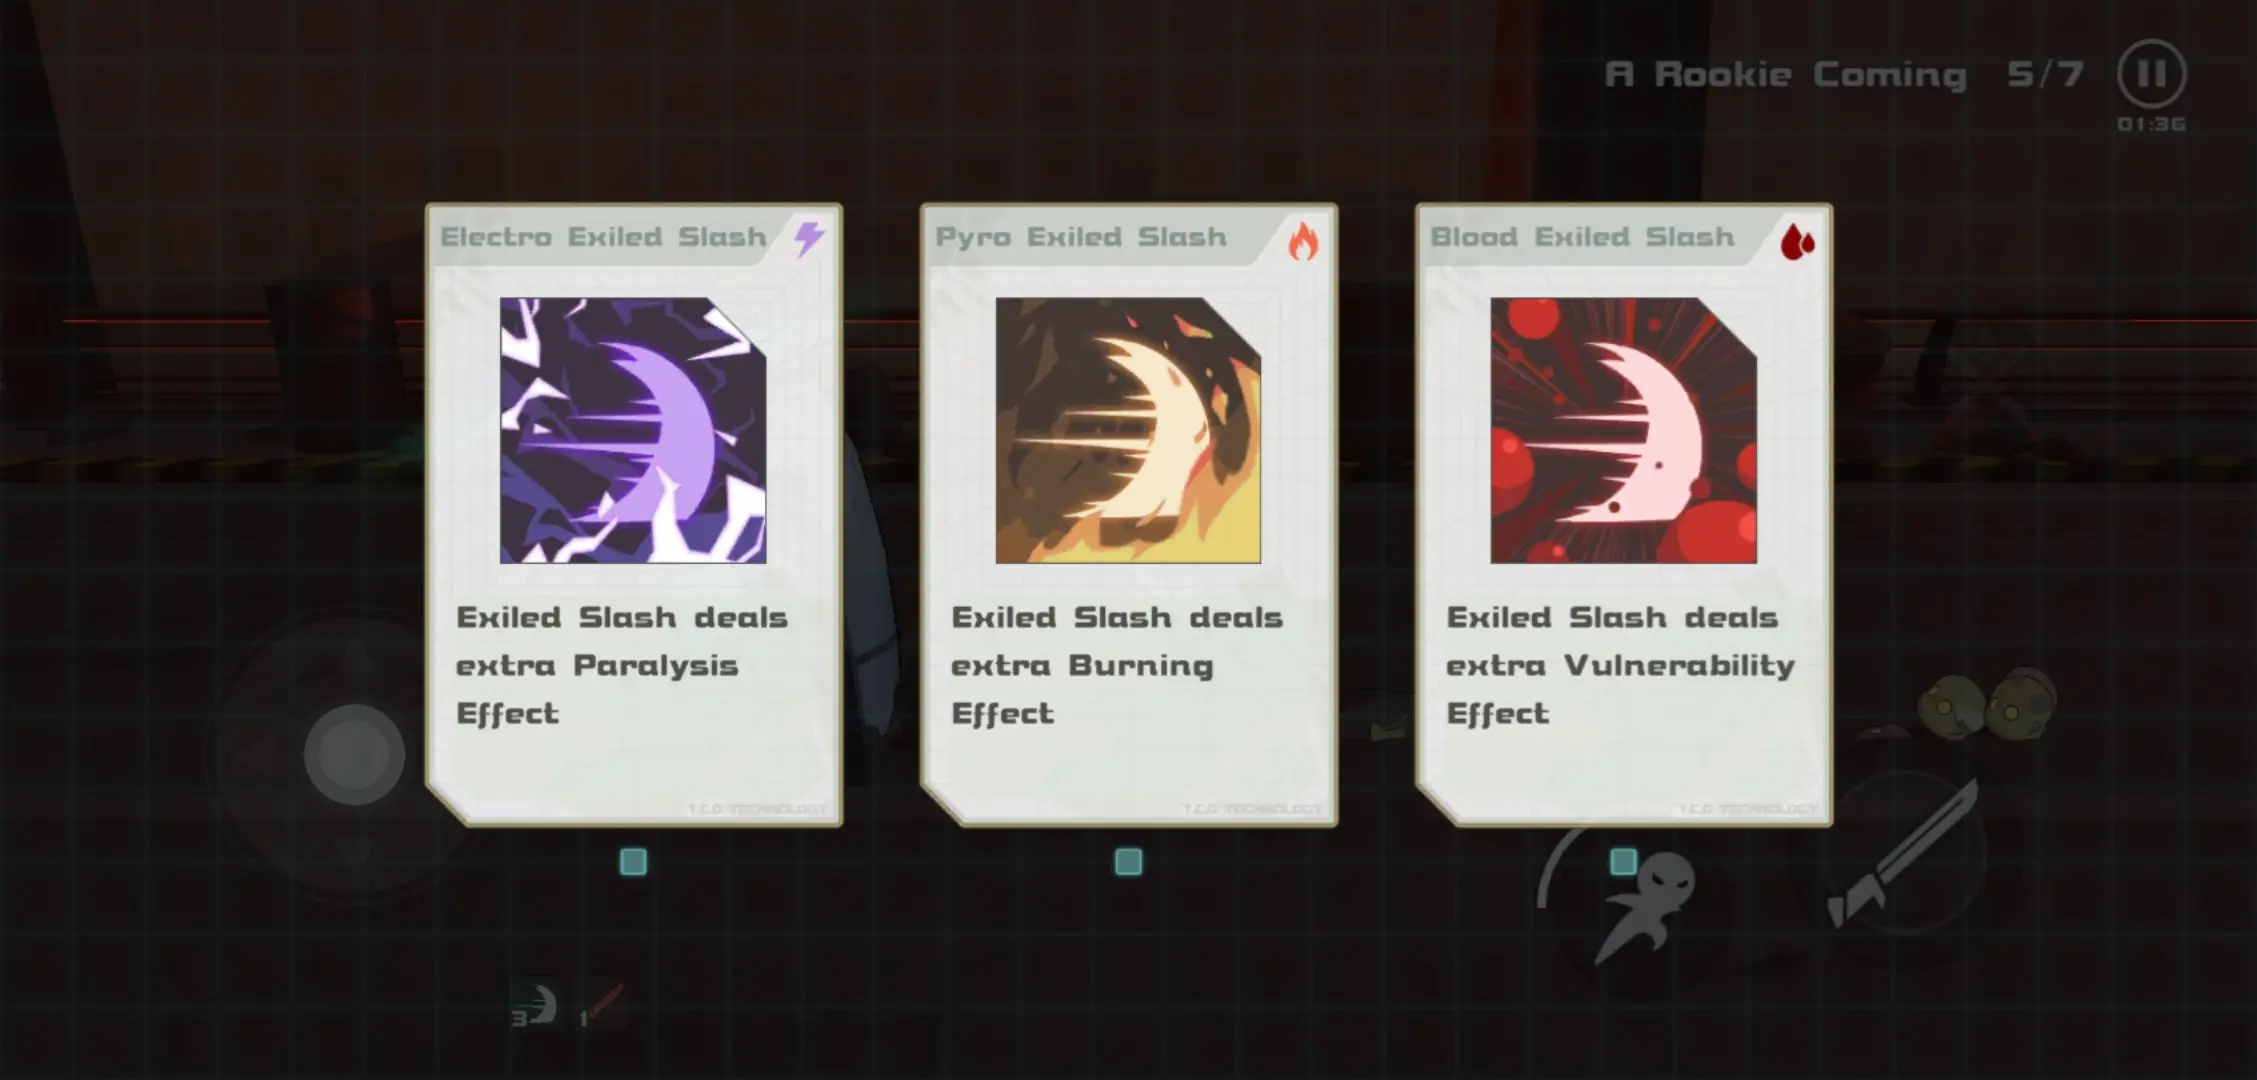
References aside, Swordash allows Sanny to take control of the battlefield completely through the use of powerful elemental attacks. These elements are imbued into Sanny’s blade depending on the choices you’ve made into the level. Sure, these are all acquired through RNG, but once you have them, consider a dramatic boost in damage levels. You’ll be killing off zombies much quicker than you’d hoped, and bosses will follow suit once afflicted by any of these. (NOTE: you will need to use the affected skills to inflict Elemental Damage.)
Firstly, there’s Burning. It does exactly what you think it does; roast the flesh of the zombies. Once Sanny is equipped with the Burning element for her skills that have it, she will be able to set the enemy alight, dealing damage over time. This is particularly useful for boss zombies or zombies that have high health.
Secondly, there’s Paralysis. This element zaps the enemy and greatly reduces their movement and attack speed for a short amount of time, creating more openings for attack. This also damages the afflicted zombie over time. If you feel like your current skill set is built for combos or burst damage, use it and slow the enemy down.

Thirdly and lastly, there’s Bleed. As edgy as it looks, Bleed is an outstanding element since it nicely ties in with almost anything without overpowering other elements. In fact, it’s an element that nicely complements the others when used together. What Bleed does is it severely reduces the enemy’s defense while they’ve been wounded. This is symbolized by a red wound over the afflicted enemy; they will take more damage from Sanny’s blade so long as they have this mark.
Much like everything else in this game, elements can also be upgraded. The strength of their enemy-weakening properties can be enhanced if you’re given the chance by completing a wave. As we’ve mentioned earlier, Bleed goes with either element, so don’t repeat elements when running a mission.
If you’re looking for constant damage, try Bleed and Burning whereas if you’re looking for more damage with openings for powerful skills, try Bleed with Paralysis. Burning and Paralysis may be combined as well for an increase in damage-over-time speed. This all ties into the previous bullet of offing the enemy as quickly as possible.
There is yet another way to swiftly kill off weaker zombies, and it’s one of those things you learn very early on into the game.
5. Save Your Ult Until Later
The ultimate skill looks quite familiar, doesn’t it? Well then, let’s get a few things clear about this Space Judgment, firsthand.
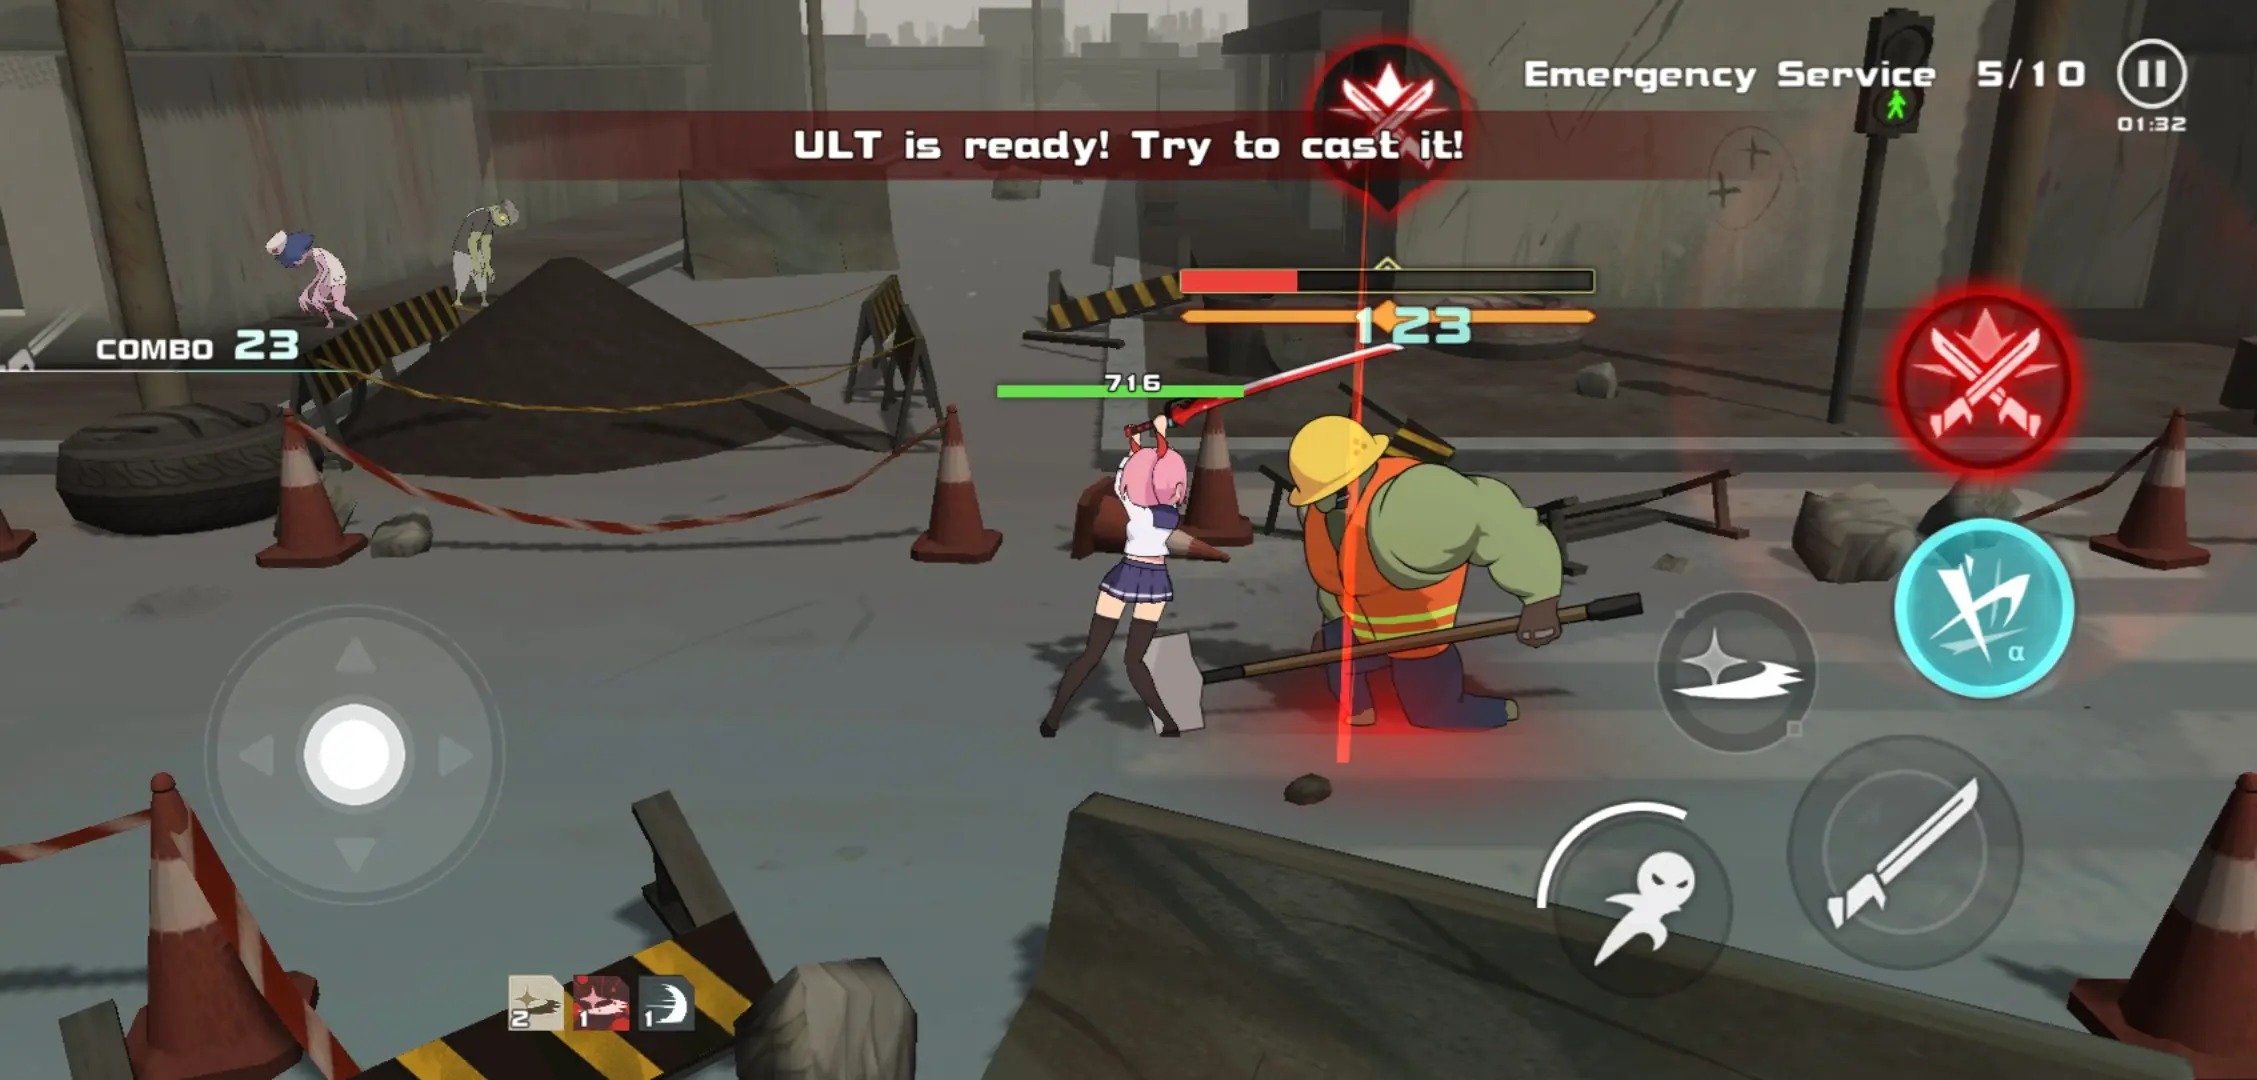
The Ultimate Skill, or Ult, as the game calls it, is an Ultimate Skill for a reason. It should never be used randomly; it should always be used at the perfect moment. That perfect moment being when you’d want to finish off weakened zombies, especially early on. This is important since the first Ults you receive don’t deal enough damage to wipe out the entire screen, so only do this if you know you’ve considerably weakened the congregation of flesh-eaters.
That said, the Ults you get very early on are very, very weak and you shouldn’t be using them unless you know they can kill something. If you happen to get better ones, specifically those in a higher tier (green, blue, or even purple, but we’ll talk more about that soon), use those. They’re not worth using if they’re not going to kill anything—in fact, if you’re chasing that star where you have to beat a stage in a few minutes’ time, you’ll be wasting your time with these.
So in short, only use it if you absolutely know that you’ll kill them off. You’ll be better off using other means to off your prey than wasting your time scattering them across the field and then waiting for them to group up so you can damage them altogether.
There is one hidden button on the right side of the screen that will allow you to inflict massive damage but this only works specifically on bosses.
6. Build Up the Execution Meter
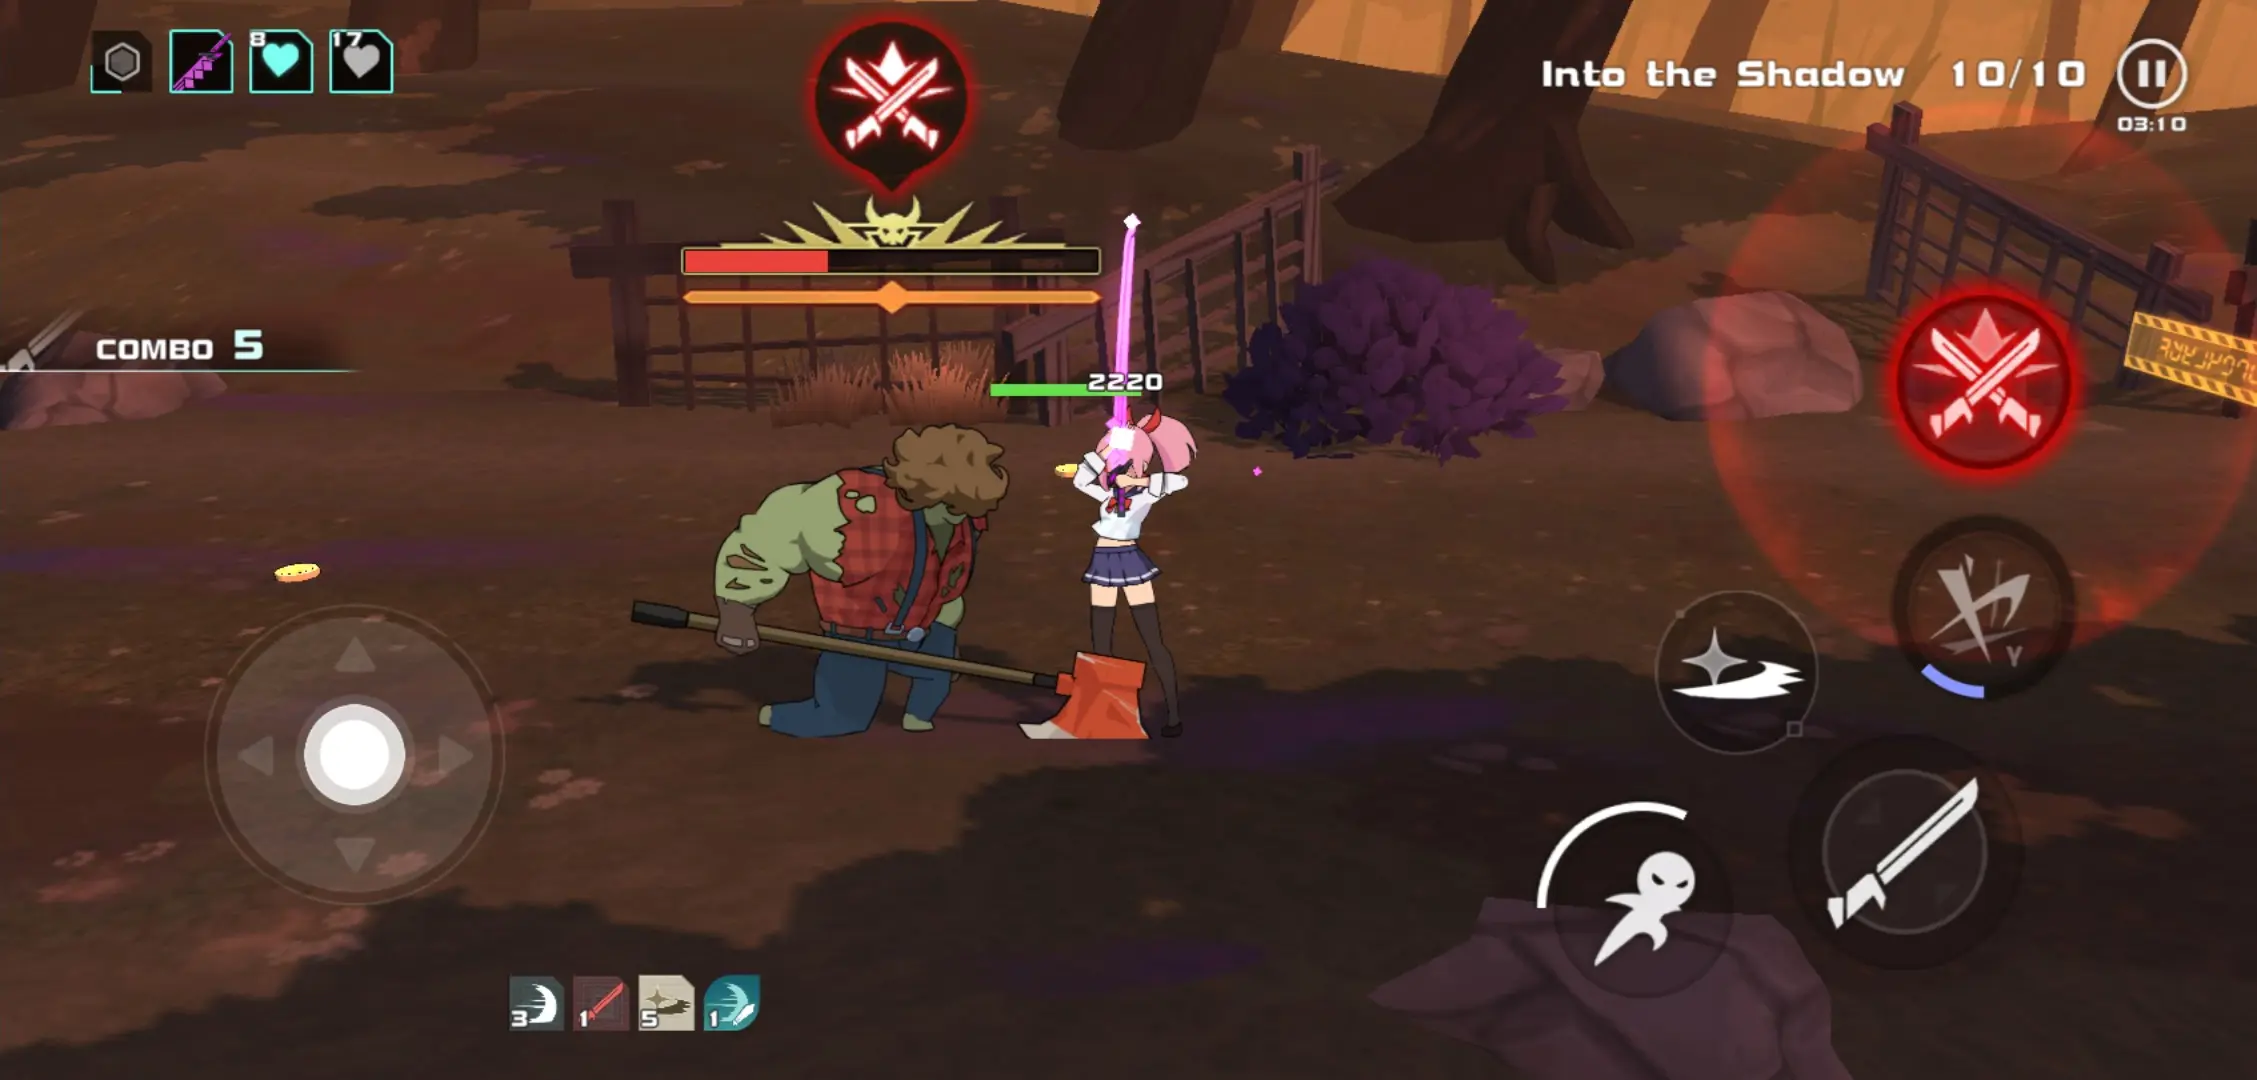
In the most heated battles, eventually one must fall.
Between Sanny and her most resilient foes, she can slice through their hardened flesh as much as she’d like, but sometimes there will be a moment where they’d be at their most vulnerable; a golden opportunity for her to cut them down once and for all. This is simulated through the presence of the Execution Meter which only appears beneath the health bars of boss zombies.
This mechanic is somehow inspired by certain action games like God of War, Darksiders, and the like wherein the player character finishes off an enemy in a brutal yet satisfying way. However, in some cases, some bosses or monsters in those games can only be finished off with just that animation. That’s not the case in Swordash since you may still cut the boss into pieces if the Execution fails.
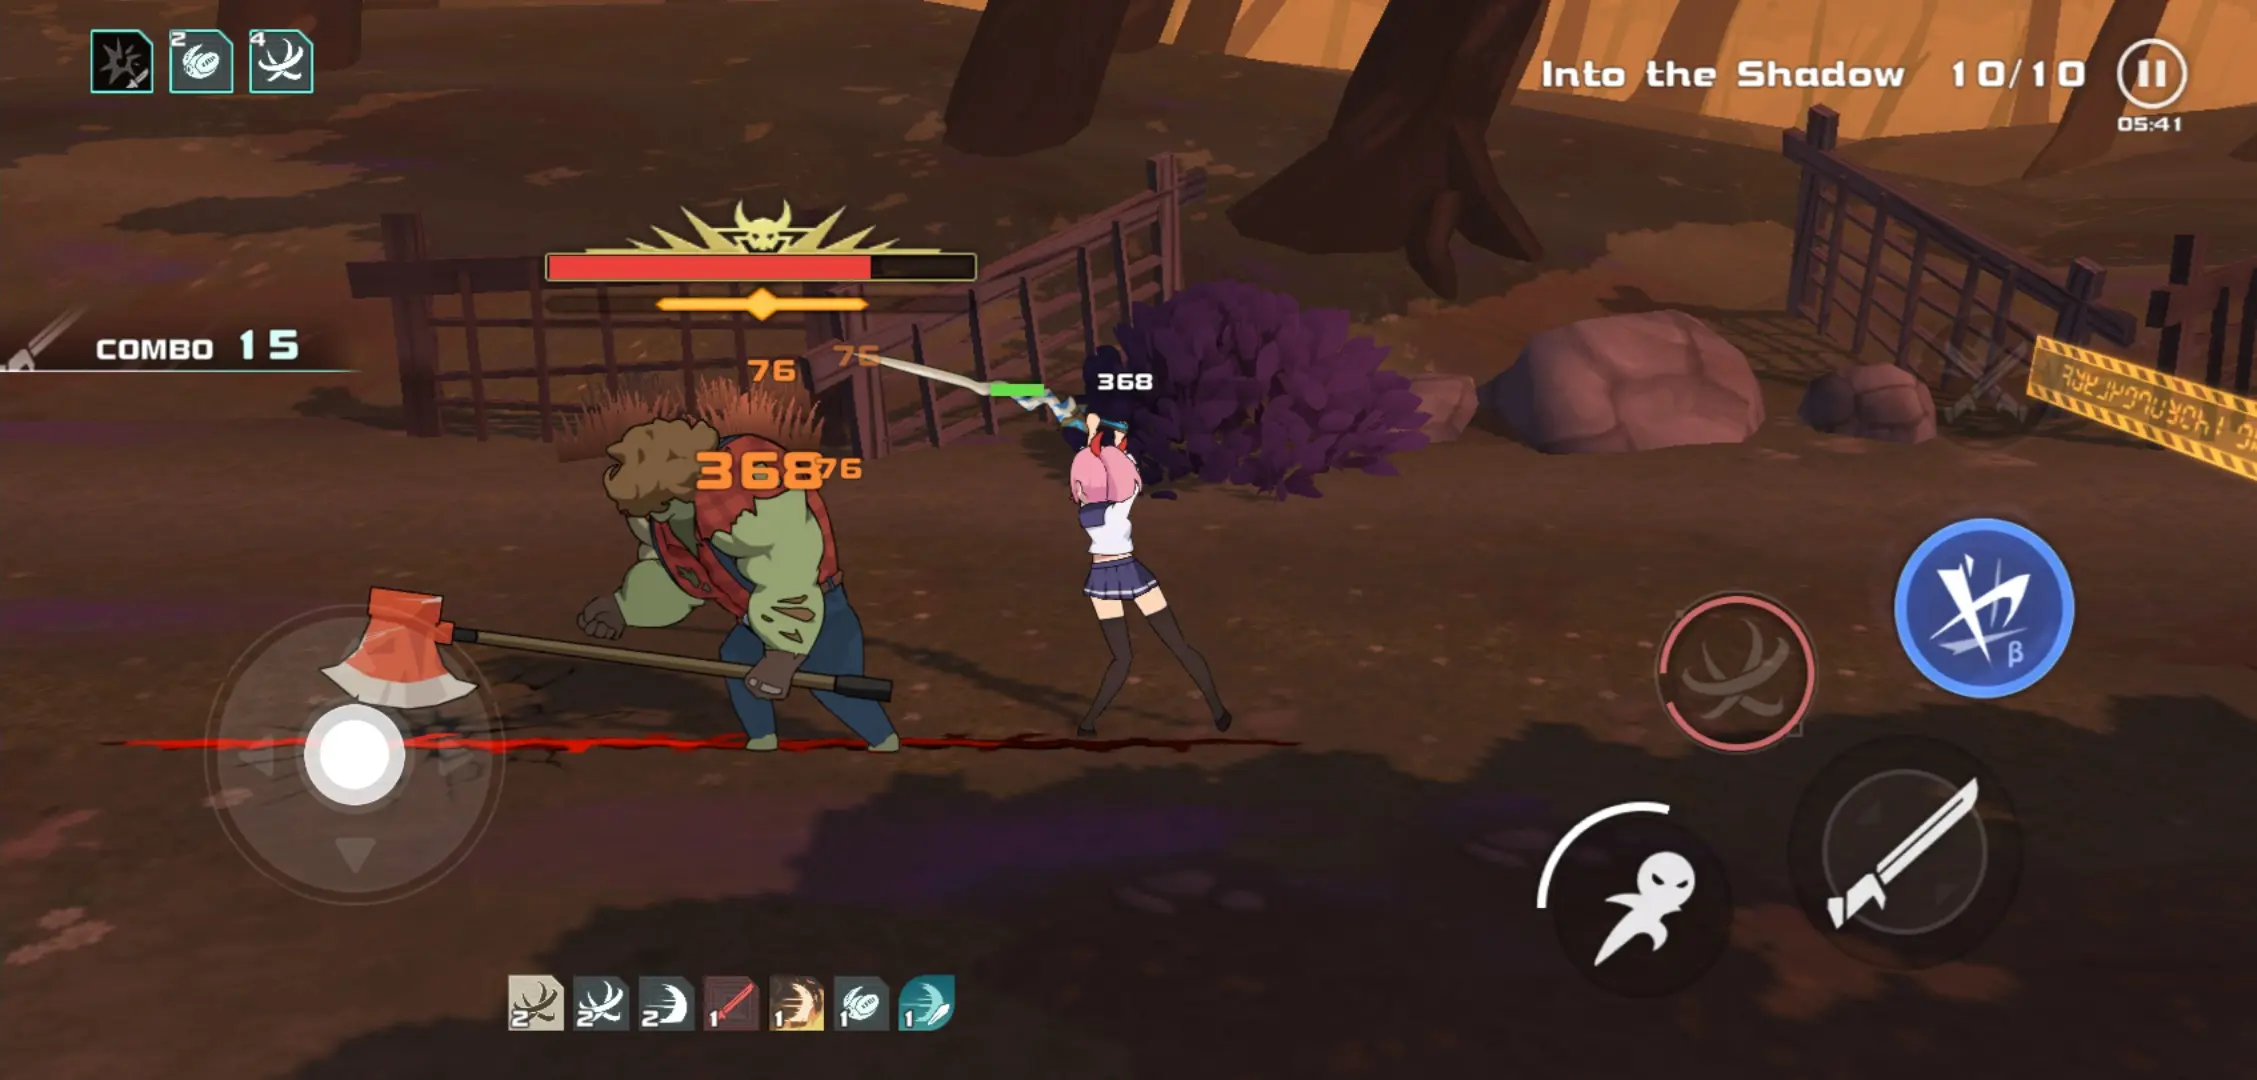
What the Execution does, when the Execution Meter is full, is that the boss stops moving completely and a big, red mark appears above their head. A hidden button to the right side of the screen glows for you to press. Once pressed, Sanny will strike at the boss zombie with all her might, dealing a massive amount of damage that she cannot attain through normal attacks or active skills. That said, building up the meter to finish a boss so quickly will take some time.

The Execution Meter will only go up if Sanny attacks the boss using her basic attacks. This means that skills, Exiled Slashes, and her Ult will not affect it. It will take a lot of dodging, retreating, and slashing at the boss to completely fill the bar.
Most importantly, this is a true test of the player’s skill since filling the bar in itself is already quite the chore. Though, if you manage to pull it off, it’s completely worth it since you might cut the boss battle mercifully short. In turn, killing the boss will completely off their companions if they have any, sparing you the trouble of cleaning up at the end of the level.
Getting hit by the boss or anything in this game hurts, really. So it’s best to keep the rest of Sanny’s stats in check. You can do this through improving her equipment.
7. Level Sanny Up, Improve Her Gear

While a warrior can only be as strong as the technique they practice, their tools augment the way they fight—their tools being their weapons and armor.
In all its entirety, Swordash is still an RPG somehow. In other words, leveling up and minding the stats of your player character, being Sanny, is a big deal. Each of these little and big numbers mean something in the long run; they dictate how long Sanny could survive or even how quickly Sanny could slay her foes. Each piece is integral to keeping Sanny powerful.
The equipment available is categorized into 6 items: weapon, headgear, body, shoes, accessory, and Ult Disk. These have different stats that contribute to Sanny’s raw abilities:
- Weapon — ATK, which affects the overall damage that Sanny does to zombies.
- Headgear and Ult Disk — Max HP, which dictates the total amount of Sanny’s HP at the start of every mission.
- Armor — DEF, which affects the amount of damage Sanny mitigates upon receiving an attack.
- Shoes — Dodge Mastery, which grants the chance for Sanny to passively dodge attacks without pressing the dodge button. She won’t have to move, but the enemy will miss.
- Ornament — Crit Mastery, which grants Sanny the chance to land critical strikes.
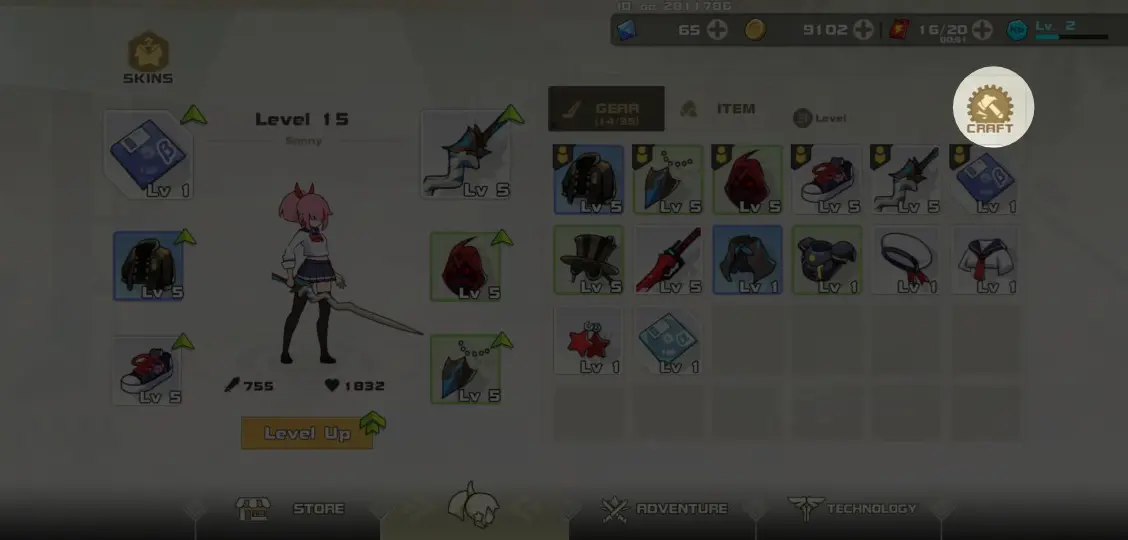
Once you’ve equipped Sanny with your desired items, you may also upgrade these to improve the stats they bear. Keep in mind that upgrading these won’t improve the perks that each gear piece has, only the stats that they come with. Upgrading will cost Cyan Ores and Gold. You can obtain Cyan Ores from various missions, the special events, or even by dismantling unused gear using the Craft button on the upper right corner of the Hero menu. Be warned that dismantling unused gear means they’ll be gone forever!
That said, each gear piece falls under a specific set. While they are implied to work together as they would in most RPG titles, they merely follow a theme instead. For example, the Soldier set involves getting stronger as the mission continues and the Zealot set involves getting bonuses each time Sanny scores a critical strike. Try to mix and match these parts to see which suits your gameplay best!
There’s also the option of raising Sanny’s level entirely. Doing so will give her an all-around stat boost as well as unlock some of the boxes that are in your inventory. This will require things like XP Capsules, however, and these are quite hard to come by since they mostly come from Main Missions.
Much like most mobile RPGs today, a gacha system is in place. But you won’t be rolling for heroes!
8. Roll the Item Gacha for Better Gear
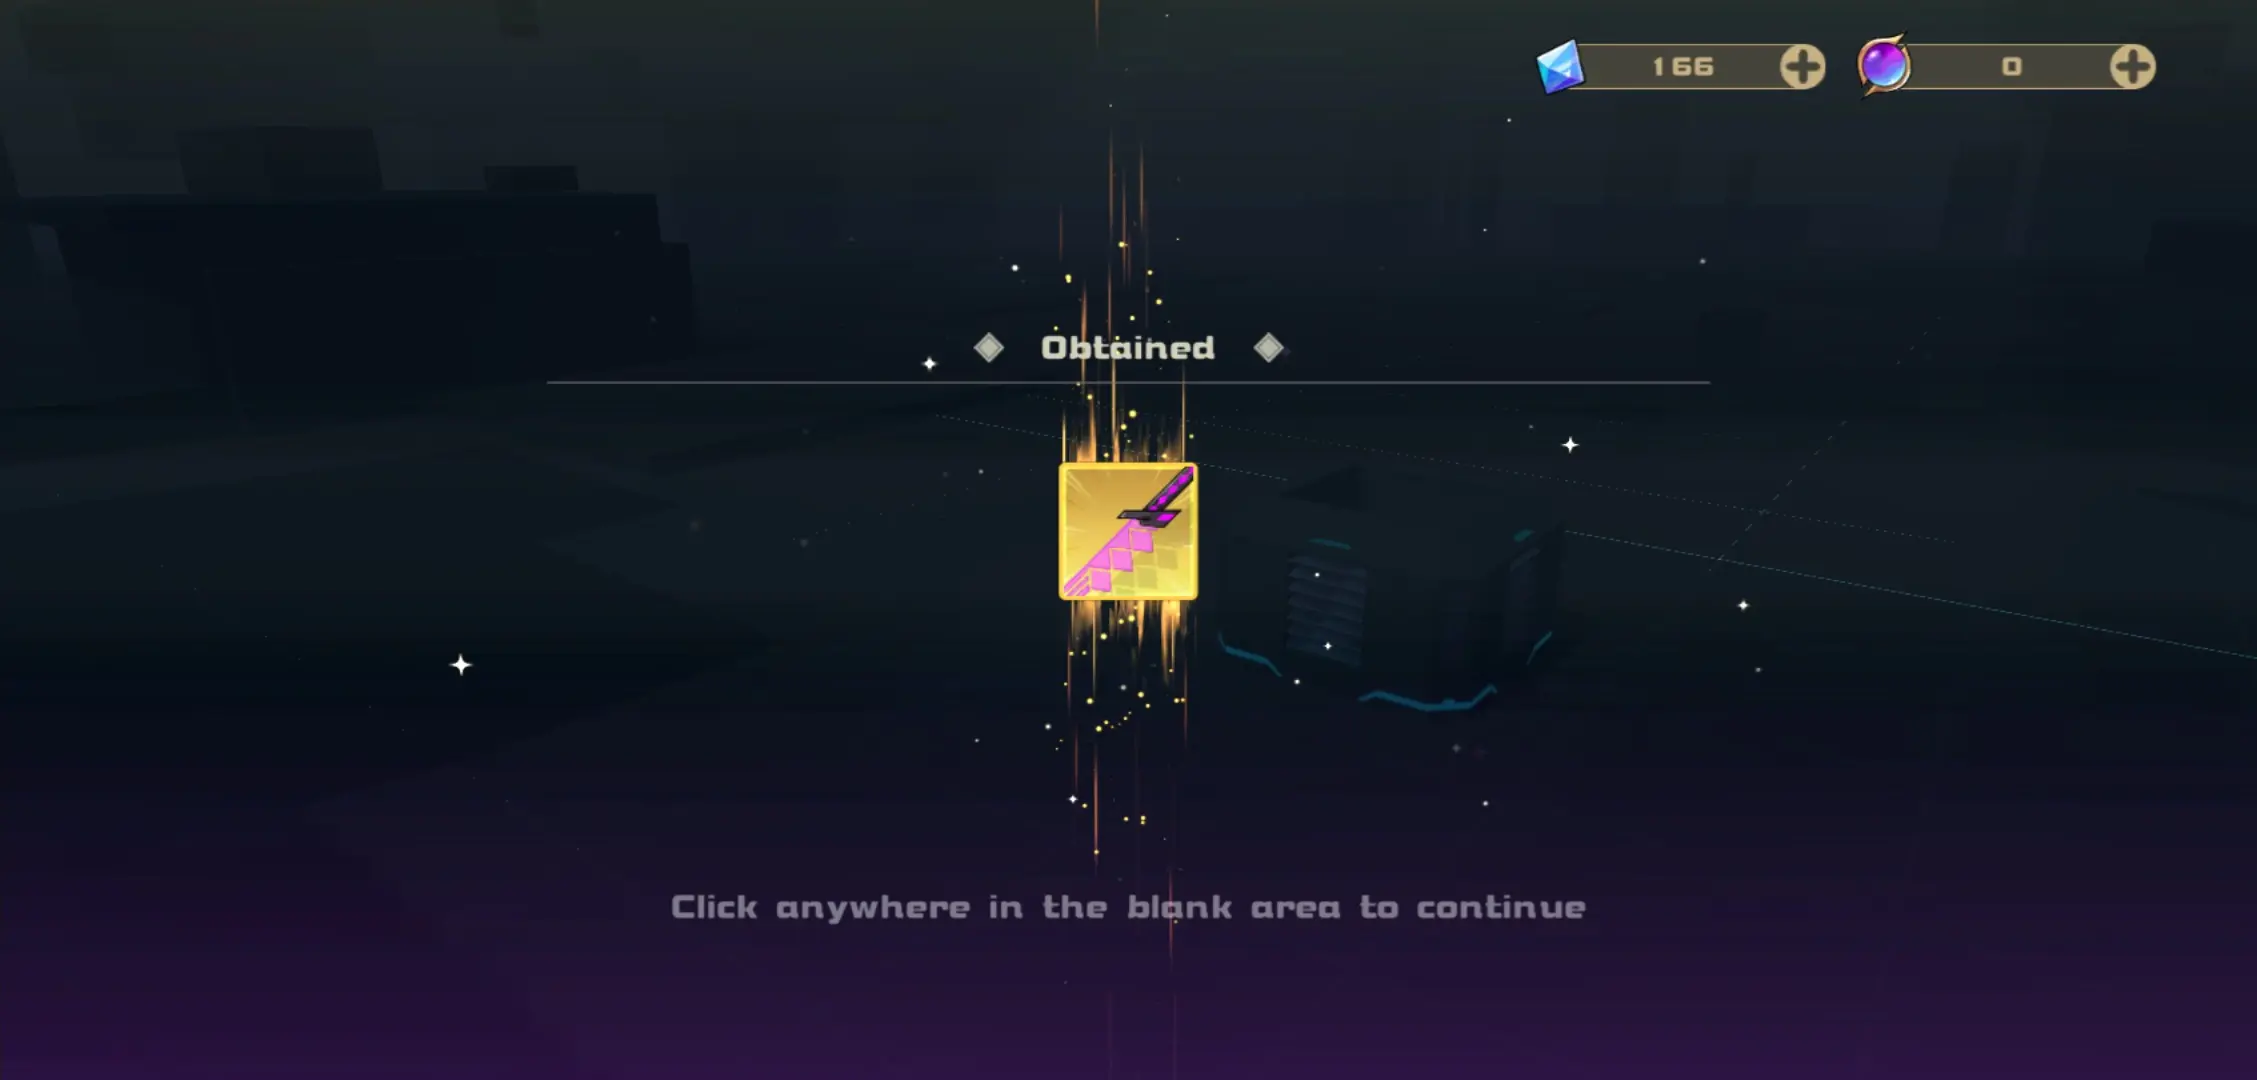
There are two ways to get gear in Swordash: either replay older missions, or try rolling the gacha with the tickets (or gems) you receive.
Under the Adventure menu, you can access a tab that will allow you to open gacha boxes. This is on the upper right; an icon that looks like a box between a clipboard icon (more on this soon) and a calendar icon.
Once you’re in this menu, you’ll be greeted by a choice among 3 different boxes: Common, Amazing, and Marvelous. Common and Amazing Boxes can be opened using tickets you receive (Common Coupon, Amazing Coupon) whereas Marvelous Boxes will require gems or premium currency to open.
Common Boxes only drop up to Epic Equipment, Amazing Boxes can drop up to Legendary gear albeit at a very low rate, and Amazing Boxes have better rates for high-tier gear in general. You’ll get tickets as you play the game and occasionally as a login gift, so don’t miss a day of Swordash!
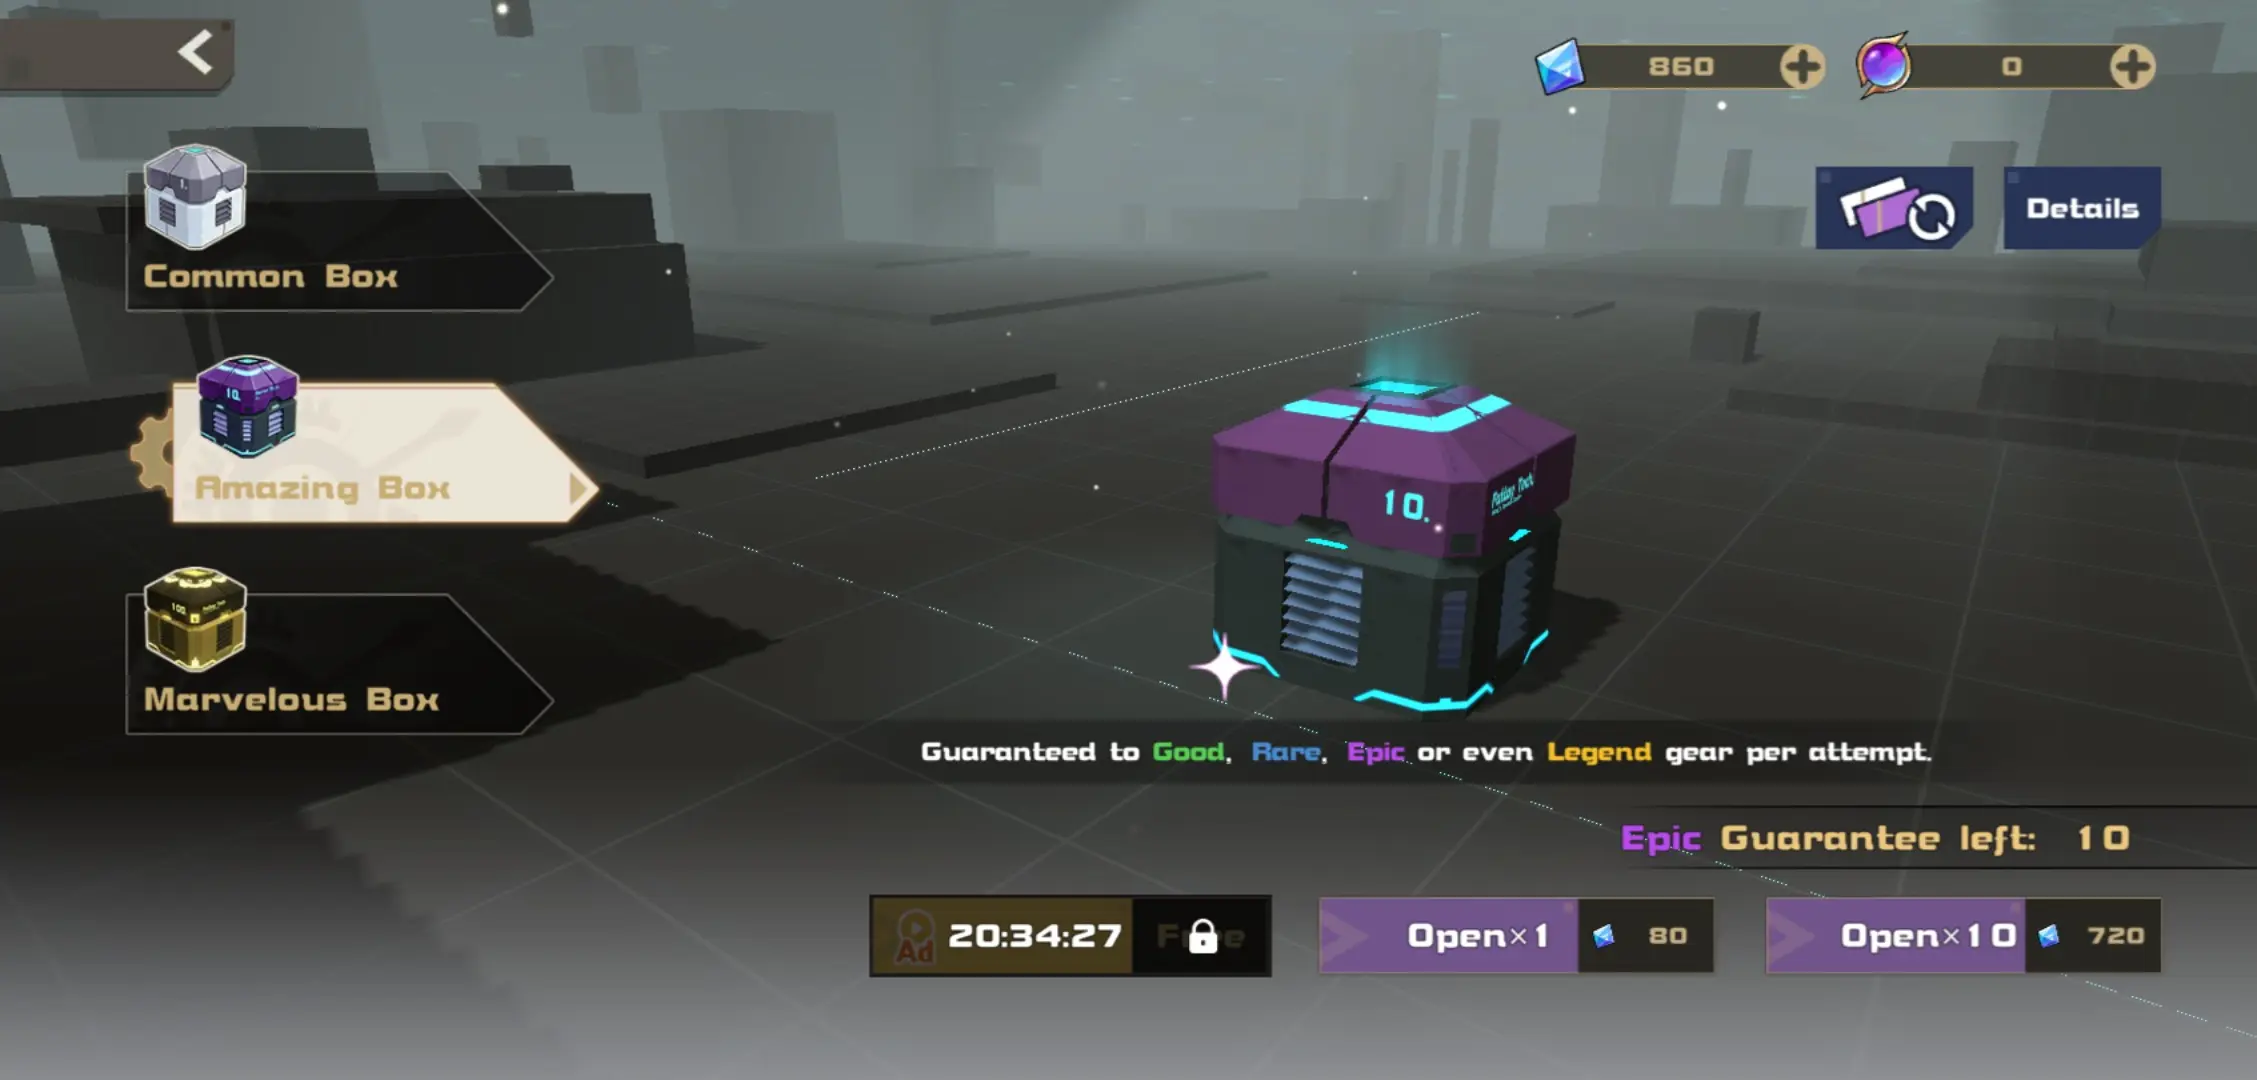
Gear is separated into various tiers, color-coded for the user’s convenience: Common (White), Good (Green), Rare (Blue), Epic (Purple), and Legendary (Gold). Naturally, higher-tiered equipment are more powerful than those of lower rarity. If you’re looking for really powerful gear, go for those in the Purple to Gold levels. Blue will do, but only if you don’t have anything better. In the beginning, getting Legendary gear is rare, so don’t worry too much about it if you don’t have any. You’ll be most likely getting Epic gear at first, and this is still a good thing.
If you happen to have at least 80 gems with you, attempt to pull for Legendary gear ASAP, especially from the Marvelous Box. That way, you’ll be able to conquer some of the tougher levels early on. Though, this will go on cooldown for 6 hours. You can get more gems solely by completing any of the tasks at the Adventure menu. These can be found by tapping the clipboard icon we mentioned earlier. Generally, you’ll get gems for playing the game. Be sure to check back on your tasks to see if you’ve completed any new ones.
Upgrading your gear is an integral part of the game, and just so you don’t go broke doing it, the game has a means for you to earn extra material.
9. Fight in Other Missions for Extra Material
The main story’s missions can get quite difficult.
The strength of the zombies scale tremendously and getting Cyan Ores for upgrades can be scarce sometimes. Before you throw in the towel, don’t! What you need to do right now is to find a way you can earn extra material without wasting your gas on needless deaths. This is where the other missions such as Event Missions or World Missions come in handy.
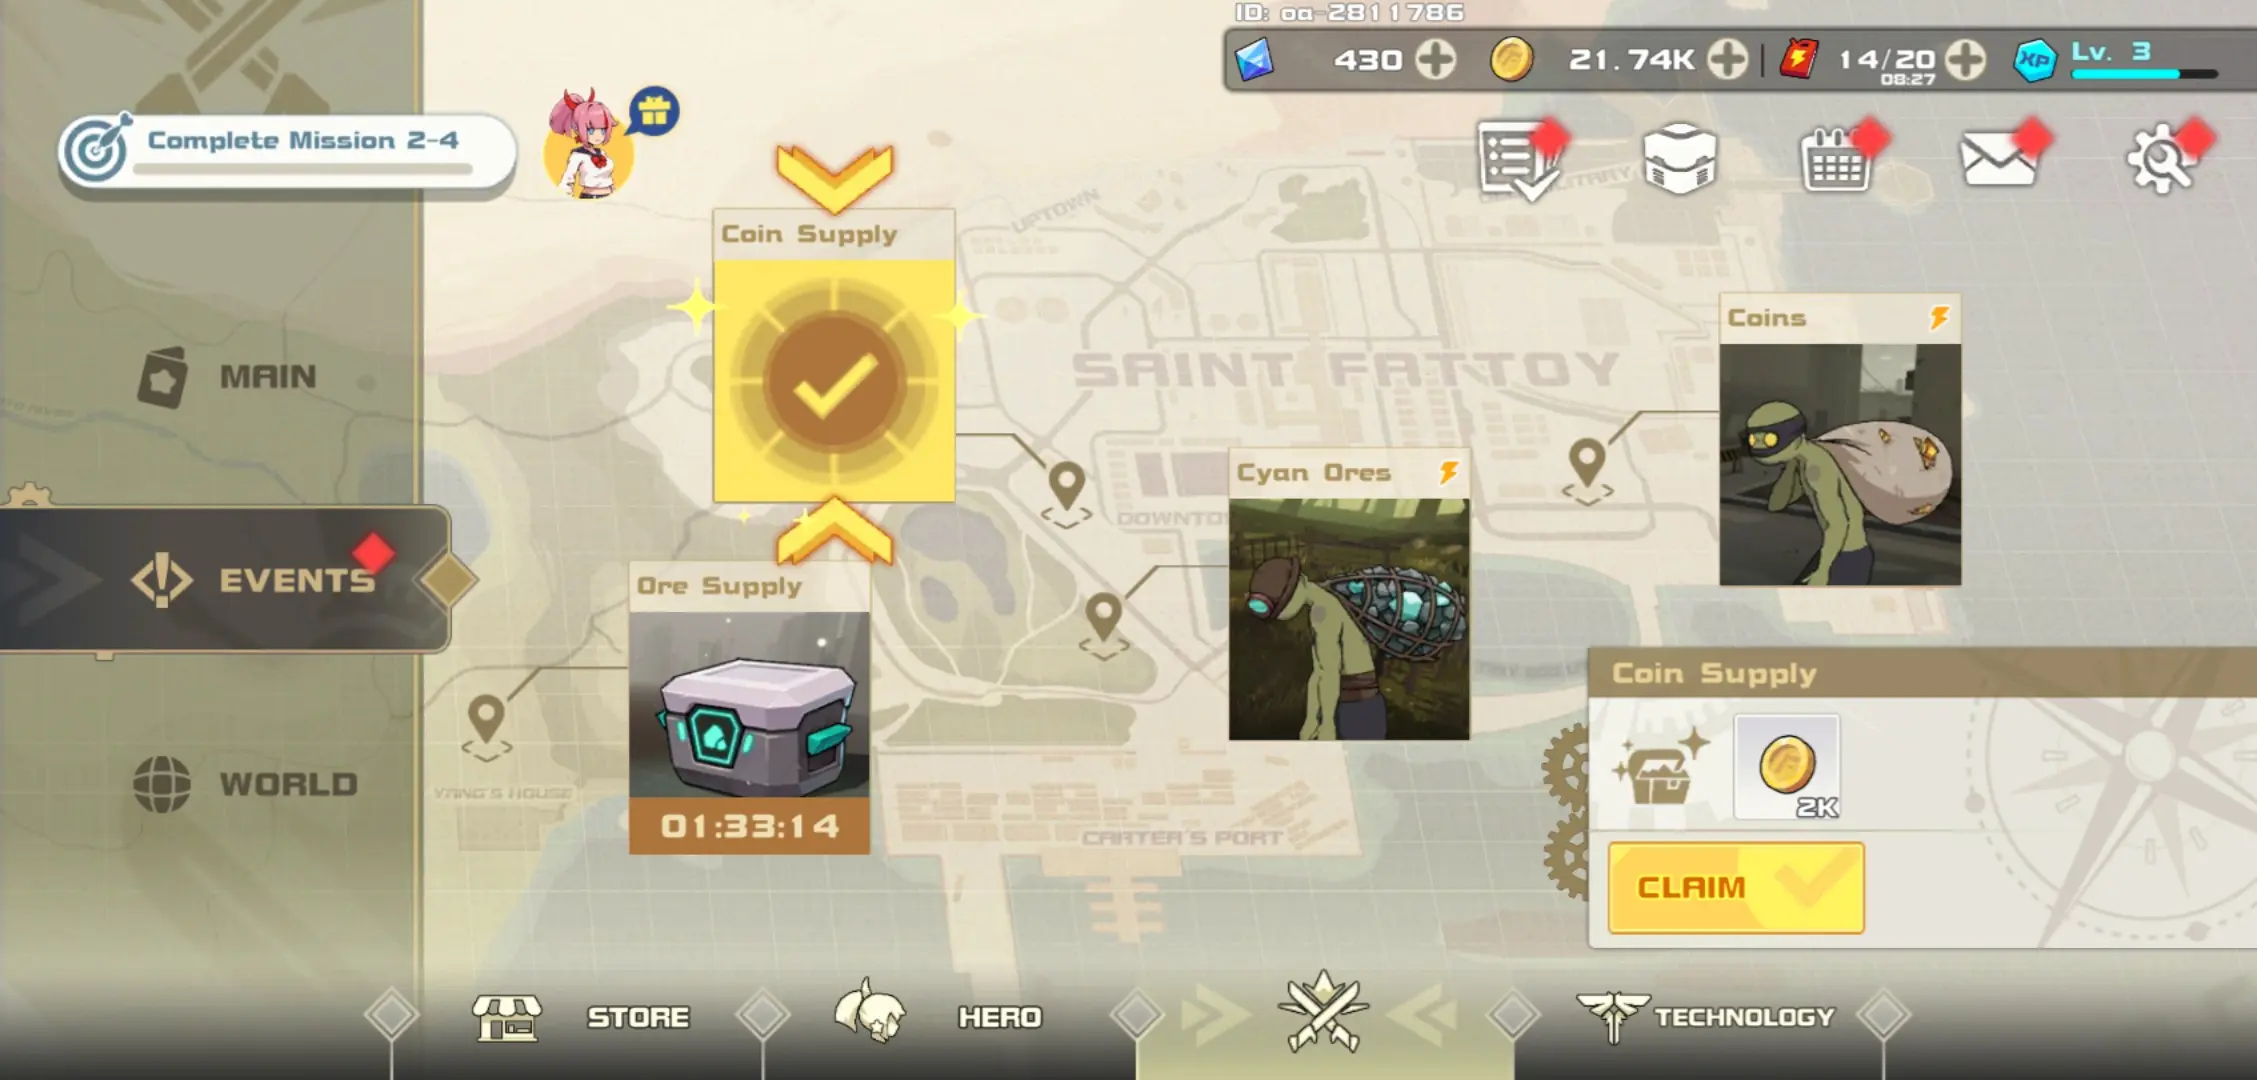
In the Adventure menu, you will see on the left side of the screen, a couple of categories: Main, Events, and World. Main would be the Main Missions which follow an episodic storyline. You’ll fight through ruined towns, contaminated forests, and other maps. The Event Missions are where you can get your coin and Cyan Ore supply. These refresh after a span of time.
If you wish to add to the amount of gold or Cyan Ore you receive from this, you may attempt the special missions wherein the zombies hoard either resources. If you run out of time and fail to kill all the zombies, you still get to keep what they’ve dropped. You just earn more if you manage to kill them all.
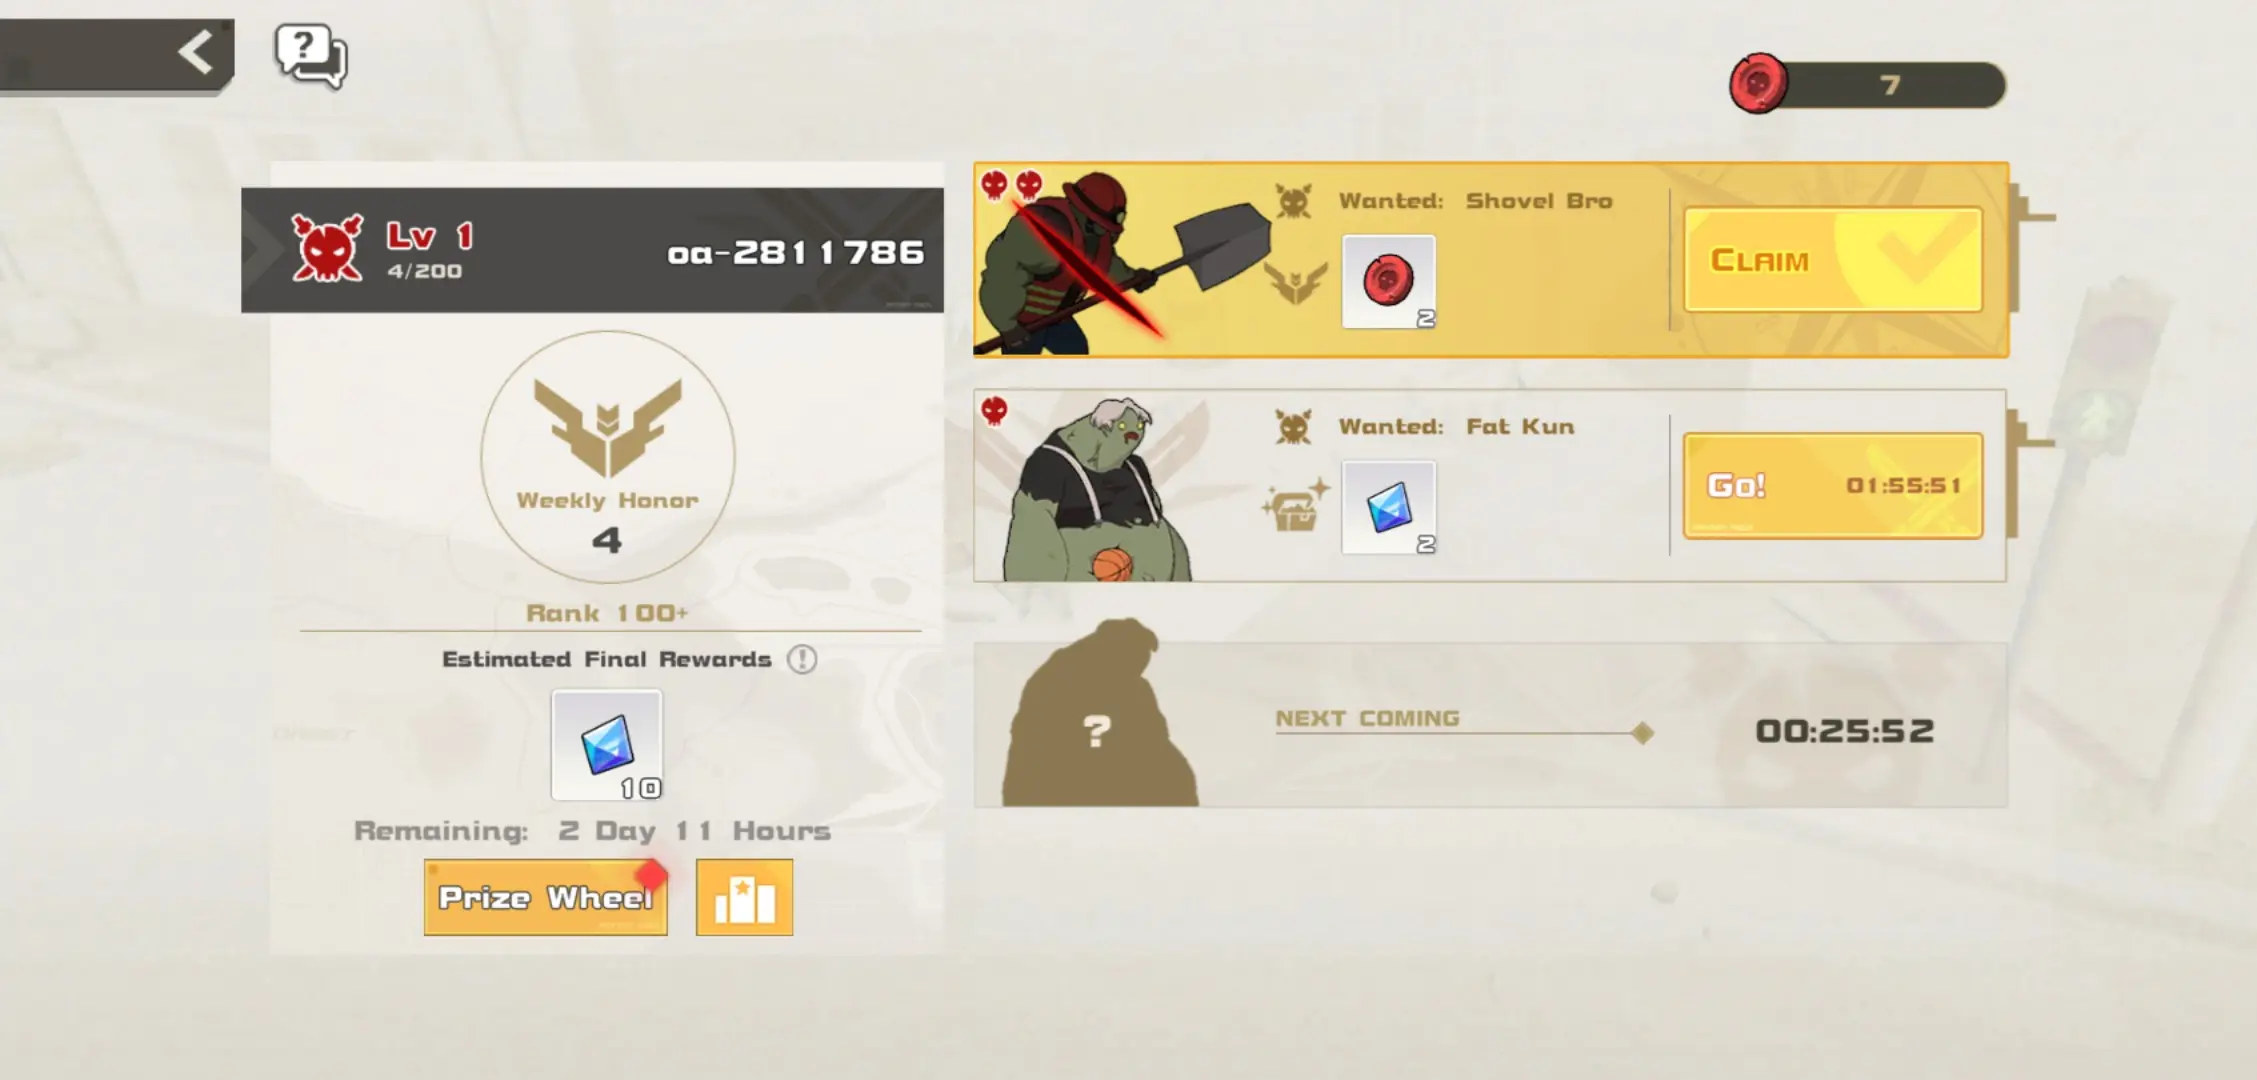
Under the World Missions tab, you’ll be able to play the Hunting Zone and the Endless Tower. The Hunting Zone allows you to kill bosses you have previously encountered. Killing them will earn you Honor, which will make you rise through a leaderboard.
The higher your Honor, the better your prizes. You can also earn tokens for the Prize Wheel which may grant you tickets, XP Capsules and more. There is a catch to fighting these bosses, however: you only get to have 1 skill. Pick wisely! Upon winning against any of the bosses here, your rewards could range from gems, to gear coupons, to both. Get grinding!
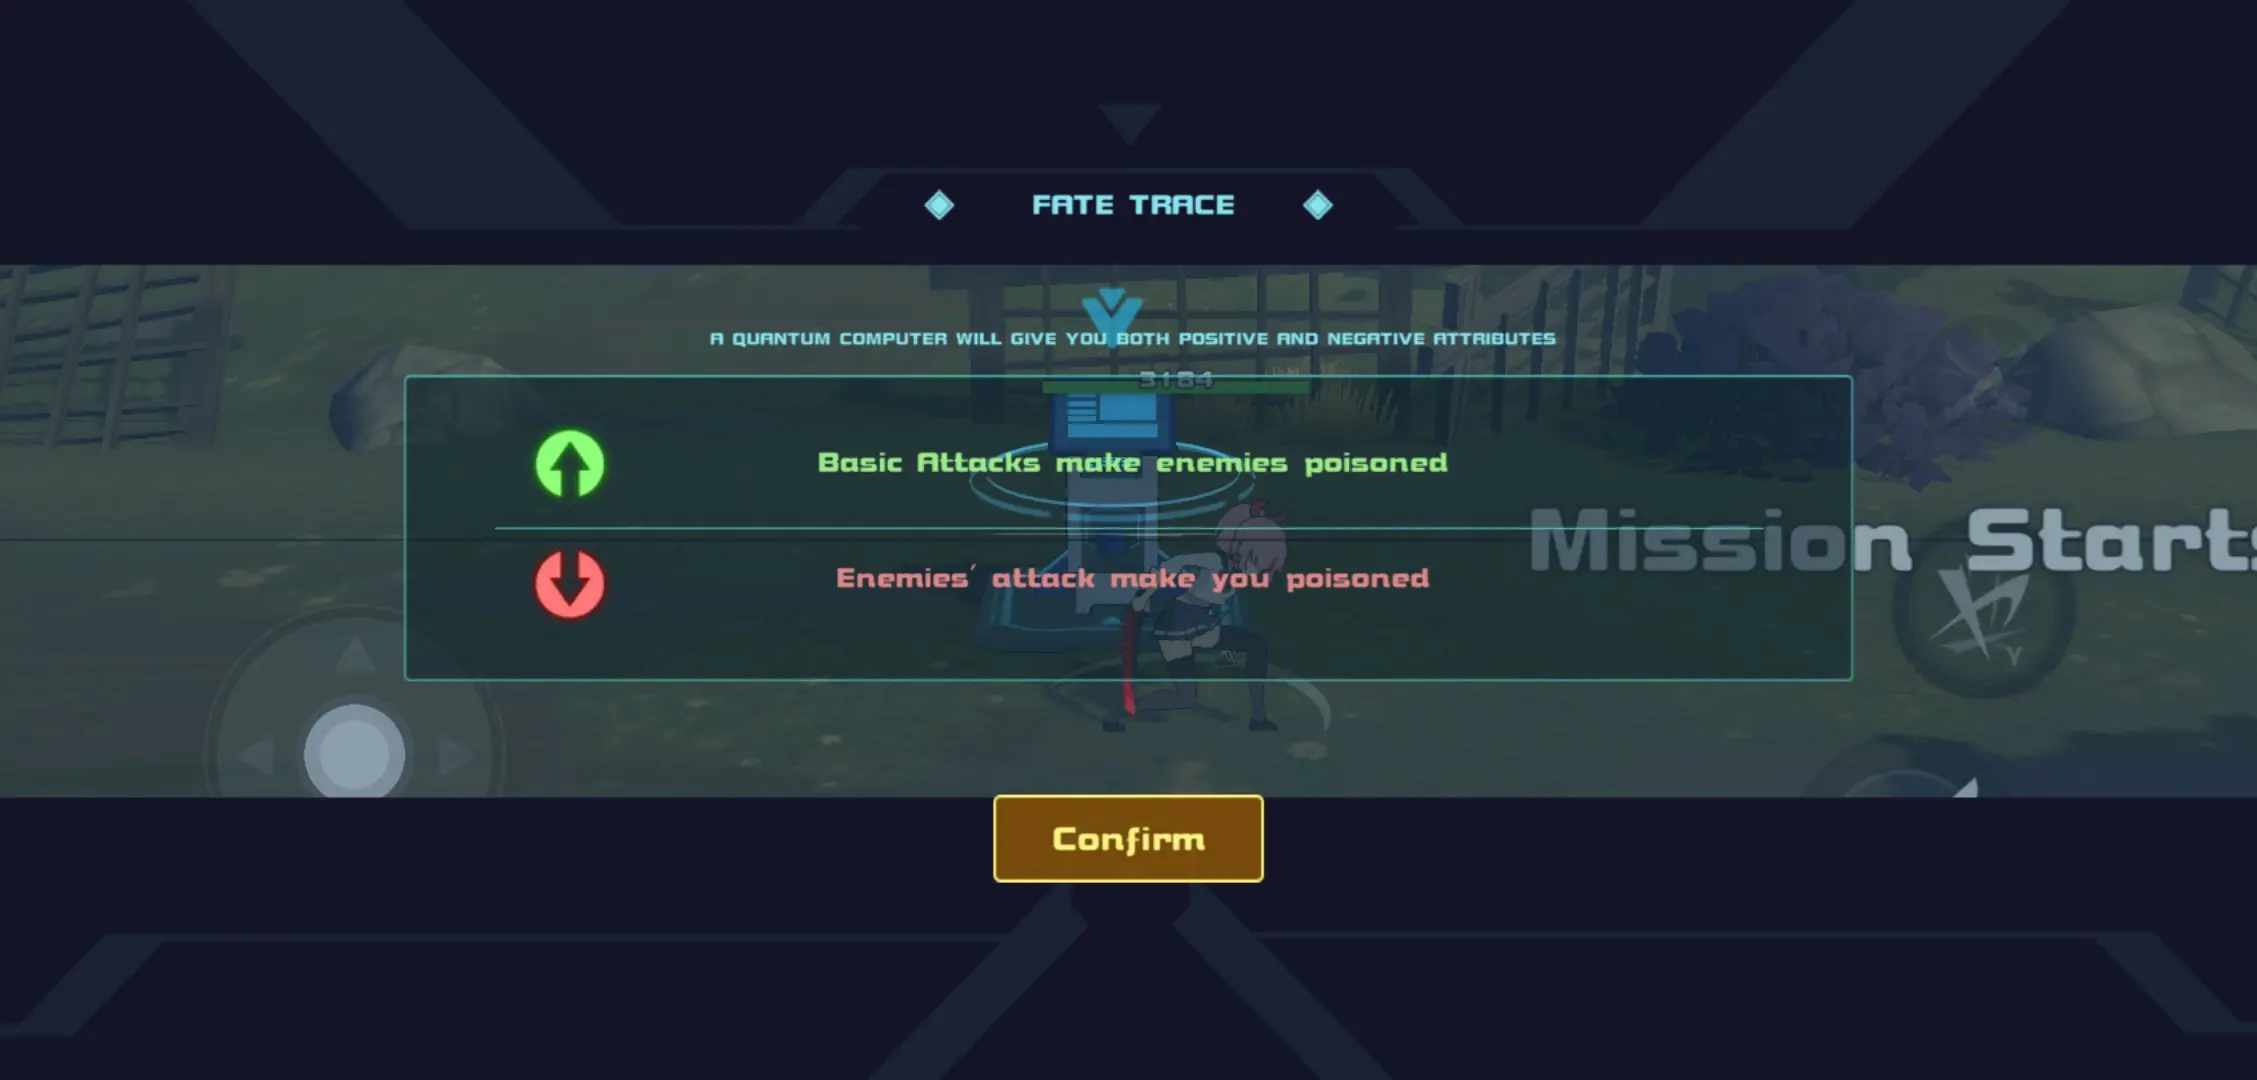
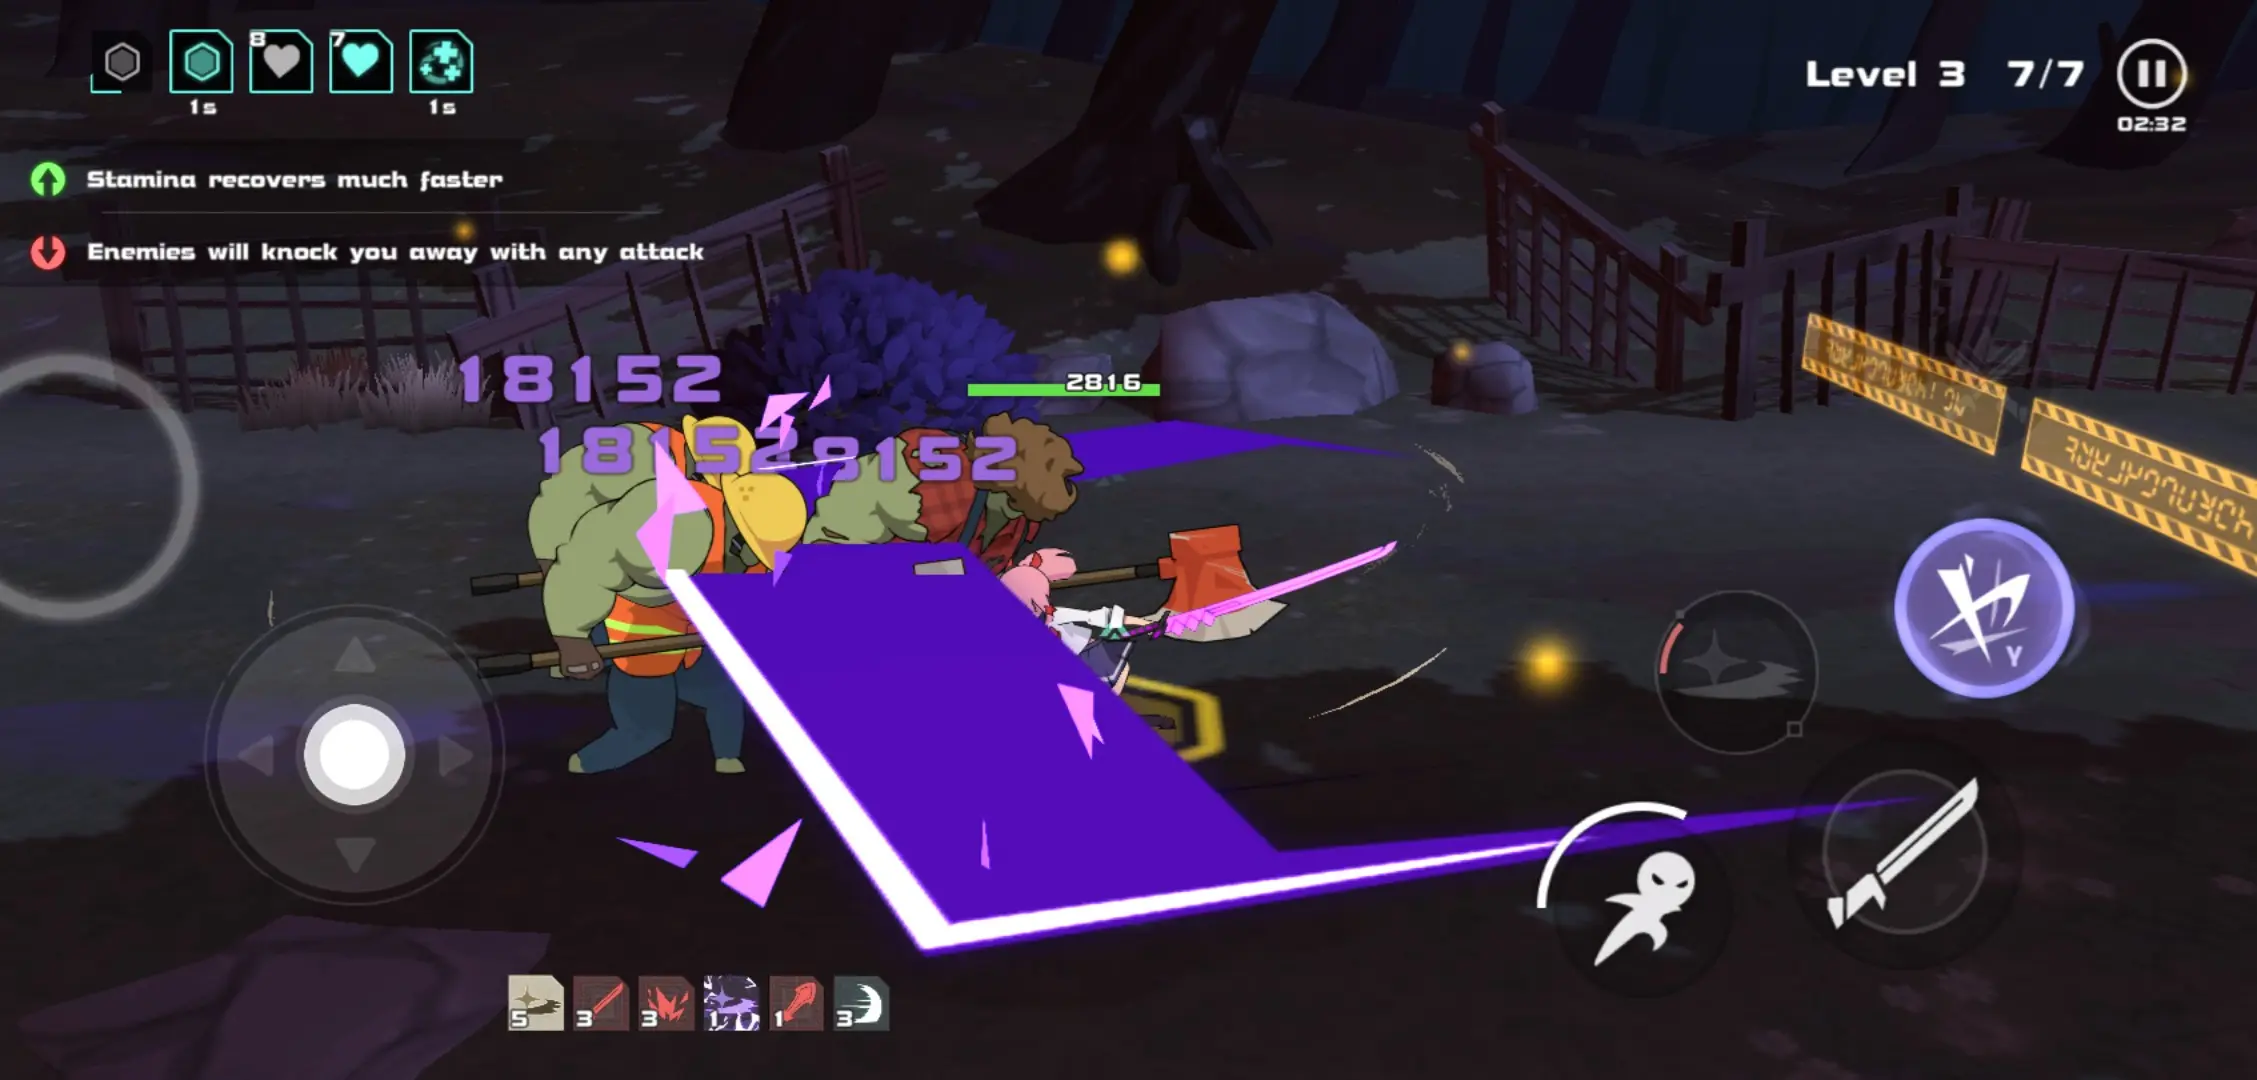
Meanwhile, the Endless Tower is a test of survival and endurance. As soon as you begin a floor, you’ll have to activate the Fate Tracer which will give you a buff and a corresponding debuff to up the challenge. You will also receive more skills to pull each time you complete a wave. Reach the end of a wave and the floor will be completed.
As you climb higher and higher, the enemies will become stronger and, if you aren’t careful, Sanny could get hurt. You may have to heal her using the medkits that the floors come with. Completing Endless Tower floors will earn you Endless Medals which you can spend in the Endless Tower Shop. This shop sells a variety of goodies needed to also improve Sanny’s gear.
One thing you might quickly notice about Swordash in general is that it has ads. These are important, too!
10. Watch Ads for Bonus Rewards
Advertisements—extremely annoying or mildly entertaining?
We’ve seen them all before: ads having players with questionable IQ trying to complete a level, ridiculous choices that could instantly change a character’s life, badly-voiced ads about the hottest MMORPG to hit the market where you’ll get 100 free draws and a legendary hero—regardless of their type, ads will always be here and they’ll be everywhere in many mobile games.
Fortunately, most mobile games have this as an option and they aren’t forced down your throat every few seconds. Swordash is one of the few games that allow the player to view these ad will (see what we did there?).
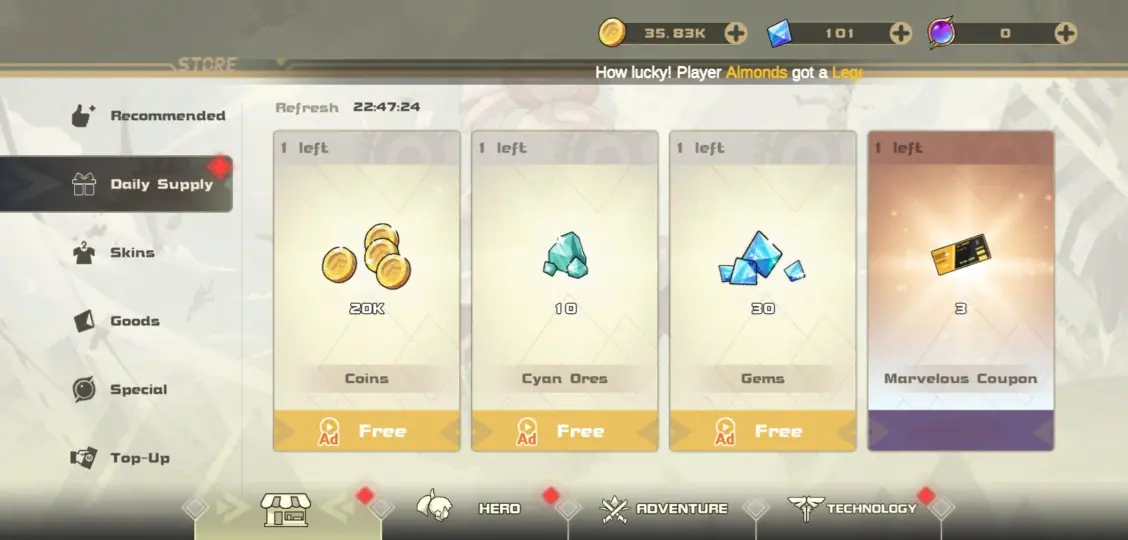
Ads are a good thing. Watching them will give you, the player, extra rewards upon watching them. If anything, in the screenshot, you get these items for free if you decide to watch the ads for them. Consider this a short break from fighting all those zombie hordes. In other words, you’ll also have the gas regenerate so Sanny could be transported around the mission areas.
Additionally, you’ll also support the developers indirectly this way. If you don’t have money to spend on Swordash and you really like this game, you may watch ads in support of the developers since these ads are monetized. Naturally, if you want to buy anything from this game, you may send the developers your love at your own discretion. Regardless, ads are a win-win for both player and developer in this sense.
Swordash is a fast-paced and frantic hack n’ slash full of challenges at every turn. Apart from having actual skill while making Sanny fight, there is also the task of grinding for your upgrades. Don’t lose heart—the climb is constant and you’ll only want the best for your school uniform-clas swordswoman. While each challenge may overwhelm the player, just try to remember the few things you’ve learned in this guide:
- Don’t chase after 3 stars early on. This will only be a waste of gas—you could spend gas trying to unlock more content.
- Time your dodges according to enemy attacks. When you see them raise their arms or their weapon, dodge and strike back where they’re vulnerable.
- In any mission, thin out the enemy herd as quickly as you can. You don’t want to get caught in the middle of a bunch of zombies trying to eat you alive.
- Elemental Damage makes all the difference. Use it whenever possible.
- Early on, don’t fuss over your Ult so much since it will underperform. You’d be better off using it when you have a better Ult Disk equipped. Once you have one, save it for the boss or if the map gets too populated.
- Build up the Execution Meter through basic attacks. Be careful, this could take a while. It pays off in the end!
- Sanny and her gear need to be constantly improved in order to ensure better survivability. Take advantage of this when you have coin, Cyan Ores, and XP Capsules to spare.
- Open loot crates for better gear. You’ll need this later on, especially because you have the chance to receive Legendary gear.
- Missions other than the ones under the Main Mission tab will give you extra material. Challenge them frequently to get extra rewards to help upgrade Sanny’s gear.
- Ads are a good thing! Watch them and receive bonus prizes.
This concludes our beginner’s guide for Swordash by FATTOY. Buckle up and get ready to slice through walls of rotten flesh—Sanny’s out to help restore the fallen world and she’ll do it one zombie army at a time!
Are you an experienced Swordash player? Have you gotten the best equipment in the game so far? Are there any techniques that you know that we haven’t mentioned in this guide? Shoot us your thoughts in the comment section!
Cristian
Sunday 9th of November 2025
Great guide, very useful! It would be fantastic to have one about the technologies in the game, since I've searched and haven't found any information on some technologies that don't exactly explain what they do, and they're the most expensive ones, like Pure Path and those T.C.O. skills, which I honestly don't even know what those initials mean 😂. A guide about that kind of thing would be great.
Anthony
Saturday 15th of February 2025
There is a technique, which I don't know if you know, but when you die you have to be quick to pause and close the game, so when you re-enter the game it starts again before dying, it's like spawning without spending gems or anything.
None
Friday 14th of February 2025
What is the purpose of the technology?
MrNobody
Monday 2nd of September 2024
That's excellent writing right there and the guide was very helpful, thank you.