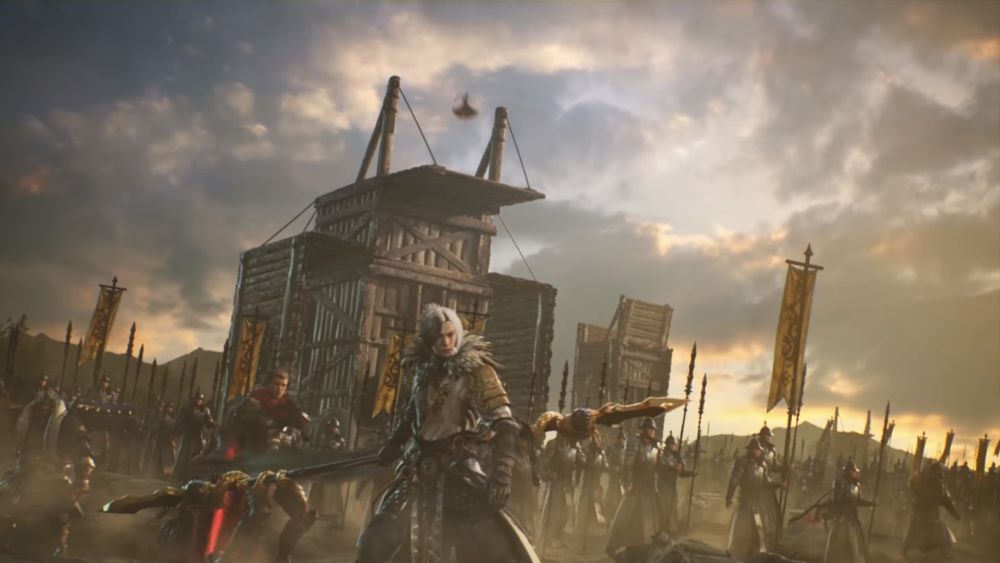
Wemade’s ground-breaking NFT MMORPG, MIR4, maintains its strong force of attracting new players while keeping current ones across each of its servers. With servers constantly being marked busy almost all the time, first time players are bound to wonder about just how much activity goes on within MIR4’s massive open worlds to maintain its high level of activity. Beyond its top quality graphics and stylish, action-packed combat scenarios, MIR4’s herculean offerings make it a challenge for players to leave its world once they dive in.
If you have just started your adventure in the world of MIR4 and still at the starting line of understanding the core concepts and basic features it offers, we strongly recommend that you go through our MIR4 Beginner’s Guide first as it contains many useful tips and strategies you will need to get a head start on your long and challenging journey.
Although we already gave a brief introduction of each character class in our beginner’s guide, our dedicated Class Tier List provides a more extensive coverage of each character class’ strengths and limitations. Our tier list ranks each character class based on our perception of each one’s performances in PvE and PvP content, in general. In case you are wondering, how you can farm for resources fast and efficiently in the game, then be sure to check out our detailed Farming Guide as well.
Now, in this new guide we will be diving a little deeper into some of the mechanics in MIR4, most particularly the ones we have not tackled in our previous guides. Given the plethora of features and mechanics to dive into in MIR4, no single guide can simply cover its entirety in one go. While the issues we covered in the beginner’s guide are relatively easy to pick up for complete newbies, we feel that a little time in-game is needed to better understand the concepts we will discuss in this article.
1. Master The PvP And Karma System
One thing every beginner will instantly notice as they dive into the world of MIR4 is that there are plenty of other players almost every area you visit or pass through. Whether the quest at hand requires you to slay a certain number of enemies or gather a certain amount of resources, you will most likely never be alone in any of these areas. The auto mode on missions as well as both the auto battle and auto gather features make a lot of the farming and grinding extra easy and very convenient, there are also big challenges and risks that come with idle farming and grinding.
MMORPGs have always been home to a variety of offerings that enable more interaction between its players. MIR4 provides plenty of quests to take on for solo players and also has a plethora of adventures lined up for teams and alliances to take on. Where there are cooperative modes, you can certainly expect a chunk of competitive gameplay involved and your adventures within the world of MIR4 can be a predominantly PvP experience given that a lot of the areas in the open world map are open to it.

One thing you may need to set up is your PvP Mode, which can be changed when you click on your character status at the upper left side of the screen. Your PvP mode is set to Peaceful by default, which means auto mode will not have your character attack any other player even if they attack you first. Lawful Mode enables auto mode to automatically attack players with a bad or worse alignment, except fellow party members, fellow clan members, and your friends.
Hostile Mode lets you attack everyone regardless of PvP status, except party members, clan members, and friends while Carnal Mode lets you attack almost everyone save those currently in your party. Regardless of your selected PvP Mode, you can always attack players belonging to warring clans and players on the most wanted list. This mode can also be changed at any time.
As you will naturally be engaged in PvP throughout your adventure in MIR4, it is important to keep tabs on your PvP status, which is basically dependent on the propensity points you earn or lose. Every player basically starts with 0 propensity points and have a Normal PvP status.
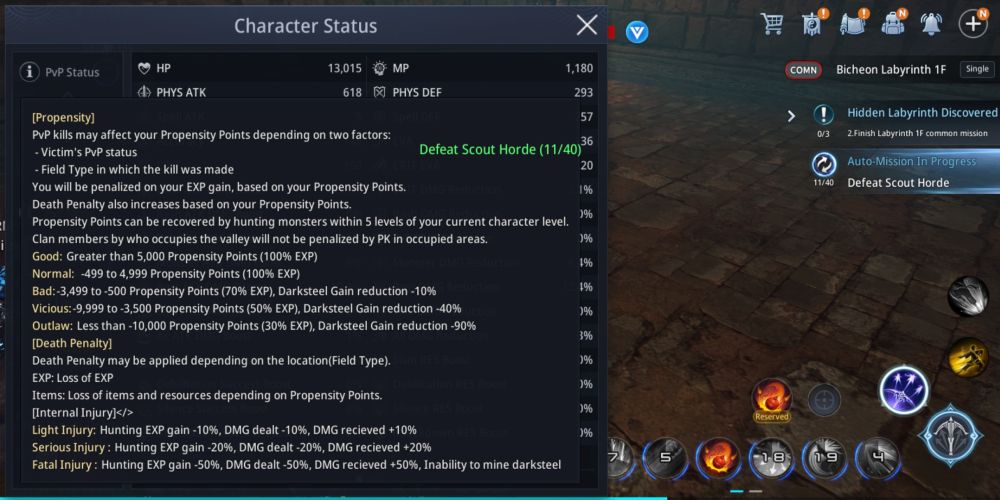
Killing monsters within 5 levels of your current level will recover propensity points lost. PvP kills, however, can negatively impact your propensity points, depending on the victim’s PvP status as well as the field type in which the kill was made. Propensity points do not go over 0 for killing monsters.
Earning at least 5,000 propensity points leads to earning a “Good” PvP status, which is pretty much like Normal Status, which ranges from -499 to 4,999 propensity points. Bringing down propensity points to -500 up to -3,499 and having a “Bad” PvP status starts to impose penalties on your character, reducing EXP earned by 30% and Dark Steel gains by 10%.
Losing more propensity points and having -3,500 to -9,999 brands you as “Vicious”, earning 5% less EXP and 40% less Darksteel gains. Lastly, amassing -10,000 propensity points and beyond makes you an Outlaw, imposing a 70% reduction in EXP you earn and 90% reduction in Darksteel you gain.
2. Be Wary Of Death Penalties
Most modern MMORPGs in mobile, and RPGs in general, would typically let players plow through a lot of the content with ease and convenience in that actually getting your character killed takes a long while for anyone to experience.
We hardly consider including topics about character deaths in most guides as it is inconsequential for the most part. In MIR4, however, there are death penalties that you should be wary of as knowing all the mechanics surrounding death should definitely make everyone be more careful with everything they do.
It is still smooth sailing on the first few hours of your adventure within the world of MIR4. Once you hit level 20, though, things become a little more serious and you would want to be a lot more careful with your adventures. With auto mode, power saver farming, auto missions, and all other conveniences at the palm of your hands, you should begin to consider the risks involved in leaving your character to stay active while you are away.
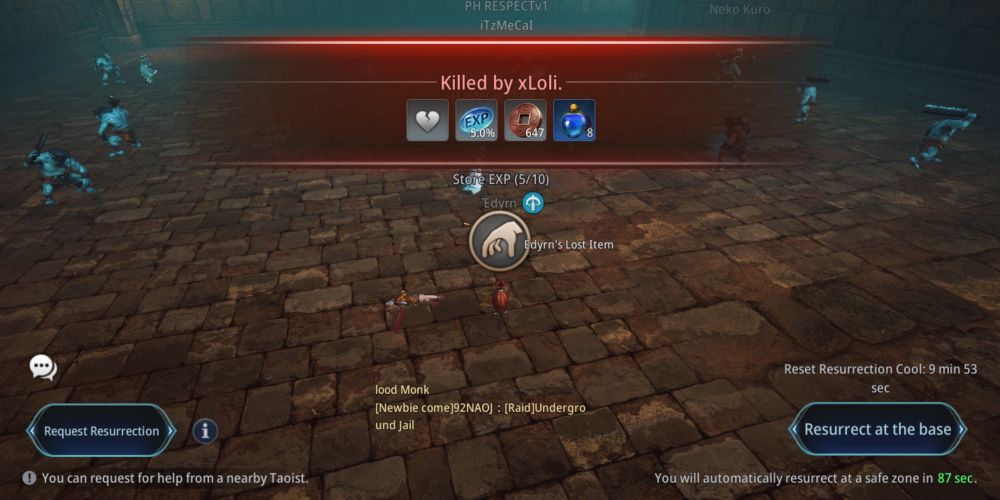
Getting killed my monsters or by other players can be very painful especially considering the penalties that come with it. Although a Taoist can resurrect you and that there is auto resurrection after a cooldown period, the most probable way of being able to return to battle will come with a teleportation to the nearest town.
When it comes to hunting mobs of monsters, there will be plenty of scenarios where you may misjudge the difficulty of the area. Monsters may have levels lower than you and there may also be several players farming in the area. What you need to consider, though, is if you can successfully survive mobs of those monsters if you were left relatively alone to deal with them.
This can lead to your character dying when you choose to leave them in auto mode. Before you do, moving forward, make sure that your character can withstand and take on plenty of mobs in the area where you plan on farming.
As far as PvP battles are concerned, there is just no guarantee that a player will be prevented from killing you unless it is in a safe zone. You can expect that a world as big as what MIR4 offers will certainly hold its own share of players who enjoy engaging in PvP or PK more than the usual. Having a bad or lower PvP status certainly makes you an attractive target, so idle farming should be out of the question.
Despite having a normal or good status, however, does not make you immune to being slain by some players. Besides some players’ idea of crazy fun, keep in mind that there are also players who utilize numerous accounts and can afford to have some of their characters earn a nasty reputation.
Regardless of whether mobs of monsters or other players kill you, you can lose EXP as well as chance of losing some items and currency each time you die. Dying often will also lengthen the cool down period of the auto resurrection.
In some areas as well, internal injuries add up to the host of negative effects you can experience for dying. Note that there are also areas in the map where you can fall off and die. Auto travels will never lead you into one but be very careful when manually travelling.
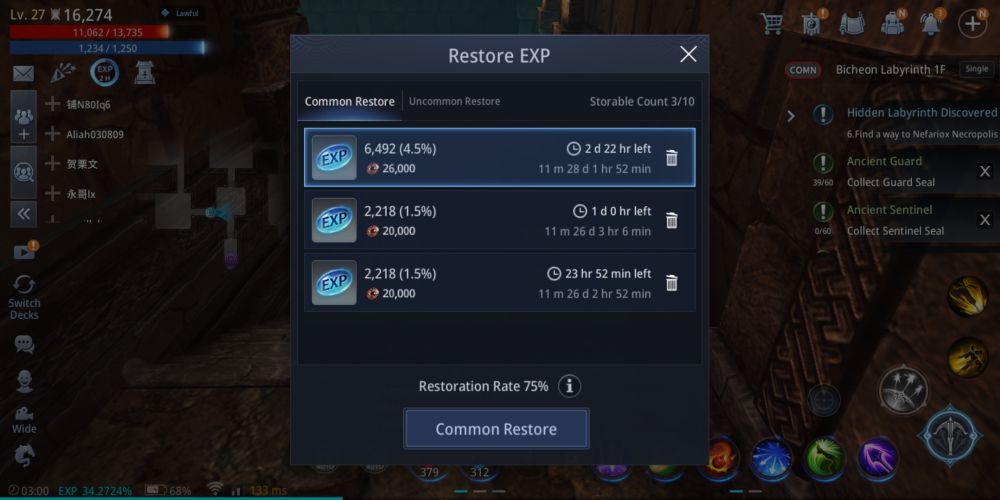
There is a recovery system for injuries as well as the EXP and items you lose after dying. By clicking on the fourth icon at the upper left side of your screen, you will be presented with option of recovering from injuries and retrieving some lost XP. For the items, though, what is provided is an auto travel to where you dropped your items. There is a limited period of time within which you can nab your items.
3. Always Be Conscious Of The Area Type You Are In
We have already established just how huge MIR4’s world is and just how plenty it can offer. Considering the enormity of its open world and the plethora of features it has, players, most especially beginners, are most likely not able to notice area properties and how each one may affect gameplay.
Every bit of land in MIR4 has a property that impacts PK, death penalties, and propensity points. You can see the area property of the place you are in at the upper right side of the screen and clicking on the area property can give you a description of what each one holds.
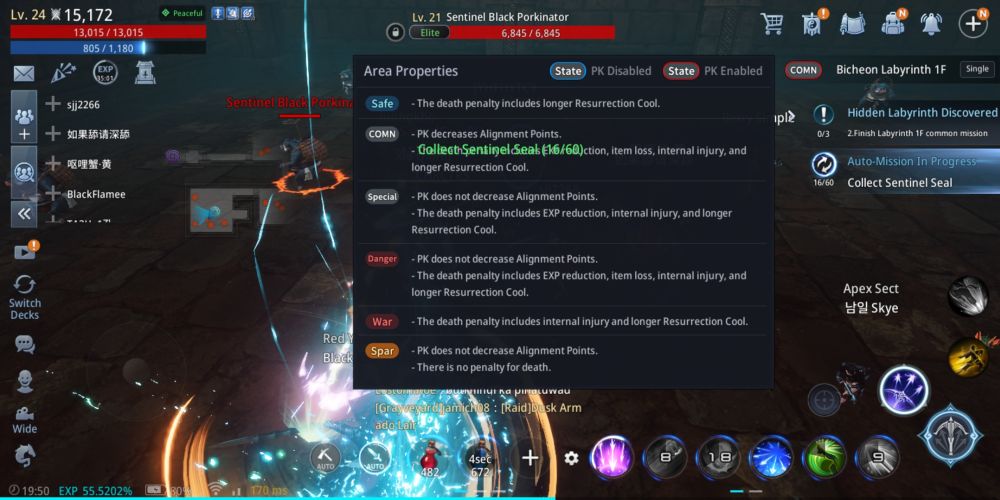
Towns are expectedly safe zones where PK is disabled but will affect resurrection cool downs as well in the event that you perish within one. Most areas outside of dungeons are Common Areas and PK can transpire in these locations. Loss or increase of propensity points apply in common areas. Death will increase cool down period for revival and you can lose items and EXP in common areas as well. Special Areas work very much like Common Areas except PK in these areas do not affect propensity or alignment points.
Areas marked as “Danger” Areas has all the same effects that apply in Special Areas. The “danger” part actually applies to the kind of items you can lose in these areas as it may be more severe. All is fair in War Areas and the only things you need to worry about for dying in these areas are internal injuries and longer resurrection times.
Last, but not the least, are Sparring Areas. These areas work more like real-time arenas where you can always test your might against another player. There are no effects on propensity points here and there are also no penalties for dying in these types of areas.
4. Fill Up The Codex As Much As You Can
MIR4 sets players up for a massive world with a plethora of items to gather and use to strengthen their character as well as amass resources to purchase necessities and other useful items and gears for their adventures. It is undeniable that players who dive into the world of MIR4 certainly expect a lot of hours to farm and grind.
Beyond all the usual items you can either equip or utilize directly, however, items needed to make progress in the Codex is something that should be focused on to some degree, as the perks it provides your characters can positively impact your performance moving forward with your adventure.
You can access the Codex from the main menu and it is among the earliest features that becomes available for players. The Codex basically works like a milestone record of sorts, where you need to deposit various kinds of items to unlock stat boosts for either your character, or all characters in your account.
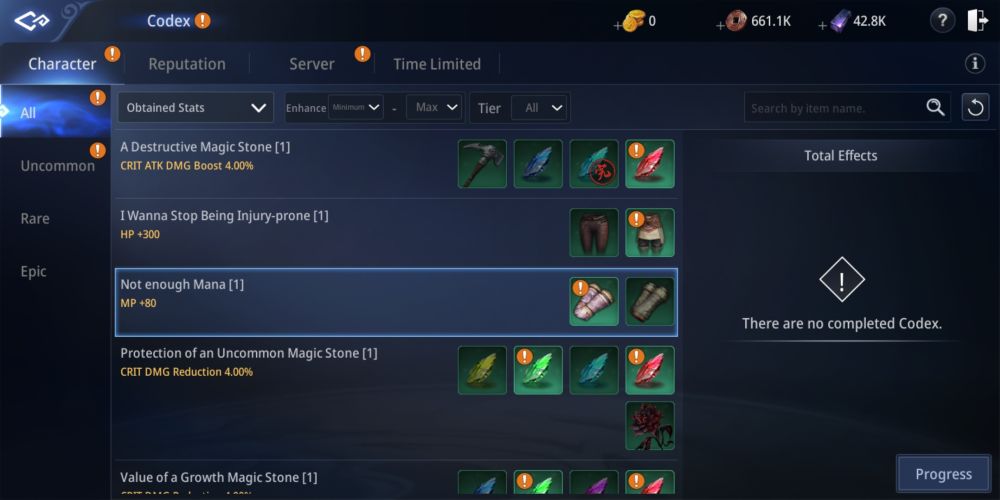
Deposited items will of course vanish from your inventory and will never be returned but, the perks you get out of the small sacrifices are certainly worth it each time. The Codex is divided across 4 separate tabs: Character, Reputation, Server, and Time Limited. Only the items listed under the “Server” tab have perks that apply to all your characters. Not that the “Time Limited” tab holds temporary buffs as well.
With the Character tab of Codex housing a lot of the most basic items you will have more than enough of, be sure to try and complete sets and earn the perks as soon as you can. It may be best to hold off on some items you will need immediately but if you can complete a set and earn the effects immediately, we recommend going for it.
Gears you need to register can always be crafted, while resource materials such as magic stones can be traced as to their sources. The Codex will always show indicators if you have items available that can be deposited in but, again, we recommend going for it with a complete set in hand to readily reap the effects.
5. Do Not Throw Away Obsolete Gears
We mentioned in our beginner’s guide that you should always go for the push when it comes to performing upgrades and while upgrades relating to gears and equipment means sacrificing some gears to obtain higher tier ones via crafting, it does not necessarily make obsolete gears devoid of any value.
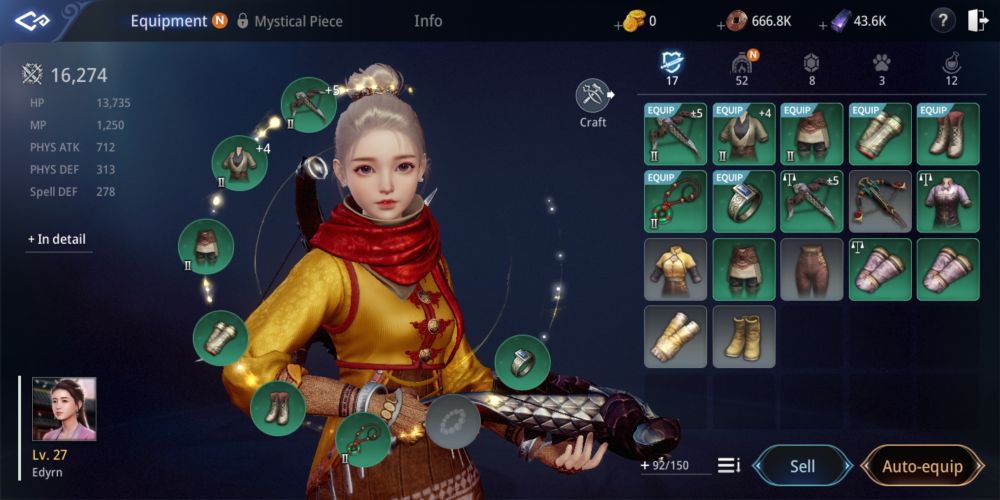
Of course, there is always the Codex where you can deposit some gears and unbound upgraded ones can be sold off at the market. Beyond all that, there are practically limitless needs for you to keep all obsolete gears in your bag.
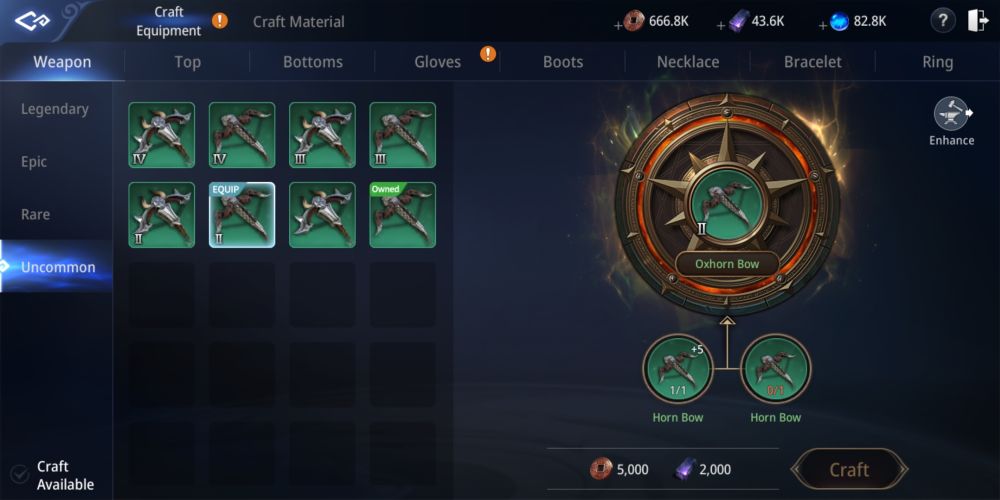
The basic idea covering any piece of gear is that while the most basic ones are crafted using various crafting materials, higher tier ones are borne of 2 copies of their lower tier versions. With several tiers up the ladder, you can expect to need an abundance of even the base form of each equipment before you can reach having a high enough tier. In this sense, it is always worth it to keep any kind of gear with you for upgrade purposes, with market sales coming in at a close second.
Although we recommend pushing for gear enhancements as well, it must be noted that only enhancement levels up to +5 are guaranteed. There is a chance to fail in enhancement going to +6 and beyond although failure will not cause any enhancement level reduction or so, losing enhancement materials are the exclusive penalty.
Keep in mind, however, that failure in enhancing while in a danger zone can lead to the gear or equipment being destroyed. So, again, always be conscious of the area properties your hero is in.
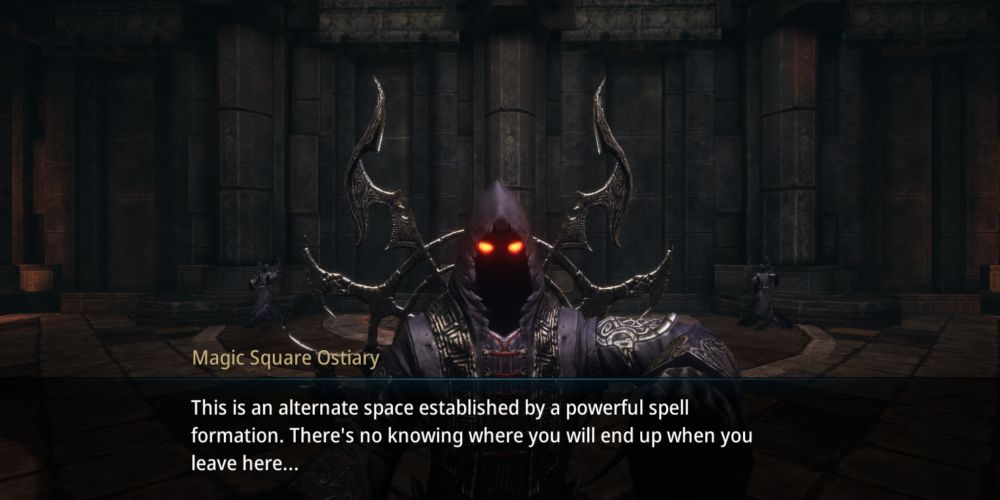
6. Take Full Advantage Of The Magic Square
When you have completed all the Labyrinth 1F missions and progressed through the next main objective, you will unlock one of the most exciting dungeon modes in MIR4. The Magic Square is a special zone of sorts, separate from the rest of the world in MIR4, where you can farm more efficiently for what you currently need the most.
Once available for you, you can access the Magic Square via the Portal icon on the main menu. Once inside, you will be greeted by the Magic Square’s lobby where NPCs are available to give you a brief introduction as well as trade some of the loots you can earn across any of its chambers.
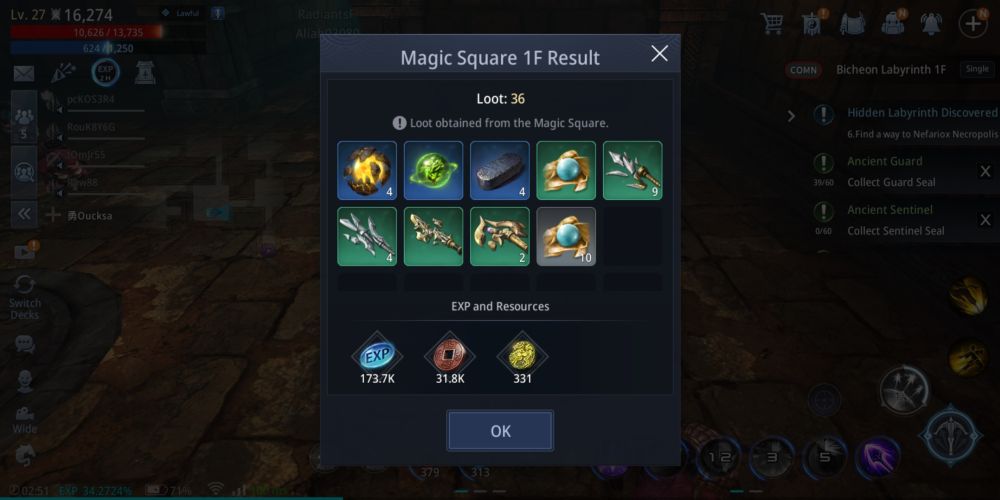
Players have 2 magic square tickets each day with each one granting entry to the Magic Square for 30 minutes. These tickets reset each day, meaning that players will have 2 tickets the following day regardless of whether or not they consumed today’s tickets. The Magic Square is composed of various chambers, each offering specific rewards like EXP, copper, Darksteel, Magic Stones, and more.
Once inside the Magic Square, a portal icon will appear at the upper right side of your screen and you can tap on it to be randomly transported into one of the numerous chambers. Just like common areas in MIR4, it is always a good idea to join parties within the Magic Square and be wary of players who might revel too much in PvP.

Within any room inside the Magic Square, you can check the “I” icon at the upper right side of the screen. This will show you a full list of all the available chambers within the Magic Square floor you are in as well as the chance you will move into any of them when you click the portal button. Note that chambers within the magic square that leaves a lower chance of warping into can be the ones that are more in demand. Likewise, though, these are the ones that are more dangerous as well.
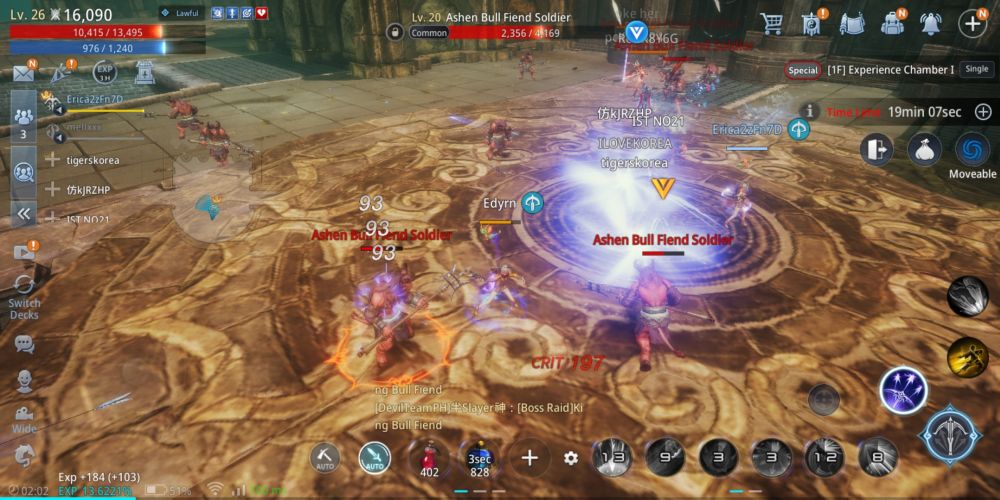
The Magic Square resembles normal dungeons in that it is subdivided into floors. You can expect higher floors to have more challenging enemies and better rewards but you can see the recommended Power Score or PS before choosing the floor to farm in. It is recommended that you establish an end in mind before heading into the Magic Square.
2 tickets per day leaves you with only an hour to revel in what it has to offer so every moment counts. You may want to consider checking your inventory and needs before expending your Magic Square tickets as purchasing extra ones cost gold.
MIR4 certainly has plenty more of features and content waiting to be discovered as well as ones that will be added in future updates. For now, this is where we wrap up our MIR4 Advanced Guide and we hope that you learned a great deal from the extra tips and strategies we shared. There are most certainly players out there who have invested more hours into MIR4 than we did and if you happen to be one of them who also has some nifty tricks and strategies to share, do leave us one or a couple down in the comment area!