LifeAfter is an exciting survival game from NetEase, that is set in a post-apocalyptic world full of zombies. These zombies are called the Infected. Your character is one of the few remaining humans who have managed to escape the infection. In order to rebuild society, you must work together with other survivors in killing off the Infected and reclaiming territory.
To achieve this, you must learn various life skills that include gathering, crafting, and combat. There are a ton of things you can craft in this game, including weapons, armor, food, building materials, and most importantly, drones. These drones are similar to the ones you fly using your iPad, only they are beefed up with modifications that will help you survive in the wild. There are a lot of benefits in having a drone with you, but it takes a lot of work to get one. Check out our LifeAfter drone guide below if you want to get your hands on one.
1. Know Your Drones
There are five types of drones available in LifeAfter. You have two drone slots available when you first get your hangar and you can spend gold bars to unlock four additional slots. That means you can have up to six drones with you. Drones, however, require a lot of resources to assemble, so you won’t really need all those six slots right away. In fact, it will take you a while to get your first one. That is why you should know the type of drone you want before you go ahead and invest resources on it. Check out the list below for the different types of drones and what they are for.
Basic Drone – This is the first drone available to you. You will be able to learn all the formulas needed for the basic drone for free. The catch is it’s actually a very weak drone that is hardly worth the resources you spend to make it. Skip this one if you can afford to unlock the other drones.
Carrier Drone: This drone has inventory slots that you can use to carry resources. It’s great to have one or two of these when you’re gathering resources as you can store multiple stacks of items before you need to go back to the Postman. You can also store extra weapons, tools, and bandages here.
Healing Drone: As the name suggests, this drone automatically heals you. It’s a good support option, especially when you’re running around on your own. Just release it and it will heal you whenever you are damaged. You can only have one drone out at a time, so consider if you want a defensive drone like this, or an offensive one like the Basic or Combat drones.
Combat Drone: This is the most coveted drone in the game because it dishes out massive damage with its bombs. You can easily decimate structures during raids or take out multiple Infected. It’s also the go-to drone of players who like PVP.
Self-Destruct Drone: This is probably the worst possible drone you can build. It’s even worse than the Basic drone because all it does is self-destruct. Yes, it will deal a ton of damage, but after that, it’s gone. You just threw away a lot of rare resources for a one-time boom. Avoid this at all costs!
2. Upgrade To Manor 6

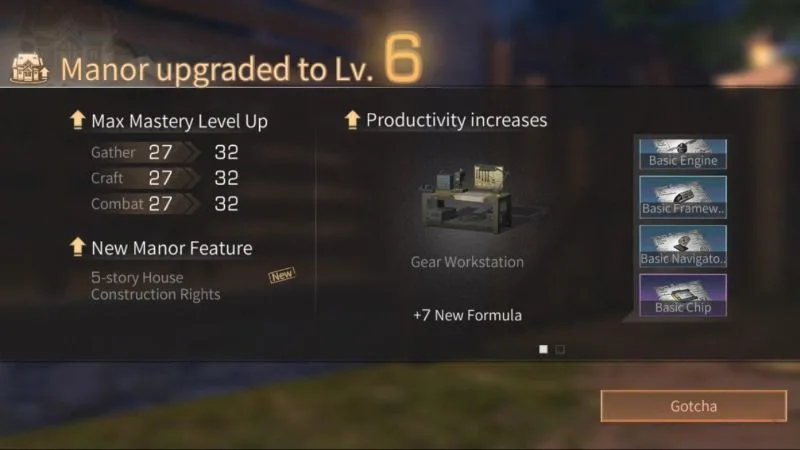
We mentioned earlier that you will get all the formula for the Basic Drone for free. This happens when you unlock the Module Crafting option in your Gear Workstation. This will automatically be unlocked when you reach Manor level 6. To upgrade your Manor, just go to the Controller outside your house, near the Mailbox then tap on the Upgrade menu. You will see the list of resources needed for the upgrade as well as the required levels for Gathering, Crafting, and Combat abilities. Once you have all the requirements, just tap on the button at the bottom to proceed with the upgrade.
Related: LifeAfter Manor Renovation Guide: Everything You Need to Know
3. Building The Drone

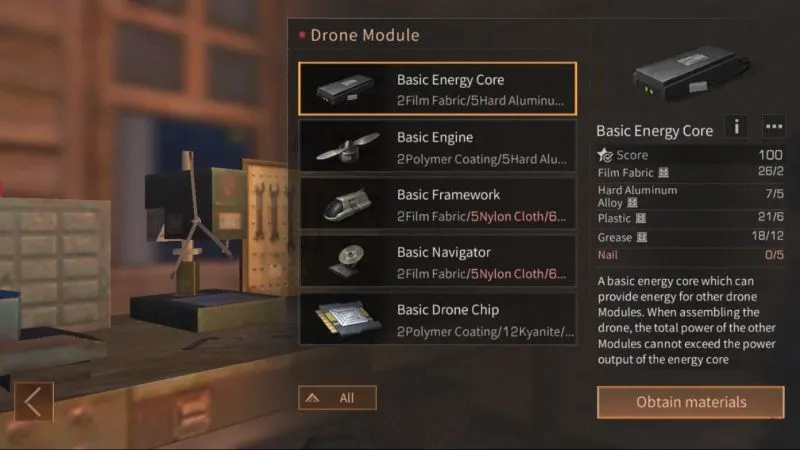
A drone has five parts: Energy Core, Engine, Framework, Navigator, and Chip. You will need to have all parts before you can build a drone. You can purchase a completed drone from the Market but that will most likely cost you hundreds of thousands of gold bars. It’s a lot cheaper to assemble one on your own. Just go to the Module Crafting menu of your Gear Workstation to craft each part. You will notice that each part will require either Polymer Coating or Film Fabric. These are rare items that can be hard to find. Read our dedicated LifeAfter guide for acquiring these two materials if you don’t have them.
Once you have all the parts needed, you will have to go to the Equip Drone menu of your Gear Workstation. This is where you assemble the parts. Just tap on each part on the menu then choose the module that you want to attach to the drone. When you have all the parts attached, just confirm then claim the drone. It will appear in your inventory, and you will have to select it in order to put it in your hangar.
4. Where To Get Better Chips
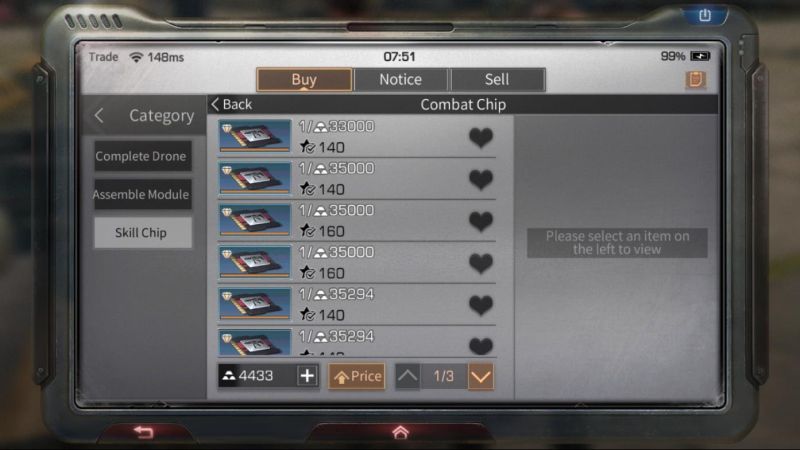
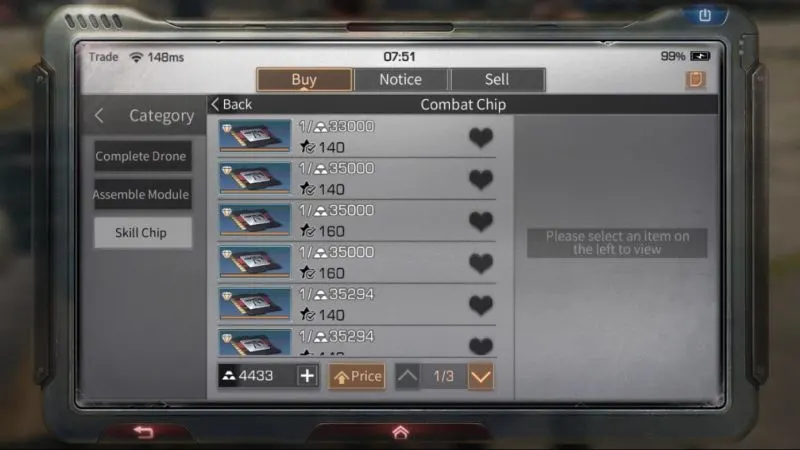
When you unlock the Module Crafting menu, you will only get basic formulas. This will allow you to build a Basic Drone. It’s alright to use the basic parts for your first drone, but you should at least find a better chip for it. If you’re feeling lucky, you can try opening Basic Drone Packs in the Mall under the Sale Packs tab. It will cost you around 9000 gold bars to open one, and you can open up to five per day. There is also an Advanced Drone Pack that you can open for 300 Federation Checks. The problem with these two options is that you will have to rely on luck to get a chip. There is a chance that you will get modification or crafting materials instead.
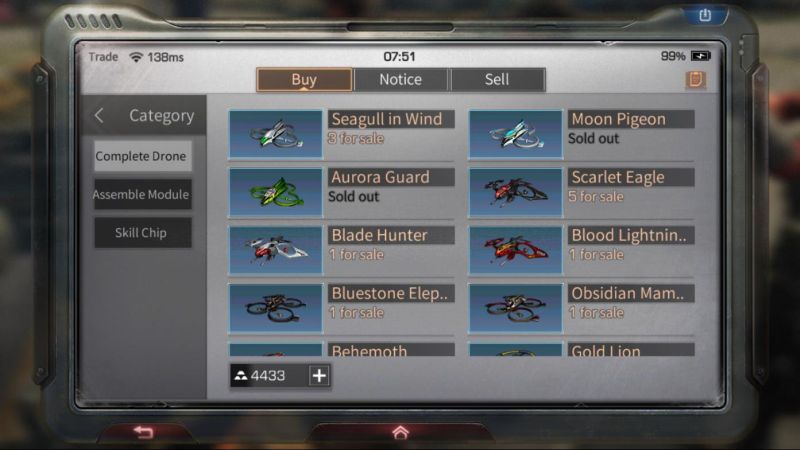
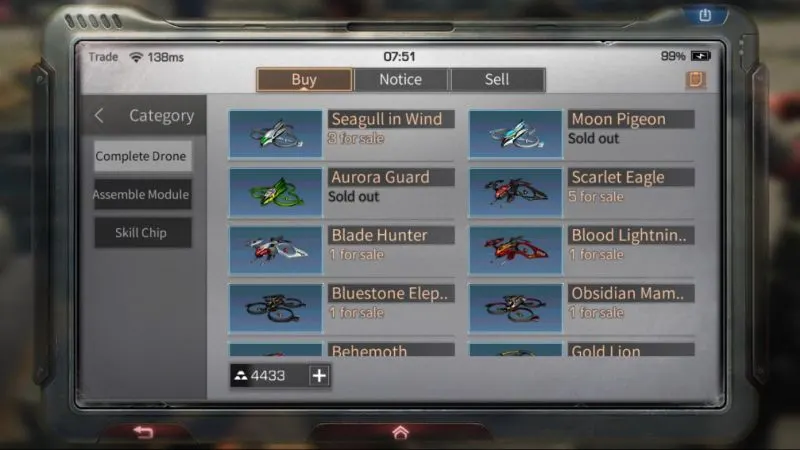
If you want a sure way to get chips, you will have to go to a Trade City or Hope 101’s Market. You can find drone chips for sale, but they will cost you a lot of gold bars. The price depends on your server’s economy, so you will have to check the pricing yourself. Make sure you check prices first before you try your luck with the drone packs. It might be better to spend 30,000 gold bars on the Market than blow 27,000 gold bars on three Basic Drone packs and get nothing but materials.
5. Modifying Your Drone

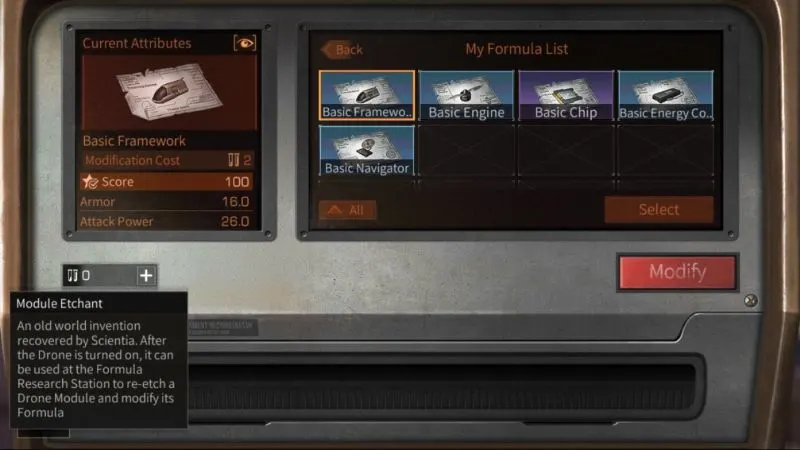
Now that you know the basics of assembling a drone, you might be interested in modifying parts. You can do this by going to your Formula Research Station. You will notice that you now have Drone Bit Formula Mod available. This is where you can modify the formula for the different drone parts that you have unlocked. Pay attention to the modification cost because you will no longer be using R&D Data here. Chips will require Chip Photoetching Pens while other parts need Module Etchants. These are rare items, so make sure you think carefully before spending them on modifications. Never use them on the Basic Drone Chip formula!
6. How To Use Drones

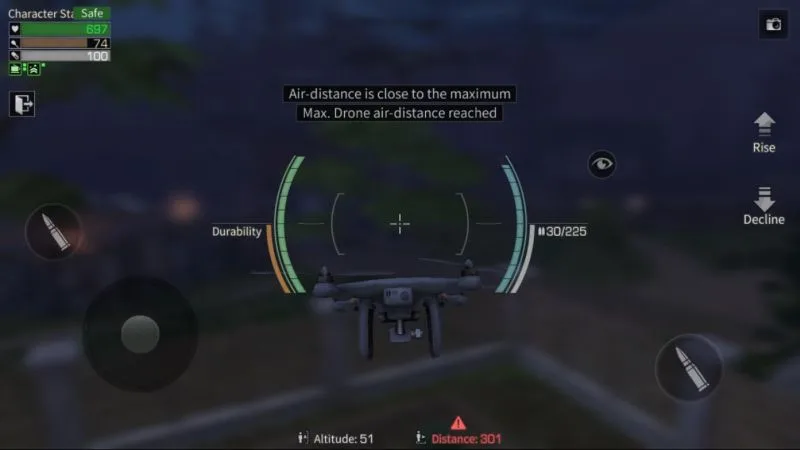
Once you reach Manor Level 6, you will have a drone button right below your mini map. Tap on it to open up your Drone Hangar menu. Here you will find the different drones you have equipped. Tap on the one you want to use, then tap on the Release button on the lower right corner of the screen. Keep in mind that you cannot fly your drone in bad weather.
Offensive drones like the Basic and Combat ones will automatically attack enemies when deployed. You can also manually control the drones by opening up your Hangar menu and tapping on the Manual button. This will switch your view to the Drone’s view. This is a good way to safely attack objectives from a distance, like Miska University’s bookshelves, or Imperial Soldiers inside a camp. Just make sure you take note of the maximum distance that your drone can fly. You will need to be close enough to control the drone.
Related: LifeAfter Ultimate Guide: 30 Best Tips & Tricks to Master the Game
To access a Carrier Drone’s Inventory, just go to the Hangar then tap on the chest icon beside it. You will be able to transfer items between your bag and the drone’s inventory the same way you do with your dog’s pack. Healing Drones, as we mentioned earlier, do not need to be manually controlled since they will automatically heal you when you take damage.
7. Restock Your Hangar’s Supplies

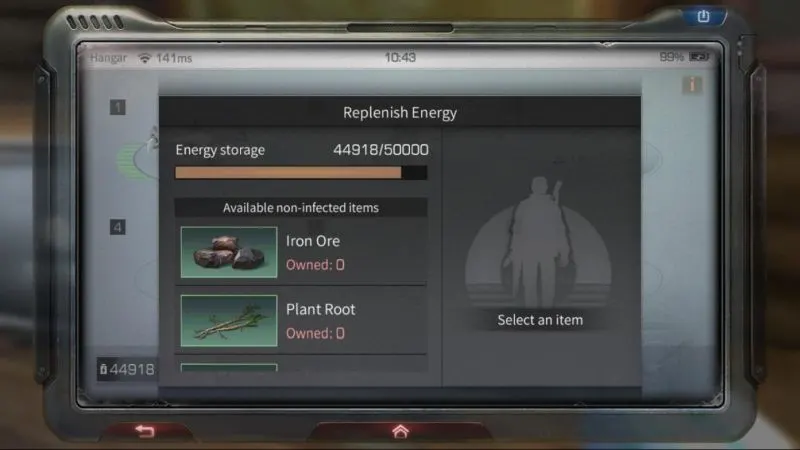
When you are in the Hangar menu, you will notice that there are two numbers at the bottom left of the screen. The one with the battery icon is the amount of energy you have left. You won’t be able to fly any drones when you are out of energy. The one with the bullet icon is the amount of ammunition you have. Drones will not be able to attack without them.
To restock energy, you just need non-infected items as sacrifice. Most green and blue resources can be used as drone fuel. The amount of energy restored depends on the item you sacrifice, so just check your storage for surplus items that you don’t really need. Ammunition can be restocked by using Gunpowder, Smokeless Gunpowder, and Drone Magazine. The first two can be crafted from your Gear Workstation while the Drone Magazine can be purchased from the Mall for 600 gold bars.
Journeying through zombie-infested land is a lot easier when you have a drone with you! We hope you’ve enjoyed this LifeAfter guide. If you have additional tips for getting a drone, be sure to leave us a message in the comment box below!