Legend of Solgard is an exciting RPG game from King, a well known company that’s behind various mega popular match-3 titles such as the Candy Crush games and the Bubble Witch Saga series. So they took elements from various games such as collecting and match-3 to create a new strategy game. And yes, you better believe the strategies can get tough as you get to higher levels/maps! You have the random output just like a match-3 game. Those random outputs are all based on which creatures you’ve collected and set onto your team for the current game mode. Then it’s a matter of your decisions for each move.
For the most part, chess players would love this game due to the strategy and anticipation involved. Just like in chess, if this game doesn’t teach you to look before you leap, nothing will. Puzzle type game players would love this game due to it being a match-3 type of game. Card collection game players would like this game because that’s in there too! Just like other card collecting games and RPGs, you have to setup your teams as properly as you can.
It’s all in good fun but there’re a couple of problems that seem to be really poking at players. It first starts with getting the requirements needed to gain creatures. Then it’s a problem of trying to decide which creatures to use for which game modes. And of course, gaining resources for everything certainly isn’t a giveaway (some players honestly welcome this idea)! In this Legend of Solgard beginner’s guide you’ll find a set of tactics, tips, and tricks to help get you going and keep it that way.
1. The Importance Of And Gains Involved With The Time You Play
Believe it or not, Legend of Solgard is supposed to be a fun game. Not something you have to stress over. Yes, it’s definitely considered as challenging. Stressful and challenging are not supposed to be the same thing in a game! Yes, you can spend hours at a time playing Legend of Solgard. However, the game is setup to maximize your gains when you spread out your gaming time. As it turns out, your best gains come from playing twice a day. Basically, once “in the morning” and once “before bedtime” is the idea. Of course, your morning and bedtime may vary compared to anyone else but you get the idea!
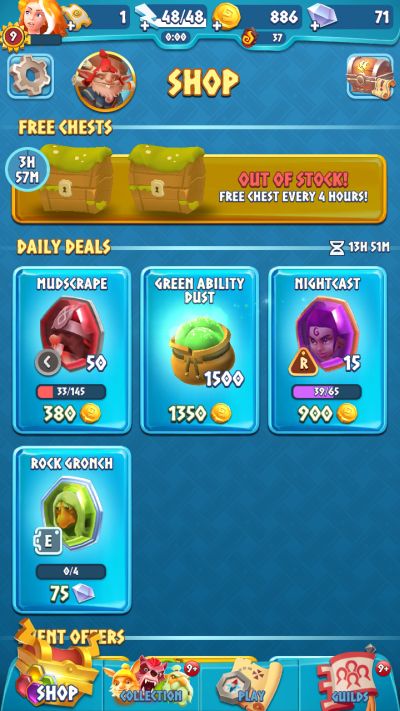

When you check out the Shop in the above screen shot, you can see it would take 8 hours to be able to gain both free chests at the same time. That’s exactly what you’d want and you don’t have to stress over the timing too much. This game timing strategy will leave you with plenty of time to do whatever else you needed to do for the day. Either of those chests can just hand out materials and gold as they are or they can become bigger chests. The bigger they become, the more materials and gold you’ll gain. Unfortunately, they only grow at random. Again, Legend of Solgard is not a giveaway type of game!
Now take a look at the energy in the upper middle of the above screen shot. Each level you gain will add a little more energy to the maximum limit. You can gain energy beyond that limit. The problem is that you will have to wait for that energy to regenerate unless you’re spending real money or otherwise gaining lots of diamonds. The other problem is that the higher in the campaign maps you get, the more energy you’ll need just to play. So if you spread out your Legend of Solgard playing time to twice a day, you’ll end up giving the game plenty of time to regenerate your energy. Also keep in mind that several game modes require time to be able to use as well.
As long as you have energy, you can keep playing in the campaign maps just fine. But the other game modes are setup differently. The Treasure Caves can be played twice a day but require a lot of time to become available between each round. Other game modes require attempts to play them. Those attempts also require a lot of time to regenerate unless you’re spending. The Hero Arena is a little different in how it handles its attempts. You keep your attempts and can keep going at it all day long as long as you don’t lose a match. Naturally that’ll become easier said than done! So all things considered, playing twice a day as indicated makes for an easier gaming experience without losing much at all.
2. Creature Upgrading / Evolving Tips And Tricks
Sooner or later you’ll gain sun gems ability dusts to be able to gain and upgrade/evolve your creatures. Legend of Solgard is mostly about gaining as many creatures as quickly as you can. But once you have them, you don’t want them hitting like wet noodles! Yes, there’re a variety of ways, some are completely free, to gain the sun gems and ability dusts. Unfortunately, that’s not the question here. Which creatures to upgrade first is the question.
The idea is to eventually have teams that work well with each other. For example, the Flame Wyrm and the Lamp Wraith is a very lethal combination. The Hobling, the Elfling, and the Rock Gronch combination is a nasty “beat down” waiting to happen too! It’s all a matter of what you have at the time. But they won’t do as well if you didn’t upgrade and/or evolve them when you get the chance. What you have to remember is to put priority on the creatures you’re using the most first. Then you have to know the difference between the upgrades and evolutions and the skill upgrades. The creature upgrades and evolutions in Legend of Solgard provide boosts to the creature just like its skill upgrades do. But they also provide EXP for your account level. The skill upgrades only provide the boosts to the creatures.
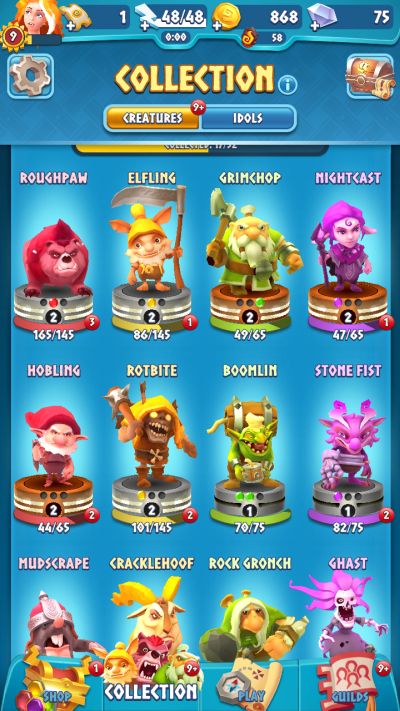

Even at this, you also have to know the differences between the 2 skills each creature has. The skills found in the upper left corner of the creature screens are for when the creatures are combined. Any combine (making the creature during play) of the creature will trigger the skill. The shape doesn’t matter in triggering the skill. Your first aim should be for upgrading the combine skill since it’s there once you gain the creature. The attack skill is found in the upper right and is only available after the creature is evolved.
For example, the Elfling can combine and stun a random target. But it won’t hit targets on the sides of the intended target (straight in the column) until its attack skill is activated after evolving it. Some creatures gain strength while attacking due to the attack skill and some gain while attacking during their standby. Others gain strength via the combining skill. So take the time and read the skill descriptions so you won’t get unexpected results. For example, suddenly your Ghast is doing what looks to be next to nothing. Reading the skill descriptions will definitely help you avoid a lot of that mess!
When dealing with what to upgrade first on a creature, base that on the creature’s skills. For example, the Rotbite gains strength when it hits a critical attack. So if you’re stuck with a decision such as upgrade its strength or critical strike chance, the aim should be put on the critical strike chance. The other upgrades can wait until you gain the sun gems for the creature in question. Once you get the chance to evolve a creature, don’t hesitate unless you simply don’t have enough gold to evolve it. There’s no real point in waiting to evolve a creature whatsoever.
3. When To Use Creatures For Maximum Gains / Winning
This is first of 2 of the incredibly tricky parts in this Legend of Solgard strategy guide. It’s the random nature of the outputs during battle that will provide most players with a loss. Even if you have what’s considered as the perfect team for a game mode, the creatures might not come out when and where you need them. The good news is that you’ll have a good chance to setup a team with these tips and tricks which is the basis of trying to win. But for this, you have to check the game mode and don’t forget to setup your teams before you start.
The first game mode you’ll find yourself in is the campaign maps. You’ll start out with certain creatures and for a while, that’ll work fine. But you will find yourself in campaign maps that your starting creatures just won’t win in or it will take way too many tries. The real problem with these maps is that you have to play it first. So the first round of any campaign map really is a test of your luck. Beyond that, it’s your own fault for not making changes with creatures that you do have. As you level your Legend of Solgard account, you’ll unlock more and more game modes. The other modes offer up much more of a chance to prepare things.


When you open the Bounties game mode in Legend of Solgard, you’ll have a chance to win good sized chunks of gold. As showing in the above screen shot, you also have a chance to prepare your team based on the enemies you’ll be facing. Sometimes you will have to play a round in this mode to see the terrain layout in order to make a better creature team decision. For the most part, you can base things on the displayed enemies and most of the time you’ll be fine. Also note that some of the Bounty rounds only allow 2 or 3 creatures on your team. Most of the time, having a Rock Gronch, a Mudscrape, and an Elfling or a Cracklehoof on your team for Bounty rounds comes in handy. They can hit targets behind obstacles. The Bounty game mode plays very similar to the Hero Arena.
The Hero Arena is all about the wins. And yes, you have an excellent chance to win and gain diamonds. Again, look before you leap is absolutely the name of the game in the Hero Arena! Any other option is a great way to waste a lot. The real losing point for many of the Hero Arena matches is the random output of the battle. This refers to which creatures come out and where during battles. But your chances for setting up a good team before you start are very high. But if you find yourself in a situation where your displayed opponents look to be too much for your creatures, click the Refresh Duels button for another pair of opponents. Just be sure as much as possible because there’re better things for spending diamonds on.
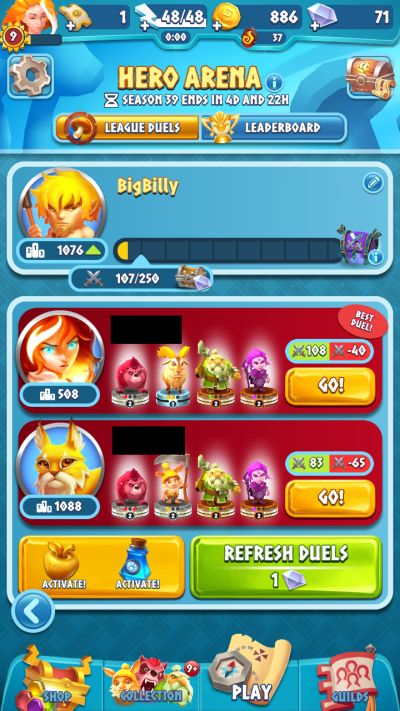

In the Hero Arena, a Rock Gronch, an Elfling, a Wyrm Wrangler, and Mudscraper usually do well. Creatures such as Dunder Gronch and Stone Fist rely too much on obstacles to be in the match so they’re not such a great idea. The Cracklehoof makes for a nice attacker from its combine skill but it takes a bit too long before it attacks. Most of the time, Cracklehoofs get killed before they get to attack. Boomlins can help depending on what creatures you’re facing. As mentioned earlier, a Flame Wyrm and a Lamp Wraith make for a nasty combination to use on someone! It’s just on you to get them however you can.
The Guild Boss mode can be an awfully tough game mode in Legend of Solgard to decide things on. Of course you should be in a guild as soon as you get the chance!
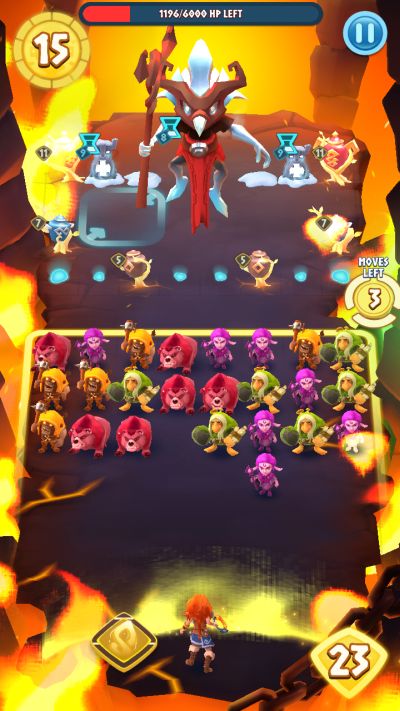
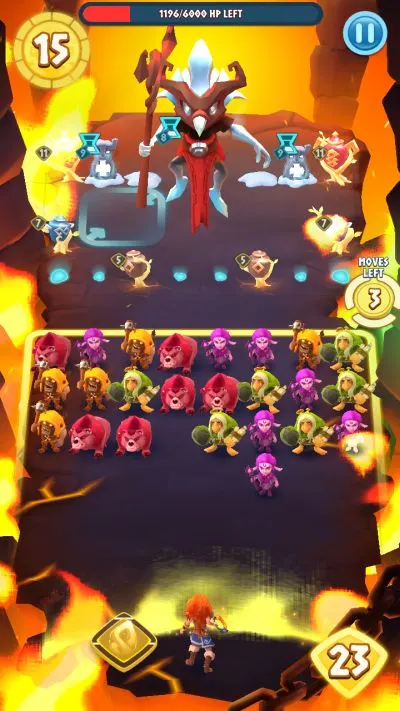
During the Guild Boss battles, you have 15 moves to not only survive the attacks, but also try to attack and do as much damage as possible. At the same time, you want to try to kill those red, and other, jars as much as possible. Your best bet is to use fast, constant, heavy, or any combination of the above for attacker creatures. The Rotbite can keep attacking as long as it hits critical strikes. The Nightcast has a bit longer standby time but works nicely against frontline enemies and obstacles. The Rock Gronch attacks random targets each turn it spends in its standby phase and builds strength each time it attacks as such. The problem is that it will take a lot of good timing and placing to hit the things you want to attack when it turns to attack mode. Do note that the Guild Boss moves in this match. The Roughpaws make for good fast attackers. You can also swap the Rotbite for Elflings. You don’t have much in the way of obstacles so creatures that rely on attacking obstacles won’t help much here.
The Treasure Cave in Legend of Solgard is just plain fun! You have no opponents but you do have to try to gain as much as possible.

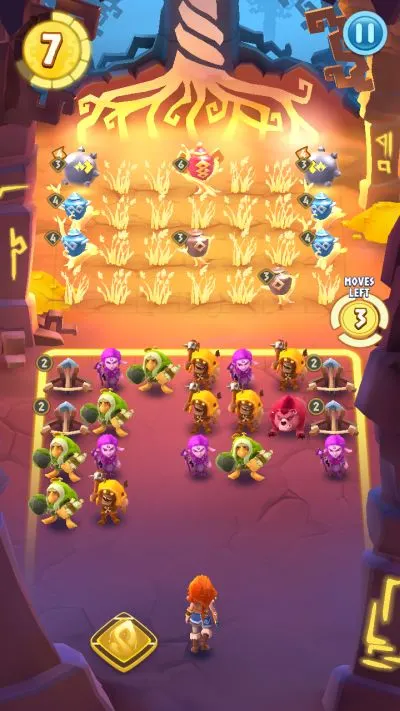
You only have a certain number of turns in the Treasure Cave rounds. You only have 2 per day and they’re available at very lengthy intervals. With that deep lack of an opponent here, you’ll want fast and/or constant attackers. You also want to pay attention to the arrows on the jars. That’ll tell you which way the bombs will detonate. So if you haven’t spotted the problem in the team setup in the above screen shot, don’t feel too bad! Many players won’t realize the objects that look like golden grass count as obstacles. Using the Nightcast wasn’t the better bet. Switching Nightcast with Dunder Gronch works far better. The Dunder Gronch gains strength when it attacks obstacles via its combine skill. A well placed Dudner Gronch turns out to be enough to get through most of this. Creatures such as the Elfling can also do well here but only if the attack skill is active (most would have it already).
4. Best Strategies For Gaining Gold And Resources
This is the second of the 2 incredibly tricky parts to Legend of Solgard. As it turns out, there is no real “best tactic” to gain gold and resources other than the time you play. Again, that should be twice a day as previously mentioned. Yes, you have game modes such as Bounties, the Hero Arena (diamonds) and the Treasure Cave which can be nice gains. With the Bounties, the real aim is the boxes after defeating the gang (all of it which might not be so easy). Not the rewards for winning a round. The Treasure Cave makes you aim for the red jars as much as possible. That’s not so easy with the random outputs during battles. If you’re not winning in the Hero Arena, you really have to “re-think your inks”! Then again, it’s not meant to become easier as you get higher in the Hero Arena ranking! But even with these game modes, all gains (if any) are still at the mercy of the random output of the battles.
The best advice for gaining gold and resources in Legend of Solgard is to do what all you can to get to account level 10 as soon as possible. That and try not to lose battles much at all. Unfortunately, even that’ll be a time consuming and challenging process. The trick here is to add to your gains via repeating campaign maps. Aim for the maps that have sun gems for the creatures you want to upgrade the most. You can check the creature screens to see where to get their sun gems. Prior to level 10, you won’t get much of anything for repeating campaign maps. You should only repeat campaign maps prior to level 10 when you can’t defeat the current campaign map. You still want to gain all the quest rewards daily and the only way to do that is to defeat 5 campaign maps daily. The fun part is that it never said which campaign maps you have to defeat! Whichever game mode(s) happens to be included in the campaign maps counts towards that score. After all this, it’s really a matter of you continuing to play daily.
That’s all for now, as far as Legend of Solgard is concerned. We hope you’ve enjoyed this strategy guide and if you know additional tips or tricks for the game, don’t hesitate to drop us a line in the comments below!
Stacie
Tuesday 25th of February 2020
What are the runes used for?