Bekko Games’ take on the creature collector turn-based strategy genre took the Play Store by storm in recent weeks. The company’s new mobile game called Dragon Tamer features different battle modes, home base customization, team formations, and over a hundred dragons to collect and raise. The game plays quite similarly to other mobile titles such as RAID: Shadow Legends, Monster Super League, and Summoners War to name a few. Unlike these titles however, Dragon Tamer has a personal touch: you can rename your dragons!
The road to becoming a great Dragon Tamer is a long (believe us, it’s really long) and grueling one. You will be faced with lots of challenges, frustration, and hard work. In the end, however, we assure you that Dragon Tamer is one of the most rewarding experiences of a game that you could ever have.
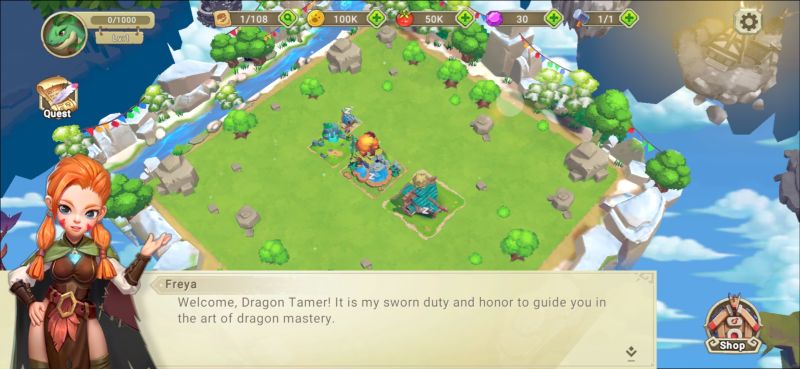
If you’ve recently picked this game up, read on and we should be able to give you enough tips to send you on your way to becoming a Master Tamer! So without further ado, let’s move on to our Dragon Tamer guide!
1. Spend Your Gems Wisely
Let’s get this one out of the way first. Because Dragon Tamer is a free-to-play game, the developers will find ways to earn from it. Here, it’s mostly through their premium currency called Gems. These Gems can be used to accomplish tasks quicker or buy various other material such as Growth Certificates, Spacetime Keys, and Dragon Tickets for summoning.
Do NOT spend entirely on these.
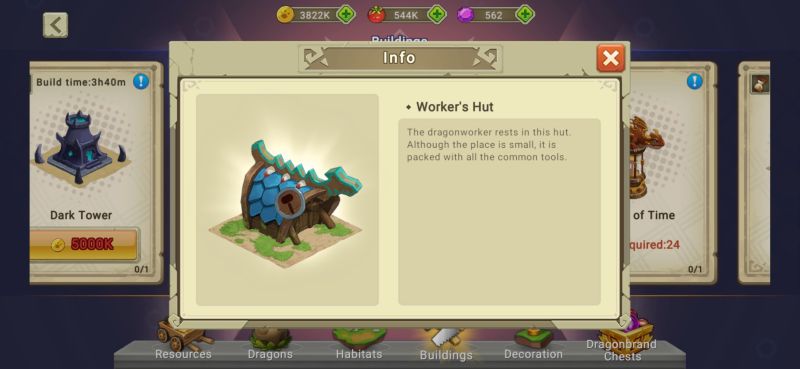
While it’s tempting to spend your Gems on these little things, the overall cost of it will bite you in the tail when you need your Gems the most. Instead, spend your Gems on Statues that help improve your island, upgrades for buildings like the Hatchery, and an extra worker for building construction and island cleanup.
If you’re willing to send the developers some love, we recommend spending on the Piggy Bank once it’s filled with 400 Gems. Not only is this a giveaway from the devs themselves, but you will be spending less than how much 400 Gems actually cost if you bought them directly. The best part of this is that this offer comes back to you every now and then and completing certain tasks will add Gems to the Piggy Bank.
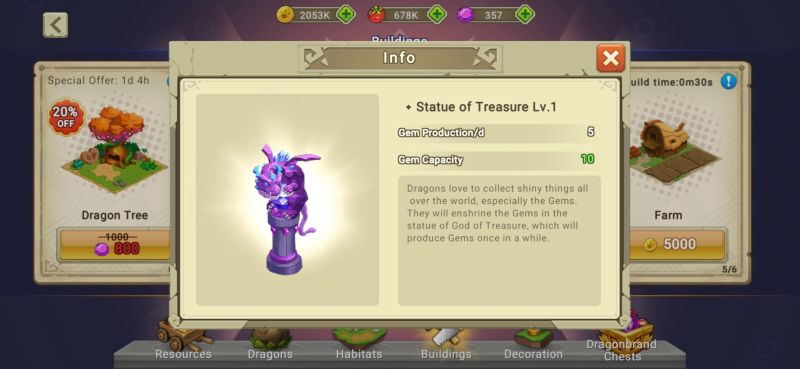
If you aren’t willing to spend a cent on Dragon Tamer, we recommend you save up for a Statue of Treasure. It passively generates Gems over time and may assist you when you’re short on this premium currency.
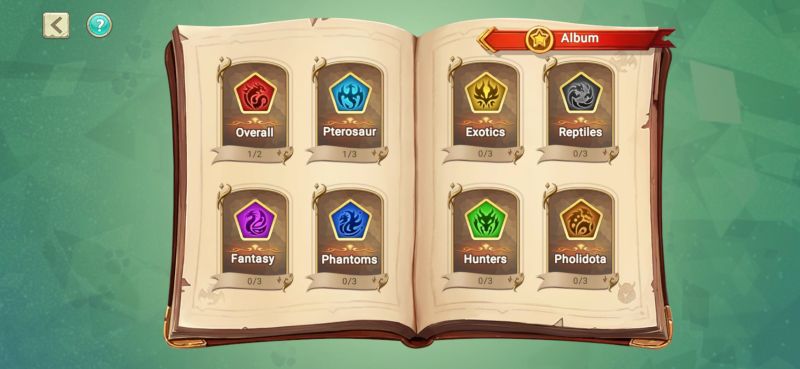
2. Diversify Your Dragons
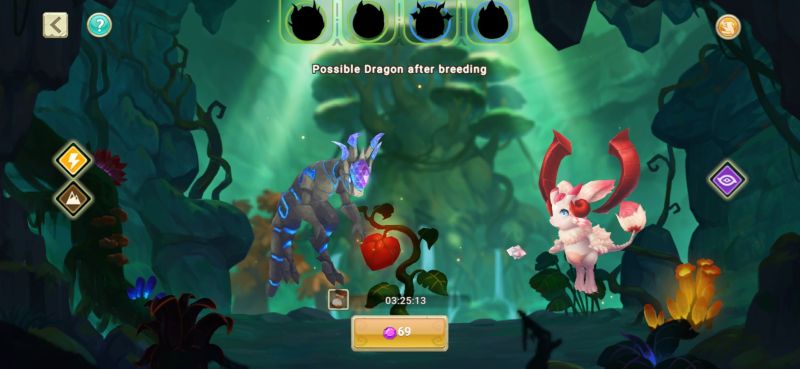
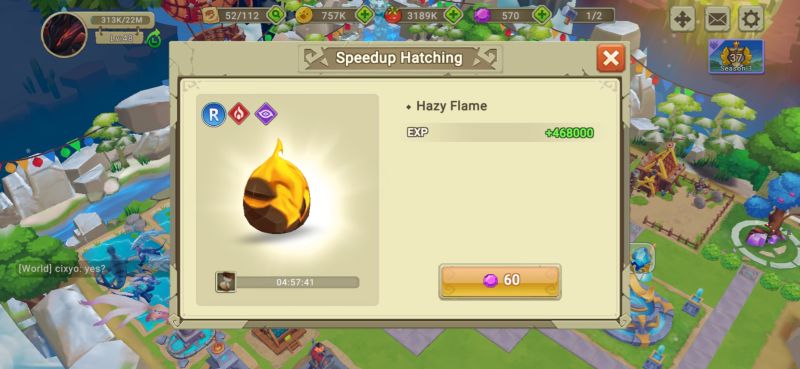
Gaining dragons in this game should be an enjoyable experience for you. Making two dragons breed and waiting for the outcome is one of the best (and most frustrating) features of this game. Simply take two dragons and let love flow through the air. You’ll get an egg after a certain amount of time… and that egg still needs to be hatched. This is the main “gacha” of the game.
Dragons can be obtained through breeding, using Shards at the Spacetime Altar (more on this later), and the Summoning Cave. Having a wide variety of dragons can put you at an advantage in modes like Adventure, the Mystic Mountain, the Forest of Sprites, and the Arena.
Related: Dragon Tamer Dragon Builds Guide: How to Build Your Epic and Legendary Dragons
A variety in breeds will allow you to experiment and carry out strategies wherein you could make your chosen dragon shine. With a proper team formation, you might even be able to take on opponents or stages somewhat above your overall power rating.
A feature that Dragon Tamer does not have is a role system. This means the player will have to figure out what dragon suits their formation based on their skills. Some dragons may be dedicated healers, and others may be dedicated DPS. However, that doesn’t mean they’re restricted to the role that they seem to excel at.
If you’ve used Shards or the Summoning Cave and you happen to gain a dragon whose element you do not have yet (for example, getting Psychic, Light, or Dark early), take advantage of them through breeding. You’ll never know what new dragons you will discover! Keep in mind that the longer the breeding session, the higher the rarity.
Early on, you might even be able to breed (or summon) a few Epic-grade dragons. Having Epic dragons in your team may allow you to breeze through fights easily (if they are used correctly) as they can be quite powerful. These are the following:

● Aurita (Water/Electric) – You first get the Aurita by summoning it with a Dragon Ticket. This is your first Epic. The Aurita is capable of crowd control and debuffing; an easy way to throw the enemy into confusion.

● Ruby (Fire/Earth) – Getting the Ruby means completing stages in Adventure Mode. Once you’ve received all its Shards, you can summon the Ruby egg at the Spacetime Altar. The Ruby is a deadly dragon capable of taking on opponents one-on-one. In a duel, it is quite difficult to defeat.

● Core (Fire/Water) – By breeding Rare dragons with fire and water elements could give you a Core. The hulking, lumbering Core is a dragon that wields massive fireballs at its command. If it isn’t playing with fire, it can protect itself or its friends with thick walls of ice.
Breeding two Epic dragons together may give you the chance to gain a Legendary dragon! The technique here is to make sure at least one of their elements is the same. Just remember that your island will require more habitats or upgraded versions thereof in order to accommodate all the eggs you’ll be bringing in.
3. Raise The Dragons Well
With each egg coming in fast (or slow, depending on the waiting time), it’s important for you to always make room for the baby dragon once it’s born.
Observe first the element(s) of the dragon. This will determine where you will want to put your baby. If you don’t have enough space on any of the baby’s elements, you can move one of your other dragons living in one habitat to another. For example, your baby dragon is going to be a Lavagon (Fire/Psychic) and you have a psychic habitat inhabited by a Mercury (Metal/Psychic). You can move the Mercury to a Metal Habitat while the Lavagon is put in the Psychic Habitat.
At level 50, you will be able to construct the Dragon Dojo where you can house dragons that do not have a place to stay. While this building is pretty handy, it does not generate income like habitats. If you ever run out of space, you can buy the other islands around your main one.
In addition to making sure that your babies have an adequate home to stay in, they should be well-fed and made stronger. If you can cap off their level by feeding them to their max level, do so. Their strength improves greatly per level. If you need to increase the level cap, save up for Towers.
With each dragon bearing a rarity, this does not matter so much in the game. The only time rarity matters is at which a dragon reaches its level cap:
● Common (C) – Lv60
● Uncommon (UC) – Lv70
● Rare (R) – Lv80
● Epic (E) – Lv90
● Legendary (L) – Lv100
What should matter is how you deploy your formations. Get a team whose skills complement one another. In the long run, a well-balanced team will be able to destroy a team that relies solely on power ratings. We will talk more about this later.
4. Food From Quantity, Money From Quality
To make your island thrive, you will have to account for the following things: gold and food.
Gold can be earned by doing a variety of activities such as playing Adventure, fighting in the Arena, selling dragons you no longer need. The fastest way you could earn gold, however, is through collecting the gold accumulated by each of your dragon habitats. The higher the level of the habitat, the more dragons you can have in them. Consequently, the more dragons in that habitat, the more money you will earn. If these dragons have their levels high, the amount of gold you gain will also increase.
Additionally, you will be able to earn gold and other useful items if you have some Ruins in your island. These Ruins allow for a few dragons to explore and uncover treasure and different valuable items after a certain amount of time. They also grant Souls for Soul Upgrading, which we will talk about later. Ruins are expensive to build, so save up for them before you do.
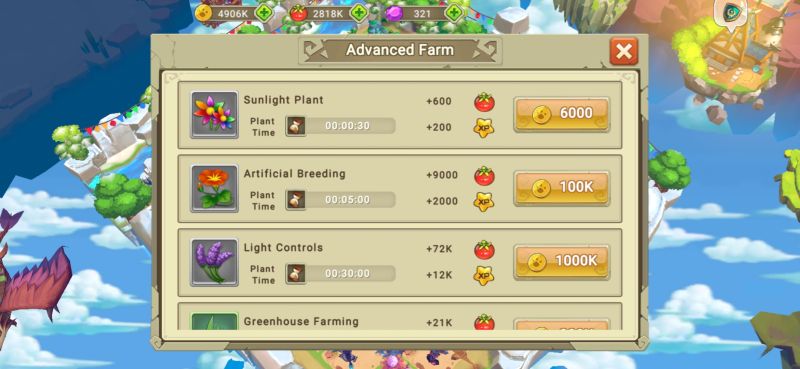
As far as farms go, they are the primary source of your dragons’ food. Food can be earned much like gold, but let’s talk about a couple of farming techniques. More expensive food are available as you scroll down, but the fastest way to earn food is through using the humble Sunlight Plant technique.
Every 30 seconds, your crops will be ready for harvesting. For each of those 30 seconds you are playing the game, you will be earning 600 food, and that’s only for a single farm. It may seem small if it’s a lone farm, but with multiple farms, you’ll be flooded in food faster and more frequently.
It’s good to plant high-quality crops once in a while, but nothing beats keeping yourself on your toes (or in this case, your fingers) when it comes to idling on your island. The 5-minute Artificial Breeding technique is ideal for when you’re off to battle since some of these fights can take more than 5 minutes to complete, especially if the enemy is strong.
Once you upgrade your farms to Mid Farms and Advanced Farms, the Greenhouse Farming technique, while slightly more expensive than the Sunlight Plant, is more cost-effective as it yields a greater amounts of food than the Sunlight Plant and the Artificial Breeding techniques.
5. Fight! Fight! Fight!
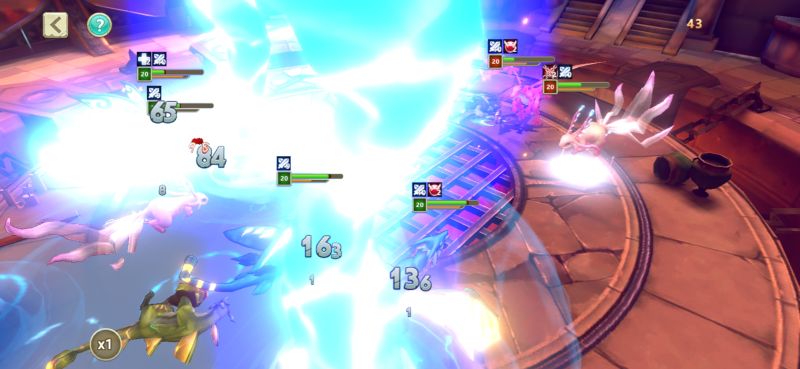
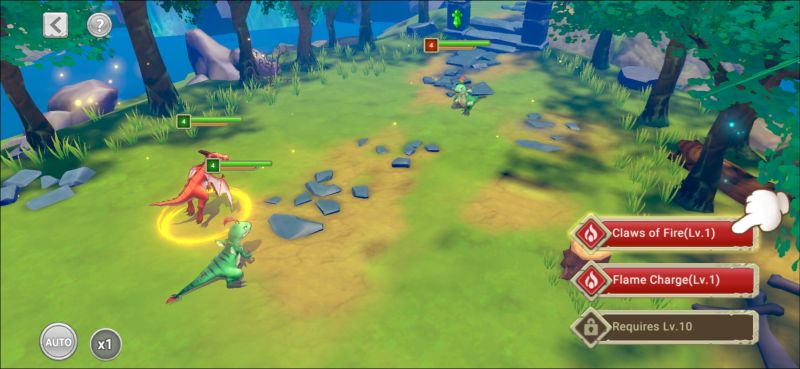
As it is in many hero collector games, Dragon Tamer offers no shortage in combat. You can pick up to five dragons in one team and even get the assistance of a friend’s dragon (in Adventure and Mystic Mountain only). Fighting in Dragon Tamer is a task that involves utmost concentration since strategy and the timing of skills can win almost any fight. One way to gain advantage of a fight is by understanding how elemental damage works.
Elemental Damage
To start off, it’s important to understand the elements. Elemental damage plays an important role in any battle. Having dragons that resist elements are more likely to survive an encounter rather than those that do not.
If a dragon is attacking with an element the enemy is weak against (indicated by a green sword above the enemy’s head when in combat), they will deal 20% more damage. Conversely, if a dragon is attacking with an element the enemy is strong against (indicated by a red sword above the enemy’s head when in combat), they will deal 20% less damage.
Below is the list of elements as well as their strengths and weaknesses:

● Nature
Strong VS: Metal, Psychic
Weak VS: Fire

● Fire
Strong VS: Nature, Psychic
Weak VS: Water

● Water
Strong VS: Fire, Psychic
Weak VS: Electric

● Electric
Strong VS: Water
Weak VS: Earth

● Earth
Strong VS: Electric
Weak VS: Metal

● Metal
Strong VS: Earth
Weak VS: Nature

● Dark
Strong VS: Electric, Earth, Metal
Weak VS: Light, Psychic

● Light
Strong VS: Nature, Fire, Water
Weak VS: Dark, Psychic

● Psychic
Strong VS: Dark, Light
Weak VS: Nature, Fire, Water

● Chaos
Strong VS: Dark, Light
Weak VS: Electric, Earth, Metal
Effects / Debuffs
Sometime during battle, you may notice red icons that appear above your dragons’ heads whenever they take damage from an enemy dragon. These are called debuffs or effects. While buffs are just as important, these debuffs may throw players off once they’re inflicted. Below is a quick list of non-descript debuffs and what they do:
● Disarm
Icon Looks Like: A bunch of chains
Visual Effect: None
What it Does: Disables 4-Set Dragonbrand effects and Magic
● Taunt
Icon Looks Like: A horned demon’s head
Visual Effect: The dragon has anime anger veins all over
What it Does: The provoked dragon will auto-attack the dragon that provoked it only using their basic attack. It cannot be controlled while at this state.
● Freeze
Icon Looks Like: A snowflake
Visual Effect: The dragon is encased in an icy prison
What it Does: Your dragon skips a turn.
● Stun
Icon Looks Like: A spiral
Visual Effect: The dragon has a swirling light above their head and they look dazed
What it Does: Your dragon skips a turn.
● Damage Over Time
Icon Looks Like: Depending on the element of the attack, it can be a drop of water, a ball of fire, or a bleeding cut.
Visual Effect: None
What it Does: The dragon takes damage every turn.
● Seal
Icon Looks Like: A cancel sign
Visual Effect: An ellipsis coming from your dragon’s mouth
What it Does: The dragon can only perform its basic skill.
Now that we’ve covered elemental damage and debuffs, let’s talk about where we can apply this knowledge.
Adventure Mode
This is the game’s most basic combat mode where you can take your dragons and fight through stages filled with increasingly strong enemies. Upon accomplishing a level, do NOT click Next Stage as you will be brought to the next stage without changing your formation. Instead, go back and study the enemy’s formation before attacking so you know you have the upper hand in elemental damage.
Completing levels will increase the amount of loot you get from Idle Rewards (a sack icon on the upper right-hand portion of the screen in the stage menu). These rewards accumulate after an amount of time and from them you will be able to gain account EXP, gold, elemental crystals for building upgrades, and random Dragon Brands.
After completing a difficulty, you will be able to move onto the next difficulty, offering higher-quality rewards but with more powerful opponents.
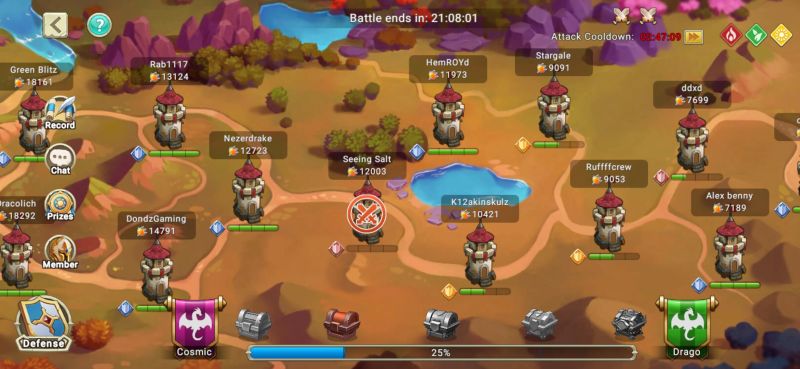
Arena Mode
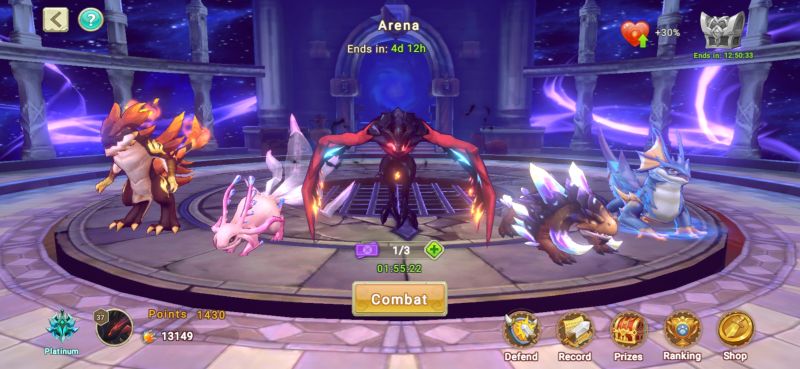
This is the PvP mode of the game where you will first have to set up a Defense Team. This Defense Team will fight on your behalf while you’re out fighting other players.
There are 16 ranks in the arena. Here they are in descending order:
● Immortal 1
● Immortal 2
● Immortal 3
● Immortal 4
● Immortal 5
● Immortal 6-10
● Immortal 11-20
● Immortal 21-50
● Immortal 51-100
● Divine
● Diamond
● Platinum
● Gold
● Silver
● Bronze
● Iron
To get to the next rank, you must defeat opponents in succession. Winning battles through your Defense Team as well as through fighting opponents earns you points that send you up the ladder. Losing any battle, however, subtracts your points and sends you down the ladder instead. If you have lost a battle, you can review what might have happened by watching a replay of the match in the Record menu at the main Arena menu.

Having a certain amount of points at the end of a Season (a week in real time) gives you prizes that you can claim. Other than that, you may also claim rewards that become available to you every now and then. One of these rewards is Arena Tokens.
Arena Tokens can be spent at the Arena Shop, where you will have access to various dragons that are otherwise hard to obtain by breeding. These dragons can be summoned with the use of their Shards.
There is also a technique called Revenge Farming where you keep a weak Defense Team to lure weaker players to attack you. Once you check your Record menu, you will be able to “farm” Arena Tokens by beating those who beat your Defense Team. As dishonorable as it may seem, Revenge Farming might seem like a quick and easy way to gain Arena Tokens. The Season Rewards will always have better prizes for those who actually try nonetheless.
Spacetime Rift
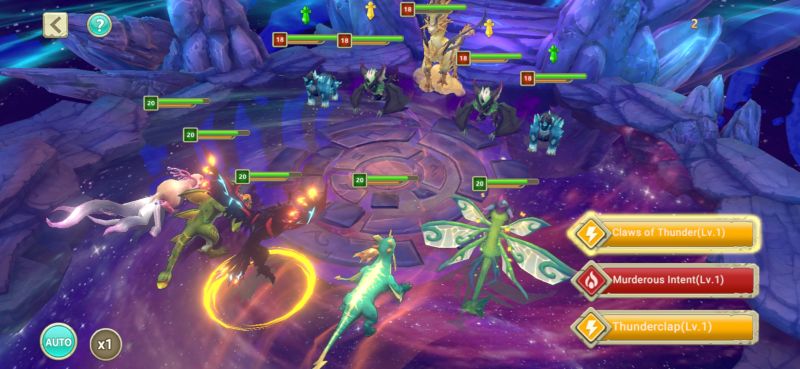
The Spacetime Rift is a special mode where you fight a set squad of enemy dragons each rift. These dragons do not change in team composition. Instead, they become increasingly powerful in level. In addition, each rift has a main enemy dragon that rules it; a powerful dragon that is always in the middle of the formation.
What you can earn from this, however, is a set of Dragonbrands corresponding to the rift you’ve entered. We’ll tackle what Dragonbrands do later. Below are the rifts and what corresponding Dragonbrands they give:
● Fire Rift
Main Enemy Dragon: Core (Fire/Water)
Dragonbrands Rewarded: Freyr, Heimdallr
● Thunder Rift
Main Enemy Dragon: Plough (Electric/Metal)
Dragonbrands Rewarded: Baldr, Jammu
● Flood Rift
Main Enemy Dragon: Aurita (Water/Electric)
Dragonbrands Rewarded: Vidar, Mimir
● Nature Rift
Main Enemy Dragon: Enki (Nature/Water)
Dragonbrands Rewarded: Bully, Schiff
● Earth Rift
Main Enemy Dragon: Comet (Earth/Metal)
Dragonbrands Rewarded: Hoarder, Amir
● Psychic Rift
Main Enemy Dragon: Keydorah (Metal/Psychic)
Dragonbrands Rewarded: Tyr, Skade, Iaso, Ares
Be warned that fighting a battle in the Spacetime Rift will require a Spacetime Key. Regenerating up to a maximum of 5 may take a few days in real time. Refilling these requires a hefty sum of gems, too, so we strongly suggest waiting.
Mystic Mountain
This mode is actually more difficult than the others since the enemy dragons here scale in power equivalent to yours. Mystic Mountain pits your team against an ascending group of challenger dragon teams; all of which increase in power with each stage that follows. The catch here is that if your dragons die in battle along the way, they stay dead until the mountain resets (which is every 2 days), or unless you pay 30 Gems to revive them all to full health.
To be successful in Mystic Mountain, field your weaker dragons for the early stages so once you reach the later stages of the mountain that require your more powerful dragons, you’ll have a better chance of winning. To finish your run, you have to reach the top of the mountain.
Every three victories, you will be able to claim rewards. These rewards allow you to purchase other dragon shards in the Mystic Mountain Shop similar to that of the Arena Shop using Adventure Coins. The selection of products vary, however.
The scaling of the enemy dragons’ strength is based on your five strongest dragons.
Forest of Sprites
Compared to Mystic Mountain, the Forest of Sprites may be a little bit easier. It plays similarly to a roguelite where every time you complete an encounter, you are rewarded with a variety of perks that could improve your team’s performance there. Just like Mystic Mountain, any dragon that perishes in battle will stay dead until the forest resets (every Wednesday) or unless you use a Healing Potion to revive them all to full health.
The Forest of Sprites measures your movements by 30 points. Each tuft of grass that you clear is 1 point spent out of that 30. Whenever you clear a tuft of grass, here are the possible things you may uncover:
● Food
● Gold
● An enemy – Encountering an enemy will disable you from moving to the grass tufts adjacent to it unless it is beaten.
The enemies are color coded for difficulty. Here they are in ascending order:
○ Green Enemy
○ Blue Enemy
○ Purpe Enemy
○ Orange Enemy
○ Red Enemy – Stage Boss
○ Black Enemy – End Boss
● Treasure
● A healing fountain
● A Healing Potion – Used to heal or revive your dragons to full health.
● A captured dragon – Freeing a captured dragon will allow you to recruit them for your Forest of Sprites run. After the run ends or if you finish it, the dragon leaves you. This is also perfect for you to try out different dragons that you might not yet have.
● The Next Stage – This gate is usually guarded by a Red Enemy.
Your goal is to reach Stage 10 where you can get even more Mystic Ores to spend in the Dragonbrand Shop where you will only be able to find the Dragonbrands Tyr and Skade. Aside from Ores, you will also be rewarded with other prizes.
Island Brawl
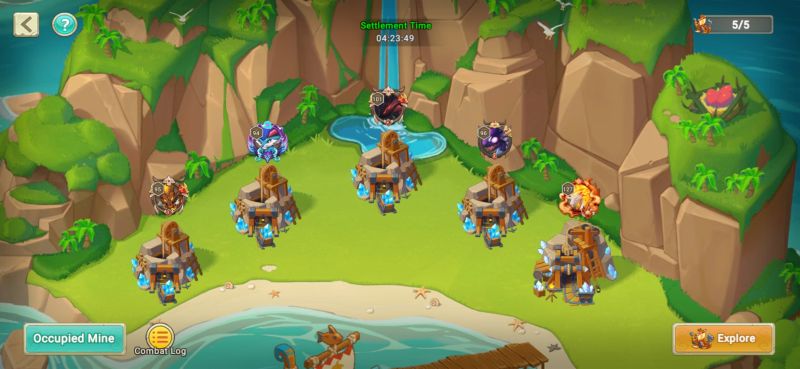
Feeling bold, Tamer? After repairing your magical canoe (not to be confused with the dragon breed Canoe), you may now set out for the Island Brawl where you will compete with other Tamers for the ownership of mines.
These mines contain enchanted ores needed for you to forge powerful artifacts that can immensely strengthen your dragons once equipped. These artifacts are completely separate from Dragonbrands and Souls and the stats that they grant your dragons stack with one another. Getting these ores aren’t as easy since the dragons and their Tamers (if any) guarding the mines are quite powerful. Unlike most battles where your dragons fight in teams of 5, the Island Brawl battles are only 3 on 3. Only the strongest will win!
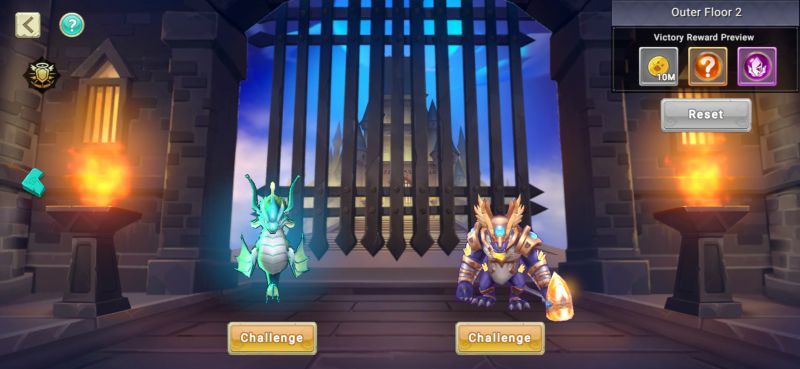
Dark Trial
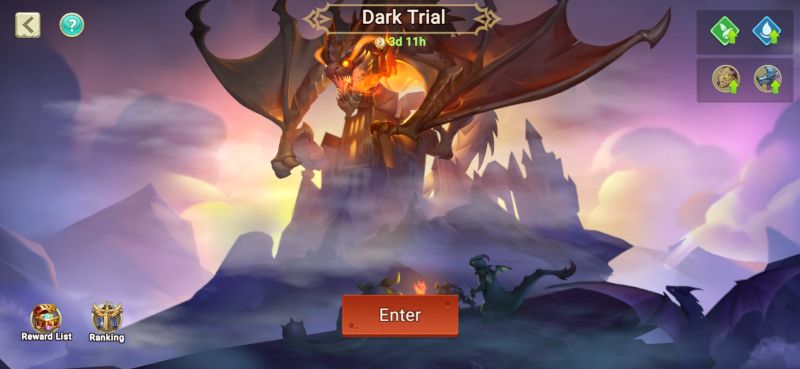
Lastly, there is the Dark Trial. This mode is the ultimate test of strength and is only available to Tamers who have become among the elite. After reaching a certain level, this mode will be opened to you.
The Dark Trial consists of three sections: Outer, Inner, and Core. Each of these sections bear 9 floors. Every floor is guarded by a pair of elite dragon guardian teams with their own Dragonbrands and Magic. Be warned that fighting these teams isn’t as simple as it looks.
Firstly, the best way to tackle these teams is through playing on their elemental weaknesses. Study the elemental chart (or our guide above) to gain the upper hand.
Secondly, you will need multiple teams and multiple dragons for this mode. Once one team has defeated one guardian, that same team cannot tackle the other guardian. Mixing and matching your dragons is the key to success and this should also be an incentive to make any dragons you have much stronger.
Undergoing the Dark Trial will earn you handsome rewards: millions of gold, Legendary or Mythic Dragonbrands, and the elusive Chaos Source which is exclusively used in the Chaos Temple.
Best of luck to you.
6. Use The Spacetime Altar To Your Advantage
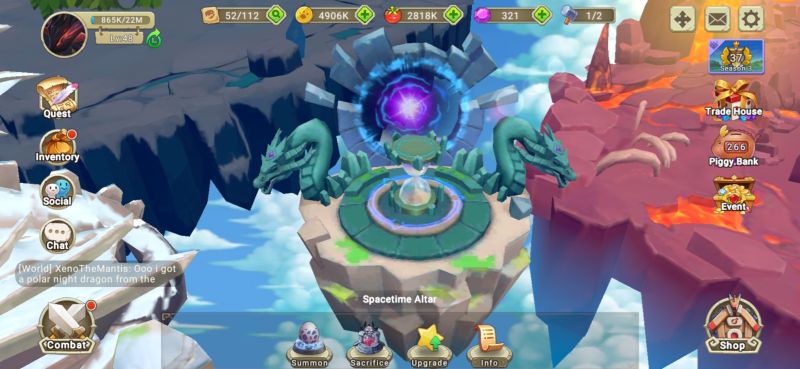
On the northernmost part of the main island is a floating rock with an hourglass and a portal. This is the Spacetime Altar. It’s a powerful part of your island that allows you to summon, sacrifice, and upgrade dragons. Here’s how it works:
Summoning
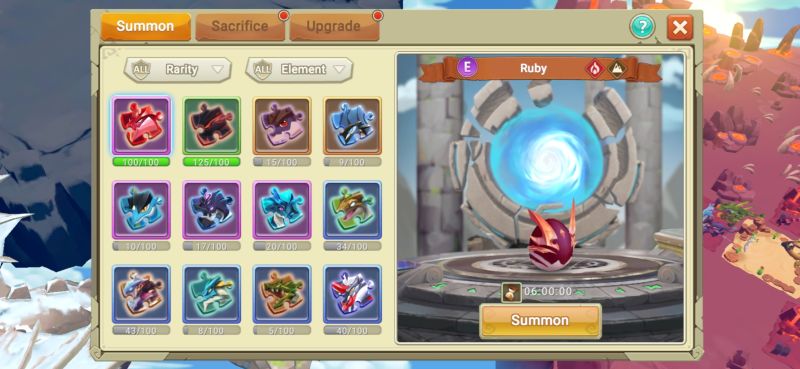
As we’ve mentioned earlier, dragons like Ruby can be summoned at the Spacetime Altar. With the use of Shards, you can summon any dragon in the game, provided that you have enough of their Shards.
Sacrificing
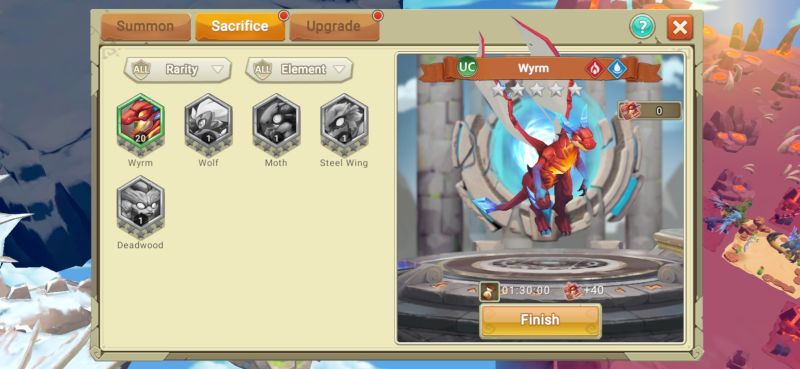
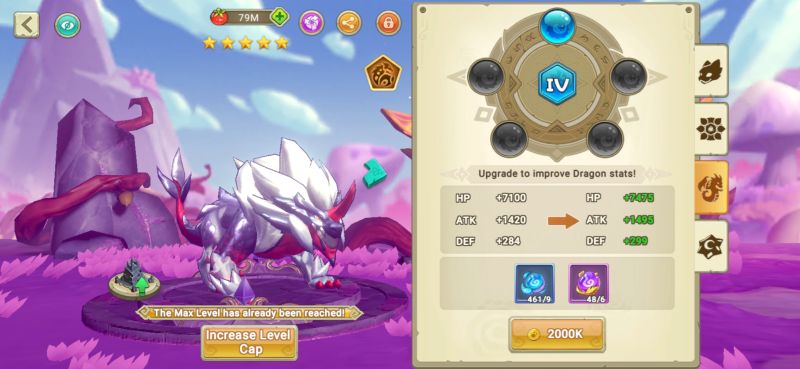
When you have duplicates of any of your existing dragons, these can be sacrificed at the Spacetime Altar. Do know that sacrificial time increases based on the dragon’s number of stars and their rarity. For instance, for a Legendary dragon to reach 5 stars, it will take 24 hours.
After sacrificing the dragon of your choosing, you will gain its Shards. These Shards can be used to summon another dragon of its kind or, more importantly, upgrade their star level.
In addition, you can use these Shards at the Sprites Pyramid where you will be rewarded Mystic Ores and Shards of Plough and Helios, both powerful dragons.
Upgrading
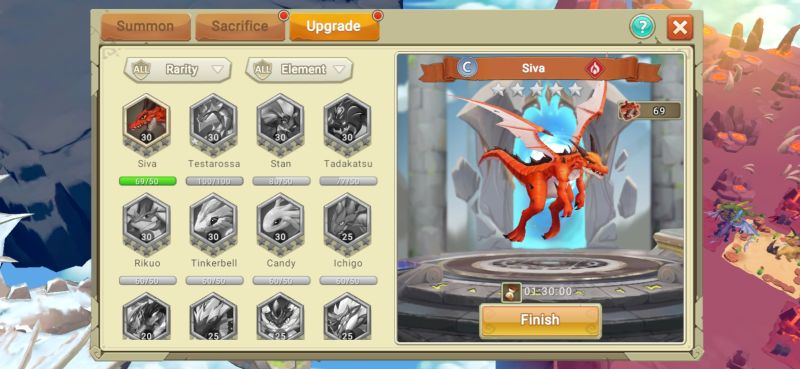
As the dragon’s star level rises, they will require more and more Shards, so Common dragons are the easiest to upgrade and Legendary ones are the hardest.
If you do not have enough Shards, you can collect Uncommon, Rare, Epic, or Legendary Dragon Shards, which act as universal Shards. This means that any dragon can use them provided that they are equal to or above the rarity of the Shards.
Upgraded dragons will receive a greater stat boost as compared to when they simply level up. While this technique of empowering them is more time-consuming, it is also more effective and rewarding. A 3 or 4-star Uncommon might have no problem dispatching a 1-star Epic or an un-starred Legendary. This goes to show that in Dragon Tamer, rarity isn’t everything.
Aside from using the Spacetime Altar to make your dragons more powerful, there is also making use of Dragonbrands.
7. Strengthen Your Dragons with Dragonbrands, Magic, and Souls
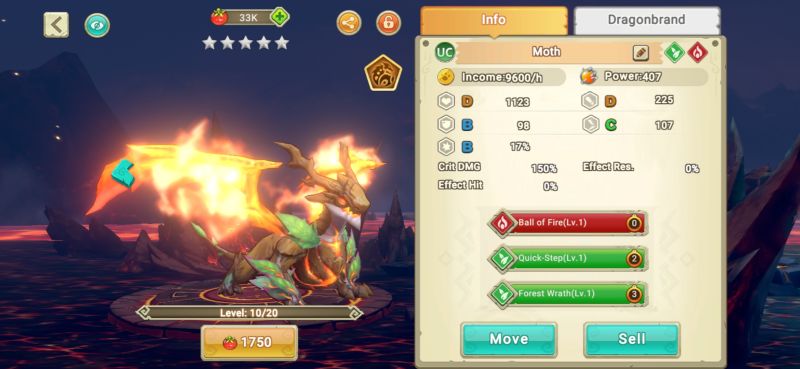
Dragonbrands, or brands, are the gear of your dragons. Equipping your dragons with these items will grant them better stats as well as passive abilities that may give you an edge in battle.
Supplementing this is a Magic Fountain that you can obtain later on in the game. The Magic Fountain further augments your dragons’ abilities by giving them a team-wide passive skill.
Dragonbrands
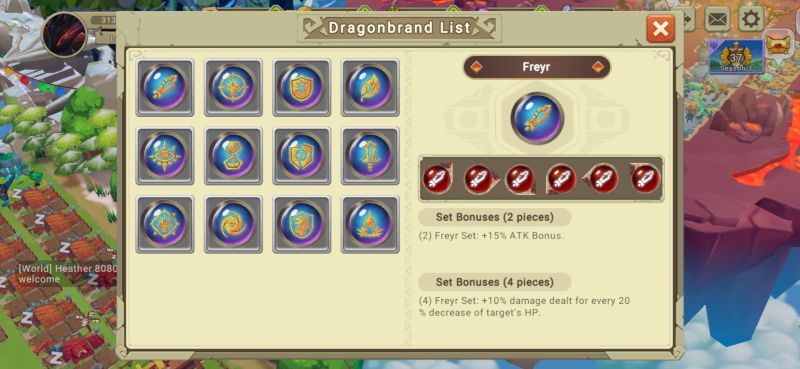
Each dragonbrand piece has its own set of stats and goes into a corresponding slot marked by Roman numerals (I, II, III, IV, V, VI). However, there are 12 Dragonbrand sets in the game, each of which granting two bonuses to any dragon wearing them. Here’s what they each can do:

● Freyr
2 Pieces Equipped: 15% Attack Bonus
4 Pieces Equipped: Dragon deals 10% more damage for every 20% decrease of the target’s HP

● Vidar
2 Pieces Equipped: 15% Crit Chance
4 Pieces Equipped: Dragon deals 40% more damage to targets affected by Taunt, Stun, and Freeze.

● Baldr
2 Pieces Equipped: 15% HP Bonus
4 Pieces Equipped: When the dragon receives a critical hit, it casts a shield upon itself (30% chance to shield its allies as well) that absorbs 10% of its max HP. This lasts for 1 turn.

● Heimdallr
2 Pieces Equipped: 30% Defense Bonus
4 Pieces Equipped: Dragon gains 20% base healing and 50% base healing if its HP is below 20%.

● Mimir
2 Pieces Equipped: 15% Effect Resist
4 Pieces Equipped: Dragon has a 15% base chance to randomly inflict effects like Stun, Freeze, Taunt, or Seal for 1 turn.

● Bully
2 Pieces Equipped: 15% Crit Chance
4 Pieces Equipped: Each kill reduces the cooldowns of all the dragon’s skills by 1 turn.

● Hoarder
2 Pieces Equipped: 15% Attack Bonus
4 Pieces Equipped: Dragon’s attacks have a 50% chance to ignore 45% of the enemy’s Defense.

● Jammu
2 Pieces Equipped: 15% Crit Chance
4 Pieces Equipped: Dragon has a 50% chance every critical hit to deal extra damage based on 10% of its target’s HP. This is True Damage and cannot be mitigated. It is capped at 120% Attack.

● Amir
2 Pieces Equipped: 15% HP Bonus
4 Pieces Equipped: Dragon has 30% chance to reflect 100% of damage inflicted to it.

● Schiff
2 Pieces Equipped: 15% Effect Hit
4 Pieces Equipped: Dragon has a 30% base chance to stun the attacking enemy for 1 turn.

● Skade
2 Pieces Equipped: 15% HP
4 Pieces Equipped: Dragon reduces 25% of damage received by allies and receives it as 50% True Damage.

● Tyr
2 Pieces Equipped: 15% Attack
4 Pieces Equipped: Dragon immediately uses its basic attack to strike the enemy with the lowest HP after killing an enemy using a single-target skill.

● Iaso
2 Pieces Equipped: 30% Defense
4 Pieces Equipped: The dragon removes all crowd control effects on it (Seal, Freeze, Stun, Taunt) and recovers 10% of its max HP.

● Ares
2 Pieces Equipped: 15% Attack
4 Pieces Equipped: For every 10% of HP the dragon loses, it gains 20% Attack.
Magic Fountain
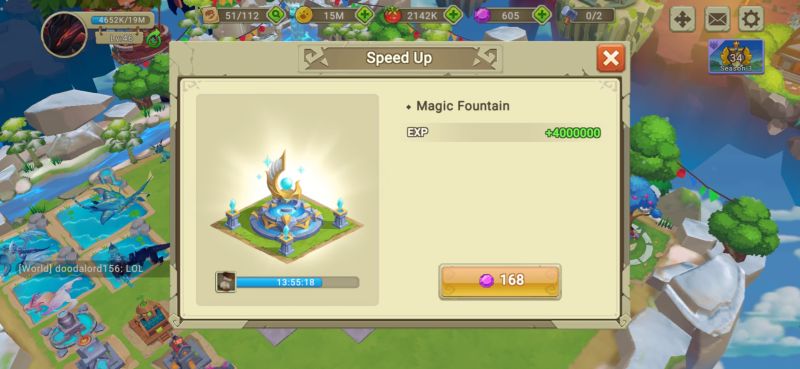
This structure takes 1 day to build but comes with powerful magic that empowers your entire team while in battle. Equipping these spells before a fight may put you at an advantage over your opponent. There are currently 6 spells:

● Origin
What it Does: Allies that get attack have a 15% chance to reduce a skill on cooldown by 1 turn. This has no effect if no skills are on cooldown.
● Protection (Unlocks at Magic Lv5)
What it Does: At the beginning of battle, all allies have increased Defense and Effect Resist for 3 turns.
● Health (Unlocks at Magic Lv10)
What it Does: Each dragon on your team restores 2% of their HP at the start of their turn.
● Counter (Unlocks at Magic Lv15)
What it Does: When any dragon takes damage, it has a 15% chance to retaliate. Multiple hits increase the chance to counter, but the countering dragon will still attack once. The dragon that is attacked only retaliates with its basic skill.
● Curse (Unlocks at Magic Lv20)
What it Does: This magic affects the entire battle. The enemy receives damage based on 14% of the Attack of the allied dragon with the highest Attack stat. The damage is inflicted after said dragon ends their turn.
● Revenge (Unlocks at Magic Lv25)
What it Does: With every ally that falls in battle, living allies receive a 12% damage increase toward their enemies. This Magic can stack up to 9 times.
Leveling up your fountain’s magic requires Magic Crystals that can be acquired from increasing the stars of your dragons. This will only work if it’s the first time for that breed, however. The amount of crystals received depends on the rarity of the dragon and the amount of stars it received.
Soul Upgrade
If you go through the tabs of your dragon, you will notice a tab there that allows you to spend Souls you collected from Ruins exploration. With each time you upgrade your dragon, the tiers of their Souls will increase in quality and a mark of their strength will manifest itself in the form of a badge at the number of their level.
The more Souls you use on a dragon, the fancier the badge will look (sprouting wings and changing color, for example). If you want to know which dragons to spend your Souls on, make sure they’re mainstays on your team or a part of your strongest roster. That way, you’ll save some Souls for new members that might find their way there.
8. How To Manage Your Time
Because Dragon Tamer is chock full of different time limits for almost everything, it’s a wise idea to manage your time. As we’ve mentioned earlier, if you’re off to battle something for a while, you might as well plant food that take 5 minutes or longer to grow.
If you’re upgrading a building or dragon, or breeding two dragons, and they take more than a couple of hours, you’d best want to do this before you go to sleep. The next morning will guarantee you with a surprise (or a duplicate, if you’re breeding). Try to measure the amount of time needed in-game with what you might be able to do in real life so when you come back to the game, it’s finished.
One very important way to manage your time by deploying your dragon workers to different projects. One dragon worker will be dedicated to bigger, longer projects while the other will be used for smaller, shorter ones. For instance, one dragon worker will work on removing a piece of debris that requires 2 hours to complete and another worker will be in charge of building another Fire Habitat.
9. Make Friends, Speed Up Your Game
As the saying goes: “No man is an island.”, or at least in this case, no island should be alone. Filling your Friends List with friends will allow you to visit their islands and speed up anything they may have in production. Likewise, they can do the same to you and they might even do it if they look at their Social Log after seeing that you’ve helped them. You may help strangers in chat by visiting their islands and speeding up their production, too.
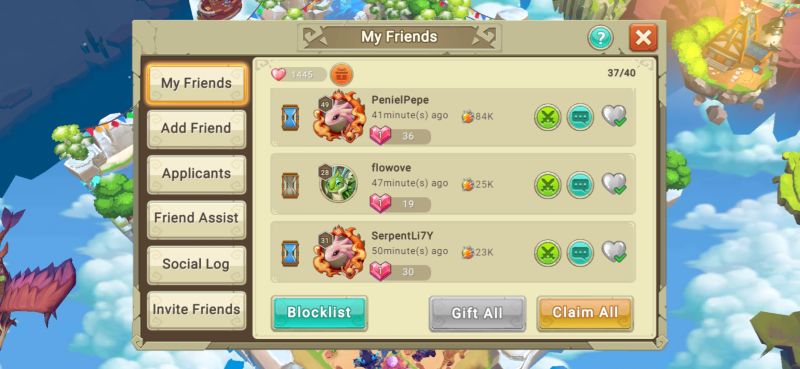
You may also borrow their dragons’ assistance in Adventure and Mystic Mountain. Depending on their dragon, they might make your battles a breeze. You can do this as well, allowing your friends to take any two of your dragons with them on trips.
Doing any of these actions will earn you Friendship Points. These points can be used to redeem a variety of resources in the Friendship Shop. Additionally, there are also dragons there that are otherwise hard to obtain through breeding.
10. Find An Alliance
No online game is complete without an alliance! In joining a guild, a clan, or as it’s called in this game, an alliance, you will be able to participate in unique challenges and events such as Alliance Boss and Alliance Warfare.
The Alliance Boss is a test of endurance and strength where your team of dragons is pitted against a single Legendary dragon whose stats increase the more times you lower its health bar. For participating, you gain a prize of a couple of Alliance Coins but if you manage to score the highest damage out of your entire alliance, you’ll have access to a prize box.
Alliance Warfare involves your entire alliance battling another. In wiping out different members of the enemy alliance, your alliance is rewarded with a chest. This mode requires an utmost exercise of teamwork and coordination as each member is only given a limited number of chances to attack. At the end of the war, the whole clan will receive prizes in their mail.
After earning these Alliance Coins, these can also be spent in the alliance’s very own Alliance Store. This store’s goods depend on the Alliance’s level, so if you’re hoping to unlock more goods in the store (especially some Legendary dragons that can only be acquired through this), be active and participate in your alliance’s events!
And that’s all we have for Dragon Tamer, folks! Remember that the key here isn’t to chase Legendary or Epic dragons, but to employ effective strategy in almost anything and everything you do in-game. You’ll get those shiny dragons eventually. Just like everything in the game, it’s a matter of patience. While Dragon Tamer can be pretty time-consuming, it handsomely rewards you the longer you play.
If there’s anything we missed here or if you have tips of your own, do leave your thoughts in the comment section down below!
Ed
Friday 21st of April 2023
How do I obtain Rainabow spars once I have obtained 10 dragons at level 101?
Ed
Wednesday 10th of August 2022
How do you use the Red stars to increase your strength from 5 stars to 6-10 stars? Thanks Ed
Roni
Sunday 13th of June 2021
Can you tell us how the Chaos Temple works and how to acquire Chaos Sources to breed there