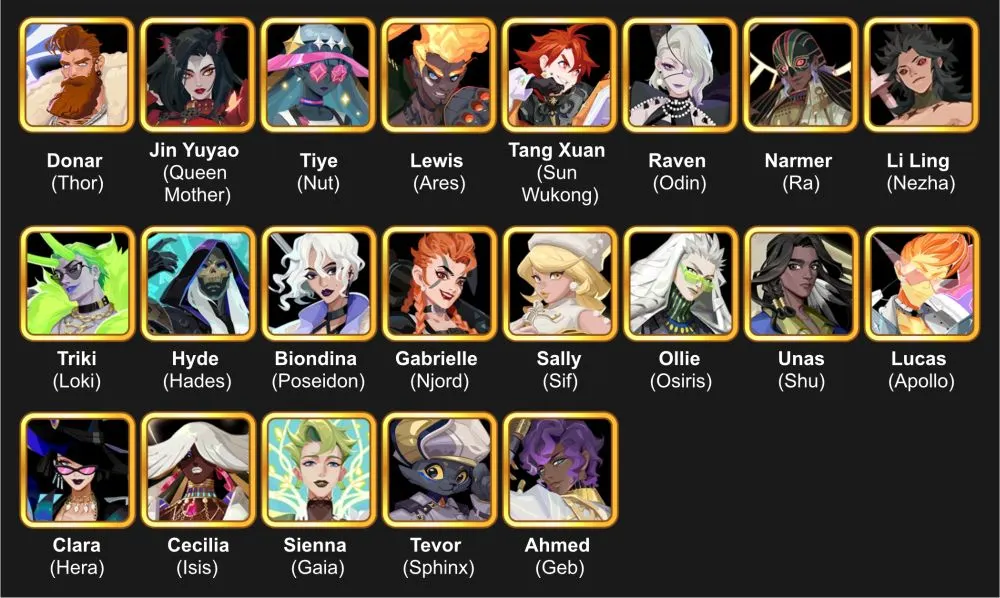
Welcome to the last part of three of our Esper Guides! In this guide, we will learn about the strengths and weaknesses of the 21 Legendary Espers that you can currently obtain and encounter in the game. If you haven’t already, make sure to also check our Rare Espers Guide as it will explain the different Esper Roles and Sub Roles as well as our Base Attribute Ranges which will come up often in this guide and our Epic Espers Guide.
This guide assumes you’ve been playing Dislyte for some time and are familiar with a few terminologies. However, if you’re new to the game, you can check out our Dislyte Beginner’s Guide!
Legendary Esper Attributes
| ESPER | ATK (lvl 1) | ATK (lvl 60) | HP (lvl 1) | HP (lvl 60) | DEF (lvl 1) | DEF (lvl 60) | SPD |
| Donar (Thor) | 261 | 952 | 2,985 | 10,862 | 341 | 1,243 | 94 |
| Jin Yuyao (Queen Mother) | 236 | 860 | 4,583 | 16,680 | 245 | 887 | 99 |
| Tiye (Nut) | 261 | 952 | 4,240 | 15,428 | 245 | 887 | 103 |
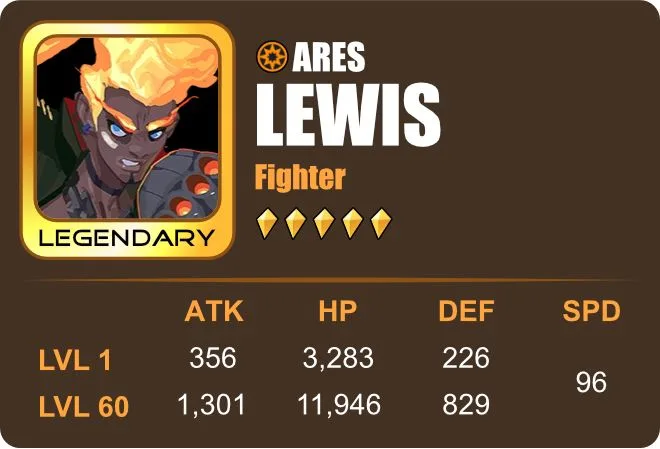
| Lewis (Ares) | 356 | 1,301 | 3,283 | 11,946 | 226 | 829 | 96 |
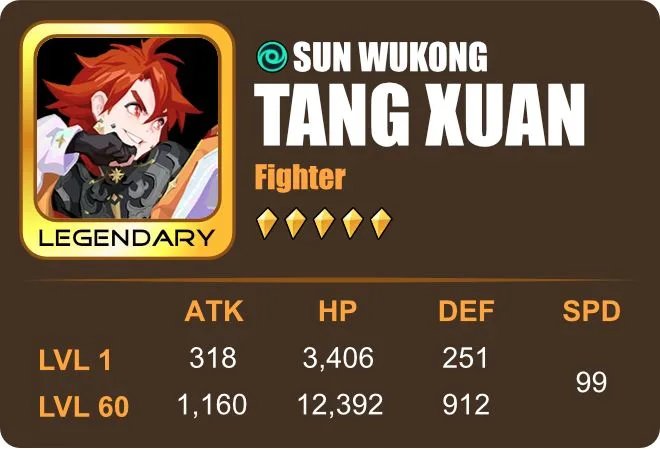
| Tang Xuan (Sun Wukong) | 318 | 1,160 | 3,406 | 12,392 | 251 | 912 | 99 |
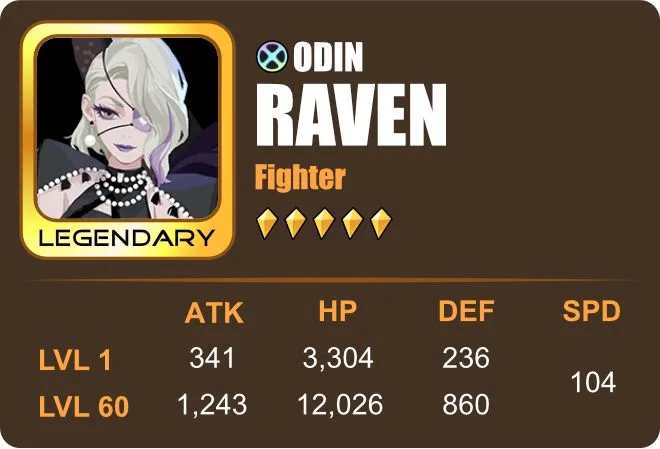
| Raven (Odin) | 341 | 1,243 | 3,304 | 12,026 | 236 | 860 | 104 |
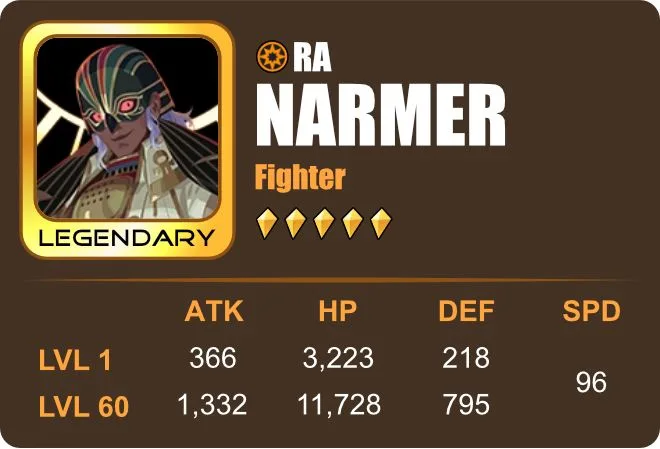
| Narmer (Ra) | 366 | 1,332 | 3,223 | 11,728 | 218 | 795 | 96 |
| Li Ling (Nezha) | 331 | 1,204 | 3,406 | 12,392 | 237 | 861 | 105 |
| Triki (Loki) | 240 | 874 | 4,472 | 16,273 | 250 | 911 | 107 |
| Hyde (Hades) | 340 | 1,242 | 3,677 | 13,383 | 213 | 780 | 96 |
| Biondina (Poseidon) | 340 | 1,242 | 3,071 | 11,176 | 255 | 926 | 104 |
| Gabrielle (Njord) | 264 | 961 | 3,850 | 14,005 | 275 | 1,002 | 106 |
| Sally (Sif) | 226 | 829 | 4,481 | 16,304 | 265 | 963 | 96 |
| Ollie (Osiris) | 322 | 1,173 | 3,715 | 13,521 | 227 | 830 | 93 |
| Unas (Shu) | 298 | 1,084 | 3,406 | 12,392 | 271 | 992 | 106 |
| Lucas (Apollo) | 278 | 1,013 | 4,012 | 14,602 | 249 | 910 | 105 |
| Clara (Hera) | 232 | 849 | 4,335 | 15,777 | 272 | 992 | 106 |
| Cecilia (Isis) | 232 | 849 | 4,537 | 16,510 | 255 | 926 | 95 |
| Sienna (Gaia) | 271 | 992 | 3,751 | 13,646 | 275 | 1,002 | 100 |
| Tevor (Sphinx) | 335 | 1,224 | 3,057 | 11,126 | 218 | 795 | 97 |
| Ahmed (Geb) | 249 | 910 | 4,382 | 15,948 | 207 | 754 | 94 |
Legend:
| Highest among all Espers | Lowest among Legendary Espers |
Legendary Espers
Legendary Espers are very difficult to obtain and may take up to 120 spins before you are guaranteed to get one. They never have Low stats, rarely have Average stats (only for SPD) and usually range from Good to Godly stats. You’d be very lucky to get even a duplicate of one.
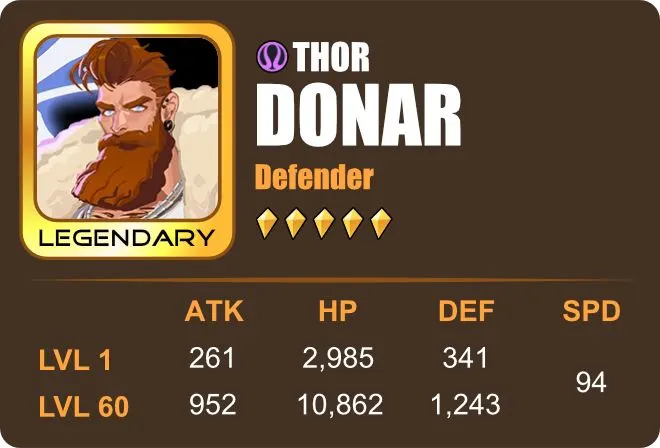
Donar (Thor)
Role: Defender (Possible Fighter)
Sub Roles: AoE, Nuker, Debilitator, Buffer
Buffs: DEF Up, Immunity, Conductor, Thunder Blessing
Debuffs: ATK Down
Other Abilities: Reduce Cooldown
Captain Ability: Increases ally DEF by 30%
Attributes:
Godly DEF (Highest among all Espers)
High ATK
Good HP (Lowest among all Legendary Espers)
Average SPD
Skills:
| Upward Lightning | Thundercrack | Explosions in the Sky | |
| Target | 1 Enemy | All Enemies, Self | 1 Enemy |
| Damage / Heal | Damage: 30% of ATK + 50% (max lvl) of DEF | Damage: 90% (max lvl) of DEF | Damage: 80% of ATK + 100% (max lvl) of DEF |
| Effects | 45% (max lvl) chance to ATK Down, 2 turns | Conductor, 1 turn (Self) If attacked while Conductor is active = Thunder Blessing, 1 stack (max stack: 5) Warning: Immobilization removes Conductor | DEF Up & Immunity, 2 turns |
| Triggers / Cooldown | — | 4 turns (max lvl) | 5 turns (max lvl) |
| Ascension Upgrade | — | If active ability triggers Critical Hit = Reduce Cooldown on Thundercrack by 1 | — |
Recommended x4 Relic Sets:
Hades Set, War Machine, Ocean Waves
Recommended x2 Relic Sets:
Stoneveins, Sword Avatara, Fiery Incandescence
Donar’s ability to convert DEF to damage makes him a hard-hitting, hard-to-kill Defender. Paired with his ATK Down debuff, his Immunity buff and his Captain Ability that increases team’s DEF by 30%, he is near impenetrable. Hitting him while his passive is active only serves to increase his defense (up to 5 stacks), letting him attack with a much more devastating blow to all enemies at the beginning of the next turn. Immobilizing him with debuffs may make him falter, but that is if enemies manage to do so before he activates his Immunity buff which lasts for 2 turns.
Ocean Waves for cooldown reduction or Hades for lifesteal are great choices for relics. You may also equip him War Machine for more ATK since it is almost half of the damage for his first and last skill but your main focus should be his DEF. Stoneveins is a must for 2-Relic sets but Sword Avatara is a possible alternative since his first skill has a chance of inflicting ATK Down. You may also want to equip him with C. RATE attributes or Fiery Incandescence since Critical Hits will reduce Thundercrack’s cooldown.
Related: Dislyte Tier List: A Complete Ranking of All Espers
He is best paired with Espers with DEF Up and C. RATE Up buffs. However, unlike most Defenders that have Taunt that will direct enemies to them, Donar does not and it will be up to chance if he gets hit. This means he won’t be useful in defending lower HP & DEF Espers in the team. He will be even more useless if paired with another defender that does have Taunt.
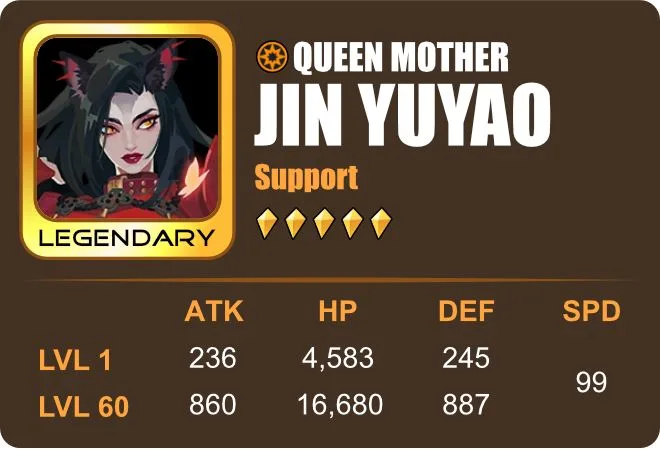
Jin Yuyao (Queen Mother)
Role: Support
Sub Roles: Nuker, Disabler, Buffer, Healer
Buffs: —
Debuffs: Stun
Other Abilities: Increase AP, Transfers Debuffs, Removes Debuffs, Immune to disables
Captain Ability: Increases ally HP by 30%
Attributes:
Godly HP (Highest among all Espers)
High DEF & SPD
Good ATK
Skills:
| Blood Talisman | Abode of Immortals (Passive) | Mount Kunlun‘s Rage | |
| Target | 1 Enemy | All Allies, Self | 1 Enemy |
| Damage / Heal | Damage: 110% (max lvl) of ATK | Damage: 13% (max lvl) of max HP | |
| Effects | 50% (max lvl) chance to Stun, 1 turn | Immune to disables (Self) Increase AP by 20% (max lvl) when ally receives debuff (once per turn) (Self) Removes a random debuff other than Immobile + Heal 5% of max HP (All Allies) | Transfers all debuffs from all allies to target |
| Triggers / Cooldown | — | Start of Jin Yuyao’s turn | 4 turns (max lvl) |
| Ascension Upgrade | Increase AP by 25% if the target has a debuff | — | — |
Recommended x4 Relic Sets:
Wind Walker, Astral Witchcraft
Recommended x2 Relic Sets:
Master Grove, Adamantine
Jin Yuyao is every disabler’s worst nightmare. Her passive skill, Abode of Immortals, makes her immune to disables, lets her remove a random debuff from all allied espers and heals them for 5% of their max HP at the start of each turn. Each debuff placed on her allies increases her AP, making her turn come sooner, activating her passive each time. She is also capable of stunning enemies and transferring all of the team’s debuffs to a target, dealing 13% of her Max HP as damage.
Equip her with Wind Walker for faster turns or Astral Witchcraft which increases her allies SPD if afflicted with disables. Go for Master Grove to focus on her survivability and increase her HP-Damage conversion or Adamantine to grant allies Shield, making her more focused on Support. HP and SPD are her most important attributes to improve.
Related: Dislyte Squad Formation Guide: Recommended Team Formations
She is best used against Espers reliant on debuffs. She is best paired with Espers with a SPD Up buff, Espers that can heal and Espers that can deal large amounts of damage since she lacks in those departments.
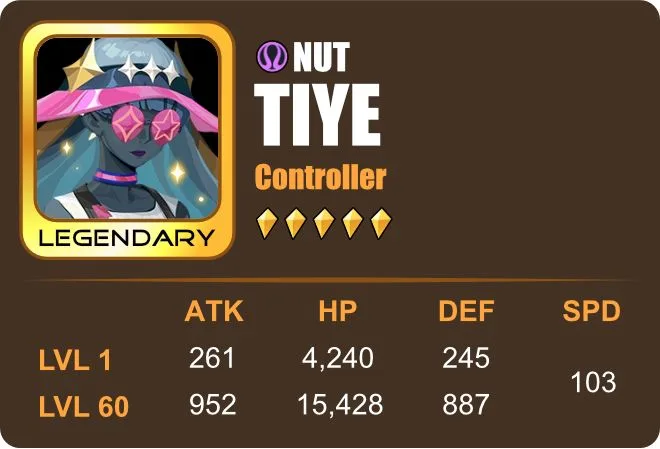
Tiye (Nut)
Role: Controller
Sub Roles: AoE, Disabler, Buffer
Buffs: —
Debuffs: Stun, SPD Down
Other Abilities: Takes AP, Distributes AP to allies
Captain Ability: Increases ally SPD by 25%
Attributes:
Godly HP
Excellent SPD
High ATK & DEF
Skills:
| Nightbringer | Starstruck | Devouring Void | |
| Target | 1 Enemy | All Enemies | All Enemies |
| Damage / Heal | Damage: 110% (max lvl) of ATK | Damage: 80% (max lvl) of ATK | Damage: 105% (max lvl) of ATK |
| Effects | 60% (max lvl) chance to Take 20% AP | 60% (max lvl) chance to Stun, 1 turn | Take 30% of targets’ AP and distribute equally among all allies |
| Triggers / Cooldown | — | 3 turns (max lvl) | 5 turns (max lvl) |
| Ascension Upgrade | — | SPD Down, 2 turns | — |
Recommended x4 Relic Sets:
Wind Walker
Recommended x2 Relic Sets:
Apollo’s Bow, Adamantine, Master Grove
Tiye can put her enemies down before they can even use their first skill. With a starting SPD stat of 103, a Captain Ability that increases the team’s SPD by 25%, skills that absorbs enemies AP, inflict SPD Down and Stun and even redistributing 30% of target’s AP equally among team members, this Esper can give your team a great advantage over your enemies.
SPD is everything to Tiye so equip her with Wind Walker with SPD-focused attributes. Improving her ACC with Apollo’s Bow or relics with the attribute will make her Stun and SPD Down’s chance of inflicting higher. Alternatively, you can choose Adamantine for early battle Shields and Master Grove for HP.
She makes a good counter against hard-hitting enemies that strikes more than once per turn. She is best paired with Espers that have low SPD or long cooldowns.
Lewis (Ares)
Role: Fighter
Sub Roles: Chain Striker, Nuker, Buffer, Healer
Buffs: C. RATE Up
Debuffs: —
Other Abilities: Increase AP, Damage to Heal, Bonus Turn, Reduce Cooldowns
Captain Ability: Increases ally C. RATE by 25%
Attributes:
Godly ATK
High HP
Good DEF & SPD
Skills:
| Iron Fists | Flames of Fury | Rage Avatar | |
| Target | 1 Enemy | 1 Enemy | 1 Enemy |
| Damage / Heal | Damage: 130% (max lvl) of ATK Heal: Converts 50% of damage dealt to healing | Damage: 180% (max lvl) of ATK | Damage: 3 hits, 260% (max lvl) of ATK + 5% for every 10% HP lost |
| Effects | If Critical Hit = Increase AP by 20% | C. RATE Up, 2 turns If Critical Hit = Bonus Turn | — |
| Triggers / Cooldown | — | 4 turns (max lvl) | 4 turns |
| Ascension Upgrade | — | — | If target dies = All Ability Cooldowns reduced by 1 |
Recommended x4 Relic Sets:
War Machine, Hammer of Thor
Recommended x2 Relic Sets:
Fiery Incandescence, Sword Avatara
Lewis uses his critical hits and kills to increase his AP, gain Bonus Turns and even reduce his ability cooldowns. He makes it easy to trigger his crits with his Captain’s Ability and C. RATE Up buffs. The more HP he loses, the greater the damage his Rage Avatar can deal. To keep him from dying, his basic skill has the ability to convert a percentage of his damage to healing.
Hades seems to be a popular relic choice, possibly for survivability, but it may not be good for Lewis since the goal to make his third skill stronger is to lower his HP. Instead, focus on improving his ATK with War Machine or C. DMG with Hammer of Thor. Equip him with Incandescence for additional C.RATE or Sword Avatara since counter attacks are extra chances at triggering crits.
He is best used against high HP or DEF enemies and is best paired with Espers that can grant him Standoff and ATK Up. Healers or Revivers may also help keep him in battle when close to death or has died.
Tang Xuan (Sun Wukong)
Role: Fighter
Sub Roles: Chain Striker, AoE, Nuker, Disabler, Debilitator, Buffer, Healer
Buffs: Scorch, Death, Shackle, Shield
Debuffs: Diseased, DEF Down
Other Abilities: —
Captain Ability: Increases ally ATK by 30%
Attributes:
Excellent ATK
High HP, DEF & SPD
Skills:
| Righteous Anger | Enchanting Dream | Shattering Dream | |
| Target | 1 Chosen Enemy + 2 Random Enemies | 1 Enemy | All Enemies |
| Damage / Heal | Damage: 120% (max lvl) of ATK (Chosen Enemy) Damage: 80% (max lvl) of ATK (2 Random Enemies) | Damage: 200% (max lvl) of ATK | Damage: 2 hits, 60% (max lvl) of ATK each |
| Effects | Scorch, Death or Shackle before each attack, 1 turn | Absorbs all current Enchantments (Scorch, Death or Shackle) Ignores 15% DEF per absorbed Enchantment Restores 10% of Tang Xuan’s max HP per absorbed Enchantment | Scorch, Death & Shackle before attack, 2 turns |
| Triggers / Cooldown | — | 2 turns (max lvl) | 3 turns (max lvl) |
| Ascension Upgrade | — | Shield (Strength: 10% + 5% of max HP per absorbed Enchantment) + amplifies attack by 10% | — |
Recommended x4 Relic Sets:
Hades, War Machine
Recommended x2 Relic Sets:
Fiery Incandescence, Sword Avatara
Tang Xuan’s attacks utilize the power of his three unique enchantments: Scorch, Death and Shackle. Scorch makes the enemy unhealable, Death inflicts a portion of the target’s HP as damage while Shackle lowers the target’s defense. Absorbing enchantments would also heal Tang Xuan and give him a Shield, making him a self-sufficient Fighter that can survive without Supports.
Tang Xuan will greatly benefit from an ATK boost with relics for damage and HP for better Shield and survivability. War Machine and Fiery Incandescence will make his attacks hit harder, increasing ATK and C. RATE, while Hades is advisable against enemies with equally deadly blows. Sword Avatara pairs well with him too since his basic attack hits 3 enemies.
He can be placed on any team but may do even better if paired with Supports that can buff his ATK, SPD or C. RATE or Controllers that can disable his enemies. Add Defenders if he needs help staying alive.
Raven (Odin)
Role: Fighter
Sub Roles: Chain Striker, AoE, Disabler, Debilitator, Dispeller
Buffs: —
Debuffs: Sear, Buff Blocker, DEF Down
Other Abilities: Takes Buffs, HP Ceiling Decrease, Removes Debuffs, Removes Buffs
Captain Ability: Increases ally ATK by 30%
Attributes:
Godly ATK
Excellent SPD
Good HP & DEF
Skills:
| Eternal Comet | Sunset | Sleipnir | |
| Target | 1 Enemy | All Enemies | All Enemies |
| Damage / Heal | Damage: 2 hits, 70% (max lvl) of ATK | Damage: 2 hits, 50% (max lvl) of ATK | Damage: 120% (max lvl) of ATK (buff & debuff removal before damage) |
| Effects | 70% (max lvl) chance to Take 1 buff from target (if successful, inflict Sear, 1 turn) | Buff Blocker, 2 turns (first strike) HP Ceiling decrease equal to amount of damage dealt (second strike) | Removes Buffs (All Enemies) Removes Debuffs (Self) |
| Triggers / Cooldown | — | 3 turns, (max lvl) | 4 turns (max lvl) |
| Ascension Upgrade | — | — | 50% chance to DEF Down, 2 turns |
Recommended x4 Relic Sets:
Wind Walker, War Machine
Recommended x2 Relic Sets:
Fiery Incandescence, Apollo’s Bow
Raven puts Supports to shame. Her skills are built to lower her enemies’ defenses, inflicting DEF Down, Buff Blocker and Sear. She also has the power to steal or remove buffs from her enemies and dispel debuffs from herself.
ATK, SPD, ACC and possibly C. RATE are attributes that will supplement her build and skill set so equip her with relics depending on which role you want her to focus on. War Machine and Fiery Incandescence for damage, Wind Walker and Apollo for disabling and debuffing or mix them up.
She is best used against enemies with buffs or high DEF and paired with at least one more AoE or DPS Esper to maximize her debuffs. Her HP and DEF are her lowest attributes and may also benefit from having healing or buffing Supports to keep her in battle.
Narmer (Ra)
Role: Fighter
Sub Roles: AoE, Disabler, Buffer
Buffs: ATK Up, Burning Sun
Debuffs: —
Other Abilities: Takes Buffs, Reduce Cooldowns
Captain Ability: Increases ally ATK in Point War by 40%
Attributes:
Godly ATK (Highest among all Espers)
High HP
Good DEF & SPD
Skills:
| Sunwheel | Wheel of Fate (Passive) | Emblazoned Strike | |
| Target | 1 Enemy | Self | All Enemies |
| Damage / Heal | Damage: 130% (max lvl) of ATK | — | Damage: 100% (max lvl) of ATK + 10% per Burning Sun |
| Effects | Take 1 buff 100% (max lvl) chance to ATK Up | Stacks 2 Burning Sun (max stack: 8) | Consume all Burning Suns 3 or more Burning Suns = Ignore 40% of enemy DEF 5 or more Burning Suns = Reduce all ability cooldowns by 1 |
| Triggers / Cooldown | — | Start of Narmer’s turn | 3 turns (max lvl) |
| Ascension Upgrade | — | Stack 1 Burning Sun for each buff received | — |
Recommended x4 Relic Sets:
War Machine, Hammer of Thor
Recommended x2 Relic Sets:
Sword Avatara, Fiery Incandescence
Narmer is a force to be reckoned with, but only if put in the right conditions. His skillset is built around using his ultimate skill, Emblazoned Strike and stacking Burning Sun buffs to make it stronger. He can stack Burning Suns at the start of his turns and each time he uses his basic skill once his passive is upgraded in Ascension.
To make the most out of his unique skill set, he is best equipped with War Machine for more ATK and Sword Avatara so he could keep using his basic skill outside of his turn, stacking even more Burning Suns. SPD is good to invest in but instead of Wind Walker, Hammer of Thor can be effective so your turns can pass by more often while enemies stay immobile. If stacking Burning Suns is not a problem, Fiery Incandescence is a good alternative to Sword Avatara for extra C.RATE.
However, because he requires a buff to be stolen for him to stack Burning Sun with his basic attack, he won’t be as effective against enemies that aren’t reliant on buffs. To make up for this, it’s best to pair him with Controllers that can slow down and stun his enemies or Supports with SPD and AP boosts so he can build up his stacks.
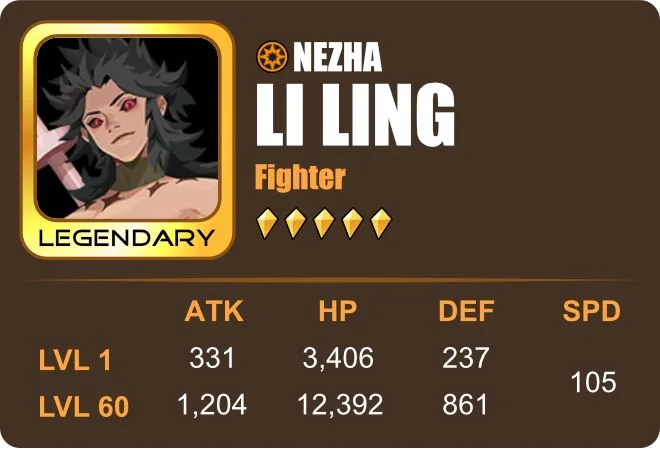
Li Ling (Nezha)
Role: Fighter
Sub Roles: Chain Striker, AoE, Disabler, Healer
Buffs: —
Debuffs: —
Other Abilities: Takes AP, Damage to Heal
Captain Ability: Increases ally ATK by 30%
Attributes:
Godly ATK & SPD
High HP
Good DEF
Skills:
| Lanceburner | Tai Chi | Altar | |
| Target | 1 Enemy | 1 Enemy | All Enemies |
| Damage / Heal | Damage: 130% (max lvl) of ATK | Damage: 5 hits, 36% (max lvl) of ATK + 6% of target’s HP as True Damage (not exceeding 80% of Nezha’s ATK) | Damage: 3 hits, 38% (max lvl) of ATK + 6% of target’s HP as True Damage (not exceeding 80% of Nezha’s ATK) + 10% of target’s AP |
| Effects | Takes 15% AP | — | — |
| Triggers / Cooldown | — | 3 turns (max lvl) | 4 turns |
| Ascension Upgrade | — | 50% of damage converted to healing | — |
Recommended x4 Relic Sets:
War Machine, Hades
Recommended x2 Relic Sets:
Fiery Incandescence, Sword Avatara
Li Ling’s skill set is all about damage. He takes stats from his ATK, his targets HP and even their AP to deal tremendous amounts of damage. He can also push enemies back in the AP bar with his first skill and convert damage to healing with his second upon upgrading it in Ascension. What’s great about his first and second skill is his damage scales up or down based on who he’s attacking, which makes him an amazing ally against boss fights.
ATK is his most important attribute to increase followed by C.RATE and C.DMG. War Machine and Fiery Incandescence will help greatly with the first two attributes, but you may want to trade them for Hades’ lifesteal or Sword Avatara’s counter attacks which may also delay enemies’ turns with his AP-stealing basic ability.
He can work well in any team and assumes the position of team’s hardest hitter. His performance improves more with Supports buffing his ATK, SPD or C.RATE.
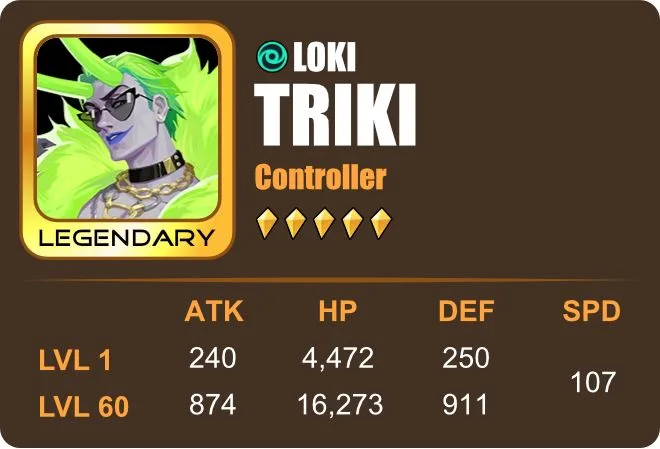
Triki (Loki)
Role: Controller
Sub Roles: Chain Striker, AoE, Nuker, Disabler, Debilitator, Dispeller
Buffs: —
Debuffs: Stun, Petrification, Miss Rate Up
Other Abilities: Transfers Debuffs, Extends Debuffs, Removes Buffs, Never Misses
Captain Ability: Increases ally ACC by 40%
Attributes:
Godly HP & SPD (Highest among all Espers)
High DEF
Good ATK
Skills:
| Greenflames | Gambit (Passive) | Revolver | |
| Target | 1 Enemy | All Enemies, Enemy that removes a debuff | All Enemies |
| Damage / Heal | Damage: 2 hits, 30% (1st hit) & 110% (2nd hit) (max lvl) of ATK | — | Damage: 3 hits, 40% (max lvl) of ATK each |
| Effects | Each strike transfers a debuff from Triki to the target Successful debuff transfer = 70% (max lvl) chance to Stun, 1 turn | Loki’s attack never misses (does not refer to debuffs) (All Enemies) Enemy removes debuff = enemy loses 30% of current HP, their buffs + Petrification, 1 turn | 75% (max lvl) chance of removing 1 buff each hit Miss Rate Up, 2 turns |
| Triggers / Cooldown | — | — | 4 turns (max lvl) |
| Ascension Upgrade | — | — | Extends all targets’ debuffs, 1 turn (1st hit) |
Recommended x4 Relic Sets:
Wind Walker, Ocean Waves
Recommended x2 Relic Sets:
Apollo’s Bow, Sword Avatara
Triki’s skills revel in debuffs. Ranging from inflicting, transferring and extending debuffs to removing his enemies’ buffs and punishing them when his debuffs get dispelled, he is an all-around Anti-Support Esper.
While his skills do a great job disabling his enemies, Triki’s attacks themselves won’t do much damage. But instead of trying to increase his ATK, focus instead on his strengths and improve his ACC with Apollo’s Bow, his SPD with Wind Walker or reduce his cooldowns with Ocean Waves. Sword Avatara is also a decent alternative as it will cause him to have more chances of transferring debuffs and stunning his enemies.
As he focuses on disabling, you can pair him up with strong Fighters that can take advantage of his disabling skills
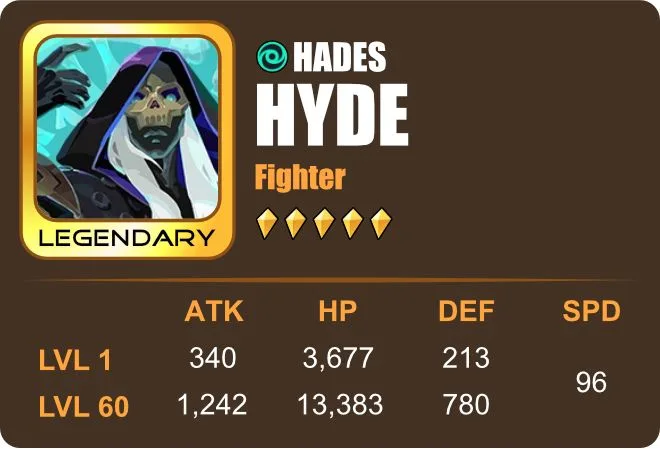
Hyde (Hades)
Role: Fighter
Sub Roles: Chain Striker, AoE, Disabler, Debilitator, Healer, Buffer
Buffs: Breath of the Deep
Debuffs: —
Other Abilities: Takes Buffs, Reduces HP Ceiling, Immune to buffs and debuffs, Damage Reduction, Damage to Heal
Captain Ability: Increases ally RESIST in Point War by 50%
Attributes:
Godly ATK
Excellent HP
Good SPD & DEF (Lowest among all Legendary Espers)
Skills:
| Underworld Curse | Reaper (Passive) | Cerberus | |
| Target | 1 Enemy | Self | All Enemies |
| Damage / Heal | Damage: 2 hits, 65% (max lvl) of ATK | — | Damage: 110% (max lvl) of ATK |
| Effects | Take 2 buffs Reduce HP Ceiling by 100% (max lvl) of damage dealt | Immune to buffs and debuffs 10% reduced damage from all sources Attempts to buff or debuff Hyde will stack Breath of the Deep 10 Breath of the Deep stacks upon death of an ally (max stacks: 50) When taking first deadly hit in battle (and survives) = restore HP based on Breath of the Deep stacks (1% of max HP per stack) | Take 1 buff each |
| Triggers / Cooldown | — | — | 4 turns (max lvl) |
| Ascension Upgrade | — | — | 30% of damage dealt converted to healing |
Recommended x4 Relic Sets:
Ocean Waves, Hades
Recommended x2 Relic Sets:
Sword Avatara, Fiery Incandescence, Master Grove
Hyde gets stronger as the battle goes on. His Breath of the Deep buff gives him 5% ATK per stack and 3% damage reduction per 10 stacks with a max count of 50 which cannot be dispelled. However, each wave resets the number of stacks. This buff stacks up whenever someone attempts to buff or debuff Hyde or if an ally dies. Paired with buff-spamming allies or used against debuff-happy enemies, those stacks can quickly max out, making him a scary damage dealer that’s hard to kill. He is also capable of lifesteal once Cerberus is upgraded in Ascension and his basic skill can continuously shorten his enemies’ max HP per attack.
His damage reductions can make up for his lack of DEF, but you may need to build up his SPD through your relic’s attributes or equip him with Ocean Waves since his third skill takes 4 turns to cooldown. Alternatively, equip him with Hades to give him lifesteal which is best paired with Sword Avatara so he can use his basic skill more often. Alternatively, you can use Fiery Incandescence for C.RATE or Master Grove for more HP.
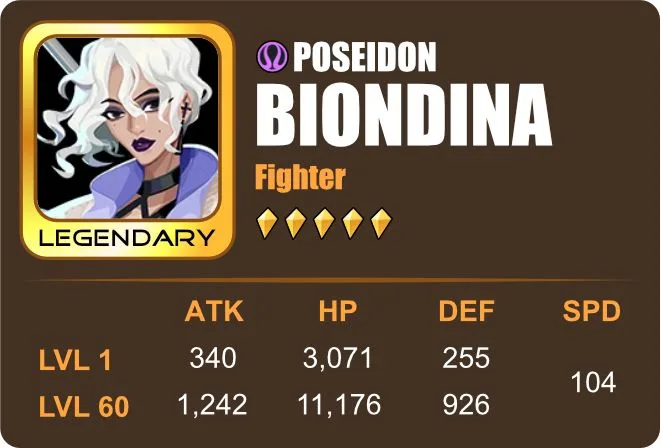
Biondina (Poseidon)
Role: Fighter
Sub Roles: AoE, Disabler
Buffs: —
Debuffs: Buff Blocker
Other Abilities: Removes Buffs
Captain Ability: Increases ally ATK in Point War by 40%
Attributes:
Godly ATK
Excellent SPD
High DEF
Good HP
Skills:
| Tidal Wave | Tsunami (Passive) | Neptune’s Wrath | |
| Target | 1 Enemy | 1 Random Enemy | 1 Enemy + All Other Enemies |
| Damage / Heal | Damage: 120% (max lvl) of ATK | — | Damage: 65% (max lvl) of ATK (1 Enemy) Damage: 30% (max lvl) of ATK (All Other Enemies) |
| Effects | 80% (max lvl) chance to Buff Blocker, 2 turns If unbuffed = 50% damage increase | Remove 1 buff 100% (max lvl) chance to remove 1 more buff Effects are guaranteed not to miss Prioritizes buffed targeta | Ignores 100% DEF of unbuffed targets (reduced a certain amount for each buff a target has) |
| Triggers / Cooldown | — | Start of Biondina’s turn | 3 turns (max lvl) |
| Ascension Upgrade | — | Removes all other buffs instead of just 1 more buff | — |
Recommended x4 Relic Sets:
War Machine, Hades
Recommended x2 Relic Sets:
Sword Avatara, Master Grove, Fiery Incandescence
Biondina never gets intimidated by her enemies’ buffs or high DEF as her first two skills can easily remove those buffs and her third ignores their defenses as she attacks. She can even prevent enemies from buffing and gets a damage increase each time she attacks an unbuffed enemy.
War Machine and Fiery Incandescence will make her deal more damage along with relic attributes for ATK, C.RATE and C. DMG. However, her biggest weakness is her HP which is only just as high as most Epics. Equip her with Hades for lifesteal and Master Grove for more HP along with attributes that can increase HP and DEF to increase her survivability. Sword Avatara could potentially be good since counterattacks will give her more chances of blocking buffs but it may prove to be risky unless she has Healers and Buffers who can support her. Aside from heals, SPD Up buffs or cooldown reductions will greatly improve her performance in battle.
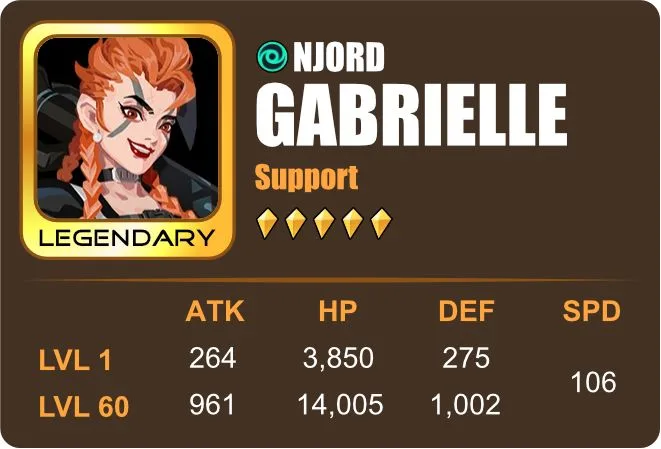
Gabrielle (Njord)
Role: Support
Sub Roles: Chain Striker, AoE, Debilitator, Buffer
Buffs: DEF Up, Immunity
Debuffs: ATK Down, DEF Down
Other Abilities: —
Captain Ability: Increases ally HP by 30%
Attributes:
Godly SPD
Excellent ATK, HP & DEF
Skills:
| Wavebreaker | Broadside | Rush | |
| Target | 1 Enemy | All Enemies | All Enemies, All Allies |
| Damage / Heal | Damage: 140% (max lvl) of ATK + 0.45% ATK per point of SPD | Damage: 3 hits, 80% (max lvl) of ATK total | Damage: 105% (max lvl) of ATK |
| Effects | — | 50% (max lvl) chance of DEF Down, 2 turns (each hit) | DEF Up, 2 turns (All Allies) ATK Down, 2 turns (All Enemies) |
| Triggers / Cooldown | — | 3 turns (max lvl) | 4 turns (max lvl) |
| Ascension Upgrade | — | — | Immunity, 2 turns (All Allies) |
Recommended x4 Relic Sets:
Wind Walker, Tyranny of Zeus
Recommended x2 Relic Sets:
Apollo’s Bow, Adamantine
Gabrielle may be categorized as a Support but she also has the makings of a Fighter. She can not only grant her allies DEF Up and Immunity, she can also debuff her enemies with ATK Down and DEF Down while dealing damage in the process.
Wind Walker seems to be the ideal relic for her since her SPD can be converted to ATK. This also helps her get to her turns a lot quicker which she needs since her skills have long cooldowns. If SPD is not too much of an issue, Tyranny of Zeus is a great alternative, giving her skills a chance to Stun enemies. To make her buffs and debuffs more likely to stick, increase her ACC attributes and equip Apollo’s Bow. Alternatively, you can equip her with Adamantine for early battle Shields.
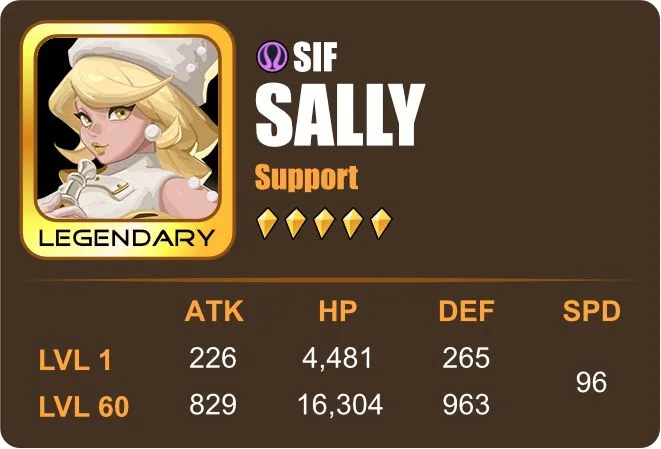
Sally (Sif)
Role: Support
Sub Roles: Chain Striker, Buffer, Healer, Dispeller
Buffs: Immunity, Sweet Harvest
Debuffs: —
Other Abilities: Removes Debuffs, Balances HP Ratio
Captain Ability: Increases ally RESIST by 40%
Attributes:
Godly HP
High DEF
Good SPD & ATK (Lowest among all Legendary Espers)
Skills:
| Light Call | Universal | Ode to Joy | |
| Target | 1 Enemy, Self | All Allies | Self, All Allies |
| Damage / Heal | Damage: 3 hits, 45% (max lvl) of ATK each | — | Heal: 26% (max lvl) of HP (start of each ally’s turn until Sweet Harvest ends) |
| Effects | 60% (max lvl) chance to gain Immunity, 2 turns (Self) | Removes all Debuffs Balances HP Ratio ATK Up, 2 turns | Sweet Harvest, 2 turns (makes Sally Immobile) (Self) Removes a debuff (start of each ally’s turn until Sweet Harvest ends) |
| Triggers / Cooldown | — | 3 turns (max lvl) | 4 turns (max lvl) |
| Ascension Upgrade | — | — | Take 25% less damage (All Allies) |
Recommended x4 Relic Sets:
Ocean Waves, Abiding Panacea
Recommended x2 Relic Sets:
Master Grove, Adamantine
Sally’s final skill, Ode to Joy, gives her a Sweet Harvest buff which puts her in an immobile state for 2 turns in exchange for the ability to remove a buff and heal an ally up to 26% of max HP at the start of each ally’s turn. Once upgraded in Ascension, this skill allows all Allies to take 25% less damage. When her third skill is not available, her second skill can redistribute and even out all allies’ HP and also remove all debuffs.
Unlike most Supports that benefit from higher SPD, Sally would actually benefit from lower SPD. Her heals happen at the start of each ally’s turn, which means that a higher SPD Esper will potentially be able to heal for more than 2 turns if they move faster than Sally. However, her last skill has a long cooldown so if your team is reliant on her heals, you may need to equip her with Ocean Waves for a chance to lower them. If it is not an issue, you could concentrate on improving her healing efficacy instead with Abiding Panacea.
HP is her highest stat and investing in it will be helpful when she uses her second skill so equip her with Master Grove or relics with HP attributes. Alternatively, you can give her Adamantine for early battle Shields for the team.
Her biggest weakness is her inability to heal herself often or move during her Sweet Harvest state so pairing her up with another Healer, even a minor one, would keep her afloat. She may also benefit from Defenders who can take the damage instead or Controllers who can slow down enemies. She also doesn’t deal much damage so it is essential that you pair her up with hard-hitting Fighters to balance the team.
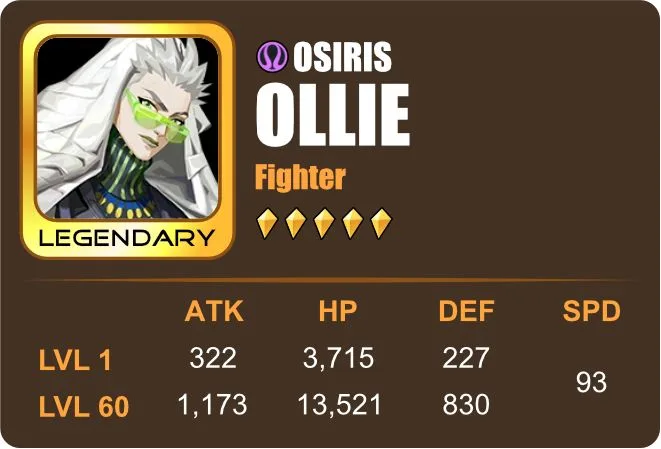
Ollie (Osiris)
Role: Fighter (Possible Defender)
Sub Roles: Nuker, Disabler, Debilitator, Buffer, Healer
Buffs: Invincibility, Recovery
Debuffs: Silence, DEF Down, Taunt
Other Abilities: Prevents Ally Death, Counterattack
Captain Ability: Increases ally SPD by 25%
Attributes:
Excellent ATK & HP
Good DEF
Average SPD (Lowest among all Legendary Espers)
Skills:
| Hookstrike | Salvific Judgements (passive) | Law of Duat | |
| Target | 1 Enemy | 1 Ally (fatally hit), Attacker | 1 Enemy, Self |
| Damage / Heal | Damage: 120% (max lvl) of ATK | — | Damage: 200% (max lvl) of ATK + portion of target’s max HP |
| Effects | 80% (max lvl) chance to Silence, 1 turn | Prevents Ally’s death + Invincibility & Recovery, 1 turn Casts Law of Duat on attacker | DEF Down, 2 turns Taunt, 1 turn |
| Triggers / Cooldown | — | When an ally is fatally hit 5 turns (max lvl) | 4 turns (max lvl) |
| Ascension Upgrade | — | — | Invincibility, 1 turn (Self) |
Recommended x4 Relic Sets:
Ocean Waves, Wind Walker
Recommended x2 Relic Sets:
Fiery Incandescence, Adamantine, The Light Above???
Master Grove, Stoneveins
Ollie’s skill set and stats suggests that he has the makings of a Defender, having high HP, the ability to Taunt and a unique passive that can keep an ally from dying.
While increasing Ollie’s ATK is ideal for damage, it may be best to prioritize increasing his SPD since his long cooldowns and Average SPD will make it almost impossible to use his last two skills more than once in battle. Equip him with Wind Walker for faster turns or Ocean Waves for cooldown reductions and build up his SPD and ATK attributes. If you are able to raise his SPD attributes and pair him with Espers with SPD boosts or cooldown reductions, you could equip him with War Machine instead. As for his 2-relic sets, you can change it up based on the situation. Fiery Incandescence for extra damage (C. RATE), Adamantine for early battle Shields or Master Grove for extra HP.
He is best used against enemies that deal fatal or critical blows like bosses since his passive is sure to save at least one ally. However, since his DEF is not that high, he may need Supports to buff and heal him.
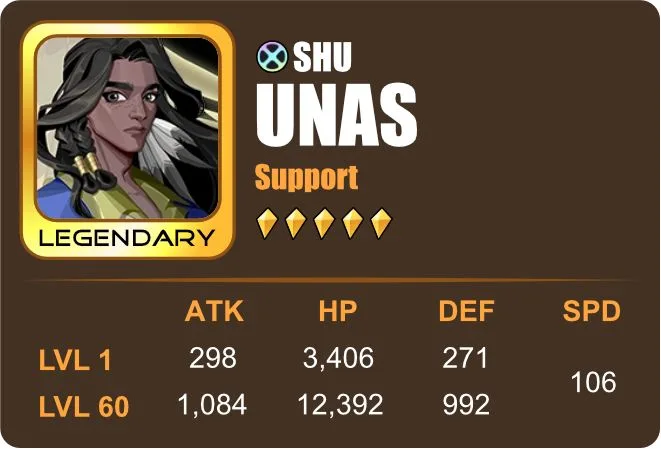
Unas (Shu)
Role: Support
Sub Roles: Chain Striker, AoE, Debilitator, Buffer
Buffs: Immunity, Haste
Debuffs: DEF Down
Other Abilities: Increases AP
Captain Ability: Increases ally SPD in Holobattle by 35%
Attributes:
Godly SPD
Excellent ATK
High HP & DEF
Skills:
| Follow the Wind | Zephyrus (Passive) | Gale Force | |
| Target | 1 Enemy | All Allies | All Enemies, All Allies |
| Damage / Heal | Damage: 3 hits, 35% (max lvl) of ATK + 1% per 10 SPD of ATK each | — | Damage: 90% (max lvl) of ATK + 1% per 10 SPD of ATK each |
| Effects | 60% (max lvl) chance to DEF Down, 2 turns | Immunity, 1 turn | Increase AP 30% (All Allies) |
| Triggers / Cooldown | — | At the end of Unas’ turn (if he is not immobile) | 3 turns (max lvl) |
| Ascension Upgrade | — | 1 Haste (max stacks: 3) Haste stacks are dispelled after attacking | — |
Recommended x4 Relic Sets:
Wind Walker
Recommended x2 Relic Sets:
Master Grove, Adamantine, The Light Above, Immensus Peak
Unas’ skillset is all about SPD. Each of his attacks convert every 10 SPD points to 1% ATK and his passive, once upgraded in Ascension, will grant him Haste. This unique buff can stack up to 3 times, with each stack giving him 30 SPD. Adding all his stats when Haste is maxed without relics, he could get up to 19% additional ATK. Equip him with Wind Walker and add SPD and ATK attributes to make him both speedy and hard-hitting in battle.
He may have a hard time against Controllers since his passive cannot trigger if he is immobile. To prevent this, at least at the start of his turn, equip him with The Light Above for early battle Immunity. This may also help against debuffs that can damage him for each turn (like Bleed or Poison). Immensus Peak is also a good alternative as it gives him 25% RESIST. If no Controllers or enemies with damaging debuffs are present, you can opt for Master Grove for HP or Adamantine for early battle Shield instead.
He is best paired with Espers that have ATK Up or SPD Up which can stack on top of his Haste along with Supports that can cleanse debuffs. He is best used against slow enemies.
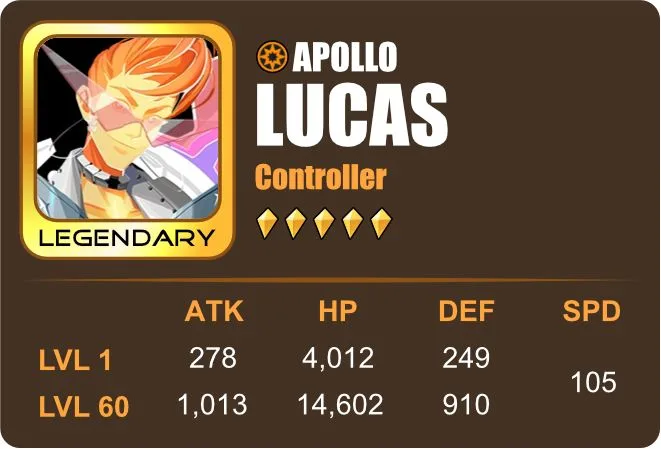
Lucas (Apollo)
Role: Controller
Sub Roles: Chain Striker, AoE, Disabler, Buffer
Buffs: —
Debuffs: Stun
Other Abilities: Increase AP, Reduce AP, Remove Buff
Captain Ability: Increases ally ACC by 40%
Attributes:
Goldy SPD
Excellent HP
High ATK & DEF
Skills:
| Lightpulse | The Blessing of Phobos | Pillar of Light | |
| Target | 1 Enemy, Self | All Enemies, Self | All Enemies |
| Damage / Heal | Damage: 3 hits, 115% (max lvl) of ATK total | Damage: 80% (max lvl) of ATK total | Damage: 3 hits, 100% (max lvl) of ATK total |
| Effects | If Critical Hit = Increase 15% AP | 85% (max lvl) chance to Stun, 1 turn | 50% (max lvl) chance to Remove 1 buff each hit + Reduce 10% AP |
| Triggers / Cooldown | — | 3 turns (max lvl) | 4 turns (max lvl) |
| Ascension Upgrade | — | Each Stun Increases 15% AP (Self) | — |
Recommended x4 Relic Sets:
Wind Walker, Tyranny of Zeus
Recommended x2 Relic Sets:
Apollo’s Bow, Fiery Incandescence
Apollo’s AP Boosts paired with his Stuns, AP reduction and buff removal for enemies makes him a very competitive Controller. His disables make it easy for his allies to pick apart the enemy team but his boosts will only affect himself when he triggers crits or Stuns an enemy.
SPD is his greatest asset and is best improved with Wind Walker and SPD attributes on relics. Alternatively, you can choose Tyranny of Zeus instead to add chances to Stun in every skill. However, his ATK and DEF are his weakest links. It may not be worth investing much in ATK since you will need a lot just to make him a capable Fighter. It may be smarter to go for C. RATE and C. DMG with Fiery Incandescence since critical hits using his basic skill gives him AP boosts. If you want to focus more on his chances to Stun, equip him with Apollo’s Bow.
He is best used against enemies reliant on buffs since he can remove one buff each and reduce AP on one skill and Stun all enemies with another. He is best paired with Espers that can boost his SPD, ATK and C. RATE with buffs. Since he doesn’t deal too much damage, he will need a stronger damage dealer on the team to take advantage of his disables.
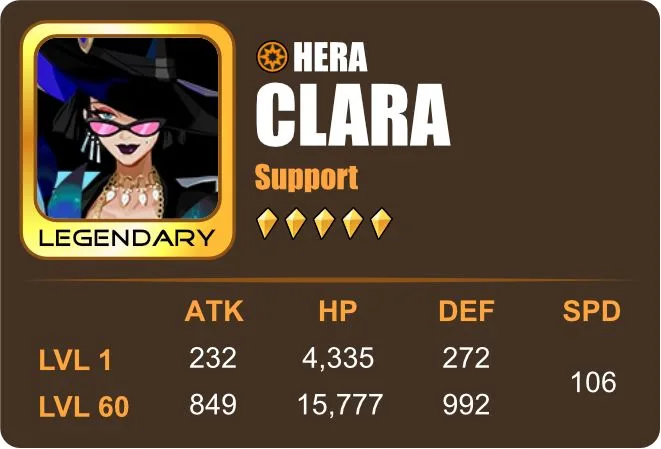
Clara (Hera)
Role: Support
Sub Roles: Chain Striker, Buffer, Healer, Dispeller
Buffs: Shield, Immunity
Debuffs: —
Other Abilities: Increase AP, Removes Debuffs
Captain Ability: Increases ally DEF in Point War by 40%
Attributes:
Godly HP & SPD
High DEF
Good ATK
Skills:
| Queen’s Blessing | Queen’s Protection (Passive) | Hymn of Life | |
| Target | 1 Enemy, 2 Lowest HP Allies | Healed Ally / Allies | All Allies |
| Damage / Heal | Damage: 2 hits, 110% (max lvl) of ATK total Heal: 5% of Clara’s max HP (Allies) | — | Heal: 35% max HP |
| Effects | — | Removes 2 debuffs If no debuffs = Immunity, 1 turn | Increase AP 20% |
| Triggers / Cooldown | — | Whenever Clara heals | 4 turns (max lvl) |
| Ascension Upgrade | — | 120% of overflow healing is converted into a Shield, 2 turns | — |
Recommended x4 Relic Sets:
Wind Walker, Abiding Panacea
Recommended x2 Relic Sets:
Master Grove, Sword Avatara
Clara makes heals easy as she can heal 2 lowest HP allies while damaging an enemy with just her basic skill, making it available in each of her turns and usable outside turns through counter attacks with Sword Avatara. However, if you want higher heals, HP is one of the most important attributes to improve since it affects her first skill. You may also decide to equip her with Abiding Panacea to improve that aspect or Wind Walker for faster turns and more chances to heal.
To add to her heals’ usefulness, her passive can remove 2 debuffs from her target/s or grant them Immunity if there are no debuffs. Overflow heals can also turn into Shields once this skill is upgraded.
She would work well in any team but will perform best against boss enemies or long battles as her consistent heals will keep her allies going.
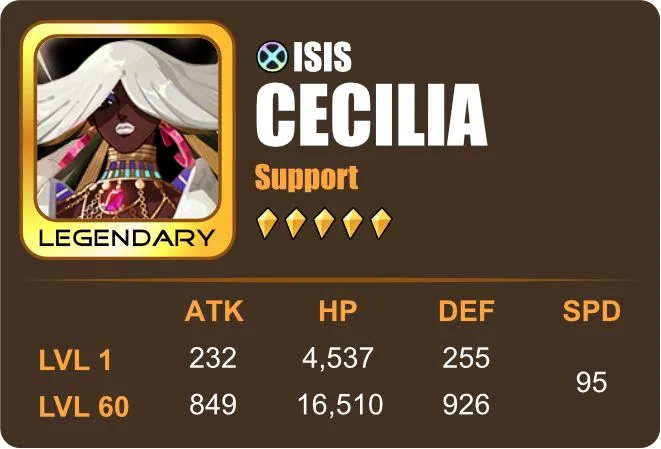
Cecilia (Isis)
Role: Support
Sub Roles: Buffer, Healer, Reviver, Dispeller
Buffs: Shield, Immunity
Debuffs: —
Other Abilities: Damage to Heal, Increase AP, Removes Debuffs
Captain Ability: Increases ally HP in Point War by 40%
Attributes:
Godly HP
High DEF
Good ATK
Average SPD
Skills:
| Gemstone Feathers | Crimson Protection (Passive) | Ruby Coronet | |
| Target | 1 Enemy, Self | All Allies (except Cecilia), All Dead Allies | All Allies |
| Damage / Heal | Damage: 30% of ATK + 5.5% (max lvl) max HP Heal: 100% of damage dealt (Self) | Heal: 15% of max HP Revive + Heal: 15% of max HP (All Dead Allies) | Heal: 35% of allies’ HP |
| Effects | — | Shield (50% of ally’s max HP), 1 turn | Removes all debuff Immunity, 1 turn |
| Triggers / Cooldown | — | When Cecillia dies (triggered only once) | 4 turns (max lvl) |
| Ascension Upgrade | — | Increase AP 50% | — |
Recommended x4 Relic Sets:
Wind Walker, Ocean Waves, Abiding Panacea
Recommended x2 Relic Sets:
Master Grove, Adamantine
Cecilia has the potential to change the outcome of battle with her death, triggering her passive to heal, Shield and boost AP of all allies and even revive dead ones. Her basic skill can heal up to 100% of damage dealt which makes her self-sufficient. However, the heals she can cast on her allies take up to 4 turns even when upgraded which may be too late by that time. Equip her with Ocean Waves for cooldown reductions or Wind Walker for faster turns and add SPD attributes to relics to combat that. If you have Espers that can boost your SPD and AP, you may choose to equip her with Abiding Panacea instead, increasing healing efficacy. For 2-Relic sets, Master Grove is a good choice as it affects the amount of damage her first skill does. Alternatively, go for Adamantine for early battle Shields.
Her biggest downside is the fact that she needs to die for her passive to work, making it completely useless if she doesn’t die and could leave you with a blank in your team if she does. You could bring in another Reviver, but her passive won’t trigger again if she dies again. And since her heals for allies are not always available, it is best to pair her up with another healer that can support the team while she waits for her cooldown or in case she dies. She is also not damage heavy so be sure to add Espers that are to the team.
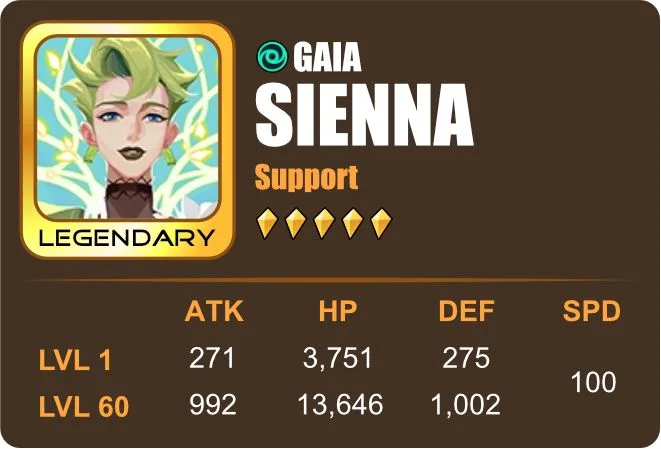
Sienna (Gaia)
Role: Support (Possible Controller)
Sub Roles: AoE, Disabler, Buffer
Buffs: ATK Up, SPD Up
Debuffs: Stun
Other Abilities: Increase AP, Reduce AP, Bonus Turn
Captain Ability: Increases ally RESIST by 40%
Attributes:
Excellent HP & DEF
High ATK & SPD
Skills:
| Guardian Vine | Earth’s Blessing | Wrath of the World | |
| Target | 1 Enemy, Self, 1 Random Ally | All Allies | All Enemies |
| Damage / Heal | Damage: 125% (max lvl) of ATK | — | Damage: 120% (max lvl) of ATK |
| Effects | Increase AP 15% (Self + 1 Random Ally) | ATK Up & SPD Up, 2 turns | Reduce AP down to 0% If target’s AP gets to 0% later, 60% (max lvl) chance to Stun, 1 turn |
| Triggers / Cooldown | — | 4 turns (max lvl) | 6 turns (max lvl) |
| Ascension Upgrade | — | — | Bonus Turn (Self) |
Recommended x4 Relic Sets:
Wind Walker, Ocean Waves
Recommended x2 Relic Sets:
Adamantine, Master Grove, The Light Above
Sienna has the ability to boost up AP along with the most important attributes for most Espers: SPD and ATK. She would make a fantastic pairing with Unky Chai who could reduce cooldowns of every ally with ATK Up with his last skill. She can also bite back against enemies with her last skill, dealing damage and reducing AP which may stun them while getting a bonus turn.
However, you may have problems with her long cooldowns so be sure to equip her with Wind Walker for faster turns or Ocean Waves for cooldown reductions. As for 2-Relic slots, you may use Adamantine for early battle Shields, Master Grove for more HP or The Light Above to avoid early debuffs.
Since damage is not her strong suit, she would benefit from having stronger damage-dealers in her team.
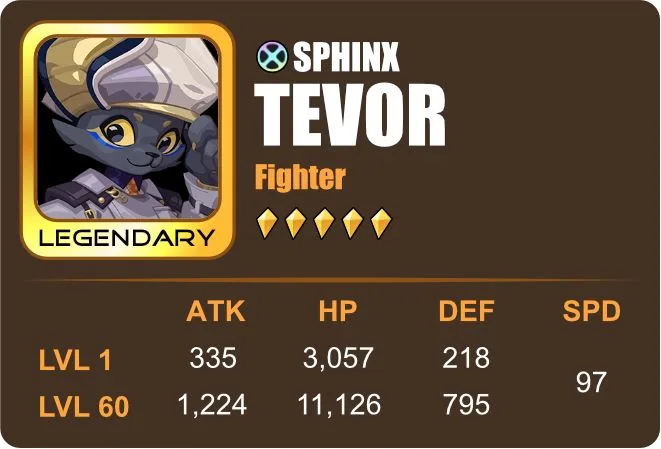
Tevor (Sphinx)
Role: Fighter
Sub Roles: Chain Striker, AoE, Nuker, Debilitator, Buffer
Buffs: Neko-Sense
Debuffs: Neko-Curse, Sear
Other Abilities: Repeat Ability, Damage Reduction
Captain Ability: —
Attributes:
Godly ATK
Good HP, DEF & SPD
Skills:
| Uncovered Truth | Neko-Analysis (Passive) | Neko-Giftbox | |
| Target | 1 Enemy | Attacked Enemy | 1 Enemy |
| Damage / Heal | Damage: 130% (max lvl) of ATK | — | Damage: 210% (max lvl) of ATK |
| Effects | Neko-Curse, 1 stack | If target’s HP is above 50% = Repeat Ability If target’s HP is below 50% = Gain 1 Neko-Sense (only 1 stack per turn) (max stack: 2) | Sear, 1 turn |
| Triggers / Cooldown | — | Whenever Tevor attacks | 5 turns (max lvl) |
| Ascension Upgrade | — | Each stack = +15% Damage Reduction | — |
Recommended x4 Relic Sets:
Hammer of Thor, War Machine
Recommended x2 Relic Sets:
Fiery Incandescence, Sword Avatara
Tevor’s skills revolve around his unique buff, Neko-Sense, and debuff, Neko-Curse. Neko-Sense resets all ability cooldowns and attacks a target twice the next turn once he has two stacked. Each stack reduces damage taken by 15% and will reset once activated. Neko-Curse deals 40% of Tevor’s ATK as True Damage to all enemies once the carrier dies. This debuff stacks up to 5 and increases the multiplier by 40% each.
His base ATK is extremely high compared to the rest of his attributes. You could equip him with War Machine to increase it even more or equip him with Hammer of Thor and Fiery Incandescence to improve his C. DMG and C. RATE. You may also equip him with Sword Avatara so he can use his basic skill more, triggering Neko-Curse more often.
However, the rest of his stats are way lower compared to his ATK which makes him easy to kill and too slow for his turns. He may be best paired with a Support that can increase his SPD or one that can lower cooldowns. Defenders could also keep him from dying while Controllers could slow down his enemies so he could catch up and play his turns.
He is best used against enemies with high DEF as his Neko-Curse debuff, once activated, will completely ignore their DEF.
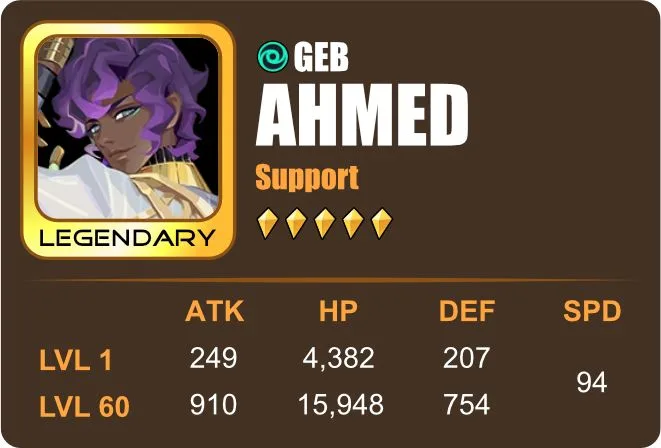
Ahmed (Geb)
Role: Support
Sub Roles: Chain Striker, Buffer, Healer, Dispeller
Buffs: Supporting Song
Debuffs: —
Other Abilities: Removes Diseased debuffs, Restores HP threshold
Captain Ability: Increase ally HP by 30%
Attributes:
Godly HP
Good ATK & DEF
Low SPD
Skills:
| Prelude To Life | Warm Harmonics (Passive) | World Stage | |
| Target | 1 Enemy, 1 Lowest HP Ally | 1 Lowest HP Ally | All Allies (Prioritizes Lowest HP Allies) |
| Damage / Heal | Damage: 3 hits, 15% of ATK + 2% (max lvl) of max HP each Heal: 4% (max lvl) of Ahmed’s HP (Ally) | — | Heal: 10 heals, 8% of Ahmed’s HP |
| Effects | — | Ahmed’s heals always target Lowest HP Allies first If target has HP Ceiling Penalty = Restore target’s HP threshold by 5% + Remove Diseased debuffs + Supporting Song (1 stack) (max: 25) | Reduce Cooldowns by 1 turn Skill is not affected by cooldown buffs / debuffs |
| Triggers / Cooldown | — | Each time Ahmed casts a healing ability actively | 4 turns (max lvl) |
| Ascension Upgrade | — | If target’s HP is less than 50% = Supporting Song (+1 stack) | — |
Recommended x4 Relic Sets:
Abiding Panacea, Wind Walker
Recommended x2 Relic Sets:
Master Grove, Sword Avatara
Ahmed is all about healing and less about attacking. His first and last skill heals his allies while his second skill is a passive that improves them, making him the ultimate support. ATK is not important to this Esper, merely using 45% total ATK for his basic skill and taking the rest from a percentage of his max HP. You are better off concentrating on HP attributes, equipping him with Master Grove for even more HP and Abiding Panacea for more effective heals.
Also consider adding SPD attributes to his relics as it is his lowest stat. Alternatively, you can choose Wind Walker for faster turns or Sword Avatara for counterattacks that will trigger his heals every time.
His Supporting Song buff gives +2% base ATK which can stack up to 25 times, making him an ideal support for Fighters, especially if paired with another Esper that has ATK Up and possibly one with C. RATE Up. However, even with all these buffs, he is not very reliable when it comes to dealing damage.
And this concludes our guide for Legendary Espers. We hope that this guide gives you insight in using your Legendaries, what relics to equip them and what type of Espers they are best paired with.
However, the game is constantly changing and new discoveries on how Espers are used are made each day so feel free to deviate from our suggestions and have fun experimenting with different builds. If you have learned other tips and tricks regarding the Espers discussed in this guide, feel free to leave your findings in the comment section below!

