X.D. Network certainly isn’t a newcomer in the mobile gaming scene, as the company has released a bunch of popular titles over the past few years on iOS and Android, such as Ragnarok M: Eternal Love, Ro: Idle Poring and Ulala: Idle Adventure.
Sausage Man, actually left us guessing on what the game was all about before reading its description and launching it for the first time. Sausage Man is actually comparable to a number of popular battle royale games but capitalizes more on the fun and whacky gameplay mechanics and concepts it offers.
With well over 5 million downloads accumulated from the Google Play Store alone within a month after its release, snatching the top rank of new Android games in several countries, and taking the #1 spot in the action category of the Apple App Store, Sausage Man has certainly proven itself to be a battle royale game that everyone needs to peek into, especially hard core competitive PvP enthusiasts and battle royale fanatics.
Sausage Man is a pretty simple game from the controls and interface down to the actual game mechanics. If you played one or a couple of battle royale games before, you will certainly get a good grasp of the game quickly. If Sausage Man is your first dive into a battle royale world, then consider the 15 seconds as the entirety of the tutorial a glimpse of how easy it will be to get a good grip of the game.
Knowing the basics as far as controls and mechanics are one thing and preparing and strategizing in an actual match, however, are 2 distinct sets of learning. As much as experience will be your best teacher especially if you are a total beginner, our Sausage Man guide is guaranteed to pave the way towards more wins and domination in your favor as you step into each match!
1. Make Adjustments To The Control Configurations
In general, players who enjoy FPS and battle royale games typically prefer diving into battle as soon as they are able to. Sausage Man actually allows you to do just that and the super hasty tutorial session should not be enough to lessen your eagerness to jump right in on the action. In any case, you will certainly learn as you go and pick something up with every match you partake in. For efficiency’s sake, however, and if you want to perform much better on your first match, we recommend tinkering with the settings first.
The developers behind Sausage Man certainly made a lot of effort to provide a default button layout and control configuration settings that make it very easy to navigate and control everything. It is a given, however, that no single control and configuration settings will be perfectly suitable for every player.
Fortunately enough, Sausage Man provides a very liberating way for players to customize a lot of the game’s settings and beyond button layout editing, there are plenty more configurations to tinker with to ensure a perfect set up for even the most finicky of players.
On the main screen, you can tap on the drop-down button at the upper right corner and click on the gear icon to get to the settings menu. There are plenty of tabs categorizing different elements of the settings and while some are more important than others in terms of impact to gameplay, it is always best to peek into each available option and customize it as much as you want to ensure that you everything is at peak performance before you dive into the next match.
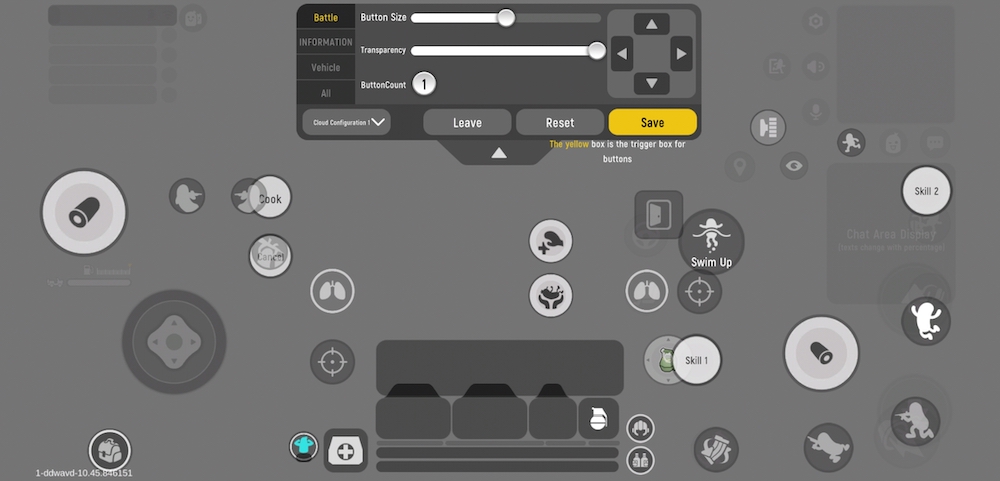
For starters, the basic settings lets you make adjustments to the firing settings and there are plenty of options to really look into. Switching scopes, firing mode controls, enabling additional left side buttons, and ADS button options are some of the options you can customize to your liking.
The control settings lets you choose between a fixed or floating movement and fire button. Note that beyond this, the bigger customization opportunity presents itself after you tap on the “custom panel” button, as this will let you completely overhaul the button layout in accordance to your liking.
There are actually plenty of buttons available on the screen once you engage in a match and as much as the default layout is excellent, there are always ways to tailor-fit it more to your taste. Beyond moving buttons around, you can also make adjustments to each one’s size as well as transparency level. Remember to save after you customize. You can always reset this any time as well.
There is also a separate tab of settings for driving vehicles. Well, it’s actually 3 sets of choices and while each one is okay, one definitely suits you the best. Sensitivity settings are also important to tinker with. There is a global sensitivity slide bar that cuts across all sensitivity settings and then there are separate options for the camera depending on your scope.
There are also pick up settings you ought to look into. Although you probably wouldn’t think much of it, it is actually very important to configure this in accordance with your play style. In the heat of combat, you need to be very efficient as far as picking stuff up is concerned so be sure to make the necessary adjustments her as well.
If your device seems to have difficulty running Sausage Man in its peak settings, you can tone down the frame rate and resolution via the graphics settings. You can make adjustments to sounds as well and Sausage Man also lets you choose to disallow being spectated by friends. This is under the privacy settings, which also allows you to go on a “do not disturb” mode, barring anyone from sending you invites.
2. Spend Time In Practice Mode
Once you have gone through all the adjustments under the settings menu, you would probably be raring to dive into your first actual match. As much as we have practically the same level of enthusiasm on our first go we opted for something else. As such, we would likewise recommend having you go through a practice session first so that you can test out all the adjustments you have made and ascertain if you have the best control settings to have before diving into a real match.
By default, clicking on the ready button on the lower right side of the main screen will take you to a classic mode match, as this is the most basic game mode in Sausage Man. To change the game mode, you can click on the banner itself. For now, you can choose among classic party, arcade party, and training party. We recommend going for a private training party first.
Engaging in a training session goes well beyond simply familiarizing yourself with the controls and button layout, regardless of whether or not you made modification to it. There are plenty of game mechanics to get yourself accustomed to and while you can slowly pick each of them up in an actual match, having a good enough sense of familiarity with all of the game’s aspects during ta training run ensures a more focused and better performance in an actual match.
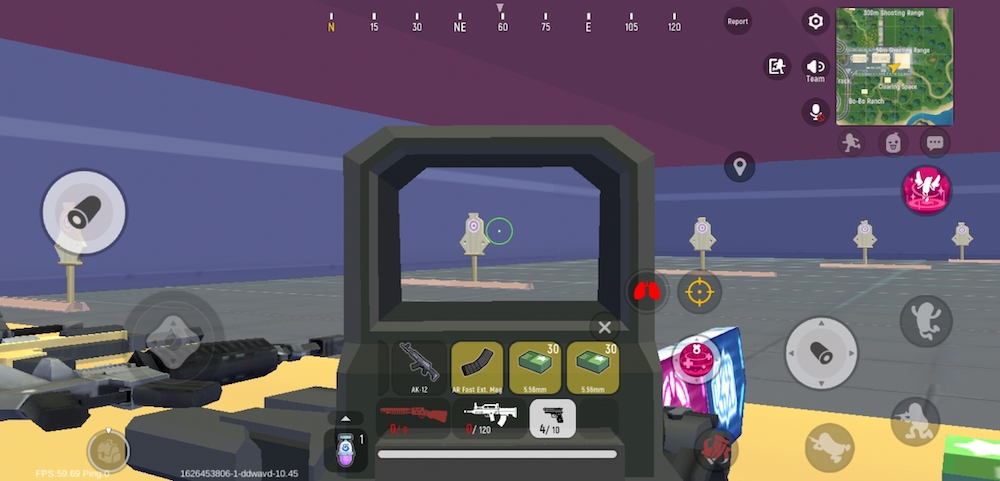
Sausage Man provides more than plenty of weapons you can use in an actual match. Naturally, there will be some random elements present that would very much make it difficult for you to grab hold of specific types of guns, much so familiarize yourself well enough with each one in the course of an actual battle. The training session lets you freely use any of the available guns in Sausage Man and it is an opportunity that you should definitely take advantage of.
On the training grounds, you will find a hangar or warehouse of sorts that has all the guns lined up. Close to it is a shooting range with some guns lined up as well. The shooting range provides moving targets you can practice your aim on and testing each weapon out. Keep in mind that each of the weapons has unique elements and you should familiarize yourself as much as you can if you want to be as efficient as you can be regardless of which ones you arm yourself with in actual combat.
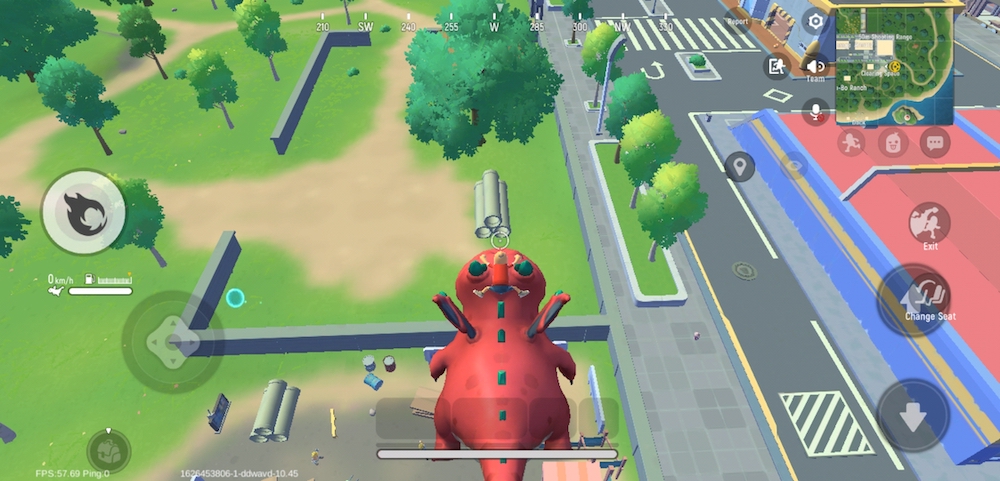
Beyond the plethora of guns, Sausage Man offers a wide range of tools and items that add more color and creativity to each match. With an array of whacky and unconventional gadgets and gears you can only see and use within the world of Sausage Man, testing each one out on the training field becomes as important as getting to know each gun. Vehicles or rides in Sausage Man also break conventions, which is why you would want to take them for a spin as well before you dive into an actual match.
It may take some time for you to have a fair level of familiarity with every weapon and item in Sausage Man. If you have at least tried most of them, you should do fairly well in an actual match compared to jumping in without any knowledge of what to expect at all. Heading towards a training session is not a one-time deal, though. If you want to perfect your skills in using each of the many tools and weapons at your disposal, you will have to revisit the training stage every once in a while.
3. Consider The Initial Matches As Practice Session Extensions
Having the perfect control settings and button layout as well as raising your level of familiarity with every weapon and item in Sausage Man definitely gives you an edge in your starting matches. There are still plenty of things you can only learn from an actual match and like everyone else, you cannot expect to instantly be a top performer on your initial set of battles.
Learning to move about and shoot, as you will discover in the super short tutorial session, is far from the tip of the iceberg here. Tinkering with the different settings and spending time in training runs are closer to what an actual initiation ought to be.
Sausage Man is truly a game that is easy to learn but difficult to master and yet, there is fun to revel in from the start of your first match with other players. If you followed the above tips and strategies, you should already feel that you already know a lot at this point. There is still much to unravel in Sausage Man, and most of it comes from actual battle experience.
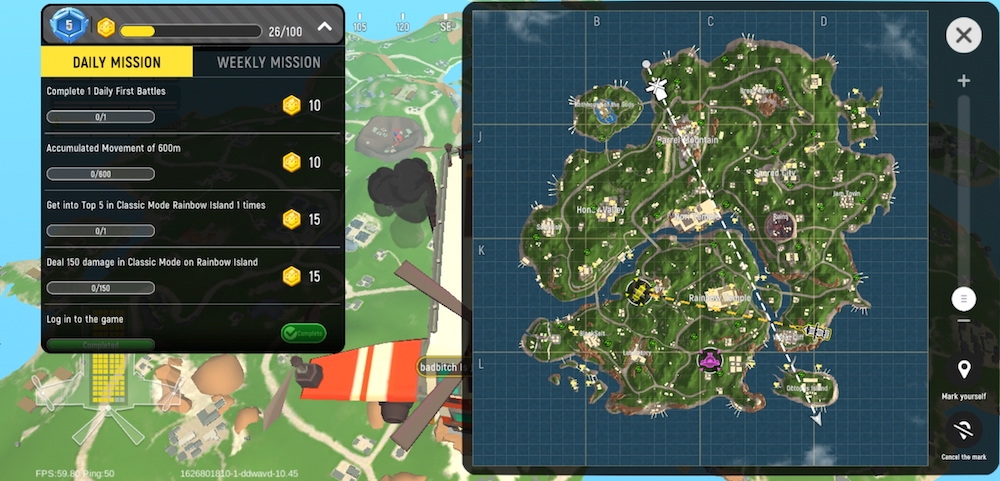
On the initial sets of matches you engage in, one of the major details you need to pay attention to is the map layout itself. There are currently only 2 maps in Sausage Man and the basic mode allows you to choose either one or go with a random map. Although 2 maps seem easy to familiarize yourself with, each battle arena map in Sausage Man is extraordinarily humongous, even by battle royale standards. It will certainly take a while and a lot of repeat matches before you grow your familiarity with each one.
You do not necessarily have to memorize every detail and every corner of each map. A good enough understanding of where structures and lumps of structures are as well as where wide open spaces are available should already be enough. Its importance, of course, relates to the strategies you need to put in place in accordance with where you are most likely be situated after the jump. Naturally, having a good overall sense of its general layout means you can do well enough to hold your own wherever you and your team wind up in as the match ensues.
Knowing plenty of good places is key to raising chances of victory in every match. There are plenty of random elements in play as you engage in a match in Sausage Man and you are likely to find yourself in different locations with every match, even within one. Potential hiding spots or covers as well as entry and exit points on the more structured areas can give you an advantage in every encounter.
Another key point you cannot learn from the tutorial and training sessions are the exact location of loots to arm yourself with after the big drop. Surely enough, part of random element in the game comes from how the weapons and items are shuffled and scattered but you can be certain enough that there will always be something to loot and arm yourself with on specific locations. You can expect that some areas will potentially have more items to loot than others and likewise has a higher probability to invite more people on them.
4. When To Jump Should Be Based On Expertise
One of the staple aspects of every battle royale game relates to how players are deployed into the battle arena. Just like conventional ones, Sausage Man sets you off to jump out of a moving aircraft. Another random element in each match presents itself during this phase as the path and direction of the aircraft you and all other players jump from, vary from one match to the next. What is consistent about it is that the path will always cut across the map.
Even with this random element, there is still strategic planning to be held before the start of each match and, to a great respect, should be tied up to you and your team’s level of expertise. Regardless of which way the aircraft travels, your decision on when to jump off the aircraft should not be a random activity but, rather, based on your plan of action or strategy within the match.
In general, there are basically 2 extreme points to consider. The first is to jump off as early as possible and the other option is to exercise more patience and wait for the final moments of the aircraft travel before you jump off of it.
The early birds catch the worm, so they say, and in the case of Sausage Man as well as most battle royale games, jumping off the craft ahead of the pack means an earlier touchdown. This ultimately leads to a high probability of getting weapons and items first, giving you a solid advantage over everyone else that comes second or even later.
The early birds, in this case, will unfortunately have to contend with numerous other early birds. Some of these players may actually just be reckless, or some are pros who are confident enough of their skills to want to get to the battle arena that fast.
For the most part, the decision to jump off ahead of the pack is best left for the more experienced or veteran players given that the chances of quick encounters are high and the risk of being disadvantaged in terms of arms and weaponry is equally high as well.
As far as jumping targets go, jumping off the craft as soon as you are able to or earlier rather than later, means that you will choose to land on the areas with buildings or structures. As these spots have more weapons and items in them, jumping down towards a rather desolate area of the map will certainly leave you at a disadvantage in case of an encounter.
On the other extreme end of considerations, there is also an option to jump off at a later time as the aircraft travels towards the end of its route. You may notice that there are less players who choose to go this way and you might even find yourself to actually be the last man standing as far as diving down the battle arena is concerned.
While the early birds or, in this case the early jumpers, are already at each other’s throats on the other end of the map, you can have a bit of liberty to scrounge for weapons and items without much risk. There is still a chance to encounter some enemies even if you chose to jump off late, but it is highly unlikely.
Of course, you should always keep watch of players jumping off and never stop looking around as you make the drop towards the map. Going for a late jump is naturally more suitable for beginners as well as cautious yet experienced players. We recommend going for this until after you have gained enough experience and confidence to go for a riskier maneuver.
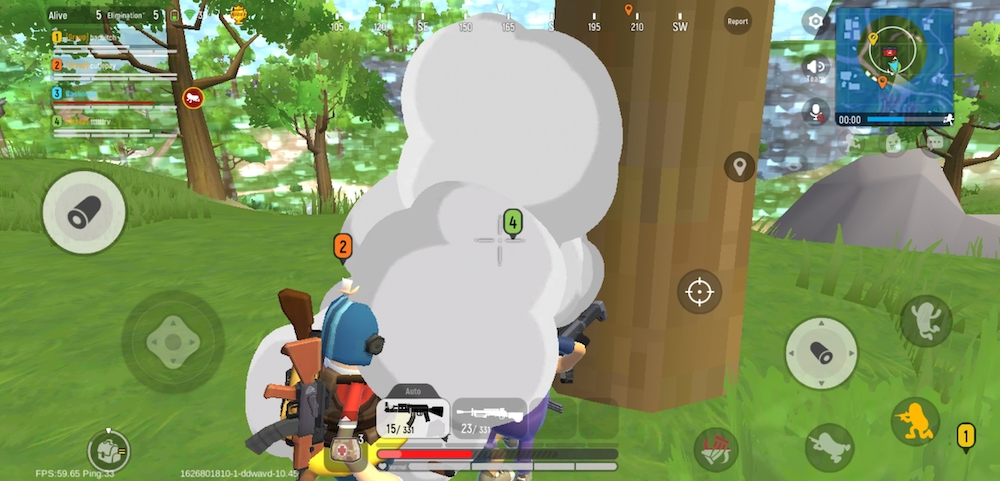
5. Stay Close To Your Squad
Sausage Man lets you engage in a match on your own, with a partner, or with a full squad with 3 other people. There are always advantages and disadvantages to any of the choices and then, there is also a matter of whether you are playing with friends or random people. Naturally, it all boils down to coordination and cooperation, which typically dwindles the more people there are and the more random players you pair up with.
Having a reliable set of friends, or people you actually know has its advantages but this should not stop you from competing with a squad of random players. Sausage Man actually makes it easy enough for each member of the squad to communicate and coordinate with one another and, beyond that, playing well enough with random players will naturally lead you to acquiring more friends you can subsequently pair up with.
To start off, you can select a drop tactic at the mode select screen, indicating your preferences that will lead to you being paired up with like-minded people. You can go for a hot drop, a safe drop, or no tactics. Keep in mind that you can also choose a specific map on this area as well as whether to go solo, duo, or quad as far as team members are concerned.
It all starts right from the drop off and while there will be a random drop leader, it can happen that a full squad of random players will wind up jumping at different times. Regardless of what happens, you should always make an effort to get back to your team as no advantage will ever come out of being far and away from your fellow team members.
In this regard, do not shy away from placing markers on the mini map. If you feel that you and your squad need to meet up on a certain area and in the absence of a leader, you can always place a marker along with some communication if necessary to drive the entire squad to come together.
Having encounters with a full squad can be dangerous enough even if it is a 4-on-4 engagement. Being separated from your team and being forced to engage enemies will seriously put you at a disadvantage if you are alone, even more if you are a beginner.
As a beginner as well, staying with more experienced squad members can lead you to many discoveries such as areas you may not discover on your own as well as extra loot chances to pick up if they kill an opponent close by.
Another discrete advantage comes when you or your fellow squad member has been downed. Being downed means you can still be recovered by a teammate and you can do the same for each of your fellow squad members as well. Downed players are very vulnerable, though, and an extra shot on them and they are out of the game.
Despite not being able to readily tell if your random teammates are more experienced or less experienced than you, sticking with them will give you a plethora of opportunities to learn from each of them. You can learn from the more experienced ones on what to do and, in contrast, learn from the fellow beginners what not to do. For beginners, we also recommend that you stay behind your team. In case of an engagement, being behind leaves a better chance of survival especially if you are moving forward.
6. Strategize Around The Shrinking Safe Zone
Another constant feature that is a standard across battle royale games is a shrinking safe zone. Players start off in a herculean island and if everyone is free to roam around indefinitely, then matches could stretch for several hours or even longer. The idea of having storms, radiation, or bombs being dropped in the case of Sausage Man, is to force players to converge into a smaller area over time.
Being caught outside of the safe zone has its dire consequences. In this case it is not instant death, but the rate at which it eats away your HP gives you tremendous disadvantage in a subsequent engagement and certain death following extended exposure.
The safe zone will continue to shrink regardless of how many players are left. The way it shrinks will be random, which means that the final stretch of the match can take place in many different areas of the map. How the safe zone shrinks is not instant. There will be a countdown on intervals, and the actual shrinking takes time as well. With the shrinking safe zone being a constant in every match, you should always be a step ahead of it and likewise be prepared to beat it in case it cuts to close to where you are situated.
Sausage Man provides a lot of means for you to easily move about. Running with your guns tucked in lets you dash faster, for one. There are plenty of vehicles scattered across the map as well and if you find yourself stuck in a particular are for various reasons, it helps to keep one at bay in case you need to move fast later on.
Beyond the danger zone catching up to you and constantly reducing your HP, the typical danger that comes with it lies on other players within the safe zone who may just be waiting to ambusgh other players running away from the bombardment.
In contrast with seeing the concept of the shrinking safe zone as a peril to you and all other players, it also presents plenty of opportunities for you if you strategize around the concept. Although the behavior by which the safe zone shrinks is unpredictable, there are ways to assume a stage earlier as to which areas will most likely be safe after the next shrink.
In this sense, being ahead of the pack as far as keeping within the sheltered area can lead to an opportunity to ambush players struggling to enter the safe zone. You may think that no one would be foolish enough to get caught outside of it but the bombardment certainly finds victims in every round.
Considering all the above tips and strategies, there are still plenty for you to learn in Sausage Man that simply cannot be put on paper. Learning in battle royale games hardly has an end to it and every new match you engage in will likely bring something new to the table. Keep in mind that spectating in the event that you get taken out of the game early on can teach you a lot of new things as well, given a different perspective of the battlefield.
And this concludes our Sausage Man guide. We hope that the tips and strategies we laid out has given you an enlightening outlook on your matches moving forward. In any case, starting at the bottom league for beginners will pit you against equally inexperienced players, or even A.I.s that are relatively easy pickings even for complete newbies.
If you have a lot of experience in Sausage Man and would like to share some of your very own tips and strategies beyond what we provided, we would very much appreciate hearing from you about it so do not hesitate to share them away in the comments!
ANANT
Saturday 23rd of October 2021
USEFUL TIPS AND TRICKS