Strategy games have been a long-time defining genre in the gaming landscape. They’ve started out in the forms of Red Alert, Dune, and even StarCraft. While most of these have started out on PC and remained there even up until today, many game developers have decided to spread the genre out into the mobile playing field.
Such titles include Plague Inc., Rebel Inc., Mushroom Wars, Iron Marines and many more out there, filling the different tastes of many a player. One such game in recent times had created ripples among the Steam community and the mobile RTS gamers, and that game is Mindustry.
Mindustry is a fresh spin on the RTS genre, heavily focusing on a tower defense-style of gameplay as well as heavy resource management. The player is tasked to overcome the enemy by outlasting waves of hostile robots whose aim it is to destroy the Core of the player’s home base. In a PvP match, players will have to deploy their own robots at the enemy and ensure the destruction of the rival’s Core.

All of this is done through an integration of resource gathering and combat. Using everything at the player’s disposal, it is up to them on how they’ll protect their Core and ensure a safe and seamless mining operation.
At first the game can be quite overwhelming, especially since almost everything requires connections to a mining outlet of a specified resource. In the very beginning, and especially if the player knows nothing about Mindustry, they can easily find themselves with turrets out of ammo, broken or clogged conveyor belts, or even a Core overrun by the enemy at Wave 5.
If you’re one of these players who picked Mindustry up and don’t know what to do exactly, read on and maybe you’ll have enough knowledge on how to survive the game. Do know that this is a game of patience and experimentation, so practicing what is written in this article could be your ticket to getting good.
So without further ado, let’s delve into our Mindustry beginner’s guide!
PART I: The Basics Of Mindustry
This section of our Mindustry guide shall focus on everything you need to know to get yourself acquainted with the game’s mechanics. In knowing these, you should be able to play without the fear of losing any of your structures.
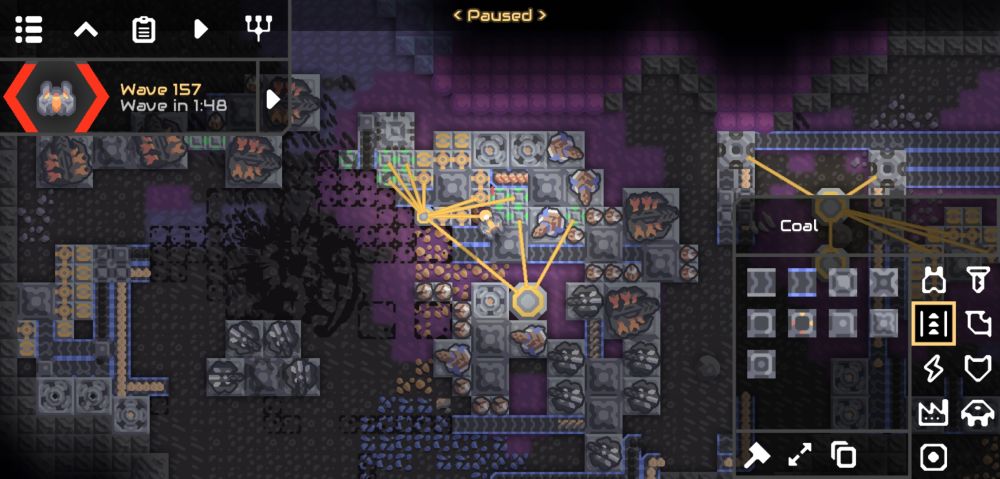
Pause The Game Before Building Anything
The Pause Button is your friend. This will allow you to stop time and plan your next moves before an enemy wave arrives. While the game is paused, take advantage of viewing the terrain around you, what ores you might have nearby and where you can put your outposts.
Additionally, while the game is paused, you can still make your ship build structures. The steps in which you have selected the structures to be built will be performed after you unpause the game. This will keep you from fumbling with the controls while waiting for the enemy’s next attack.
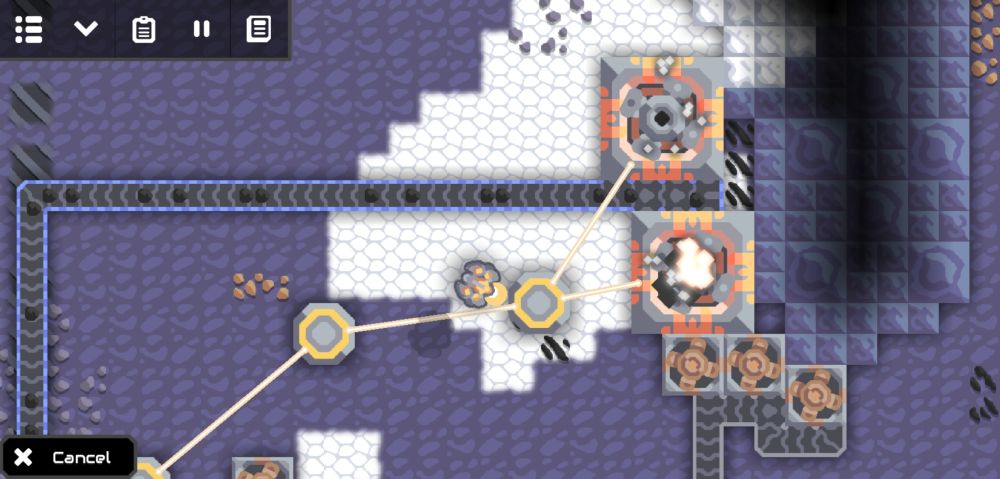
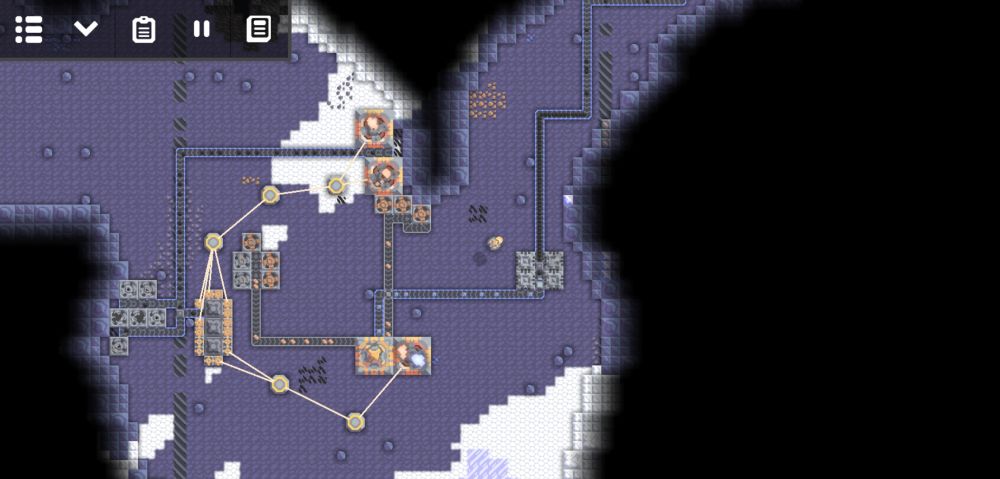
One important thing we need to point out here is that, unlike most RTS games out there, each structure in this game has to be connected via a couple of conveyor belts.
Everything Has To Be Connected To A Source
You read that right! Everything has to be connected to something —your Core, the turrets you need for defense, your Graphite Presses, your Combustion Generator plants, everything.
Deploy drills at a mineral deposit and make sure they are connected to something appropriate. For instance, a Scatter turret will not benefit from copper but will greatly make use of scrap. It cannot operate without this attachment since scrap is used as ammunition.
For some machines such as energy weapons or advanced production facilities like Silicon Smelters, these have to be connected to Power Nodes and, naturally, a power source. We’ll talk about the Silicon Smelter later.
One of the things that could stand on their own without being connected to a steady supply of ore are walls. Walls are independent entities that simply stand in the enemy’s path to deter them from getting to your base as well as keeping anything from getting shot.
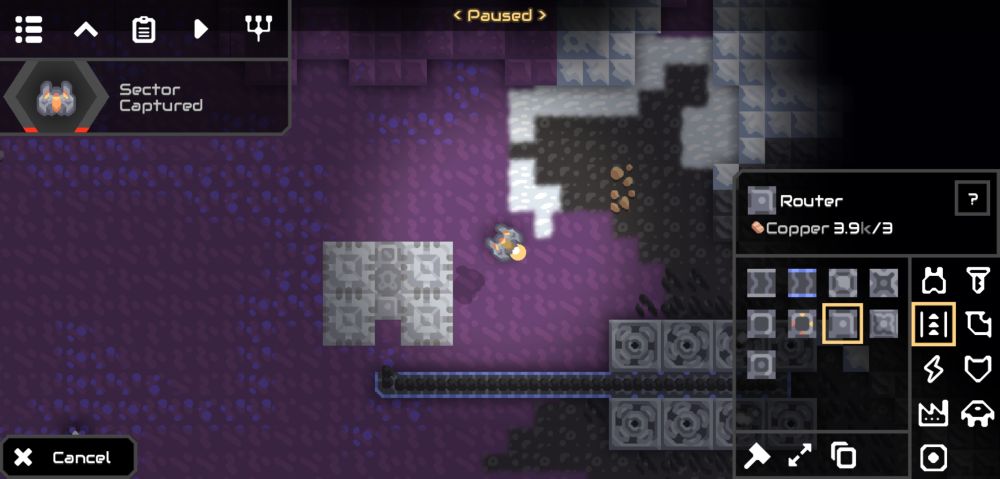
This is also a good opportunity for you to play around with the conveyor belt and its components. You will discover different uses for different items like Sorters, Routers, Distributors, Junctions, and more. Use these to your advantage and you’ll generate a seamless flow of resources to anything around the map.
While you are busy trying to figure out what machine connects to the other, your main focus starting out should be harvesting copper and lots of it.
Gather As You Gather In The Early Game
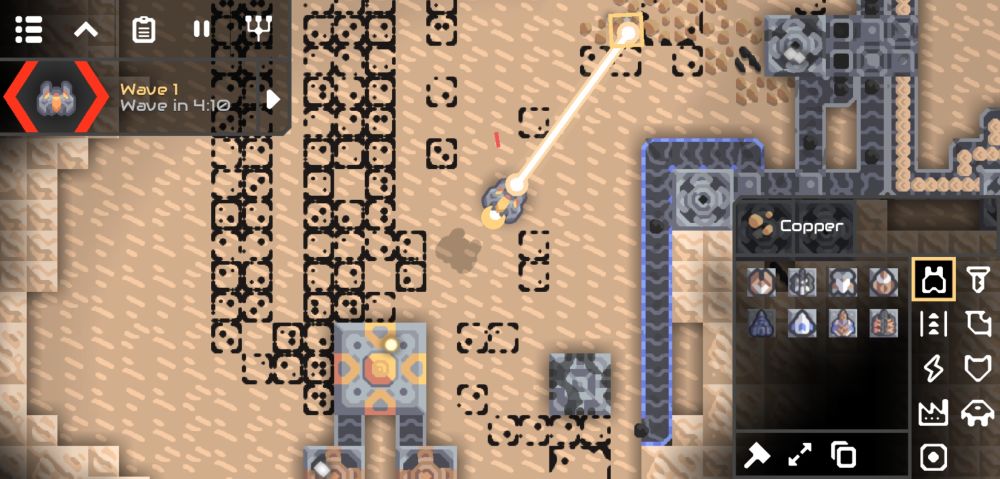
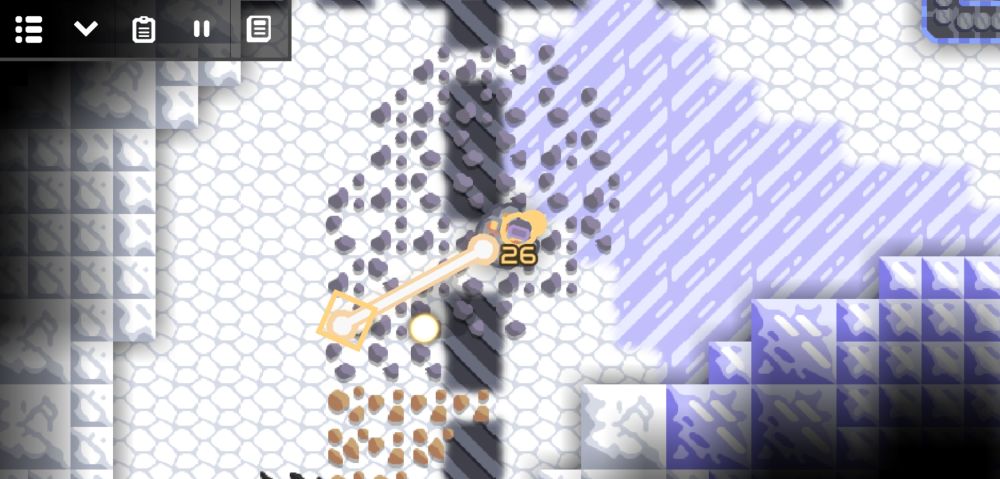
As you set your first Mechanical Drills down, use your ship’s manual drill to harvest copper, too. Your ship can hold a maximum of 30 minerals per haul if you’re away from your base, but if you are near your Core, your ship will automatically send its harvest for storage.
While your Mechanical Drills are busy mining for copper (and after you’ve attached them to your Core using conveyor belts, of course), your copper yield will increase much quicker with your ship manually mining on the side. With enough copper, you should be able to lay down your first defenses or even more harvesters.
Be sure to try harvesting other materials as well since any and all materials will be needed for research. Such research will allow you to unlock powerful new tools in the Tech Tree.
Explore The Tech Tree
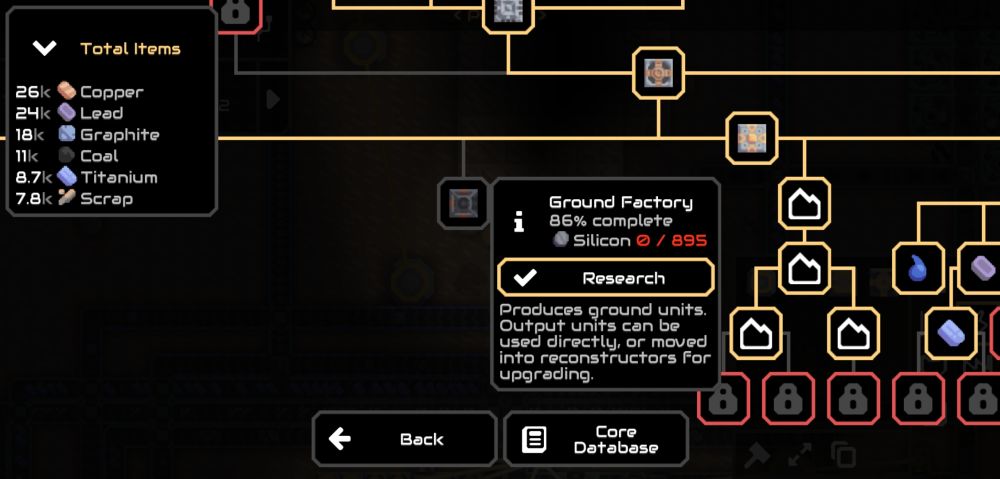
The Tech Tree has a lot of new items to offer. After gathering a set number of resources, research on them to utilize them any time in battle. Be wary that some items will require different kinds of resources needed for completion.
For example, you may encounter an item requiring both silicon and graphite, both materials that require processing. For this, you may need a dedicated supply line straight from the manufacturing area to your Core. This may prove difficult since each map in the game varies with resources and resource locations.
Not to mention, harvesting these resources could be a pain since the enemy could spawn and destroy your supply lines before anything could even reach your base. But if you have no defenses, your ship has a life-saving function that could save your early game.
Your Ship Can Shoot!
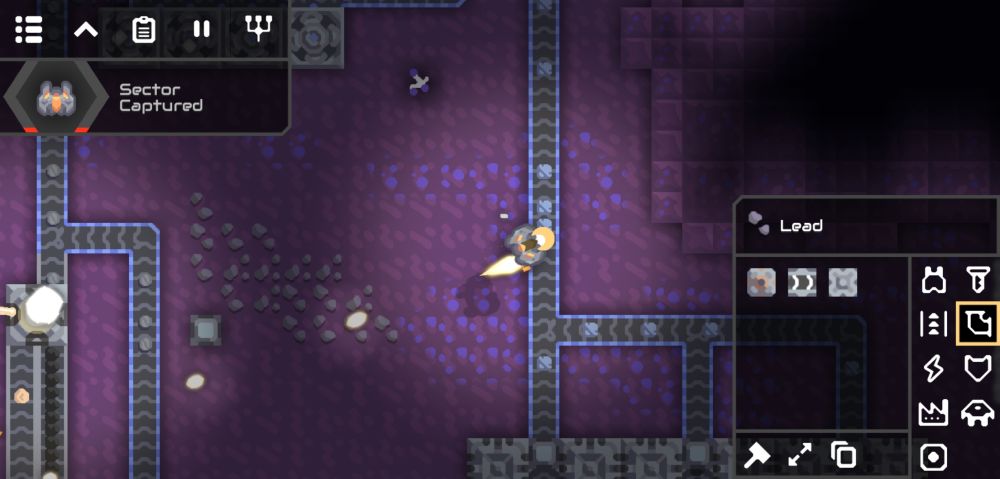
Your ship isn’t just for gathering, but early on you can send it at the enemy waves to soften them up a little or destroy them completely. That’s because your ship comes with a small gun that’s useful for pelting enemy robots or aircraft with.
If your ship gets shot down in battle, it will respawn with no consequence. This tactic is useful if you want the enemy forces to be whittled enough for your base defenses to take them down as soon as they arrive at your base’s perimeter.
Sometimes the enemy will create robots that explode when they come in contact with your ship. Sending your ship to crash into them can keep them from damaging any structures you have in your base, so make use of your ship’s versatility whenever possible. Slowing down the enemy should be a priority when it comes to defending your base.
Now that the basics have been covered, let’s move onto the meat of Mindustry’s gameplay.
PART II: Gathering
One of the best ways you can gain the upper hand is if you know what you need to gather. The map is rife with ores, but to many new players, they don’t know where to start. This section of the guide will (hopefully) help clear the air and give you a new understanding and appreciation of the various resources that exist in each game.
However, we cannot guarantee a fixed pattern of resources in the maps of this game since these are procedurally generated (this means they are random every time), but we will try to help you get familiar with them as much as we can.
Know Your Resources
There are a lot of resources that can be harvested in each game played, but knowing what you need right away is quite important. Having a game plan as you start out can help you become victorious, so keep in mind what you need to gather before building anything drastic like base defenses.

Copper – The most important resource of all. This light brown-colored ore is available almost anywhere and is used in almost everything that you build. Harvesting these en masse is key and the best way to get these is to use multiple drills at a time to mine them.
Similarly, copper supplies your most basic base defense, the Duo, with ammunition, so take advantage of far-off copper deposits and turn them into outposts. Additionally, like many other resources, these are needed to unlock new gadgets in the Tech Tree. This resource, therefore, will require the most gathering.

Lead – A greyish-purple set of rocks. These deposits are just as important as copper since some structures require them. They can also supply some defenses with ammo. Lead is a requirement in most advanced structures so prioritize this resource alongside copper.

Coal – A jet-black mineral found in various parts of any map. Coal is used for producing energy through the utilization of Combustion Generators as well as the production of graphite and silicon. Depending on how far you are into the Tech Tree, the utilization of coal is completely optional early game and a necessity late game.


Sand – It’s coarse, rough, irritating and gets everywhere! There are two types of sand in the game: dark and light. Regardless of the type of sand harvested by your drills, they produce the same raw product for your consumption.
To distinguish sand from regular dirt tiles, look for the ones that are patterned with diagonal dashes and they can only come in either black or white colors. Two of sand’s primary uses are in the manufacturing of silicon and metaglass.

Scrap – These gray, sand-dashed rocks are just as abundant as copper. They can be found in deposits of varying sizes and can be used to give ammo to some of your base defenses such as the Scatter. If you find that there is a scarcity of sand in the map, scrap can be crushed with a Pulverizer to create sand.

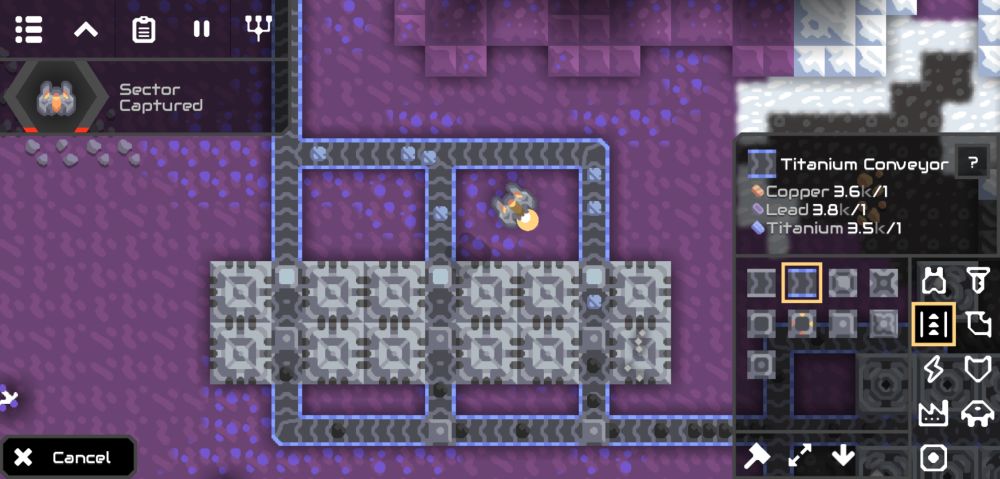
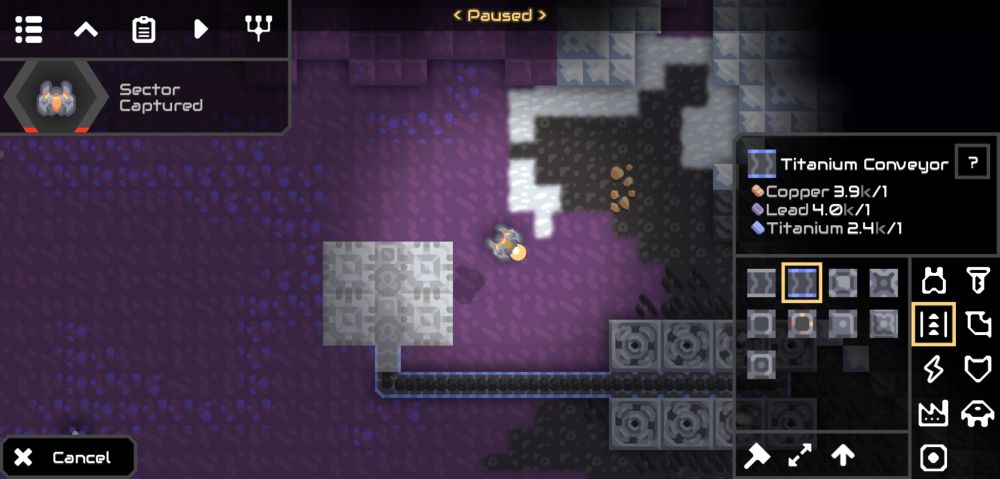
Titanium – This unique, light-blue mineral can be elusive in most maps. Titanium is so powerful that it can be used to upgrade many of your machines to ensure better productivity.
One practical upgrade is the Titanium Conveyor Belt which sends ores to their destination much faster than its regular counterpart. However, titanium can only be mined using the lead-based Pneumatic Drill.

Thorium – Perhaps one of the rarest resources in the entire game. The bright-pink thorium is used in the creation of high-end, high-grade material and can only be mined with the sophisticated Laser Drill. Once you have found a thorium deposit, do your best to mine it since the upgrades it provides in the Tech Tree are quite powerful.
As we’ve pointed out a few times in this item, there are some raw resources that have other uses after being put through a process.
Process Some Of Your Materials
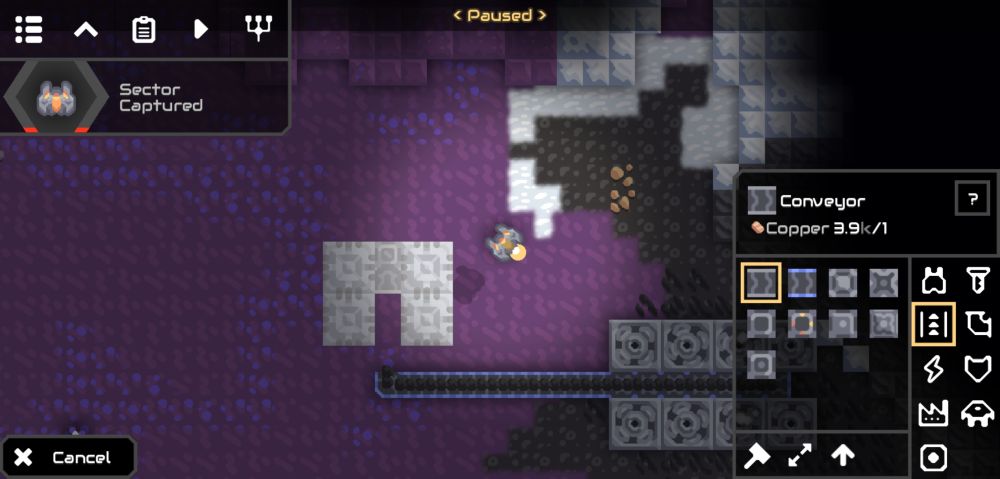
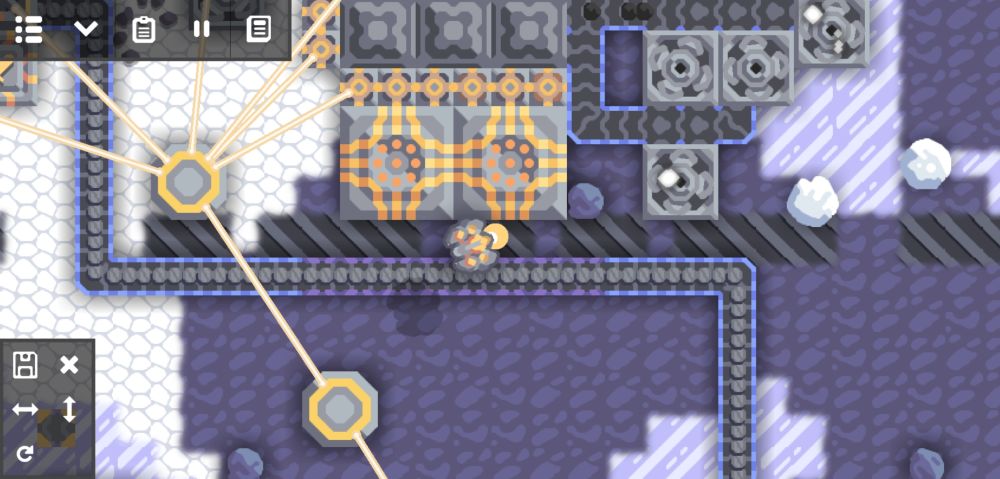
Certain structures and defenses will require different types of material and thus, it is important to have some of these minerals processed. One of the most basic minerals to process is coal. With a Graphite Press, coal can be turned into graphite.
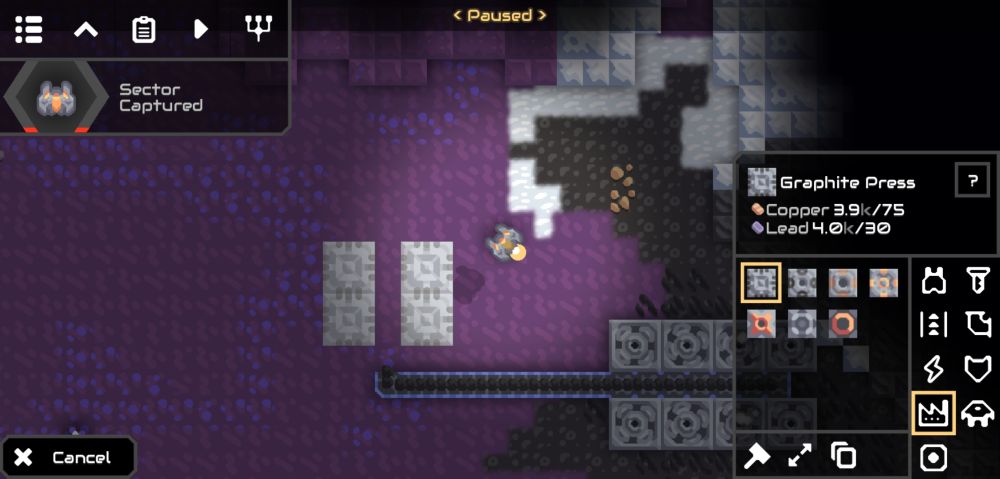
For this item, we will use the Graphite Press as an example of how to process a mineral. First start by putting down four Graphite Presses — two on opposite sides separated by a single block of space (this is the space for the conveyor belt).
Next, between the top presses, put a Sorter and set it to Graphite (the light gray mineral). Below the Sorter, place a conveyor belt in the direction toward the Sorter.
Below that conveyor belt, put a Router so the coal will be transferred to and from the presses. Put another conveyor belt below the Router.
Lastly, connect that conveyor belt to your coal drills. To harvest the graphite, connect it to your Core or defenses that use it as ammunition.
There are numerous ways you can produce different processed materials. Some creations like Silicon Smelters will require energy, so branching out belts from your coal deposits might prove to be a challenge. The coal will be used for both the silicon and the energy.
Try these out yourself. If you want to practice or create your own manufacturing plants, try playing a custom game with no enemy spawns so you are free to experiment with no consequence.
If these practice sessions go well, you can make your own schematics for when you have a serious game.
Make Use Of Schematics For Easy Production
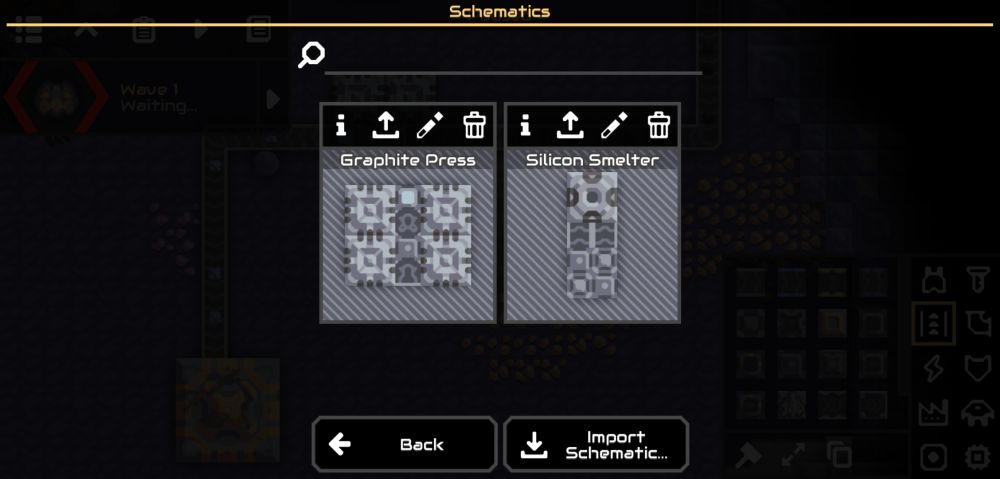
Schematics are a quick and easy way for you to produce your plants if you are pressured by time. If you have enough resources to create these plants, lay the schematic down and watch your ship get to work.
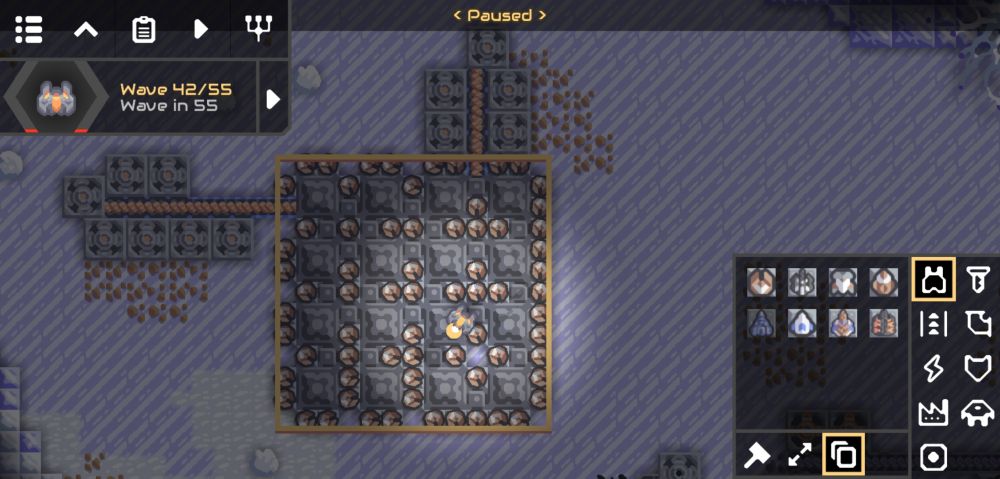
To make your own schematic, simply tap on the Copy button on the lower right (it looks like a pair of paper sheets overlapped with each other), and highlight the very item you would like to copy.

The copied items will be previewed live on the map, but instead hit the Save icon on the left (the diskette).
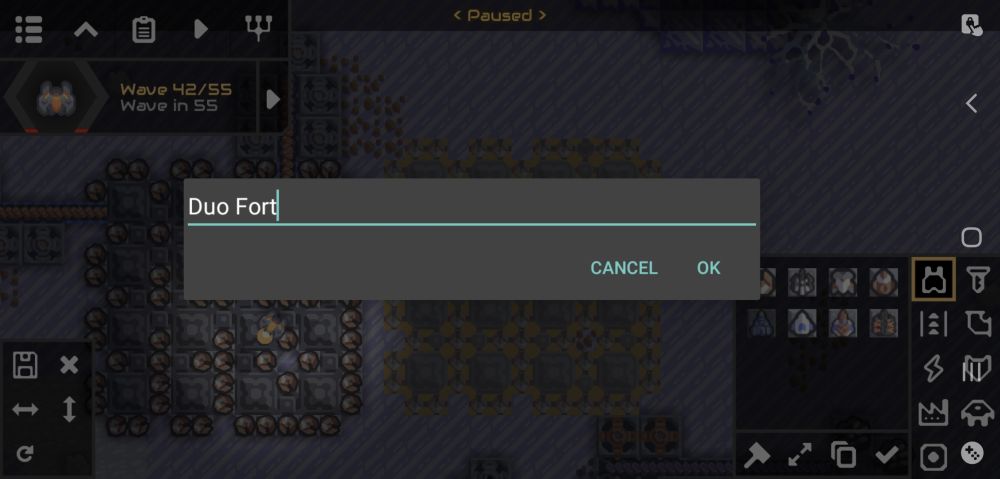
Give your schematic a name and it will be ready for use anytime. These can be accessed by tapping the Clipboard icon on the upper-left portion of the screen.
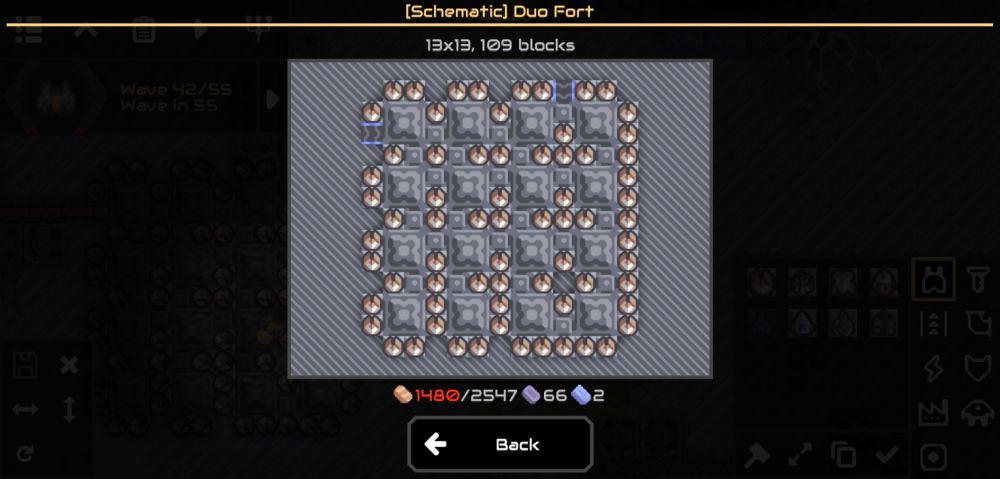
Using these can save you time and effort in making structures for your base. In the heat of battle, your schematics might just spare you of the headaches you get from misplaced blocks.
As you play the game, you will need more and more of these resources, so it’s important to prioritize the collection of these as opposed to arming yourself.
Prioritize Resource Collection Over Ammo Supply
Base defenses are important but progress through the Tech Tree and the game itself is even more important since unlocking such different features can yield you newer technologies and better guns. The soul of your base should be seethed in efficiency and convenience, not complexity.
If you have recently discovered how to make a new material, focus on gathering that material first instead of arming your guns with a fancy new type of ammo. To put this into perspective, let’s pretend you’ve recently discovered how to make pyratite. You’ve created a machine efficient enough to arm your Duos with ammunition that burns.
But you soon discover that only a few of your Duos have been armed and the enemy is already attacking your base. Your defenses crumble before you can fire any of those fancy pyratite bullets.
Gather first, arm later. Without resources, your base is defenseless. But the backbone of your gathering operations should always be kept in check, so you should…
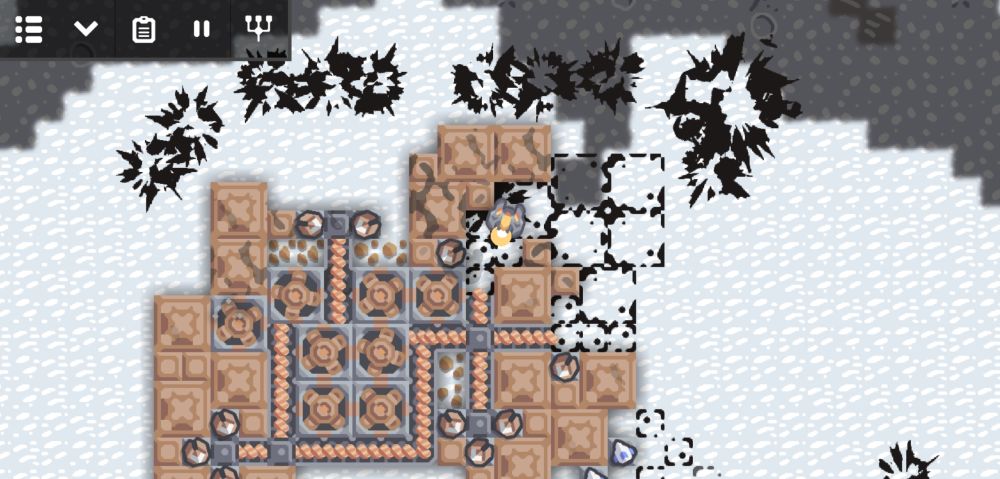
Upgrade Your Drills When Able
Mechanical Drills are good. Multiple Mechanical Drills on a single ore deposit are great. But there are better drills out there.
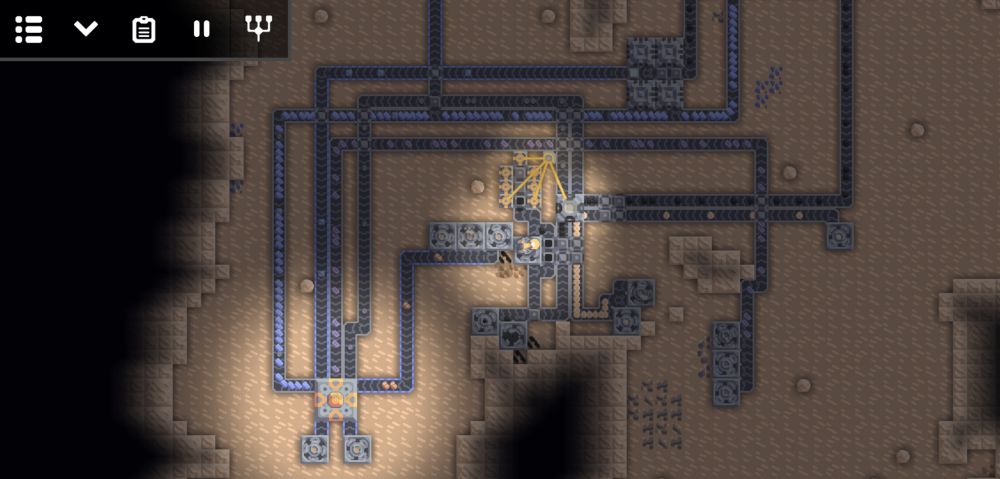
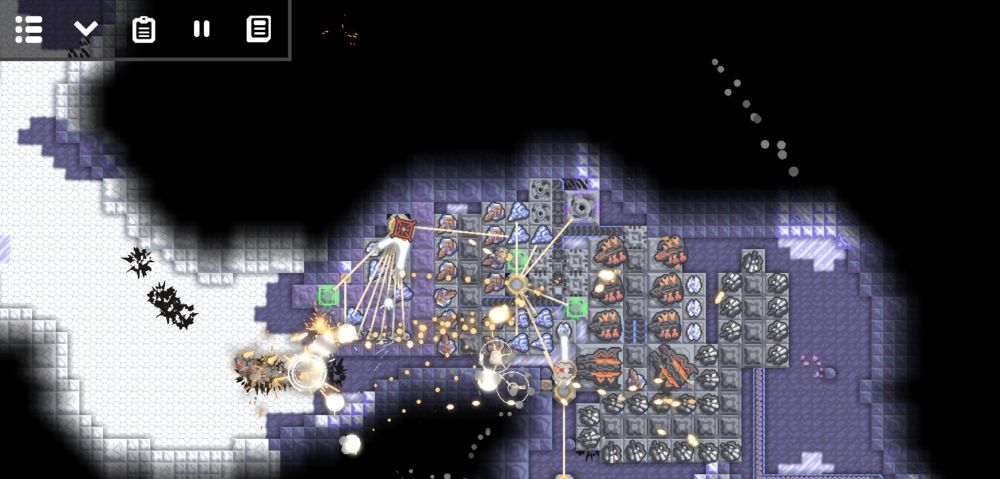
This is why research is important. Unlocking these new drills will definitely bring your gathering game a step up. The moment you build those brand-new spankin’ Pneumatic Drills to mine for copper, you might be surprised to see that you can recreate the Great Wall of China using Large Copper Walls. Bigger, better drills are the key to harvesting lots of ore in a short span of time, especially the Airblast Drills in the above screenshot.
Sometimes drill placement can greatly affect your ore yield. Let’s now talk about how you can maximize this.
Leave Room For Conveyor Belts

As long as conveyor belts are touching the drills, they should be fine, right? That isn’t always the case.
If you have a single line of drills attached to one conveyor belt, your ore yield could be good. But to make it better, it’s best if you leave room for conveyor belts between two groups of drills (if the ore deposit allows this, of course).
The logic behind this is you’ll have pairs of drills, and maybe one at the very mouth of the conveyor belt, churning out ore at maximum efficiency. You’ll have a full, busy belt as it runs down the line with that many drills working overtime.
As we’ve stated in the previous item, better drills will yield even more ore. Taking advantage of patterns like this will have you swimming in your mineral of choice in short spans of time, maybe even right before the enemy attacks!
Eventually you may notice that you could still have more. There’s definitely a quicker solution to that.
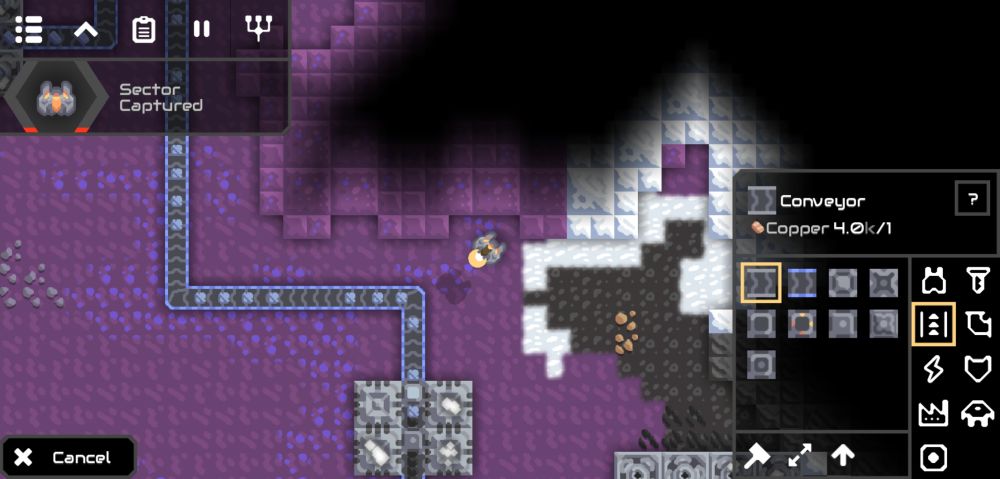
Upgrade Your Belts
If your Core is the brain of your operation, then your conveyor belts are the veins with the drills pumping minerals through them. Keeping these flowing nicely is a must and thus, it’s important to upgrade your belts once in a while.
Titanium Conveyor Belts are possibly the most practical since they allow the ore to travel at much higher speeds, allowing for a greater yield even if your drills are still at their basal forms.
However, if you have outposts on the front lines, there’s always the option of turning their belts into Armored Conveyor Belts since they can take a pounding in a fight. There are different kinds of conveyor belts for all sorts of situations, so putting up whatever you may need at the moment is entirely on you.
Did you know that sometimes these can get clogged, especially if you accidentally mix the ores on one belt?
Do Not Mix Ores On The Same Belt
This is especially important if you have processing machines like Graphite Presses or Silicon Smelters. There’s nothing more frustrating than having the wrong piece of mineral jam the whole thing.
As much as possible, if you are harvesting any ores, make sure that none of these separate belts are connected by Routers. Junctions are fine as they allow the minerals to cross over other belts, but a Router’s job is to evenly distribute the resources to other belts that it touches. At the end of the day, parallel conveyor belts are good, but never intersect them with Routers if your goal is to keep the flow separated.
Should the worst happen, that being an unwanted mineral clogging the line, simply tap the belt or machine with the unwanted mineral in it and you will be presented what minerals are in the device.
Tap the unwanted mineral and your ship should harvest it into its cargo hold. If you wanna set it down on the proper conveyor belt, do so, but it’s much quicker to just drag your finger from your ship and to the ground to drop it.
In an advanced example, keep your Silicon Smelter far from your Combustion Generators as the sand from the Silicon Smelters may accidentally find themselves on the combustion line. Imagine how annoying it would be to have sand (or glass since it’s being burnt!) clogging up a generator designed to vaporize coal for energy.
Because we’re already talking about coal…
Utilize Coal Fields For Energy
Energy will be important for your base much later on, especially if you’ve decided to invest in more advanced defenses like energy weapons. But more importantly, energy powers more sophisticated contraptions like Laser Drills or even Silicon Smelters. This is where the use of coal can give you that early boost.
Many Mindustry players will agree that the Steam Engine is more efficient than Combustion Generators and that’s true. However, starting out, Combustion Generators are all you have and here’s how you can take advantage of them.
Simply take some drills to a coal deposit and attach a belt to a Router (or Distributor if you want that extra chunk), and put some Combustion Generators on it. The coal should be evenly distributed to them and they’ll produce energy through incineration. Adding batteries nearby should help in the storing of energy as well.
Naturally, this kind of power should be distributed all over your base and that’s where Power Nodes come in. These fancy pylons are like electrical lines. Stick them around and they’ll power whatever is within their radii. Of course, more Power Nodes and more energy-based machinery will require more power, so this is where more Combustion Generator plants or Steam Engines will come in handy.
You’ve got all these fancy machines just carrying all the ore you need to your base. But what happens if you can’t fit anymore belts or the creation of said belts may require some severe base remodeling? You’re at a deficit of a certain ore. You’ve no other choice but to rough it out.
Manually Gather If At A Deficit
Once again, it’s time to put your ship to use other than building and picking off small fry. If you’re trying to get a specific kind of resource that you can’t seem to squeeze into your busy gathering operation, you’re gonna have to manually gather it yourself.
This happens if you’ve extensively spent on the Tech Tree and forgot that you needed that fat amount of lead or you’ve spent too much titanium on Titanium Conveyor Belts alone. Even the keenest player can make these mistakes, so at worst, this is what happens.
Do take note that your ship can only hold a maximum of 30 resources in its cargo hold. An upgrade for this may take a while to find. You may have to perform these trips while your base is at a lull or if you’re confident that your defenses can hold off a wave of enemies or two.
With the ins and outs of gathering discussed thus far, let us now move onto the fun part.
PART III: Combat
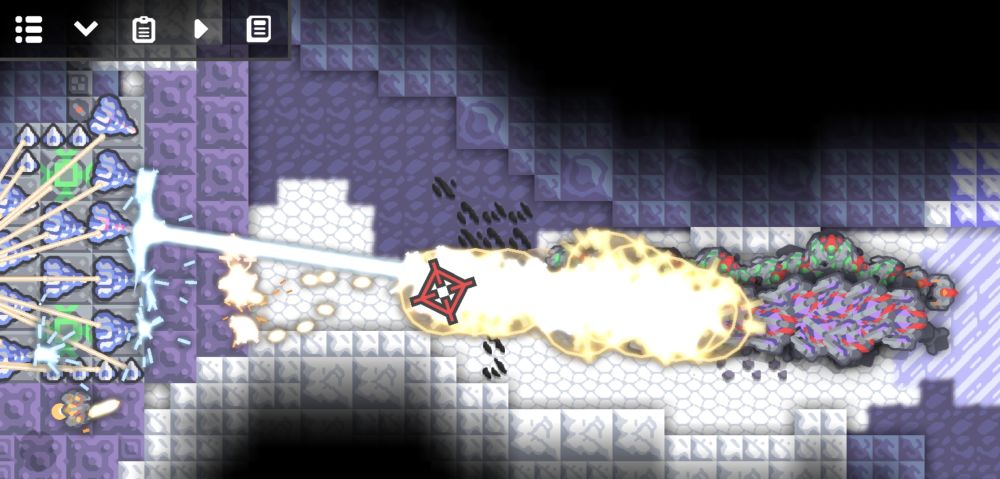
What’s an RTS or tower defense without combat at all? Mindustry’s combat is unlike any other. You may experience firsthand the brutality of the enemy robot horde after they destroy your outward defenses and make a beeline for your Core. But, we’ll try to keep that from happening by any means necessary. Read on!
Expand Inward, Not Outward
In most strategy games, the player’s goal is to expand their base throughout the map, claiming checkpoints, resource deposits, chokepoints, and others. It’s this movement that allows them to gain the upper hand in a fight. But the movement starts from their base and to the next-nearest possible outpost location, until the player has complete dominion over the entire map. That isn’t always the case here in Mindustry.
Instead of expanding outward to halt your enemy’s attacks, you must expand inward. What we mean is to find the farthest ore deposit from your base, preferably in the enemy’s path, and turn that into your first outpost. Once that is done, you can work inward, turning all similar resource points into supporting outposts, should your enemies tear through your first one.
There is a caveat to this technique, however. If you’re going to expand outward as per a traditional strategy game, do it offensively. Use long range turrets such as Hails or Ripples to destroy enemy installations and safeguard them with some anti-air defenses (Duos will do if you’re feeling cheap).
Once you’ve destroyed a section of the enemy base, proceed to build on their ore deposits and give them a real problem. Be careful, though. The enemy definitely won’t take kindly to you muscling in on their territory!
While this may seem resource-heavy, it also pays to have simple outpost designs in mind to maximize efficiency.
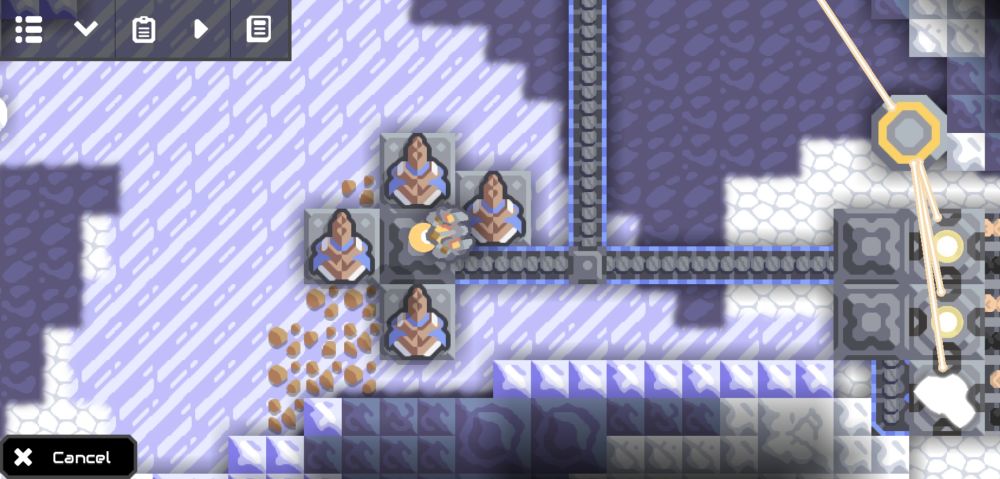
Opt For Simple Outpost Designs
While it is true that the majority of the structures of this game have to be connected to something, most of the time, simpler designs win battles. What we mean is that connecting each turret to a separate drill each with separate conveyor belts is highly inefficient and could be a nightmare to repair.
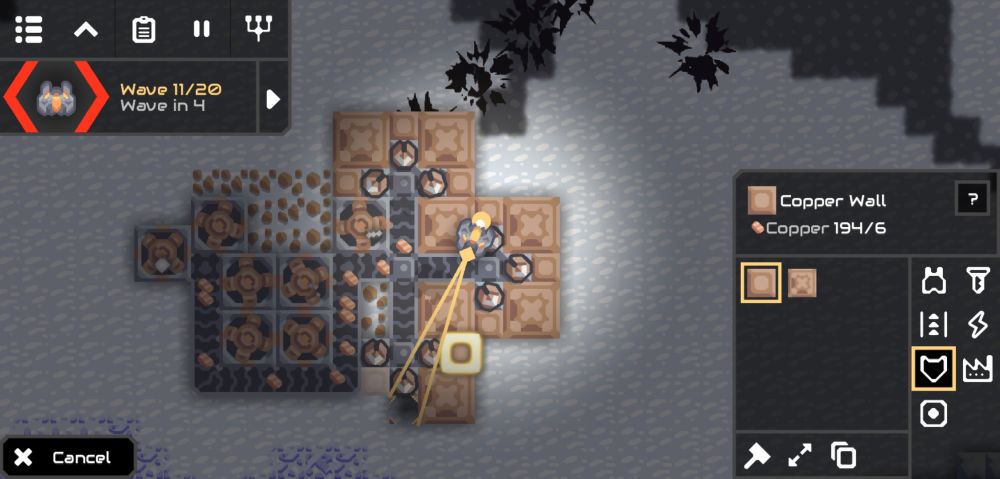
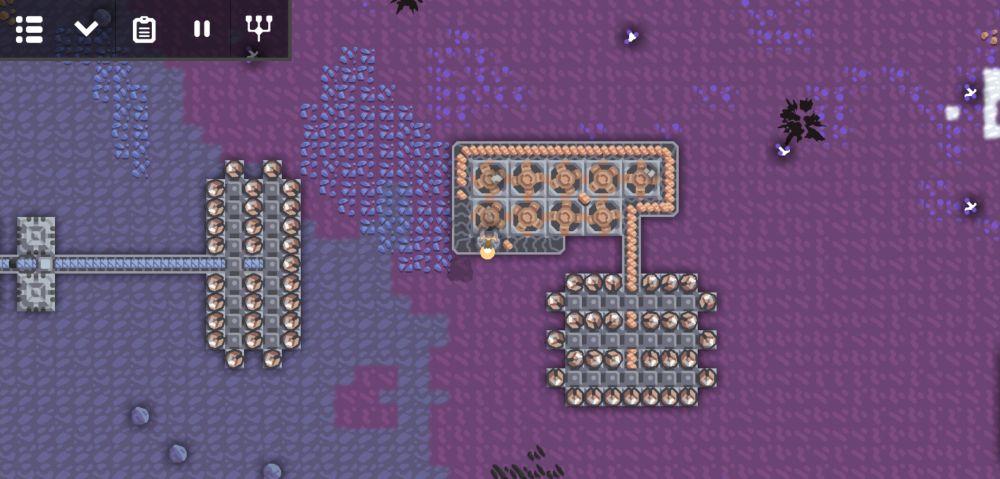
One such example we can give you is a Duo outpost only consisting of Routers or Distributors as a means for them to be fed copper (or whichever material you wish to arm them with). As you can see in the screenshot above, they are only fed through a singular conveyor belt and the ammunition is distributed evenly to all Duos.
Of course nothing beats having ammo given to your guns straight from raw resources. But be careful to remember that each gun uses a different kind of ammo.
Different Guns Require Different Kinds Of Ammo
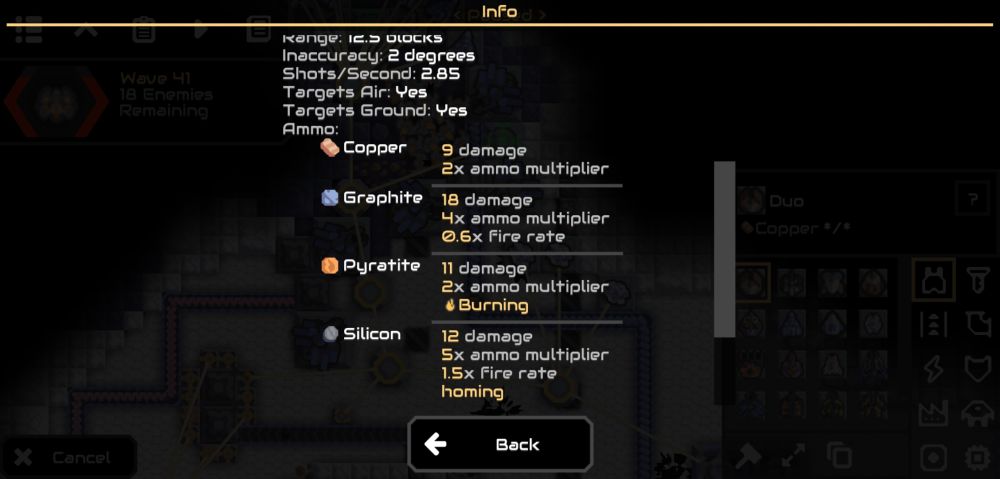
Never confuse one gun for being able to use the same kind of ammo as the other. Duos, Scatters, and Scorches all have different needs for basic ammunition, and guns like Arcs don’t require any minerals but energy.
Always view the info of the gun before deploying it anywhere. As we’ve mentioned prior, this game is all about planning, so the placements of your defenses will definitely matter. Sometimes, one type of resource can be used raw while others will require processing for advanced ammunition types.
Early game, it’s important to look for these raw resources, but come mid or late game, processed material is a must if you wanna keep up against the enemy onslaught.
Make Use Of Processed Material For Upgraded Ammo
Remember how we touched upon making a Graphite Press production line previously? This will come in handy later for any Duos you might want upgraded.
Upon studying the different ammo types supported by every gun in the game, linking them to a processing plant of your choice will supply them with the special ammo you need it to shoot. With the Duos as an example, granting it graphite ammo will allow them to fire faster.
Conversely, you can also opt to link your Duo outpost to a Silicon Smelter line so it can fire homing shots at enemy aircraft. There’s also the pyratite option which will allow your Duos to fire incendiary rounds at the enemy.
Try this out with other guns as well such as Scatters, Hails, Ripples, or Salvos and you’ll be able to turn a fight around by shuffling ammo from time to time. This can be done by changing the belts going into the gun outpost, depending on what you want them to fire.
Projectile defenses are great. While they offer versatility and options, there are other forms of defenses that can provide a rigid but more powerful bolstering force to your base’s protection.
Energy Weapons Can Help
Energy weapons are quite expensive, but they are expensive for a reason. That sole reason is due to them hitting somewhat harder than their projectile-shooting counterparts. One stark contrast they have with said counterparts is that they cannot adapt new forms of ammunition.
Instead, energy weapons provide a more focused form of defense, offering specialties right off the bat. For instance, you have the basic Arc energy weapon. This humble turret packs a shocking surprise for the enemy, a bolt of concentrated electricity that chains through their formation.
Another example of an energy weapon is the Lancer which fires powerful beams of energy at anything belonging to the enemy. Use these to take the foe down a peg!
With the power of these defenses, your base should be a safe place. But what happens if the enemy starts attacking something you hoped they wouldn’t?
Intercept Enemy Units With Your Ship
As we’ve discussed in Part I, your ship can whittle down enemy waves using its tiny gun. It’s this tiny gun that can also draw the attention of some enemies away from a specific structure that’s under attack, especially if you’re no longer an effective threat to the enemy units’ armor (they’ll be using shields later on).
Zero into the fray yourself and start firing! There is a chance that the enemy will want to shoot your ship down. You can use this to your advantage by leading the enemy into a nasty outpost you left somewhere. Be warned that if your ship gets shot down, the enemy will resume its attention on its intended target unless your defenses are firing at it.
Leading the enemy to your defenses is the perfect way to stop them but after getting shot down, you might find that your guns are all in shambles. This is where walls should come in.
Wall Up Any Openings

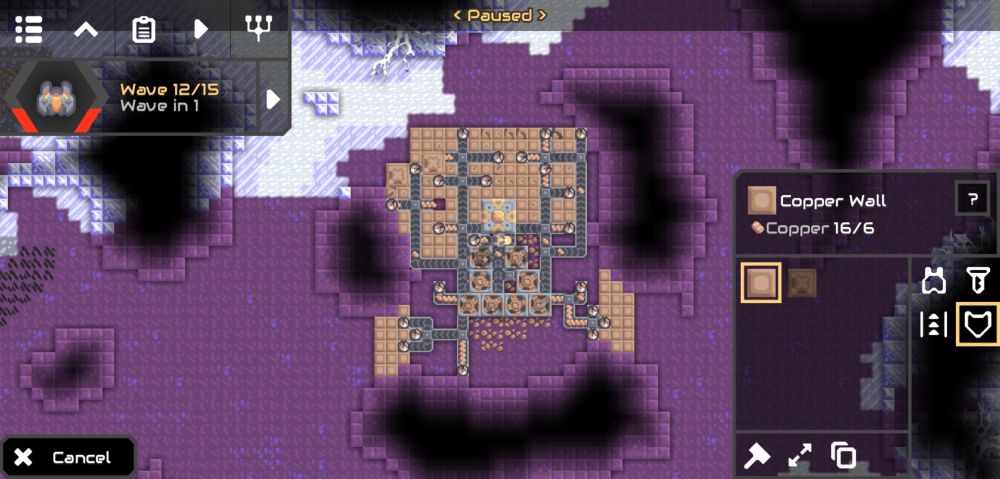
Walls are the best solution to enemy fire. They can keep your structures from being shot at and their HP values vary. The earliest wall you can get, the Copper Wall, can be used to seal gaps between structures or Large Copper Walls.
Eventually, you’ll be able to develop stronger walls such as those made from titanium. Keeping these in front of your turrets will make for a formidable defense since even aircraft will have to fly over the walls and shoot your defenses from behind. Otherwise, their shots will always hit the walls first.
Maintaining these can be quite a pain, especially after an enemy attack. To minimize your expenditures, you will need something to repair these guns and walls while you’re away doing something else.
Make Use Of Menders And Other Repair Devices

Menders and Mend Projectors are powerful additions to any installations you might have anywhere. The only downside here is that they require energy, so bring those Power Nodes out and burn that coal!
These glowing green blocks slowly repair any damaged structure within its immediate vicinity. Deploying any of these in the center of a defensive installation will guarantee its longevity and toughness for a few attacks.
Even then, they could take some damage (Mend Projectors, especially), so keeping them protected with walls and turrets is a must. It’s like an “I scratch your back, you scratch mine” kind of situation. The turrets and walls protect the Menders and the Menders keep them repaired. Everybody wins… except for the enemy.
Now, when your Menders fail…
Restore Or Replace Any Damaged Defenses After An Attack
It’s a dirty job, but you’re gonna have to do it. You’re the only one that can.
After each and every attack, do check for any missing conveyor belts, destroyed turrets, busted drills, ruined walls, and anything that used to be there. Replace these immediately as you only have a limited amount of time to rebuild before the next wave arrives.
If remodeling is a must, for example you’re opting to replace your Graphite Press with a Silicon Smelter, take advantage of this time as well. Keep your schematics at the ready and set those bad boys down to save on laying them out manually. Walls may take slightly longer to rebuild, so prioritize defenses and their sources of ammunition before everything else.
Eventually, you’ll find out that the ammunition belts have stopped and all the guns have had their fill. Don’t let those resources just sit there.
Use Surplus Ammo Material For Your Base
That’s right, folks. We’ve come full circle! We said that resource gathering is a priority and here we are again talking about it. Only this time, this comes from the surplus material you’ve gathered.
Once a gun (or guns) has reached its full capacity, the drills stop mining and the conveyor belt stops. Set a Router down on the belt and make more belts leading all the way to your Core. The excess material won’t go to waste and will, instead, be used for research or extra building material.
Keep in mind that the enemy can still destroy these. If you are at a deficit, one of your harvesting lines might have been cut. Who knows? Maybe you can lay another router somewhere there and make yet another outpost to keep the ore flowing.
And that’s about it for this extensive guide for the tower defense/RTS hybrid that is Mindustry! Gather, build, fight is the best way we can sum this whole guide up, but you’ll be missing out on the tiny details if you told your friends that this is all there is to it.
If you’ve got a strategy of your own that you’d like to share or if you have ideas that could help fellow Mindustry players, you know the drill — deposit your thoughts in the comments section below!
Additionally, if you would like to know more about the game and make some friends who also play Mindustry, be sure to join the official Mindustry Discord!
yesC48
Friday 18th of November 2022
here's a few things I'd like to mention: 1. make efficient schematics in sandbox mode 2. practice makes perfect 3. don't be afraid to experiment upon stuff 4. expect the unexpected 5. consult professional Mindustry players if you're having trouble 6. there are units that can rebuild, build and deconstruct for you (I wonder why it isn't mentioned…) and, as always, have fun!
Trevor
Sunday 9th of October 2022
Not just drills, but even some turrets!
Trevor
Sunday 9th of October 2022
And also keep in mind, most drills can be supplied with water to increase speed