Idle Guardians: Never Die is a brand new idle RPG from SuperPlanet, the company behind mobile titles such as Evil Hunter Tycoon and Lucid Adventure. In this iOS and Android game, you can recruit dozens of different Guardians and form your own party as they join you while going through hundreds of stages, killing more enemies as your Miners earn you tons of Gold coins. Your Guardians and Miners will do everything for you, limiting your involvement as you sit back, relax, and enjoy the “cute” dot graphics and retro feel. And just as promised, this is a game where your Hero never dies, and could, in theory, get reborn endlessly.
The best way we would describe Idle Guardians: Never Die is that it’s reminiscent of Nexon’s titles — not just in terms of the graphics (although the aesthetics in this title are definitely retro), but also in terms of the fact that the game comes with an underlying backstory and is packed with an unusually high number of features for an idle clicker.
And while you may find the game quite easy to play after you’ve figured things out, it may be better to read along as we show you how to navigate the game’s more basic features and go beyond what is offered in the extensive tutorial cutscenes. So with that said, here’s our Idle Guardians: Never Die beginner’s guide for those starting out, which we believe covers everything that you need to know about the game while you’re still in the first two or three Hero levels or so.
1. The Basics Of Idle Guardians: Never Die – Pay Close Attention To The Tutorials
Although Idle Guardians: Never Die is indeed an idle clicker, you may feel a bit overwhelmed at first by the fact that there is a backstory, as well as the sheer number of features in comparison to the average title in the genre. However, that’s also why you need to pay attention to the tutorial stages, of which there are many — as long as there is a new feature to introduce, you will see two of the game’s characters having a cutscene conversation where they discuss the features in the context of the backstory.
It is possible to learn the game’s basics while skimming through the tutorials, but it’s still recommended that you pay attention, as the cutscenes cannot be repeated unless you uninstall and reinstall the game.
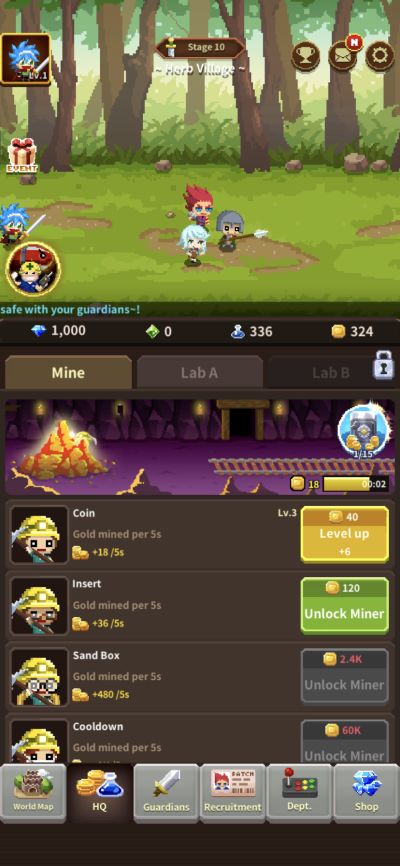
In the early goings, there are two tabs at the bottom of the screen that you need to pay attention to more so than the others. The HQ tab (second to left) is where you will find your Miners — you may want to disregard the names of each of the Miners, as they appear to be random words that are connected to hardware and/or software features. What you need to keep in mind is the order of each of the Miners — the topmost one, which is called Coin, is the first available Miner and is the one that is capable of mining the least Gold per 5 seconds.
Each subsequent Miner is capable of mining more Gold per 5 seconds, but would cost progressively more coins to level up. There are only two options here — to level up each Miner by one or to level them up by as many levels as your gold can afford. There doesn’t appear to be a way to level up by increments of 5, 10, or 50 like in other idle clickers, so we suggest leveling up by one unless you’re dealing with some of the more expensive Miners available.
The Guardians tab, which is third to the left, is where you will find the game’s titular Guardians, who automatically escort your Hero character and defeat enemies as you go from one level to another. Student Publi and Assistant Patch (the two characters who guide you through most of the tutorial cutscenes) are among your three default characters, and both start out at three-star rarity.
A third character, Guard, is a common Guardian with only one-star rarity. You can either level them up by one level or level them up by 30 or 40 (typically), with the latter option appearing after you level them up by one — this, too, will cost you some gold coins, but upgrading Guardians is much cheaper than upgrading Miners. You will notice that each Guardian acquires more skills as they level up, so make sure you level them up whenever you could, just like you upgrade your Miners to increase your Gold production per 5 seconds.
We should reiterate the importance of upgrading your Guardians, because there are consequences if all of them die — in its subtitle, the game does not specify that your Guardians “Never Die,” after all. Once all your Guardians are killed, your Hero will be left by his lonesome, and a bird will fly onscreen and take him two stages back, with all existing Guardians back at 100 percent.
It does hurt your progress and affect your earnings if you get set back by two stages, so do what you could to avoid this by leveling up your Guardians, even the weaker ones! It shouldn’t take long anyway before you’re able to replace them, and we’ll show you how to do that in the next tip.
2. Use The Recruitment Feature To Get More Guardians
Eventually, you will reach a point where your one-star Guardians no longer would cut the mustard. Or you may notice that three Guardians is not enough to hold off the enemies as you keep going through more stages in Herb Village. That’s where the Recruitment tab comes in handy — this is the fourth tab at the bottom, and once you tap on that tab, you will see two Guardians that you can recruit, with three free chances to recruit them and the option to pay at least 50 Diamonds (your premium currency) for Special Recruitment — this gives you a guaranteed shot to add them to your list of Guardians, and the cost in Diamonds to take advantage of this will go up as the star rarity of the Guardian increases.

If you’re in the early stages, you can probably get by with one- or two-star Guardians and use the free recruitment option — the chances of recruiting a Guardian for free are fairly good if they’re pretty common, in the one or two-star range. However, once you’re close to completing Herb Village, you can start using your Diamonds for Special Recruitment when it comes to three-star or better Guardians. Using the free option for these more powerful characters gives you a low chance of recruiting them, but you can also try recruiting them for free, then paying Diamonds once your free chances are up.
What happens after you recruit a new Guardian? Don’t expect to see them appear immediately in the Party tab under Guardians. You’ll need to go instead to the Stand By tab, where you will have to tap on Join Party, upon which you can add them to your party, or have them replace someone who is already on your party. You will also notice that you have three Party configurations to choose from, as designated by the 1, 2, and 3 tabs — feel free to mix and match Guardians so you can experiment with various configurations and see which one works for you the best!
In order to refresh the list of Guardians that you can recruit, you’ll need Interview Tickets, and we’ll tell you later how you can get more of these. New Guardians will show up at random, and there’s no guarantee that you’ll be getting a three-star or better Guardian available to recruit. It’s purely based on luck here, but trust us when we say you’ll have more than enough Interview Tickets to allow you to refresh the Guardians options to your liking and find someone worth adding to your Party.
3. Check Your Mail Rewards And Dailies And Redeem Them
On the upper right side of your screen, you’ll see an envelope icon with a red letter “N” above it — tapping on that will take you to the Mail menu, and as a new player, you will get several messages that contain various rewards, including, but not limited to your common (Gold) and premium (Diamond) currencies. Even after you redeem these rewards, we suggest coming back to the Mail menu at least once a day, as long as there’s an “N” designating new messages — at the very least, you’ll have a chance to watch an ad video, but if you received new Recruitment Tickets through the events, as we will be discussing below, your can use them in the Mail menu by either tapping on the yellow “Reward” button for the individual reward, or by tapping on the green Receive All button at the bottom.
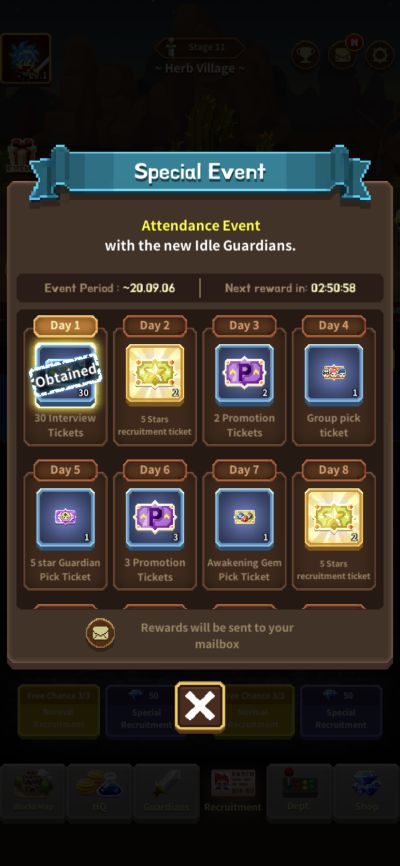
It appears that Idle Guardians, like your average role-playing game, idle or not, is packed with special events that allow you to get tons of freebies that could help you in your overall quest to keep improving your Hero, Guardians, and Miners and complete more stages! These events come with daily login rewards, and it just so happens that your initial reward for logging on in the first day is 30 Interview Tickets.
Just as we promised you in the last tip, these will be very valuable in your first few days of playing the game, as this gives you a chance to refresh Guardians in the Recruitment screen if you aren’t satisfied with the one- and two-star options or have recruited both Guardians from the current batch. However, that’s not the only reward you can get for your daily logins in this event — these include 5 Star Recruitment Tickets, Promotion Tickets, and tons more goodies that will also be useful in helping you improve your roster of Guardians!
4. Empty Your Vaults Once They Fill Up Completely
Just like any other idle clicker worth its salt, Idle Guardians comes with a feature that allows you to earn currency while offline. While leaving the game open will allow you to earn a ton of money in the blink of an eye, you can earn up to 60 times the current gold production every 10 minutes or so.
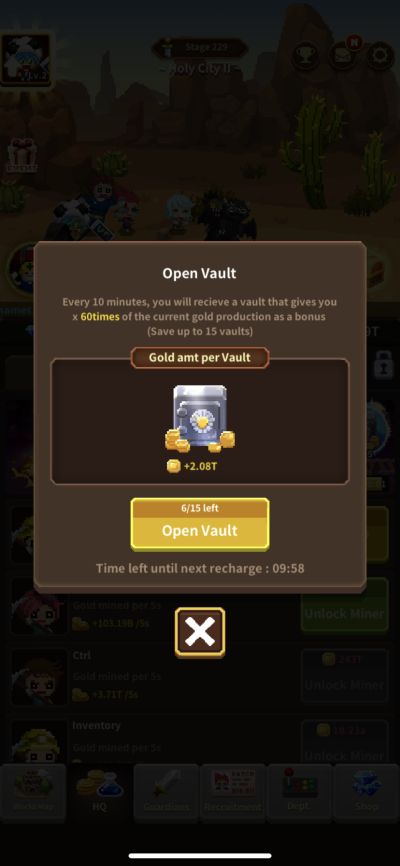
Essentially, that eliminates the ability of loading up on in-game currency during the six to eight hours (or more, or less) of sleep you get each day, but by default, you get up to 15 Vaults, and since it takes 10 minutes for each Vault to charge up, that means you’ll want to check back every 150 minutes (2 hours and 30 minutes) if you prefer to open all your Vaults in one go and quickly add to your Gold total. Once you’re offline, also keep in mind that you will remain at the same stage you were when you were last online — this isn’t one of those clickers where your characters keep working through stages even when you’re not actively playing.
The only drawback here is that you’ll need to manually tap on Open Vault in order to open each one individually — sadly, there’s no option to open all available Vaults at the same time. However, it’s just a minor inconvenience if you’re trying to take full advantage of the game’s offline earning capabilities and earning more Coins to level up your Miners and Guardians alike!
5. About Rebirth – How It’s Different From Your Usual ‘Prestiging’
You may be wondering why we’re talking so early about Idle Guardians’ equivalent of “prestiging,” which, for those who are unfamiliar with the term, is the process of starting everything else from square one but enjoying some of the perks that may have been acquired during the previous playthrough, thus allowing for the new playthrough to move considerably faster. But the game will prompt you quite soon to tap on your Hero’s avatar on the upper left corner of the screen and Rebirth him, which will allow you to earn Dragon Stones. This is a resource that you can then use to power up your Guardians, making them stronger and more effective against enemies as you go from one stage to the next.

Given how idle clickers work, you may be wondering if you will be losing the Guardians you unlocked during your previous playthrough. As Patch and Publi will explain during the Rebirth tutorial cutscene, you will retain all Guardians once you Rebirth your Hero. All promotions that have been performed, all items that have been equipped or acquired, and any progress you may have had in Research (more on that later) will also be retained. What will be reset, however, is your progress in the map, as well as the levels of each of your Miners and Guardians.
However, the obvious tradeoff here is that you will progress faster in the next playthrough, thus making leveling up and earning Gold much easier! And let’s not forget those Dragon Stones, which you can double by paying a few hundred Diamonds for a “Special” Rebirth. All in all, Rebirth is designed to level up your Hero, and as your Hero level increases, you will unlock more features.
Before Rebirthing, it is highly advisable that you spend all of the Dragon Stones you had previously acquired by powering up your better Guardians — if they’re at two stars and below (or three stars as you progress), you wouldn’t want to focus on those characters too much.
6. Research – What’s In It For You If You Study More Technologies?
Aside from Gold, one other resource you can earn while completing more Stages and killing more enemies is Flasks — these appear as containers of blue liquid right in between your Dragon Stone and Gold counters. What’s the purpose of these Flasks and how can they help you in Idle Guardians?
When we were talking about the HQ tab earlier, we specifically focused on the Miners because we wanted to bear down on the basics. However, there are two other tabs next to the Mine tab in the HQ menu — these are Lab A and Lab B. Lab A will be the one that’s available immediately, and in here (as well as in Lab B when it gets unlocked), you can research new technologies that could help your cause, especially as you go through more stages, level up your Hero through Rebirth, and destroy more enemies.
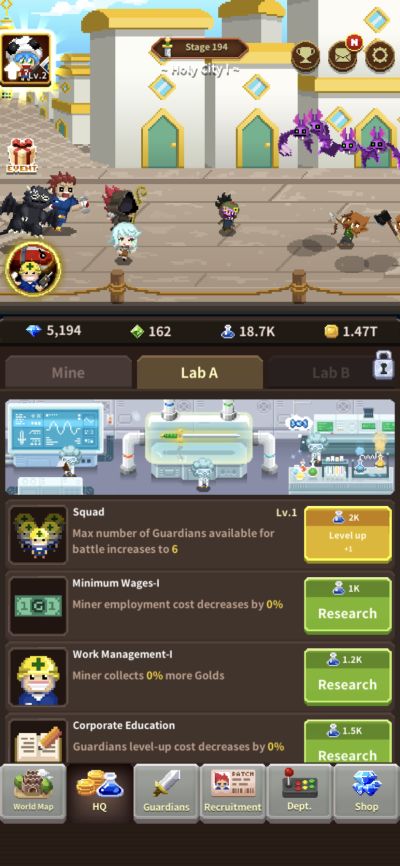
When it comes to the technologies you should prioritize, we would warn you against making the same mistake we did, which was to prioritize Squad, which increases the number of Guardians you can include in your Party. In the first few hundred stages, you should get by well enough with six Guardians, so there’s really no need to get this up to 7 or 8. Instead, you should prioritize Minimum Wages, as this decreases the cost of hiring and upgrading Miners by a certain percentage — at level 2, you can save 40 percent on all Miner expenses.
Work Management is also important, as this allows your Miners to collect more Gold — at level 2, this increases by 40 percent. Corporate Education, meanwhile, shouldn’t be too important as compared to the Miner-related technologies, as it’s fairly affordable to level up your Guardians anyway. Still, it’s arguably more important than the Squad technology when talking about the hierarchy of the first available technologies.
As you increase your Hero level, more technologies will become available, but we won’t discuss them just yet, as this is merely a beginner’s guide for anyone in their first few days of playing Idle Guardians.
7. Crawl Through The Dungeons To Earn Resources For Your Equipment
As you’ll see in your Hero screen, you will have the option to equip various items — a Helm, Armor, Boots, Weapon, and two Accessories. Given that your Hero doesn’t do as much as the Guardians do, they won’t directly impact your Hero — instead, they serve as buffs that could improve certain stats for all Guardians you may have unlocked.
For example, a level 1 Hero’s Wooden Club would increase damage by 20 percent for all Guardians, and if you upgrade it all the way to level 6, for instance, that figure will increase to 49 percent. But how do you buy new Equipment anyway, and how do you upgrade the existing items that you have?
The answer to this question is the Dungeon, which is unlocked once you Rebirth your Hero to the first time and level them up to level 2. There are various Dungeons to choose from in the menu of the same name, which can be found in the World Map (first tab at the bottom), and these allow you to earn various resources that can be used to buy new Equipment at the Equipment Shop (also on World Map). Different Dungeons are available on various days of the week, and you’ll be limited to using certain Guardians, with all their skills fixed at level 1.
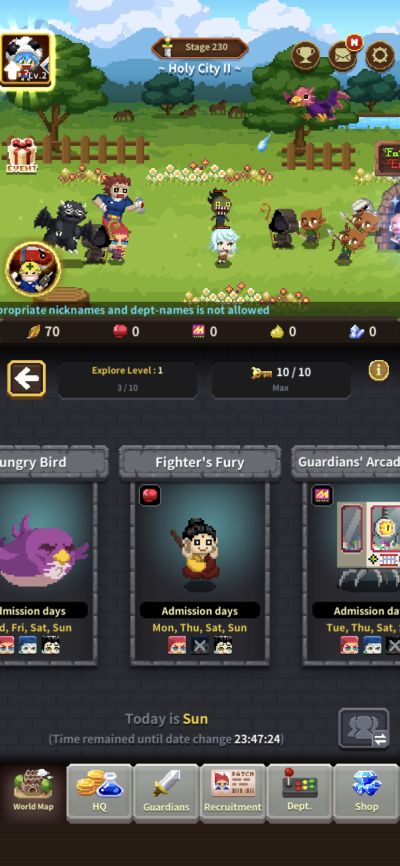
That’s where the challenge generally lies, though you can always crawl through Dungeons repeatedly, just as long as you have enough keys, which automatically refill. As for the Dungeon schedule, keep in mind that the game follows Japanese time — Hungry Bird is available on Wednesdays, Fridays, Saturdays, and Sundays, for instance, and this is the easiest series of Dungeons you can crawl through.
It’s best to crawl through as many types of Dungeons as possible per day, as there are five different resources that can be used for different types of Equipment. For example, you cannot use the resource designated for weapons to buy armor, or vice versa!
There you have it! These would be all the tips and strategies we have for Idle Guardians: Never Die. If you happen to know more tips for the game, then be sure to drop us a line in the comments!