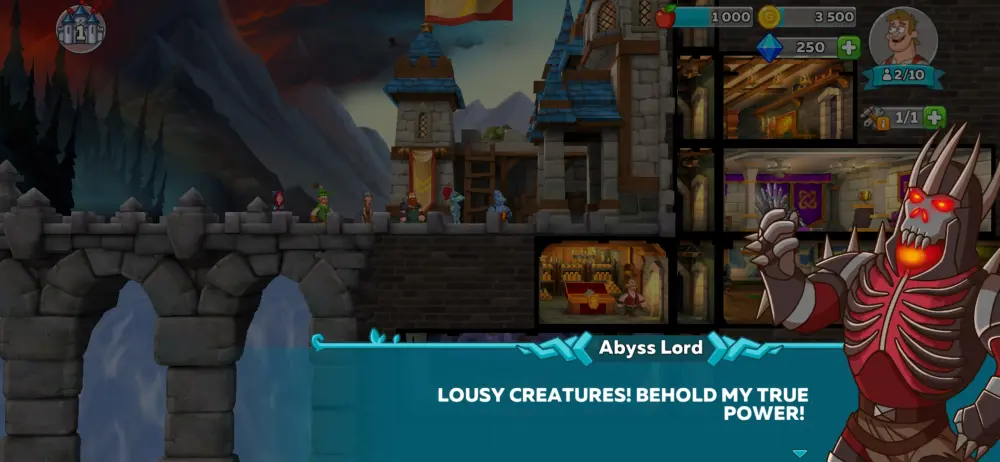
Look out! The Abyssal Lord has claimed your betrothed, Princess Olivia, as well as her father, the King!
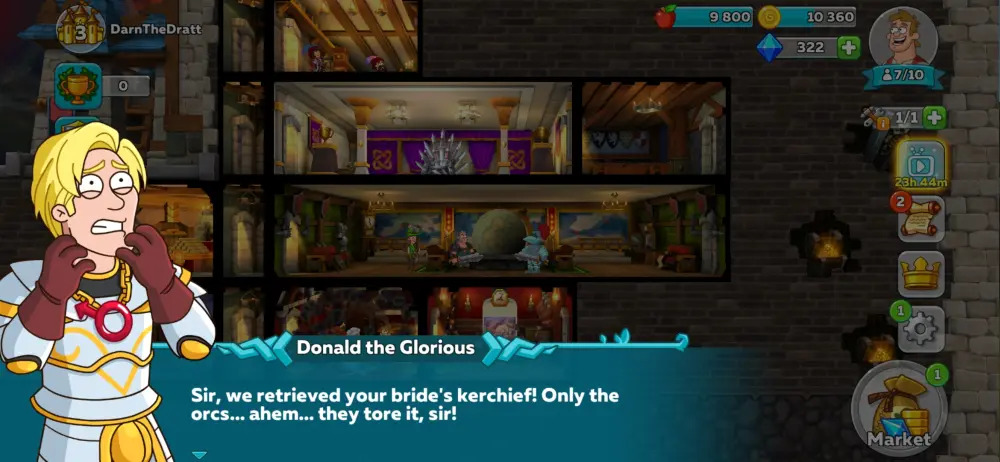
Through the efforts of the eccentric old man, Sage, and your narcissistic yet powerful pucker-lipped commander, Donald the Glorious, it is now your quest to retrieve Princess Olivia from the clutches of the Abyssal Lord. Unfortunately for you, the Abyssal Lord has an assortment of friends (or fiends, for that matter) who seem to want to wed Princess Olivia for themselves. Your wedding preparation has gone topsy-turvy, it seems, and that brings you to acknowledging your purpose in Hustle Castle.
From the makers of War Robots, Rush Royale, and Tacticool 5v5, UPWAKE.ME brings to you a fortress simulator with an art style similar to well-known western cartoons like Family Guy called Hustle Castle. To complement said art style, Hustle Castle is packed with adventure, a plethora of battles and loot to be had, a cast of zany do-gooders and raving rapscallions, and ridiculous amounts of shenanigans and tomfoolery.
The above summary is indeed the premise of the game itself where you are Princess Olivia’s bridegroom in a languid quest—sorry, did we say languid? We mean a harrowing and desperate quest to rescue her. This is where not only love conquers all but powerful warriors and heroes do as well!
But not everyone is at ease when they march forth into the depths of the unknown. With the Abyssal Lord’s army at the gates (not literally, those will be your neighboring lords!), it’s entirely up to you to fulfill your destiny and make the very best castle like no castle ever was! Although this may seem difficult, fear not—this is why this Level Winner guide exists!
Brace yourself, for you’ll be on a journey that will test your wits, your patience, and your willingness to save Princess Olivia (though, it’s entirely up to you if you really wanna do that; she can wait). If you’ve started building your castle and need some tips on how to get stronger, read our comprehensive Hustle Castle guide below!
Hustle Castle for Dummies
First and foremost, Hustle Castle is, as we’ve mentioned a few paragraphs up, a fortress simulator. How does this simulator work? Well, let us explain.
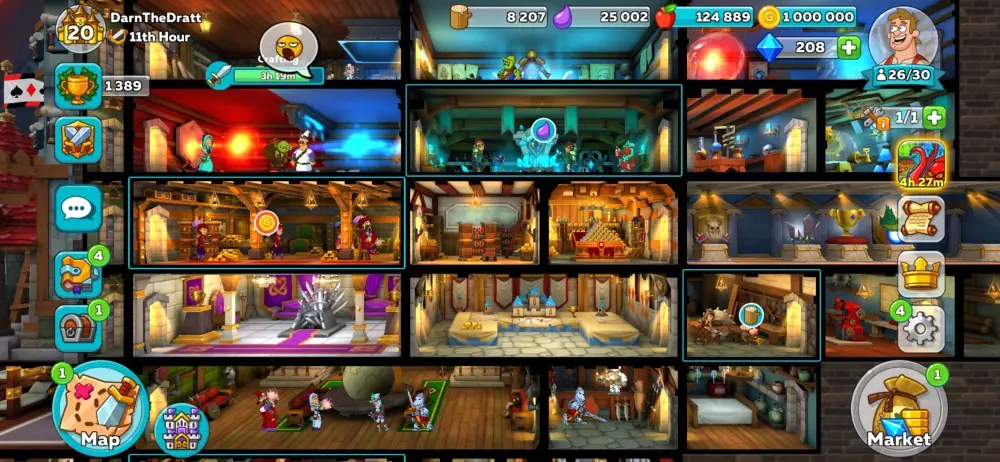
You own a castle and in this castle, you have a bunch of Dwellers that roam about and fulfill their duties, or at least whatever you direct them to do. Each Dweller stays in a room and every room can hold a set amount of Dwellers. Usually, small rooms can only hold 2 Dwellers at a time and big rooms can hold up to 4. Long-pressing a Dweller and then dragging them to another room will command them to go to the desired room.
If a Dweller moves to a room that is full, one of the other Dwellers staying inside it will run off to the nearest vacant room. Tapping a room will allow you to view info about it and what it does, as well as open options for upgrades and granting the Dwellers in it an “Equip the Best” button. That button will allow you to easily dress the Dwellers in the room with the best gear available. But this doesn’t work on Fighter Dwellers—that’s for you to decide (playing dress-up for the battlefield is fun)!
Rooms can be built and upgraded. Early rooms are bought from the Market using gold and, later on, some rooms will require other resources to be successfully built or upgraded in your castle. Gold aside, other resources that may be involved in construction or upgrading are wood and iron.
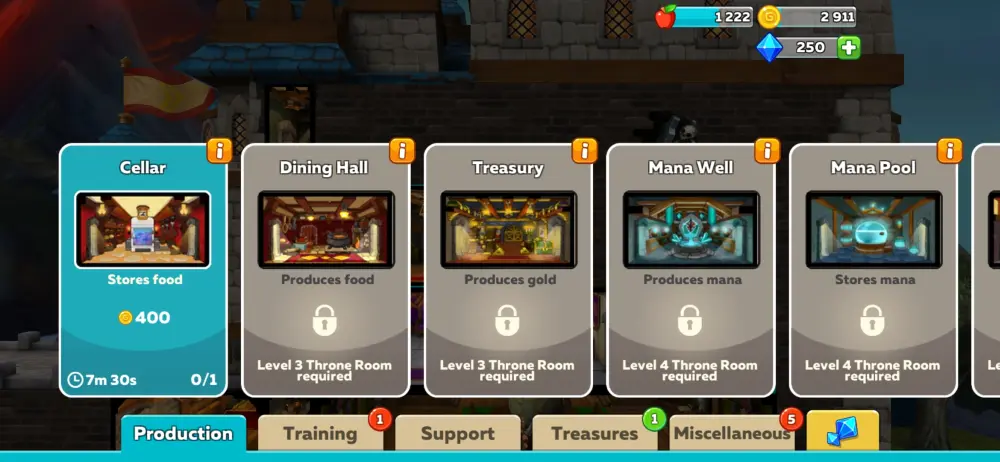
Each room in the castle serves a purpose. Here’s what each room type does:

● Production — Production rooms provide you with various resources for your castle. Without these resources, your castle will barely function. Very early on, you will have the Dining Hall and the Treasury, which produce food and gold, respectively. Later on, you’ll unlock the Mana Well, the Lumber Mill, the Mine, and many others. These rooms can be merged with identical rooms of the same level to become bigger rooms, which will allow more Dwellers to work in them.
Dwellers staying in these rooms may aid in the production of whichever resource it’s in charge of producing with what they’re currently wearing or equipped with. Just remember that most production rooms will require support rooms that store the resource produced. For example, food is stored in the cellar, wood is stored in the shed, gold is stored in the vault, etc.
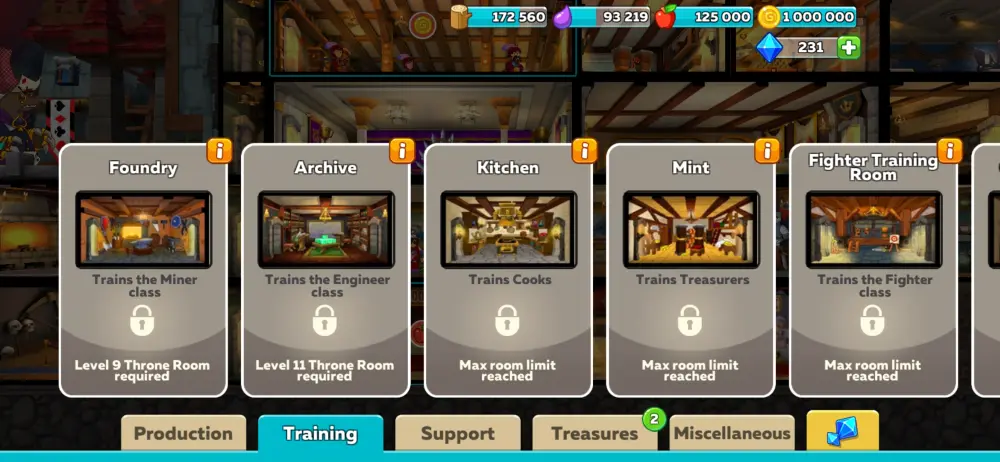
● Training — Training rooms make your Dwellers better at what they do. Putting them here will increase their class level and it will allow them to wear better gear for their jobs. The in-game classes available are Fighter, Cook, Treasurer, Alchemist, Carpenter, Miner, and Engineer. You will initially start with the first three and slowly extend into acquiring the other four. Usually, these rooms are small, so they’ll only hold up to 2 Dwellers at a time for training. More on this later.
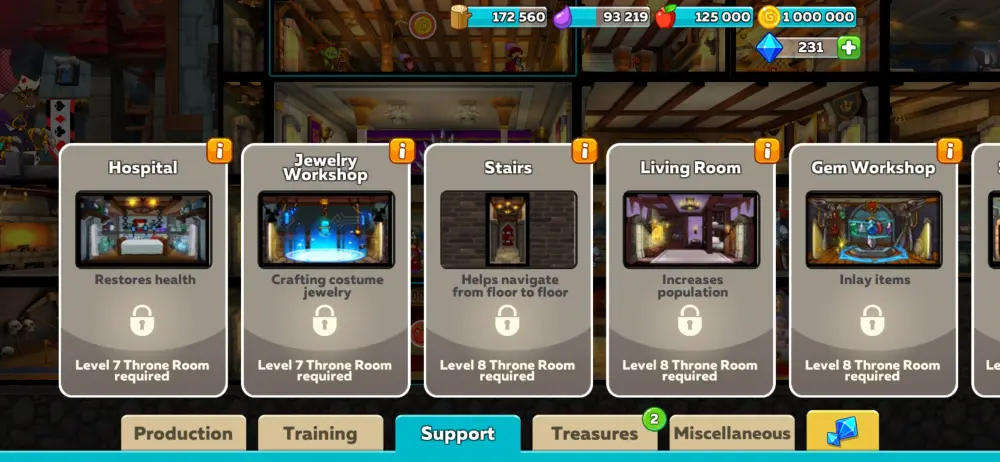
● Support — Support rooms help your castle thrive. They can increase how many resources the castle can hold, or even how many Dwellers the whole castle can have. Other rooms that fall under the support category are those that craft or enhance items, heal your Dwellers, provide them a place where they can access the various rooms, item inlaying, and many more. Try to unlock all of these!
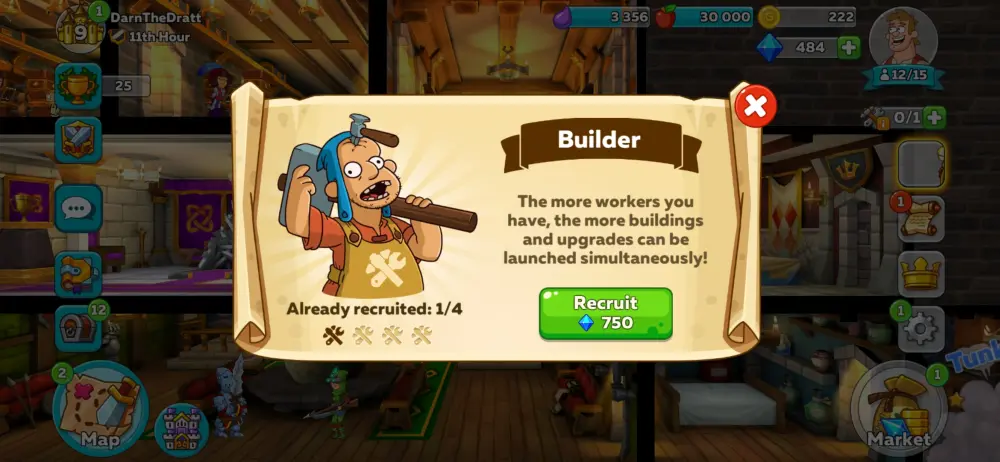
If you are a new player, you’ll certainly start with a single Builder for your castle. This Builder’s sole responsibility is to construct and upgrade new rooms for you. However, more Builders can be purchased using gems (Hustle Castle’s premium currency). If a Builder is busy, then no new room can be presently built or upgraded.
You may also notice debris in the walls of your castle. These require a small sum of gold as well as a free Builder to remove. Do note that any action that a Builder does around the castle will require time and, more often than not, the more complex the room is, the more time it will take to build or upgrade. They need to fit the parts properly or you’ll be cooking steaks on training dummies!
Combat plays an important role in this game. While we will discuss the ins and outs of combat later on, it’s important to note that new players will get a taste of what it’s like to play with a Premium Account status for a couple of days. In other words, you’ll be given a few days of living as a noble before you ultimately get demoted to becoming a peasant.
With this status on, not only will you gain additional resources, but more noticeably, your troops will be healed immediately after battle regardless of the injuries they’ve sustained. Thus, having a Hospital in the castle is important, and keeping it nicely upgraded is key just in case your Premium Account status expires and you become a part of the peasantry for good. Of course, if you’d like to extend this status, you may show the devs your appreciation, if you know what we mean.
With most of the basics already mentioned thus far on how to play the game, it’s time to dive into the minutiae of Hustle Castle. We will first talk about managing the castle from a greater perspective and combat in general. Let’s get going or Princess Olivia will berate you again for not saving her!
Castle Administration
Managing the castle is a lot of work! You have so many things to account for, especially when it boils down to resource management. Although the gaining and spending of resources mostly depend on combat (more on this later), there’s more than meets the eye when it comes to managing the castle as a whole as well as the Dwellers that… er… dwell within. With that note, let’s talk about how you can make your castle a force to be reckoned with (apart from being a snazzy vacation spot).
1. Castle Progression 101
Your castle level is a general indicator of how far you’ve gotten into the game.
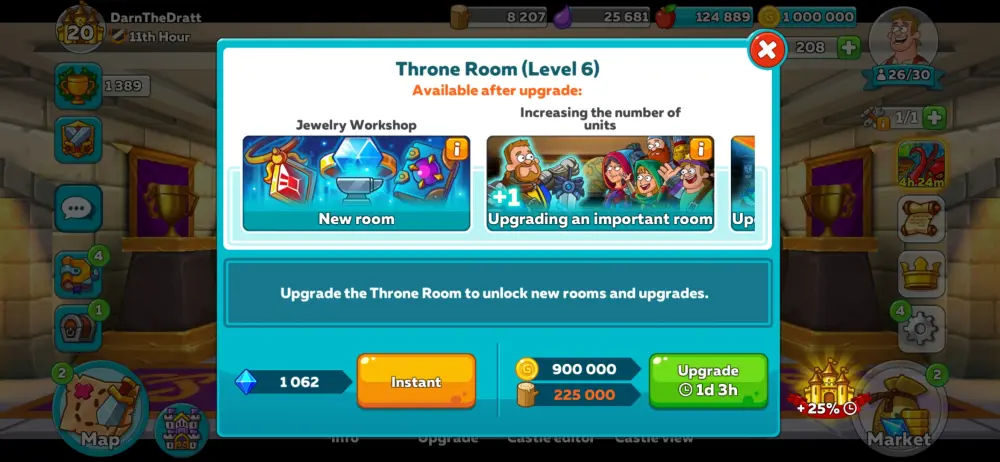
What determines a castle level exactly? Is it how sturdy its walls are? Is it how powerful its defenses are from the Arsenal? Is it the quality of living within? How about the scents of its many halls and rooms? After all, your Dwellers will pass gas when you’re not looking (you can catch them, though!) and this may certainly turn potential visitors off! But we digress. A castle’s level is determined by the level of its Throne Room… no, not the bathroom, the Throne Room.
That’s right, the Throne Room: your most literal seat of power, the place where you sit and make your subjects feel special or command them, the room in which the throne stays where you sit your butt on. This room has to be upgraded regularly for you to progress and unlock more features within the game.
By features, we mean more rooms and modes, of course! More ways to make yourself look mighty to your friends and quite contemptuous toward your most bitter rivals. But upgrading your Throne Room is beyond just spending gold.
Upgrading your Throne Room is the goal that many players should strive for. But the climb doesn’t start until your castle needs new rooms that take a while to build or several powerful Fighters that have attained a certain Fighter Level. Once these goals come up, it’s time to decide whether or not you’d want to focus on these or set for yourself some personal goals.
Surely, you’d want a certain Dweller to become good at what they do—you may focus on that. But if you’d like to unlock more of the better stuff, set that goal aside for now and get on with the Throne Room upgrade. Be warned that each succeeding upgrade of the Throne Room will require more time than the last!
Dwellers this, Dwellers that—when are we gonna talk about these dang Dwellers? Now? Okay, now. Moving on!
2. Get Better Dwellers (Spartan Style!)
Let’s now talk about the Dwellers.
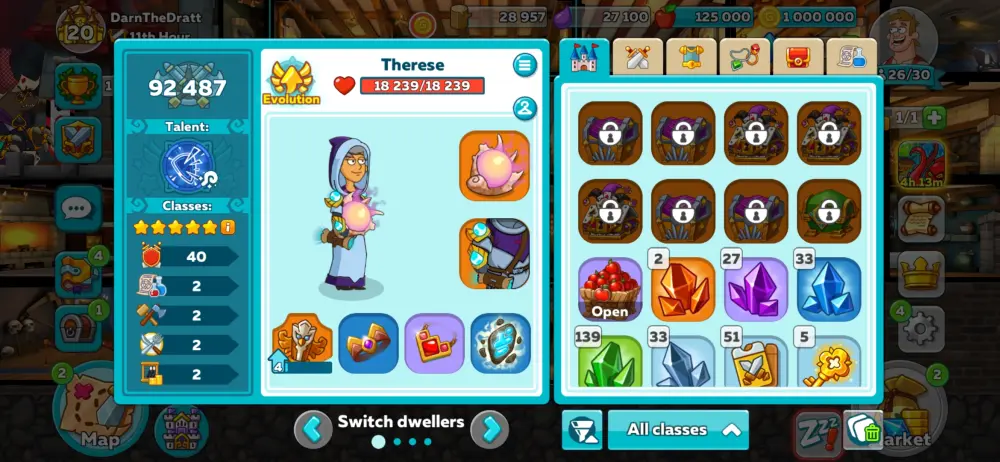
These lovable goofballs are all a part of your huge castle family… literally! It’s going to sound weird, but you’re going to be inbreeding these lovable goofballs. Thankfully, because this is just a videogame, there won’t be any looming threat of Habsburg Jaw anywhere. Instead, look at the stars, and they’ll give you an answer. We are, of course, referring to a Dweller’s star level, or as it’s called in-game, Potential.
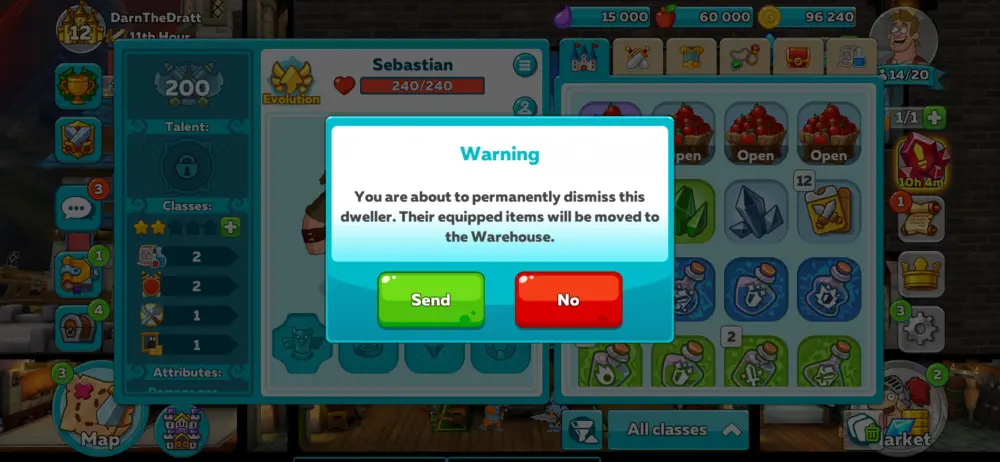
A Dweller’s Potential determines how far they can go up with their levels (especially Fighter Levels). Naturally, 1-star Dwellers are the runts of the litter and 5-star Dwellers are born winners. The key to achieving perfectly-starred Dwellers is to make the 4 or 5-star Dwellers breed like rabbits and banish the weak when they’ve matured (you cannot banish them when they’re kids).
Here’s what you’re going to need:
● A Living Room with ample space
● A pair of Dwellers, a male and a female (multiple pairs if the Living Room allows it)
● Space for new Dwellers in the castle
● Time
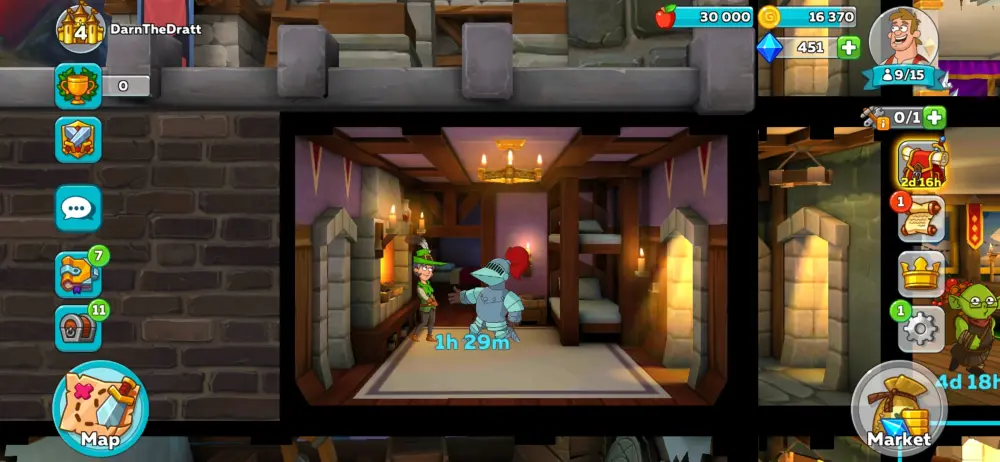
First, take your Dweller pair and have them stay in the Living Room for an hour or so. When they’re done, the game should alert you that the female Dweller is about to give birth. Tap on the baby icon and a kid Dweller will run around the castle for a few hours.
The mother Dweller will not be able to have another baby for at least 24 hours in real-time, while the father Dweller may have another go with another female Dweller anytime. When the kid Dwellers have fully matured, you’ll notice that they’ll have a birthday cake icon atop their heads. Tapping this will turn them into an adult, and this is where you’ll decide whether to keep them or not.
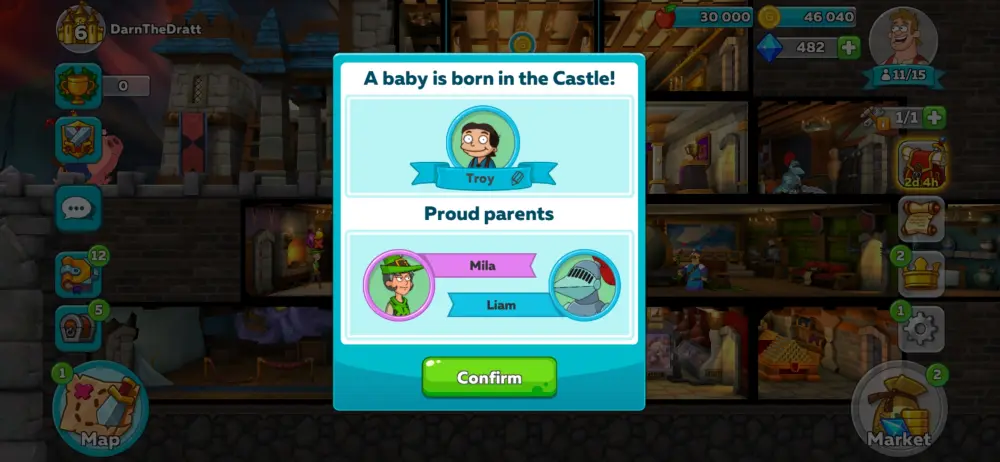
In the beginning, Potential shouldn’t matter so much since you’ll be spawning 2 or 3-star Dwellers at best. Having a 4-star Dweller will be quite a leap, but you will have to rely on that Dweller for a better generation.
Having two Dwellers of the same star level will likely produce a Dweller of a star level higher than their parents. For example, two 3-star Dwellers have a small chance of producing a 4-star Dweller, and two 4-star Dwellers have a small chance of producing a 5-star Dweller. Don’t rely on 1-star Dwellers, however, as they will always produce a 1-star Dweller no matter what.
Once you have a castle with a couple of 4 and 5-stars, it’s time to start weeding out the weak, but don’t remove all the Dwellers from your castle or else you will lack people manning the production rooms! What we mean here is to set a floor for yourself. If the average Potential level of each Dweller is 3-stars, banish new Dwellers that are 2-stars and below.
If you have more 4-star Dwellers than 3-star ones, start banishing the 3-star ones. It may seem harsh, but make them retire with dignity. Perhaps castle living isn’t for them when you become stronger as a ruler.
If you seem to be down on your luck and you aren’t producing Dwellers of your desired Potential level, you may increase their Potential by spending gems. Be warned that graduating a Potential level will cost a hefty amount of gems. For instance, bringing a Dweller’s potential from 3 to 4 stars will cost 750 gems, while bringing them up from 4 to 5 stars will cost a whopping 2,000 gems.
“This is highway robbery!” you’d probably exclaim. The reason behind this ginormous gem price is because Dwellers that hit 5 stars in Potential are given Talents. Talents are basically the RPG classes of the game. We’ll talk about this in-depth in the combat section below. Regardless, this is why apart from having a bigger and better Throne Room, trying to get 5-star Dwellers is important as they make fights more tactically sound.
Potential only increases the maximum level that a Dweller can attain. But you can raise their levels so they can perform their tasks better. It’s time for some serious training.
3. Turn Your Dwellers Into Pros
They say if you really like something and you wanna get good at it, you will do your best. Without skill, you may need to study first before putting what you’ve learned into practice. That’s just how life works. The same goes for your Dwellers.
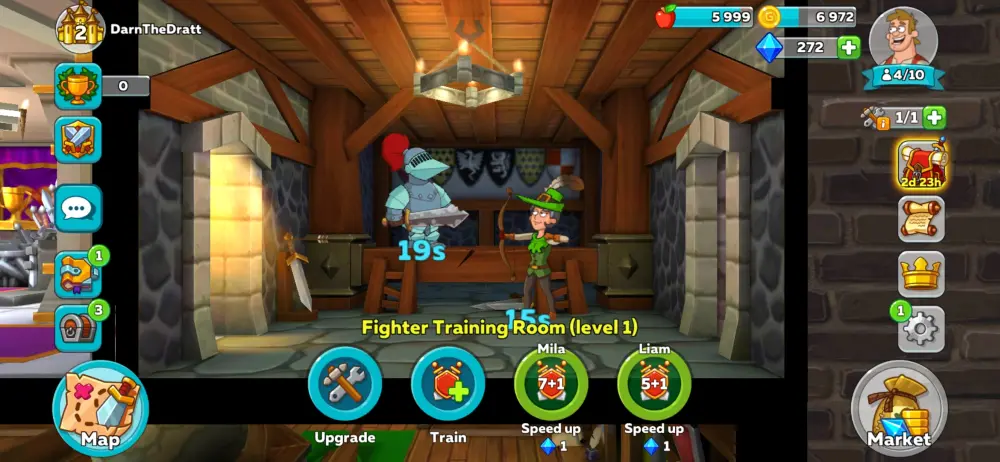
Dwellers with a low level of anything won’t be able to do well at their job. However, you can alleviate that by putting them through training. Training isn’t hollering at your Dweller while they slave about at their workplace—that’s the job! Training means that they will need to isolate themselves in a specific room and hone their skills until they become better at what they do.
Take for instance the Kitchen. The Kitchen is where your Cooks will train to get better. While Dwellers can already operate at the Dining Hall by themselves, they will be producing a mundane amount of food and you won’t be able to send your troops out on empty stomachs.
Putting Dwellers in the Kitchen, however, will minimize food production but this will improve your Dweller’s Cook Level. After attaining a higher level in this field, they’ll be able to wear better cooking attire, handle more sophisticated cookware, etc. Food will be flooding out in no-time flat when they’ve been deployed there at last.
As we’ve mentioned in the introductory section, each Dweller class has a specified training room. Sending your Dweller to your desired training room will let them train for a couple of hours. Be warned that the higher the level, the more time it will take for them to train there. Of course, each training room can still be upgraded and upon doing this, it will increase the maximum level that the Dweller can achieve in their class.
When it comes to production rooms like the Dining Hall or the Mill, we recommend sending at least one Dweller into the training rooms of these classes while the other Dweller saves about producing minimal resources. That way, when the newly-trained Dweller comes back, the other un-trained Dweller will take their place in the training room as demands for resources in your castle skyrocket. It’s a vicious, vicious cycle, we know, but hey, at least it keeps your Dwellers from revolting, right?
Revolutions and monarchy beheadings aside, your Dwellers can become unhappy! How do you address this as a lord or lady of the land? Check out the next item in this list.
4. Keep Your Dwellers Happy
The secret to happiness—what is it?
Is it a full belly? Is it peace of mind? True love perhaps? Could it be a pool full of nail clippers? Why do we ask so many questions? We don’t know either! But we do know how and why you should keep your faithful little goofballs happy.
Let’s look at this from a realistic perspective for a moment: when you aren’t happy, you won’t be giving it your all. Deadlines won’t be met on time, you’ll be dragging your feet to school or work every single day; more visibly, you’ll have a face with a stone-cold frown on it and bags under your eyes that touch the floor.
If you were happy while you were studying or working, or if you were enjoying each moment of it, you’d be giving it your hundred percent. Your output will be much better when you’re happy and spirited than when you’re sad or disinterested. Morale and happiness go hand in hand, but your Dwellers’ efficiency is only measured in terms of happiness.
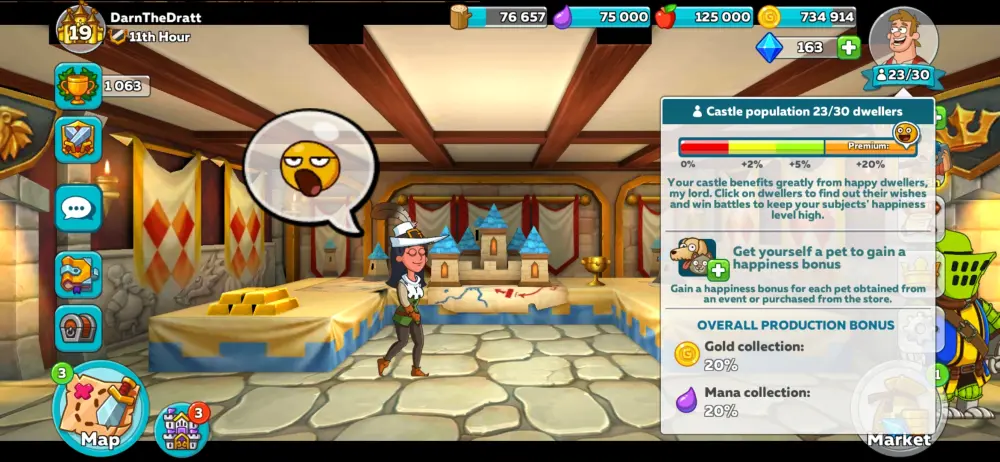
When Dwellers are happy, they produce more Mana, food, wood, gold, Mithril, and iron more efficiently. This means keeping their happiness meter up is crucial if you want to be at the top of your game. Happiness also affects their movement around the castle—happy Dwellers run when they’re called to another room, while depressed Dwellers shamble across the floor. To keep an eye on your happiness meter, simply tap on the Dweller’s face in the upper-right corner of the screen. They aren’t at their best when they’re depressed!
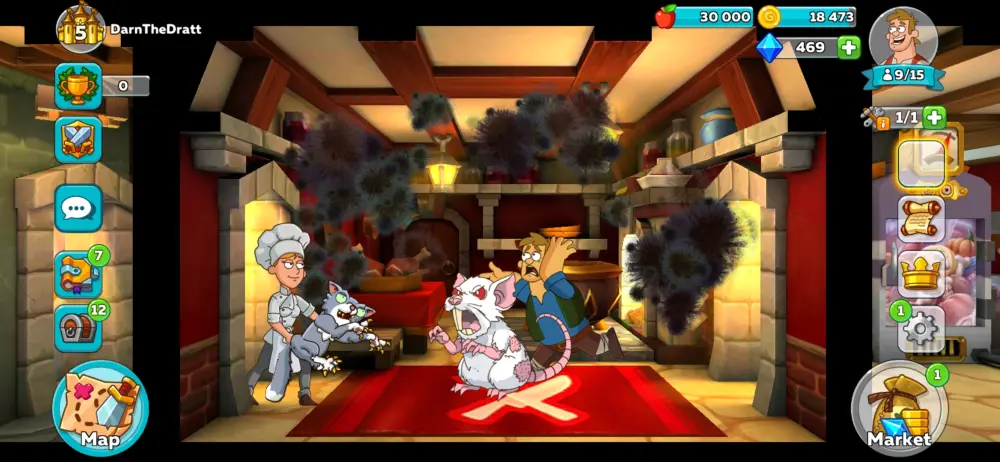
Happiness can be gained in small bursts by clearing events in the castle. These events are like little speech bubbles coming from the Dwellers that you may tap on. The speech bubbles may include faces that are yawning or nauseated, skulls and crossbones, a triplet of snoring Zs, and a few others. Meanwhile, there are major castle events that involve rat infestations (pictured above), hauntings, and fires. Taking care of these will yield greater happiness points and keep your castle at peace.
Although doing this while you linger in your castle is all fine and dandy, you’ll soon discover that keeping your Dwellers happy using this method will be much slower than a geriatric snail trying to get out of bed on a Monday. The surest, quickest, most darn-tootinest way to shoot your Dweller happiness levels up is by sending your Fighters out to war with other players (yes, this means any form of PvP) and coming back victorious.
Yes, because people rejoice at the return of Fighters with the spoils of bloodlust. It’s fun! If you happen to lose, however, your Dwellers’ happiness will not be affected. The winning part, we can prepare you for that later.
Tying into what we discussed earlier, making Dwellers have babies does keep them happy. Doing this until the kids are ready to enter adulthood will give a significant happiness boost, almost as good as waging war.
Who knew that taking lives and making lives would be just as fun as the other? These can all be done for free (in-game, not in real life, and the former is illegal). There are premium options to doing this, however, and it’s to obtain a Premium Account status or buy a Pet from the store. Otherwise, doing the above to maintain Dweller happiness is already good enough for you to get by.
With all your Dwellers running around the castle, inhabiting different rooms, and going from training facility to training facility, it could get confusing. That’s why we’ve devised a plan you may try out for yourself!
5. Dweller Naming Conventions
As you move your Dwellers about, you’ll notice that it’ll become difficult to track them aside from what they’re wearing. This is where naming them isn’t just an aesthetic.
A name is more than just what you call your Dwellers—they’re a designation. These will help you sift through your Dwellers once they start to reproduce and move around the castle. There will be times when some parts of the castle are short of work because a couple of people are elsewhere training, making babies, or trying hard to grow their limbs back from the previous fight.
So you have to substitute them for Dwellers who might be less experienced or overqualified for their position. The messy part comes if you happen to dress them up in the equipment to suit their job, and then you start to forget who they are.
Sure, the game pre-generates names for your Dwellers right off the bat, but this could be confusing since it only chooses from a pool of so many. That said, the name pool is so tiny that you will often find yourself with two or more Madisons or Matthews. Instead of these default names, consider the following naming themes below to designate your Dwellers in a way you can remember them:
● Fighters — Name these after mythological beings, storied heroes, and historical figures that fought in a battle, superheroes, or characters from movies or literature. You can even go further as to name them according to their class like a mage named Albus, a tank named Guts, and an archer named Artemis.
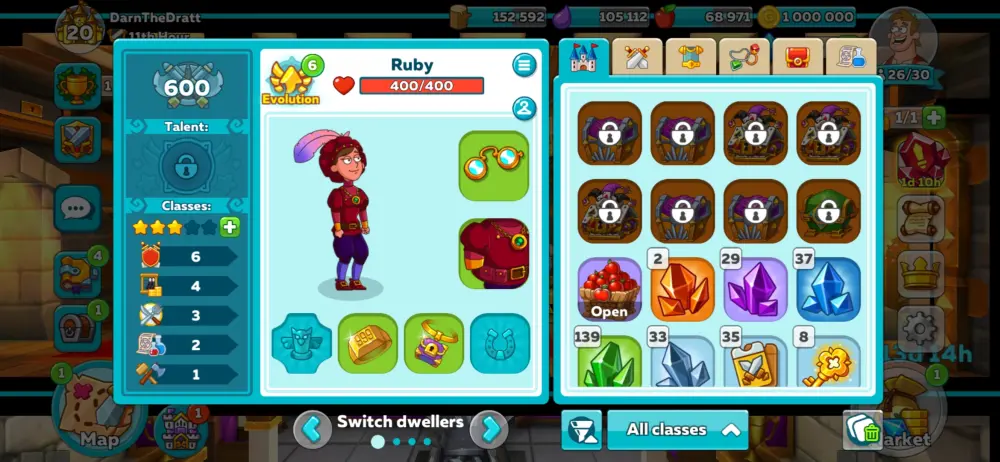
● Gold Producers — Name the Dwellers after anything or everything that has to do with affluence, accounting or business terms, gemstones, etc. Treasurers like Ruby, Goldman, or Earnest sound like fun.
● Mana Producers — You want Mana? These Dwellers are tricky to name, but if you’re going to follow some similarities to the Fighter Dwellers, go for naming these after fictional and historical persons who dabbled in or wielded the mystic arts. Consider names like Ezalor (or Kotol if you feel silly), Blaine, or even Bellatrix.
● Cooks — Now this one is going to be fun if you’re a fan of cooking or cooking shows. Think of names of famous chefs, dishes that you enjoy eating, or ingredients. Imagine having a 5-star cook named Gordon who has a group of other cooks with names like Parsley, Darjeeling, or Maki.
● Wood Producers — Naming the Dwellers here can have anything and everything to do with wood and woodworking in general. For instance, consider names like Buzz, Birch, or Barkley.
● Iron Producers — These are mostly miners, but don’t let it get you down if you know nothing about mining or any famous miners. How about going with a rock-themed set of names like Slate, Gravel, Cobble, or Marble?
● Mithril Producers — This can get just as tricky as the Mana Producers, but since the in-game world of Hustle Castle treats Mithril as some sort of high-tech and powerful material, think of names that allude to science or math. Name the Dwellers here like Pythagoras, Archimedes, Tesla, Curie, Beaker, or Burner.
As far as names go, you aren’t obligated to push through with this. We’re suggesting this so that you don’t catch yourself scrambling for your Dwellers after they’ve finished training or producing offspring for your castle. If you can’t think of a name for your Dweller, just remember that the internet is your friend. Look up some names before assigning them!
To alleviate the Dwellers being all over the place, try considering a layout for your castle.
6. Interior Design Tips
Interior design is always a tough subject in games similar to this!
As a topic, interior design (or base design) discussions become lengthy and complex since many players have their own preferences or ideas on what makes their castles comfortable. What are we talking about, exactly? Room placement, that’s what.
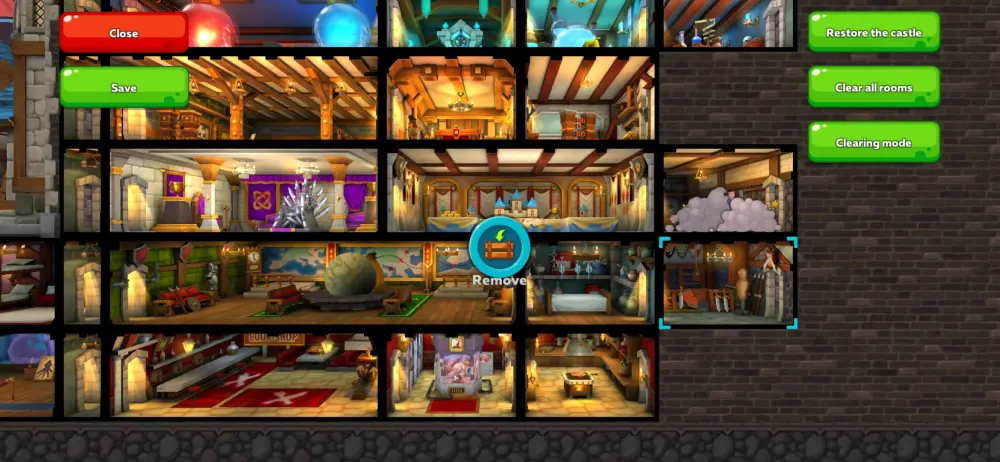
To give you an idea of what we mean, Hustle Castle allows players to rearrange the castle’s layout however they see fit. Did you happen to place a room somewhere you don’t want it to be? You can fix that. All it takes is to simply long-tap a room and the game brings you into the castle editor mode.
This mode will allow you to freely move rooms around the castle space, provided there’s enough room for your new arrangement. The best part is doing this doesn’t even require a Builder. So be sure those excess bricks, skeletons, and hidden treasure chests sticking out of your castle walls have been cleared out!
Now, here comes the hard part: rearranging the rooms. Although this seems a bit intimidating at first (not as intimidating as some of the bosses in this game or the Dark Cathedral mode), here are a few tips you can use when rearranging the rooms of your castle. Note that you can do all these separately or combine them if you’d like:
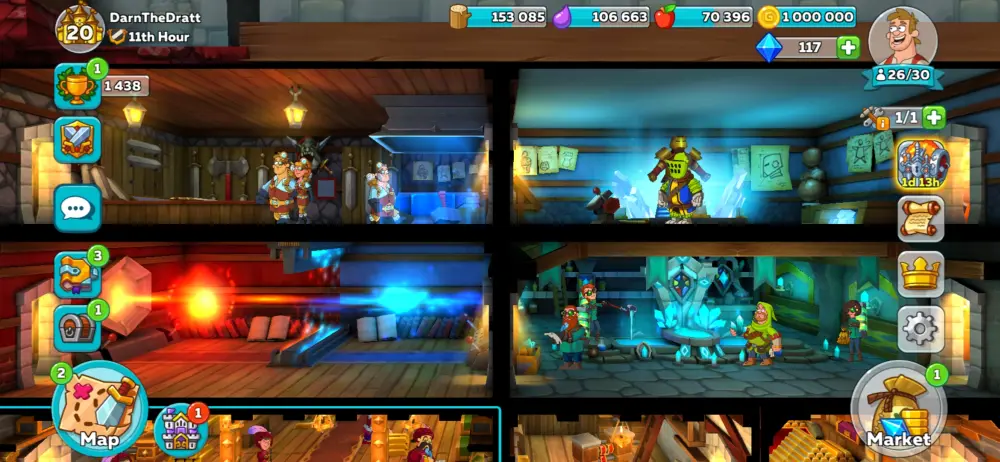
● Keep production rooms together. That way, you won’t have to navigate your castle and collect their resources separately.
● Combine production rooms, training rooms, and storage, especially if they’re all related (e.g. Dining Hall – Kitchen – Cellar).
● Keep your Barracks and Fighter Training Rooms close to the Hospital. Once your troops have recovered fully or completed their training, you may field them once again.
● Keep long rooms together or at the bottom of the castle.
● Merge identical production rooms for more resource yield. This will also allow more Dwellers to work there.
● If any room is being built or upgraded, put some dwellers in there to help reduce the time needed to complete it.
Always remember that there is no be-all, end-all to castle arrangement. These guidelines are here to give you an idea of how you might make your castle more comfortable. But if you have a better arrangement in mind, go ahead and use that instead!
If you happen to have all of your production buildings spaced out and you feel like tapping on them when they’re full is cumbersome, why not hire a Goblin Assistant?
7. Get a Goblin Assistant
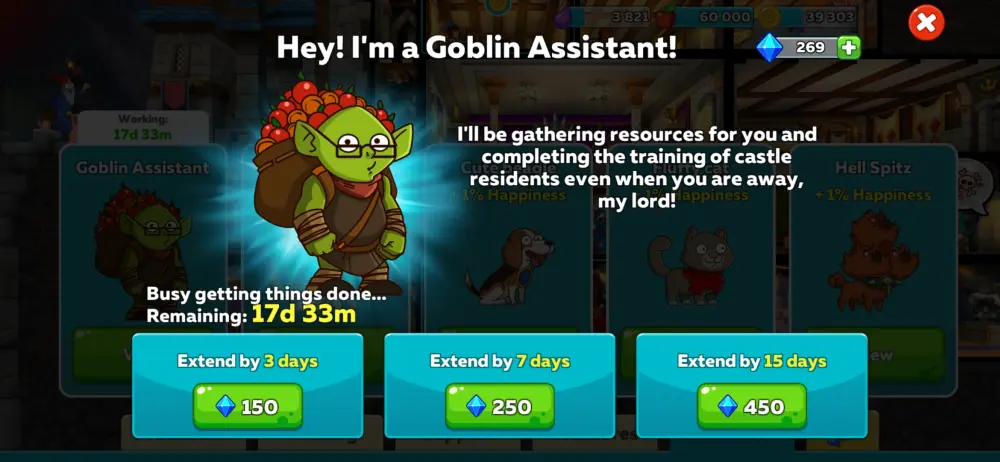
Despite all its resource-gathering and timed gameplay, Hustle Castle is not an idle game… But would you like to turn it into one? Introducing: the Goblin Assistant.
The Goblin Assistant is a hard-working, never-tiring, resource-collecting character that runs around your castle. He will be sure to take any resources that might be ready for collection. This means that if the Dining Hall has its food ready, he will go there and harvest it without you needing to tap the Dining Hall, then he will make his way toward the next production room with full resources.
This busy little guy doesn’t work for free (hey, this kinda labor ain’t cheap). Starting at 150 gems for 3 days, you may purchase the Goblin Assistant’s services immediately in the market. He also has higher rates for longer durations. Buying any of these will set him up for work straight away as he will collect all the resources available.
This is a no-brainer in terms of getting ahead of your competition since, over time, the Assistant will ensure that all of your resources have been collected before you log back into the game. Once you’ve returned, you’ll be able to do more instead of waiting to manually collect your stuff.
If his contract expires, he will leave the castle and wait to be enslaved—err—rehired with another gem purchase. Just make sure that you complete your quests and open chests often so you can obtain more gems at once.
Performing all these tasks seems like hard work, but is there a reward for all this or are you working just like the Goblin Slave—er, Assistant? There are rewards!
8. Finish Your Daily Quests
Having a list of things to do is always what gets us going.
While it’s nice to live life spontaneously, sometimes having a guide can set your priorities straight. Getting chores done, for example—do you start with the dishes? Walking the dog? Shaving the back of your elderly neighbor? Chores in themselves are much like Daily Quests. Daily Quests are a common thing in many mobile games these days, and Hustle Castle doesn’t shy away from such things.
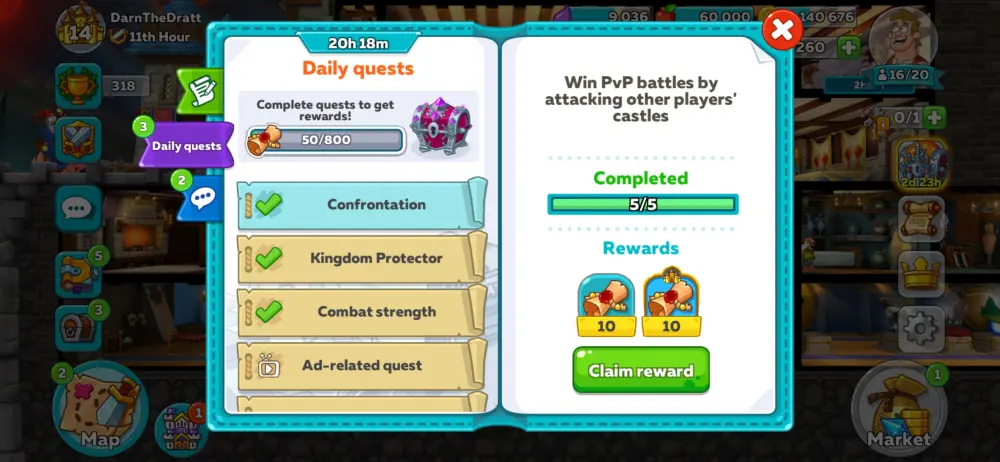
You might think that they can get quite cumbersome, or that perhaps they’re just something to distract you from conquering your enemies, but Daily Quests tie into almost everything that you do here in Hustle Castle. These involve fighting, watching ads, going on quests and adventures, visiting other rulers (or potential conquests—ha, weaklings), and a couple of other things that you could think of. The best part is what follows.
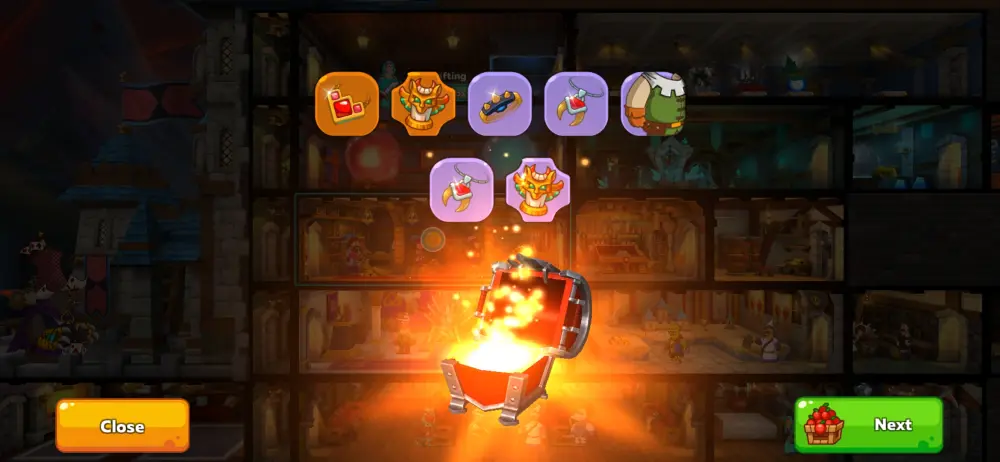
After filling up your Quest Scroll meter, you will be rewarded with a chest. This particular chest has a high chance of spawning awesome duds that your Dwellers can wear depending on their purpose (Cooks can be awesome, too, just ask Marco Pierre White). On top of the high-end equipment chance, you are guaranteed to receive 50 gems when you open this chest.
Thus, completing all of these quests within a week should earn you roughly 350 gems. If you aren’t gonna spend those on the Goblin Assistant’s contract, maybe you can save them to rank up your Dwellers’ Potentials (if you wanna do that, it still costs an arm and a leg).
Lastly, it also gives you other forms of valuable loot such as crafting material or things that may come in handy when you visit the Dark Cathedral. You know, just in case you need something to keep your team alive long enough before watching them succumb to their inevitable demise!
Speaking of chests…
9. Claim Rewards, Join Events
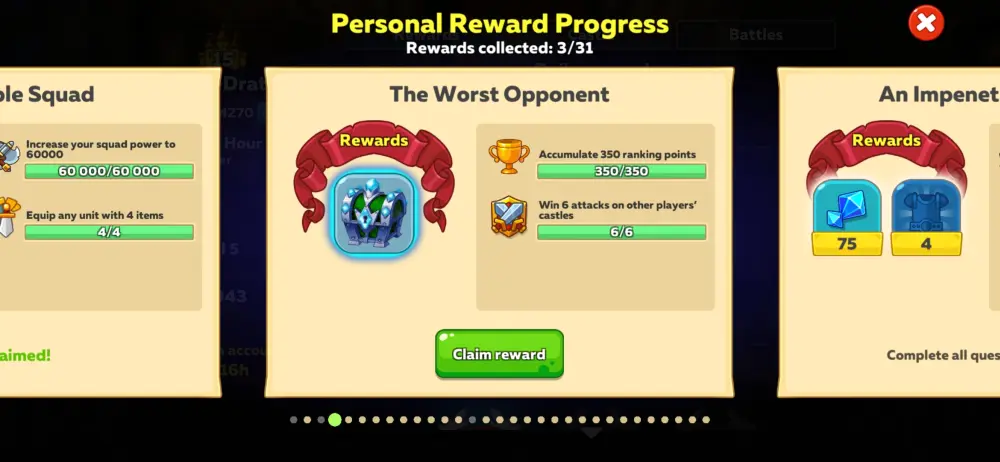
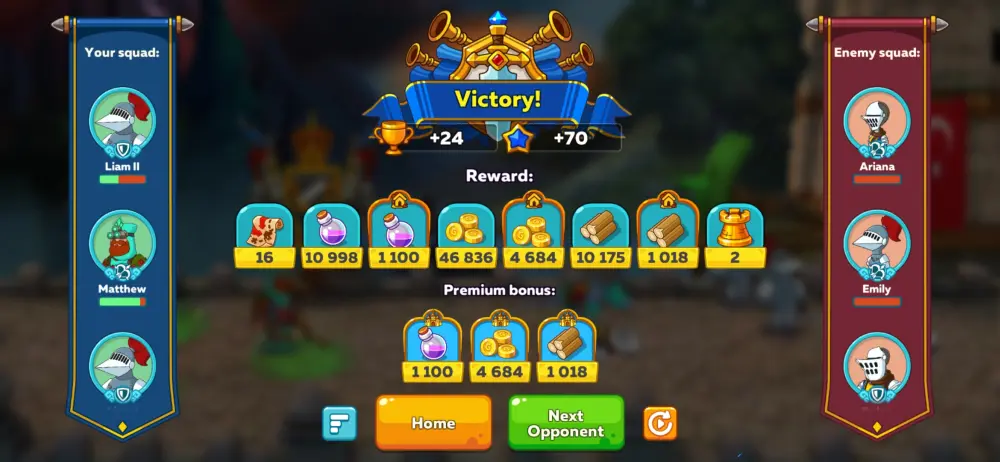
Booty, swag, spoils of war, glittery glim-glams, or tinsley tinglies—these are all known as treasure. In other words, treasures are synonymous with rewards!
Claiming rewards will be one thing you’ll spend some time on while you play the game. While this doesn’t sound as fun as ruining the Abyssal Lord’s day or upgrading your Arsenal to ruin the day of an invading ruler, think of this as a time for you to appreciate what you have in store for your Dwellers.
There are a variety of chest types and some can be earned in one way or another. Most chests contain resources like food, gold, or Mana, and they might even have crafting material like Shards and special currencies like Particles of Light from the Daily Chest (you spend these in the Dark Cathedral). We’ll discuss where some of these rewards come from very soon.
Occasionally, Hustle Castle will have its share of events for every player to join. While each event requires certain amounts of time to be dedicated to them, their rewards range from rare items and materials to event-exclusive items like Dweller equipment.
Of course, these will require you to rank up Dweller classes accordingly if you want them to wear any of these. Feeling lucky? Give these events a try and hopefully, you won’t miss out! … We kinda did.
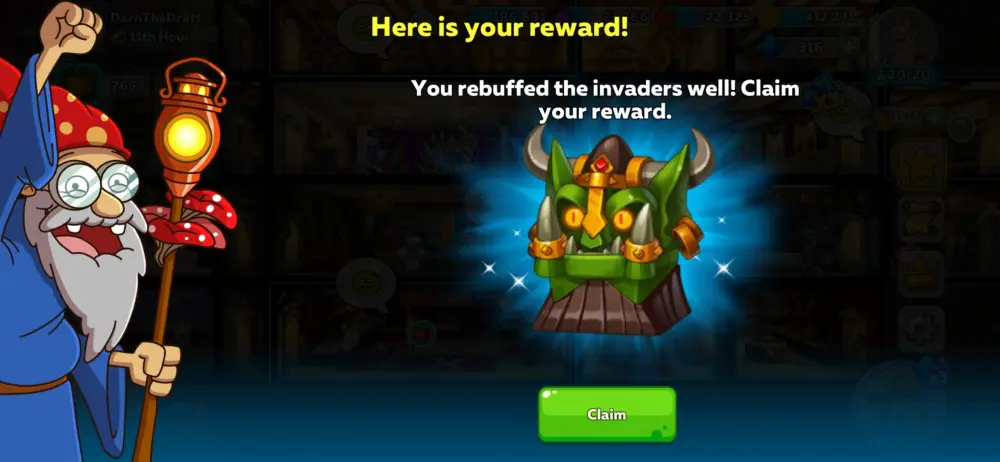
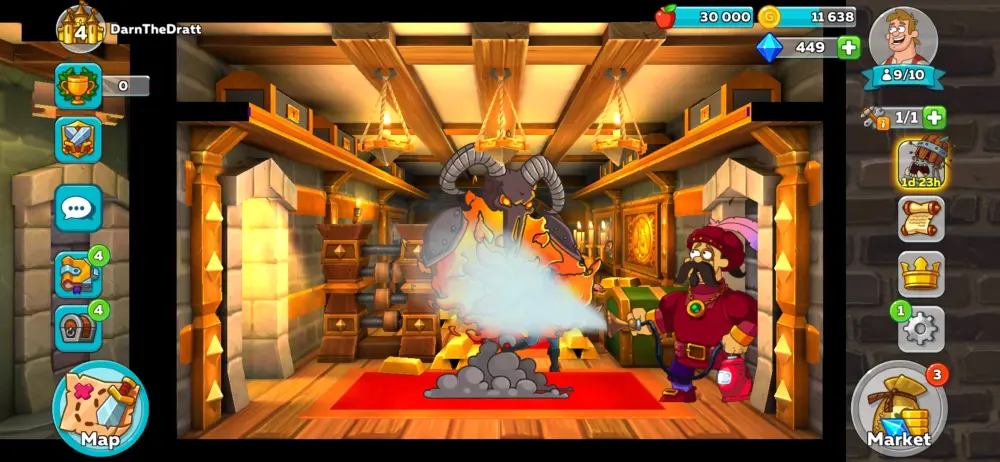
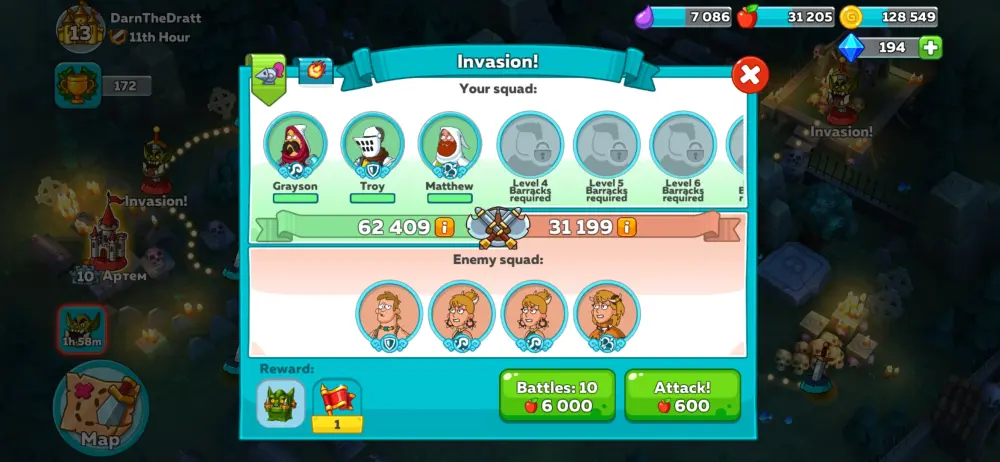
Every day, you will at least experience Invasions. This is when various minions of the Abyssal Lord emerge from the farther corners of the map to reclaim the lands you’ve conquered thus far and they’re represented by orc icons or totems on the stages you’ve cleared.
Quelling an Invasion entirely will reward you with a lot of high-quality loot (pictured above, in an ugly green chest), so don’t take these for granted. You will need a lot of food for it, though. Don’t forget to wave pork chops in the faces of your enemies to show them that they’re wrong for fighting for the Abyssal Lord and his council of evil! Give them justice and let them eat cake!
Rewards may also be claimed by progressing the story. The further you go into the campaign, the better the loot you will receive. Though, be warned that each level you encounter in the campaign will be more difficult than the last, so be prepared for a real fight.
Do you know what else can get you all sorts of goodies in this game? Joining a Clan!
10. Join a Clan for Extra Stuff
As the saying goes: lone wolves die young. There’s also the other saying: no man’s an island. And the other saying goes your credit’s good, but we need cash… Okay, maybe not that last one. Clans, let’s talk about ’em.
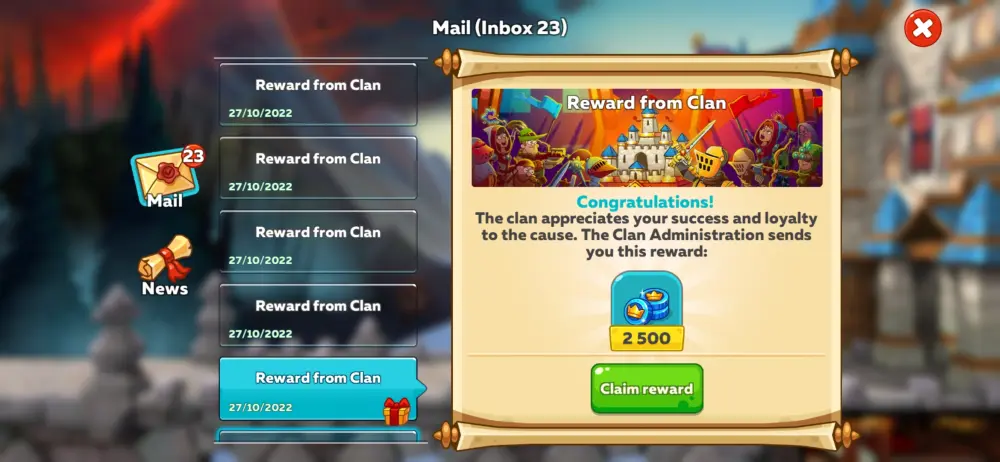
Clans are a way that many players can work together towards a common goal. For rulers who join forces in Hustle Castle, they may partake in Clan Quests, which are posted on the Message Board, and other activities that will earn them exclusive items and equipment. More often than not, these items can be quite rare and may only be obtained by being in a Clan.
These can be gained by spending Clan Coins, a currency earned from performing Clan Quests. On top of earning lots of fancy duds from the Clan Shop, you may even send or request resources to and from your fellow clannies. It’s not begging if you’re begging from friends!
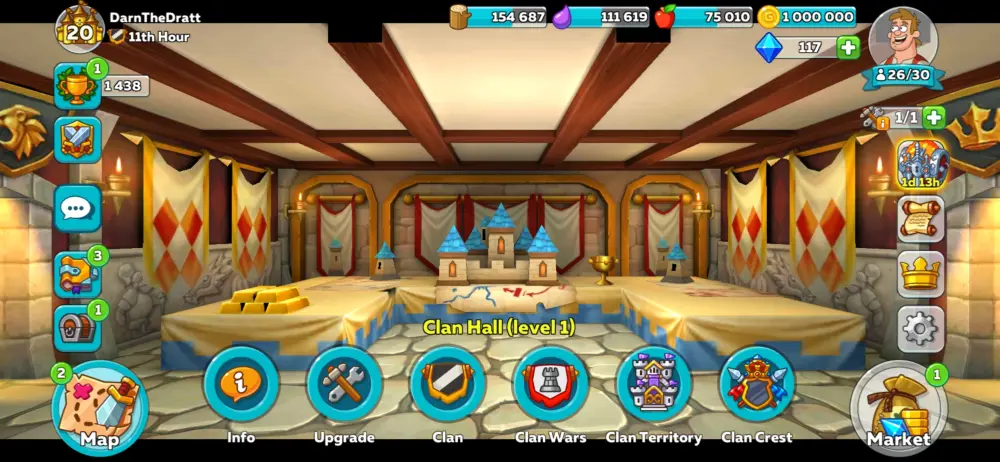
To join a Clan, your castle must first have a Clan Hall. Upon constructing one, you should be able to search for and join one immediately. We don’t recommend making a Clan as a beginner since managing one on your own without prior knowledge of how it works is quite tedious and difficult, especially if you have never managed a Clan in any game before. It can get crazy complex, so we strongly recommend following in someone else’s footsteps first.

Joining a Clan will have your Clan Leader assign you to a neighborhood, albeit not immediately. Once you’ve been put in your neighborhood, you will gain bonuses to resources that you’ll earn. Naturally, as the clan grows, you will gain more allies and neighbors in each neighborhood, but this is also purely at the Clan Leader’s discretion. They may also declare a Clan War where each member of the Clan will go toe-to-toe with that of a rival Clan.
This said, we highly recommend that you join Clans whose members’ power is akin to yours. You wouldn’t want to join an elite Clan and have your rear handed to you on a silver platter during a Clan War.
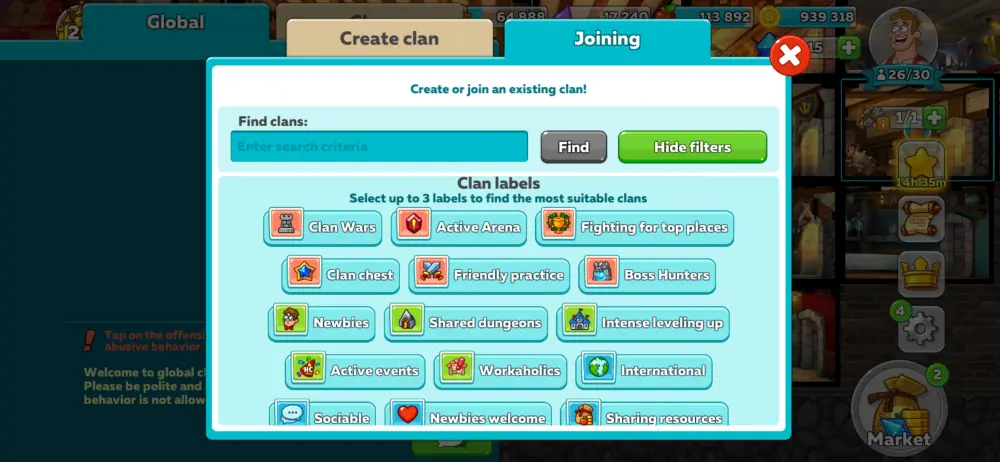
The best part about finding a Clan is that you get to tailor-fit the clan to your needs. Want a Clan that focuses on getting stronger? You can choose that. A Clan that’s only here to chill and socialize? You got that. A Clan for newbies? Definitely out there. A hardcore Clan that plays to win? With certainty!
A Clan that obsesses over potatoes and often argues among themselves whether they like them boiled or fried? … We’re not sure, but it might be out there! You won’t have to feel left out when you join any Clan, so find a Clan that you want to join, not one that you have to.
This covers most of your administrative duties in the castle. With this knowledge, you’ll be managing every goings-on and have better Dwellers than those you started with. Now that your Dwellers are nice and strong, there are only two things left to do with them: hold a weight-lifting competition and a hotdog-eating contest among them! Whoever wins gets to stay in the castle! … Oh—erm—we mean, go to battle with them and win.
General Combat Tactics
War—it never changes… at least that’s what we would say if you aren’t kicking butt! This section of the guide covers almost everything you need to know about sending your Dwellers to war and coming back victorious.
1. Combat and How It Works
Fielding your Fighters is but the first step! Here’s a brief description of how battles work in Hustle Castle:
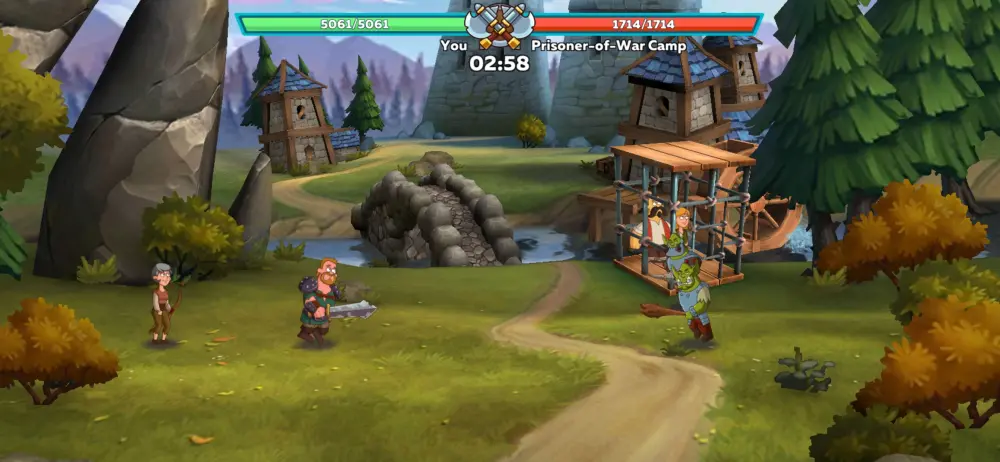
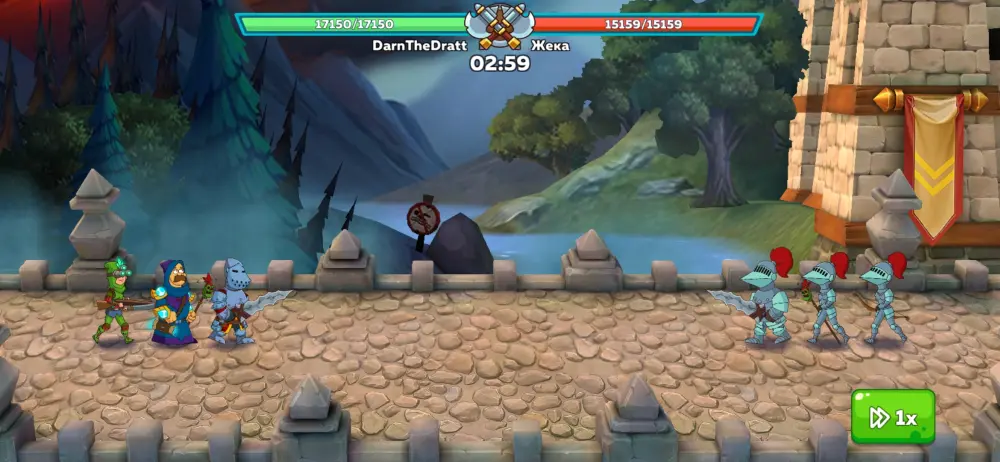
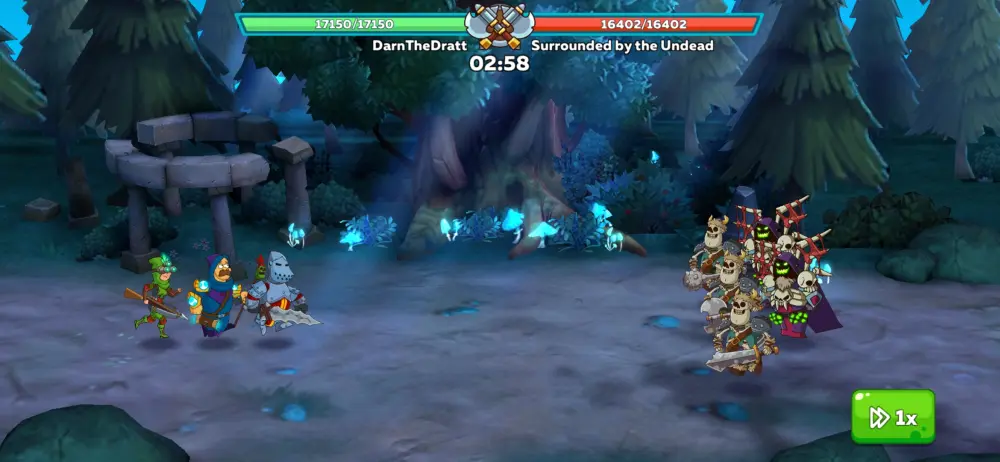
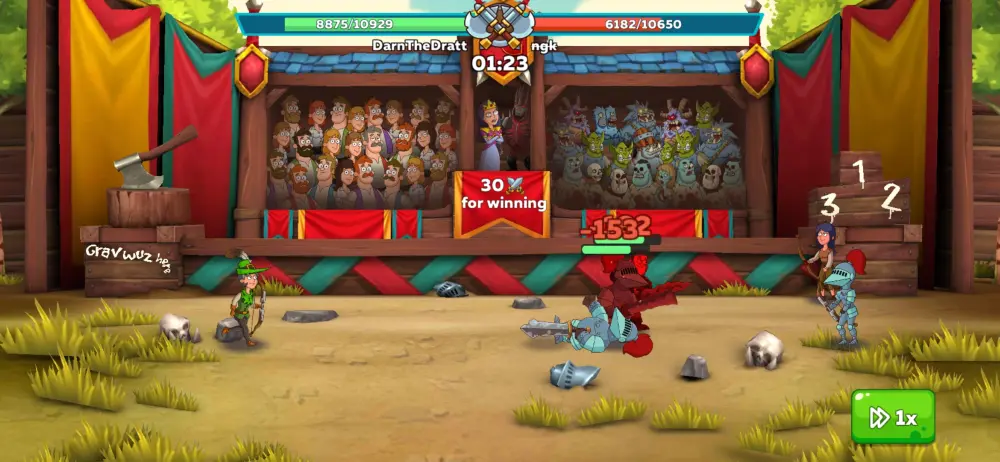
The attacking force will come in from the left side of the screen (this will most likely be you unless you’re watching the replay of a defense). Both forces will then proceed to charge toward the middle and begin to clobber the tar out of each other.
They will continue to do this until at least one member of a side is left standing and there is no way you can command the Fighters—every movement they make is automatic. If you’re the attacker, you have the option to use Spells (more on this later).
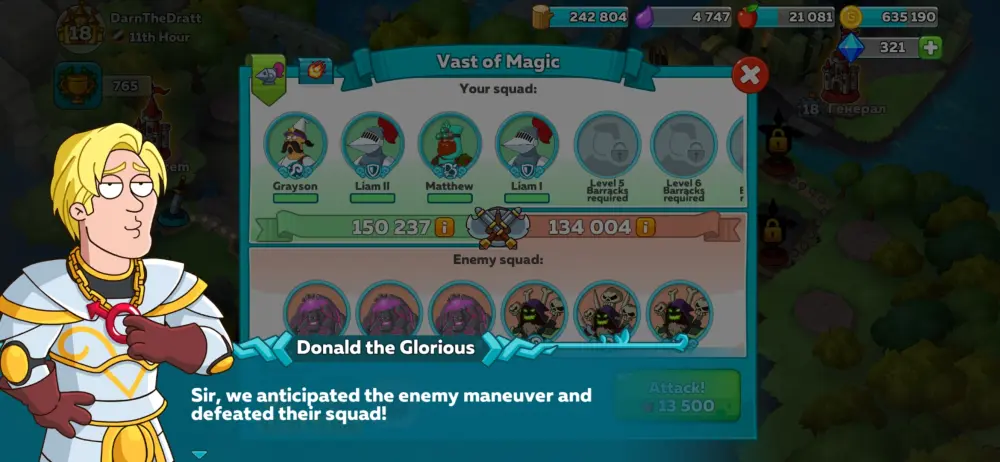
The Fighters that you send out to battle are placed in the barracks of the castle. In the barracks, you may have a total of 8 Fighters present, but each added Fighter will require an upgraded barracks every time, which in turn, requires an upgraded Throne Room. You start with 2, but you’ll work your way up with more Fighters eventually.
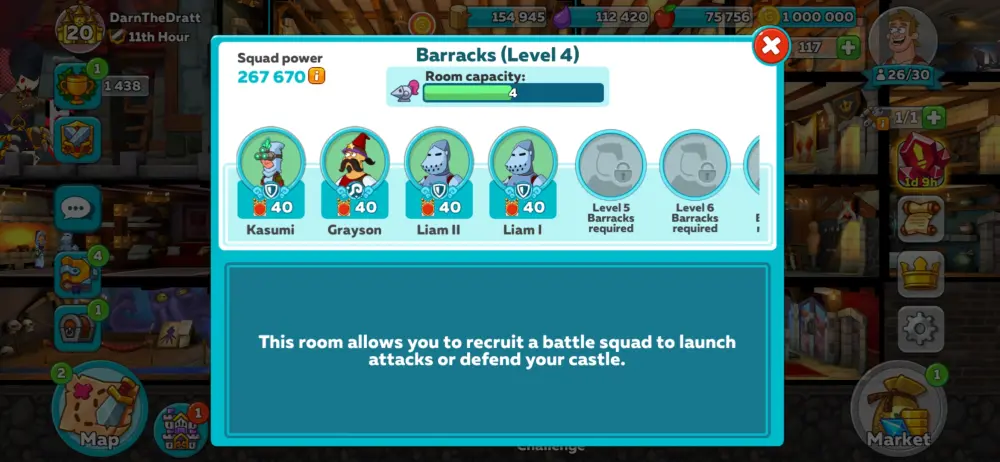
As you build up your team, you may view your total Squad Power under the info of the barracks. With this pointed out, it’s wise to pick the battles that you fight anywhere. Sure, with some planning and tactics, you can overcome some enemies whose Squad Power is higher than yours, but Squad Power is a number that serves as a base guideline of whom you should and shouldn’t fight. This means PvP in general. Imagine going up against some dude with a Squad Power of 3M while you’re only in the 200k range. It ain’t gonna be pretty, pal!
So what good does fighting do apart from making your enemies’ lives miserable? There’s plenty of good in fighting.
2. Fight, Pillage, Raid for Resources
It’s the same reason why civilizations and empires do it: for resources! Sadly, expansion isn’t a thing; you can’t expand your castle’s territory into the enemy’s lands, but resources ho!
We aren’t kidding when we say this, but you take some resources from the enemy and vice versa if they’re the ones who attacked you. If you successfully defeat an enemy on the campaign map, you will gain a set amount of resources that they currently have on them, and tying into the last item we have here, we recommend picking on the weaklings or at least anyone with a lower Squad Power than you. Be warned that the defending force always has the upper hand thanks to the defenses used by their Arsenals, so be sure that your troops can take a pounding!
With all this said, fighting enemies on the campaign map is a means to get an instant amount of resources when you need them. For example, you’re trying to upgrade this one room and you’re lacking wood. Your mill still hasn’t produced enough and you don’t have any resource chests in your inventory.
What do you do now? Go to war with someone who has a lot of wood! This doesn’t stop at one battle—fight until all of your woody desires have been fulfilled! Keep fighting until you have enough wood to put woodsmen out of business! Wood is good. Really, really good.
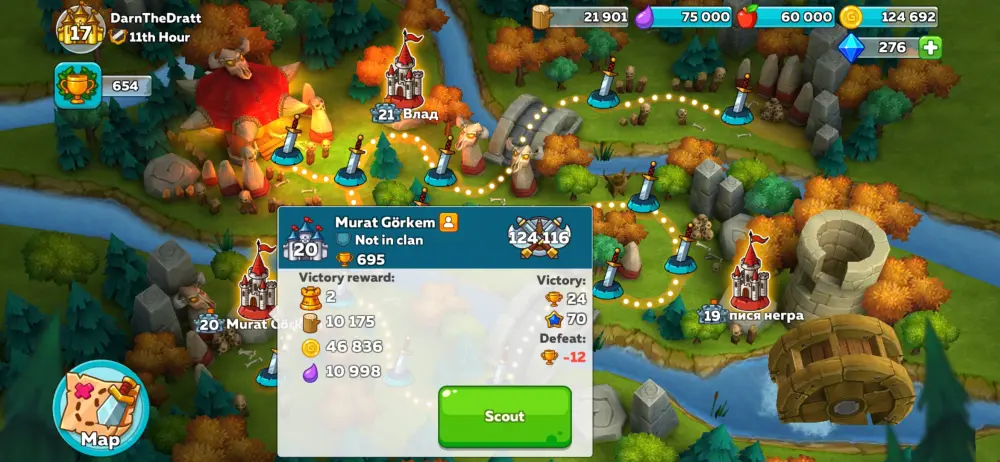
Anyway, to launch an attack on someone, simply find them on the campaign map and tap the Scout button to see what their Squad looks like. If you think you can whip them around using your pinky, then go ahead and give them hell. You will consume a small amount of food each time you launch an attack.
Your opponents refresh every now and then. If you feel like you cannot take on your current selection of opponents on the campaign map, you may wait it out or even change the selected opponent for a tiny sum of food, so be sure you have enough to sustain your troops so they can fight in more battles (and especially bring home more resources… like wood).
Wait, campaign map? The game has a story? … Uhh, yeah! We forgot that we uhh… We are on a valiant quest to save Princess Olivia, sorta! Onward!
3. Play the Campaign for Stage Progression
Every good RPG has a campaign, be it saving the world from magical clowns or universe-destroying beings. Hustle Castle’s campaign goal is quite simple: you have to save Princess Olivia.
Sure, you might be focused on getting stronger as you go, but Princess Olivia can wait. She’ll be around for a while, but it’s always a good thing to pursue her when you have the time. The reason behind this is that the stages have loot. Why wouldn’t you wanna try this out?
Within each chest you find after completing a successful battle, you gain a random set of items that may prove useful to you in some way. Even if you don’t equip them on your Dwellers, the equipment can be dismantled into shards for crafting. It’s a win-win if you ask us. Plus, you also get to witness the banter among the game’s colorful cast of characters (Lord Argonius is our favorite, but he’s too hot to handle).
Progressing through the story doesn’t stop at just fighting through the campaign; you also need to browse your Storyline Quests, too. As you complete these, you will also fill up a bar similar to your Daily Quests, and it will also grant you a chest full of rare goodies. If you ever get lost and don’t know where to go, come back here and it will steer you in the right direction like a little rat pulling your hair under your chef’s hat.
“But my bloodlust hasn’t been quenched yet!” you say. Don’t worry, there are more places you can fight!
4. Play Other Modes for Rare Items and Elixirs
We’ve already discussed PvP to an extent, but there’s actually more PvP to be had.
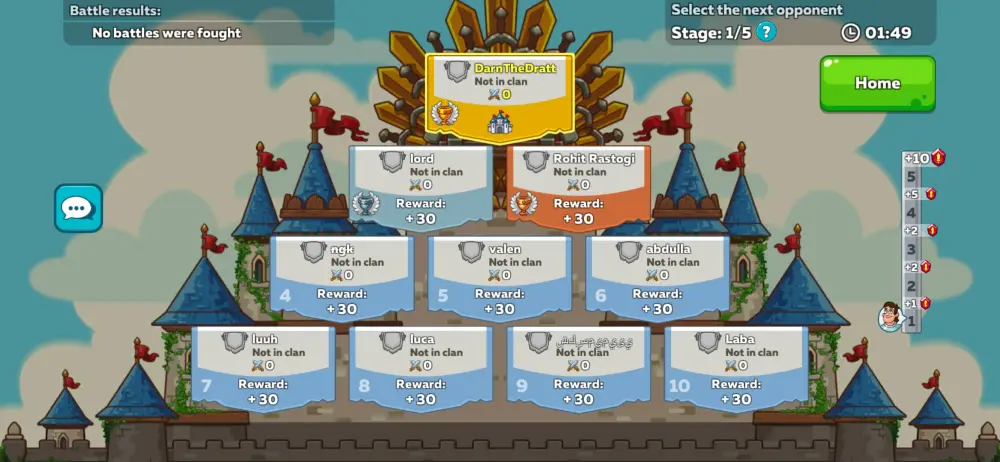
Let’s first start with the Arena. This is where you will be pitted against 10 other live opponents. Yes, this mode is live. How it works is simple:
● Combatants are placed on a pyramid in random positions. This is the lobby where each combatant is given 2 minutes and 30 seconds to choose their opponent.
● With each victory, the combatants are awarded tournament points. The amount of points gained varies depending on how quickly the battle went and the ranks of both players in the pyramid.
● The tournament is over after 5 rounds have passed. Whoever is atop the pyramid gains the most rewards.
Players may choose to compete for food or Arena Tickets, which can be used to fight in more tournaments. More importantly, players are awarded Badges of Valor for participating in the tourney. Badges of Valor are an Arena-only currency that can be used to buy powerful equipment like Totems and weapons with deadly skills. If you wanna make your Fighters the best of the best, make the Arena your shop.
Deploying your Fighters in the Arena doesn’t follow the conventional barracks rule where whoever is currently in the barracks will be fielded in the Arena. Instead, you may choose to deploy your best Fighters (by pressing a button), or manually assign the ones you have, regardless of where they currently are in the castle.
The only time this is moot is if they are in training, in which case, they cannot participate. We don’t always recommend pressing the Deploy the Best button since the game will solely pick “the best” based on their attack powers. We’ll discuss this at length later.
Once the tourney has started, you have two options:
● Attack the weakest links first then fight the stronger ones
● Attack the strong combatants first and then finish off the weak
The first option is quite practical since you’ll be finishing off your opponents in such a short amount of time. The caveat it has is that you’ll be left with stronger opponents and this can be unpredictable if your numbers are close. The second option, however, is safer if you’re confident in the strength of your squad. Eliminate the strong ones first and then cull the weak to gain those juicy extra points.
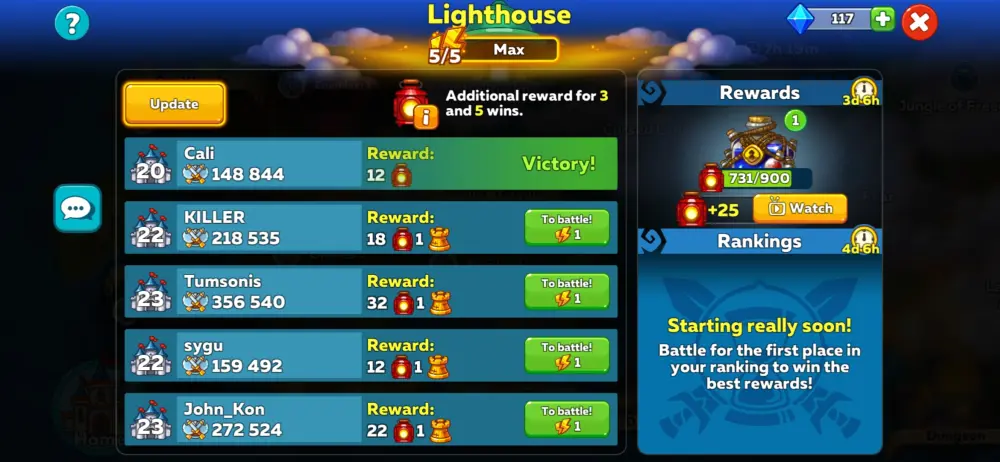
Another early PvP mode you will encounter aside from the Arena is the Lighthouse. This is similar to invading other players, except you fight in a weekly season instead of 5 rounds in the span of a few minutes. This mode will allow you a selection of 5 opponents at a time and you are given 5 points of Lighthouse energy. Each opponent requires 1 Lighthouse energy point to fight and this point won’t be refunded even if you lose.

Winning Lighthouse battles will earn you Lanterns, which you use to redeem Elixir Chests. Much like completing quests, Lanterns serve as points that fill up a bar wherein every other increment contains Elixir Chests as a reward. You get bonus Lanterns if you win in a streak and in doing this means you get to the next increment sooner. Mind you, these chests will play an important role when you start building your Fighters, so get out there and start pwning people at the Lighthouse!
Now we tackle the whole “Deploying the Best” bit. We’ll point out why having a team composed entirely of tanks is not a great idea.
5. Strive for a Well-Rounded Team

Do you ever wonder why an RPG party almost always has its classes spread out?
Apart from keeping the party from destroying itself (seriously, you’d hate the other tank if you were a tank yourself—they’d hog all the glory!), a good party is composed of different individuals with different purposes—a well-rounded team. This will become more and more evident when you start having more Fighters in your barracks and even more so when they’re all 5-star. Let’s first view this in the most basic way.
Hustle Castle has 3 starting classes: Archer, Mage, and Tank. A class is given to a Dweller depending on the weapon they are wielding. If they are wielding a melee weapon, they fall under the Tank class, ranged weapons make them Archers, and magic weapons like wands, staves, and orbs turn them into Mages.
Tanks soak up damage from the enemy, Archers often comprise the main DPS of the group, and Mages provide support through a variety of means. As soon as you get 3 Fighters fielded, this will become important when you start strategizing for different scenarios.
While in some cases, having one of each class is effective, it doesn’t work all the time, especially in the campaign. For instance, if the Abyssal Lord’s soldiers like lumping together and you happen to have a Mage that deals splash damage, try deploying two Tanks to hold the line while the Mage pelts the enemy from the middle line.
Likewise, if the enemy has a ton of HP, try having two Tanks and one Archer. If you haven’t noticed yet, Tanks are extremely important. Having them take damage while the backline provides backup is a sound strategy, so have at least 1 Tank in the squad and you can thank us later.
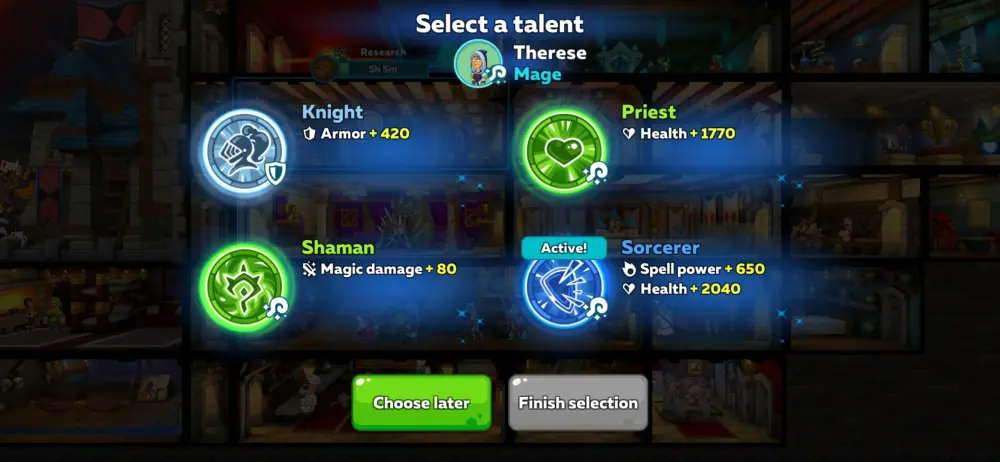
When your Dwellers reach 5 stars, they unlock a Talent—a class that is further narrowed down. Talents can be changed using Talent Folios (albeit at random, but you get to keep the Talent the Dweller started with) which can be purchased from the Arena Shop at a hefty price. There are a total of 30 Talents in-game but each Dweller may only have one at a time. Much like equipment, Talents are classified in rarities: the higher the rarity of the Talent, the more powerful its stats. High-rarity Talents may even come with their own skills. Think of it like spinning plates on sticks: some people can do it, but others can do it while riding a unicycle mounted on the back of an orca (we don’t condone animal cruelty).
After gaining a party composed entirely of 5-star Fighters, we recommend giving each of them different Talents whilst sticking to a class. For example, having a Samurai and Ninja on the same team is a deadly combo. They’re both Tanks, yes, but the Samurai is the primary tank thanks to their shield, while the Ninja aids in providing DPS due to their guaranteed critical strike after every 4 hits.
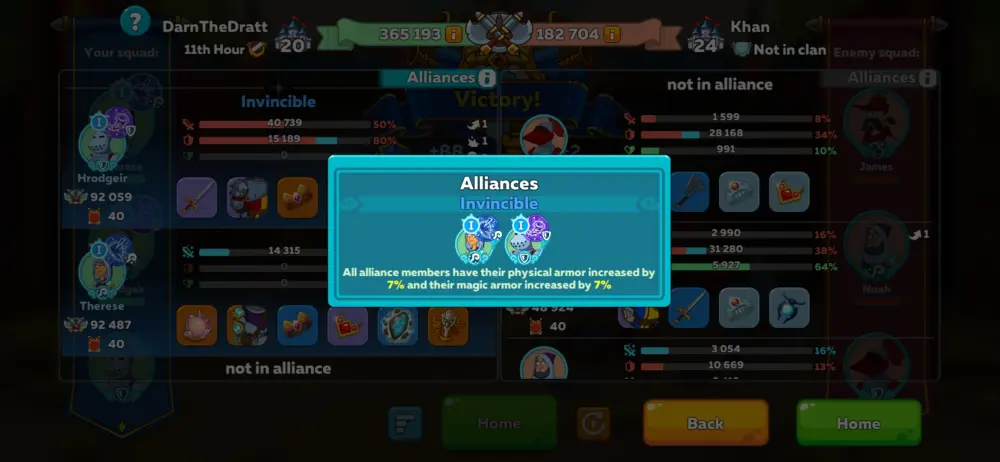
However, these special skills are only present in Epic and Legendary versions of the Ninja and Samurai. Sometimes, having two Fighters with differing classes with Talents may result in an Alliance (as pictured above), which gives a party-wide bonus.
Classes aside, did you also know that RPGs have magical items, too? Well, some of them anyway. Hustle Castle has them, and boy, you’ll turn your Fighters into a force to be reckoned with when you have them using these.
6. Gear, Gear Skills, and You
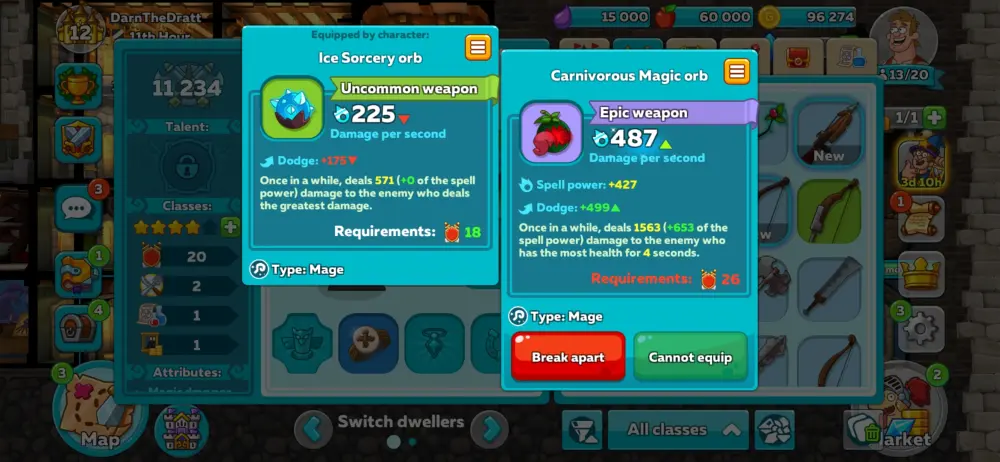
Magical items! Swords in stones, stones in swords, supersonic dentures, fireproof underwear—these are the very spice of any RPG and this game doesn’t fall short in this department.
Believe it or not, the deciding factor of any fight depends on the effectiveness of your Fighters’ gear. What we mean here is that each class has a designated set of armor: Tanks wear heavy armor, Archers wear light armor, and Mages wear cloth armor. Sometimes making one class wear another suit of armor is counterintuitive (e.g. making Archers wear plate mail) since the Fighter will lose bonuses that their class greatly benefits from.
Other times, it can be effective if pulled off correctly. For instance, if you make a Tank wear Archer armor, it will deal a ton of damage per strike, but this also depends on the weapon they’re wielding. The game offers a ton of experimentation, but nothing beats practical setups in this case.
Some gear pieces also come with skills. These skills trigger once in a while in each battle and they may range from special attacks to healing spells. Outfitting your Fighters with these may put you ahead of the competition, but they’re even more powerful in high-tiered gear. Don’t fret, though, you will get the occasional Rare-grade gear piece with a super useful skill. Just keep opening up those chests!
Speaking of chests, let’s go back to the Elixir Chests for a bit.
7. Fighter Evolution Basics
What do you think Elixirs taste like? Are the orange ones orange-flavored? Are the clear ones just water? Do the green ones taste like apples or sewer? Who knows?
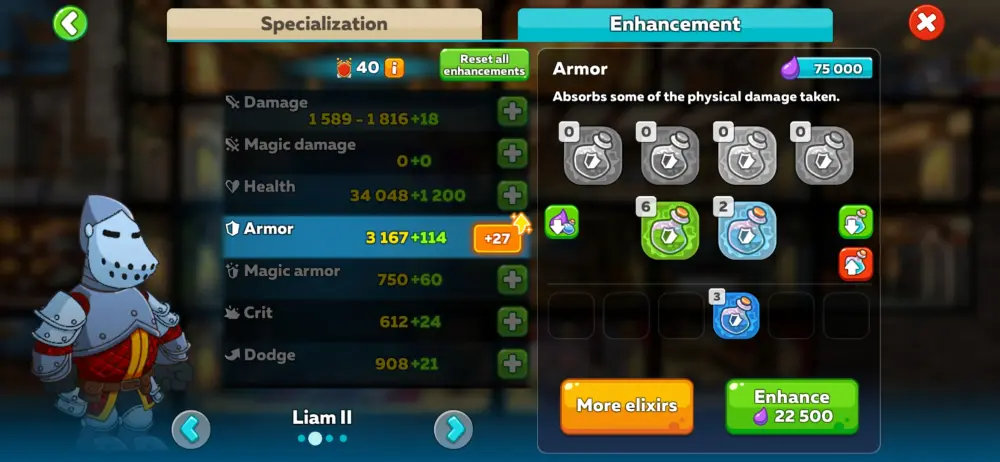
After opening Elixir Chests, you gain Elixirs—precious, precious potions that you may give to your Fighters to drink. While early on you may give these to just any of your Fighters, you should save most of these for your 5-star ones since, that way, you’ll be able to power them up accordingly based on their Talents.
What Elixirs do exactly is that they permanently boost a Fighter’s stats. Here’s a brief rundown of what each stat does as well as the classes that benefit from them:
● Damage – This affects a Fighter’s physical damage output. (Tank, Archer)
● Magic Damage – This affects the amount of magic damage a Fighter deals. (Mage)
● Health – A Fighter’s overall health stat. If it hits 0, they die. (All)
● Armor – This is a Fighter’s resistance to physical attacks. (All, but mostly Tank)
● Magic Armor – This denotes a Fighter’s resistance toward magic attacks. (All, but mostly Mage)
● Crit – This affects the chance a Fighter deals increased amounts of damage through critical strikes. (All)
● Dodge – This affects the likelihood that a Fighter dodges an attack, receiving no damage from the enemy as a result. (All)
● Spell Power – This affects the potency of gear skills. (All)
● Fortitude – This reduces the damage your Fighter receives from critical strikes. (All, but mostly Tank)
● Accuracy – This stat lowers the enemy’s chance of dodging. (All, but mostly Archer)
● Pierce – This affects your Fighter’s physical attack and how much of it gets through enemy armor. (Tank and Archer)
● Magic Pierce – Like pierce, but this affects your Fighter’s likelihood of getting through the enemy’s magic armor. (Mage)
Once you have chosen the role a specific Fighter should fulfill in their party, this is when you start giving them the Elixirs. Focus on the stats that they need and you’ll be sure to have them built like an Olympic athlete on permanent steroids.
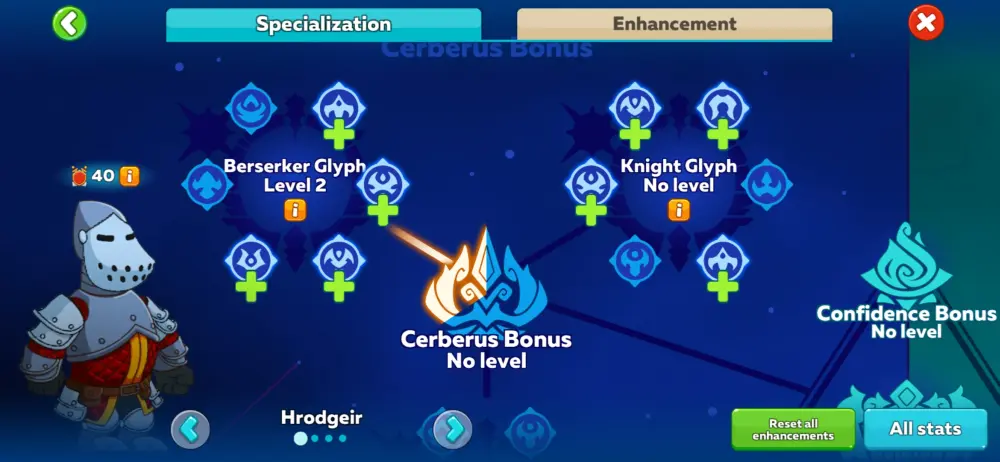
There are also Specializations, which are passive boosts to specific parts of a class. Upon unlocking each glyph, the Fighter gains a small bonus. The glyphs each add up to giving the Fighter a bigger bonus, eventually reaching one of the 3 major bonuses in the middle if you’ve completed at least two zodiacs.
If you complete all the glyphs and have all 3 major bonuses active (even if one of them doesn’t apply to your Fighter’s class), they will unlock the Specialization Master node which, after each level up, will increase the power of all of the Fighter’s glyphs. They’ll be overwhelmingly powerful. The catch to unlocking these glyphs is that they cost Manuscripts, which can only be found in the rather difficult Dark Cathedral mode. Give it a try anyway. Good luck!
We’ve mentioned Spells earlier, right? Well, how about we learn how to spell?
8. Learn How to Spell
C-H-E-E-S-E! What does it spell? No, not that kind of spelling. Though having Spells on your side will allow you to cheese through some fights.
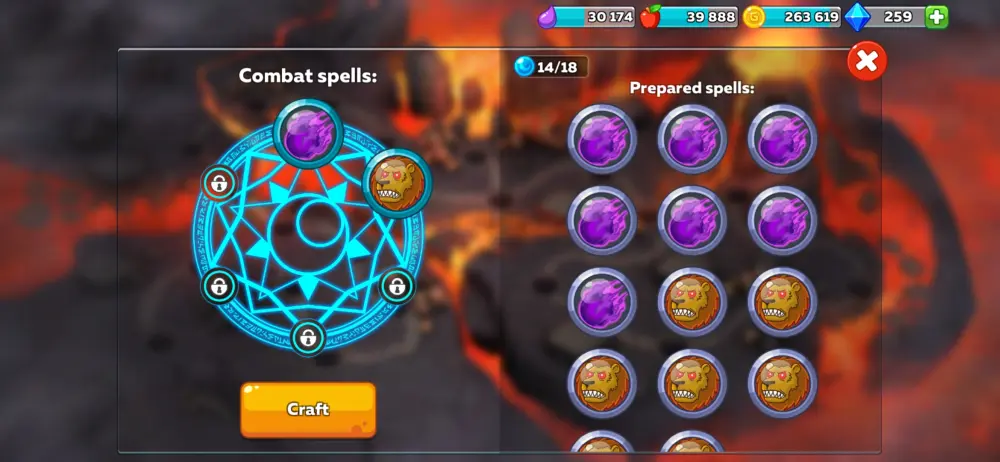
Spells are active buttons you can press in some fights in Hustle Castle (the exception being the Arena) that aid your Fighters in one way or another. For instance, the first two Spells you get are Magic Orb and Lion’s Spirit.
Magic Orb comes in clutch when you want that instant burst of damage on a pesky enemy backliner. If you feel like one of them appears to be a threat, feed them a magic exploding grape. Lion’s Spirit, on the other hand, makes all of your Fighters hit harder, making it an important Spell for pushing the enemy back (manes not included, sadly).
Unfortunately, Spells can only be cast one at a time between cooldowns (each Spell shares the same cooldown time). This means that you cannot cast Lion’s Spirit immediately after casting Magic Orb and vice versa—you will have to wait. After a Spell has been cast, it will be depleted.
You can craft more of these in the Magic Workshop. Naturally, upgrading this room will grant you access to more Spells. If you wish to upgrade Spells, then you will need a Magic Lab. Be warned that you can only hold a set number of Spells, so the only way to get rid of these to make room is by casting them in battle.
While these tips so far have hopefully aided you in taking resources from other rulers, there’s another way you can earn these without hurting anyone.
9. Send Your Fighters on Journeys Often
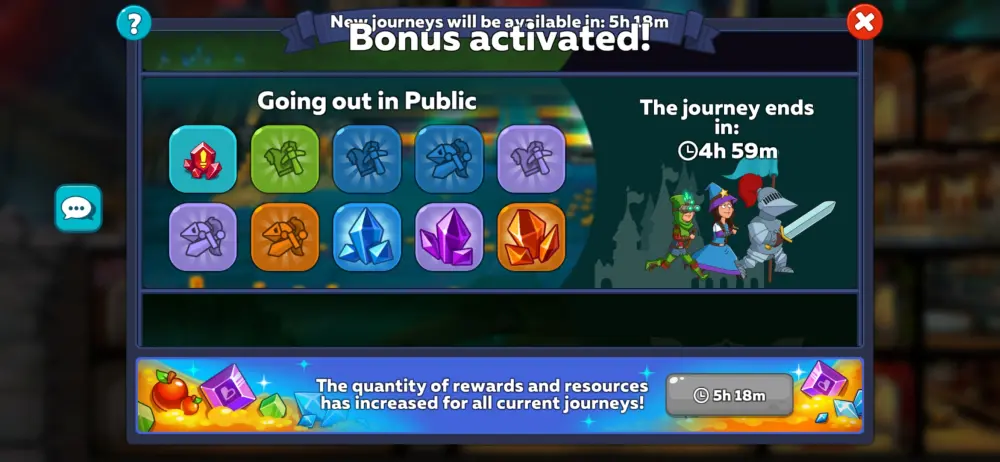
How about sending your Fighters on their noble quest that doesn’t involve saving Princess Olivia?
Oh, wait, did we say that? Yeah, we totally did. But what the Fighters can do without saving the princess is to go on a Journey. This can be found in the Map menu.
Tap the zeppelin that has the Journeys label on it and you’ll be given a set of choices for different Journeys. The shorter the Journey, the less yield there will be, but upon sending your best Fighters, the yield will be higher than usual. Of course, not all Journeys yield food and gold; others have the chance to reward you with equipment of varying rarities. Do this often and you might find something really good.
Some games have similar mechanics where you send your heroes out on errands and they come back after a while. While they’re on said errands, you will be unable to select them. Thankfully, this doesn’t apply to Hustle Castle since you may still use your favorite Fighters in whichever battles need winning.
We’ve constantly mentioned stuff about your best team. Hopefully, you aren’t tired of it by now, but we’ll mention it one more time!
10. Always Keep Your Best Team Ready Before You Log Out
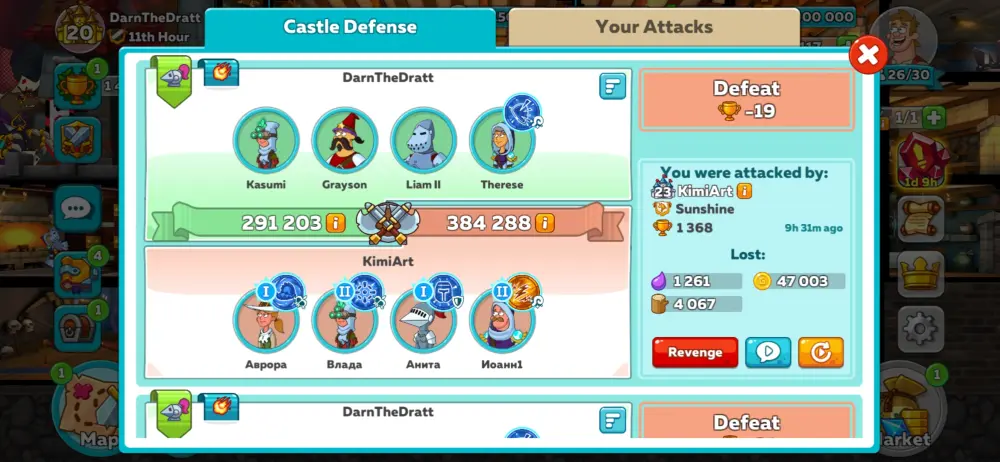
Don’t you just hate getting raided and losing? Yeah, sure, you’d raid other players every now and then and take their stuff, but don’t you hate it when it happens to you?
Become a bigger bully and leave your best team in the barracks before you log out. Your enemies will think twice when they see your Squad Power (although, if they are leagues above you, they’ll just steamroll you) and your most ferocious warriors. But what do you do when some of them are busy training or making babies? Send out the second best. You can trust them to cover for the lacking power levels.
Keeping enemies out with bigger numbers is what should matter and maybe when you log back on, you’ll be able to make those upgrades work with what resources you saved… or don’t and just raid another ruler’s castle. It’s a vicious cycle!
If you want to beef up your defenses, consider investing in what your Arsenal has to offer. It comes with ballistas, magic runes, and castle defenders. Even if your best team isn’t at the barracks, you’ll still have a solid defense to repel your foes with.
As complex as this game might be, Hustle Castle is still rife with a lot of secrets that we have not covered in this guide. We’ll let you unravel the rest on your own since now, you’ve plenty enough knowledge to get by. You would have learned the following after reading this article:
● Upgrade the Throne Room to progress your castle’s overall level and unlock new stuff.
● Banish the weak from your castle!
● Train your Dwellers. Always.
● Your Dwellers need to be happy to give you their best.
● Rename your Dwellers to avoid confusion.
● Set room building and upgrading priorities.
● The Goblin Assistant is your friend!
● Complete your Daily Quests for big rewards.
● Claim any rewards you might have; open chests in your inventory.
● Join a Clan and make some friends, especially if you don’t have any.
● Careful planning and strategy can win fights.
● Raid other players for bonus resources.
● Fight through the campaign for loot.
● Try out the Arena and the Lighthouse for bonus resources and rare equipment.
● Get a well-rounded team consisting of varying classes and Talents if you have 5-star Dwellers.
● Gear Skills can turn fights around. Fast.
● Make your Dwellers chug them Elixirs for major gains and let them read the Manuscripts from the Dark Cathedral.
● Spells help a lot! Craft them!
● Journeys give a lot of stuff, so do these often.
● Always keep your castle defended by having your best team stay in the barracks before you log out.
And that neatly wraps up our guide for Hustle Castle, ribbon, and all! Now, let’s get out of here before Princess Olivia notices that we’ve been slacking off again.
Are you a high-level ruler? Is there a tip we might’ve forgotten to give the newbies? Do you have any wood to spare? If so, leave your thoughts and comments (and logs) in the comment area below this article!
Fred
Saturday 8th of October 2022
How do I receive items shared by my clan members?
Meekko
Monday 24th of April 2023
@Fred, No one in the clan except for the owner/leader can open the chest. And he will be the one distributing rewards amongst the clan members. And one more thing, in order for you to obtain one of the item shares, then you should have a specific glory level, and if that glory level does not succeed that specific level, than, the "system" won't allow you to get a item shares.
Danny Cheung
Friday 6th of August 2021
how to log off?
Mehmet ali
Friday 14th of May 2021
Argonius with 3 20 level soldiers I defeated ;1 unarmed tank,2 health regenerating wizards without using any mana 😎
Ray
Saturday 25th of April 2020
Can you explain about the Hearo and constilation puzzle parts and the dungeon. Also about gems how to merge etc
Elf Lord
Sunday 3rd of May 2020
once you reach level 30 the hero becomes an absolute necessity. The constellation system is just to organize the powers you can accumulate and upgrade for your hero. You can only build your hero from awards given in the "Dungeon". appearances items for the hero are also awarded in dungeon as well as in various festivals. each constellation power needs the puzzle pieces to make it usable and then dungeon points in the appropriate type ( archer mage or battle) to pay fro the upgrade. they are color coded for ease and the game will highlight and number whatever category can be upgraded. These upgrades to your hero will immediately show in your squad's power number.