Zombie Idle Defense is a tower defense title from Onesoft, a game where you slay hordes of zombies with a squad of mercenaries in order to cull the zombie populace of several large American cities. At your disposal are various types of explosive ordinance, a pretty good selection of different guns, and the handy-dandy support of your friendly neighborhood airstrikes.
The game features several in-game transactions and ads which can help enrich the experience by providing extra items and support to assist you in a pinch if at any time you ever feel overwhelmed by the shuffling undead army trying to get a bite out of you.
When you start the game, there is no fanfare and it immediately prompts for you to enter the first level. You then get to watch your new friend Punker repeatedly unload his Glock against a slowly approaching horde of zombies. They drop gold which you can claim with a button on the top right to place it in your wallet so you can upgrade him (and your future mercenary friends) mid-stage to make things go faster.
With that said, we are presenting you our Zombie Idle Defense beginner’s guide, that’s packed with a bunch of tips, tricks and strategies. We are certain that these tips will help to make your idle defense against these zombies a wonderfully productive experience, bathed in explosions, bullets, and the corpses of your enemies in your quest to liberate New York City and beyond.
1. Be Aware Of Weapon And Character Interactions
In Zombie Idle Defense, our good friend Punker comes with two skills: a grenade he can throw and a passive ability which increases his damage as he kills zombies. Unfortunately his second ability only activates later in the game when you increase his rank, so you’ll have to make do with his first ability for now. It’s the same for your future friends who’ll be joining you as you repel the zombie horde.
Moving on, there is a red grenade icon above his head. If you tap this icon (which needs you to hold it down and aim it otherwise it harmlessly plops next to you) there is no way to cancel its activation. If it happens, just be patient and keep your finger on the screen. The same thing goes for the items the game introduces to you on the sidebar in the succeeding stages, specifically the barricades and flaming barrels. Once you tap them, you must put them down.
Another thing to note about Punker is his specialty in assault rifle weaponry. He starts with a Glock and it unfortunately doesn’t increase his attack as much as a rifle would. As you progress, the game will give you premium currency which you can use to purchase weapon crates, and if you’re lucky one of these crates will contain an assault rifle you can give him. It’s fine to give him any other weapon if you don’t have any rifles though. You can at least pass whatever weapon he’s holding onto your other characters with a specialty in it once you get them.
So to help Punker with his zombie problem even more, you can upgrade your weapons using scrap, the second type of currency you gain from clearing a stage. Of note, you can upgrade your characters mid-stage but not your guns. Especially make sure everything concerning your weapons is ready before you enter a stage; you can’t level, fuse, or switch weapons between characters when they get busy repelling the oncoming horde.
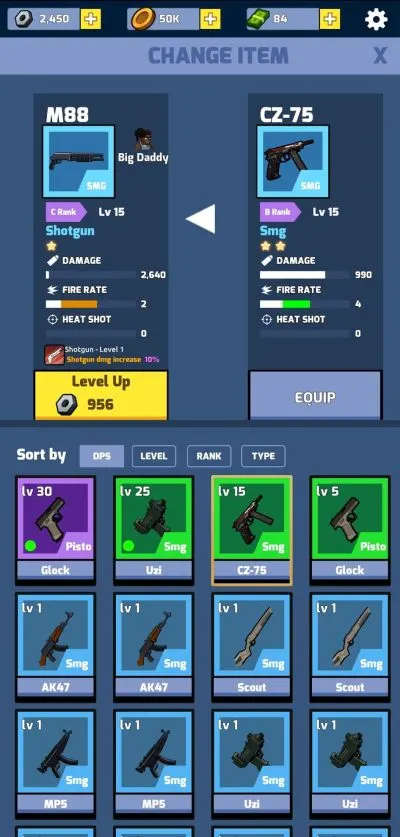
Weapons in Zombie Idle Defense have ranks starting from C going all the way to A rank, indicated by its background color and number of stars under its picture. The higher the rank, the better its stats. Most weapons start out in C rank, though some crate drops give you B rank weapons. In order to raise a weapon’s rank, you need to merge three weapons of the same type and rank together. To do this, go to the weapons screen, select any gun, and tap the upwards arrow icon directly on top of it.
So if you want to upgrade your C rank Glock, you’ll need 2 more C rank Glocks to fuse into it to get it to B rank. If you want to push that Glock to A rank, you’ll need 3 B rank Glocks instead. An important note is you can keep weapon levels in this process; just make sure you select the leveled weapon as your base weapon during the fusion.
Gun and character levels will increase the damage your skills do. If your character’s skills aren’t doing enough damage despite high levels, then consider switching or leveling up your guns if leveling your characters isn’t giving enough of that sweet, sweet DPS.
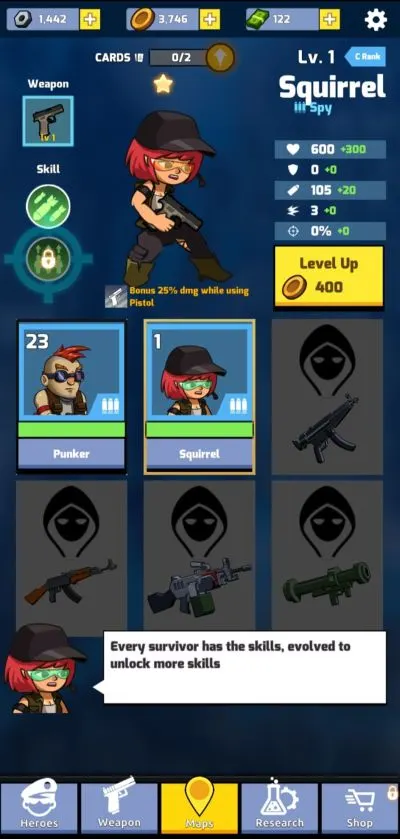
Now Punker doesn’t stay by himself for long. Squirrel the pistoleer joins your team at the end of stage 10. She’ll make much better use of the Glock you got at the beginning of the game since she’s pistol oriented. Her “Justic Rain” skill is effectively an easy mode button; The bombs from the skill drop in random places with a wide enough blast radius to keep you from being overwhelmed. It works great for speeding up stage clearing too.
Now that you have Squirrel and Punker together (and hopefully gave them leveled up guns), it becomes a little bit easier to deal with the shuffling horde of zombies constantly coming towards you. However, your mercenary friends have more ways to cull the zed population than just their innate skills and ordinance. To expound on this, we’ll move on to…
2. General Stage And Progression Tips
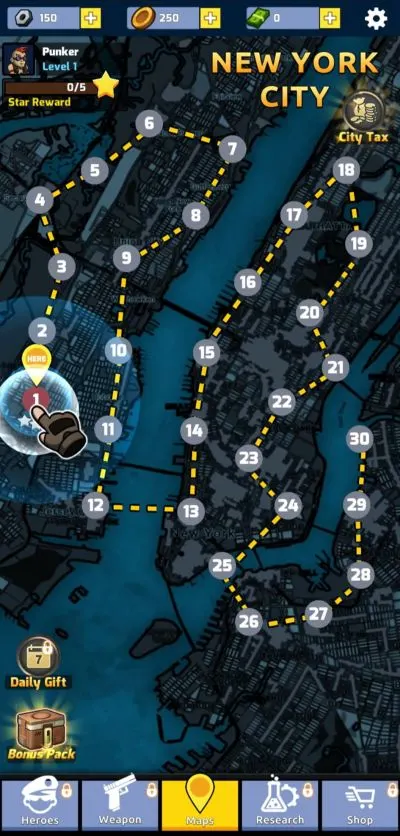
Securing 3 stars in each stage of each city is vital to speeding up and future-proofing your grind in Zombie Idle Defense. Getting at least 2 stars in every stage in a city will give a 20% increase in City Tax rewards, and getting 3 stars will bump the bonus up to 50%. That means more gold, scraps, and research points! However, in order to access this feature (and unlock research points, which are a thing we’ll cover later!), you first need to clear all 30 levels of New York City.
Strap yourselves in. This is going to be a bit of a long ride. First off, in order to gain 3 stars in a level, your health by the end of the level must be at 90% or above. The game doesn’t care how much damage you take in a stage, as long as your health is above 90% by the time the last zombie gets gunned down. You can keep your health up with either medkits or box-carrying drones.
Speaking of, be on the lookout for said box drones or conspicuously dressed birds flitting about your screen. The mailbirds (with their cute little hats) are much faster than the drones are. Tapping them yields extra rewards, from gold to consumable items to premium currency, though the drones need you to watch an ad to grab the numerous items inside the boxes they carry.
Conveniently enough, said drones will stop and wait in one spot for a minute or two after lazily drifting around the screen, allowing you to save the HP boost they come with for when you’re in a tight spot. If you have the patience for it, you can watch ads to double your 1st time 3-star scrap bonus as well. It saves you a massive amount of time due to how small the scrap drops are per stage.
If you find yourself lacking supplies even after being on the lookout for drones and mailbirds, there is an Air Drop button next to your character buttons. What it does is send down a care package containing usable items and currency. It also comes with its own ad prompt to give you additional supplies if you choose to watch it. I would recommend you only use it using the ad prompt rather than premium currency though. You’ll need every bit of cash you can get for other things, like weapon caches and turrets.
3. How To Acquire And Unlock Weapons
On the topic of weapons and turrets, there are three ways you can acquire weapons:
– Through star or stage rewards
– Through weapon crates
– By buying them directly via the weapon shop under the weapon crate section.
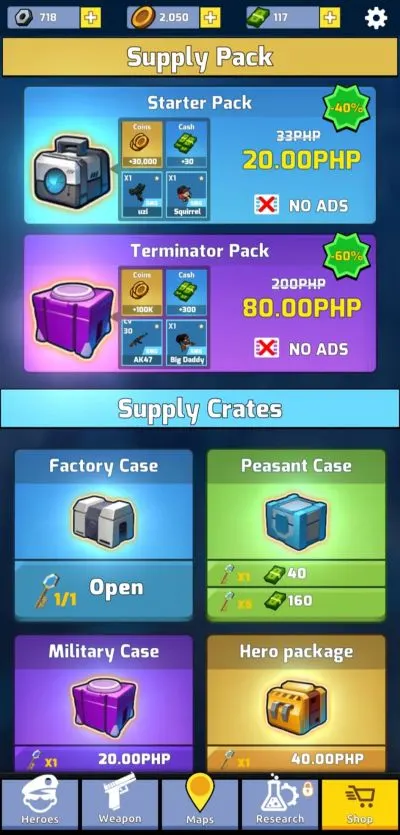
Of the three specified methods, the best way to gain them would be via the weapon crates. Unfortunately, only two out of the four weapon crates can be purchased with the game’s equivalent of premium currency. The only way you can purchase the other two weapon crates available is with real money. Be wary when doing so, since the game doesn’t offer a way to save your account. If you delete the game, there’s probably no way to get your crates or account back except through customer support.
…Back to weapon crates. They are the most cost effective way to purchase weapons, despite them being completely random as to which weapon you’ll get. The more expensive weapon crate with better drop rates is priced at 40 Cash, and getting 5 of them is only 160 Cash instead of 200. To compare, individual weapons go from 40 to 120 cash per piece, so only buy them individually if you need one specific weapon to rank up. Despite the randomness, it helps having a bevvy of different weapons and thanks to clearing stages and being on the lookout for mailbirds, you’ll be able to have enough currency to repeatedly buy the 5 crate bundle.
Alternatively, you could also pick the less expensive bundle with a lower rarity for weapon types to take advantage of the free crate system in the shop. How it works is it rewards you for every 5 crates you purchase with a free crate, with the rarity of the crate increasing the more you buy, to a limit of 20 crates, where it resets back to zero. Spamming crates is a good way to quickly build up strength because you’re bound to get duplicates of weapons to fuse into higher ranked versions.
Concerning turrets, they are also unlockable via premium currency, with the first one costing 100 cash. You can unlock your first turret once the research function becomes available together with Squirrel, and its damage is scaled at 10% of your team’s total DPS. You can upgrade its level with research points, which increases the percentage it derives from your total DPS. Your second turret is priced at 200 cash, and succeeding turrets become more expensive, though their effects get more interesting as you go down the line of unlocking them.
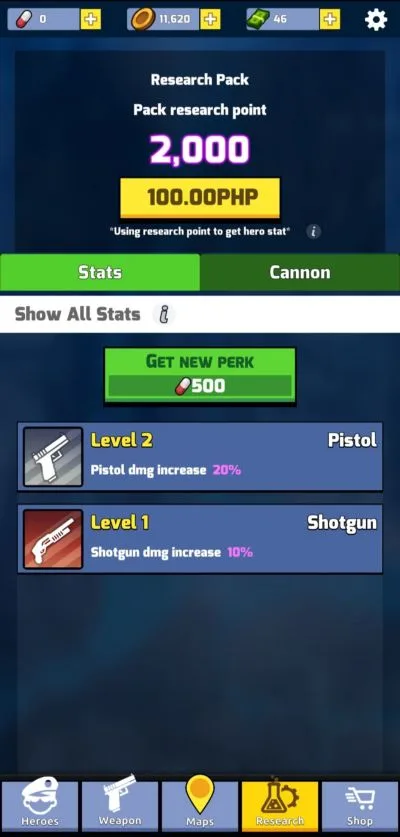
Research points are mostly gained via City Tax, and in addition to turrets, you can also unlock global passive skills which apply to all your merc buddies for 500 points a pop. These range from a global damage increase to higher damage when using certain weapon types, and can be leveled. The disadvantage of this system is that it’s random, so you don’t know what skill you will either get or level up. Which means it’s possible to have a high skill level in a weapon type unavailable for you or not synergistic with your characters.
Though each character you’ll unlock has a proficiency, sometimes it’s better to give them a two star weapon they aren’t proficient in compared to a synergistic one star weapon. Two star weapons are stronger than their one star counterparts to the point where they can outperform them despite proficiency, if they have the same level. The exception to this rule is if your research skills give the weapon type a big enough boost to be strong enough even at one star rarity.
4. Specific Stage Tips
So you’ve gone through maybe half of New York City by now, spamming loot crates and intensely staring at your screen for any mailbird so you can get that glorious premium currency drop, and Squirrel and Punker are sufficiently leveled with some two star weapons and a research skill or two (turret optional!). How do you further guarantee getting 3 stars in every level in New York City so your idle zombie defense becomes gets a huge boost from happy tax payers living in a zed-liberated city? Here’s how!
So New York has an unfortunate infestation of butcher zombies (hard to miss with the red hair, apron, and butcher knife). Make sure none of them go past a third of your screen from the spawn point if you don’t have a barricade up. They are very long range attackers who deal decent damage to your HP, so making sure not even a single cleaver is thrown your way will greatly increase the odds of you getting 3 stars in a stage. Worse still is their larger, much tankier variants will occasionally show up as well, so if you don’t have a barricade up when they appear, be ready with a medkit or pray there’s a drone still around to call on.
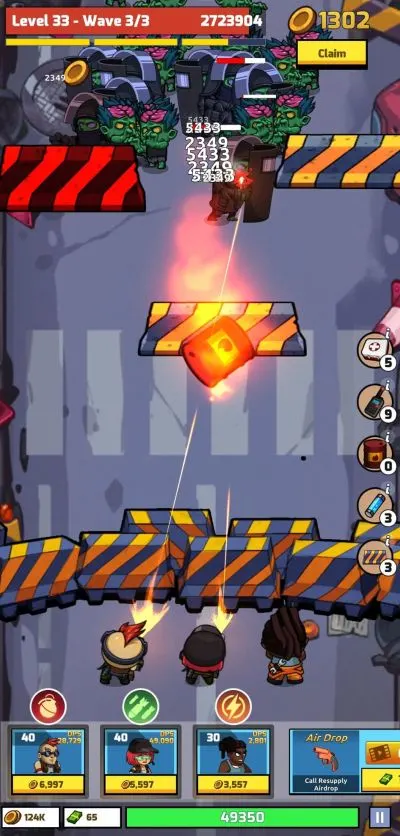
Patience is key to winning and a gateway to massive amounts of dopamine from watching several dozen zombies explode from a single skill. If the stage doesn’t come with preplaced barricades and you have some to spare, plunk one down and watch as they shuffle towards it. Spice it up even more by placing a flaming barrel directly in front of the barricade before letting Squirrel’s Justic Rain and Punker’s grenade loose at the same time, and if they still aren’t all dead, call in an airstrike to seal the deal! This combo works on pretty much every single stage as long as you have the items for it. Even up to stage 30.
Speaking of which, the final giant butcher zombie in node 30 of New York City has so much HP, even level 40 characters with 2 star guns at level 20 will take at least 15-30 seconds to kill him, even with skills. If you want to guarantee getting the 3 star rating in the last note, save up at least 2 First Aid kits to immediately heal the damage he inflicts on you, and make sure you have at least 1 barricade up by the last wave.
If you’ve successfully cleared every stage in New York with 3 stars, congratulations! You’ve unlocked taxes and can now grind by simply checking on your game every couple hours to collect gold, scraps, and research points! Give yourself a pat on the back for the mountain of burning corpses you had to stack in order to get this far!
From here, it’s time to move on to the next city, with their own zombie variants and even higher total HP pools. Luckily enough, you get reinforcements of your own with new characters and weapons, and more bonuses for first time stage clears.
And this ends our beginner’s guide for Zombie Idle Defense. If you happen to know any additional tips, tricks or strategies for the game, then feel free to let us know in the comment area!

