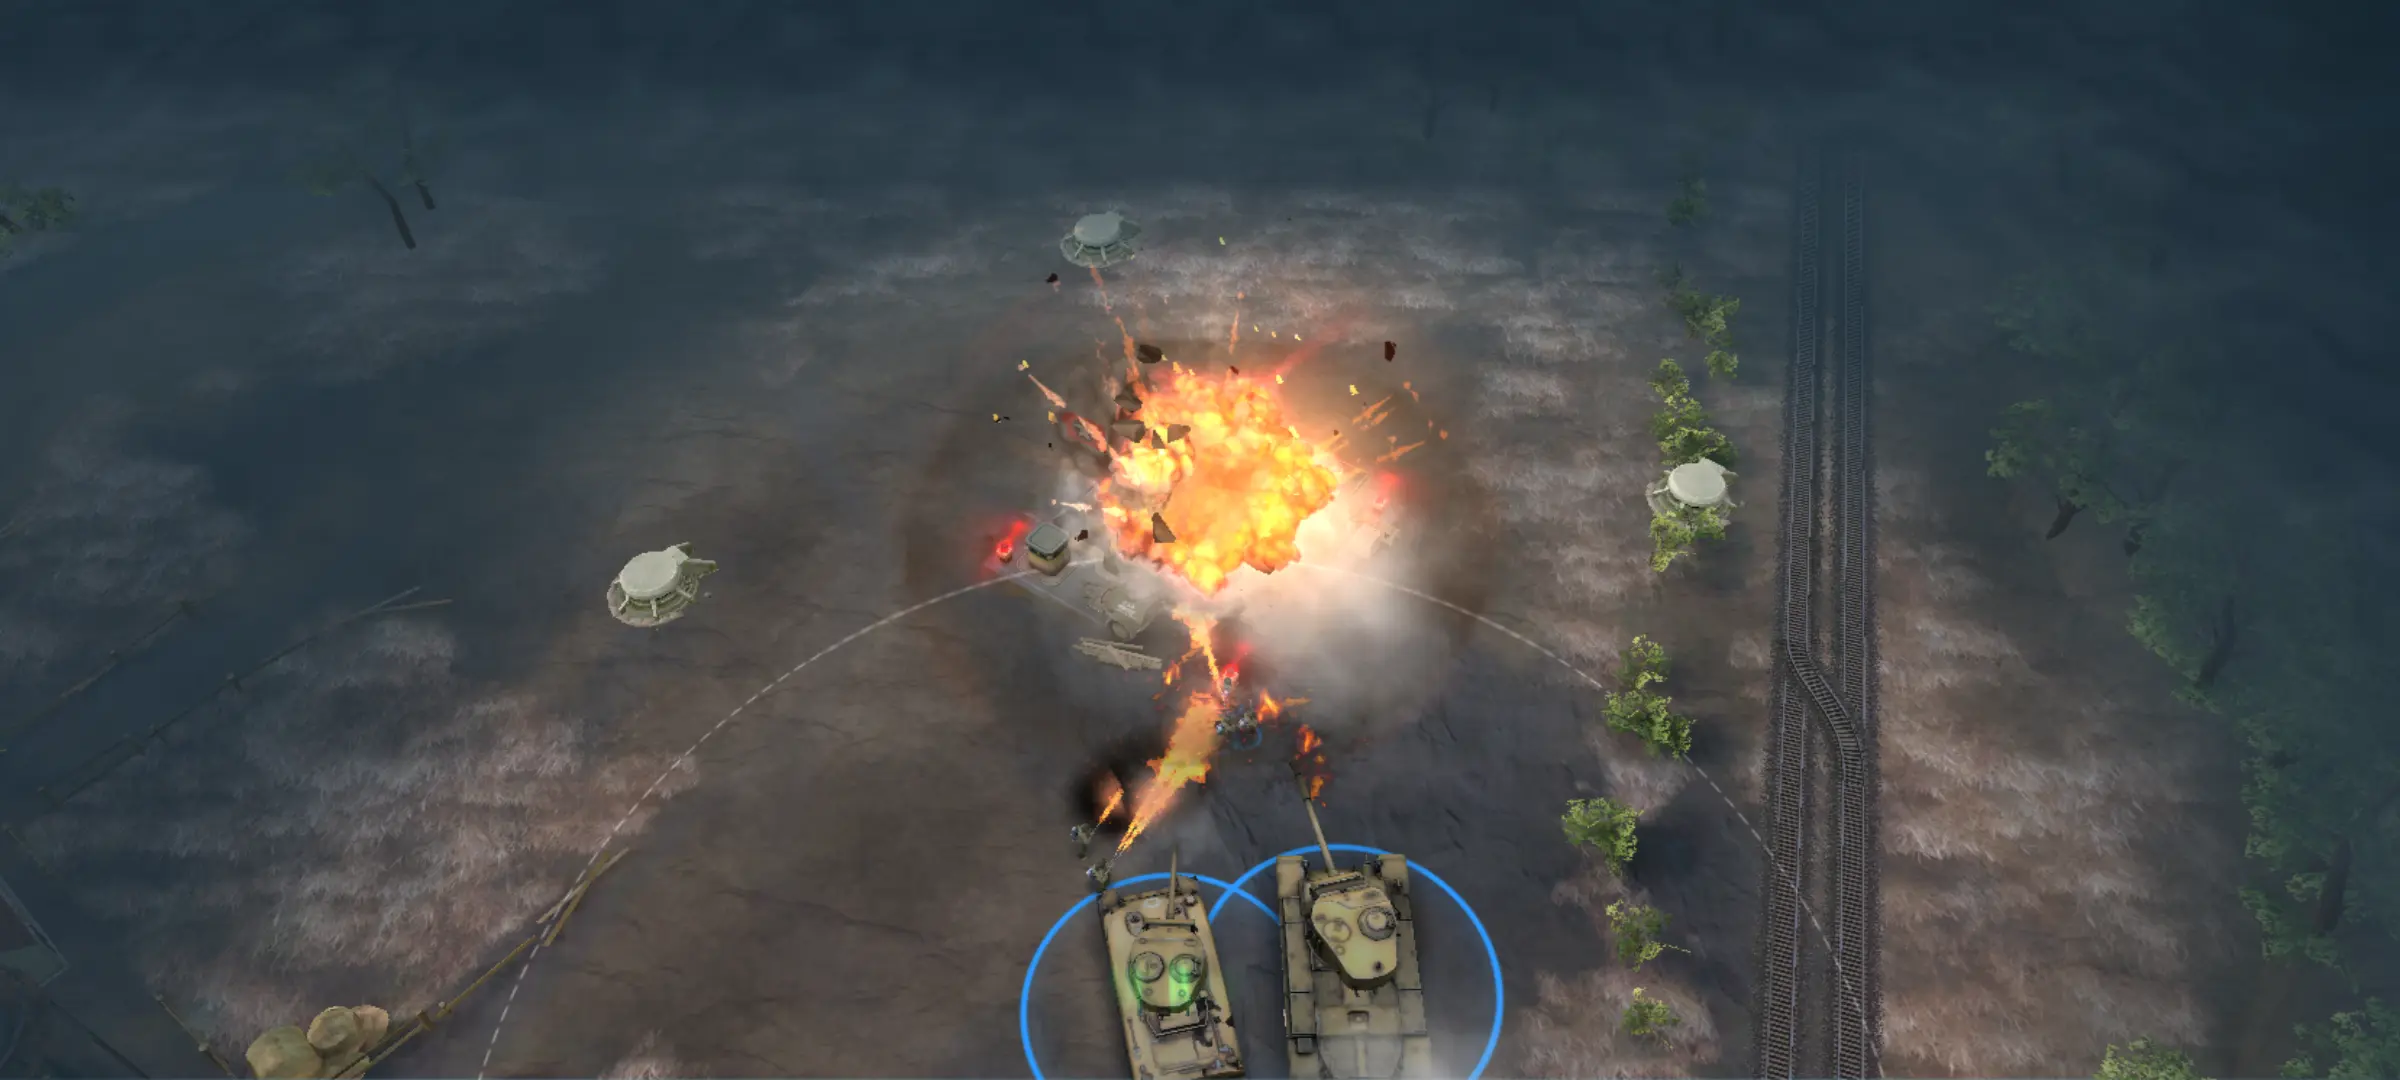
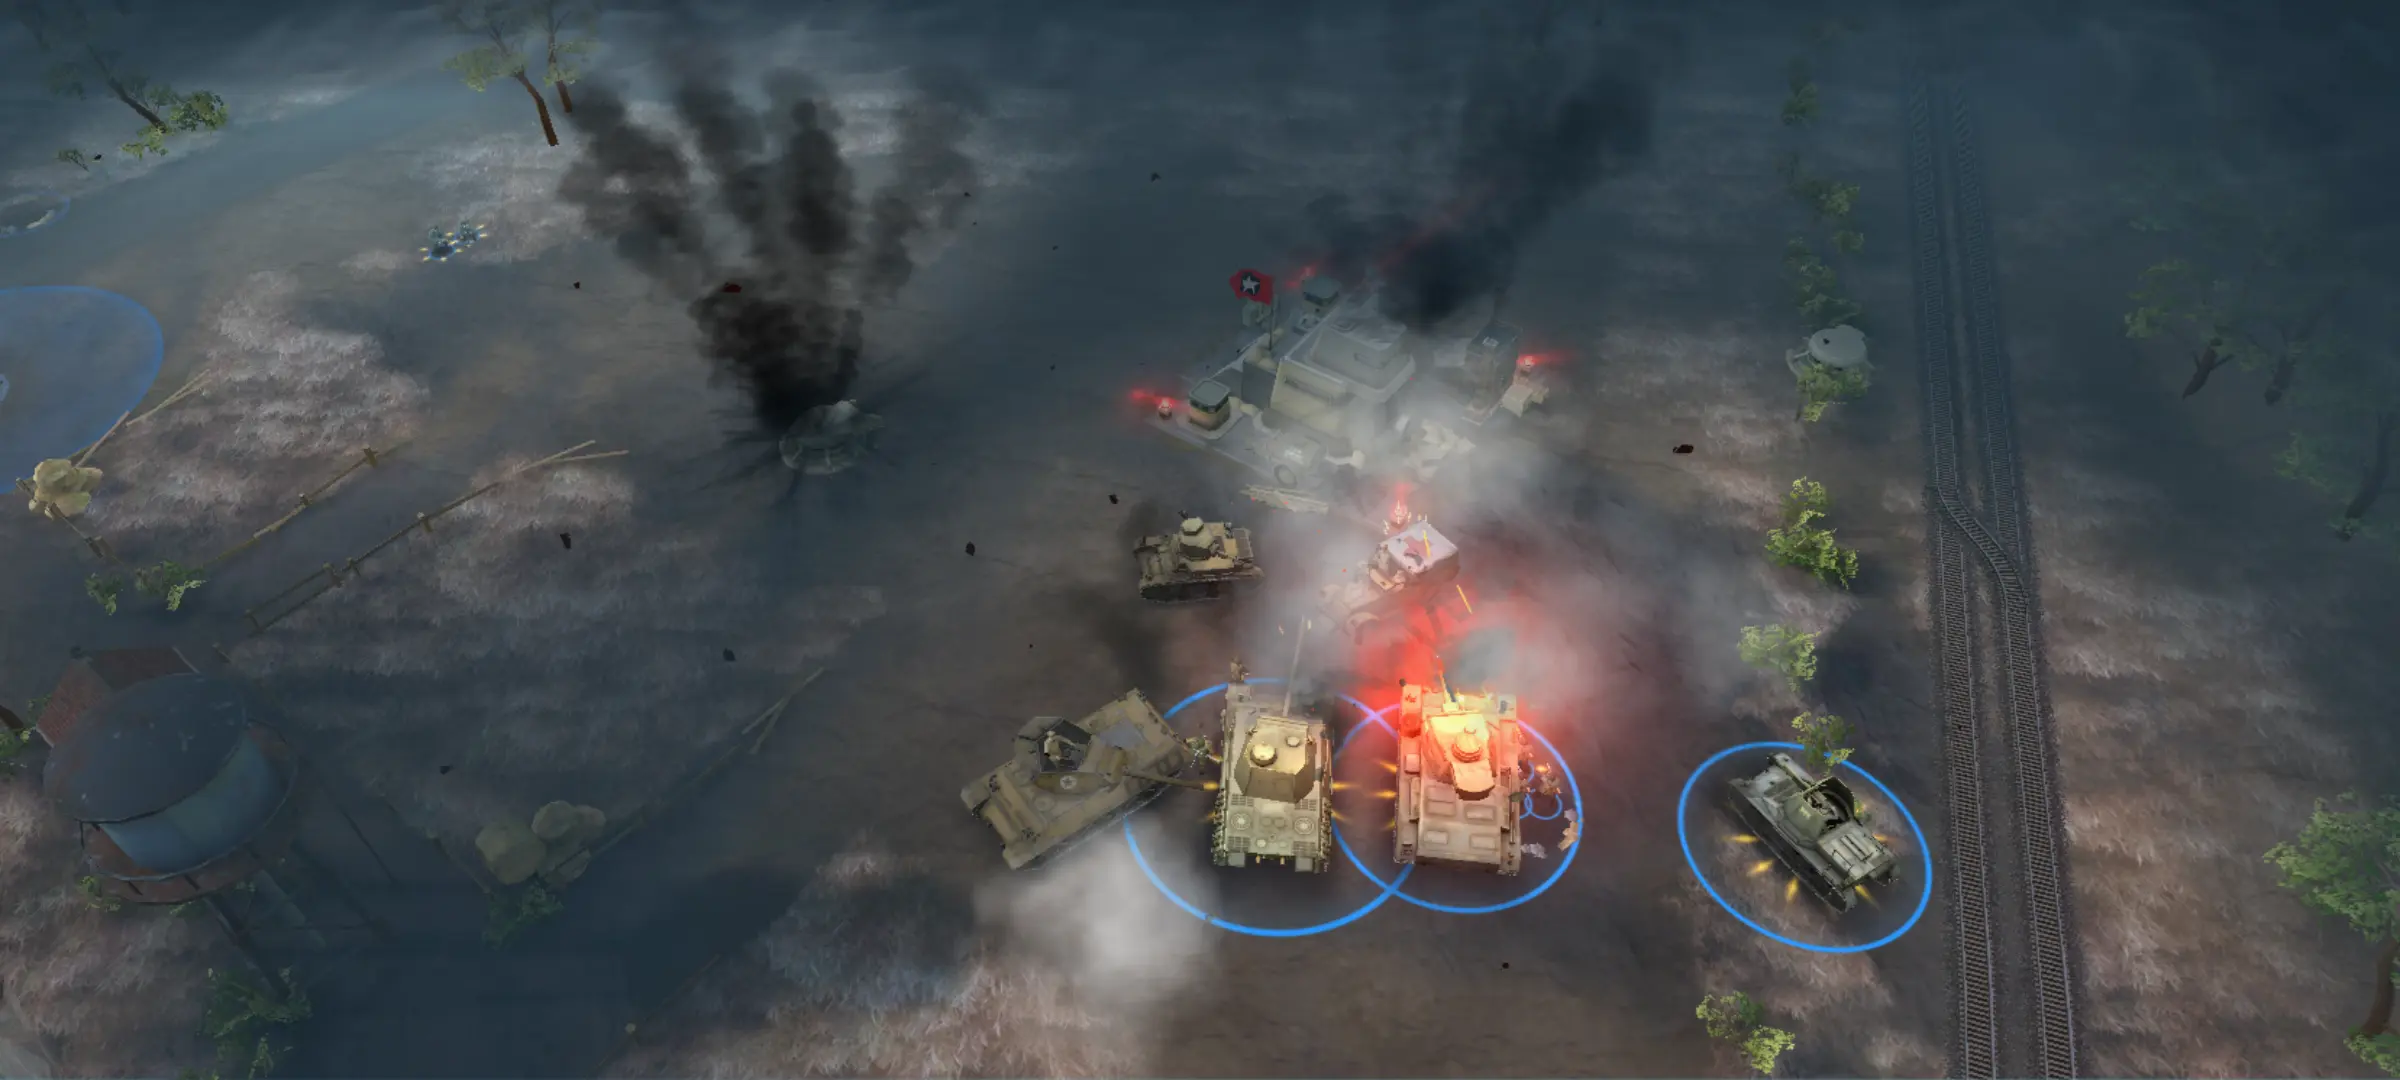
“We’re being overrun! We need reinfo– OH HELL! A TIGER! AAAAGH-” The radio cuts out with the sound of an 88-millimeter cannon blast. You look over the battlefield from a relatively safe position in your HQ, but you see no good heading your way. The Germans have blown through the first defensive position, a large concrete-reinforced radio tower which you need for the rest of the front in your area to communicate.
A call for reinforcements goes out. The remaining troops in the front retreat to a prepared position supported by concrete pillboxes, but they sorely lack anti-tank weaponry to get rid of the rolling metal behemoth rampaging through the frontline.
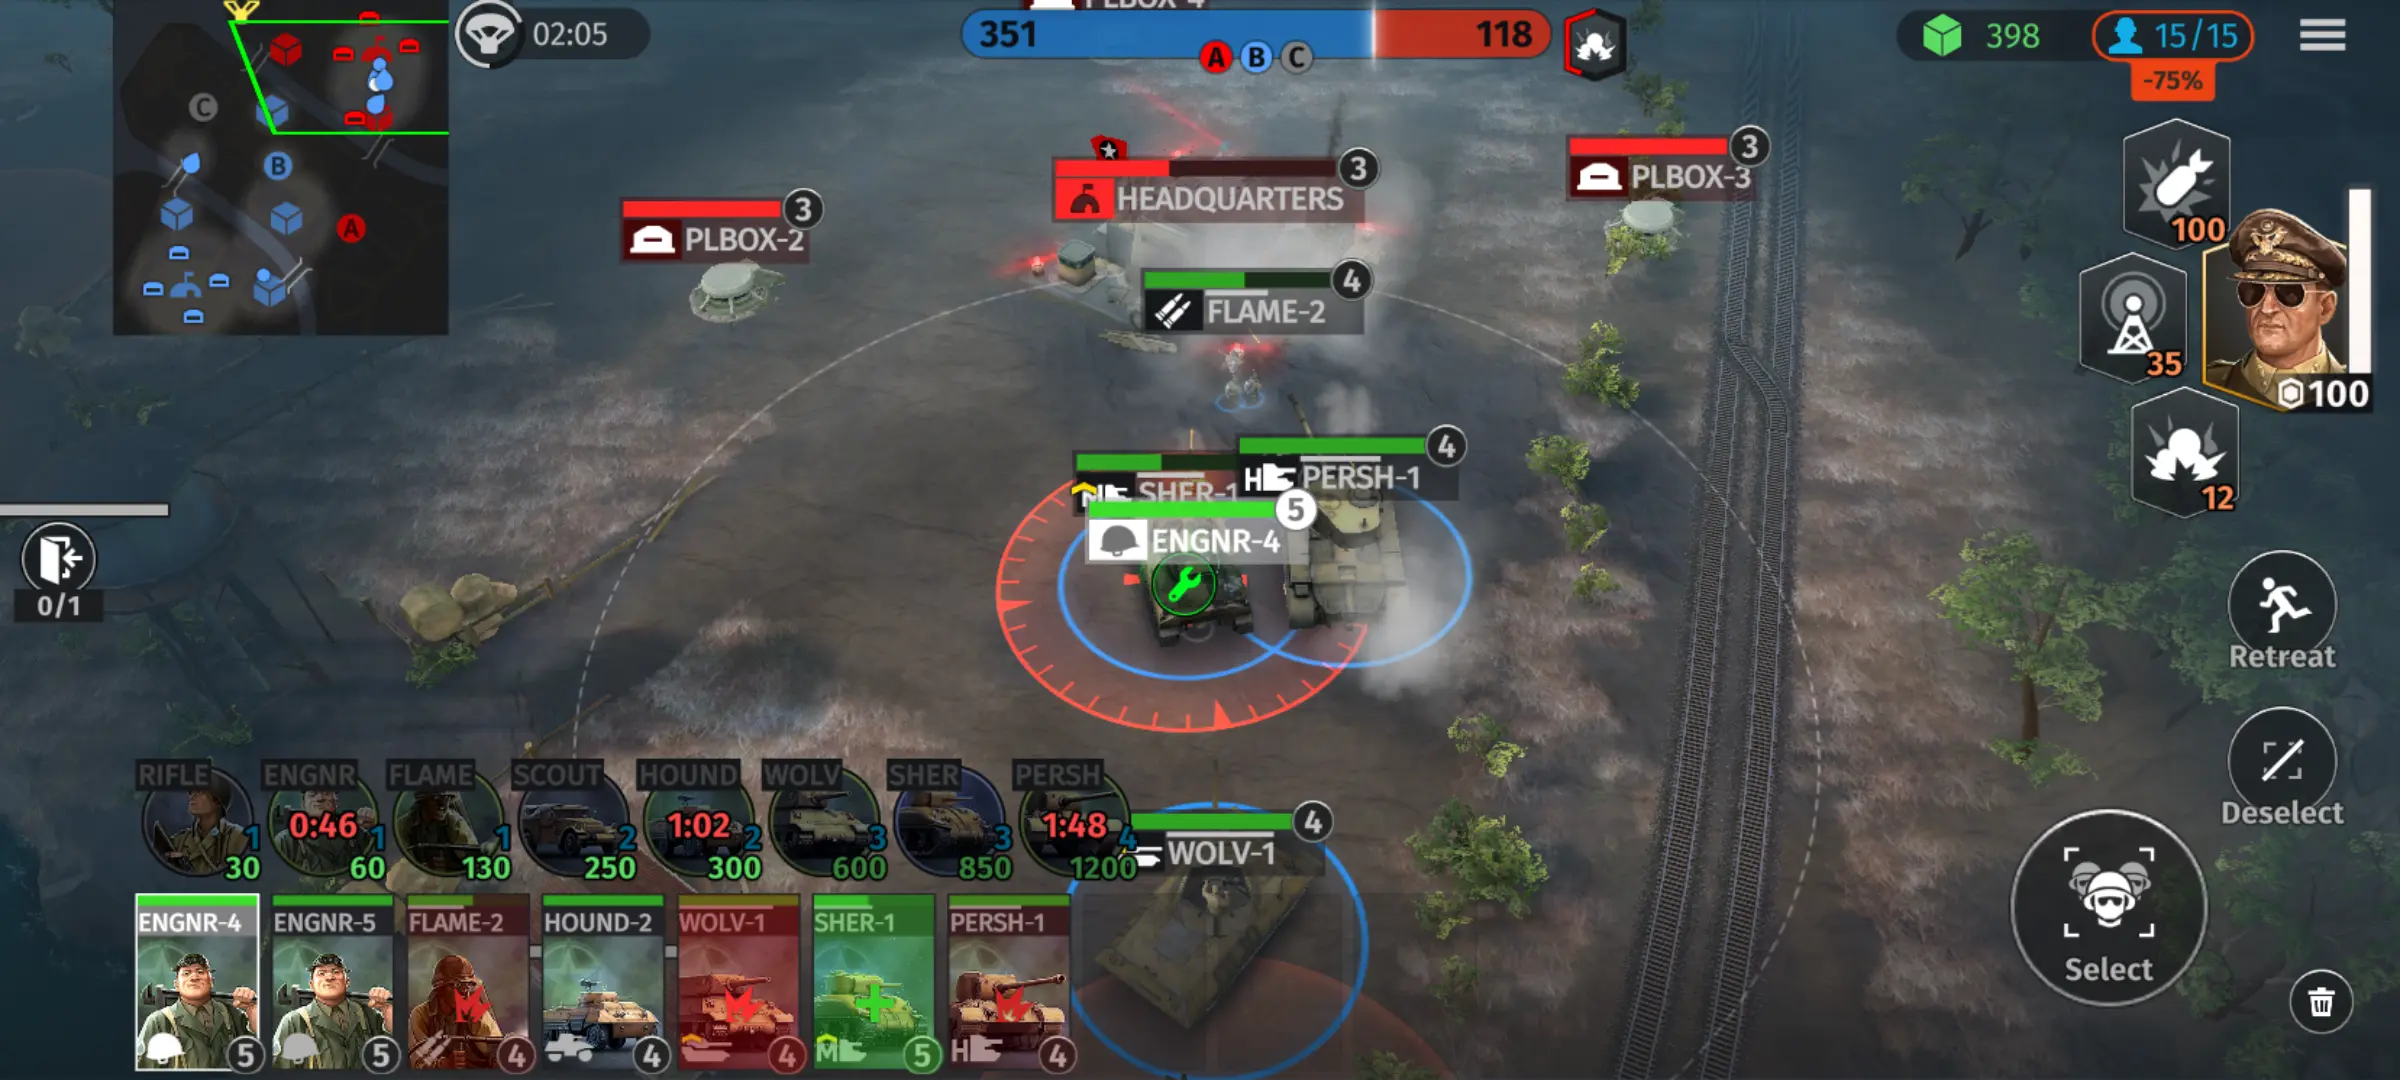
Just as all hope is lost, the Tiger suddenly halts as if hitting a wall, a hole in its hull. A second later, the turret flies off in a tower of flame. Out of the smoke and fog, an M26 Pershing arrives, barrel smoking, on the battlefield.
As the terrible machine rolls slowly and menacingly across the line, rocket artillery from outside the area of operation pounds the zone around the radio tower ruthlessly, sending men and pieces of a Hanomag half-track hither and fro and to the sky. Supply positions and communications are captured and cut off, rendering the Germans unable to reinforce themselves.
The enemy runs back to their own positions to prepare for one last battle. As your forces march to the enemy HQ, the Germans fight to the end, but without reinforcements or supplies, it is all hopelessly futile for them. POWs and injured men are led away from the smoldering ruin of the enemy headquarters, another town liberated from the mustached tyrant in the Reichstag. But at what cost? The town is barely a town now. But a quiet, lonely pile of ash and rubble. Just a typical day in World War Armies.
Welcome to our World War Armies beginner’s guide! World War Armies is a real-time strategy game of a fairly small scale, like a tiny version of Company of Heroes. While there is no base building, you can instead make a deck of unit types, call them in, command them directly to capture control points and objectives and blow your enemies to bits.
It can both be a brain tickler and a fast, twitchy fight once things get going in a battle, holding on to objectives and trying to kill important targets such as tanks or infantry specialists while yelling at your troops to move away from off-map bombardments and sudden ambushes.
THE BASICS OF WORLD WAR ARMIES
As an RTS, commanding your troops is the whole meat and potatoes of World War Armies. If you’ve played Company of Heroes or Dawn of War, this game will look quite familiar to you, though shrunken to a scale that won’t utterly ruin your fingers via excessive high-speed micromanagement.
That being said, being on a tablet means you’ll have to adjust to the controls if you’re used to mouse and keyboard sorts of RTS games. Your objectives are twofold: Either capture the Strategic Points around the map and drain the enemy’s Strategic Points to zilch, or blow up the enemy HQ via direct use of firepower.
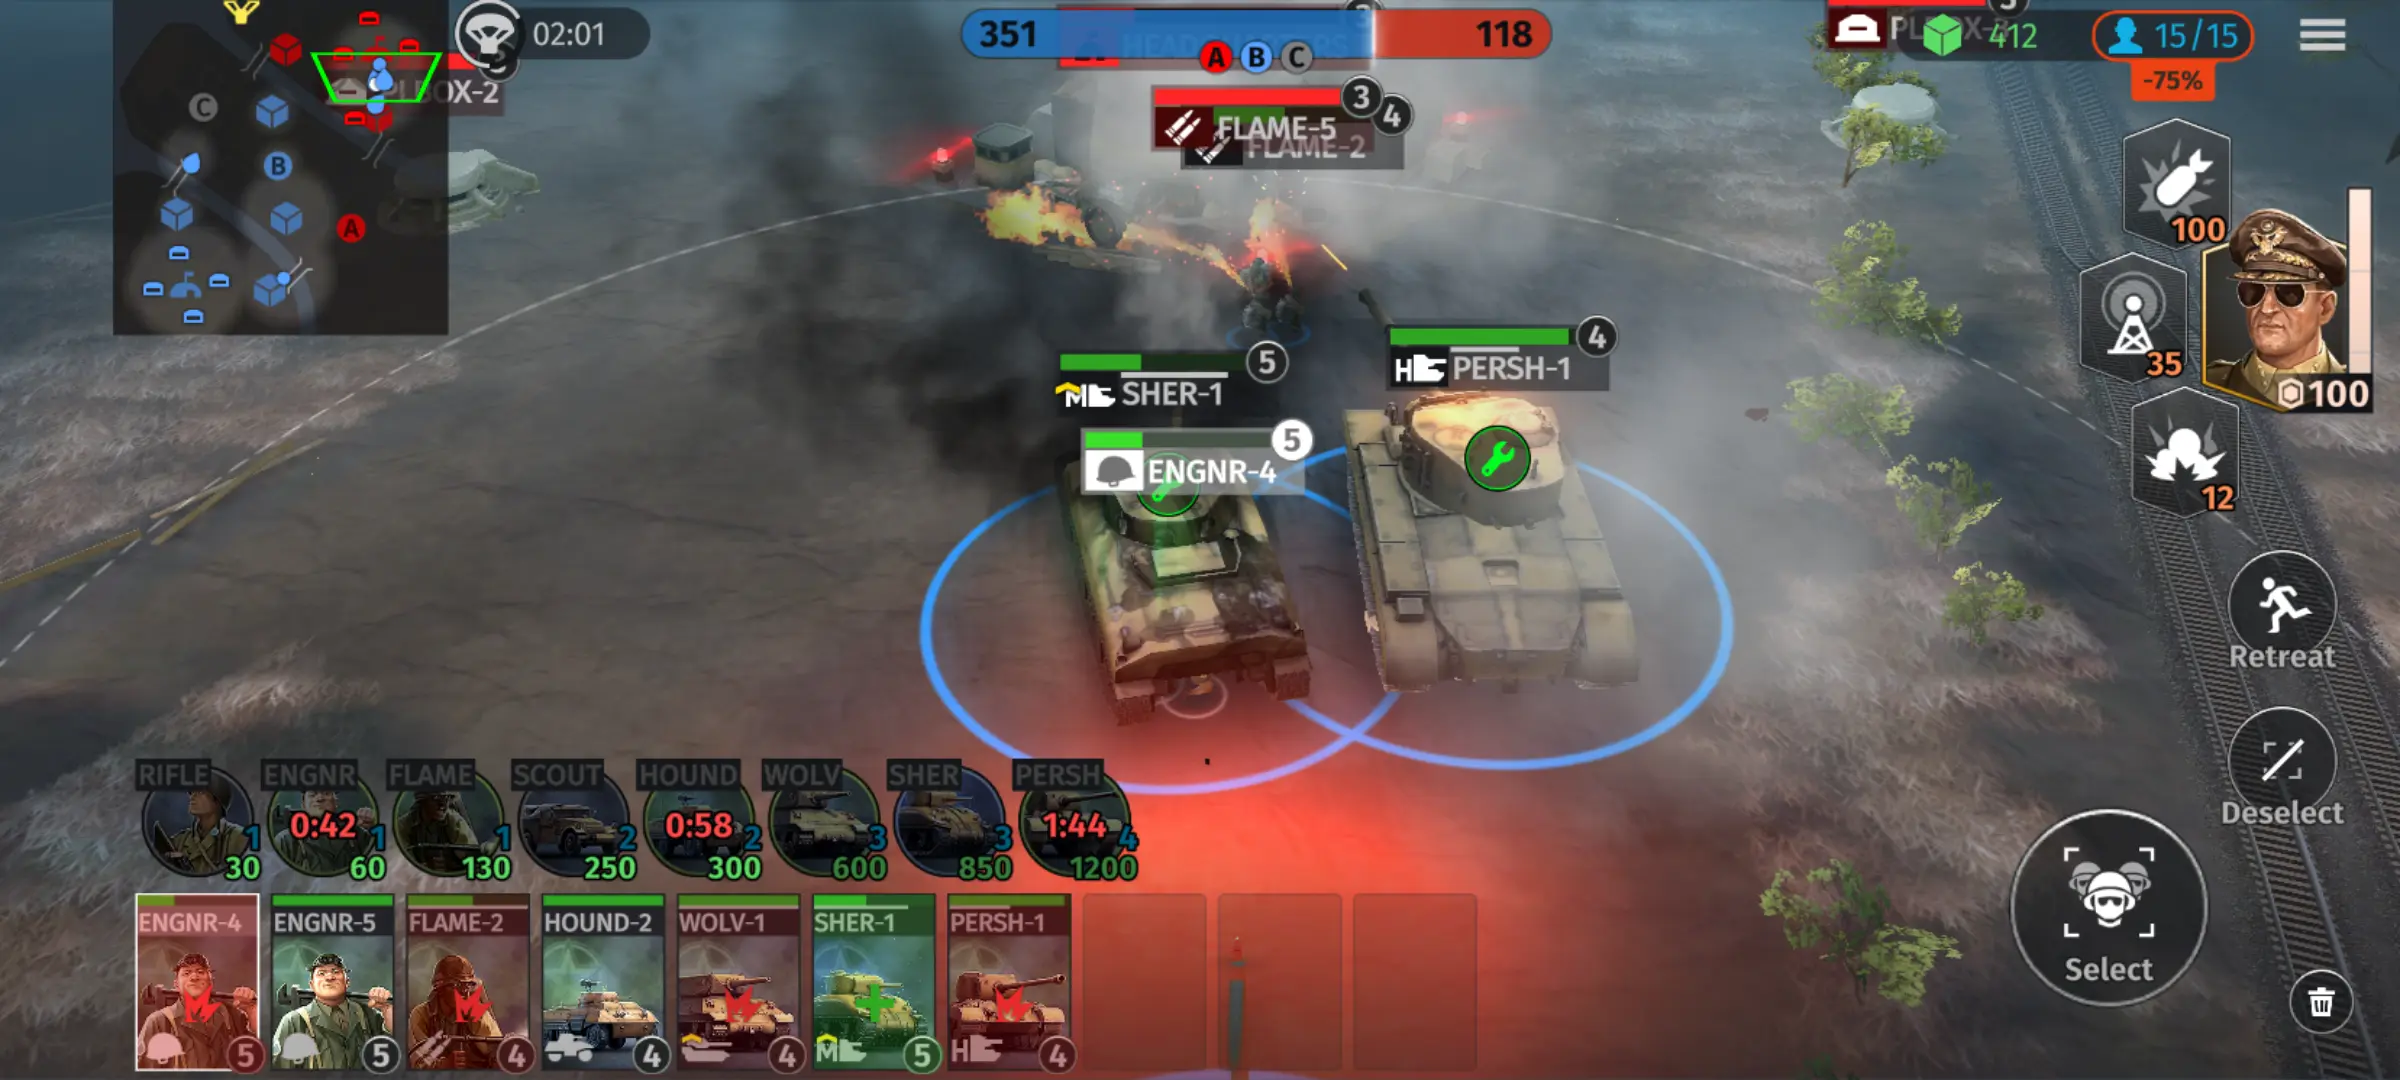
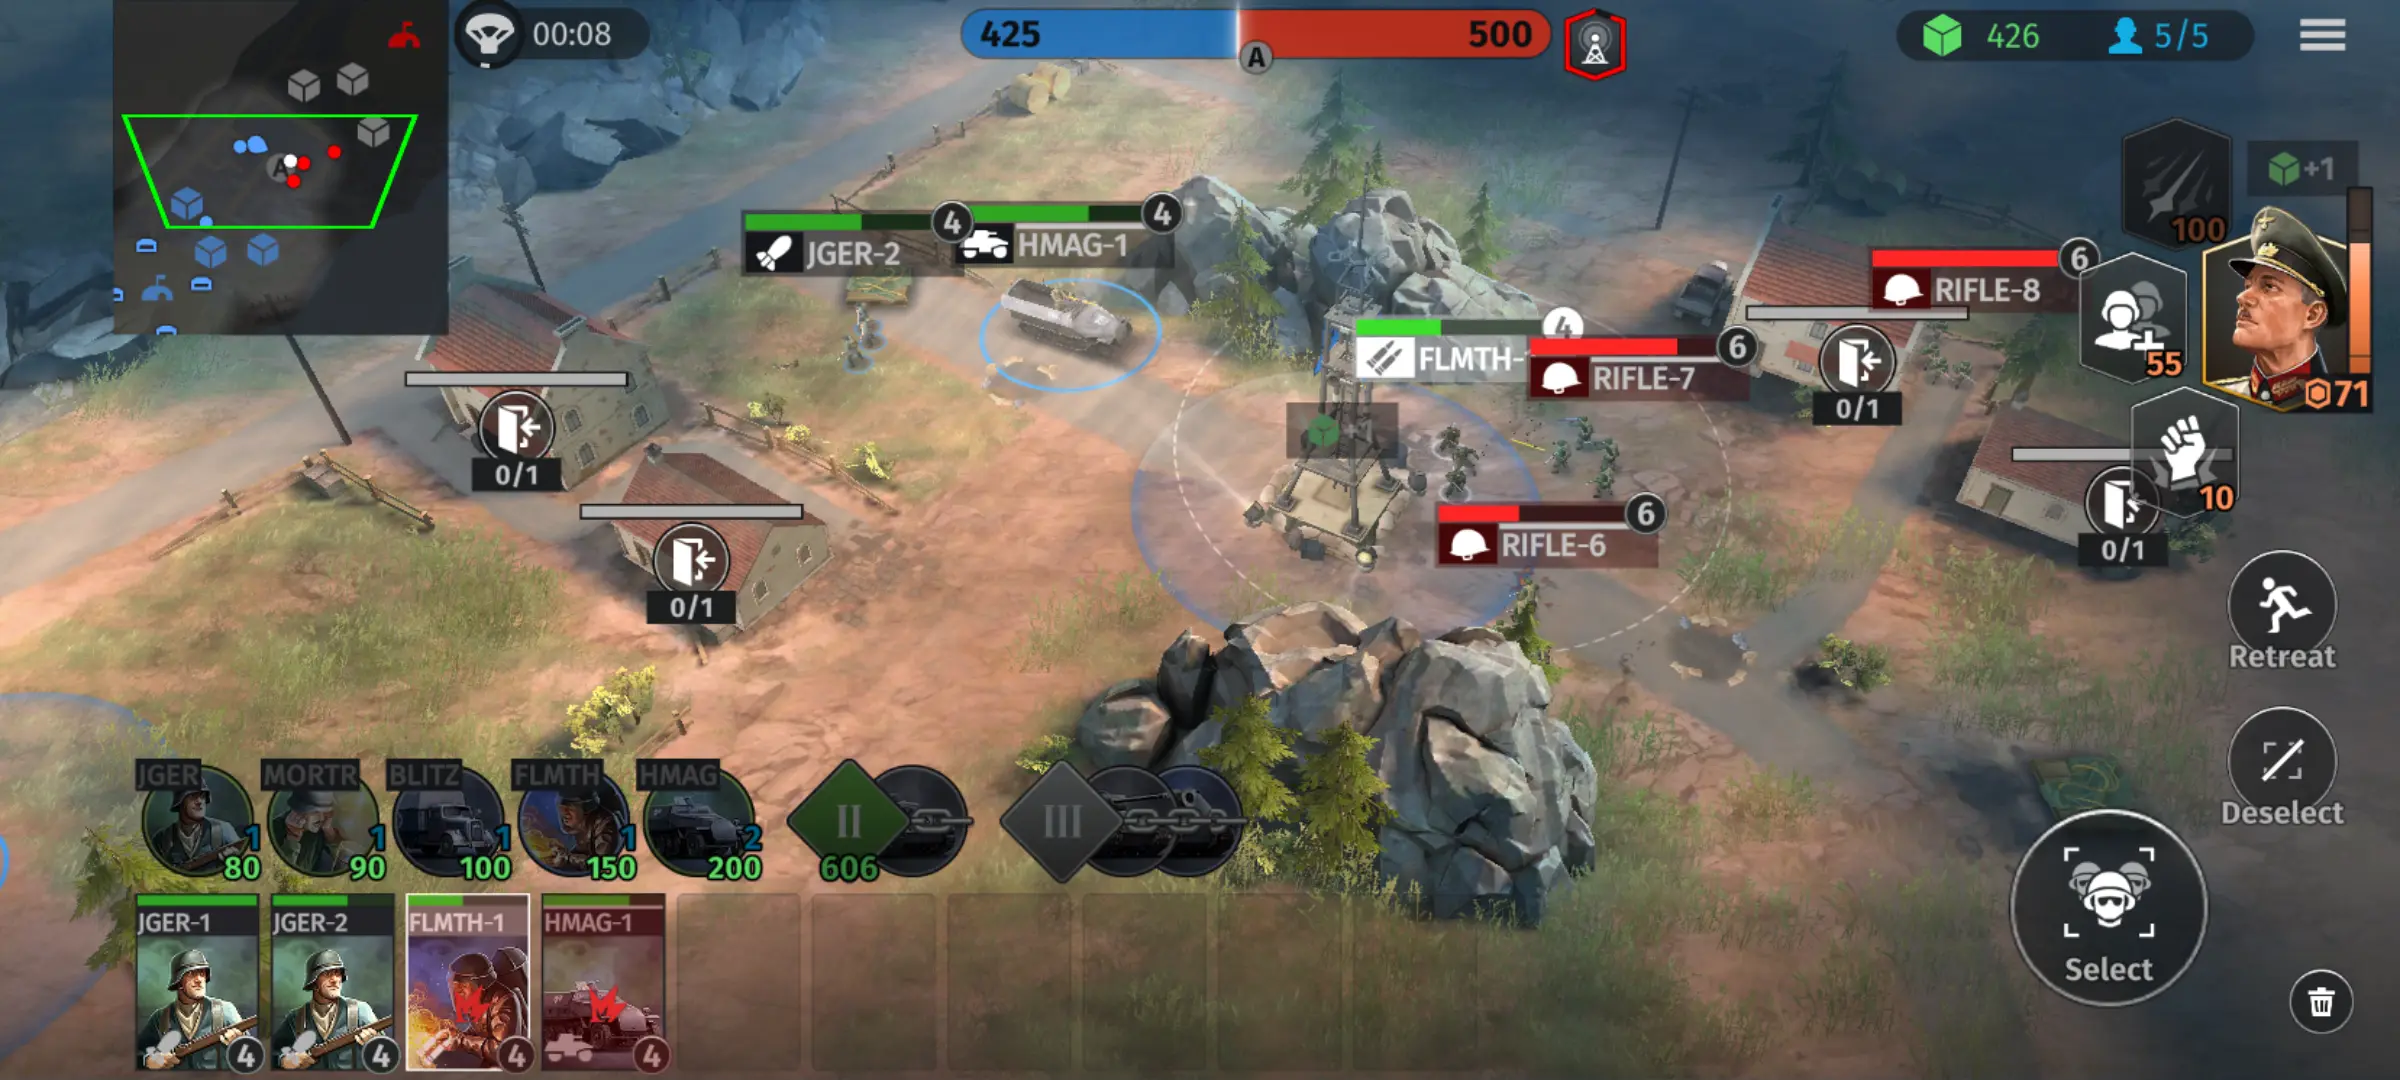
Unit Command

Commanding units is simple: Tap a unit’s name, card, or 3D model, then tap twice on the ground or once on a target. Or set singlet tap movement to ON in the Options menu so you don’t have to tap twice to move. If you have single tap movement OFF, you can tap 3 times to get them to force-move, ignoring any enemies in the way, and if you have single tap movement ON, just tap twice for forced movement.
You can select multiple units by dragging a square with two fingers across the screen, but depending on your screen and how buttery your fingers are it can be incredibly unreliable. The Select All button is your best friend here: Tapping it once selects everyone on the screen, and tapping it twice selects all your units across the map.
The battle maps can be fairly small, and armies max out at 15 units of Troop Limit, which means 15 Infantry maximum and it only gets smaller once you deploy vehicles, so single selection and the Select All button is good enough for most tasks and is fast enough that it will pretty much override the potential precision of a Drag Select.
After all, fumbling for 5 seconds with your fingers is enough time to get hit by an off-map bombardment which you could have avoided with 2 half-second taps on the screen.
Control Points and Strategic Points: Winning By Conquest
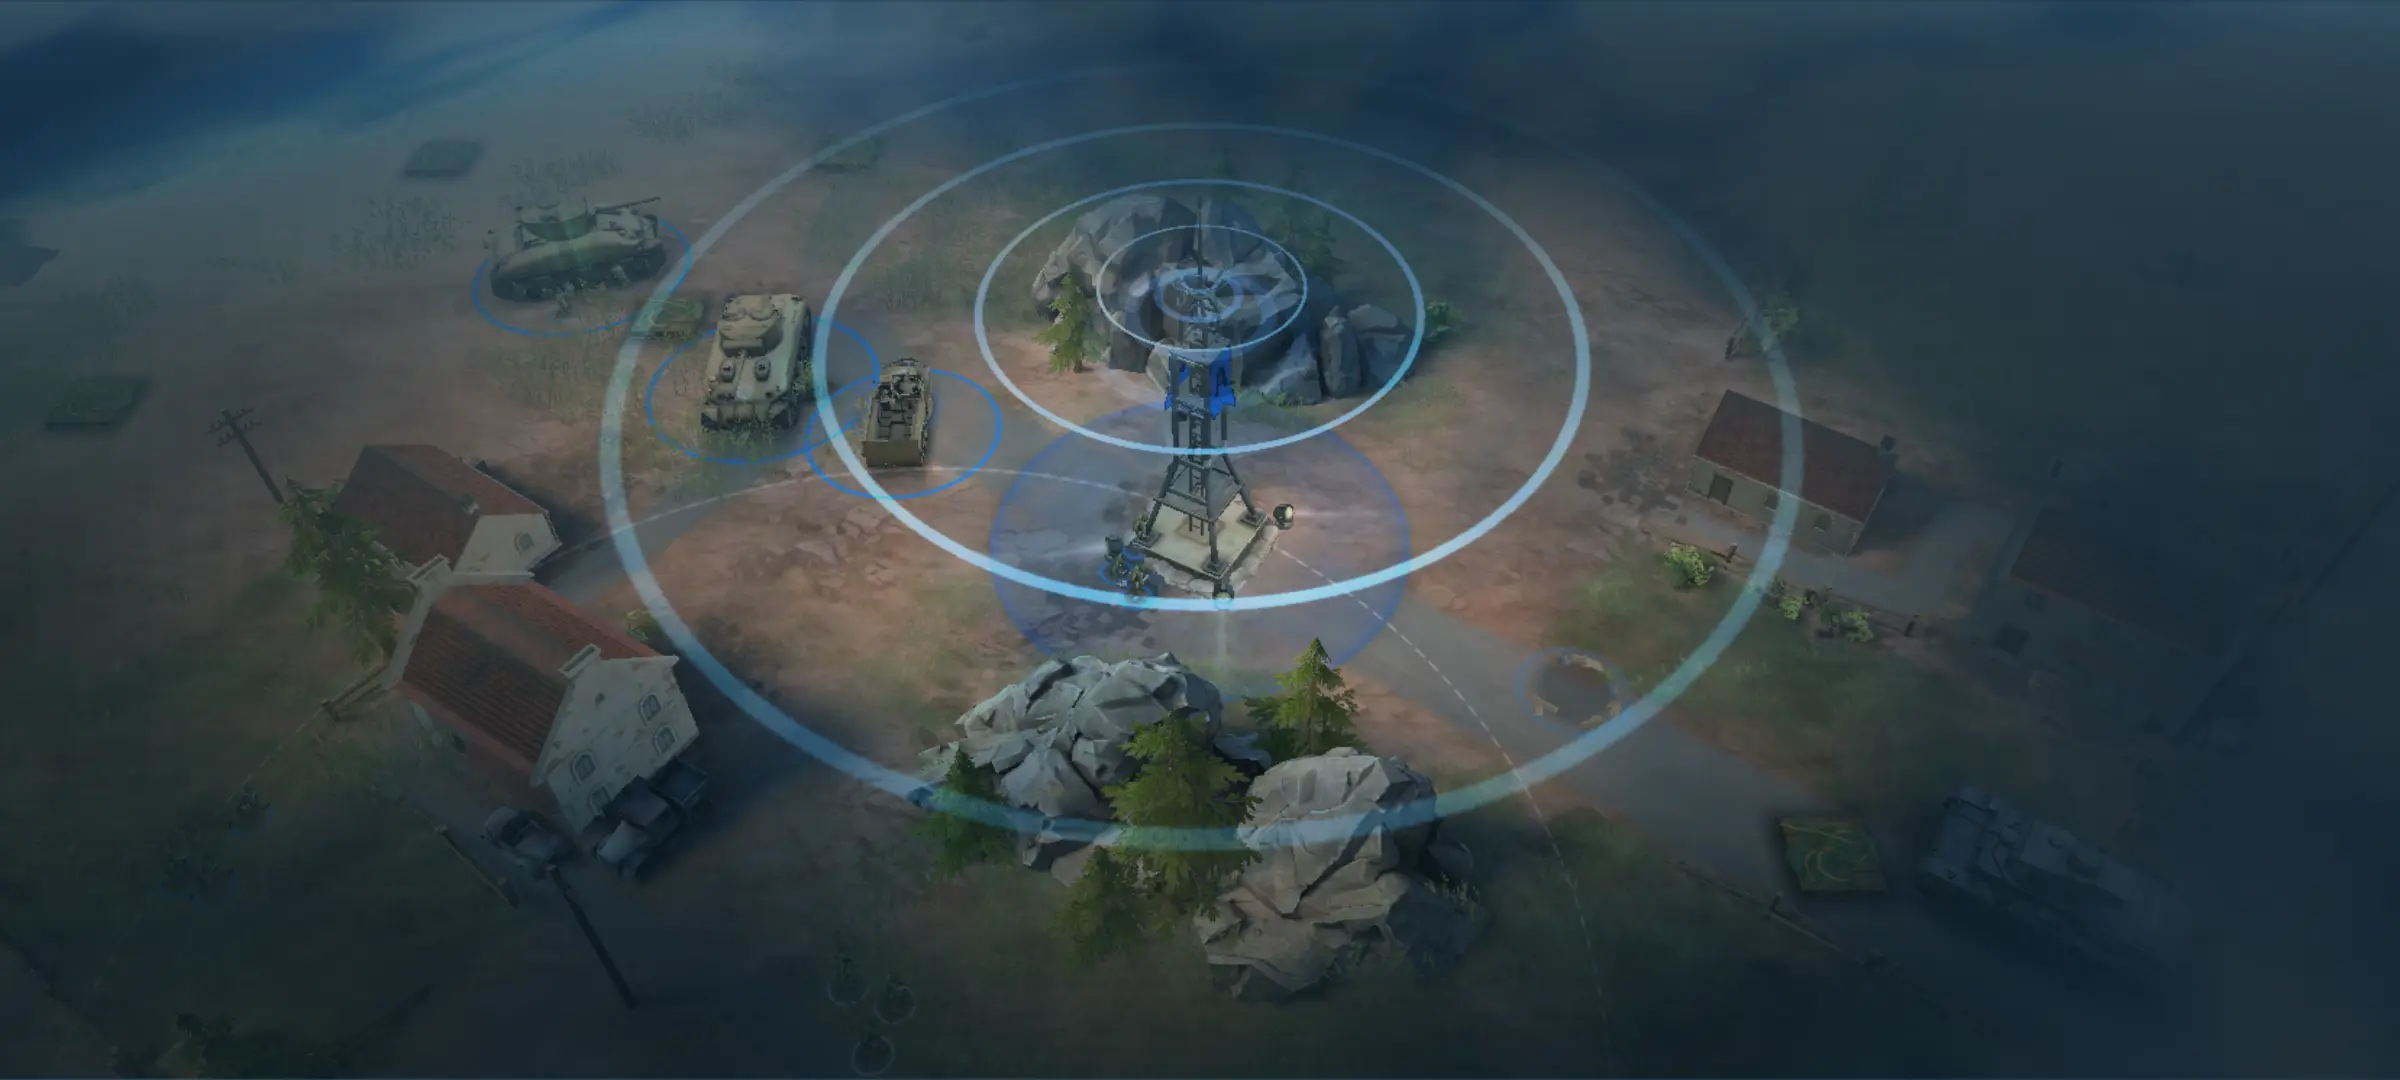
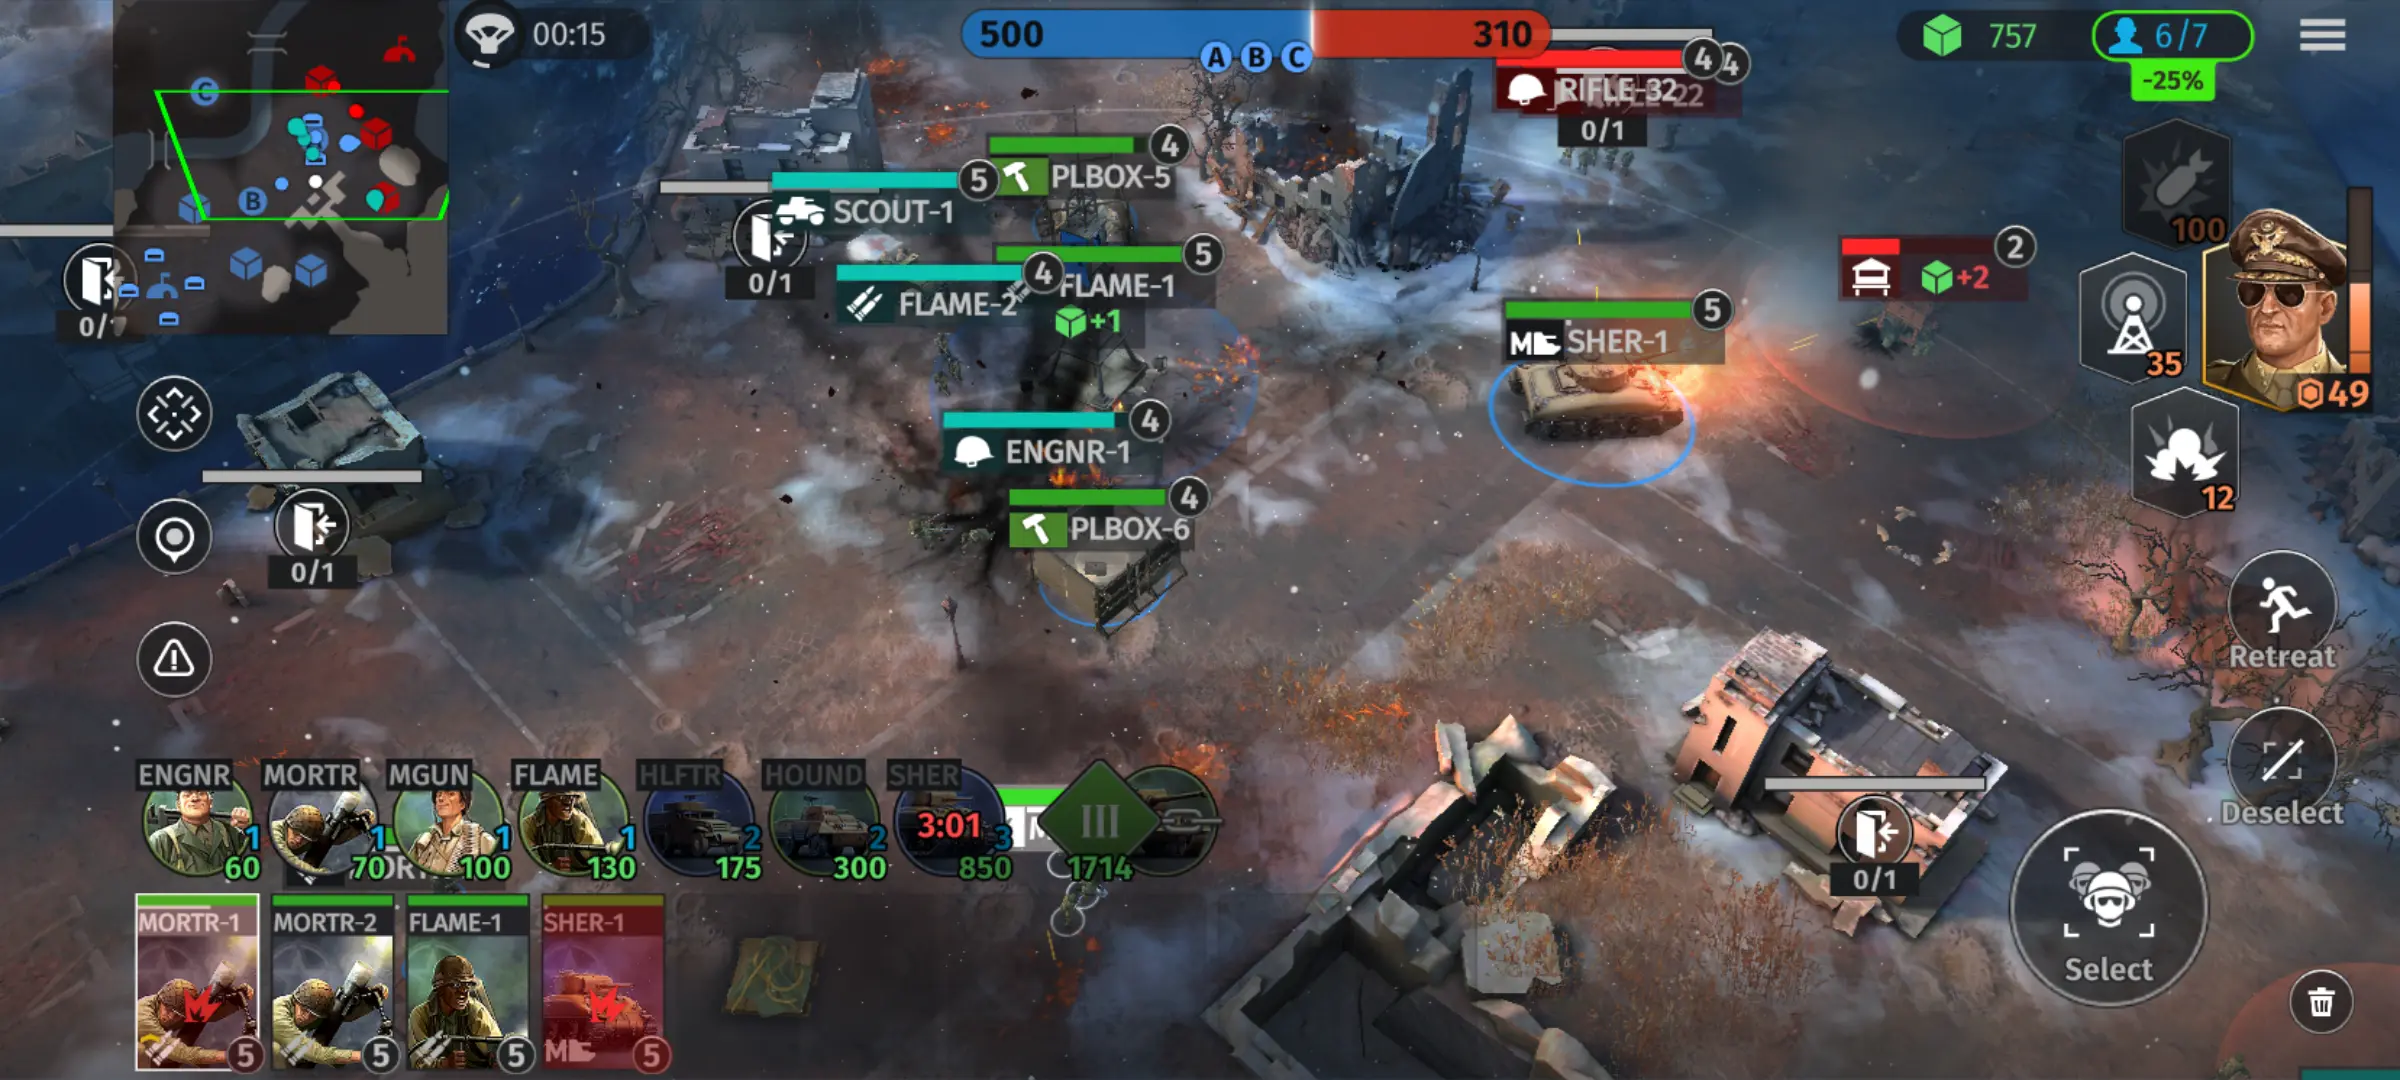
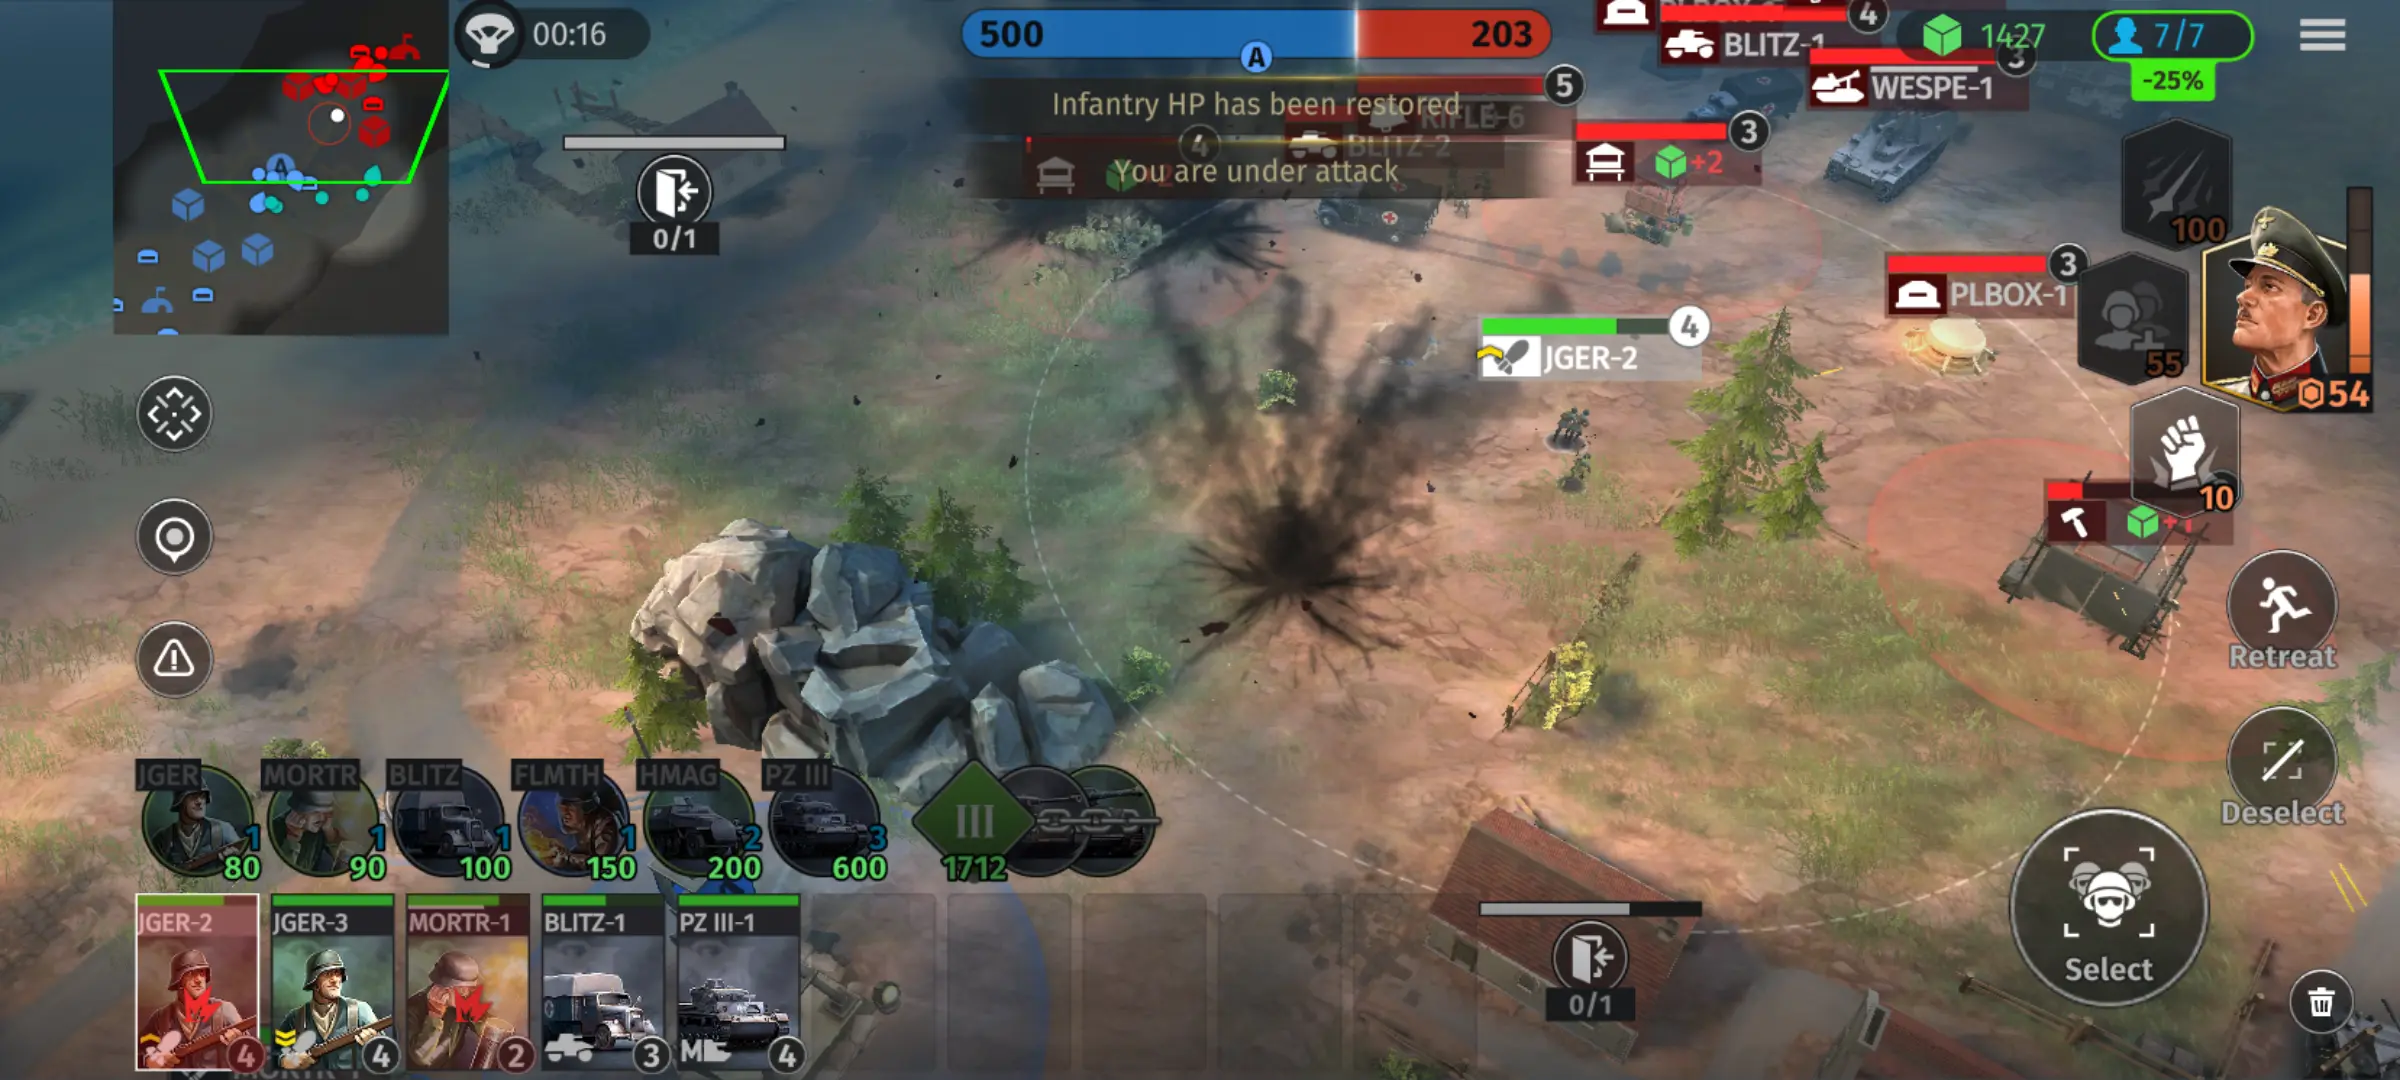
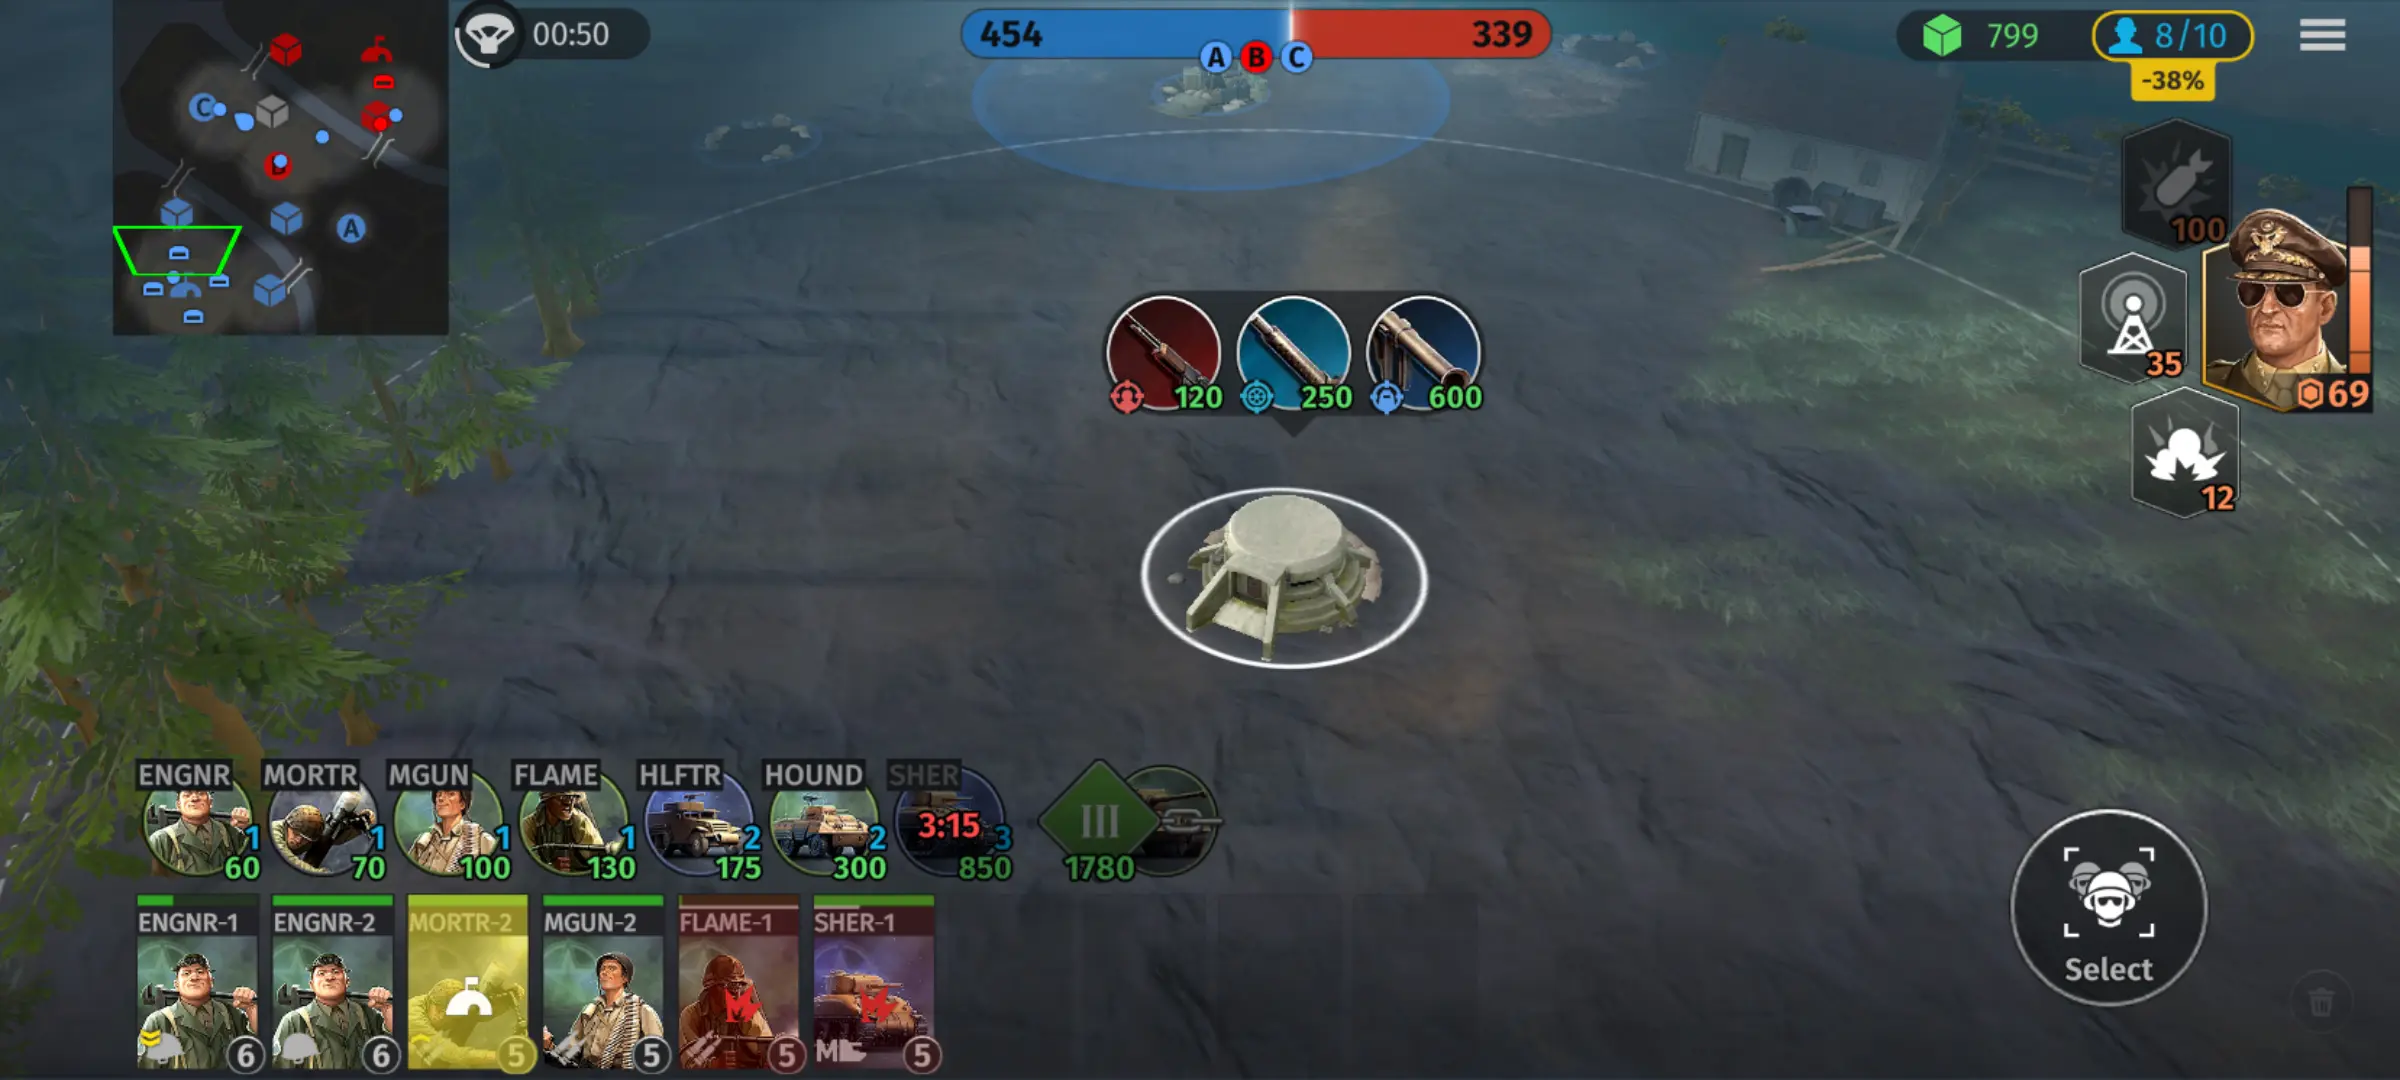
A central mechanic of the game is the capture of Control Points and Strategic Points across the map. Control Points provide Supply, which you use to call in new units back in your HQ. Control Points look like big white circles on the screen surrounding a pile of supplies, and walking any unit marked as a Capture Unit (unit cards marked with a flag symbol, of which most are infantry or extremely light T1 vehicles) will change its color until it turns into the color of that unit’s team.
A Control Point can be protected by building a Listening Post on top of it, which needs to be destroyed before it can be captured by the enemy while also improving a Point’s supply production. Strategic Points act similarly in that they give Supply and allow the construction of Pillboxes around it.
Unlike Control Points though, they also chip away at the enemy’s Victory Meter (If theirs hits 0, you win!), cannot have Listening Posts built on top of them, and are typically where most of both sides’ soldiers end up six-feet-under midway into a game.
Controlling the Strategic Points is vital to victory, but controlling at least your side of the map’s Control Points is vital to getting an army big enough to hold those Strategic Points in the first place.
The Enemy HQ: Winning With A Decisive Blow
Another way to win is to blow up the enemy HQ with your army. This happens fairly rarely, and is usually a tactic done as an opportunistic strike: If you notice their army is attacking elsewhere and you’ve got at least a 600 Supply tank (T2 or T3 is fine) backed up with a sizeable force, you can send them forward for a faster Strategic rather than waiting to cap the enemy’s own Strategic Point.
It can also be pulled off as an act of desperation: Perhaps you’ve just gotten your army’s heroic second wind after beating back a particularly harsh attack, but the Strategic Points counter is very much against you and it might take too long to cap the points: You might as well attack the enemy HQ, perhaps leaving behind one infantry unit to cap one Strategic Point to slow the counter down.
Supply, The Troop Limit, and Unit Creation
Supply and the Troop Limit determine how big your army can be. You requisition new units with Supplies, and each unit takes up space in your Troop Limit. The more supply a unit eats up, the stronger it tends to be, but that doesn’t mean more expensive equals better: That hyper-costly 900 Supply heavy tank doesn’t matter if it never comes out because you need reinforcements right now!
As for the Troop Limit, it exists so you can’t throw 15 tanks at the enemy come to the end of a match: Weaker units like infantry take up less supply than stronger units like tanks, and it’s often a balance between getting many Infantry units to capture points faster vs bringing more tanks for firepower and bulk to hold down what you have already taken. Which brings us to…
Tier Escalation
There are 3 tiers of units, TI, TII, and TIII. Unlocking a new Tier is a supply-heavy affair but necessary to Strategic: Going up a Tier during battle increases your supply cap and lets you deploy stronger units to the frontline.
But even lower-tier units are vital: Most Capture units are TI, and you often win with TII units even if you have escalated to TIII since TII has access to certain meat-and-potato units such as medium tanks and artillery. That being said if you DO get the opportunity to finally deploy that Pershing or Tiger, call it in!
Supply Drops
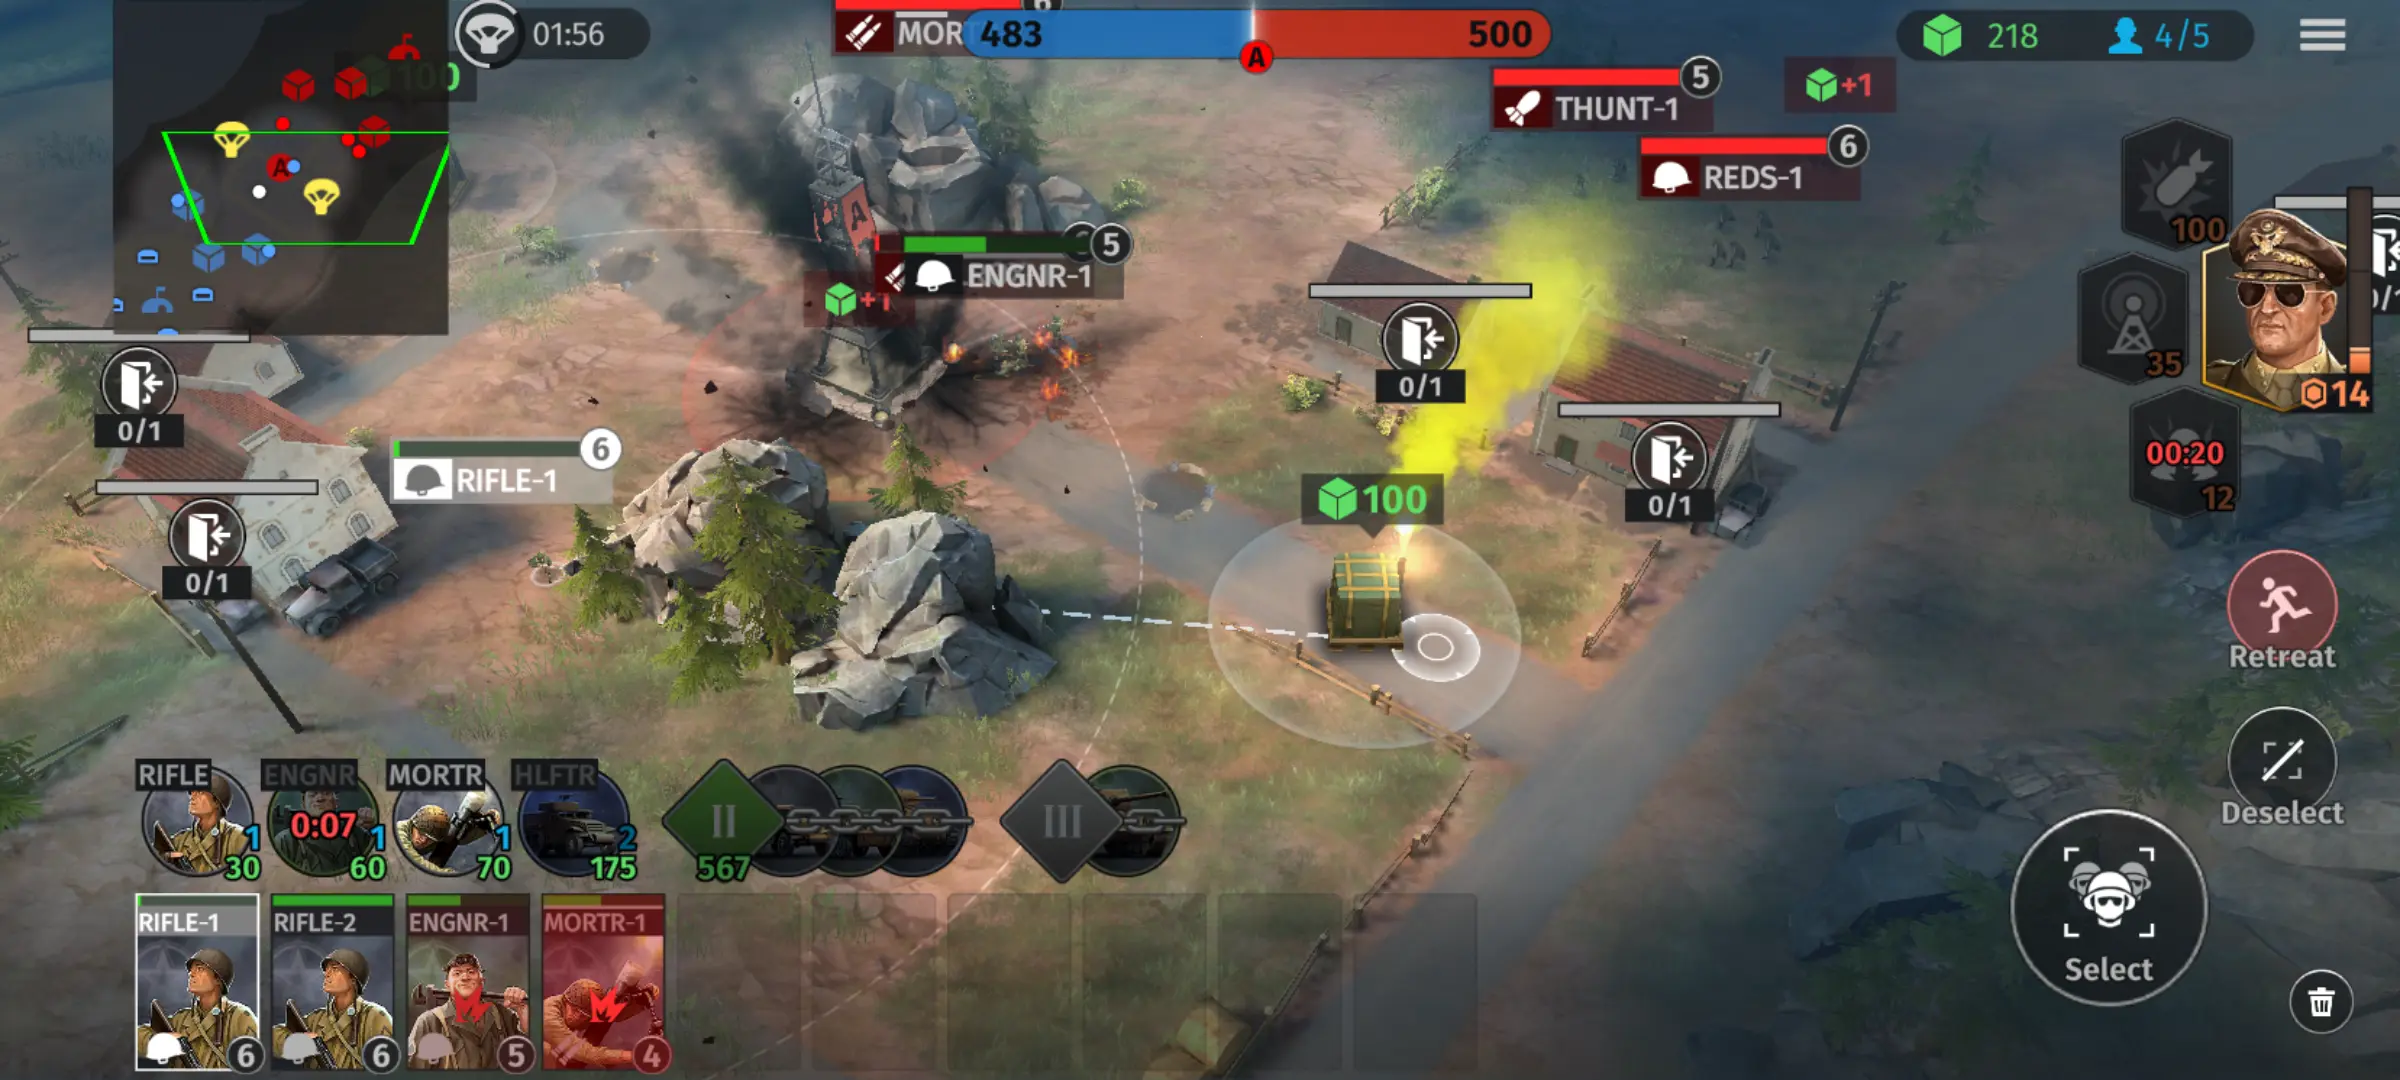
Supply Drops pop out throughout a match, and can be captured the same way you take a Control Point: Sit some infantry on top of it and wait until they finish unpacking the box. They are marked by a yellow parachute icon on the map. These things can really win a match for you: As the game progresses, these drops give more and more supply, usually in batches big enough to immediately call in a tank you would otherwise wait ages for, especially if you’ve been plonking Pillboxes down all day.
Penetration Vs Armor: Big Guns For Big Targets
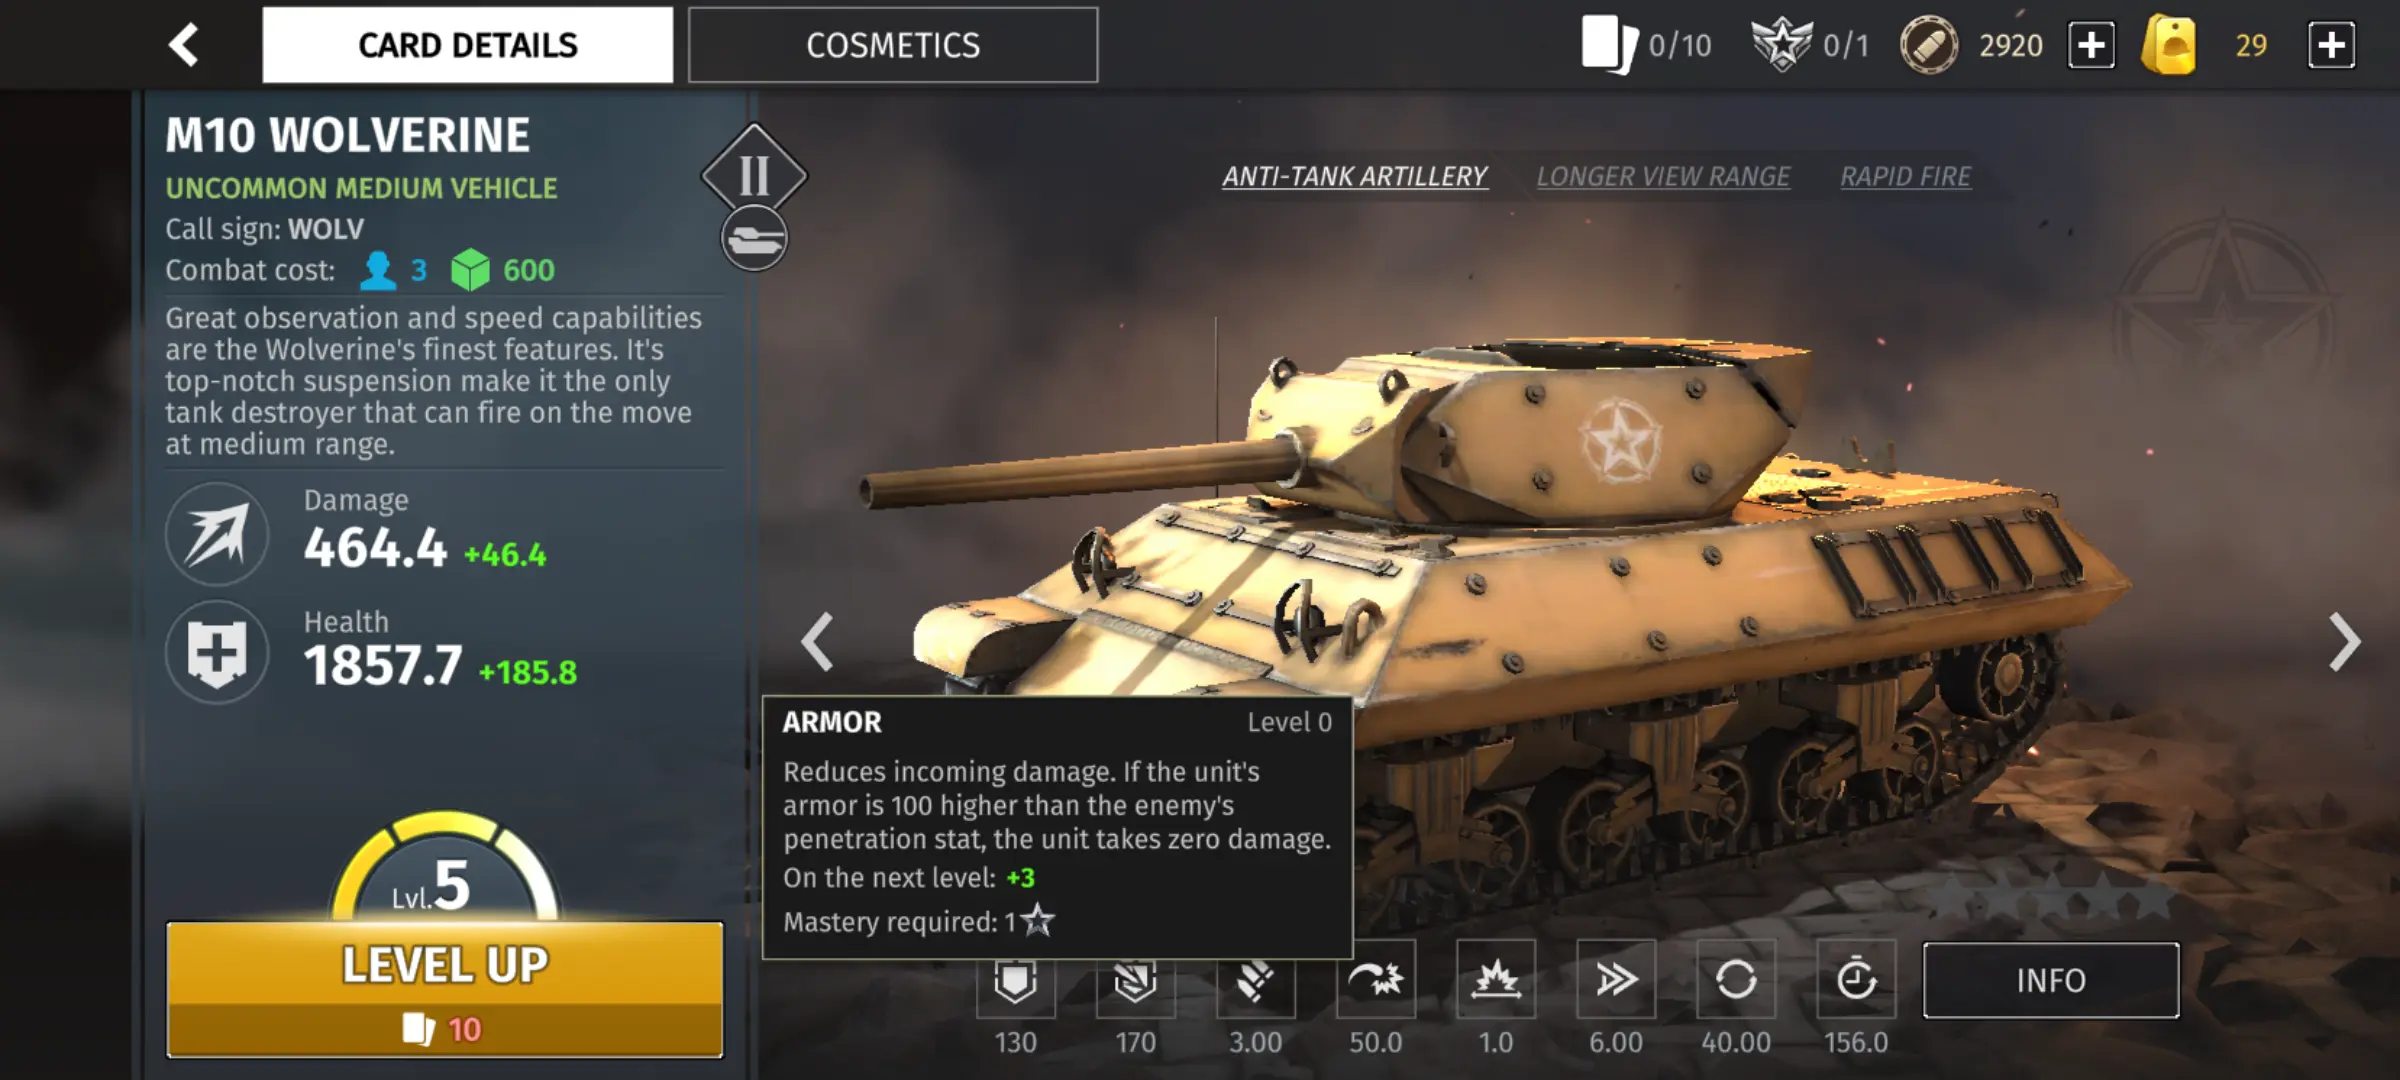
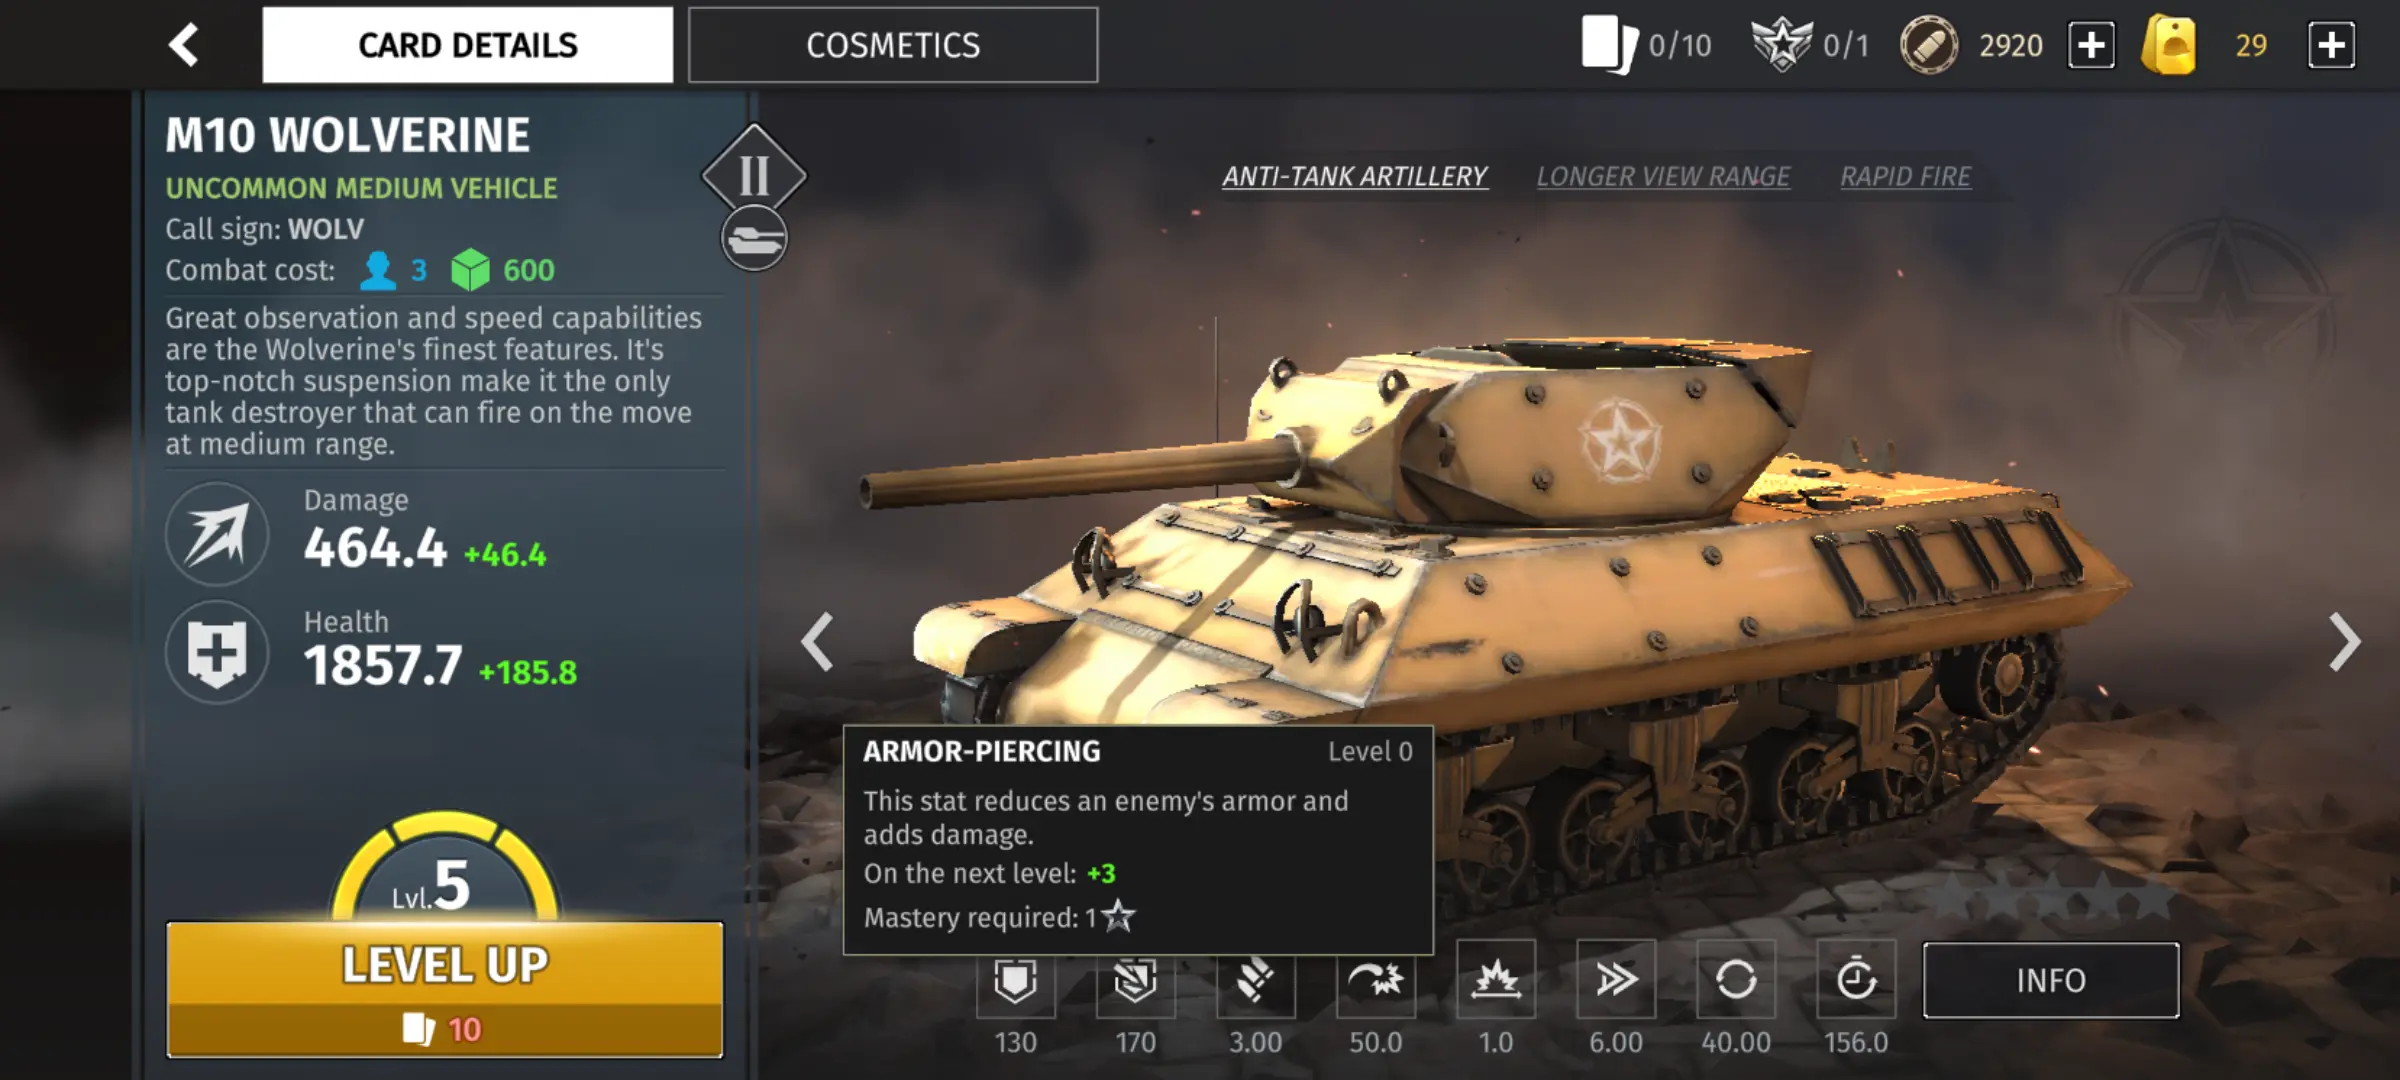
When you look at a unit’s stats, a big ol’ Damage and Health number assaults your eyes and it’s pretty easy to ignore everything else. There’s another pair of fairly important stats that determine a unit’s deadliness and toughness, located at the bottom of the Card Details screen: Armor and Penetration.
The shortest explanation: Armor reduces damage taken, Penetration increases damage given, and if a unit’s Armor stat is 100 units stronger than the attacker’s Penetration stat, then the unit getting shot takes no damage at all. This is why you don’t send Riflemen after tanks and Hanomags since piddly little bullets don’t do so well against 45 tons of rolled homogenous steel plating.
That being said, the armor rating displayed is always the front armor rating. This lets basic rifle infantry deal small amounts of damage to things like Hanomags from the rear, but this is still generally ill-advised: Bring Jaegers, Tank Hunters, or avoid and stall them by focusing on control points they’re not on, since now they’re down 2 infantry squads. Now if you’ve got a tank to take advantage of the enemy’s weaker rear armor, that’s more like it.
Support Powers
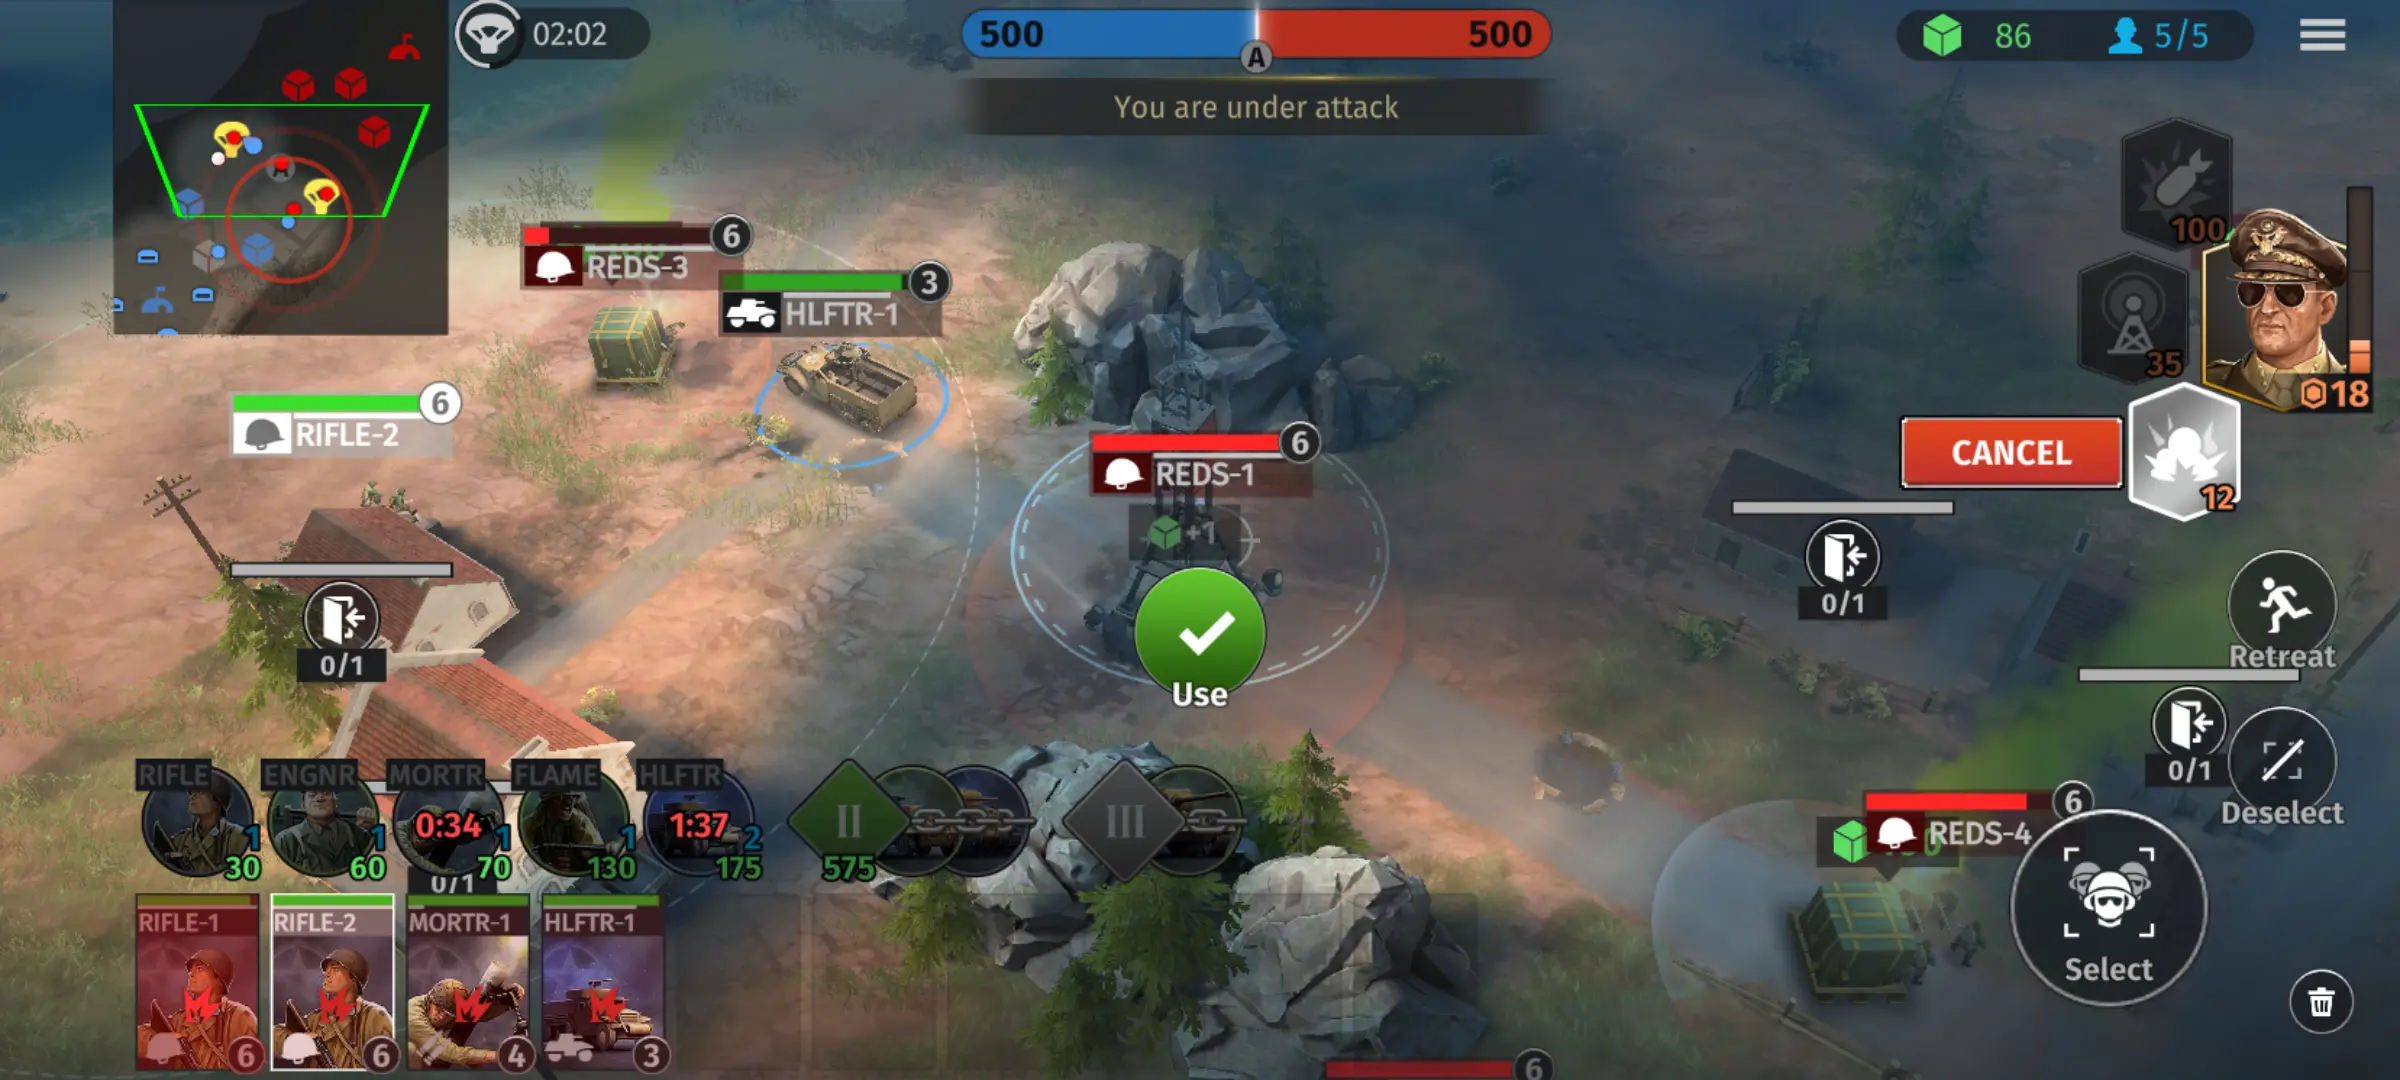
Each commander comes with Support Powers. Support Powers come in many forms: It can be anything from pulling a Machinegun Team and a Panzerjager tank destroyer out of thin air, army buffs, all the way to sudden nasty off-map bombardments. Each commander has 3 of them, and while the cheaper ones tend to be less powerful, they might be more useful simply because you can throw them at the enemy more often. Note that you cannot use Support Powers within a certain range of the enemy HQ. That way no side can just accumulate weapon barrages and win that way.
OUT-OF-COMBAT TIPS
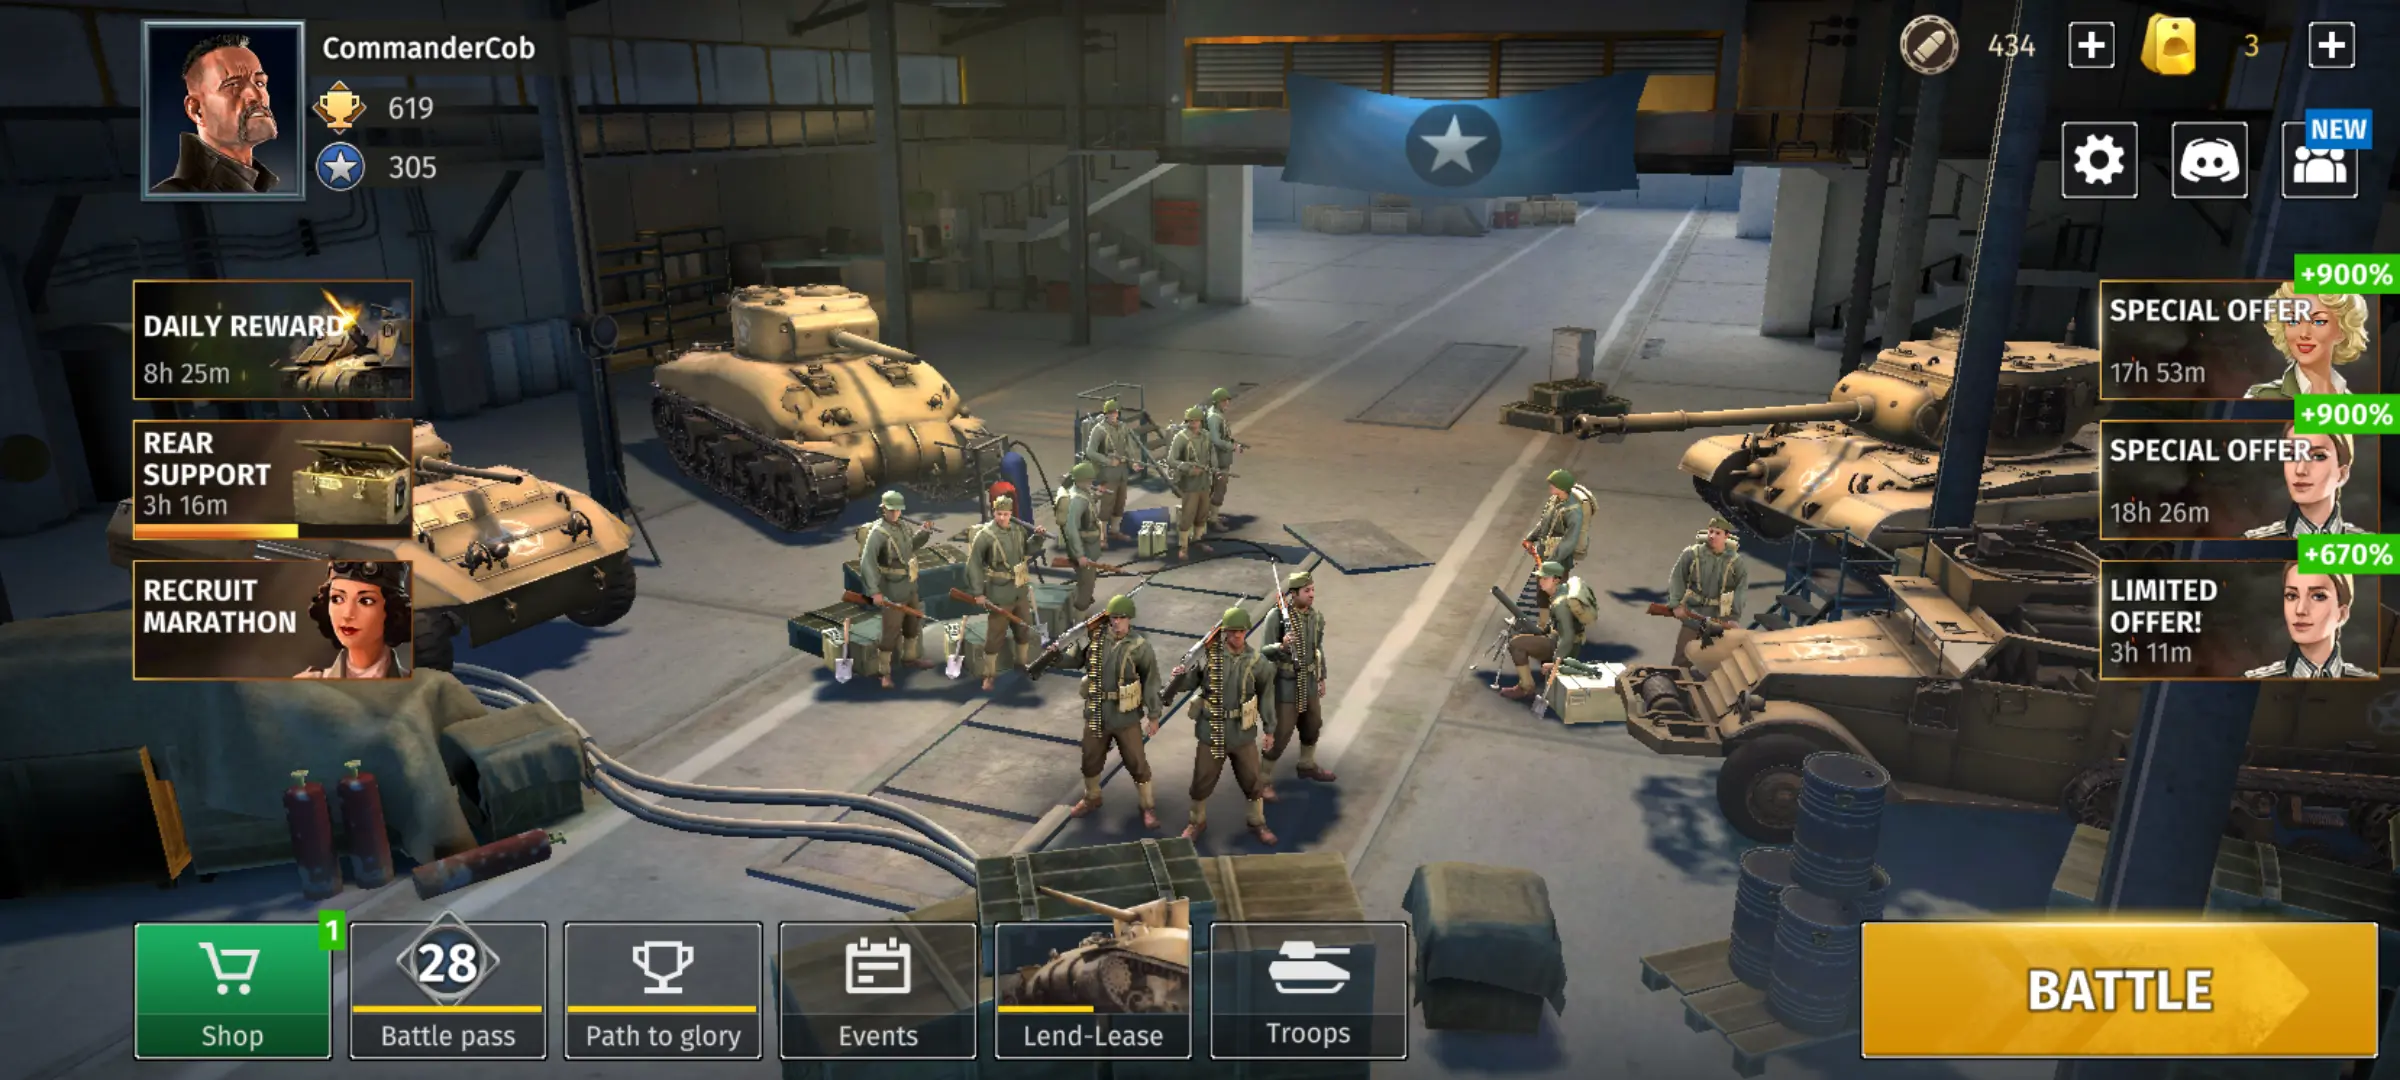
Unlike a lot of gacha mobile games, there isn’t a lot to do outside of combat in World War Armies beyond making a deck and leveling your units. That being said, here are some tips to make it easier to think up a good army to aim for once you start rolling in the Reinforcements Gacha.
Make A Strong T1-T2 Deck

The quickness of games and the expense of upgrading all the way to TIII necessitates a deck heavy with TI and TII units. TIII units are usually there if you want to seal the deal, and in the case of the super-expensive TIII heavy tanks, can turn a really bad fight around when paired with Engineers.
On the other hand, if your TI and TII game is weak, you’re not likely to last long enough to make it to TIII in the first place! This is why USA tends to be the toughest faction for new players to use, since their only TI halftrack-killer is the 57mm AT Gun, a Legendary (and therefore extremely rare) unit.
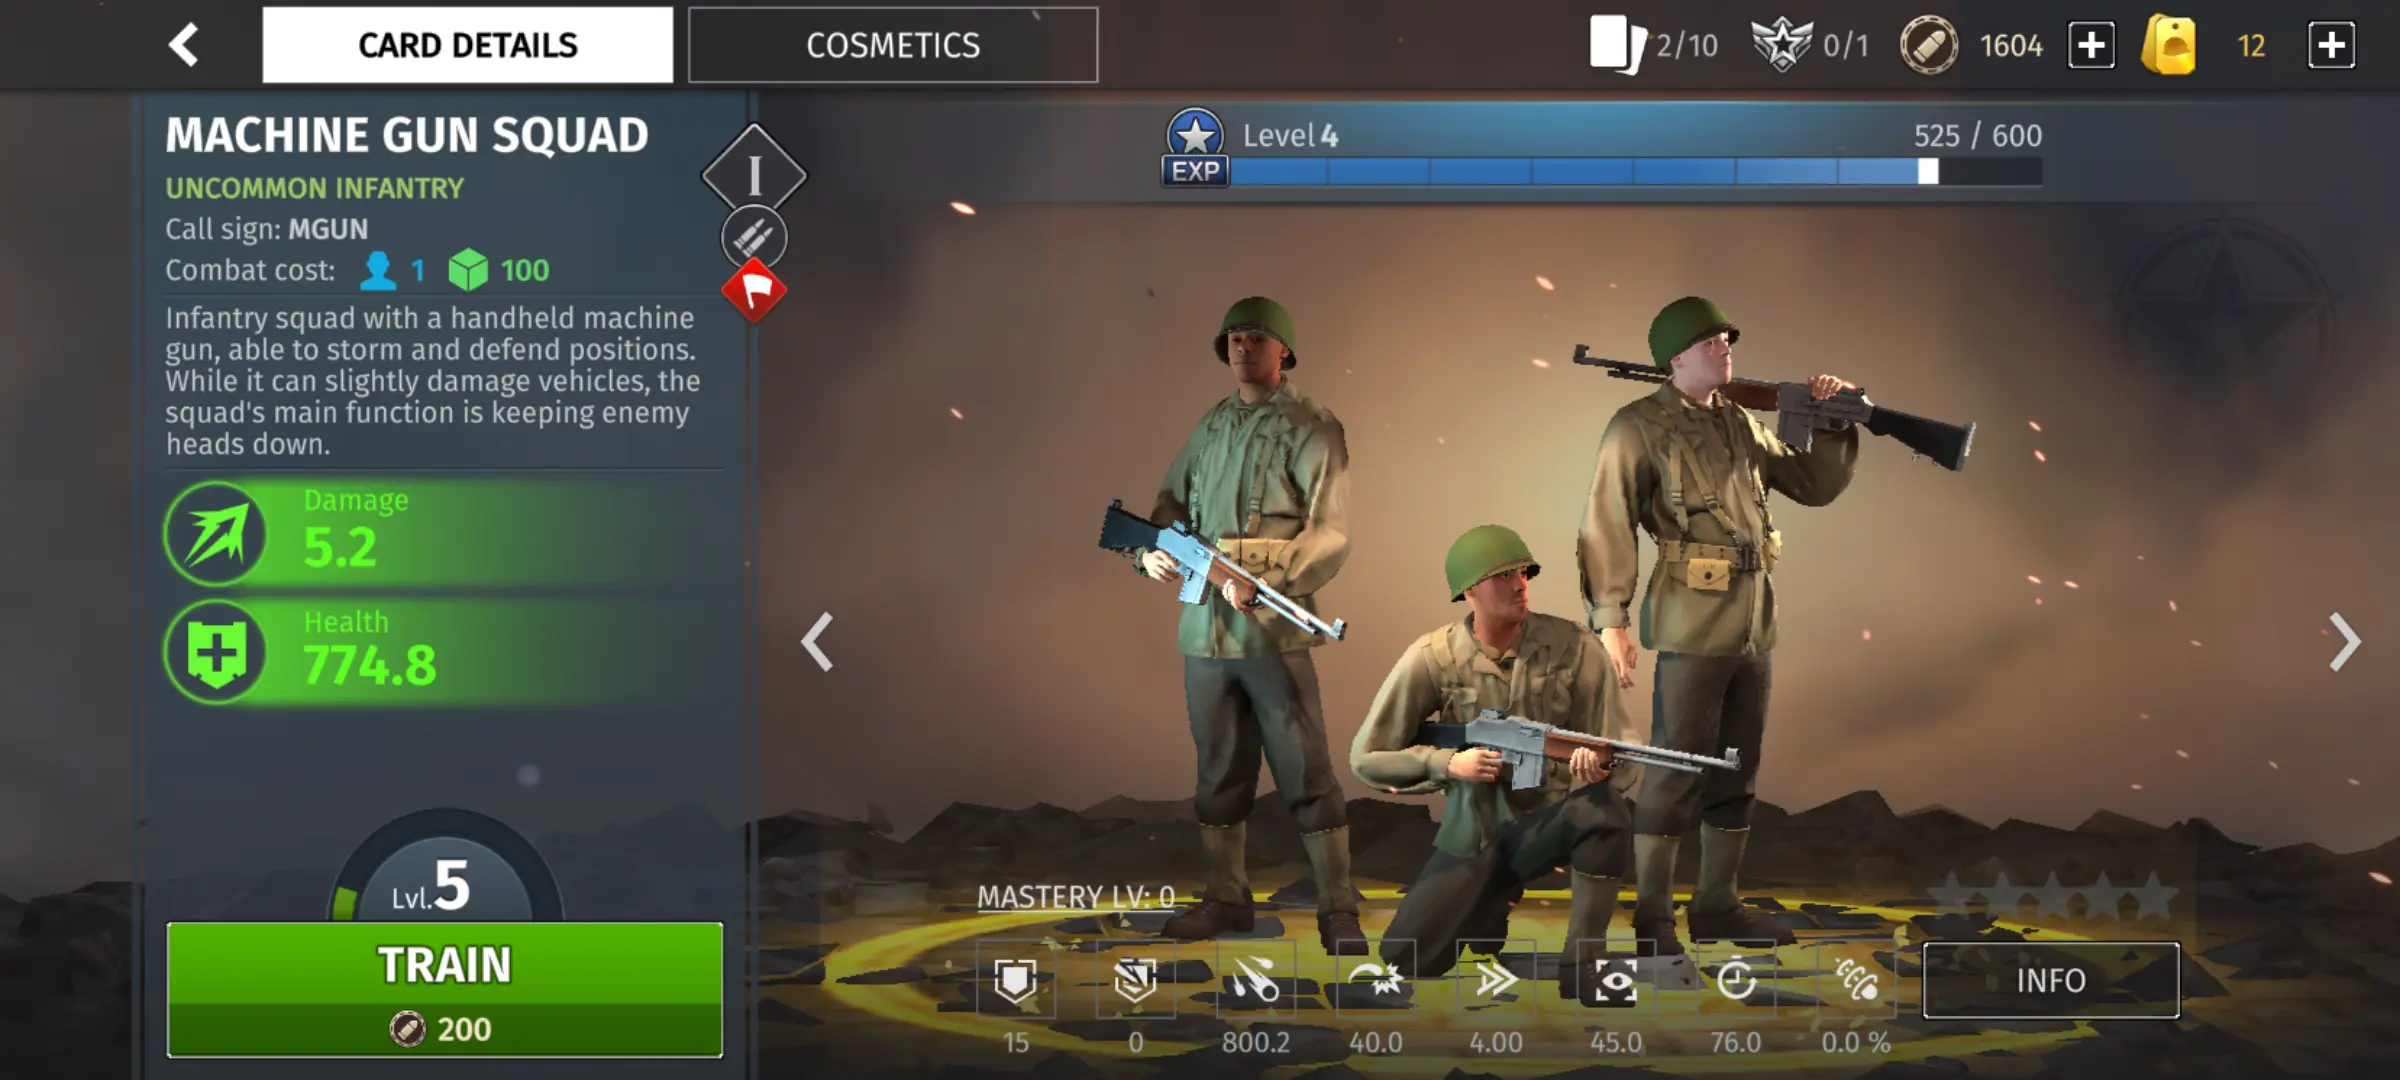
Some examples of particularly dangerous TI and TII units are German SdKfz 251 Hanomags and American M3A2 Halftracks (With more than 100 armor, you need hard-to-find TI anti-armor units to kill them or wait for TII), Jaegers, and Tank Hunters since they can deal with said Halftracks, Shermans since they’re a TII Medium able to fight even TIII units when there’s more than one of them, and Flame and Mortar Teams of any kind. Things only get wilder as you unlock new units such as the paradrop-deployed Fallschirmjagers, the 57mm AT gun, etc.
You Get The Cheapest Guy On Your Deck For Free Once

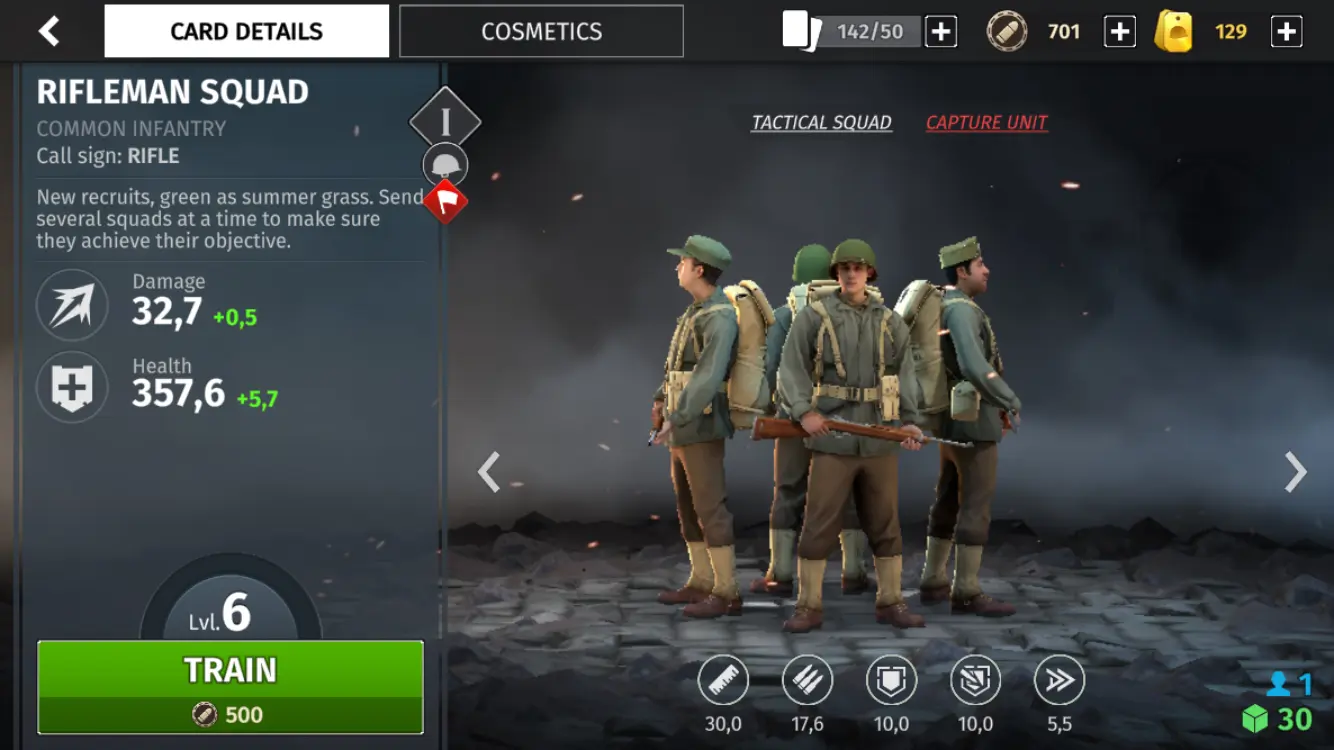
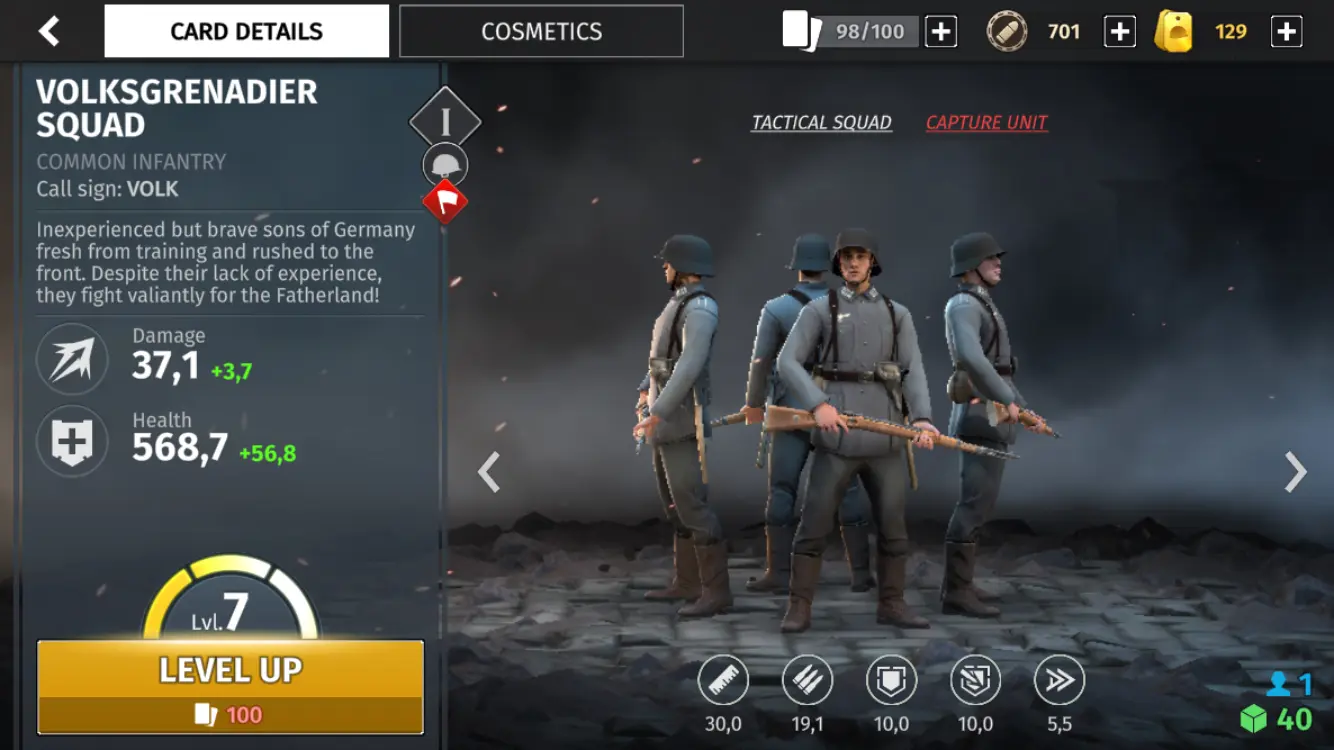
If you notice the start of every match with a normal deck, you’ll have a Rifleman team, a Volksgrenadier team, or a Red Army team depending on what faction you pick. But what if you get rid of your basic infantry from your deck? Turns out, whatever is cheapest takes its place at the start of a match. This has its upsides and downsides: Starting off with a free Machinegunner team is always very funny, and gives you a large advantage in the initial cap-off as this is a good use of Troop Limit.
The bad part is that you suddenly don’t have access to cheaper units the whole match, because they’re not in your deck! It can still be a good idea if you last long enough to get through the initial supply drought since you can pay for your more expensive army if you cannily and diligently go after Supply Drops and remember to put Listening Posts on your Control Points. Especially since TII vehicles don’t need replacement as often as Infantry units do, and you wind up accumulating Supply thanks to that.
Vehicle-Heavy Deck? Bring Engineers!
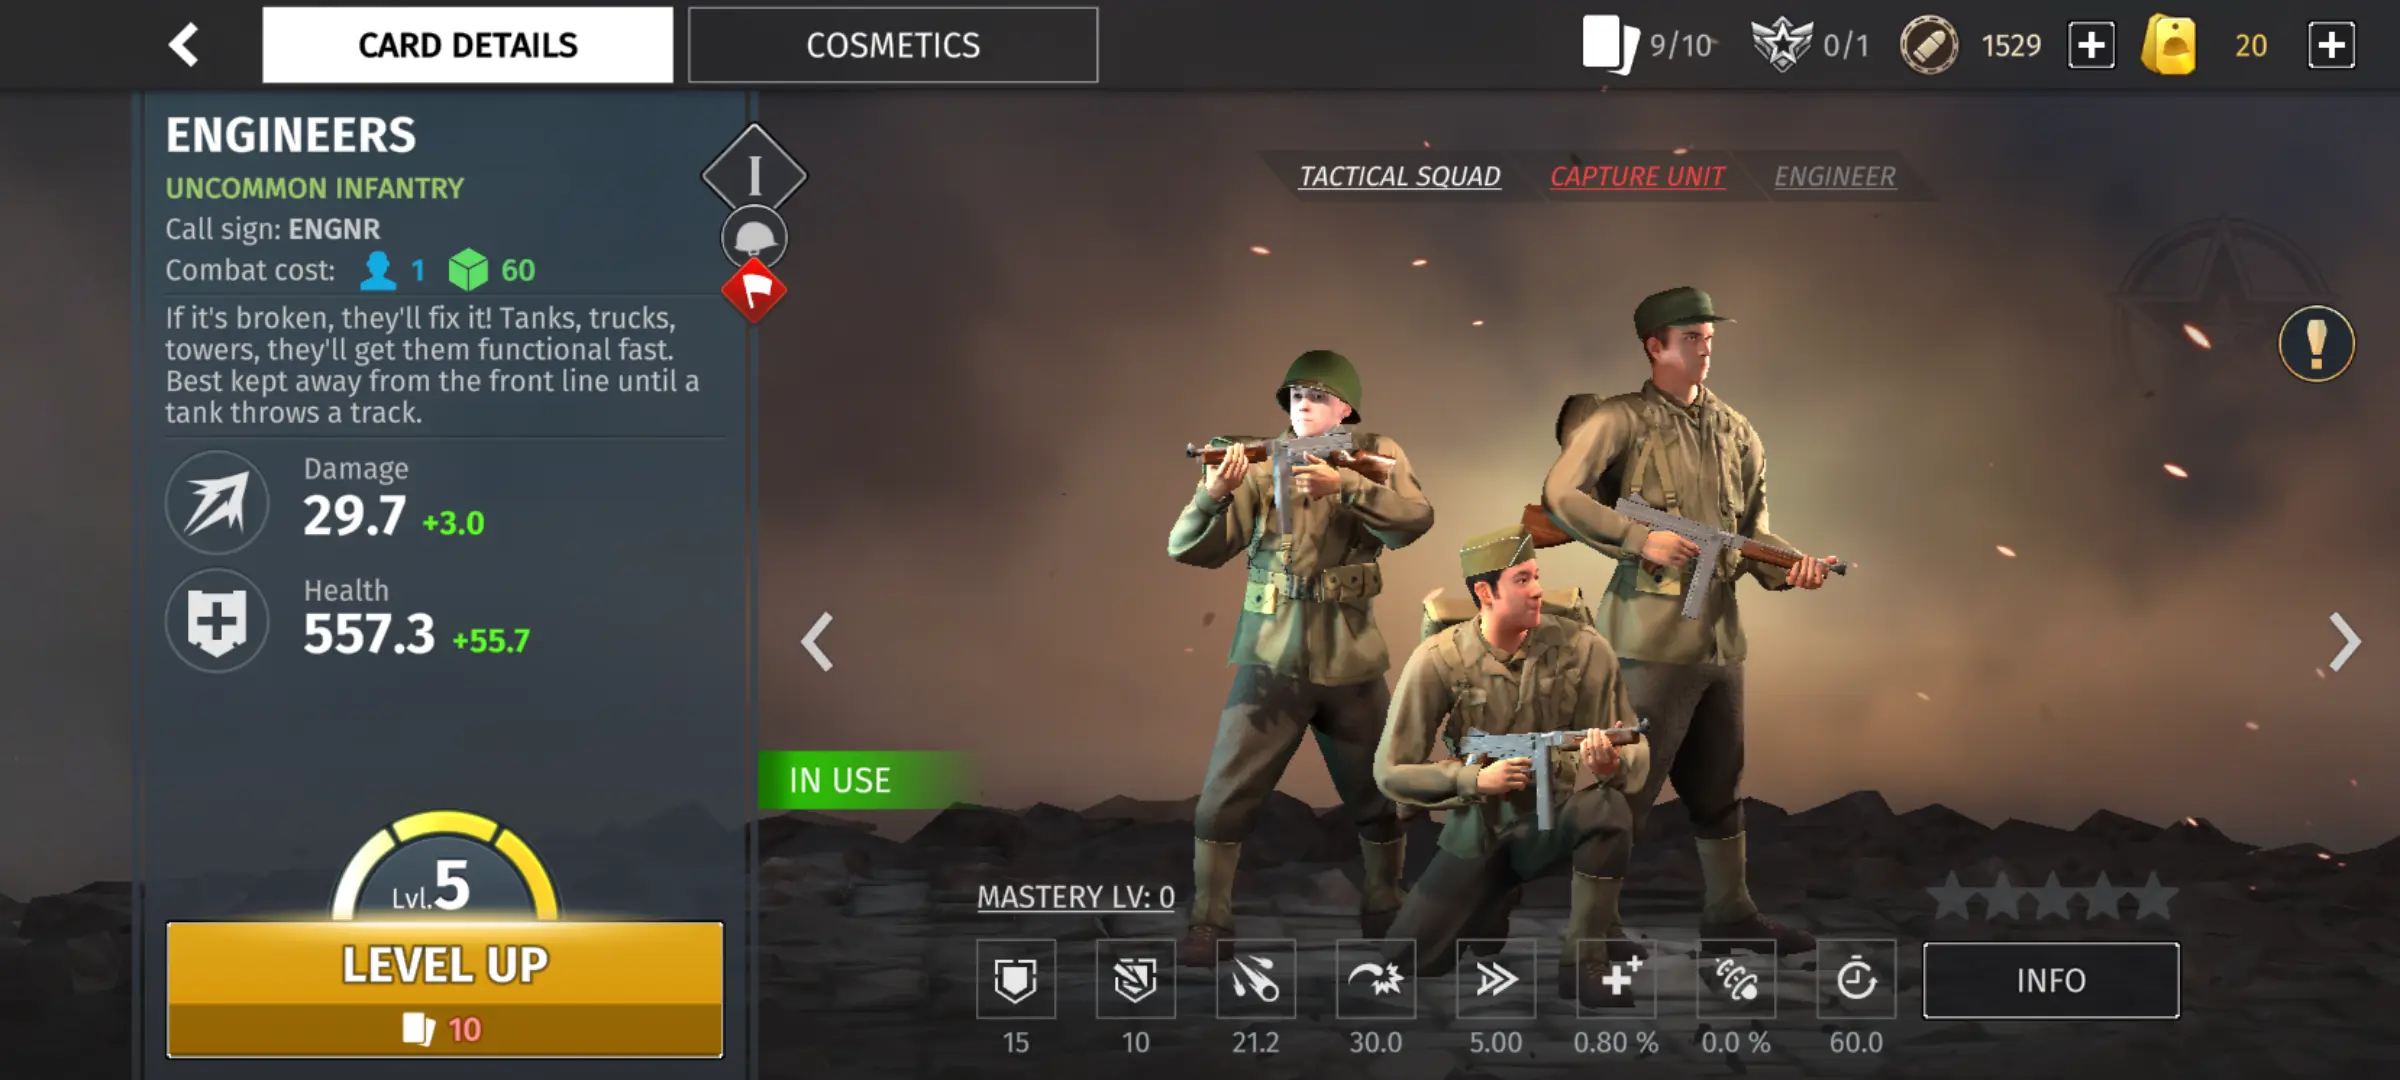
Even things like big heavy tanks can get chipped badly throughout a fight. Unlike retreating infantry and light vehicles, the fatter armored vehicles are precisely that: Fat! They take a while to turn around and run and are often not smart enough to drive in reverse to keep their front armor pointed at the enemy, so if they’re caught with low HP they are often unable to escape to HQ for repairs.
That’s where units like Engineers come in: Having Engineers on call to fix vehicles near the front allows those vehicles to hold points for much longer and eventually raise their Veterancy throughout a battle.
They can also repair vehicles much faster than HQ repairs, though you have to actively order them to repair vehicles, unlike the HQ and units with the MEDIC tag which can heal infantry just by standing close to them. An exception is the Opel Blitz truck, which trades away guns for the ability to both repair vehicles and heal infantry in a radius.
Make A Deck According To Your Plan
Once you get enough cards, set up a deck, preferably a fairly balanced one that lets you cover many options, biased toward an overall battle plan. Are you gunning to defend control points to the end? Get some tankier units in your deck and anything with the Medic or Engineer tab to keep them topped up without needing to retreat constantly.
Is your policy “They can’t kill me if they’re dead!”? Then get some big-gun tank destroyers and artillery so they can’t even come close. Want to annoy the enemy away from control points early in the game? Get some TI light vehicles and some Mortar teams (Or a big ol’ half-track if you also want to hold a point hard early) to scare enemies away from early capping.
Do Your Quests and Events
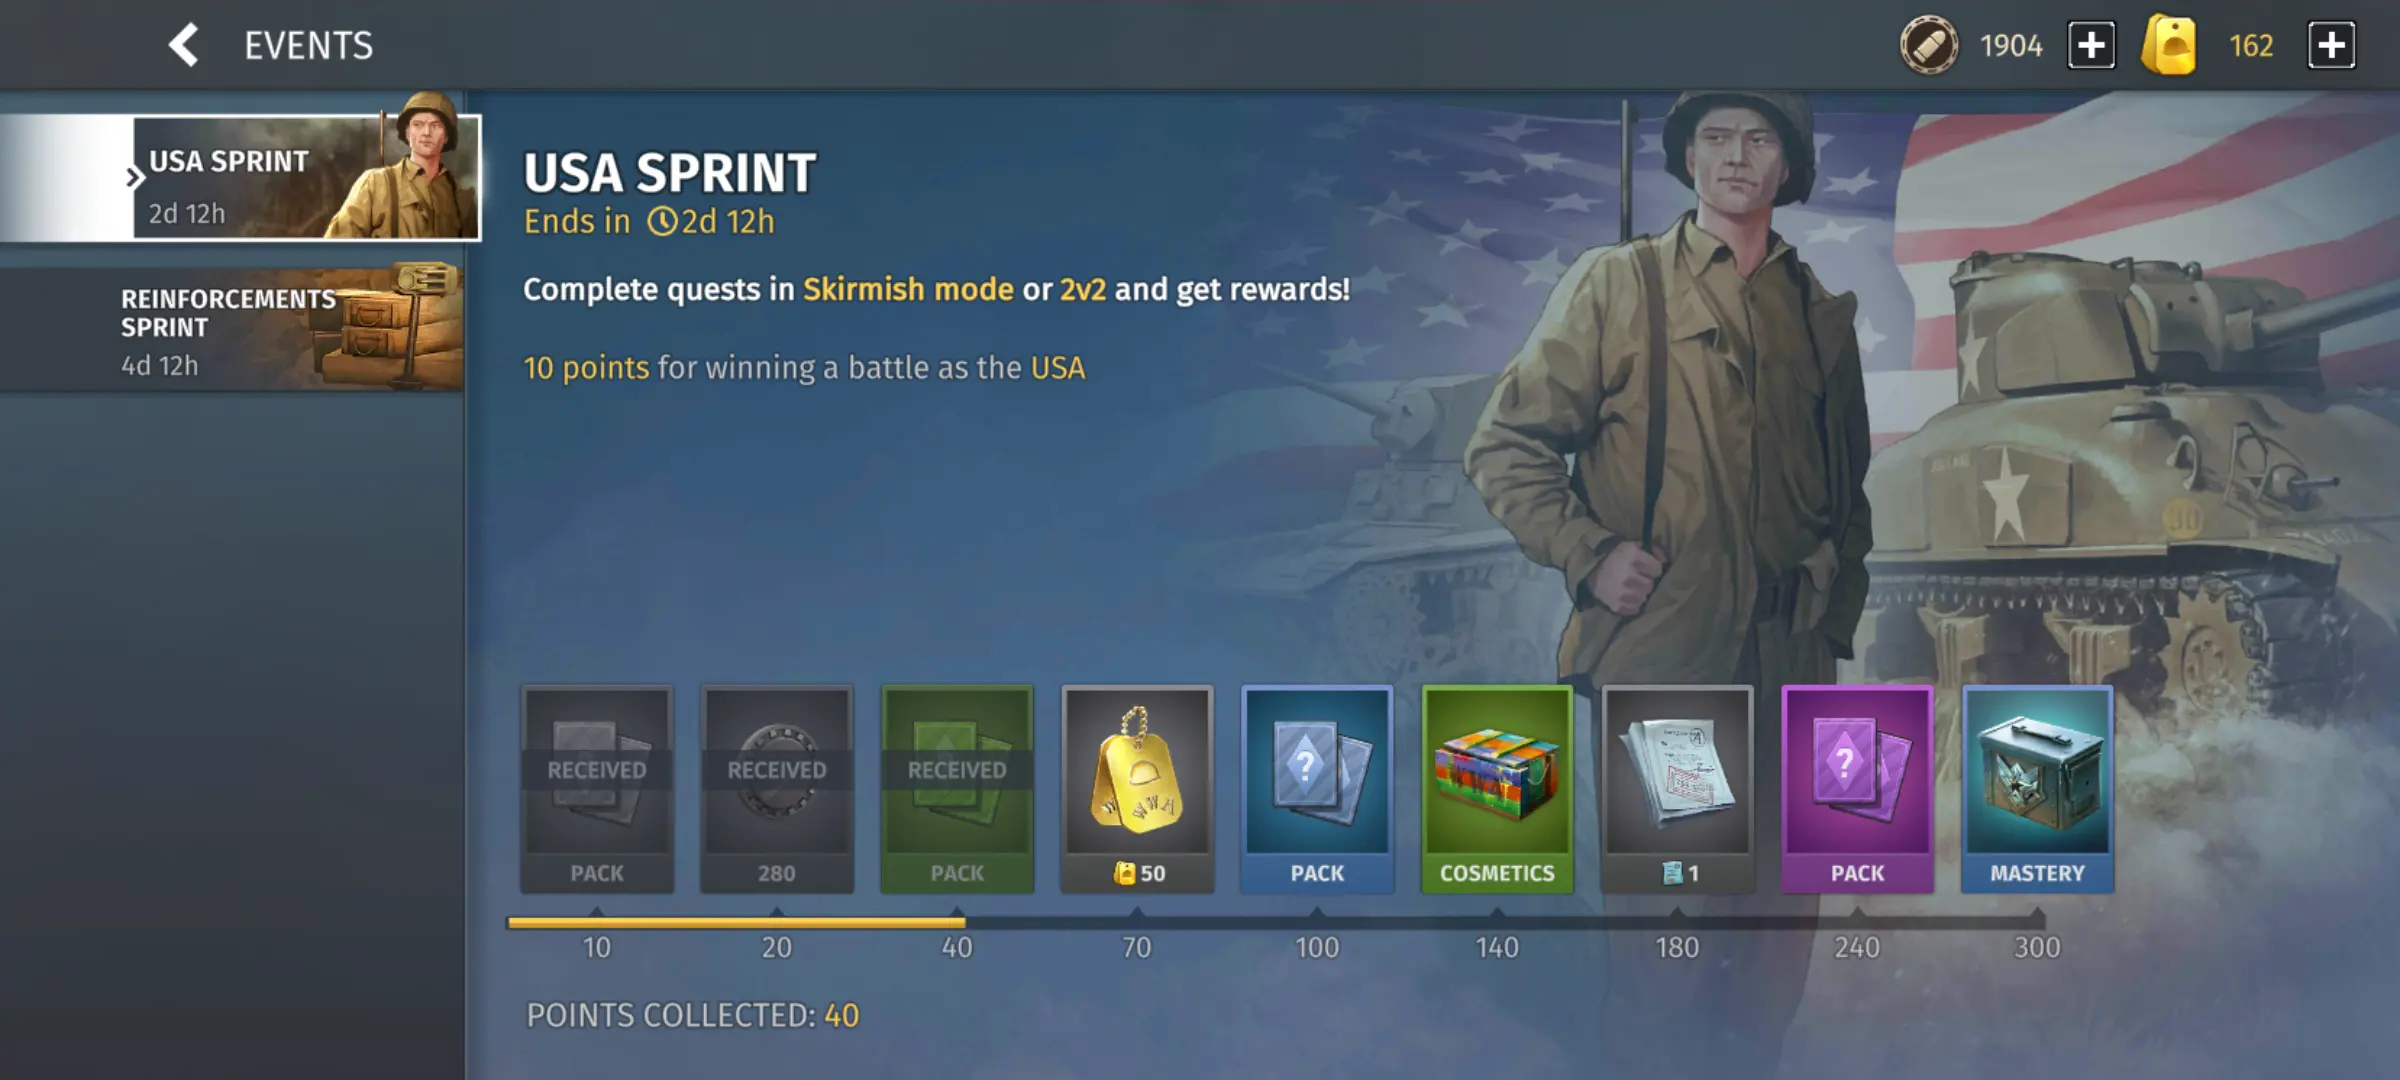
Most of your profits to get new unit cards come from Events and Battlepass quests. This means building your army over the long term requires you to do the various tasks the game asks. Usually, this means learning the ins and outs of all 3 factions, the USA, the Germans, and the USSR, as these quests often have you trying to pull things off with units of each faction.
Reinforcements Gacha? Lend Lease Contracts? Or Events?

The way you unlock units is usually via the Reinforcements gacha. Every day, certain unit types become available, usually limited to several lists: In a day, maybe only German Infantry, T2 units from any nation, USA Vehicles, and USSR Vehicles may be available.
Think of them as very odd, very wide banner gachas. It’s usually a good idea to save your Tokens for an event that lets you take advantage of the Reinforcements Gacha, or by spending them on Lend Lease contracts instead: Reinforcement Gacha drops tend to be heavy with Common units, which is fine since they work well enough, but some niches are only filled by higher rarity units. The USA suffers from this very badly, since the only TI vehicle buster they can unlock in the Gacha is the 57mm AT Gun, a Legendary.
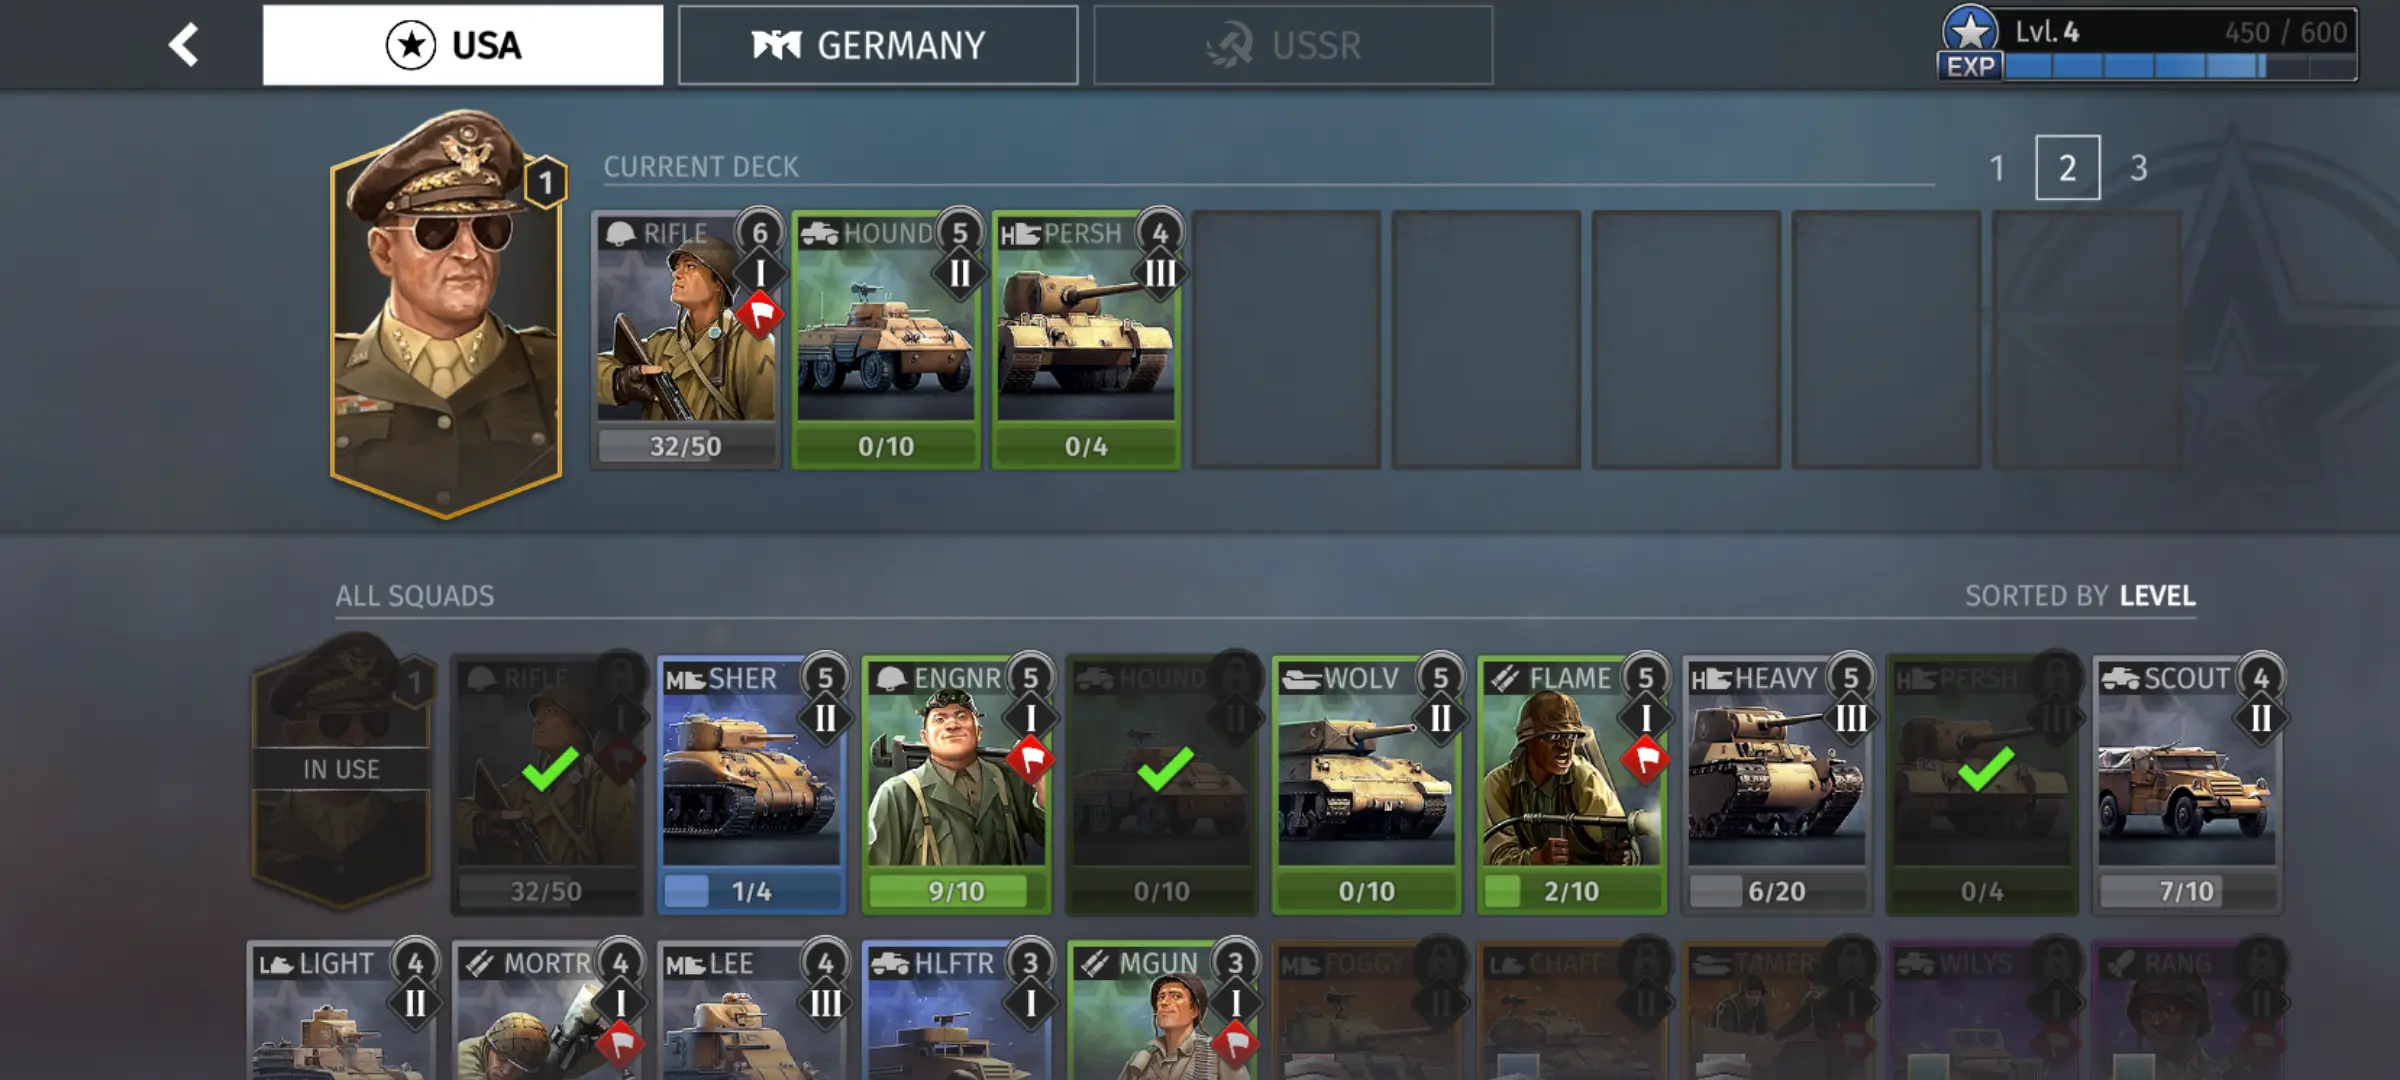
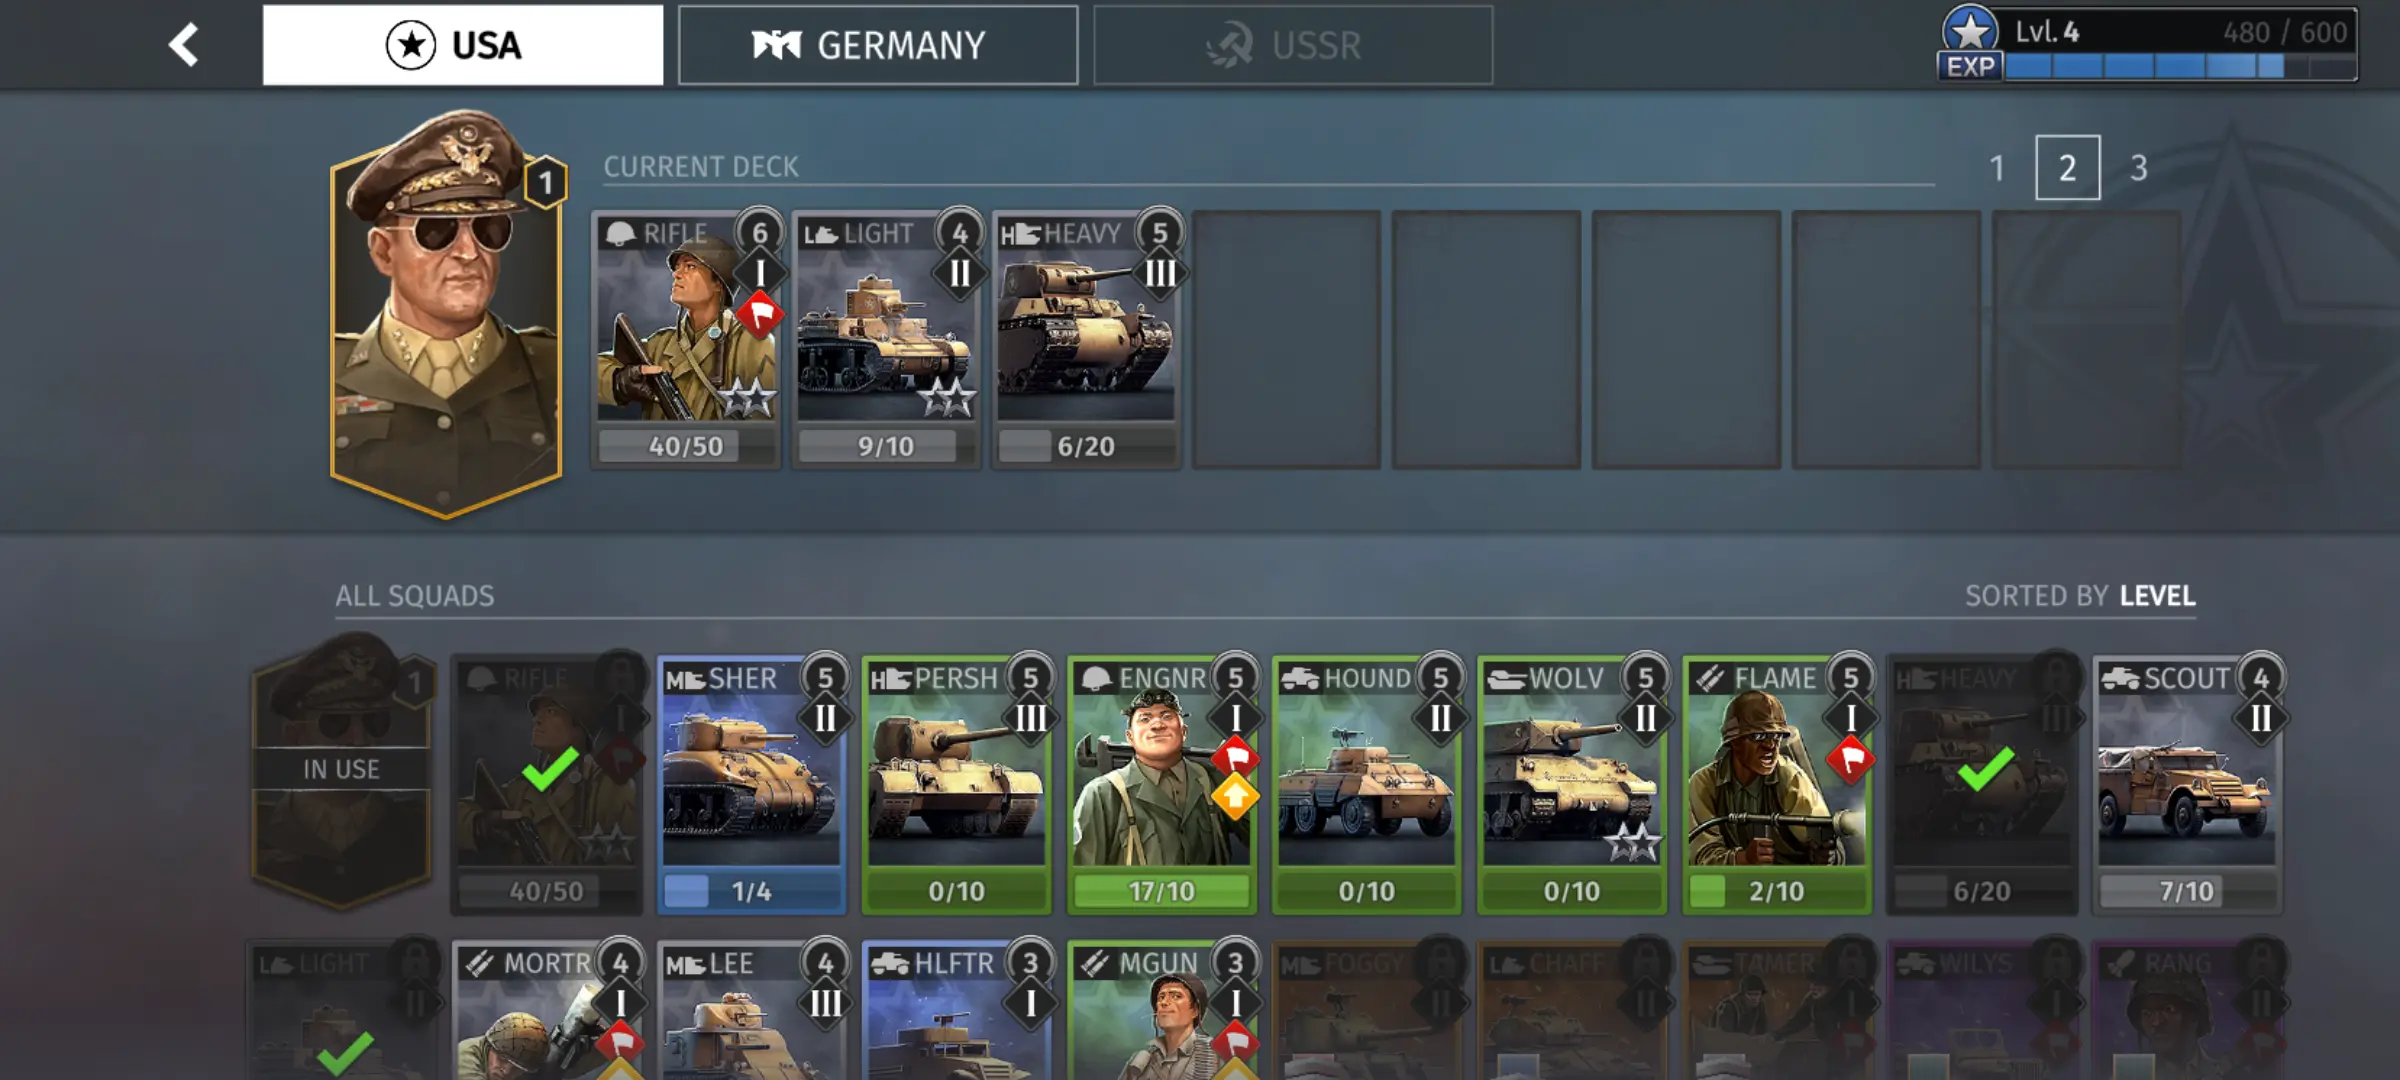
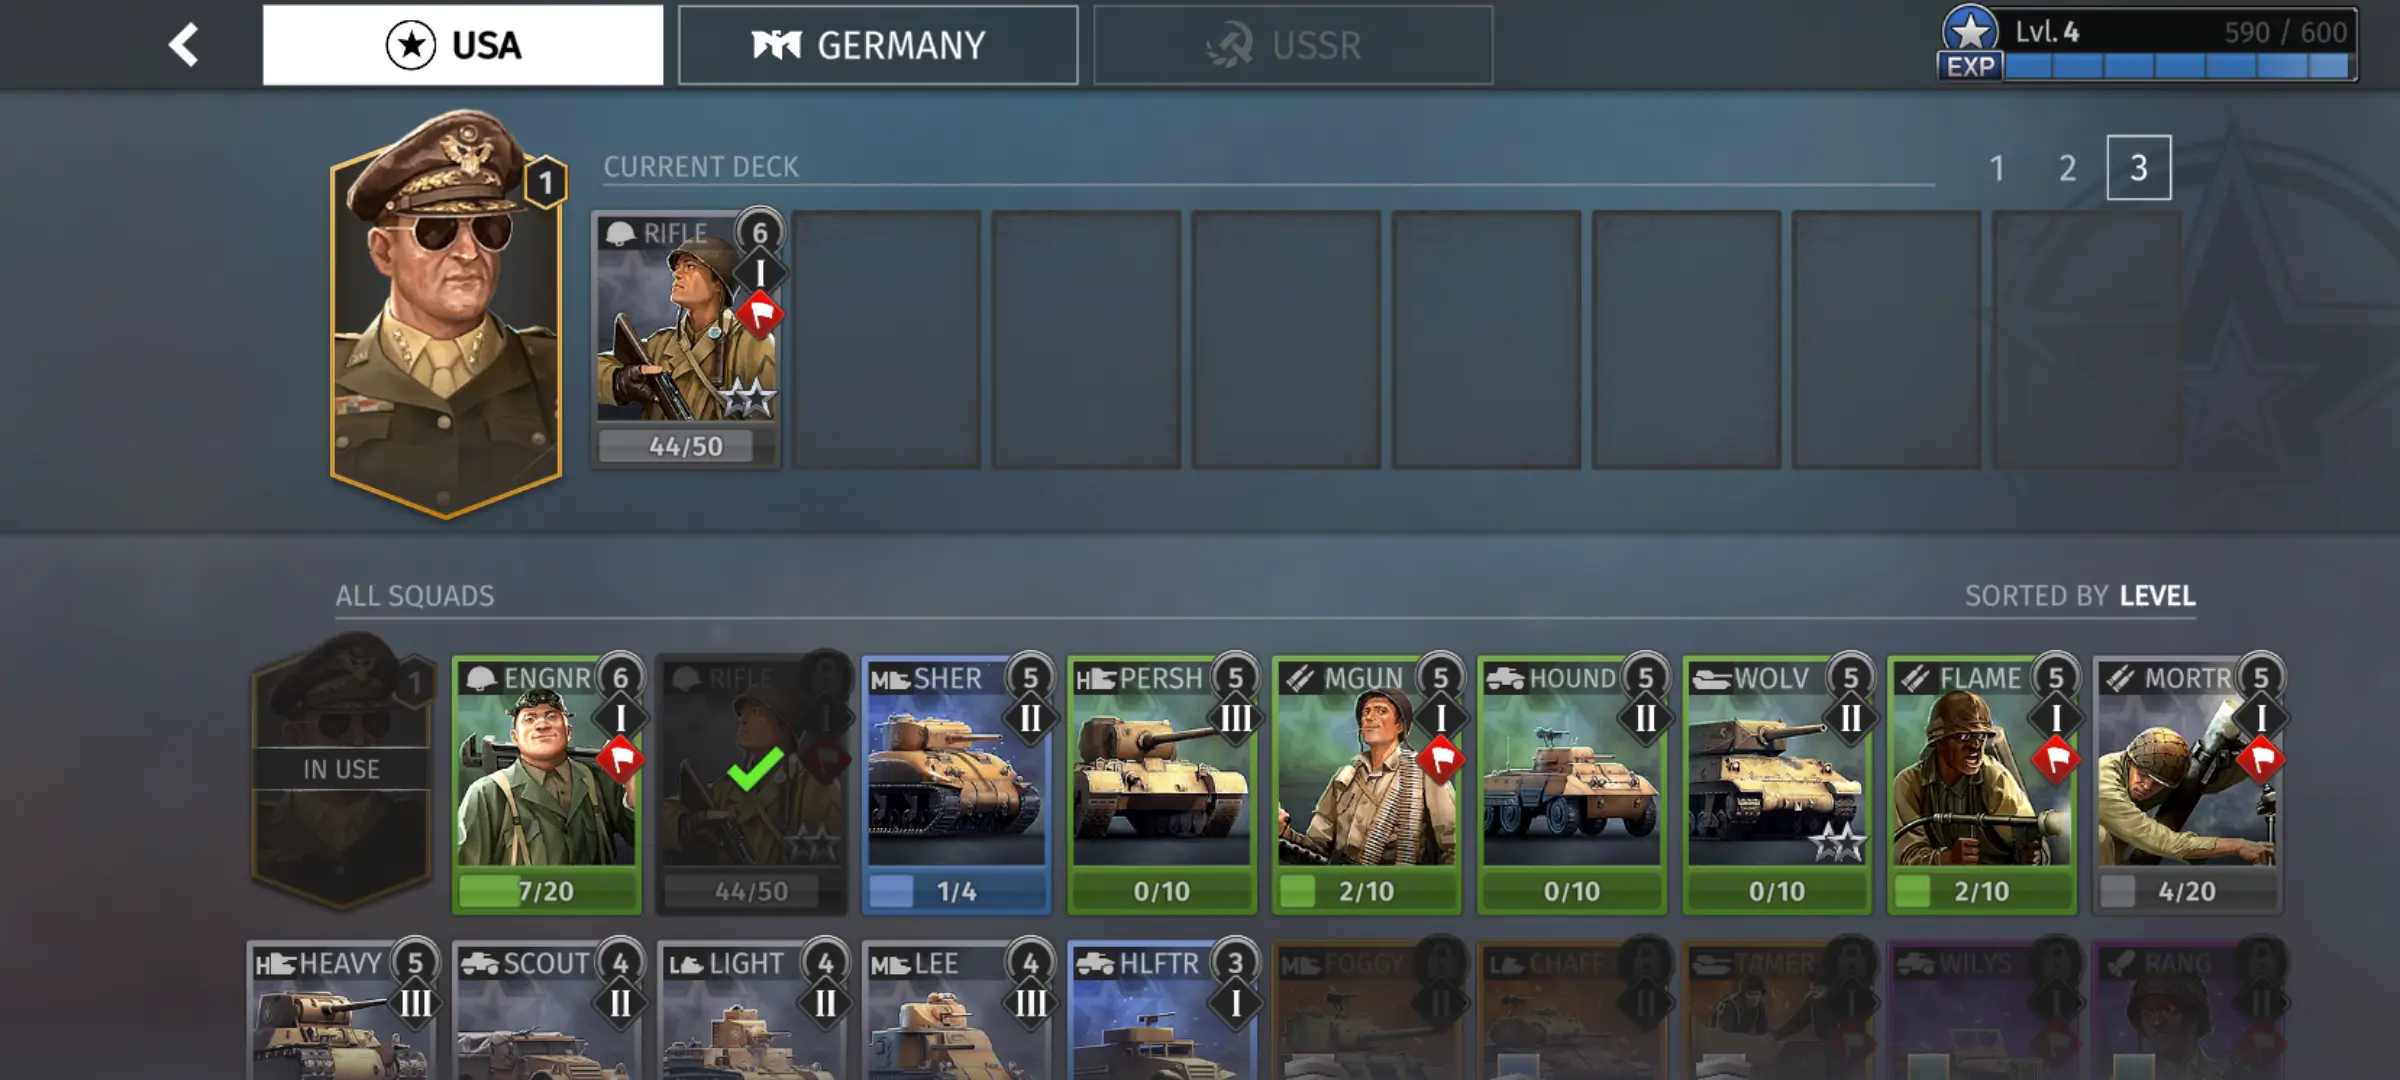
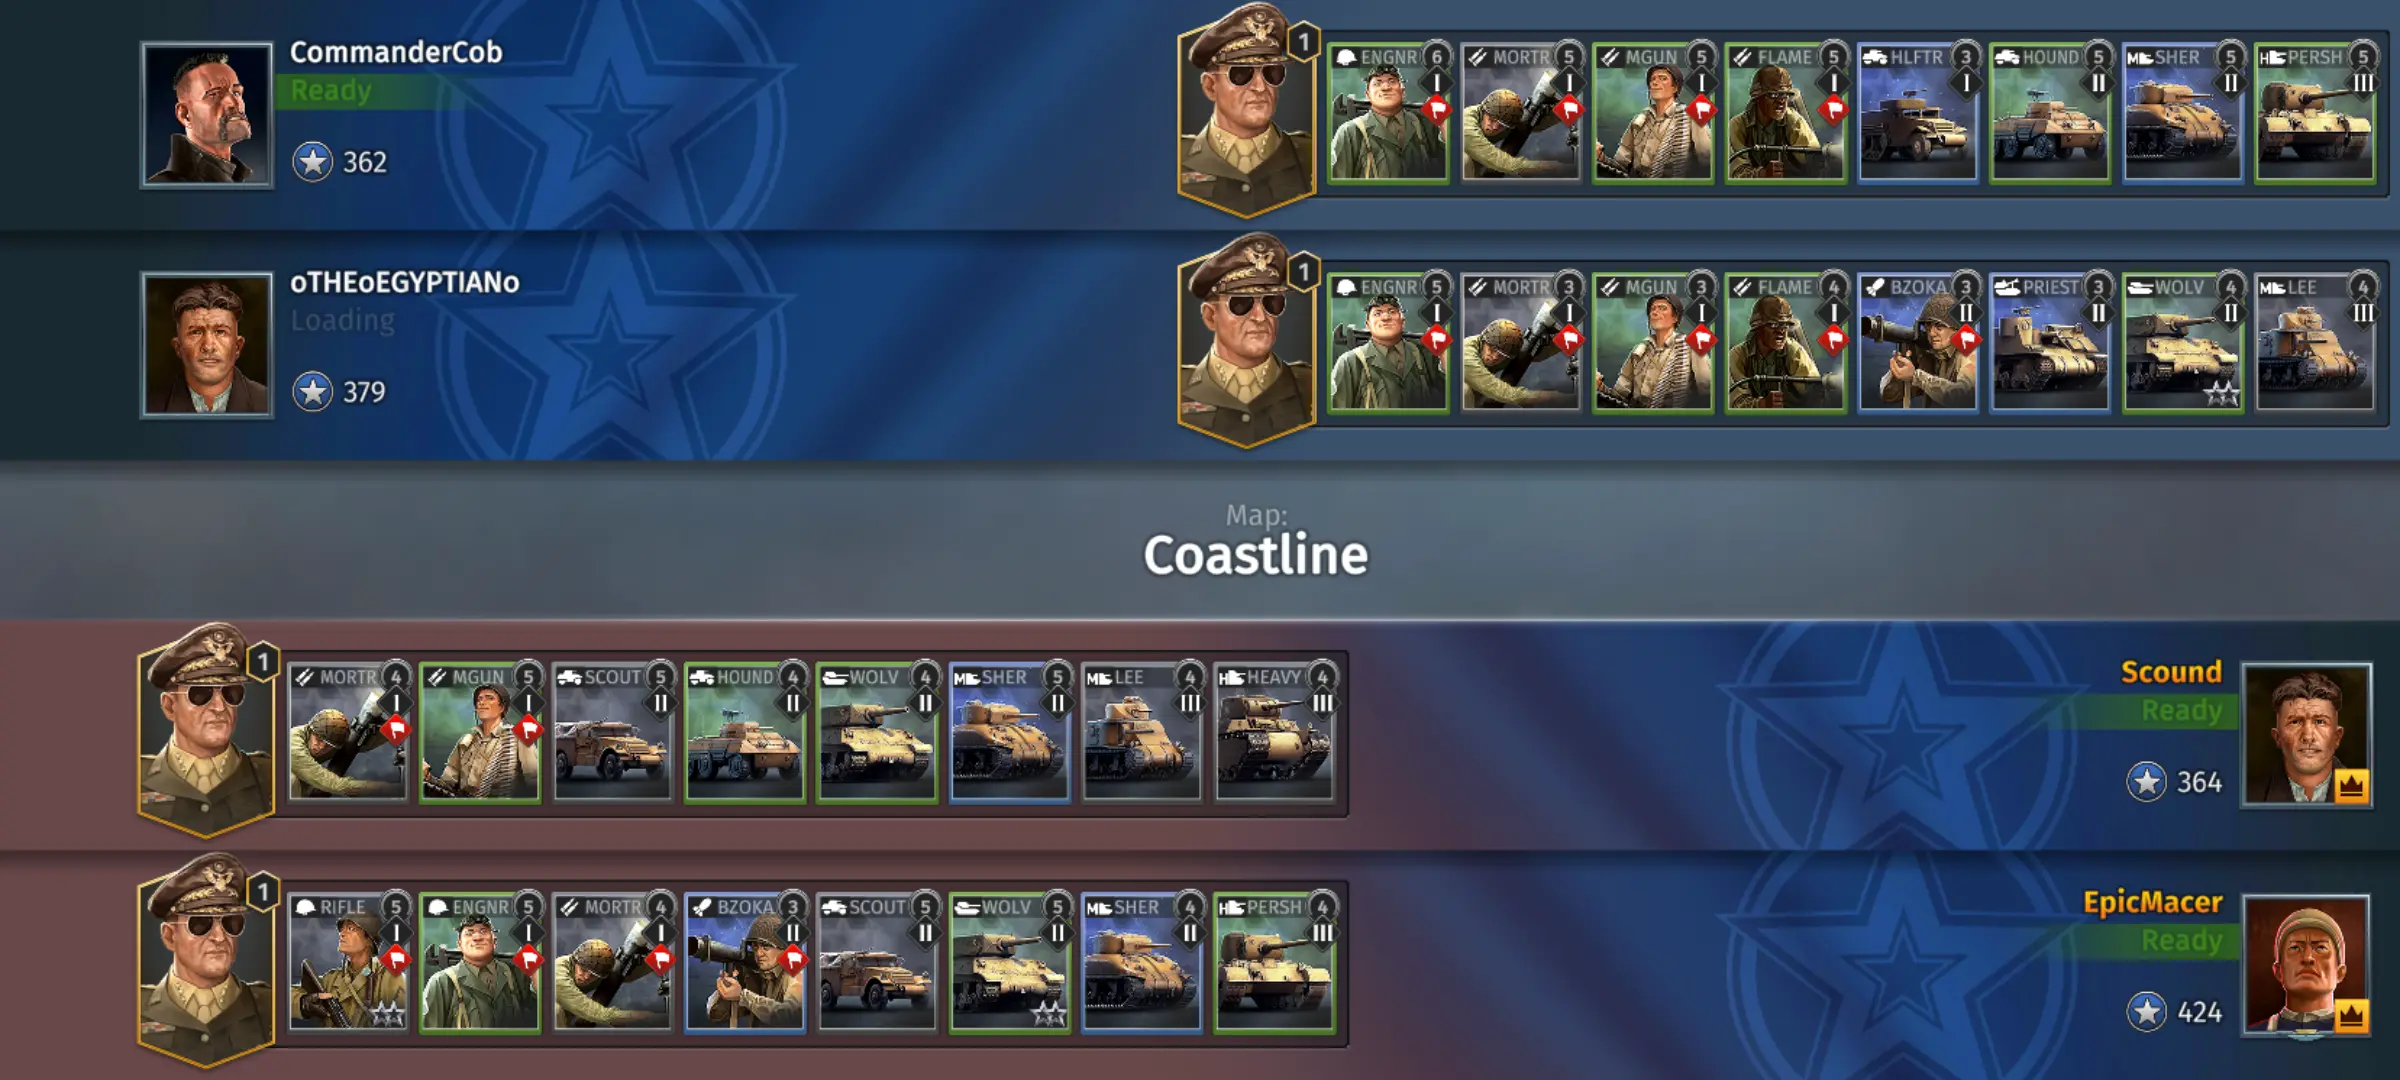
Army Building

In the Troops Screen, you can build an army for each faction. You do this by taking the cards you have and picking which ones go into your 8-slot deck. One rule is to always make sure you have at least one TI Capture Unit on your deck, usually, whichever is the cheap basic infantry of whatever faction you’re making a deck for, with 2 or 3 different infantry units being a good number just so you can immediately call in 3-4 squads to capture 3 points early into a fight, unless you want an early Halftrack/Hanomag opening instead. This is because calling in new units usually leaves a card on cooldown even if you can afford more of the same unit.
Unit Leveling
Leveling units, not to be confused with Veterancy which is an upgrade that only lasts for the duration of a match, is a way to permanently upgrade a unit. Leveling a unit is simple: First, you pay Coins to fill a Level bar which gives small incremental stat boosts, then once the bar is full, you use duplicate unit cards to get a bigger stat boost, leveling up that unit.
The basic Health and Damage stats are upgraded this way, but not the stats at the bottom of the screen such as Armor, Fire Rate, and Penetration lest you suddenly have infantry that can shrug off tank shells due to armor penetration mathematical nonsense. Penetration, Armor, and the other bottom-of-the-screen stats can be upgraded with Mastery Points, available in the Shop, but you can only really upgrade each of those stats once.
BATTLE CONTROL
Now you can plan and over-plan and plan under and above the battlefield, but as General Helmuth von Moltke the Elder once said, paraphrased as this by most people; “No plan survives first contact with the enemy”. Here are some tips to keep in mind once your men get in the soup.
No Higher Tier Units? Tier Up Anyway!
Sometimes, if a fight goes well enough, you might not even pull out a TIII unit the whole match, especially if you have powerful TII units such as the M4 Sherman tank. That’s no reason not to go all the way to TIII anyway: Escalating tiers doesn’t just allow you to deploy higher tier units, it also increases your Troop Limit by 5 per tier, or 4 in Co-Op 2v2 matches. Since bigger vehicles such as medium tanks often take up 3 units of Troop Limit, you’ll need TIII even if all you’re deploying are TII tanks. Not a lot will stand up to two Shermans at once alone!
Use Support Powers Liberally
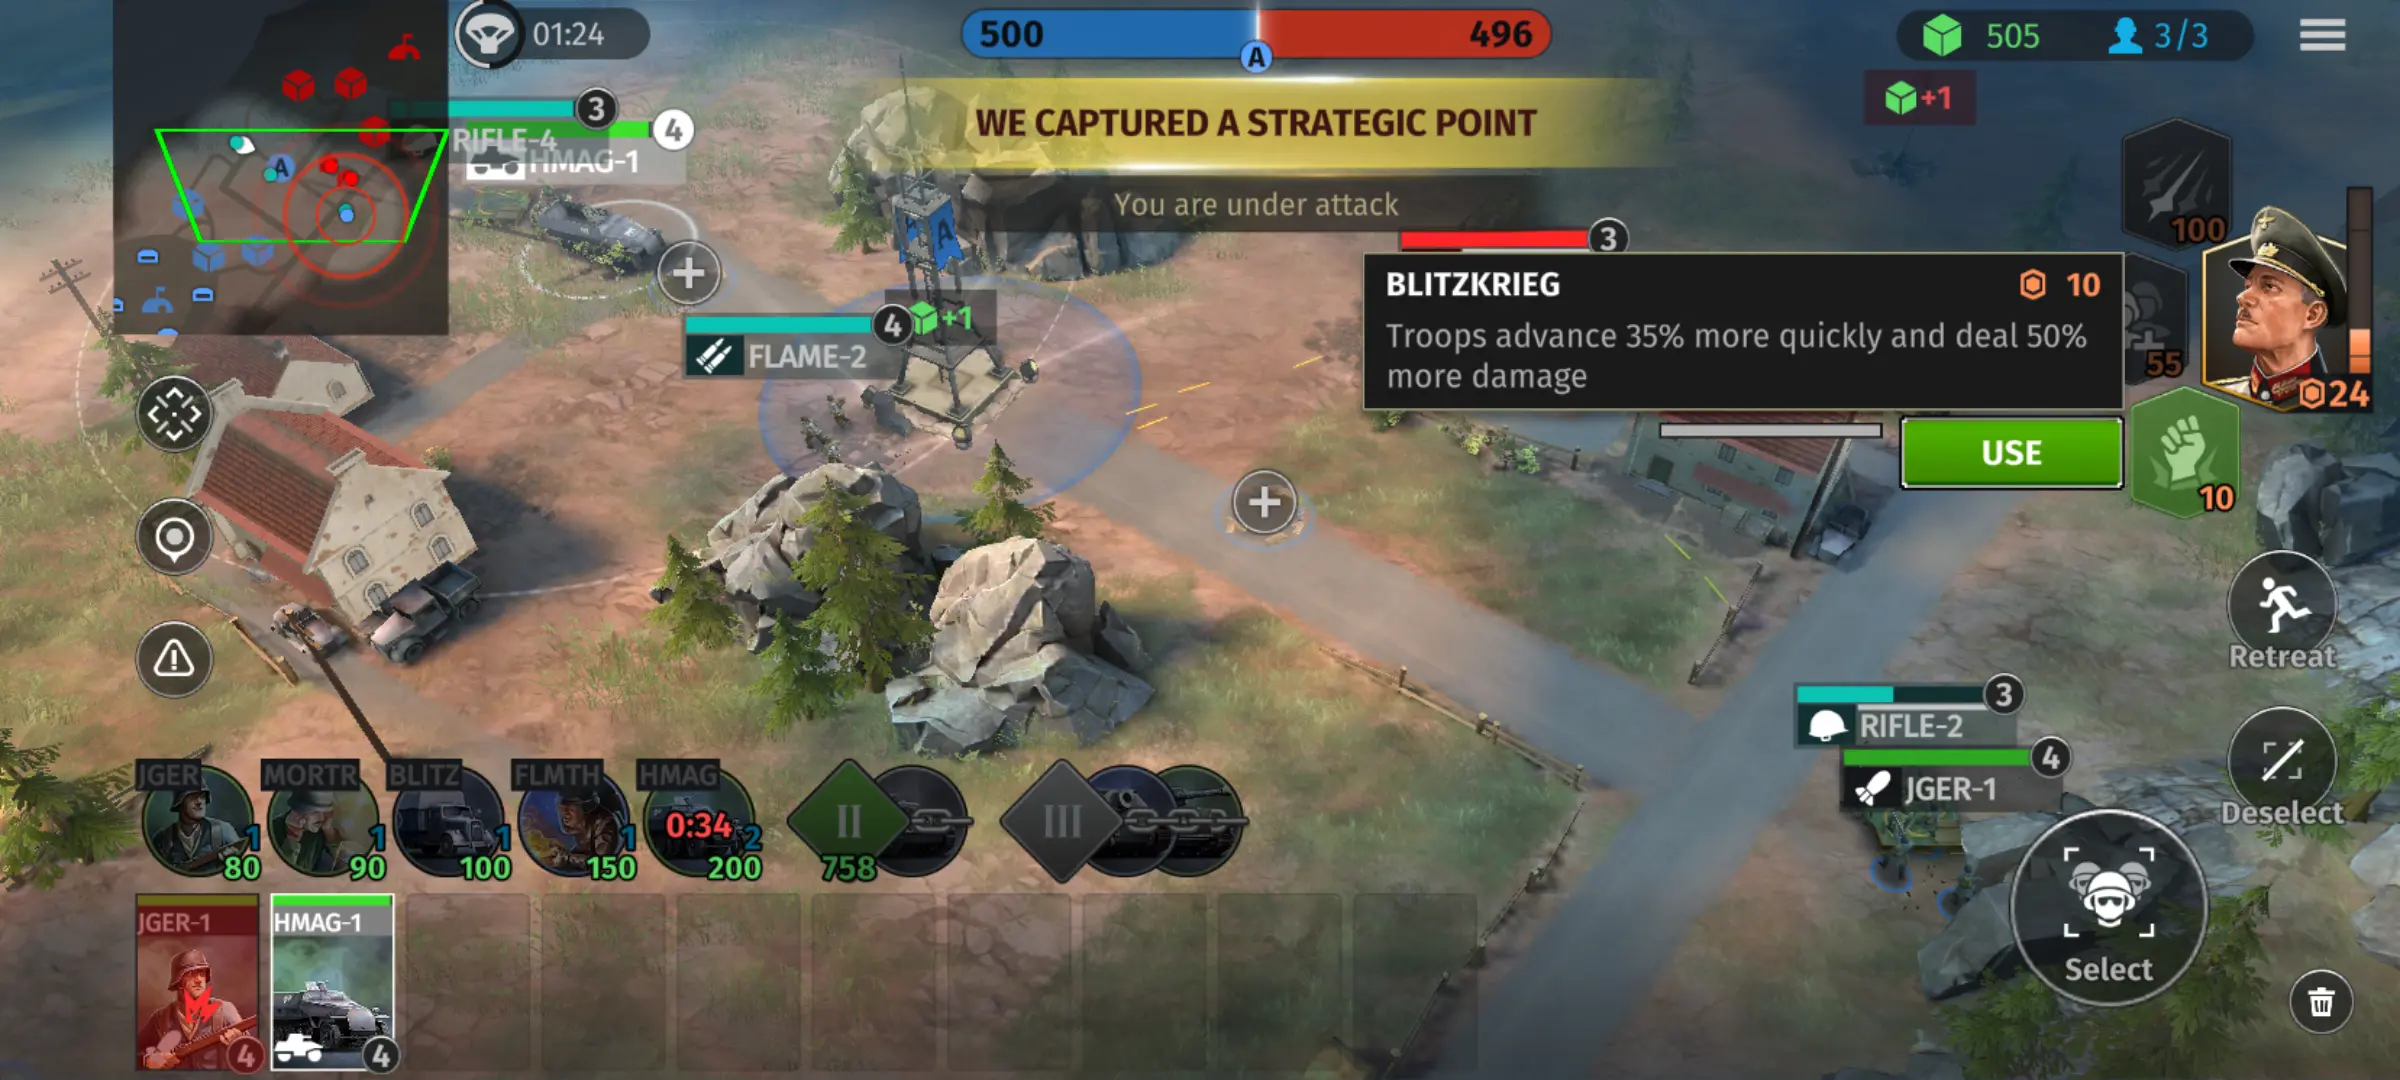
Most rookie players forget that Support Powers exist, and meeting your first opponent who remembers them can be a very rude awakening. Don’t just constantly try to hoard for the highest tier Support Power, instead make judicious and opportunistic use of all of them! Some players might think themselves clever by deploying a Kubelwagen or Hanomag to scare off your infantry early in the game, only to weep when an off-map rocket blows out a chunk of its HP.
Or worse, a Panzerjager appears even before you unlock TII thanks to the second German support power. Even later into the game low-level support powers can be very helpful; forcing vehicles into retreat, killing infantry swarms that forget not to bunch up, or summoning an extra tank destroyer when badly needed.
Hit Vehicles From Behind

All vehicles take extra damage when shot from the rear since their armor is weaker there. Whenever you have the chance, especially if you’re using smaller anti-tank units like Tank Hunters or Jaegers, try and get behind a vehicle to kill it.
On the flip side, do your best to make sure your own vehicles face the enemy head-on lest they take a shell where it hurts. Both aren’t always convenient though, once again do it when the opportunity arises as opposed to mindlessly gunning for rear attacks even when the enemy’s back is covered with Pillboxes or hostiles in support.
Retreat The Injured
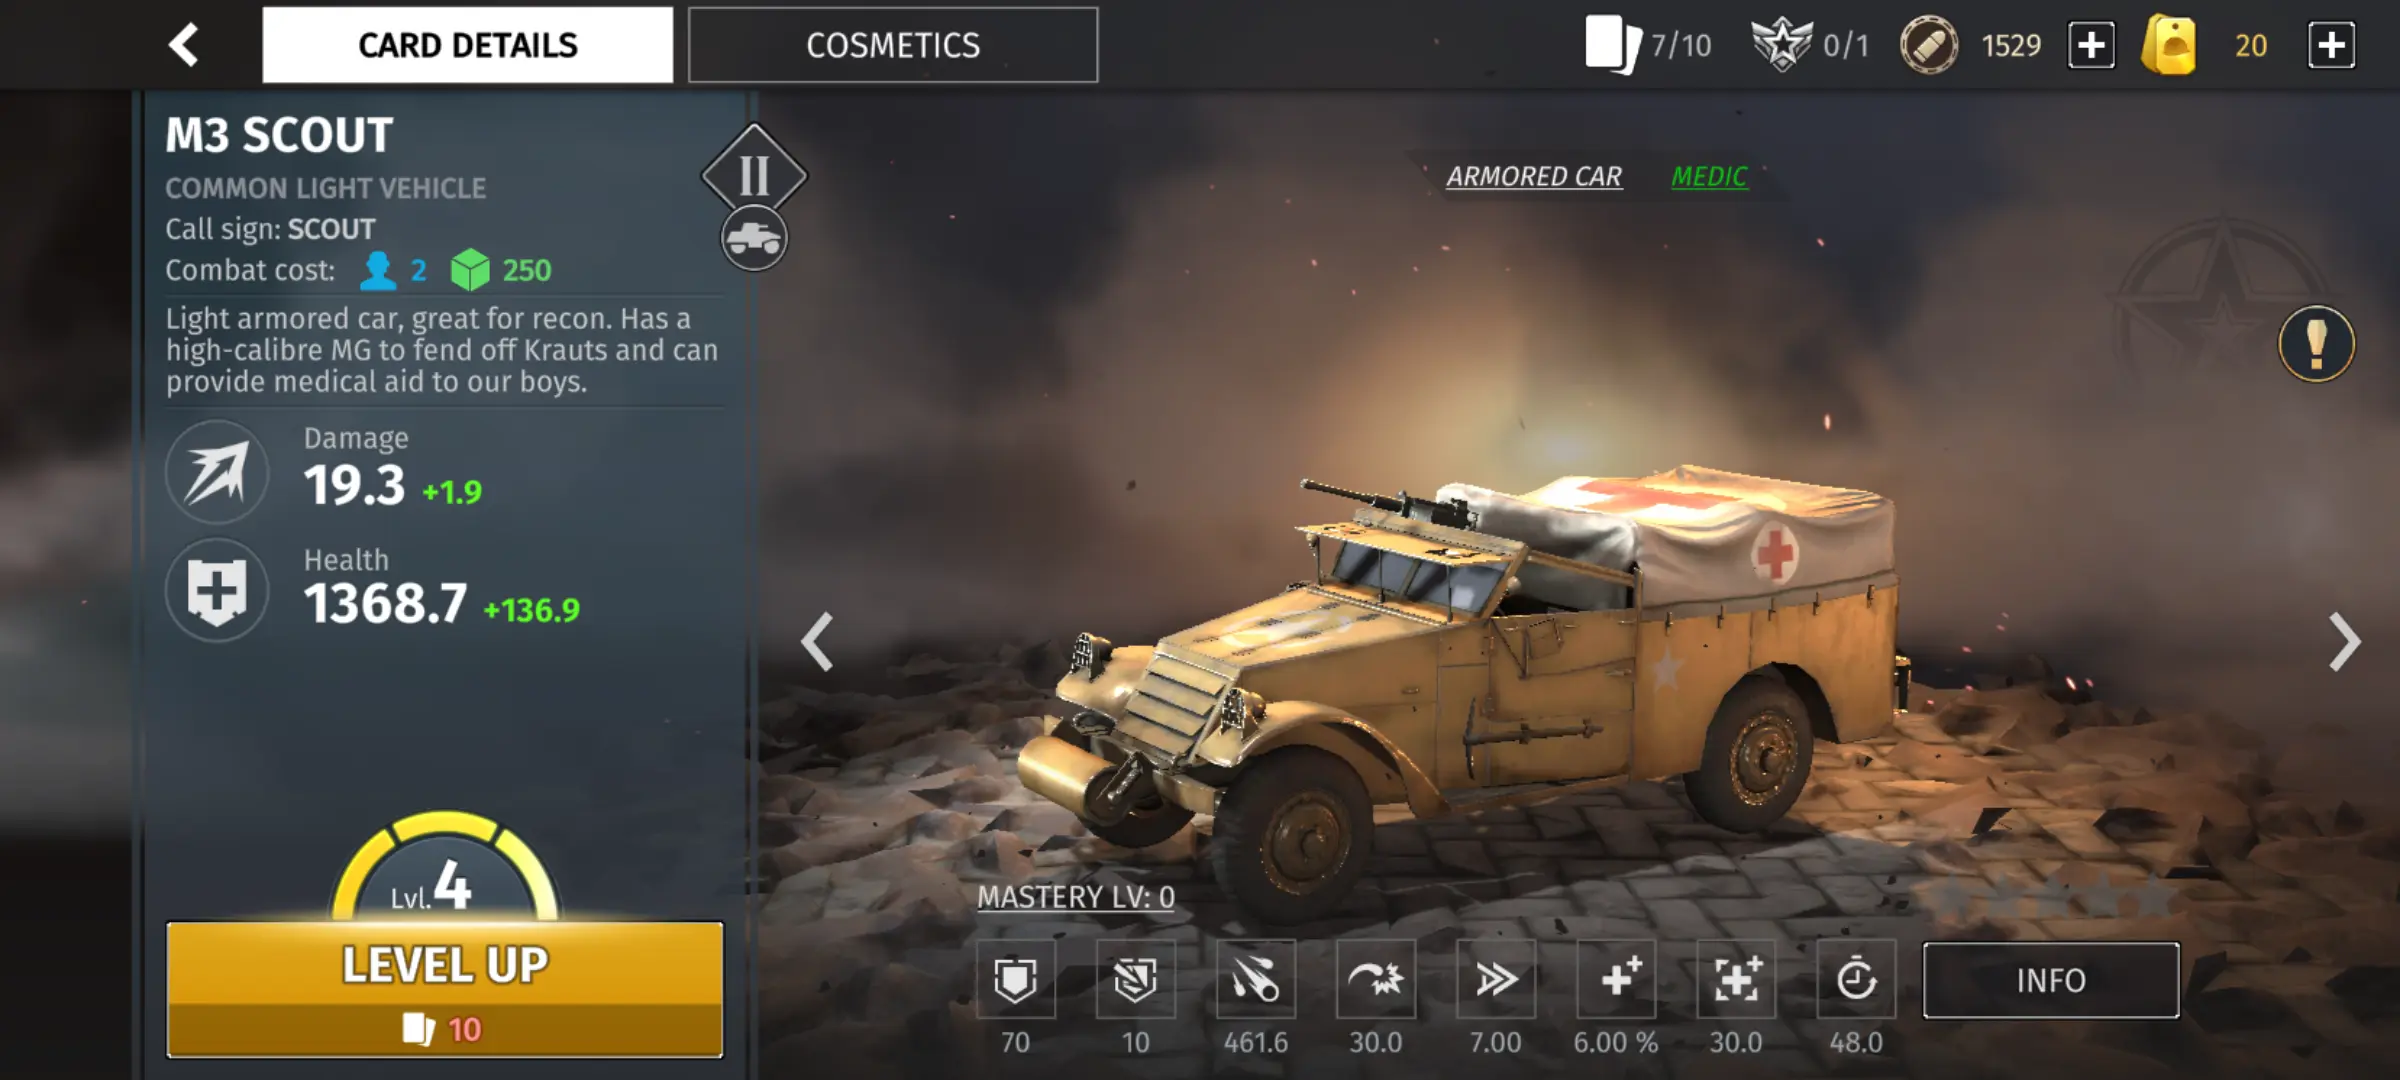
Make sure you retreat your damaged units, whether to any MEDIC and ENGINEER units such as M3 Scouts, Opel Blitz trucks, or Engineer squads or by tapping the Retreat button on the right side of the screen to immediately order them to run all the way back to HQ, which heals and repairs units nearby.
Especially anything expensive. Units can gain Veterancy as they kill enemies and the battle progresses, improving their stats for the duration of a match or until they get killed. This means a unit that’s retreated several times and lasted long enough to gain Veterancy is generally more effective than the same unit type replacing them after they get killed.
This goes double for more expensive units like vehicles and the more powerful infantry units, as you don’t want that Supply going to waste. One way to retreat units even with medical support units nearby is to tap the retreat button to get them to run ASAP, then order them to the medical unit before they reach HQ so they’re closer to the front while still running fast enough to escape the enemy.
Lots Of Supply and Not Enough Population Space? Send Cheap units To Attack, Then Replace Them
This game typically encourages you to keep your units alive, though always remember that they’re just a bunch of pixels. Don’t get too attached, especially if you have loads of Supply and not enough Troop Limit! A shiny new tank will usually do more for you later on than the equal Troop Limit use of basic infantry, especially once you’ve established your control over at least your side of the map. Especially since you actually need to hold those positions! That being said, the next tip is a good alternative…
Dig In, Build Pillboxes!
Another thing new players often forget is the existence of Pillboxes. If you constantly go after Supply Drops, you will often find yourself with loads of supply early on, but rarely enough to tier up until after a while since tier escalation prices drop as the battle goes on but start out quite high.
Especially in TI, it’s easy to fill up your 5 units of Troop Limit, and if you have some spare Supply, it’s a good idea to set up Pillboxes near your Control Points and especially your Strategic Point since you can’t put Listening Posts on top to protect them.
There are very few TI units that are effective against Pillboxes and the ones that are tend to be quite rare. Come TII and TIII the stock Pillbox is barely a road bump once the enemy starts pulling out medium tanks like Shermans, T-34s, and Panzer IIIs, but you can also upgrade them!
A Pillbox can be upgraded with either a souped-up anti-infantry machine gun, an anti-tank gun, or an autocannon to kill light vehicles. You don’t need to cover the whole map in pillboxes since that will render you broke: It’s usually good enough just to plonk one Pillbox in the most contested point, usually the central Strategic Point or whichever Strategic Points are closest to a bridge or chokepoint, and some flanks you can’t afford to guard with troops.
Listening Posts Are Vital
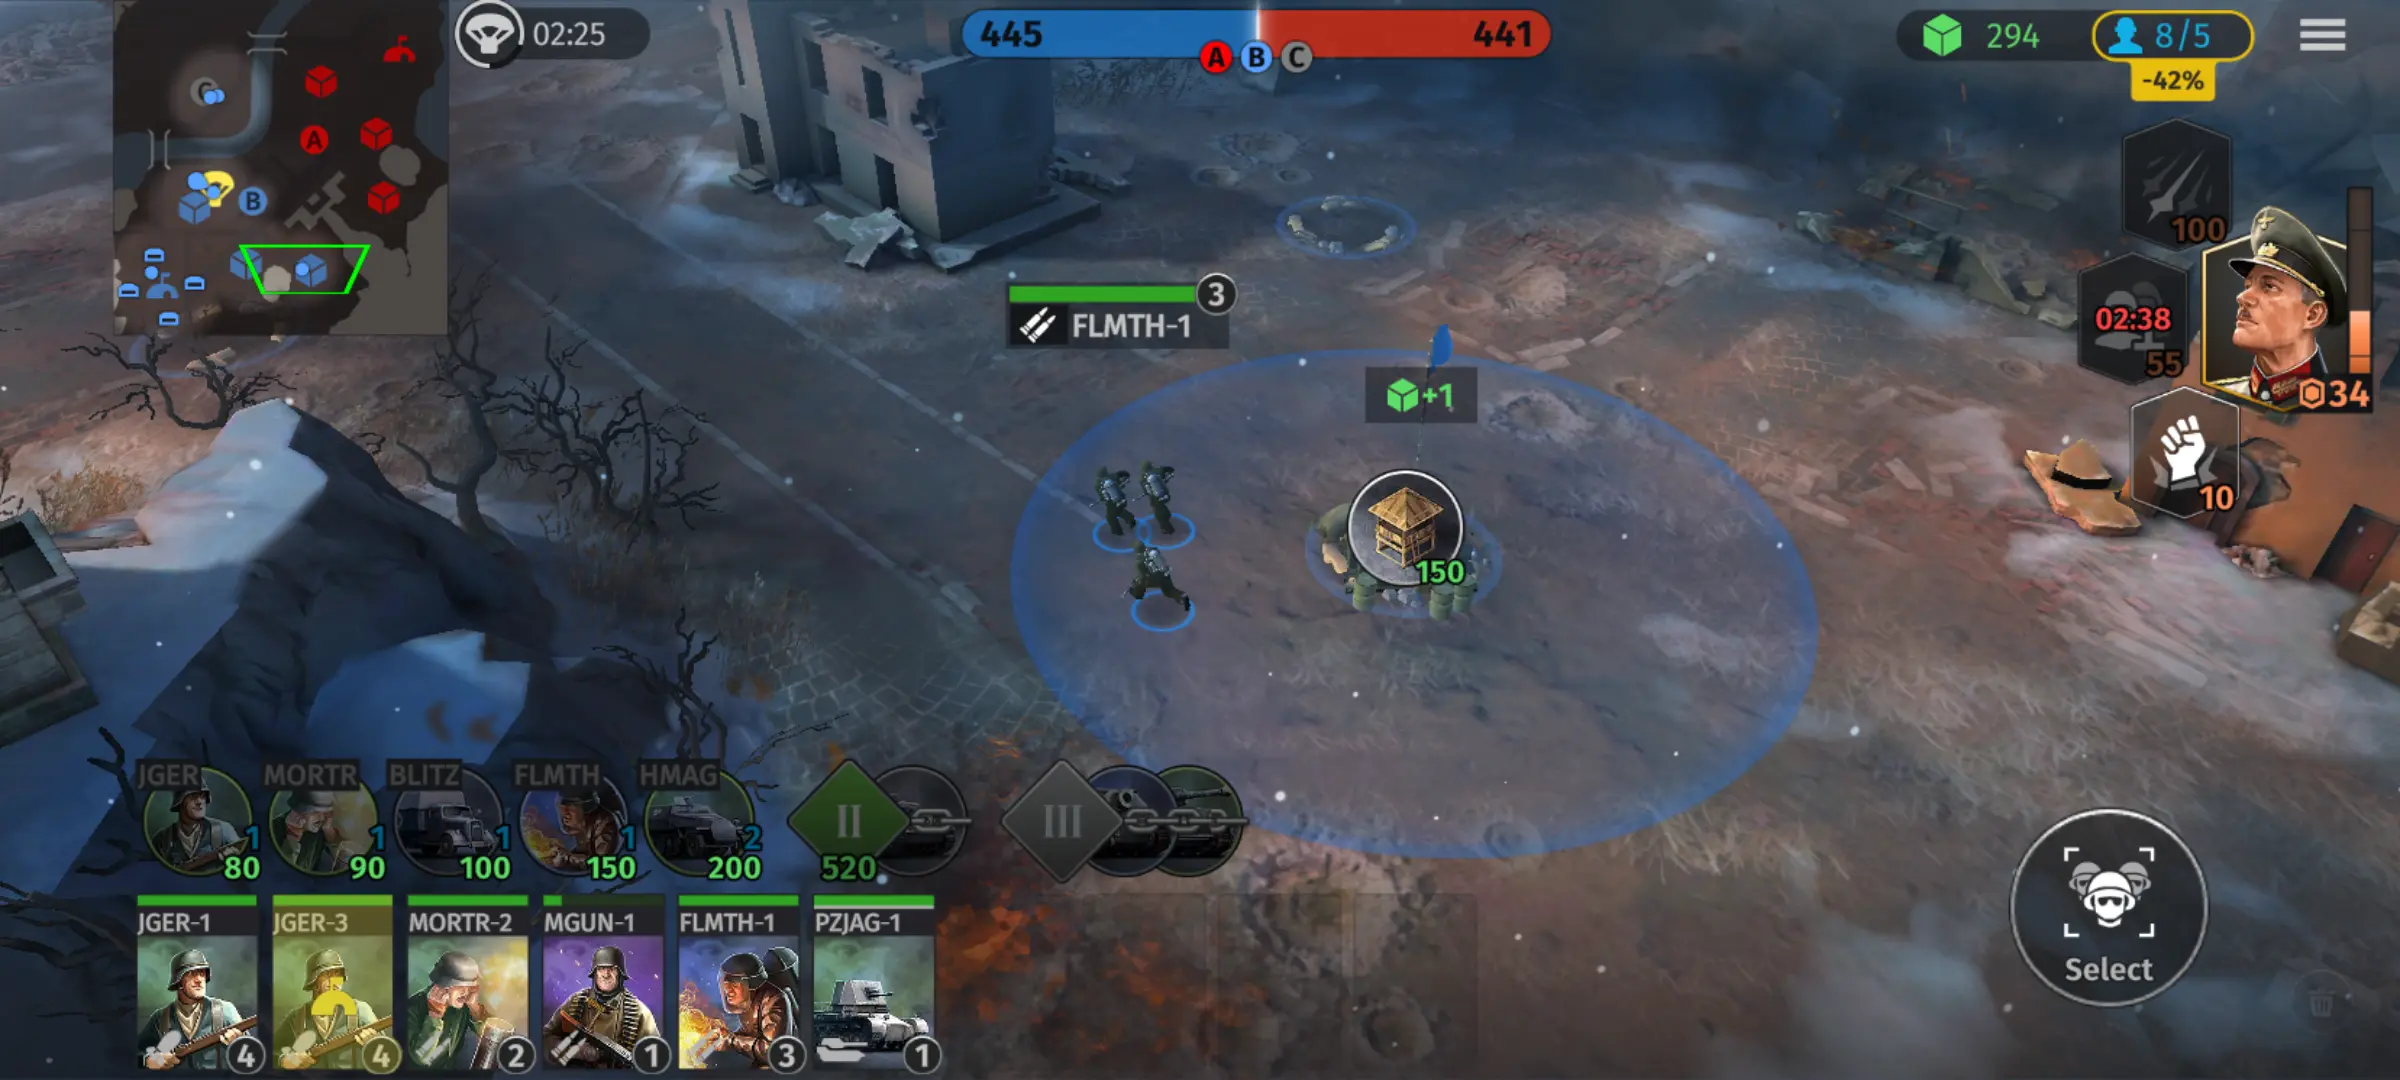
Listening Posts double the Supply generated by Control Points and protect them from capture since they first need to be dislodged by enemy firepower before their Infantry can start capping. This means, especially for Control Points that are away from the frontline and therefore away from your army, setting them up is incredibly important: It allows you to respond to sneaky attacks since the enemy will either be delayed trying to cap the point or are forced to bypass the point for whatever objective they are gunning for. You’ll also see the enemy early since Listening Posts provide vision over a fairly wide area.
Enemy Support Powers Come With A Warning
If anyone uses a Support Power, it is announced on the screen and if it’s some form of off-map bombardment attack, a circle surrounded with spikes, a crosshair, or some other symbol in the color of the team firing it will appear on the ground. If it’s blinking red, run away! Move your troops quickly, since even the smaller bombardment powers can do pretty serious damage, enough to kill infantry and noticeably dent vehicles.
This is especially important when fighting against the first available USSR commander since they have a bombardment support power that specifically targets Control Points. This means keep your troops off them unless absolutely necessary, or at least keep an eye on any units on Points when fighting USSR players.
Flame Damage Can Hurt Vehicles
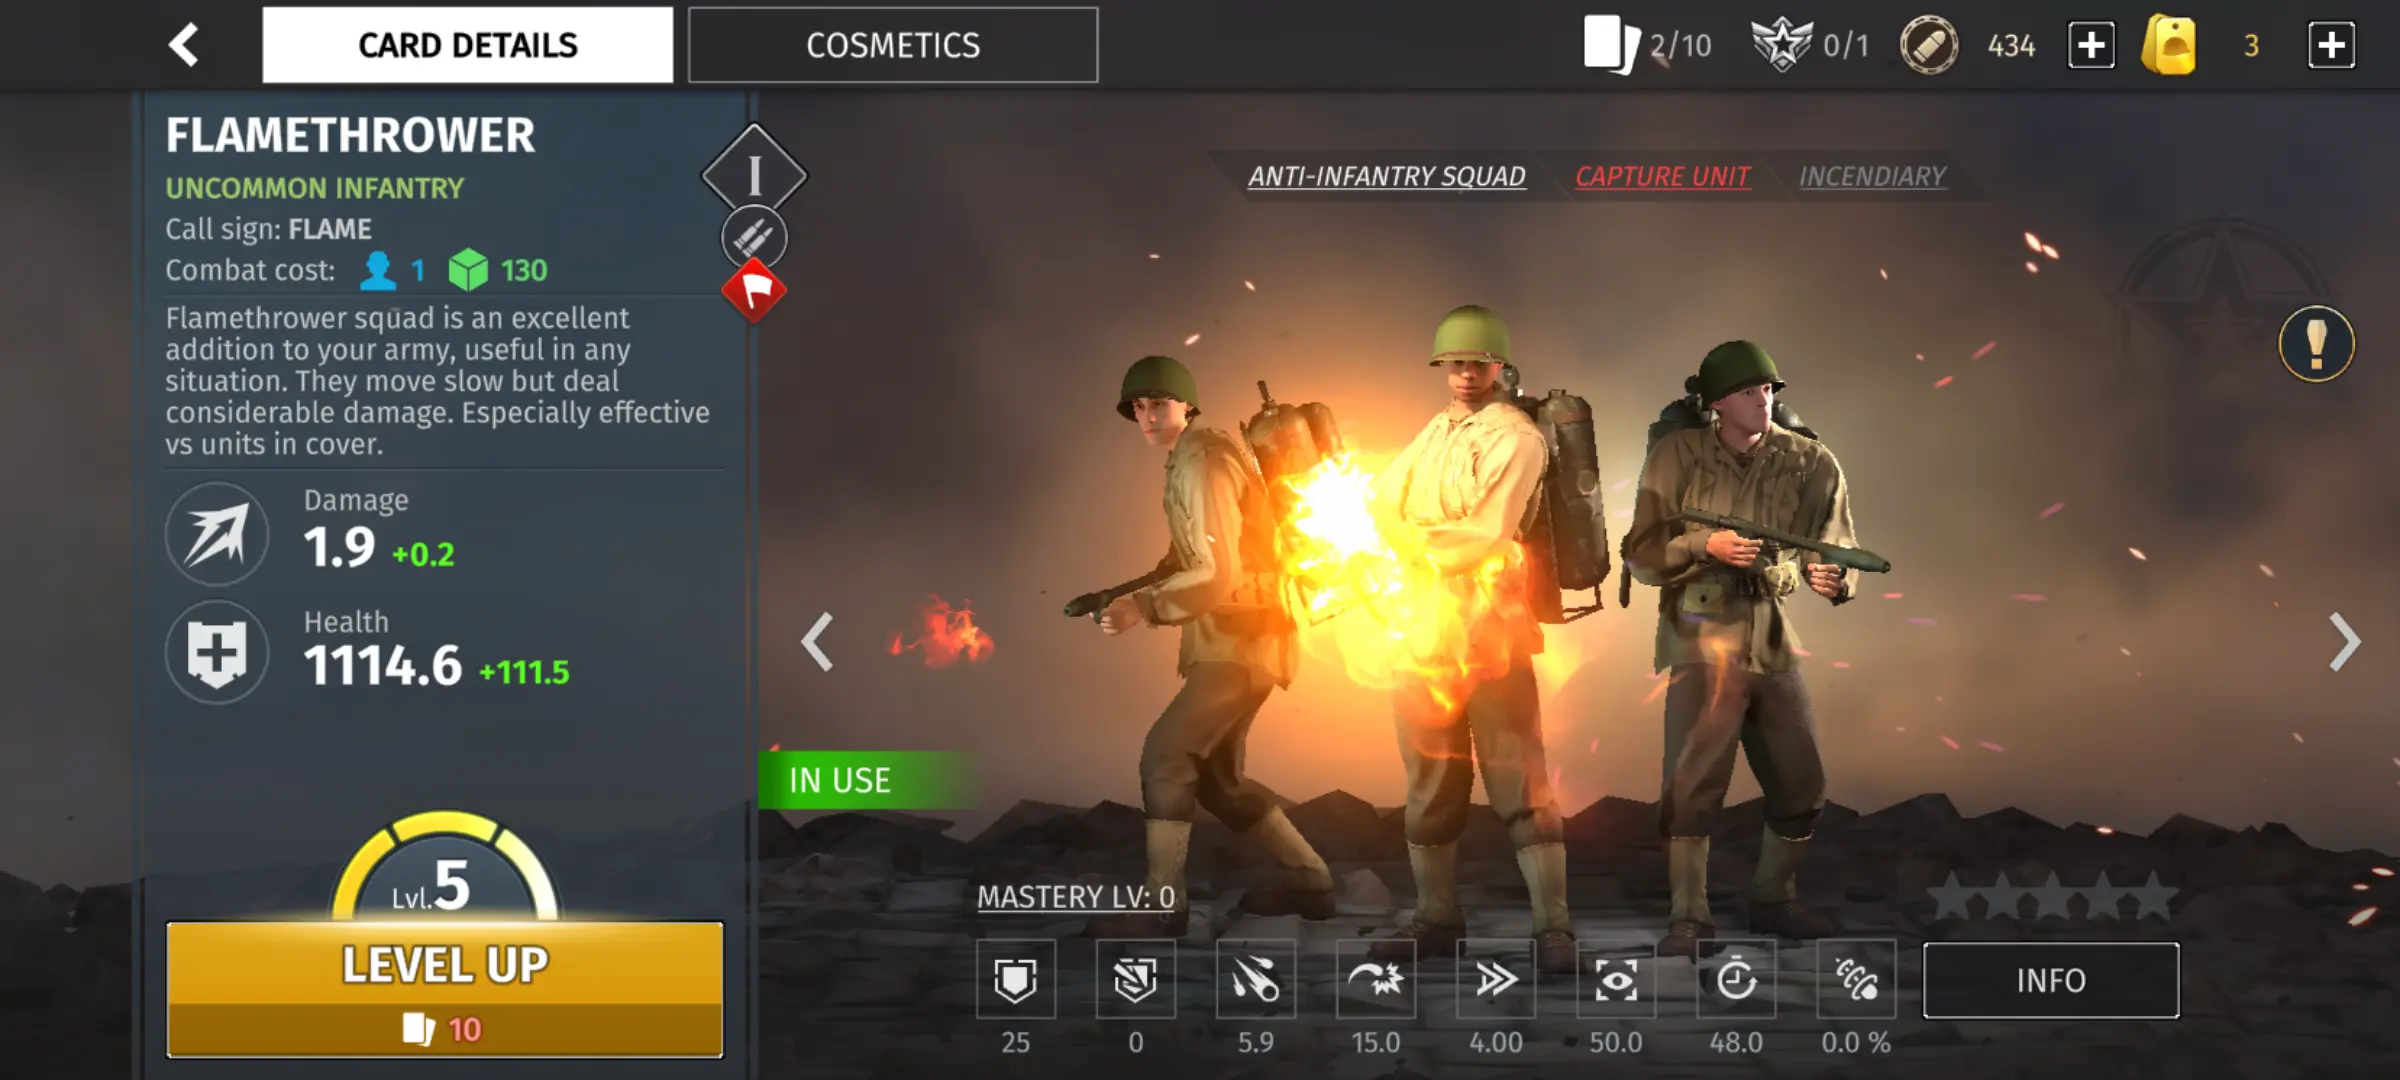
Flamethrower units from all factions have a penetration rating of 0. This should mean they’re utterly useless against an early Hanomag or Halftrack, right? Not exactly. They’re still poor choices against any sort of vehicle, but the fire they leave on the ground will cause damage to absolutely anything under it, even tanks.
It’s the slowest way to kill a half-track in tier 1, but it’s there in case you lack units like Jagers or the 57mm AT Gun. If you catch your vehicles standing on burning ground, get them off there. To a vehicle, every tick of damage counts, especially if you didn’t bring Engineers.
FACTIONS
There are 3 factions in the game. The USA, the Germans, and the USSR. At a glance they’re fairly similar, but as you play you’ll notice some differences between them, either alarming ones or happy ones depending on who’s on the receiving end of their best aspects. You start with the USA, unlock the Germans soon after, and unlock the USSR much later, roughly within a couple days of hard fighting or a week or two of playing sensibly.
USA
Weak TI, Strong and Balanced TII, Bulky TIII
The Americans suffer heavily in TI for one simple reason: They lack reliable, low-rarity TI anti-armor units, unlike the Germans and USSR. Their only TI Hanomag-killer is the 57mm Towed Gun, which is a Legendary drop!
As the USA, your job is to last through the pure torture of avoiding and stalling enemy TI armored units like Halftracks and Hanomags, and get to TII where you have access to some of the best TII units across all factions. Such as the Sherman medium tank, Wolverine tank destroyer, and the Legendary-rarity Chaffee light tank.
As for their TIII, they have access to decent TIII armor such as the Pershing and even start off with the rolling small-gun brick wall called the M6 Heavy, but the M3 Lee is rendered redundant by the Sherman tank. On the other hand, if you’re fighting the USA, the key is to stubbornly hold on to those points you took during your easy TI roll over and keep grabbing Supply Drops, lest they beat you down with Shermans afterward.
Germany
Strong TIII, Low Variety TII
As the Germans, you have great ways to make USA players suffer in TI and can defend yourself relatively well against other German and even USSR players. Unlike the USA, you have access to Jaeger squads, an Uncommon tier armor-busting infantry squad who can counter USA Halftracks who try to pull their own version of the painful German Hanomag opening.
Germany also has the Opel Blitz truck, the best healing and repair unit in the game, but oddly enough they’re more useful once you get TII and TIII armored units. German TII suffers since everyone and their mother in the USA have Shermans and M7 Priests even though they’re Rare rarity units, and the USSR’s KHTZ-16s can finally stop being useless while being backed up by T-34s and other units.
Meanwhile as a new player, you’re typically gonna be stuck with the middling Panzer III, which is neither cheap nor amazing, or the Panzerjager I, a hard-hitting tank buster that falls over the second something with a gun bigger than a rifle looks at it funny, though later on you can get the Stug III, a fine vehicle to replace it with.
That’s where the Opel Blitz shines, letting your rather meh TII units hold down points long enough for you to get to the real fun: TIII German wonder-waffles! The Panther is the best starter TIII unit available, and later you can get the dreaded yet only Uncommon rarity Tiger I. If you get a Sturmtiger, it’s always a laugh once it fires that huge 380mm comedy cannon.
USSR
Powerful TI, Artillery Lacking
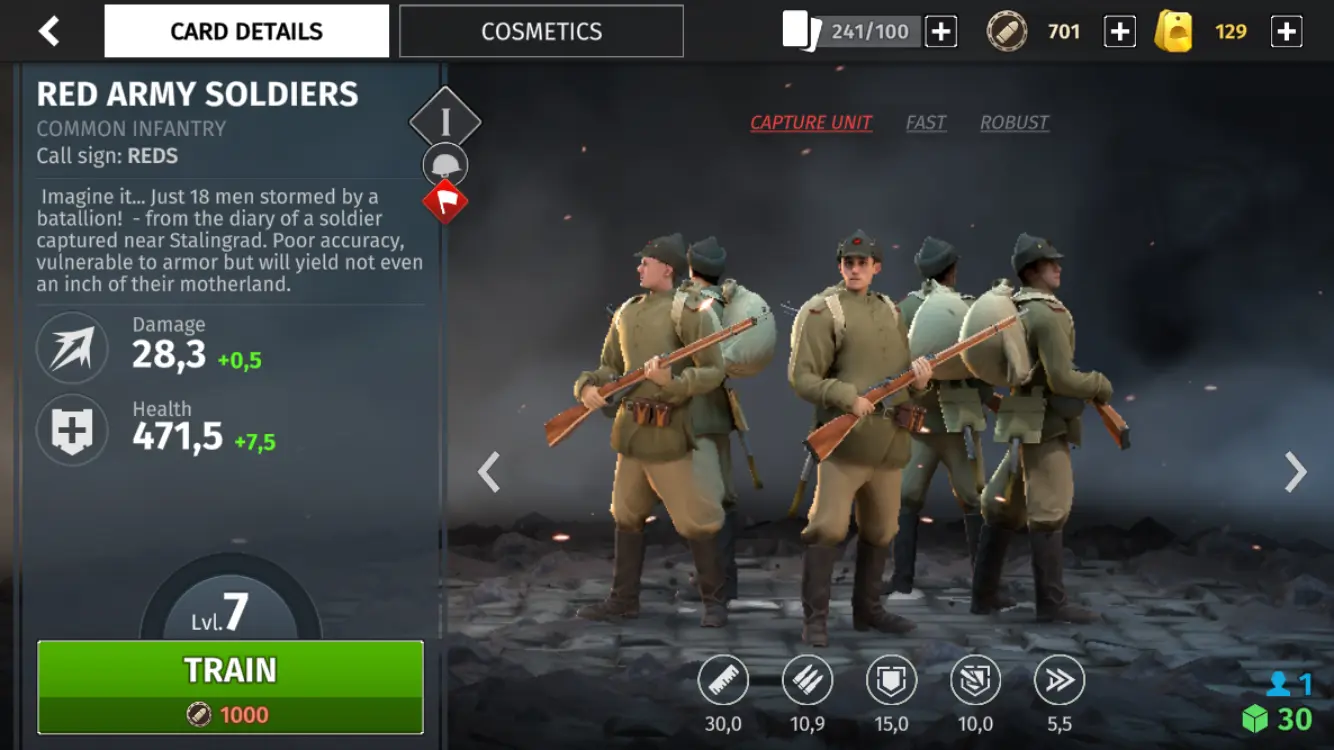
The Soviet Union focuses on a powerful TI roster, and they will never ever fall for a Hanomag or Halftrack opening thanks to the sheer number of anti-vehicle units they have in TI. The Red Army Soldier squad is the toughest of the basic starter infantry units, allowing them to capture points more reliably.
They also have the KHTZ-16 Armored Tractor, which while it’s actually no good in most TI situations, becomes more useful in TII and renders Hanomag and Halftrack openings utterly impossible. They also have Sapper squads, unique Engineer type units that use Molotov cocktails (With 100 to their Penetration stat!) instead of submachineguns, also turning Hanomag openings into a ruin.
Their TII isn’t amazing but still better than what a German newbie typically has, with the cheerful T-34 and the cheap but tough T-28. The less is said about the SU-76, the better. The writer doesn’t dare call the USSR’s TIII game weak, but it does have a fairly small selection of available units and a bias toward damage rather than bulk: The ISU-152, a tank destroyer that is mostly gun and not much bulk, the KV-1, a low-HP but high-Armor heavy tank that traded its HP for powerful armor-defeating incendiary rounds, and the T-35, a Legendary-rarity land battleship from the 1930s whose stats don’t look so good at a glance, until you notice the insane fire rate coming from its many turrets.
And this ends our World War Armies beginner’s guide. We hope this helps your war effort, and if you have your own tips, don’t hesitate to leave them in the comments below!