Endless snow assaults your eyes as you look over the horizon. This white death couldn’t possibly go on forever, you thought years ago. The bitter cold has taken many of your friends and loved ones, and the only ones left of your caravan now are your immediate family. As you scan the pale abyss ahead of you, a dark spot catches your eye. An abandoned camp! This sight brings a flicker of courage to everyone’s gaunt, tired but determined faces.
Shelter, supplies perhaps, a chance to live even a week longer if only to spite this terrible icy horror. You nor your family will go down to this cold, not without a fight. You head over to the ruined camp and start up a campfire. Everyone works through their frost-ached bones to keep it going. All your lives are tied to the tiny embers of light.
As it gets bigger, others suffering as you do find your flame and join your slowly growing community. Everyone from former soldiers and scientists offering their strength and expertise, to average men, women, and even children willing to provide any supplies they carry on their backs, or their elbow grease.
Now, your great, great, great grandkids look upon the powerful iron furnace you and your family worked so hard to keep alight. A beacon of hope now amid many others, shining with bright and beautiful anger against a miserable, hopeless perpetual winter. They will never know the murderous cold you went through to save your family, and perhaps a few generations more and they will forget you and your struggle to conquer the endless ice entirely. But is forgetting the horror of the old times really such a bad thing?

Welcome to our Whiteout Survival Beginner’s Guide! Whiteout Survival is a city-building hero-collector gacha game that starts out with an emphasis on survival, but as your city improves, the survival aspects eventually take a backseat to the more general management of your city and military as with most city builders.
The survival aspects are most apparent in the early game when your structures aren’t upgraded heavily enough to ensure everyone’s Happiness and Health meters are constantly in the green, so tackling that will be part of our article, though in the end it is simply a case of upgrading your Shelters, Cookhouse, Clinic and industrial buildings and getting them to level 10 as fast as you can. Though you do have to watch out for Snowstorms even later on!
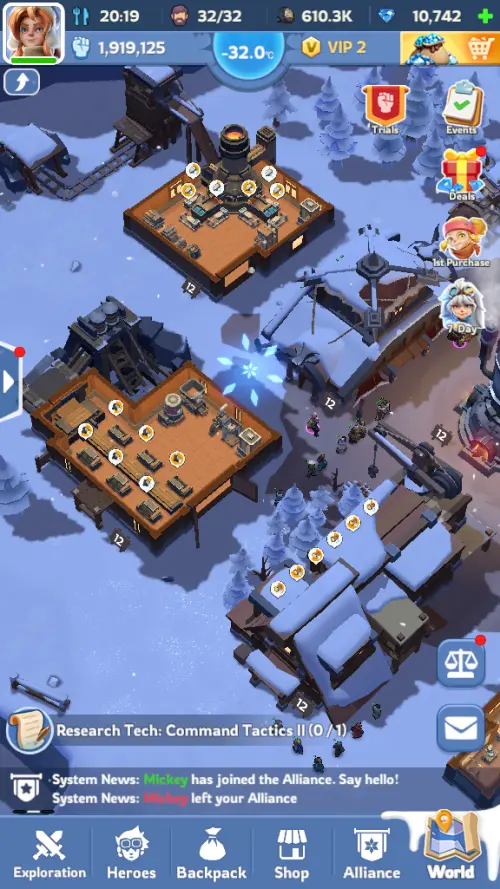
STRUCTURES
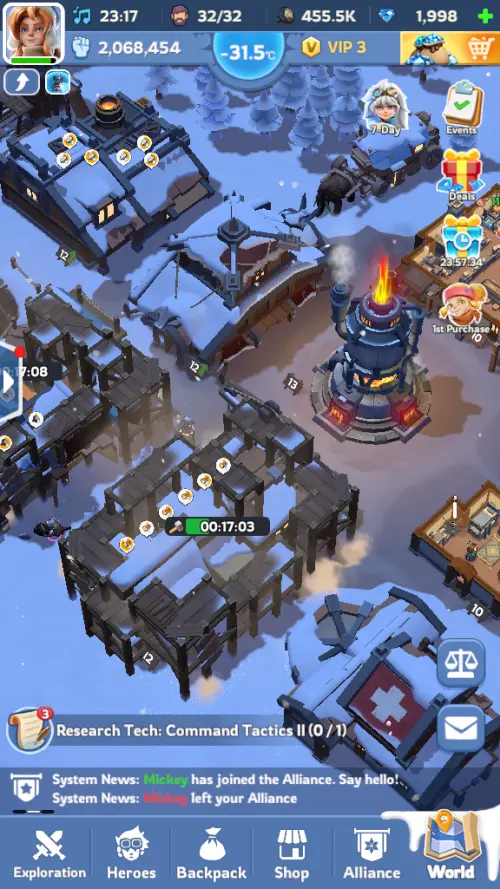
As a city builder, Whiteout Survival wouldn’t be the game it is without buildings to upgrade and keep track of. From the various industrial structures you get early into the game to housing and even military and political infrastructure, your chilly little campfire will eventually grow into a bustling town, and perhaps even a grand bastion of warmth and civilization amid a harsh, unforgiving winter.
Keeping your structures upgraded to the same standard as your Furnace, especially the factory and shelters, is important: Poor working conditions and low standards of living mean an unhappy or unhealthy citizenry.
Unhappy or unhealthy citizenry means riots and people confined to bed respectively, which will compound the aforementioned poor living and working conditions simply by making the upgrades needed to improve them harder to reach! And once that’s done, you’ll have to upgrade your Furnace too so the town stays warm.
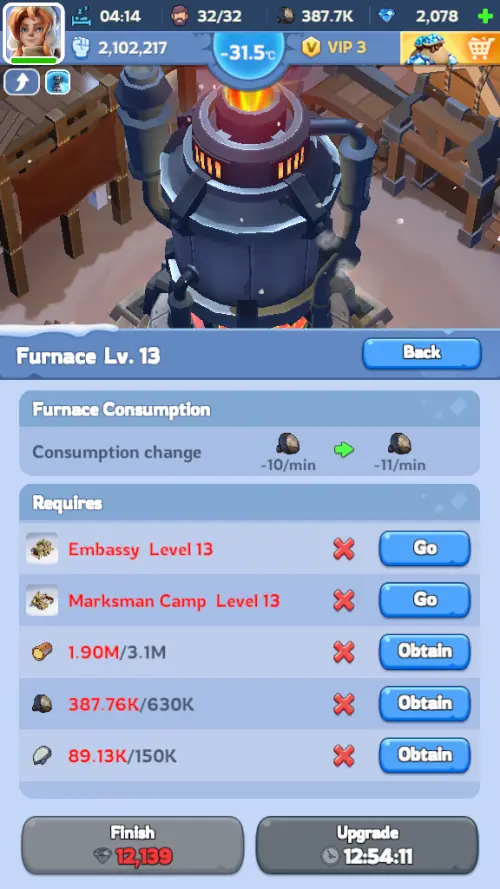
The Furnace: The Blazing Fires Of Hope
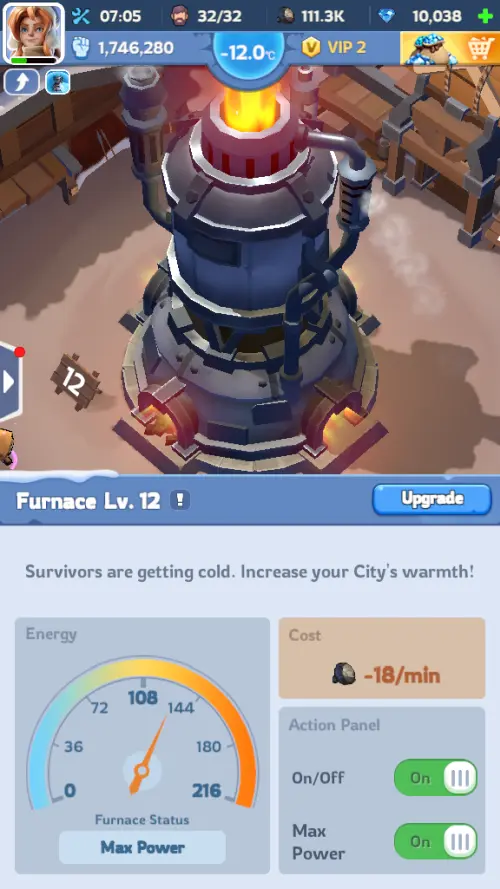
The Furnace is the core of your city, keeping the ever-encroaching death of cold away from your citizens. Upgrading it allows it to burn ever hotter, warming up more of the area around it and unlocking space for new structures to build.
It has two settings, an economy mode which burns less coal, and maximum power which burns double the coal for greater heat. Keeping your citizens warm increases their Comfort and Happiness, making them less likely to fall sick or discontent, which in turn makes them work more productively.
Shelters: A Warm Homestead Makes For Happy Workers
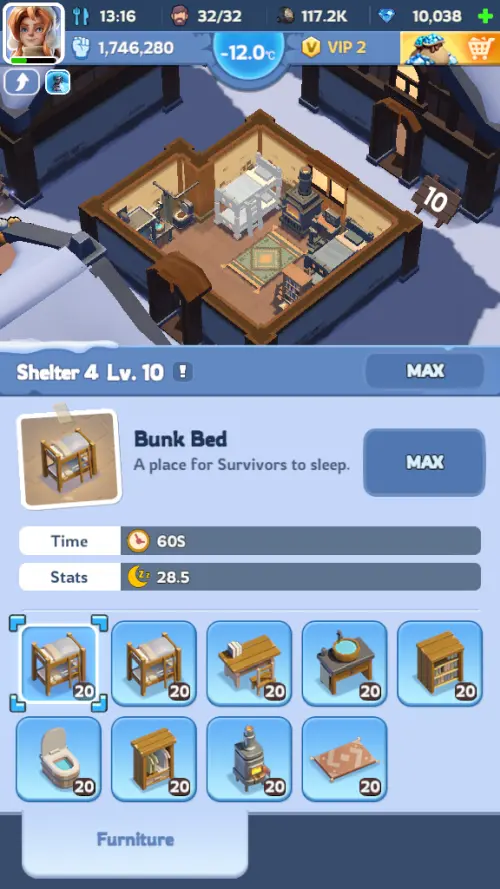
Shelters are where your citizens live, each with multiple beds and amenities to make the citizens comfy. There are two ways to get more citizens, and therefore workers, for your city: Either make more Shelters or upgrade existing ones so they have space for more Beds.
One can also upgrade them with various things such as bookcases, indoor heating, decorations, and glorious indoor plumbing to make them more comfortable for the citizens within, which makes them more productive.
The Hunter’s House: Agriculture? In THIS Cold!?
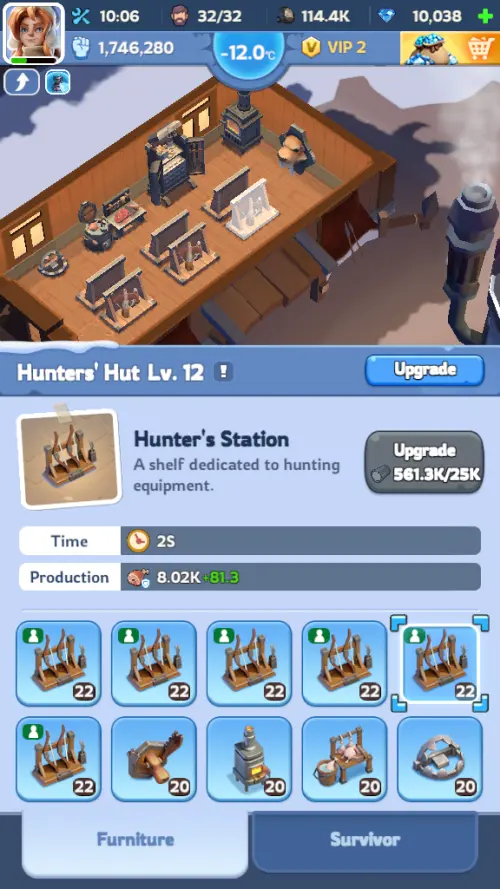
The Hunter’s House generates Meat, a resource used by the Cookhouse to, well, make food and keep everyone’s bellies full. Much like other resource-gathering structures, it must have a person assigned to it for every workbench it gets from upgrades, which in turn increases the structure’s productivity. Keeping this upgraded is important for your town’s overall Health since hungry workers tend to get sick more often.
Cookhouse: Raw Meat? We’re Not Barbarians!
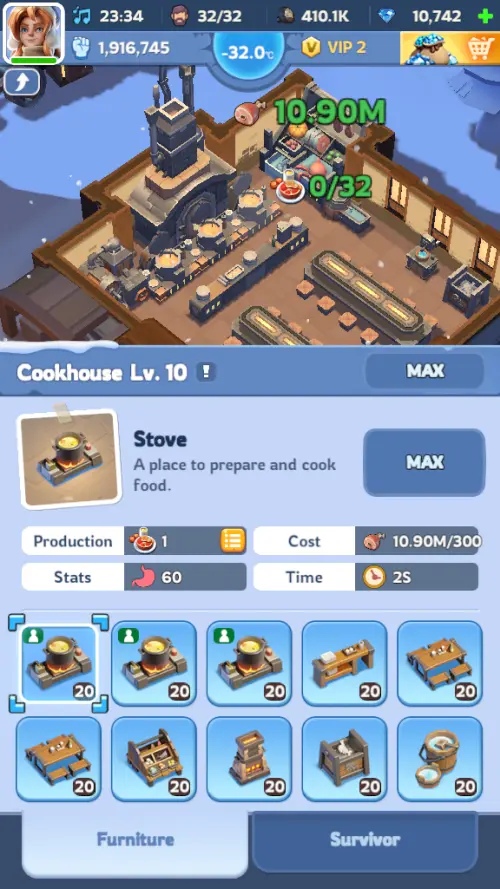
One of your most important structures, the Cookhouse converts the Meat resource into edible meals for your city. You need this badly since it affects both Happiness and Health: If your people aren’t well-fed, they’ll get cranky, start a riot and slap you with a 30% productivity debuff. Or worse, get sick and be unable to work at all for a while.
As usual, every cauldron an upgrade gives you will need an extra worker so the Cookhouse can make more meals for your growing city. Your Cookhouse has 3 settings: You can set it to make Healthy Gruel, which is economy-class food: It expends less Meat, but also isn’t as filling as the other settings after it. Nutritious Meals will expend more Meat, but also fill your citizens for longer.
Fancy Meals are expensive, draining the most Meat but also keeping everyone’s stomachs full the longest. Considering keeping your citizens happy and healthy makes them productive anyway, you might as well go for the Fancy Meals provided you keep your Hunter’s House upgraded properly, even if technically they’re not as efficient in food-per-fullness as the other foods.
The slight numerical inefficiency won’t matter much if you’re still making more Meat than you’re cooking anyway, and the lack of rioting and sick people is worth it.
Clinic: Preventing Death From Both Kinds Of Cold

The Clinic is where sick citizens go to get better. Survivors in the Clinic recover from sickness faster than in their homes, and as such having a large Clinic can prevent long periods of inactivity for your citizens. It can be upgraded with more beds and amenities to make healing faster and improve the overall sanitation of the Clinic, making repeats of sickness rarer.
You might not use this often later on once you max out your Cookhouse and Shelters, but you never know when the game will suddenly throw you a -90 degrees Celsius mega-storm while you have Night Shifts active!
Sawmill, Coal Mines, Ironworks: Hard Work and Industry
The Sawmill, Coal Mines, and Iron Mines are all structures whose resources are used for general tasks such as research, training soldiers, and most often, constructing and upgrading other structures including themselves.
All of them work similarly: You can upgrade individual parts of each structure, and once you upgrade the structure itself a few times, you’ll unlock a new workbench that requires a worker to make use of it and generate more resources. Keep these topped up so your citizens have an easy time working, especially since they’ll often complain about insufficient or low-quality tools if you neglect your upgrades.
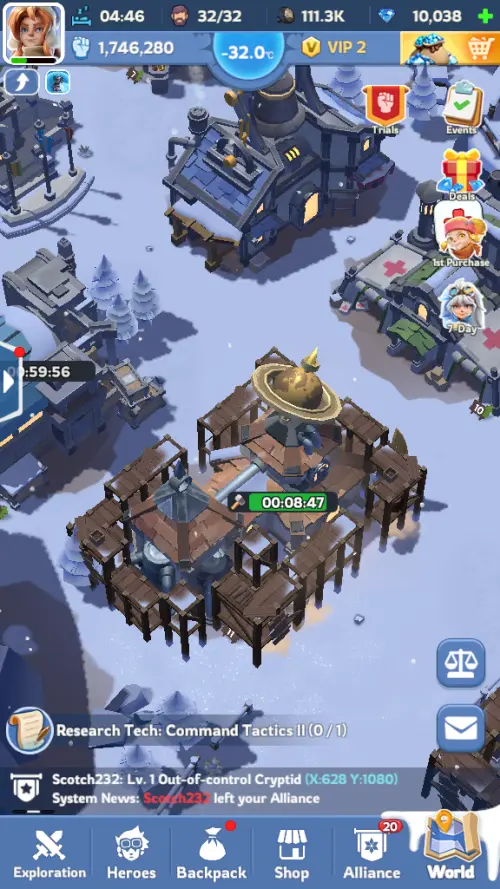
Research Center: Science Stops The Freeze
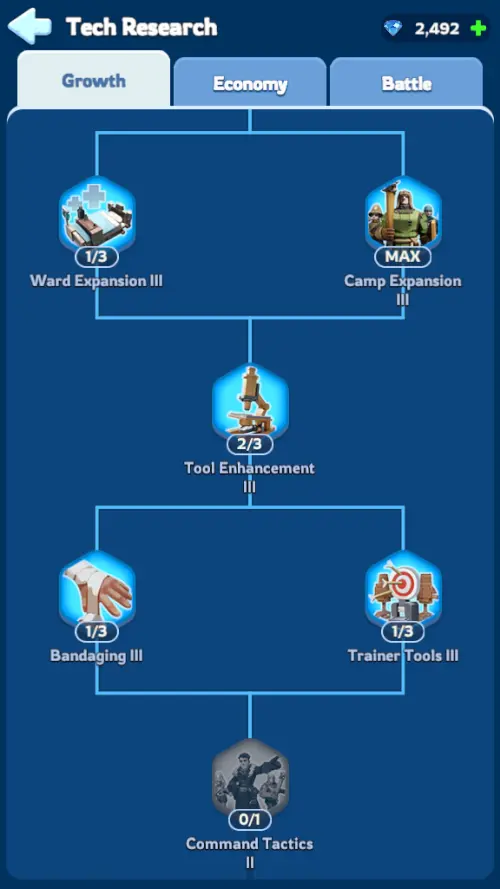
The Research Center contains many upgrades for your City and military and often requires Steel much like the more special pieces of upgradeable furniture in Inner City structures. Of particular note here for you to unlock are the Command Tactics upgrades: These allow you to increase the number of Marches you can deploy, letting you finish multiple Lighthouse Intel missions at once
Chief’s House: Don’t Make Me Declare Overtime!
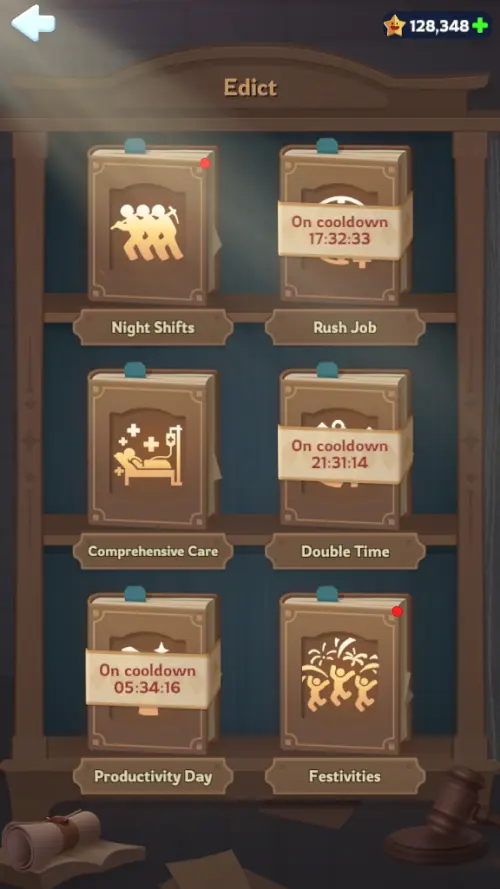
So your people are happy, content, and generally like you! You can use that as a political cushion when you tell them a couple of 48-hour work shifts are coming. The Chief’s House uses a resource called Contentment, generated when people work while they’re happy, to enforce Edicts that typically lower Happiness for extra productivity for a certain amount of time.
You can also tell them to throw a party, which raises Happiness! Early on, this is best used before incoming Snowstorms to beat the resource-gathering requirements, though later on, you can use Chief’s House Edicts more often when everyone is sufficiently happy. Just don’t give everyone Night Shifts when there is a snowstorm currently active.
Marksmen Camp, Infantry Camp, Lancer Camp: The Cold Isn’t The Only Threat Out There

The Training Camps are structures that train troops for Expeditions, which allow you to either gather resources outside the city or beat up the local monsters. Or if you’re not feeling particularly nice, bully other players into handing over their Unsecured Resources.
Upgrading these structures is simpler than upgrading resource-gathering buildings since they don’t have any upgradeable furnishings. You just upgrade the building straight away, and after a few upgrades, a new tier of soldier unit is unlocked.
As for the soldiers themselves, the game has a simple rock-paper-scissors mechanic in place, though it’s not as pronounced as with other games of this type, since it mostly shows in each unit having a 10% damage bonus against their favored foe, and a 10% DEF bonus too for late-game troops. Lancers impale Marksmen, Marksmen gun down Infantry, and Infantrymen clobber Lancers.
This also works with Heroes in Exploration battles since they each lead a squad of their respective troops, but they don’t draw their troops from the Camps during Exploration fights. You’ll typically need a balanced force of troops since you can only put one Hero of each type of unit for command in a March anyway!
Infirmary: Battlefield Injuries Need Care Too
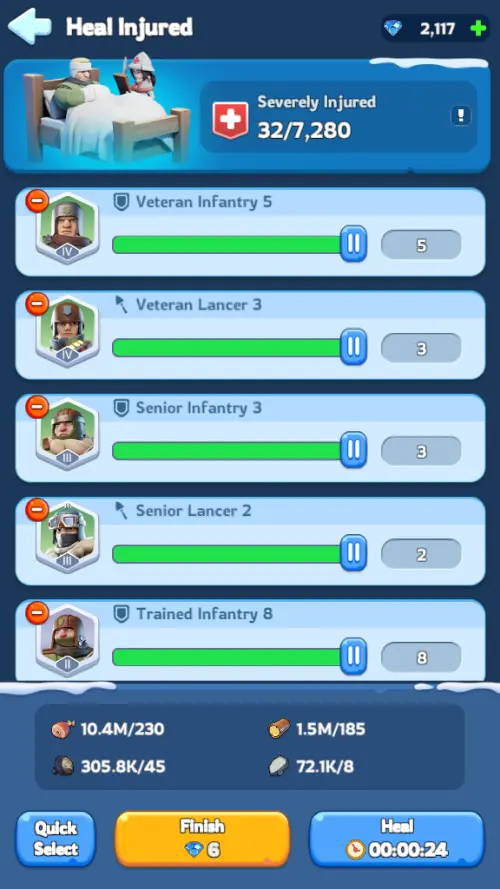
Not to be confused with the Clinic, which is for your Survivors, the Infirmary is a structure for taking care of injured Troops. When you go on Expeditions, you may get some of your soldiers hurt too badly to keep fighting in future missions. In that case, they either go to the Infirmary to be healed or straight up die if there is no more Infirmary space. Upgrading the Infirmary improves the speed at which it heals Troops, along with the amount of space it has so it can save more Troops from death.
Lighthouse: The Search For Adventure

The Lighthouse gives you one of the biggest reasons to make troops for Expeditions: It gives out Expedition missions that come with Hero shards and other resources as rewards. It starts out giving you low-quality missions denoted by grey icons, but as you do more of them, you get missions with superior rewards, denoted by a change in the color of their icons.
Greys are the lowest quality, Greens are better, Blues are better than Greens, Purples are the second best, and sparkly Golds are the best of the non-boss missions, with fiery Gold bosses usually requiring strong armies but also giving out the best rewards.
Other than those fiery Gold boss fights, Lighthouse missions tend to be easy and not require much in the way of offensive strength, as they’re essentially free rewards that just take time to get because of Marching times. Missions denoted by a Skull icon require a March slot, while Crossed Sword icons and Tent icons do not.
Embassy: On The Off-Chance Of War, It’s Better To Have Friends

If you have a reliable Guild, an Embassy will be a powerful, though not often used, means of defending your City from other players. It allows Guildmates to reinforce your city with their own troops, making it much harder for other players to take your stuff. That being said, city PVP isn’t very common since it doesn’t pay all that well against players that actually remember to burn through their Unsecured Resources, so it might be at the bottom of your upgrade priorities.
Arena: Nice Wholesome Family-Friendly Blood Sport

Now for the PVP which you will do fairly often, at least as a newbie, the Arena is closer to the PVP you usually see in Hero collector gacha games instead of city-builder strategy games: You set up a team of 5 heroes, and have them auto-combat another team of 5 heroes until you or the enemy team bite the snow.
As is usual with this sort of PVP, it’s always a good idea to bully weaker opponents, since you get roughly the same reward since matchmaking is based on rank and not team power. At the end of each IRL day, you will get Arena Tokens which can be spent in the Arena Shop to buy various resources.
Enlistment Office: Emergency Conscription

The Enlistment Office serves as an emergency troop supply should you lose troops during battle, which tends to happen very rarely if you’re new to the game as A, you’re not really a target worth invading if you keep an eye on your Unsecured Resources and B, casualty rates tend to be very low in the fights you DO get in when fighting NPC units, even if you lose.
If you’ve lost units and the Infirmary can’t recover them, they will appear as Reserves, and the Enlistment Office’s Loyalty number will start going up. Once you reach enough Loyalty, you can recruit those reserves to replace your lost troops.
Loyalty gain speed is affected by three factors: If you have a low loyalty count, loyalty gain is sped up, the fewer troops you have in the Infirmary, the faster it goes, and the more reserves in the Enlistment Office, the faster loyalty gains go.
You can also get them via Gathering and daily missions provided the Office isn’t empty. The Enlistment Office isn’t going to be much use to you as a newbie, but it will become relevant later on if your Alliance ever gets involved in Fortress Battles, or if you start taking on some really rough Rallies or end up in some form of PVP-focused limited event. Or if you went offline for an extended time and suffered from some invasions.
GENERAL TIPS
As a city builder, there is much to keep in mind in Whiteout Survival, especially when it comes to resource allocation. For one thing, leaving too many surplus resources unused and in the open out of your Backpack is a bad thing: excess Unsecured Resources are not only a sign you aren’t upgrading as aggressively as you ought to, but they also paint a giant target on your back in a game that otherwise doesn’t have much reason for PVP, at least early on.
You have to be careful with opening Backpacked resource packs, you have to make good use of your General Speedups to rush the Furnace, and you have to spend your Gems wisely with the long term in mind rather than tossing them all into the Hero Recruitment gacha. We’ll go into more detail about those in this section.
Very Early Into The Game? Use Edicts During Emergencies

The Edicts available to you in the Chief’s House are important tools that can improve productivity, but usually at the cost of your City’s overall Happiness. If you’ve just started playing the game, maintaining Happiness is actually quite hard, but gets easier as you upgrade all your structures.
This means early on, you should use Edicts only during emergencies: Sometimes, Snowstorms will come with rewards if you reach a certain resource and upgrade threshold, but you can’t meet the resource gathering threshold by using Backpack resources, only through your City’s mining speed.
Since they’re probably gonna be angry no matter what you do during a Snowstorm anyway, you might as well declare Productivity Day and maybe Night Shifts if you have a good Clinic if a Snowstorm is coming for the resource generation buffs. This way you can meet the required resource-gathering threshold to get the Snowstorm rewards. Just remember that later on, Snowstorms stop giving rewards!
Level 10 Housing? Use Edicts Aggressively… Just Be Careful With Night Shifts
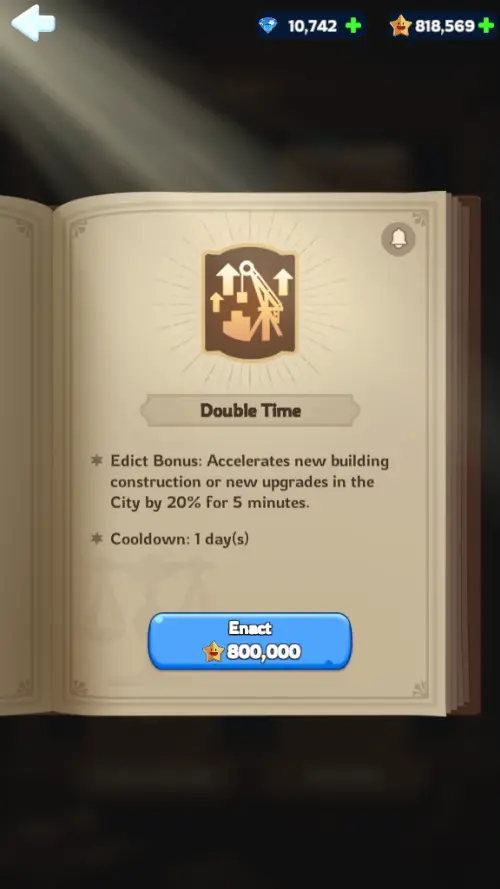
Once you have your Shelters, Cookhouse, and Clinic at level 10 with maxed or nearly maxed furniture, that’s your cue to use Edicts as often as you want to make as much profit as possible, assuming your other Inner City structures are also upgraded at around levels 9 or 8.
That’s usually the level when Happiness stops being such a huge problem to deal with, and your workers will rarely mind if you shave off 20 Happiness to give them extra hard work hours, since their homes are so comfy and factories efficient enough that the Happiness bar will go up fairly quickly after the Edict is declared anyway. The devs really do need it to be this way: Level 10 Shelters and a Level 10 Clinic and Cookhouse are as high as they go, though resource-gathering structures and the Furnace can max out at level 30.
Night Shifts are an exception to this: Make sure you only use Night Shifts if either Festivities are ready to go, or you just finished a post-max housing Snowstorm, since night work during a snowstorm is one of the ways you can still put a huge dent on the Happiness meter even with maxed out housing! Productivity Day is generally a safe bet though since it still allows your workers to rest, they just have to put some elbow grease in during their work hours.
Save Gems for VIP, Not The Gacha

Unlike most gacha hero collectors, using Gems on the gacha is a very bad idea in Whiteout Survival. A 10-roll even in the Epic Recruitment gacha does not guarantee a Hero or even shards if you’re really unlucky, and they cost a painful 15000 Gems, 1500 per key. You should only use Keys on the Gacha.
Now if you want to spend your Gems in a more useful manner with the long-term in mind, gun for at least VIP 8 and spend your gems on both VIP EXP, a bit of VIP Time if you’re planning to be online for a long period, and the VIP Shop. The VIP shop sells various resources for gigantic Gem discounts, with VIP 8 being the level at which all of the commonly spent necessities, especially Hero upgrade materials, will be available to you.
Anything sold past VIP 8 is usually some kind of Expedition buff, which, while useful, is more relevant to later game PVP shenanigans and aren’t as necessary for long-term growth compared to Hero upgrade resources, though the VIP 11 Essence Stones and the higher tier General Speedups would be nice to get.
General Speedups- Use Them For Research or the Furnace
General Speedups are speedups that can be used for any purpose and tend to be quite rare. Ironically, this means you have to use them most carefully of all. Accumulate them and use them for Furnace upgrades or Research, two important tasks with long-term effects for your game.
Research starts out fairly quick but takes a while in the later levels, while Furnace upgrades will regularly eat several whole hours even after just a day or two of playing. Since Furnace upgrades take forever, you’ll have plenty of time to upgrade everything else while it waits, so you might as well burn speedups on it while you do so.
Other Speedups? Use Them Liberally

As for other speedups, use them often, especially if you’re not about to log off anytime soon. Shaving minutes off some construction jobs or upgrades can really make things easier and helps make the most out of your online time. Especially since you’ve only got 1 build queue, or 2 if you pay gems for a temporary one. And don’t worry about using a 1-hour speedup on a 5-minute build or upgrade either: Unused speedup time gets refunded as a bunch of 1-minute speedups!
Use Backpacked Resources Only When Needed

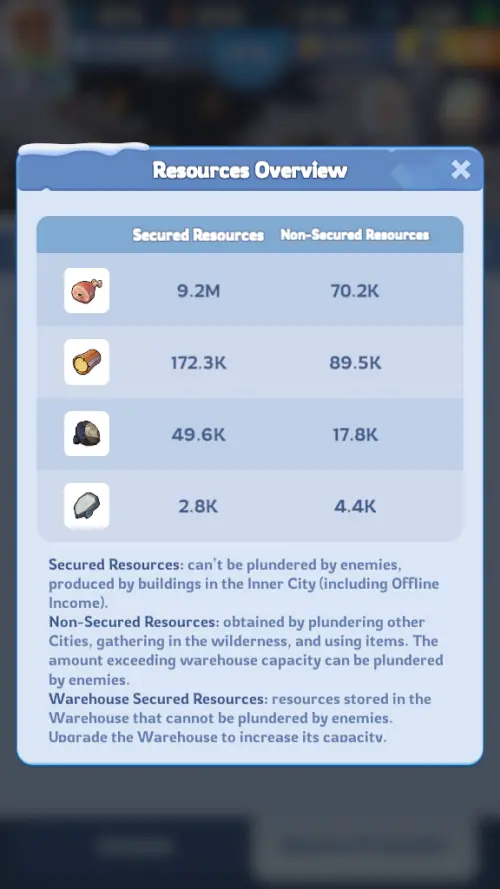
So you’ve got some resources in your Backpack, and you want to open all of them now. Don’t! Resource Packs that come from your Backpack, once opened, count toward Unsecured Resources that are not protected from enemy attack should another player decide to pick a fight with your city.
This means if you’re gonna open those Resource Packs, you better spend them fast! Unsecured Resources in large quantities might as well act as a big “Kick Me!” sign on your back, since they make you a lucrative target for anyone who decides scouting you is worthwhile.
The Whining-er-Suggestion Box

If you’re unsure just what to do next, take a peek at the Suggestion Box: This is where all your Survivors cry like babies -we mean- provide some constructive critique of your leadership ability. In game parlance, this is an easy way to check what buildings need upgrades and to go to those buildings quickly, since each complaint that isn’t just a pile of whining and pessimism has a very helpful arrow button that sends you to where you’re needed.
Even the seemingly pointless whining is useful though: If there are suddenly too many whiny, non-specific complaints for apparently no reason, the game might be telling you to upgrade your Furnace already!
Happiness and Health
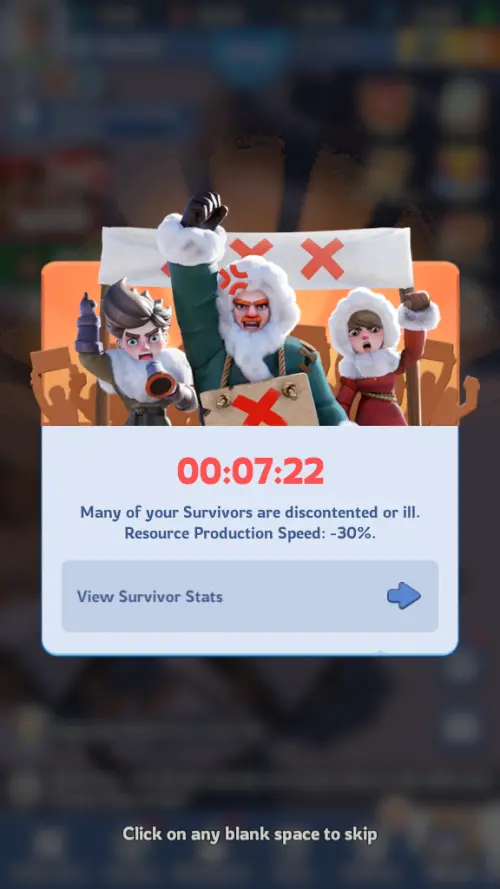
The Happiness and Health of your citizens affect their productivity: Unhappy citizens will trigger a temporary riot debuff that lowers the city’s productivity by 30%. After the debuff, Happiness will be maxed out again.
That being said, Happiness will slowly decrease and they’ll riot again as time goes on if you don’t upgrade the City’s various comforts and amenities to the point that the great majority of people are satisfied. Health is just as important, though thankfully easier to maintain: Sick citizens are rendered unable to work for a whole 12 hours if they aren’t taken to a Clinic to get better.
Even so, they’re still knocked out for a shorter amount of time, which means they’re useless for the duration. Happiness is generally affected by Comfort, and Health in particular is affected by Hunger, Sleep, and Cold. All of that can be fixed by keeping your Shelters’ and industrial buildings’ upgrades in order, and a good way to keep an eye on your people’s needs is the Suggestion Box.
EXPEDITIONARY TIPS

Expeditions are your other way of nabbing resources, and for Lighthouse Intel Expeditions in particular, nabbing hero shards. They’re also the main way you usually interact with Events, especially Alliance-focused ones and they often carry many rewards.
You can also invade other players, but apart from Events and later game tasks where that is encouraged, Expedition PVP isn’t particularly profitable if your targets simply use their Unsecured Resources regularly. Here are some tips to manage your Expeditions well.
Equalize Your Marches

Sending the max number of troops a single March can carry becomes inefficient once you unlock your second March Slot. That’s because early on, you don’t have enough troops to fill up both March slots, so you’re gonna end up being able to send only one March out at a time anyway!
Instead, if you’re doing Lighthouse Expeditions, split your forces into both your Marches so you can take on two missions at a time since Lighthouse missions that aren’t boss fights are generally incredibly easy no matter what tier they are.
The Equalize button will automatically allocate a fraction of your army to a March rather than the whole army, with the number of troops dependent on the number of March slots you have available. Only send in all your troops in one army if you’re about to fight one of those Lighthouse bosses, send them on a Rally, or kick another player in the shins and take anything they forgot to nail down.
Combat Heroes For Battle Expeditions

Heroes marked for Combat with a red sword icon are best used in combat Expeditions, which are unlocked once you get the Lighthouse. While both Growth and Combat Heroes can be used for combat Expeditions, Combat Heroes typically have buffs that increase an army’s ability to fight, allowing a team of Combat Heroes and their respective armies to beat tougher NPCs or cause bigger headaches for other players. Or in Gina’s case, do those expeditions for a lower cost.
Growth Heroes For Gathering Expeditions

Growth Heroes with the green icon on the other hand carry both passive buffs for your City’s resource-gathering ability just by existing, and carry another buff for Gathering outside the city in places like Abandoned Farms or Mines, depending on the hero used.
Each hero tends to boost gathering for a particular resource. They also often have skills that increase your Inner City’s resource income, so getting them is important for your city’s development.
EXPLORATION COMBAT TIPS

Exploration battles are your primary source of Steel along with the Exploration idle chest. Steel is used for special furniture upgrades for Shelters, industrial buildings, the Cookhouse, and Clinic early on, and for Research upgrades later on.
Exploration battles can be accessed through the Exploration button on the lower left of the screen, and Exploration-style battles can be found as Lighthouse map markers and the same mechanics are used for Arena battles.
The gameplay is similar to those you’d usually find in gacha hero collectors ala Cookie Run Kingdom: You set up a team and fight another team of Heroes either by timing skills or setting your team to Auto. It also has a rock paper scissors system, since unlike other Hero collector games of this type, your Heroes also bring a retinue of mooks with them, and often it’s those nameless, unassuming soldiers that end the match for you!
Growth or Combat? Doesn’t Matter In Exploration!

Unlike with Expeditions, the designation Combat hero or Growth Hero doesn’t matter in Exploration combat! Each hero has its own separate set of skills specifically for Exploration, and making a team with Heroes that either synergize with each other or counter the enemy’s unit-type composition will help with victory, even if you make a team full of Growth Heroes.
Shields Bows Spears: Like Rock Paper Scissors, But With A Body Count

If you have a roughly even power level with your opponent, especially against AI, and still wind up losing, you may need to rearrange your team. One of the simpler ways to do this is to play the equivalent of Rock Paper Scissors with the enemy Hero composition: Heroes come with mook escorts, with Infantry Heroes being followed by Infantry, Marksman Heroes by Marksmen, and Lancer Heroes by Lancers.
Infantry bludgeon Lancers, Lancers stab Marksmen, and Marksmen shoot Infantry full of holes. This is how it goes in both Expedition and Exploration battles. Of course, you’ll also need to make sure your Heroes work together and have skills that mesh with each other just as we discussed in the previous tip, but if your Hero roster isn’t wide enough to come up with galaxy-brain comps just yet, give the rock-paper-scissors approach a try.
Infantry Forward, Lancers, and Marksmen In The Rear
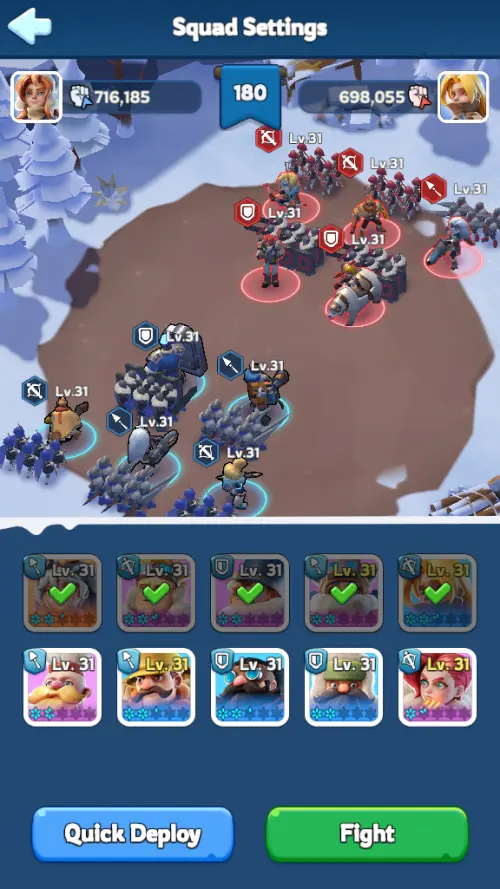
Whenever possible, arrange your units to have Infantry Heroes up front, and Lancers and Marksmen behind them. Infantry units generally have more HP and fight in melee, and while Lancer Heroes can either do melee attacks or ranged shots usually with AOE depending on the hero, their Lancer troop escorts in general throw their lances from mid-range.
Marksmen naturally hang back and shoot the enemy, and are squishy enough to get pasted by Infantry even though Marksmen beat them in the rock-paper-scissors of the game. Though only if the Infantry mooks actually get within strangling range, which they rarely do if you put the Marksmen out back and block them with your own Infantry or even Lancers if you need more firepower than you need meatshields.
And this ends our Whiteout Survival beginner’s guide. We hope this helps, and we wish you a warm day. If you have your own tips, don’t hesitate to leave them in the comments below!