April 12, 1861. Confederate troops fire upon Fort Sumter in Charleston, thus beginning one of the bloodiest eras of United States history. Abraham Lincoln declares war on the secessionist southern states who call themselves the Confederacy.
A war where the soul of America and their ideals of freedom for all, are put to the test against the old, tyrannical institution of slavery and cotton. The smoke-belching industrial modernity of the North, against the old agrarian riches and obsolete prejudices of the South.
And in this war can be seen a taste of horrors to come. Large formations of neatly lined up musketeers and cannons mixed with the prototype tactics of trench warfare, dangerously experimental hand grenades, the deadly Gatling Gun, and less than adequate military medical care cause grievous death and suffering for all involved. A dark foreshadowing for another, greater war decades into the future. In all honesty, this game has very little to do with all that!
Welcome to our War and Peace: Civil War guide! War and Peace is a kingdom (Or in their insistent terminology, Fort) management game by eRepublik Labs. You can choose to be a Union or Confederate general, which has very little bearing on who you get to fight: You might have Union and Confederate forts in the same Alliance together, and Union forts can attack Union forts, Confederates can fight Confederates, historical accuracy is a complete non-issue.
You’ll mostly spend your time training troops, keeping track of day-to-day fort upgrades, picking fights with non-aligned Tech Monsters (A weird way to call bandits carrying huge cannons), checking on events, doing Daily missions, and, unless you’re the one picking fights, checking if someone attacked you recently.
Take note that if you plan to play this game and see it through, you’re in for a really long haul: Even in your first week, you’ll hit several hour long Construction timers and several day long Research timers. It’s an incredibly slow game requiring patience, but thankfully they make up for it with forgiving rewards: It is entirely possible to grind the lowest tier Tech Monsters, Agar Guns, for Gold, the premium currency! You’ll be using a lot of it to recharge your VIP timer and speed up construction and research.
With that in mind, let’s get started with our War and Peace: Civil War guide!
THE FIRST 3 DAYS
When you start the game, you’re given a mostly empty Fort, 3 days of VIP, and 3 days of a Peace Shield. And unlike most kingdom builders, there are no new building slots to unlock, you can fill them up as soon as the game begins. Make the most of it, since after the Peace Shield goes down, you’re open to attack, and you’ll need an army by then.
As such, the first three days, or the first day depending on how nuts you are, will be the most hectic for you. After the first 3 days, things will slow down, though you’ll still be using Speed Ups if you plan to play seriously. Here are some tips for starting out in the game, and things slow down even more once you unlock tier 2, since that’s when the timers start getting really slow.
Use Your Speedups

Often, it gets tempting to save speedups until some emergency befalls you, much like hoarding Elixirs in a Final Fantasy game. Thing is, with your starter 3 day VIP and Peace Shield, you’ve got about that long to get your fort up and running. Use your speedups carefully, but use them, making sure to use just enough to get structures to the VIP free construction time limit.
In any strategy game, it isn’t just about having more resources than the enemy, but also making use of those resources efficiently and in a timely manner to not just get a head start on them, but to make sure you keep them out of your face. Meanwhile, save the heavier multiple hour Speedups, because you’ll eventually run into Research timers that might need them. Using those speedups means you won’t get into nasty emergencies in the first place, because you’ll have troops prepared to deal with them!
Fill The Town ASAP
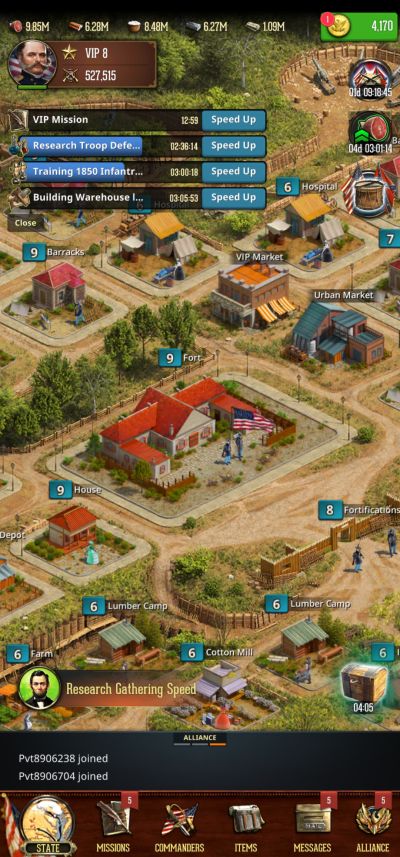
With your 3 days of starter VIP, it comes with build timers reaching below a certain amount of time becoming instant, usually marked by a big purple FREE button when you plonk a structure’s foundations on the ground. This means you should have your whole town’s space filled by the first or second day, taking care to make space for the Telegraph, Garrison, Warehouse, College (You’ll build this as part of the tutorial) and Supply Depot.
You should have some Houses early on so you can gather the Greenbacks resource, but later into the game you may want to ditch some of them for more Barracks and Hospitals, so you can more easily conscript troops en masse, then recoup those losses when they get massacred in some horrific ill-fated assault.
Shaking Hands
Make sure to join an Alliance, especially one you notice have clumped together on the State map, as that’s your second line of defense after your Peace Shield goes down… And more importantly, they have an Alliance Shop! After you join an Alliance, try your best to look for where they’re positioned: If they’re in a big clump, use your Basic Teleporter if your Fort is below lv6, or your one starter Advanced Teleporter if you only found or joined them after lv6.
That way, other players think twice about picking a fight with you. If your Allies are scattered, then either find a new, more cohesive Alliance to join, or look for where a few of them may have clumped together (or the strongest Ally you can find nearby) and teleport your Fort to them.
GENERAL TIPS
There are some things to take note of over the course of general gameplay. Quite a few of these tips may be familiar to you if you’ve played kingdom builders before, but there are also some specific to this game, such as how different tiers of troops and Tech Monsters are drastically more powerful than the previous one, or the fact you can grind the game’s premium currency more easily than in most other games of this type. Keep these in mind and you’re good to go.
Save Your Gold
You get roughly 4-5k Gold at the start of the game if you diligently build up your town thanks to the initial leveling up events, along with items that can increase both your VIP rank, and VIP time. If you’ve decided that you like the game you can use that Gold for a 30 day VIP timer, which is far cheaper than buying smaller VIP timers piecemeal, at 3k gold.
Another option, if you somehow manage to get a ton of VIP timer items, is to go for VIP points instead, so your VIP level is higher. Later on, it might do you well to save your VIP time items for when you get a higher VIP level or expect some long winded upgrades, tasks, or a fight. You can also grind Gold by fighting Tech Monsters, even the low level ones, making Gold acquisition much easier than in most games with premium currency.
Constant Training
Union training manifest, 1862
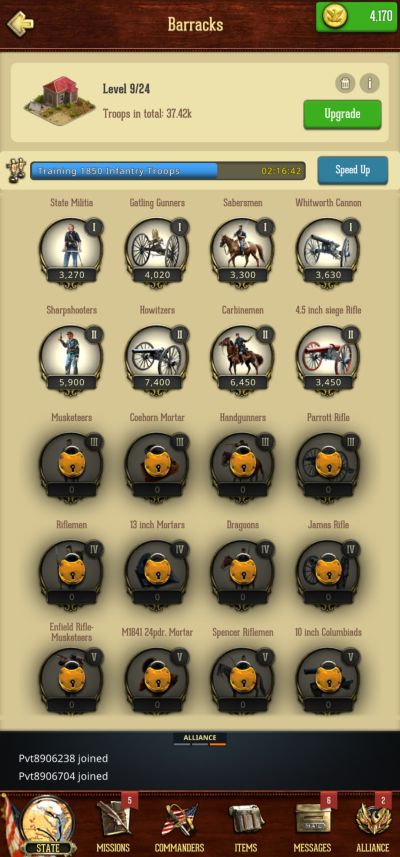
As much as you can, keep the Barracks running. You’re gonna need as many troops as you can to do tasks such as attacking Tech Monsters (Basically PVE), gathering resources, and if need be, picking fights with other players while still having enough left to make sure nobody strikes while your main force is away. There are 4 different kinds of units, which we will discuss later.
Burn Down Your Stamina
You are given 50k stamina maximum, used to do tasks in the State map. It recharges with time, so make the most of it and use it all up. That way, you make more progress and profit every day, and have a better idea of when to log off.
One of the better ways to do this is to grind Tech Monsters, since even low level ones have a chance to drop Gold in useful amounts. If you constantly burn through your Stamina every day, you’d be surprised just how fast you’ll make Gold and get that VIP extension you’ve been eyeing.
Rock Paper Scissors, Horses Guns and Men
There are 4 different types of units, and three of them have a rock-paper-scissors mechanic with each other.
Infantry are strong against Cavalry and weak against Field Guns. In real life, a unit of close-combat horsemen running into a line of muskets with pointy bayonets at the end never ends well unless the infantry they’re attacking are already on the verge of breaking and panicking anyway. On the other hand, large, slow-moving infantry formations are easy meat for Gatling guns and howitzers.. This is reflected in the way the game does battle math between armies.
Cavalry are strong against Field Guns and weak against Infantry. In real life, Cavalry units can easily outflank towed artillery units such as Gatling guns and strike them, since towed field guns of that era only aim fast enough to be able to hit large lines of musket infantry. On the other hand, a man can swing their musket around much faster, and even if those soldiers miss their mark, horses don’t exactly find the idea of charging against pointed bayonets an enticing prospect.
Field Guns are strong against Infantry and don’t work too well on Cavalry. Field Guns are typically defined as short range direct fire artillery or heavy weapons. Field Guns like Gatling Guns were practically made for shredding the infantry formations of that era, doing so horribly enough that late in the war, infantry tactics turned away from big formations shooting each other and started developing smaller, more mobile infantry units and some of the earlier forms of trench warfare.
On the other hand, Field Guns of that era were slow and lacked powered aiming. Unlike a modern machine gun, a Gatling Gun of that era is huge enough to be pulled by horses and has a very limited traverse without having to rotate the entire gun, and trying to aim it at a unit of horses swinging to your side never ends well.
Siege Guns are weak against everything, and most players generally consider them useless for combat, unlike in real life where you typically need them to bust down fortress walls. That being said, Fortifications in this game only give you a damage bonus rather than having an actual HP count like in most other kingdom-management games that have PVP, so that’s their one job being tossed out the window.
Or is it? Most players typically use tier 1 siege guns for gathering, since A, they cost less than what your mainline troops will cost after you tier up, and B, you’ll never use them for serious fights anyway, and it’s convenient to have a specific unit type you can just tap on for gathering.
Typically you’d want to make a balanced defensive army of Infantry, Cavalry and Field Guns, so that the enemy will have a rough time trying to look for weaknesses.
Tiers of Pain
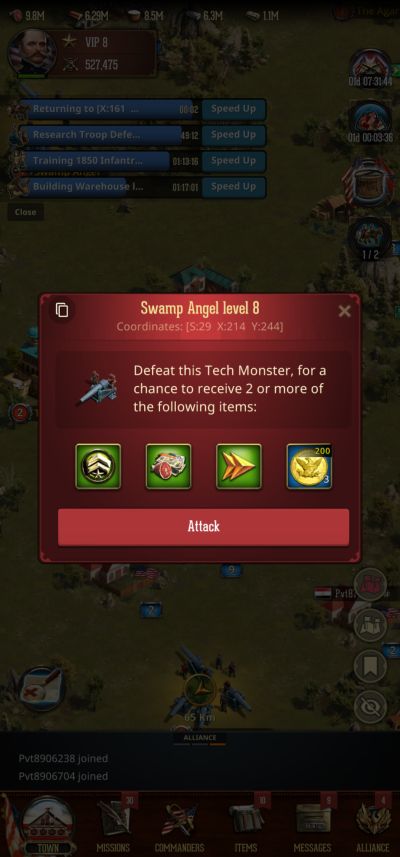
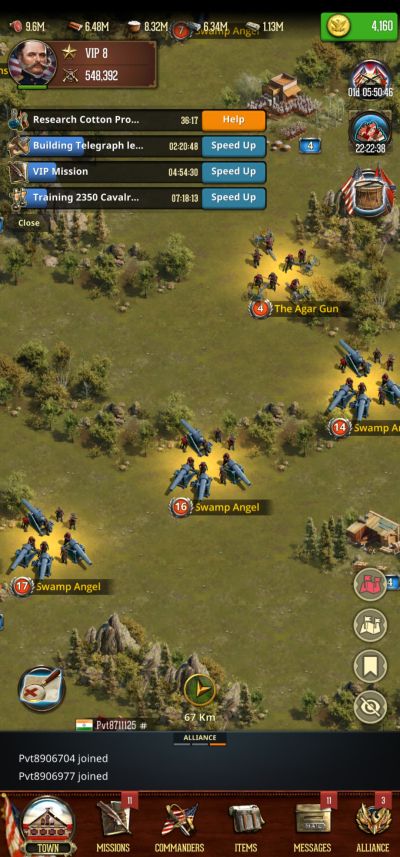
Not only should you look at the level of a Tech Monster before attacking it, you should look at its tier: The difference between the first tier level 6 Agar Gun and the second tier level 7 Swamp Angel is great enough that an army good enough to think the level 6 Agar Gun is a “Piece of Cake” will tell you that fighting the level 7 Swamp Angel is “Suicide”.
This tier difference goes for your soldiers too: Every new tier of unit you unlock is about twice as powerful as the unit before it, going up exponentially. As such, if you see Tech Monsters above your tier, that means you should go into your Research Tab and start trying to unlock better units if you haven’t already.
Knowledge Before Aggression
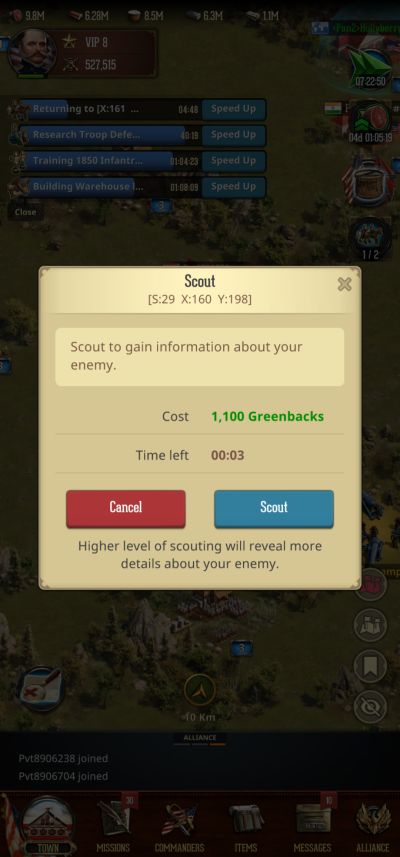
So you want to pick a fight with your fellow player. Perhaps you’re bored of fighting Tech Monsters, maybe your opponent just looks like an easy mark, maybe you just want to ruin someone’s day because you feel like being a jerk. If so, tap their fort and use the Scout option first.
This way, you know exactly what you’re getting into. Now if the guy is using an Anti-Scout, then that’s probably just a sign that the other guy knows what he’s doing and is a risky person to attack. Either way, at least try to Scout your target first so you don’t wind up sending 20 men against 200,000.
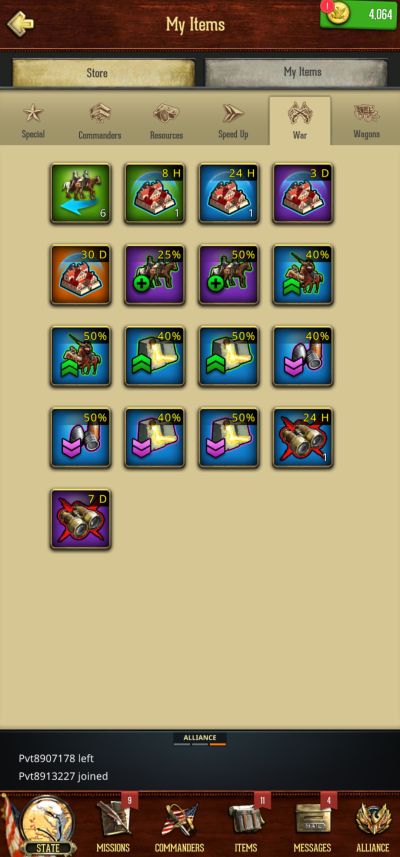
That being said though, beware of Rally Traps: Rally Traps are a way players attempt to lure other players into attacking them, usually by having only a small army garrison their Fort, but buffing it into outer space with a high level Commander and lots of defensive buff items (You find such items in your inventory via the War tab).
The low troop count or low power count (The latter is done via the use of low tier soldiers as opposed to few soldiers) is to make it look enticing when scouted, only for the attacking player to get shredded because that tiny army is made of absolutely jacked supersoldiers on steroids.
Always take into account the Fort level of the player you’re attacking: Even if the Scouting info says their army is weak, if their Fort level is high enough to raise red flags in your head, listen to your head and turn away.
THE DAILY GRIND
With any mobile game, there is a daily routine you’ll likely wind up following as you start playing regularly. War and Peace is no exception to this, with not just daily tasks marked out for you, but other things you have to do for Fort maintenance such as constant troop training. Do these everyday diligently so your Fort is always in in good shape and moving forward, an inch at a time. At the very, very least, always do the first thing on this list.
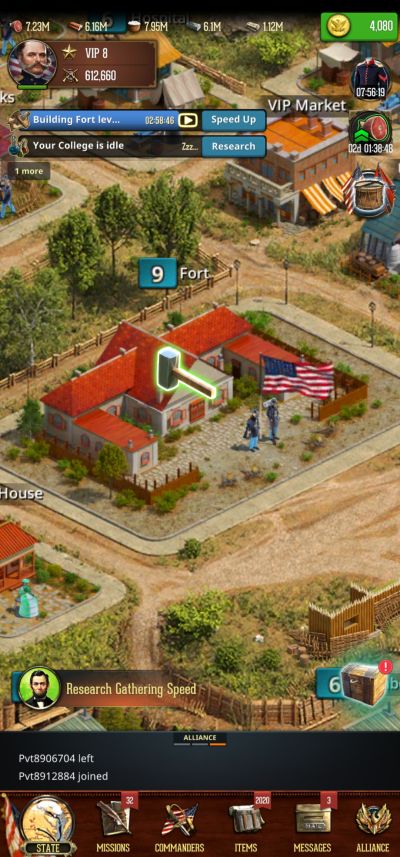
Kick Everyone Awake
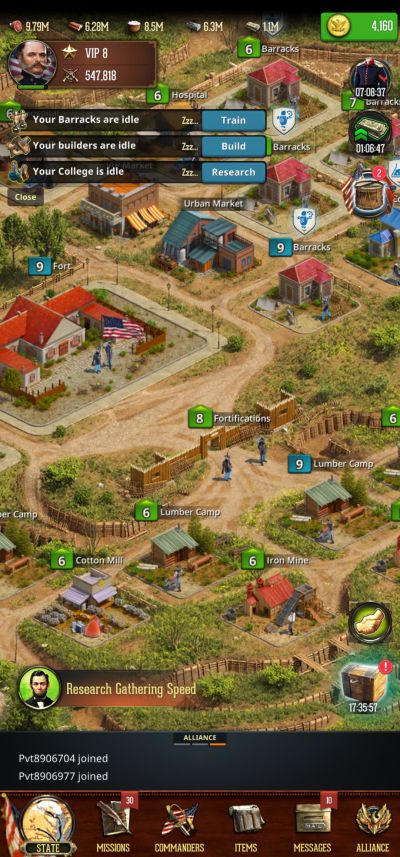
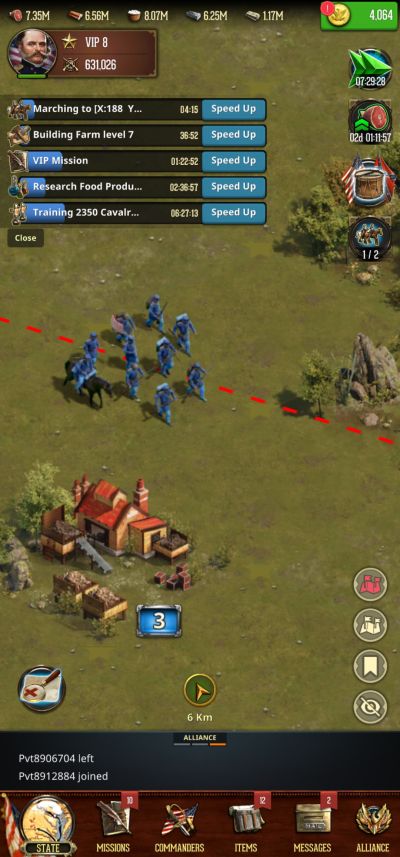
The first thing you should do every time you log in is to check the upper left corner of your screen. That tells you everything that is idle, such as your Builders, College researchers and the Barracks. If they’re idle, get their butts in gear!
Tell them to upgrade a building, do some research, or train some soldiers! Your drill sergeants, workmen and nerds are worthless if they aren’t doing their jobs, and you always need more troops, more supplies, more and more and more everything for the war effort. Keep them working constantly and check up on them every couple of hours or so.
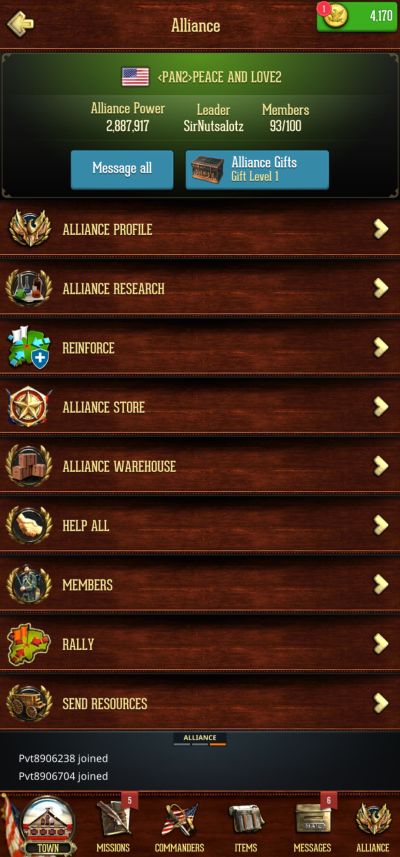
Check The Alliance Tab
Check on your Alliance tab once every day. You might have Allies asking for Building Help, and tapping the Help button cuts some time from their build timers, and they will do the same for you. You can donate to the Alliance’s tech tree and work towards a global buff for the rest of the Alliance, including yourself.
Heck, you can donate resources to other Allies, even if only because you want to look for them then teleport next to them for protection. You can check the Alliance Store for goods, maybe save for that 10k VIP Points item. You can also check for any ongoing rallies and see if you can contribute troops to a Tech Monster Fort assault. Do your part as a member of your Alliance, if anything it’ll only benefit you and everyone else in it.
Resource Nabbing
Around the map are resource tiles, which can be occupied by your troops. While occupied, your soldiers will gather resources there, and they will have to march back home for you to get those resources.
It is also entirely possible for hostile players to attack them while they’re gathering, since this takes quite some time. Each tile has a certain amount of resources on it, so the only reason to bring more troops than is needed to carry those resources is if you’re expecting a fight to break out over it.
Otherwise, it’s usually a good idea to use only enough soldiers to occupy a resource tile, as you may need the leftover troops for home defense, or to grind out the next thing on our list of things to do. You can look for these tiles with the Tile Seeker, the button that looks like a map with a magnifying glass looking at a bright red X.
You will usually do this after expending your Stamina fighting Tech Monsters and Tech Monster Forts, as Gathering expends no stamina and takes a while. If your troops are doing gathering jobs, that usually means it might be time to log off for a bit.
Tech Monsters
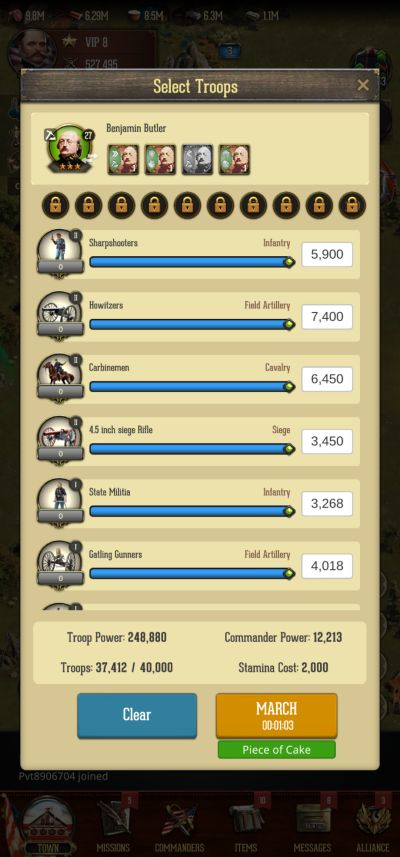
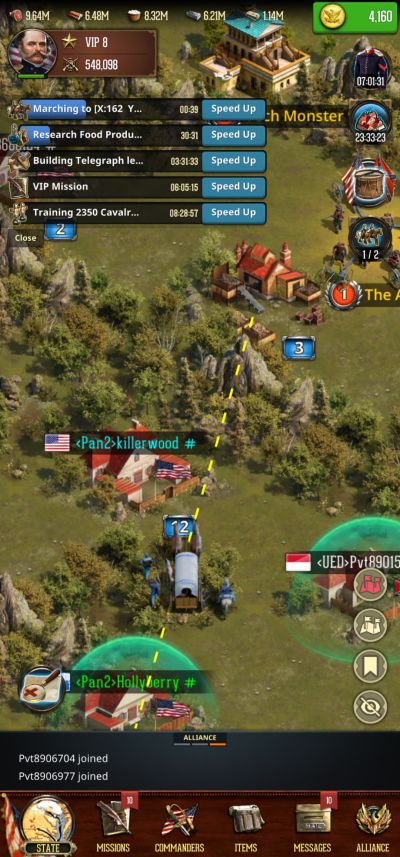
Tech Monsters are non-aligned troops manning artillery weapons, and count as the basic PVE enemy in the game. Fighting them is simple: Select them, then pick what units to bring and how many, pick your commander, and let your troops march to them. The attack button will have a note telling you how easy the fight is, ranging from “Piece of Cake!” To “Suicide”, which should be enough to tell you if you have enough men to fight it.
Unlike Resource tiles, low level Tech Monster tiles (Levels 1-6, anything higher and your troops will have to march) will be spawned in right next to your Fort if the Tile Seeker cannot find one within quick, reasonable marching distance, allowing you to grind them more easily by cutting on march time.
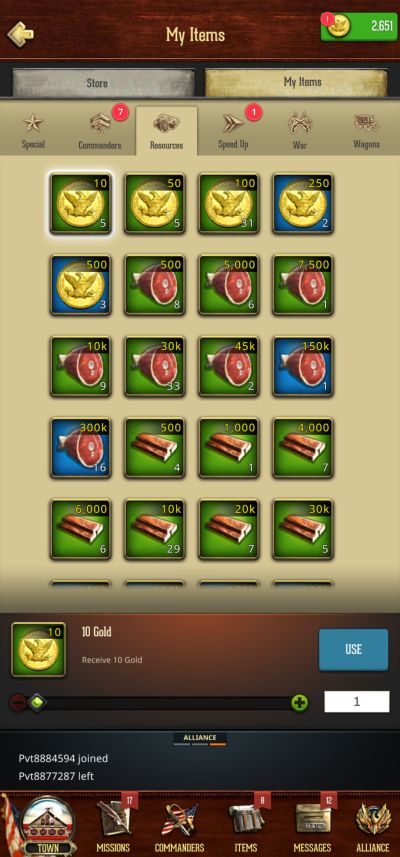
They have a chance to reward Resources, Commander Exp, Speed Ups and Gold in packs of 100, which you can use via your Inventory under the Resources tab. Repeatedly grinding down low level Tech Monsters (Relative to your level) is the easiest way to get Gold (And therefore, things like VIP extensions or Speed Ups from the VIP Market and Urban Market), as the drop rates aren’t particularly bad. Burn down your stamina hunting them.
Missions Tab
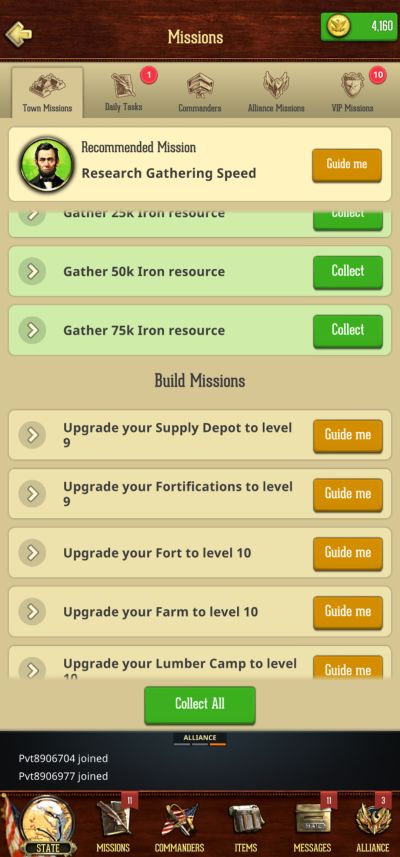
If you have no idea what to do next, the Daily Tasks and Town Missions can point you to the right direction. Town Missions have chapters at first as a tutorial, but you’ll finish them in about a day and you’ll be given a long list of missions that are meant to be accomplished through your career. They’re helpfully separated into Build, Training, Research and Miscellaneous missions, making these missions a good way to see how far you are into the game and where you might be lacking based on what missions you have.
The Daily tasks on the other hand tell you how much you’ve done for the day, as missions completed here fill a bar that allows you to open chests. Always do enough Dailies to get the final chest every day, as that chest contains a single Legendary Pank Point booster to upgrade your Legendary Commanders with, along with 100 Gold.
Commander, Alliance and VIP Missions
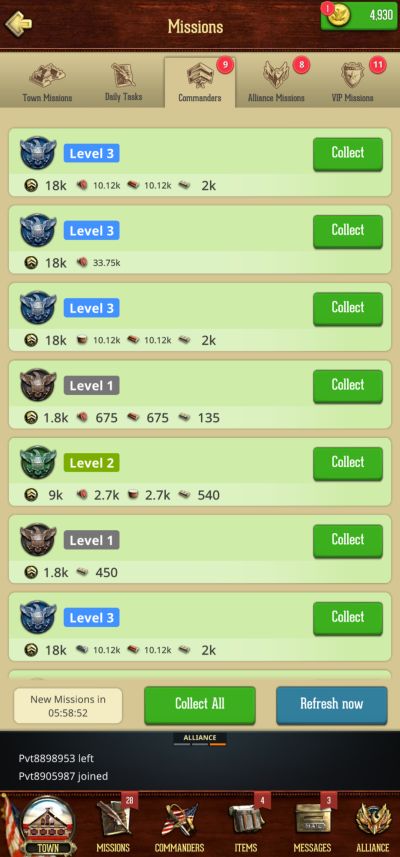
Commander, Alliance and VIP Missions make up the rest of the Missions tab, and they’re basically timed boxes for you to open. All mission types give out Commander EXP and resources, Alliance Missions are only available if you’re in an Alliance and give out Alliance Shop coins, and VIP Missions
typically give greater rewards than Commander missions, but are only given if you have VIP active.
A good idea is to start with the shorter low level missions first to clean them up. Afterwards, do the higher level missions until the three tabs are empty. If all the missions left take a long time, you may want to get the highest level missions out of the way first so they don’t get refreshed, in case you forget about them, just make sure all the gray ones are swept out of the way first.
Check The VIP and Urban Markets
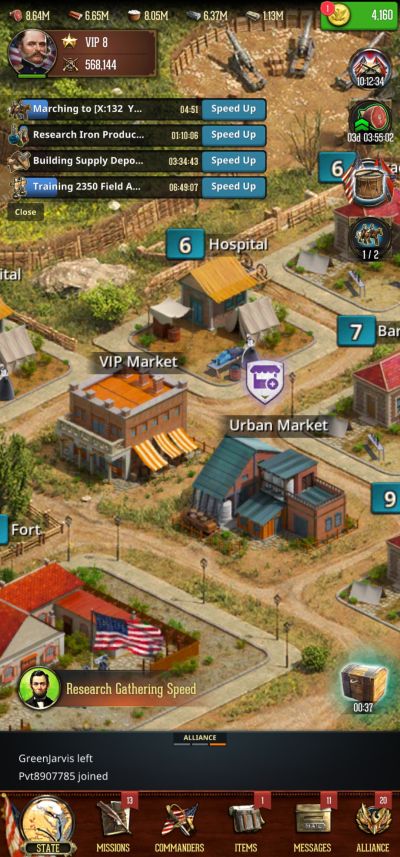
Always check the Urban Market every day, and the VIP Market every half-week or so. Those markets will be your source for things such as Speed Ups, VIP Extensions, and other useful items outside of grinding Tech Monsters into powder. They’re often sold with discounts too, and sometimes not even for Gold. Keep an eye on these and buy wisely.
STUFF TO DO ASIDE FROM THE DAILY GRIND
If there are daily tasks, then these are what you do once you sense the opportunity to do so. Note that both of these are typically meant to be done later into the game, once everything is running smoothly and you’ve done quite a lot of research and grinding.
For one thing, Tech Monster Forts are strong enough to need an Alliance to beat, and Events can be a mixed bag, sometimes having fairly easy goals, while others are meant to cater to high level players. Either way, rewards await so keep an eye on them.
Tech Monster Forts
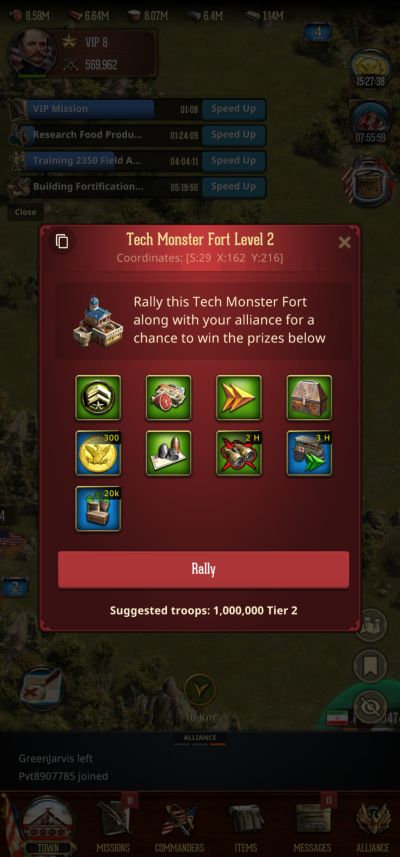
Tech Monster Forts are more powerful than Tech Monsters, to the point you’ll usually need a couple of your Alliance buddies to help out. You fight it the same way you fight a Tech Monster tile, except all your Allies are notified, and you add a delay to allow your Allies to send in their troops.
It has better rewards compared to Tech Monsters, with Alliance Gifts, War Scrolls for Rally Point upgrades, and VIP points and extensions on top of the normal rewards you’d expect from a Tech Monster tile. Attempting to attack one of these alone is highly risky for your troops.
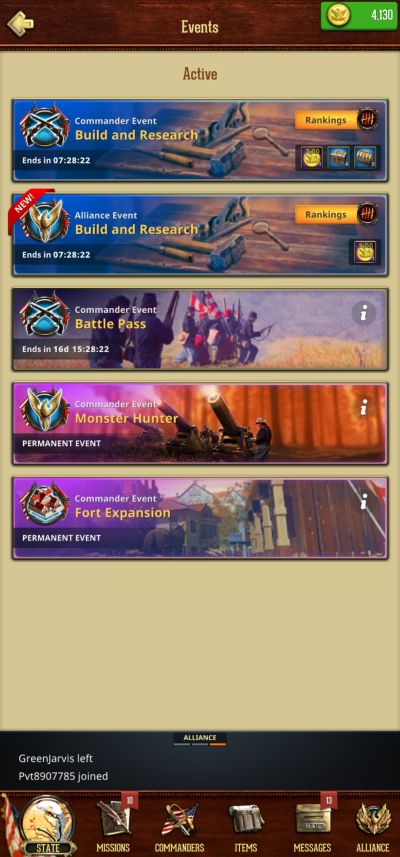
Events
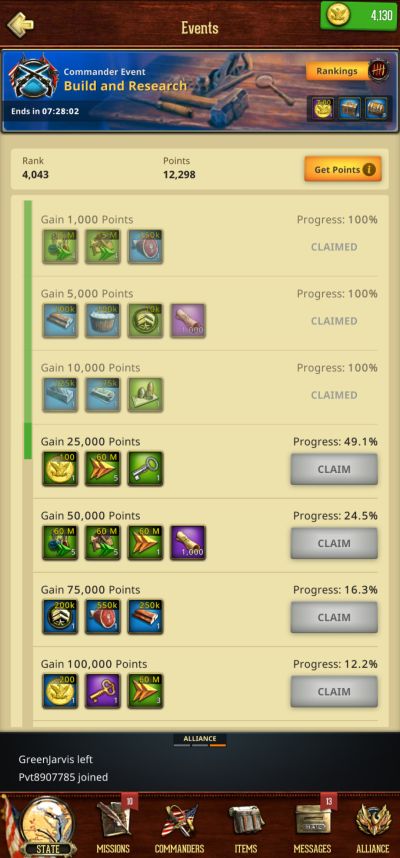
If you look at the right side of your screen, you’ll notice a bunch of icons there. One of them is the Events icon, showing quests and events that you can do for big rewards. These are typically the best way to get things like Gold and VIP Points/Extensions, and sometimes they even reward high tier equipment for your Commanders.
Most events tend to be centered around Alliances, so joining a competent or active one is in your best interest. They can range from holding a certain set of tiles for as long as possible (Beware, these kinds of events tend to end in player vs player bloodshed!) to simply looking for the local Tech Monsters and shaking them down for their lunch money. Keep an eye on these as you play.
Beware, that most events that have tasks aligning with Alliance objectives often require you to be at a rather high level.
COMMANDERS
Commanders, typically made of historical figures from the Civil War era (Even the seemingly made-up character Old Green Eyes is based off an old Civil War era myth from the Battle of Chickamauga), are the ones in charge of your armies. They’re one of the two things limiting how many armies you can send, the other one being your available March slots.
Even if you have 3 march slots, you can’t send 3 marches if all you have are 2 commanders, and vice versa. Each Commander has a set of passive skills specific to them, but can also be upgraded via a more general skill tree that can let them do tasks they might not normally be good for if you’re a bit short on luck. Here’s some details about their use and how to make them stronger.
Fort Assignments
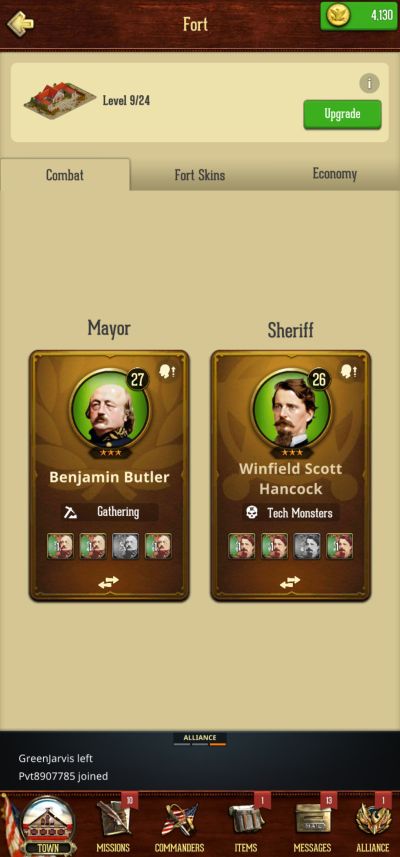
You can assign two Commanders to your Fort to give passive buffs.
The Mayor will give their passive economic buffs at all times to the Town. This means your best bet for Mayor, at least before you get any Commanders specifically built for economic buffs, is actually whichever Common commander you have available to you It’s pretty easy for you to shove Common commanders full of EXP compared to higher tier commanders, and therefore dump all their skill points into economy buffs like resource production and construction speed nodes. You should also give them gear meant for powering up your resource structures or speeding up research, training and construction.
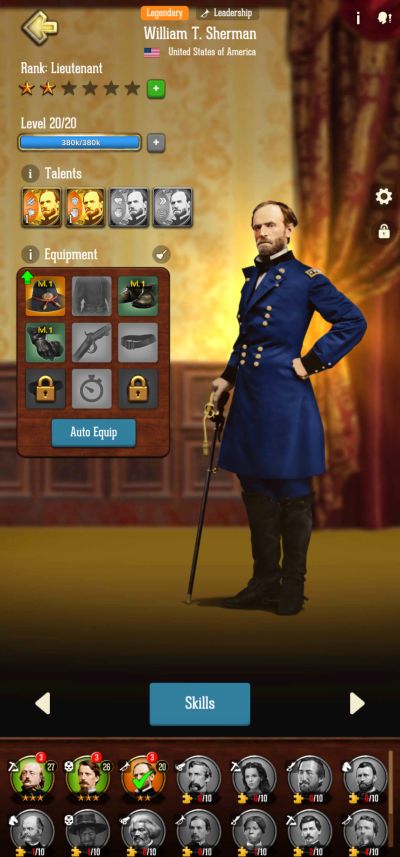
The Sheriff on the other hand is in charge of defending your town, and as such needs to be one of your more combative or murdery commanders, like say William Tecumseh “Turned Georgia Into Lava” Sherman, a generalist Legendary, starter, and overall fiery personality. Their troop buffs will activate if your town is under attack, and as such you should equip them with gear that have stats for combat, and use their skill points on defensive buffs.
Command Training
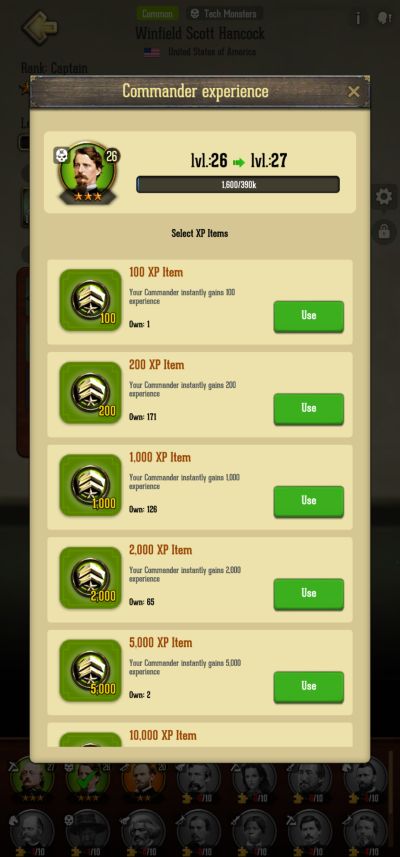
You have two ways to strengthen your commanders, one reliant on the other. Commanders can be leveled up by pressing the + button next to their EXP bar. Then you can give them Commander EXP points, which you usually find as drops from Tech Monsters, and Tech Monster Forts.
They can go up to a maximum of 10 levels at a time, after which you need to star them up, raising their military rank. To do this, you use the Rank Points item appropriate to the Commander’s rarity. You can typically buy these from the VIP or Urban Market.
Equipment
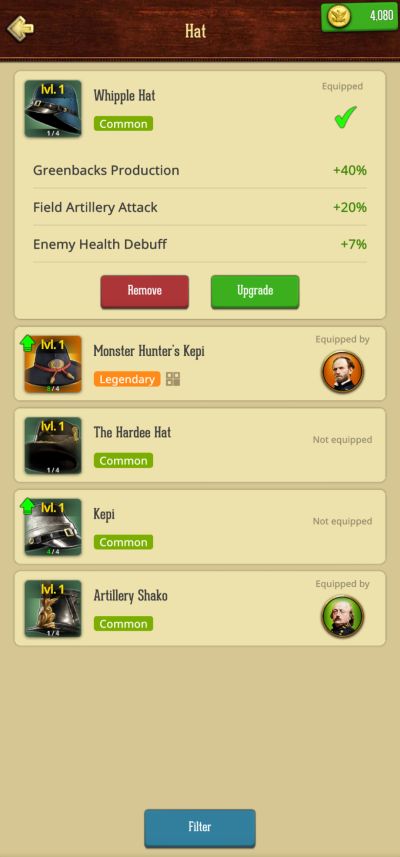
Equipment is the main reason you need loads of Greenbacks. Equipment typically give fairly hefty boosts to your Commander. You upgrade them by getting duplicates of the equipment from [LOOT CHESTS], then spending a ton (As in, your first equipment upgrade will cost you roughly 2 million!) Greenbacks. You should equip your Commanders according to their job, with your Mayor getting economic bonuses while everyone else gets combat or gathering bonuses.
THINGS WORTH SAVING FOR
In War and Peace, there are several items that you ought to save Gold for. They’re typically things that you use defensively or to power up permanently rather than resources, which you can grab fairly easily if you play regularly. Here they are.
Shields
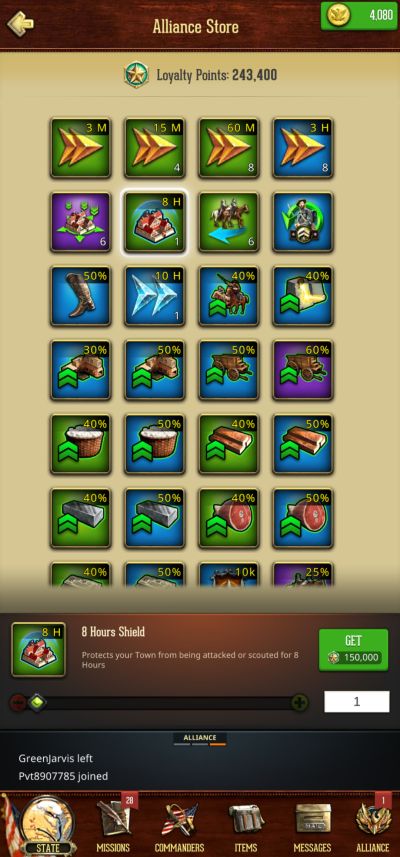
Shields protect your fort from player attacks and scouting, allowing you to send your entire army to fight against Tech Monsters and do other tasks without having to leave troops at home. This is especially useful for Gathering jobs: While the Shield doesn’t protect your gathering troops, the presence of said Shield in your fort means you can send the whole army if you want.
This means those gathering troops become much more dangerous to attack, making other players think twice about bothering them! Most players agree that keeping a peace Shield on at all times often makes it easier to handle Events, since Events typically mean your army is constantly out doing work, putting your fort at risk.
Anti-Scout
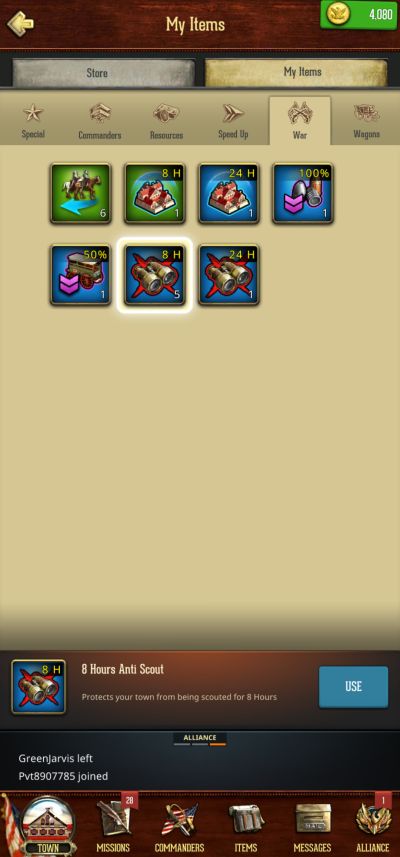
While Anti-Scout doesn’t completely protect your Fort like a Peace Shield does, it also gives its Anti-Scout effect to gathering troops occupying tiles, unlike a Peace Shield, which still leaves gathering troops vulnerable.
If you’ve got some extra lying around, you can use it in conjunction with a Peace Shield so enemies think twice about fighting you. Use it if your troops are gathering and you expect to do so for a long time, especially if you’re gathering while you’re offline.
Speed Ups
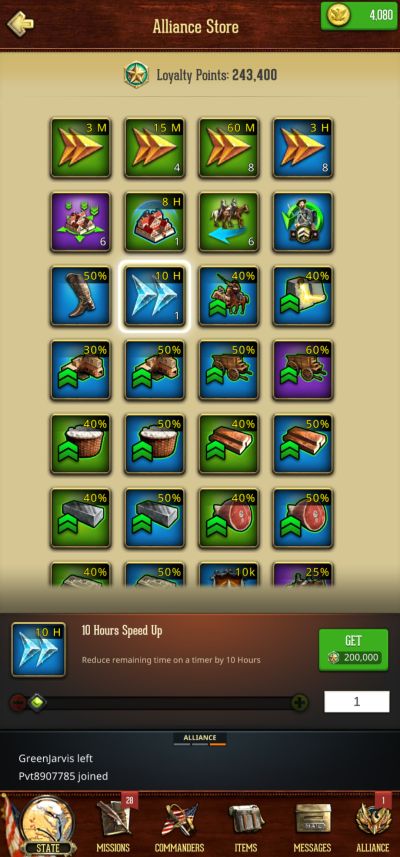
Eventually, you’ll notice the timers go very slowly, especially with Research, where the time requirements for researching mere second tier units like Sharpshooters and Howitzers could hit 2-3 real-life days per unit.
This means that while you should use the smaller speed ups for upgrading structures, the heavier ones are best for Research and the Fort… and you’ll need a lot of them if you want upgrades in a timely manner. You can buy Speed Ups in the Alliance Shop, and sometimes in the VIP and Urban market. Buying Speed Ups is more cost-efficient than spending Gold directly to remove a timer.
Often, Speed Ups from the two Markets come with some form of discount. Task-specific Speed Ups are also cheaper than generalist ones, so you might want to save on Research and Building Speed Ups. As for Training Speed Ups, it’s not usually worth it to speed up Training, since you can lose troops anyway. Best to pour resources into Research, since the enemy can’t send that to the graveyard.
VIP Extensions
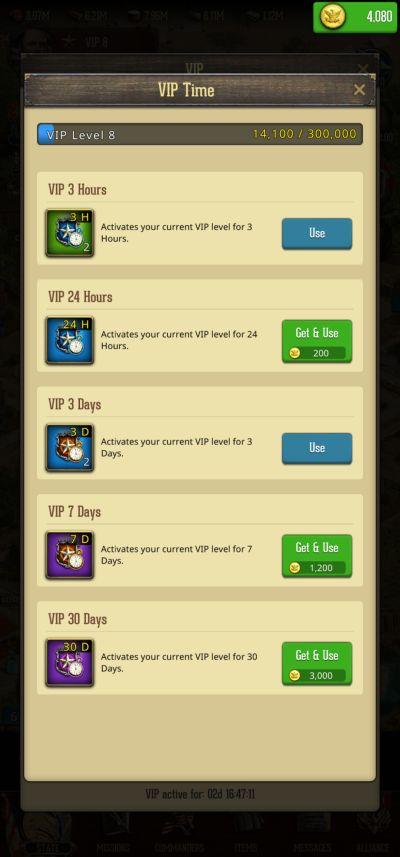
Having VIP active, even at lower levels, gives you some advantages such as access to the VIP Market, VIP Missions, and a load of buffs toward resource gathering. Of all those, the VIP Market is the most important, since it sometimes sells discounted Speed Ups and Rank Points for either gold or resources. The higher your VIP level, the more stuff you have access to.
As for the VIP extensions themselves, it’s entirely possible to grind for them by wailing on something as weak as Agar Guns repeatedly, given enough time. Not to mention waiting for events that reward Gold and free VIP Extensions!
Universal Talents
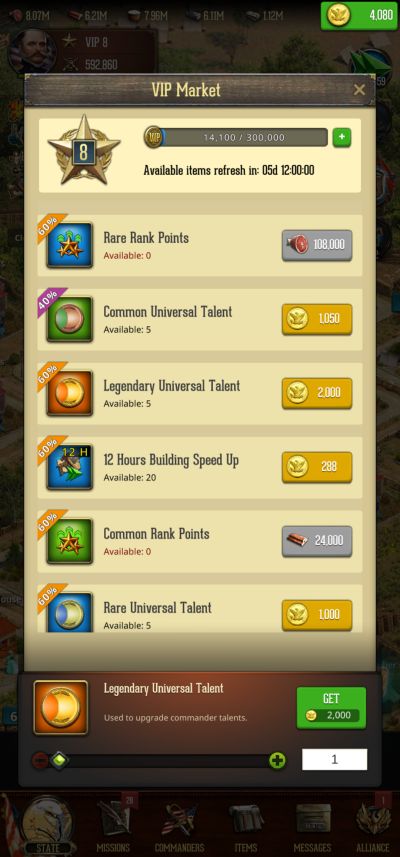
Universal Talents are used to upgrade a Commander’s Talents, provided they match the tier of said Commander. They’re useful since they can be used on any talent, as opposed to Talent items that can only upgrade specific ones. They’re some of the more expensive items on sale at a few thousand Gold depending on discounts, but they’re something you’ll need to power up your commanders, especially after you’ve unlocked all their skills.
Rank Points
As we discussed before, a commander’s Rank comes after leveling them up, acting as a threshold that lets them unlock new skills after hitting their current maximum level. Promoting the commander increases their max level and unlocks a skill. You can buy Rank Points to do this with from both thew VIP and Urban Markets, and you’ll need them since a high level commander can improve an army’s performance noticeably, or your town’s productivity depending on how you allocate their skills.
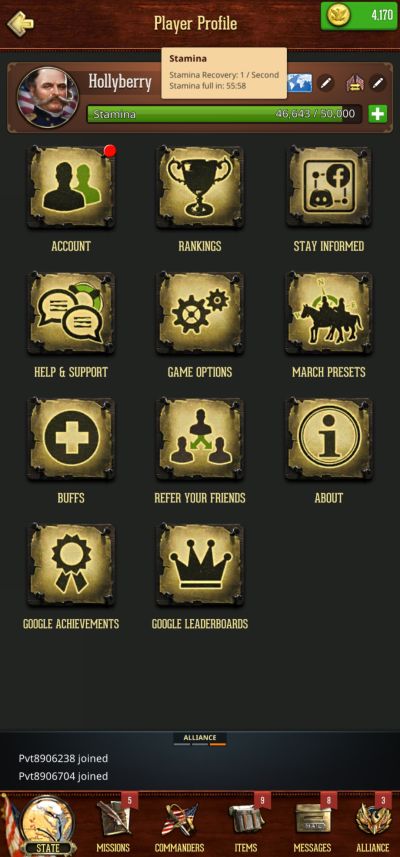
VIP Points
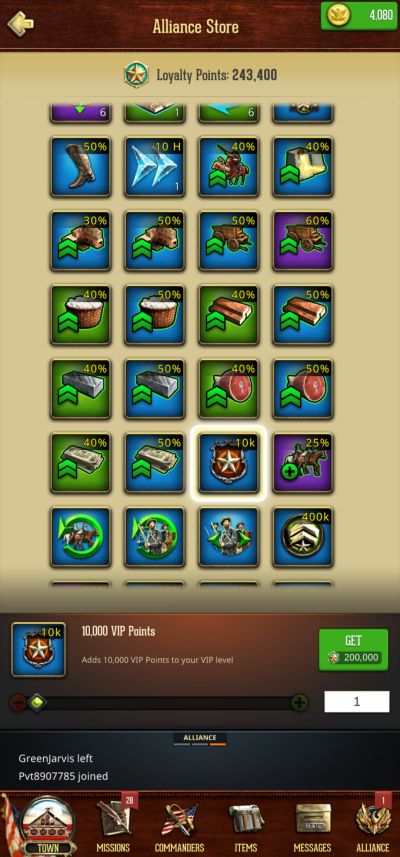
Ranking up your VIP gives you many conveniences, and even level 8 VIP is good enough to make your live quite breezy: Each level of VIP adds something to make your life easier, such as cutting down on construction time, various buffs, and level 8 VIP autocompletes Alliance Missions in the Mission Tab!
Seeing as you can grind Gold even by beating up low level Tech Monsters repeatedly, it shouldn’t be too hard to rank up your VIP to level 8 at least in your first week, though of course the price goes up with every level. Just set aside some Gold for VIP Points over time, especially if you’re in this game for the long haul.
And this is the end of our War and Peace: Civil War guide. If you have tips of your own, don’t hesitate to share them in the comments below!