The Lord of the Rings novel was first published by English author and scholar J.R.R. Tolkien on July 29th, 1954 as a sequel to his 1937 children’s book, The Hobbit. While it was initially met with mixed reception, the epic high-fantasy novel eventually made its way to the hands of readers who reveled in the magic and sense of adventure the book introduced them to.
Its popularity inspired two more books, completing a trilogy, along with several creative works by others that were enchanted by the author’s creativity. Several decades later, even well after the death of J.R.R. Tolkien, his fans kept his magic alive in the form of posthumous publications, adaptations to various media, and references in pop culture.
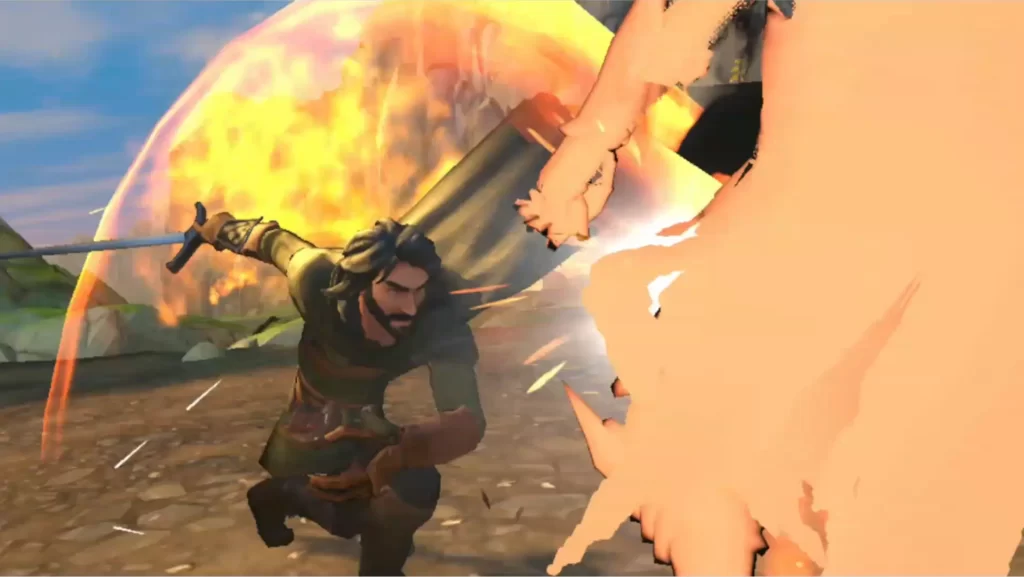
In this present age of mobile games, the characters from Middle-earth come to life in this free-to-play hero-collecting mobile RPG created by Electronic Arts. The Lord of the Rings: Heroes of Middle-earth is reminiscent of Disney Mirrorverse’s hero collection mechanics and overall gameplay but with an action-bar-dependent turned-based combat system similar to Final Fantasy X. Like Disney Mirrorverse, the game brings familiar characters into a story outside of the books, pitting light against dark as new ring-bearers come into play that have the power to control heroes.
The game is available in both Android and iOS and was only released globally on May 10th, 2023. To help new players get used to the game and develop strategies to excel in it, we’ve created this handy-dandy beginner’s guide! It will be covering mostly the basics along with a few tips and tricks that some players may miss in their first playthroughs.
1. Be Wise When Choosing Targets
In battle, you’ll face several enemies at a time. While the objective is to defeat them all, the order in which you eliminate them could be what determines a win or a loss. Below are some factors to consider when choosing which enemy to attack first.
More Segments = More Health
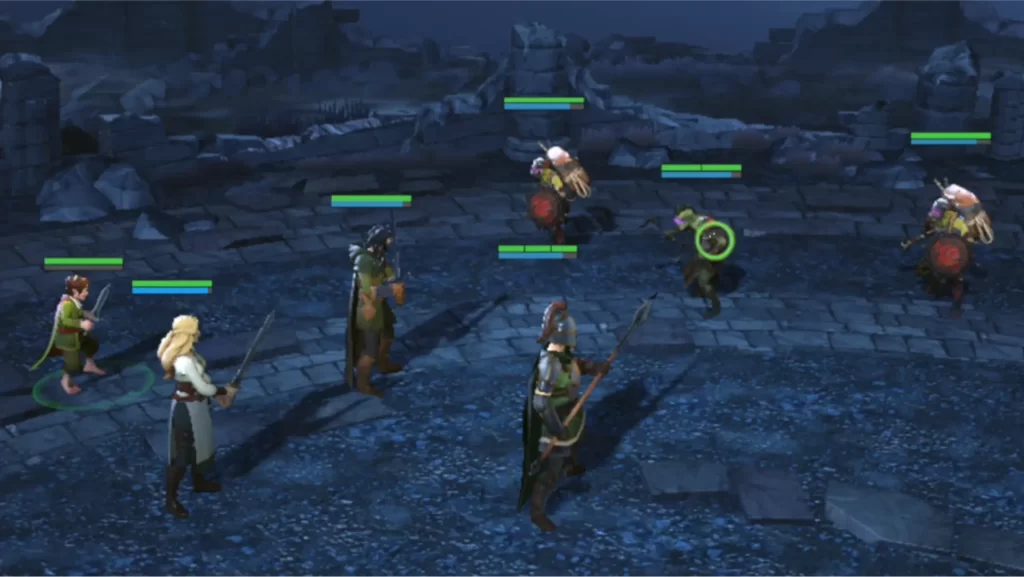
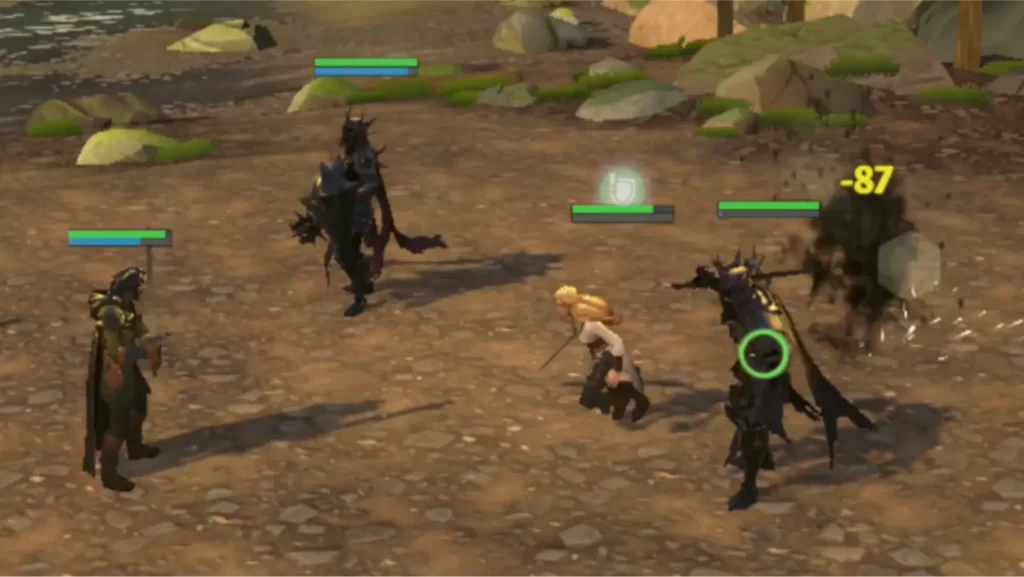
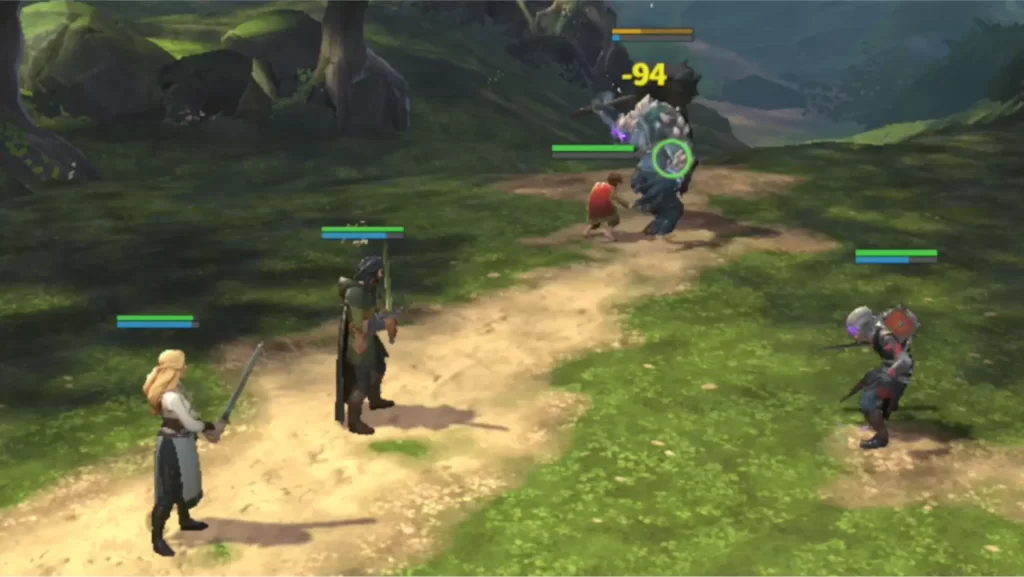
One particular feature we often see in RPGs that some may not notice are the segments in health bars. Each segment usually represents an estimate of around 500 HP or less. That said, the more segments a character has, the more health they have. In battle, it is ideal to get rid of the weaker enemies so your party won’t get attacked as often and you can focus on the remaining stronger enemies.
Kill the Healers
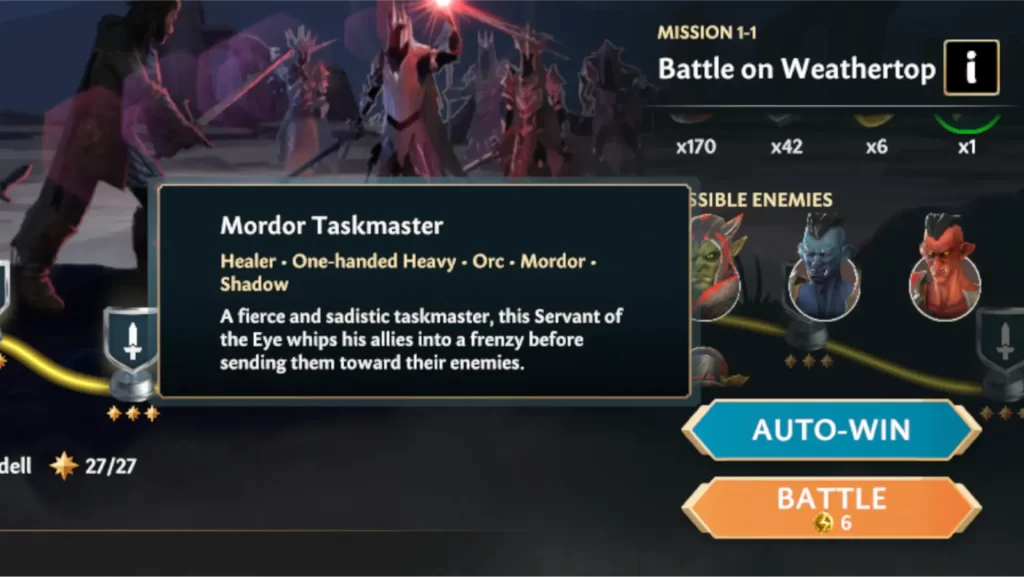
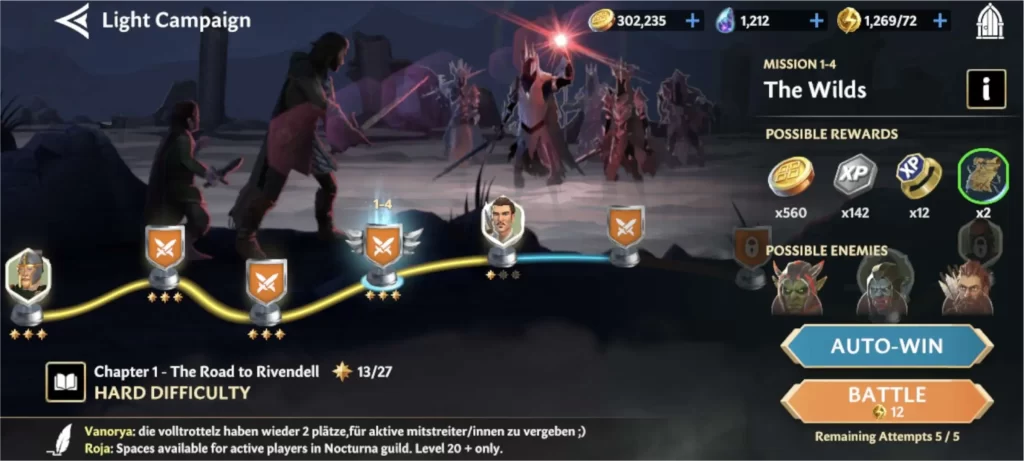
Healers don’t always appear in battles but when they do, kill them on sight. They will effectively lengthen a battle by healing their allies after receiving some damage. To know which enemies can heal, you can tap them during battle and tap their profile picture on the upper right corner of the screen. This will show you a list of their abilities. Alternatively, you can view the possible enemies found in the mission on the right side of the campaign screen. Tapping their pictures will tell you their abilities. Once you find the “Healer Tag”, remember their name for later.
Kill Enemies Before They Attack
Below the green health bar is a blue bar. Usually in RPGs, those represent mana, but in this game, it represents speed. It will get longer after a character’s turn. The longer the blue bar is, the sooner the character is about to make their move. As much as possible, we’d want to eliminate enemies before they can have the chance to attack our party.
However, you also have to take into account whether or not it is even possible to kill them before their next move. If their health has a lot of segments, and they’re not at all close to death, it may be more beneficial to target a different enemy.
Alternatively, you might also want to target enemies that currently have a shorter speed bar. This strategy is good for enemies that may take a few more blows before they are killed. Before the bar fills up, you would have delivered the finishing blow, making him unable to deal damage before you do.
Focus on one Enemy at a Time
Like in any endeavor, you get the most results from focusing on one thing at a time. In the case of battles, commanding your party to deal with all their attacks on one target will effectively eliminate them much quicker than if you made them attack different ones. It’s also much easier to survive a skirmish when there are only one or two enemies attacking you than to have five.
Observe Your Enemy’s Banes and Boons
Banes and Boons are other factors that can influence which enemies you should attack first.
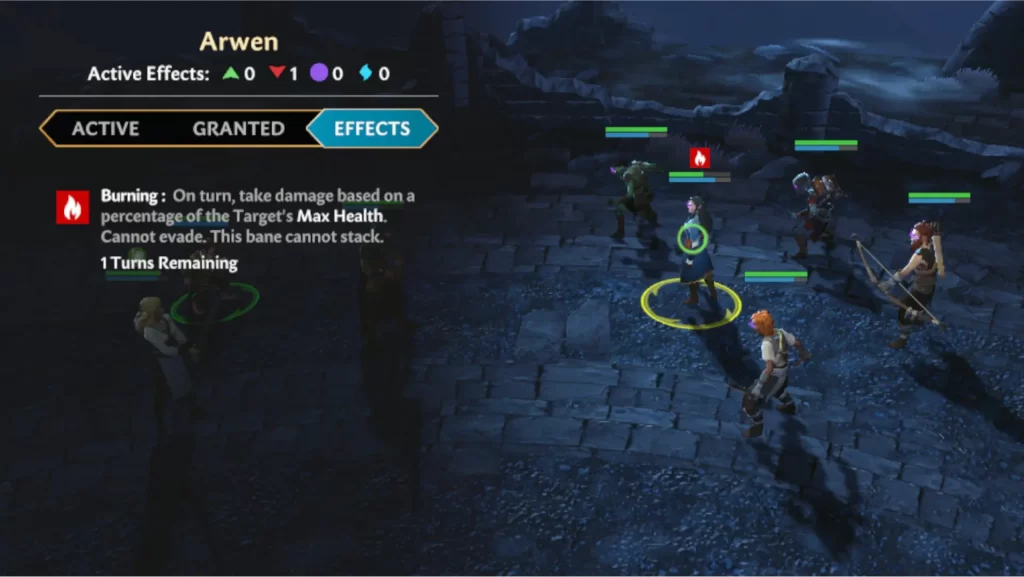
Banes, which are the red icons that appear above the health bar, will negatively affect a character. Take advantage of this and attack them to eliminate them quickly. In some cases, where the character is only 1 hit away from death, you may want to use your move to attack a different enemy if this enemy has a Bane that damages them. You could let this Bane kill them so you won’t waste your turn.
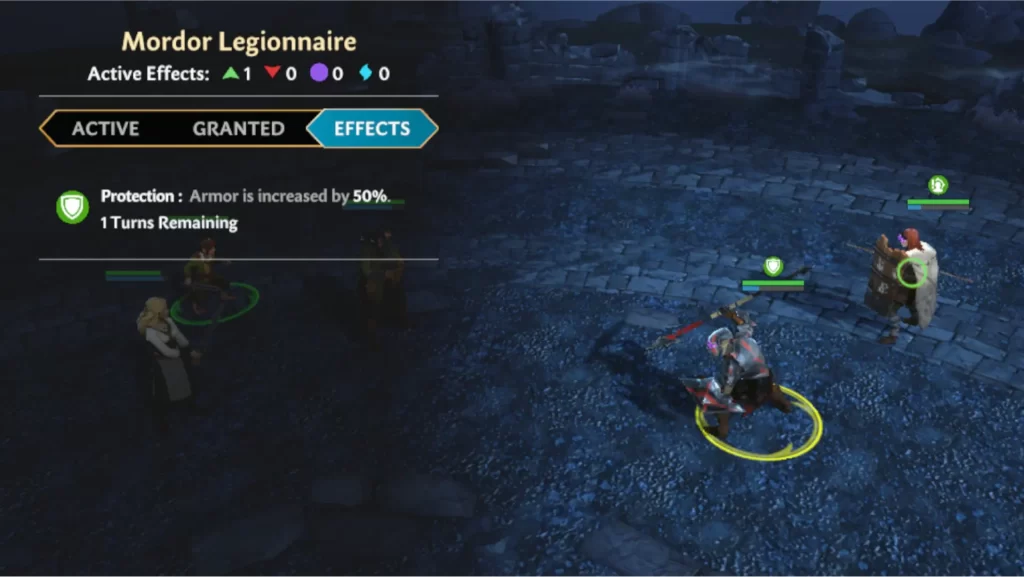
On the other hand, Boons, which are the green icons that appear above the health bar, will positively affect a character. Some Boons only last for a few turns while others may last until you hit them a number of times. You may want to wait until an enemy’s Boon fades off before attacking them in some cases.
Think Before You Use Your Specials
Specials may be exciting to use, but they cannot be activated often since they require Stamina to carry out. The bars above these skills signify how many turns must pass before you can use it again. Because of this, it is recommended to use them sparingly and only during times when they can be best utilized.
It’s usually best used at the start to give boons to your allies, banes to your enemies, or get a good head start by dealing a large amount of damage. Healing specials on the other hand are best used only when an ally is injured or near death. The worst way to use a Special that is intended to attack an enemy is to use them against an enemy that is about to die.
2. Identify Boons and Banes
As you engage in battle, you’ll notice that certain skills will result in a green or red icon appearing above a character’s health bar. These icons represent Boons and Banes that can affect a character’s performance during a fight. Learning what each Boon and Bane does will greatly help you in deciding which actions to take to claim victory.
Boons
Boons are represented by green icons and positively affect a character. Below are the Boons found in the game and the heroes that can grant them.
| Boon | Effect | Light Heroes | Dark Heroes |
| Advantage | Guaranteed Crit on next attack. | Halbarad, Legolas | Bolg, Grimlurz |
| Assistance | When an ally uses a Basic attack, Assist that ally and remove 1 stack of Assistance. | Éomer | |
| Blood Frenzy | Gain additional benefits per stack (up to 10). Benefits vary depending on skill. | Eddric, Alreda the Chieftain, Wexxe, Eddric | |
| Concentration | Focus is increased by 25%. | Úzhan | |
| Counterattack | Retaliates against enemies that attack them. | Éothain, Lady Éowyn, Lómion, Nàremiri, Sergeant Ára | Wexxe, Grimlurz |
| Deadly | Critical Chance increased by 30%. | Halbarad, Elladan, Halbarad, Legolas | Mauhúr, Orfurz, Rókma |
| Defensive | Block the next hit from an enemy attack | Lady Éowyn, Arwen, Halbarad, Gimli, Halbarad, Leliel, Sergeant Ára | Uglúk, Núrraz, Bolg, Dûnhar, Morzhà, Núrraz, Robel, Úzhan |
| Eagle Eye | Attacks cannot miss or be blocked. | Halbarad, Mírie | |
| Fortitude | Resistance is increased by 50%. | Fíli, Lord Elrond, Sam Gamgee | |
| Goblin Fury | Gain +5% Damage and +5% Focus per stack. | The Great Goblin | |
| Haste | Speed is increased by 30%. | Legolas, Merry Brandybuck | Mauhúr, Morzhà |
| Immunity | Character cannot receive Banes. | Arwen, Merry Brandybuck | |
| Life Steal | Healing granted based on a percentage of the damage dealt. | Chef Krazhkà | |
| Might | Damage is increased by 50%. | Frodo Baggins, Lady Éowyn, Lómion, Herendil, Elrohir, Gimli, Pippin Took | Eddric, Azhak, The Great Goblin, Eddric, Gruhúr the Brute, Shagrat |
| Nimble | Evade the next hit. | Lómion, Arwen, Elladan, Legolas, Leliel, Sam Gamgee | |
| Merciless | When an ally is at or below 10% Health, Final Order will hurt the most wounded ally to deal more damage. | Shagrat | |
| Provoke | Foes are forced to target this character. An attack removes 1 stack. | Elladan, Éothain, Gimli, Sam Gamgee | Bolg, Eddric, Núrraz, Robel, Tordok, Uglúk, Wubete |
| Protection | Armor is increased by 50%. | Lord Elrond, Nàremiri | Chef Krazhkà, Grîmpa |
| Regeneration | Heal 5% at the start of each turn. | Aeldred, Arwen, Elladan, Gimli, Lord Elrond, Pippin Took | Eddric, Mauhúr, Núrraz, Úzhan |
| Stealth | This character is hidden from sight and cannot be targeted. | Frodo Baggins, Strider, Leliel, Mírie | |
| Taunt | Foes are forced to target this character. | Fró, Halbarad | Grîmpa, Tordok |
| Unbreakable | Character is left with 1 Health if they are dealt a death blow. | Fró, Lord Elrond | Úzhan |
Banes
Banes are represented by red icons and negatively affect a character. Below are the Banes found in the game and the heroes that can inflict them.
| Bane | Effect | Light Heroes | Dark Heroes |
| Black Serpent’s Poison | When this unit receives a Boon, prevent that Boon and inflict 1 stack of Poison instead. 1 stack of this Bane is removed when this effect is triggered. | Robel | |
| Bleed | On turn, take damage based on a percentage of the Target’s Max Health. | Kíli, Mírie | Azhak, Wexxe, The Great Goblin, Dûnhar, Golburz, Grimlurz, Shagrat |
| Blind | Accuracy is reduced by 100% | Sam Gamgee | Uglúk, Alreda the Chieftain |
| Burning | On turn start, take damage based on a percentage of the Defender’s Max Health. Cannot Evade. This bane cannot stack. | Strider | Rókma |
| Daze | Focus is reduced by 50%. | Gruhúr the Brute | |
| Disable | Only Basic Attacks are available. | Lady Éowyn, Kíli | Uglúk, Bolg |
| Disrupted | Character can’t receive boons. | Bolg, Morzhà | |
| Enfeeble | Critical Chance decreased by 25%. | Herendil, Wilfwyn | Tordok |
| Expose | Armor is reduced by 50%. | Frodo Baggins, Fíli, Elrohir, Éothain | Alreda the Chieftain, Azhak, Golburz, Gruhúr the Brute, Morzhà, Yeftu |
| Heal Block | Cannot be healed. | Bolg, Dûnhar | |
| Marked | Target is forced to Taunt. | Merry Brandybuck, Sergeant Ára | |
| Poison | On turn, take damage based on a percentage of the Target’s Max Health. Incoming healing is reduced by 10% per stack. | Gruhúr the Brute, Shagrat | |
| Slow | Speed is reduced by 30%. | Lord Elrond | Mauhúr, The Great Goblin, Úzhan, Wubete |
| Stun | Character cannot act. | Fró | |
| Weaken | Damage is reduced by 50%. | Fíli, Elladan, Gimli, Mírie | Núrraz, Dûnhar, Grîmpa, Núrraz, Rókma, Yeftu |
| Weak-Minded | Resistance is reduced by 50% | Halbarad | Uglúk, Grîmpa, Morzhà, Rókma |
3. Strengthen Your Heroes
Heroes are only as strong as you make them to be. You’ll need to level them up, collect items for their Gear and develop their abilities if you want to stand a chance against your enemies.
Level Up!
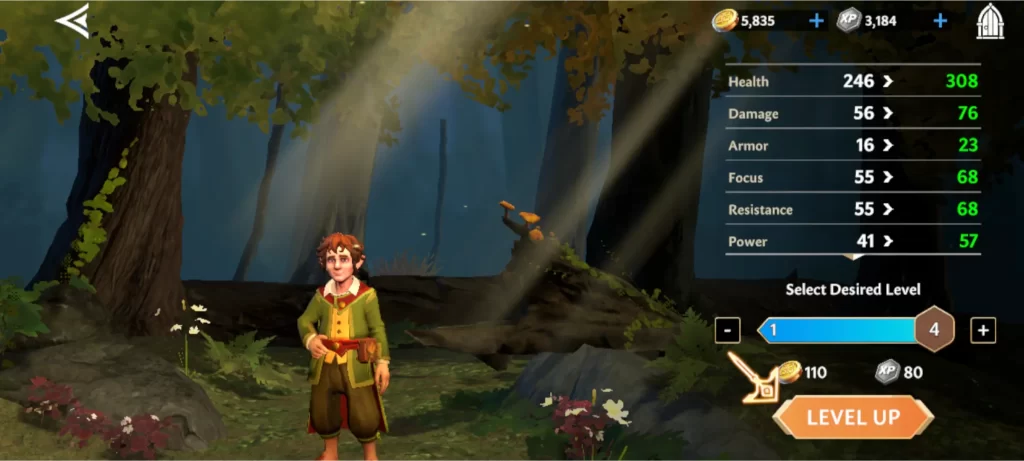
Your heroes can be leveled up by going to Collection, tapping the hero of your choice and tapping level up. You’ll need to spend a certain amount of Gold and Character Experience each time you level them up. However, leveling up your heroes in this game is a little different from most hero-collector games. Your current player level is the level cap of your hero.
This means that if your account’s level is at level 10, your hero cannot go further than that. So make sure to play through the campaign, check your quests and objectives and collect your rewards to quickly level up your account!
Collect Items for Your Gear
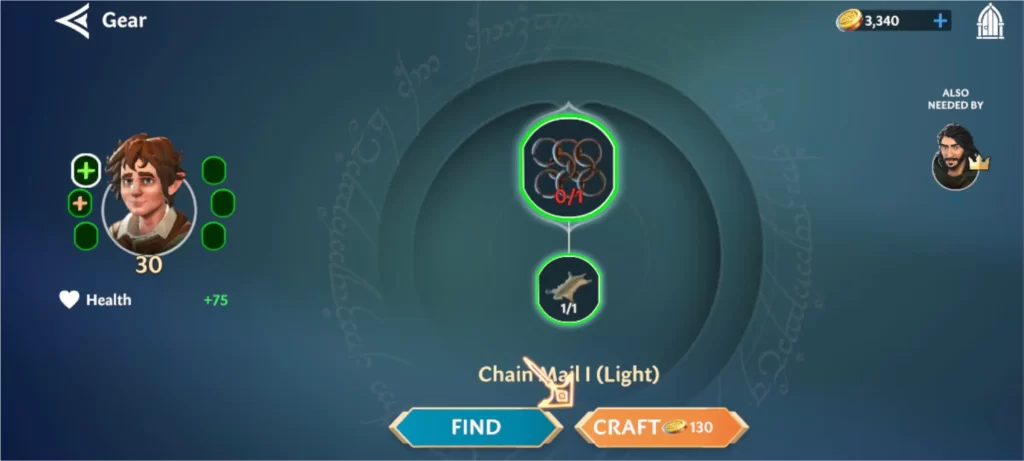
When looking at your hero’s screen, you’ll notice 6 slots surrounding them. These are your equipment slots. Unlike other RPGs where you find or buy armor, this game will require you to find items for them for you to craft. The sources of these items can be found by tapping Find and can usually be obtained by finishing or Auto-Winning a stage.
Once you have crafted all of your character’s equipment, they will disappear and level up your Gear Tier. If you want to upgrade the Gear Tier again, you’ll need to collect a brand new set of items.
Improve Your Abilities
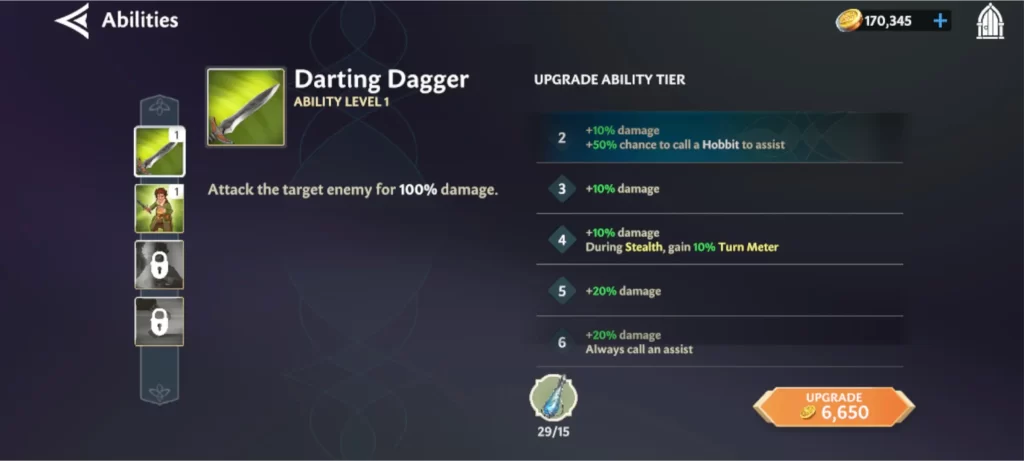
Your hero’s abilities can be improved by tapping on the ability and using a specific rarity of Ability Materials and a certain amount of Gold. The higher the level is the rarer and the higher number of Ability Materials and the higher amount of Gold you will need. Winning battles in Guild Campaigns are a surefire way to collect Ability Materials but don’t forget to also check your dailies for freebies!
Grind Efficiently
Battles tend to be quite tedious and repetitive. If you have items you need to obtain for your gear or if you’re trying to finish a few quests or objectives, take advantage of the game’s Auto Mode and Auto-Win. Tapping Auto-Mode during battle will allow your heroes to move by themselves and finish the battle without the need for your input. If you change your mind, you can always turn off auto-mode in the middle of battle.
Auto-Win on the other hand gets rid of the battle itself and gives you the rewards based on how many rounds you plan to do. This will cost energy and only stages that have already been won once are possible to Auto-Win. If you want even better rewards, go through the Hard Mode stages of Campaign Chapters you’ve already finished. Once you finish a stage there once, you will also be able to use Auto-Win to quickly gain rewards.
4. Synergize your Teams
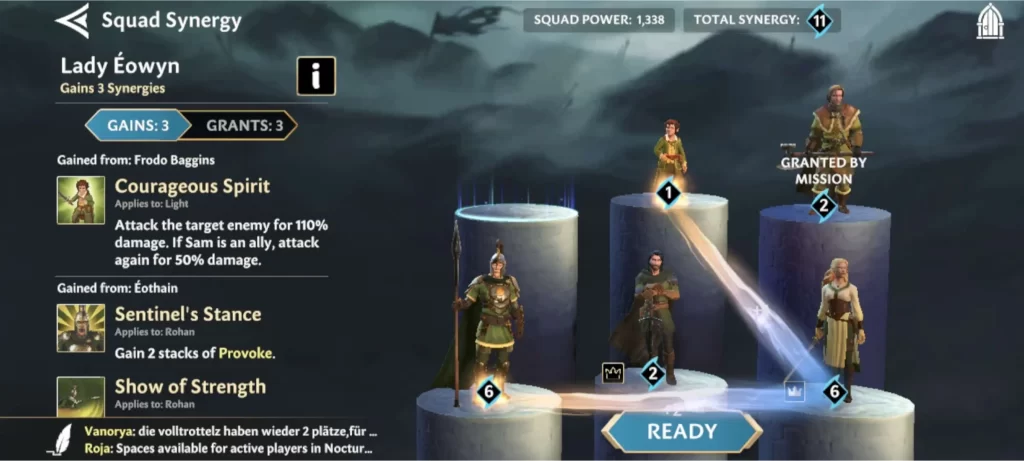
Before you get excited and place all of your strongest heroes in one team, you must think about the synergy of the group. Synergy will determine how well they work together. The higher their synergy is, the more abilities and beneficial effects can be unlocked. Heroes need to fight alongside other heroes that they have an alliance with, otherwise they will not reach their full potential.
To aid you with team formation, we have listed each hero in the game (51 at the time of writing this article) and divided them into Light Leaders, Light Heroes, Shadow Leaders and Shadow Heroes and wrote down their tags, the groups and heroes they have Synergy with along with their Boons, Banes and other abilities and upgrades.
Take note that Light Leaders and Heroes will not synergize with Shadow Leaders and Heroes even though you can have both of them in a Guild Campaign. If you must have two different factions, make sure that there is at least two from each faction that can synergize with each other.
Light Leaders
Halbarad
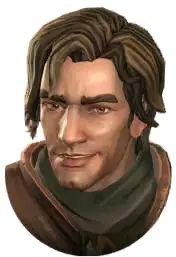
Human, Ranger, Tank, Two-handed Heavy, Leader
| Synergy Groups | Ranger |
| Synergy Heroes | Elladan, Elrohir, Mírie, Strider, Lady Éowyn, Frodo Baggins, Arwen, Lord Elrond, Sergeant Ára |
| Boons | Eagle Eye (Stealthed Ranger ally), Advantage (Stealthed Ranger ally), Defensive (self), Taunt (self), Deadly (self and Mírie or all Ranger allies) |
| Banes | Weak-Minded (1 enemy) |
| Other Abilities and Upgrades | Heal (self, 2-3 most wounded allies or all allies), Increased Turn Meter (Stealthed Ranger ally), Attack twice if Mírie is an ally |
Lady Éowyn
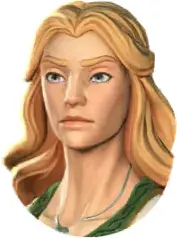
Human, Support, One-handed Sword, Rohan, Leader
| Synergy Groups | Rohan, Ranger |
| Synergy Heroes | Aeldred, Éomer, Éothain, Wilfwyn, Elladan, Elrohir, Halbarad, Mírie, Strider, Frodo Baggins, Arwen, Lord Elrond, Sergeant Ára |
| Boons | Defensive (self), Might (self, 1-4 random allies or all allies), Counterattack (self) |
| Banes | Disable (1 enemy) |
| Other Abilities and Upgrades | Increased Crit Chance during assists and counterattacks (Rohan allies), Cleanse 2 Banes (self) and 1 Bane (all allies) and deal additional damage per Bane cleansed, Gain Turn Meter (self) when an ally or Rohan ally is inflicted with Bane |
Legolas

Elf, Attacker, Bow, Fellowship, Leader
| Synergy Groups | Fellowship |
| Synergy Heroes | Frodo Baggins, Arwen, Lord Elrond, Gimli, Sergeant Ára |
| Boons | Deadly (Elf ally), Haste (Elf ally), Nimble (self), Advantage (random Fellowship or Elf ally) |
| Banes | n/a |
| Other Abilities and Upgrades | Dispel 1 Boon (self), Gain 100% Turn Meter on kill, Gain Crit Chance and Crit Damage if Gimli is an ally, Gain Crit Chance per Boon on self |
Lord Elrond
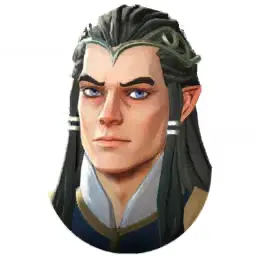
Elf, Healer, Staff, Rivendell
| Synergy Groups | Rivendell, Light, Elf |
| Synergy Heroes | Aeldred, Arwen, Elladan, Elrohir, Éomer, Éothain, Fíli, Fró, Frodo Baggins, Gimli, Halbarad, Herendil, Kíli, Lady Éowyn, Legolas, Leliel, Lómion, Lord Elrond, Merry Brandybuck, Mírie, Náremiri, Pippin Took, Sam Gamgee, Strider, Sergeant Ára, Wilfwyn |
| Boons | Fortitude (if no Banes, Rivendell allies), Regeneration (most wounded ally), Protection (most wounded ally), Unbreakable (1 stack per Rivendell ally) (self) |
| Banes | Slow (all enemies) |
| Other Abilities and Upgrades | Extends duration of Boons by 1 turn if they have no Banes (Rivendell allies), Increased Damage per boon (up to 5) (Elf allies), Increased Max Health (Light allies), Heal (all allies), Revive (random Elf ally), Reduce Turn Meter per Boon on self (up to 5) (all enemies), Stamina gained if no Elf allies to revive |
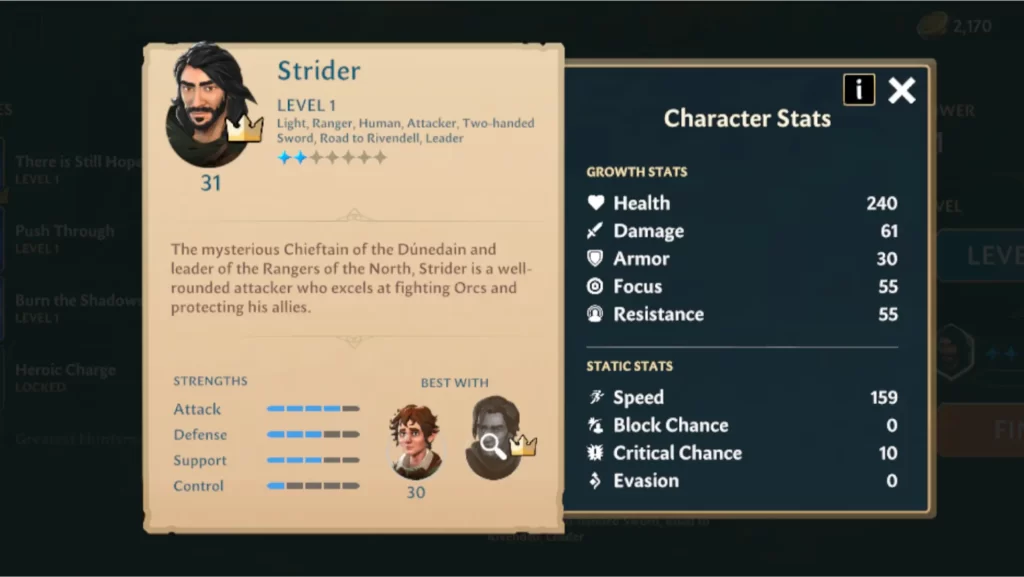
Strider
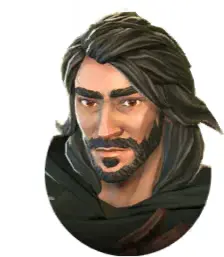
Human, Ranger, Attacker, Two-handed Sword, Road to Rivendell, Leader
| Synergy Groups | Ranger, Hobbit, Road to Rivendell |
| Synergy Heroes | Elladan, Elrohir, Halbarad, Mírie, Frodo Baggins, Merry Brandybuck, Pippin Took, Sam Gamgee, Lady Éowyn, Arwen, Lord Elrond, Sergeant Ára |
| Boons | Stealth (most wounded Hobbit ally when Strider Crits) |
| Banes | Burning (1 enemy) |
| Other Abilities and Upgrades | Increases Damage and Armor (Road to Rivendell allies), Deal more damage to enemies with Banes, Multiple attacks, Deals more damage to Nazgûl enemies |
Light Heroes
Aeldred
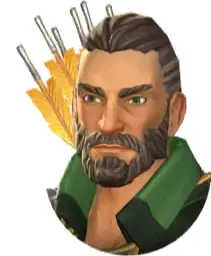
Human, Healer, Bow, Rohan
| Synergy Groups | Rohan |
| Synergy Heroes | Éomer, Éothain, Lady Éowyn, Wilfwyn, Frodo Baggins, Arwen, Lord Elrond, Sergeant Ára |
| Boons | Regeneration (most wounded ally or 1 Rohan ally) |
| Banes | n/a |
| Other Abilities and Upgrades | Heal (most wounded ally or all allies), Gain Turn Meter for each Rohan ally (self) |
Arwen
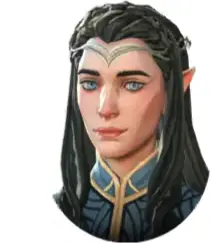
Elf, Support, One-handed Sword, Rivendell
| Synergy Groups | Rivendell, Light |
| Synergy Heroes | Aeldred, Elladan, Elrohir, Éomer, Éothain, Fíli, Fró, Frodo Baggins, Gimli, Halbarad, Herendil, Kíli, Lady Éowyn, Legolas, Leliel, Lómion, Lord Elrond, Merry Brandybuck, Mírie, Náremiri, Pippin Took, Sam Gamgee, Strider, Sergeant Ára, Wilfwyn |
| Boons | Defensive (most wounded ally), Regeneration (all allies), Immunity (most wounded ally) |
| Banes | n/a |
| Other Abilities and Upgrades | Dispel Boon(s) (1 enemy), Cleanse Bane (2 allies to all allies, light allies), Gain Turn Meter per Boon (self) |
Elladan
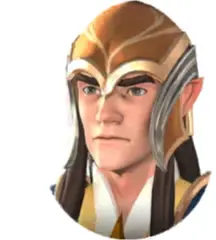
Elf, Ranger, Tank, Spear, Rivendell
| Synergy Groups | n/a |
| Synergy Heroes | Lady Éowyn, Elrohir, Halbarad, Strider, Frodo Baggins, Arwen, Lord Elrond, Legolas, Sergeant Ára |
| Boons | Provoke (self), Regeneration (self), Deadly (self, 1-2 random allies), Nimble (self) |
| Banes | Weaken (1 enemy) |
| Other Abilities and Upgrades | 1 Stamina per Boon (self) |
Elrohir
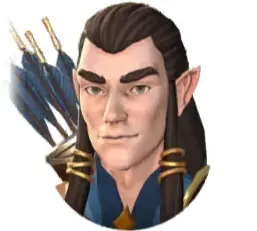
Elf, Ranger, Attacker, Bow, Rivendell
| Synergy Groups | n/a |
| Synergy Heroes | Lady Éowyn, Elladan, Halbarad, Strider, Frodo Baggins, Arwen, Lord Elrond, Legolas, Sergeant Ára |
| Boons | Might (self) |
| Banes | Expose (1 enemy) |
| Other Abilities and Upgrades | Additional Damage per Boon (self), Multiple Attacks (more if allied with Elladan), Gain Stealth if has Boon (self), Ignores enemy’s Armor, Retaliates against enemies that attacks allies with Taunt or Provoke |
Éomer
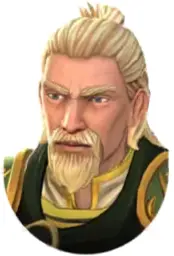
Human, Attacker, Two-handed Sword, Rohan
| Synergy Groups | Rohan |
| Synergy Heroes | Aeldred, Éothain, Lady Éowyn, Wilfwyn, Frodo Baggins, Arwen, Lord Elrond, Sergeant Ára |
| Boons | Assistance (self) |
| Banes | n/a |
| Other Abilities and Upgrades | Gain Turn Meter (self), Summon Rohan Attacker, Multiple Attacks (more damage if allied with Éothain), Cleanse Bane (self, Éothain), Heal (self, Lady Éowyn) |
Éothain
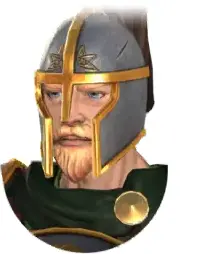
Human, Tank, Spear, Rohan
| Synergy Groups | Rohan |
| Synergy Heroes | Aeldred, Éomer, Lady Éowyn, Wilfwyn, Frodo Baggins, Arwen, Lord Elrond, Sergeant Ára |
| Boons | Provoke (self), Counterattack (self, 1-3 random ally or all allies) |
| Banes | Expose (1 enemy) |
| Other Abilities and Upgrades | Gain Turn Meter (all allies) |
Fíli
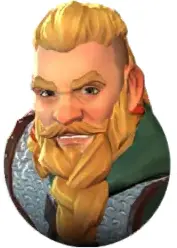
Dwarf, Healer, Two-handed Heavy, Thorin’s Company
| Synergy Groups | Thorin’s Company, Dwarf |
| Synergy Heroes | Frodo Baggins, Arwen, Lord Elrond, Gimli, Kíli, Fró, Sergeant Ára |
| Boons | Fortitude (Thorin’s Company allies or Dwarf allies) |
| Banes | Expose (1 enemy), Weaken (1 enemy) |
| Other Abilities and Upgrades | Heal (most wounded ally, all allies; heals more if Kíli is an ally), Increase Block Chance (all allies) |
Fró
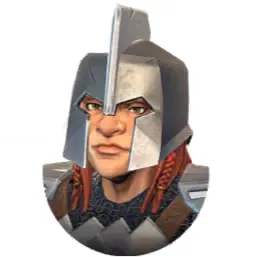
Dwarf, Tank, One-handed Heavy
| Synergy Groups | n/a |
| Synergy Heroes | Frodo Baggins, Arwen, Lord Elrond, Gimli, Kíli, Sergeant Ára |
| Boons | Taunt (self), Unbreakable (self) |
| Banes | Stun (1 enemy) |
| Other Abilities and Upgrades | Reduce Turn Meter (1 enemy), Heal (self) |
Frodo Baggins
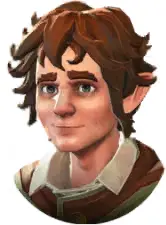
Hobbit, Attacker, Dagger, Road to Rivendell, Ring-bearer
| Synergy Groups | Hobbit, Light |
| Synergy Heroes | Merry Brandybuck, Pippin Took, Sam Gamgee, Strider, Aeldred, Arwen, Elladan, Elrohir, Éomer, Éothain, Fíli, Fró, Gimli, Halbarad, Herendil, Kíli, Lady Éowyn, Legolas, Leliel, Lómion, Lord Elrond, Mírie, Náremiri, Sergeant Ára, Wilfwyn |
| Boons | Stealth (self), Might (self) |
| Banes | Expose (1 enemy) |
| Other Abilities and Upgrades | Calls a Hobbit ally to assist, Gains Turn Meter during Stealth (self), Double attack if allied with Sam |
Gimli
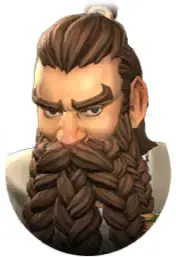
Dwarf, Tank, One-handed Heavy, Fellowship
| Synergy Groups | Dwarf, Fellowship |
| Synergy Heroes | Legolas, Fíli, Fró, Kíli, Sergeant Ára |
| Boons | Might (self), Provoke (self), Defensive (self, ally that triggered Retaliate), Regeneration (self, most wounded ally) |
| Banes | Weaken (1 enemy) |
| Other Abilities and Upgrades | Retaliates against enemies that attack Fellowship or Dwarf allies (triggers once per ally) |
Herendil
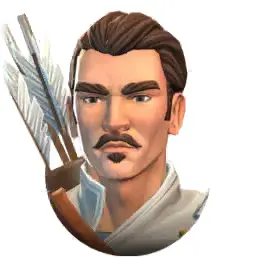
Human, Attacker, Bow, Gondor
| Synergy Groups | Gondor |
| Synergy Heroes | Frodo Baggins, Arwen, Lord Elrond, Sergeant Ára |
| Boons | Might (self) |
| Banes | Enfeeble (all enemies) |
| Other Abilities and Upgrades | Deal more damage to Nimble enemies, Gain Turn Meter (self) on ally death or Gondor ally death (once per turn) |
Kíli
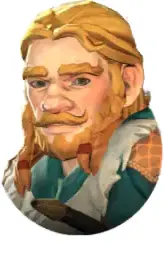
Dwarf, Attacker, Bow, Thorin’s Company
| Synergy Groups | n/a |
| Synergy Heroes | Frodo Baggins, Arwen, Lord Elrond, Gimli, Fíli, Sergeant Ára |
| Boons | n/a |
| Banes | Disable (1 enemy), Bleed (1 enemy; more stacks per Boon) |
| Other Abilities and Upgrades | Calls Fíli to assist, Dispel 1-2 Boon(s) (1 enemy), Increased Crit Chance and Crit Damage when below Health threshold (self) |
Leliel
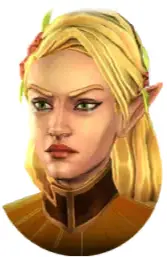
Elf, Tank, One-handed Sword
| Synergy Groups | n/a |
| Synergy Heroes | Frodo Baggins, Arwen, Lord Elrond, Legolas, Sergeant Ára |
| Boons | Defensive (self), Stealth (all Elf allies), Nimble (self) |
| Banes | n/a |
| Other Abilities and Upgrades | Gain Turn Meter (self), Heal (self) |
Lómion
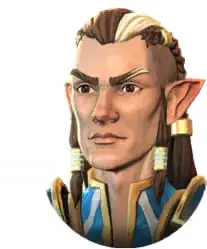
Elf, Attacker, Dagger, Rivendell
| Synergy Groups | n/a |
| Synergy Heroes | Frodo Baggins, Arwen, Lord Elrond, Legolas, Sergeant Ára |
| Boons | Might (self), Nimble (self), Counterattack (self) |
| Banes | n/a |
| Other Abilities and Upgrades | Gain Crit Chance per Boon (self), Multiple attacks, |
Merry Brandybuck
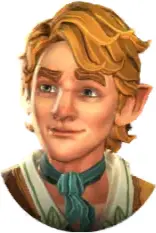
Hobbit, Support, One-handed Heavy, Road to Rivendell
| Synergy Groups | Hobbit |
| Synergy Heroes | Frodo Baggins, Pippin Took, Sam Gamgee, Arwen, Lord Elrond, Sergeant Ára |
| Boons | Haste (all allies), Immunity (self or Pippin) |
| Banes | Marked (1 enemy) |
| Other Abilities and Upgrades | Call Pippin or a random Hobbit ally to assist, Dispel 1-3 Boons (1 enemy), Grant Stamina (1-4 random Hobbit ally) |
Mírie
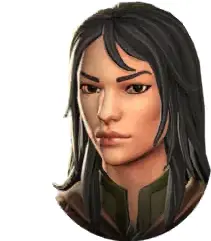
Human, Ranger, Support, Dagger
| Synergy Groups | Ranger |
| Synergy Heroes | Elladan, Elrohir, Halbarad, Strider, Lady Éowyn, Frodo Baggins, Arwen, Lord Elrond, Sergeant Ára |
| Boons | Stealth (self), Eagle Eye (1 random Ranger ally if enemy has a Bane) |
| Banes | Weaken (1 enemy), Bleed (1 enemy) |
| Other Abilities and Upgrades | Ignores enemy Armor, Increases Resistance from Ranger allies |
Nàremiri
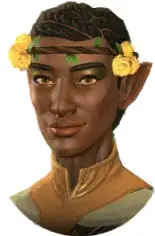
Elf, Healer, Spear
| Synergy Groups | n/a |
| Synergy Heroes | Frodo Baggins, Arwen, Lord Elrond, Legolas, Elladan, Elrohir, Leliel, Lómion, Sergeant Ára |
| Boons | Protection (ally with the most Banes), Counterattack (ally with the most Banes) |
| Banes | n/a |
| Other Abilities and Upgrades | Cleanse 1-2 Bane(s) (ally with the most Banes), Heal (all allies), Grant Stamina (random ally) |
Pippin Took

Hobbit, Support, Dagger, Road to Rivendell
| Synergy Groups | Hobbit, Road to Rivendell |
| Synergy Heroes | Frodo Baggins, Merry Brandybuck, Sam Gamgee, Strider, Arwen, Lord Elrond, Sergeant Ára |
| Boons | Might (3 random allies), Regeneration (self and Merry if Merry is an ally, 1 to all allies) |
| Banes | n/a |
| Other Abilities and Upgrades | Dispel 1 Boon (1 enemy), Heal (self, 2 wounded allies or all allies), Cleanse 1 Bane (random ally, all allies) |
Sam Gamgee
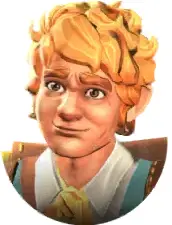
Hobbit, Tank, Staff, Road to Rivendell
| Synergy Groups | Hobbit, Road to Rivendell |
| Synergy Heroes | Frodo Baggins, Merry Brandybuck, Pippin Took, Strider, Arwen, Lord Elrond, Sergeant Ára |
| Boons | Fortitude (self), Provoke (self), Nimble (self, most wounded ally) |
| Banes | Blind (1 enemy) |
| Other Abilities and Upgrades | Heal (self), Retaliates against enemies that attack Road to Rivendell allies |
Sergeant Ára
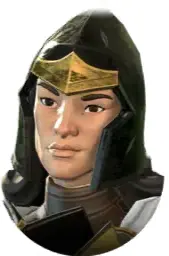
Human, Support, Spear, Gondor
| Synergy Groups | Gondor, Light |
| Synergy Heroes | Aeldred, Arwen, Elladan, Elrohir, Éomer, Éothain, Fíli, Fró, Frodo Baggins, Gimli, Halbarad, Herendil, Kíli, Lady Éowyn, Legolas, Leliel, Lómion, Lord Elrond, Merry Brandybuck, Mírie, Náremiri, Pippin Took, Sam Gamgee, Strider, Wilfwyn |
| Boons | Counterattack (self), Defensive (self, 1-2 most wounded Gondor allies, 1-2 most wounded Light allies) |
| Banes | Marked (1 enemy) |
| Other Abilities and Upgrades | Reduce Turn Meter (1 enemy), Call random ally to assist |
Wilfwyn
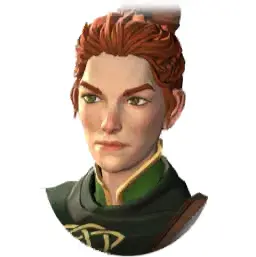
Human, Attacker, One-handed Heavy, Rohan
| Synergy Groups | n/a |
| Synergy Heroes | Lady Éowyn, Frodo Baggins, Arwen, Lord Elrond, Sergeant Ára |
| Boons | n/a |
| Banes | Enfeeble (1 enemy) |
| Other Abilities and Upgrades | Deal more damage against enemies that has Taunt or Provoke, Higher Crit Chance if Wilfwyn has more health than the enemy |
Shadow Leaders
Alreda the Chieftain
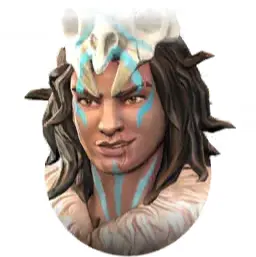
Human, Support, Staff, Dunland, Leader
| Synergy Groups | Dunland / Dunlending, Isengard, Shadow |
| Synergy Heroes | Azhak, Bolg, Chef Krazhkà, Dûnhar, Eddric, Ghâzh Ironhide, Golburz, Grimlurz, Grîmpa, Gruhúr the Brute, Mauhúr, Morzhà, Núrraz, Orfurz, Robel, Rókma, Shagrat, The Great Goblin, Tordok, Uglúk, Úzhan, Wexxe, Wubete, Yeftu |
| Boons | Blood Frenzy (all Dunland / Dunlending allies whenever Shadow enemies die; Increased Life Steal per stack, self when Alreda or Dunlending allies attack enemies with Banes) |
| Banes | Expose (1 enemy), Blind (1 enemy, 2 enemies for each stack of Blood Frenzy) |
| Other Abilities and Upgrades | Reduce Turn Meter per stack of Blood Frenzy (1 enemy), Increased armor per stack of Blood Frenzy (self), Gain Blood Frenzy when Isengard ally attacks an enemy with a Bane (self) |
Bolg
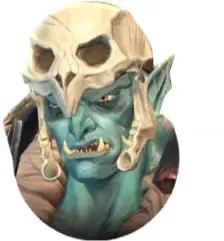
Orc, Tank, Two-handed Heavy, Misty Mountain, Leader
| Synergy Groups | Troll, Orc, Misty Mountain |
| Synergy Heroes | Alreda the Chieftain, Tordok, Azhak, Chef Krazhkà, Dûnhar, Ghâzh Ironhide, Golburz, Grimlurz, Grîmpa, Gruhúr the Brute, Mauhúr, Morzhà, Núrraz, Orfurz, Rókma, Shagrat, The Great Goblin, Uglúk, Úzhan |
| Boons | Advantage (Orc, Troll and Misty Mountain allies), Defensive (self), Provoke (self) |
| Banes | Disable (1 enemy), Heal Block (1 enemy), Disrupted (1 enemy) |
| Other Abilities and Upgrades | Attack twice if Tordok is an ally, Gain more damage when below 50% Health |
Shagrat
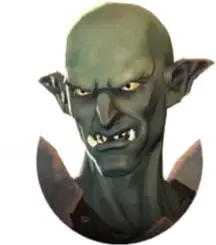
Orc, Attacker, Two-handed Sword, Mordor, Leader
| Synergy Groups | Mordor |
| Synergy Heroes | Alreda the Chieftain, Bolg, Ghâzh Ironhide, Grimlurz, Rókma, Úzhan, Chef Krazhkà, Tordok |
| Boons | Might (all allies), Merciless (self) |
| Banes | Bleed (1 enemy), Poison (1 enemy) |
| Other Abilities and Upgrades | Party gains extra Turn Meter per Bane when attacking an enemy with a Bane (higher % for Mordor allies), Deals more damage when affected by Merciless, Receive extra stack of Poison if target is already affected by Bleed, Burning and Poison, Hits and inflicts all enemies with Poison if Grimlurz is an ally, |
The Great Goblin
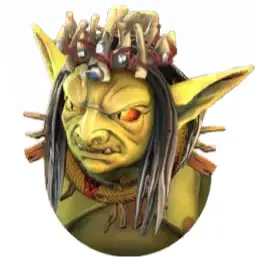
Goblin, Support, Staff, Misty Mountain, Large, Leader
| Synergy Groups | Goblin |
| Synergy Heroes | Alreda the Chieftain, Bolg, Chef Krazhkà, Golburz, Grîmpa, Orfuz, Tordok |
| Boons | Goblin Fury (all Goblin allies upon a Goblin ally death), Might (ally with highest damage) |
| Banes | Bleed (1 enemy), Slow (1 target enemy and 2 random enemies) |
| Other Abilities and Upgrades | Summons a Goblin Guard and calls him to assist, Class ally with the highest damage to assist, Increases damage per Goblin ally alive, Gain Turn meter when attacking an enemy with Bleed, Takes less damage from enemies with Dagger or Staff weapons but takes more damage from enemies with Two-handed Sword or Two-handed Heavy weapons |
Uglúk
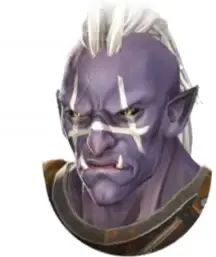
Orc, Tank, Two-handed Sword, Isengard, Leader
| Synergy Groups | Isengard |
| Synergy Heroes | Alreda the Chieftain, Eddric, Mauhúr, Azhak, Dûnhar, Morzhà, Bolg, Chef Krazhkà, Tordok |
| Boons | Provoke (self), Defensive (self, Mauhúr) |
| Banes | Blind (1 enemy), Disable (1 enemy), Weak-minded (1 enemy) (on block) |
| Other Abilities and Upgrades | Heal (all allies) when an Isengard ally inflicts a Bane, Increases Focus and Max Health (all Isengard allies), Deals more damage if Mauhúr is an ally, |
Shadow Heroes
Azhak
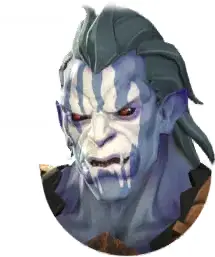
Orc, Attacker, Two-handed Heavy, Isengard
| Synergy Groups | n/a |
| Synergy Heroes | Alreda the Chieftain, Eddric, Mauhúr, Bolg, Chef Krazhkà, Tordok |
| Boons | Might (self and Mauhúr) |
| Banes | Expose (1 enemy), Bleed (1 enemy) |
| Other Abilities and Upgrades | Deals extra damage to enemies with Bleed, Ignores Taunt |
Chef Krazhkà
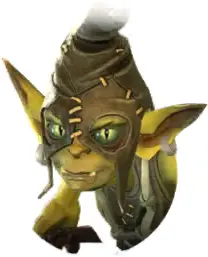
Goblin, Healer, Dagger, Misty Mountain
| Synergy Groups | Goblin, Shadow |
| Synergy Heroes | Alreda the Chieftain, Azhak, Bolg, Dûnhar, Eddric, Ghâzh Ironhide, Golburz, Grimlurz, Grîmpa, Gruhúr the Brute, Mauhúr, Morzhà, Núrraz, Orfurz, Robel, Rókma, Shagrat, The Great Goblin, Tordok, Uglúk, Úzhan, Wexxe, Wubete, Yeftu |
| Boons | Protection (1-3 random Goblin allies or 1-2 random Non-Goblin Shadow allies), Life Steal (Goblin allies) |
| Banes | n/a |
| Other Abilities and Upgrades | Steals a random Boon from an enemy and gives it to a random squad member with priority to The Great Goblin, Heal (all allies), Summons a Goblin Assistant Cook and heals all allies on death, |
Dûnhar
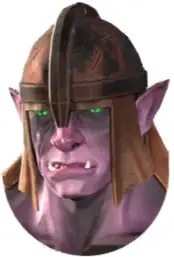
Orc, Healer, Two-handed Sword, Isengard
| Synergy Groups | Isengard |
| Synergy Heroes | Alreda the Chieftain, Eddric, Azhak, Mauhúr, Morzhà, Uglúk, Bolg, Chef Krazhkà, Tordok |
| Boons | Defensive (most wounded ally) |
| Banes | Bleed (1 enemy), Heal Block (1 enemy), Weaken (1-2 random enemies) |
| Other Abilities and Upgrades | n/a |
Eddric
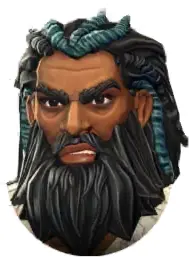
Human, Tank, Two-handed Heavy, Dunland
| Synergy Groups | Dunland / Dunlending, Isengard |
| Synergy Heroes | Alreda the Chieftain, Wexxe, Azhak, Dûnhar, Mauhúr, Morzhà, Uglúk, Chef Krazhkà, Tordok |
| Boons | Provoke (self), Regeneration (self), Might (self and 2-3 allies or all), Blood Frenzy (self) |
| Banes | n/a |
| Other Abilities and Upgrades | Gain Turn Meter for every stack of Blood Frenzy (Grants Turn Meter to all allies once he has 10 stacks), Doubles the chance of gaining Blood Frenzy when an ally is attacked if the ally is Dunlending or Isengard, Increases Turn Meter when Dunlending or Isengard ally is attacked |
Ghâzh Ironhide
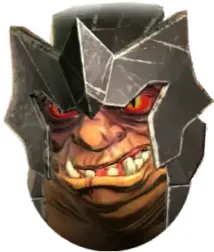
Troll, Tank, Spear, Mordor, Large
| Synergy Groups | Mordor |
| Synergy Heroes | Alreda the Chieftain, Bolg, Gruhúr the Brute, Grimlurz, Rókma, Shagrat, Úzhan, Chef Krazhkà, Tordok |
| Boons | n/a |
| Banes | n/a |
| Other Abilities and Upgrades | Dispel 1 Boon (all enemies), Additional damage for each Mordor ally below 100% health, Takes less damage from enemies with Dagger or Staff weapons but takes more damage from Two-handed Sword or Two-handed Heavy weapons |
Golburz
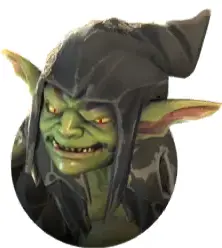
Goblin, Support, Staff, Misty Mountain
| Synergy Groups | n/a |
| Synergy Heroes | Alreda the Chieftain, Bolg, Chef Krazhkà, Orfurz, The Great Goblin, Tordok |
| Boons | n/a |
| Banes | Bleed (1 enemy or all enemies), Expose (each enemy with Bleed) |
| Other Abilities and Upgrades | Inflicts more stacks of Bleed if Chef Krazhkà is an ally, Summons a Goblin Shortfuse and inflicts Poison to the enemy that kills him on Death, Attacks enemies with Bleed on each turn passively (attacks 1 random enemy if no enemy has Bleed) |
Grimlurz
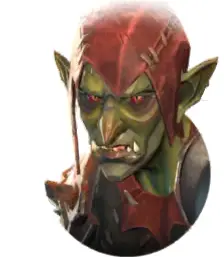
Orc, Attacker, Dagger, Mordor
| Synergy Groups | n/a |
| Synergy Heroes | Alreda the Chieftain, Bolg, Ghâzh Ironhide, Chef Krazhkà, Tordok |
| Boons | Counterattack (self), Advantage (self) |
| Banes | Bleed (1 enemy) |
| Other Abilities and Upgrades | Increased damage per Bane on enemy |
Grîmpa
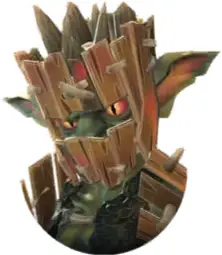
Goblin, Tank, One-handed Heavy, Misty Mountain
| Synergy Groups | n/a |
| Synergy Heroes | Alreda the Chieftain, Bolg, Chef Krazhkà, Orfurz, The Great Goblin, Tordok |
| Boons | Protection (self), Taunt (self) |
| Banes | Weak-minded (1 enemy), Weaken (1 enemy) |
| Other Abilities and Upgrades | Summons a Goblin Guard and grants protection (most wounded Goblin ally) on Death |
Gruhúr the Brute
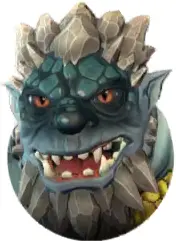
Troll, Attacker, Two-handed Heavy, Misty Mountain, Large
| Synergy Groups | Troll, Misty Mountain |
| Synergy Heroes | Alreda the Chieftain, Bolg, Ghâzh Ironhide, Chef Krazhkà, Golburz, Grîmpa, Núrraz, Orfurz, The Great Goblin, Tordok |
| Boons | Might (all allies) |
| Banes | Expose (all enemies), Daze (1 enemy), Poison (enemy that attacked him) |
| Other Abilities and Upgrades | Dispel 1 Boon (1 enemy), Takes less damage from enemies with Dagger or Staff weapons but takes more damage from enemies with Two-handed Sword or Two-handed Heavy weapons |
Mauhúr
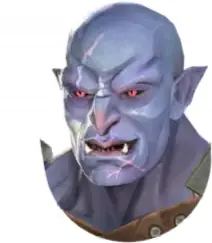
Orc, Attacker, One-handed Sword, Isengard
| Synergy Groups | Isengard |
| Synergy Heroes | Alreda the Chieftain, Eddric, Azhak, Dûnhar, Morzhà, Uglúk, Bolg, Chef Krazhkà, Tordok |
| Boons | Regeneration (self), Deadly (self), Haste (self) |
| Banes | Slow (1 enemy) |
| Other Abilities and Upgrades | Increases Crit Chance per Bane on the enemy (self), Increases Turn Meter (self), Calls Uglúk to assist, Cleanse 1-3 Banes (self), Increases Crit Chance (Isengard allies) |
Morzhà
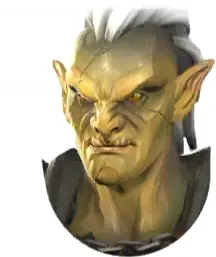
Orc, Support, Spear, Isengard
| Synergy Groups | Isengard |
| Synergy Heroes | Alreda the Chieftain, Eddric, Azhak, Dûnhar, Mauhúr, Uglúk, Bolg, Chef Krazhkà, Tordok |
| Boons | Defensive (self, assisting ally), Haste (1-3 random ally or all allies) |
| Banes | Weak-minded (1 enemy), Disrupted (1 enemy), Expose (1 enemy) |
| Other Abilities and Upgrades | Dispel 1-2 Boons (1 enemy, 1 random enemy), Calls an Isengard ally to assist |
Núrraz
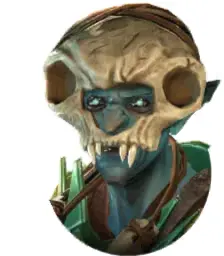
Orc, Healer, Dagger, Misty Mountain
| Synergy Groups | Troll Stonebreaker, Troll |
| Synergy Heroes | Alreda the Chieftain, Bolg, Chef Krazhkà, Gruhúr the Brute, Ghâzh Ironhide, Tordok |
| Boons | Defensive (self and 2-3 random allies or all allies), Regeneration (self), Provoke (Troll Stonebreaker or 1 Troll ally) |
| Banes | Weaken (1 enemy) |
| Other Abilities and Upgrades | Cleanse 1 Bane (self and 1-2 random allies or all allies), Summons a Troll Stonebreaker |
Orfurz
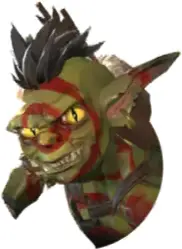
Goblin, Attacker, Bow, Misty Mountain
| Synergy Groups | Goblin |
| Synergy Heroes | Alreda the Chieftain, Bolg, Chef Krazhkà, Golburz, Grîmpa, The Great Goblin, Tordok |
| Boons | Deadly (self) |
| Banes | n/a |
| Other Abilities and Upgrades | Increase damage to target enemy per Bane on target, Summons a Goblin Lightfoot on death and grants it Turn Meter, Increase Crit Chance per Goblin ally on spawn (self) |
Robel
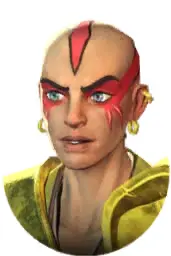
Human, Attacker, Spear, Haradrim
| Synergy Groups | n/a |
| Synergy Heroes | Alreda the Chieftain, Chef Krazhkà, Tordok, Wubete |
| Boons | Provoke (self), Defensive (self) |
| Banes | Black Serpent’s Poison (1 enemy) |
| Other Abilities and Upgrades | Reduce Turn Meter (1 enemy, all enemies) |
Rókma
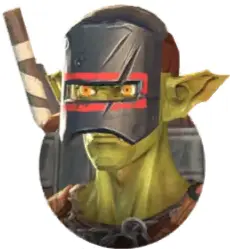
Orc, Support, One-handed Heavy, Mordor
| Synergy Groups | Mordor |
| Synergy Heroes | Alreda the Chieftain, Bolg, Ghâzh Ironhide, Grimlurz, Shagrat, Úzhan, Chef Krazhkà, Tordok |
| Boons | Deadly (1 random Mordor ally) |
| Banes | Weaken (1 enemy), Burning (all enemies), Weak-minded (all enemies) |
| Other Abilities and Upgrades | Increased damage against Burning enemies (self) |
Tordok
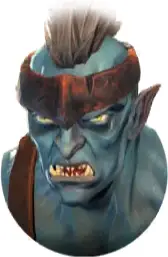
Orc, Tank, One-handed Sword, Misty Mountain
| Synergy Groups | Leader, Shadow |
| Synergy Heroes | Alreda the Chieftain, Azhak, Bolg, Chef Krazhkà, Dûnhar, Eddric, Ghâzh Ironhide, Golburz, Grimlurz, Grîmpa, Gruhúr the Brute, Mauhúr, Morzhà, Núrraz, Orfurz, Robel, Rókma, Shagrat, The Great Goblin, Tordok, Uglúk, Úzhan, Wexxe, Wubete, Yeftu |
| Boons | Taunt (self) |
| Banes | Enfeeble (1 enemy), Provoke (self) (triggered if a Shadow Leader ally’s health drops below 50% Health) |
| Other Abilities and Upgrades | Heal (self) |
Úzhan
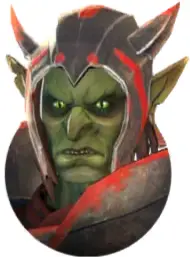
Orc, Healer, One-handed Heavy, Mordor
| Synergy Groups | Mordor |
| Synergy Heroes | Alreda the Chieftain, Bolg, Ghâzh Ironhide, Rókma, Shagrat, Chef Krazhkà, Tordok |
| Boons | Defensive (1 random ally, self), Regeneration (1 Mordor ally), Concentration (all allies), Unbreakable (ally with less than 30% health) |
| Banes | Slow (1 enemy) |
| Other Abilities and Upgrades | Calls 1 ally to attack, Heal (all allies) |
Wexxe
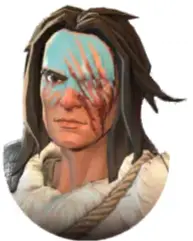
Human, Attacker, Two-handed Sword, Dunland
| Synergy Groups | n/a |
| Synergy Heroes | Alreda the Chieftain, Eddric, Chef Krazhkà, Tordok |
| Boons | Blood Frenzy (self), Counterattack (self) |
| Banes | Bleed (1 enemy) |
| Other Abilities and Upgrades | Increases stack of Blood Frenzy if target has Bleed or if Crit is dealt, Deals more damage per stack of Blood Frenzy, Ignores % of target’s armor upon collecting 10 Stacks of Blood Frenzy, Increased Crit Chance per stack of Blood Frenzy |
Wubete
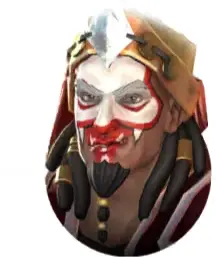
Human, Tank, One-handed Heavy, Haradrim
| Synergy Groups | n/a |
| Synergy Heroes | Alreda the Chieftain, Chef Krazhkà, Tordok, Robel |
| Boons | Provoke (1 enemy) |
| Banes | Slow (all enemies) |
| Other Abilities and Upgrades | Cleanse 1-3 Banes (self), Heal (self) when attacking enemy with Black Serpent’s Poison (can only be inflicted by Robel) |
Yeftu
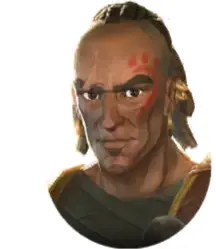
Human, Attacker, One-handed Sword, Haradrim
| Synergy Groups | n/a |
| Synergy Heroes | Alreda the Chieftain, Chef Krazhkà, Tordok |
| Boons | n/a |
| Banes | Weaken (1 enemy), Expose (1 enemy) |
| Other Abilities and Upgrades | Dispel 1 Boon (1 enemy), Gain more Crit Chance if Yeftu has no Banes |
5. Be a Part of a Guild
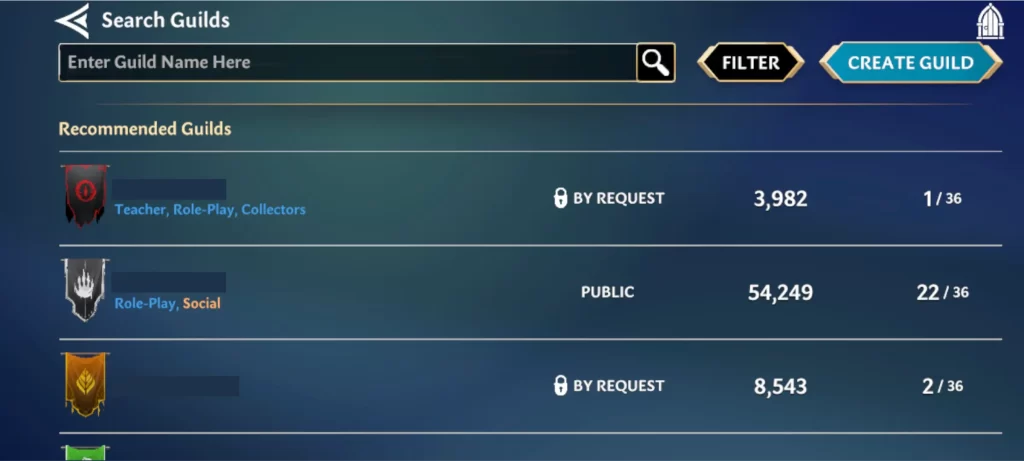
At Player Level 10, you’ll unlock Guilds and Guild Campaigns. No man is an island as they say, and having fellow players as allies will be very beneficial in dealing with enemies and tasks which require more than 1 Ring-bearer (player) to complete.
In Guild Campaigns, although it is not necessary to be in a guild to actually play through them, having Guildmates will make it a lot easier, especially if those Guildmates have stronger heroes. In Guilds, you can put up your strongest heroes for others to borrow for their campaigns and they in turn will let you borrow theirs.
Unlike regular campaigns that only let you have 5 heroes in battle, these Guild Campaigns have an extra slot intended for your Guildmates’ hero. Take note that the heroes you borrow from them can only be used once per rest and cannot be a duplicate of a hero you already placed in your party before the battle. Because of this, we highly recommend only putting up uncommon or rare heroes for rent if possible.
Unlike regular Campaigns in the Light or Shadow factions, Guild Campaigns let you choose heroes from both factions to form a team. There is also a dedicated energy system (Guild Campaign Energy) and guild currency (Guild Coins) for them. Guild Coins are used to buy items from Supplies which can be unlocked at level 18.
But how does one become part of a guild? By creating your own Guild or joining one!
Creating a Guild
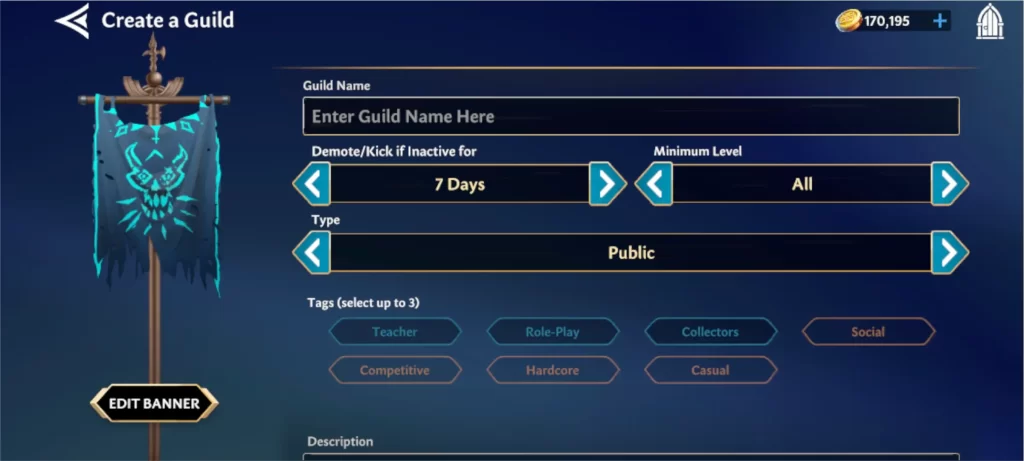
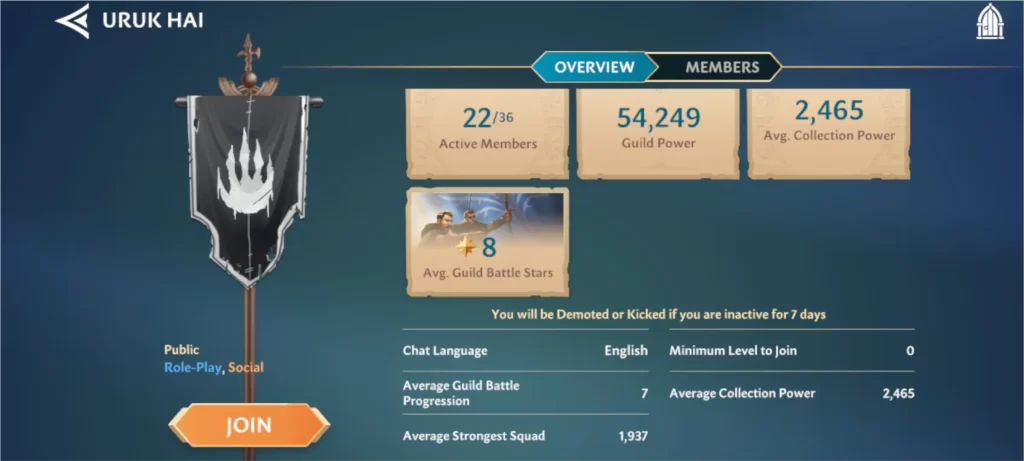
There are no additional level requirements to create a guild. As soon as you unlock it at level 10, you are ready to go. You can customize your Guild Name, choose a banner from 12 options, and add a description for your Guild. You can set a minimum level requirement from 10 to 60 if you want to be surrounded by players of a certain level range.
If you are concerned about how active your members should be, you can set a rule where your Guild will automatically demote or kick a member if they’ve been inactive for a certain number of days. It can be set to 7, 14, and 30 days.
To find members that will suit your group, choosing 3 tags from the 7 options can greatly help. The Teacher tag will let you find members who are open to teaching newbies or newbies who want to learn the game from more experienced players. Role-Play is for players who like to roleplay their characters.
Collectors are for players who seek to collect all heroes. Social is for players who want to talk and socialize with fellow players. Competitive is for players who actively seek out challenges and want to be in an active group with the same goals.
Hardcore is similar to Competitive but is more concentrated on strengthening their own team and becoming an expert in the game. Casual is best for newbies or players who want to take it easy and play the game at their own pace.
Don’t forget to set what type of Guild you have. Public Guilds are open for anyone to join. By Request Guilds will require players to send a request to join first and must be approved by the Guildmaster. Closed Groups do not accept any new members.
Joining a Guild
Joining a Guild is pretty straightforward. Once you’re on the Guild screen, there will be some recommended guilds laid out on a list. It will show you tags underneath their name that will tell you what kind of Guild they are. To the right of their name is information about the Guild type (by request or public), their Guild Power, and the number of active members they have.
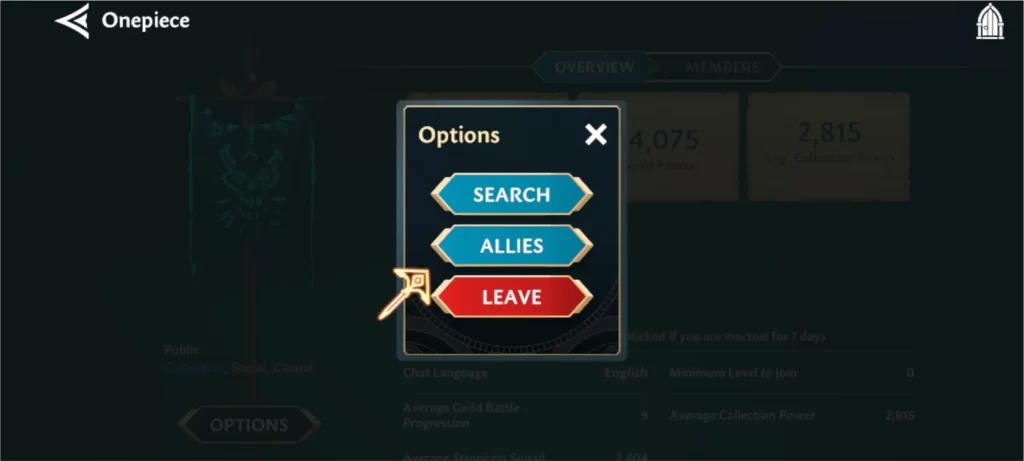
Choosing a Guild that fits your needs may require you to try out a few of them. If you are not happy with the Guild you joined, you can tap Options inside your Guild’s page and tap Leave. There is no penalty for leaving but be warned: it may be harder to come back to a Guild you left if it is a By Request type.
6. Collect Freebies, Rewards, and Dailies
Who doesn’t like freebies? Like most mobile games nowadays, this game comes with freebies and rewards you can collect, and dailies you can accomplish.
Login Rewards
The very first freebies you’ll run into are the ones that appear when you open the game for the first time in the day.
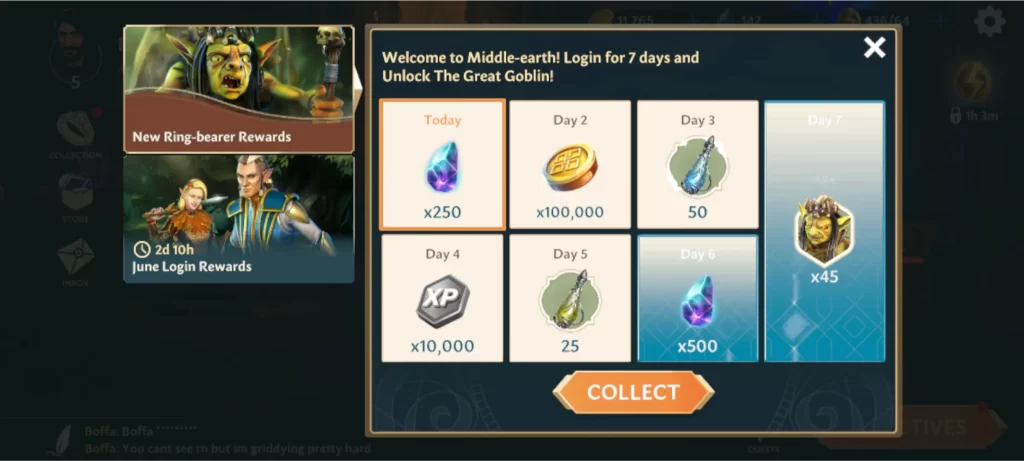
For new players, you can collect 7 rewards for the first 7 days of logging into the game from the New Ring-bearer Rewards. These mostly consist of currencies like Gold and Gems, Experience, and Ability Materials with Character Shards as the final reward.
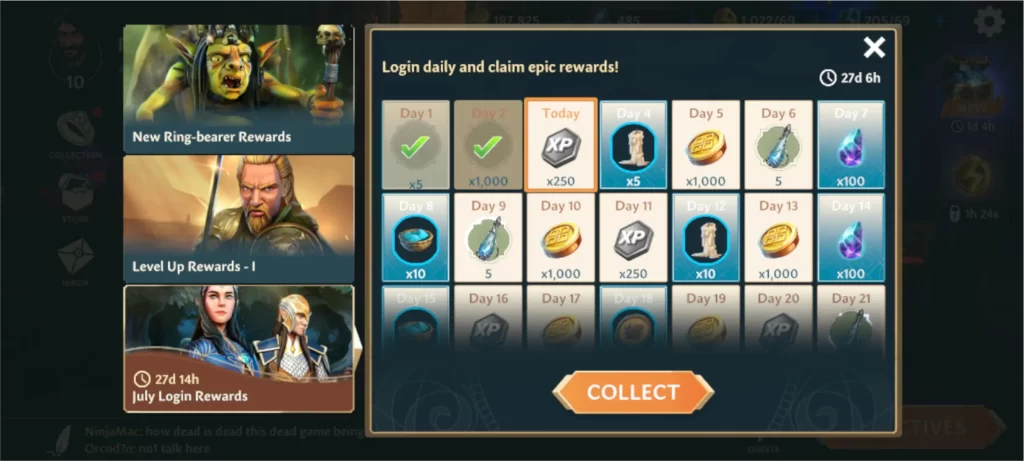
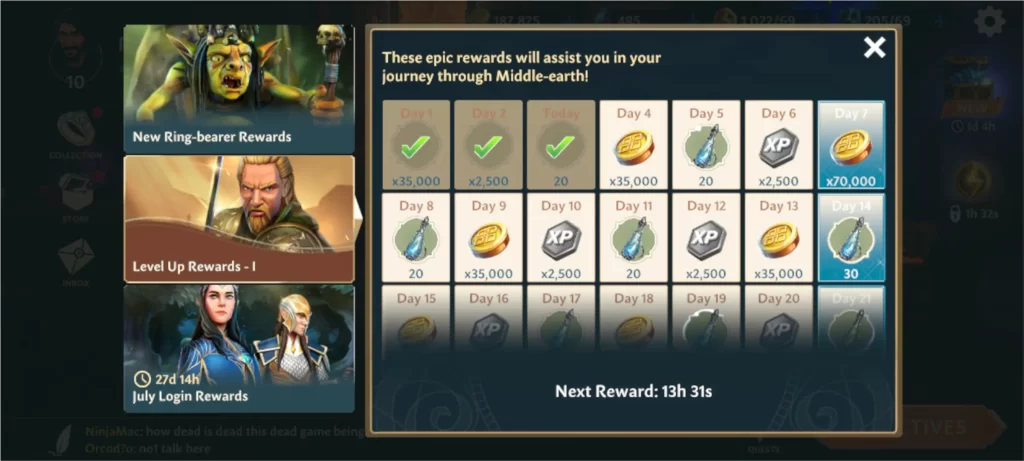
Players can also obtain freebies from the Monthly Login Rewards. These have the same rewards as New Ring-bearer Rewards but with a Character Shard or special item for Gear for every 4th day that you login. You can collect up to 30 rewards if you log in every day. If you miss a day, this won’t mean that you’ll skip an item. So if you want those 4th-day specials, you have to log in that many days before you can claim it.
Level-up rewards function pretty much the same as Monthly Login Rewards except they are filled with rewards that focus on leveling up and upgrading your character. This includes Gold, Ability Materials, and Character Experience.
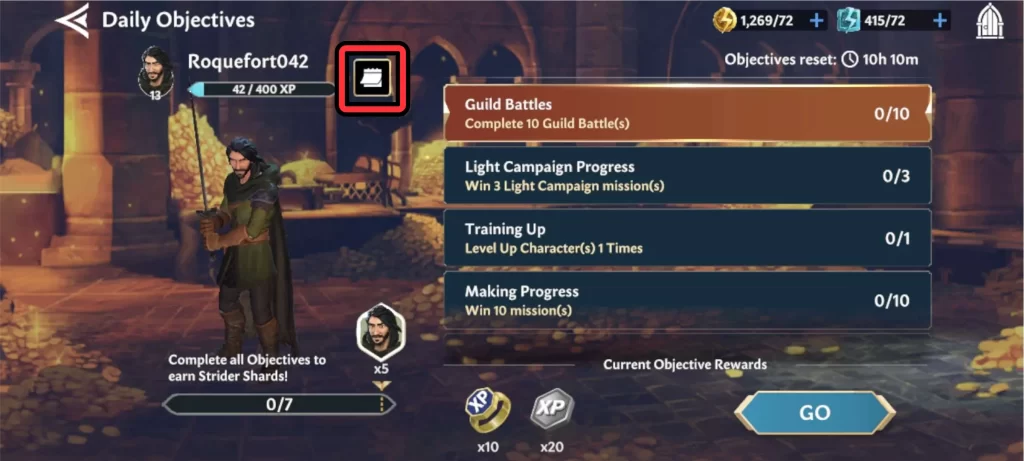
If you weren’t able to claim them, you can always go to the main screen, tap the Objective button on the lower right side and tap the calendar icon next to your name.
Bonus Chests
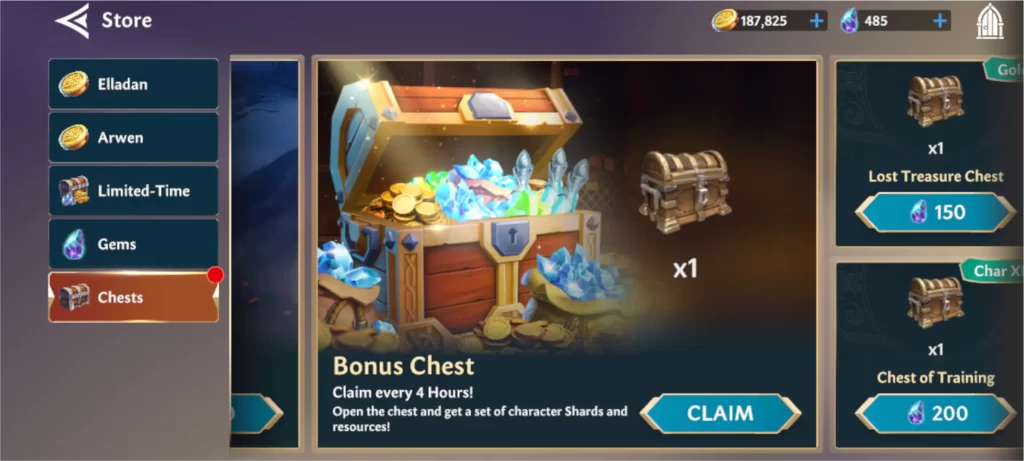
While free-to-play players may not find many reasons to visit the store because they cost Gems (that are difficult to obtain and are usually bought with real money), it is worth visiting for one important thing: Bonus Chests. Under the Chests category of the store, you’ll find a Bonus Chest you can claim. Unlike Login Rewards, these chests can be claimed every 4 hours. Possible rewards you can obtain from them are character shards and various resources.
Bonus Energy
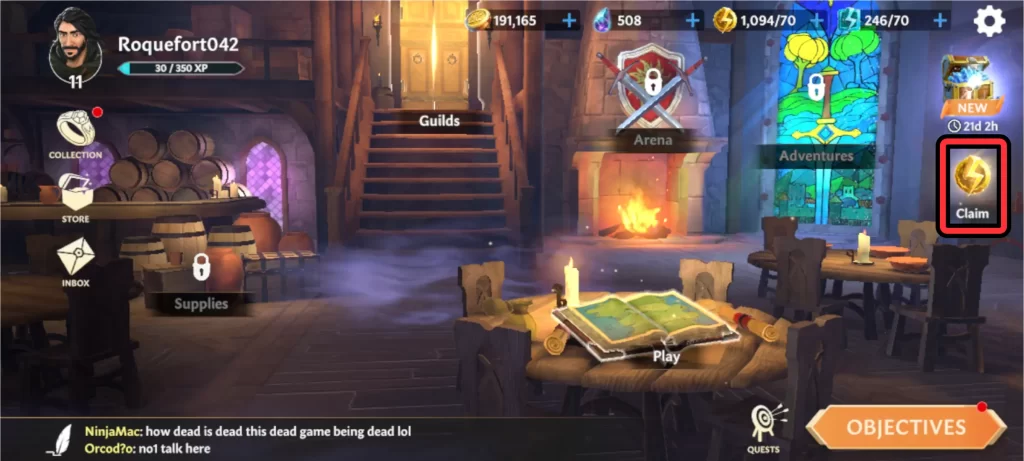
To play through the Campaigns, you’ll need to spend Energy. The gold one is used for regular Campaigns while the blue one is used for Guild Campaigns. Tapping the gold Energy icon found on the right side of the main screen will let you collect a good helping of Campaign Energy and Guild Campaign Energy. Like the Bonus Chests, these are claimable every 4 hours.
If you have enough energy on hand, it’s still worth claiming since the game will stack the energy even if it is over the limit. The number limit only refers to how much energy is regenerated naturally but not how much energy can be stocked.
Inbox
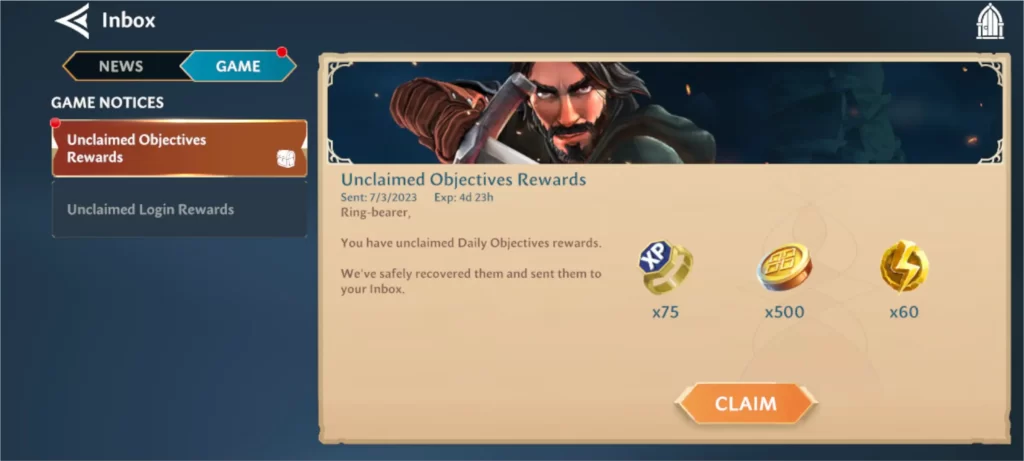
The in-game Inbox isn’t just there to tell you about the newest updates or exciting new features the game has to offer. It’s also there to send you any unclaimed Login Rewards or Daily Objective Rewards. Occasionally, the game developers will generously send you some goodies as well! In our experience, this usually happens when you unlock a feature after leveling up your player level.
Daily Objectives and Quests
Daily Objectives can be viewed by tapping on the Objectives button on the lower right side of the main screen. These objectives must be accomplished within the day in order to obtain the special reward which is usually Character Shards. Objectives and rewards are reset each day.
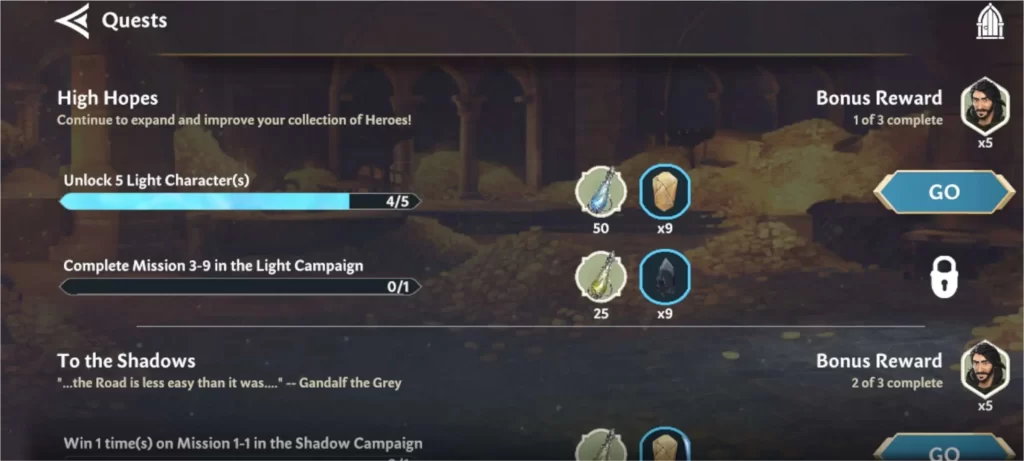
Quests on the other hand can be found by tapping the target icon right next to the Objectives button. Unlike Daily Objectives, these don’t reset and will stay unchanged until you clear one of the Quests. There are usually 3 Quests displayed which have 3 tasks each. Each task has a reward and completing a Quest will typically reward you with Character Shards. There is no way to change the Quests you get. If you want new ones, you’ll have to clear the existing ones first.
7. Connect Your Account
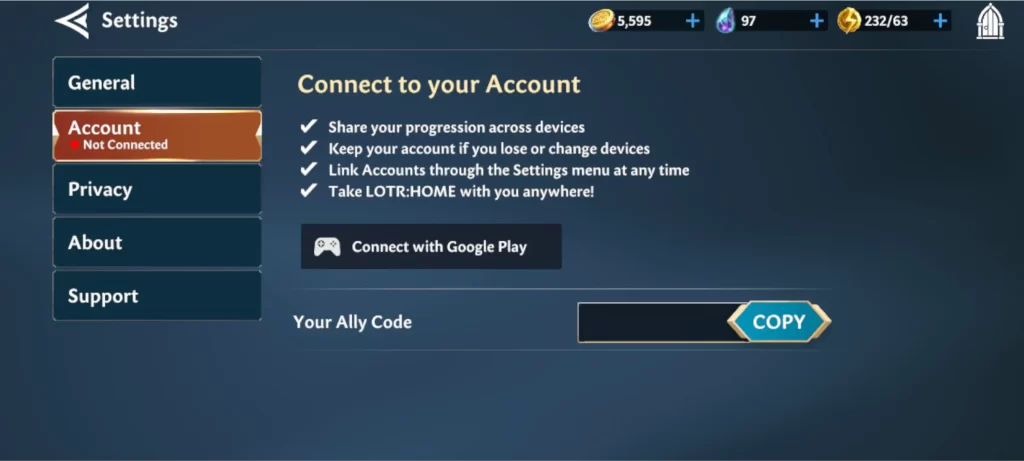
Connecting your game to a Google Play or Apple Game Center account is not mandatory but it does come with the benefit of having a backup save. With an account, you’ll be able to share your progression across all your devices and be content in knowing that even if you delete the game or change your device, the hours you spent will not be lost.
To link your account, all you have to do is go to Settings > Account > Connect Account. You’ll be prompted to log in or choose an account to connect your game to.
And this marks the end of our beginner’s guide to The Lord of the Rings: Heroes of Middle-earth! We hope that this article aids you in your journey through Middle-earth and sets you on your way to greatness! Are there any tips or tricks you heard about or discovered as you played the game that we did not cover? Is there a mobile game that you’d like us to make a guide on? Let us know in the comment box below!

