It has been quite the journey but your goal is now within sight: in Chapter 6 of The House of Da Vinci 3, you, as Giacomo—with the help of your friend and maestro Leonardo da Vinci and the monk Luca Pacioli—managed to foil Cesaré Borgia’s plan of taking the Pope’s amulet from you by force. With a bit of ingenuity, good luck, and a nifty little device called the Oculus Perpetua, you were able to knock out Borgia and his double-crossing henchman Marco with the cart in Luca’s garden. As the uninvited guests were rendered unconscious, you were able to take back the second glove Borgia had so you can use it to go back in time and prevent the Gate of the Temple of Wisdom from being used in the first place.
You, Leonardo, and Luca then hurriedly leave Northern Tuscany for Central Apulia that very same evening in search of the secret tunnel that would lead your party to the secret fortress of the Ordo Iustitialis (Order of Justice). At the end of a long journey through horseback, you manage to find the entrance to this secret tunnel. As you and Leonardo enter, you come face to face with puzzling obstacles inside a cave containing a giant storage crane and, later on, a vast supply transport room with an elevator. Here in Chapter 7, you and Leonardo try to figure out how to proceed further into the Order’s hideout to get to the time machine.
After Leonardo fixes the elevator, you both ascend to the main hideout, where the time machine Leonardo built is. As your ultimate goal is within arm’s reach, Chapter 8 of The House of da Vinci 3 sets you and Leonardo off into the final stages of your journey—but as expected of the Order, it’s not going to be a walk in the park.
In this epic conclusion of the saga, your wits are called upon to solve the puzzles scattered throughout the fortress of the Ordo Iustitialis. Just as you did in the previous chapters, you’ll be going back and forth in time to affect the present in your favor. By the end of the chapter, you’ll be—quite literally—taken out of this world and into another time to set things right and fulfill the mission you’ve been tasked with.
Similar to our last walkthrough, we’ve combined Chapter 8 and 9 in one document as Chapter 8 contains the majority of the puzzle-solving while Chapter 9 serves as the conclusion with just a short puzzle to solve. However, being that these are the last two chapters of this series, expect to encounter puzzles at every turn that will test your attention to detail, understanding of patterns, and your ability to decipher clues and cues like a master detective.
Without further ado, let’s get into the walkthrough for Chapter 8 and 9 of The House of Da Vinci 3.
Chapter 8: Castel del Monte
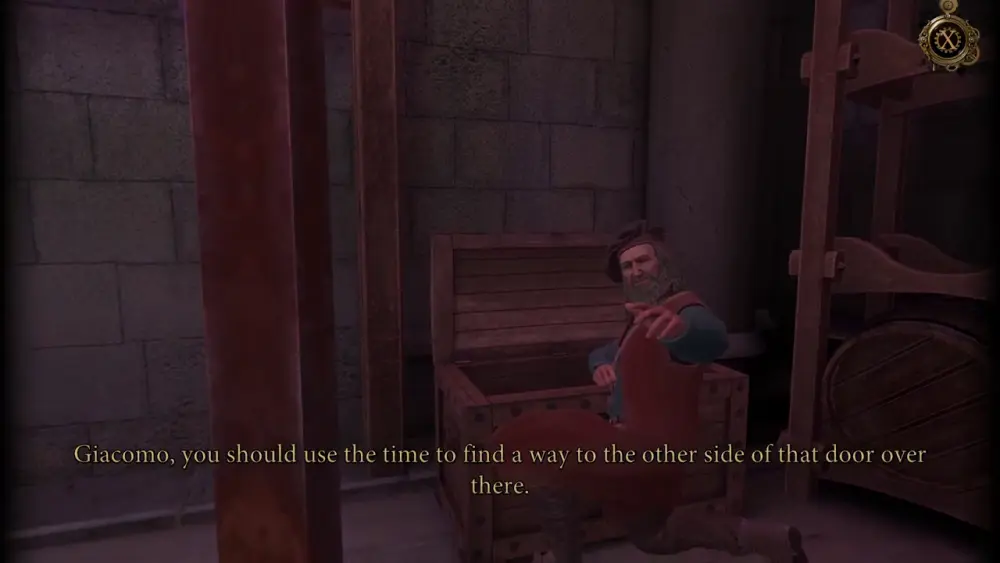
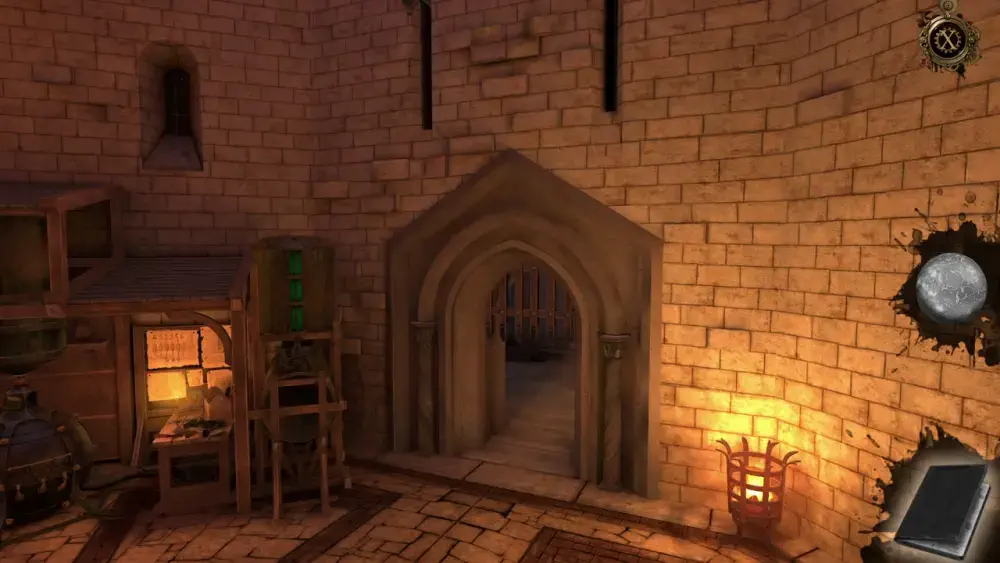
As you reach the top of the elevator, you and Leonardo find yourselves in what the latter deduced was a storeroom that had been used to supply Castel del Monte. But more than just housing supplies for the Order, Leonardo notices that the storeroom also has some documents, which he rummages through in the hopes of finding something useful. In the meantime, he offers some instructions your way…
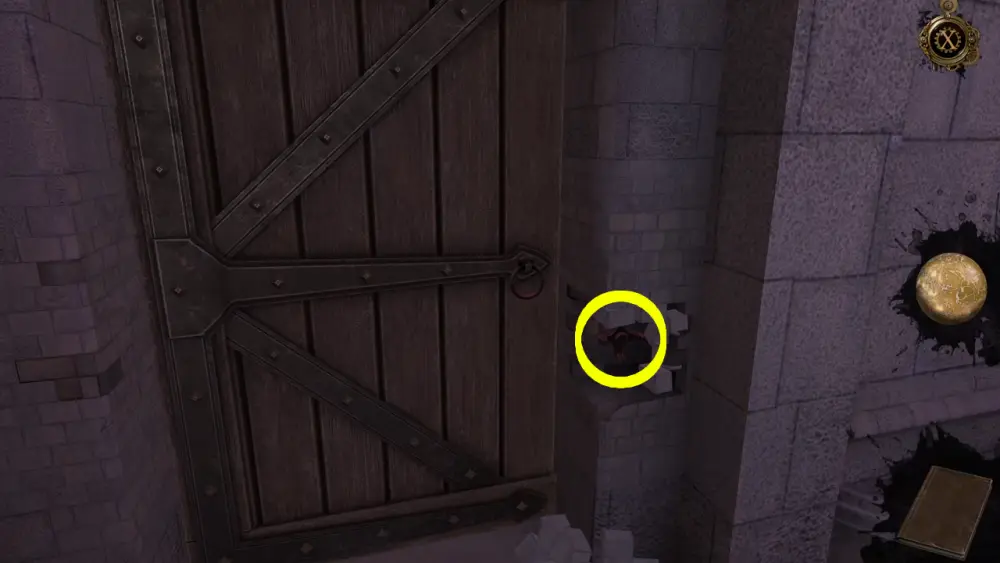
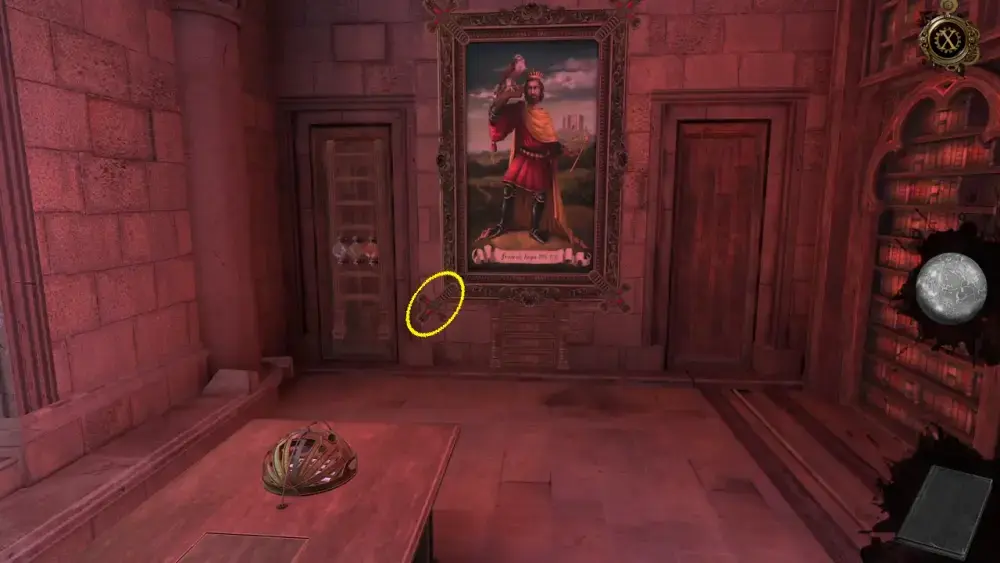
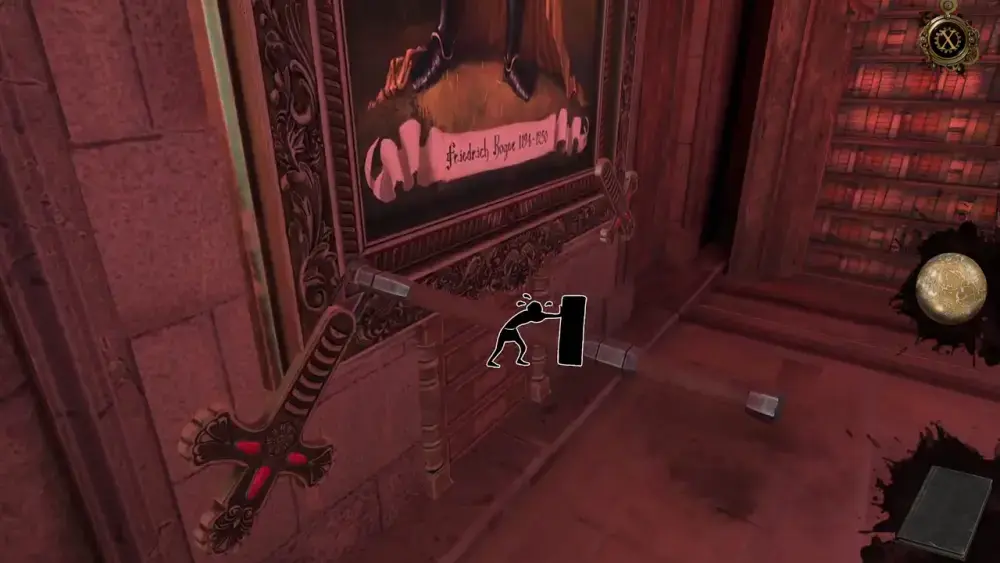
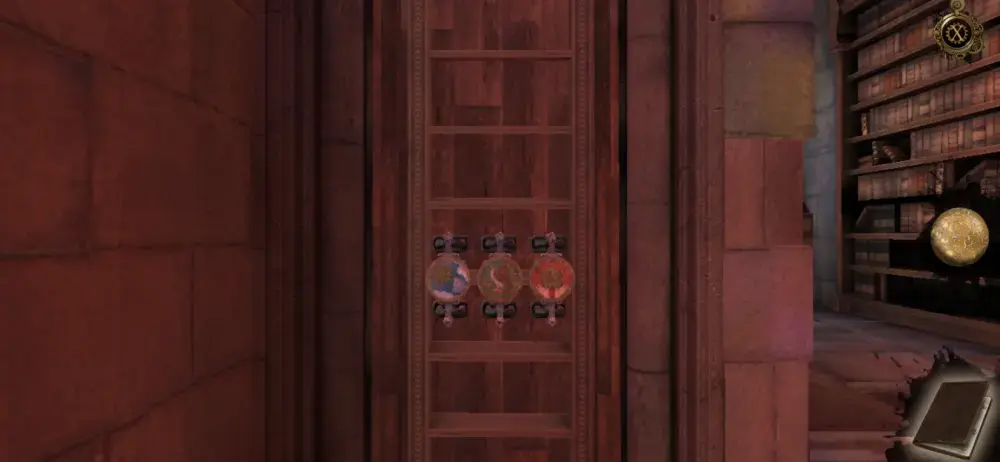
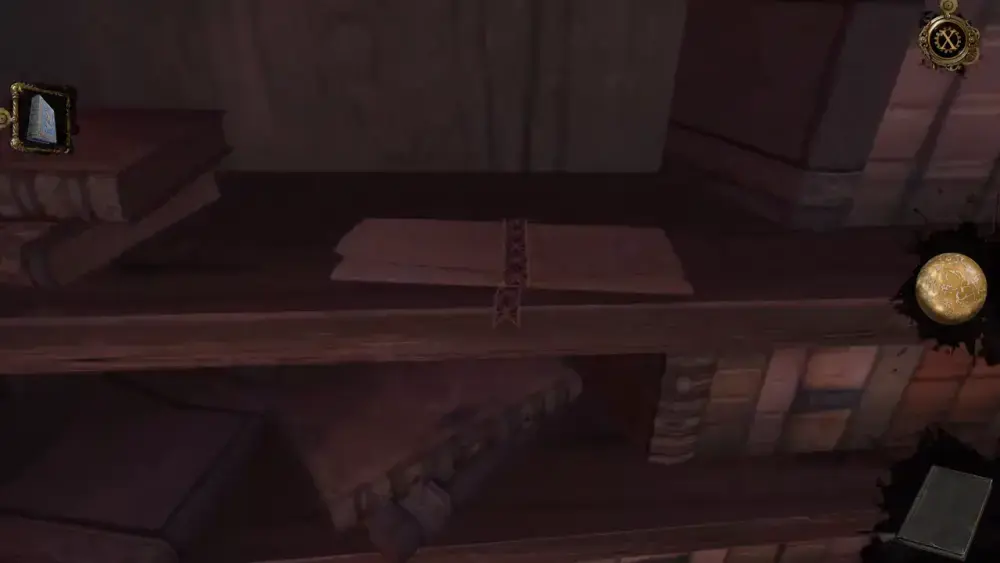
Looking around, there is only one door in the entire room. If you approach it and try to pull the handle, it won’t budge. You will, however, notice that there are some broken parts of the wall near the door. The red brick in the damaged part seems to stick out like a sore thumb.
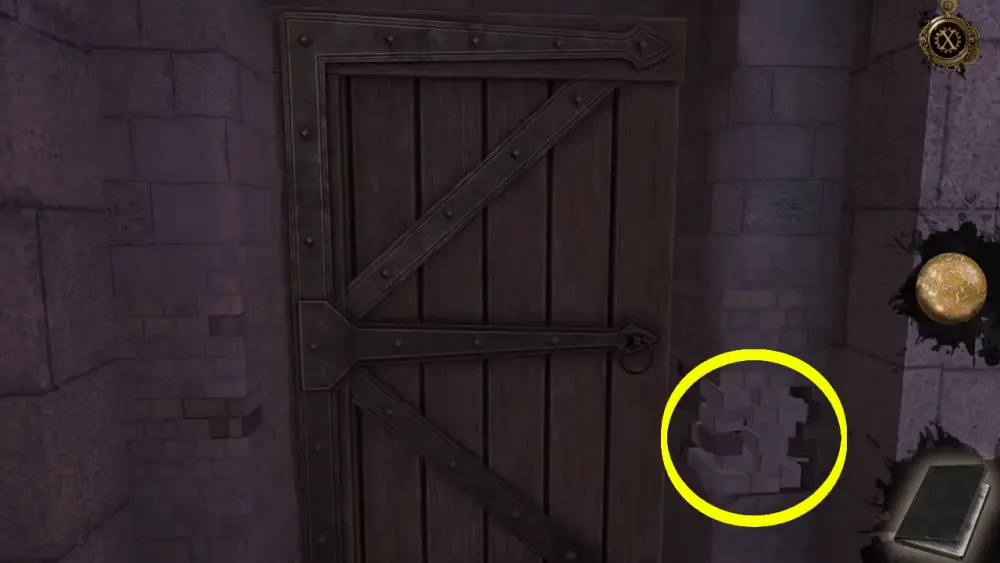
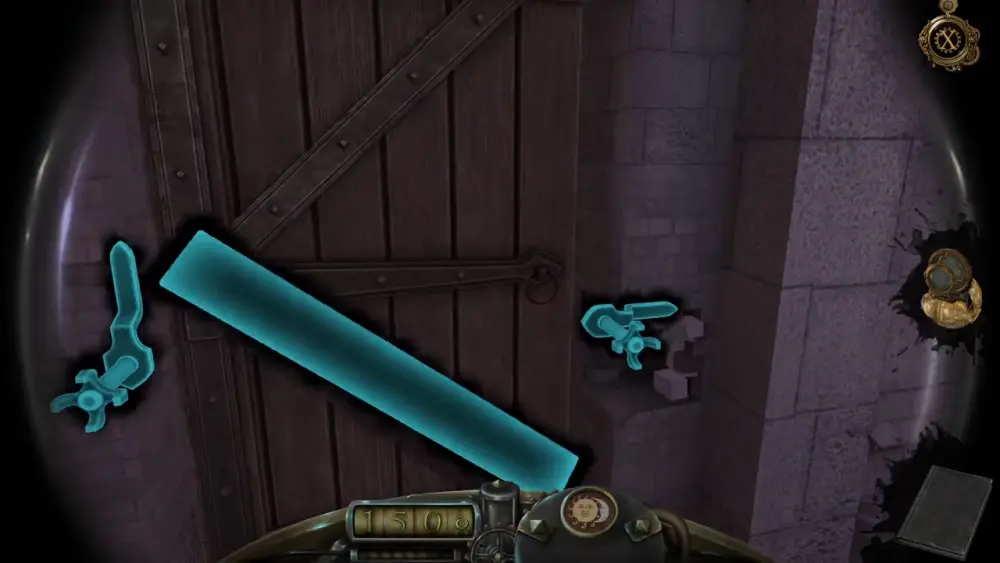
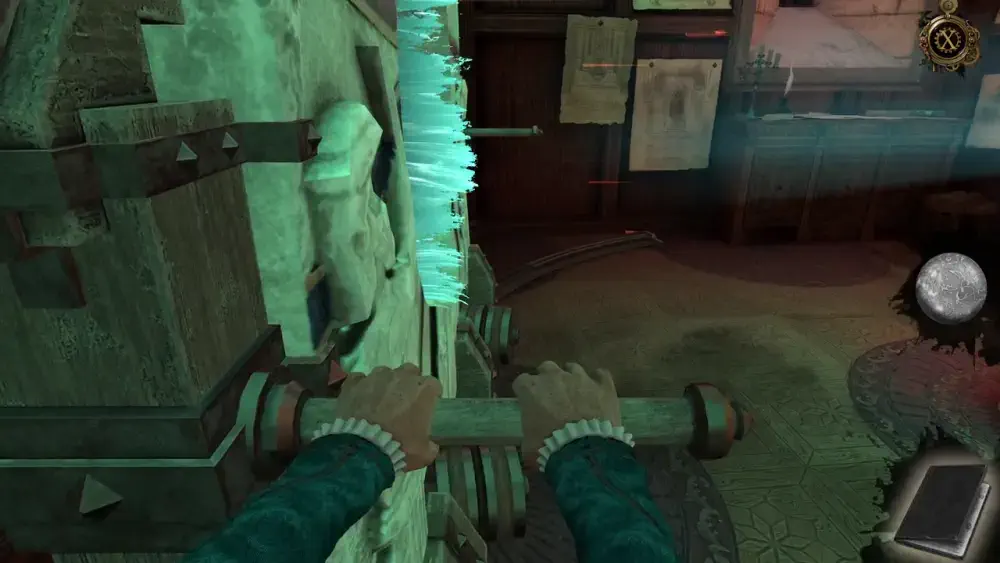
Still, you need to find a way to unlock the door and seeing as there isn’t anything else you can use inside the room, open the Oculus Perpetua so you can see how the door’s locking mechanism works.
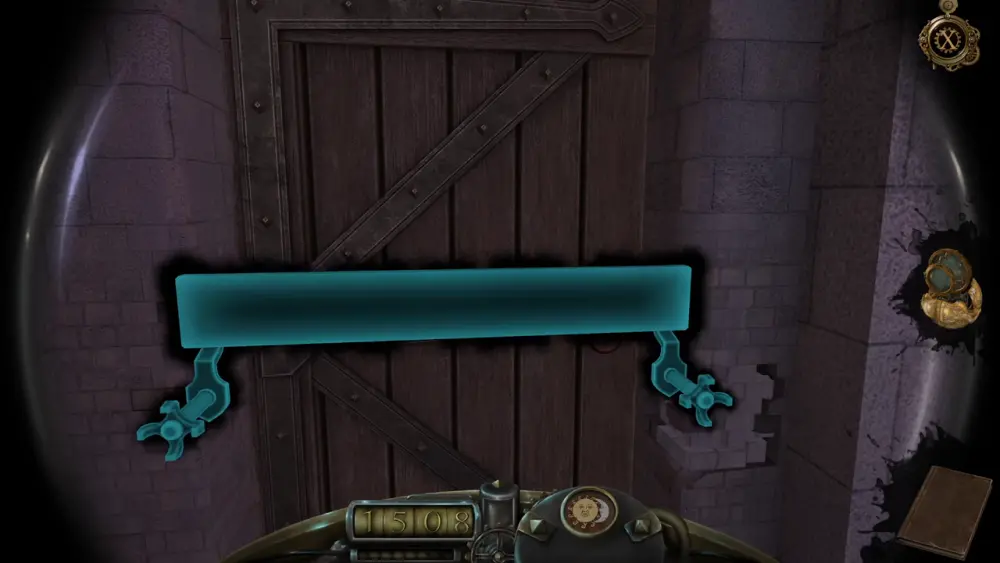
The lock appears to be connected to the damaged part of the wall. Moving the red brick will cause the other bricks to fall, revealing the actual latch holder that you can see through the Oculus Perpetua.
Zoom into the latch holder and turn it, consequently unlocking the door.
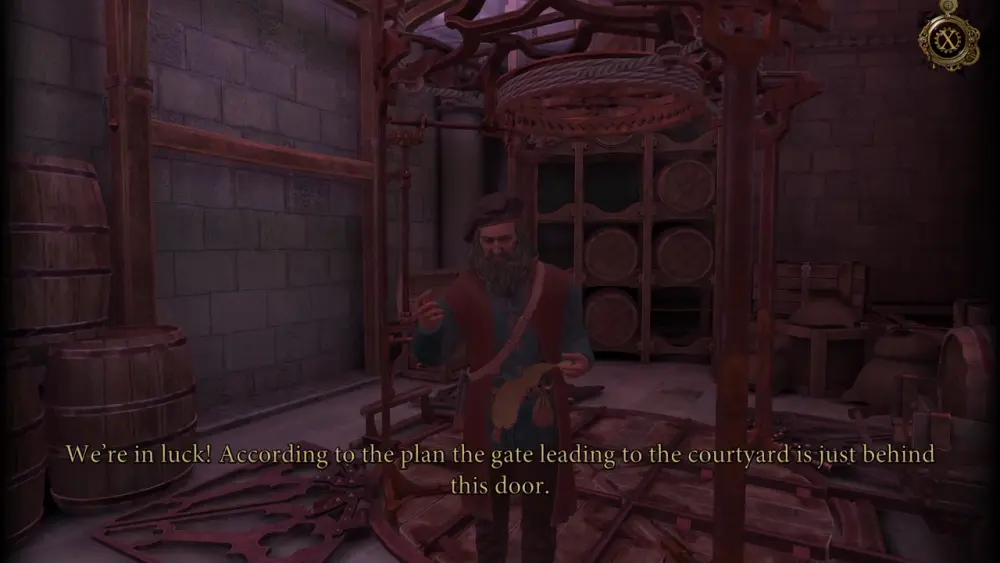
As soon as you unlock the door, Leonardo tells you that he has found a copy of Castel del Monte’s building plan. Surveying the document, he concludes that the courtyard is the place most likely to house the bulky time machine he built. Fortunately, it looks like you and Leonardo are closer to your goal than you might imagine…
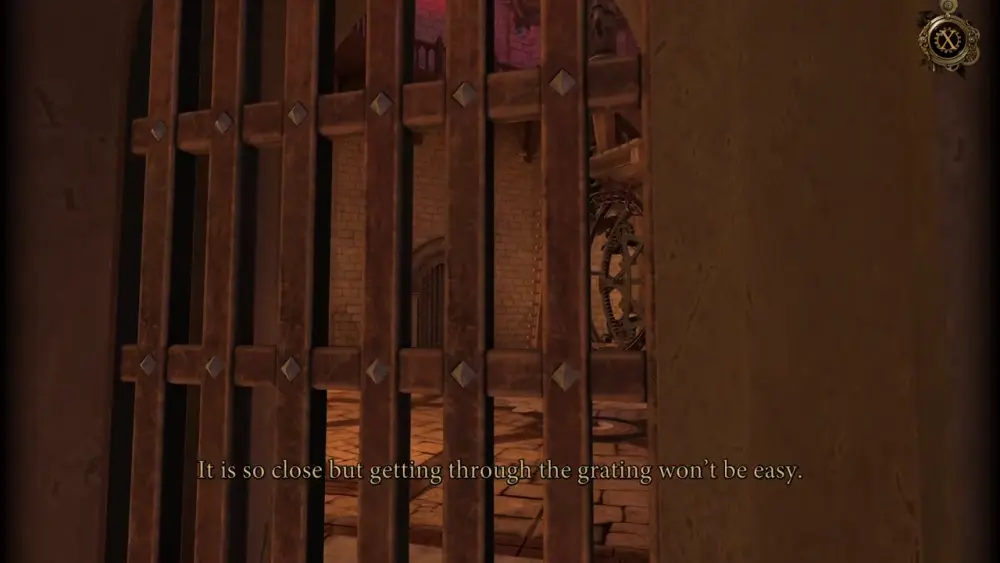
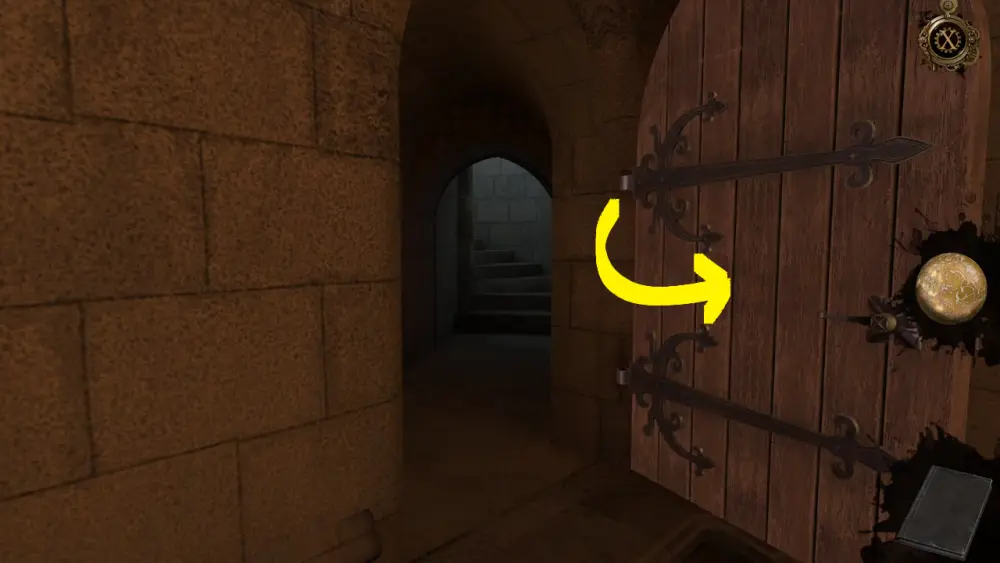
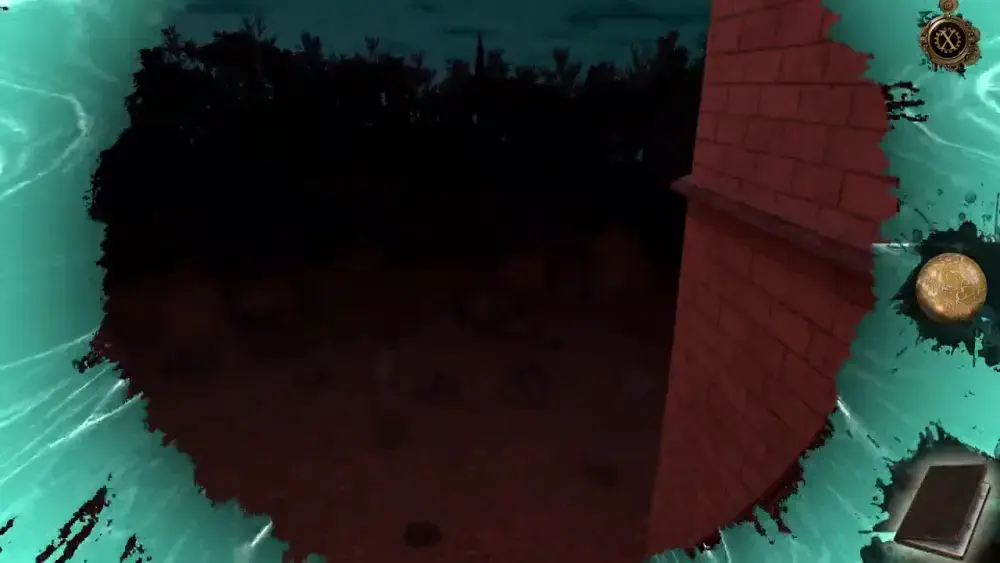
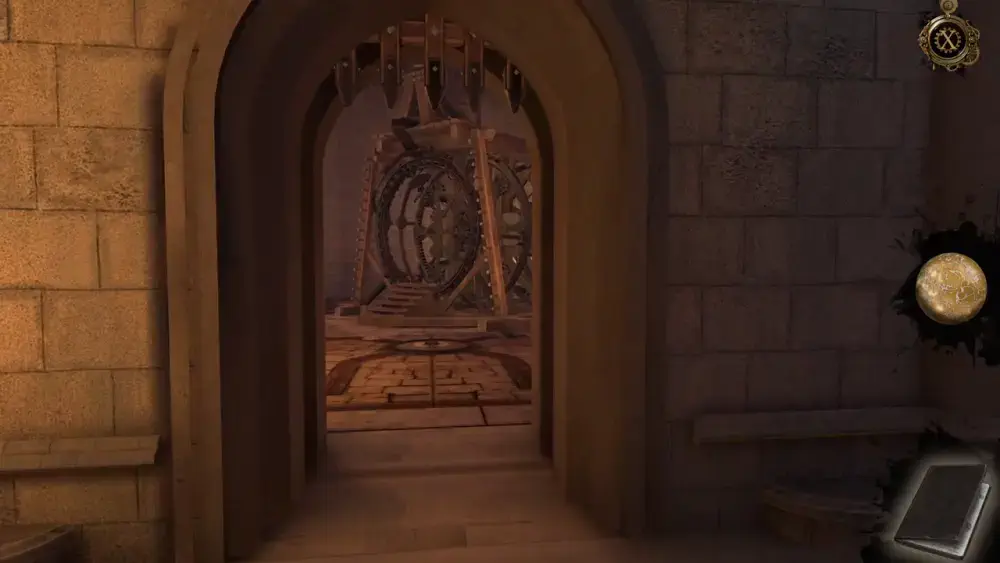
Open the door and enter the next room. Indeed, the time machine had ended up in the courtyard, but while you’re quite literally a few steps away from the device, a large metal gate is blocking the path and there are guards patrolling the area.
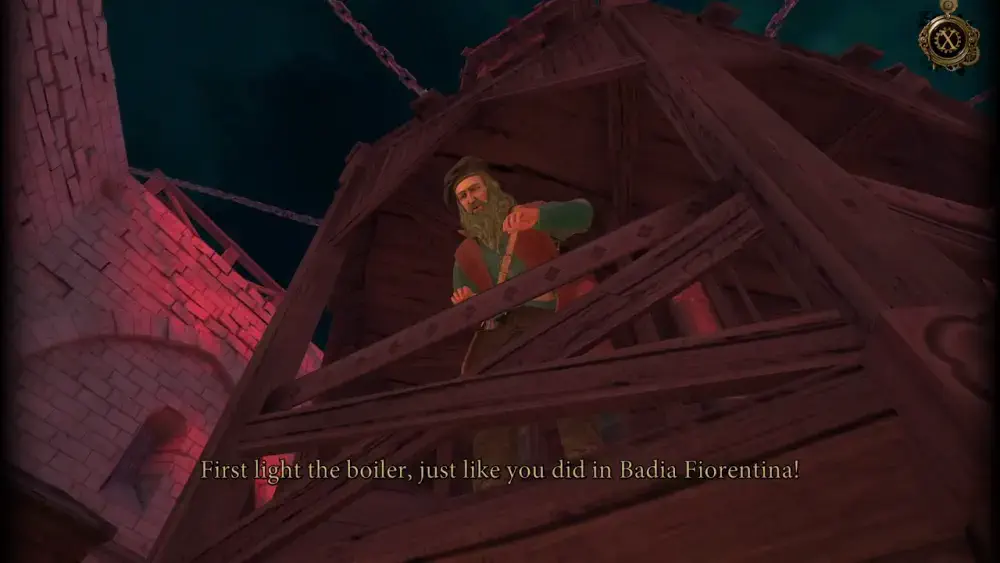
Leonardo explains how the time machine works and what you need to do: split up as he finds a way to the tanks above the machine so he can mix the fuel while you find a way into the courtyard to light up the boiler powering the machine. As for the guards patrolling the area, Leonardo simply suggests improvising so you don’t get caught.
With this, you need to find your way to the roof, which, according to the blueprint he’s holding, is behind the door of the room you’re currently in. He also mentions that the controls for the gate should be in the room directly above you, though there doesn’t seem to be a door that will directly lead you there. In any case, the cutscene ends and you both get moving.
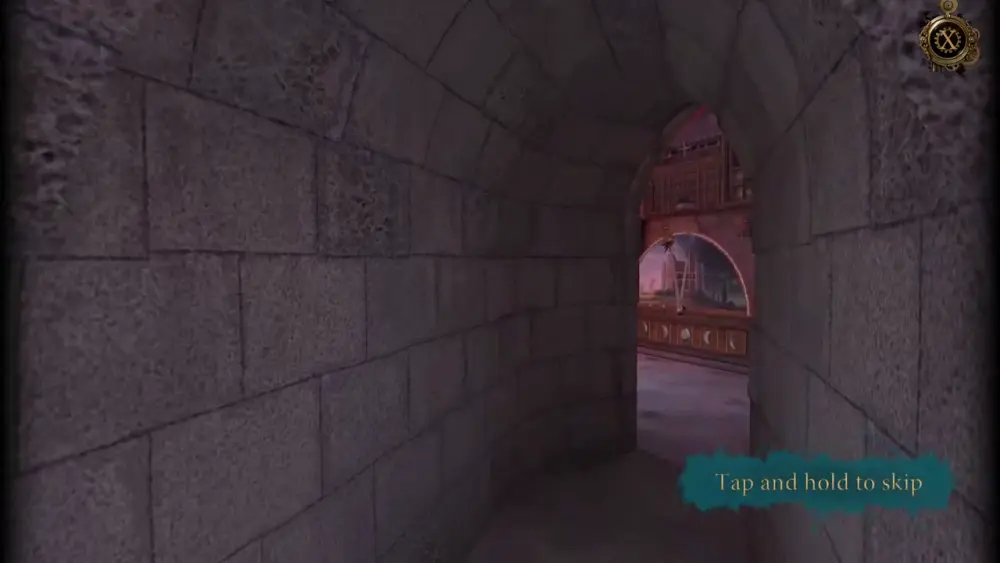
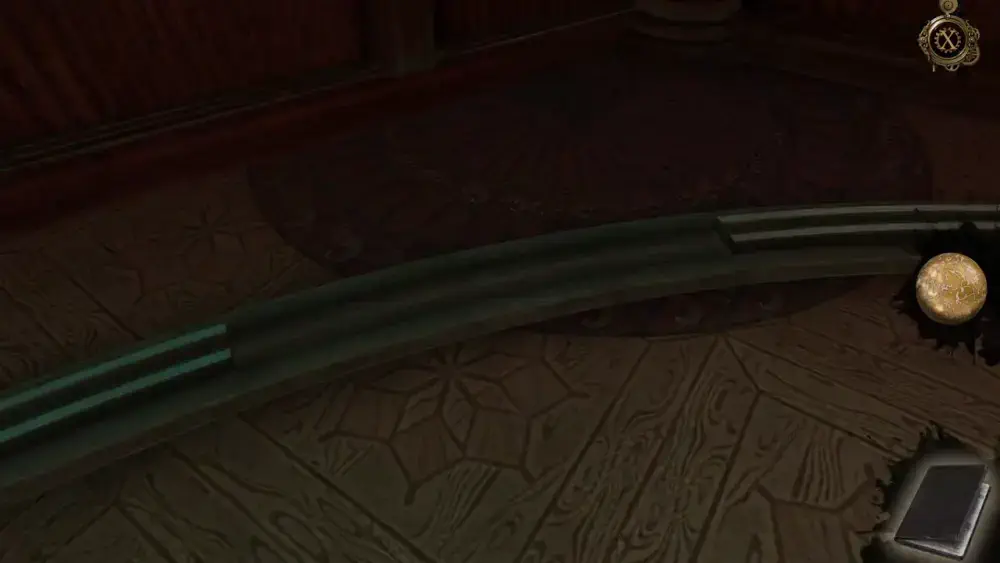
Open the door in the room. This will lead you through a long and winding staircase.
At the top of the flight, there is a metal gate to your left…
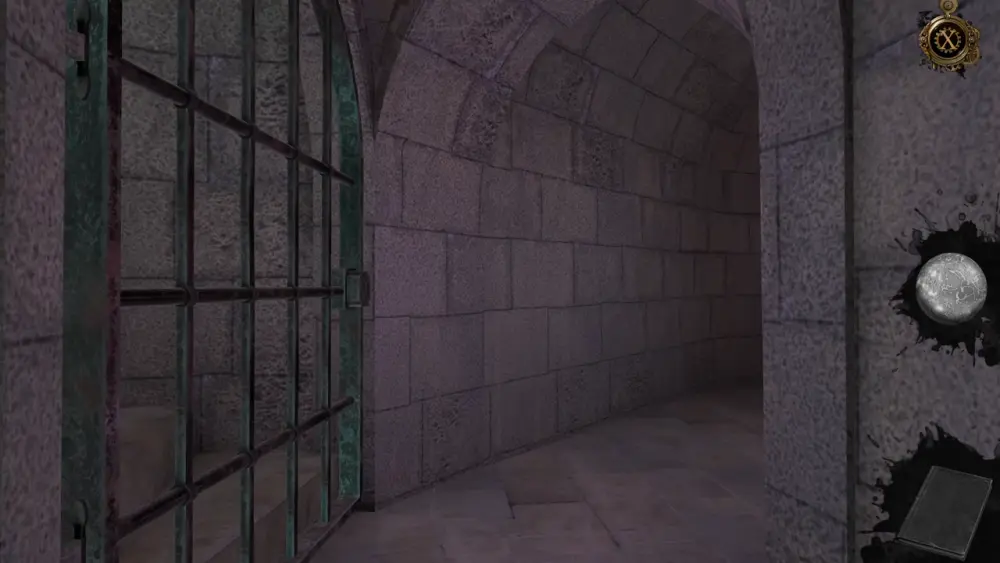
And a room to your right just down the hall.
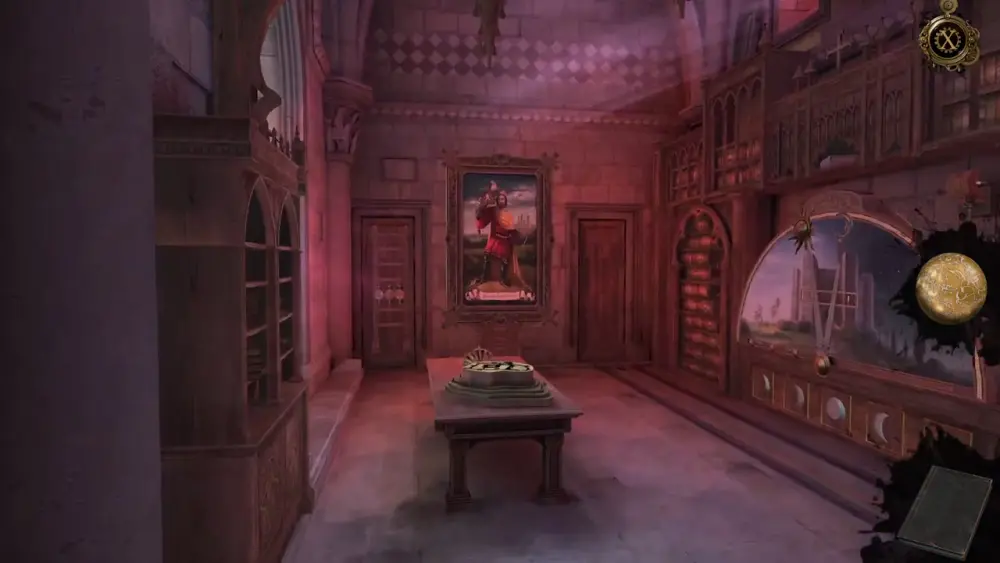
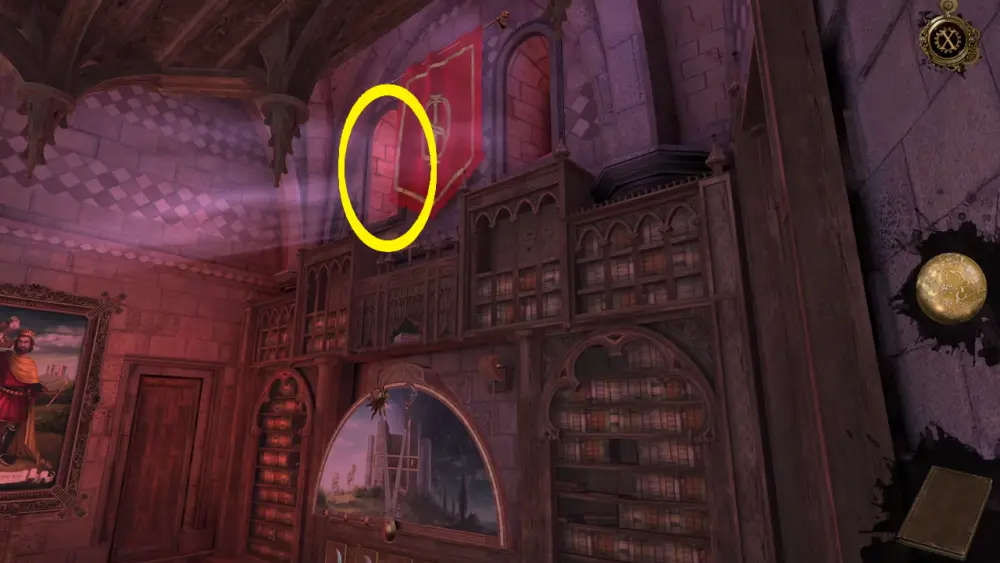
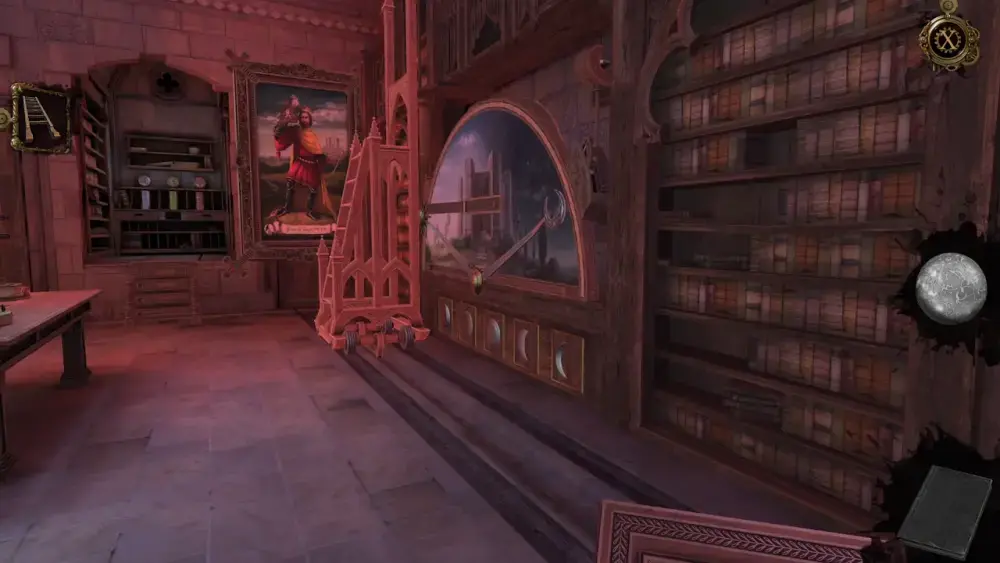
The gate is locked and Leonardo points out that you would need a key. Perhaps, he says, there is something in the next room, which looks like a library or study of sorts. Immediately, three things might catch your attention: the large portrait of a king, the illustration of a place with a sun and moon above it, and a strange machine on the table in front of you.
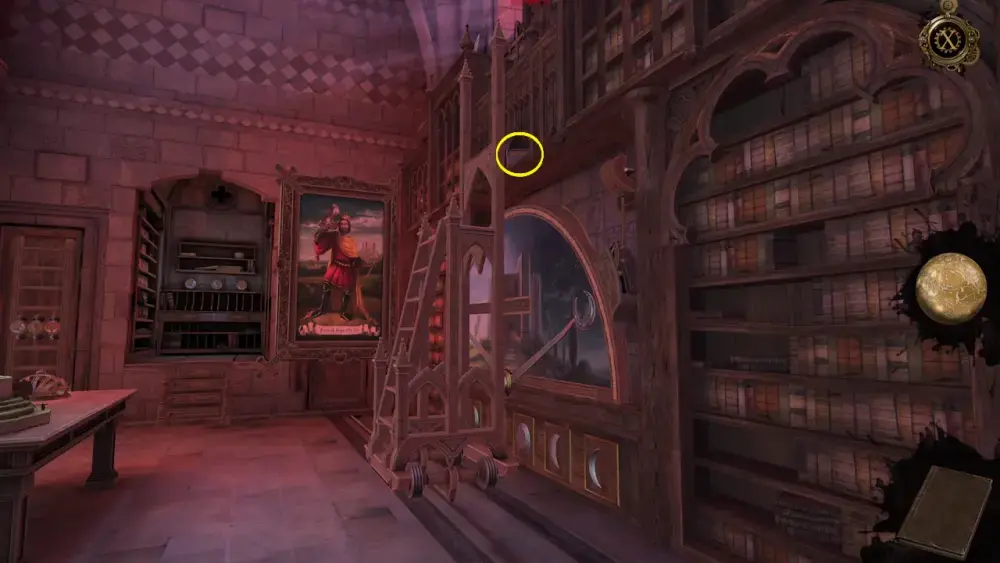
If you look up, you’ll notice that there are two possible passages at the top of the bookshelf on either side of a red banner. The one on the left has a soft beam of light coming out of it, which means that it’s likely that this passage will lead you somewhere important.
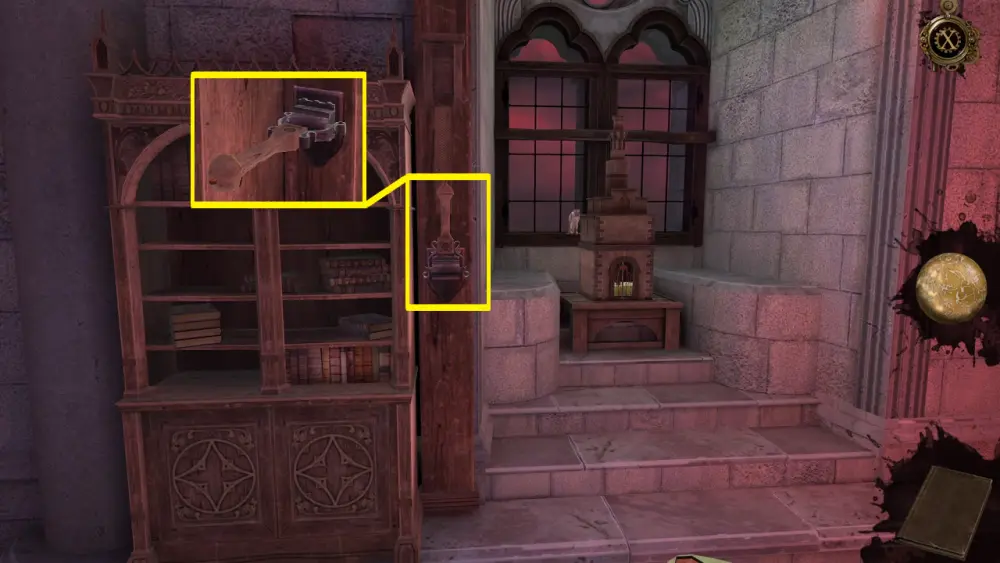
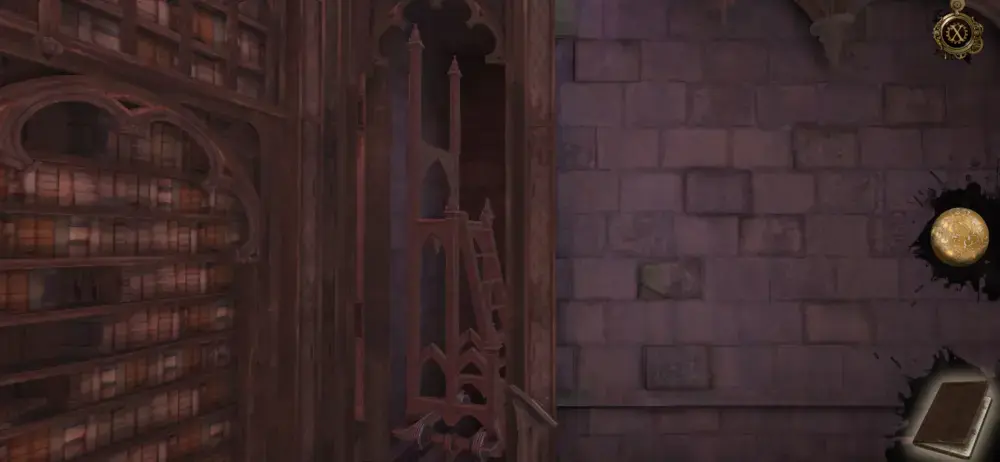
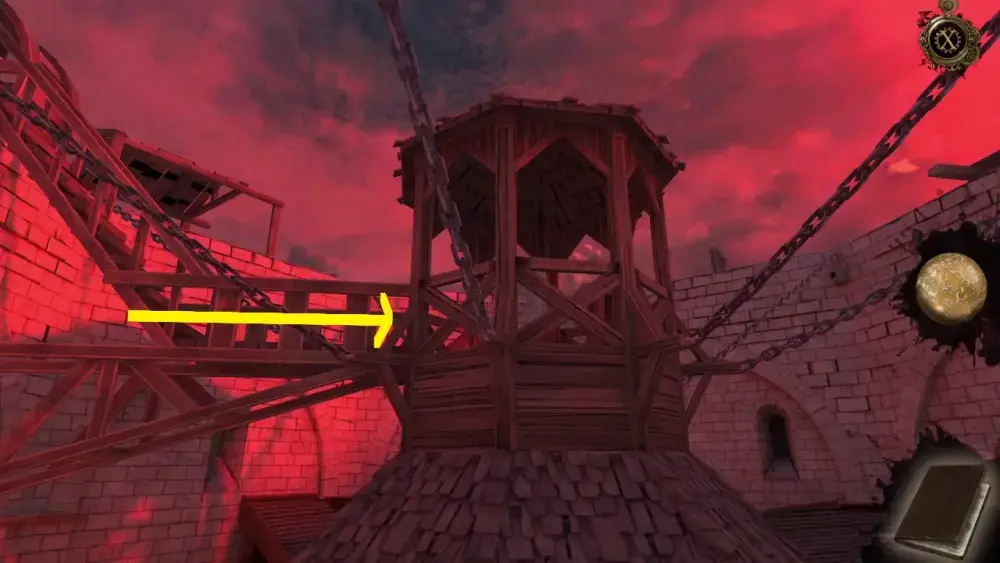
As you enter further into the room, you’ll see more objects to your left, most notably a wooden structure that looks like a tower in front of the windows, and a lever on the wall. Approach the lever and pull it down.
This action will trigger a ladder to descend from a hole above the room.
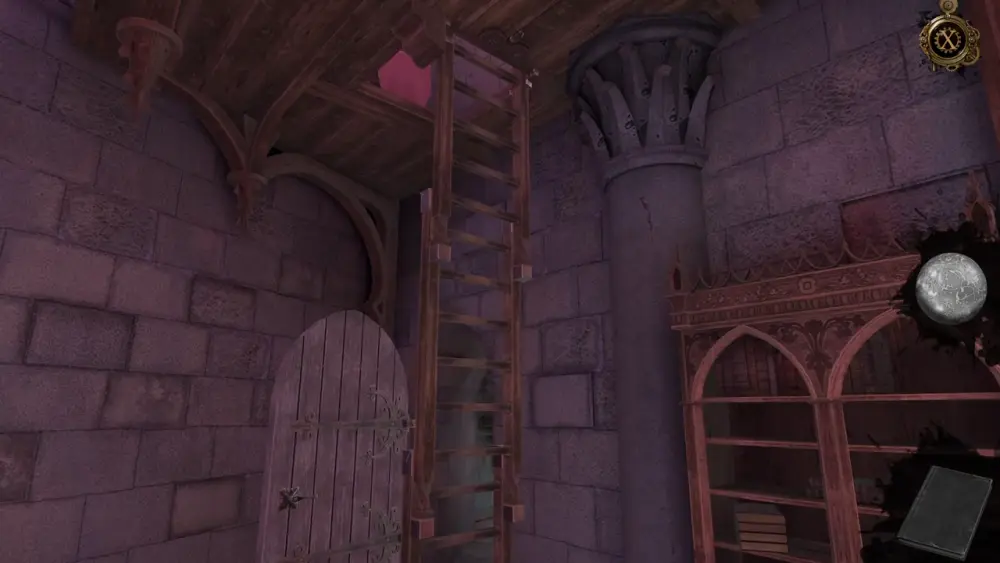
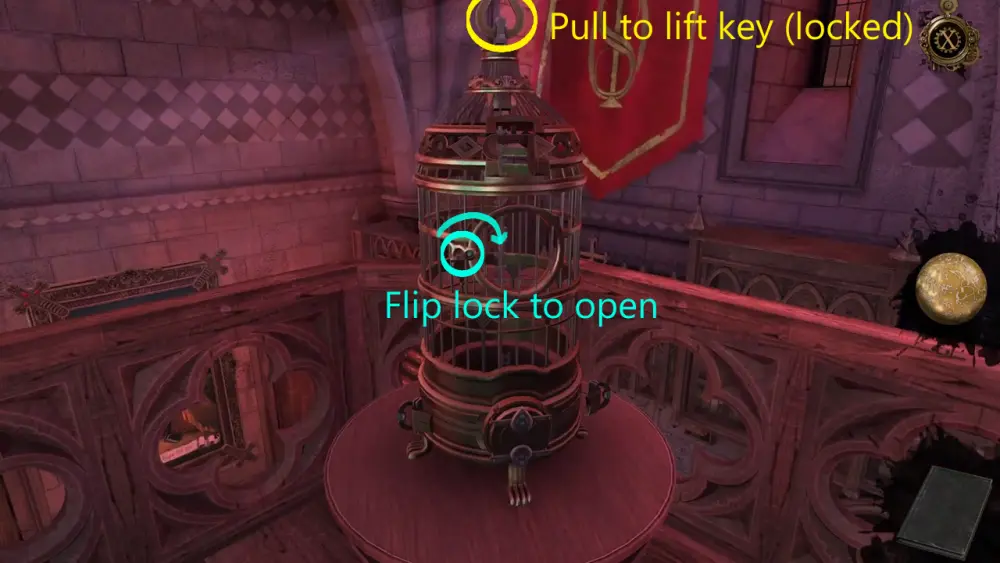
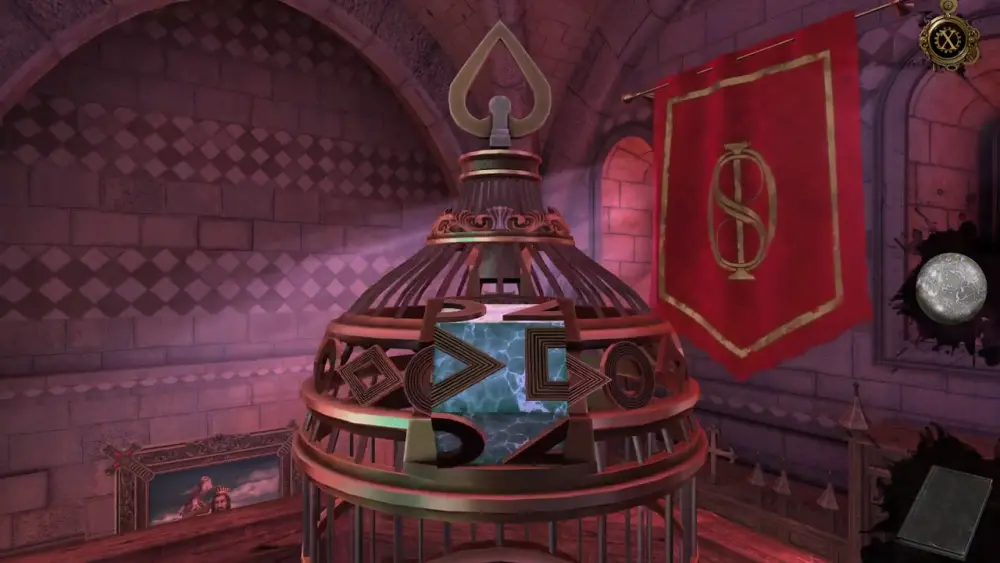
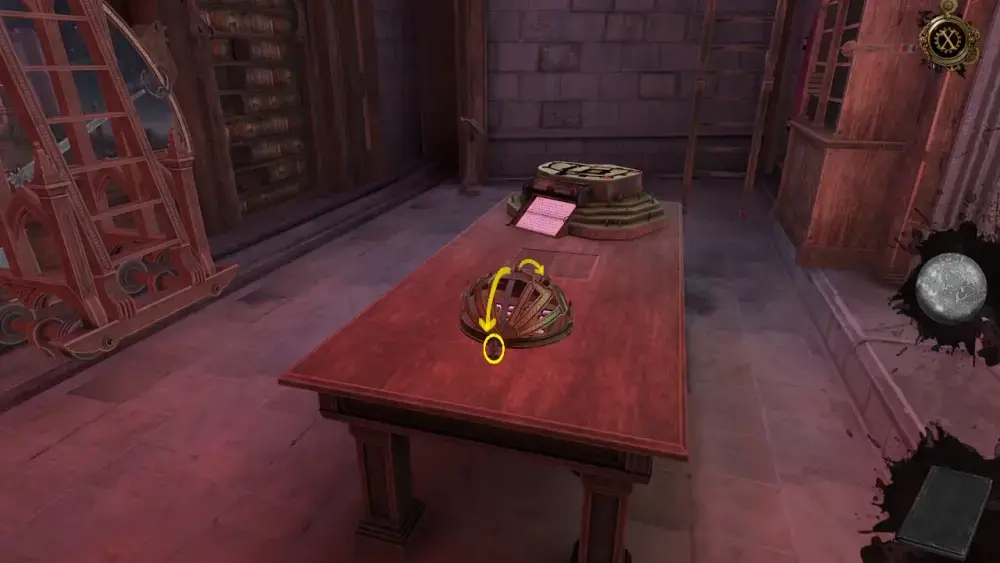
Head up the ladder and you’ll access a small balcony, where an ornamental bird cage is resting on top of a small, circular table. From this vantage point, you’ll also be able to see the arches flanking the red banner on top of the bookshelf below. Indeed, the left one is more illuminated and is more than likely a passageway, while the one on the right is merely a window.
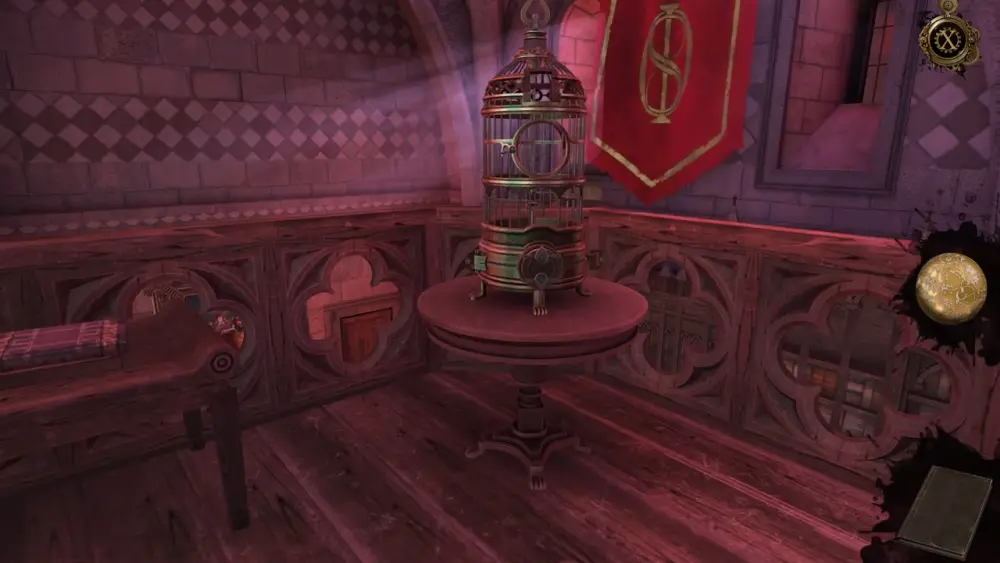
If you approach the bird cage and try to fiddle with it, you’ll see that there is a draw bar handle at the top of the cage that you can pull to lift the key kept inside. However, the draw bar is still locked in place. If you flip the lock on the cage, you can open the small door but won’t be able to reach the key inside as the opening is too small.
To loosen the draw bar and obtain the key, turn your attention to the sliders at the bottom part of the cage. At the center is a disc with two teardrop-shaped arrows. On either side of it are sliders with two narrow slots. Turn the disc so the arrows will face the narrow slots on the sliders, then pull the sliders toward the center.
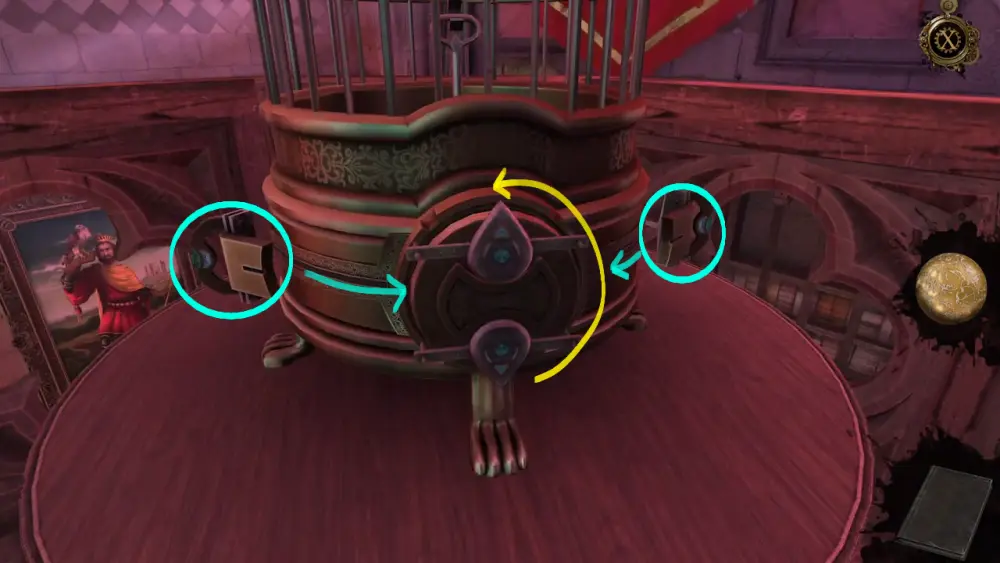
This is how it should look like to unlock the draw bar holding the key:
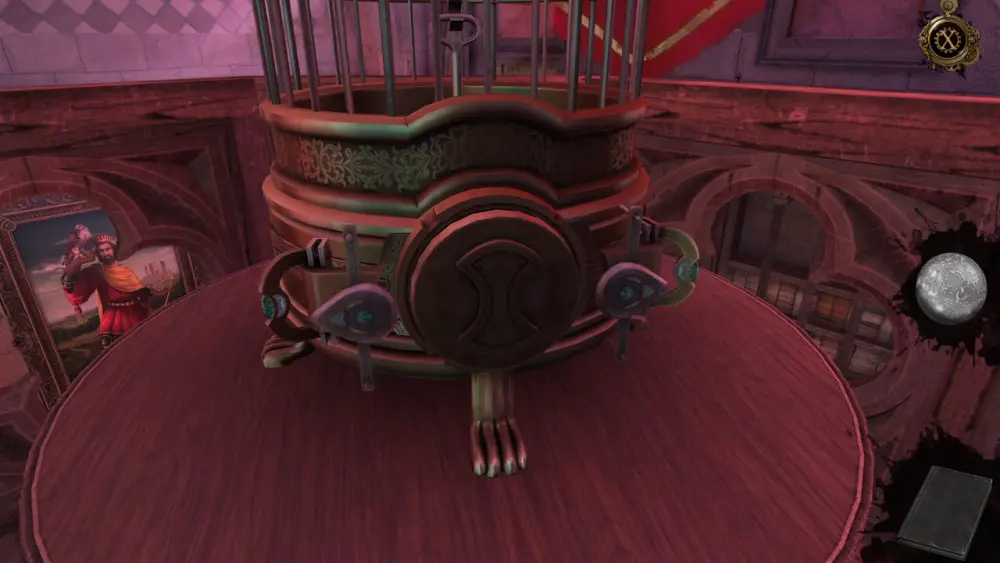
The disc will then open, revealing an item inside: a green Hexagonal Prism.
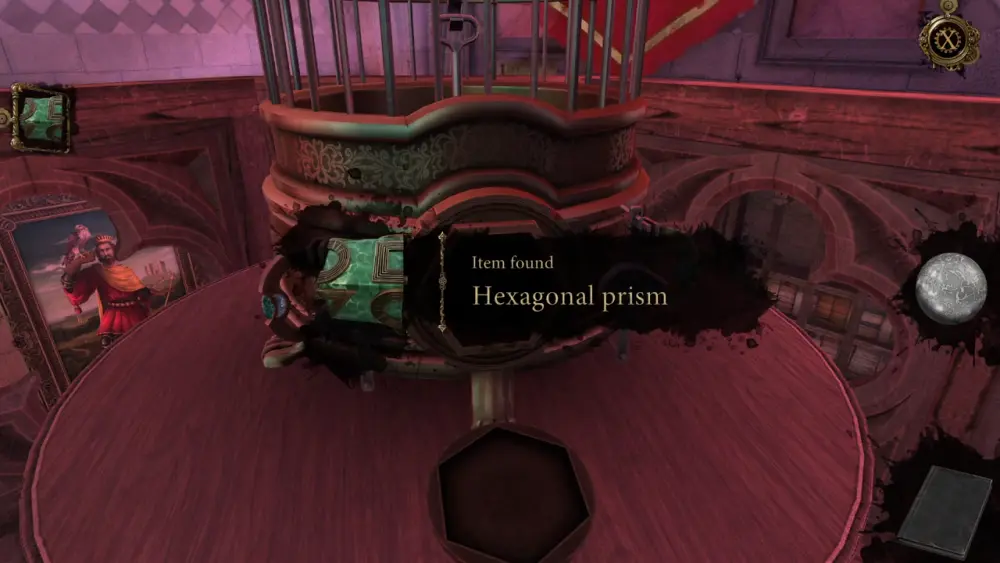
If you observe the Hexagonal Prism from your inventory, you’ll see that it has shapes on its surface, which look similar to some symbols on the upper part of the bird cage. Insert the Hexagonal Prism on this slot next to the symbols.
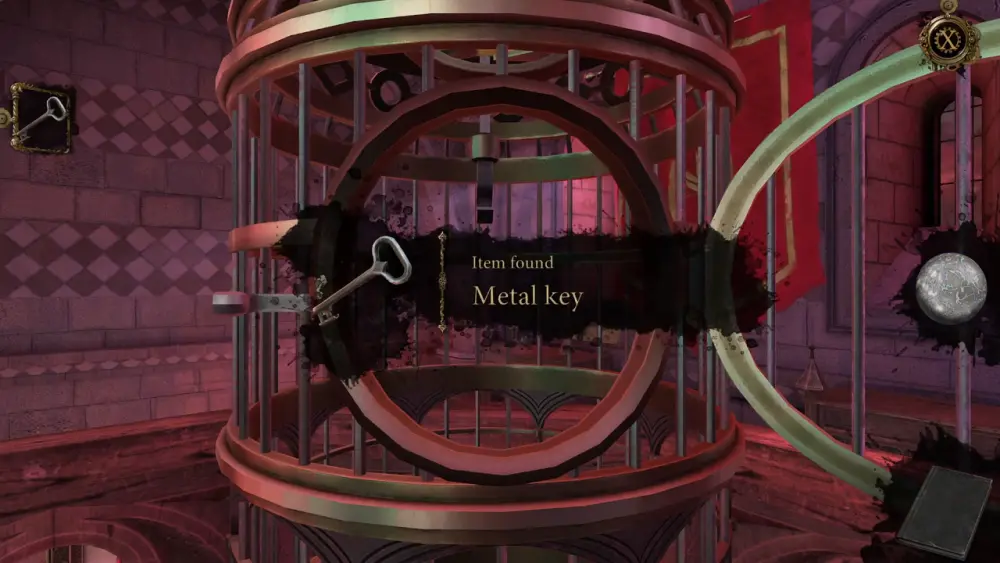
Rotate the prism to find the symbols that match with those on the bird cage. It should be a circle and a diamond. Upon matching the symbols, you’ll see that the bolt blocking the draw bar will loosen. Now you can lift the draw bar handle and get the key inside the cage.

Take the Metal Key from the cage’s opening.
With this item on hand, head back down via the balcony’s ladder and approach Leonardo. Drag the Metal Key to him, which will prompt a cutscene of him opening the gate. He explains what you should do and where you should be going to open the metal gate below leading to the courtyard, even suggesting that you move to the gallery above the courtyard to avoid most of the rooms where guards will surely be stationed. He also points out the windows above the bookshelf in the room you just entered, stating that it can be used as a means for you to get outside. He also leaves you with something important before heading to the rooftop…
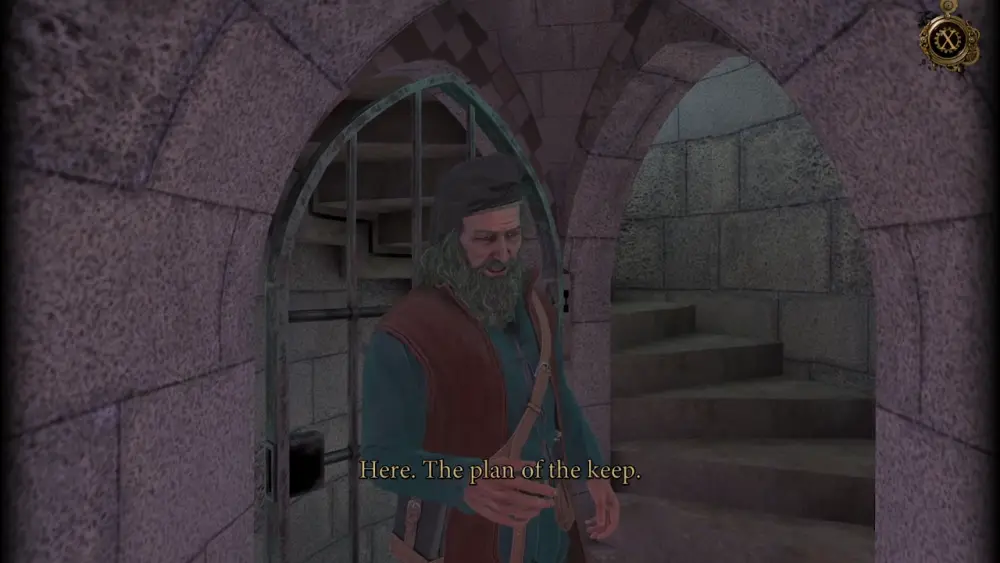
Typical of mentors, Leonardo reminds you of how important this mission is and apologizes as the responsibility of seeing your plans succeed falls directly into your hands. As if foreshadowing the future, Leonardo tells you that while he would very much like to enter the time machine, your goal of destroying the Gate takes precedence over everything else, so you must finish the quest at all costs—even if it means doing it without him.
Apart from the blueprint of the keep, Leonardo also leaves you with an item that will definitely be of great importance later…
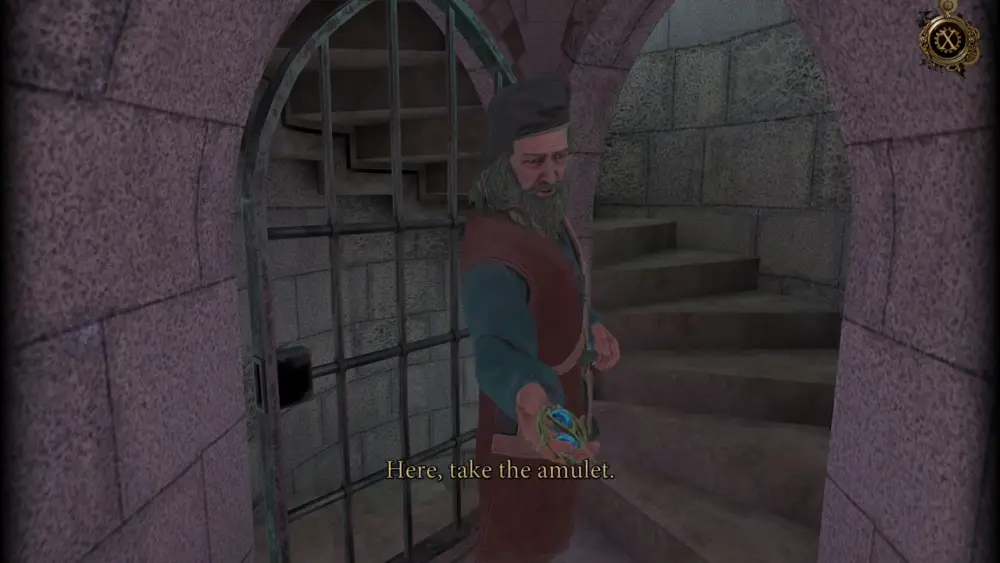
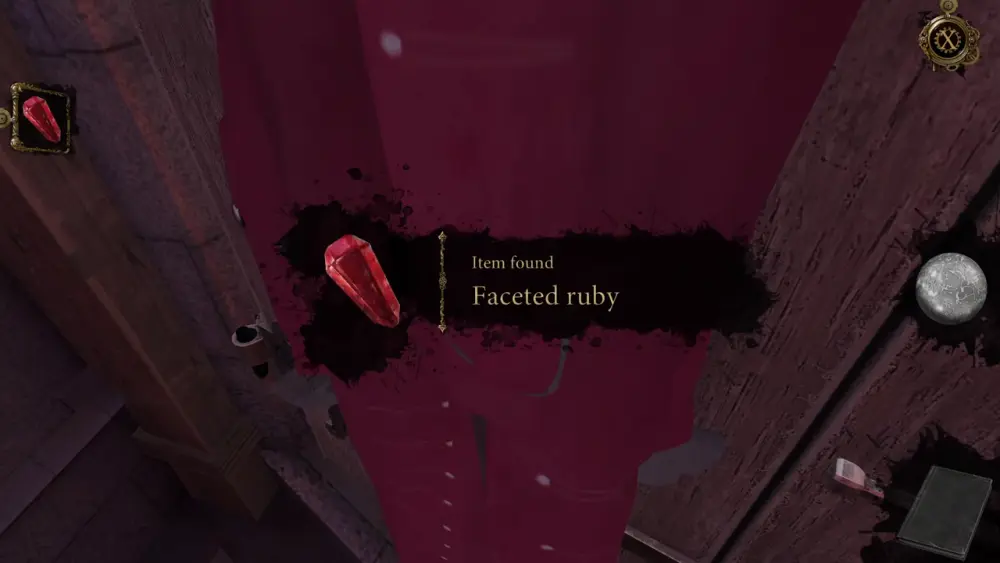
And with that, Leonardo leaves for the rooftop and the door to the library closes. Hanging from it is a red coat with something shiny sticking out of the pocket.
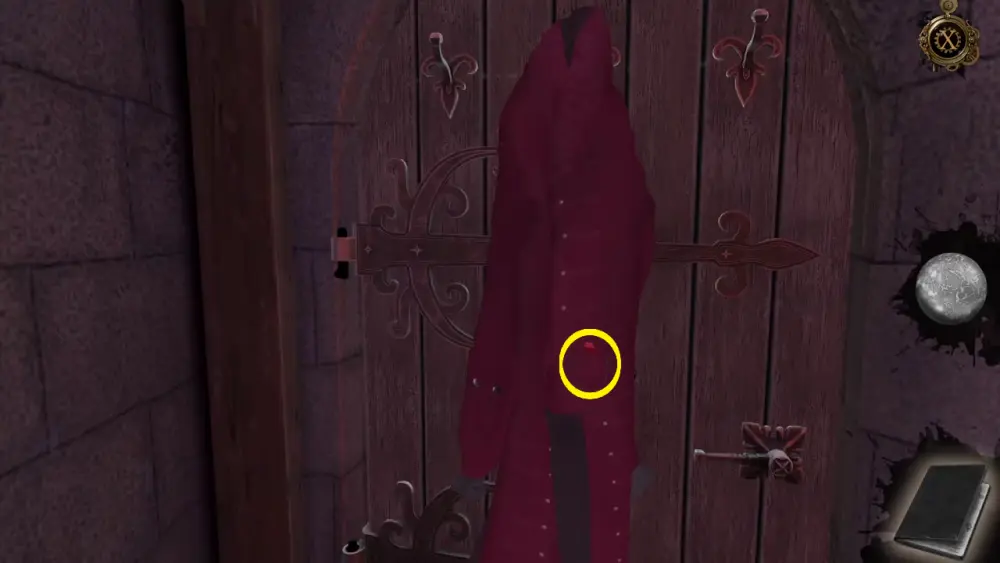
Approach the coat and you’ll be able to get a Faceted Ruby.
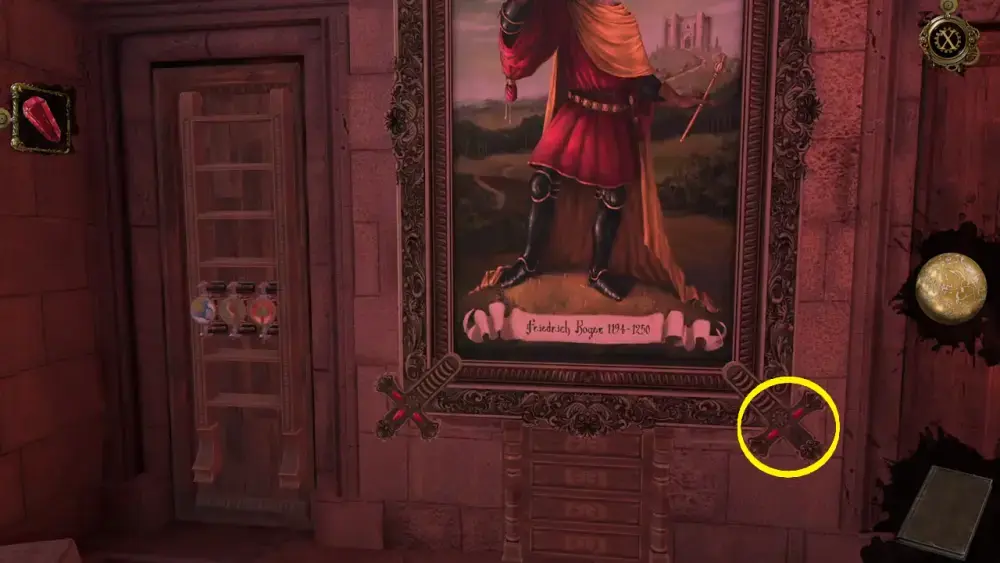
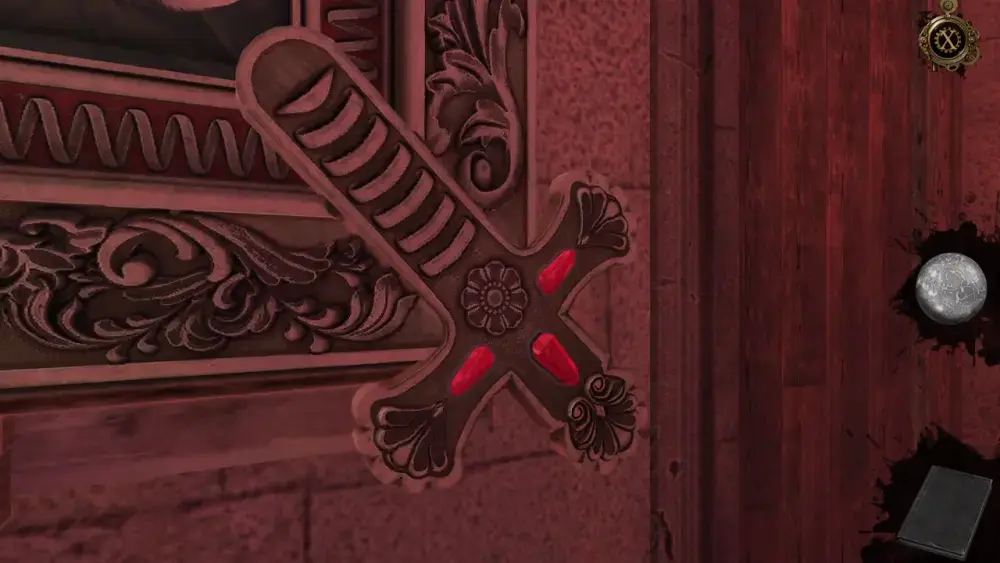
Clearly, there’s a place in the library where the item will fit so continue observing your surroundings and searching the room. Below the portrait of Frederick II, you’ll notice two ornamental daggers decorating the bottom corners of the frame. One of them is missing a red stone. Take note as well of the dates on the portrait.
As you may have guessed, this is where the Faceted Ruby fits. Approach the portrait’s frame and place the ruby in the empty slot.
Three things will happen upon placing the stone in the slot. First is that the picture marked by a sun and moon, which is found to your right on the wall, will turn into a circular counter with astronomical symbols on it and a wooden block with four numbers.
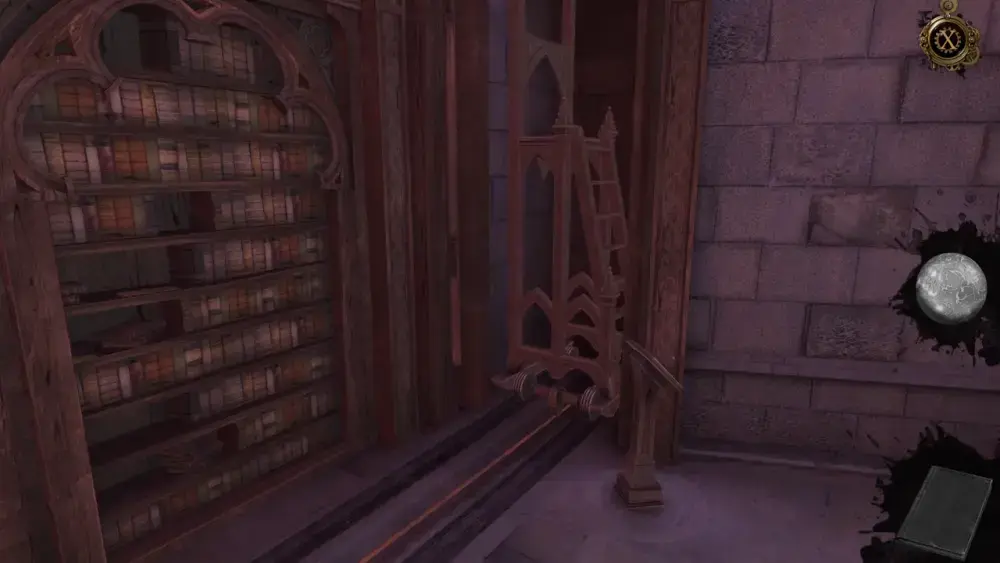
Second is that a door beside the bookshelf will open, revealing a movable ladder inside the hidden compartment. If you look down, the ladder is mounted on a track.
Third: the device on the desk, which somehow resembles a typewriter, will emit paper.
Turn your attention first to the counter with astronomical symbols. As mentioned, there are four blocks with numbers on each of them. Without context, this might seem rather confusing, but this is where the Oculus Perpetua will come in handy: open it to view another clue for this puzzle. With the Oculus Perpetua activated, you’ll see Frederick II written underneath the number blocks.

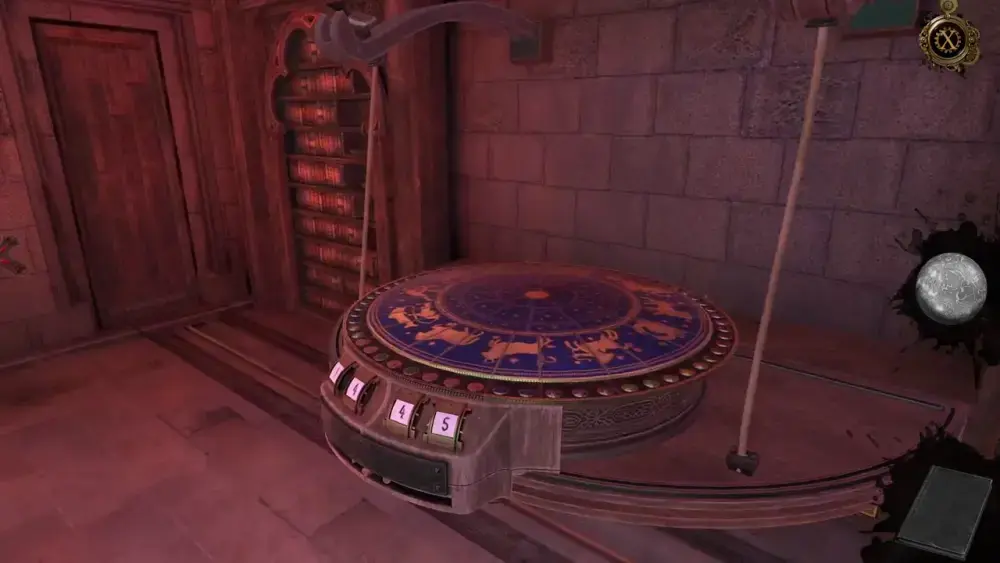
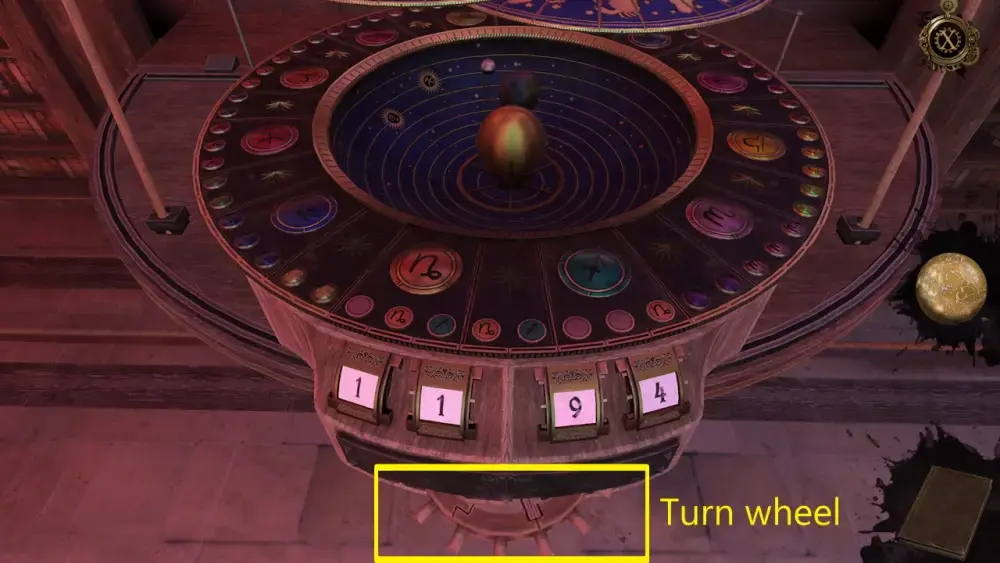
By inference, it’s easy to assume that the numbers on the blocks should correspond to the date written on Frederick II’s portrait. Turn the number blocks to reflect 1194, which is the year of Frederick II’s birth as indicated on his painting. This will cause the top layer of the circular counter to lift and reveal a set of astrological symbols underneath. In the middle of a circle is a miniature depiction of the sun, Earth, and moon in orbit, or what is known as an orrery. A wooden wheel will also pop out underneath the circular counter. Turning the wheel will cause the orrery to revolve around the sun.
Once the orrery completes a year’s worth of revolution around the sun, a reverse-L-shaped lever would emerge from the counter. This lever controls three small discs upon which a symbol of Capricorn, Sagittarius, and a blank face are depicted. The lever may be moved from side to side and pushing it inward will cause the three discs on the lever to replace the discs they’re facing on the circular counter. In turn, the discs that have been replaced will exchange positions with those on the lever.
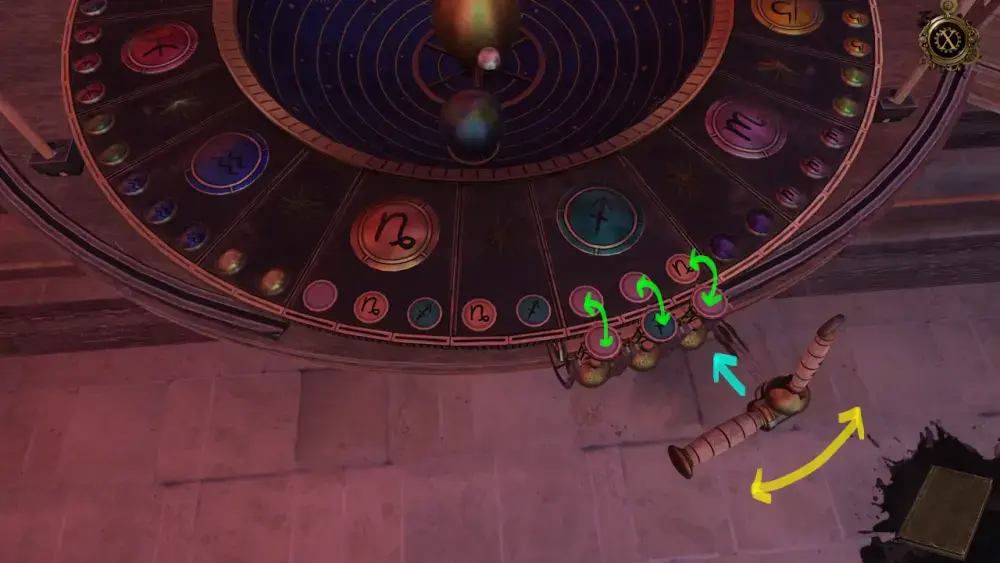
Your objective in this puzzle is to set all the symbols in their rightful places. The peach discs with the symbol of Capricorn should align with the large symbol of Capricorn on the circular counter. The same goes for the blue discs with the symbol of Sagittarius. The blank discs are what make this puzzle challenging since they can disrupt the proper alignment of the discs.
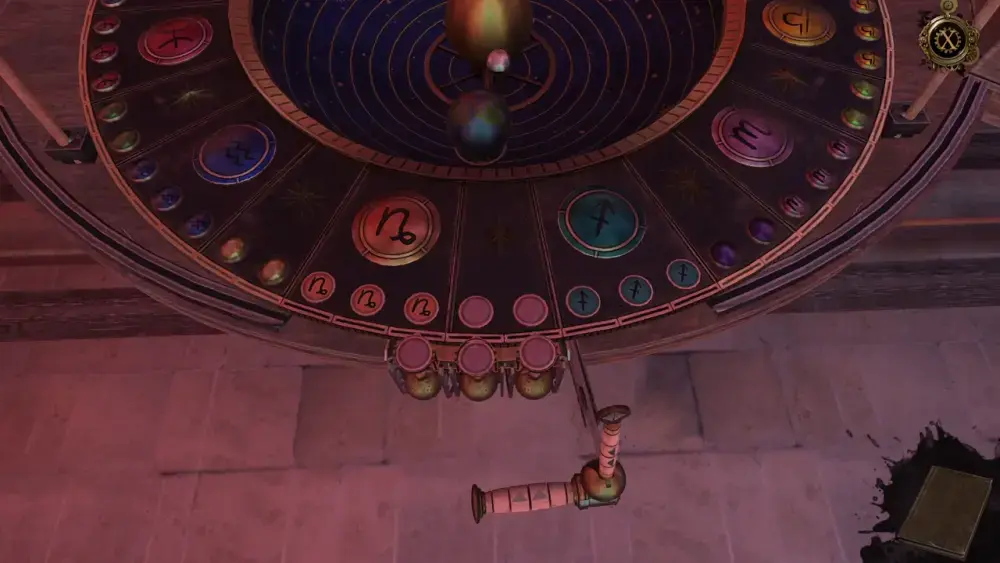
This puzzle can take a bit of time and requires some experimentation, but the best way to go about it is to work from the side going to the center. Basically, align one set of Zodiac symbols first as it will be easier to move and manipulate the other set of symbols accordingly thanks to the two blank discs in the middle. This should be how the counter ought to look like when you’ve managed to align the discs in their proper places:
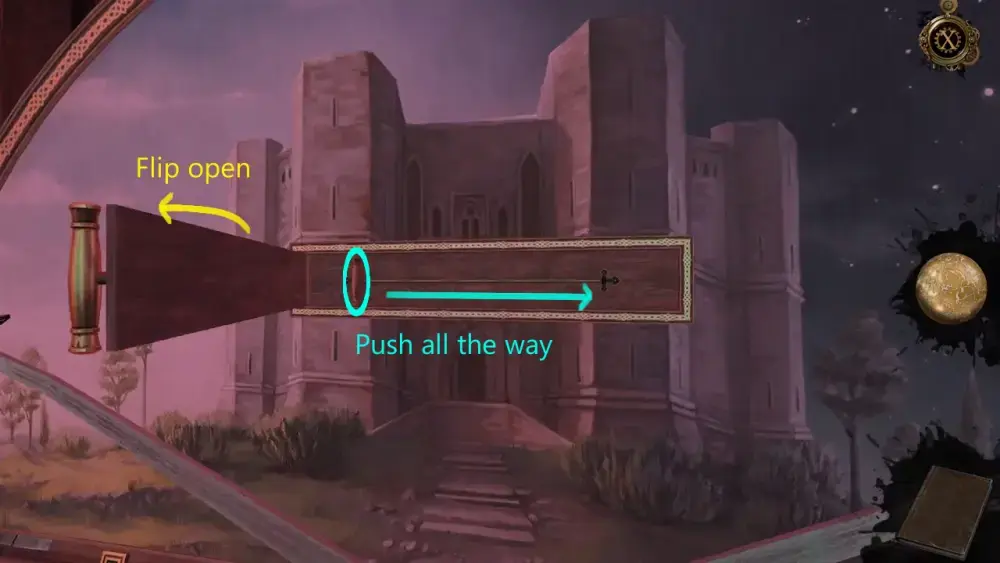
Once you’ve solved the puzzle, the lever will retract back into place and the circular counter will return to being a picture on the wall. A small hatch in the middle of the picture will come loose, which you may open. Zoom into it and, inside, you’ll see a tiny slider. Push it all the way to the end.
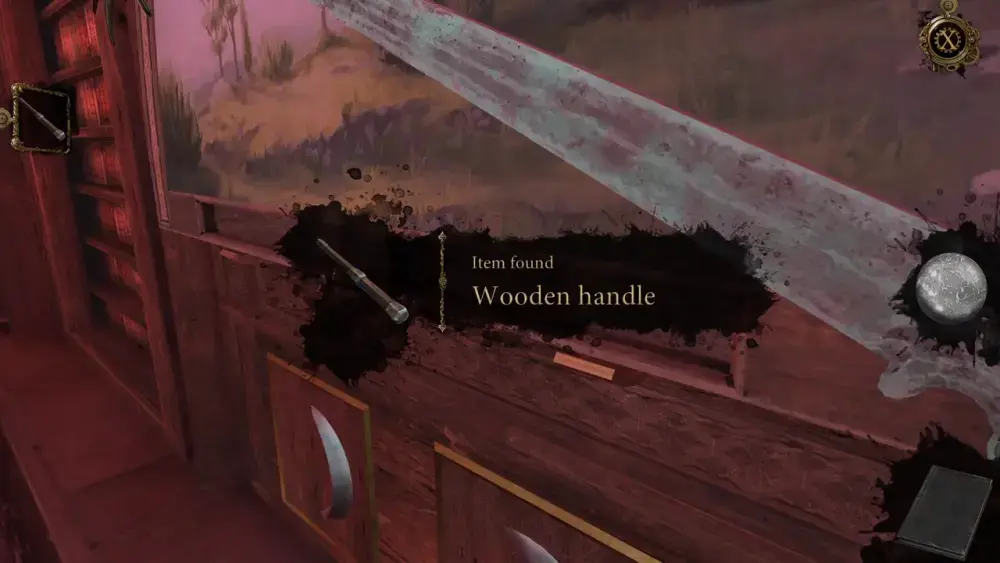
Two things will happen: first is that a hatch on the bottom left side of the picture will be unlocked, revealing a new item you can pick up: a Wooden Handle.
Second, one of the ornamental daggers decorating the frame of Frederick II’s portrait will move downward.
When the brief cutscene is over, take the Wooden Handle and approach Frederick II’s portrait. A circular socket can now be found above the ornamental dagger that had moved. Place the Wooden Handle into the slot and push it when you receive the prompt to do so.
With the portrait moved all the way to the side, you now have access to the secret room behind it.
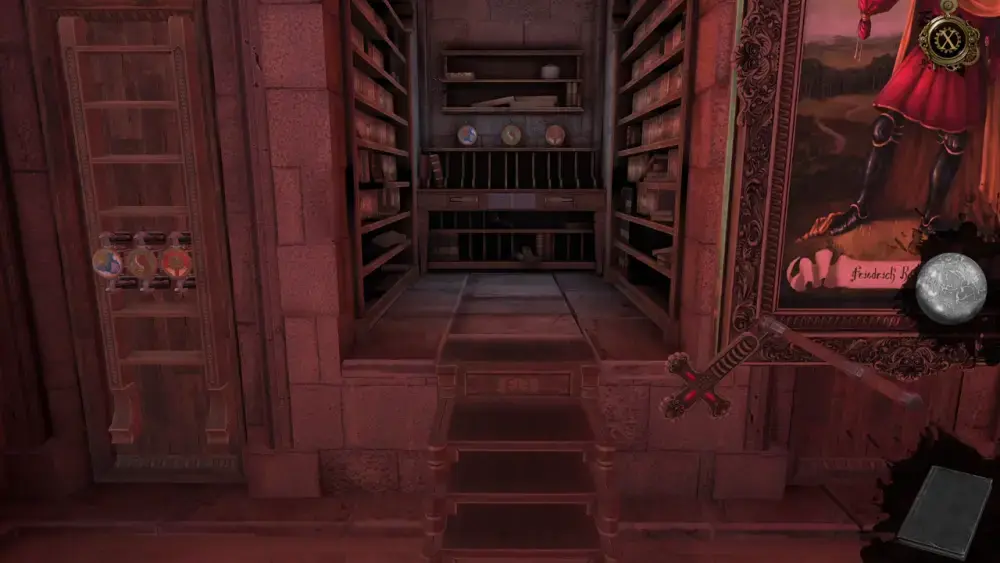
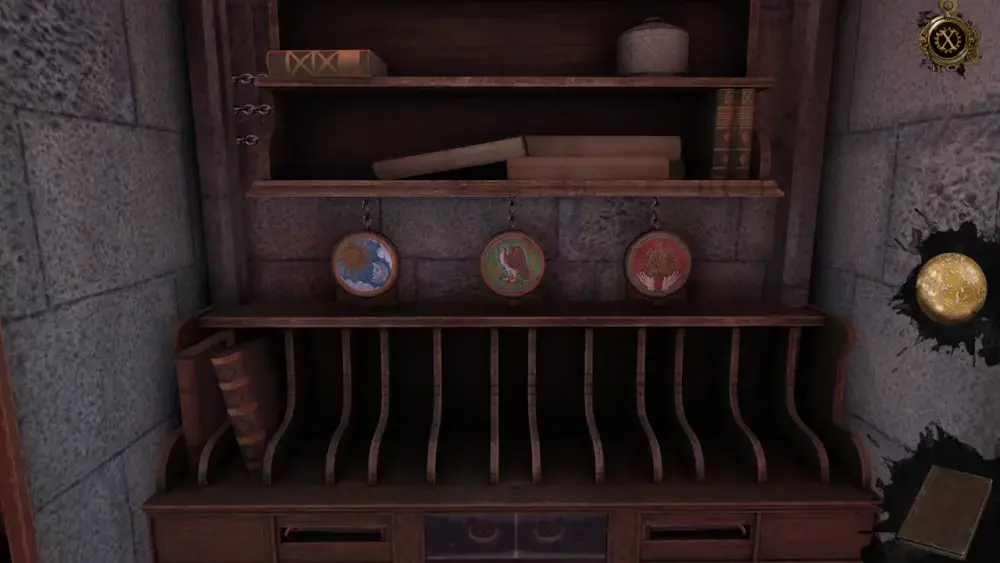
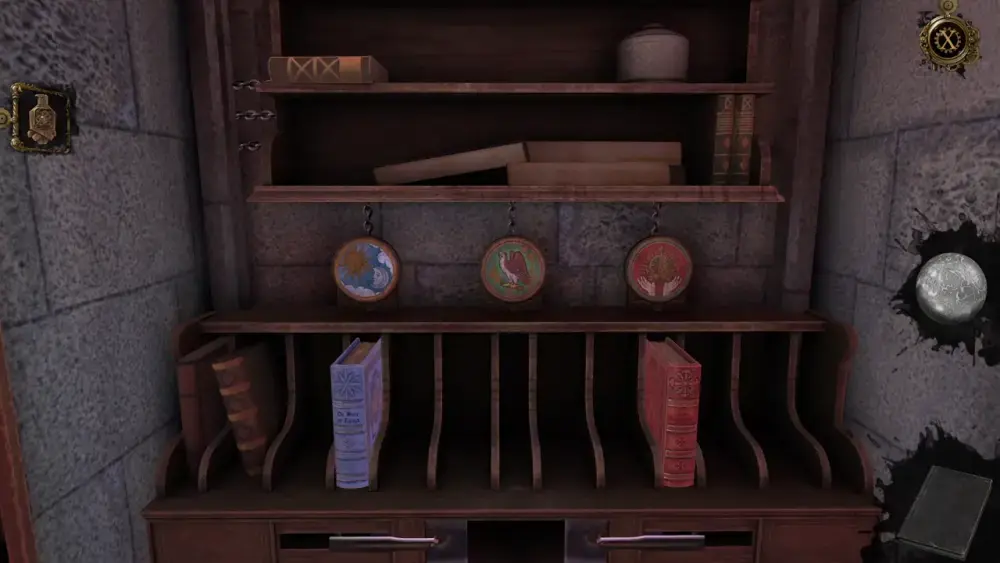
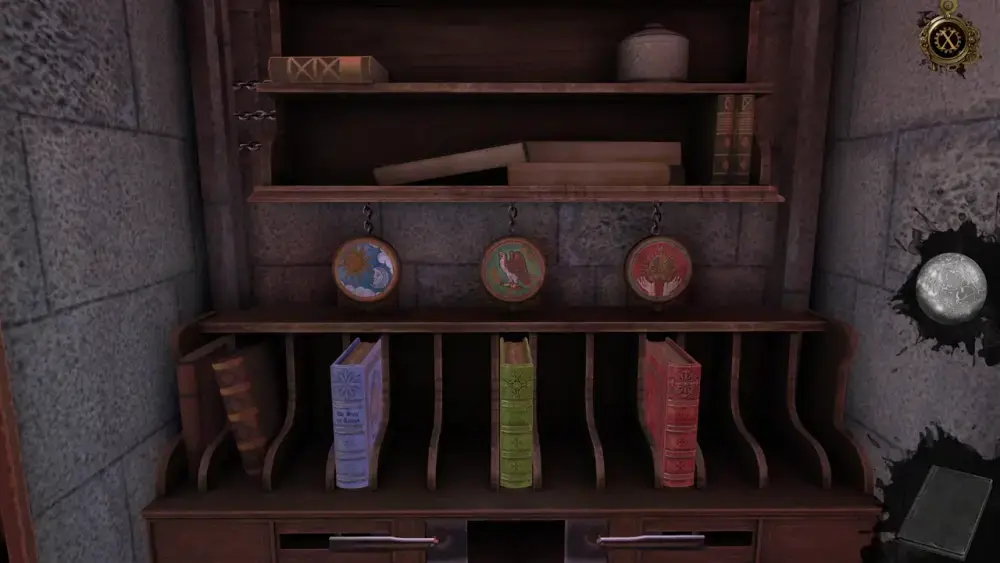
Inside, are three symbols on top of a small bookcase: first is that of the sun and the moon; in the middle is a bird; and lastly, a pair of hands lifting a crown. Upon further observation, it appears that each symbol is resting perfectly on top of slots on the bookshelf where only a single book can fit. In that case, there must be books hidden in the library corresponding to these symbols.
You might also be wondering why these symbols look familiar. If you’ve accomplished a cursory observation of the library, you would have seen the same symbols earlier, just beside where the portrait of Frederick II used to be. The same symbols appear to serve as locks for a ladder mounted on the wall.
We can assume that this ladder will be an important item later since the game has made an effort to keep it sealed. And just like the three symbols, a ladder may also seem familiar to you as there’s another ladder you’ve seen before: the one just beside the large bookcase that had previously been hidden behind a door.
As we’ve previously pointed out, there appears to be a track in front of the large bookcase upon which the wheeled ladder can tread. Its controls are just beside it on what looks like a small wooden podium. Here, you’ll see a handle you can swing from side to side. The ladder will move according to the arrow you’ve pointed the handle towards.

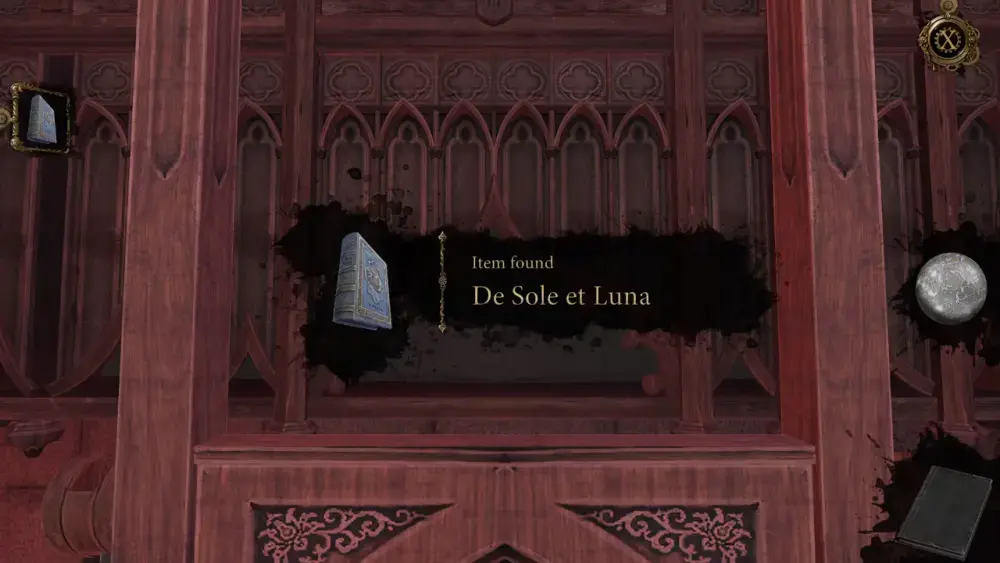
Since we’ve established that the three symbols in the secret room likely correspond to specific books in the library, the best place to start searching is, of course, the large bookshelf. Clearly, the picture in the middle of the bookshelf is a huge clue as it is decorated by a sun and moon—the first symbol. With that, move the wheeled ladder on the track until it’s right in front of the picture. If you look closely, you can see a blue book sticking out of the bookcase.
With the ladder in position, climb it and you’ll be able to pick up the book De Sol et Luna (The Sun and Moon).
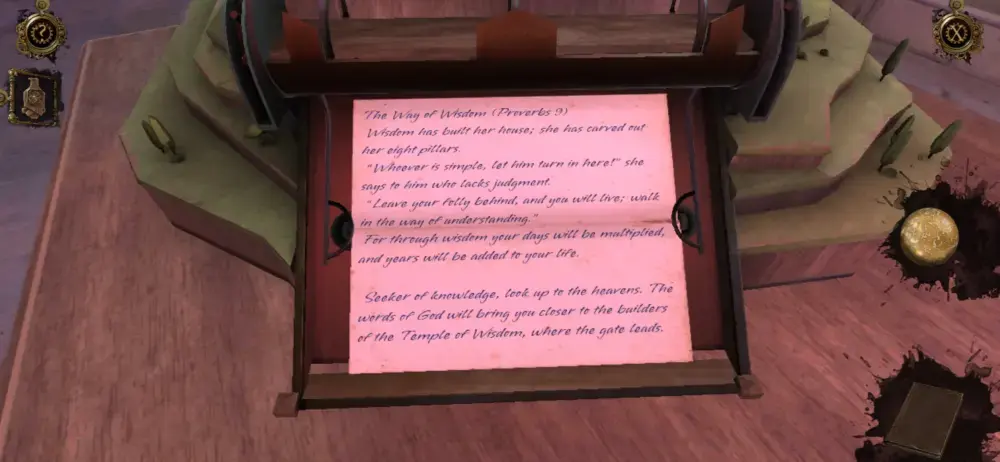
The other books in the large shelf don’t appear to be items you can pick up, although if you approach the right side of the bookcase, you’ll see that a letter has been left there.
This is what it says:
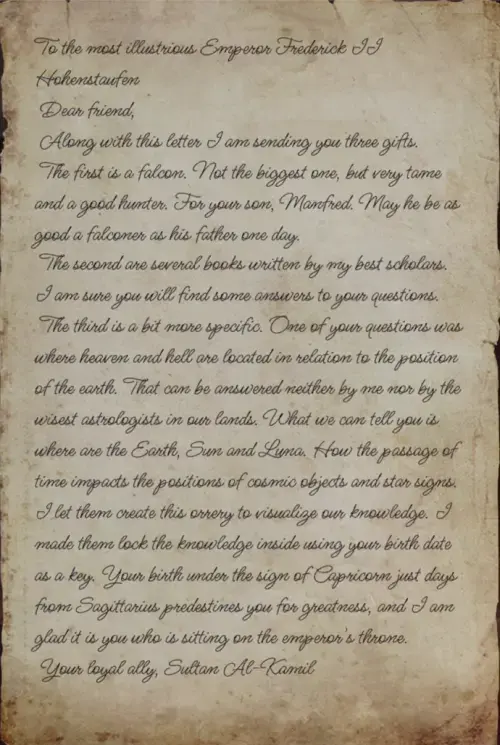
With De Sol et Luna in your hands, go back to the room where the three symbols are and place the book right under the symbol depicting the sun and the moon. You’ll hear metallic chains moving, signifying that a mechanism has been triggered.
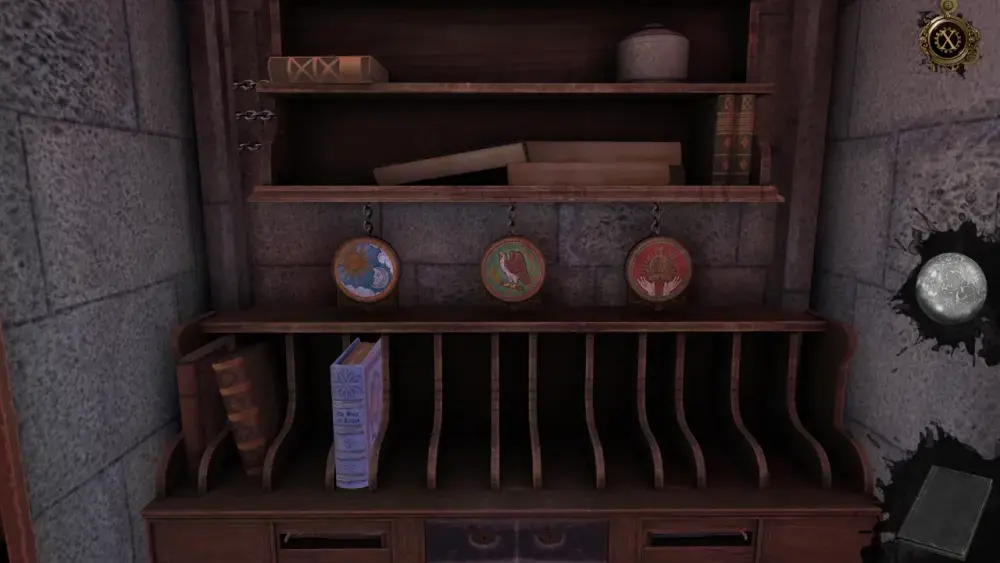
Whatever mechanism this is, it has caused one of the locks on the wall-mounted ladder to fall. Naturally, it’s the lock that bears the symbol of the sun and the moon.
One other thing that happens is that the metal, dome-like device on the table behind you will be unlocked.
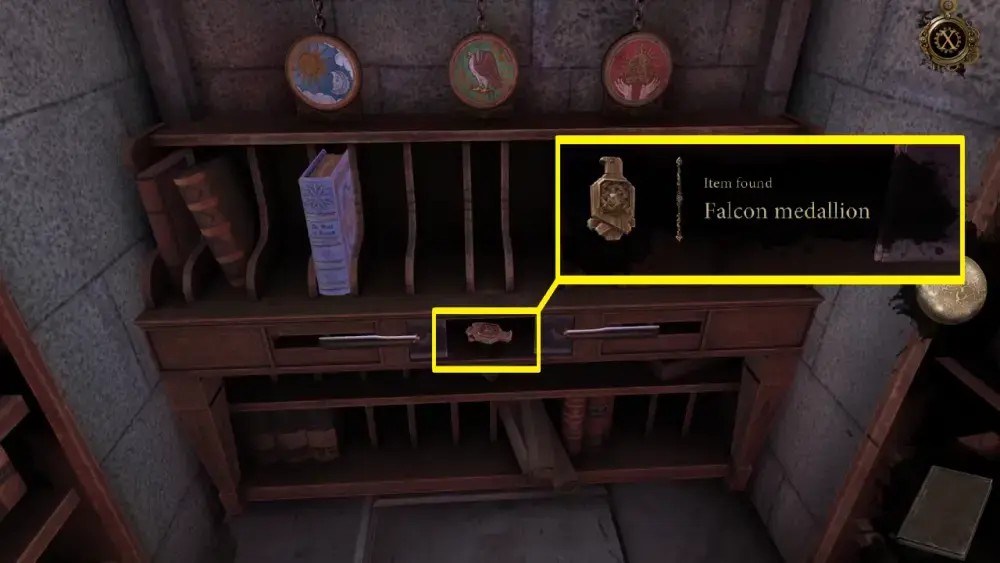
Simultaneously, this will open up a drawer underneath the small bookcase. From here, you can pick up a Falcon Medallion, which is clearly related to the second symbol on the plaque.
Afterwards, go to the table where the metal dome-like device is and approach it. You’ll see that there’s a knob at the top. Turn it so you can access the next puzzle inside.
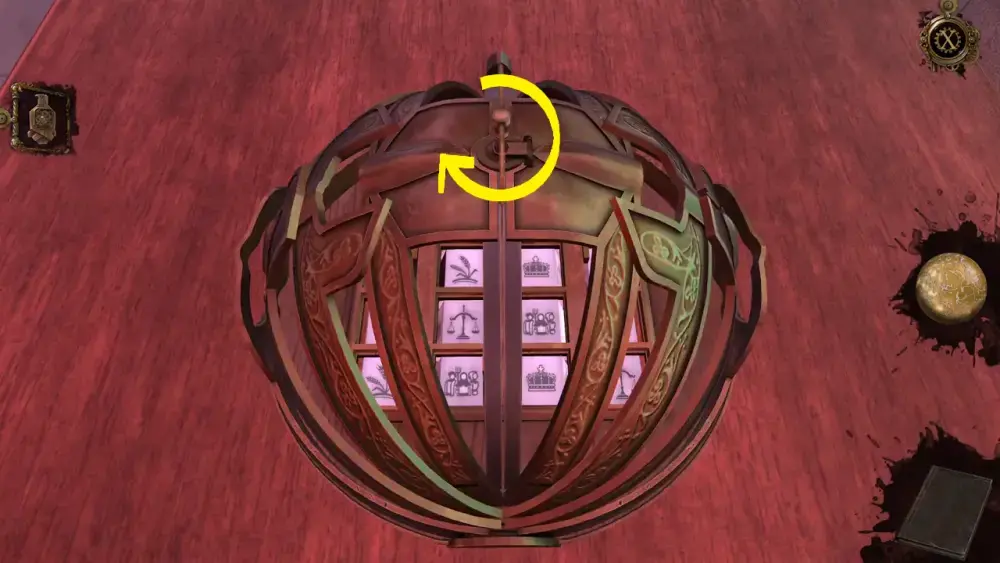
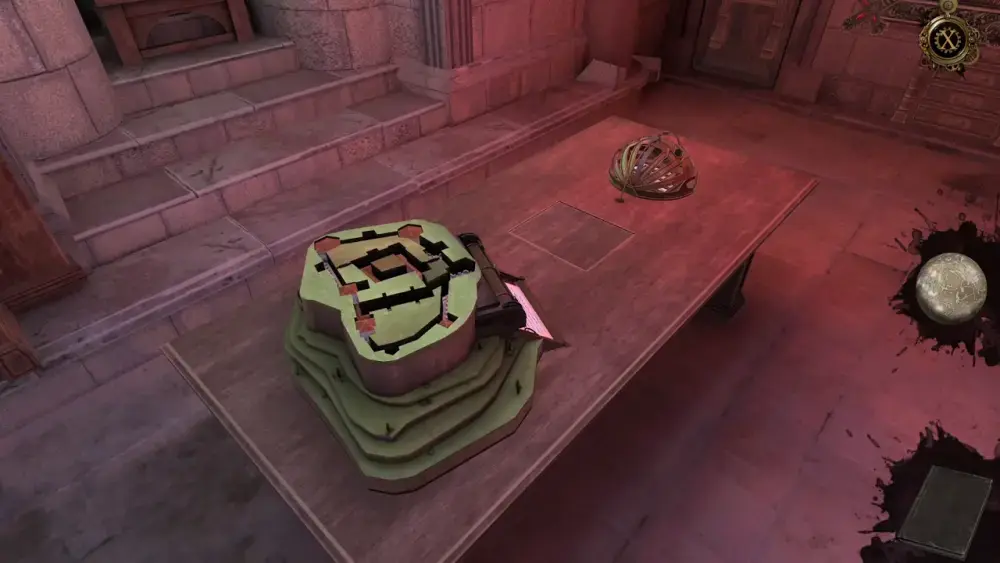
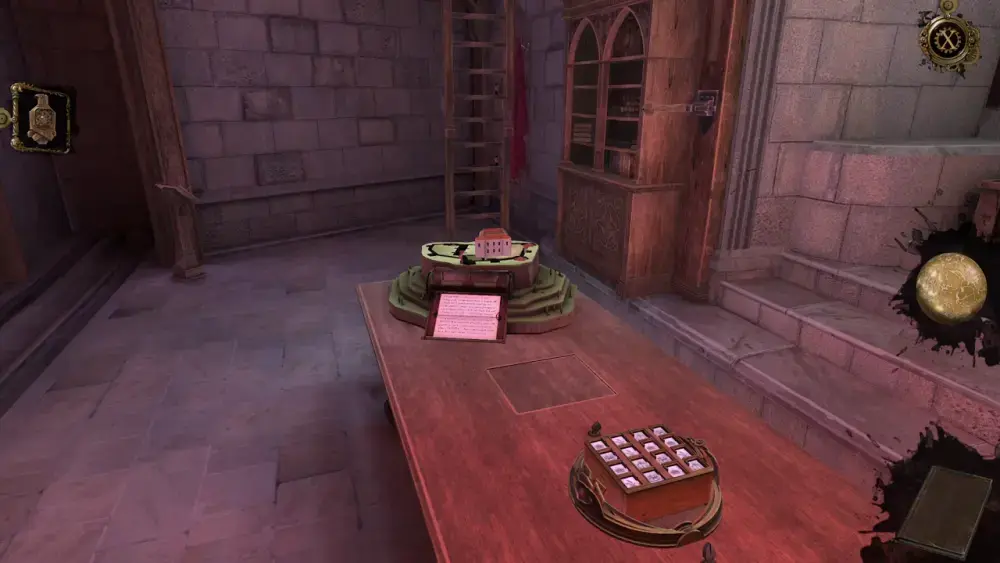
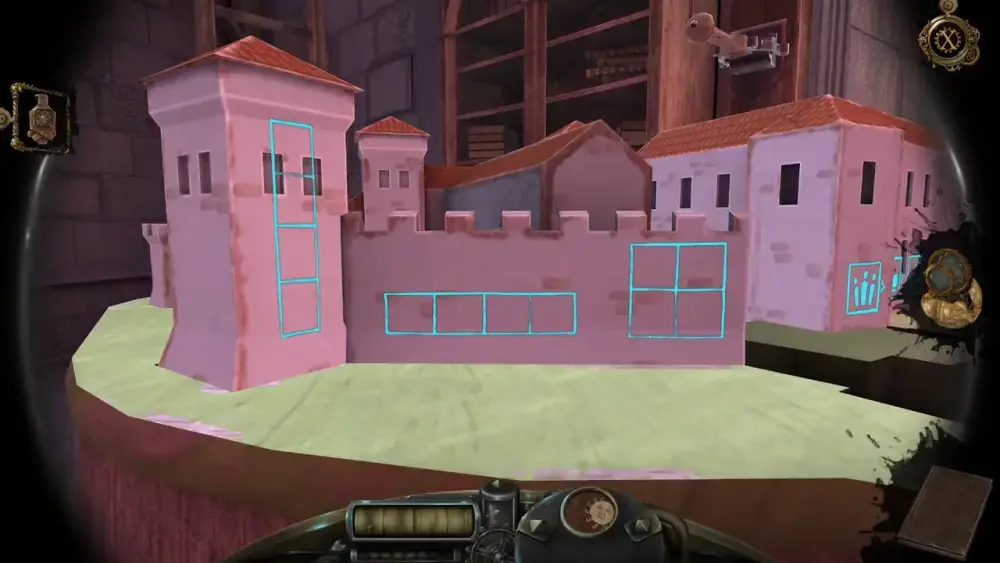
A board with different symbols will emerge from the unlocked dome. Meanwhile, the device in front of it, which looks like a typewriter but also like a diorama of sorts, will spring up a miniature house.
First, let’s look at the device farther down the table. There appears to be a piece of paper with something written on it. If you approach the letter, this is what you will read:
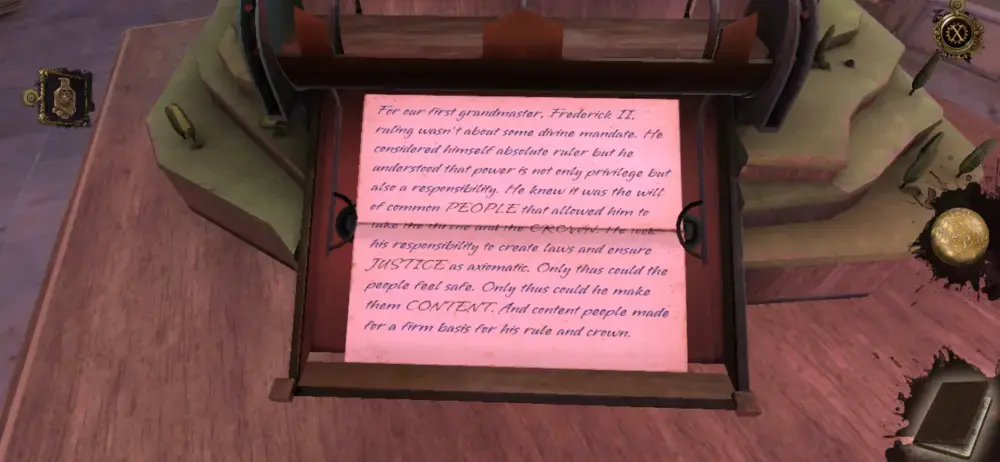
You’ll notice that the words PEOPLE, CROWN, JUSTICE, and CONTENT are all in uppercase letters, clearly done for emphasis.
Taken alone, they might not mean anything, but if you zoom into the miniature house on the device and open the Oculus Perpetua, you’ll see that each word corresponds to the four symbols on the house as revealed by the Oculus Perpetua.
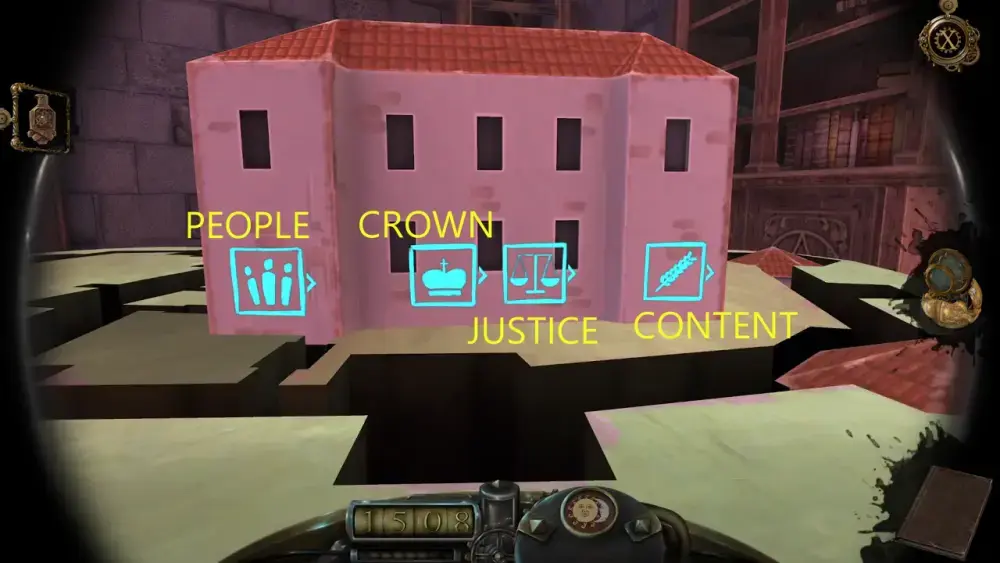
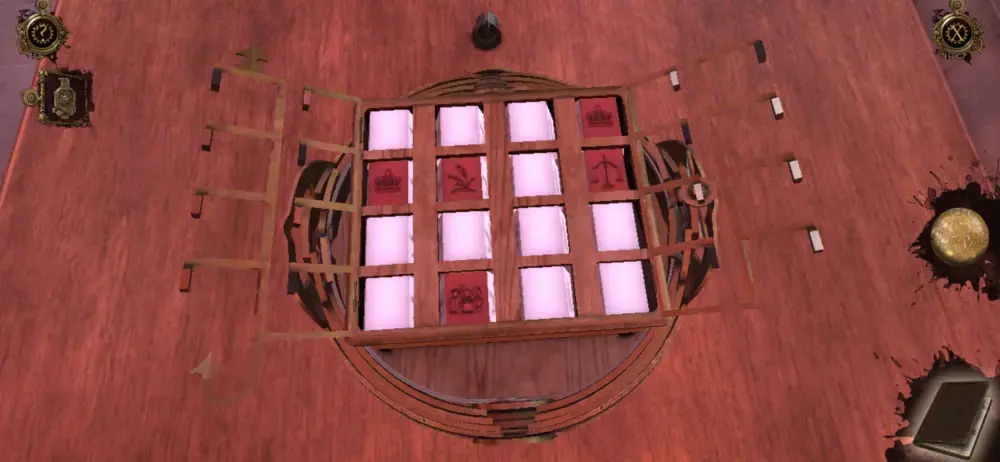
You’ll see these four symbols again once you go back to the puzzle board on the other side of the table, only this time, the symbols look more elaborate.
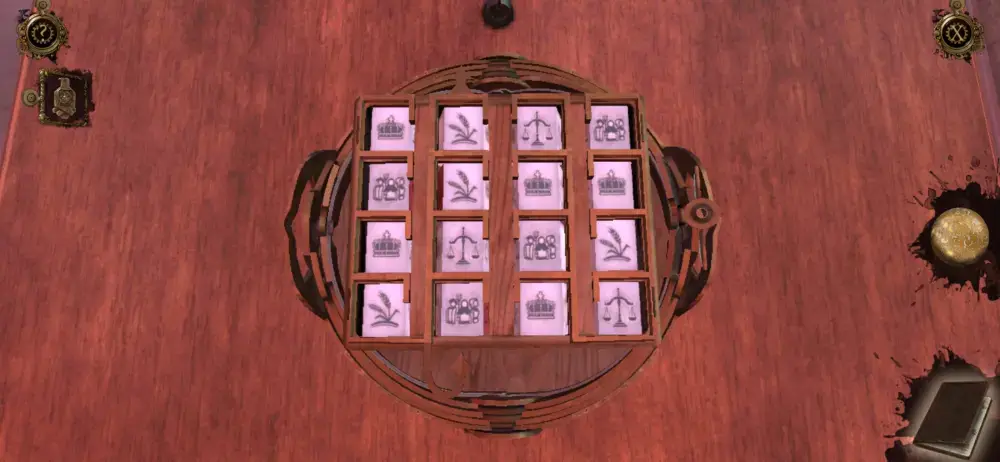
If you try to press any of the symbols, some will spring back up while some will not. The key to solving this puzzle is pressing on the symbols that won’t spring back up in an order that corresponds with the words written on the letter. Below is the correct order in which these symbols should be pressed:
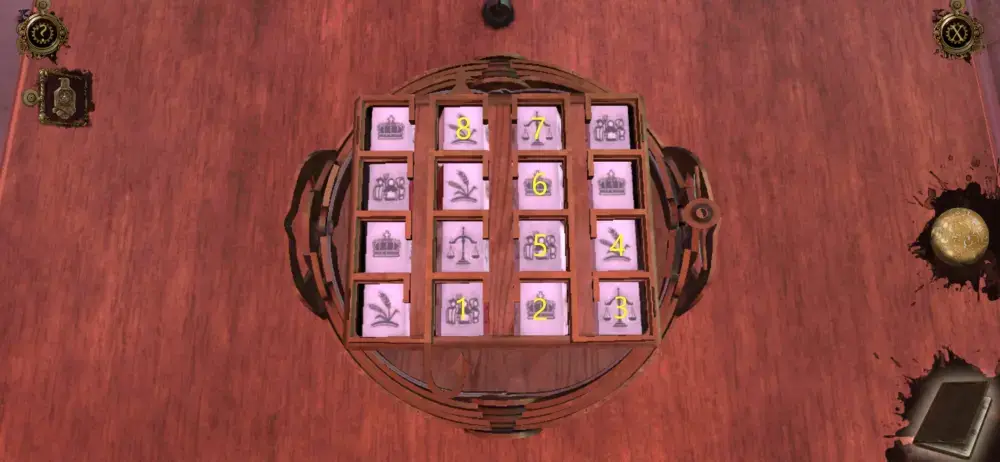
The frames will unfold and the board will rotate, revealing new tiles marked in red.
If you check the letter, you will find that something new is on the piece of paper. The words BALANCE, FOUR, CORNER, LINE, and COLUMN are all written in uppercase.
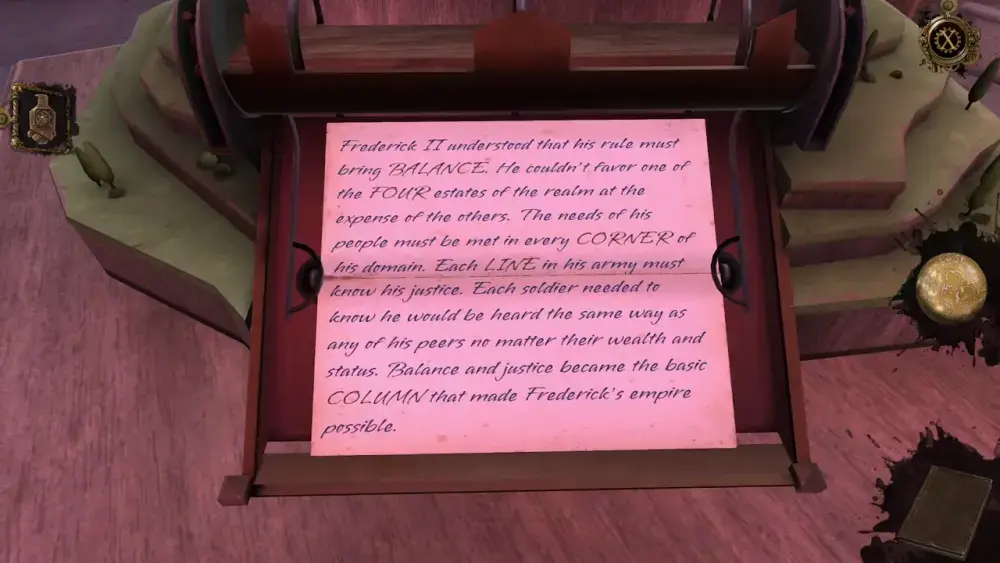
At the same time, a new structure has emerged from the top of the typewriter-looking device. Just like the house, it also has symbols when viewed through the Oculus Perpetua.
These symbols appear to correspond with the words being emphasized on the letter above. Thus, if we were to interpret them as a clue, solving the new board means balancing the four symbols in each corner, line, and column. Simply put, our objective for this part of the puzzle is to arrange all the symbols in such a way that in every row, column, and corner, all four symbols will be present. This is how you ought to arrange the board:
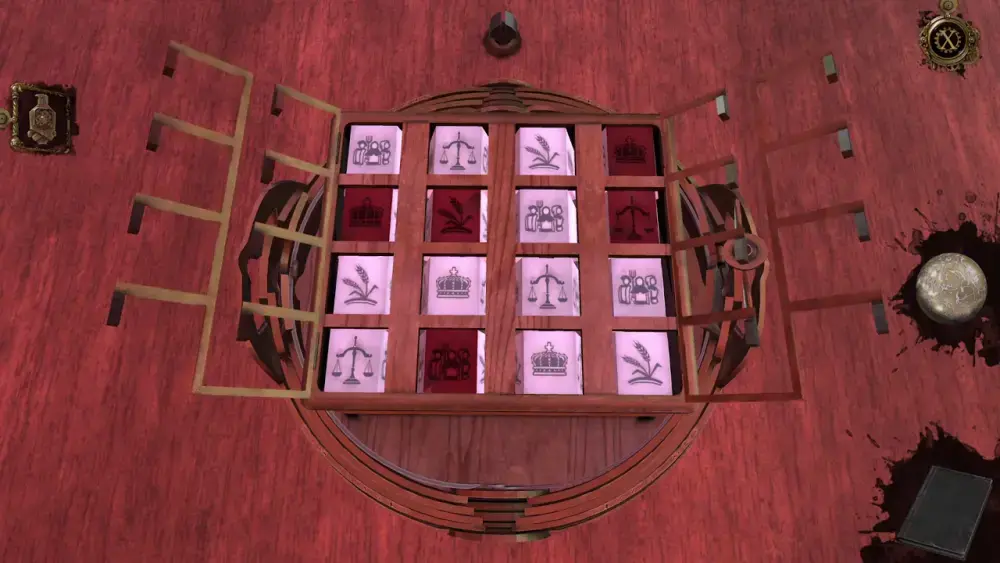
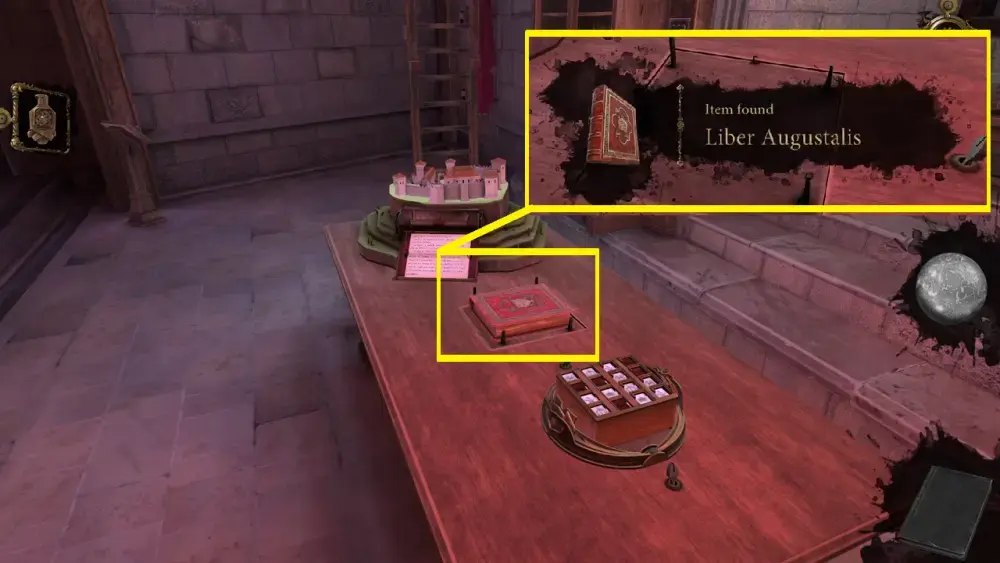
Once done, the frames of the board will set themselves back and a red book will appear in the middle of the table through a secret rotating compartment. This book is the Liber Augustalis, which, if you look closely at the cover via your inventory, depicts a pair of hands holding up a crown.
The device resembling a typewriter will also proffer you one last letter. This is what it contains:
With the Liber Augustalis at hand, return to the secret room and place the book into the slot on the bookshelf right under the red plaque.
Just like the first lock on the wall-mounted ladder, the third lock will fall.

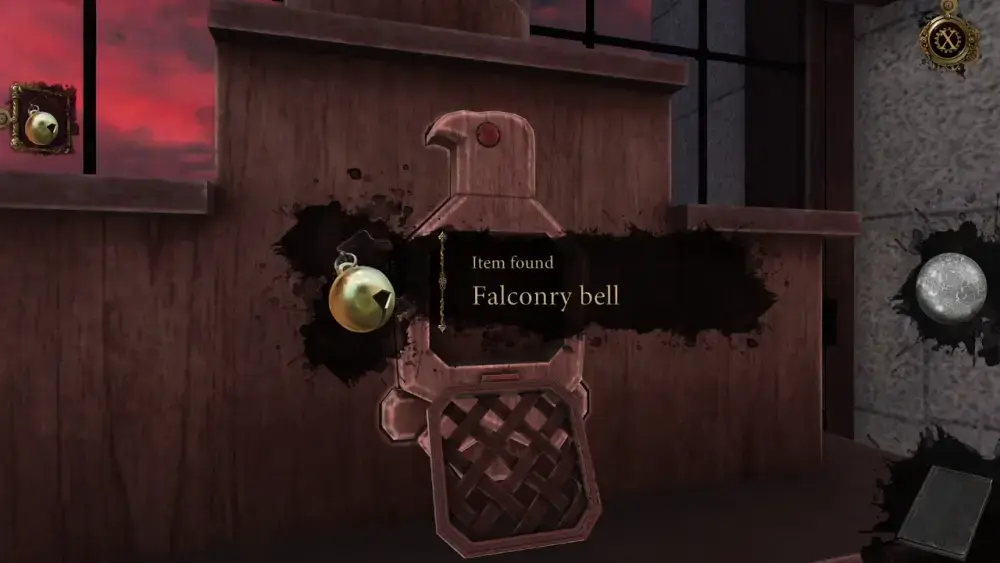
Now, for the Falcon Medallion in your inventory: approach the wooden tower model right in front of the window. Immediately, you’ll see a socket shaped exactly like the Falcon Medallion on the upper part of the tower. Insert the medallion here.
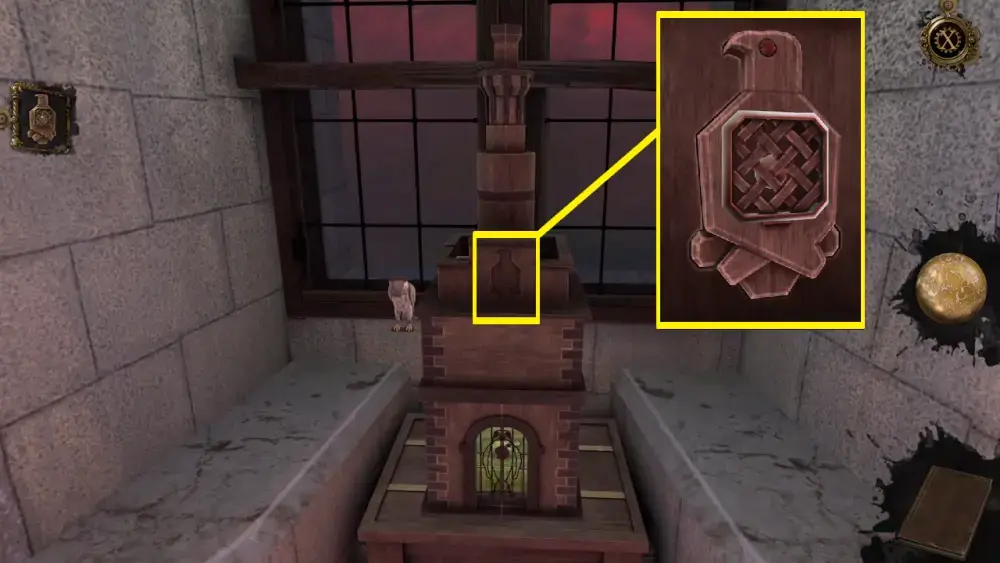
Upon inserting the medallion, a hatch will open, allowing you to collect the Falconry Bell inside. The medallion will then protrude from the socket, which will let you to press it later.
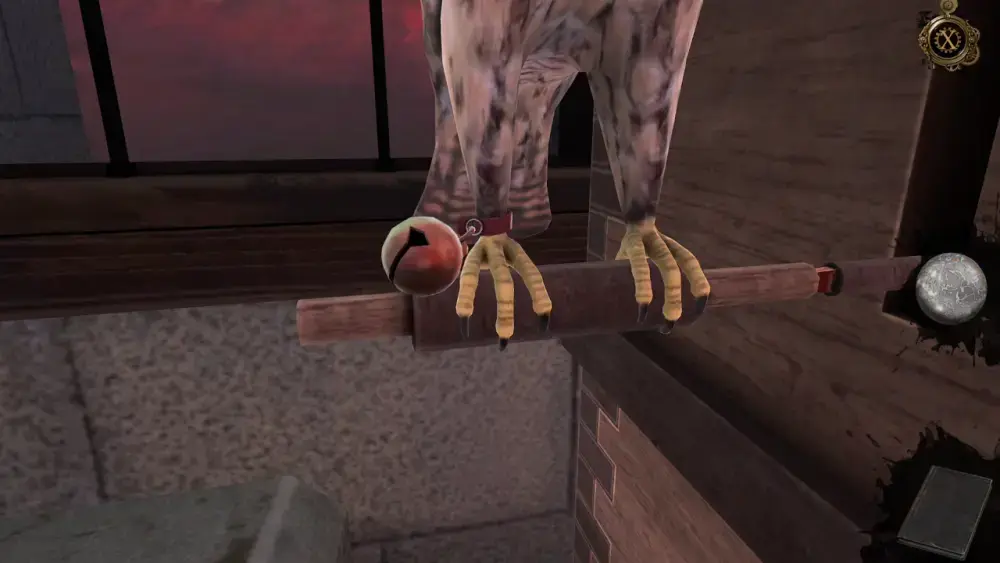
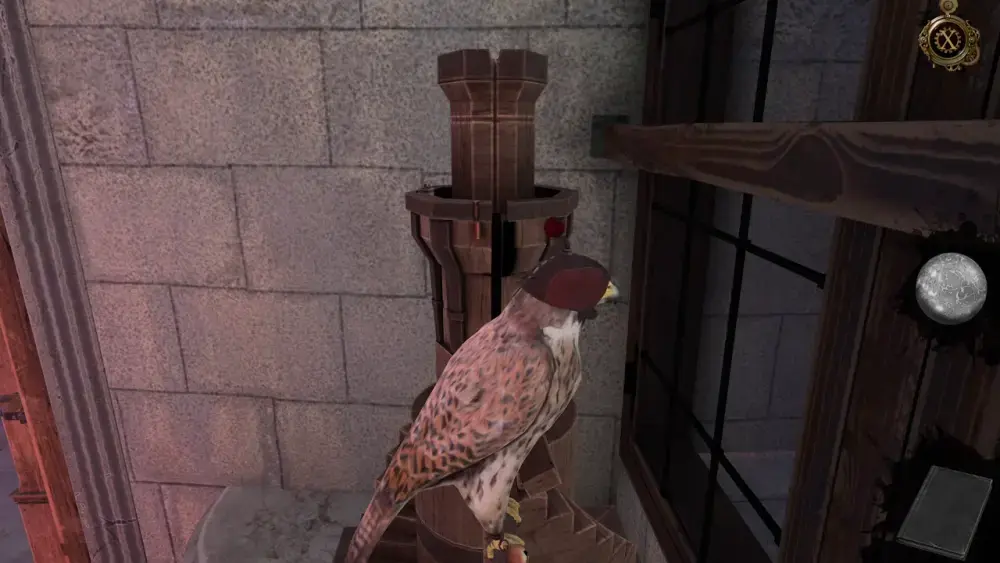
Bells like these are often tied to a falcon’s talons so place this bell on the leg of the falcon perched on the left side of the model tower.
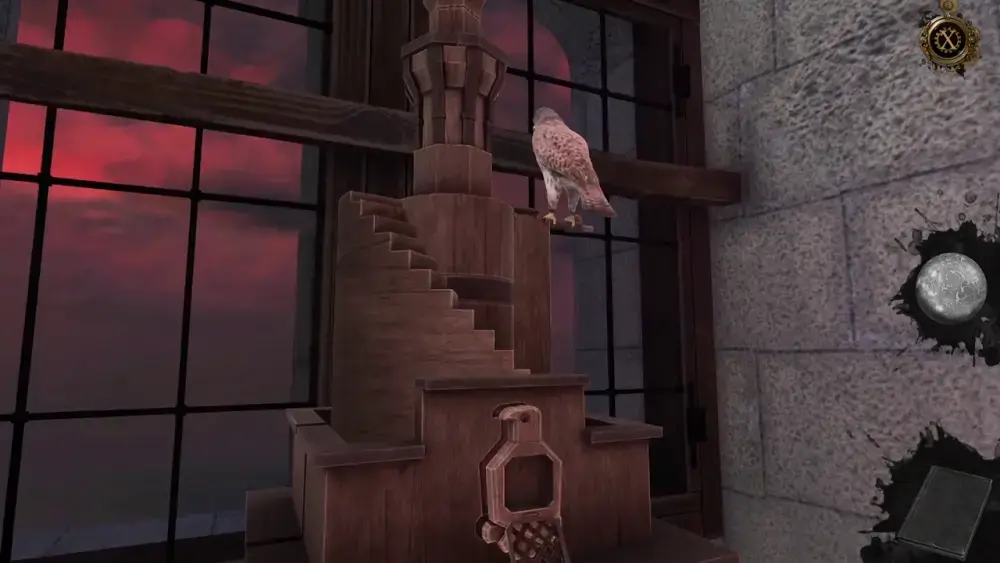
Press the medallion on the socket, which will trigger the falcon to raise its head and move along the rail winding around the tower. At the top, the bird now faces the window.
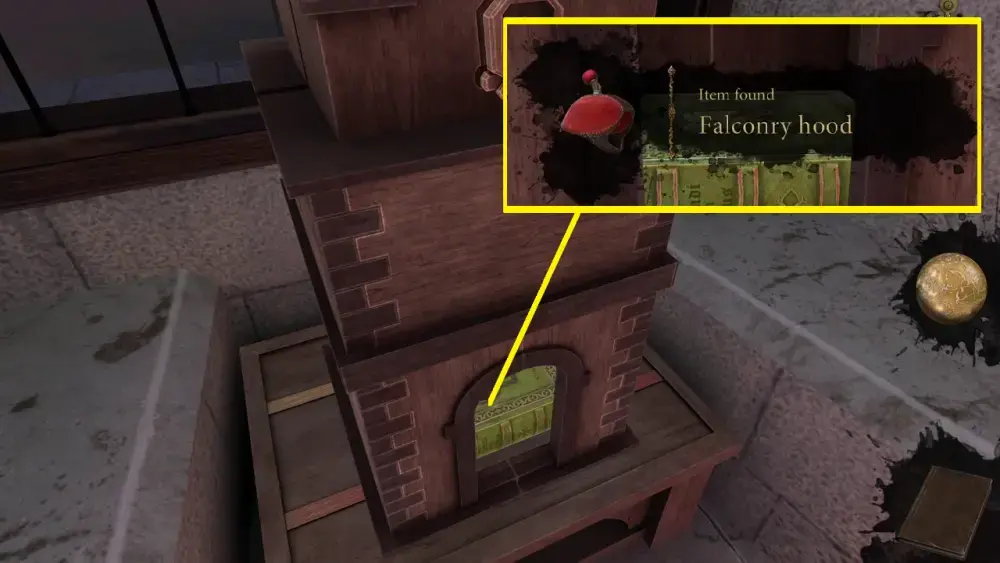
At the same time, a door at the bottom of the model tower will open. Inside, you’ll see two things: a Falconry Hood, which you can pick up, and a green book. Unfortunately, the green book is too big to be collected from the small opening, indicating that there’s something else in the model tower you have yet to activate.
On the flipside, you have the Falconry Hood, which you can place on the falcon’s head.
After doing so, press the medallion on the tower. This will trigger a mechanism that will cause the falcon to rise to the top of the tower and consequently open up the bottom part of the tower containing the green book—the Venandi cum Avibus (Hunting with Birds).

Similar to the other books, place this one on the shelf inside the secret room. Align it with the green plaque displaying the symbol of a falcon.
The last lock will fall from the wall-mounted ladder.
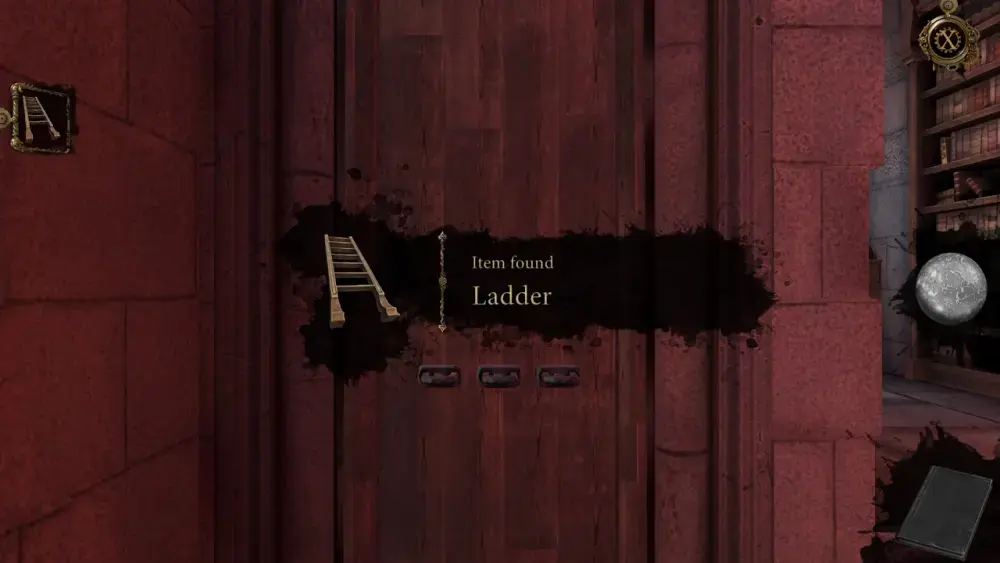
In turn, you may now collect the Ladder as part of your inventory.
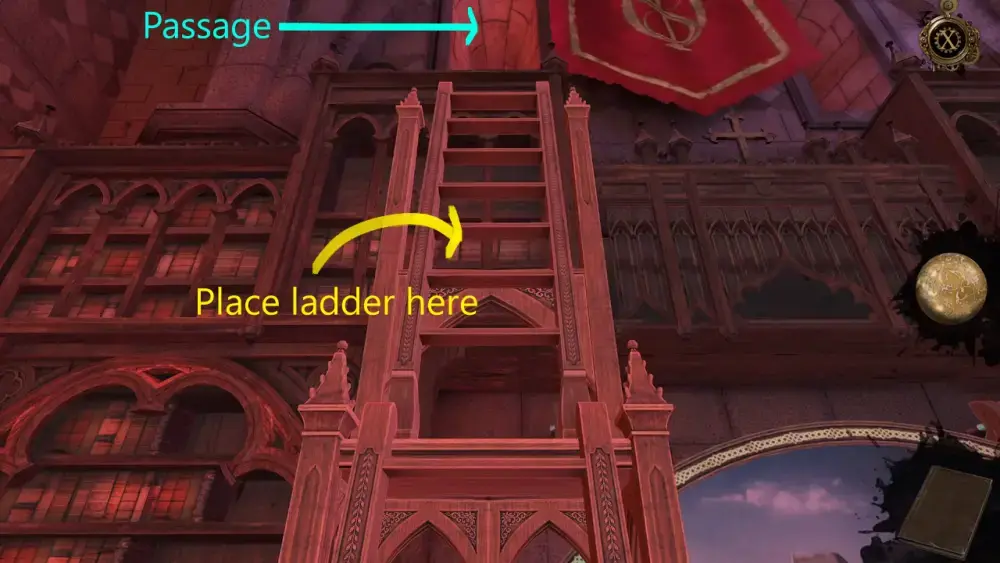
This Ladder is clearly an extension of the wheeled ladder you can move in front of the large bookshelf. That said, go to the wheeled ladder’s controls and move the ladder to align with the passage at the top of the bookshelf. This passage should be the one located on the left of the red banner.
Approach the wheeled ladder. When you look up, you should be able to clearly see the passage at the top. Place the Ladder extension on the upper part of the wheeled ladder.
Climb the ladder. Just before going through the passage, you’ll see a plaque on the wall with an inscription. It looks a little vague when you view it this way, but you’ll be able to note it down in your journal, which will also provide you with a translation of what it says.
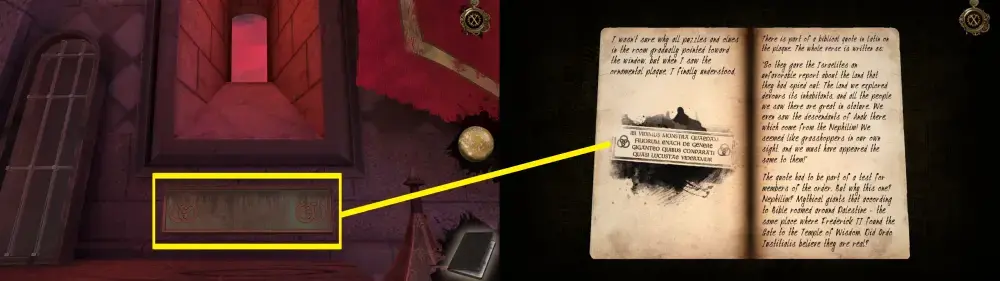
With this information noted down, you may now go through the passage, where you will find yourself face to face with the time machine at the center of the courtyard.
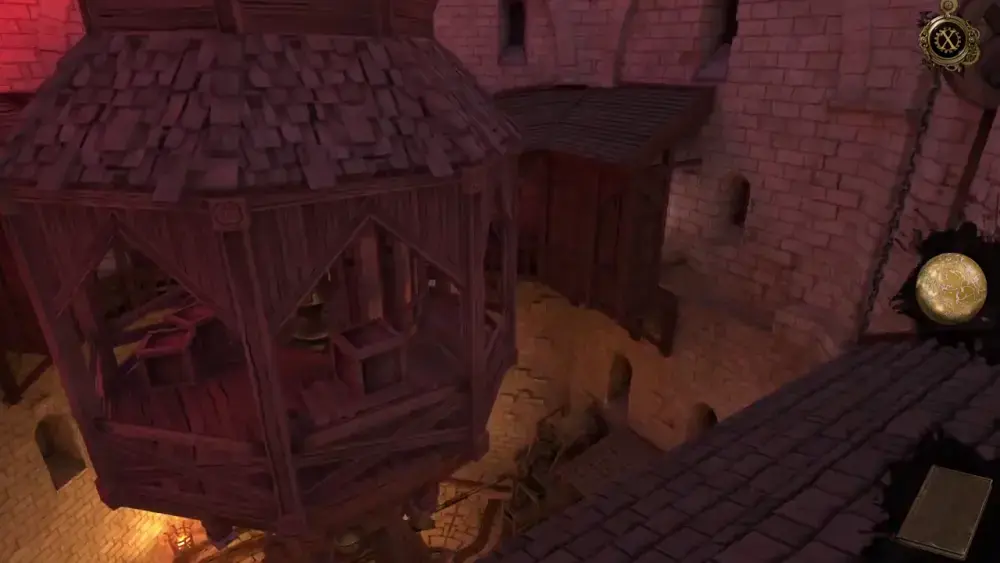
But since you’re likely on top of an awning, you can’t just drop down onto the time machine. Besides, there are also guards patrolling below. Thus, you need to find a discreet path toward the walkway leading to the top of the time machine.
From where you’re standing, you can see a door to your lower left and while it may look like a viable option, there’s a guard patrolling it.
With your options basically nil (you can’t jump down the courtyard and neither can you jump down the place where the guard is patrolling), there’s only one logical thing to do:
Open the Oculus Perpetua and go back in time, to 1465.
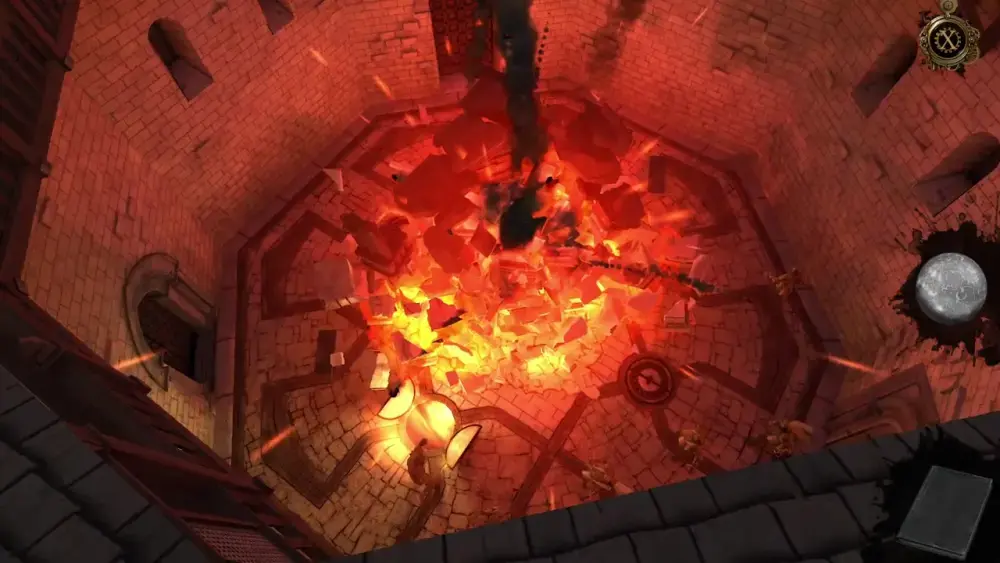
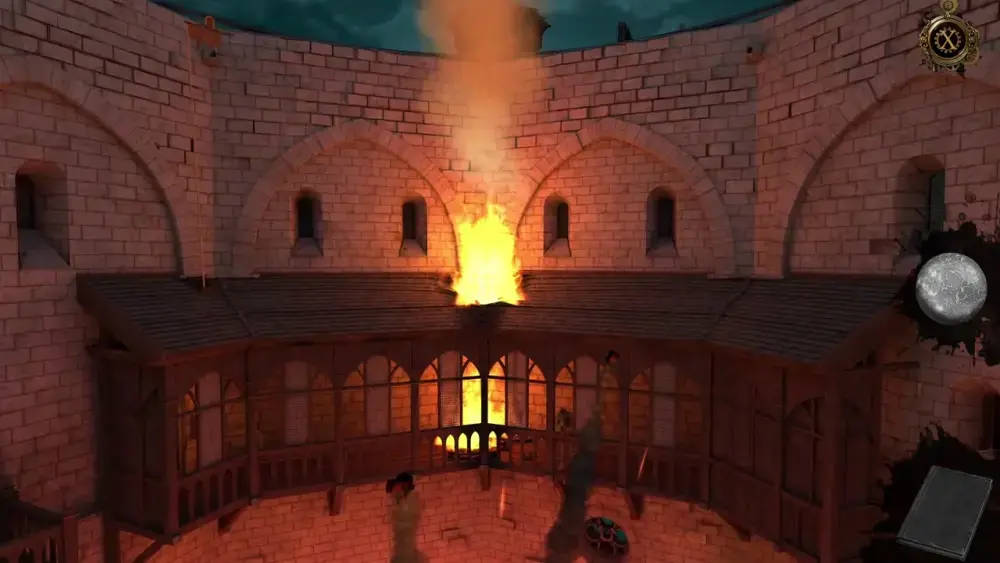
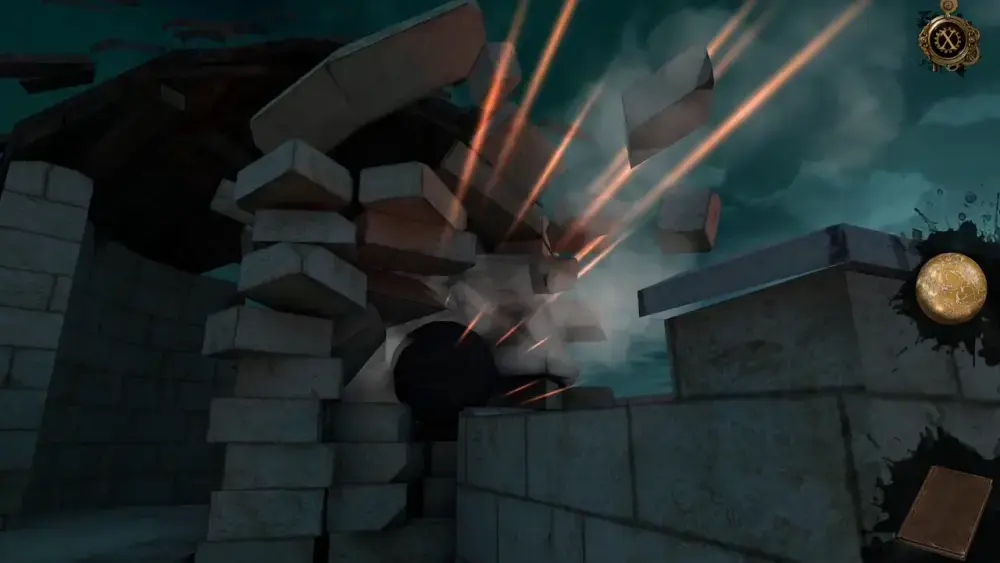
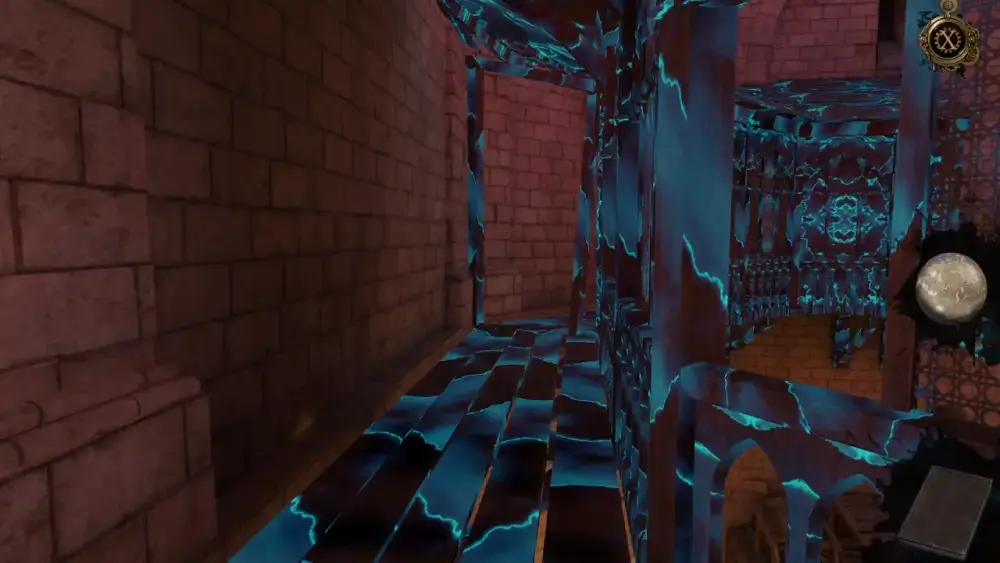
Similar to what happened in the supply transport area, you are thrust into the moment when the fortress was attacked by the Pope’s army. Upon entering 1465, you see the middle of the courtyard set ablaze by what looks like flaming boulders catapulted from afar. The Gate to the Temple of Wisdom has been destroyed.
On the opposite side, that part of the fortress is also on fire.
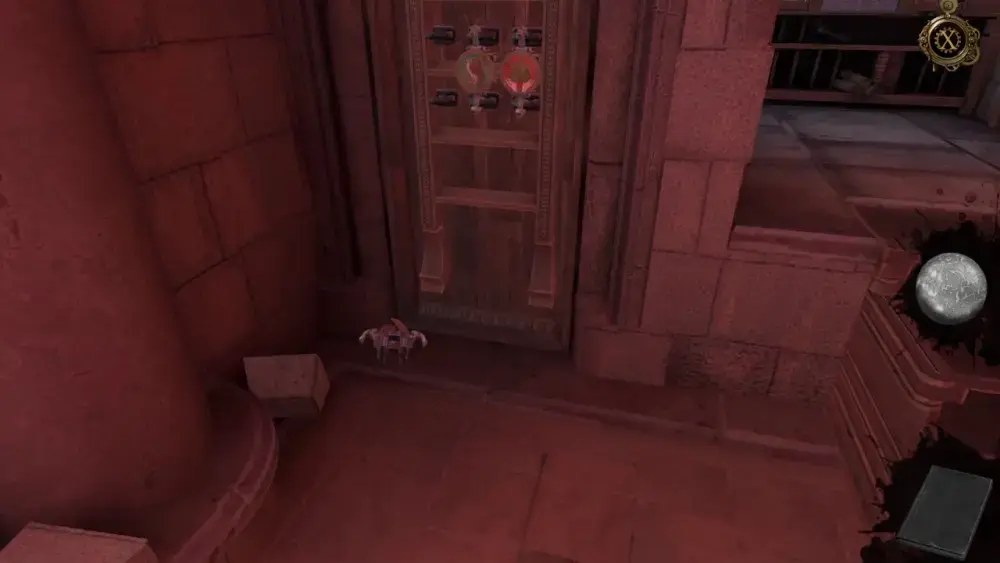
Fortunately, however, the area on your lower left, where you initially planned to jump down, is now free of any patrolling guards.
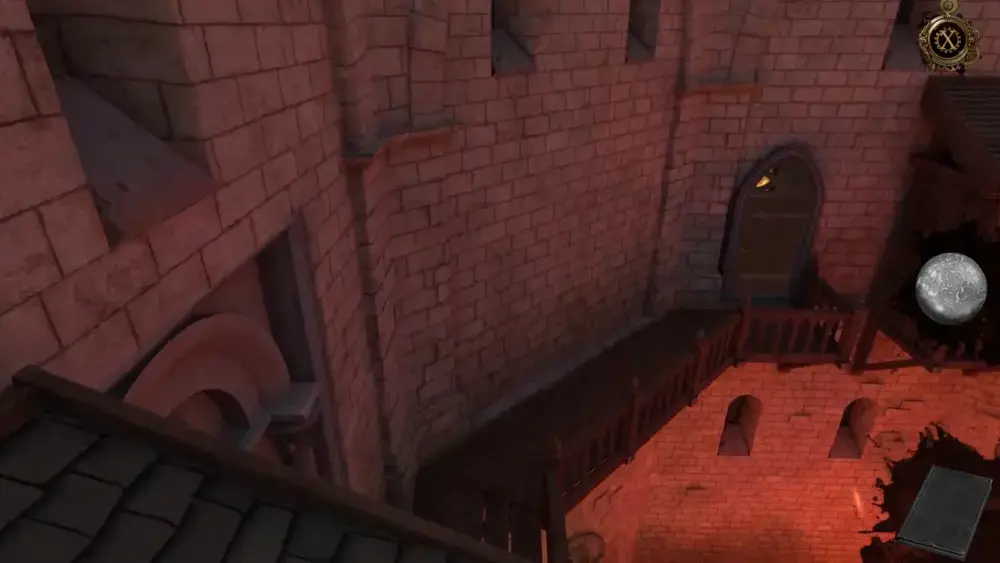
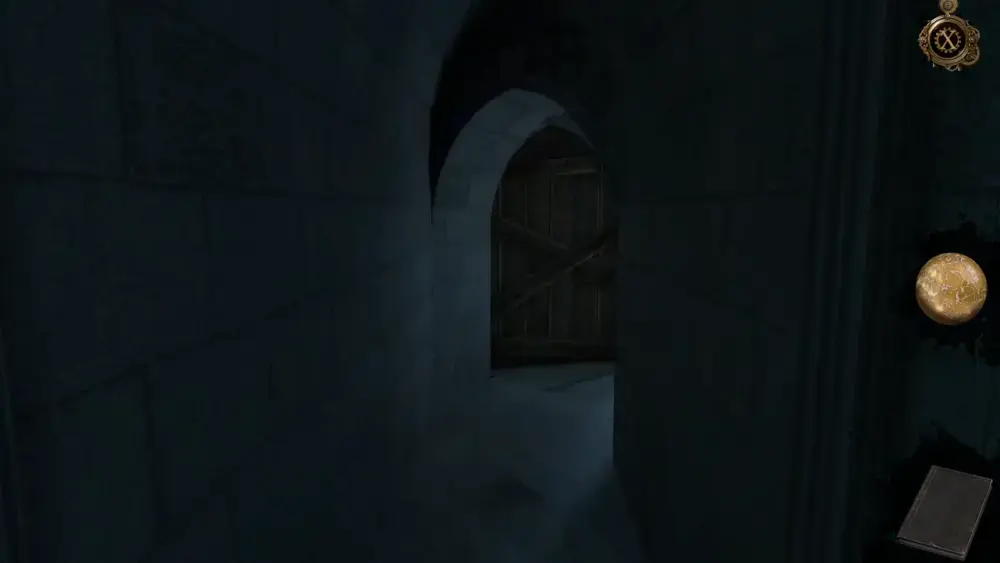
You successfully make it to the walkway below. If you look behind you, there’s a door but it’s locked. This leaves you with the door ahead. Walk further down to open the door.
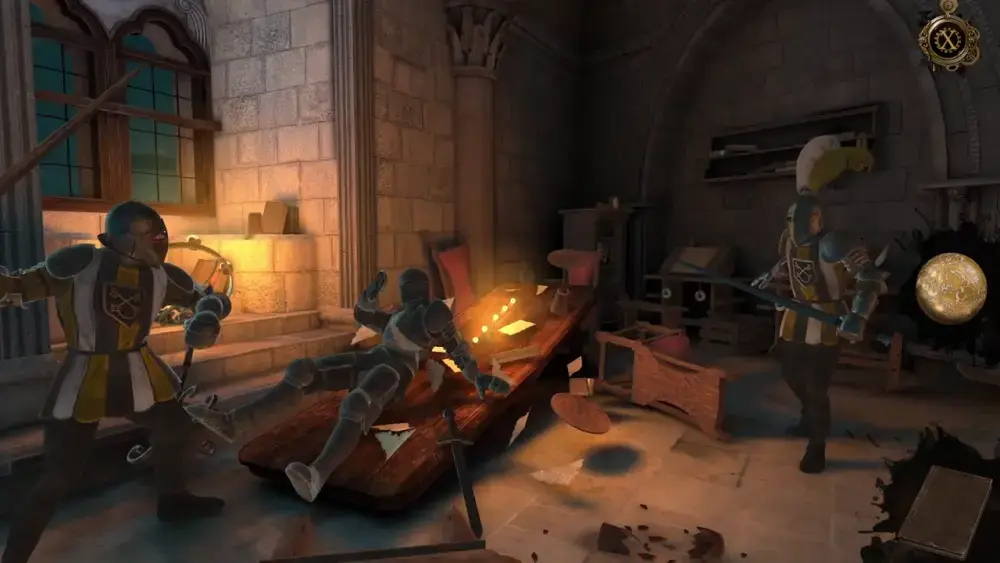
When you enter the room, you will be met with this scene.
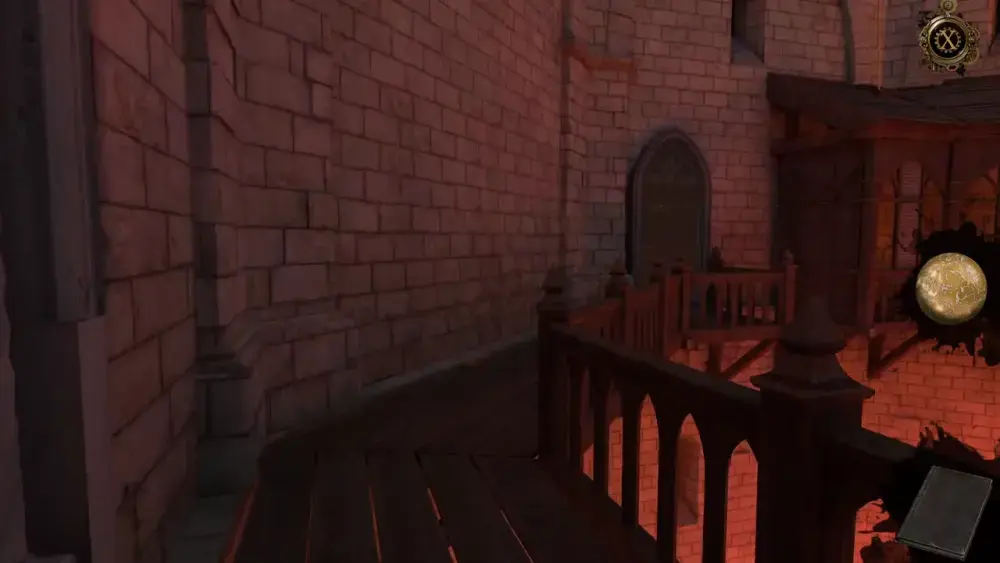
If you pan a little to the right, you will see the entrance to another passage.
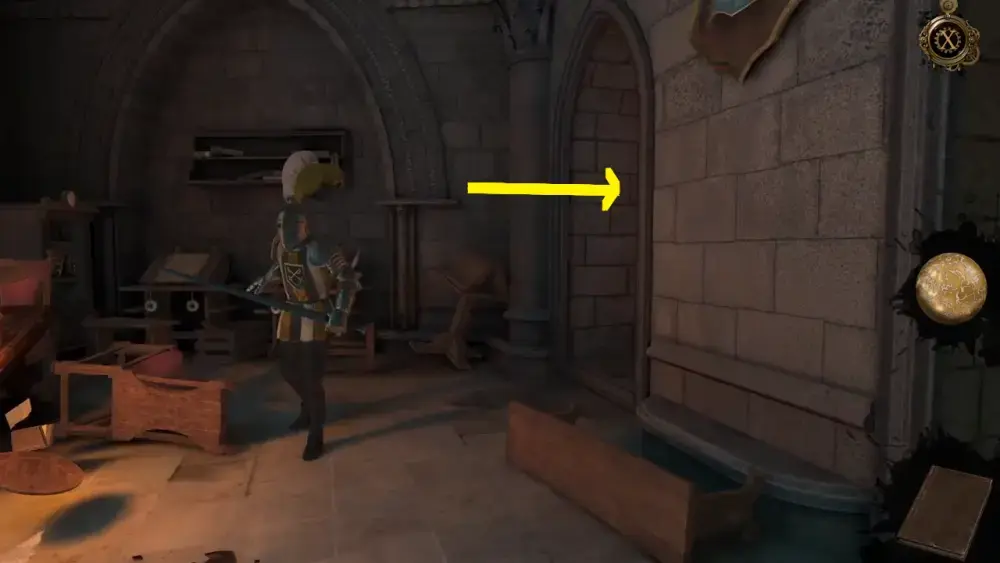
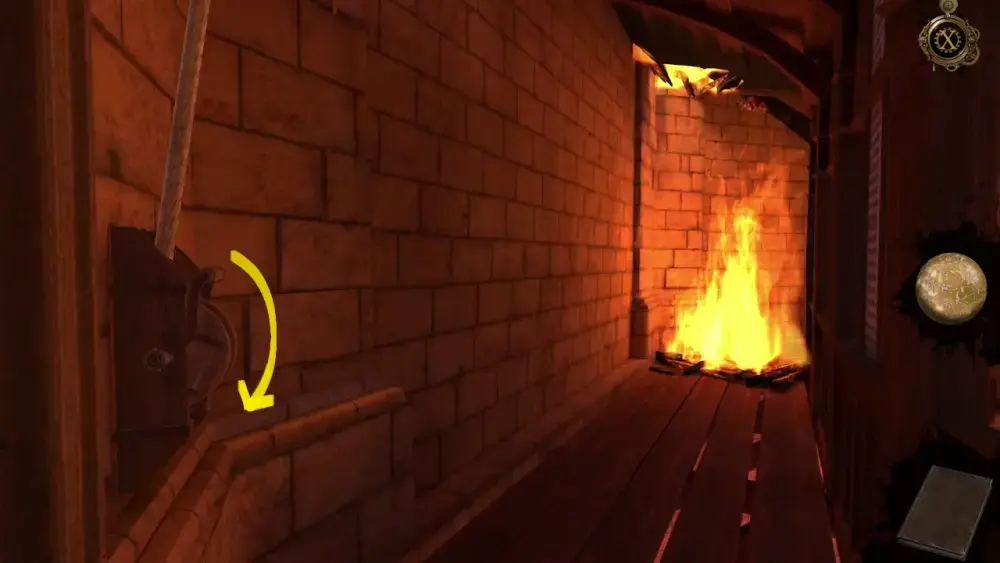
If you enter this passage and take a peek, you’ll find the path blocked by fire.
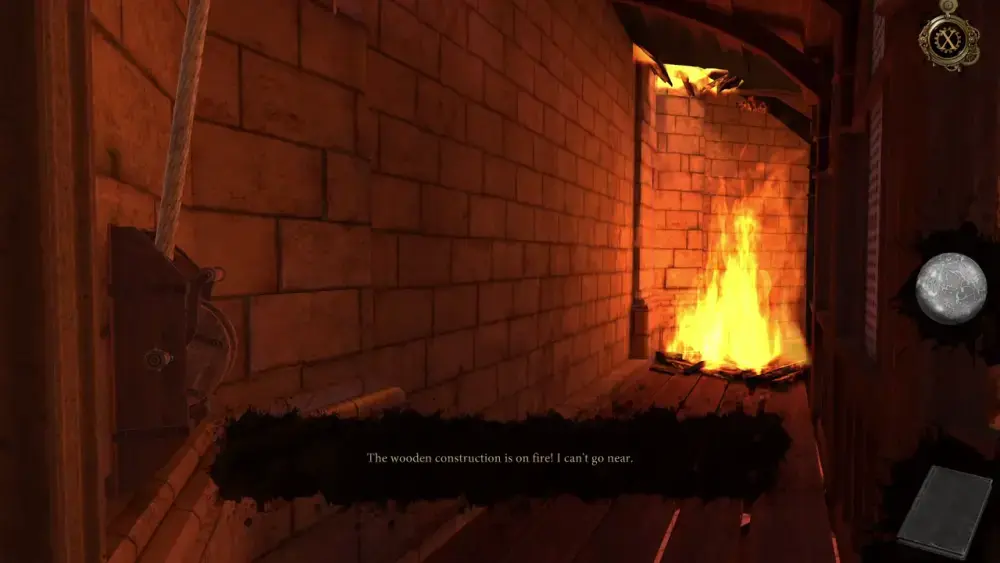
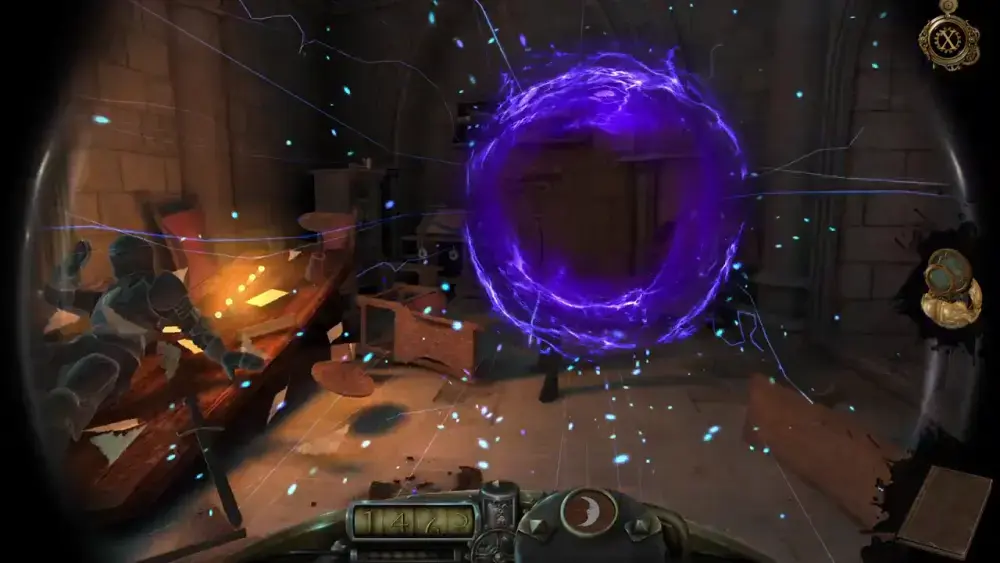
Before you leave, you might notice a lever right beside you. Pull it down.
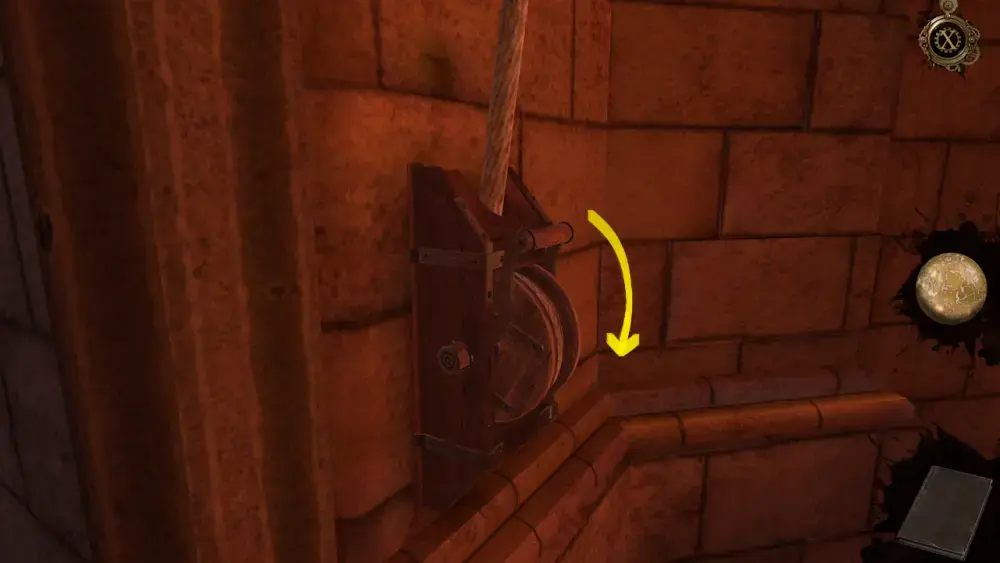
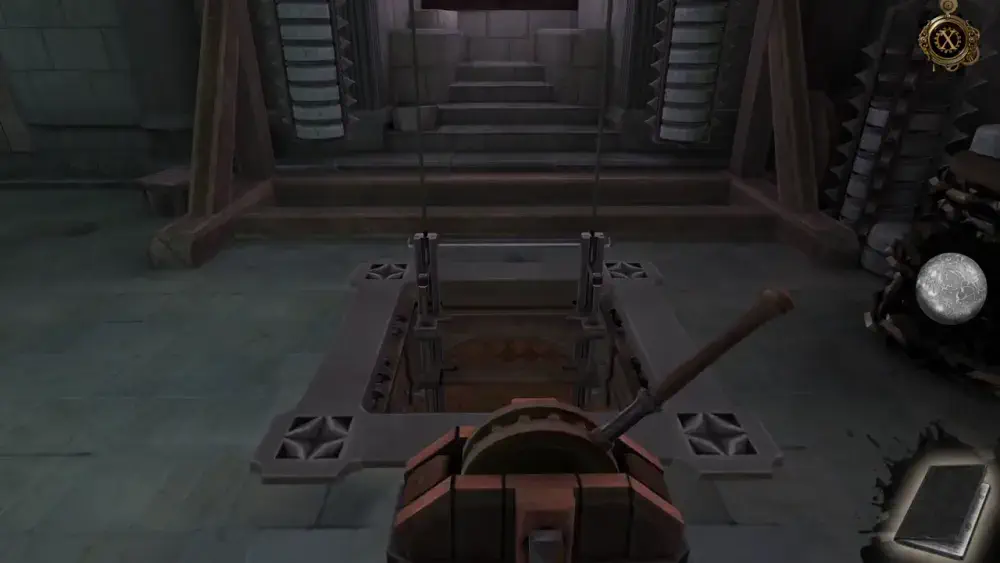
This action will trigger a cart to pour water down from the very top of the fortress. However, the water is suspended in mid-air and doesn’t completely fall.
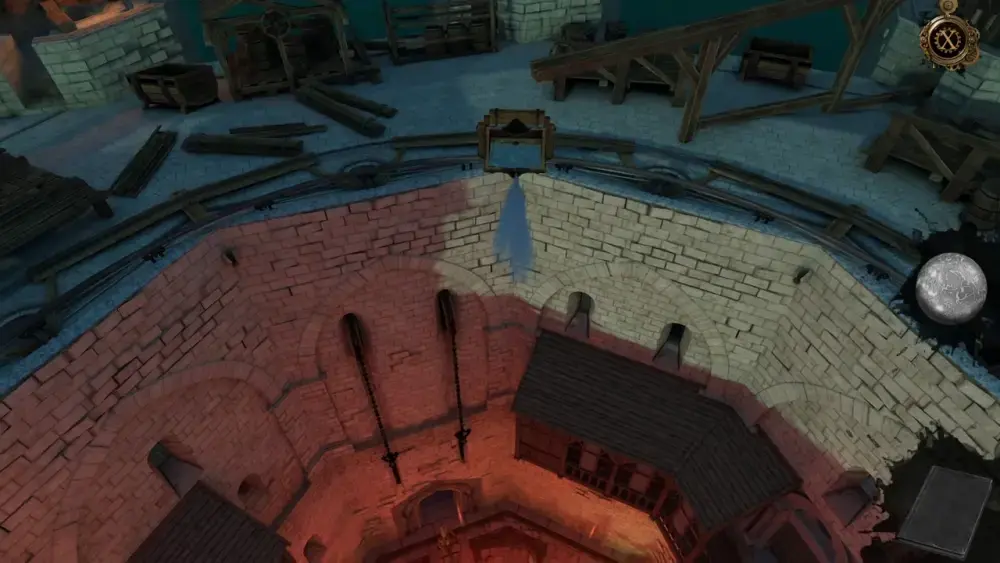
You might have missed it initially but if you look closely at the screenshot above, you’ll see that the cart full of water can be moved around a track. This means you can move the cart and place it right on top of the fire blocking your path so it can extinguish the flames.
In the meantime, you need to look for a way up. If you return to the room with the fighting soldiers frozen in time, you’ll see a door, but it’s locked.

With nothing much left to discover or affect for now, open the Oculus Perpetua and return to the present.
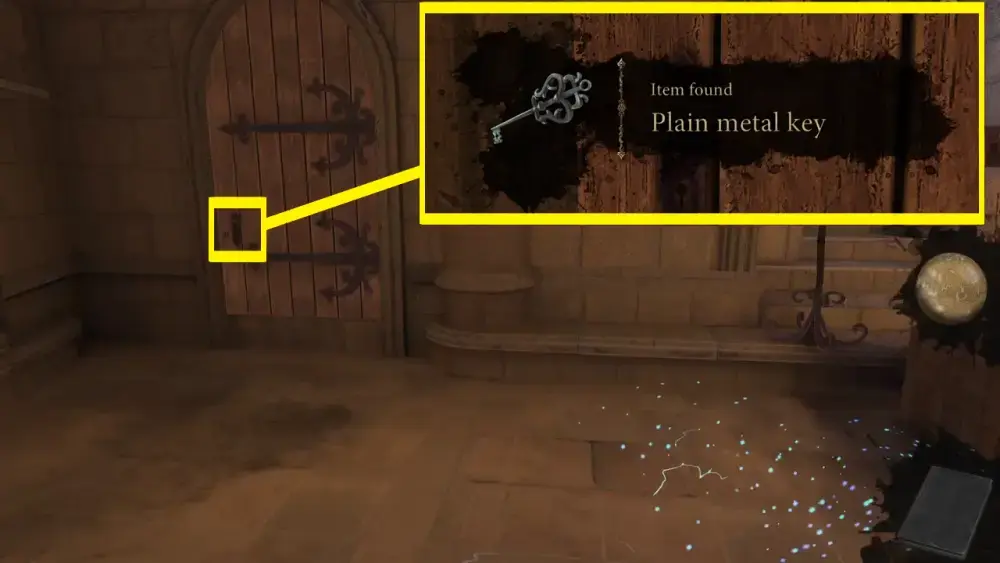
You should find yourself in the same room, but the soldiers will be gone and the furniture and other items of the room aren’t flying around as collateral damage from combat. Look behind you and you will see that the door you’ve accessed in the past has a key lodged in its lock here in the present. Approach the door and turn the key. This should open the door and allow you to collect the Plain Metal Key for your inventory.
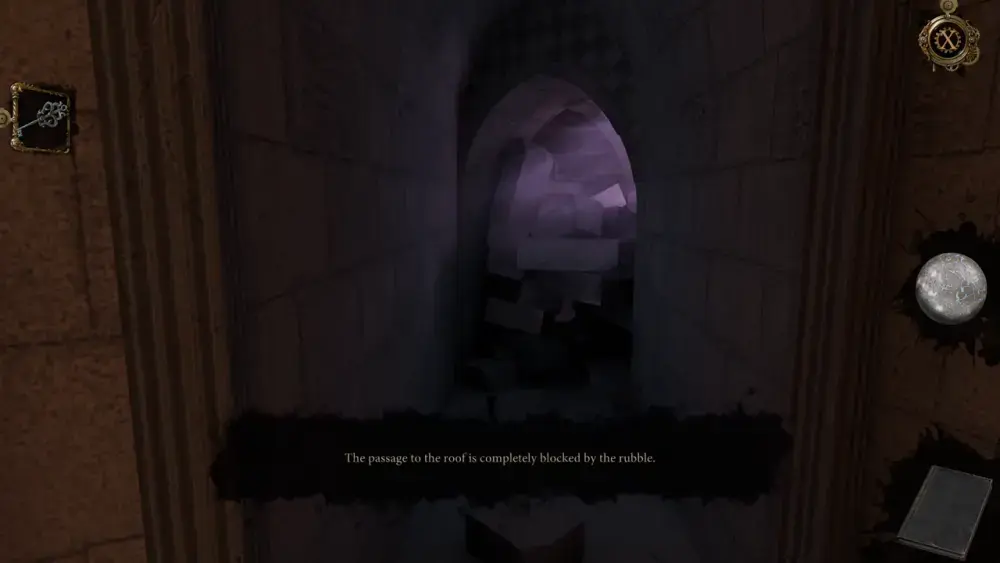
Unfortunately, if you open the door and take a look at the passage, it’s blocked by rubble.
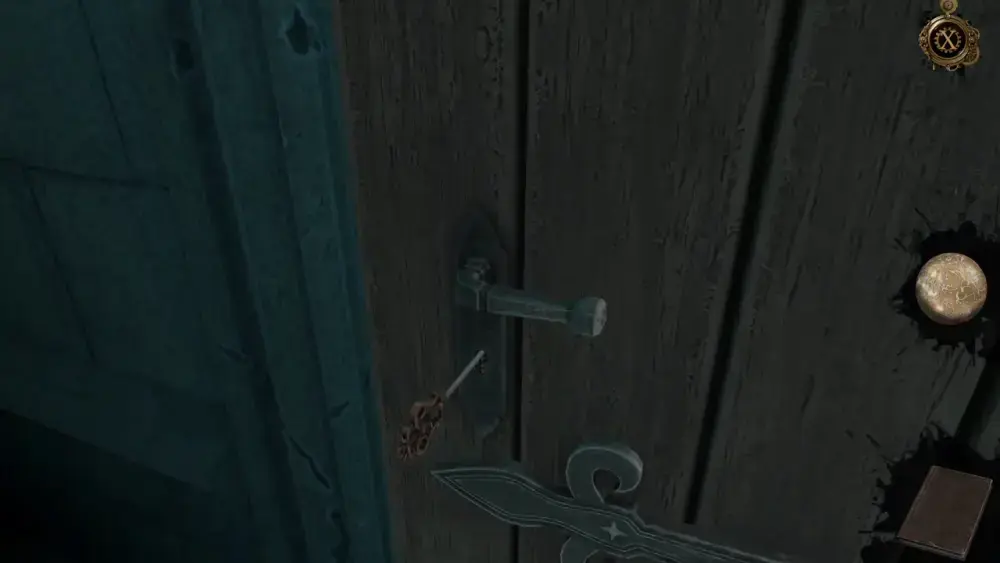
But since you have the key to this door, you might have more luck if you access this passage in the past. That said, open the Oculus Perpetua and head back to 1465. Again, you will find yourself in the room with the fighting soldiers. This time, though, when you approach the door, you’ll have the Plain Metal Key to open it with.
Just as predicted, the passage beyond this door is free of rubble.
Walk through the passage and it will lead you up a long and winding flight of stairs, at the end of which is the very top of the fortress.
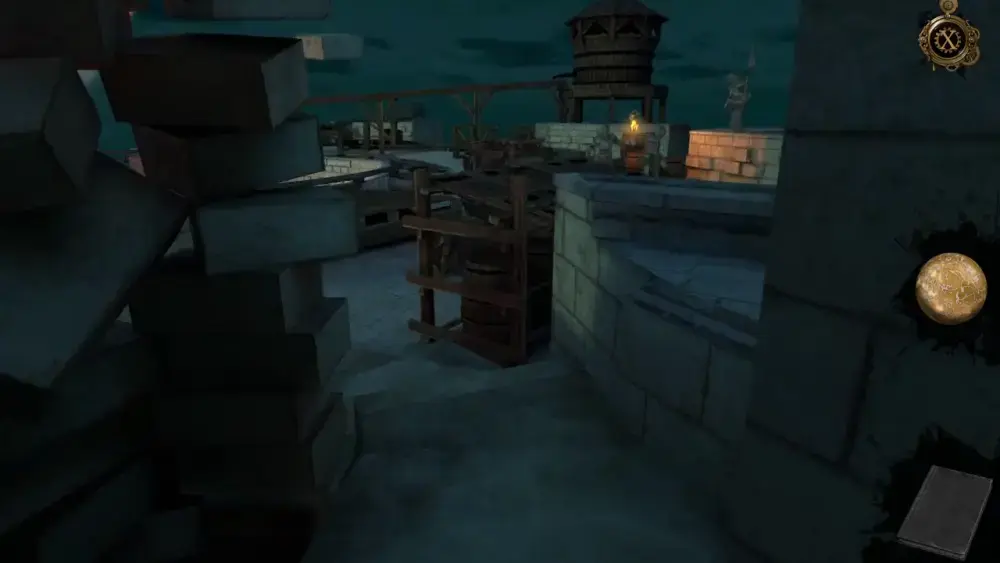
Walking out into the open, you can pan around to observe your surroundings.

If you look behind you, you will see that a cannonball has struck the stones of the passage, which explains why the entrance below had been barred by rubble in the present.
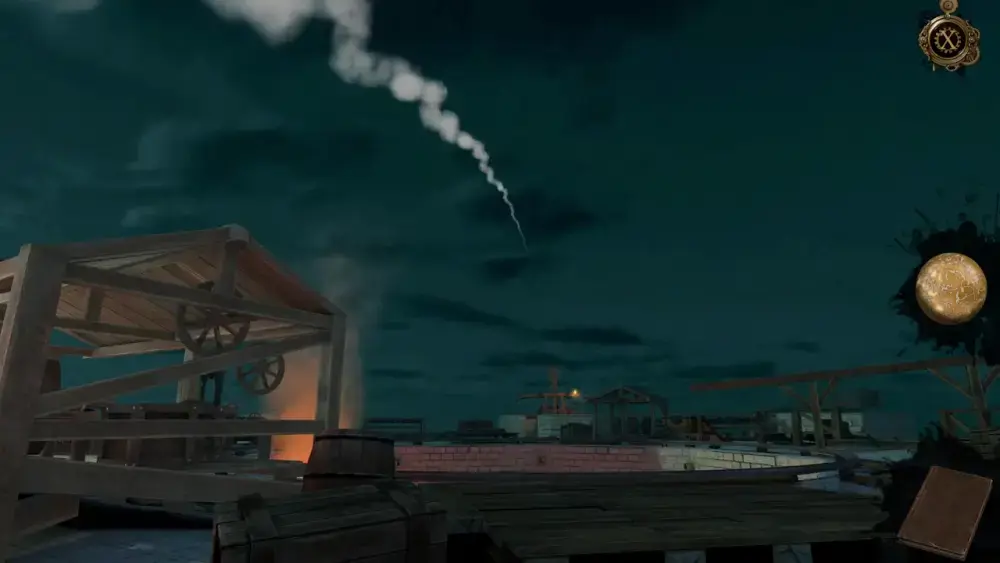
If you trace the arc of the shot, you will see that on the opposite side of where you’re standing is a catapult. Right in the middle is the top of the courtyard.
If you move further down to your left, you’ll see a clash of soldiers frozen in time. Behind them is a water tower.
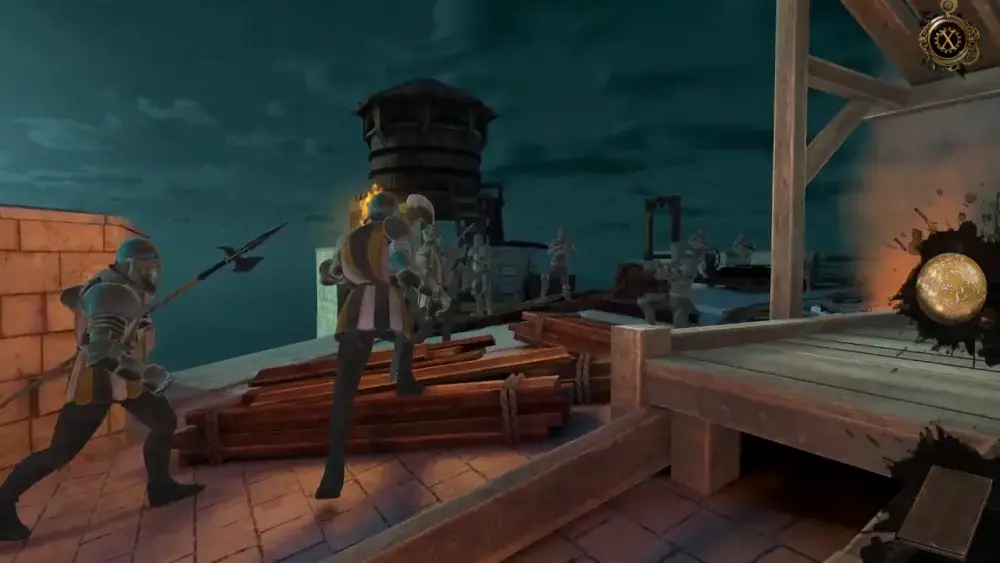
Look to your right and you will see a platform with a rotary device with a wheel. However, if you zoom into the wheel and attempt to turn it, a prompt will flash telling you that the mechanism is broken.

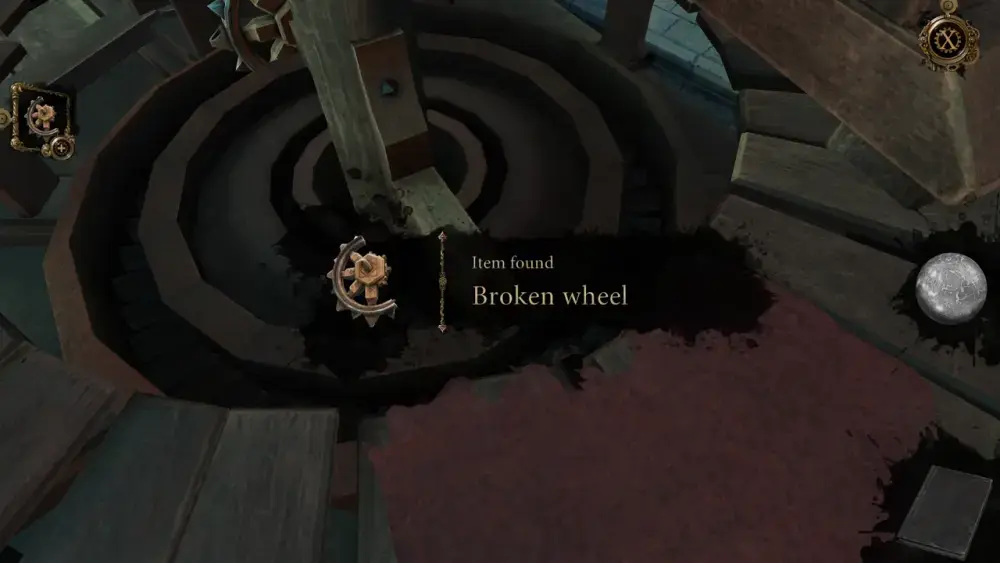
If you zoom into the side of the rotary device, you’ll discover the problem. One of the smaller wheels is broken. You can acquire the Broken Wheel as part of your inventory.
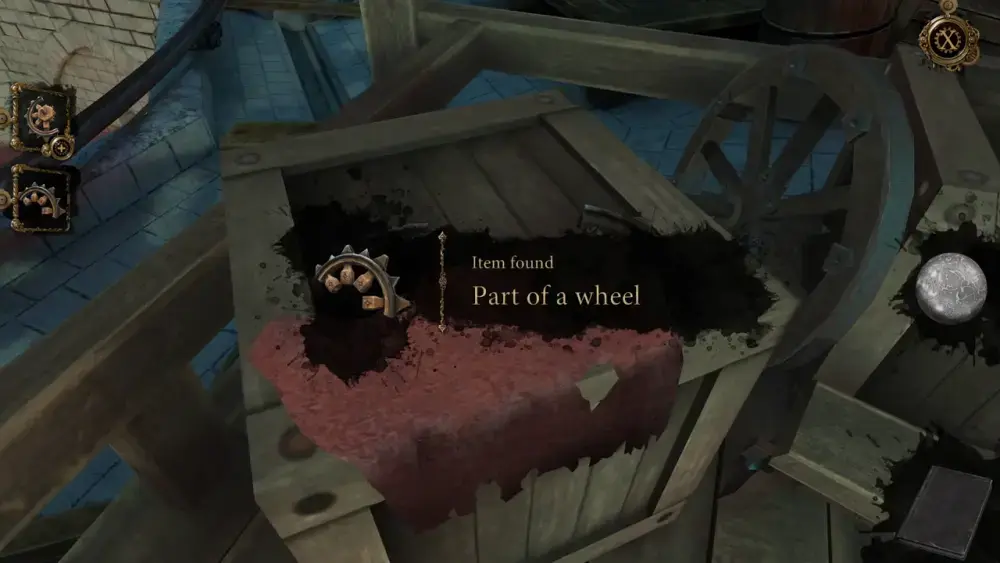
Since this item is marked by a + sign, it means that you need to find another part to complete it, consequently repairing it. If you look around, you’ll see a crate to your right. On top of it is a Part of a Wheel.
Open the Broken Wheel via your inventory and drag the Part of the Wheel to it. This should give you a new item: the Reinforced Wheel.
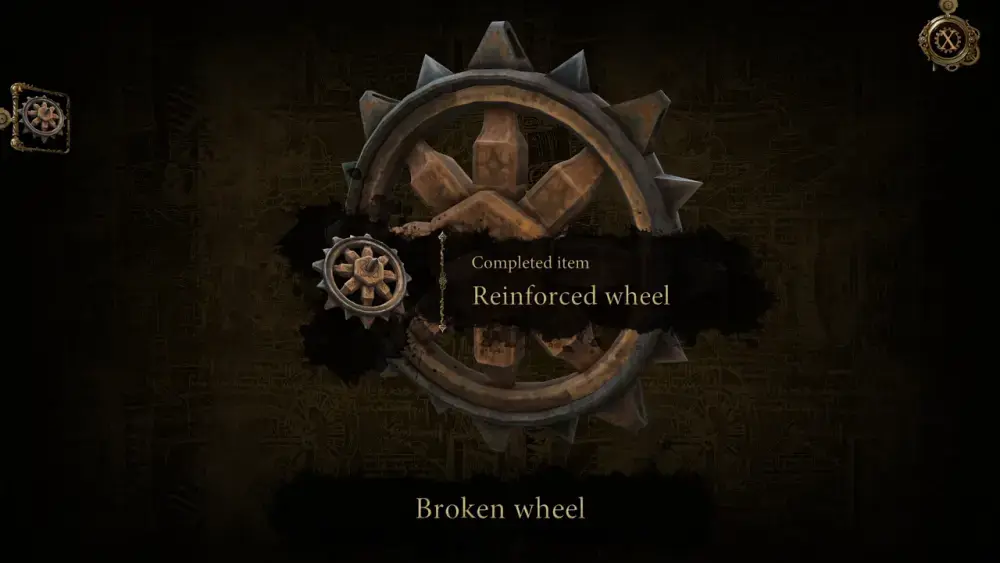
Place this new item in the spot where you’ve found the Broken Wheel to repair the rotary device.
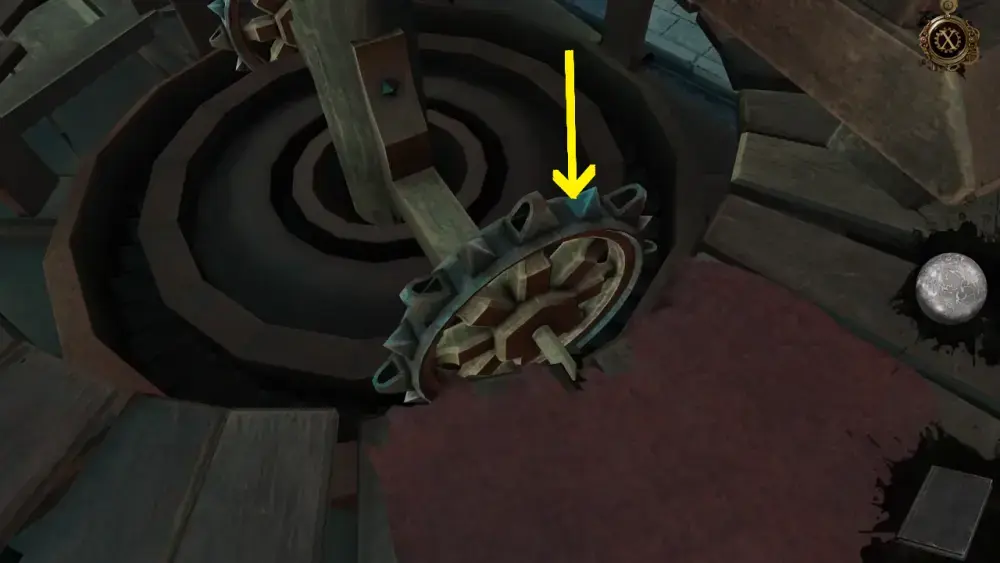
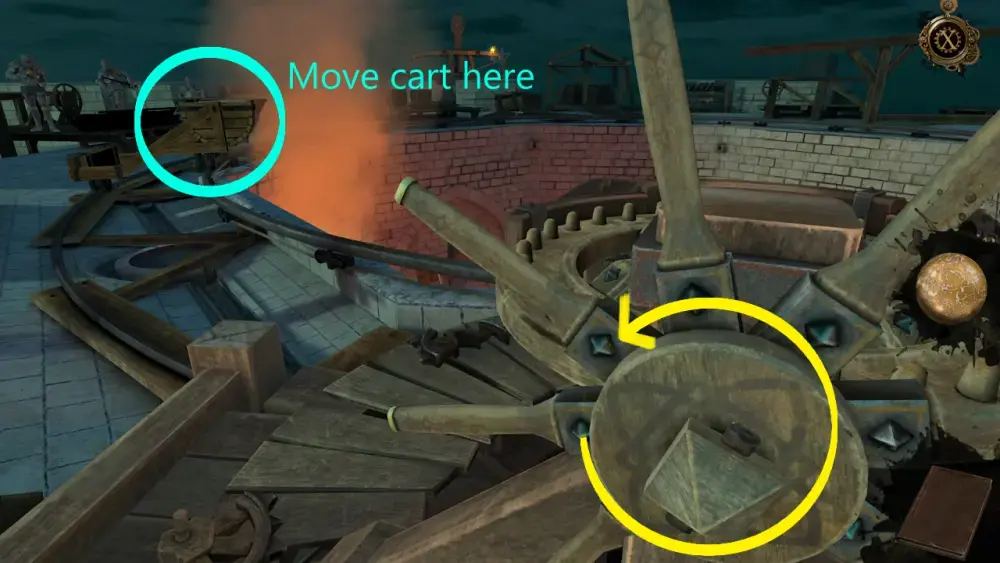
Zoom into the large wheel and start spinning it to the left. You’ll see the water cart move along the circular track. Place the water cart right on top of the spot of the burning walkway.
With the water cart in place, all you need to do is release the water to douse the flames burning the walkway below. If you recall, there’s a lever that can do this. That said, head back down from the roof. You’ll find yourself inside the room with the fighting soldiers. Take the left passage and you will find the lever, in front of which is the burning walkway.
This will trigger a brief cutscene showing the cart tipping over and pouring water directly onto the fire in front of you.
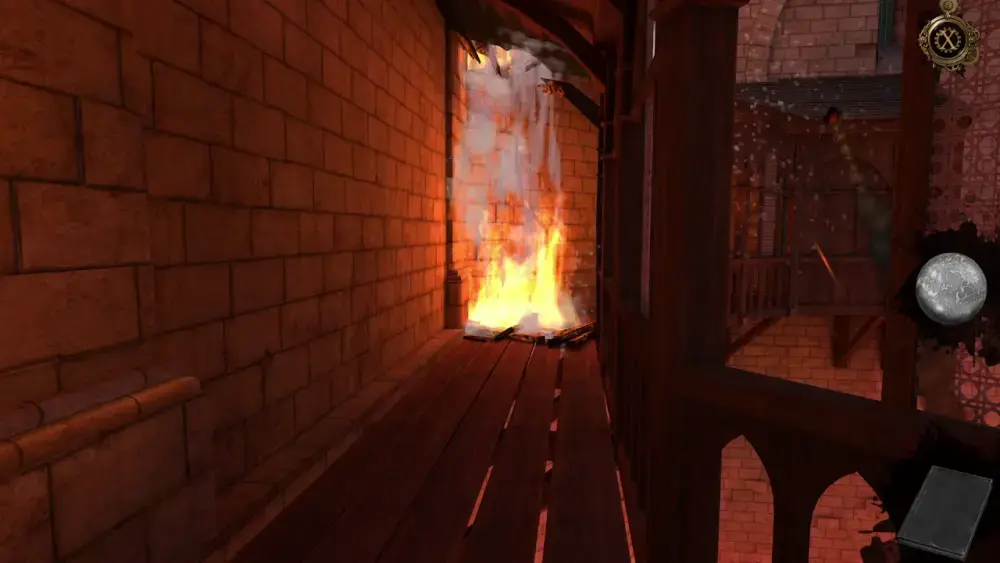
Once the flames have been completely extinguished, you will be immediately sent back to the present with complete access to the walkway.
Traverse the walkway and you’ll encounter a door.
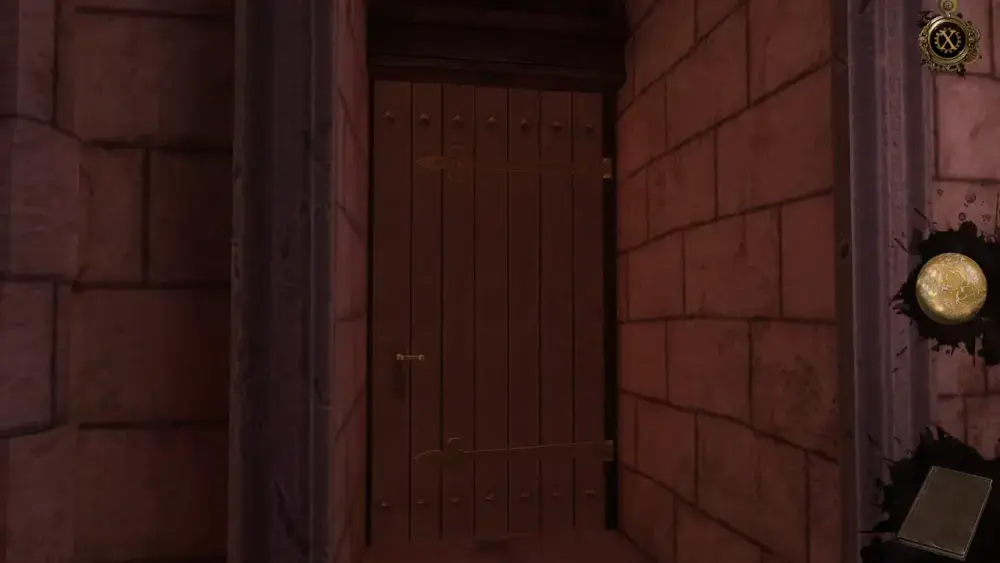
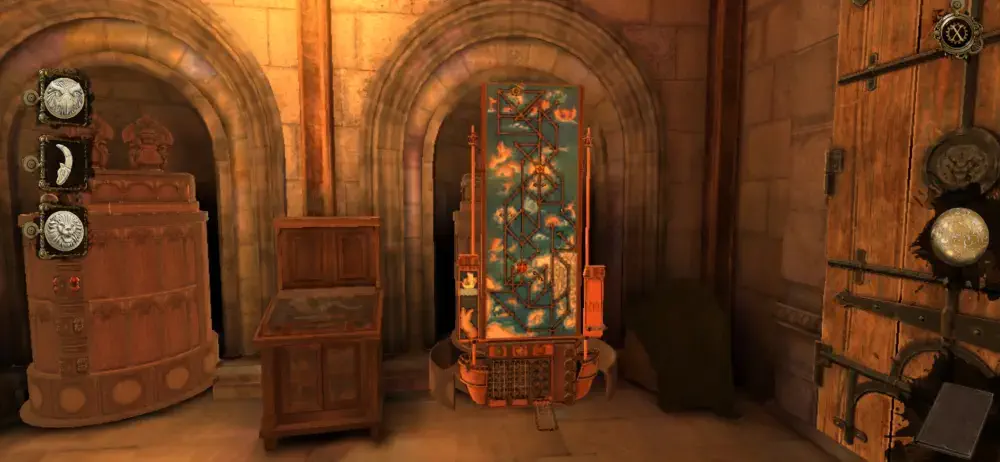
Turn the knob and open the door, which will give you a peek into this room:
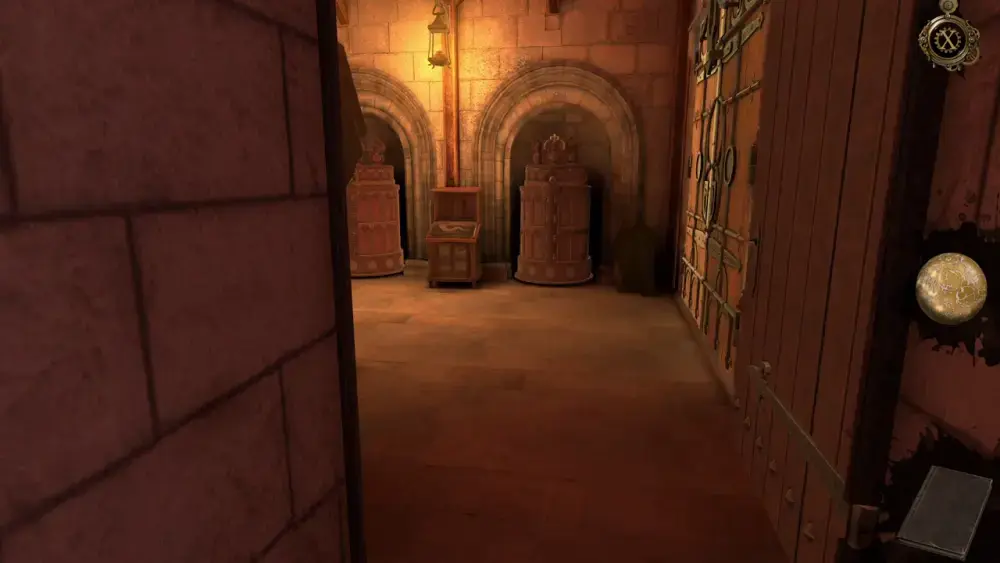
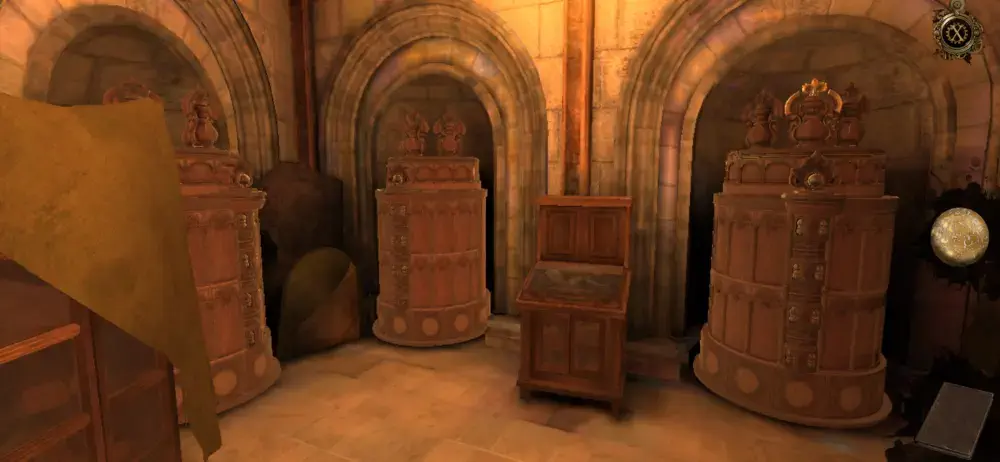
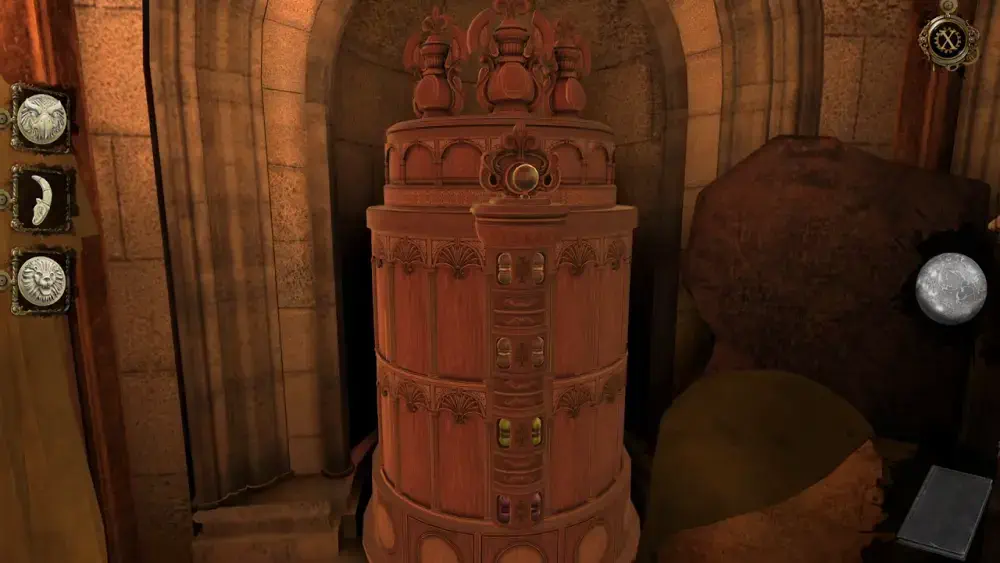
Inside, you’ll find a few interesting things: four circular wooden cabinets—three in front of you and one to your left…
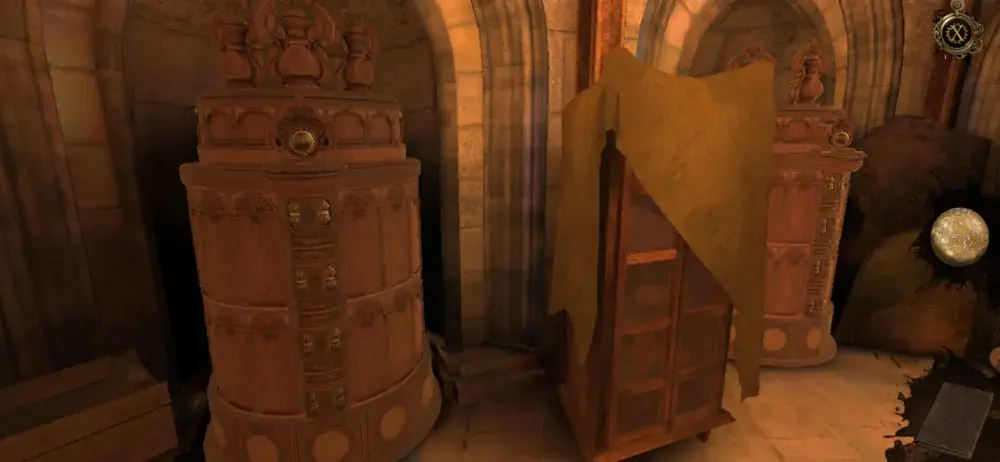
And a huge door to your right.

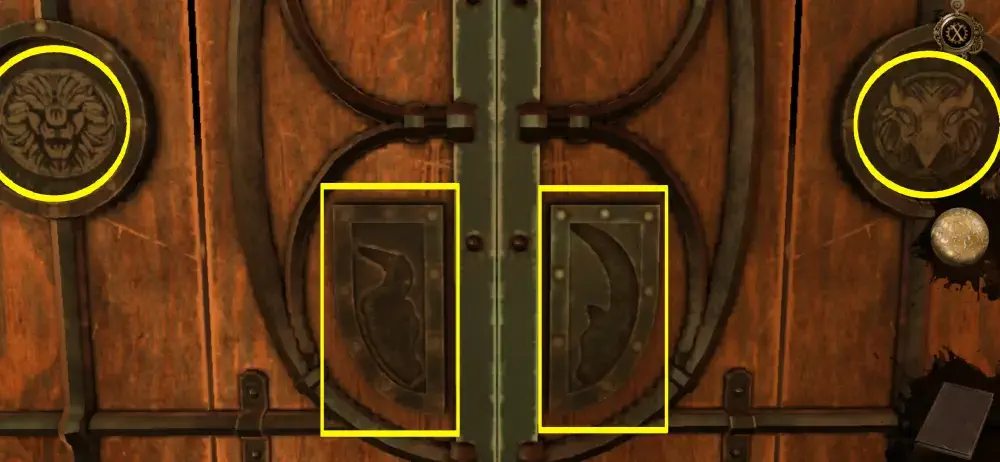
If you look closely at the door, you’ll notice that it has four slots for four objects. Two of these look like circular plaques (one for a lion and one for a bird), while the other two look like strange animal shapes that will likely make more sense later.
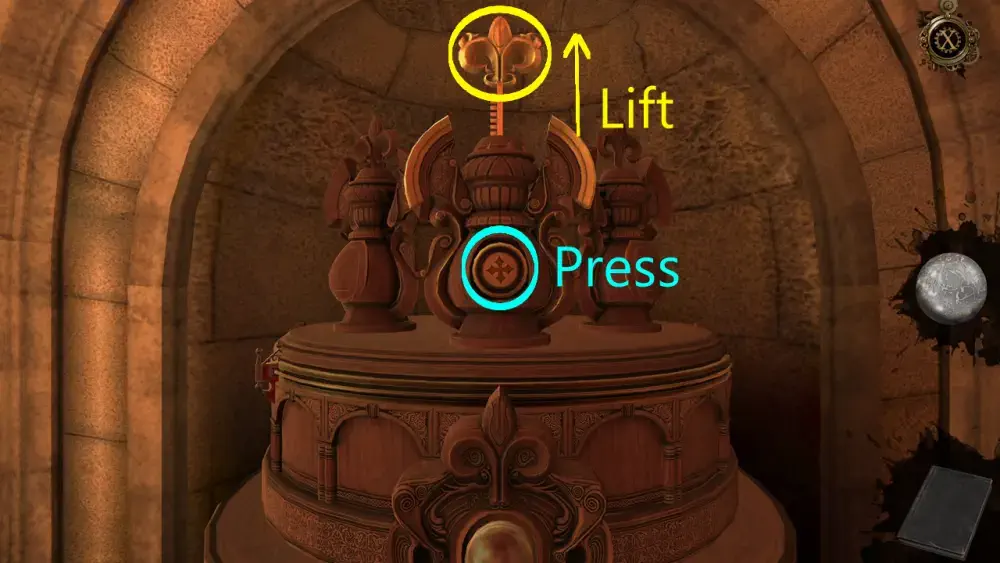
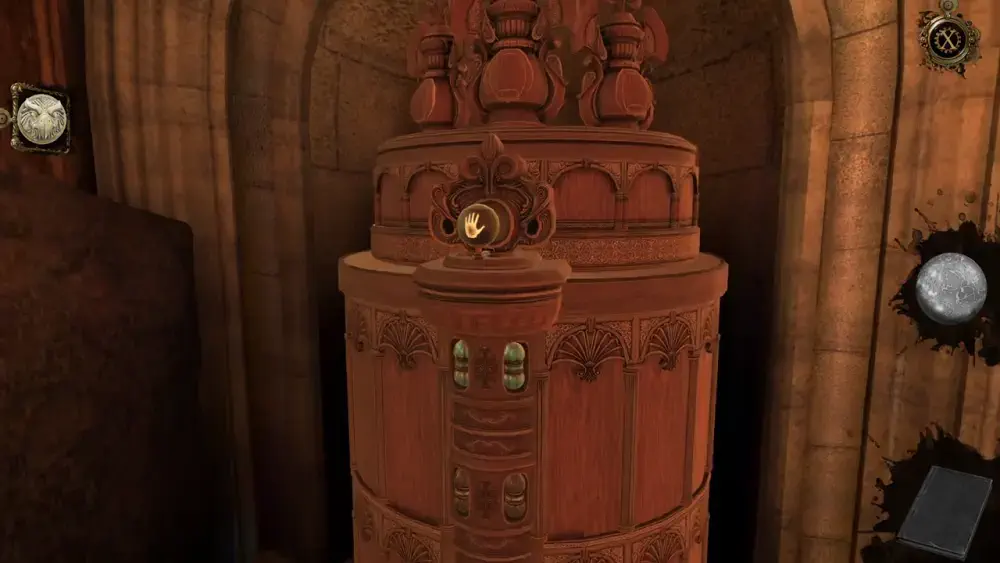
Obtaining these four objects appears to be your objective for this particular room, and the four circular cabinets inside might have something to do with them. Turn your attention to the wooden cabinet to the right side of the small display case in front of you. You’ll notice that, unlike the other wooden cabinets, this one has a golden ornament on top of it. Zoom into this ornament and pull the spike. Upon pulling the spike, a lid in front of the ornament will fall, revealing a red cross in a circle. Press this circle.
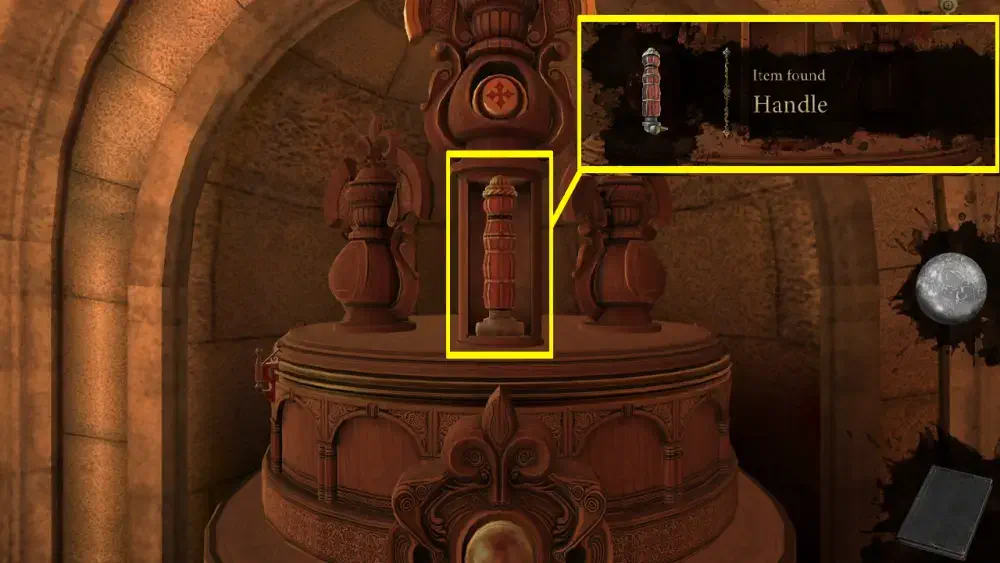
The ornament will rise, revealing a small compartment containing a Handle that you can pick up.
If you check the left side of the cabinet, you’ll see a small socket with two holes, which look similar to the protrusions at the bottom of the Handle. Thus, insert the Handle in this socket and move it to the right, all the way to the end of the rail.
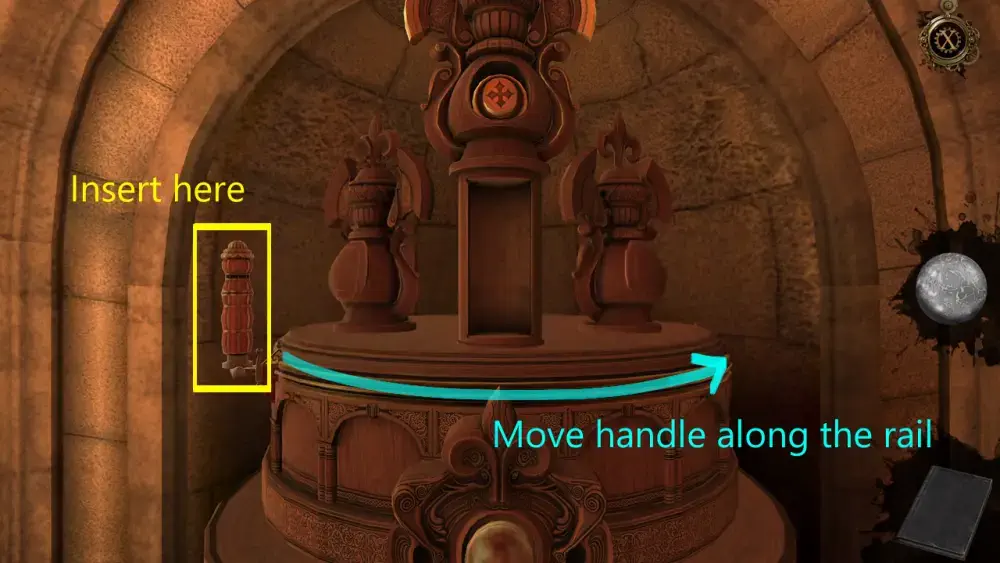
This will trigger a metal ball with a hand symbol to protrude from the bottom of the rail. Press it.
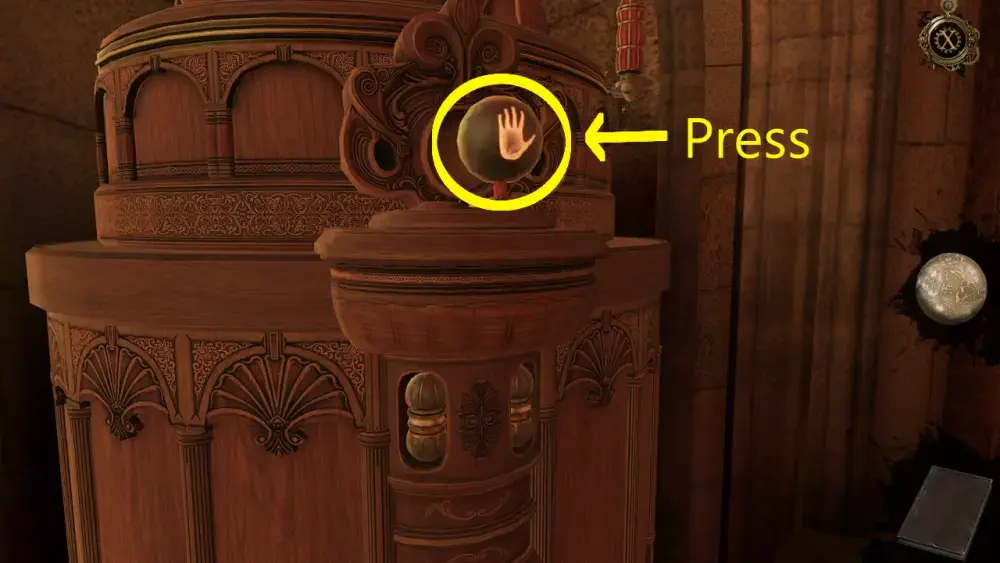
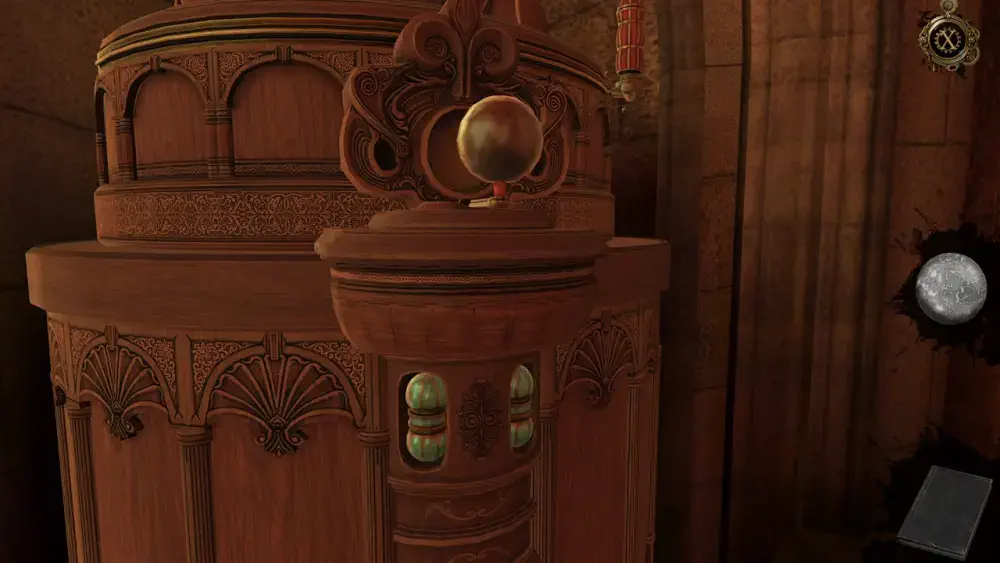
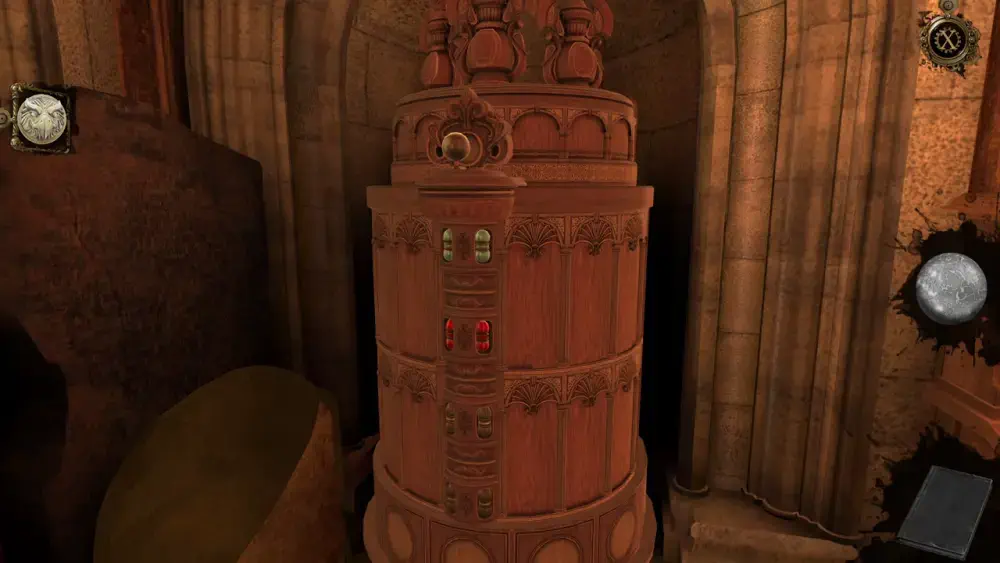
The metal ball will turn and so will the two ornamental tiles beneath it, changing color from dark gray to teal.
The cabinet on the left side of the display case will undergo the same change, with the metal ball acting as a button and the two small ornaments beneath it changing color from dark gray to teal. If you press the metal ball with a hand symbol in this second cabinet, a circular board with a lever and smaller round sockets on the sides will emerge from a secret compartment.
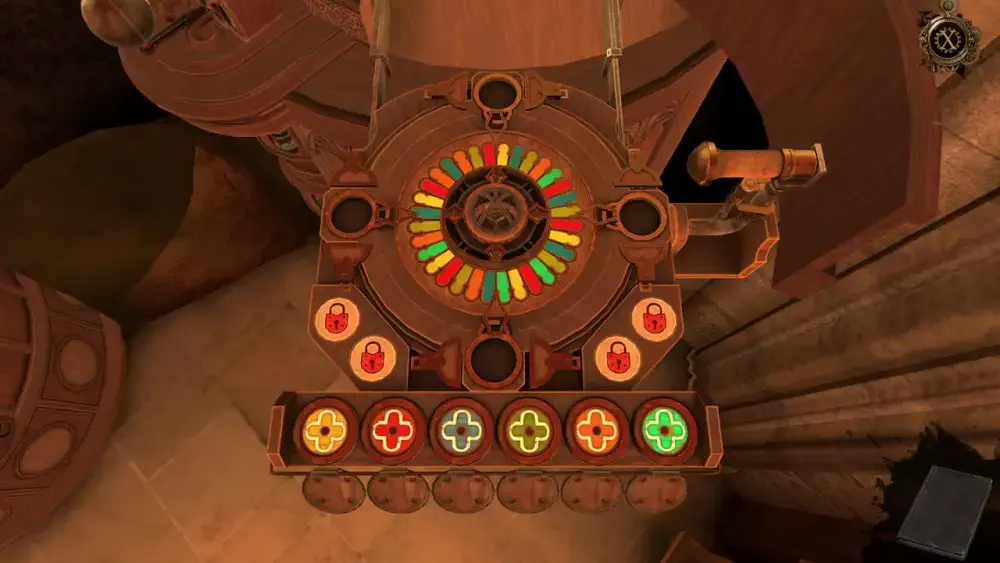
How this mechanism works is that you’re supposed to place the colored chips onto the empty sockets. Pulling the lever on the right will make the color wheel in the middle spin. When the wheel finishes spinning, each arrow at the end of the empty socket will point to a color from the wheel. If the color of the chip matches with the color that the arrow ends up pointing to, it will unlock one of the four locks on the board.
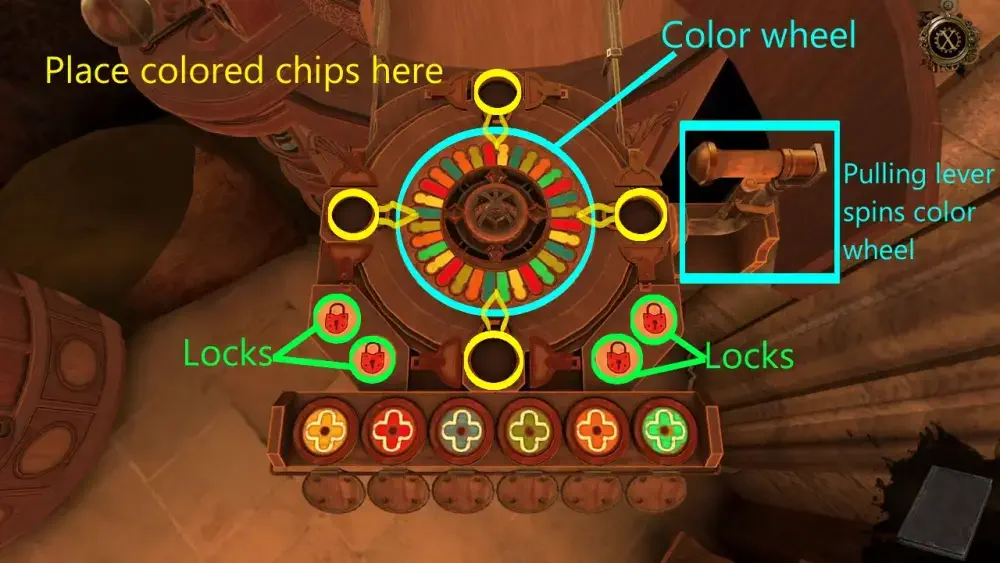
The number of locks you unlock will depend on the number of colored chips you’ve matched with the color on the wheel the arrows end up pointing to. For instance, if you’ve successfully matched three colored chips with their corresponding colors on the wheel, you get to unlock three locks. If you only match one, you get to unlock one lock. Among the many puzzles you’ve encountered, this one is purely a game of chance and there’s no way to know what color the arrows will end up pointing toward so you just have to repeat the process until all four locks are unlocked.
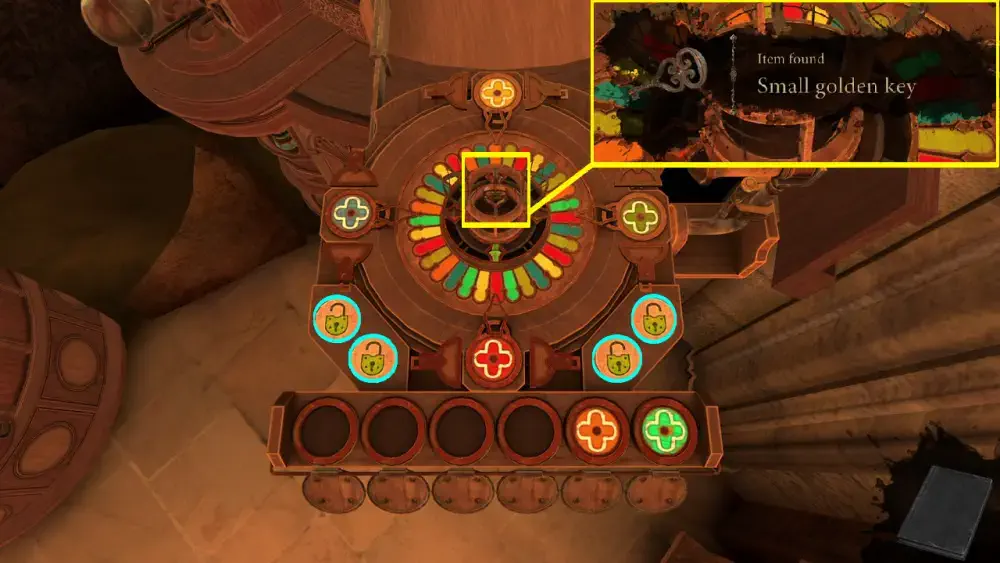
Once you’ve managed to do this, an item will emerge from the middle of the board. Pick up the Small Golden Key for your inventory.
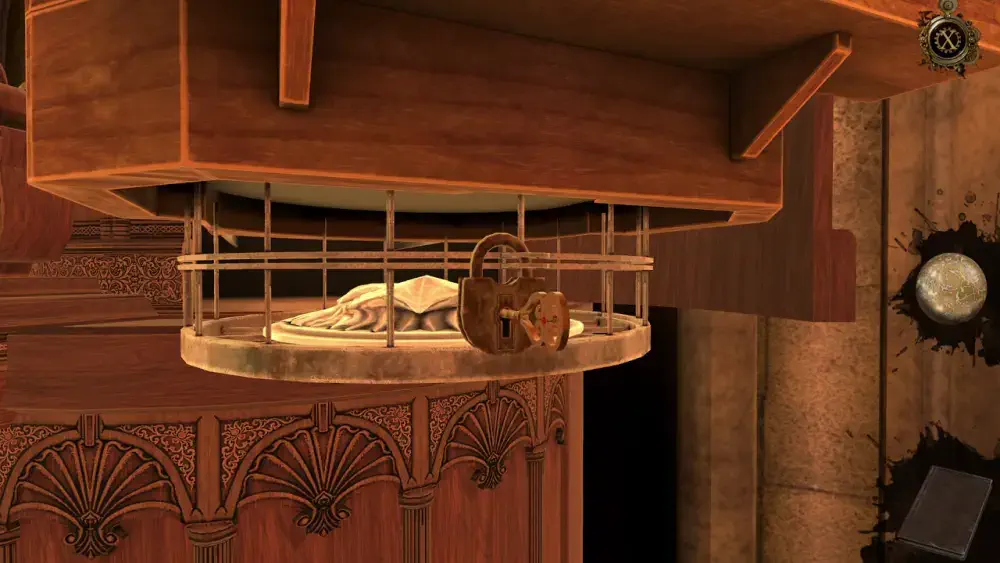
The circular board will partially retract and reveal a small cage underneath it. Use the Small Golden Key to open this cage.
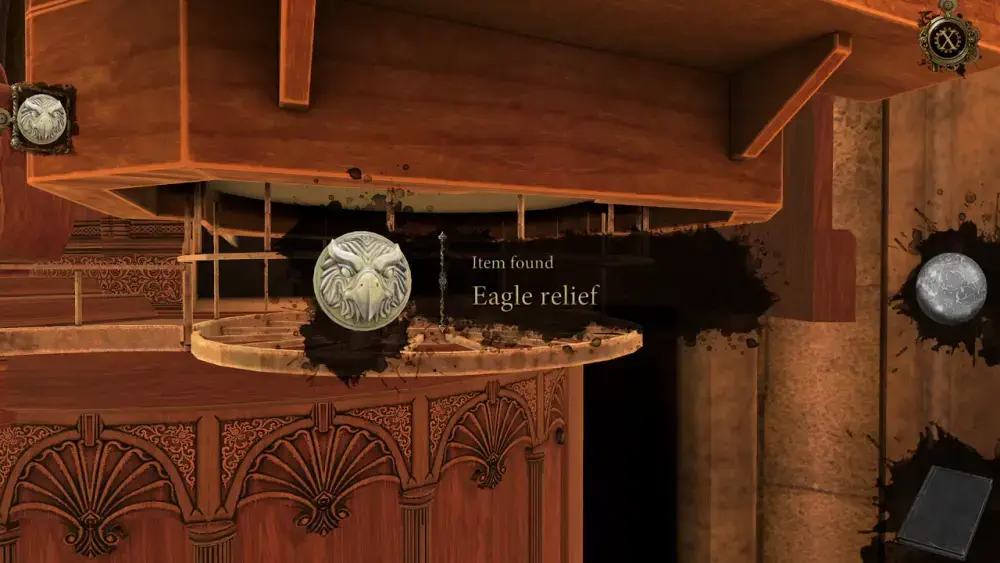
Flip the cage door open and you’ll be able to obtain the item inside: an Eagle Relief.
Upon taking this item, the circular board will retract completely and disappear inside the wooden cabinet once again. On the same cabinet, the metal ball will turn and reveal the hand symbol. This means you can press the metal ball again.
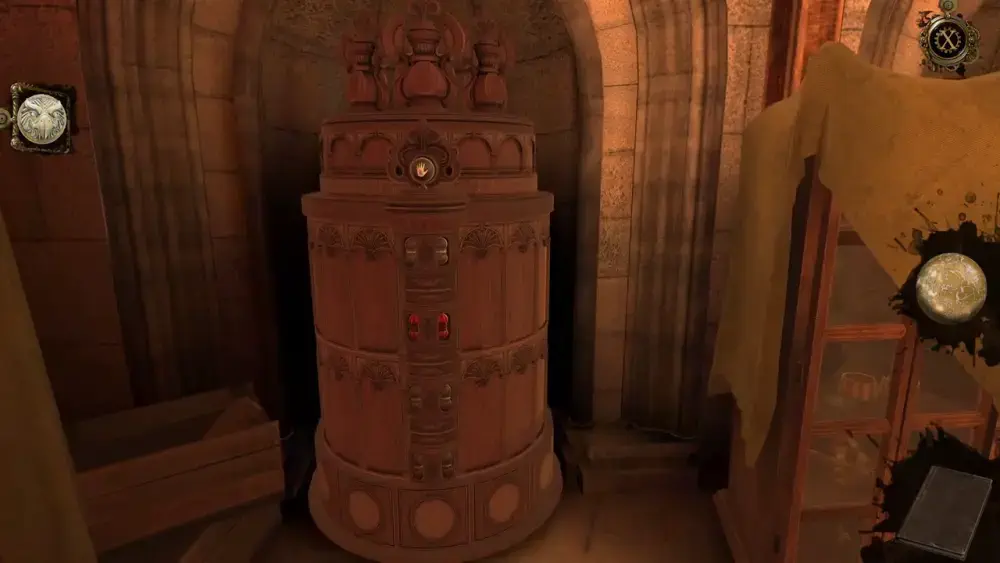
When you press this metal ball with the hand symbol, it will turn once more to its blank side, but the second pair of ornaments underneath the teal ones will change color from dark gray to red.
At this point, you may have realized that once a wooden cabinet’s metal ball has a hand symbol, that means it’s ready to be activated. Moving away from this cabinet, we move on to the third one, which is the cabinet directly opposite the large door. If you’re facing the room from the entrance, this cabinet is the one to your left.
Press the metal ball with the hand symbol. On the lower right side of the cabinet, another device will emerge from one of its secret compartments.
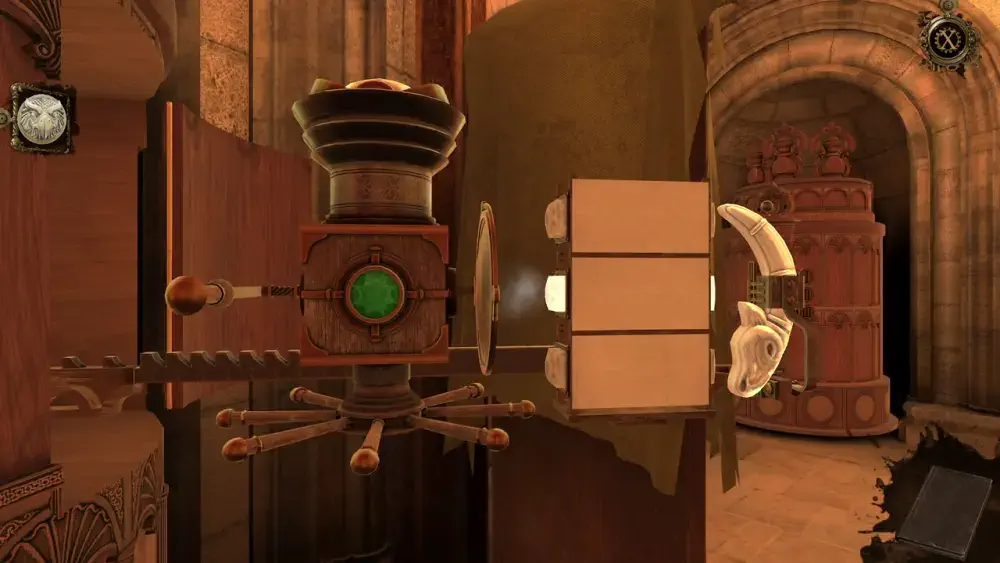
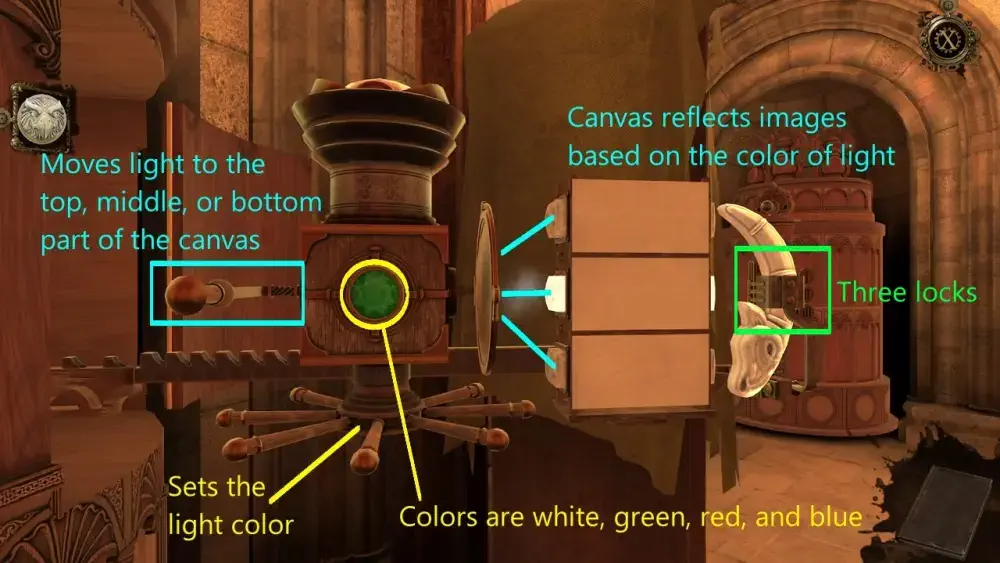
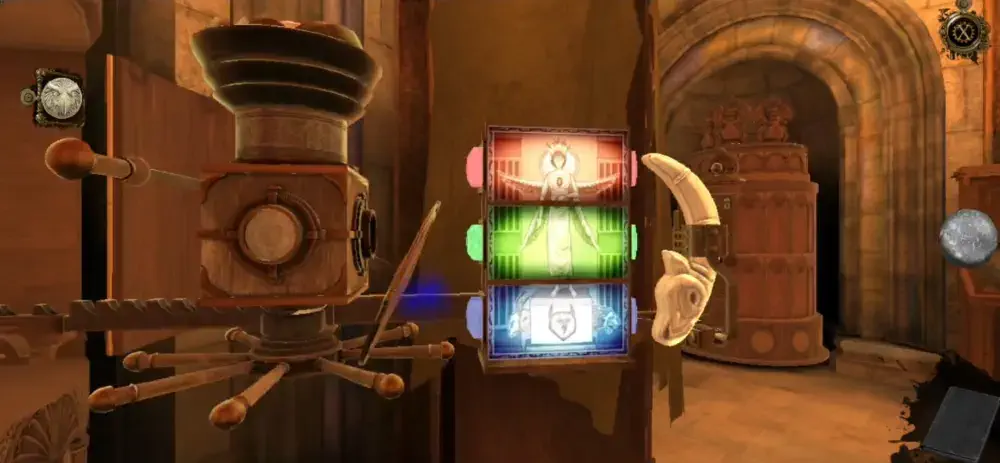
Like the circular board we’ve encountered previously, this light-emitting device has a few important parts: there’s the wheel at the bottom, which sets the color of light to be reflected on the canvas (the light colors available are white, green, blue, and red); the lever at the side, which positions the light box toward the top, middle, or bottom portion of the canvas; the canvas itself, which projects different images based on the color of light being pointed at it (in the screenshot below, the light is currently set to white); and the three small locks holding the sculpted profile of a goat.
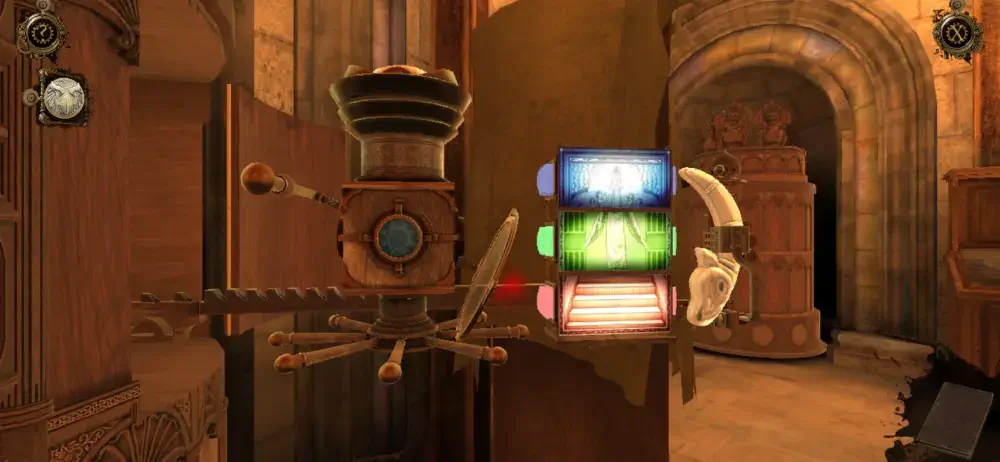
Here’s an example of the lights set to (from top to bottom) blue, green, and red.
One caveat of this puzzle is that the images can only be reflected for a limited duration. Basically, once you move the light away from one part of the canvas, that image will disappear after a while. That said, you need to act quickly, moving the wheel and lever to reflect the right images while they’re all still visible.
The main objective of this puzzle is for the canvas to show a single image spanning all three parts. You may achieve this by shining the lights in a particular order depending on which part of the canvas they’re directed toward. Additionally, the puzzle has to be done in three sets as each successful set will unlock one lock holding the goat sculpture in place.
Below is the list of the correct order the light colors should appear on the first, second, and third set from top to bottom on the canvas:
First set: Blue, red, green.
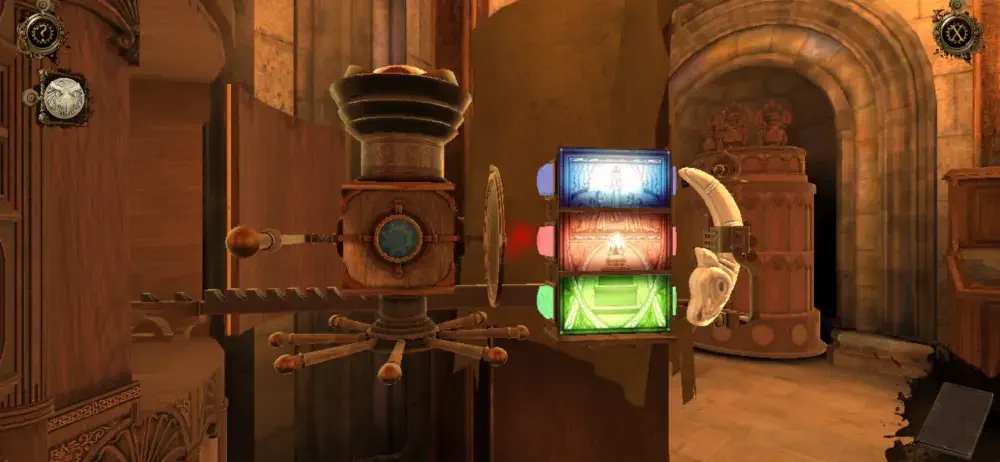
Second set: Green, blue, red.
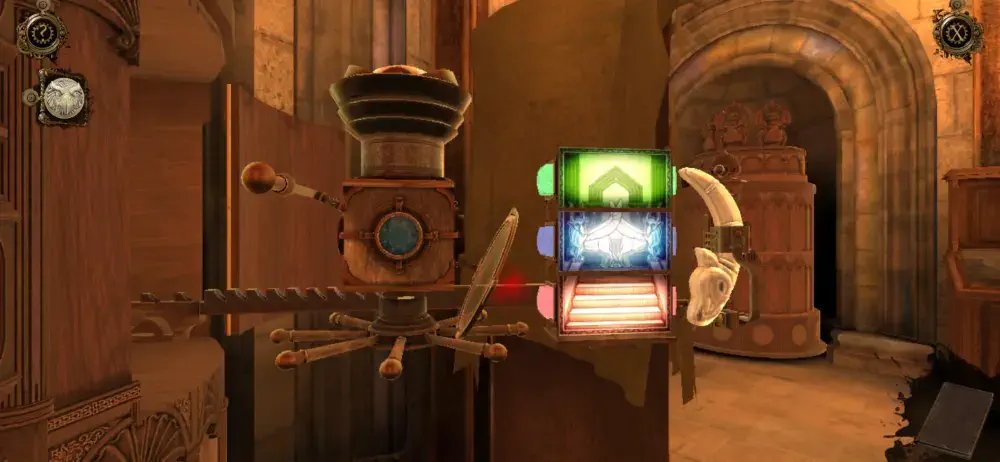
Third set: Red, green, blue.
This should unfasten the three locks holding the sculpture in place. You may now take the Capricorn Relief and place it in your inventory.

Once you’ve taken the item, the device will retract back into the cabinet. On the same cabinet, the metal ball will turn, displaying the hand symbol. Press it. The third pair of ornaments will change their color from a dark gray to green.
Move on to the next cabinet whose metal ball is displaying a hand symbol and press it. From its left side, another device will emerge.
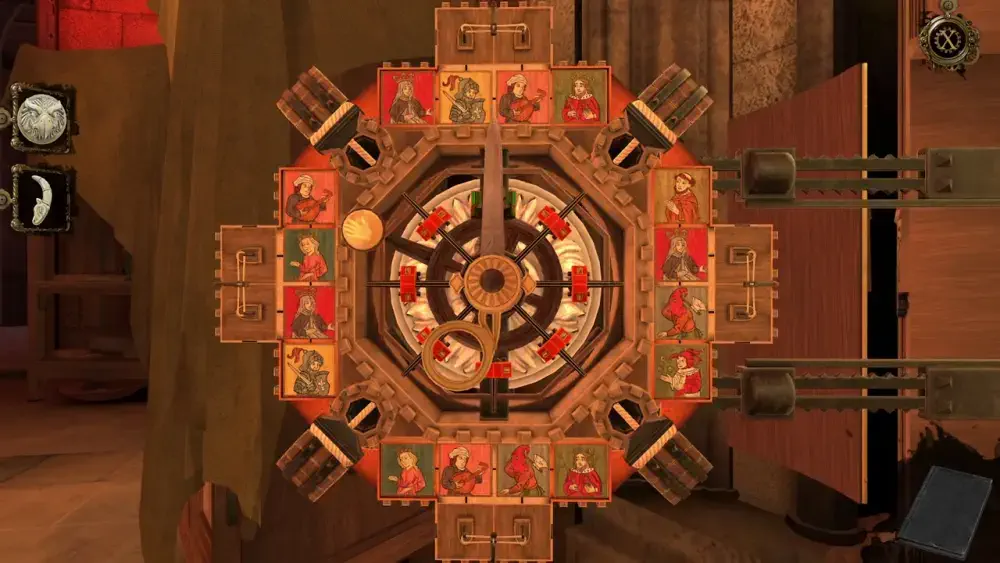
From the get-go, this mechanism can look a bit overwhelming as it can be broken down into several parts. Before diving into the solution for this puzzle, allow us to illustrate the different parts of this device:
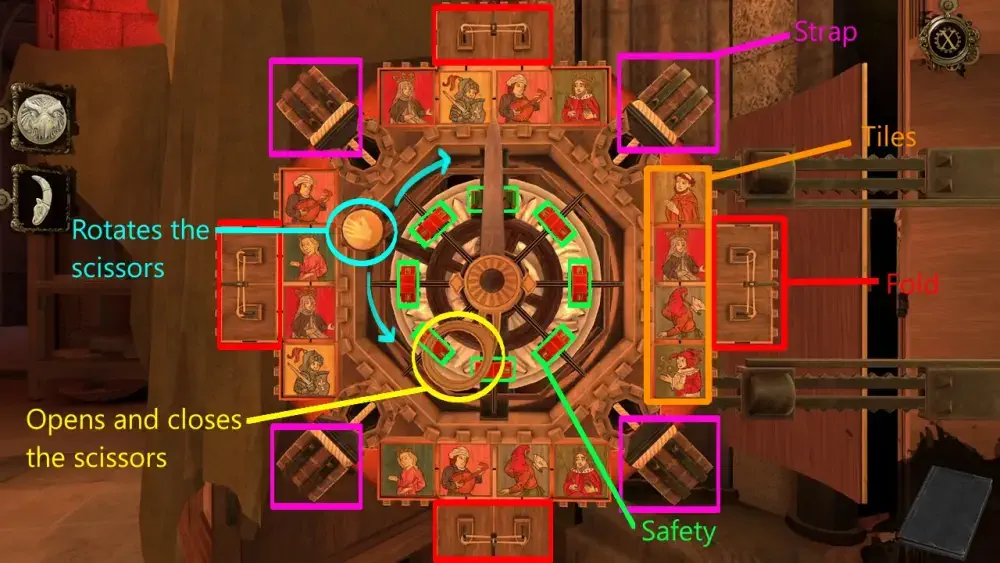
- Finger ring: Opens and closes the scissors.
- Circular handle: Rotates the scissors around the board.
- Safety: Green safety locks means they have been unblocked while red ones mean they are still locked. Unless a safety lock is green, the scissor won’t be able to cut in the direction the safety is blocking.
- Strap: There are four straps on each corner of the mechanism. These can be cut if the safety blocking their direction has been unlocked.
- Fold: These parts can be unfolded once the safety opposite them has been unblocked and the string keeping them in place is cut. When unfolded, this will give the tiles additional room to move along a grid.
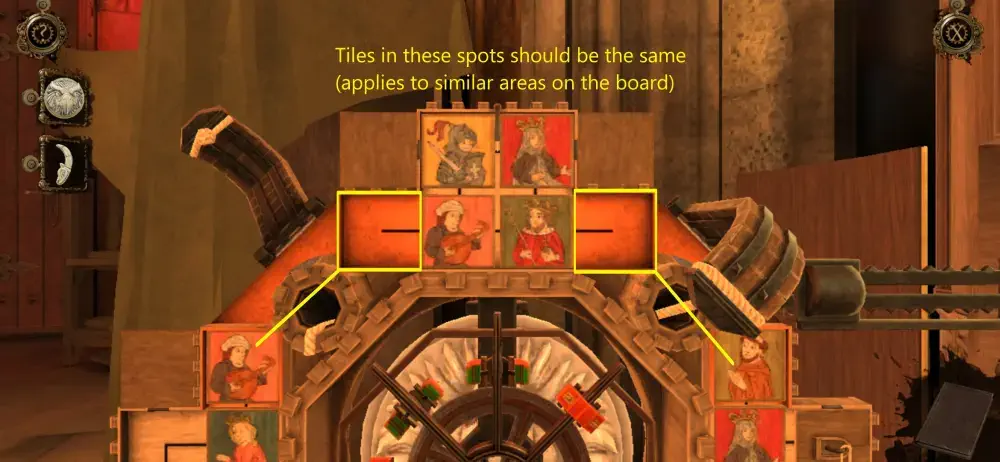
- Tiles: These can be moved along the grid under the folds once the latter have been opened.
When a fold has been opened and you can move the tiles around, you’ll notice that there are areas on the grid that are highlighted in orange. The objective of this puzzle is to make sure all adjacent tiles in those highlighted areas are the same.
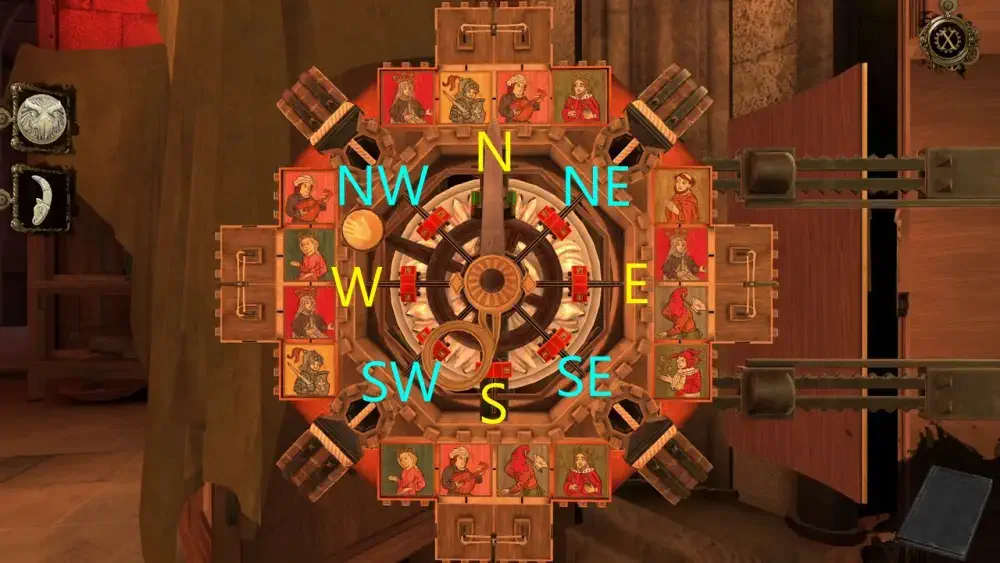
To make navigation a little easier, we’ll refer to the directions on the board using the terms applied to a compass.
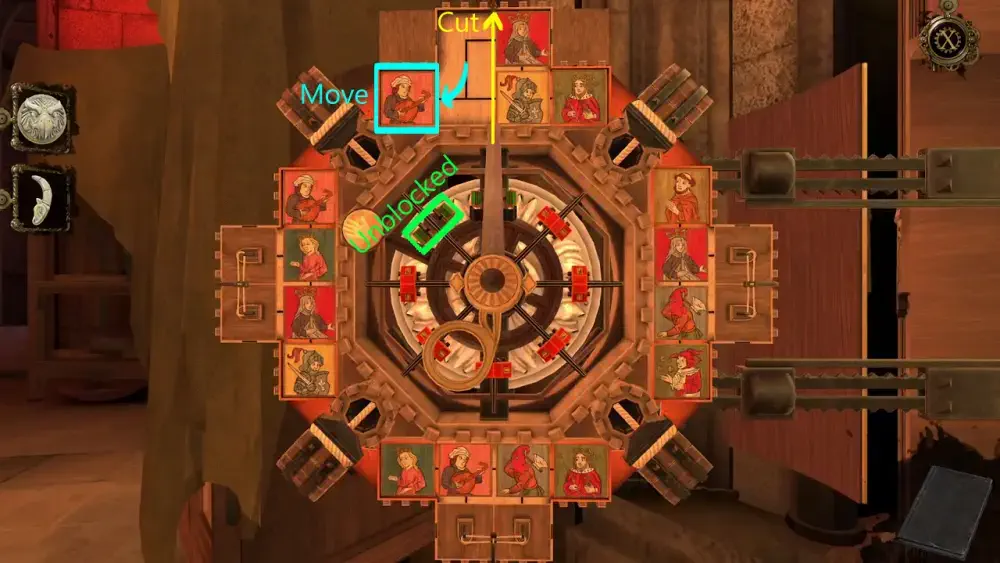
Now to solve the puzzle: first, cut the string holding the fold north of the board. Then, move the tile with the minstrel on the leftmost part of the grid. This should unblock the safety lock on the northwestern part of the board.
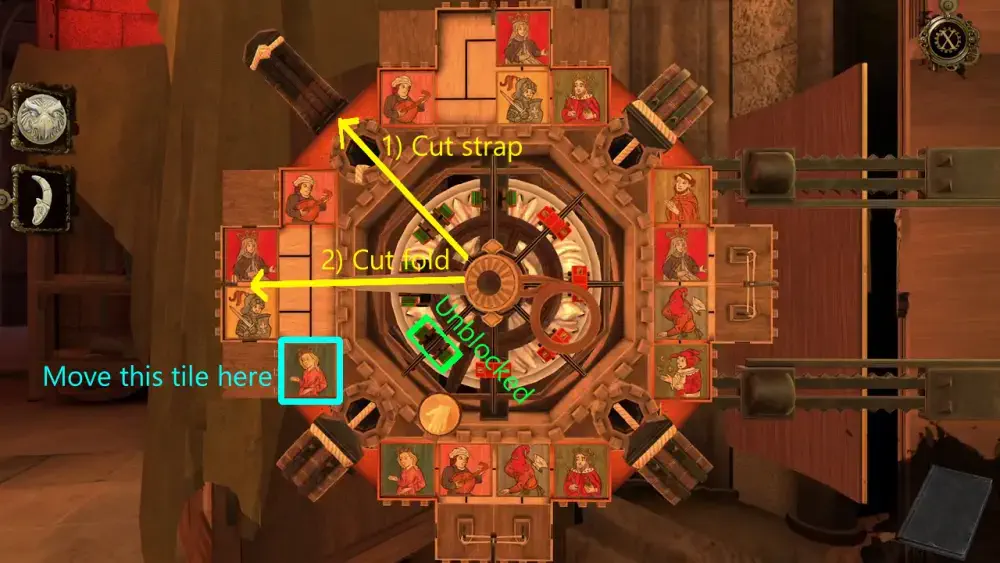
Next, rotate the scissor to face the green northwestern safety lock. Cut the strap in the same direction. This will unblock the safety lock in the west. Cut the fold and move the tile representing the lady in a pink dress toward the very bottom of the grid. This should unblock the safety lock southwest of the board.
Rotate the scissor to face the green southwestern safety lock and cut the strap in the same direction. This will unblock the safety lock east of the board. Rotate the scissor to face the eastern safety lock and cut the fold in the same direction. Since there are no “king” tiles on this grid and the grid at the top, look for which tiles are similar in both sets. This should be the “queen” tile. Thus, move the queen tile at the topmost portion of the eastern grid. Then, move the same queen tile at the northern grid to the rightmost portion. This should unblock the safety lock in the northeast side of the board.

Lastly, cut the strap on the northeast. This should open up the safety lock south of the board and cut the fold in the same direction. Similar to the previous grid, you need to move two tiles on the southern grid and the eastern grid. This tile should be the one representing an executioner. For the southern grid, move the executioner tile to the rightmost side of the grid. For the eastern grid, move the executioner tile to the bottom. This should unblock the safety lock on the southeast side of the board. Cut the final strap in that direction.
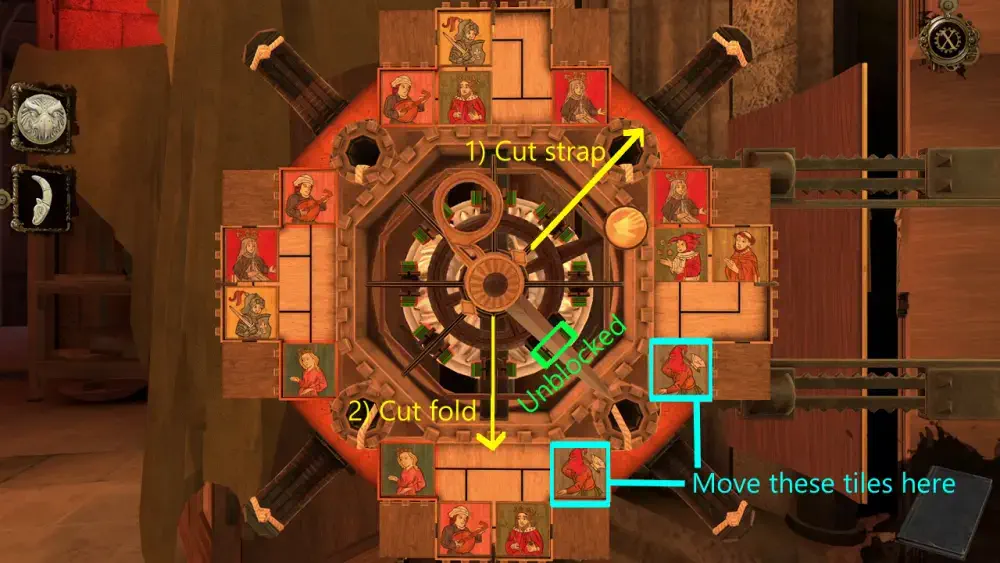
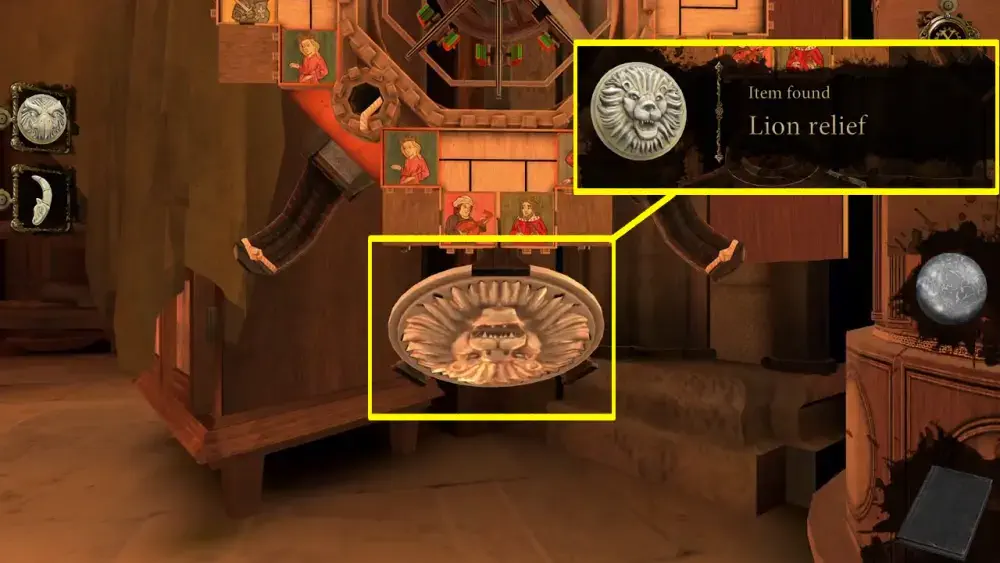
The puzzle has now been solved! You’ll see that an item locked behind the center of the board will hang at the bottom of the puzzle’s mechanism. Take the Lion Relief and place it in your inventory.
You now have three out of the four items required to open the large door in the room. Once you’ve taken the Lion Relief, the mechanism will retract back into the cabinet. The same cabinet’s metal ball will turn and once more display the hand symbol, indicating that it’s ready to be activated. Push the metal ball. This will cause the last pair of ornaments to change color from dark gray to purple.
Move to the very first cabinet you’ve worked with and you’ll find that its metal ball has the hand symbol on it. Press the metal ball and a new puzzle will emerge from the bottom of the cabinet.
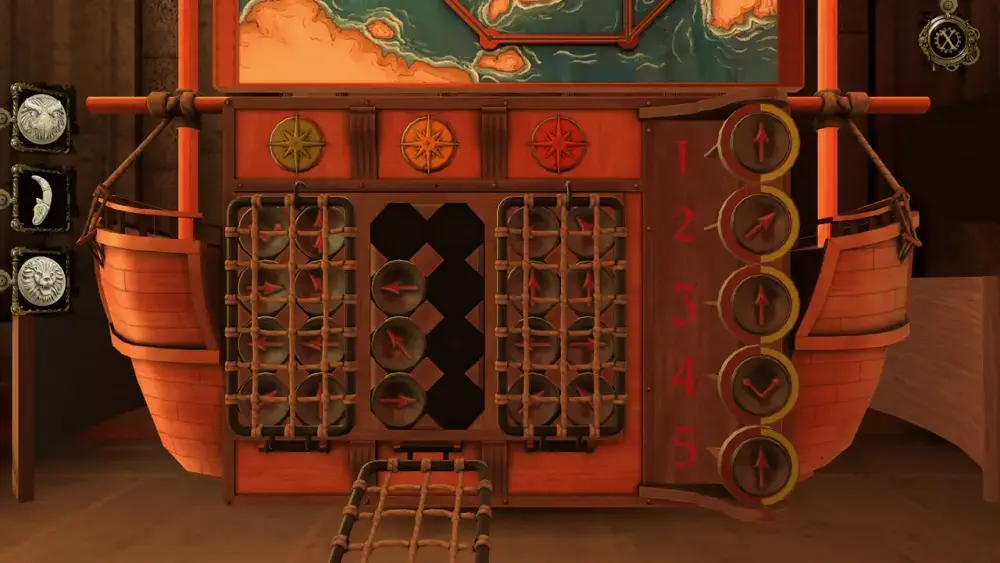
It’s larger than the previous puzzles that you’ve encountered, but it’s surprisingly more simple than the rest. If you look closely at this puzzle, you’ll see that you have a map with different pathways and three points marked in red, yellow, and green. These points are represented by islands. The map also seems to illustrate various obstacles, such as whirlpools and sea monsters.
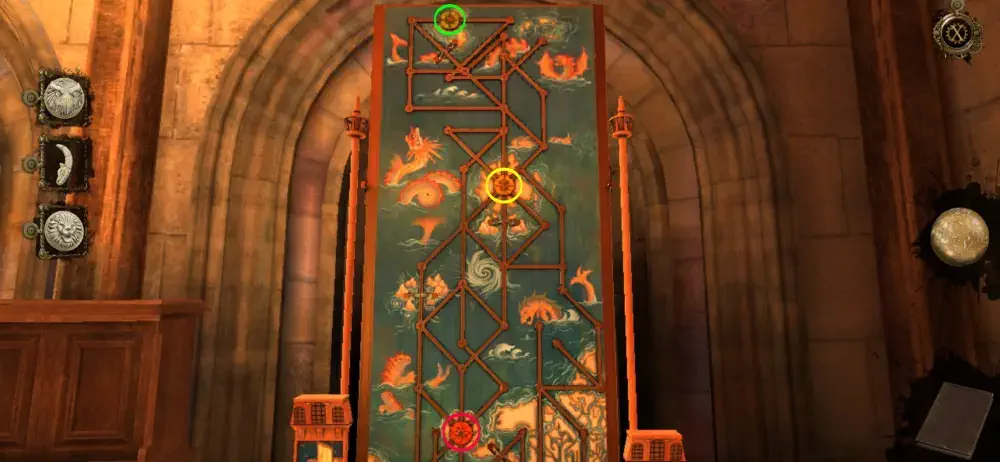
At the bottom of the puzzle, which is shaped like a ship, are discs with directional arrows on them. The arrows under the holder marked by a red circle can be accessed, while those in the yellow and green holders are still locked behind a grid-like cover. To the right are slots marked by the numbers 1 to 5.
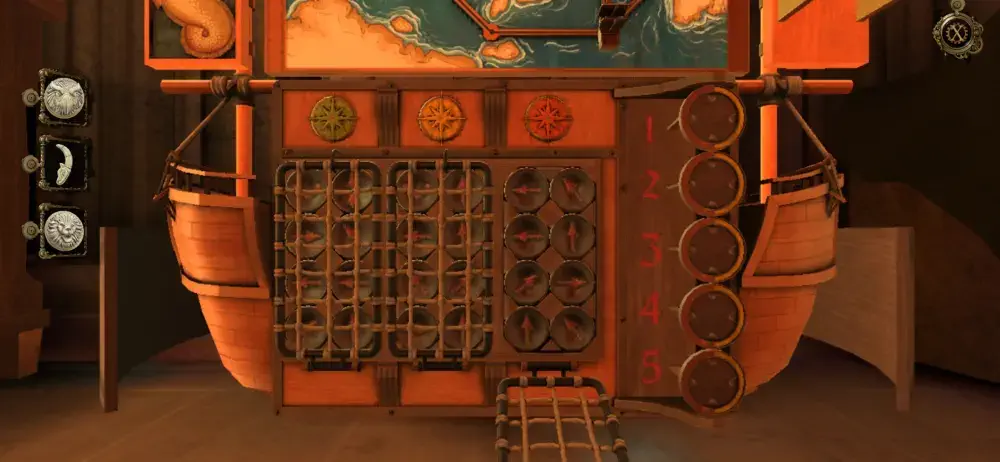
Other pertinent items in this puzzle include the model ship on the map and the lever on the right.
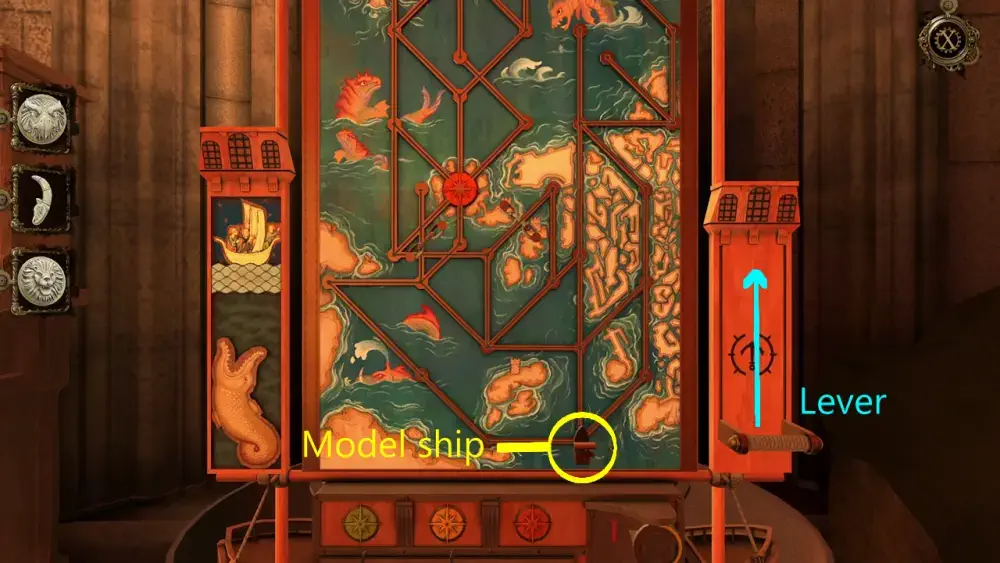
With this information at hand, we can deduce that the goal of the puzzle is to get the model ship on the three highlighted points (red, yellow, and green) on the map. You can do this by placing the discs with arrows on the 1-to-5 slots depending on the path you want the model ship to take while traversing the map. Each map point also contains a different set of arrows, meaning you’re limited to the discs provided by the puzzle depending on which map point you’re heading toward. After successfully reaching a map point, the arrow discs you’ve previously used won’t be accessible for the next map point.
Pulling the lever upwards will set the model ship in motion based on the order in which you’ve set the arrow discs, with 1 representing the first move and 5 the last.
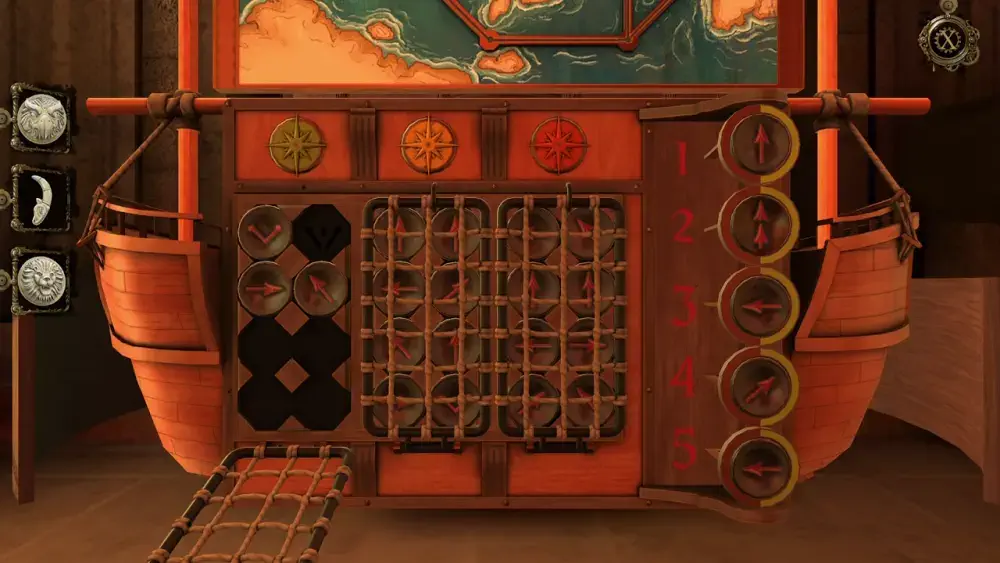
That said, here’s the correct order in which the arrows must be set for each highlighted point on the map.
Red point:
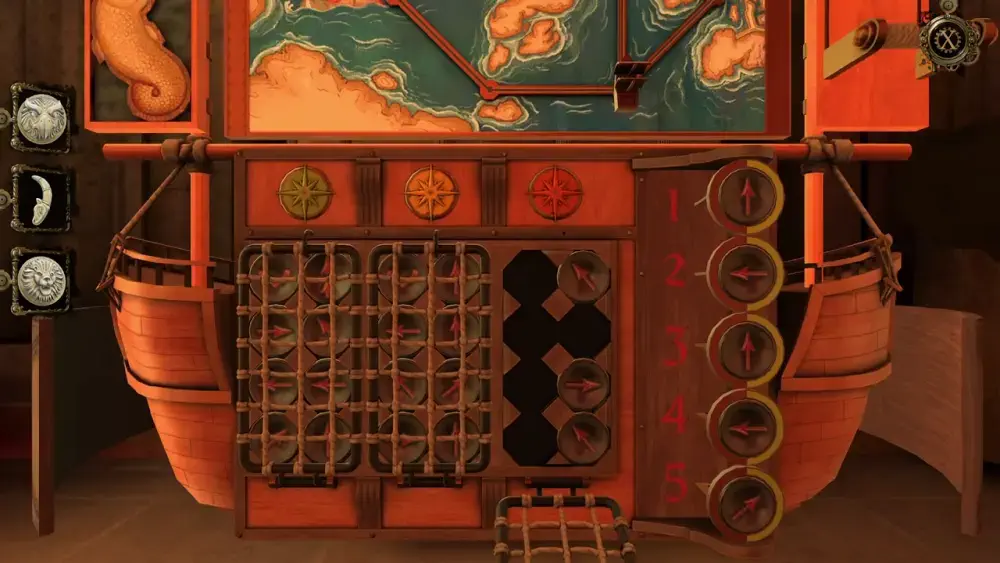
Yellow point:
Green point:
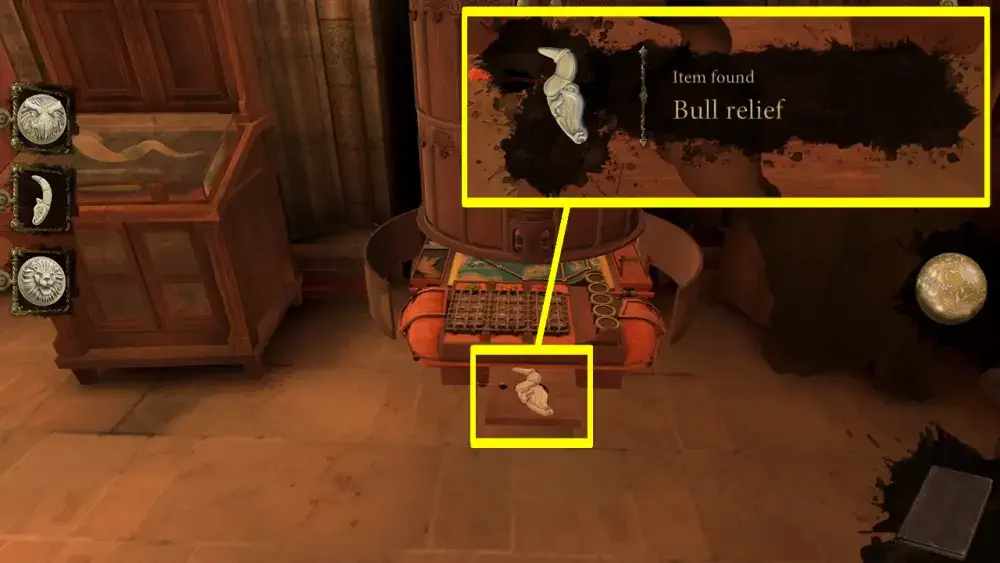
When you’ve reached the last point, the puzzle will fold itself up into the cabinet again, but this time, it will reveal a small compartment containing a Bull Relief.
You now have all the four items needed to open the door. Set the four relief sculptures onto the door with the lion on the upper left, the eagle on the upper right, the bull on the lower left, and the Capricorn on the lower right.
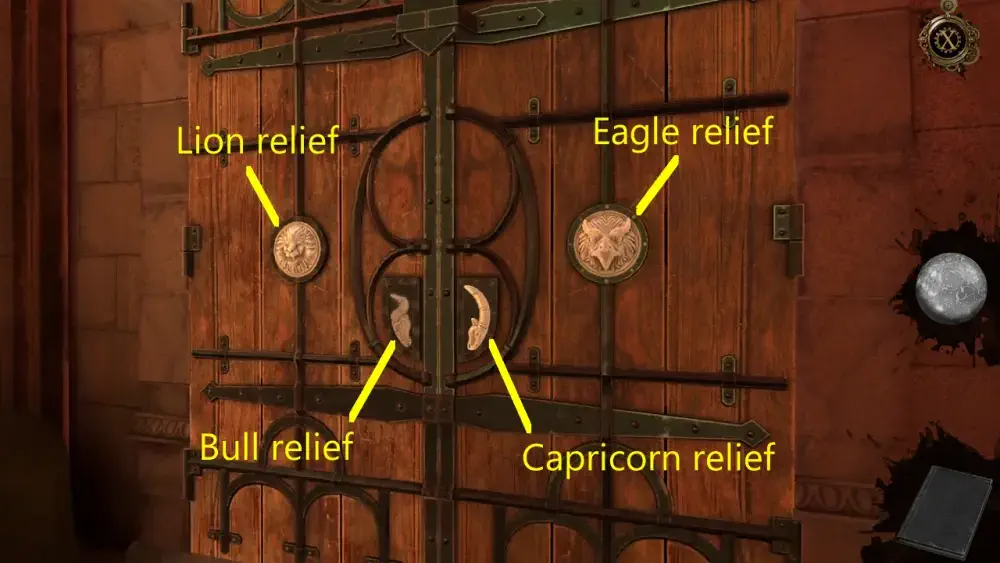
The lock at the very top of the door will come loose, allowing you to peek and step into the next room.
When you enter, a brief cutscene will play as a quick interlude. A soldier reports to his commander that they’ve noticed some movement on the roof and they hurry to find the intruder. They’re likely referring to Leonardo. Aside from applying urgency by way of the narrative (how fast or slow you solve puzzles will not impact how events will unfold), this cutscene serves as a subtle suggestion showing you that the courtyard with the time machine is now unguarded as the soldiers have all run off to search for the intruder.
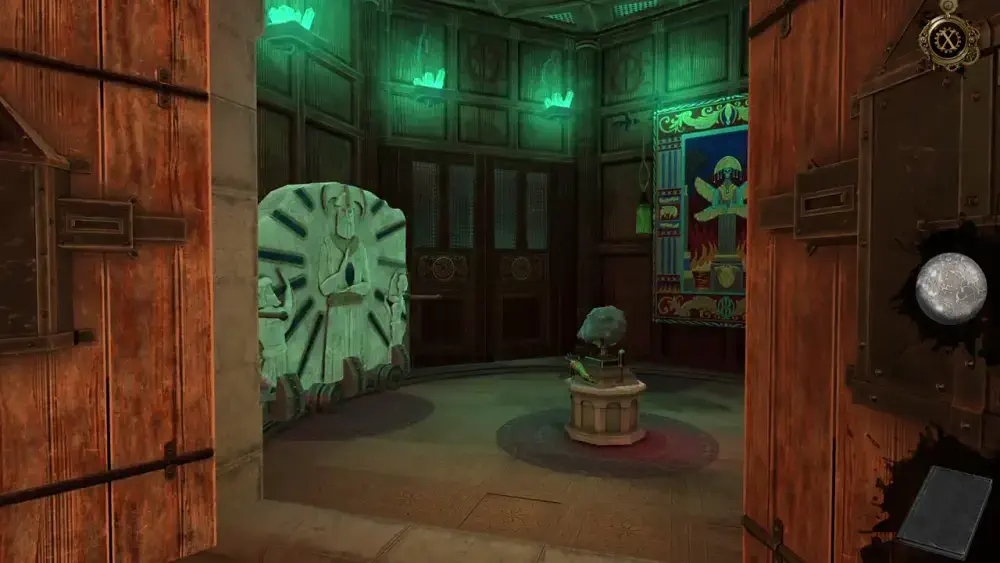
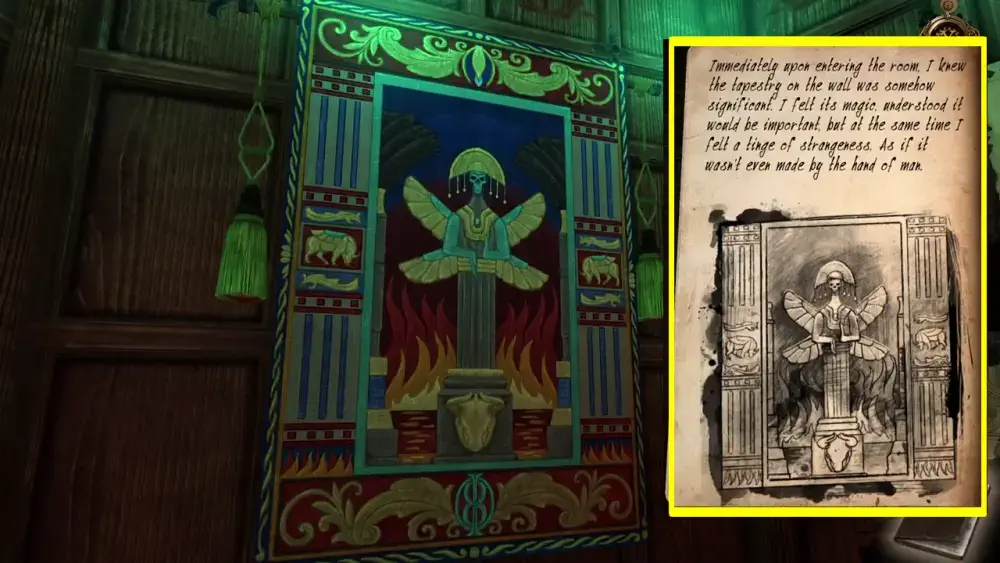
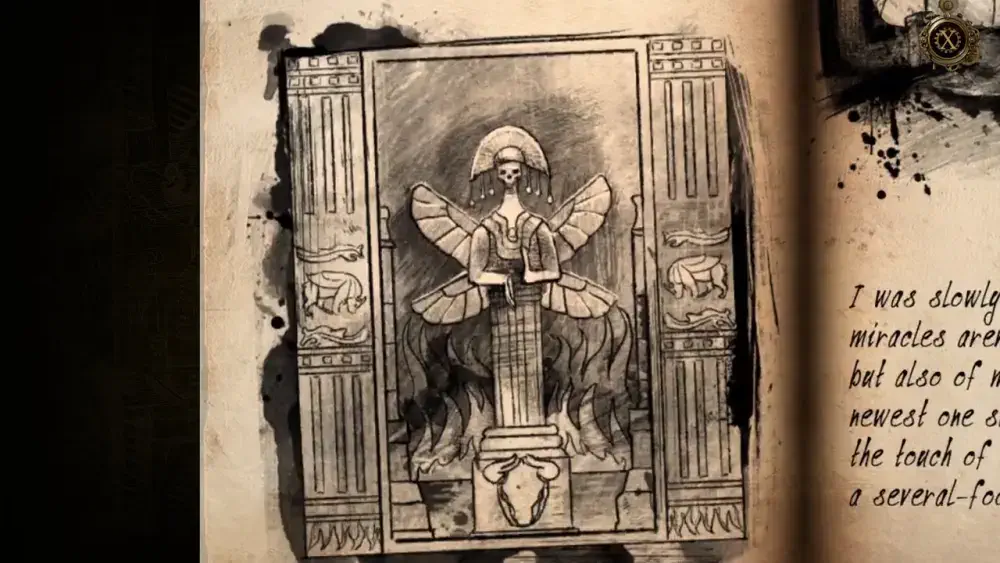
Afterward, the scene cuts back to the room you’ve just discovered. Here, you’ll see a few interesting things. Perhaps the most striking is the strange portrait on the wall depicting some mysterious creature or statue with a skull for a face and wings behind it. Surrounding the pedestal are large flames. A bull facing front also decorates the base. Flanking the statue are two large pillars with a bull on each one. A sketched copy of this portrait will also appear in your journal.
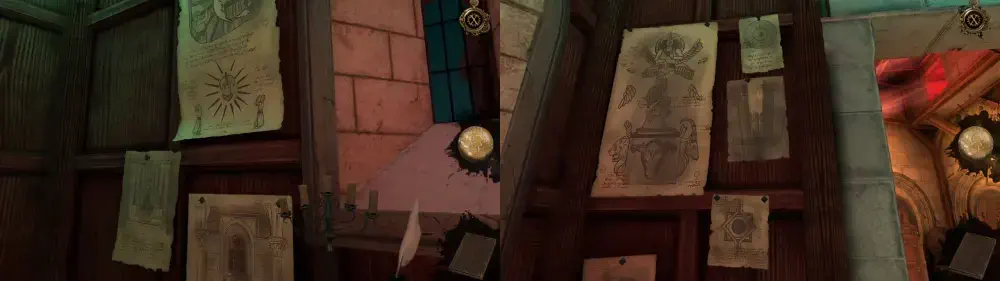
If you pan to the right, you’ll see sketches on the walls and papers filled with equally strange drawings that somehow look related to the statue’s portrait.
To your left, near the door, is a stone slab depicting the image of what appears to be a deific being aglow as he holds something in his hand. The people at the side of the statue look as though they are either worshiping this being or are blinded by the light emanating from his form—or, perhaps, both. The stone slab, if you will notice, is mounted on a wheeled device set across a track that goes around the room.
Dead center of the room is some kind of device that may remind you of the one that recorded the voice in the Pope’s underground chamber. However, this one appears to have been damaged.

Upon closer observation, you will find that a letter has been left next to this device. This is what it says:
After reading the letter, observe the device further and you will see a small lever at the side. Push it down.
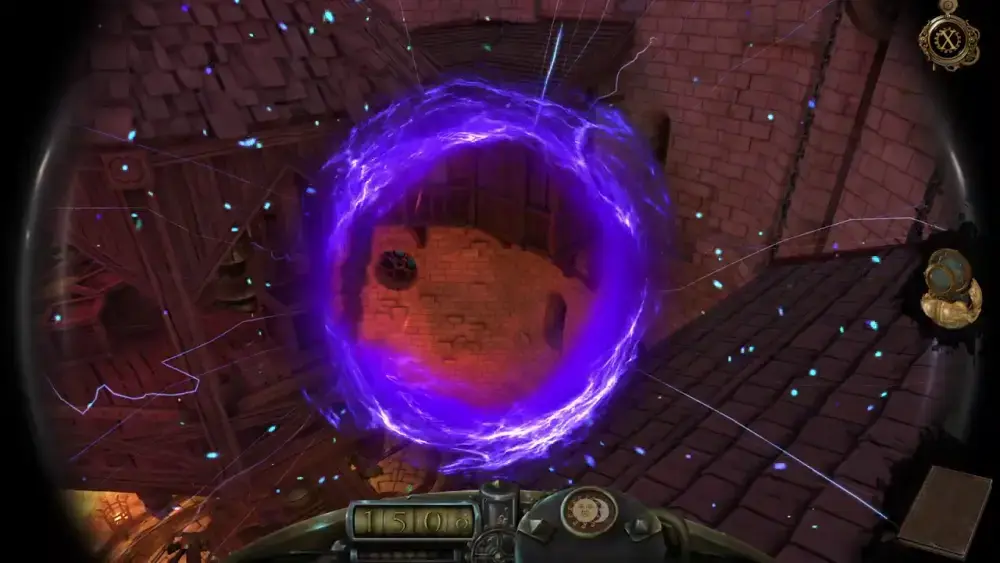
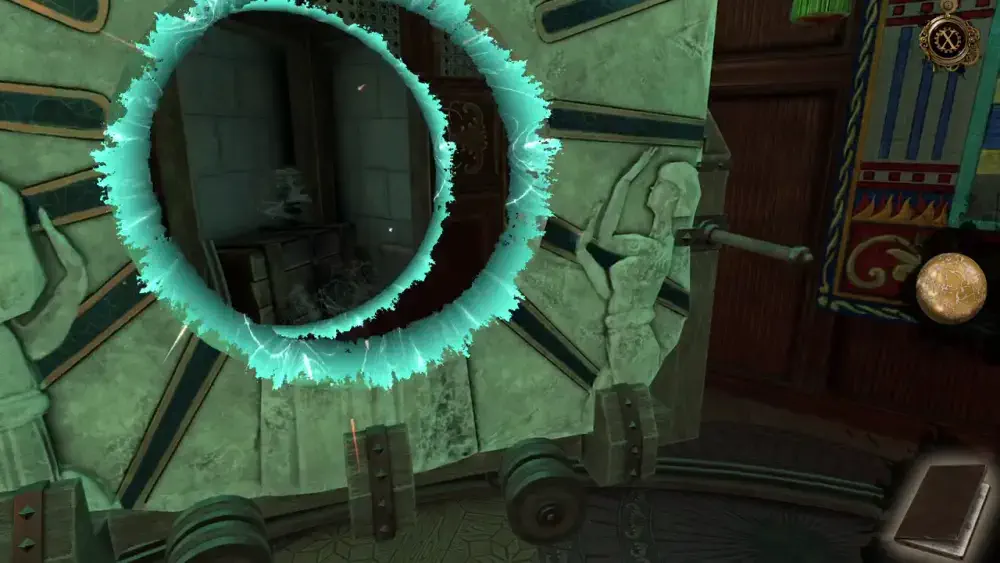
This will cause the stone on top of the device to transform into a glowing, pentagon-shaped relic whose beam of light can open a portal when directed toward the stone slab.
If you approach the portal, you’ll see that it leads to a different part of the fortress.
With this new discovery, we can safely say that moving the stone slab along the rail may offer access to different areas of Castel del Monte. That said, it makes sense to move the stone slab right in front of the huge portrait of the strange statue.
However, as you push the stone slab along the rails, you will soon discover that the track is actually incomplete as it’s missing one rail, hindering you from properly aligning the stone slab with the portrait.
Fortunately, the spot in which the stone slab stops is a place where you can find what you’re looking for. The place below is what the portal should be reflecting:
Step inside and you’ll find yourself in a small storage room. Luckily enough, a Metal Rail is lying around.
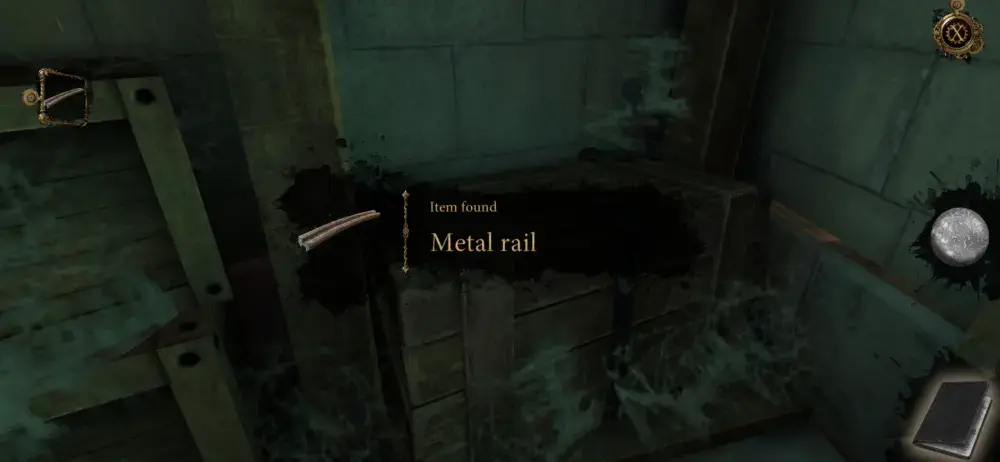
Step outside of the portal and set the Metal Rail onto the gap on the track.
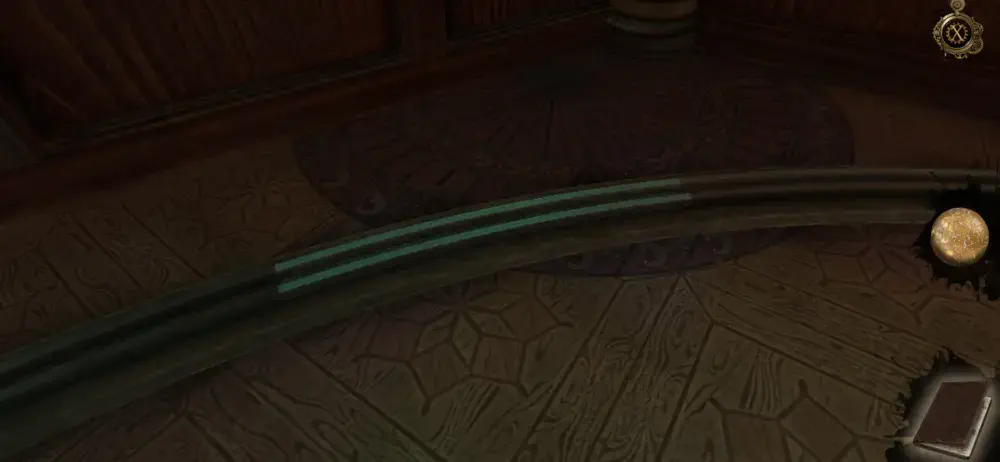
Once the track is repaired, move the stone slab right in front of the portrait. This should take you to a room that looks like this once you step inside:
Keep in mind that, once you enter this room, the game won’t allow you to go back out through the portal.
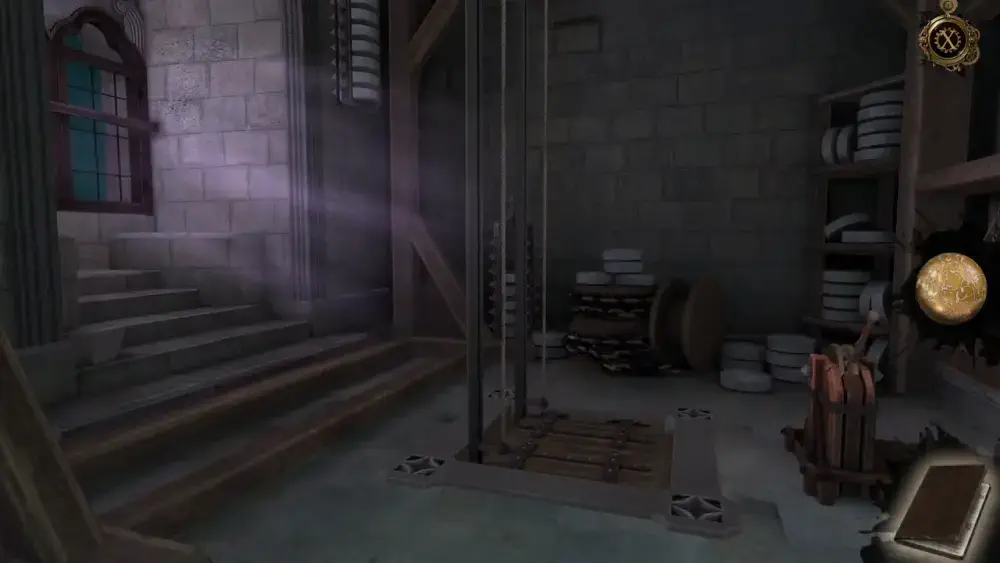
As always, try to observe and go around the room. According to the blueprint of the fortress Leonardo gave you, this room should have the controls to the locked gate leading to the courtyard. At the back of this room, you’ll find a door but it’s locked. It appears that the only way you can get out is to work the mechanism in front of you, which looks like a trapdoor with a lever in front. Approach the lever and pull it to the right.
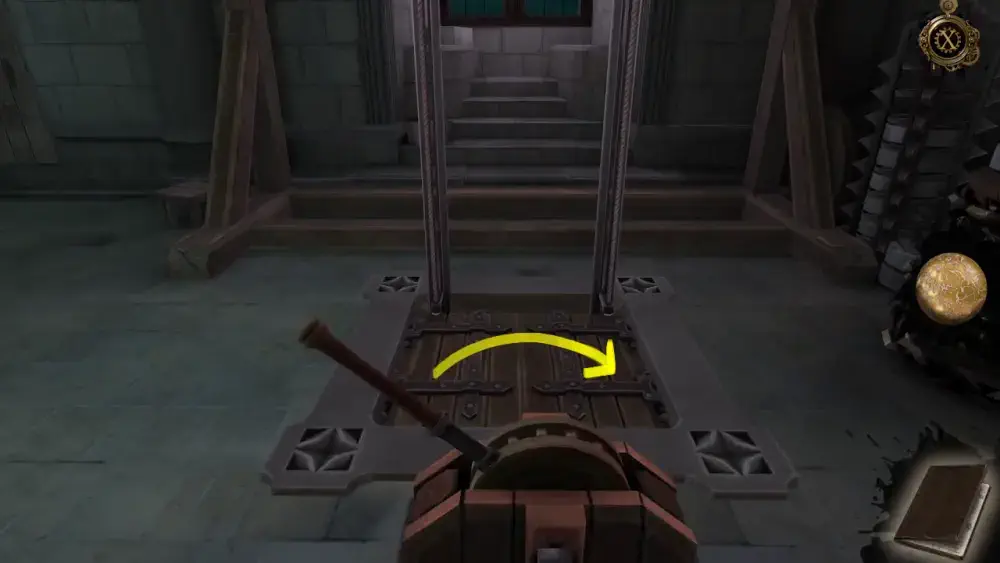
This action will cause two hanging weights to descend on either side of the trapdoor. A brief cutscene will also be triggered, wherein you’re shown that the gate at the courtyard has now been lifted.
Additionally, the trapdoor will open and a ladder will be set down the opening.
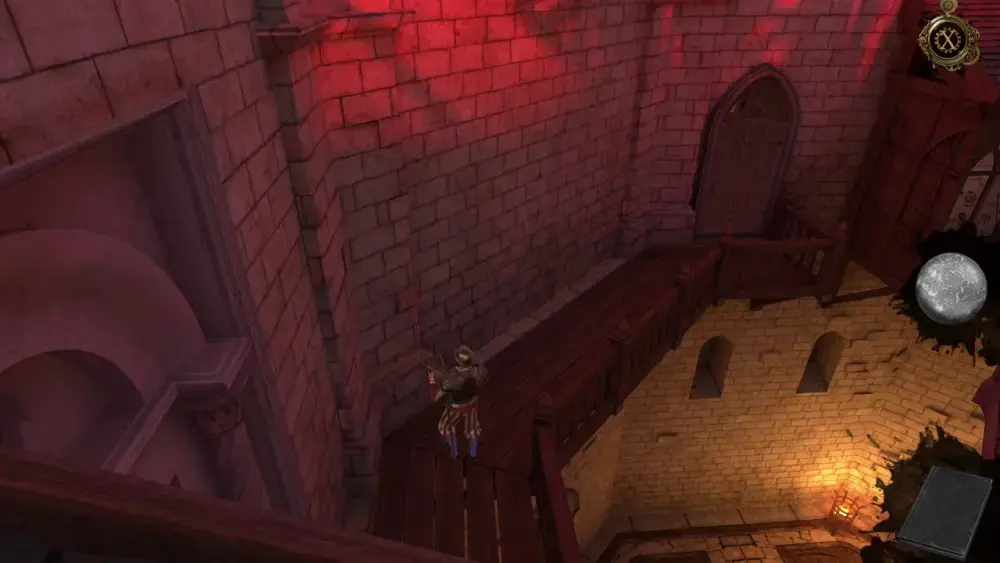
Climb down the ladder and you’ll find yourself just right outside the courtyard with the time machine in sight.
Upon stepping into the courtyard, Leonardo will greet you from the top of the time machine, stating that you have either the luck of the devil or Luca had prayed so hard that he didn’t even have to do anything for the guards to leave the courtyard. But while you’re one step away from fulfilling your plans, there’s still work to be done and Leonardo tells you what you ought to do…
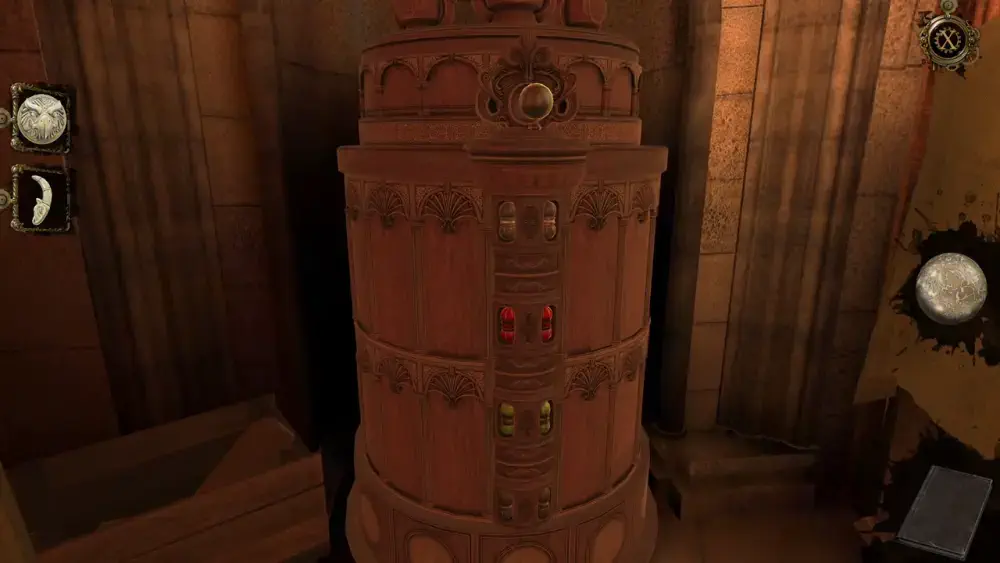
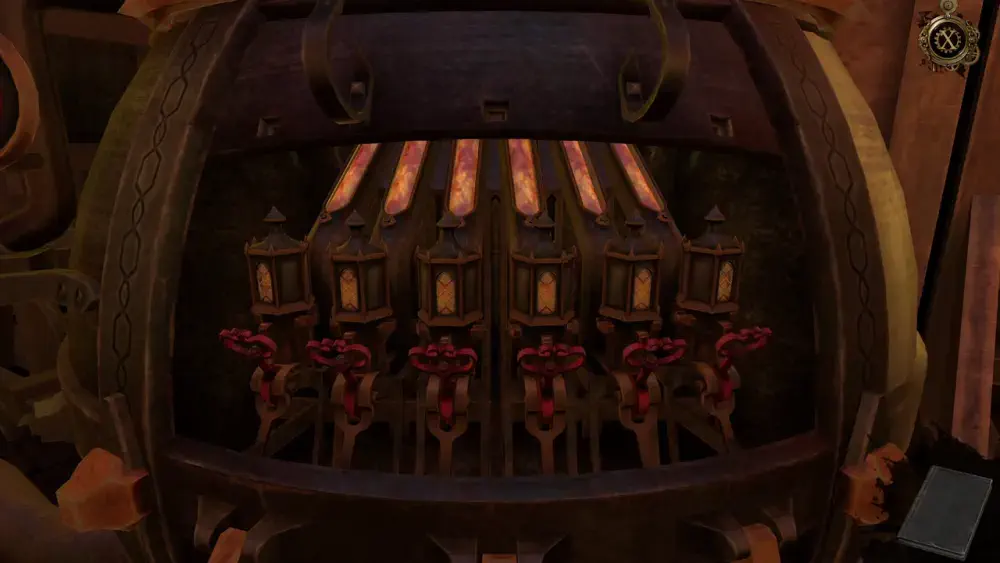
So, once the brief cutscene is over, approach the boiler to your right and lift the cover in front. Behind it, you’ll see six red keys that will fire the boiler up. However, if you try to randomly press the keys, you’ll instantly realize that firing up the boiler needs to be done in a particular order as pressing the wrong keys will reset the flames.

Fortunately, if you look to your right, you’ll see some notes left by the Order on a board. Among them is the correct order in which the keys of the boiler must be pressed.
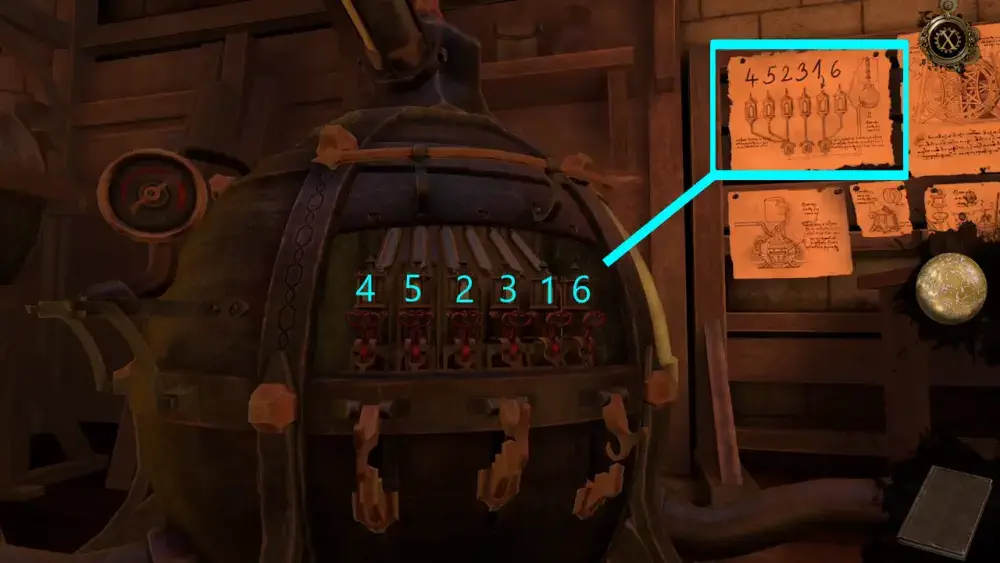
You’ll know you did it right when all the boiler’s flames are active.
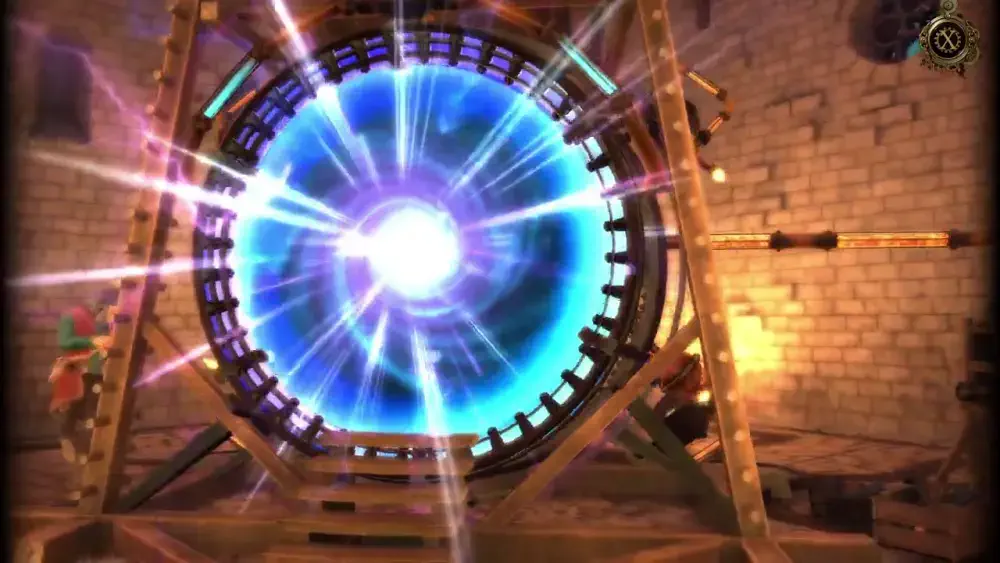
With the boiler successfully lit, Leonardo proceeds to do his part of pumping the fuel into the machine as it spins. Soon enough, you finally get to see the time machine in action.
Leonardo climbs down from the time machine and expresses his excitement at going through the machine together. However, the celebratory mood is rather short-lived as Cesaré Borgia comes out of nowhere, his crossbow aimed at you both.
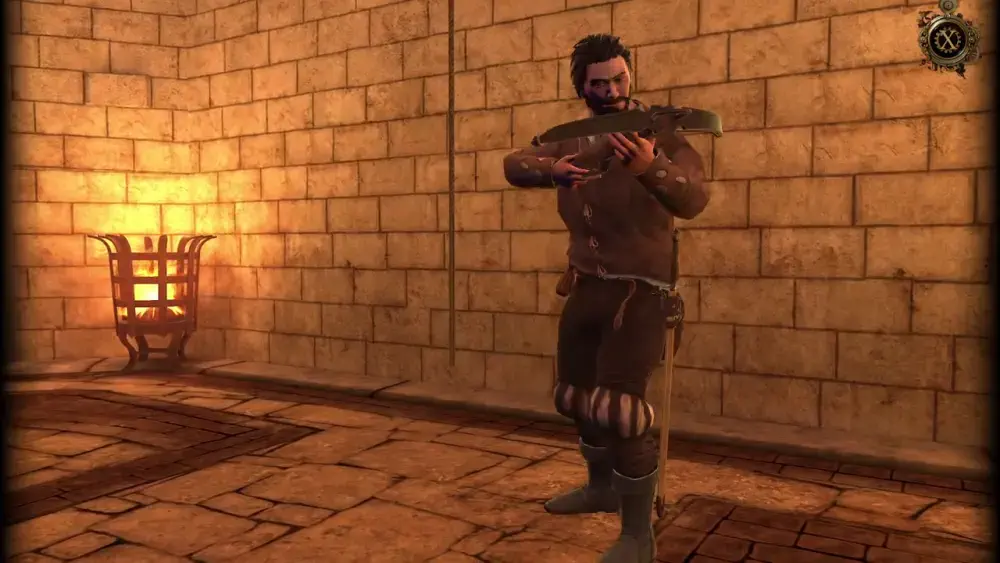
However, it becomes quickly apparent that Borgia’s illness has caught up with him and while he seems to have the upper hand, he can barely keep himself standing.
Leonardo tries to reason with him but Borgia doesn’t listen, and instead lays out his plans. But before he finishes his monologue, the guards of the Order suddenly appear, threatening to shoot Borgia for breaking into their hideout. At the same time, the commander of the guards subdues Leonardo as you yourselves are intruders.
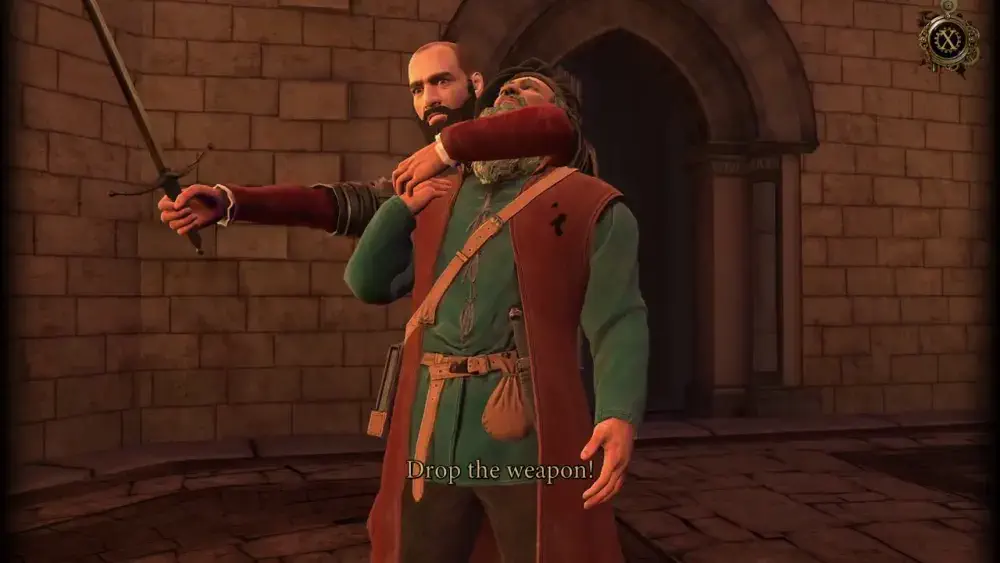
Overpowered just by their sheer number, Borgia realizes that it’s the end of the line for him and his plans to change his fate. At this, he looks at you and urges you to do what you came here for…

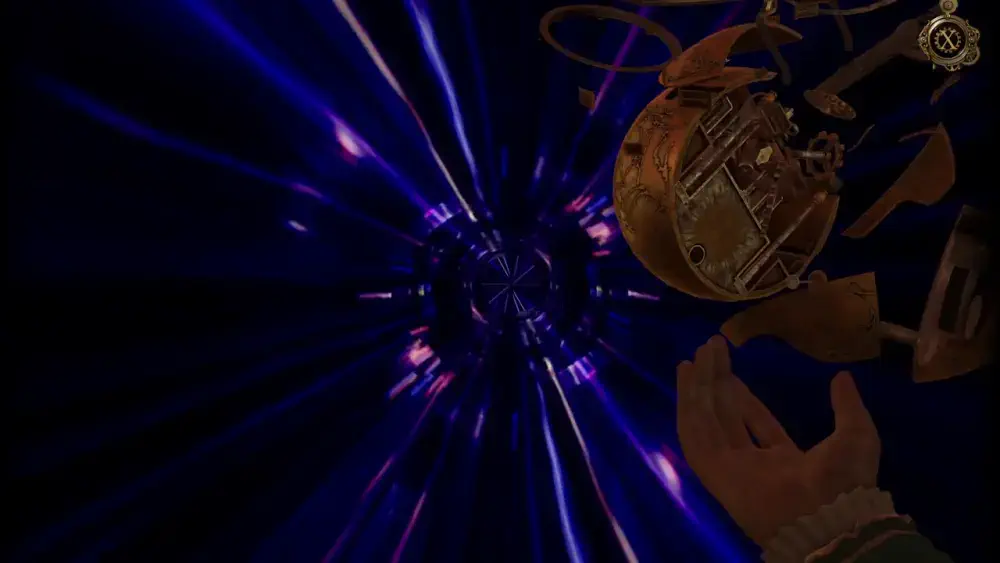
With that, you step into the time machine, the Oculus Perpetua broken apart in your hands.
You wake up to another time, when the Gate to the Temple of Wisdom was still standing in the courtyard of Castel del Monte. There’s a slight drizzle but the raindrops are frozen mid-fall. Before you can even completely make sense of what’s happening, the amulet from your neck lights up and directs you toward the entrance of the Gate.
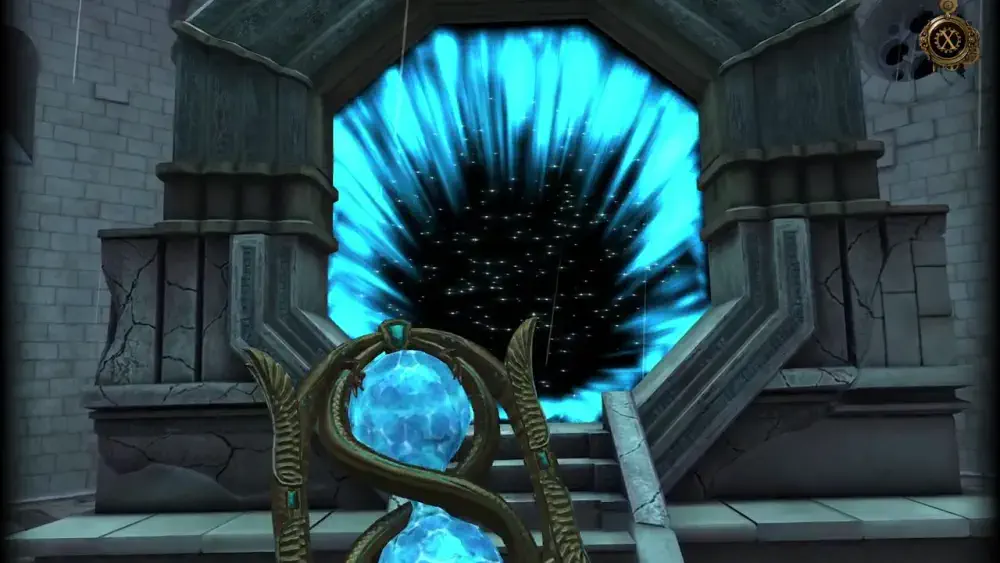
You step inside, not knowing what to expect…
Chapter 9: Ancient Temple
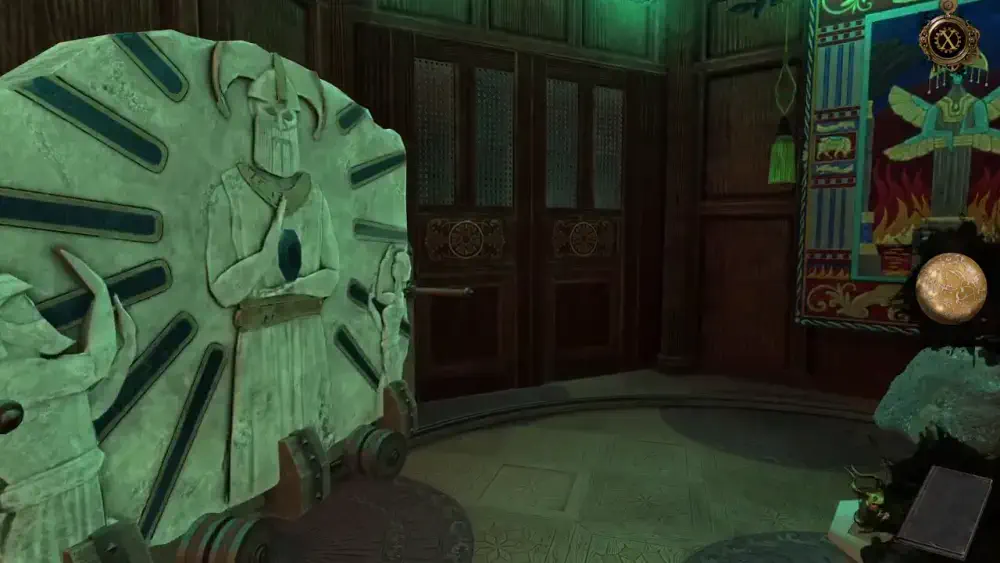
You are not in this time and you might not even be in this world upon reaching the other side of the Gate. All that’s clear is that you’re in an ancient temple, alone, and with nothing but the amulet.
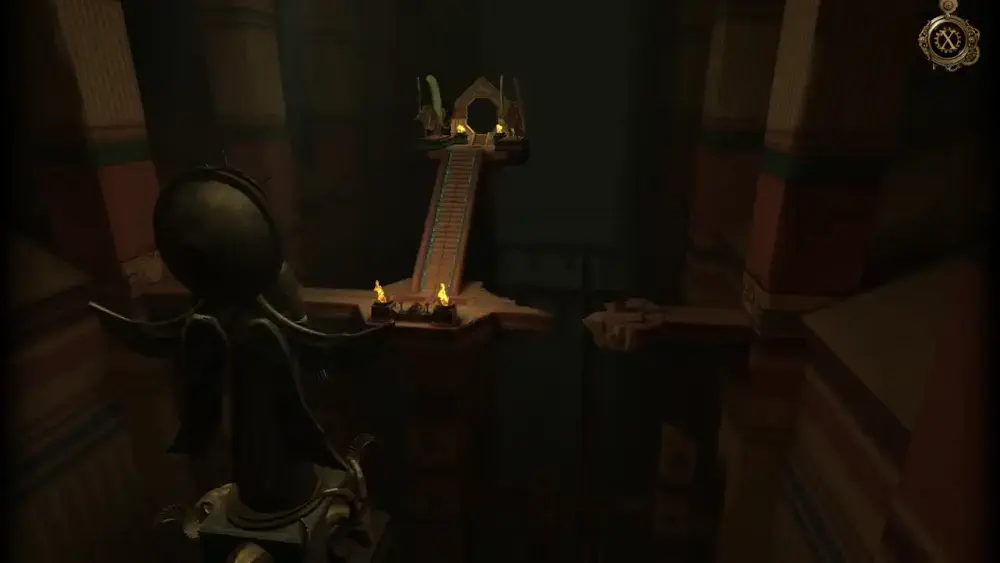
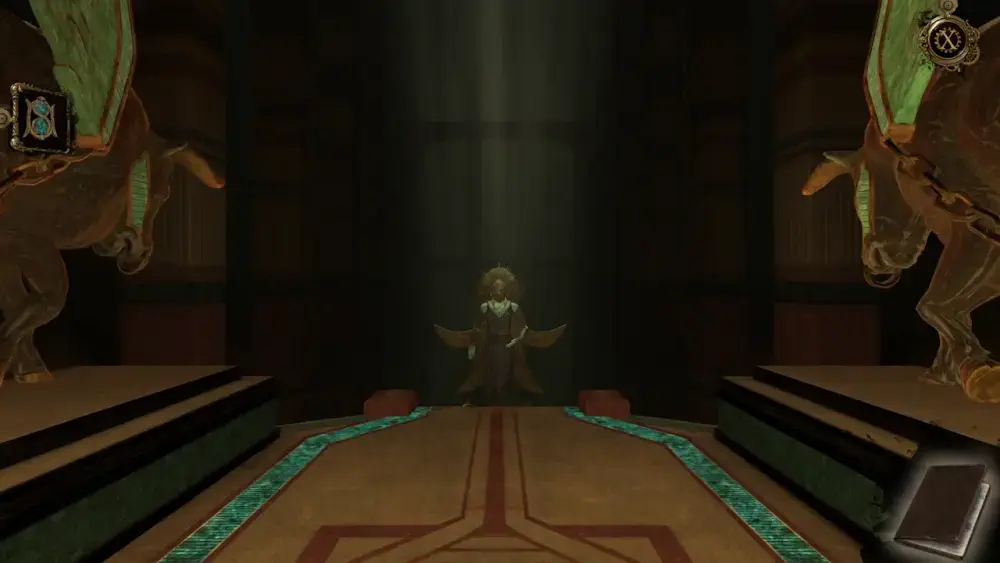
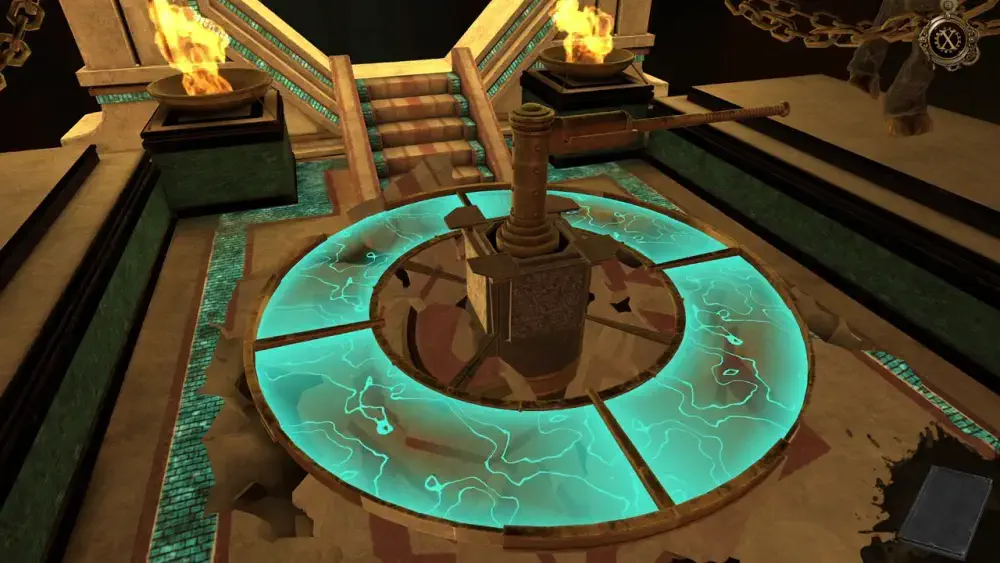
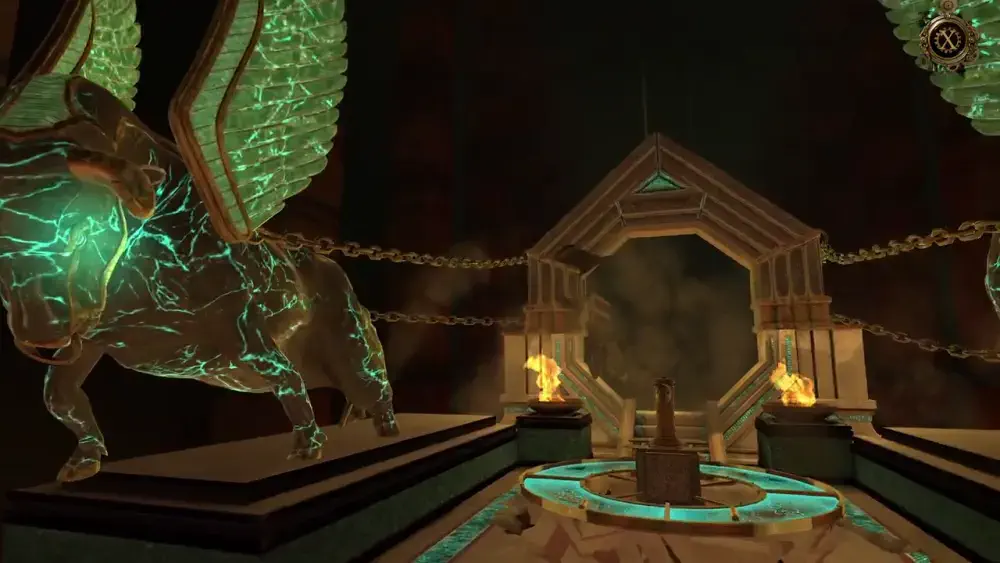
Everything seems dark at first, but small flames emerge to illuminate your surroundings. The cutscene that plays offers a bird’s-eye view of what the ancient temple looks like amid the darkness: the Gate is flanked by two bull statues and right in front of it is a flight of stairs. At the bottom of the stairs is some kind of terminal or panel flanked by small flames. Opposite the Gate is a giant statue that looks somewhat familiar even from behind. A bridge intersects the landing of the stairs, but one side has its path severed in the middle.
You soon discover that you’ve landed at the top of the stairs as the two bull statues on either side of you become clearer. Right in front is the giant statue, staring at you from a distance.
When you go down the stairs, you will indeed see some kind of mechanism.
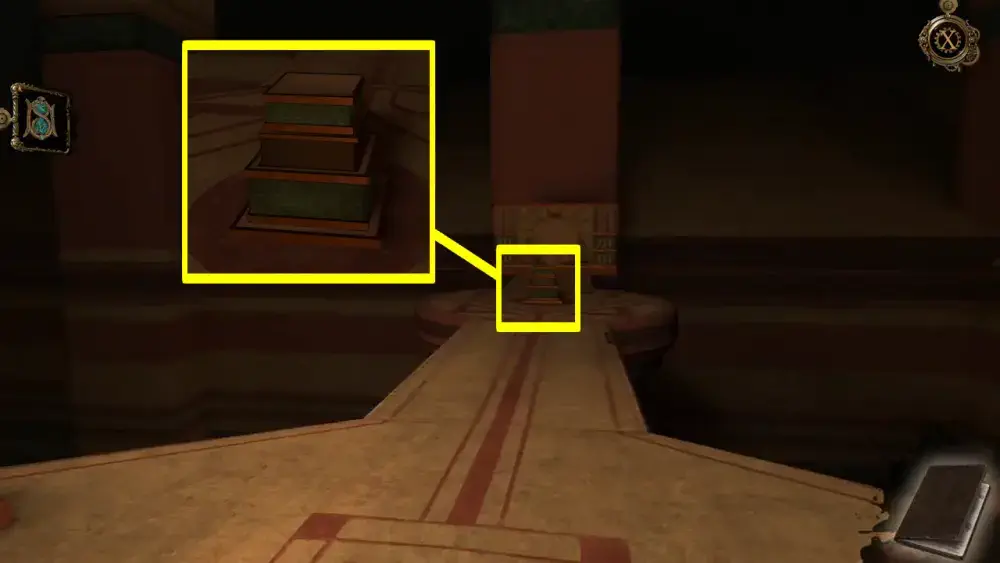
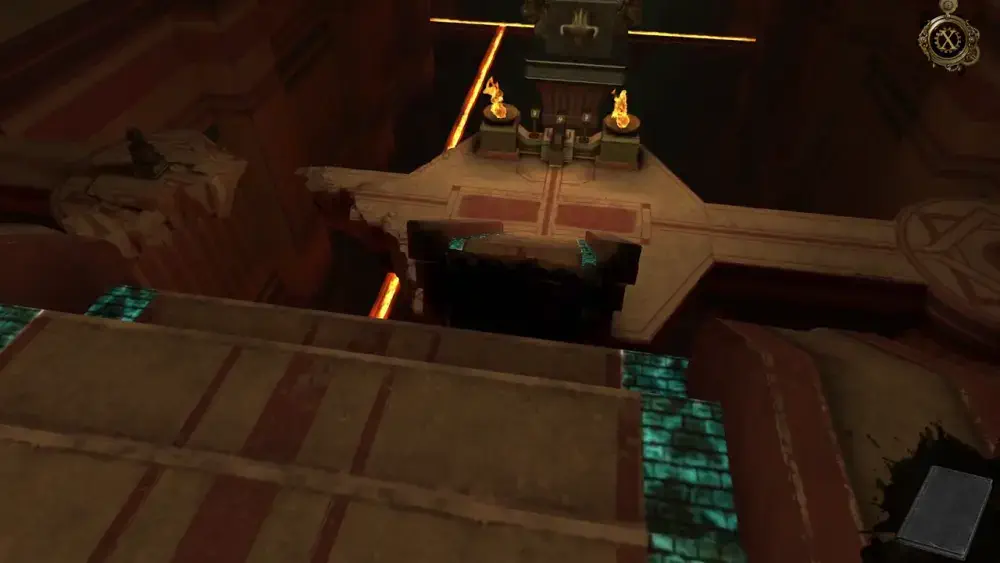
If you look to your right, you’ll see the part of the bridge that remains undamaged. In the middle of the path is what looks like a small tower.
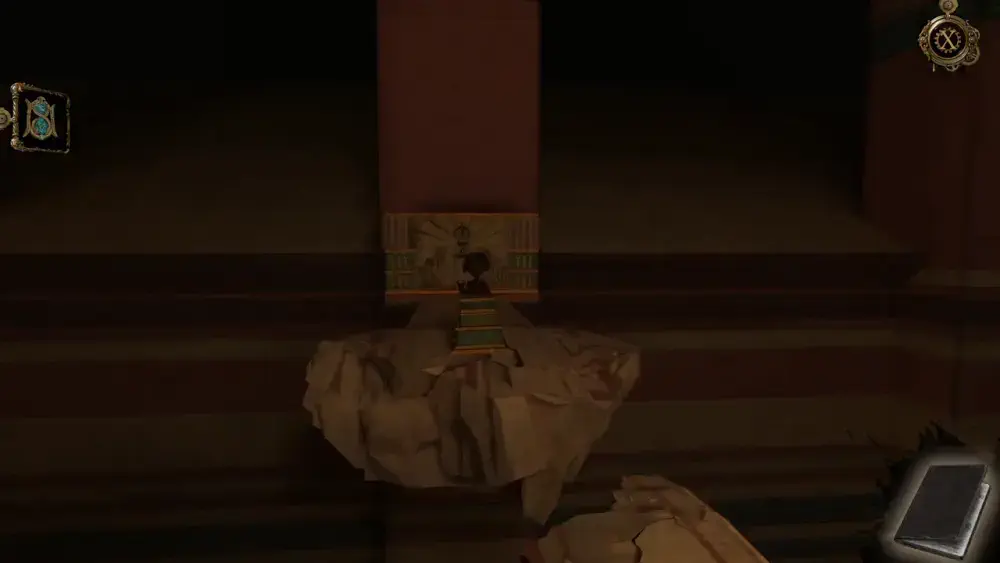
On the other side, to your left, is the same bridge but severed. There’s also a tower in the middle, but it has some kind of circular object on top of it.
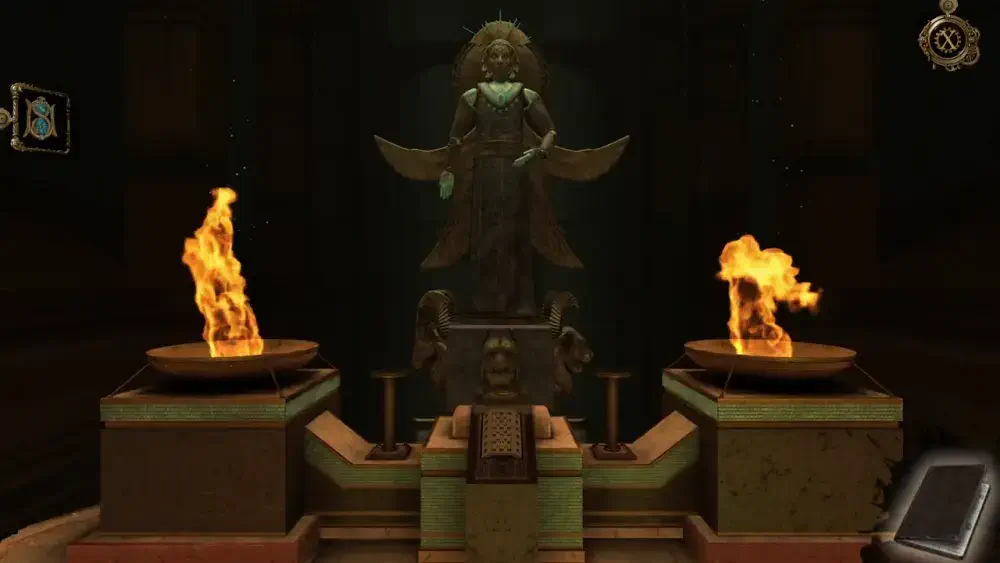
Since there doesn’t seem to be anything to trigger these parts, approach the terminal at the foot of the stairs. If you zoom into it, you’ll see that it has a slot made exactly in the shape of the amulet. Place the amulet there.
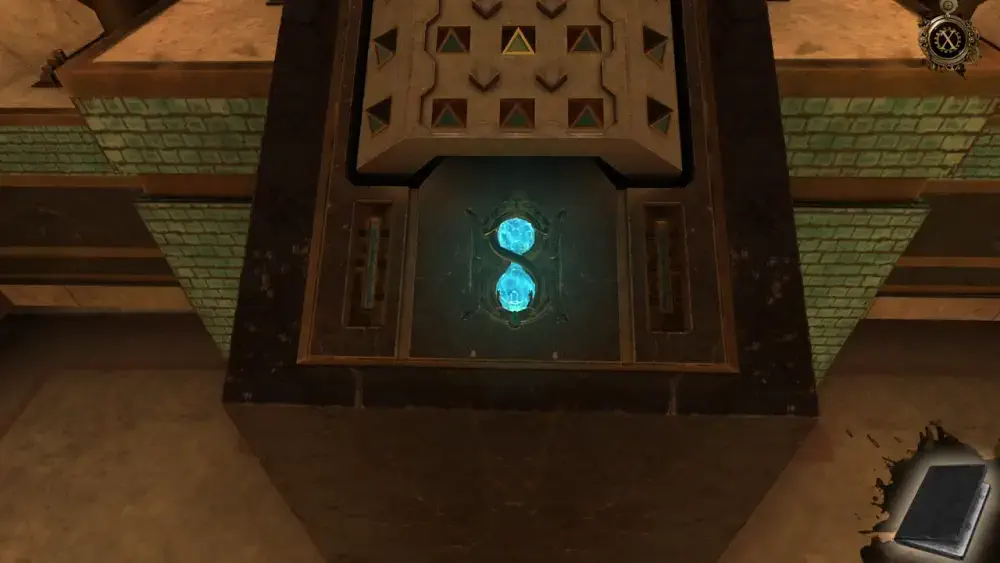
The arrows on the terminal will light up and cause three posts to emerge. In each post, a hexagonal figure will take shape, with each figure bearing different glowing symbols.
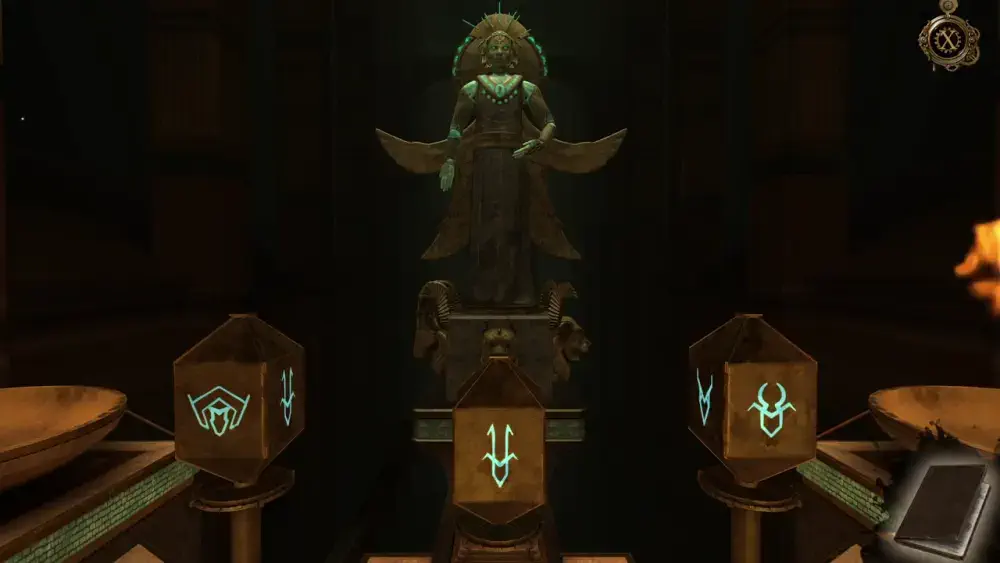
Whenever you turn the shapes and change the symbol facing you, a certain part of the statue changes position or appearance. The leftmost shape changes the position of the arms and hands, the middle changes the appearance of the head, and the rightmost shape changes the orientation of the wings.
If you’ve tried randomly turning the shapes, you’ll notice that this statue bears resemblance to the portrait of the statue you’ve found in the Order’s fortress. Open your journal to see the sketched copy of the statue so you can determine how to place its hands, wings, and head in the right way.
After checking your journal, you can now pick which symbols you should set onto the shapes. Below is the correct order of symbols:
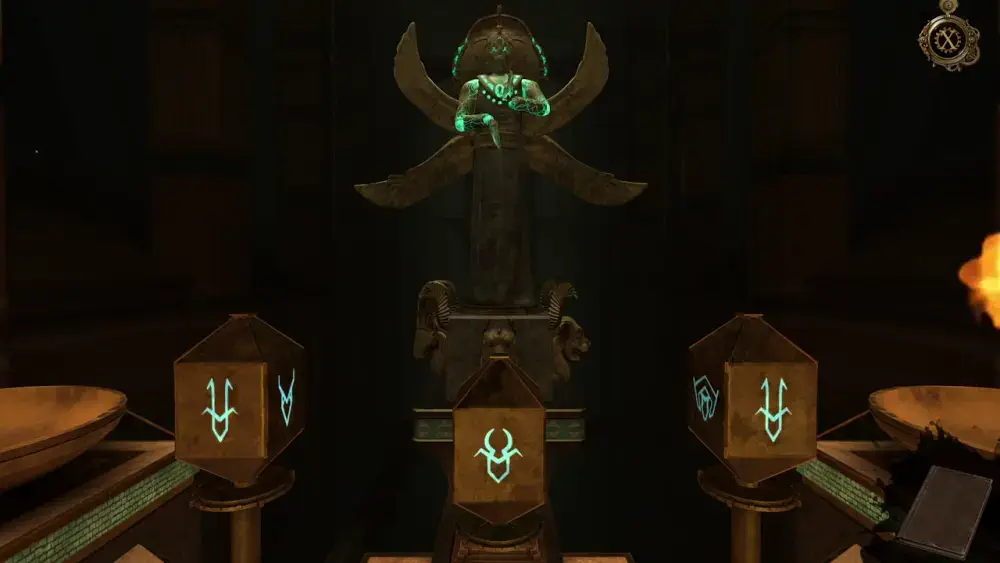
This will cause the pedestal of the statue—which has animal heads—to rotate so that the bull head is now facing front, just as the sketch depicts. The entire temple suddenly rumbles. At the top of the stairs, just in front of the Gate, a device will emerge from the ground, magically assembling itself.
If you climb up the steps, a huge rock will fall onto the stairs and you almost don’t make it. Fortunately, you manage to reach the top just in time, but the rest of the stairs leading to the terminal and the amulet have been destroyed by more falling rocks.
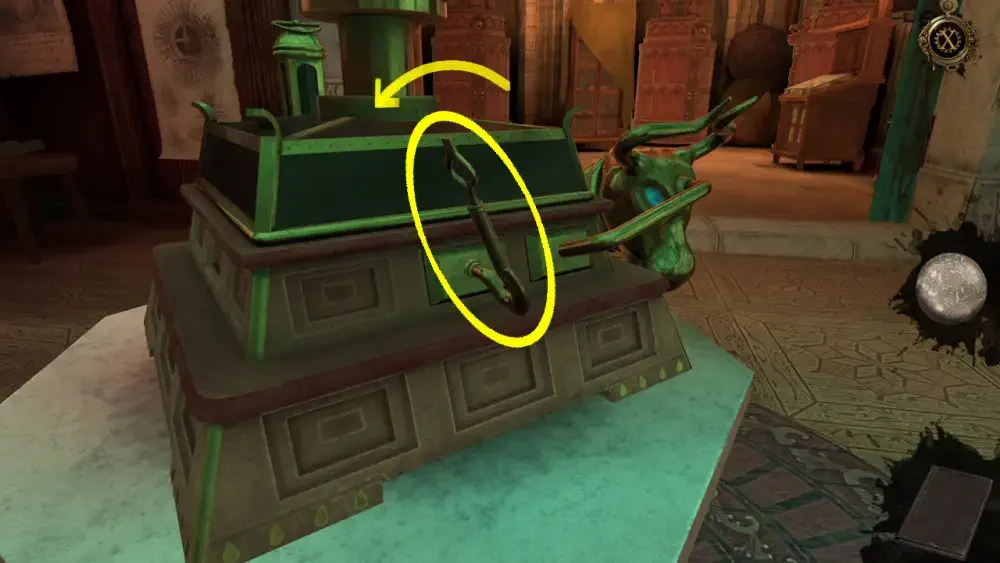
However, there’s a new device in front of the Gate. Approach it and push the handle along the circle.
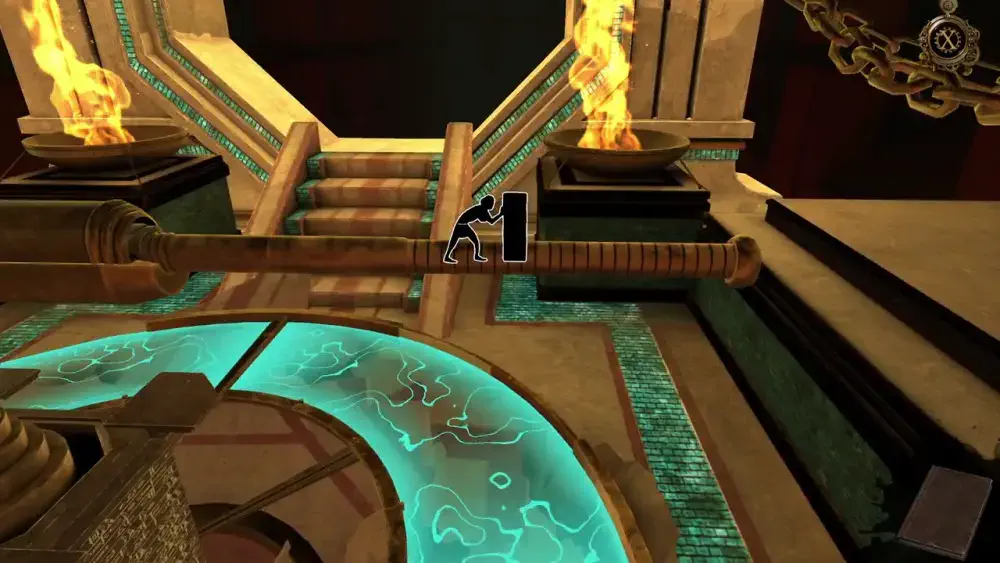
When you’ve pushed it all the way, the bull statues chained to the Gate will glow and start emitting smoke from their noses. More rocks fall from the ceiling of the temple. The handle on the device transforms into one with a button bearing the glowing symbol of a bull.
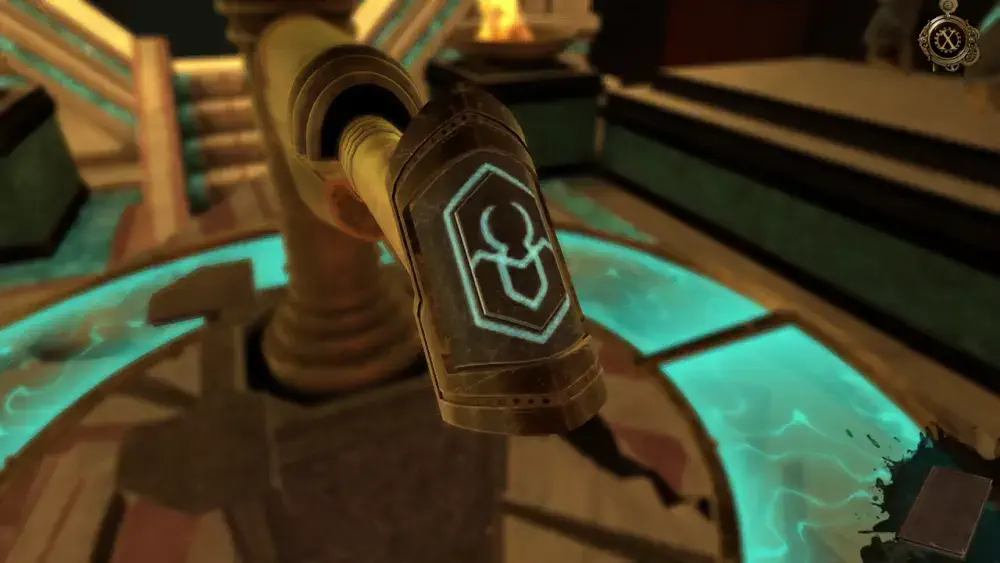
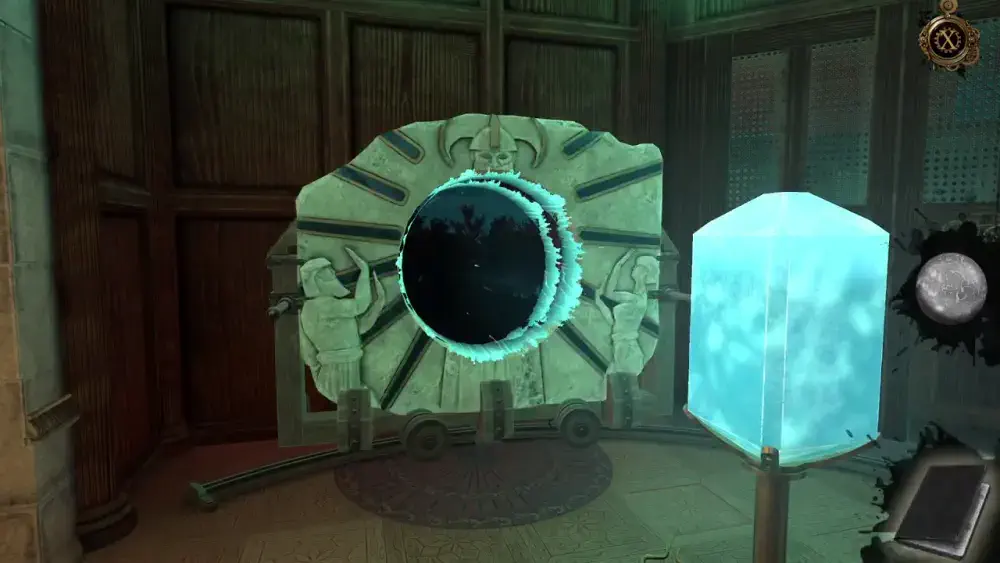
Upon pressing the button, the bulls will come to life, the force of their pull smashing the Gate to pieces.
The entire temple itself begins to shake and crumble to pieces, the ground beneath the statue a fiery inferno. The statue itself starts breaking apart until it falls into a sea of flames.
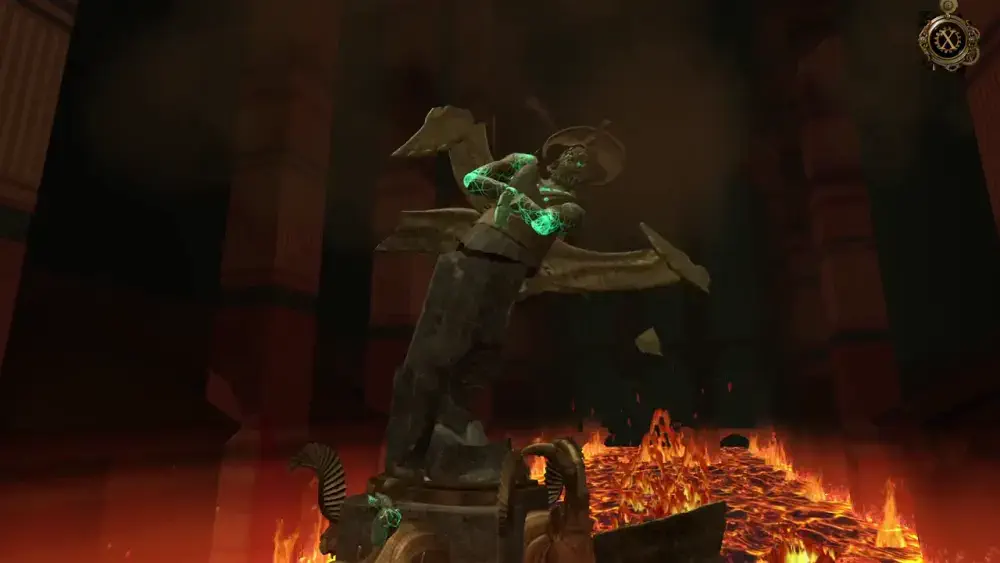
The flames begin to rise but with the destruction of the statue and the temple, you see yourself vanishing from the ancient temple.
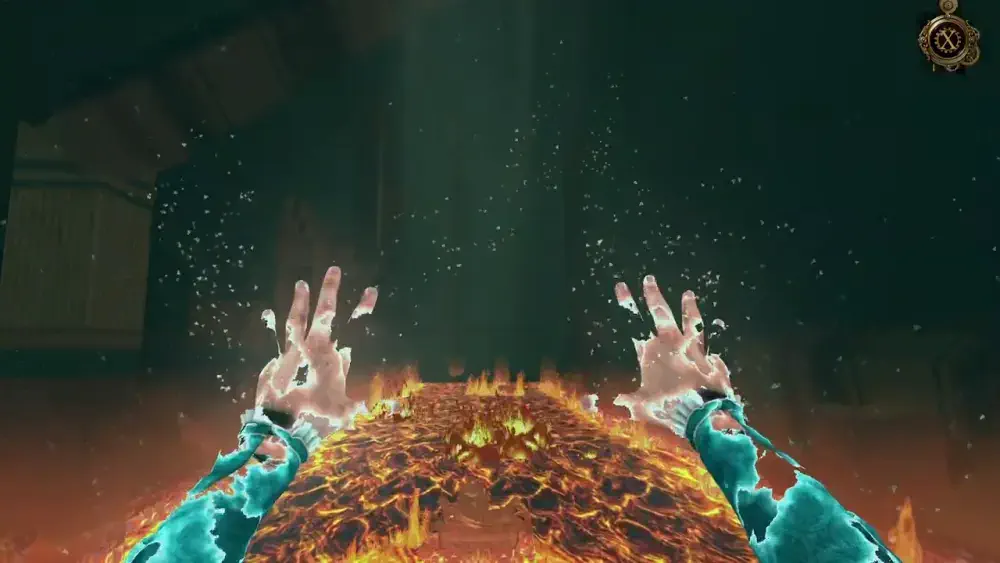
Leonardo, Borgia, and the soldiers of the Order, all of whom seem to be frozen in time, also seem to vanish from that moment, indicating that you have finally succeeded in your mission to destroy the Gate of the Temple of Wisdom so that it has never been used in the first place.
The House of Da Vinci 3 concludes with Leonardo painting the Mona Lisa along with a brief text display of how he passed away at the age of 67 on the 2nd of May 1519.

There is, of course, no mention of what happened to the other characters in the story, not even Giacomo, in the end cutscene of the game. But for anyone wondering, a quick Google search will get you some answers as many of the characters, like Leonardo, are real individuals who have been dramatized in this fictional adventure.
With this, The House of Da Vinci 3 ends almost in a way that mirrors the Mona Lisa’s enigmatic smile.
What was your favorite puzzle in these last two chapters? Which one took you the shortest or longest to solve? What did you think of the ancient temple, and would it be really possible to travel back and forth in time? Share your thoughts in our comment section below and congratulations for finishing such a well-thought-out and incredibly put-together game!