After secretly infiltrating Pope Julius II’s study in the last chapter, you as Giacomo, escape with the amulet Cesaré Borgia had coerced you into obtaining for him. Despite his threat to your life, the vengeful Borgia promised you that once you give him the amulet, he will, in turn, give you the second glove needed to work Leonardo da Vinci’s time machine. With no choice but to comply, given that the second glove was necessary to push your plans forward, you proceeded to find the amulet in the Vatican while the monk Luca Pacioli served as a distraction for the Pope by inviting him to talk in private.
In the Pope’s study, you were able to solve the puzzles that led you to a secret and mysterious chamber underneath the Vatican. Here, you were able to discover the history of the Ordo Iustitialis, also known as the Order of Justice, and how it fell into the hands of Pope Paul II. You were also able to find a sketch of a secret tunnel that the Pope’s army used to attack the Ordo Iustitialis’ secret headquarters in Castel del Monte, bringing the order to its knees.

Now, with the amulet on hand, Chapter 6 of The House of Da Vinci 3 finds you and your party back at Luca’s villa to discuss what you should do next. However, some uninvited guests—quite literally—try to gatecrash into your brief but important conversation. This chapter, in particular, is similar to Chapter 3, which is mostly a long cutscene explaining important events and getting the player up to speed with what’s happening and what’s about to happen. Though it still has a puzzle to be solved, it’s rather short, which is why we’ve decided to combine Chapter 6 with Chapter 7 in our walkthrough for your convenience. The former is rather brief while the latter is where most of the exciting and thought-provoking puzzle-solving would be.
Speaking of Chapter 7, this part of The House of Da Vinci 3’s story takes you, Leonardo, and Luca to the secret tunnel leading to Castel del Monte. If you recall, you’ve found a sketch to the entrance of this secret tunnel back in Chapter 5 while raiding the underground chamber resting beneath the Pope’s study. Certain that this will lead you to Castel del Monte and, consequently, the time machine, the three of you hurriedly travel to this secret passage before the Pope suspects you for taking the amulet—and before Borgia and his henchmen catch up to your party.
Similar to the previous chapters, Chapter 7 is rife with sophisticated puzzles and a lot of back-and-forthing, whether that’s from one part of the secret tunnel to the next, or even from one time frame to the other. Particularly, in the latter part of Chapter 7, you’ll be putting the Oculus Perpetua to work more than usual as you’d have to travel back and forth in time to complete an important objective, which is—and we kid you not—to get Leonardo a stepladder.
Of course, your true mission is far nobler than that, but at the risk of spoiling the experience, we’re going to leave it at that for now.
That said, let’s dive into our walkthrough for Chapter 6 and 7 of The House of Da Vinci 3.
Chapter 6: Return to Luca’s Villa
With your discoveries at hand and the amulet in your possession, you, Leonardo, and Luca hurriedly return to Northern Tuscany to avoid being suspected by the Pope. It was only a matter of time before Pope Julius II discovered that the amulet was missing, thus prompting your group’s quick escape from Rome.
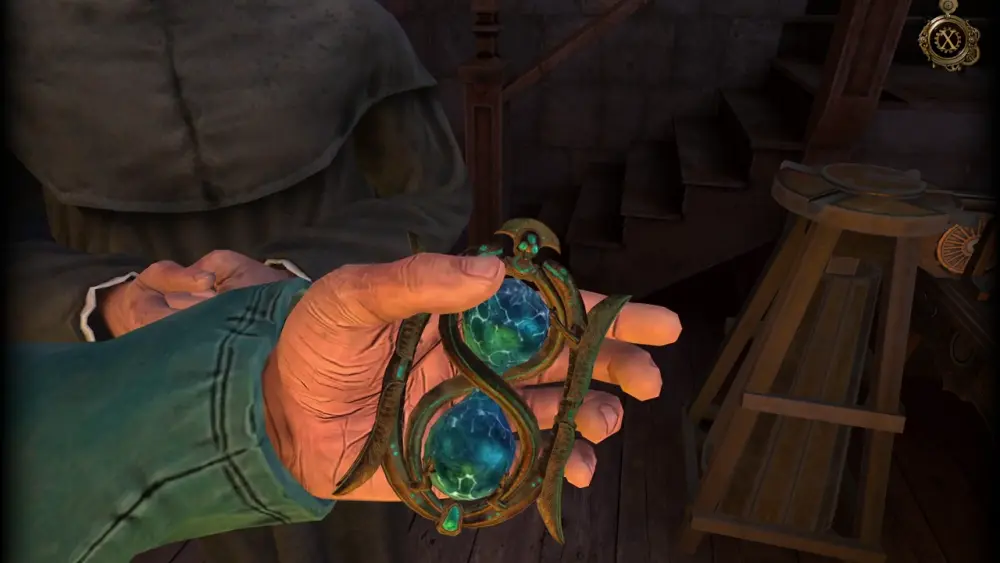
Safely hidden in Luca’s villa, the three of you converge to discuss what you should do next. As you admire the beautiful craftsmanship and quality of the amulet, Luca states that it was obvious Borgia didn’t want the amulet simply because it would serve as some kind of jewelry. Leonardo, too, is convinced that the vindictive duke, because of his dire situation and his intense resolve to change his destiny, would try everything to get his hands on the amulet no matter the cost—which is what makes him dangerous.
Leonardo further explains that the amulet—despite Borgia claiming that it was simply a symbol he wanted to acquire to show his dominance over the Order—was actually the key to the Gate of the Temple of Wisdom, the original time machine that had been once raised by Frederick II in Castel del Monte. As you’ve already discovered through the stained-glass windows in the Vatican’s underground chamber, the Gate had already been destroyed during the Pope’s attack against the Order. Your goal is to travel back in time to keep the original time machine from being made at all.
For this, you will need the replica time machine that Leonardo made. However, it was taken from Badia Fiorentina by the Order, but Leonardo suspects that it’s located in Castel del Monte, the Order’s headquarters. And since you were able to obtain the sketch to the secret tunnel, you could use this to your advantage to find and use the replica time machine.
However, there was one problem: you only have one of the two gloves needed to make the replica time machine work. Without all the ampules containing the liquid needed to get the machine going, you won’t be able to travel far back into time enough when the Gate had still been standing. Without too many available choices, Luca posits a possible solution…
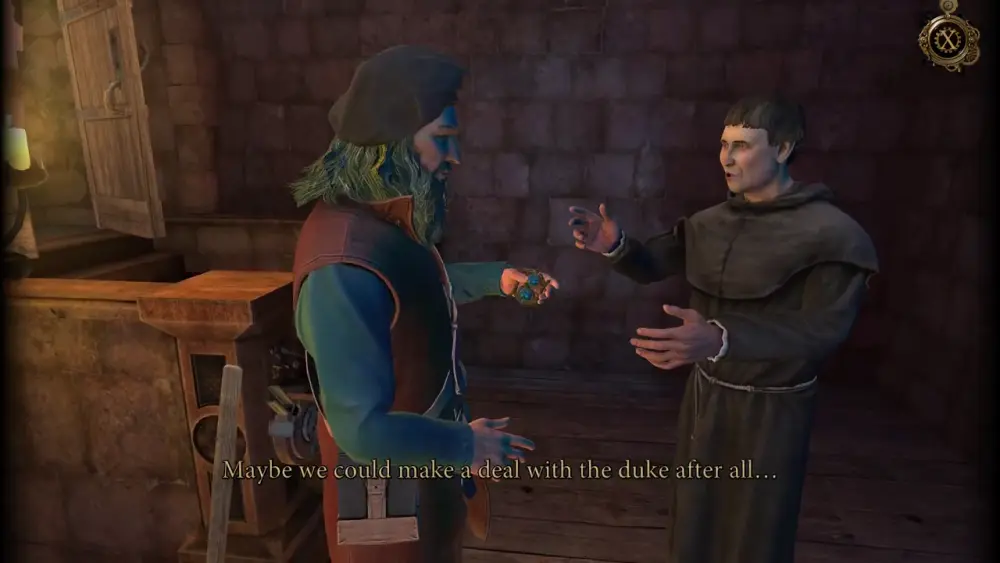
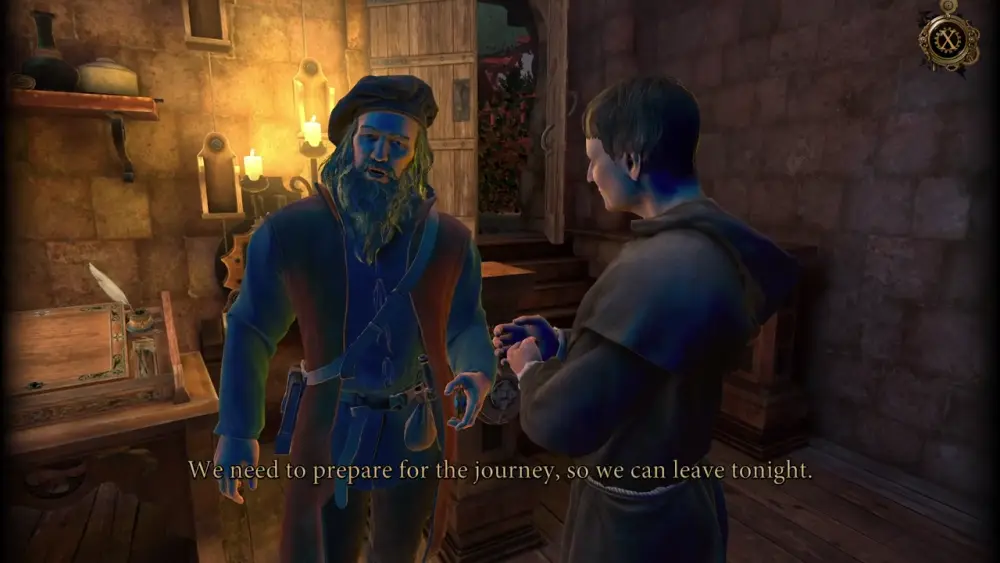
Of course, Leonardo is vehemently opposed to working with Borgia. In fact, he reminds Luca about how their last attempt to outsmart the duke almost ended in your death, if not for the deal that Borgia struck regarding the amulet. Weighing your options, Leonardo decides that the best course of action for the group was to head to Castel del Monte since he suspected that the Order did not give him all the ampules with the mysterious liquid for the time machine. Despite being a gamble, it was certainly going to be better than negotiating with Borgia. Because time isn’t in your hands—literally and figuratively—Leonardo tells you that you should all prepare to leave for Castel del Monte that evening.
But as you were about to conclude the discussion, two uninvited guests break into Luca’s villa…
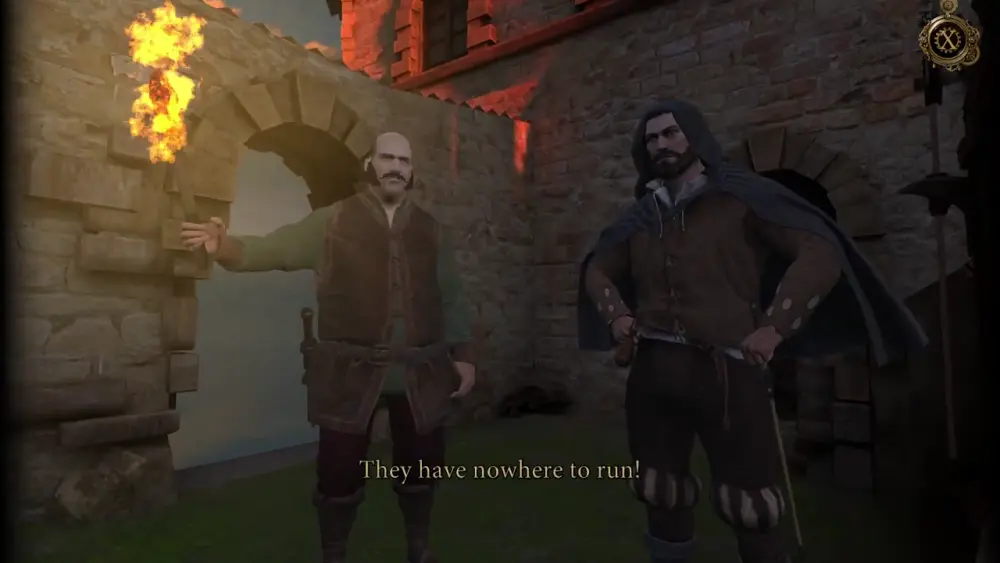
Of course, we’re already familiar with Cesaré Borgia, though you might be wondering who his companion might be. It turns out that the large man is someone you’ve already met: Marco, the man who received your party in the Bald Lady Inn, as later pointed out by Leonardo. Having been double-crossed, you three quickly bolt the doors and lock yourselves inside the workshop as you try to find a way to outwit Borgia and Marco, who clearly have an advantage when it comes to the physical strength department.
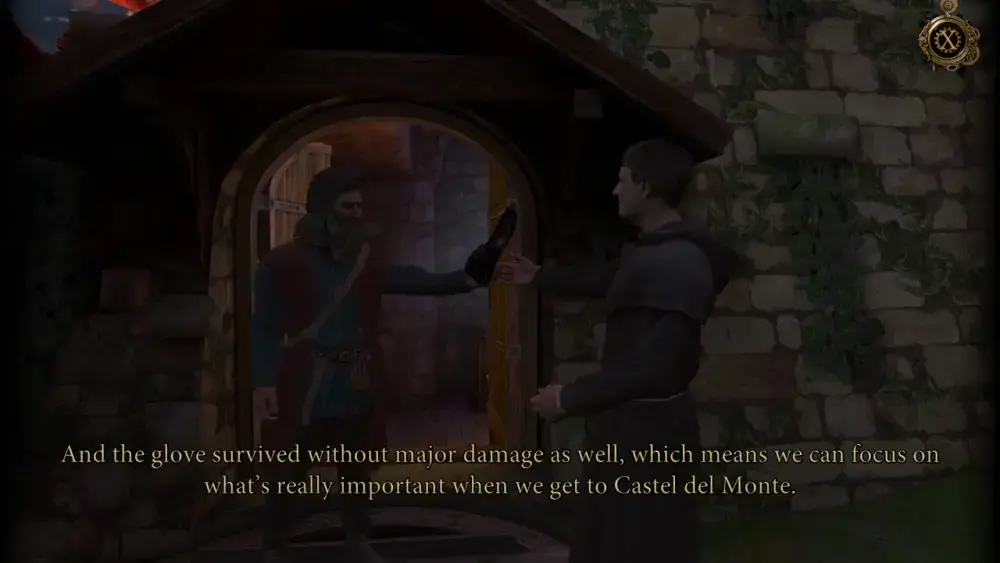
As Leonardo suspected, Borgia had indeed come for the amulet. Borgia tells your group that he does remember his end of the bargain and brought the second glove with him. However, he states that he will only allow you to keep it until such time that Leonardo is able to make the modifications necessary to take him to the Gate of the Temple of Wisdom, revealing that he had no intention to work with you at all from the beginning.
With Borgia threatening to break down the door of the workshop, and with the situation becoming more dangerous with each passing minute, Luca tells you that you have two advantages over these rogues…
After a brief discussion, you all decide that flanking Borgia and Marco might be the most viable plan since it’s something they won’t expect and have no clue about. Leonardo suggests using the cart next to the well in the garden since Borgia and Marco are likely standing on the tracks leading to the door of the workshop.
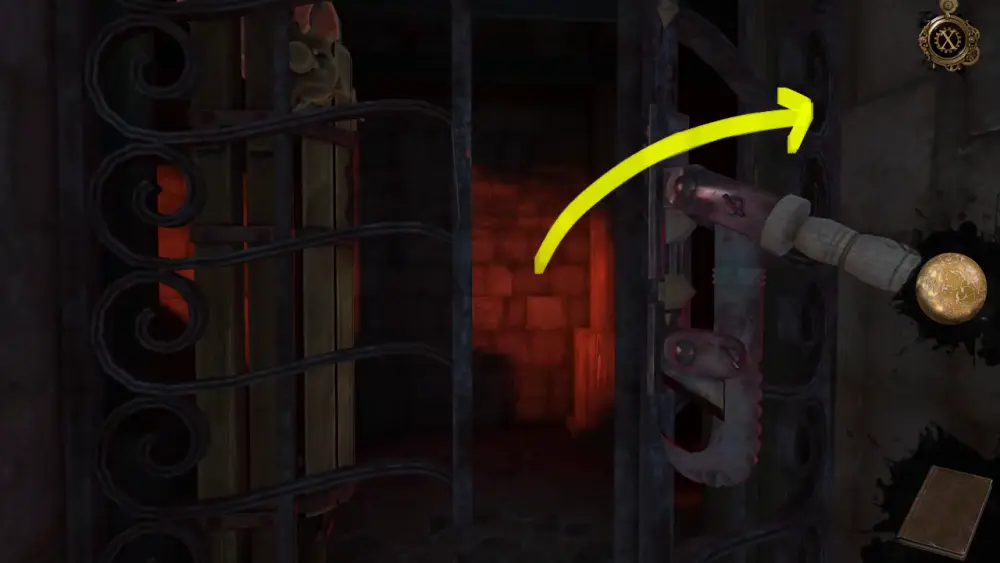
As Borgia instructs Marco to find a battering ram to open the bolted door, you, as Giacomo, are now tasked to activate the cart next to the well. Putting the plan into action, you first need to access the gate at the back of the workshop, which is found up the short flight of stairs. Swing the gate open as you’ve already unlocked this in a previous chapter.
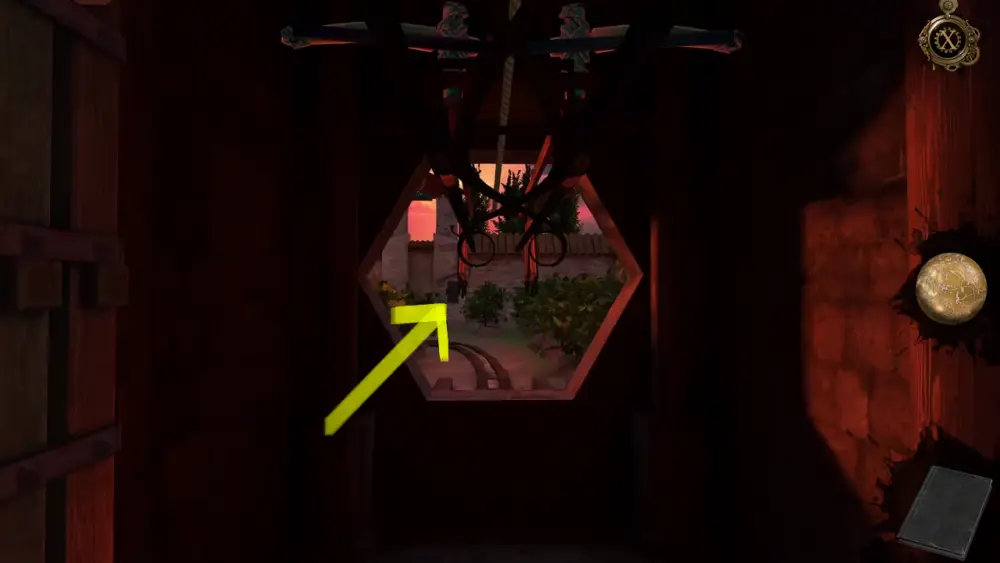
Enter this short passage and exit through the hole in the wall where the giant Archimedes screw used to be.
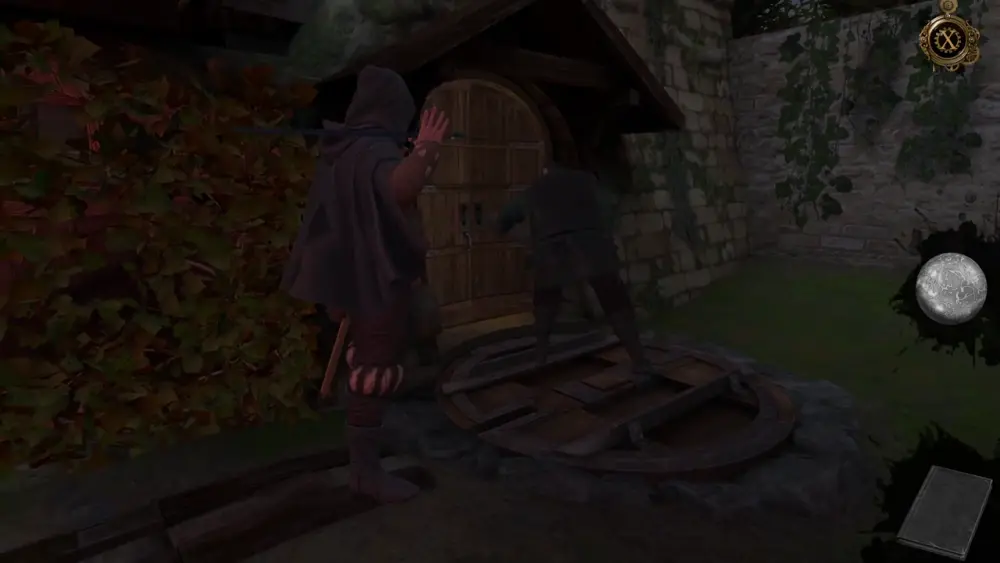
Move further down the garden until you reach the spot behind the windmill. Here, you can actually spot Borgia standing next to the door of the workshop.
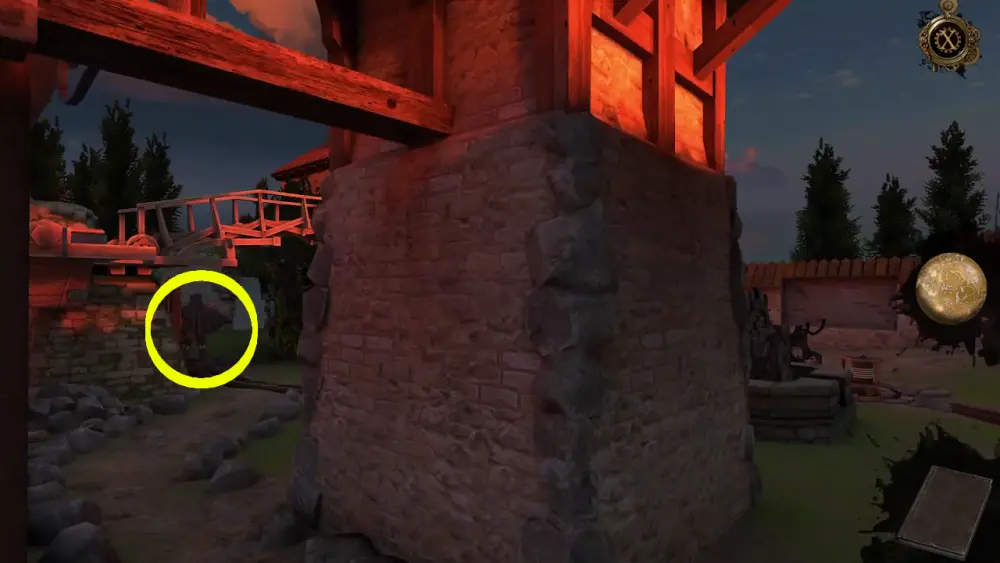
This will prompt a quick cutscene showing you how Marco has been trying to break the workshop’s doors down with a log for a battering ram. However, you will also notice that both Borgia and Marco are indeed standing right in the middle of the tracks as Leonardo predicted.
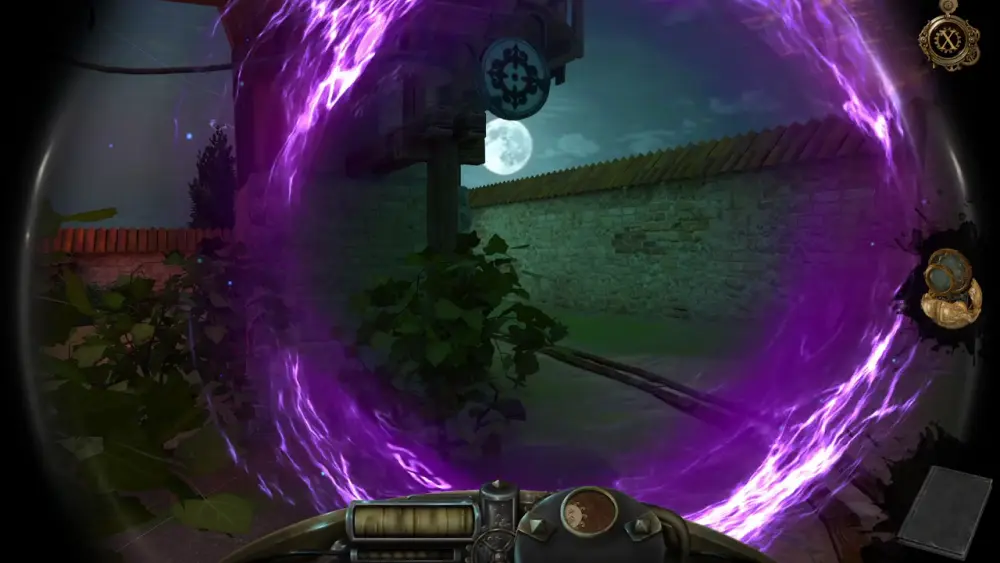
With the two rogues in place, it’s time to activate the cart so you can use it to knock them out. Take a step back and open the Oculus Perpetua so you can go back in time and execute your plan without catching Borgia’s attention. Keep in mind that the Oculus Perpetua will not open the time portal if you try to access it next to the windmill. The time portal will only open if you take a step back from the windmill since you’ll be at a location where Borgia won’t suddenly spot you.
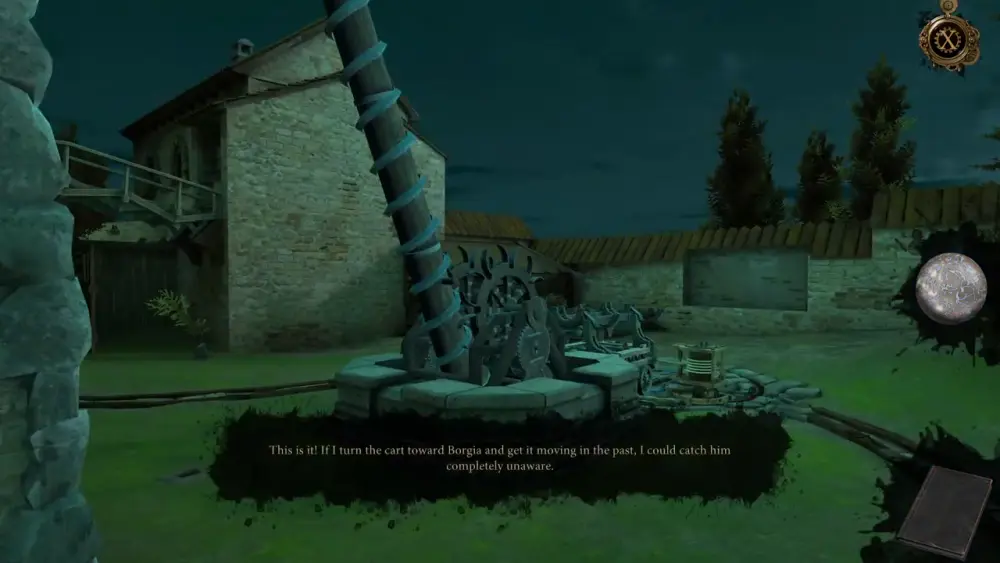
With this, you can turn the cart to face the track leading to the workshop’s door, thus catching Borgia and Marco unaware.
To reposition the cart, approach the cylindrical device next to it. Turn the lid and the rope coiled under the device should come loose from the side.
Thereafter, approach the cart and push one of the metal handles to its side, letting it roll to the beginning of the track.
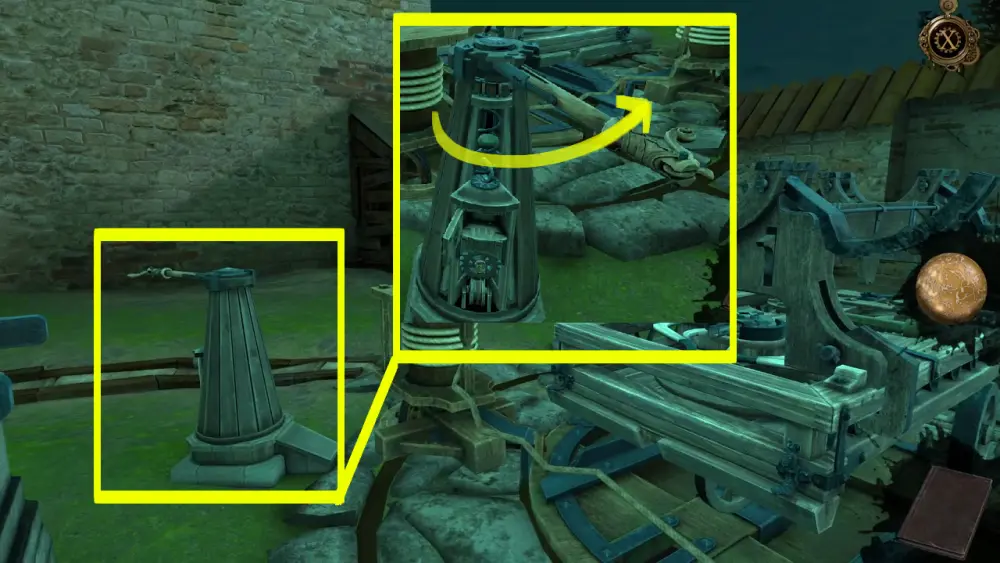
Once done, move on to the other device in front of the cart. This should have a lever in front. Turn the lever to the right, which will cause the cart to rotate in place.
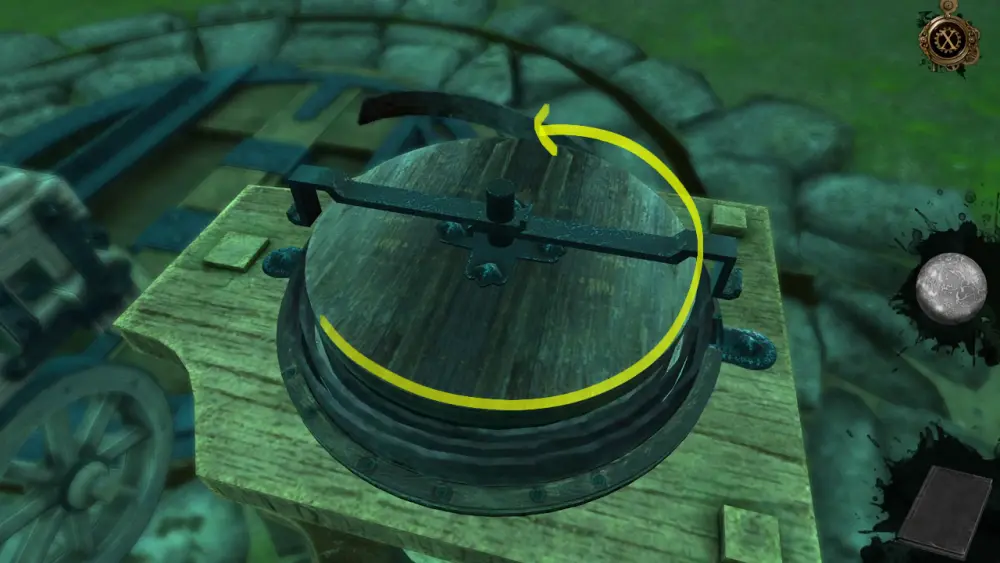
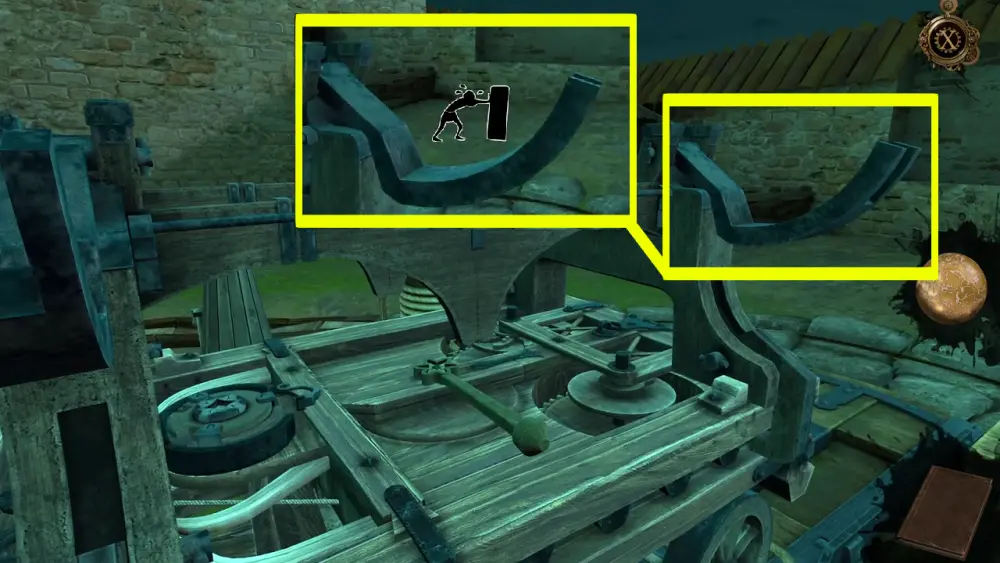
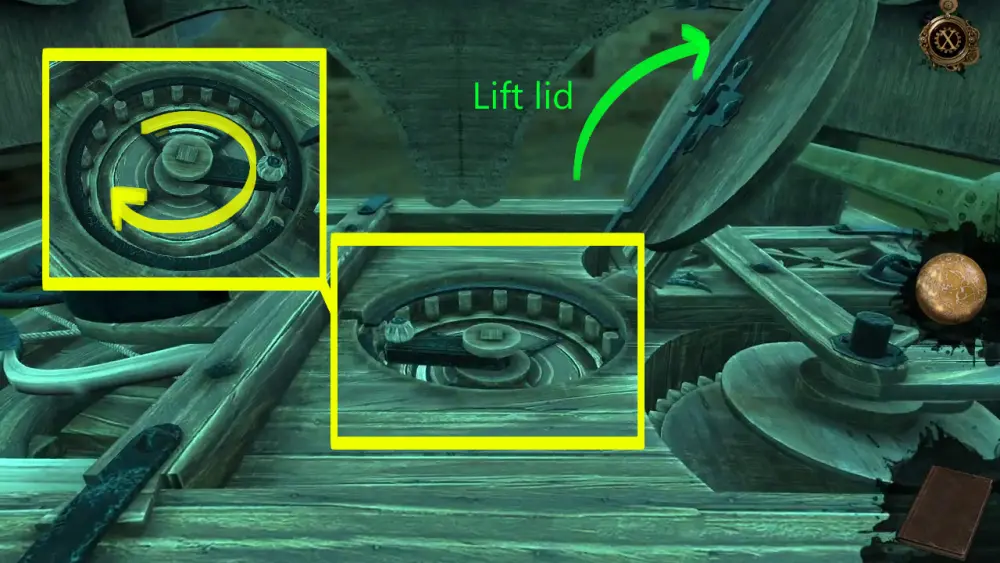
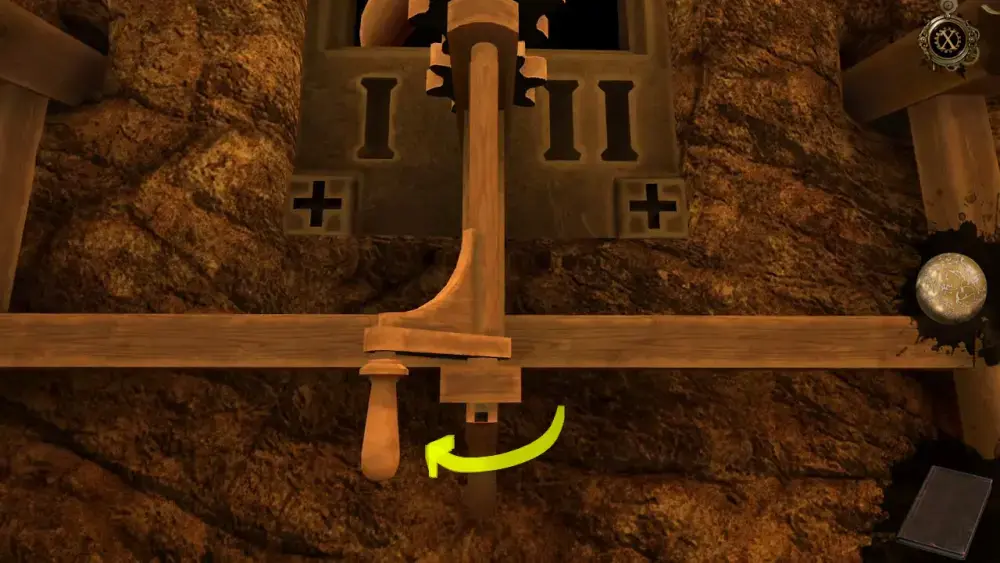
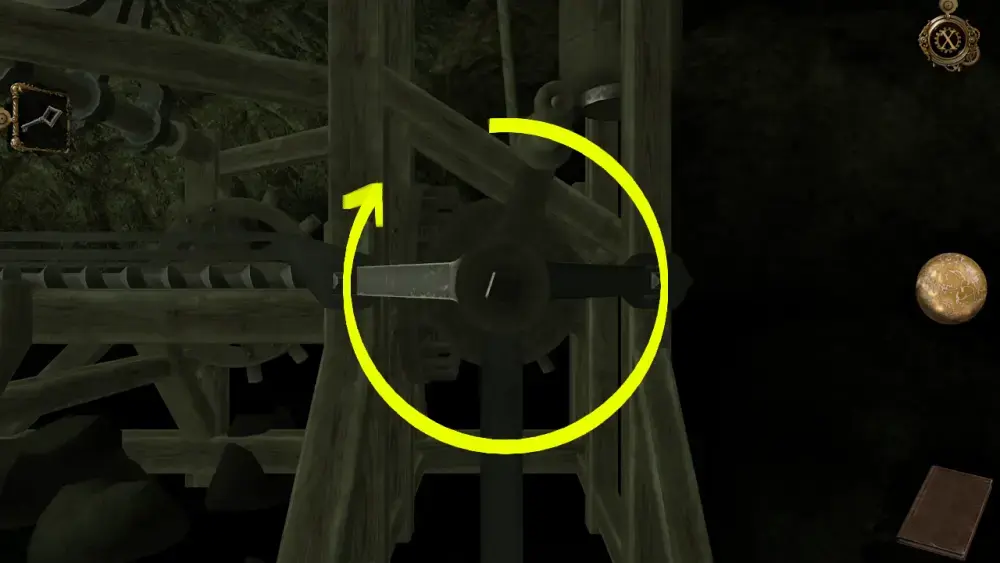
After the cart itself has turned, zoom into the top-center part of the cart, with the star-shaped tool still fastened on the lid. Lift the lid and rotate the handle inside it.
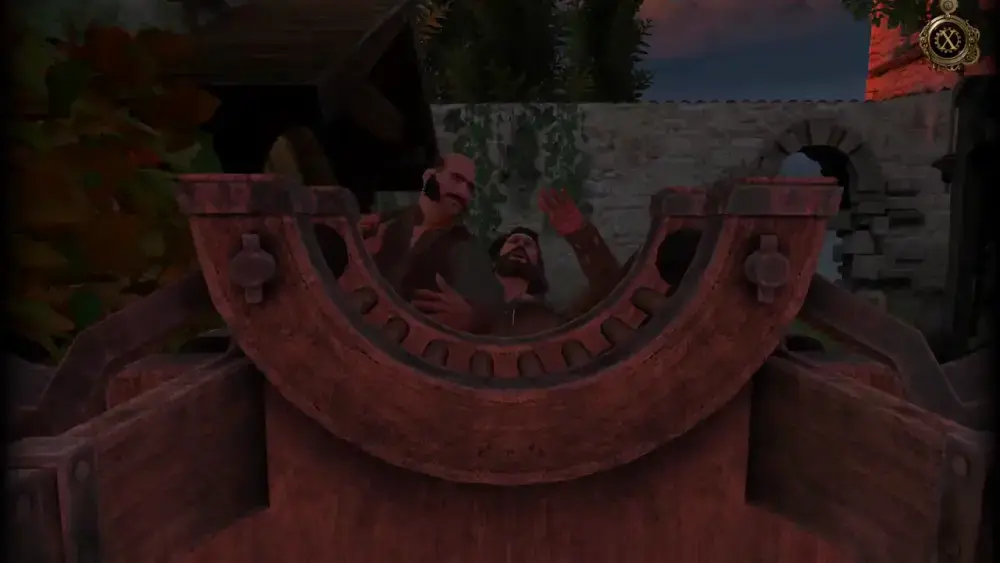
After turning the handle all the way, this will prompt the cart to zoom past the track, triggering a cutscene where you will see the cart ram into both Borgia and Marco, who were completely caught off-guard.
With the two uninvited guests knocked out, Luca takes the second glove and gives it to Leonardo, who asks you and Luca to move Borgia and Marco to somewhere warm as he makes preparations for your journey to Castel del Monte that evening.
This concludes the brief but important Chapter 6 of The House of Da Vinci 3.
Chapter 7: Secret Passage
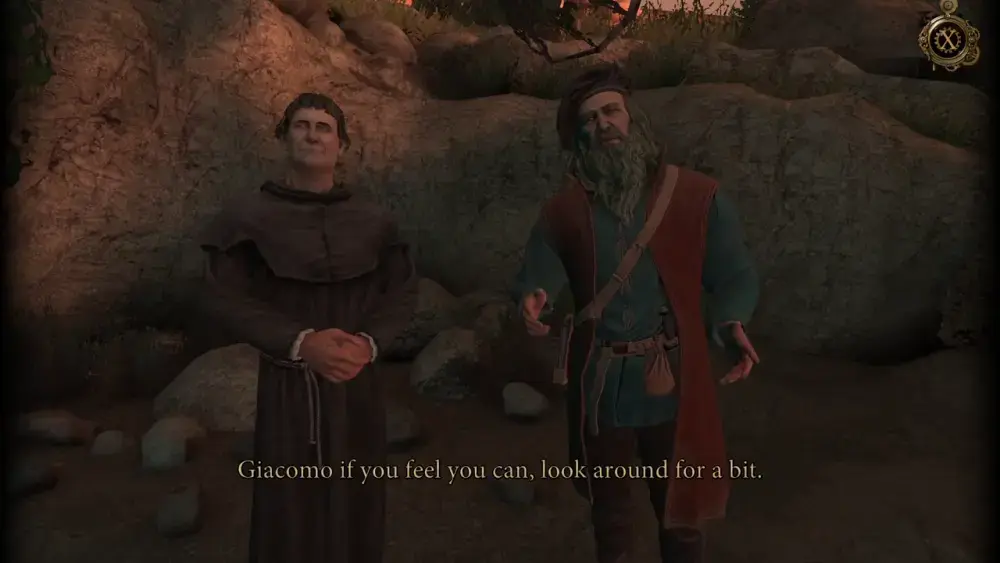
You, Leonardo, and Luca successfully make your way to Central Apulia, where the location of the secret passage to Castel del Monte should be. Unfortunately, since the journey was accomplished entirely on horseback, your two other older companions have become weary from the trip. Being the youngest of the lot, you’re now tasked to find the secret passage while you give Leonardo and Luca some time to rest and recover.
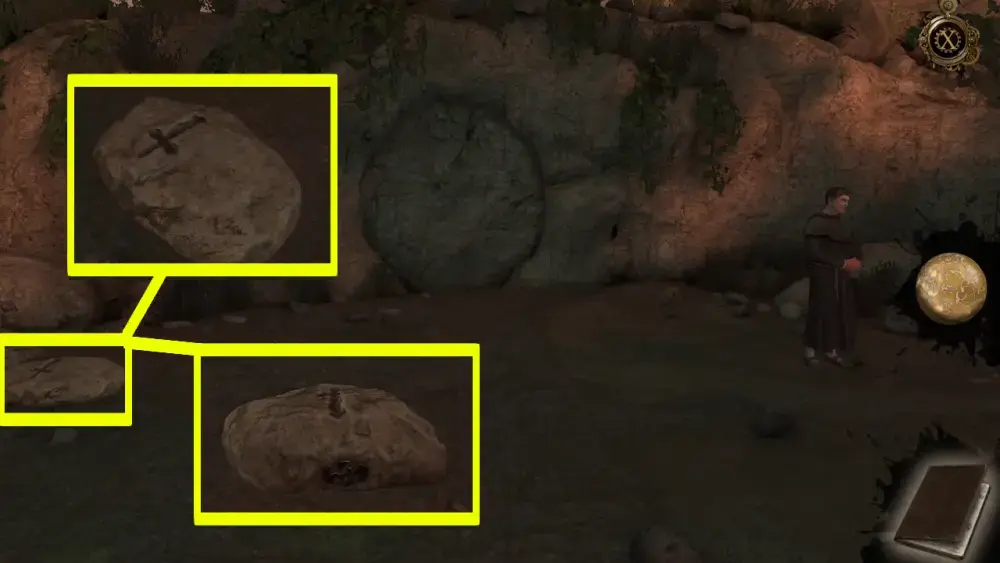
Looking around, you will find Luca and Leonardo to your right, a small gathering of rocks to your left, and what seems like a sealed cave right in front. If you talk to Leonardo, he will simply wish you good luck and an open mind. Seeing as the cave is covered by a boulder, your best bet, then, is to look closer at the rocks to your left. Here, you will find something strange: a rock with a cross etched on its surface. If you move a bit, you will also see another symbol at the back of the rock. However, the symbol on the back doesn’t seem to be identifiable at the moment.
Take a closer look at the symbol at the back. This is what it looks like:
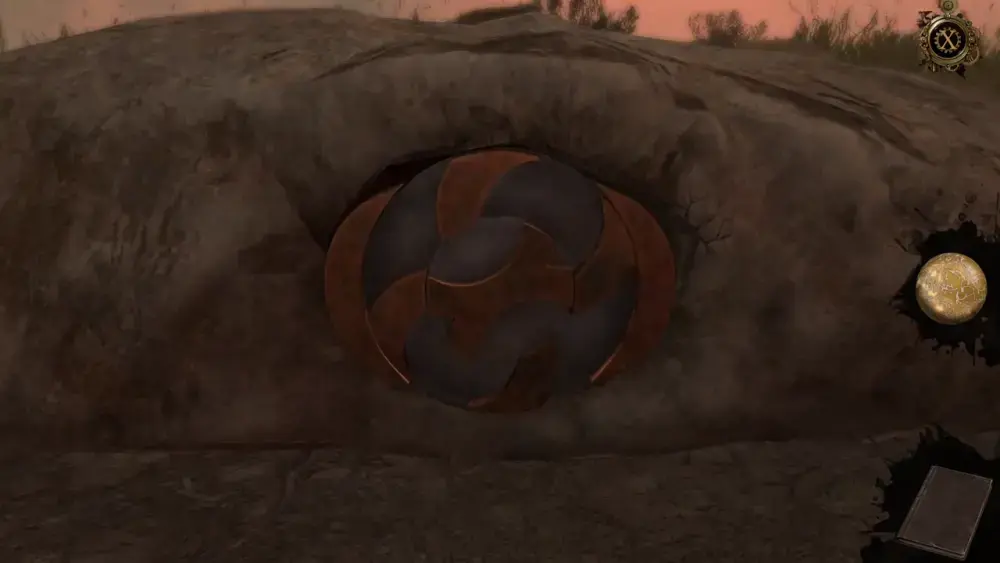
You’ll discover that you can move the two inner parts of the symbol by turning them. To solve this puzzle, you need to turn the parts to form an infinity symbol.
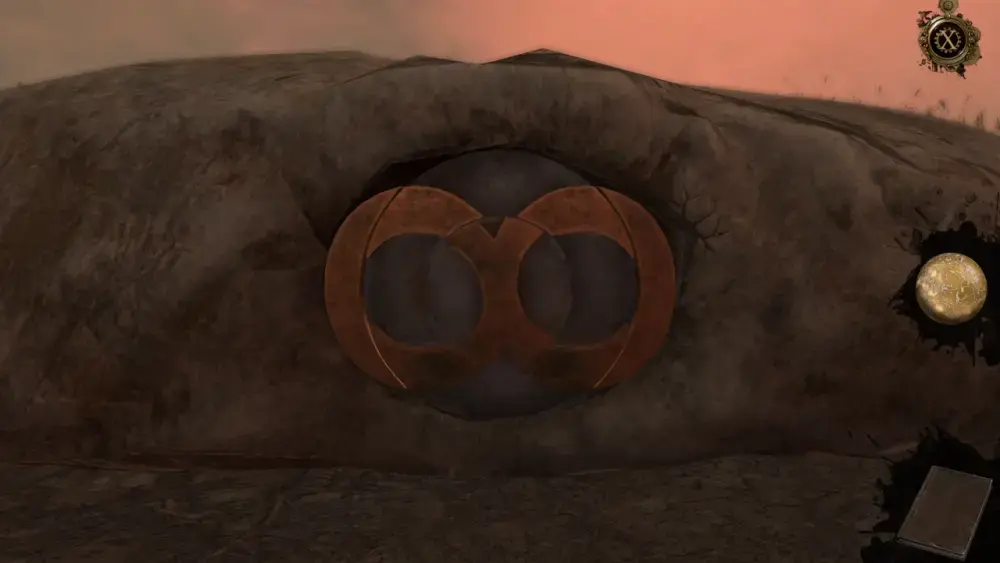
This should cause the rock to slide to the right, revealing a secret compartment underneath. Here, you can take the Lever with Folded Handles.
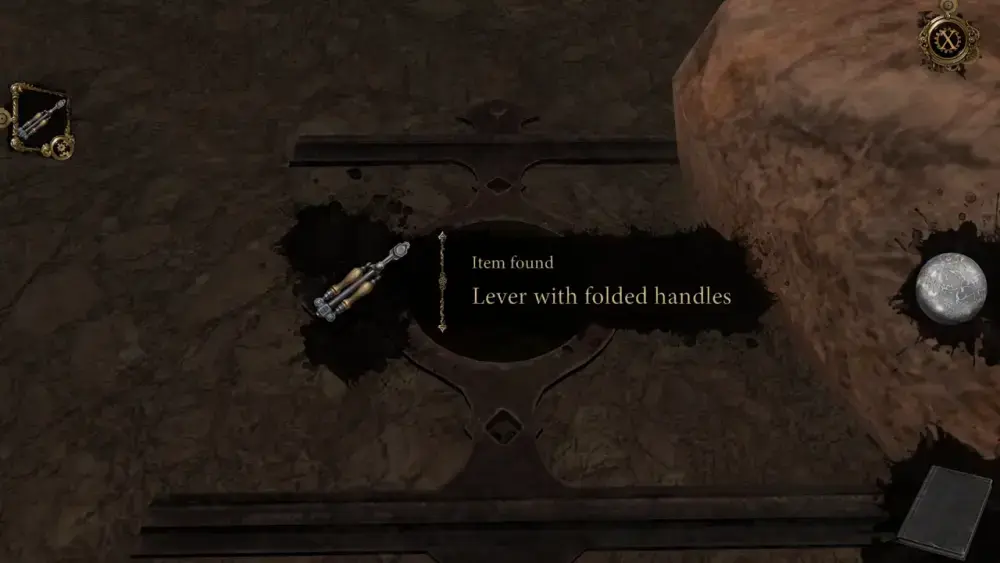
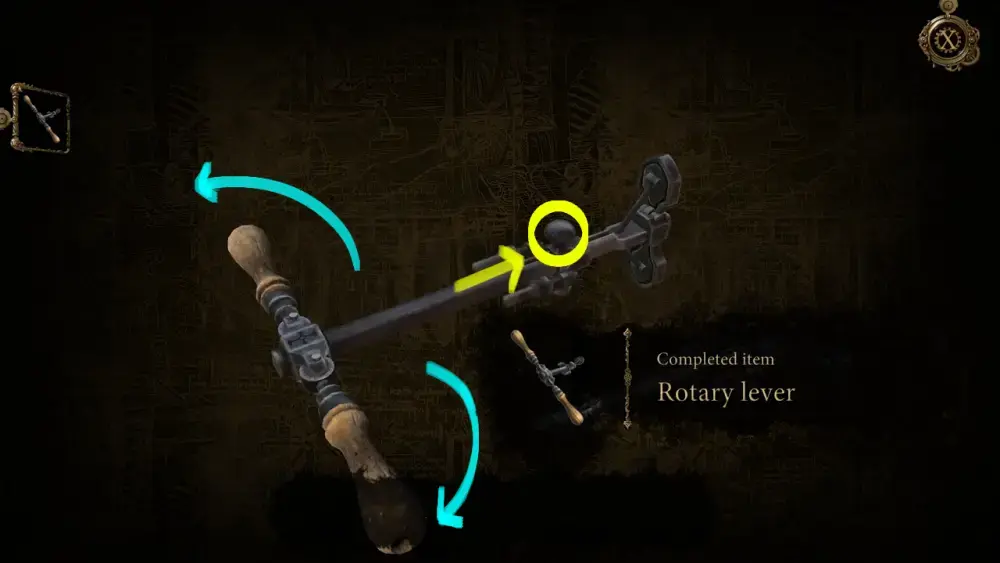
You’ll notice that the icon for this item is marked by a gear symbol, which means it’s not in its proper form yet. Thus, view the item in your inventory and slide the small metal bolt on the slot, then open up the folded handles. This should let you obtain a new item, which is the Rotary Lever.
At this point, you might be wondering what this Rotary Lever is for. If you look around, there’s nothing but rocks, trees, and earth all around you. Perhaps you’ve tried to drag the Rotary Lever into the secret compartment it came from, but it didn’t trigger any reactions. But precisely because you can’t see anything useful, it’s the perfect time to open the Oculus Perpetua. Lo and behold, you see a mechanism next to the boulder right in front!
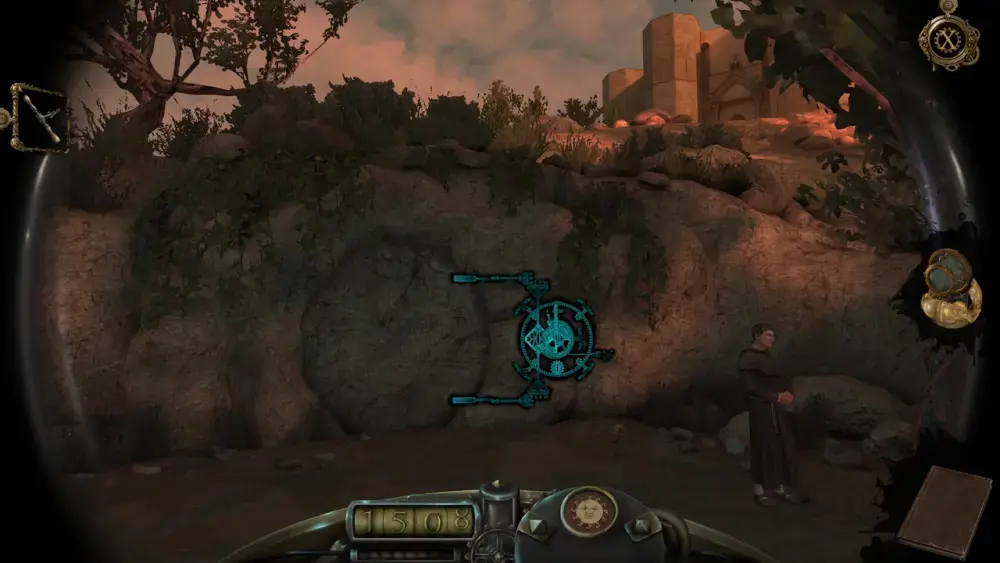
Approach the area where you can see the mechanism. If you switch off the Oculus Perpetua for a moment, you’ll see a hole on the rock face. This is where you can insert the Rotary Lever.
Once you’ve done so, open the Oculus Perpetua again so you can see the locking mechanism hidden behind the rocky wall.
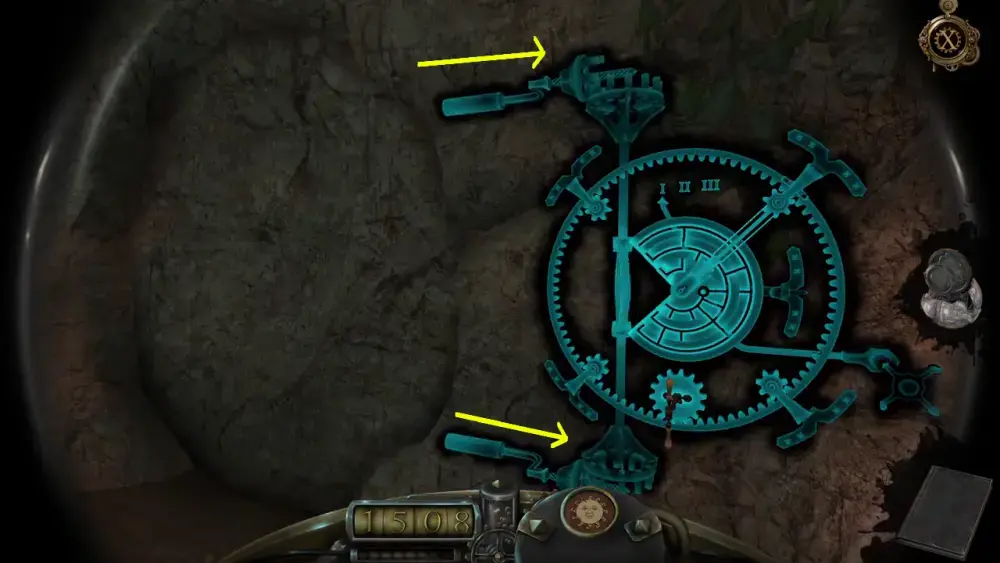
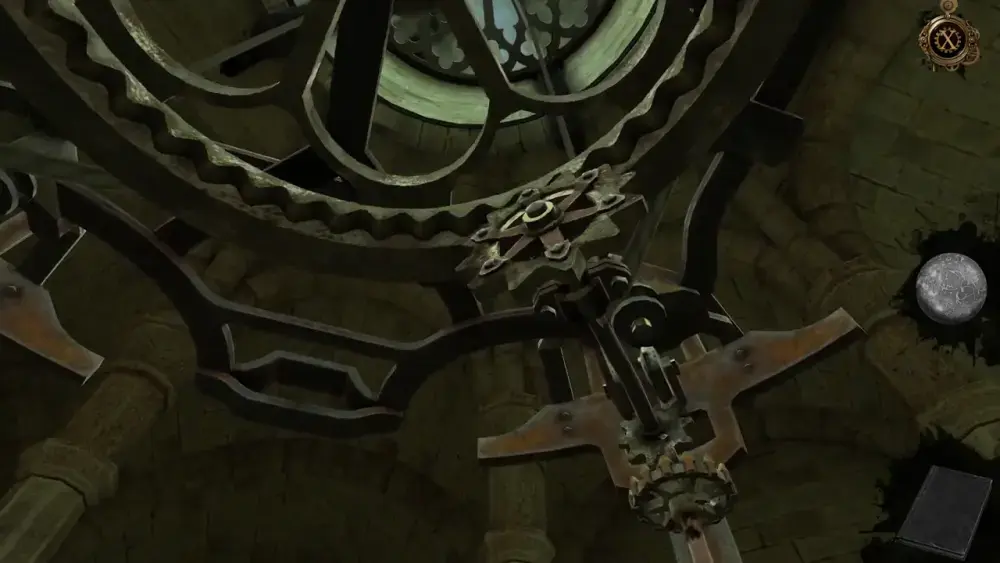
Now, this puzzle is a rather complicated one at first, but once you get what needs to be done, it’ll be relatively easy from there. Let’s first break down the mechanism into its important parts, which we’ve illustrated in the image below:

As you can see, there are several important parts of this puzzle. First, we have the Rotary Lever you’ve placed into the hole. This lever, when turned, will move any or all of the three rings above it. The rings differ in size, with the outermost ring being the largest. It’s not easily noticeable at first, but if you look closely, each ring doesn’t circle all the way as there are chunks of it seemingly missing. These holes are supposed to fit the rhombus unimpeded. Turning the rings using the lever will also move the bar attached to them.
Moving each ring is tricky as there is a pin that holds the rings in place. The pin can be moved left and right using the mechanism attached to a small rock at the right side. Keep in mind that the pin can only move along the grooves within each ring. If you move the small rock, you’ll see that the arrow pointing to the Roman numerals I, II, and III will also move. If the arrow is pointed toward I, the smallest innermost ring will move; point it to II, and the smallest and middle ring will move; point it to III and all the rings will move. The bar and the pin will dictate how far you can rotate the rings as the pin can be blocked by the bar.
Your objective is to position each ring in such a way that the holes are all in the same direction. Then, you can move all the rings and rotate it so the holes will fit the rhombus. The end result should look like this:

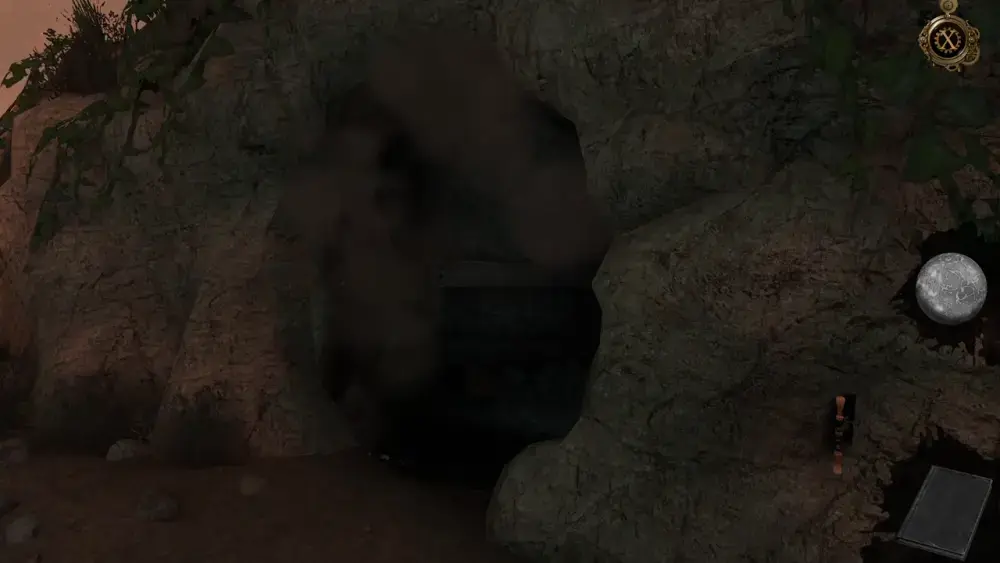
Upon solving the puzzle, you’ll trigger the locking mechanism wherein the bolts keeping the boulder in place will retract.
The boulder will then roll to the side, unblocking the entrance.
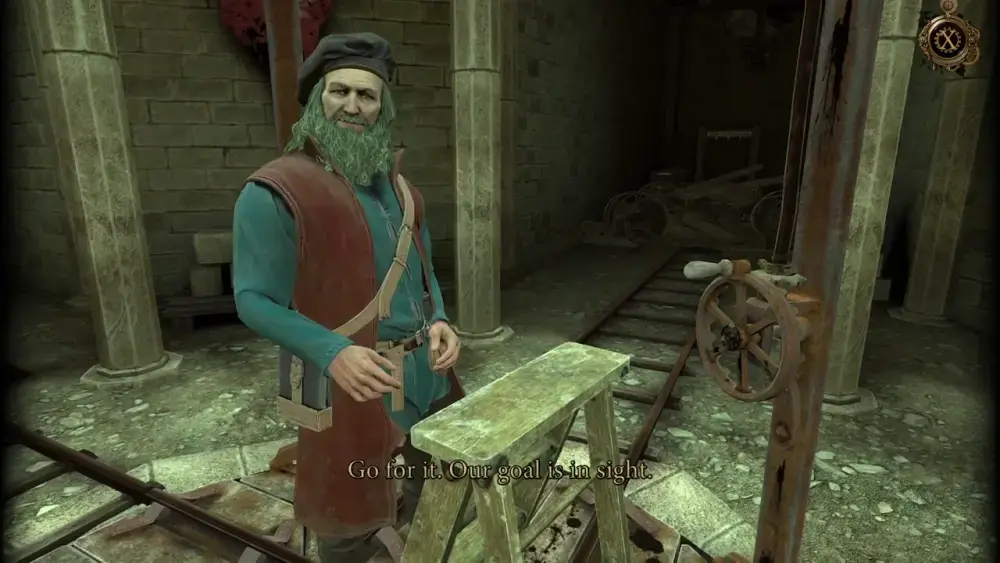
Your party then converges once more and decides that it would be best if Luca stayed behind to keep watch and make sure nobody attacks from behind. Leonardo, despite his age, is determined to see this mission through himself since he recognized that it was his own lapse in judgment that got them there in the first place and he wished to amend it.
Thus, you enter the passage with Leonardo, with the latter lighting the way using a torch. As you go deeper into the passage, it seems as though you’ve entered something that resembles a mineshaft. Leonardo points out a few things, which may come in handy down the line…
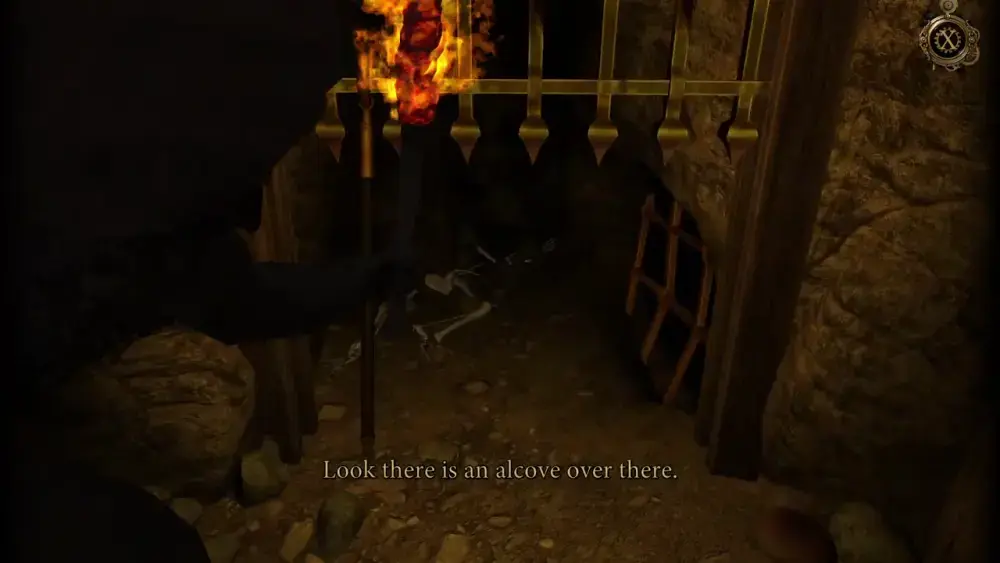
He also discovers a lighting system for the area…
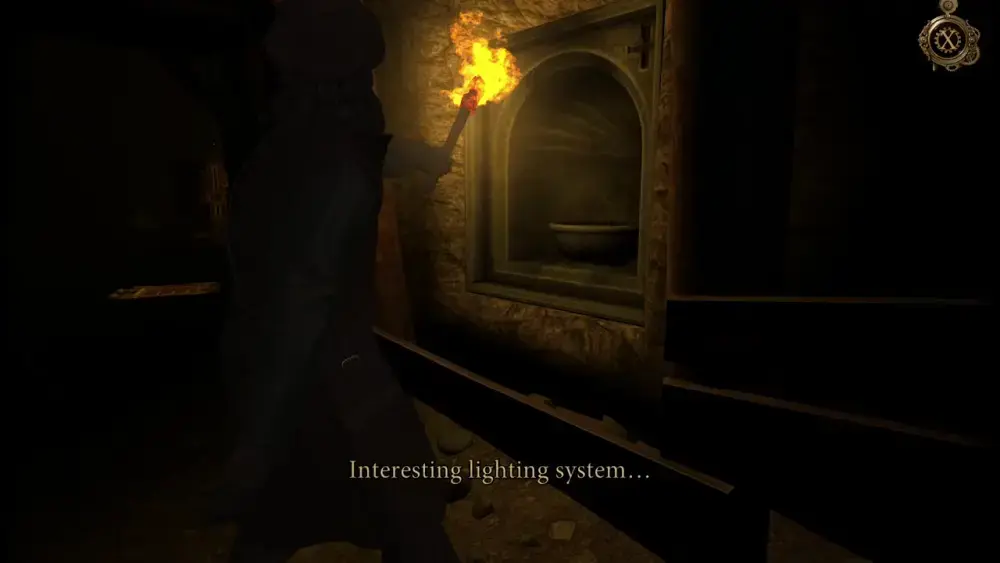
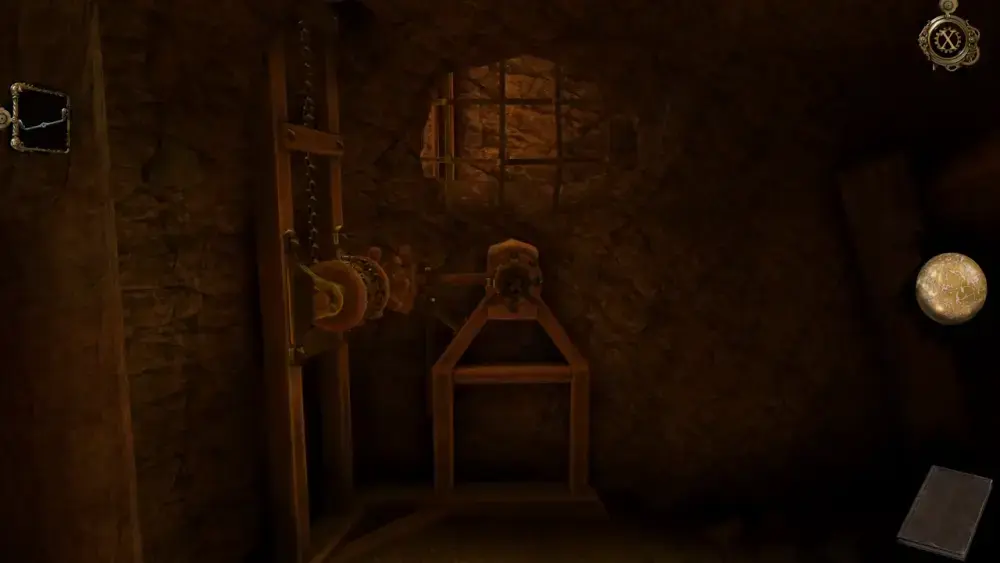
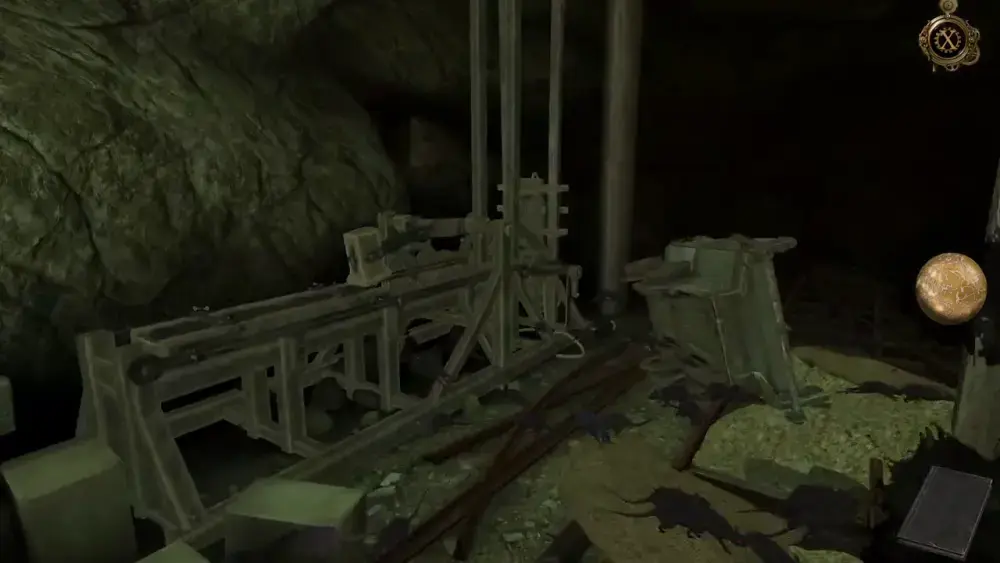
After Leonardo activates this with his torch, the once dark area becomes illuminated. Here, you can already see a couple of things, most notably a machine behind you, which Leonardo points out…
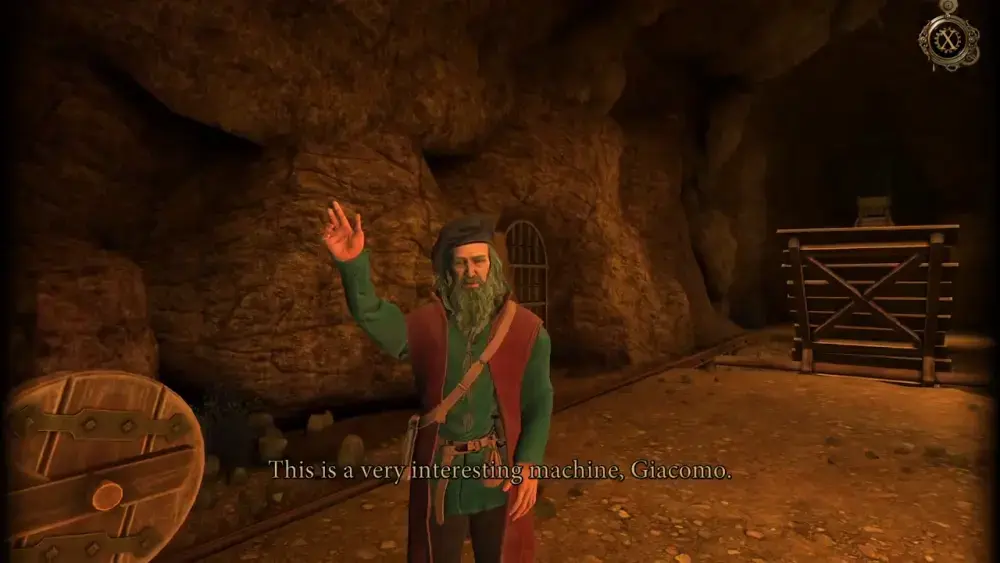
Here, he’s referring to some kind of storage crane, which he describes as pristine despite its age as it looks like it had been there for decades. He also mentions that he feels you may find a use for it later on.
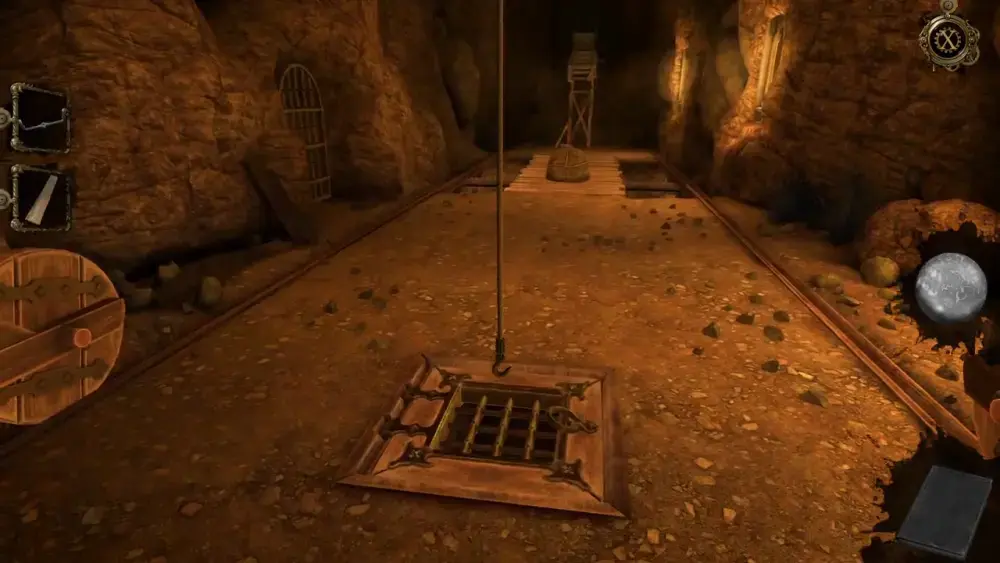
Once the cutscene with Leonardo is done, this is the area that you’ll be working on next:
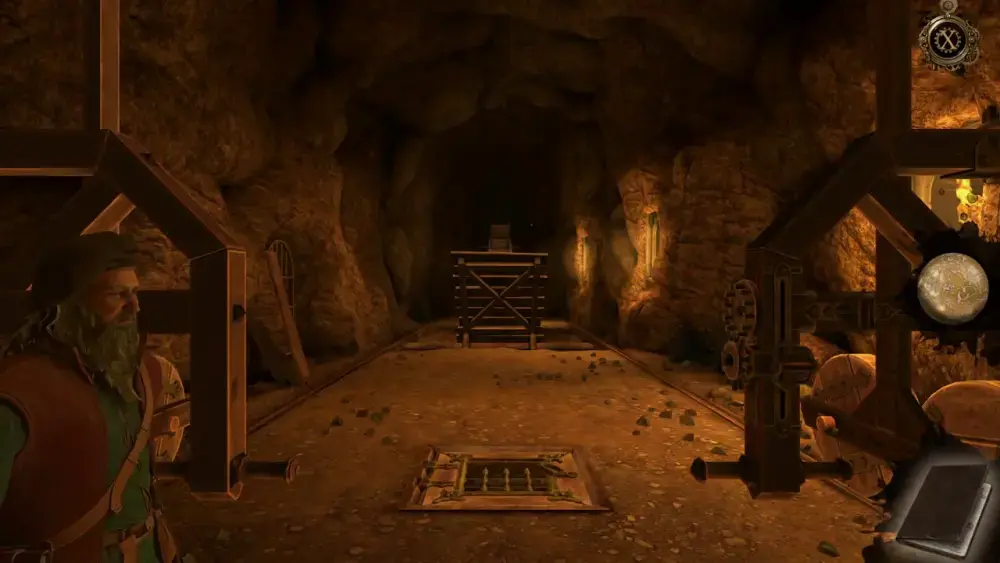
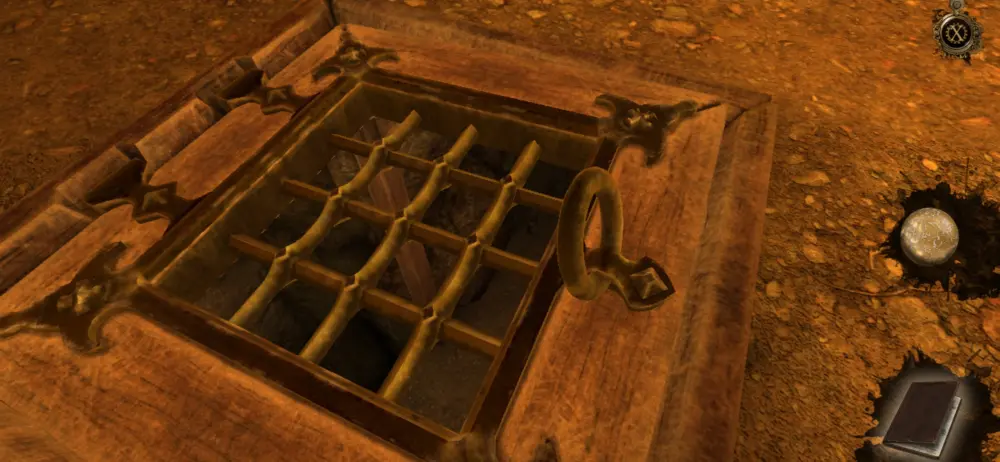
If you look around, you’ll see a couple of interesting things, such as the trapdoor in front, which is currently locked.
If you move a little further down, there’s also another door to your left, which is locked.
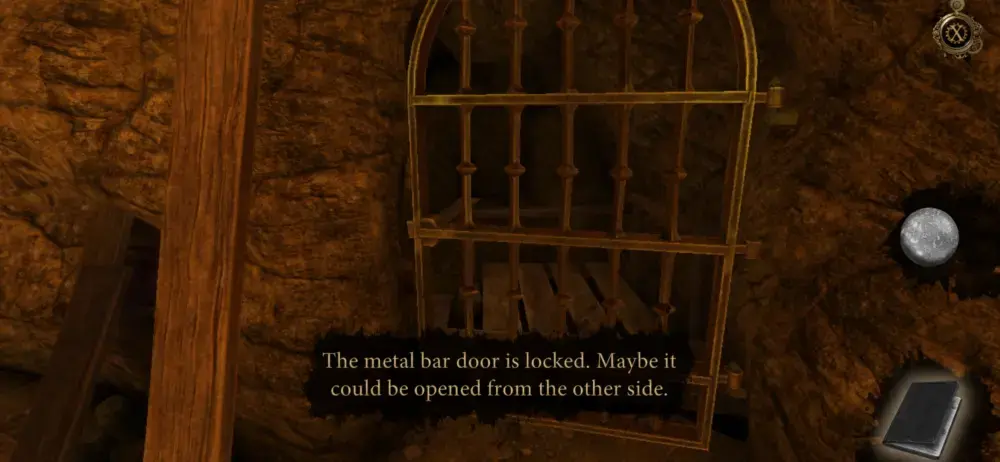
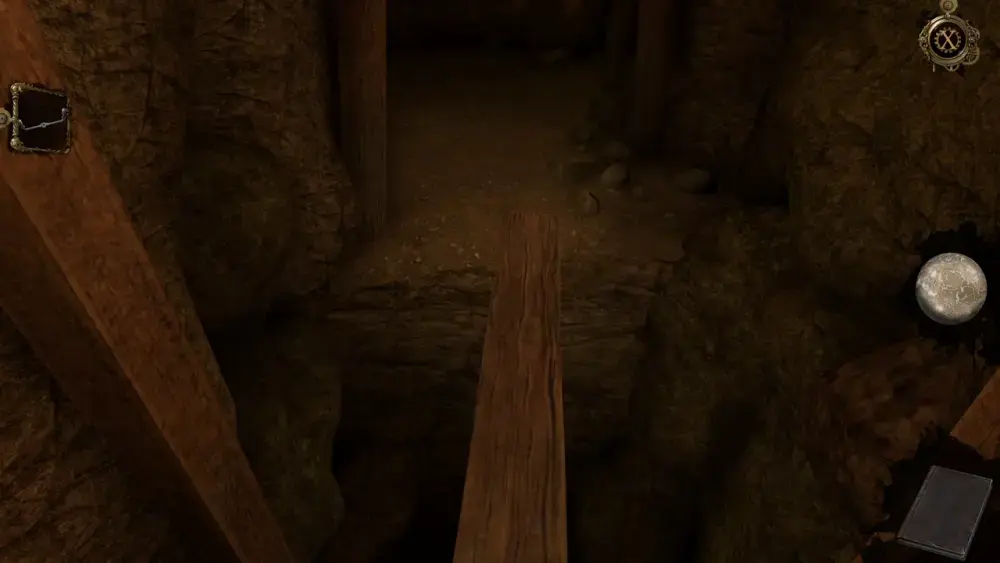
Just past the metal door and the trapdoor is what looks like a wooden bridge, but it’s not aligned quite properly.
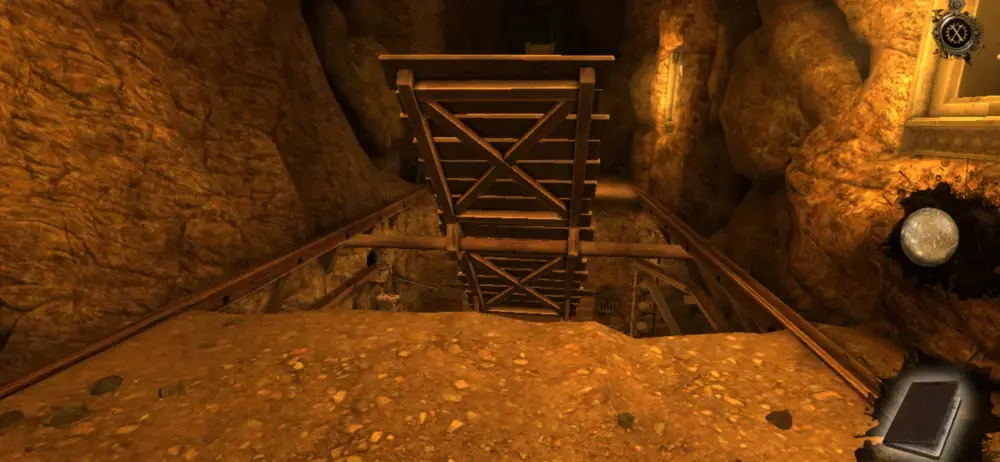
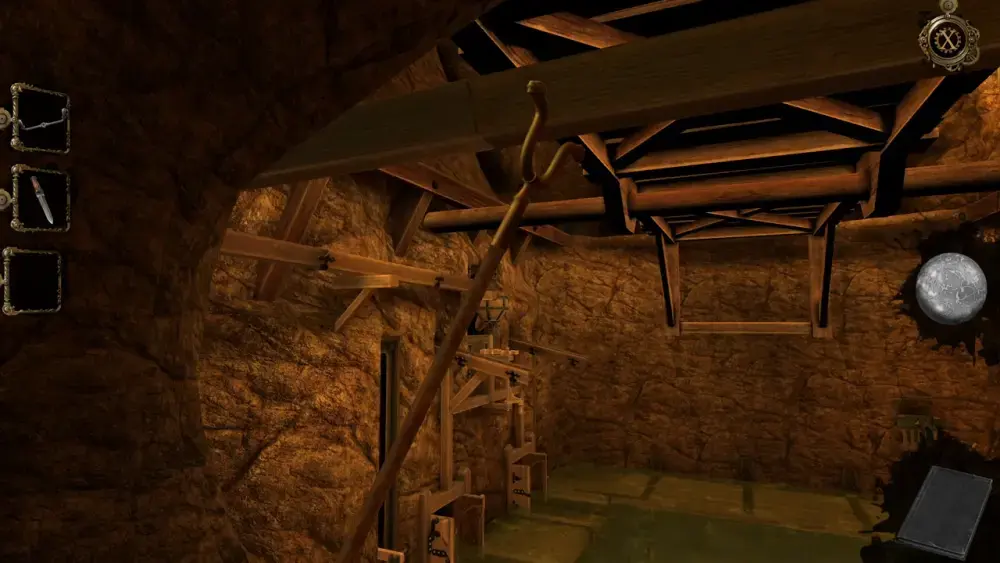
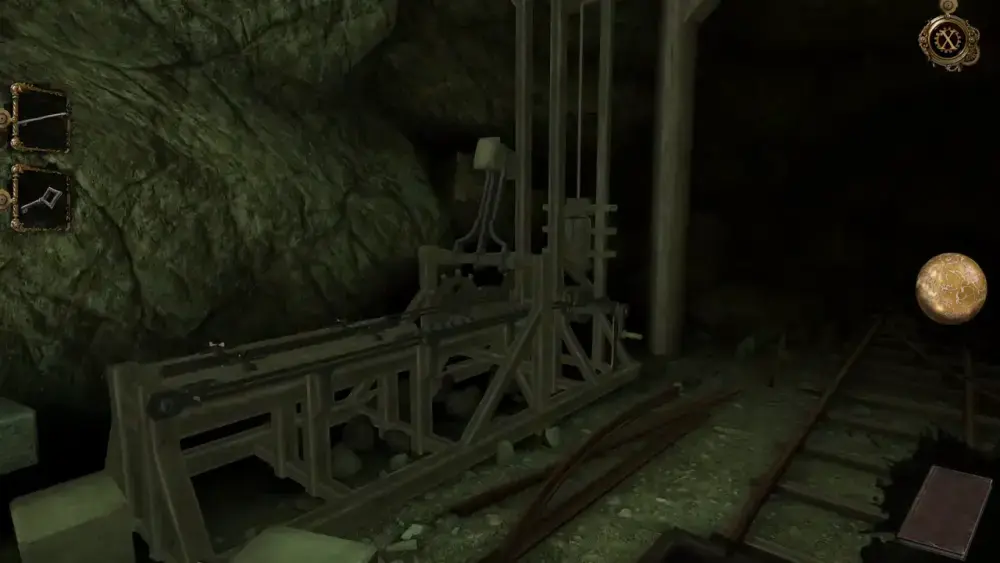
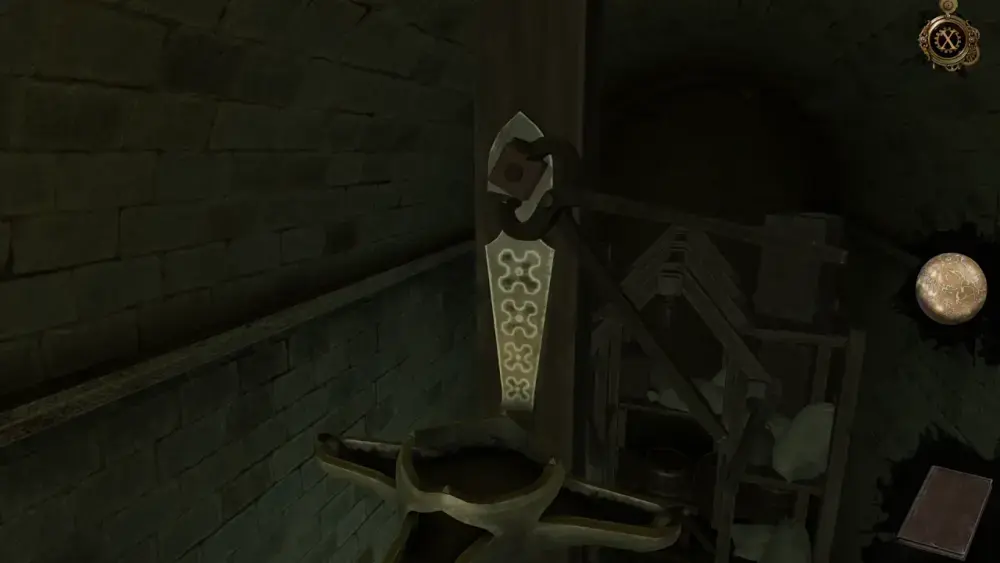
Clearly, this is the only way forward, seeing as all other options are locked. Lying right behind you is the answer: the storage crane that Leonardo had pointed out before. This is what it looks like when viewed in its entirety:
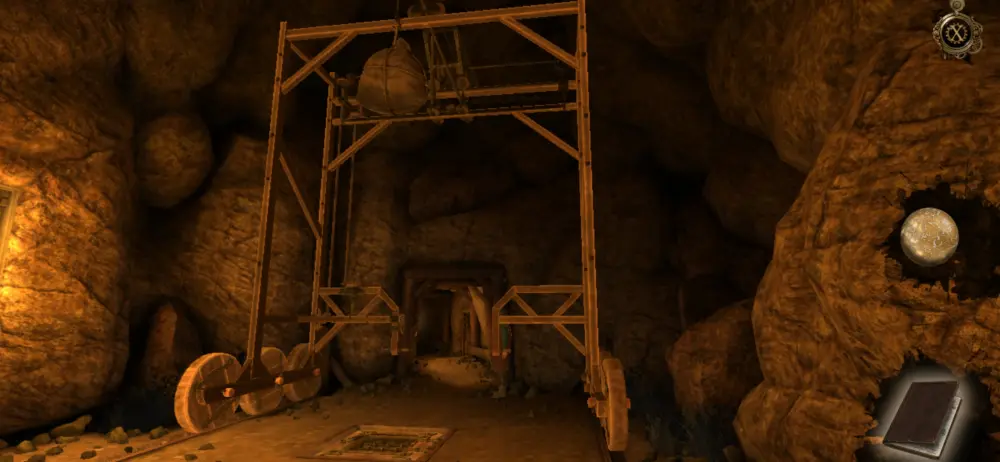
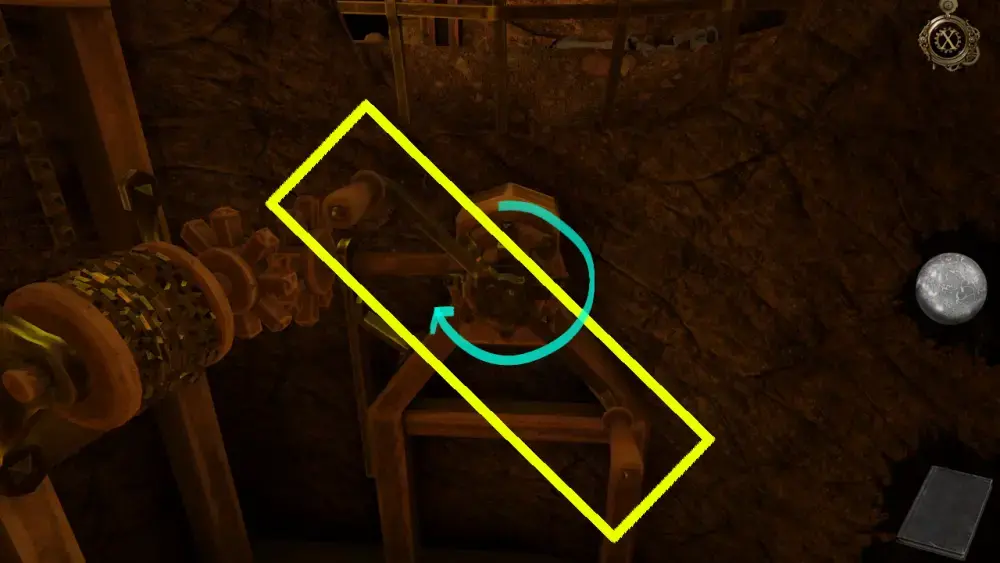
Both its wheel sets are on a track and there appears to be some kind of weight at the top. This will come in handy when trying to lower the wooden bridge. That said, return beside Leonardo and approach the handle of the crane. You’ll need to push it to get the machine moving forward on the tracks.
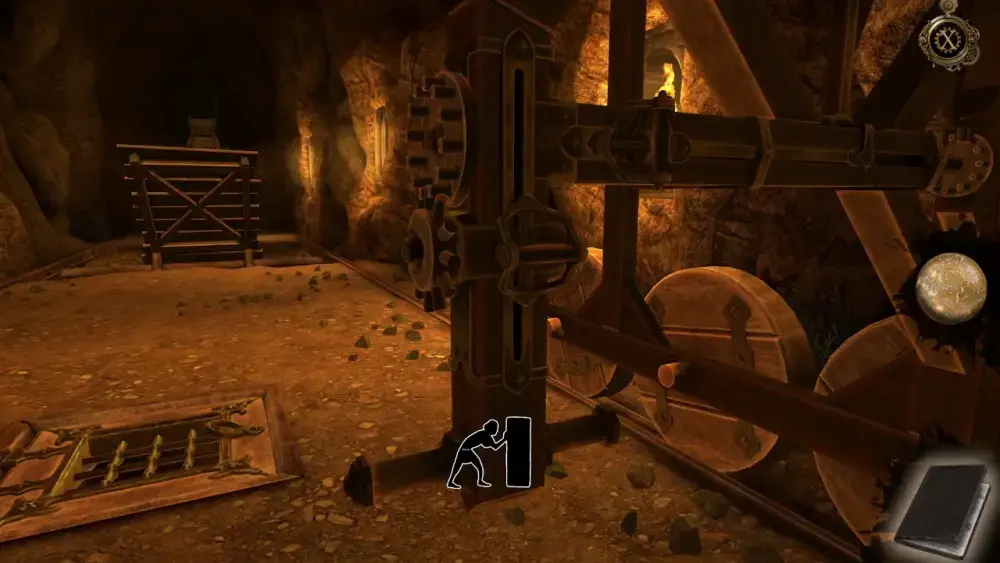
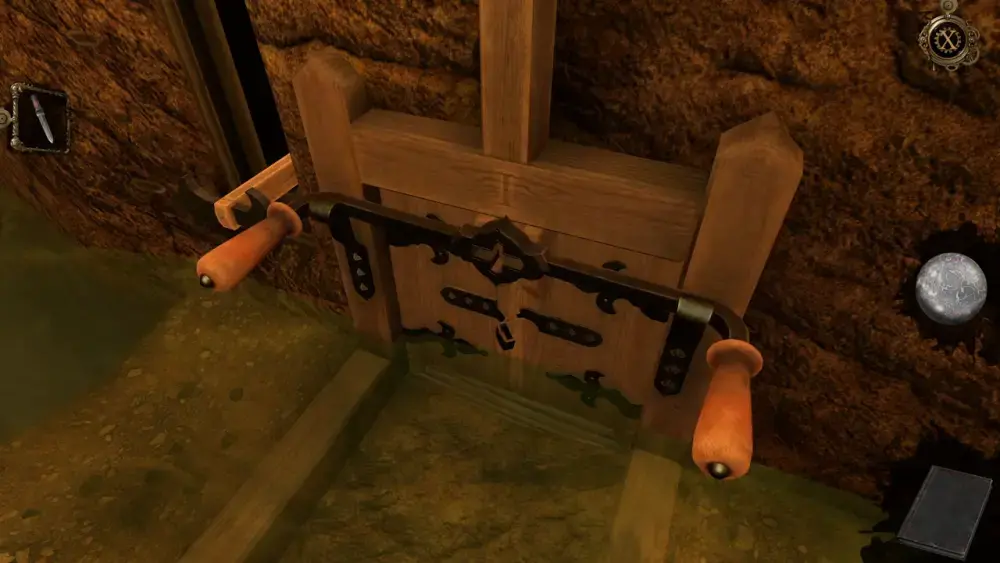
Of course, you can only move until the beginning of the bridge since it hasn’t been set upright yet. For this, you need to bring the weight down from the crane. You can do this by moving the two handles on the crane. One moves the weight side to side while the other brings it up or down.
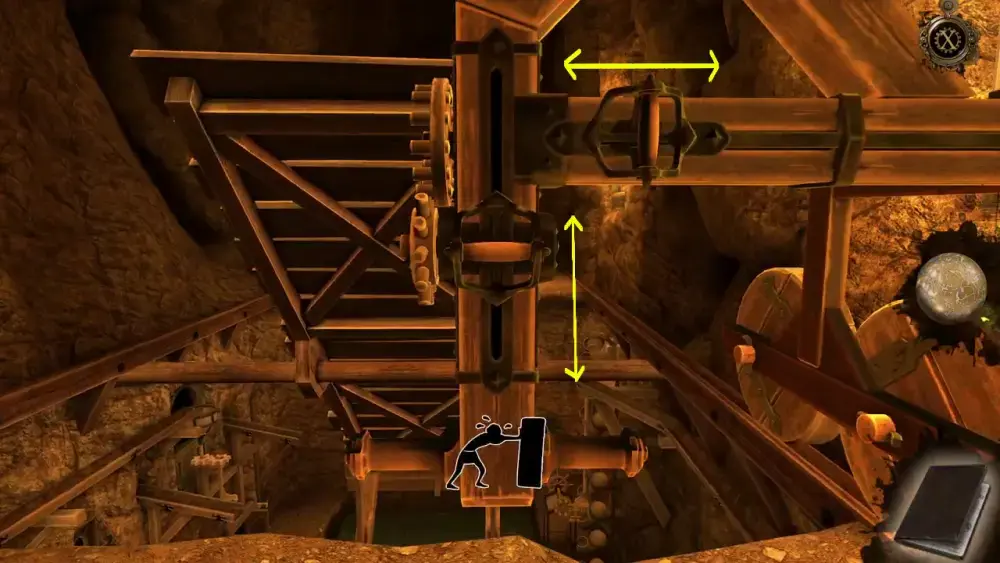
Position the weight right in the middle of the crane. If you use the handle that moves it from side to side, it will give you a view of where the weight is positioned from the top.
Once you’ve adjusted the weight to the middle, pull the handle which lets the weight descend from the crane. This should bring the wooden bridge upright.
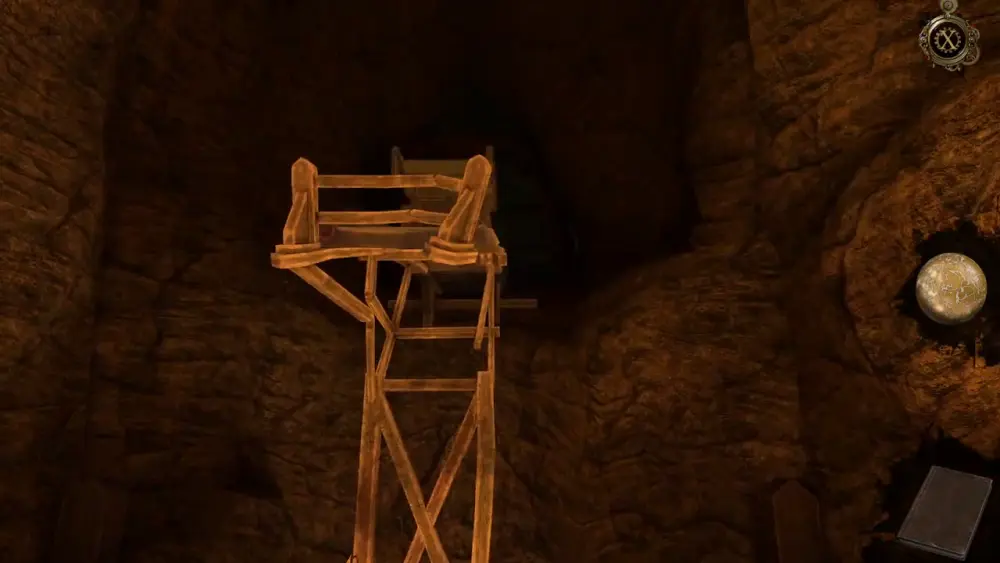
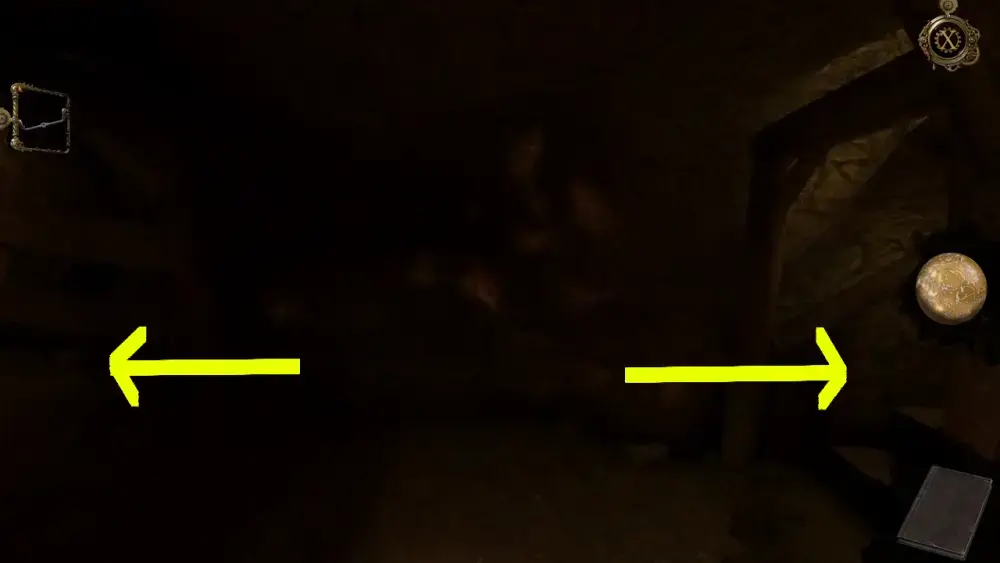
You can now cross unimpeded. Step away from the crane first and walk to the other side of the bridge. There, you will find two things: a passage to your right…
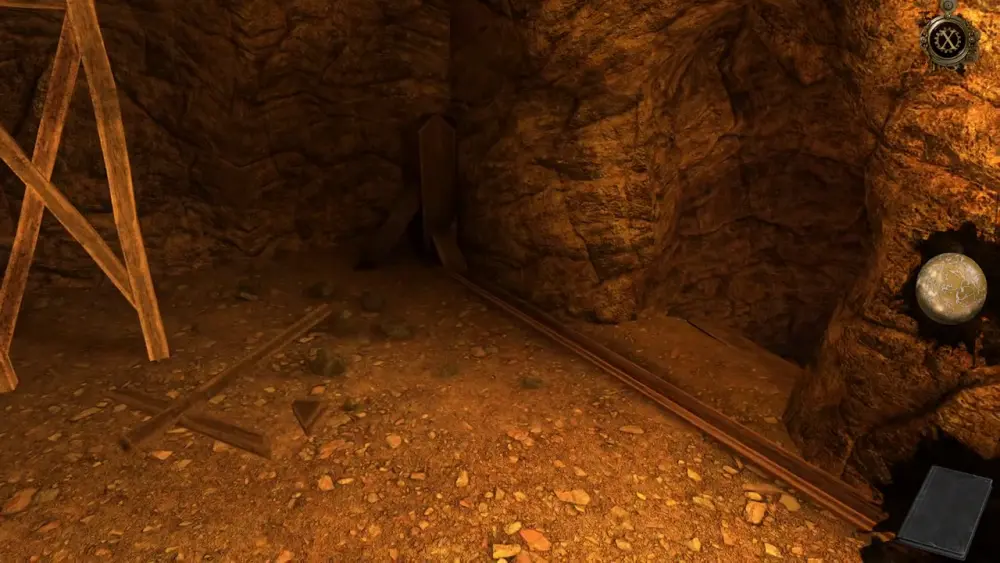
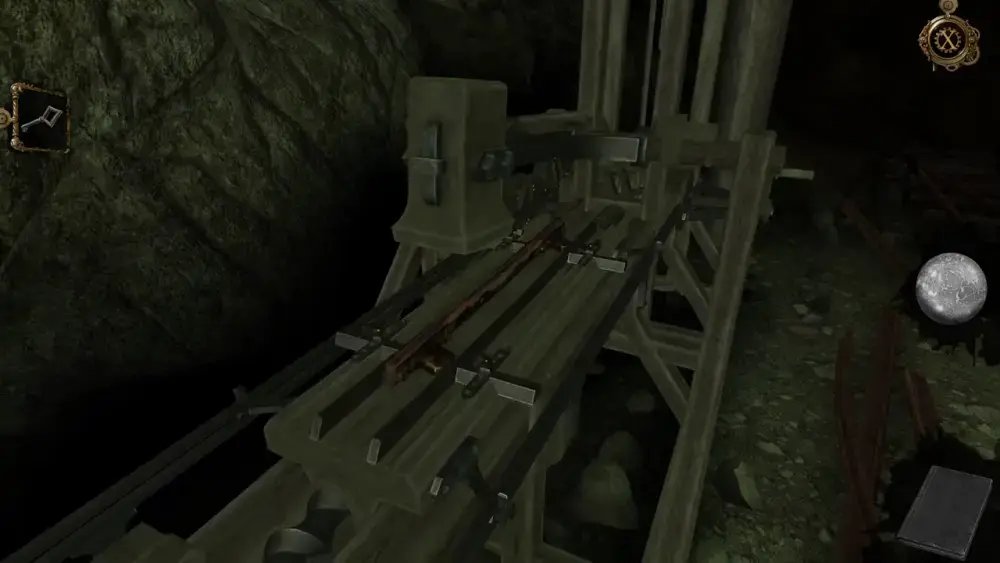
And some kind of elevated platform up front. If you look closely, it’s actually a rail with a cart.
Since you can’t access the elevated rail yet, enter the passage to your right. It will lead you down a short flight of stairs, wherein you’ll find what looks like a partially flooded room with complex mechanisms that are likely meant to pump water into the reservoirs.
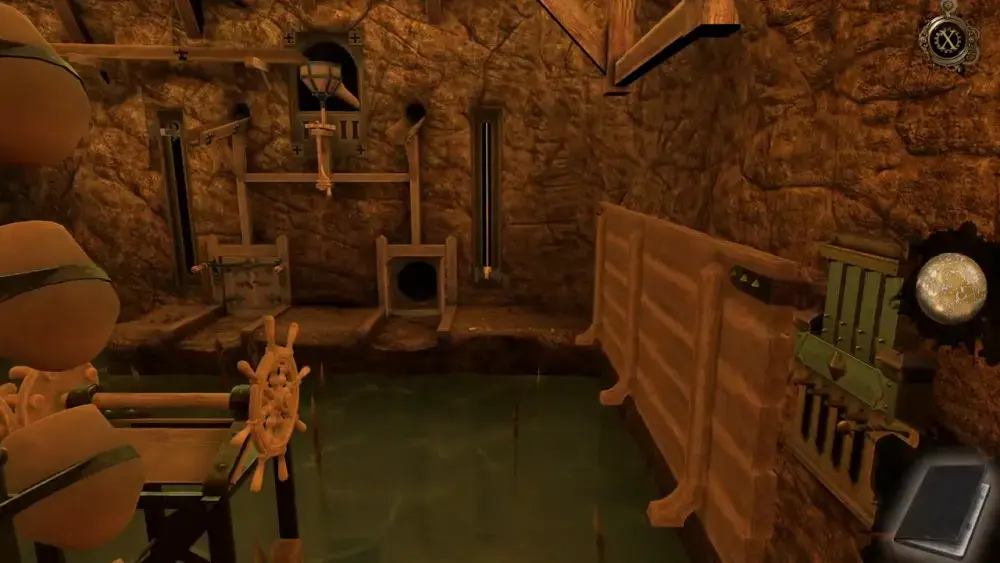
Seeing as you can’t cross to the other side yet, you’ll notice two things that are closest to you: to your left is a wheel that, when turned, will rotate the pots that can draw water. To your right is a device that appears to be connected to a catwalk that’s been locked onto the wall.
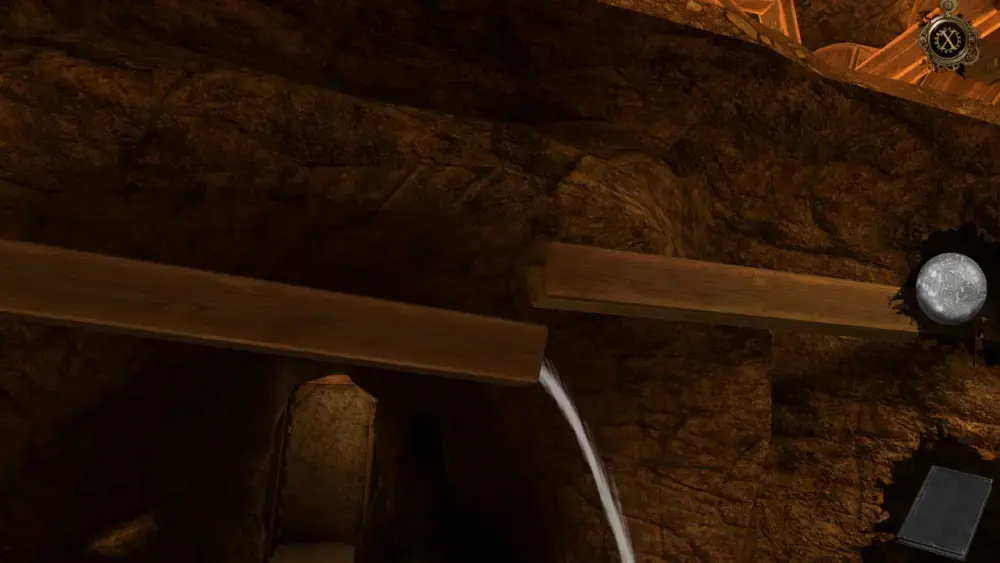
Let’s pay attention to the wheel first: If you keep turning it, this will trigger a brief cutscene where you will see a bolt come undone, disconnecting a set of wooden pipes at the top of the room. Water will stream out of the disconnected pipes.
Still, it looks like you need to cross to the other side to figure out what this means so, now, turn your attention to the device on your right. If you move the lever to the side, you’ll hear metallic clicks indicating that something inside the mechanism is moving.
As it’s likely a lock, open the Oculus Perpetua to see how the mechanism inside works.
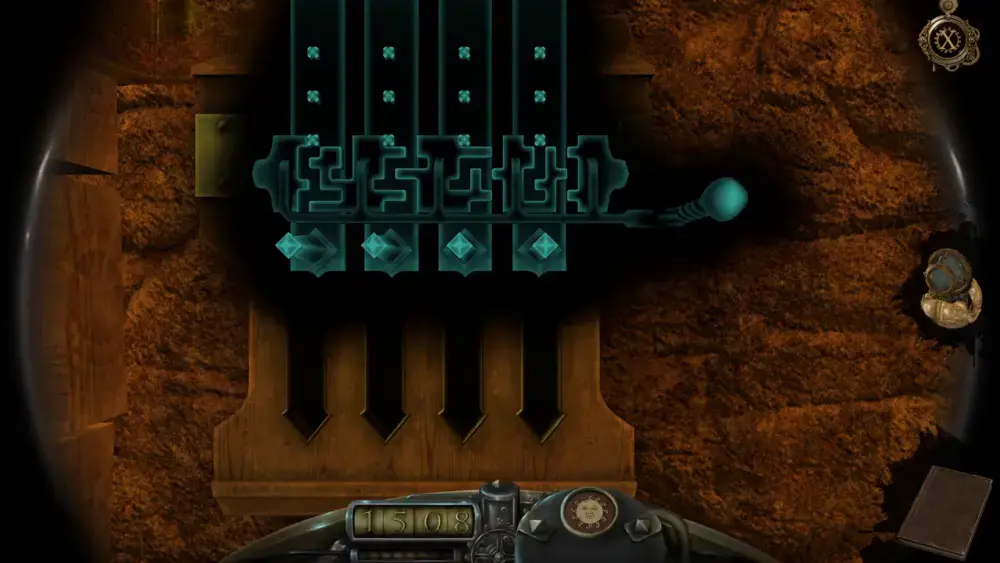
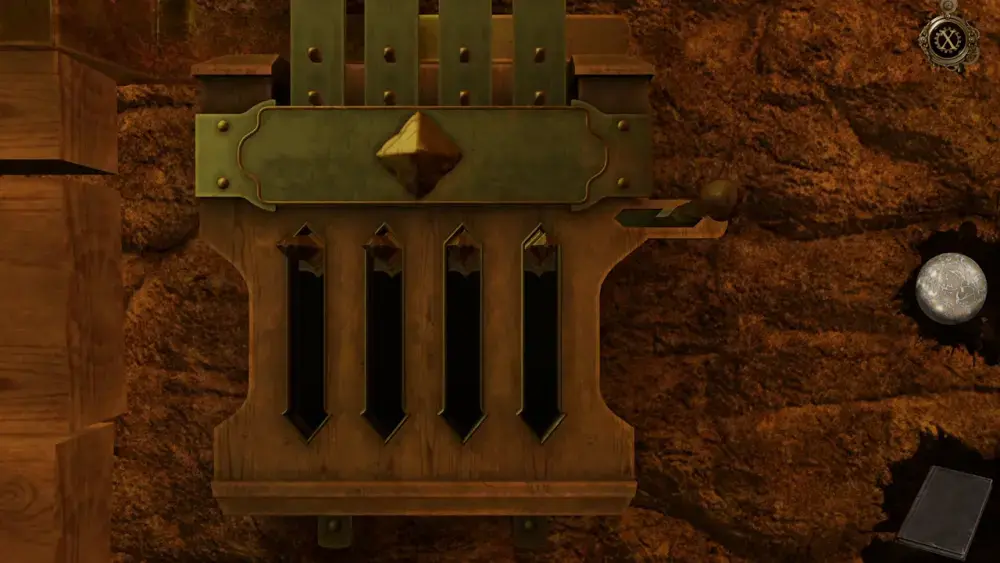
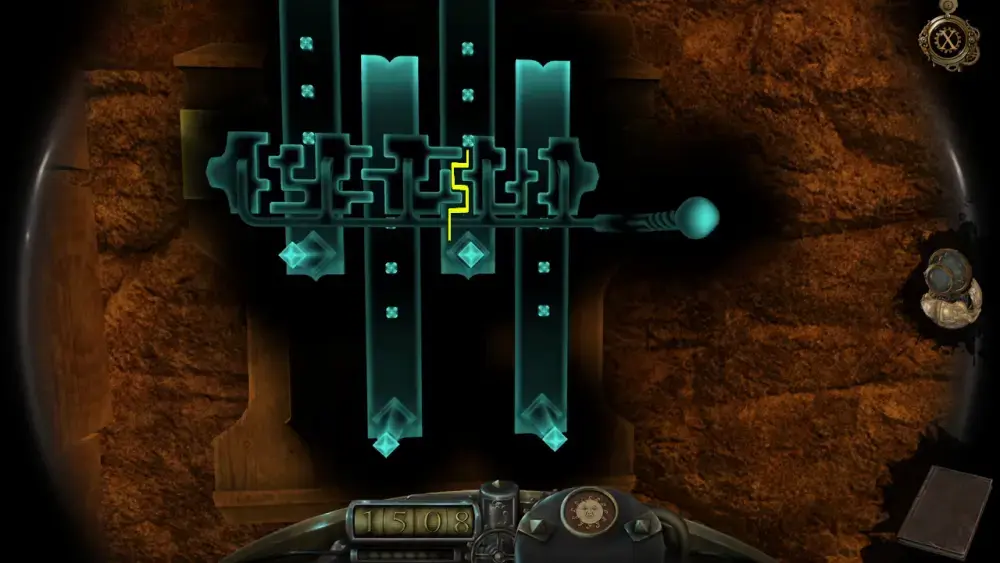
The way this lock functions is that the lever controls the position of the maze-like hinges, allowing you to move them as a group from side to side. Your objective is to bring down the rectangular slats by getting the square dots past the maze-like grooves. You can pull the slats down using the diamond protrusions at the bottom.
To solve this puzzle, let’s first label the slats into four:
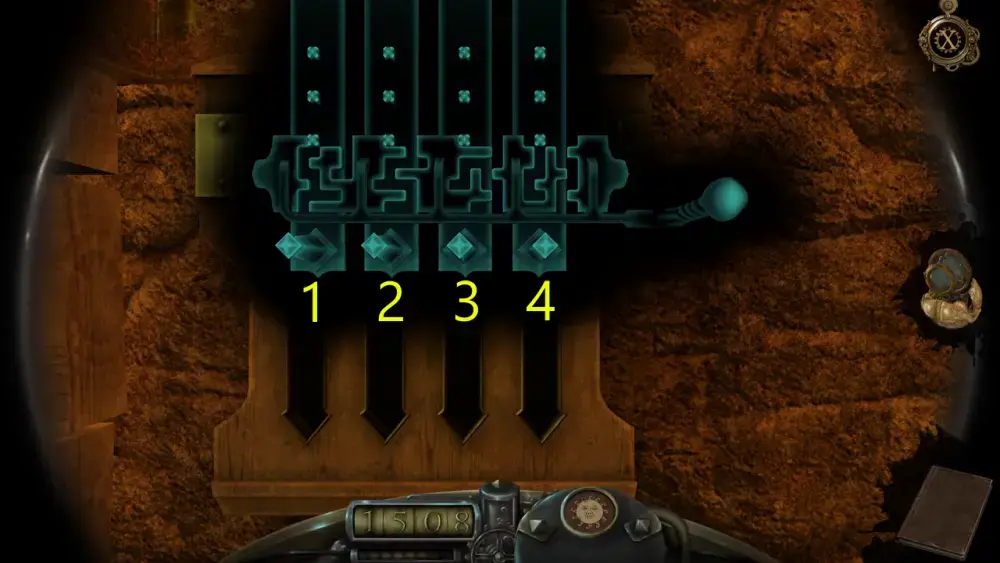
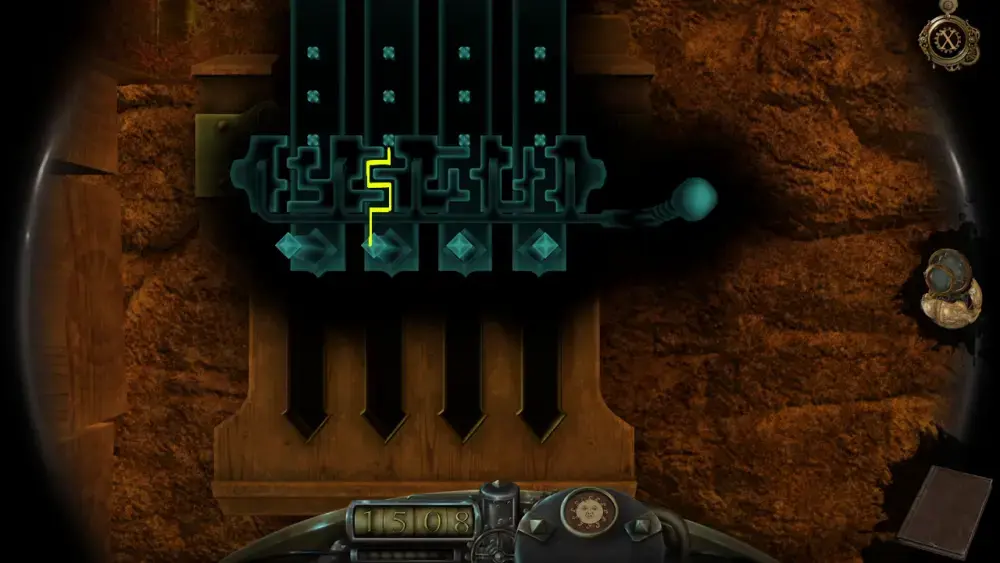
Let’s start with slat #2. Make sure all the three square dots are aligned with the specific maze-like hinge highlighted in yellow below. Move the lever and the diamond handles at the bottom so the dots can go through the empty spaces without a hitch.
Next is slat #4. The square dot should be aligned specifically with this maze-like hinge.
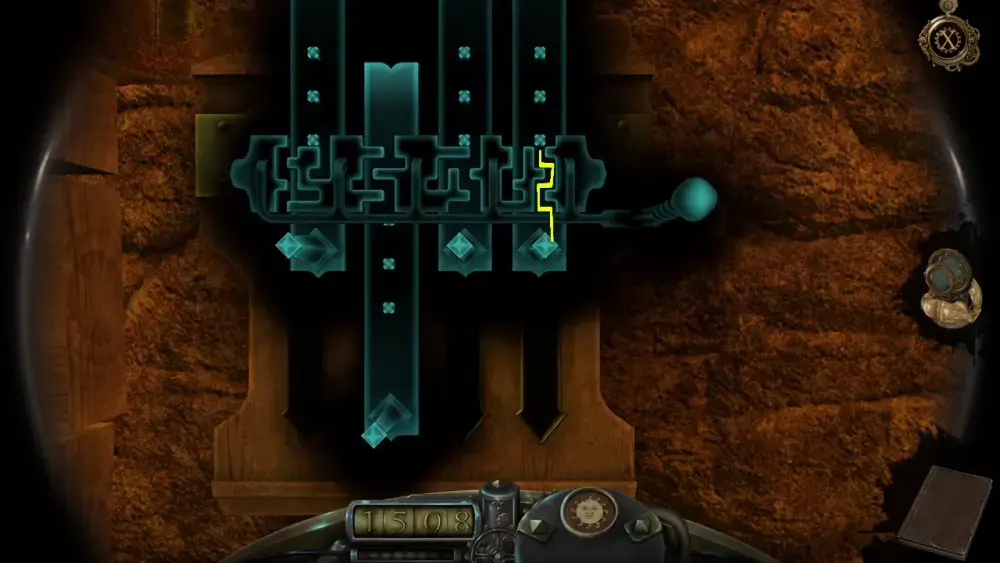
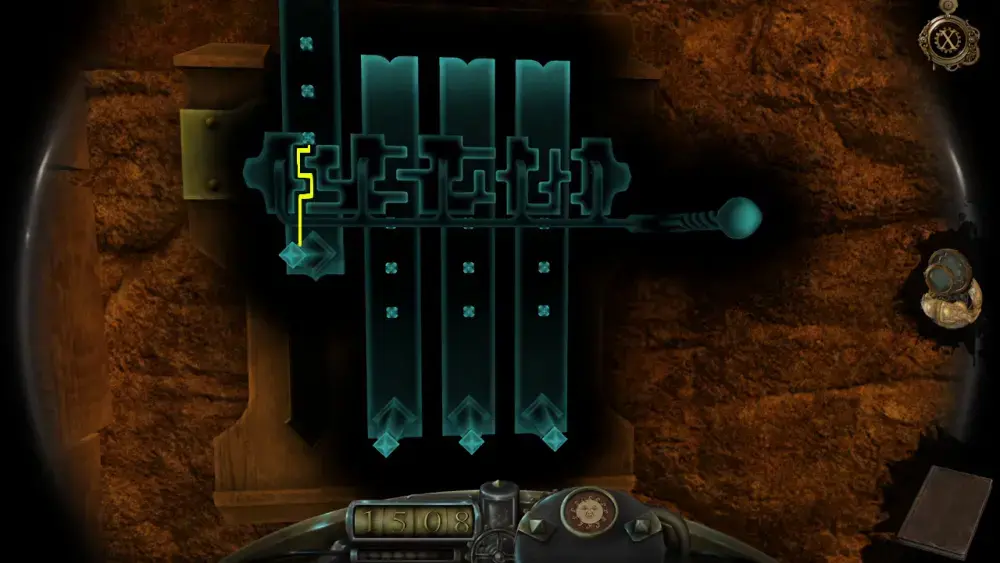
Next is slat #3. Move the square dots following these empty spaces:
Last is slat #1. From completing slat #3, pull the lever to the right so you can align the square dots along this path:
With all four slats pulled down, the catwalk fastened to the wall will fall, giving you a means to cross to the other side of the room without going through the flood or the spikes submerged in water.
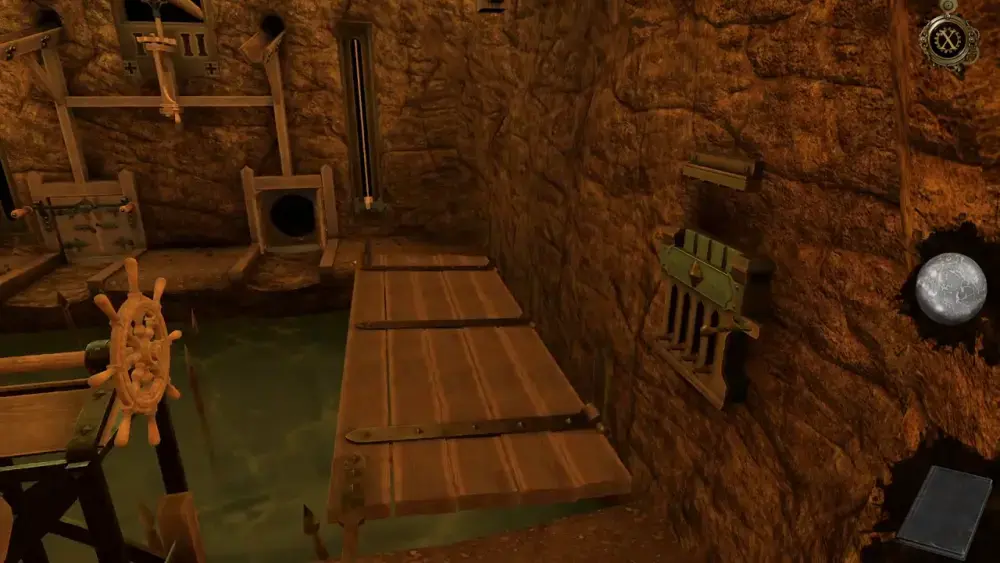
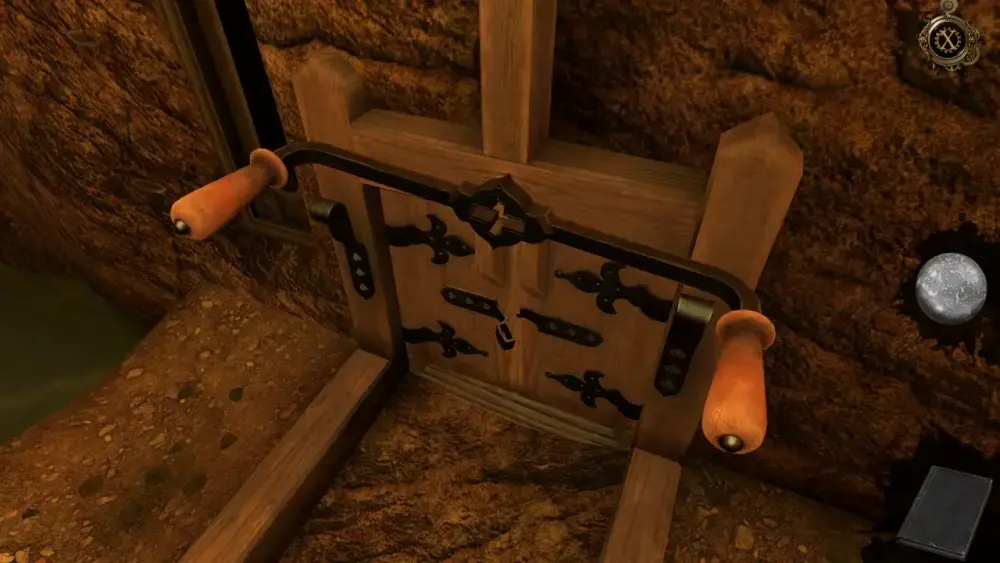
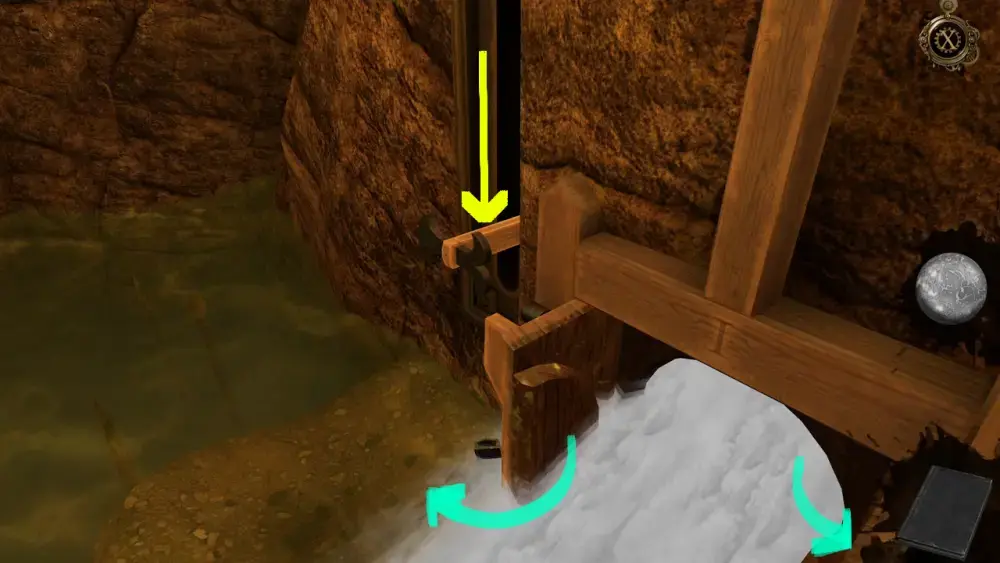
Upon crossing, you’ll be faced with a series of strange-looking mechanisms and objects. Most notable perhaps are the two doors, one of which is open while the other is closed by some kind of bar or handle. If you approach the doors, you’ll see that the door on the left has a Roman numeral I on it while the right door, which is open, has a Roman numeral II. These Roman numerals seem to correspond to the same Roman numerals at the top of the device. You’ll also see that at the center appears to be a handle that you can move from side to side. If you get closer to it later, you’ll discover that the handle is connected to a movable funnel at the top.
The most accessible among these is clearly the handle on the left door so walk toward it and take it.
This will cause the doors to open, with water suddenly rushing out. Beside the door is some kind of meter whose indicator will descend as the doors open and the water gushes out.
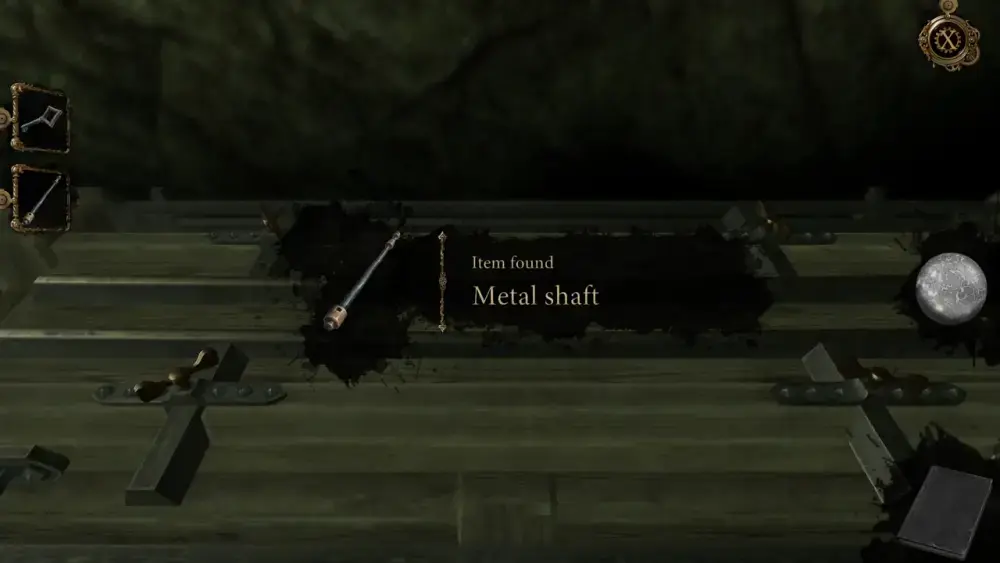
When this brief cutscene concludes, you’ll be able to obtain the item Metal Shaft with Handles.
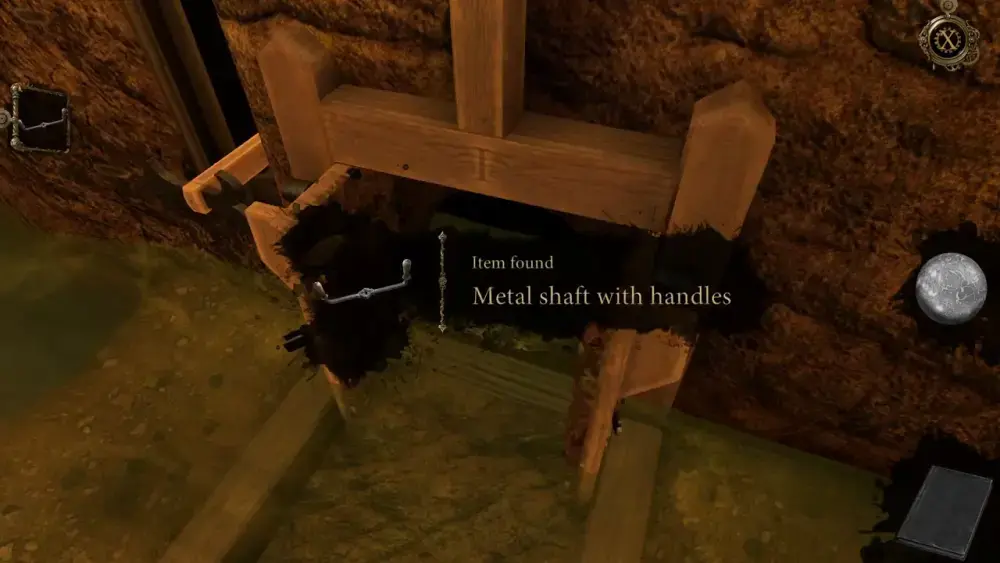
At this point, the room’s been flooded even more and there doesn’t seem to be anything else that you can interact with that could trigger the machine. The metal shaft you’ve just obtained doesn’t appear to fit anywhere either. However, you did discover that water can be kept behind those doors. If you can find something to lock the second door with, and something to reconnect the pipes at the top, you might be able to decrease the water level in the room when using the rotating vessels.
With that in mind, return to the upper part of the cavern and find something that may be useful. After all, there are two doors that you haven’t unlocked yet: the trapdoor and the metal door to the side.
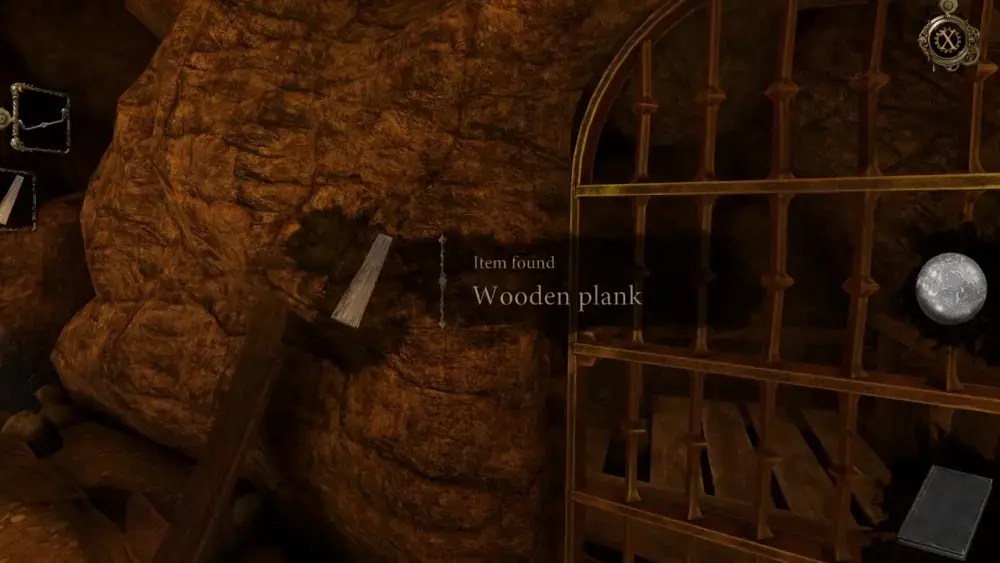
If you approach the locked metal door, you’ll find an item you might have missed initially: a Wooden Plank right next to it.
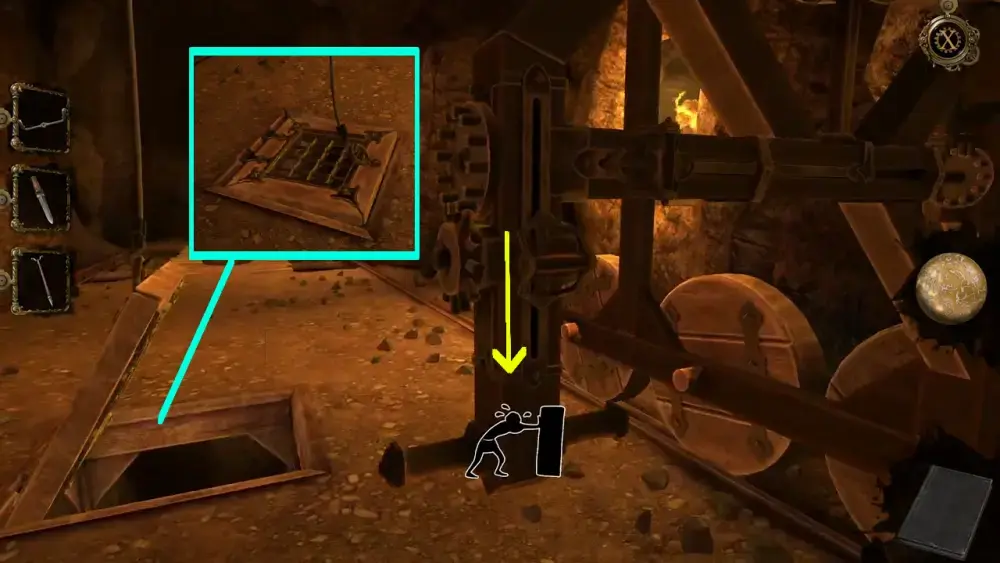
Still, the door remains locked so perhaps you’d have better luck with the trapdoor. If you approach it and try to lift the door, a prompt will appear saying that it’s too heavy. The only way you can open it is by pushing the crane back and letting the hook fall down so you can fasten it to the trapdoor.
Make sure to approach the trapdoor and place the hook on the metal ring that opens it. Otherwise, you’ll repeatedly just be pulling the hook up and down.
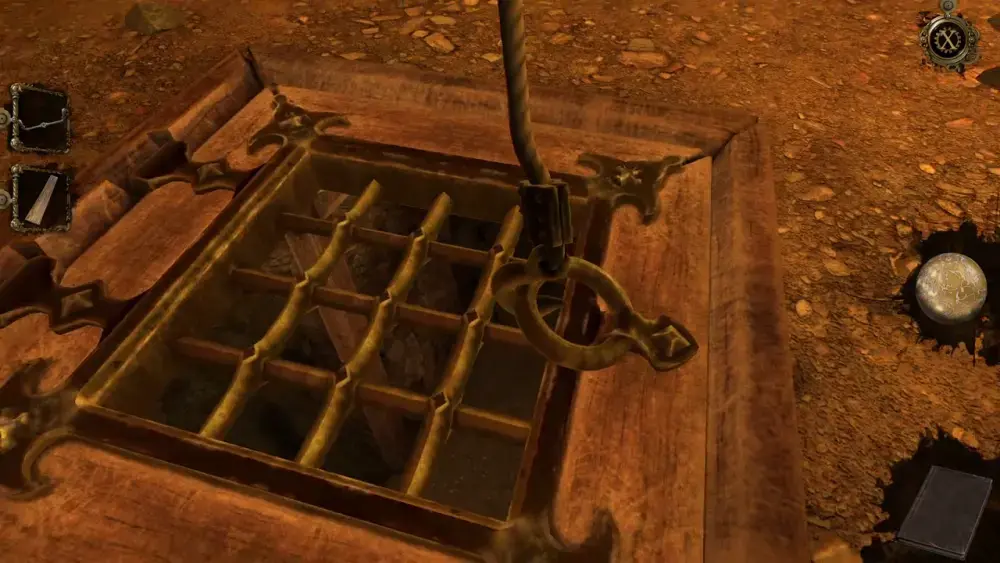
Pull the lever on the crane to lift the hook and, consequently, the trapdoor.
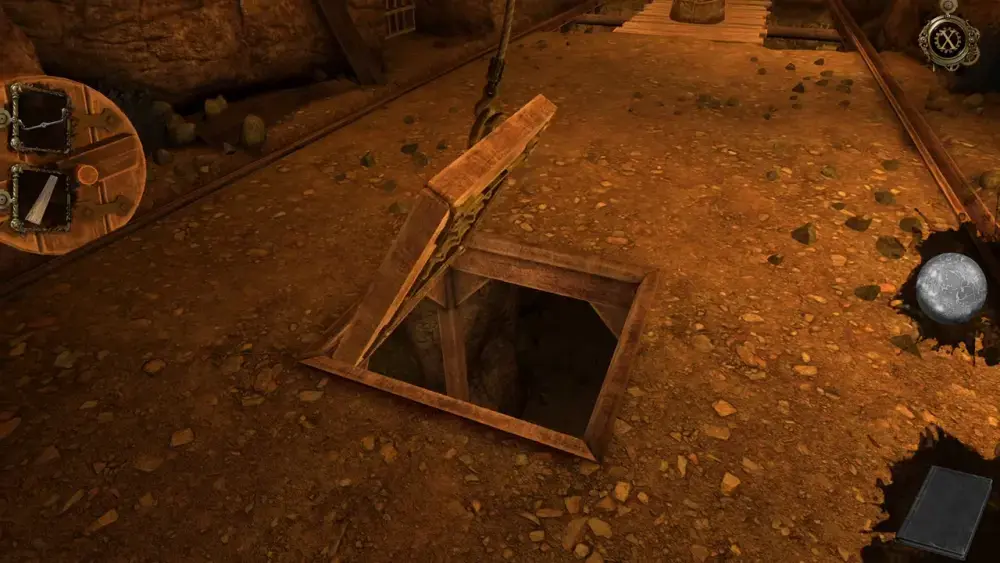
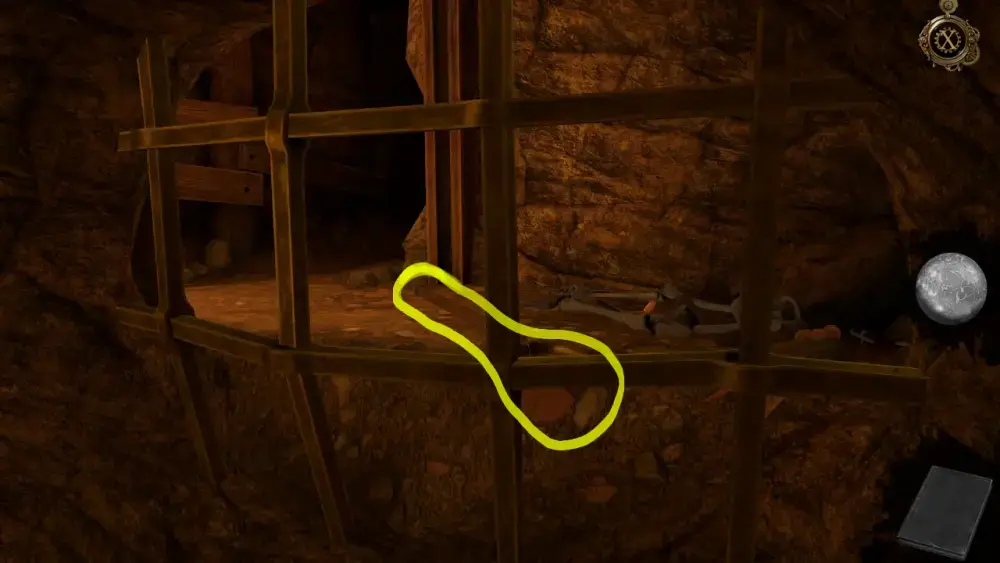
Head down the trapdoor by descending through a ladder. You’ll see that the paths fork: right in front of you is a hallway that has a chasm in the middle…
And to your right is a path leading to the side of the flooded room. Based on your position, you’ll be standing right under the disconnected pipes.

Since you still haven’t found anything that can be useful for this room at the moment, go back to the path with a chasm in the middle and use the Wooden Plank as a bridge to get to the other side.
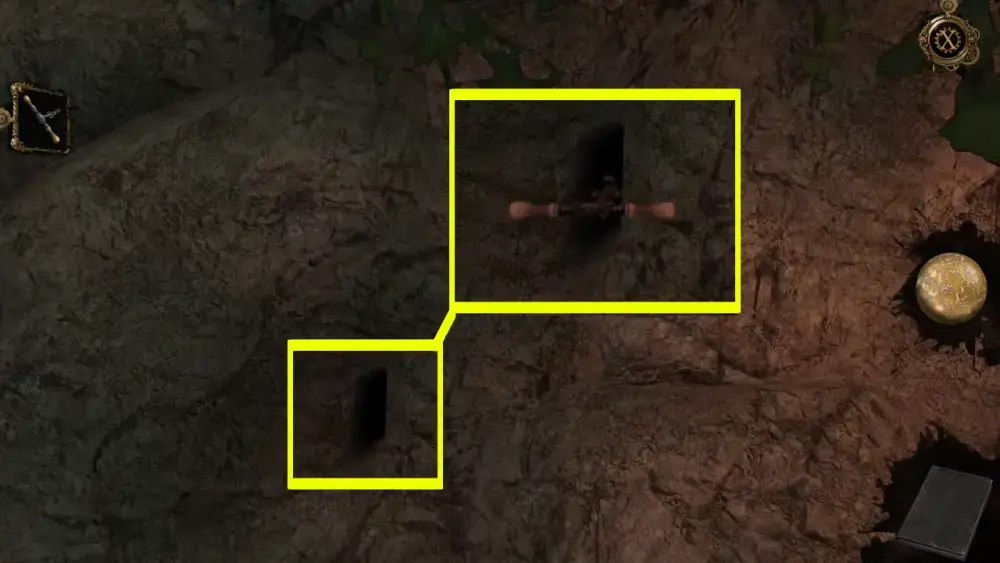
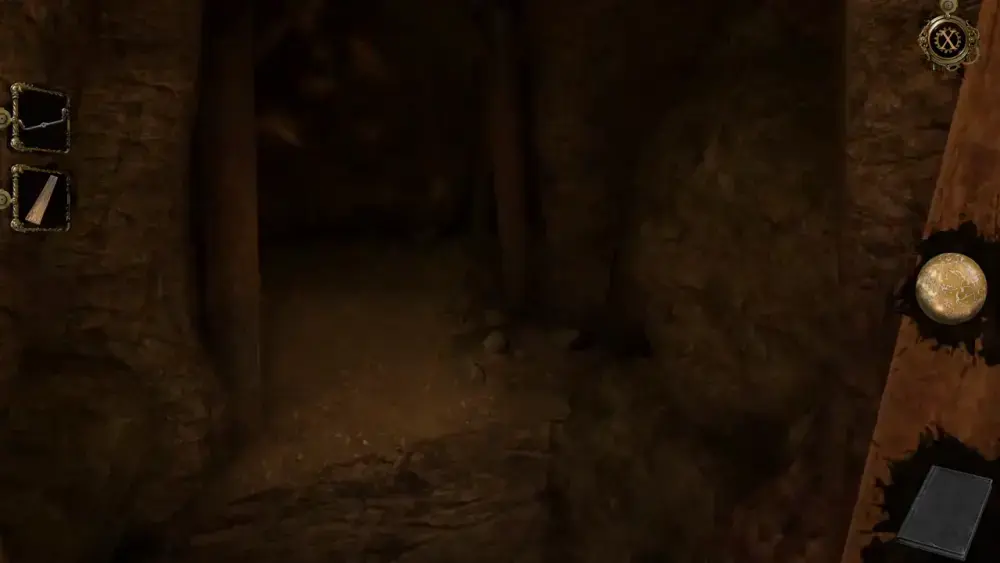
You’ll see that the path forks again. It’s a little dark in this image but you can choose to either go left or right.
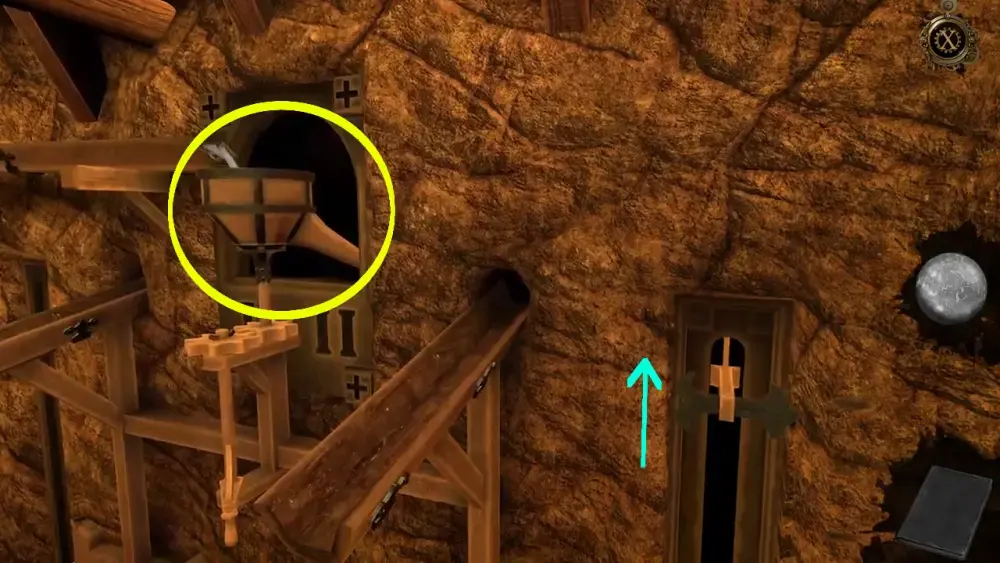
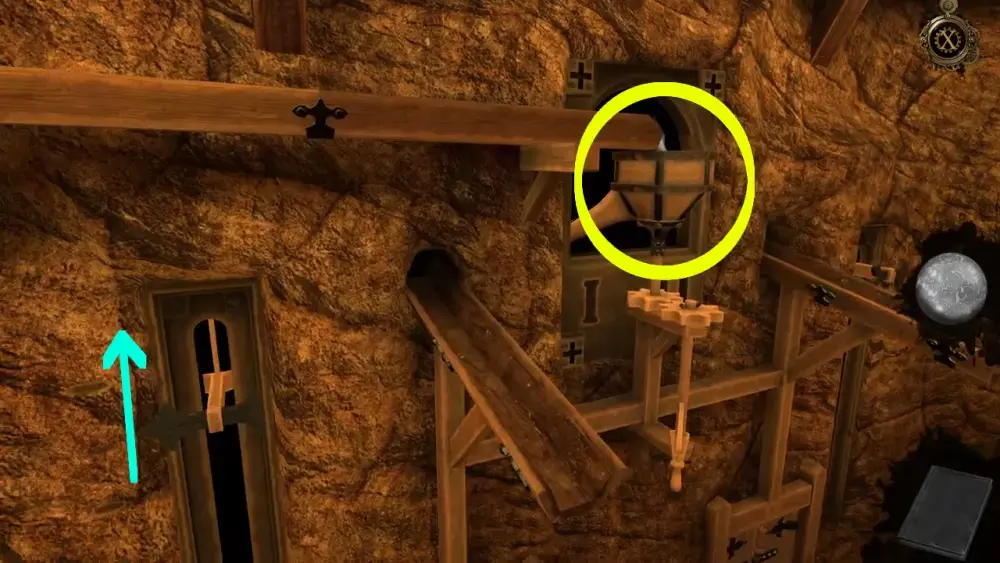
If you take a left, this what you’ll see:
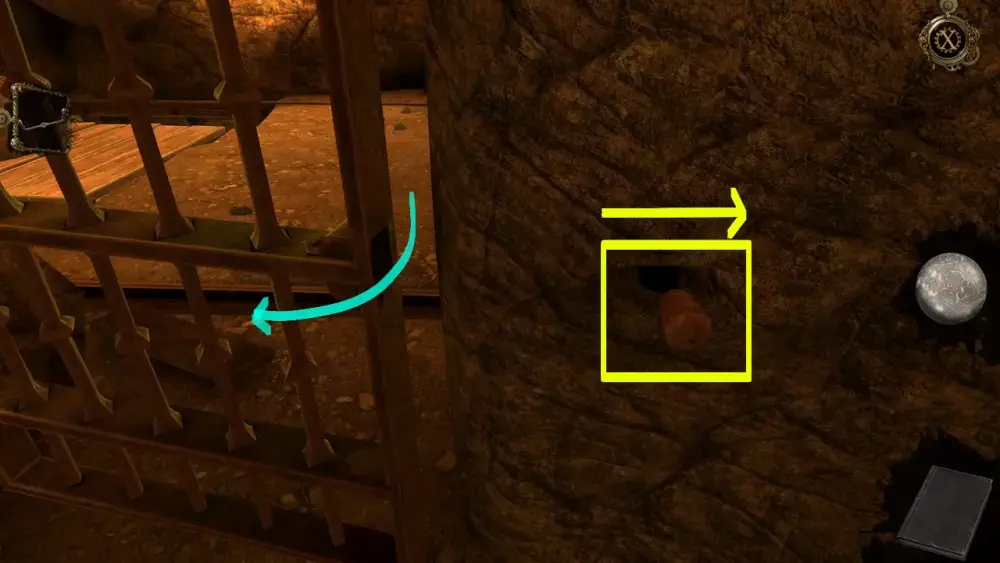
If you approach the device, which looks like some kind of pulley, you’ll notice that the area that you can see by peeking into the hole with the metal grills is the alcove that Leonardo pointed out in the beginning. Since the pulley-like device is here, it must be connected to something in the alcove. To activate the device, place the Metal Shaft with Handles on the part that looks like a wheel and turn it.
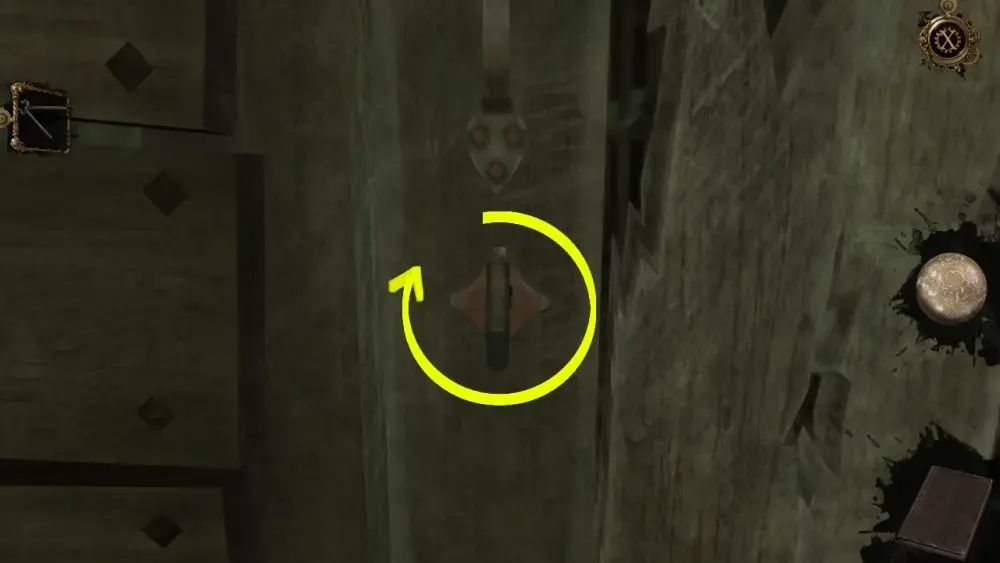
This will trigger a brief cutscene where you’ll see some kind of rod fall into the alcove. It’s a little difficult to see it clearly from this image, but we’ve highlighted its outline in yellow.
After using the Metal Shaft with Handles, you’ll be able to return it to your inventory.
Going back into the hall, taking the other path by heading right will lead you up a short flight of stairs and you’ll find yourself directly behind the locked metal door. Pull the knob to the side and open the door, and you’ll be back right at the area where you’ve been using the storage crane.
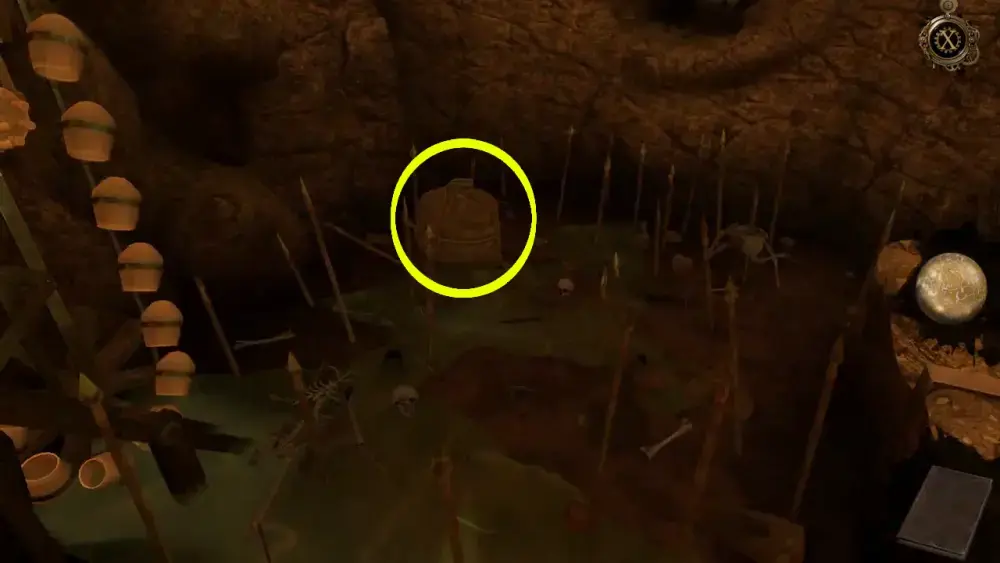
Since you know that there’s something in the alcove, which is along the hall before the area containing the storage crane, return to that place and see what you can find—other than skeletons, of course.
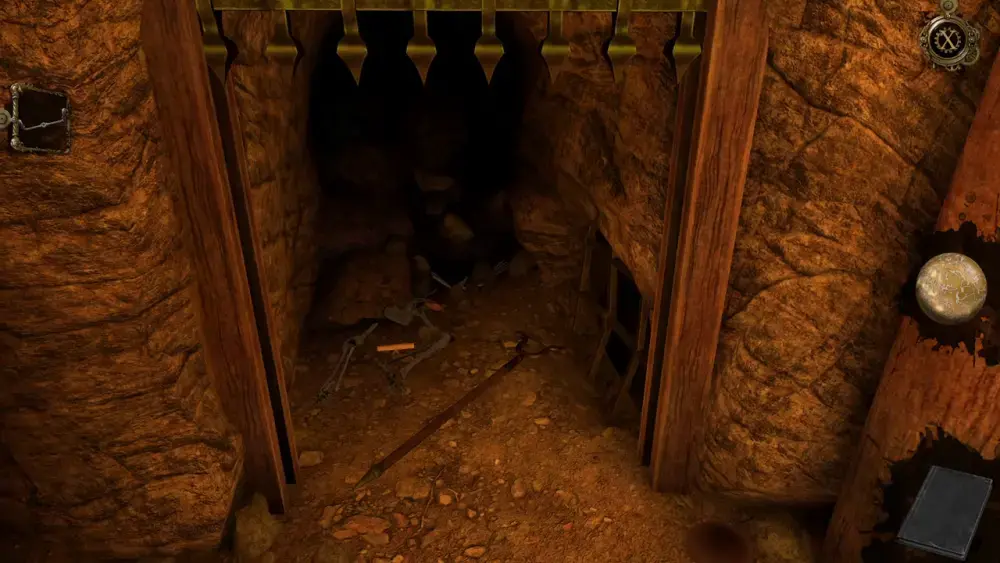
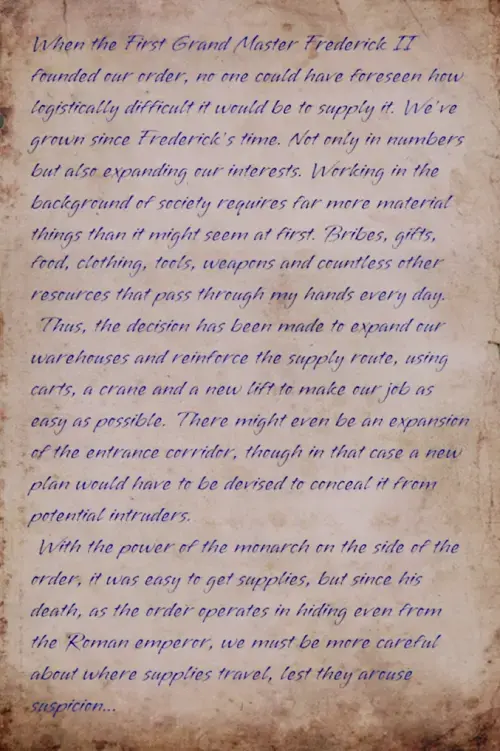
Fortunately, you’ll discover a few things in the alcove. One of these is a letter from Pope Paul II…

Another is a Dagger…
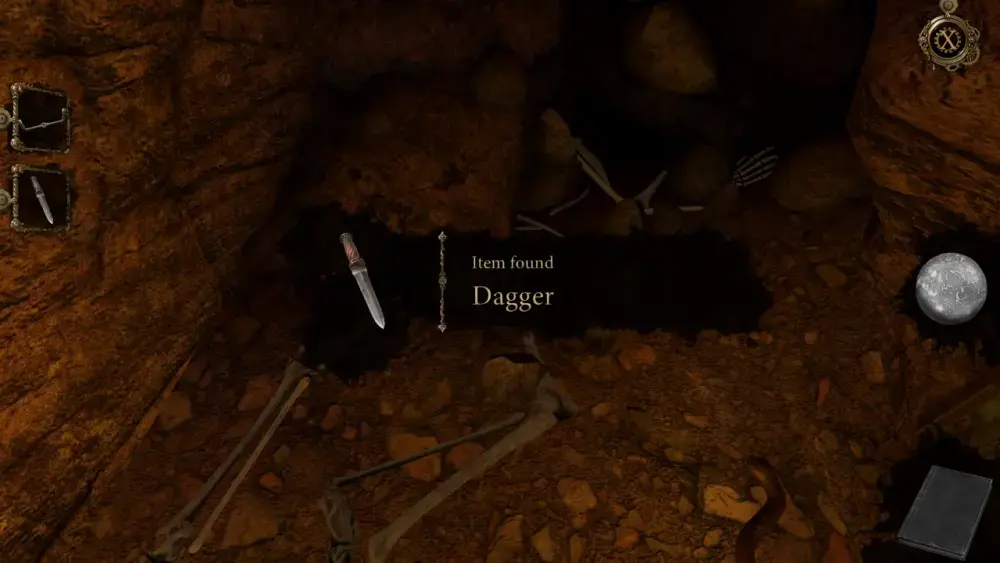
And the last item is the rod that fell into the alcove, which is actually an Arquebus Support.
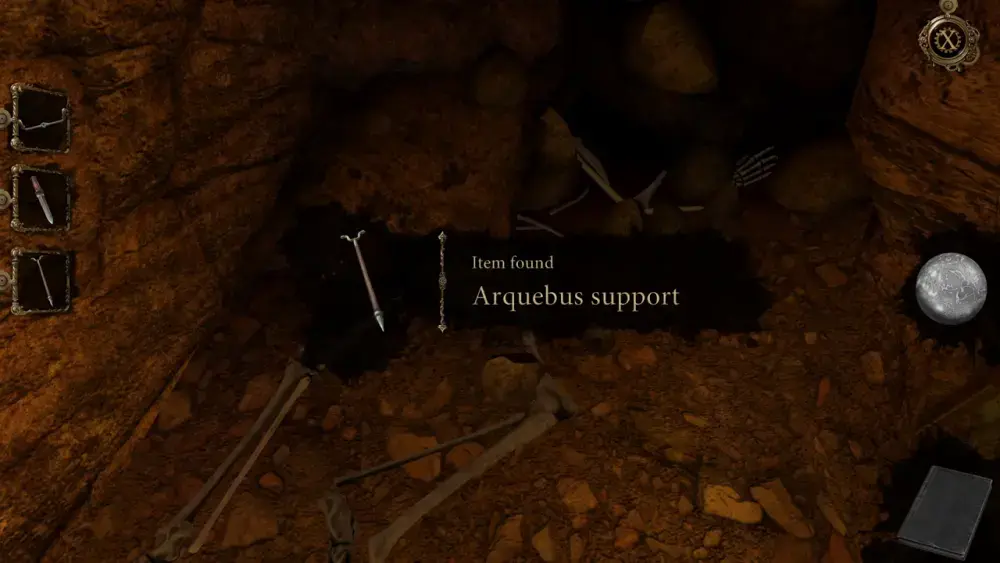
With these items on hand, you can now take steps to make the water recede in the flooded room. First, you need to go back down the trapdoor and head to the passage that leads to the side of the flooded room. Use the Arquebus Support to connect the pipes above where you’re standing.
You can’t go back up the trapdoor’s ladder so, from here, take the path that leads you back to the metal door. That’s where you can exit back into the area where the storage crane is. Then head to the flooded room again via the cavern to the right side of the elevated rail. With the pipes now connected, you can redirect water out of the room and decrease the water level that had accumulated in the pit. Start by closing the two doors at the bottom. Since the Metal Shaft with Handles is still in your inventory, return it where you found it to close the left door.
As for the door on the right, keep the door from opening by using the Dagger as a lock.

Once both doors have been secured, turn the wheel controlling the water vessels. You should see the funnel at the top of the mechanism pointing toward Roman numeral II. Water from the pit will be drained using this funnel, prompting the meter at the right to rise to the topmost level.
Once the brief cutscene ends, approach the handle controlling the funnel. Turn it to the left so the funnel will point toward Roman numeral I.
Go back to the wheel controlling the water vessels and turn it again. This time, you should see the funnel draining water toward the direction of Roman numeral I. Similarly, the meter to the left will rise to the topmost level.
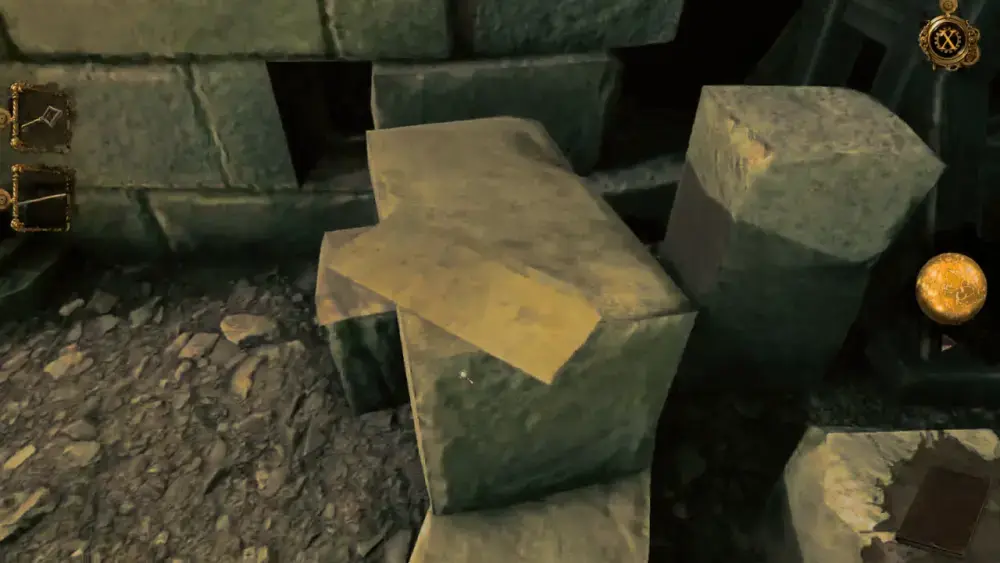
Now that the water has been drained, you can clearly see what’s in the pit and even go down to access this area. The most noticeable thing about the objects in the pit is the weight that looks exactly like the one you’ve used to stabilize the wooden bridge.
Since you already know that you can’t lift the weight yourself, you’re going to have to use the storage crane to do so. To move the storage crane closer to the area where the second weight is, first close the trapdoor by pulling the crane’s lever down, which will loosen the hook from the trapdoor. Unless you do this, you won’t be able to move the crane forward.
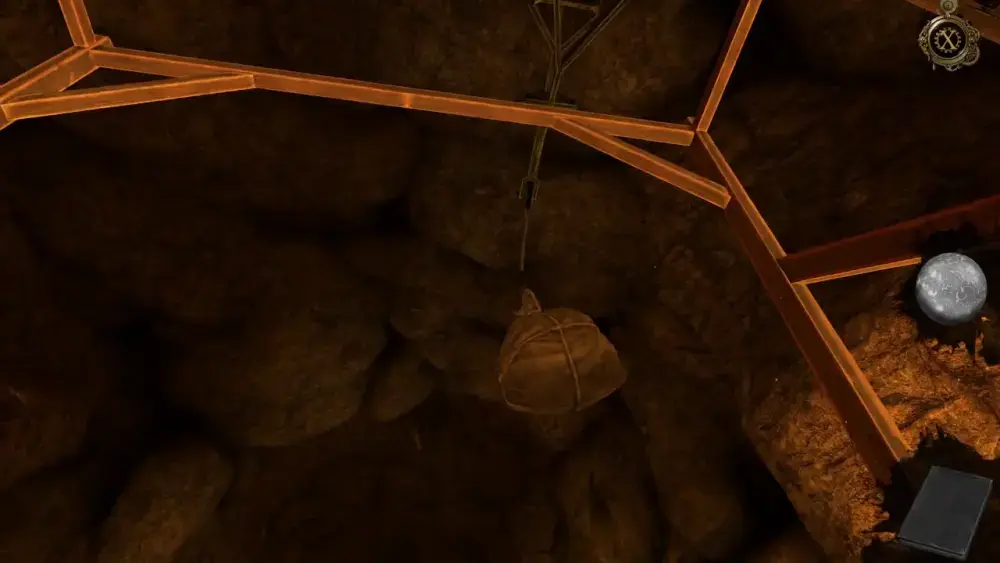
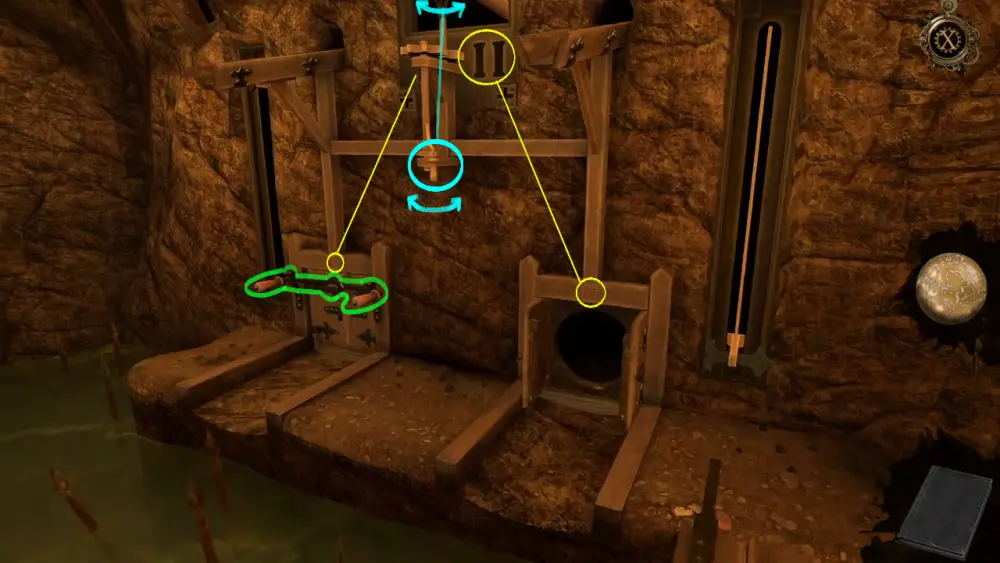
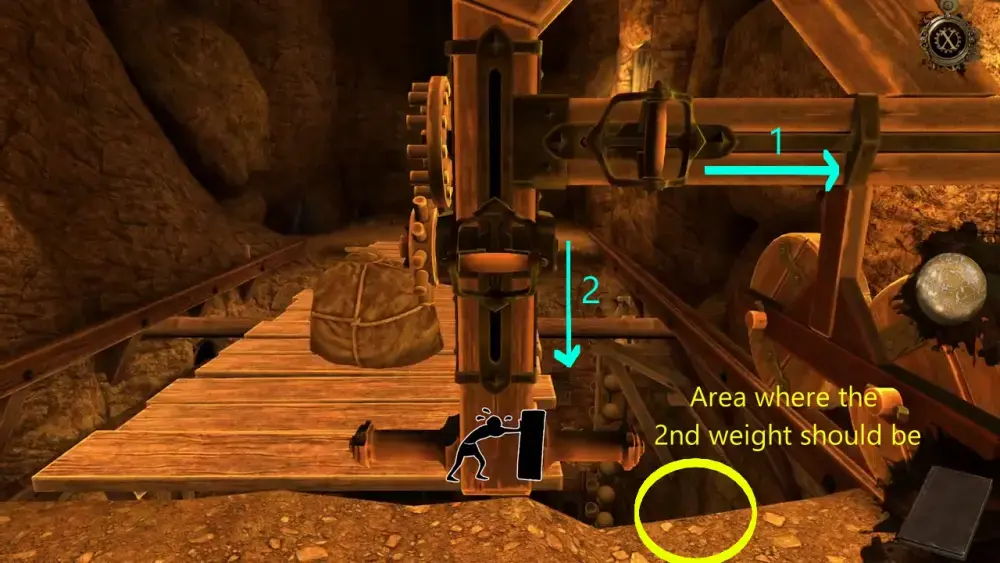
Once the trapdoor is closed, move the crane just before the bridge. From where the crane is now located, you can surmise that the second weight in the pit is somewhere around the area we marked in yellow in the image below. Thus, pull the lever of the crane to the right to make sure the hook will fall into the correct position when it descends into the pit. Then, pull the other lever down to let the hook fall onto the second weight. This will be shown to you via a brief cutscene.
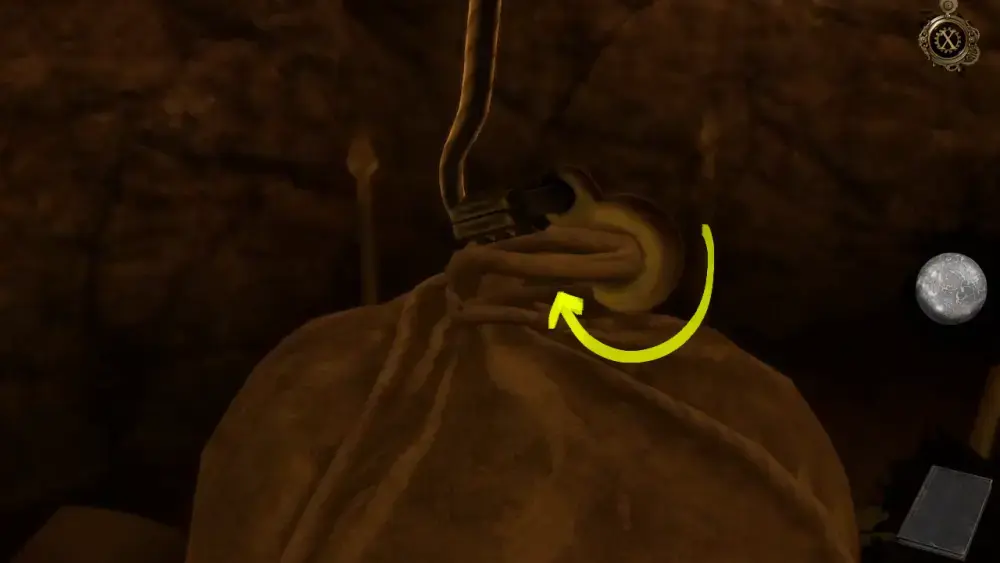
Go back down the pit and fasten the hook onto the weight.
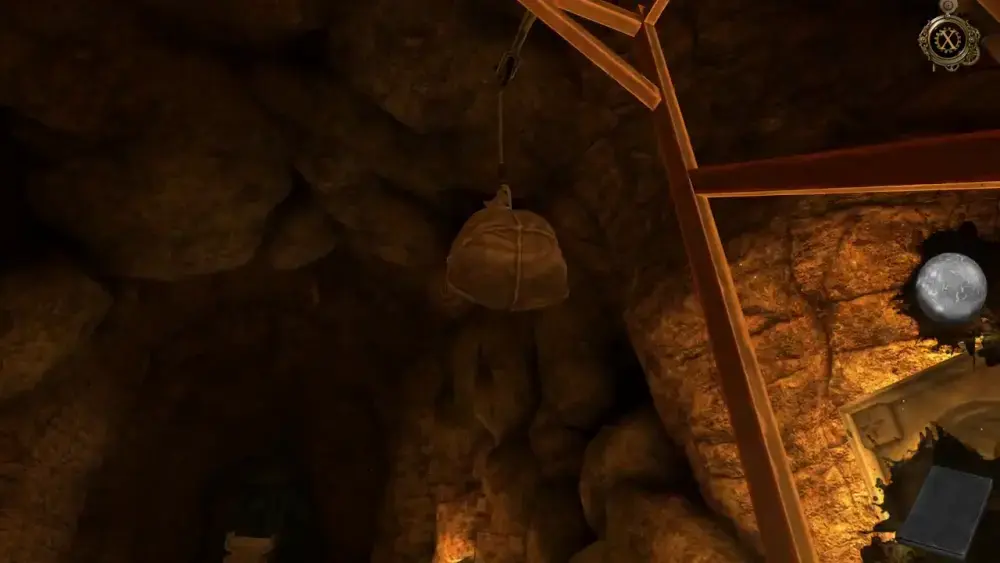
Then go back up again and pull the crane’s lever all the way up. This should prompt a cutscene showing you the second weight being hoisted up by the hook.
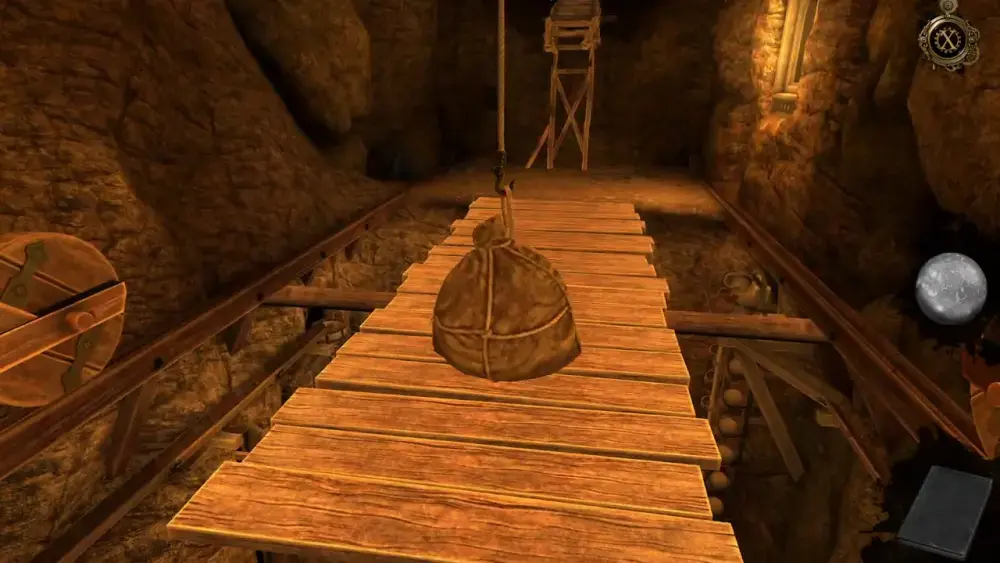
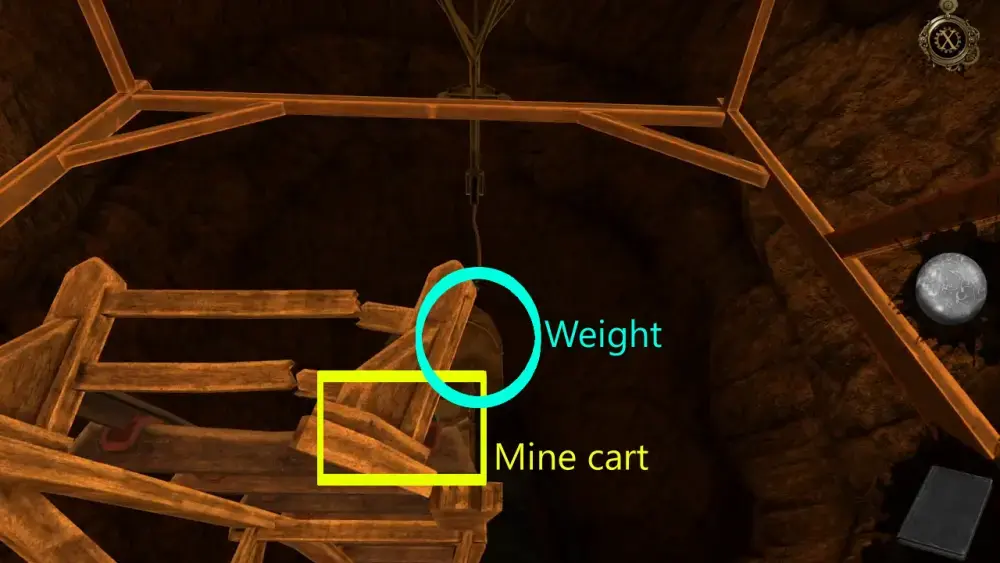
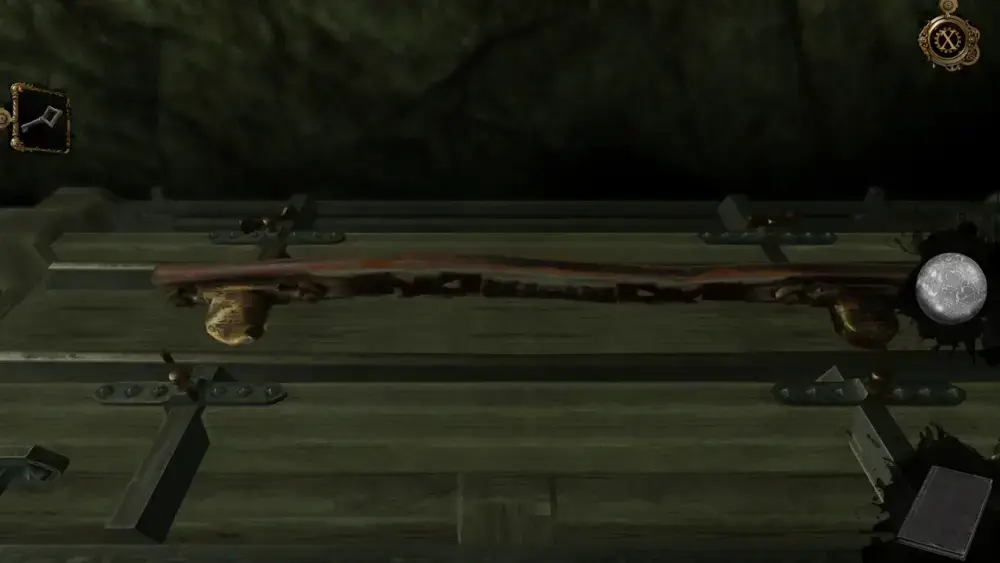
Now that you have the second weight, you need to find a way to go forward. Clearly, you need to access the elevated platform, which is a railway for a mine cart, located right at the end of the tunnel. Thus, push the crane further forward, setting it right in front of the elevated railway. Your goal now is to drop the second weight onto the mine cart, hoping that it’s heavy enough to bend the track.
To do this, you need to make sure that the weight is set in the proper place. First, pull the lever to the left to get the weight positioned in the middle of the crane. Then, pull the other lever down to drop it onto the mine cart.
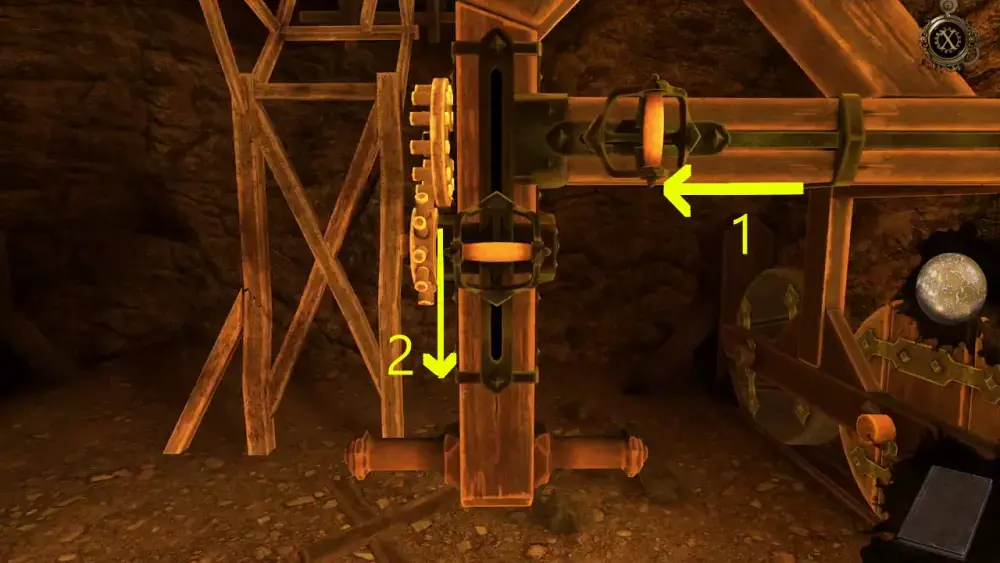
When you push the lever to the left, you should be able to see the weight just right above the old mine cart.
Upon pulling the crane’s lever down, this will trigger a cutscene where you’ll see the weight drop onto the mine cart, giving it enough of a push to move and bend the elevated track towards you because of its added mass.
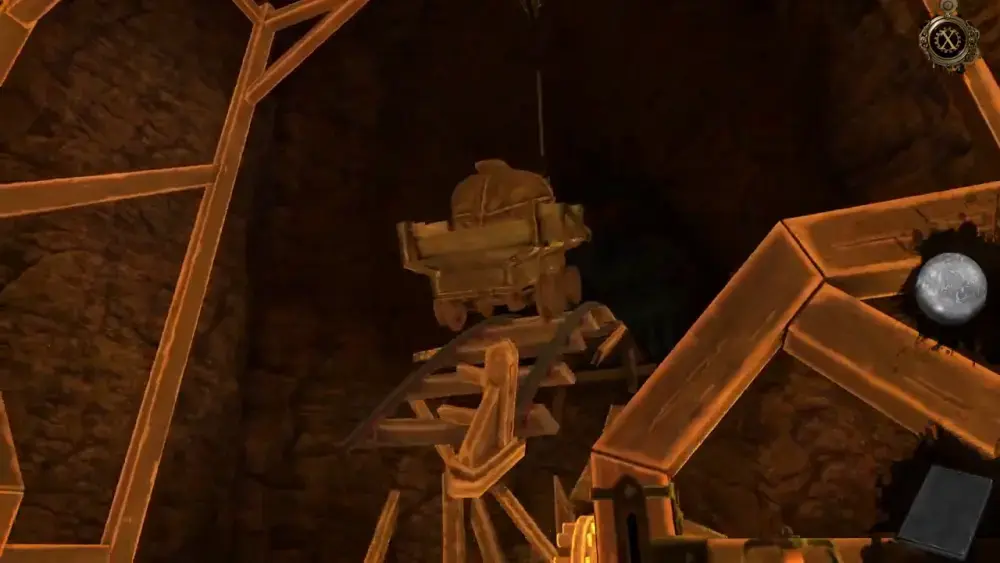
But while you’ve managed to find a way up, you’ve unfortunately taken out your means of going back as the mine cart crashes onto the bridge, causing it to fall into the pit along with the other weight stabilizing the bridge.
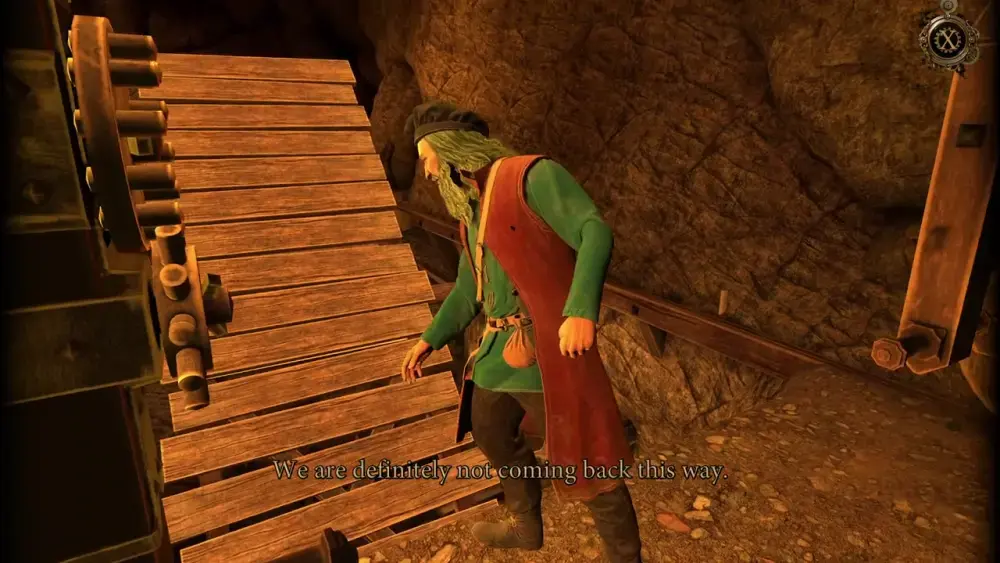
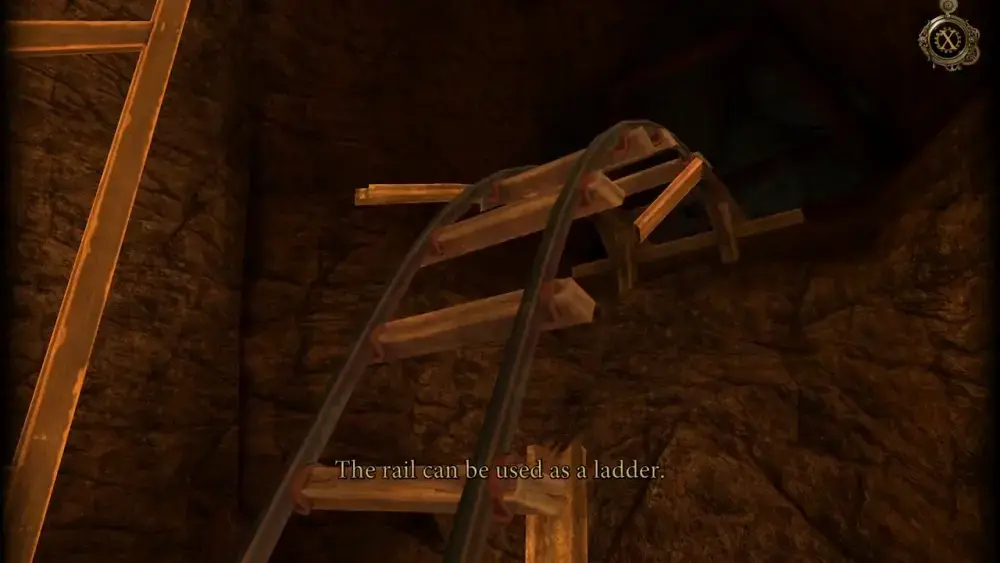
However, Leonardo remains optimistic since you’ve found a way to continue your mission. He points out that the railway can be used as a ladder, allowing you to go deeper into the Order’s secret headquarters.
After climbing up the rail, you and Leonardo will find yourselves in a vast hall that has an old freight elevator in the middle. It looks as though the place had once been used for supply storage and transport. Leonardo even admires the elevator despite its age…
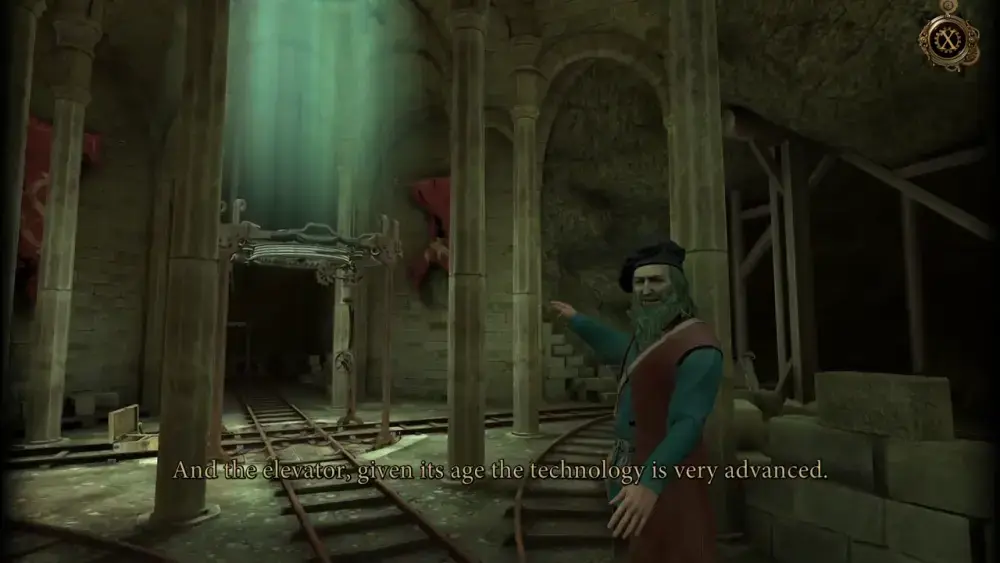
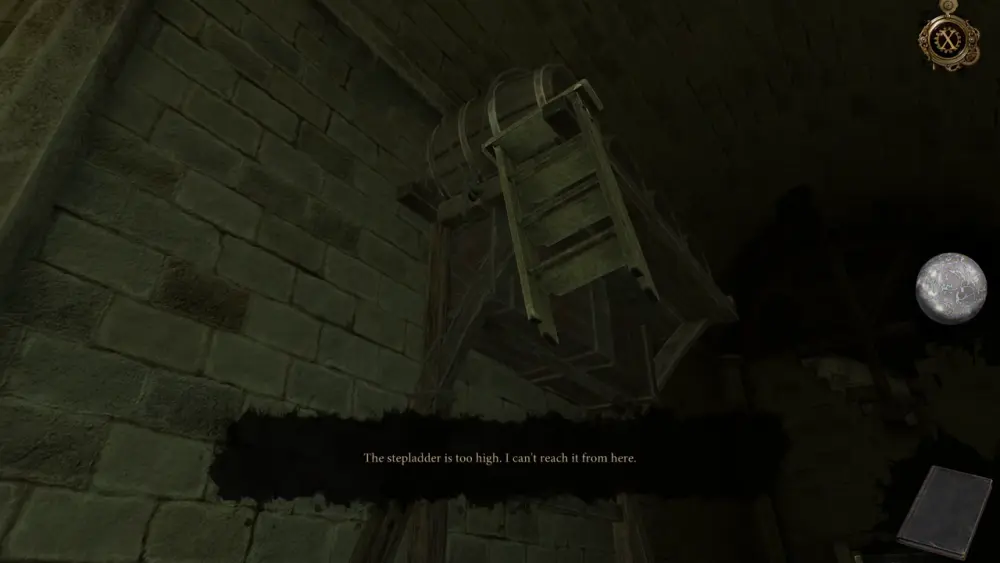
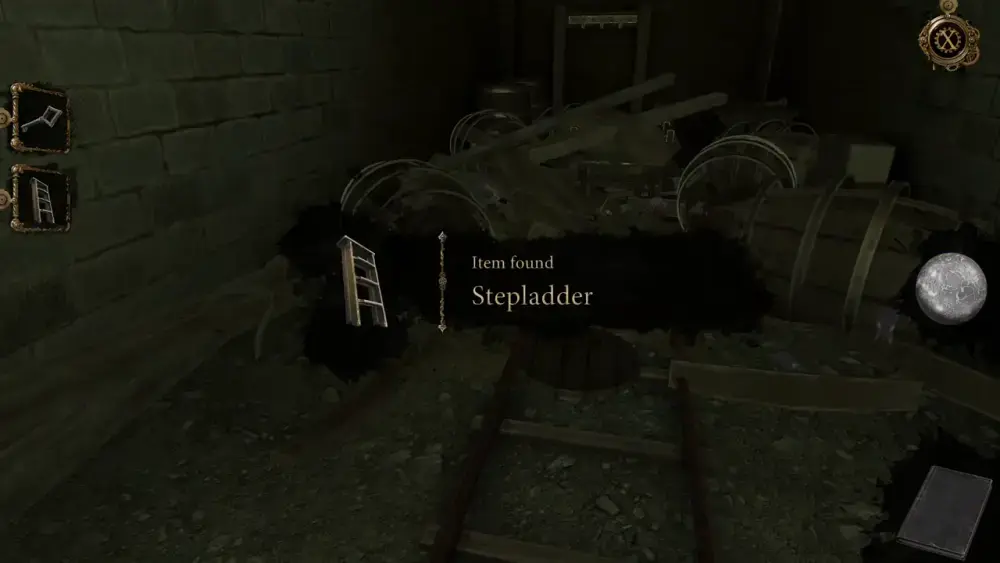
It is more than likely that you’re directly underneath the Order’s fortress. Your goal in this part of the chapter is to, of course, repair the elevator. Leonardo is the most capable in this regard, and he has the tools and knowledge for it. However, the elevator is too high for him to reach so he will ask you a favor…
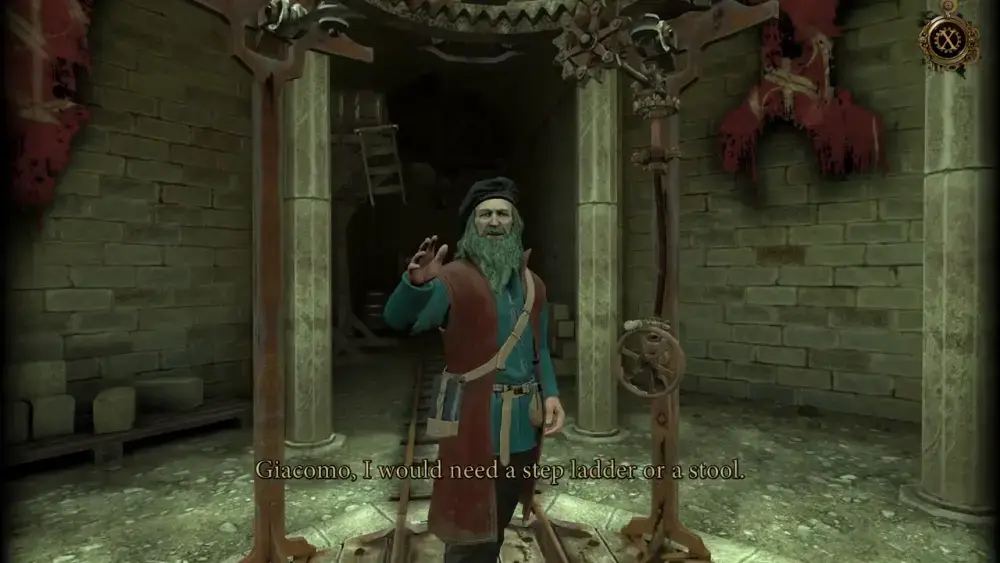
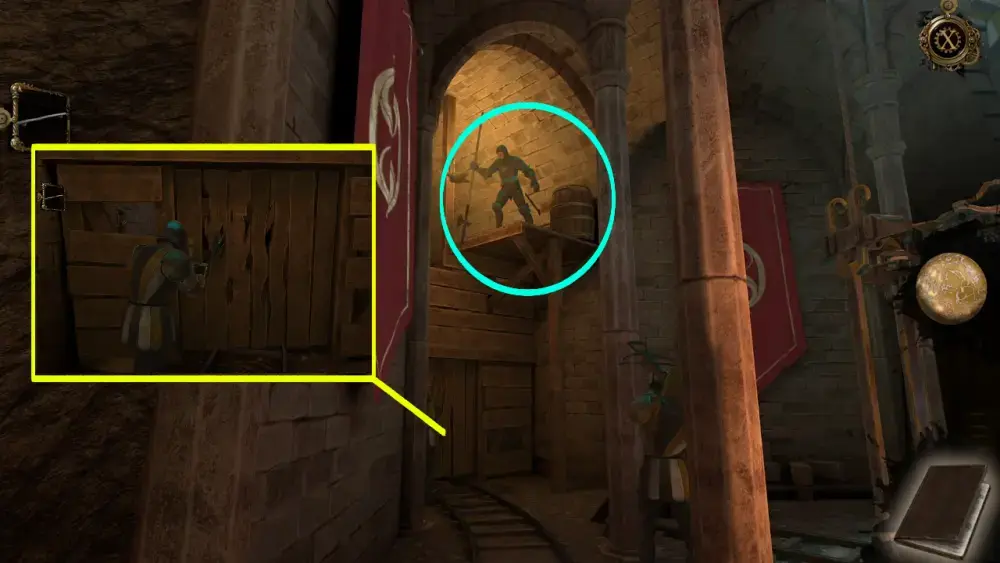
If Leonardo’s objective is to repair the elevator, your objective is to find him that stepladder. If you look closely at the image above, you’ll see that the stepladder is actually just behind Leonardo, to the left, in that somewhat shadowed hall. The stepladder is hanging just beneath a barrel atop a shelf.
Of course, getting it won’t be that easy as you have no means at the moment to reach it. As is customary in this game, looking around will prove to be an important and productive activity.
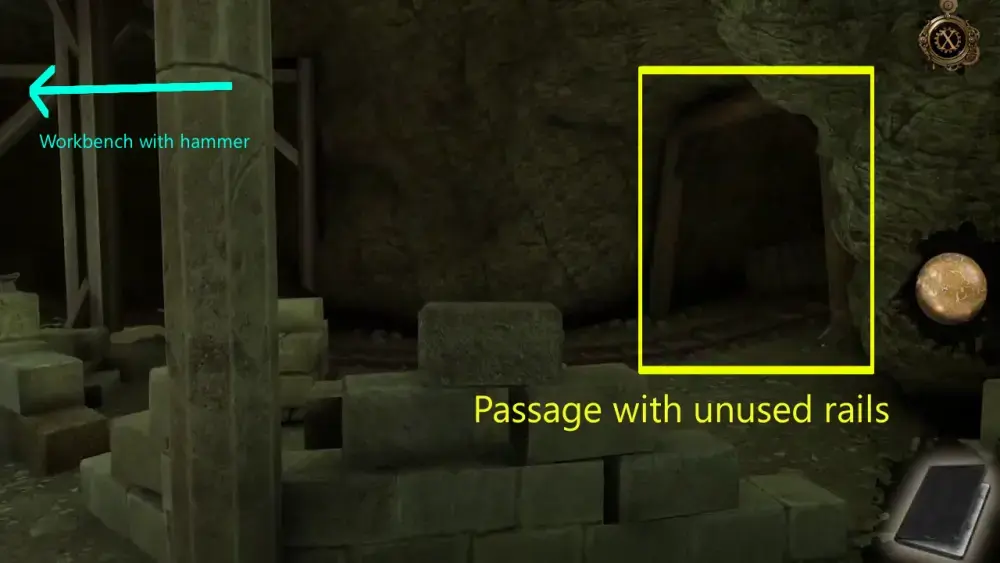
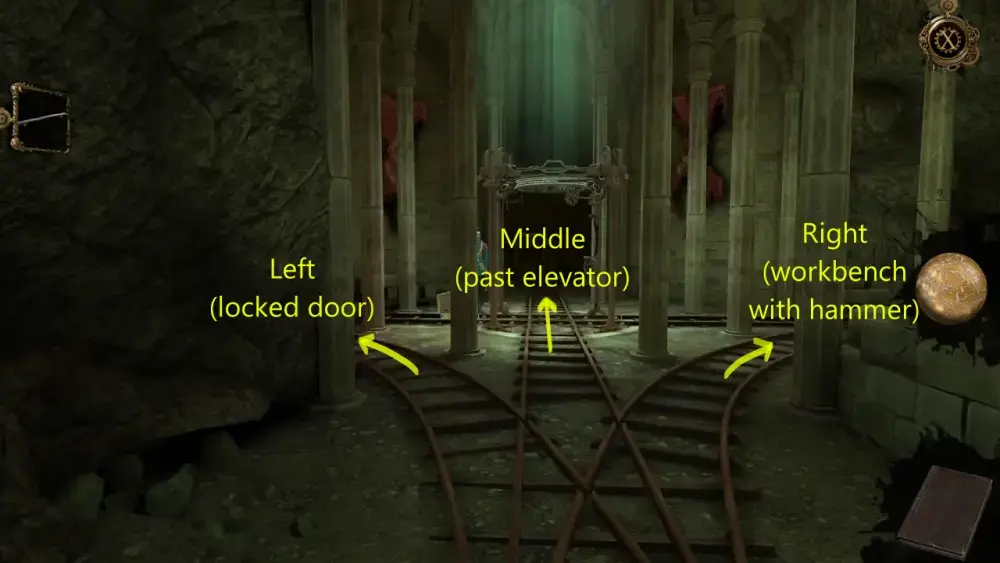
After Leonardo asks you to get him a stepladder, the game will give you a panoramic view of the vast area you’re in. It can seem quite huge and there are quite a handful of important spots you need to take note of. By looking around, you’ll be able to explore these areas yourself, but here’s a quick overview of these important spots as highlighted in the images below. Take note that the centerpoint of these areas is the elevator.
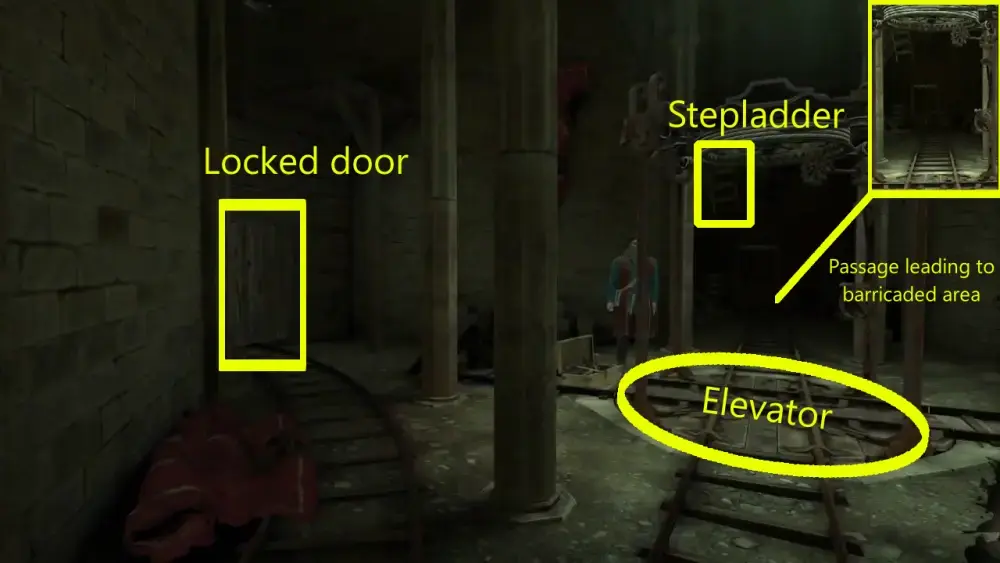
So now you have pretty much a rough idea of the areas you’ll be working with. Again, since your goal is to get Leonardo to repair the elevator, it’s up to you to get the stepladder. If you actually approach the stepladder and try to interact with it, this prompt will appear:
In the passage where the stepladder is located, you can get a better view of the barricaded area, which looks like this:
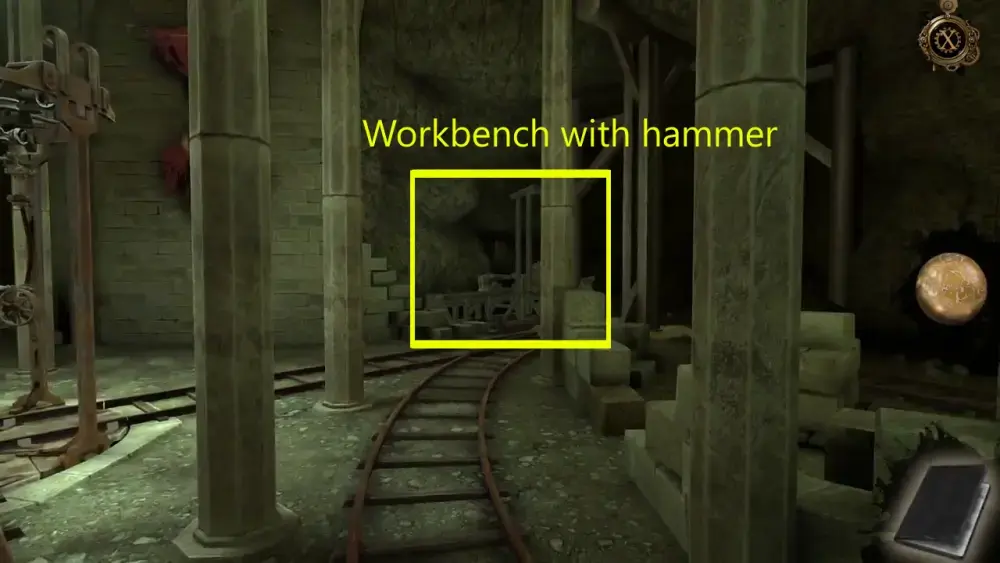
Nothing of use seems to be present so exploring other areas would be your next best bet. If you turn right from the elevator, you can get a closer look at the workbench with a hammer, except it’s overrun by rats so you can’t access it yet. Beside the workbench is what looks like an overturned supply cart that had crashed.
To the left of the workbench, you’ll see a letter left on one of the bricks.
If you pick up this letter, this is what it says:
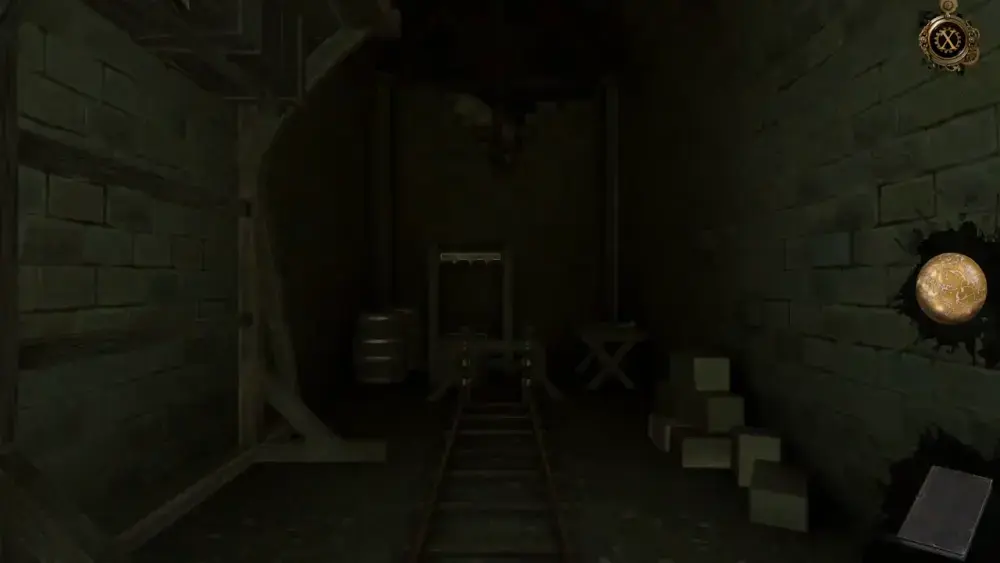
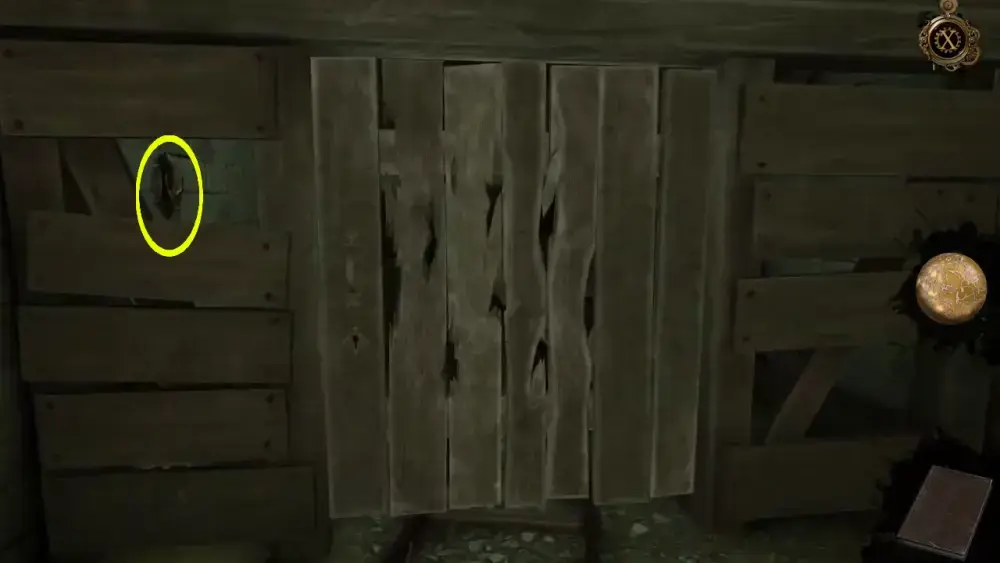
Opposite the workbench, which is left of the elevator, is a locked door. If you approach the keyhole, you’ll be able to zoom into it, which means it can interact with a key—except it’s on the other side of the door. If you look through the gap between the wood panels, you’ll see a key hanging onto a hook on the wall.
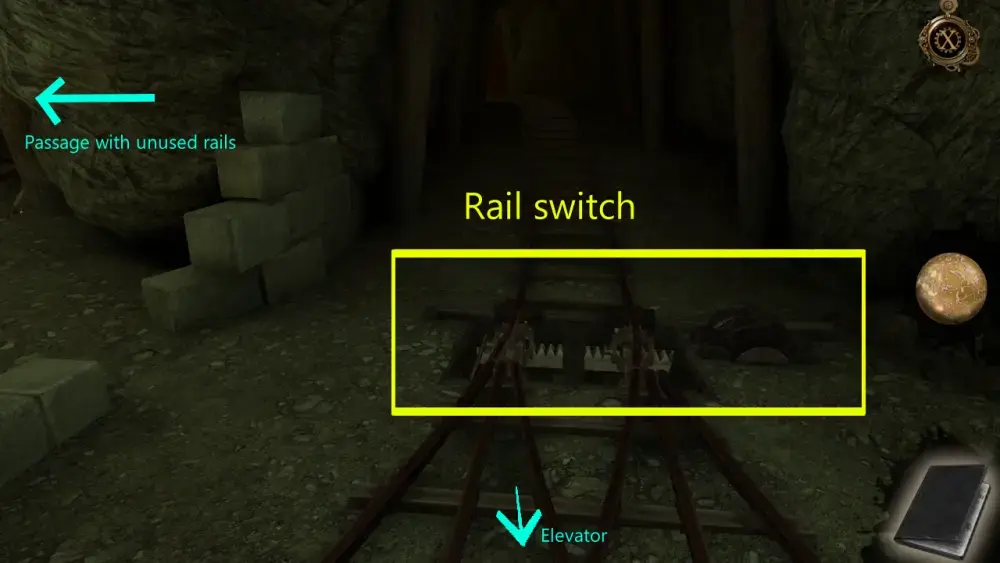
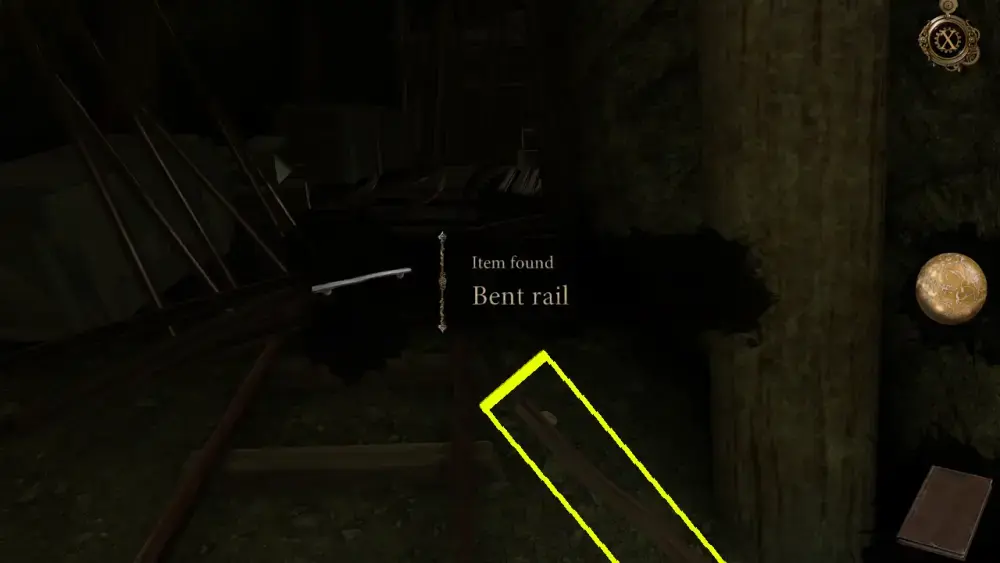
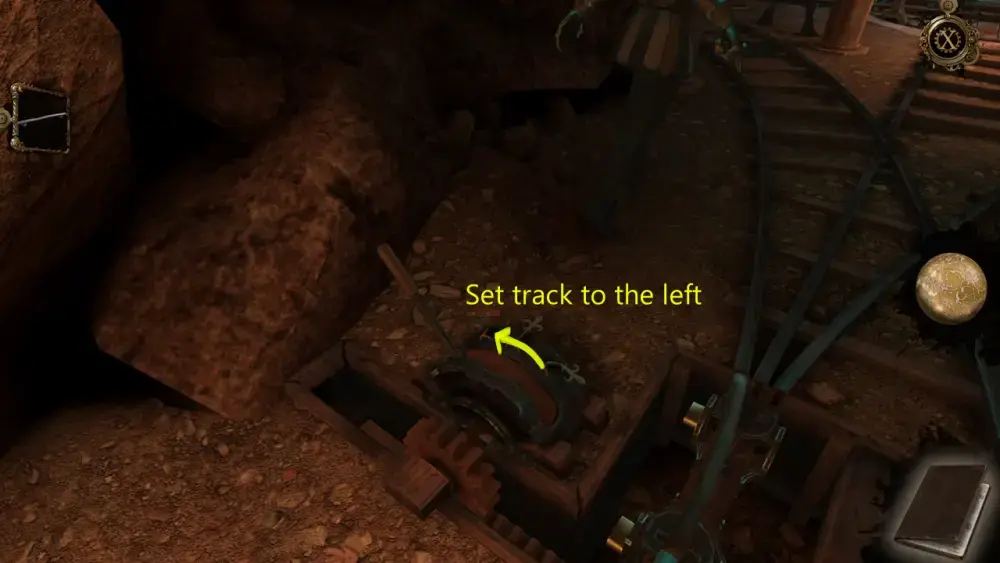
With the door inaccessible, let’s head to another area, particularly the passage where unused rails are kept. This one is pretty easy to miss because the spot is a bit dark but right next to you, as you access the area, is a Bent Rail. We’ve highlighted its position in yellow just before you pick it up for your inventory. This will definitely come in handy later.
The last area we haven’t explored yet is the rail switch. If you approach it, you’ll see that it’s old and rusted, and can’t really be used properly. If you stand right in front of the rail switch, you’ll see that it can switch the tracks to go in three directions: left to the locked door; middle as it can pass the elevator and into the barricaded area; and to the right past the workbench with a hammer.
At this point, you would have already explored what can be explored in this room for now. And if there’s anything the presence of rats have taught us in this game, it’s that they’re usually an indication that something can be changed in the past. That said, open the Oculus Perpetua so you can go back in time to affect the present. Take note that the portal will only appear right where the elevator is.
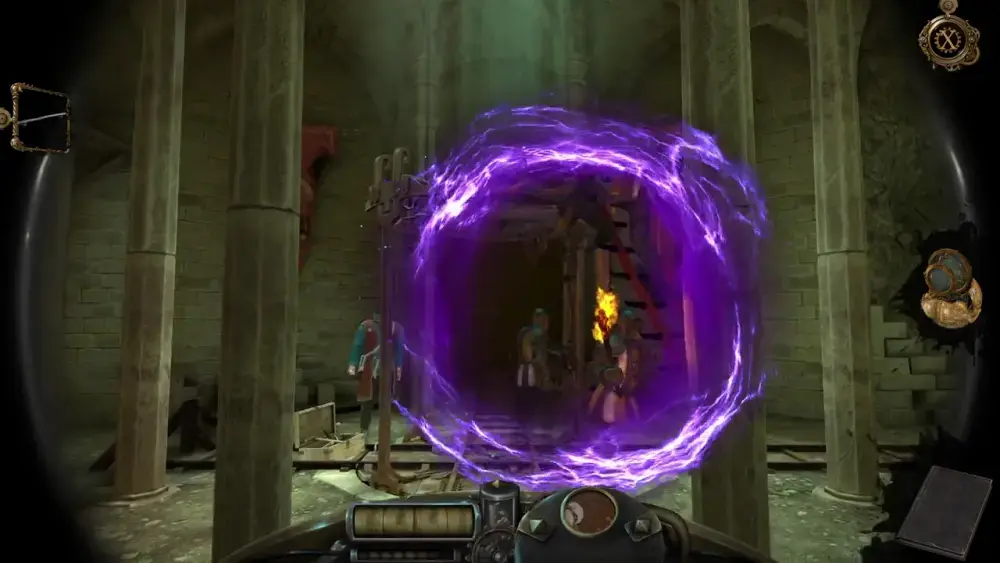
Upon entering the portal, you will be thrust back into 1465, at the moment when the Pope’s army attacked the Order. Unlike the other times you’ve traveled back to the past, this scene includes other people who are, fortunately, frozen in time.
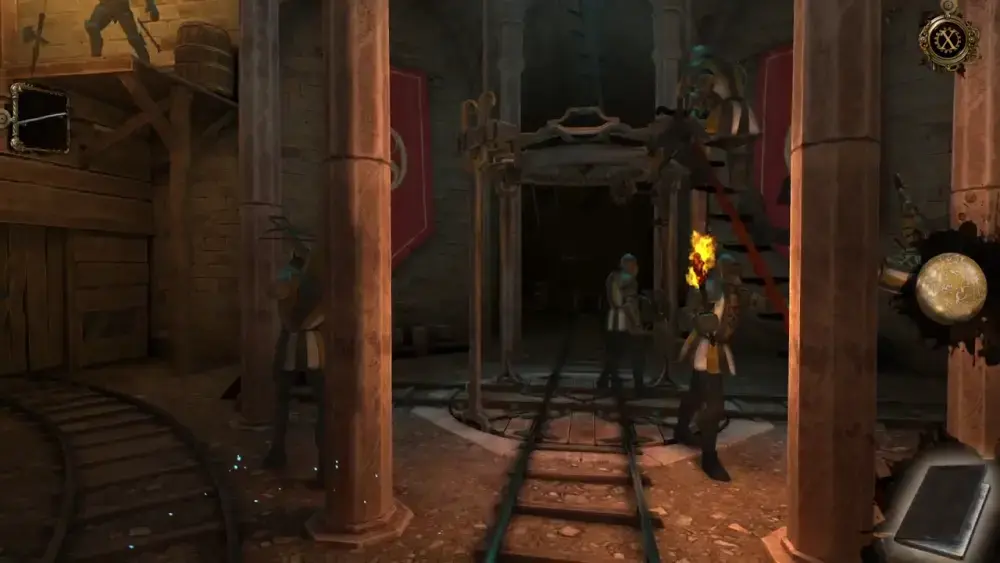
One thing you will immediately notice is that the area is much better lit in this time frame, so it’s a good idea to revisit the spots you’ve seen in the present to see if there’s anything else that you can discover.
If you go left and head to the locked door, you’ll see that the holes you’ve seen in the present were actually made by a soldier hitting it with an ax. In this scene, the door is still locked so it’s still inaccessible. If you look up the door, however, you’ll see that there is actually a platform that you can access once you actually get to open the door and see what’s on the other side. The platform is heavily illuminated, which, in this game, often means it’s something important.
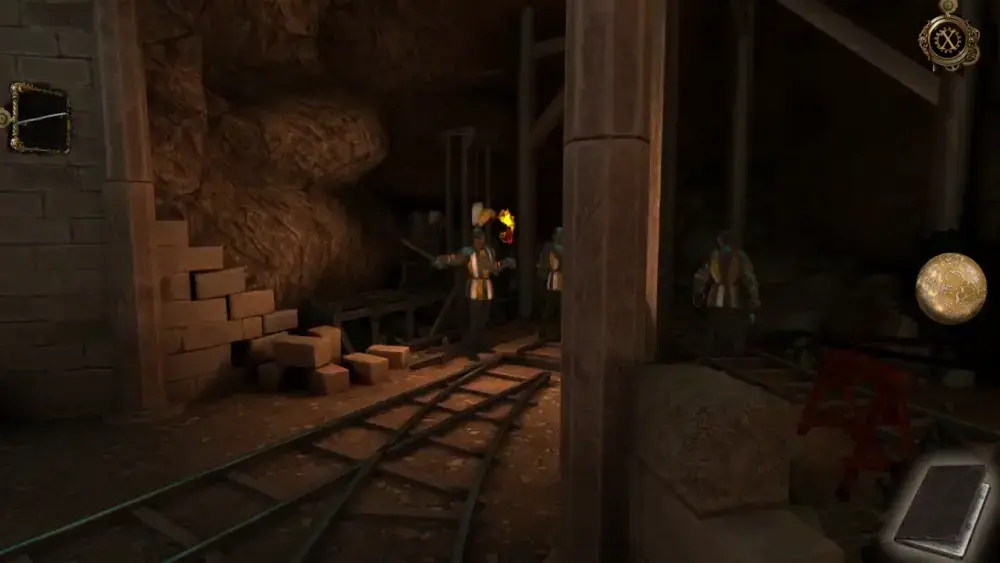
If you head right, you’ll see that soldiers have congregated near the workbench with the hammer, and there were definitely no rats yet.
At the passage where the unused rails were kept, you’ll see a soldier holding onto a rail, as if preparing to attack with it. This explains why there was a bent rail in that area in the present.

Last but not least, if you go to the spot with the rail switch, you’ll see a group of soldiers behind a supply cart. In the background, you can also see a ladder in mid-air just as a soldier had hoisted it up, explaining how the troops were able to reach this area from the secret tunnel below.

Upon closer observation of this particular scene, you might notice that the soldiers appear to be ready to crash the supply cart, which is still resting at the end of the railway. If you recall, we mentioned an overturned supply cart overrun by rats next to the workbench with the hammer. Now we know which way the soldiers crashed this cart.
Since you’re in the past, switching the direction of where the supply cart will crash can definitely affect the present. However, if you approach the rail switch, you’ll see that it’s missing a handle and the path of the cart is set to the right, further confirming that the rats in the present will follow where the supply cart is.
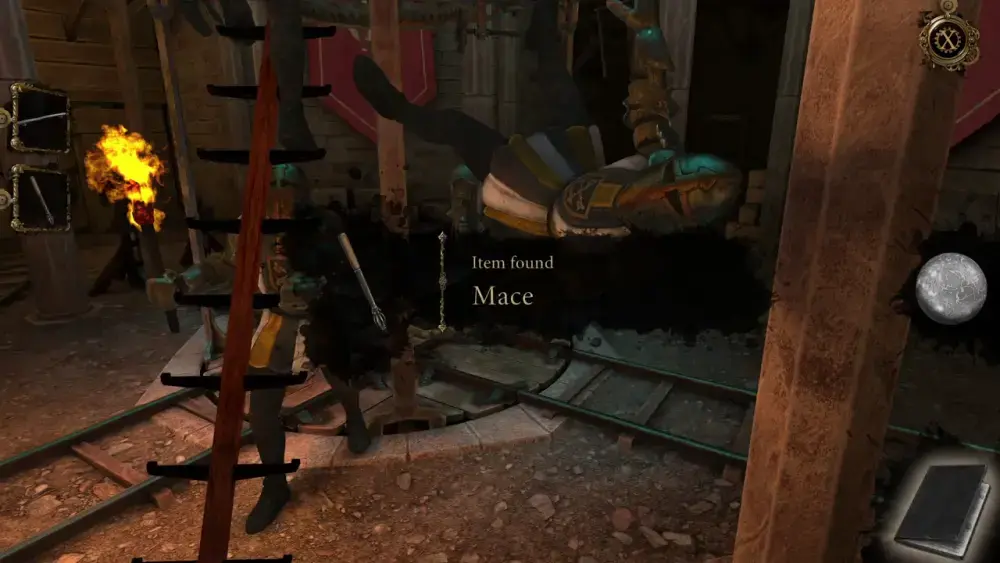
Surveying the area again, you’ll notice that, at the elevator, there’s a soldier who looks like he’s about to fall. Next to him is a Mace, which you can pick up.
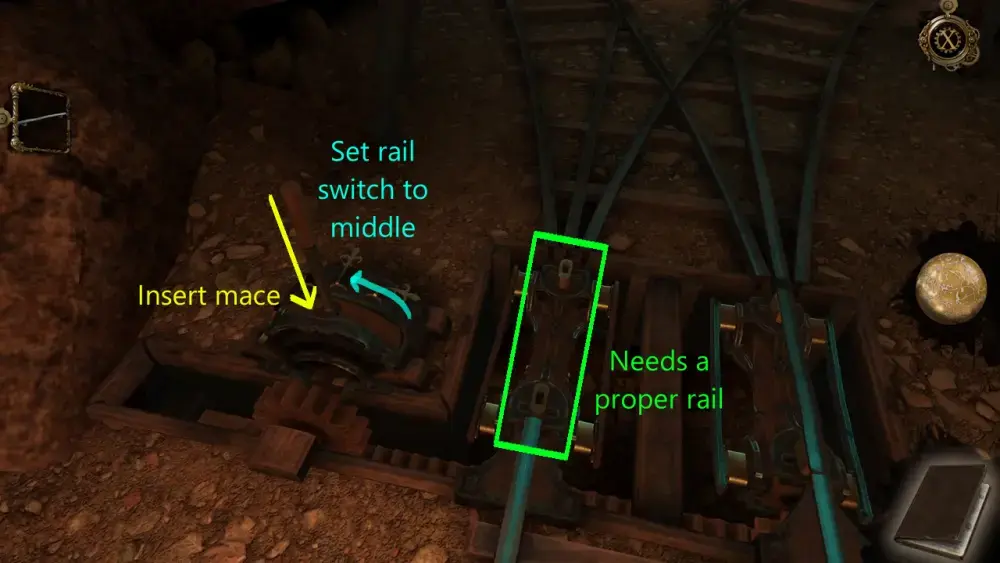
Now, you can use this Mace to serve as the handle for the rail switch. Go back to that spot and insert the Mace into the handle slot. If you move the rail switch to the middle setting, you’ll notice that the mechanism on the track will also move, revealing that it’s missing a proper rail. While you have a Bent Rail in your inventory, this will not fit the slot and you’ll receive a prompt asking you to straighten out the Bent Rail. Thus, from inference, you can safely assume that if you prevent the supply cart from crashing next to the workbench, you’ll be able to access and use the latter.
However, without a proper rail, the cart won’t go past the middle track. Thus, your other option is to set it to the left track, which will cause the supply cart to crash into the locked door, opening it in the present even if you don’t have the key. That said, set the rail switch to the left track.
Then, go back to the present via the Oculus Perpetua to see what has changed.
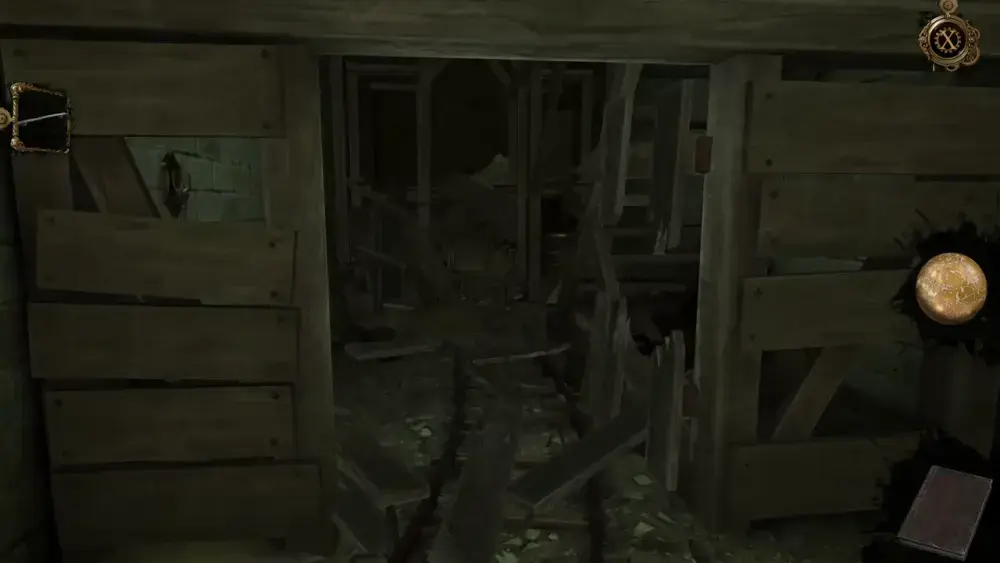
Indeed, the locked door on the left had been opened since the supply cart crashed right into it. But, of course, the rats have also relocated with the presence of the cart in this area, which means you can’t go up the platform you’ve seen illuminated in the past.
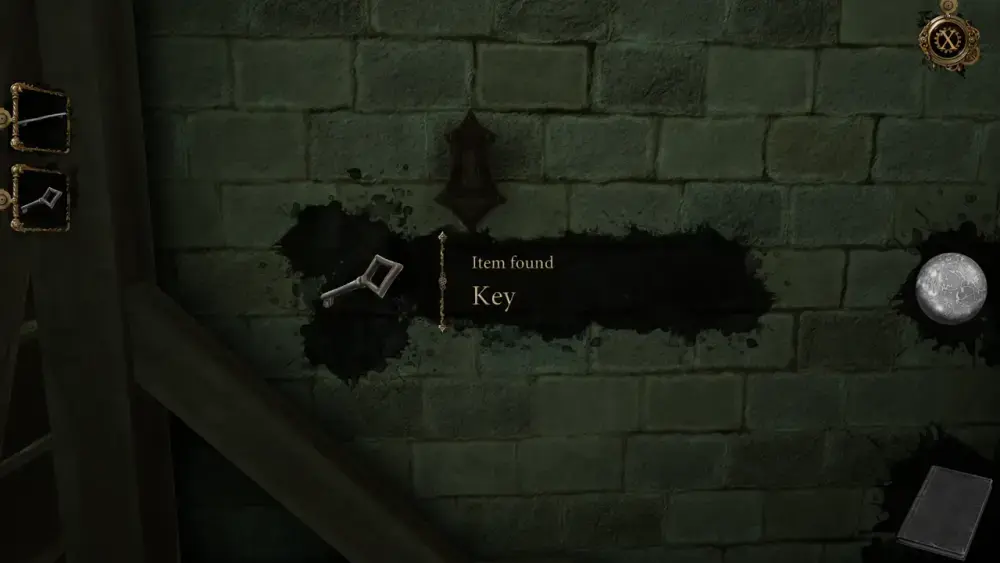
Fortunately, you’re still able to get the key hanging from a hook on the left side of the door.
Since you’re unable to move forward in this area yet, head to the right and access the workbench with the hammer, which is now rat-free.
Zoom into the workbench and place the Bent Rail on the work area. The locks will automatically loosen to accommodate the Bent Rail, then tighten again to lock it in place.
Then, go to the right side of the workbench and turn the handle to get the machine moving.
This will prompt a short cutscene showing how the hammer is straightening out the rail.
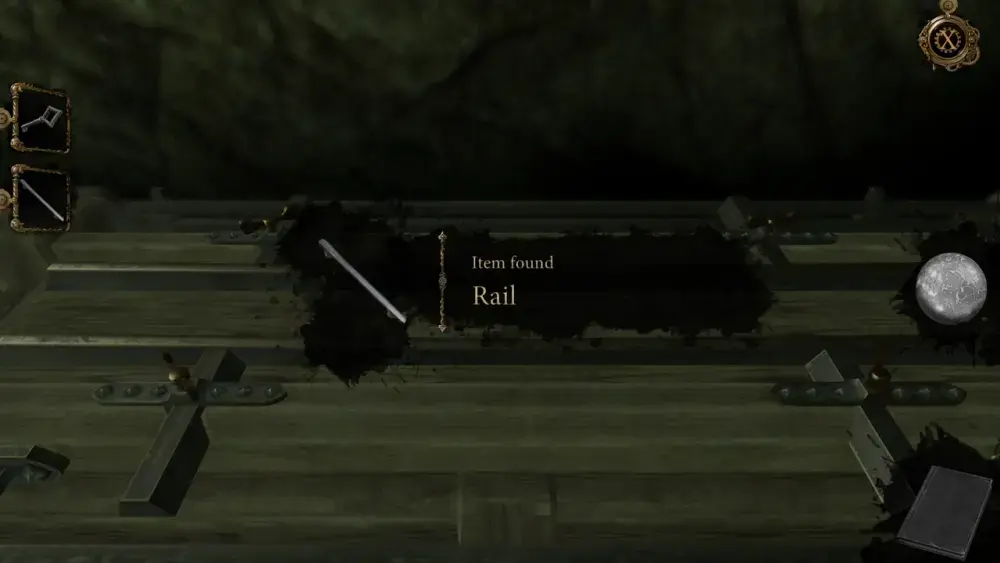
Once the process is done, you’ll be able to obtain a proper Rail.
However, despite placing a handle on the rail switch, you can’t just change the direction of the track in the present as the switch itself has rusted over time, rendering it immovable. Thus, you have to go back again to the past to change the direction of the track.
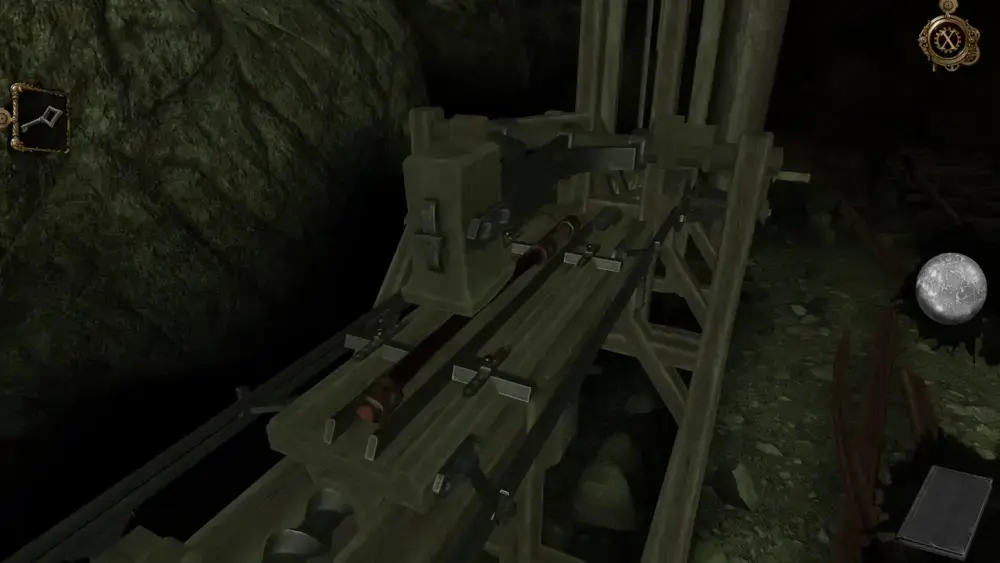
After going through the time portal, return to the spot where the rail switch is and set it to the middle track. Then, place the Rail in the empty slot on the track.

Return to the present again and you’ll see that the supply cart has now crashed into the area past the elevator. Thanks to this, the Stepladder has fallen from the shelf and you can now pick it up.
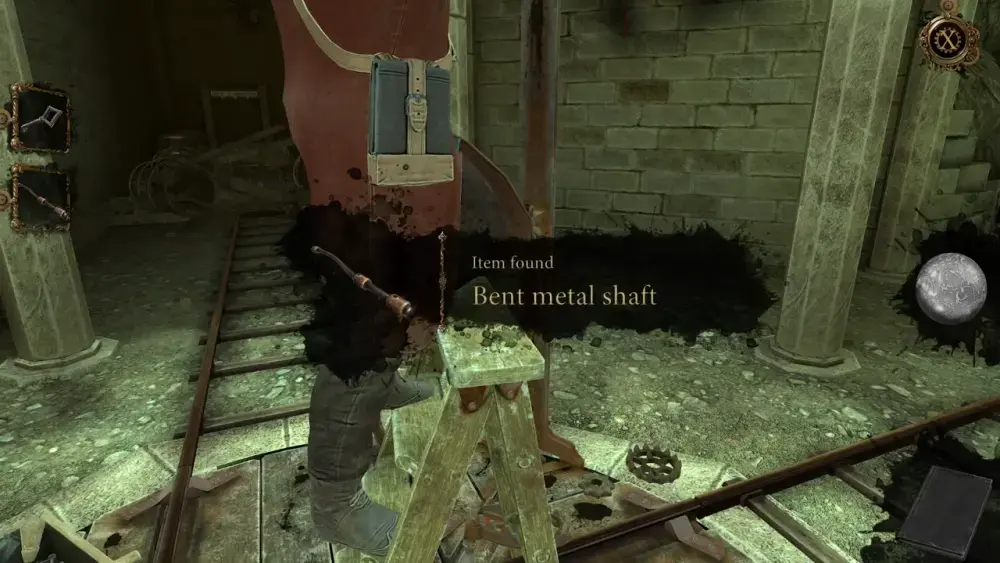
From your inventory, drag it to Leonardo so he can use it. While repairing the elevator, he’ll ask for your assistance once more:
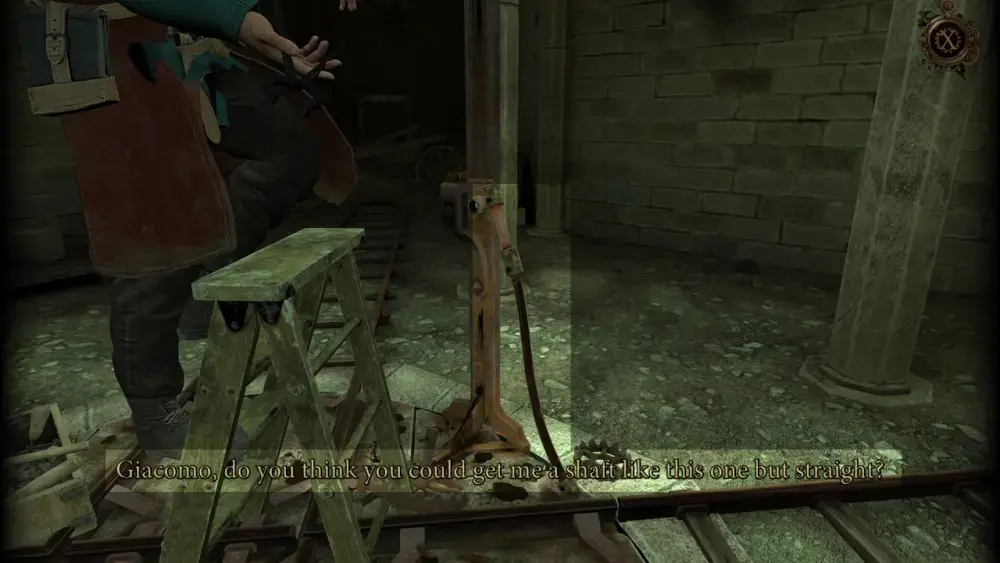
To accomplish Leonardo’s request, pick up the Bent Metal Shaft.
To straighten it out, go to the workbench with the hammer and, just like the bent rail, place the Bent Metal Shaft on the area and turn the handle to the machine’s right side to activate it.
Once the process is done, you’ll acquire a Metal Shaft.
Drag the item again to Leonardo so he can use it for elevator repairs. However, he would have one last request before finishing the repairs completely. He notes that the cogs are a bit rusty so if you could be so kind to get him one last thing…

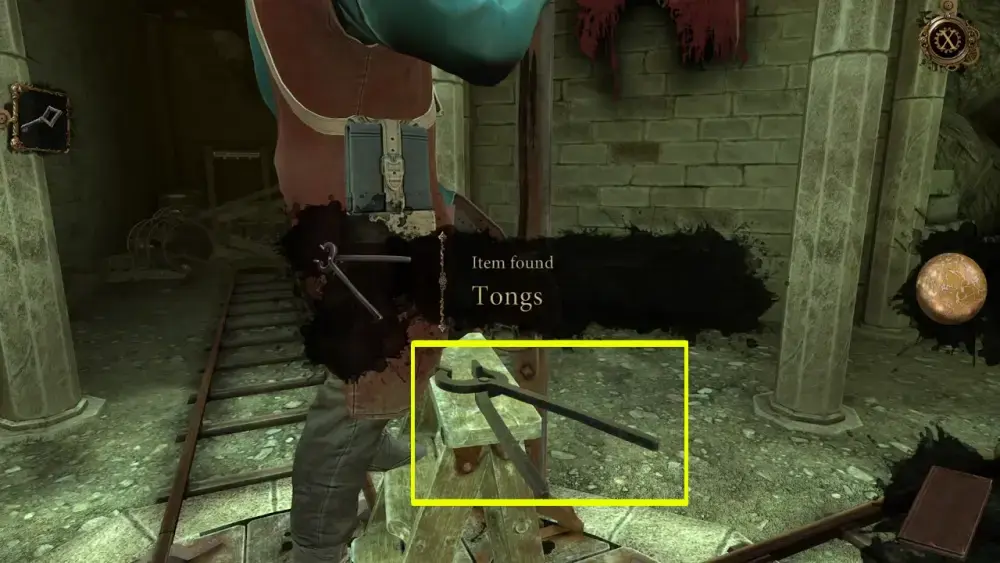
After Leonardo speaks to you, you’ll notice that your line of sight is initially affixed onto the stepladder. Here, you’ll see a pair of Tongs, which you can pick up. Surely, Leonardo won’t mind if you borrow some of his stuff.
Since you’ll be searching for oil, the only place that you have yet to completely access is the elevated platform located above the locked door to the left. Since the supply cart, in this time frame, crashed past the middle track, the door to the left is just as you found it in the beginning. However, this time, you have the key to open it. Thus, insert the key into the lock and turn it.
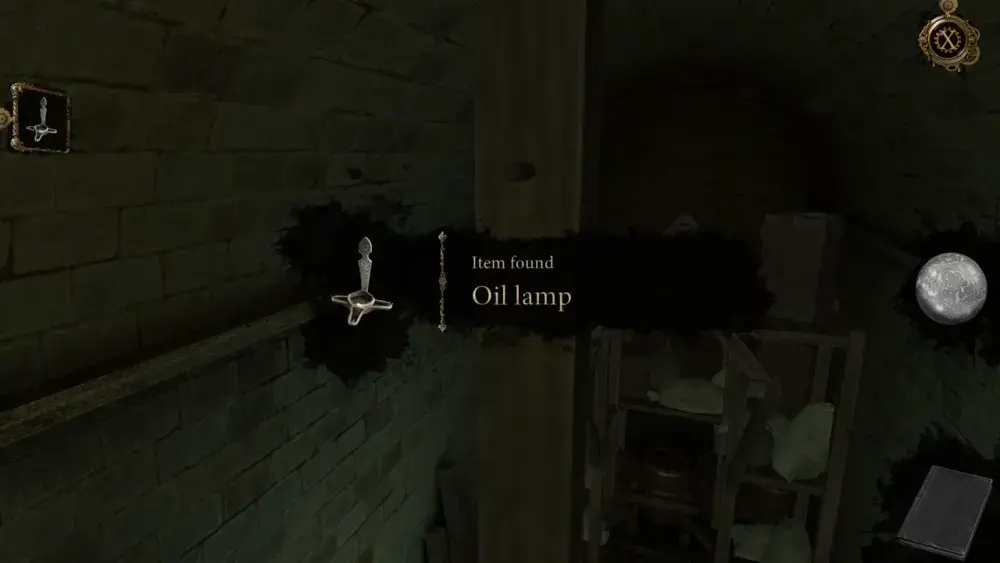
Upon entering, you’ll see a flight of stairs to your right. Go up the stairs and you’ll reach the top of the platform, giving you a bird’s-eye view of the area. To your right, you’ll notice an oil lamp bolted to a wooden beam. This explains why, in the past, this area had been brightly illuminated during the attack. If you interact with the oil lamp, you’ll get a prompt saying that even after all these years, it is still filled with oil—making it just what Leonardo needs to complete his repairs.
Since it’s bolted to the wooden beam, use the Tongs you’ve borrowed to unfasten the bolt.
After that, you’ll be able to collect the Oil Lamp as an item in your inventory.
Head back down and give this to Leonardo so he can finish repairing the elevator. Once done, he will thank you and give you the honor of turning the wheel that will hoist the elevator upward.
Upon turning the wheel, the elevator will begin to ascend. Gazing upward, you end this chapter with a peek of what lies ahead at the top of this mechanism…
And this concludes Chapter 7 of The House of Da Vinci 3. Indeed, the goal is in sight for you and Leonardo, but after reaching this far into the story, it’s clear that things will only get harder and more dangerous from here. Now, you have two factions coming after you: Borgia and, quite possibly, the Pope, who also happens to control the Order. Will this be a case of “the enemy of my enemy is my friend”? The saga is certainly drawing to a close but anything could happen at this point. What do you think that would be? Share them in our comment section below and stay tuned for the final and epic conclusion of The House of Da Vinci 3.