Welcome to our Terraria Boss Busting Guide! Terraria is a sandbox metroidvania game that is less about mere survival and more about murdering the heck out of everything that moves before they do the same to you. You can build and you can fight, and you’ll be doing quite a lot of both since Terraria is as oriented towards combat as it is toward exploration.

The easiest comparison to this game is Minecraft, though calling this game 2D Minecraft isn’t the most accurate take: In Minecraft, you typically have to be careful even against basic fights as it’s a more sneaky survival oriented game, while Terraria is a far more overtly bloodthirsty game where killing and murder and tearing limbs off of enemies is every bit as important as mining ore and building houses. Perhaps even more so!
There are many bosses in Terraria, along with some mini-bosses typically only found in events. We’ll focus on the main non-event bosses you fight for progression, including the skippable ones like Queen Bee, Deerclops, Duke Fishron and Empress of Light. We also have a couple of tips for general bossfighting which applies to all bosses. These bossfights can be hard, but none of them are impossible.
GENERAL BOSSFIGHTING TIPS
Before we talk about the bosses themselves, here are a couple of tips that apply to all bossfights.
Preparation is Key
It is entirely possible to simply rely on pure sass-blasting eye-twitching mad skill to murder bosses in Terraria, provided you’ve got the DPS to actually kill the bosses on time. That being said, we’re in the business of making things easier so you can win with less of that, so we’re obliged to tell you to prepare, prepare, prepare!
Craft some buff potions, make sure your arena is up to snuff, get some better weapons and make sure your armor is whatever happens to be the best available to you (Depending on class: If all you care about is Defense then pick whatever happens to be the best Melee set no matter what weapon you use, but if you want some firepower, class sets are the way to go, which may have uneven progression especially early in the game) before deliberately picking a fight with a boss.
Related: Terraria Mobile Guide: Everything You Need to Know
Usually some Food items, some Ironskin Potions, Regeneration Potions, maybe Endurance Potions is all you need as a basic mix if you aren’t overly confident in your ability to dodge attacks reliably, but more is always merrier. Potions are typically crafted with Bottled Water, some various herbs and fish, and occasionally ores or other weird stuff.
The easiest way to look for Potion recipes is by going to the Guide (Your first NPC) and handing him Bottled Water through the Guide’s Crafting tab. Always do your best to make sure the boss is fighting on YOUR terms, not theirs!
Basic Arena Construction
The type of arena you’ll use most often is either a long stretch of platform blocks, multiple floors of platform blocks, or both at the same time if you’re willing to take the time to build such a thing. 2-3 screens wide is plenty for a long stretch arena, and you might even find yourself building some very small ones (Fairly tall, but barely even a third of a screen wide!) like in the Crimson chasms due to terrain constraints or simply because you don’t need that much horizontal movement for certain fights.
Heart Lanterns, Campfires, Star Lanterns, and if you can find them in the Underground Desert, Bast Statues are good additions available early on, and later after Skeletron you can wire Heart Statues and Star Statues to give you Heart and Star pickups. If you want absolutely only a single Surface arena in your world (There’s no getting away from building one in the Underground Jungle or World Evil chasm), the top of the Dungeon is the best building spot: There are two bosses summoned at the Dungeon surface, and you’d want an outpost nearby to visit the Dungeon regularly anyway.
An arena and outpost near the Dungeon will cut on travel time for some bosses. The Hallow and the Ocean are good places too since you can only fight the Empress of Light in the Hallow, and Duke Fishron in and over the Ocean, even though they’re technically optional.
Wings for Agility, Mounts for Power

The Accessory slots available to you are just as important for your build as your Armor and Weapons. The usual gear older players stuck in older habits tend to use are at least Specter Boots (If you can upgrade them all the way to Terraspark Boots, all the better), and a pair of Wings, mixed with some more straightforward combat accessories that either raise Defense, or whatever offensive stat or quality-of-taking-lives upgrade they favor.
The ultimate high mobility build more modern no-hitters often use is a mix of Frog’s Legs and Bundle of Balloons with at least Specter Boots and Shield of Cthulhu, since the multiple jumps are much more controllable than the classic Boots and Wings combo while matching it for altitude, but it requires skill.
Then you have fancy horizontal movement capable wings like the Hoverboard and Betsy’s Wings, which allow you to turn left and right on a dime at high speed, at the cost of a bit of maximum total airtime compared to other Wings of their tier. Accessory based mobility with its many options but habit of taking loads of accessory space sacrifices power for the sake of absolute character control, especially with the Empress of Light’s Soaring Insignia drop which makes accessory based flight infinite.

As a Terraria Mobile player where digital thumb controls make things ever so slightly harder in spite of target lock and auto-fire existing for them, or heck just a player who wants raw firepower or Defense though, you can opt to use a Mount instead: A Mount often combines several accessories’ worth of movement buffs at once in a dedicated Mount Slot.
Even before you get to the highly popular infinite flight mount items like The Black Spot, Witch’s Broom and UFO Car Keys, you have some really solid options like the Honeyed Goggles and Slime Saddle. The Queen Slime mount (Gelatinous Pillon) in particular essentially mixes the classic Boots and Wings combo with water flotation, high drop speed, and the ability to stomp enemies from the air ala Mario murdering Goombas in your one Mount Slot!
This means you can take all those freed accessory slots and do something funny like cram them full of Emblems for raw damage, or wear two Paladin Shield upgrades at once, or any other maniacal plan you can come up with. The downside all mounts share though compared to Accessory based mobility: They’re noticeably slower to change direction during movement, especially Flying Mounts, which feel much heavier to use compared to Wings and Boots.
It’s nothing a sharp eye for enemy attacks can’t fix though, and the boons you get from those freed up Accessory slots are absolutely worth it, though you might miss the sheer acceleration and agility of Wings and Boots simply because of how good they feel to use.
BOSS TIME!
Here are the bosses you’ll pick a fight with so you can progress the game or simply get some better stuff to kill things with. Starting out with the Pre-Hardmode bosses, the typical goal before you fight these guys isn’t just Gold Armor, since there are now better offensive options for earlygame armor.
Flinx Fur Coat from the Underground Snow Biome if you like Summons, Fossil Armor from the Underground Desert if you got some guns early or like bows, Gem Robes for earlygame Mages, and, well, Gold or Platinum Armor for melee users.
That being said, Mages can overprepare by jumping into the Jungle and getting the materials needed for Jungle Armor early, which is the last Mage armor you’ll need until the Wall of Flesh goes down, and it happens to be available from the very start of the game if you like suffering in the Jungle early. And look for Crystal Hearts underground so you can max your HP to 400 eventually.
DETHRONING KING SLIME
Ground Boss, Teleportation, Slow Movement, Mook Spammer
King Slime is not likely to be the first boss you fight, but he is generally considered the easiest. He is by no means the weakest stat-wise though: He’s easy because he’s easy to dodge, but failing to dodge King Slime is extremely punishing, as he hits very, very hard for when you meet him (40, 64, and 96 damage based on world difficulty, and it can appear from Slime Rain even before you hit 200 max HP).
Usually, it’s his mooks that cause any real problems, since he summons spike-shooting slimes in Expert and Master Mode. As far as arenas go, all you really need is a decently wide flat space that lets you shoot straight at King Slime, 1 or 2 screen’s space being plenty.
Weapons
Good: Throwing Knives, Shuriken, Gold Bow/Jester Arrows, Enchanted Boomerang, Grenades
Bad: Anything that requires you to get close
Any weapon you can use at a distance works fine, since you really don’t want to get within sliming range of this guy. Piercing weapons like Shurikens and Throwing Knives work well enough, especially since they’ll likely go through the pile of smaller slimes following him and do damage. You’ll probably have a set of any sort of metal armor by the time he ambushes you, but they’re mostly there to protect you from his mooks as King Slime’s own powerful yet easily avoidable damage will overwhelm any early game armor set.
Grenades roll on the ground and do heavy AOE damage to him and his mooks, which makes them perfect on a flat stretch of land. If you’re particularly unlucky and you’ve never had a Skeleton or Piranha drop a Hook for you before running into this guy, King Slime’s Slime Hook may end up your first grappling hook. They also drop the Slimy Saddle, one of the better pre-Hardmode mounts, very useful in a surface Eater of Worlds fight if you know how to bounce it on the Eater repeatedly.
POKING THE EYE OF CTHULHU
Flying Boss, Mook Spammer, Berserk Dash Attack, Night Only
What most players consider the first real boss of the game, the Eye of Cthulhu is a nasty wake-up call to rookies everywhere. They’re a giant flying eyeball that shoots little flying eyeballs from their pupil, which has a tendency to block ranged attacks from basic Wooden, Fire and Frostburn Arrows and Musket Balls from Muskets and The Undertaker, the most likely ammo you own at this stage. Blasting them to low HP gives them a high speed dashing attack that they spam harder the lower their HP gets.
A simple wood platform about two jumps or so away from the ground is enough, though having two wood platforms one jump away from each other is also good. The Eye of Cthulhu has a tendency to dash underground when they’re angry, which makes them harder to kill. Stay high enough away from the ground, and you’ll be able to shoot them more easily, since now, dashing down doesn’t protect them.
The longer the arena, the better. They run away come 4:30 am (in-game time, an hour is a minute in-game), so make a Platinum or Gold Watch and summon them at 7:30 pm, which is when the game officially thinks it’s nighttime.
Weapons
Good: Minishark, Boomstick, Gold Bow/Jester or Frostburn Arrows, Thorn Chakram, Abigail’s Flower, Amazon
Any weapon that can be used as a distance is good, with throwing weapons like Knives and Shurikens being good for going through the Eye’s mooks and hitting them directly, if you have good aim. A Gold Bow and Frostburn Arrows (Ice, Torches, and Arrows together) will do well, but if you can splurge Fallen Stars for Jester Arrows, nothing’s stopping you.
You can vastly overprepare for the fight by getting any gun from the local World Evil then buying a Minishark from the Arms Dealer, or getting a Boomstick, Thorn Chakram or crafting the Amazon yoyo from the Underground Jungle. A melee weapon like a Blade of Grass can be useful during their dashing phase, allowing you to cause damage while the Eye charges at you.
At this early stage, there’s rather few options for Mages so just use high tier Gem Staff, and Summoners can use any flying summon available to them (Finch Staff, Abigail’s Flower) with a Flinx Fur Coat, though only because that’s all they have at this stage. By this time, you ought to have at least Hermes Boots or any other equivalent.
EATING THE EATER OF WORLDS
Worm Boss, Splits Into Multiple Targets, Projectile Spammer, Corruption Only
The Eater Of Worlds is a particularly difficult boss to build an arena for since they only fight you in the Corruption, and always runs away like a little baby when you try to drag him anywhere else. Constant squadrons of Eaters getting in your face is not conducive to proper arena establishment.
As a Worm, they can dig through solid blocks, but they can only jump so high above the ground in open air. In Expert and Master mode, they gain a very dangerous vile spit shot that they like to spam, and is more dangerous than the worm itself. Breaking a segment of the worm splits it into more worms, and the head segment of any Worm has markedly lower bulkiness but hits harder.
The point of any arena or fighting space against the Eater of Worlds is to keep you away from the Vile Spit: A stretch of solid blocks to stand on above the arena just high enough so the Eater of Worlds can’t reach you, and some platforms afterward which you can peek through and fire.
Another option is to fight the Eater of Worlds in the horizontal part of the Corrupt Chasm, but for that you’ll need at least Gold Armor and some defensive accessories. You need to be able to at least tank the body and avoid the head, but the narrow space makes the Vile Spit less of an issue since they’ll just splat on the walls.
Weapons
Good: Demon Bow/Jester Arrows, Blade of Grass, Thorn Chakram, Vilethorn, Ball o’ Hurt
Bad: Explosive weapons, Non-Piercing Attacks
Anything with the ability to pierce many enemies works since The Eater of Worlds is made of multiple segments, though the seemingly common-sense use of explosive weapons like Grenades were nerfed to do 80% less damage against him. High tier (Ruby or Diamond) Gemstaves and especially the Vilethorn will make short work of the Eater of Worlds as long as you have mana to sustain fire.
If you crafted a bow out of the evil metal (Demonite in a Corruption world, Crimtane in a Crimson world) the Eye of Cthulhu dropped, load it with Jester Arrows (The result of mixing a batch of Wooden Arrows together with a Fallen Star you got from nighttime) so you hit multiple segments at once.
As a Melee player, a good flail like the Ball O’ Hurt will penetrate many segments on throw, and catching his head with a decent sword (If you’re courageous, grab the Blade of Grass from the Jungle) or the War Axe of the Night can stunlock him to death. In Terraria Mobile, you don’t even need the War Axe of the Night since all swords can be set to autoswing.
GIVING THE BRAIN OF CTHULHU A STROKE
Illusions, Mook Spam, Dash Attack, Crimson Only, Flying Boss
The Brain of Cthulhu is what you get if you have a Crimson world instead of Corruption. While it is very difficult and generally inadvisable to fight the Eater of Worlds on the surface without protection of some sort, the Brain of Cthulhu is a better candidate for a surface platform arena fight. Unlike the Corruption’s Eater spam, you only have to worry about the occasional flying enemy as most foes in the Crimson are land-based apart from Crimeras.
The Brain of Cthulhu is also very dangerous to battle in a tight area, and you need more space to jump around. Thankfully, the usual layout of Crimson chasms practically beg to be turned into an arena, a decently large central hub with surrounding arterial tunnels. The first part of the fight is clearing out his many, many eye mooks. The second part has them using illusions to confuse you, while they try to move in closer. They are the only boss affected by knockback, so a good shot will keep them out of your face.
Weapons
Good: PHASE 1: Tendon Bow/Jester Arrows, Crimson Rod
PHASE 2: Tendon Bow/Frostburn Arrows, Thorn Chakram, Boomstick, Minishark, Ruby/Platinum/Amber Gem Staff
Just like with the Eater of Worlds, a Tendon Bow with Jester Arrows will sort them out, since their first phase eyes have a tendency to clump together. The second part is the problem. The Brain of Cthulhu opens its eye, and it starts using hallucinations to distract you, generating 3 illusions around you to hide itself before charging into your personal space.
During the second phase in Expert or Master mode, keep a sharp eye on the minimap: It reveals the real Brain in relation to your position. It only uses its illusions in Expert or Master, and the illusions become harder to distinguish from the real thing as their HP goes down, but the minimap always shows it. Dodge their attacks and gun them down. Terraria Mobile players have less to worry about with the second phase, since the target lock immediately targets the real Brain.
EVIL PICKAXE GET
After the Eater of Worlds or the Brain of Cthulhu, you’ll have access to either the Nightmare or Deathbringer Pickaxe. This can only mean one thing: Underworld mining session! The nasty burning Hellstone, when mixed with Obsidian that occurs when water falls onto lava, can be formed into Hellstone Bars at a Hellforge. Which you can also grab in one of the Underworld’s various ruined buildings. Craft an Obsidian Skull accessory, chug an Obsidian Skin Potion, dive into your Hellevator, and get to work!
FRACTURING SKELETRON
Guided Projectile Attacks, Multiple Parts, Heavy Armor, Rushing Attack, Flying Boss
Yep, this guy is a real problem. Classic mode Skeletron is already a pain in the butt by himself, but in Expert and Master, this calcified spook starts tossing guided ghost skulls at you if you shoot his hands down first, which you have to do since each hand raises his head’s defense by 25 each. This means most weapons at this tier can barely scratch his head, barring heavier melee weapons and the Musket.
One of his hands tend to swipe vertically, and the other horizontally. He also has a spinning skull attack that lowers his head’s defense, but hits extremely hard and can shred your HP to nothing in a few seconds. A perfectly normal platform arena of multiple floors will work fine, but you’d have to build it right on top of the Dungeon: The fact you have to kill his arms first before his head means you don’t have time to waste luring Skeletron to an existing arena after you talk to the Old Man to summon him.
Besides, the Dungeon’s top provides a convenient spot to place Heart and Star Lanterns to make the fight easier. Come 4:30am, they’ll spin their heads and smack you with an instant kill attack. Skeletron can only be summoned past 7:30pm either by talking to the Old Man outside the Dungeon, or if you have a Clothier Voodoo Doll, killing the Clothier with your own weapons while it’s equipped as an Accessory.
Weapons
Good: Minishark, Musket/ Meteor Shot, Boomstick/Silver Bullets or Musket Balls, Molten Fury/Jester Arrows, Frostburn Arrows or Hellfire Arrows, Flamarang, Thorn Chakram, Demon Scythe, Space Gun
Bad: Boomstick/Meteor Shot, Vilethorn
This fight favors weapons with high single hit damage if you want aim straight for Skeletron’s head. That being said, since most fast-firing or multihit weapons at this stage of the game have better DPS compared to weapons like the Musket, you’re better off aiming for Skeletron’s hands first to reduce their head’s defense, or use Shark Tooth Necklace to ensure your Minishark has more bite.
You likely have the Nightmare or Deathbringer Pickaxe, so you have access to Hellstone weapons like Molten Fury and Flamarang. You might have also found Demon Scythe, a high damage magic spell, early on.
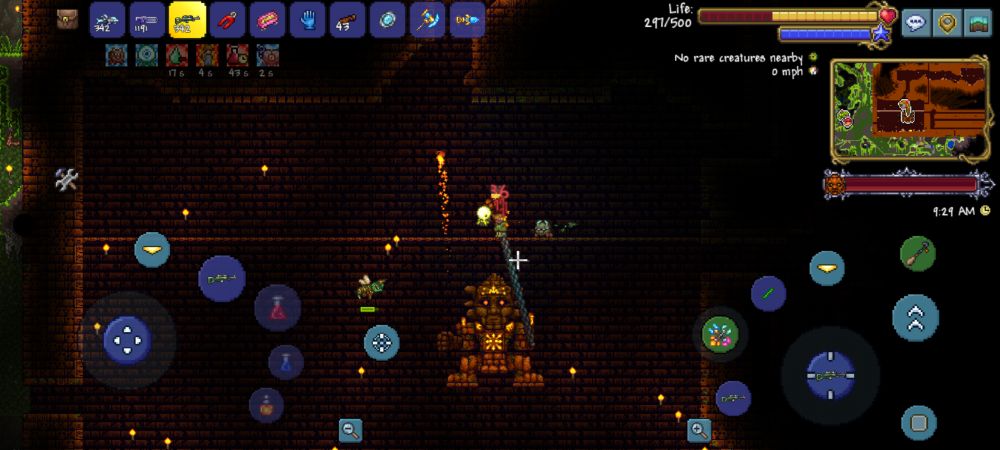
SPRAYING THE QUEEN BEE
Mook Spam, Dash Attack, Poison Projectiles, Flying Boss, Jungle Only

By the time you should be a fairly experienced dodger and fighter. If you’re one of the crazy people who try to get the Boomstick and Jungle equipment before even fighting the first boss, you should also be familiar with the terrain of the Underground Jungle. Find a giant beehive, dig inside, and for the love of all that is good, do NOT shoot at the weird larva thing inside.
Before you do that, turn the little beehive into a small arena using Wood Platforms, and if you have some to spare, stick a Heart lantern and Campfire in there. The Honey at the bottom of Beehives are both a bane and a boon: Jumping into the honey gives you a Health regeneration buff which stacks with Regen Potions, Campfires and Heart Lanterns, but it is very easy to get stuck in honey since it is very thick. Once your arena is done and lit, smash the Larva and fight the angry bee mom that now wants to sting you in half.
Weapons
Good: Boomstick, Minishark, Thorn Chakram, Abigail’s Flower, Imp Staff, Flamarang, Space Gun
Stay calm when fighting the Queen Bee: By this time you should have either Jungle, Shadow, Meteor, Obsidian, Fossil or Crimson armor, and the Bee itself is rather predictable: It alternates between angry horizontal dash attacks, standing in place to summon small bees, and standing in place to shoot stingers at you.
Don’t move around too much during the bee spam and stinger attack: The Queen Bee moves with you, so dodging only when needed lets you pour the fire on her without having to aim too hard. Aim for her butt when she summons bees, so any bee summoned dies immediately rather than swarming you. Start dodging instead once she does her horizontal dashes.
A few floors inside your small arena should be enough to let you avoid the attack, or sharp use of the Grappling Hook or any jump-boosting accessories. Jump into the honey occasionally for the HP regen, but don’t stick around: Just a tiny dip gets you a whole 30 seconds of the buff.
Now the writer can suggest the Boomstick and Thorn Chakram without sounding like a madman! Another good choice is Meteor Armor and Space Gun, since those two together means the piercing Space Gun can be fired indefinitely. Meteor Armor also works with the grey Zapinator, turning the fight into a glorious RNG-fest, where you either get bees in your earholes or kill the Queen Bee in five or so super lucky shots.
DEERCLOPS IN THE HEADLIGHTS
High HP Low Defense, Encourages Close Combat, Immune to Long Distance Attack, Ground Boss, Snow Only
The Deerclops is the most recent addition to the game, put in as part of a cross over with Don’t Starve. Mechanically, it is a very difficult boss to fight considering they’re from Pre-Hardmode, though it is made easier by the fact he doesn’t despawn immediately if you die: Instead, you’ve got a whole in-game day (24 minutes) to kill them, and you can come back to the fight anytime within the time limit, no matter how many times he freezes your butt clean off.
If you’re going to kill any boss with a non-energy-spewing sword, it’s gonna be the Deerclops. While it has many intimidating attacks, learning its patterns and staying under it, while very emotionally uncomfortable for both of you, is typically the way to go. Trying to jump over him or going too far away makes him fire off a rather unpredictable rock throw attack that hits very hard.
On the other hand, staying close forces him to use an equally devastating, but much more predictable frost wave spike attack. Deerclops will fire ice spikes toward the player twice, which can be dodged by simply running toward the Deerclops and past him. After the two strikes, run away because the third frost wave happens around him with shorter range, but being able to hit where his legs are.
Hack away at them or blast them with a Boomstick from in between his legs, then run on the third attack. Moving 30 tiles away from them turns them shadowy, making them immune to damage until you get in close again. On Expert and Master mode, they occasionally summon a few Shadow hands during combat, which make things a bit more complicated.
Weapons
Good: Phoenix Blaster, Flamarang, Night’s Edge, Quad-Barreled Shotgun, Imp Staff (Pre-Skeletron), Boomstick, Thorn Chakram, Demon Scythe
While you can fight the Deerclops whenever the heck you want, it is generally recommended you fight them after Skeletron. That being said, they’ll likely ambush you during blizzards in the Snow Biome if you have above 6 defense and 200hp, well below a safe stat set for a Skeletron battle.
Melee is the best class to fight him with, since they have the best defense and you’re constantly in strangling range of the boss, allowing you to bring to bear the full might of close-combat DPS with stuff like point-blank range Thorn Chakram/ Flamarang spam or thick manly swords like the Night’s Edge, Blade of Grass or Fiery Greatsword.
Meanwhile, Rangers have access to the Boomstick and later on, the Quad-barreled Shotgun as effective close combat weapons, though Phoenix Blaster should work fine too thanks to auto-fire and its high DPS. Summoners get the short end of the stick with their armor sets’ pitiful defense making things hard for such tight, close-in battles, though the Imp Staff mixed with the Snapthorn and Spinal Tap can wreak havoc, and the close nature of the fight allows you to use sentry summons from the Tavernkeep, provided you beat the Old One’s Army event .
If there are mountains or walls in between your flat battle zone, a Water Bolt may work as the shots will bounce off the mountains and hit Deerclops multiple times, albeit slowly. If you manage to nab a Demon Scythe during a trip to the Underworld, all the better since it has a piercing projectile that lingers before flying off, very likely shredding the Deerclops when used at a particularly romantic range.
In Expert and Master Mode, the Shield of Cthulhu will allow you to dodge the frost wave attack much more easily. Lastly, bring a Warmth Potion or two so you don’t have to worry about the frost wave attack’s “Frozen!” debuff, since while the attack is fairly easy to dodge once you get the hang of it, it’s an absolute death sentence if it freezes you.
You can choose to fight them much earlier than is safe for your mental health though, since they don’t immediately leave when you die, hanging about for a solid 24 minutes (One in-game day) in the Snow Biome waiting for you to come back. Doing so gets you some very good loot, with the Eye Bone summoning a very useful Pet that acts as a mobile Piggy Bank.
WALL OF FLESH, MEET WALL OF WATERBOLTS
Mook Spam, Aimed Rapid Fire Lasers, High HP, Map-wide Battle, Functional Instant Kill Attack, Advancing Boss
Here it is. This is the final boss right? The guardian of The Underworld itself, summoned by sacrificing the Guide… Honestly not much of a loss.
The Wall of Flesh, for all its menace, is a fairly simple to understand boss: It’s an advancing wall, with The Hungry and Leeches giving the Wall’s weak spots, its eyes and mouth, cover against non-piercing weapons while providing you with a source of red hearts when you kill them. You run away for dear life, and you shoot it until it dies, and it goes faster and faster the lower its HP goes.
Oddly enough though, the Wall of Flesh isn’t the biggest threat on the field: It’s the Underworld’s highly obstructive terrain. The outer edges of the Underworld is mostly lava and a few small islands dotting the landscape, but the middle of the Underworld is an impossibly ancient, abandoned city taken over by foul, filthy demons.
That city is a bigger problem than the demons, since those structures can and will cause you to snag onto them as you try to escape the Wall of Flesh, which is a death sentence no matter how much HP you have left. The bare minimum you need for a fighting space is to blow a path through those structures, usually with Sticky Bombs and Sticky Dynamite. You don’t even need to flatten the land as long as those houses have big enough holes in them for you to run and jump in a more or less straight line using at least Specter Boots, though flat terrain is still a good addition.
If you do plan to make a proper flat arena out of the entirety of Hell, do not use Platform blocks in Expert and Master Mode: Lava Slimes in those difficulties spawn a block of lava upon death, which can burn holes through the Platform blocks.
Instead, use solid blocks like Ash, Snow (ironically enough), and especially Dirt with one-block holes scattered all over, since a one block hole is narrow enough for your 2-block wide character to walk over while preventing Lava Slime corpses from pooling horrible burning hellfire all over your arena.
Those specific blocks are not only easy to come by en masse, they also naturally spawn herbs (Ash spawns Fireblossoms, Snow spawns Silverthorns, Dirt spawns Blinkroots) so now your arena doubles as an Herb farm for those specific plants.
The ideal arena for a Wall of Flesh battle though, if you want to go completely, absolutely all out: A long railroad across the whole Underworld, with the buildings in the center demolished badly enough to ensure the Wall of Flesh has no cover against your attacks. Such a railroad is proof against Lava and surprisingly cheap, with 50 track sections being worth a piece of wood and a single bar of Iron or Lead.
Oh yeah, using a Magic Mirror or a Recall Potion instantly gibs you, and the Wall of Flesh will forcibly pull you back into the Underworld if you try getting out manually. Have fun!
Weapons
Good: Molten Fury/Jester Arrows, Hellfire Arrows or Demon Arrows, Boomstick, Minishark, Phoenix Blaster/Meteor Shot, Hellwing Bow, Water Bolt, Combat Wrench, A Metric Ton of Bees [Bee Keeper, Beenades, Bee’s Knees, Bee Gun], Star Cannon
Bad: Yoyos, Boomerangs that aren’t Combat Wrench, anything that hits once, lacks AOE or lacks piercing ability or has range too short to safely hit the Wall without being attacked by The Hungry
Anything you got from the Queen Bee will be useful here: The Bee Keeper, Bee Gun, and especially Beenades and the Bee’s Knees bow with Wooden Arrows all have attacks that summon bees, which are in essence a swarm of guided projectiles.
A more old-school solution is the Water Bolt found in the Dungeon’s bookshelves, a meta weapon against him from all the way back in Terraria 1.1, which still works perfectly well against him here. Water Bolt shots travel very slowly, bounce a lot of times, can pierce 10 targets, and are absolutely spammable.
In an open space, Waterbolts are a poor boss-busting weapon because of their abysmal projectile travel speed, but the Underworld’s ceiling means you can point your Water Bolt at the roof and force the Wall of Flesh and his mooks to run through a never-ending wall of bouncing projectiles while occasionally firing shots straight at the Wall’s weak spots.
A surprisingly viable choice in Terraria Mobile that might hurt your mouse in PC is a Phoenix Blaster with Meteor Shot: rapid fire single shot handguns only shoot as fast as your fingers in PC, but on mobile the Auto-fire setting will make them fire at their full potential. Meteor Shots can pierce one target, so mixed with smartphone autofire Phoenix Blaster’s fire rate, it can likely get through the swarm of mooks to hit the Wall via sheer volume of fire and high damage.
Last but not least, if there is any battle worth pulling out the Star Cannon for, it’s this one: This is the last Pre-Hardmode boss, so you might as well grind for those Fallen Stars to make absolutely sure the Wall of Flesh gets demolished. In higher difficulties, it might be better to bring damage-focused armor instead of going for the safe tank armor and gun combo: The lower the Wall’s HP, the faster he runs, and you don’t want him to run faster than you long enough to kill you.
The final burst of damage is very important lest the Wall catch up at the last second and ruin your entire day. On the other hand, this is one of the toughest bosses to fight in a pure Yoyo run: Yoyos’ limited range plus their inability to pierce through mobs makes them difficult to use against the Wall, since you’re constantly in range of The Hungry.
WELCOME TO HARD MODE!
The Wall of Flesh is dead, and your world is liberated! Another thing you’ve liberated, the ancient powers of light and dark. Turns out the Wall of Flesh might have been trying to keep the whole place more or less civil. Now, murderous unicorns and bloodthirsty pixies fight with empowered eaters that spit foul bile and malice across the world.
Two diagonal stripes of oppressively bright Hallow and foul, disgusting Corruption or Crimson just shot through the vertical length of your world. And all of them hate you just as much as the rest of this world does. Congratulations, you’ve ruined everything! Now take that fancy Pwnhammer and bash some Demon or Crimson Altars to death, preferably 3 to 9 of them.
Then go mine the ores that pop out, taking care to make pickaxes or drills first except from the Adamantite or Titanium ores, since all you really need max before skipping to the Drax is the Mythril or Orichalcum Pickaxe or Drill.
QUEEN SLIME MISSES KING SLIME, OBLIGE HER
Ground Boss, Flying Boss, Mook Spam, Projectile Spam
Imagine King Slime, and bump them up to 11, and you get this gloriously horrific blob of Party Girl Bath Water. Queen Slime not only spams mooks who can absolutely fill the screen with jelly bullets, she can bombard you with larger slime bullets herself! The fight is incredibly chaotic, though it can be done with a full set of the lower tier Hardmode ore armors and a weapon suited for demolishing loads of mooks.
Ironically, she is much easier to cheese in her second flight-capable phase, since her first phase being land bound and able to teleport into your face means you have to contend with her mostly ground-bound slime babies at a less than comfortable distance. She can only be summoned in the Hallow, but she can be lured away from it with no repercussions.
If you have an old arena elsewhere on the Surface and are too lazy to build a new one in the Hallow, make her follow you there if you want. Taking her down a few times could get you Crystal Assassin armor, a generalist armor set that may give you an easier time for now, and the Gelatinous Pillion, a powerful mount that lets you fly, float on water, move decently quickly, fall at extreme speeds and goomba-stomp enemies. Much like the Slime Saddle, but with wings!
Weapons
Dart Guns/Crystal Darts, Daedalus Stormbow/Hellfire or Holy Arrows, Onyx Blaster/Explosive or Crystal Bullets, Sky Fracture, Meteor Staff, Dao of Pow, Ice Sickle
Her first phase acts much like King Slime on steroids, jumping on the ground, teleporting into you if you run too far or she gets stuck, and spamming mooks like crazy. Those mooks cause the majority of projectile spam to happen, so you need to thin them out somehow. Dart guns and Crystal Darts, Hellfire Arrows, Dao of Pow and most magic spells available to you should do the trick, especially Crystal Darts since they will actively bounce into the mooks while still damaging Queen Slime.
Her second phase allows her to fly, though she is very predictable: She always tries to stay a moderate distance directly above you, so flying high above the enemy mooks can help if you have The Black Spot on Master Mode, though if all you have are wings, you still need to put some effort into clearing the mooks before they start filling the screen with their attacks.
DESTROYING THE DESTROYER
Projectile Spam, Mook Spam, Worm, Giant Target, Worm Boss, Night Only
Ideally the Destroyer is the first Mechanical Boss you should fight, since killing them potentially makes the other bossfights easier thanks to the stuff you can craft from their specific drop, Souls of Might, unless you’re a Mage or Summoner. Then you go for the Twins first!
The Destroyer is also the most prone to being cheesed, as long as you’re careful. Just like the Eater of Worlds, he’s a giant worm that relies on heavy projectile spam, and your worries include his head, his lasers and his Probes which also fire lasers.
His weakness is a solid block platform just high enough in the sky that they can’t reach it, since their most dangerous method of attack is their laser spam, and unlike the Eater of Worlds, you’re never going to be tanky enough to sit there and take their body attack by fighting them in a horizontal tunnel, unless you’ve beaten them before and have better armor than what was available on his first appearance.
By making such a high solid floor, the only way the Destroyer can threaten you is with the laser-spamming Probes they spawn when damaged, which do eventually run out since each segment can only spawn one Probe. Not to mention killing Probes has a good chance to drop Heart pickups.
Weapons
Good: Daedalus Stormbow/Holy Arrows, Dart Pistol or Rifle/Crystal or Cursed Darts, Dao of Pow, Onyx Blaster/Crystal Bullets or Explosive Bullets, Ice Sickle, Spirit Flame, Life Drain, Abigail’s Flower, Pirate Staff
For weaponry, Rangers get the easiest time with either the Daedalus Stormbow (taken from highly dangerous yet terrain-dependent Hallowed Mimics) or the Hardmode Dart guns (Dart Rifle from Corrupt Mimics or Dart pistol from Crimson Mimics).
You’ll need Holy Arrows for the Daedalus Stormbow (These shots summon a pair of falling stars on impact for additional damage, usually clearing the sky of Probes while still dealing damage to the Destroyer reliably) and any of the Hardmode Darts for the Dart guns (Crystal Darts can bounce along the length of the Destroyer as it has passive tracking on impact and roughly 10 bounces per shot, Ichor Darts split into a spray of highly damaging defense reducing darts, and Cursed Darts rain Cursed Flames across its flight path, allowing it to bombard the length of the Destroyer’s body).
If you’re a Mage, then the best weapon available to you specifically for this fight is the Spirit Flame, something crafted with drops from the rather hideously deadly Hardmode Underground Desert. Another good mage weapon, especially if you spot the Destroyer’s initial spawn coil, is the Life Drain, which has rapid AOE damage where your mouse cursor is.
As a Melee, your life is much harder as you’ll need to get in uncomfortably close: An Ice Sickle or Dao of Pow will do well, though if you’re completely insane and have a lot of skill, you can use the Fetid Baghnaks to rack up serious DPS every time you see an opening to attack safely. You’re also probably wondering why Abigail’s Flower, a near start-of-game Summon, is on the list.
Abigail’s Flower gets a stat boost after the Wall of Flesh goes down, making her a Hardmode viable summon. Her strength is entirely dependent on your Summoner gear loadout, as she hits much harder when she takes up multiple Minion slots. She also moves fast enough to start ripping through the length of the Destroyer, and as a close combat Summon, pierces the Destroyer’s many segments.
POKING THE TWINS IN THE EYES
Flying Boss, Night Only
SPAZMATISM (The green one)- Close-Range, Slow Projectiles, Flamethrower Attack, Fast Charge
RETINAZER (The red one)- Rapid Fire Lasers, Keeps Away
The Twins are the most straightforward of the Mechanical Bosses, not being too difficult but not having any real cheese strategies other than setting up a minecart track and running for dear life while shooting. A long platform arena (You could use the old one you made for Skeletron on top of the Dungeon) is typically used in a fight against
The Twins if one lacks Gravitation Potions or aren’t in Master Mode and therefore lack access to the Black Spot flying mount. Spazmatism should ideally go down first, as they’re the more aggressive one, and have a dangerous cursed flamethrower and dash atttack in their second phase.
Afterwards, Reitnazer is much easier to deal with, as they back off and use aimed lasers to fight in their second phase. Avoiding the lasers, while needing some quick reaction, is easier than dodging the less predictable angry charge dashes Spazmatism does.
Weapons
Good: Uzi, Onyx Blaster, Clockwork Assault Rifle/Crystal/Ichor/Cursed Bullets, Adamantite or Titanium Repeater/ Cursed or Ichor Arrows, Crystal Serpent, Dart Pistol or Rifle/Ichor Darts, Amarok
Bad: Dart Pistol or Rifle/Crystal Darts
Trying to melee the Twins with anything other than Yoyos or the post-Destroyer Light Discs or the super rare Bananarangs is going to be pure agony, as one of them only gets near you with a huge flamethrower or gnashing teeth, and the other actively plays keepaway and wants nothing to do with you. Guns are the typical weapon used against the Twins, though Repeater crossbows can make a good easily accessible substitute with their decent fire rate and high damage per shot.
Dart guns and Crystal darts may actually work against you, as you do not want both of them to enter their second phases at the same time. Bring flight accessories like Wings, since you’ll need to be highly mobile for this. If you’re a Ranger or Melee, you probably fought the Destroyer first, so Light Discs or the Megashark would be available to you if so.
SKELETRON PRIME RIBS COOKOFF
Projectile Spam, High-Damage Rush Attack, High Defense, Flying Boss, Night Only
Generally considered the nastiest of the three Mechanical Bosses, Skeletron Prime is usually fought last. You can fight them either with an arena or Gravitation Potions just like the Twins, though beware if you used the For The Worthy worldgen seed: In that seed, Skeletron Prime’s bombs can destroy terrain and platform blocks!
If you’re using For the Worthy, make sure you make your arena out of bombproof materials such as Dungeon Bricks, or fight as far away from your spawn or any biome you want intact as you can if you’re chugging Gravitation Potions. Fighting them over the Corruption or Crimson may put a smile on the Dryad’s face though.
Skeletron Prime has 4 arms, each with a different weapon: The Prime Laser, Prime Vice, Prime Saw, and the Prime Cannon. There’s also his head of course, and just like with Skeletron, you should avoid it like a plague. Unlike with Skeletron though, Prime’s defense goes UP when his head spins, so it is absolutely important you get rid of his arms before aiming for the head, even if you’re using high damage low speed weapons like Dart Rifle since the defense buff is rather nuts.
The head spin attack’s speed is dependent on how far away you are: If you’re nearby, it will be slower than if it happens while you’re far away. This means Swords, and especially Fetid Baghnaks, can be used during the spinning phase if you’re very, very careful.
The Prime Laser typically hangs back and fires fast-moving lasers directly at you from your sides. The Prime Cannon sometimes fires bombs directly at you if you move in such a way as to force it to your sides, but mostly drops bombs at you from above. The Prime Vice charges at you directly, while the Prime Saw typically denies you movement by flying below you then swiping up and down.
Typically, you want to get rid of the Saw and Vice first since they’re so dangerous, though this is secondary to simply shooting whatever arm you have an opportunity to hit. Unless you’re in a For the Worthy world, in which case, kill the Cannon ASAP before they wreck your house!
Weapons
Good: Dart Rifle or Pistol/Crystal Darts, Amarok, Uzi, Clockwork Assault Rifle, Onyx Blaster, Crystal Serpent, Sky Fracture, Titanium or Adamantite Repeater/ Ichor Arrows, Cursed Arrows or Holy Arrows, Fetid Baghnaks if Head Spin Attack moves slowly
As for weapons, hardmode dart guns with Crystal Darts are a good choice since they will likely bounce through all of Skeletron prime’s arms and head at once. Switching to a rapid fire DPS machine like Light Discs (provided you beat the Destroyer first), Hardmode yoyos, Hardmode guns other than the Gatligator (Gatligator, while a great crowd pleaser, is a less than optimal gun for bossfights other than the Destroyer because of its wide spread, at least Shotguns like the Onyx Blaster fire all their pellets at once, causing a lot more reliable damage), Crystal Storm and Crystal Serpent is a good idea once their arms are all dead.
By this time, chugging buff potions such as Ironskin, Regeneration, Endurance, Wrath and Rage potions should be a habit for you during bossfights, though if you’re really good at dodging you should be fine.
THE JUNGLE GROWS RESTLESS!
The Jungle, already crawling with some nasty awful creatures like giant stinger-slinging Moss Hornets, high speed flying Giant Tortoises of death, and those yellow carnivorous plants that drop Uzis for some reason, now has some cute pink bulbs growing on it. After killing a single Mechanical Boss, Life Fruit should have started growing in there, but now it’s in full swing and it is strongly recommended you take your newly minted Drax or Pickaxe Axe there for a spin.
Mine out as much Chlorophyte Ore as your heart desires, taking care to leave a single nugget in every mined out ore vein to regrow, since Chlorophyte can spread through Mud blocks to a limit, making it renewable. Grab as much Life Fruit as you can and max your HP out from 400 to 500, because you’ll need it for the pain ahead.
ROCKING WITH PLANTERA
Projectile Spam, Dangerous Hitbox, Mook Spam, Underground Jungle Only, Might As Well Be A Flying Boss
A pretty pink plant! Is it a new item? Maybe a crafting station! You smash it with your Drax to take it home, and you hear an ominous roar echoing through the Jungle’s caverns. Soon enough, your insides are all the way over there, while your outsides are all the way over here. Oops.
Plantera is a jump in difficulty compared to the Mechanical Bosses, and a serious one at that. For one thing, you have to set up an arena in the Underground Jungle, and you can’t summon Plantera on your own terms: You summon her by breaking one of those aforementioned pink bulbs, which spawn at random within the Jungle and can be destroyed by accident with your Clentaminator if you use solutions that can convert Jungle Grass and you happen to hit a bulb some distance away.
This means you have to summon Plantera and run all the way to your arena before she murders you in the tight confines of the Jungle’s tunnels. A good arena for Plantera typically consists of a multiple floor platform akin to what you’d use if fighting The Brain of Cthulhu underground, but with one huge key difference: You must absolutely hammer away every bit of backwall, natural or player-placed, in your arena. Plantera’s tentacles can latch onto backwalls, making them much harder to avoid.
A useful addition is a panic hole, essentially a very wide hellevator (About 10-blocks wide, this could be made easily by blasting below you with a ton of Dynamite sticks) for this specific arena you can jump down into so Plantera chases you in a predictable manner.
This way, you can gun her down while barely having to aim, though you have to kill her before you reach the Underworld, since leaving the Jungle makes her extremely angry and gives her a giant speed and damage buff.
Plantera herself is fairly predictable, though definitely difficult because of all the stuff she throws at you. With a multiple floor platform arena, it’s rather easy to kite her into staying in one place by circling her. The arena needs to be deep, since apart from her petal spit attack and vines, she has a particularly deadly bouncing spikeball attack.
A deep arena or a panic hole makes it so the balls can’t bounce up and hit you, leaving only the vines, paradropping spores and the petals. Once her HP goes down sufficiently, her flower bursts open to show some really nasty teeth, starts moving faster, and her along with her movement tentacle grappling vine things spawn little biting flytraps that block your shots and damage you.
This is why your arena shouldn’t have backwalls: The vines will be forced to move out to the edge of the arena so it can latch onto solid blocks, so now you only have to worry about her head the majority of the time. Avoid her attacks as best you can, and either continue circling her or jump down the panic hole to gun her down, your choice.
Weapons
Good: Uzi, Megashark, Onyx Blaster/Crystal Bullets, Light Discs, Crystal Serpent, Death Sickle, Chlorophyte Shotbow/Holy Arrows/ Chlorophyte Arrows, Sanguine Staff, Optic Staff, Yelets
For weapons, anything you used during the Mechanical Bosses work just fine against her, though you also now have access to Chlorophyte weapons, and drops from the Solar Eclipse. Chlorophyte Arrows out of a Chlorophyte Shotbow are a solid choice, since they act much like Crystal Darts except now there’s a ton more of them. If you’re a Melee, the Death Sickle’s lingering projectiles work great if you kite Plantera well.
DISMANTLING THE GOLEM
High Damage, Slow Movement, Ground Boss
While the Lizahrd Temple is a difficult yet short trip, the Golem boss itself almost feels like a downgrade compared to Plantera. While they hit very hard and are rather tough, they’re also very easy to hit owing to the fact they move similarly to King Slime: Jumping up and down, affected by gravity, and decently damaging attacks that mostly hit you once in a blue moon if you just run left and right across a platform directly above the poor guy.
For an arena, you’re stuck with what you’re given in the Lizarhd Temple until you beat him and get a Picksaw to steal their Altar with. If you want to, flatten out the sides and the floor to avoid snagging, maybe set up a platform above so you can avoid certain attacks, and use a Wire Cutter to disable all the traps inside his Arena.
The Golem has several attacks in his first phase: Eye lasers which you should avoid, punching attacks that can be negated by shooting his hands as they’re about to fire, and of course, jumping on your head to crush you like a bug. Kill his punching hands before aiming for the head to make his second phase easier.
Speaking of which, once his head runs out of HP, it starts to fly, firing deadlier lasers and a bouncing fireball attack. Now his core is exposed. You can’t shoot at his head since it has no HP, so aim for the glowing core and gun him down. If you’ve beaten Plantera, then you should do fine against Golem unless you get careless.
Golem becomes much faster if you somehow drag him out of the Underground Jungle (Say, you use the Picksaw they drop to pull out their summoning Altar and put it back home), though they still do the same amount of damage and have the same amount of Defense, making fighting them on the surface still viable.
Weapons
Good: Tactical Shotgun, Sniper Rifle/Crystal Bullets, Dart Rifle/Crystal Darts, Chlorophyte Shotbow/ Chlorophyte Arrows, Paladin’s Hammer, Magnet Sphere, Sanguine Staff, Rainbow Gun
For weapons, anything that can beat Plantera works fine on Golem, and either Chlorophyte Arrows or Crystal Darts will almost completely shut down his fist attacks without even having to aim. You also have access to the Hardmode Dungeon though, so you can grind there then blast his fat rocky butt with a Sniper Rifle and Crystal Bullets for completely insane burst damage.
As a melee, again, whatever you used to beat Plantera works fine, but you now also have access to the Paladin’s Hammer if you get lucky with Dungeon drops, and if you have a Crimson world, the Vampire Knives turn this fight into a sad joke. Solar Eclipses should also give you the Eye of Cthulhu yoyo, the second most powerful yoyo in the game, along with materials to crate the Terra Blade, a fast-swinging projectile sword.
Any Summoner weapon available to you at this time will completely trivialize Golem as long as you dodge decently, and Mages can turn him into a non-issue with Magnet Sphere, though older weapons will suffice given enough patience.
NUKE ‘EM, DUKE FISHRON
Mook Spammer, Berserker, Dash Attack, Stealth Cloak, Flying Boss, Area Denial, Ocean Only
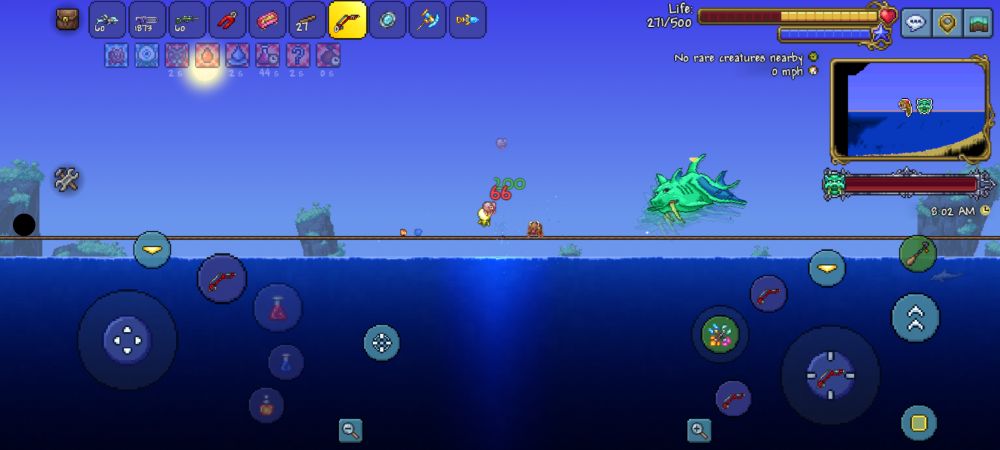
Ever so slightly below the Empress of Light in terms of power and difficulty, and far less predictable yet more prone to cheese, Duke Fishron is a dangerous foe with some very powerful drops, with standouts being the Shrimpy Truffle/Cute Fishron mount and the Razorblade Typhoon for mages. Duke Fishron starts out already difficult, rushing into you while summoning Sharknadoes, tornadoes that throw sharks at you as projectiles.
The tornadoes will limit your horizontal movement, and the sharks are just there to annoy and kill you like most projectiles are. As their HP gets low, the sky darkens and the Duke turns invisible and more aggressive, but oddly enough easier to predict if you’re really good with the Shield of Cthulhu. When they dash, you can smash into them with the Shield of Cthulhu, since the Duke’s flying so fast the shield bash invinciframes save you as the Duke flies past.
Terraria Mobile’s Lock on function acts as a decent defensive tool, allowing you to shoot down any Sharkron that tries to hit you, though it can mess with your DPS if you absolutely want total focus on the Duke himself. You can fight him fairly with a multi-platform arena located directly over the Ocean, or use a Lava Shark mount under the Ocean, since he gets really mad if you drag him away from there.
You can also cheese them to death by setting up two solid block-protected Teleporters (from the Steampunker after killing the Mechanical Bosses, which is why they’re the minimum recommended progression for killing Duke Fishron in the first place) on either side of him, specifically Teleporters with roofs and a bit of space to move. Teleport everytime they charge into you, while gunning them down.
Weapons
Preferable: Post-Plantera weapons, (Mobile) Venus Magnum, Snowman Cannon, Specter Staff, Chain Gun, Tactical Shotgun, Xenopopper/ Crystal, Cursed or Ichor Bullets
If you really want to do it before Plantera or the Mechanical Bosses: Onyx Blaster/Cursed or Ichor or Crystal Bullets, Sky Fracture, Sanguine Staff, Dart Guns/Crystal Darts, Shield of Cthulhu
Nothing special here, just bring the strongest equipment available to you and chug a ton of potions. In particular though, learning how to block the Duke’s later cloaked dash attacks with the Shield of Cthulhu’s dash can be a lifesaver in Expert and Master mode.
While you can fight them as soon as Hardmode starts if you’re completely nuts, it’s generally recommended you fight the Duke after Golem, and at bare minimum after the Mechanical Bosses if you like making yourself suffer now to have an easy time later.
Duke typically gets in your face and winds up before attacking, giving you enough time to shoot him without relying on Chlorophyte ammo, though it’s recommended if you still have a rough time aiming on PC. In Terraria Mobile, you can take advantage of auto-target and bring ammo that causes more damage rather than having target guidance, though again, the Sharkrons might give you problems aiming.
LIGHTS OUT, EMPRESS OF LIGHT
Flying Boss, Bullet Hell Pattern Attacks, It’s All Skill Baby!

Where do we even begin with this one. Empress of Light is the most cheese-proof boss in the game, in spite of being a very tiny step below Moon Lord in terms of raw stat numbers. Nothing to it but pure skill and knowledge of her attacks. While a railroad arena can work against her, she still has one attack that can hit you while you do it, and absolutely all her attacks are utterly deadly, even if you fight at night instead of going for the morning bragging rights kill.
You summon her by killing a Prismatic Lacewing, which spawns in the Hallow randomly from 7:30pm to 12:00 pm. This means you can summon The Empress by complete accident, unless you buy a Guide to Critter Companionship from the Zoologist. You’re better off catching the Lacewings with a Bug Net then letting them out when you want. Then you shoot them!
The Empress of Light has multiple attacks, all with noticeable, completely avoidable and highly telegraphed, but utterly intimidating-looking patterns. Keeping a cool head is absolutely key to fighting her as panicking and being frustrated will kill you harder here than with any other boss, even the Moon Lord. She can summon guided Prismatic Bolts that, while they have homing, are easy enough to avoid by flying above them or doing a harsh turn away, since they have a fairly wide turning circle and have to accelerate to top speed first.
If you see her become hazy after teleporting into either your left or right side, she’s about to do a ramming dash, which you can avoid by flying vertically (Or falling!) out of the way. She also has an Sun Dance attack, where she fires projectiles in a spiralling sun pattern, which is easier to avoid by flying away from the Empress. She also has Everlasting Rainbow, an attack similar to Sun Dance except the stars return to the Empress after some distance and leave a deadly trail of burning light.
Finally, if you see lines appear on the screen, avoid them since they’re telegraphing where her Ethereal Lances will go within the next second. All her attacks are destructive with none of them going below 100 base damage in Master Mode, but her dash attack is the most devastating and usually ends the fight badly for you if you eat it while your healing potions are on cooldown.
Oh, and if you fight her during the day so you can brag about getting the Terraprisma, all her attacks do tens of thousands of damage to your poor, wimpy 500hp (600 hp if you chugged a Lifeforce Potion beforehand) health pool. Have fun!
Weapons
Good: Sniper Rifle, (Mobile)Venus Magnum, Xenopopper/Chlorophyte, Crystal, Ichor or Cursed Bullets, Chlorophyte Shotbow/Holy Arrows, Posessed Hatchet, Vampire Knives, Sanguine Staff, Razorblade Typhoon/ Resonance Scepter, Laser Machinegun, (Daytime) Hallowed Armor, Master Ninja Gear, Brain of Cthulhu, Cross Necklace or upgrades
Your armor will depend on whether you’re fighting them at night, or in the day. At night, wearing armor appropriate for the stage you’re in (Shroomite, Beetle, or Specter armor) is a good idea for obvious reasons, with Beetle Shell Armor and Vampire Knives mix and healing Hood Specter Armor being standouts for their ability to drain HP. If you’re fighting in the day though, it does not matter how much defense or lifesteal you have since she’ll kill you a billion times over with a gentle touch.
Either wear whatever gets you the highest damage (Specter Mask Armor, Beetle Scale instead of Shell, with armors for Summoners and Rangers being fully offensive anyway) you can get to shorten the fight as much as possible, or put on Hallowed Armor, Master Ninja Gear, Brain of Cthulhu if you’re in a Crimson world or are willing to spread Crimson using seeds from the Dryad, and Star Veil.
Any slots left over, either mobility or damage accessories such as Celestial Emblem for mages, Yoyo Bag for yoyo mains, or the various Emblems dropped by the Wall of Flesh and their upgrades based on weapons used. Hallowed Armor gives you the Holy Shield buff, which allows you to take one free hit without suffering any damage at all, which recharges every 30 seconds. Master Ninja Gear and Brain of Cthulhu both give you a chance to dodge an attack, which can be a lifesaver if you screw up but get lucky while the Holy Shield is on cooldown.
All of those also trigger mercy invincibility, which the Cross Necklace and its various upgrades extend, protecting you from follow-up hits during a daytime battle. For weapons, anything you can hit her with at this stage works fine, especially Sniper Rifle, Xenopopper, or Venus Magnum for Rangers, Razorblade Typhoon or Laser Machinegun for Mages, the Xeno Staff for Summoners and Possessed Hatchet for Rangers.
That being said, you can make this fight easier by beating the Lunatic Cultist and the Pillars first. While the Lunatic Cultist is hard, they’re far easier than the Empress of Light, and the Pillars are practically a free win since they hang around even after you die.
With that, you’ll have access to Phantasm, Daybreak, Nebula Arcanum and the Stardust Dragon, all weapons that work well on the Empress thanks to their sheer maniacal DPS and her movement, which usually involves staying in one place and teleporting elsewhere, instead of ducking and weaving through your attacks.
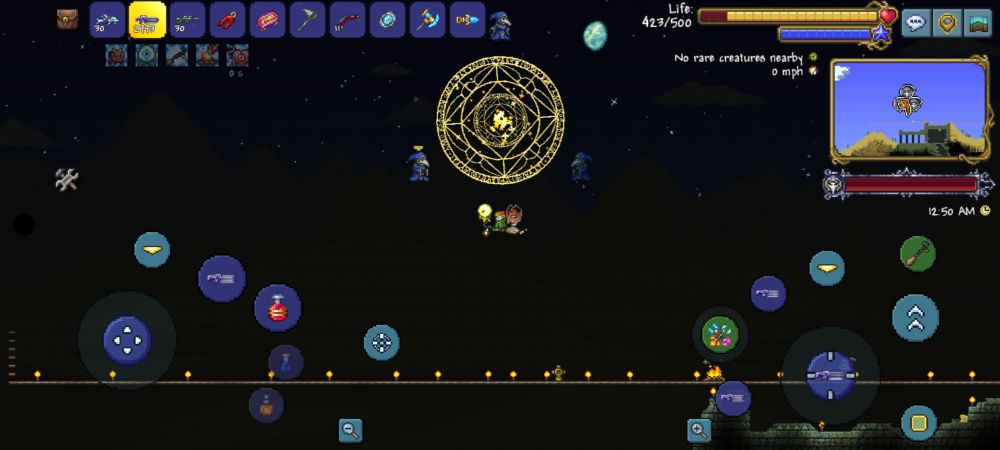
GIVING THE LUNATIC CULTIST BULLET THERAPY
Projectile Spammer, Summoner, Small Target, Fast Movement, Flying Boss
After wrecking the Golem, you’ll notice a bunch of suspicious looking hooded weirdoes around the Dungeon’s entrance. If you blast them to gibs, you’ll summon their leader, the Lunatic Cultist. The Lunatic Cultist is a truly annoying gnat of a boss thanks to a simple fact: He’s as small as you are, and therefore a hard target. In PC this forces you to fight him with Chlorophyte Bullets, a Possessed Axe, Razorblade Typhoon, a Summoner build, or a Snowman Cannon thanks to their guided projectiles, unless you know how to aim at such a teeny tiny target.
In Terraria Mobile though, you’ve got a great advantage: Auto-target! The Lunatic Cultist moves by teleporting from place to place, stopping for a noticeable amount of time to let out his attacks. This makes him extremely vulnerable to Auto-target since only moving targets can really dodge it. Now you don’t need to use homing attacks like Chlorophyte Bullets, which the Cultist is mildly resistant against.
That being said, he exits lock every time he teleports, so make sure to lock again when he does. Your old Dungeon arena would work well here, especially since they tend to maintain a certain distance and altitude away from you. Now, adding a few more floors could help so you can reach them during their summon attack, though if you have the Witch’s Broom or the UFO Car Keys, you won’t need an arena.
The Lunatic Cultist has many various projectile attacks, but it’s his summoning circle attack you should watch out for: Every so often, he’ll make multiple illusions of himself and join them around a summoning circle. Look for him carefully: He’s the one with angry eyes instead of empty eyes, and the fake clones are brightly highlighted at night or in dark places.
If you shoot the wrong one or wait too long, he’ll summon a Phantasmal Wyvern, a creature every bit as annoying as actual Wyverns and just as dangerous, especially since you need to kill them while dodging all the Lunatic Cultist’s projectiles. Beware, since your Mobile target lock CAN lock on the wrong target, unlike with the Brain of Cthulhu!
Weapons
Good: Sniper Rifle, Tactical Shotgun, Xenopopper, (Mobile) Venus Magnum/ Chlorophyte Bullets/ Ichor Bullets/ Cursed Bullets/ Crystal Bullets, Eye of Cthulhu (Yoyo), Heat Ray, Laser Machinegun, Snowman Cannon, Posessed Hatchet, Razorblade Typhoon
For weapons, anything with a guided projectile (Especially guns with Chlorophyte Bullets) works for PC, but in the mobile version you have more options: A Sniper Rifle with either plain old Musket Balls, Silver Bullets, Cursed Bullets or Ichor Bullets will work, though the Cultist is far too small for Crystal Bullets to be effective against them, though they’ll work great on the Phantasm Dragon they summon if you screw up with their summoning circle attack.
If you’re willing to get a bit closer, which you’ll be forced to do in Terraria Mobile anyway so you can lock on more effectively, the Eye of Cthulhu yoyo will work wonders with its absurd DPS. As a Mage, a Heat Ray from the Golem or Laser Machinegun and Charged Blaster Cannon from the Martian Invasion will rip him to pieces.
Basically, pick whatever hits hard and has a fast-travelling or easily guidable projectile if you want to take advantage of Auto-target. By this time, you should be wearing Shroomite Armor, Tiki or Spooky Wood Armor, Beetle Scale or Shell armor, or Specter armor.
WAGING WAR AGAINST THE PILLARS
Mook Spam, Quad Boss, Invasion
Well heck. If you’d check the chat, looks like the Lunatic Cultist finished summoning the Pillars right as you blew his head off. The Lunar Pillars are invading, and it’s your job to kick them out and show them that NOBODY messes with your world, especially not after all the blood, sweat and tears you’ve poured into it. Both yours and the enemy’s!
The Pillars are guarded by a shield that goes down as you kill their mooks, and once a Pillar’s shield is down, you can kill it. They each drop Fragments, which you can use to craft some powerful fun weapons using the Ancient Manipulator crafting station the Lunatic Cultist dropped from his pants when you ripped out his legs.
VORTEX PILLAR
Ranged Focus
Weapons
Good: Razorblade Typhoon, (Mobile) Venus Magnum, Uzi, Megashark, Tactical Shotgun, Xenopopper, Snowman Cannon, Nightglow
The easiest pillar to cheese , thanks to its lack of wallhaxing attacks and enemies, with the only wallhaxers being fairly predictable with their spawning and rather easy to kill. Apart from Alien Hornets and Alien Larva which can occasionally spawn in your personal space, you can set up a hidey-hole by digging down then shooting up, since the only wallhaxing enemies spawn directly above you and into your bullets.
Then you can shoot the enemies to death from inside, taking care to get rid of the small fry that teleports into your face. It doesn’t need cheese though, if you have a flying mount or a good set of wings and at least Specter Boots, just fly around and shoot everyone and everything.
The weapons you can craft from Vortex Fragments are Vortex Beater, a great crowd-clearing machinegun (Slightly less comparatively great in the mobile version simply because Venus Magnum matches it solidly in damage per hit and is more accurate, and Auto-Fire makes it a real monster), and Phantasm, the highest raw-DPS boss-murdering weapon in the game before anything dropped by The Moon Lord.
STARDUST PILLAR
Summon Focus
Weapons
Good: Stynger, Razorblade Typhoon, (Mobile) Venus Magnum, Uzi, Megashark, Tactical Shotgun, Xenopopper, Snowman Cannon, Nightglow

This pillar spams you with a lot of enemies, which is great since killing them is your only way to break the shield on the Pillar anyway, so more weak mooks is always better than fewer elite jerks. The usual way players beat this is to kill the large circular Stardust Cells, but ignore the little baby ones that pop out until they get bigger. That’s because the little ones don’t count towards the Pillar Shield’s kill counter, but the big ones do.
They also happen to be predictable (but fast-flying, be careful!) foes, happily running into gunfire for you. Stardust fragments allow you to create the Stardust Dragon Staff and Stardust Cell Staff, a pair of powerful summons that deal loads of DPS, enough of it that they’re great to have even when off-class.
NEBULA PILLAR
Magic Focus
Weapons
Good: Razorblade Typhoon, (Mobile) Venus Magnum, Uzi, Megashark, Tactical Shotgun, Xenopopper, Snowman Cannon, Sanguine Staff, Nightglow

This is where things get spicy. Almost all of the enemies in the Nebula Pillar are dangerous, but two stand out: Brain Sucklers will blacken your screen and drain your HP very quickly if they latch on to your head, which makes it easier for Nebula Floaters to shoot you to death with lasers. This one may take some time. There is no cheese here, only chugging a Gravitation Potion, some food, and pure skill and weaponry.
If you beat this pillar first, the Solar Pillar will be a bit easier to handle thanks to Nebula Arcanum: While it can technically be reflected, it travels so slowly that even when reflected, it will still shred enemies there to pieces without any harm to you! As for Nebula Blaze, it’s a great long-range bossfighting weapon thanks to its high speed guided shots and crazy damage per hit, if you can handle both weapons’ rather deservedly severe mana expenditure.
SOLAR PILLAR
Melee Focus
Good: Starlight, Eye of Cthulhu (yoyo), Razorblade Typhoon, Celebration Mk1, Snowman Cannon, Proximity Mine Launcher, Death Sickle, Sanguine Staff, Rainbow Gun
Bad: Stynger, Bullet-shooting guns, Bows, Single-hit projectiles of any sort
If there’s no cheesing the Nebula Pillar, then the Solar Pillar is best described as cheesing you. The Solar Pillar consists of mostly ground-bound enemies, and the thing forcing you to fight them bravely rather than smartly with a Gravitation Potion: Crawltipedes. If your feet are some distance away from touching a block or platform, they will happily swoop down on you at mach 3 and eat most of your HP away in a single blow.
The best way to fight the Solar Pillar is usually to put some blocks somewhere up high, then shoot at the enemies below you, focusing on Corites and anything else that can actually reach you from up there. Projectile weapons like guns and magic and sword beams are a bad choice here since Selenians can deflect bullets, though Summons work fine and Nebula Arcanum shots fly so slowly that even a reflected one is never a threat to you, while being perfectly capable of ripping the enemy to pieces en masse.
Certain explosive weapons (They can deflect others like Stynger and Hellfire Arrows) like Snowman Cannon and Celebration Mk1 work well too, since they explode before they can be reflected. As for Melee weapons, the stabtastic sword Starlight might be a good choice, though grabbing it from the Empress of Light is a whole other can of worms!
The weapons crafted from Solar Fragments are ironically perfect for dealing with the Solar Pillar, with Solar Eruption able to shred mobs through walls and in large groups in future Pillar grinding runs.
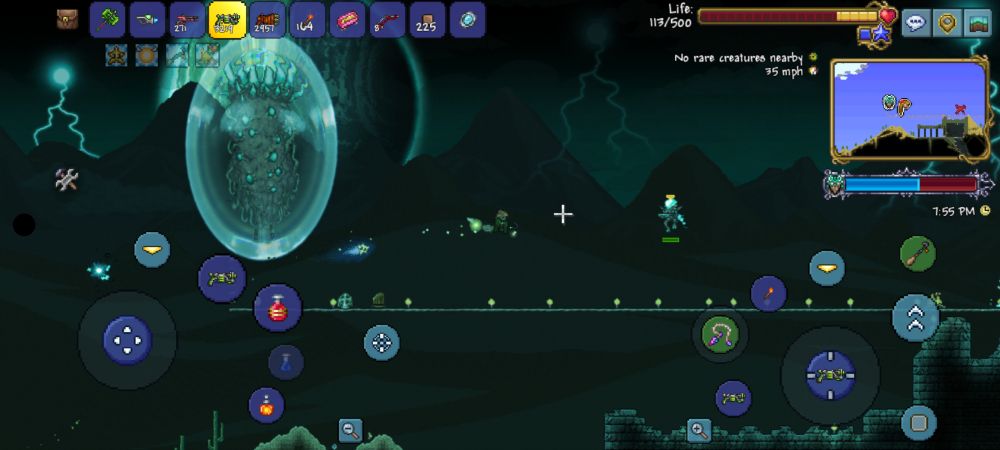
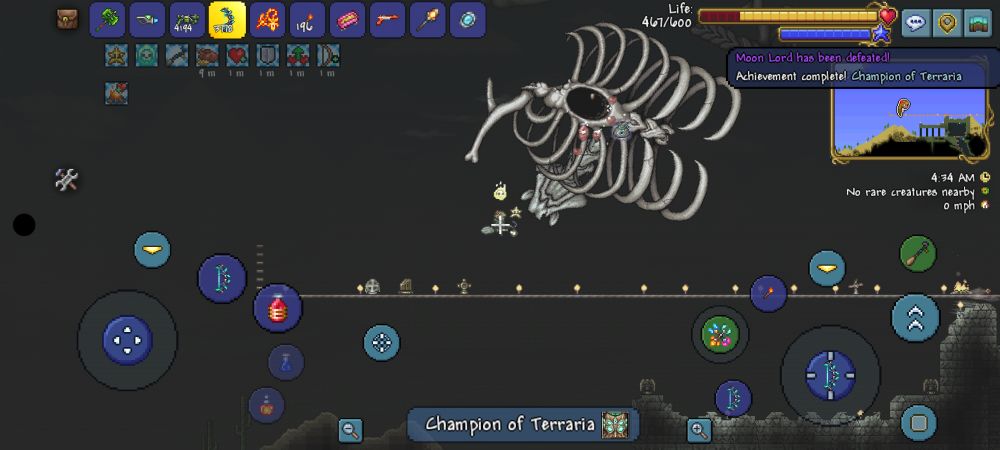
ONE SMALL STEP ON MOON LORD, ONE GIANT LEAP FOR MANKIND
Projectile Spam, More Projectile Spam, So Much Projectile Spam
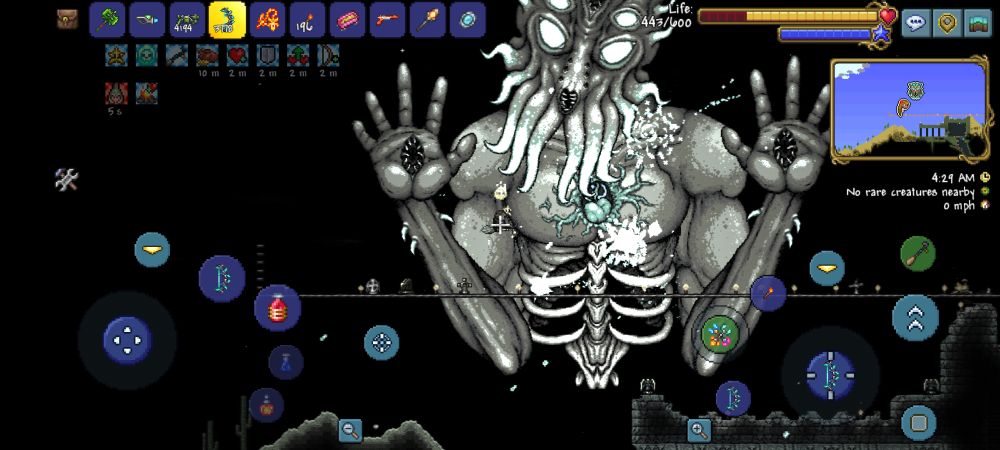
The final battle awaits. A creature so terrifying that the very thought of them nearly drives your character mad as they approach, at least according to the in-game chat. But the journey has been long, and you have become strong. You started from nothing, dragged this hostile land kicking and screaming into prosperity and progress, and forced the very powers of light and darkness themselves to buckle and shatter before your might and endless, grinding patience. And just like the rest of the world, the Moon Lord will be brought to heel.
The Moon Lord is a fairly overwhelming battle. Unlike say, the Empress of Light who requires pure skill and memorization of their attack patterns, the Moon Lord can be rather haphazard and very difficult to predict.
That being said, unlike the Empress of Light, he’s fairly easy to cheese! The easiest, safest, but slowest way to get rid of the Moon Lord is to set up a very long sky railroad (If you can cover the world with it, great!) with Bumper Tracks at each end, with some Campfires and Heart Lanterns scattered across the length of your chosen battle zone.
Then grab a tanky regen armor build (Valhalla Armor, Squire Helm and Beetle or Turtle Legs together work), chug some Regen, Endurance and Ironskin Potions, stock up on several stacks of ammunition, and shoot wildly in the Moon Lord’s general direction (With Chlorophyte bullets, Possessed Hatchet or any other guided weapon) while screaming your terrified lungs out at maximum speed with your minecart.
It takes forever, but requires basically zero dodging skill since you put all your effort into preparation and grinding. While the fight itself is not very fun when done this way, watching all that preparation pay off is highly cathartic, as the writer can attest to in previous runs.
Otherwise, a non-cheese fight has some tactics that will make your life easier. The Moon Lord’s most dangerous attack, bar none, is his forehead eye’s Phantasmal Deathray, an HP bar-annihilating sweeping laser attack. It always sweeps up towards you from below, but never down on you from above. So if you’re on its left, it goes clockwise, and if you’re on its right, counterclockwise. You’ll see the eye open and look at you, but once its pupil centers, take that as your cue to fly in an arc over his head since he’s charging the laser.
After you dodge this attack (If you failed to do so, you’re pretty much dead anyway), Moon Lord usually fires out his tongue to suck some HP out of you and heal themselves. You can shoot the healing projectiles it spawns before they reach the Moon Lord, or you can try out-DPSing it with weapons like Phantasm, Nebula Blaze, or Daybreak. Killing this middle eye first typically makes the rest of this fight easier, as you deny the Moon Lord his most devastating weapon.
Afterwards, if you’ve got an asphalt road or any sort of flying mount, you can simply run away screaming like a baby, firing Cholorophyte bullets, Possessed Hatchet or any other sort of guided weapon wildly… Or you can stick around and fight him like a man if you’re running a more defense-oriented build like Beetle armor while dual wielding Paladin Shield derivatives with a Star Veil.
One trick you can do specifically on mobile is set your Lock-on Priority to Nearest Target in the Settings Menu, then turn off Smart Cursor and simply aim the cursor as high as you can. The lock prioritizes not whoever is nearest to you, but whoever is nearest to the cursor. This means your lock will always prioritize the forehead eye with the deadly laser when it opens. You can then turn Smart Cursor back on when you kill it. Best of all, the other eyes still get targeted if the middle eye is closed!
Weapons
Good: Phantasm/Holy, Ichor, Cursed or Venom Arrows, Vortex Beater, Tactical Shotgun, Xenopopper/ Chlorophyte Bullets, (Mobile) Venus Magnum/ Crystal, Cursed or Ichor Bullets, Daybreak, Nebula Blaze, Nebula Arcanum, Razorblade Typhoon, Possessed Hatchet, Moonglow
Weapon-wise, the Lunatic Cultist’s Ancient Manipulator and the Fragments dropped from the Lunar Pillars can be used to make some very powerful equipment, all of which work great against the Moon Lord. Spare Fragments can also be used to upgrade Greater Healing Potions into Super Healing Potions, which you’ll need to fight the Moon Lord reliably.
You’re probably already wearing the best armor available to your class by the time you fight Golem, and won’t get anything better until you kill Moon Lord about twice, in which case they might as well be bragging rights rewards.
And this is the end of the… Wait what’s that? Martians? Well, we can talk about this one important miniboss before we leave, since this is the only miniboss that has a very specific way of dodging them.
MINIBOSS SPECIAL MENTION
Most minibosses like the Ice Queen, Flying Dutchman, Pumpking, and the others are a fairly simple yet tense case of “Just dodge the hail of projectiles they throw out and shoot them to death with whatever you’ve got, and pray a lot”. And if not, they have some extremely crippling cheese weaknesses, such as the Dreadnautilus being easily defeated by wearing tanky melee mid-hardmode armor and hiding in a brick-boxed Honey Jacuzzi with a Campfire and Heart Lantern, then smacking them with any Whip.
Or the Flying Dutchman being unable to go through blocks with any of its attacks, which lets you bombard them with Daedalus Stormbow from inside a bunker. One miniboss that always seems to catch players on their first meeting off guard though: The Martian Saucer with its extremely punishing and seemingly unavoidable sweeping Deathray attack. Said attack is very much avoidable though, so here’s a special mention for this unpleasant late-game surprise.
MARTIAN SAUCER CAN’T TOUCH THIS
Flying Boss, Deathray Attack, Laser Spam, Guided Missile Spam
The Martian Saucer looks like a seemingly impossible miniboss the first time you get absolutely deleted from existence with their Deathray. Though once you figure out their pattern, taking them down is no problem, with or without cheese. Their first phase has them shooting lasers at you, zipping to another position, firing missiles at you, zipping above your left or right, then firing a Deathray at you. Rinse and repeat.
If the Saucer moves to your right before firing the Deathray, move left, and vice versa. The missiles track you for a short time, but the laser machineguns do not track you at all: They fire in a cone pointed at whatever direction you were, and keep firing in the same direction even after you’ve left, until the machinegun burst is over.
Once you take down its laser machineguns and missile turrets, it goes nuts, spitting dangerous debris projectiles and constantly spamming its extremely high damage Deathray, which can reduce your HP to nearly nothing in one touch. It always alternates between sweeping left then right, in a highly predictable manner.
The Saucer telegraphs it by moving to your side, almost as if it’s trying to make you run into the laser, so use this to your advantage. If the Saucer goes to your left, move right, and if to your right, then move left. Once you have a rhythm down, just shoot them out of the sky and try not to get noticed by the ground enemies while doing it! This means avoid fighting them near Floating Islands, since you might get a Tesla Coil zap in the middle of everything.
Weapons: (If in a bunker) Daedalus Stormbow/Holy Arrows, Morning Star, Sanguine Staff, any high damage Sentry summon (If giving chase in open combat) Venus Magnum, Megashark, Uzi, Sniper Rifle, Tactical Shotgun/Chlorophyte or Crystal Bullets, Razorblade Typhoon, Resonance Scepter, Specter Staff, Snowman Cannon, Possessed Hatchet, Paladin’s Hammer
The Saucer’s habit of merely moving left and right above you, mixed with the fact you need to avoid attacks from ground enemies and how only the highly predictable but comically lethal Deathray can go through blocks, allows you to fight the Saucer from inside a relatively wide bunker, perhaps with Teleporters at each end.
This means your best bet is to kill them with wallhaxing or airstrike weapons if you lack stuff like the Hoverboard, Betsy’s Wings, or flying mounts. And unless you’re playing on Expert or Master Mode and have the Black Spot or Witch’s Broom, you’re probably lacking a flying mount anyway! That being said, if you plan to fight them in the open like the brave warrior you are, anything that works on Golem will work on the Saucer as long as you hit them with it.
And for real this time, this is the end of our Bossfight guide. If you have tips to add, don’t hesitate to put them in the comment section!