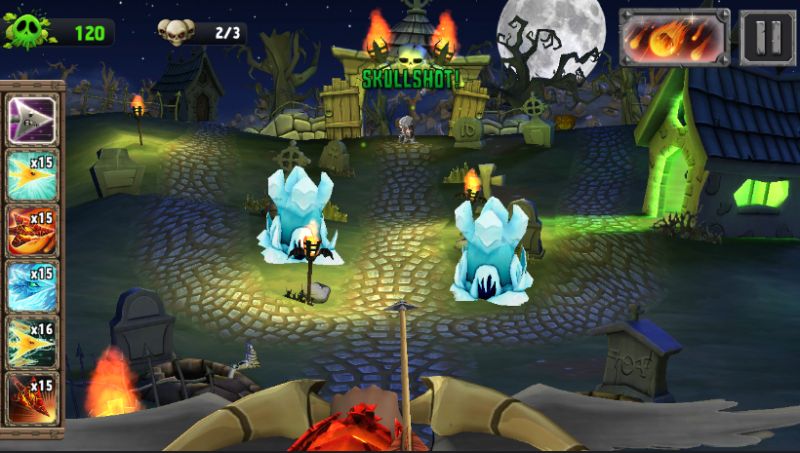
Skull Towers is a thrilling Tower Defense game developed by Genera Games, where your goal is to survive the increasingly difficult scenarios by eliminating all the skeletons the game throws at you. Every stage is divided into two phases: in the first one, you build and upgrades your towers and barricades to help you fight back the hordes of skeletons marching towards you, in the second one the game switches to first person mode, and you use your bow to get rid of all the skeletons. If a skeleton reaches you, you lose, and have to replay the scenario. If you need some advice taking down the skeletons then you have come to the right place, as our Skull Towers tips, cheats and strategies will help you do just that! So let’s dive into our Skull Towers beginner’s guide for some useful tips and tricks!
1. Practice Hitting Skullshots
Skullshots are the game’s version of headshots, and they happen when you hit enemies on their head. It seems very easy for the very first levels, since you will face slow moving enemies that will also just stop walking to stare and laugh at you, but comes the higher levels, you will notice how challenging it can be to adjust your aim to hit big, slow moving targets such as the Celtic Warrior, and fast and small enemies such as the Fanatic. Skullshots increase the damage of your arrow by 50%, considerably speeding up the process of killing the skeletons, and you will need to hit the majority of them to advance through the harder stages.
Skullshots are also important because Knights and Heavy Gladiators are immune to shots on any other part of their body, and you will need to hit them once in the head to open up their helmet, making them immune to the first Skullshot. Missing more than one Skullshot on them can prove lethal to you.
The 50% bonus is factored for every arrow, and works in conjunction with elemental damage as well, so hitting a Skullshot on an enemy weak to the element you are using is going to guarantee you will kill most of them in one hit, excluding the sturdiest of them in the highest difficulty settings of the stage.
2. Become A Master Of The Elements
There are 3 elements in Skull Towers: Fire, Ice, and Electricity. Each skeleton unit is weak to a different element, which means they take extra damage from them, some of them will also trigger additional effects, for example, hitting a Fanatic with a Fire arrow will make his bombs explode, heavily damaging all of the other skeletons around him.
There are arrows for all the elements, and they are divided into Single and Multiple. Single arrows work like any regular arrow, while Multiple arrows, as the name implies, will make you shoot multiple arrows at the location you aimed. This proves particularly useful against enemies with heavy armor like the Knight, who will otherwise need to get hit multiple times, and against groups of enemies, especially those groups that form in front of your barricades to take them down. Some elemental arrows also have an extra type, called Radius Arrows, these will explode when they impact an enemy or the scenery, causing damage all around them.
Another factor to consider is your bow. Different bows bring different boosts to your elemental damage, for example the Guardian bow boosts the damage dealt by Ice Arrows by 200%, plus 25% for each level of the bow. This information is especially useful when you know what kind of enemies you are going to face in a stage, which will allow you to pick the most suited bow for the situation.
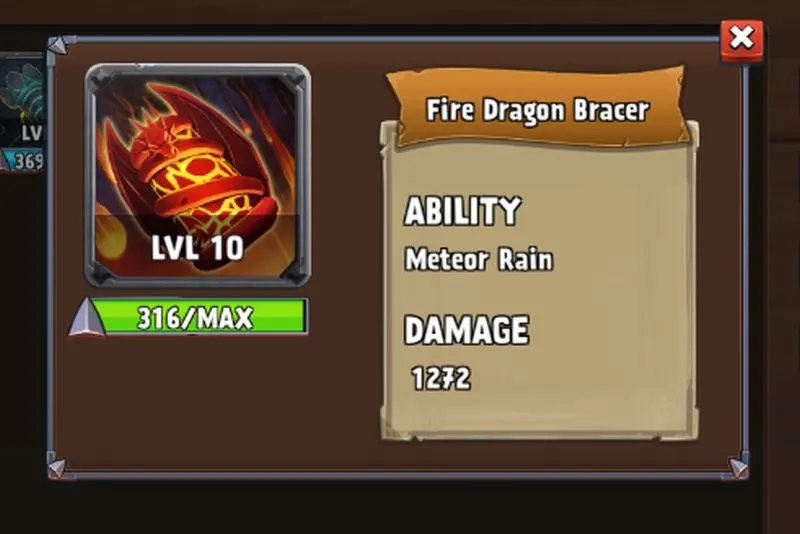
The same goes with Bracers, a piece of equipment you can select in the pre-battle screen that allows you to cast your magic power, a powerful ability that will do massive damage to all the enemies on the screen, this ability has a long cooldown. The element of the damage inflicted by the magic power will vary based on what bracer you have chosen.
Lastly, the towers you can build also have their own element. Fire Catapults deal Fire type damage, Lightning Monolith deal Electric type damage, and Ice Tower deal ice type damage.
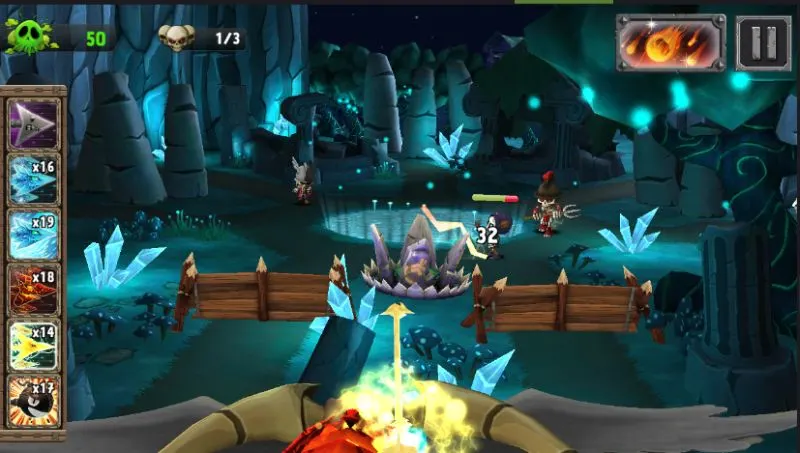
Playing the game, you will have noticed that Poison Arrows exist, and even a full bow dedicated to them. Poison doesn’t work like the other elements, rather it inflicts a Poison status that deals damage over time to the skeletons you hit. One wonders how a skeleton can take poison damage. Anyway, this is best used against monsters such as the Snow Vikings, who are very slow and thus can potentially take massive damage while they slowly waddle towards you.
Poison arrows work exceptionally well with ice towers, as those towers slow down the enemies they hit considerably, making them take more damage, as they will take longer to move forward.
3. Building Strategy
Aside from building towers whose damage type is good against your enemies, and trying to synergize with your bow and arrows, you will need to figure out where and how to build all of this.
Upgrading towers is always better than building new ones, so unless you really feel like you need to cover certain routes, focus first on upgrading what you already have. It’s also way cheaper, excluding for the last level of upgrade, since getting from level 1 to level 2 only costs 50 Ectoplasm, while level 2 to level 3 costs 100 Ectoplasm, as much as building a new tower.

Upgraded towers are very good, as it increases their damage and rate of fire, way more than if you just build additional towers. Thus, only build new towers if you need their specific type of damage, or if you have already upgraded everything else already.
Barricades are excellent, especially if you manage to get them to a higher level. You can’t upgrade barricades during a stage, and you can’t repair them, but what you can do is sell a damaged barricade for 30 Ectoplasm, half the price of a new one, and rebuild it from scratch. Barricades are great because they can gain you valuable time, and they can also force skeletons to group in a single place, making your magic power and your multiple arrows much more effective.
Regarding where to build, you should start with building barricades closest to you, and towers where they will be able to hit the highest number of skeletons, or the most difficult ones to hit. Keep in mind that Ice Towers slow the skeletons they hit, so they are exceptional at slowing down aggression from places you aren’t going to pay much attention to.
Giving more cover to certain areas also proves beneficial, as it will make easier for you to aim if all you have to do is aim on a smaller section on the screen, rather than having to move the crosshair all over the place, making you more precise, and allowing you to hit more Skullshots, an important feat to progress through harder stages.
4. Read The Dark Book
You can find out a lot about the game in the Dark Book. For example, you can read up on the effects of the magical powers provided by the bracers and how much damage they deal.
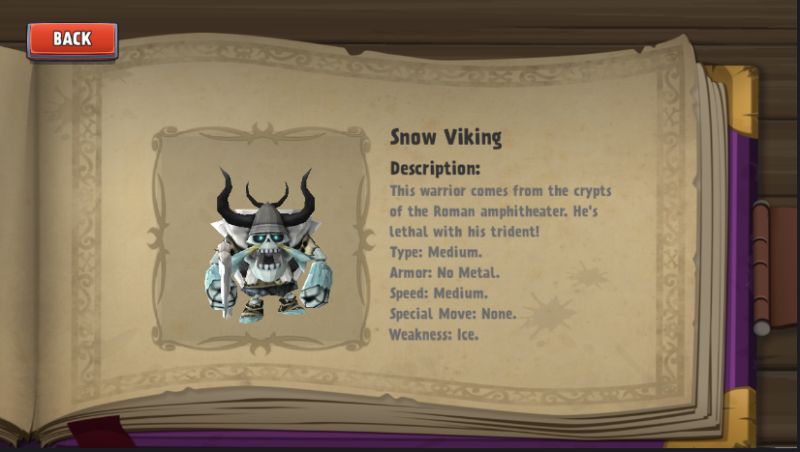
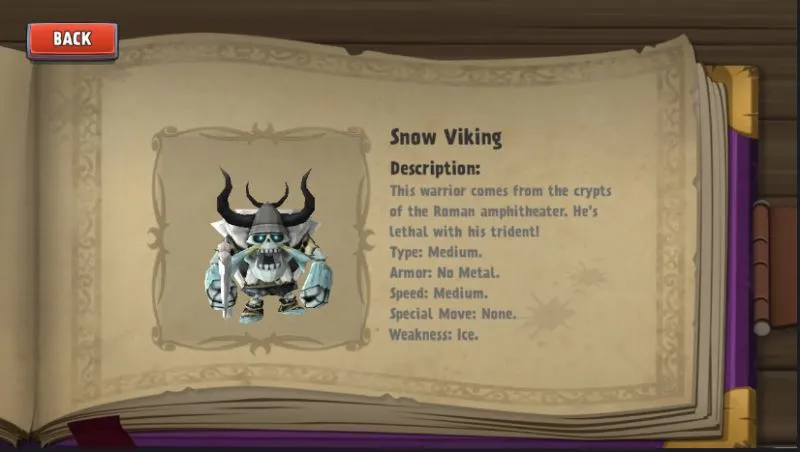
You can check out everything about the various skeletons in the game, how fast they move, their size, their armor type, and what element they are weak to. This information is especially important, as it allows you to make informed decisions in the setup stages of a game, since you will be able to build the best types of towers and bring the best types of arrows to the battlefield.
Arrows will show you the various types of arrows you have unlocked up to that point, plus some flavor text. In this section you will also be able to read up about the different types of arrows.
Bows’ description also says how effective they are at what range, but it is unclear whether or not it actually changes anything when playing, or if it is just flavor text. Towers will also show a brief description of what the various towers and barricades do.
5. Manage Your Rewards And Your Energy
Playing Skull Towers consumes energy, the higher stages require more energy to enter, same goes for the higher difficulty ones. The higher the energy, the higher the rewards. When you run out of energy, you will have either to wait for it to replenish, spend gems, or watch a video ad.
Speaking of which, you will have to watch a lot of video ads if you want to progress faster, as it will net you additional rewards from chests, more Orbs from the Shop, and unlock even more chests throughout the adventure. You can also restart a stage from the current wave of enemies once if you watch a video ad.
What does all of this mean? You cannot play the game as much as you’d like, instead you will be limited by your energy, unless you plan to spend money on the game. So, the best way to go about this is to play a stage or two, then stop, and then come back later when your energy is refilled. Gems should be spent on chests, as the rate of 1 energy = 1 gem makes it not worth to spend them on energy refills.
In general, you will have to watch a good amount of video ads to get anything meaningful done, which really takes on the experience. Remembers to always do your daily quests, you can see them under the Quests menu on the main screen, usually these involve killing skeletons with a specific bow, using a specific bracer, or specific types of towers. Doing all 3 daily quests will net you an additional chest.
6. Upgrade Your Gear
You can upgrade everything in your Inventory. To do so, you will need a certain number of shards, which you will find in the various chests. Once you get enough shards, you can select the item you want to upgrade and spend some gold to get it to a higher level. Alternatively, you can spend Orbs, a currency you can earn freely every day by watching video ads, or that you can purchase from the shop with real money.

Upgrading arrows will allow you to bring more to the battlefield, as well as directly increasing their damage output, upgrading bows will improve both the base damage of your arrows, as well as the boost they give to their element. Upgrading bracers will result in more damage dealt by your magic power, upgraded towers deal more damage, and lastly, a higher level Barricade gives them additional Health Points, making them able to take many more hits before falling.
The maximum level for any item in the game is 10. It takes a lot shards to get an item to level 10, and you won’t really need them if you prepare accurately before each scenario, so don’t worry if you are struggling to upgrade your gear.
This wraps up our guide for Skull Towers. The game is relatively simple, and it’s very fun, great for quick sessions to relax for a bit before going back to what you were doing before. The game as of now is relatively short, but the developers are planning to add additional gear and levels soon, so make sure to keep an eye on their play store page to see when the new content comes.
In case you know additional tips or tricks, that we should include in this Skull Towers guide, be sure to drop us a line! Until then, keep defending yourself from these crazy skeletons!
Jim
Wednesday 14th of September 2022
Where can I find the dark book? And how do you use the bracers? I tap on mine all the time it does nothing!