Whether it’s because of overpopulation, exile, or plain old wanderlust, here we are without a place to call home. But this land is fresh, its fields green, its rivers clean, and its mountains full of riches. In time, perhaps, this new land can be a new home.
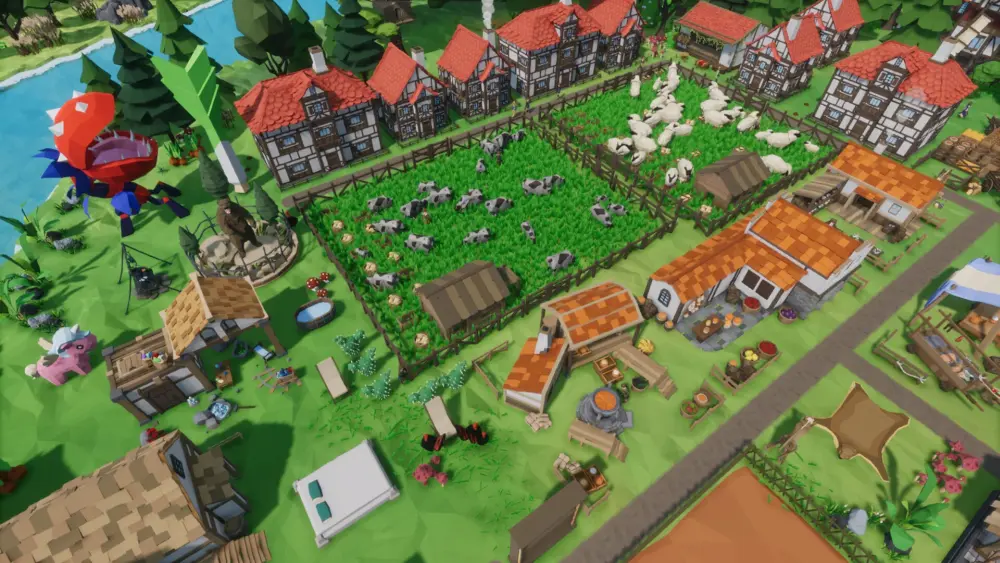
Settlement Survival is a colony management sim in the same vein as Banished. In this game, you’ll be challenged with establishing a new settlement and growing it from a simple community into a busy metropolis. Along the way, you’ll face many challenges – maintaining a healthy population, securing enough food and drink, and getting enough money to trade with your neighbors. Settlement Survival is available on the Google Play Store and the App Store, as well as on PC via Steam.
While this game can be played on mobile devices, I cannot in good conscience recommend doing so unless you are playing on a tablet. There’s a -lot- going on in Settlement Survival, and playing this game on a cramped screen is uncomfortable, unintuitive, and just plain annoying. Fortunately, the mobile port of Settlement Survival is a 1:1 adaptation of the game, so you can use this guide for either version. For reference, I’ll be using images from the game’s PC version.
This guide will aim to help you get comfortable with the basics, as well as how to move to more advanced fare such as trading. As such, this guide will take a generalist approach; certainly, there are lots of ways to play the early game, but this guide won’t focus on any particular direction. If you’re ready to not starve, read on!
Early Goals
So we’ve got a bunch of people, building materials, food, tools, and clothes to last us a year. Our first year of Settlement Survival is a freebie, but it’s vital that we set up the basics now – lest our colony falls victim to the elements and become a ghost town like so many others.
As there are a ton of options when it comes to Settlement Survival, it’s important to keep track of what we need. Here’s a checklist of things we need to build or learn before your colony take off:
- Selecting your starting point can greatly streamline your progress in later years.
- Houses, not Interim Homes, for every family. This should be your greatest priority so your villagers don’t starve or freeze to death.
- A steady source of food; at the very minimum, have two farms. If your starting position has a river and especially a fishing bonus point, you can opt to build a Fishing Dock to produce food year-round.
- A well or two, to provide your people with clean drinking water.
- How to assign labor – adding more slots for laborers and temporarily closing down structures to free up workers.
- A Chopping House and/or a Mine producing coal, so people don’t freeze to death as easily.
- A Latrine provides dung for burning while increasing Health.
- A modest Graveyard, to maintain Happiness in the face of accidental deaths.
- A Church and a Clinic (with a Herbalist’s Hut and Gatherer’s Hut) to keep Happiness and Health up.
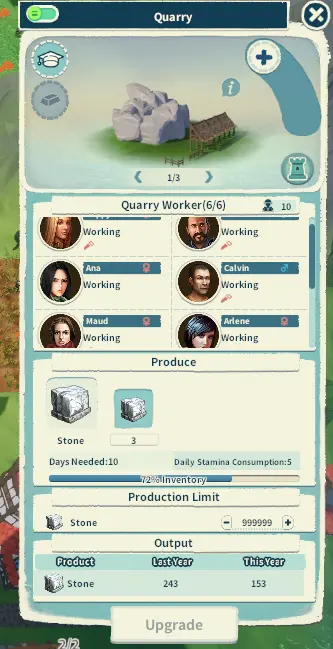
- A Quarry and maybe a Forester’s Hut to produce a slow, steady trickly of stone and wood.
- A source of clothing materials – hopefully we get lucky and find flax or cotton seeds, but you can also make a Hunter’s Hut to gather animal leather, wool, and meat.
- A Tailor to turn those raw materials into itchy and uncomfortable but functional clothes.
- A Smithy to replace the tools our villagers will be using.
- A Town Hall to accommodate immigrants who’ll be arriving starting next year.
- You should spend your tech points on things you might need once you’ve figured out your priorities.
- Capitalize on random events.
Sounds like a lot, doesn’t it? These structures will provide the means for our colony to stave off death, so it’s important to understand the systems in play here. In your first year of Settlement Survival, we’ll discuss selecting a start location, a villager’s basic needs, happiness and health, raw material gathering, tool construction, and finally immigration.
Quick Tips:
- Settle based on the bonus you want. I recommend settling near Fertile Soil, a Fishing Point, or a Jade Point.
- Build regular Houses ASAP. One house = a family of 4. People will store food and fuel in their homes, and citizens need private homes to procreate. You can only place houses within a marketplace’
- Build at least 2 farms ASAP. Planting season starts in March. You can get away with one farmer per farm at the start. Food does not rot.
- Vegetables and meat are counted as rough food and damage your villagers’ health. Later, you should move to refined food like bread, sausages, and the like.
- Build a well or 2 to provide drinking water.
- You can assign workers to a structure by tapping the plus icons on the right. More workers = faster work in general.
- You can disable a building by tapping the on/off icon at the top of the info panel. This immediately fires all workers assigned to that building.
- Build a chopping house and/or a coal mine to keep your people warm. Latrines also produce fuel and increase public health within their AOE.
- No graveyard means a huge happiness penalty when someone dies. Build a small one ASAP.
- More happiness = industrious workers; low happiness = potential crime sprees.
- More health = people don’t burn through stamina as fast; low health = possible plague outbreaks.
- Build a church and clinics within your residential areas to keep health and happiness up.
- You can “Gather All” via the command menu to harvest all lumber, stone, coal, and plants wherever you indicate. Natural resources regrow.
- Laborers are “unemployed” adult villagers that will do a lot of your dirty work. It’s a good idea to have a few on hand.
- Build a smithy to replace tools and a tailor for clothes and shoes.
- Build a Town Hall before the first immigrants come in so you can benefit from the population boost.
- Administrators give passive buffs to your colony. You’re given a choice between 2 every time you hit a population threshold, to a maximum of 450 people. You can extend an administrator’s term by paying 5000 coins.
- It’s prudent to save your tech points until you know what you want or need, or if you have an idea of what your long-term goals are.
- Random events can give your settlement a boon or bane. It’s up to you if you want to activate them.
Where Do I Settle?
The first thing you need to do when the game starts is select where to plop down your initial settlement. We won’t be getting into Civilization levels of debate here, but it’s important to leverage the many bonus nodes that Settlement Survival has while factoring in your play style.
To help you decide, here are the nodes:
- Fertile Soil: 50% increased production from farming. A simple bonus but always welcome. Try to squeeze as many farms or orchards within this node’s AOE.
- Grassland: 50% increased production from pastures. Not relevant as Windmills generate the same bonus and animal husbandry isn’t as sustainable as farming.
- Hunting Point: Greatly increased chance of finding cubs. These nodes are tied to the pack of animals they spawn on, not on the ground. I also don’t like animal husbandry in general, and this is a one-time bonus.
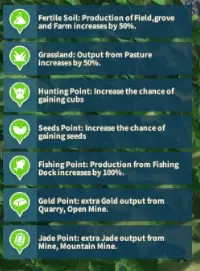
- Seeds Point: Greatly increased chance of finding seeds when gathering these plants. This one is a toss-up; on one hand, you -might- get flax or cotton. On the other, you might get another crop seed. If you’re patient and diligent with gathering, skip this bonus.
- Fishing Point: 100% increased production from Fishing Docks. Fishing is a great, year-round source of food. However, you will need to process timber into planks via a mill. If I can get a Fishing Point near a Fertile Soil or Jade/Gold Sand node, great.
- Gold Point: Open Mines and Quarries in this area also produce Gold Sand as a byproduct. Gold Sand by itself can be processed further but is useless unless used as a trade good – and even then, it’s not very valuable. Don’t break your neck trying to get this bonus node.
- Jade Point: Mines and Mountain Mines in this area also produce Jade as a byproduct. Unlike Gold Sand, Jade doesn’t need to be processed to be valuable and is a fantastic item to trade while you’re still setting up your commercial infrastructure. Do note that Mines can be difficult to place.
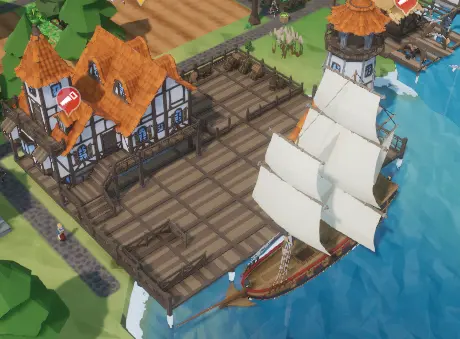
Finally, note that there are buildings that can only be built on a waterfront and are better than their land-based counterparts. Water Sawmills, for example, use running water to power their blades and are thus better than regular Sawmills.
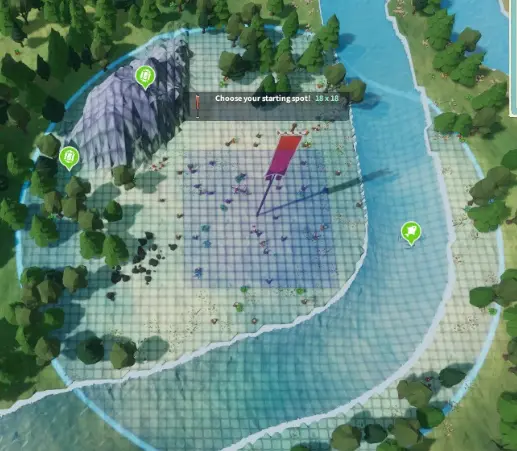
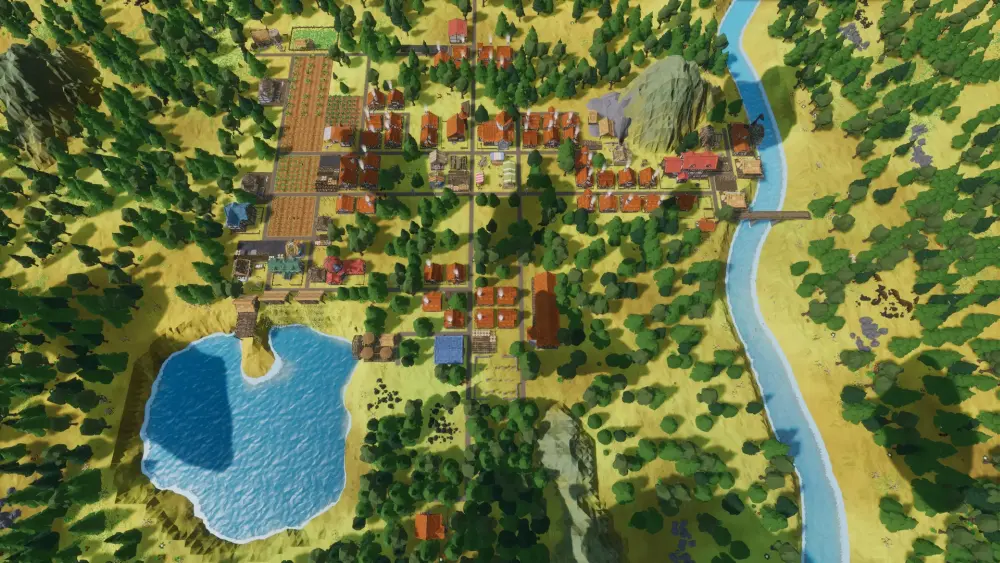
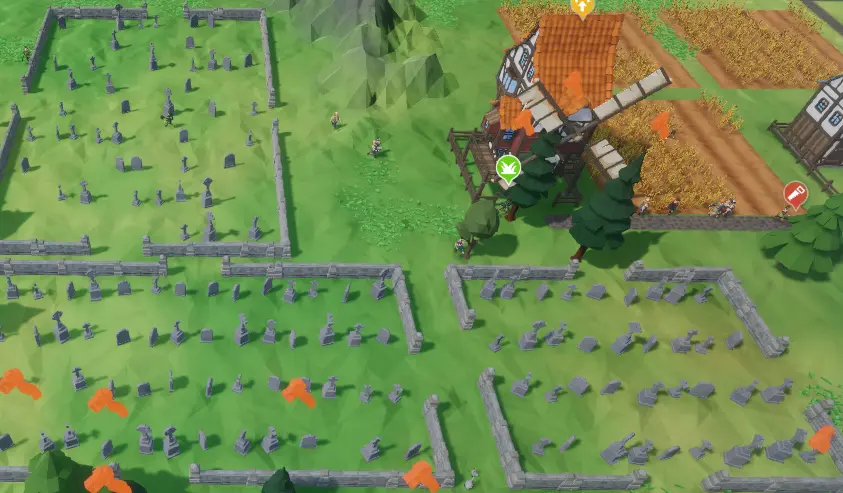
In the image above, I chose to settle on the riverbanks because of the lucky double Jade Point, as well as the Fishing Point.
Housing
Housing in Settlement Survival is core to staying alive. Citizens will store food, drink, fuel, tools, and clothes in their homes and go home to rest and replenish their stats when needed.
Each house can accommodate one family, with the basic house having room for 4 people and better houses capable of sheltering more. Children that grow into adults will also want their own homes to start their own families. Thus, it’s important to provide everyone with a house to keep your population up.
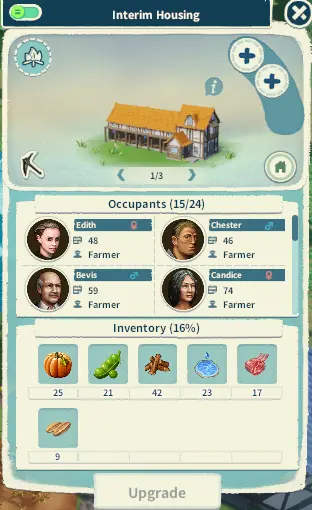
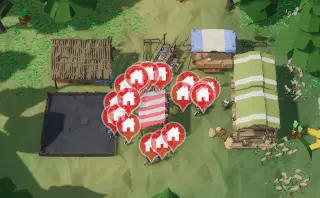
You’ll also have access to Interim Housing at the start of the game. These apartments can house a lot of people, but the living conditions are close to squalor, and people won’t want to start families in this type of housing.
Houses can only be built if they have access to a nearby Marketplace or Small Marketplace, so keep that in mind when you expand.
Food And Drink
Each of our citizens is a (simulated) living, breathing organism. To continue being alive, they’ll need a fuel source, namely food and drink.
Food and drink are relatively easy needs to meet, but they’re constant. Fortunately, they’re not too tough – you can designate fields as well as the crops they’ll grow and create Hunter’s Huts where workers will hunt animals in range. However, these are rough food and are detrimental to the health of your villagers in the long run.
Conversely, refined food such as bread and roasted meats are not only more filling but also negate the health malus from consuming rough food and can even provide extra health and more happiness.
Do note that there is no factor for food variety in Settlement Survival. Your people will neither be happier nor sadder if you provide them with different kinds of raw vegetables to not starve on.
Drinks are much like food, except that rough drinks do not have a health malus. Gathering drinks is easy – just build a Well and staff it. As with food, you’ll be able to create refined drinks down the line, such as coffee, beer, whiskey, and even tequila. These drinks aren’t that much different compared to water but generate large amounts of both health and happiness.
As a final note, your citizens will have to head home to satisfy their food and drink needs; failing that, they’ll go to the nearest marketplace. Consumables taken to a home count against the total stores you have shown, meaning that even at 0 food, you do have a small amount of time left to fix the problem.
Our First Farm
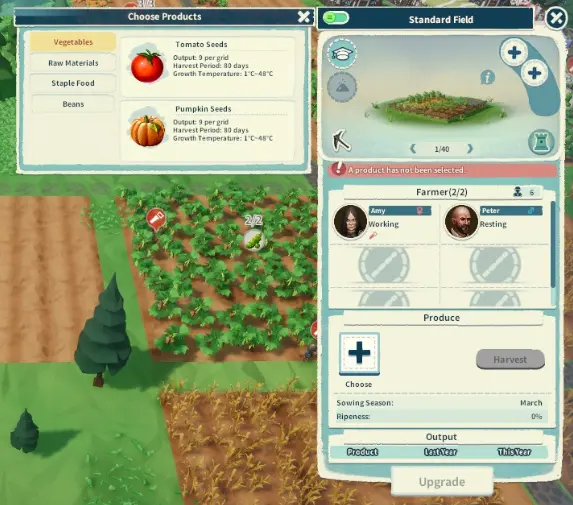
At the beginning of the game, you’ll be given two random seeds. These will determine what crops you can plant. Once you’ve unlocked a seed, you can never run out of it. If you want to find more seeds, set your villagers to gather or build a Gatherer’s Hut – more on that later.
Crops in Settlement Survival are either edible or serve as raw material (in some cases, both). Edible crops include vegetables such as pumpkins, tomatoes, corn, beans, and so on, while raw material crops encompass flax for linen and wheat and oats for grain – which can also be eaten as rough food.
I did mention that there’s no bonus for food variety, but note that crops generally follow three growth cycles:
- Fast-growing but lower yield per grid
- Medium growth speed and yield per grid
- Slow growth and high yield per grid
Which kind of crop you want to grow will depend on your town’s needs; I try to find a bean crop such as peas early on and stick to that. You can view a crop’s stats by going over it.
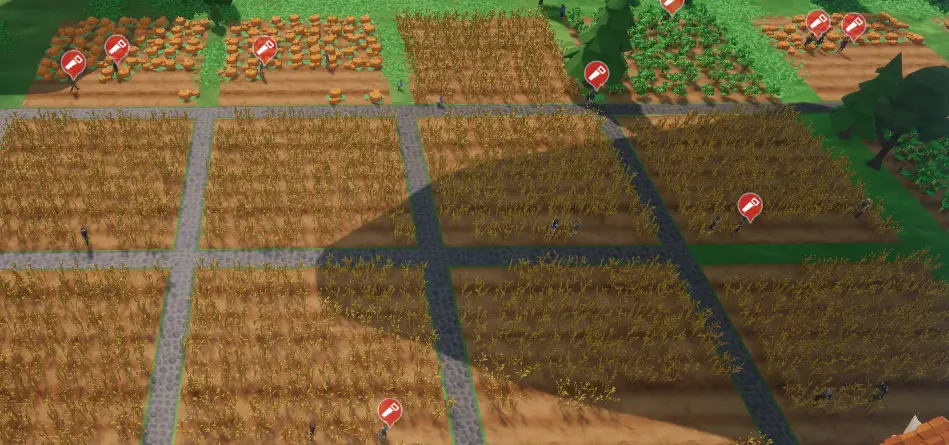
Harvesting is also done automatically; farmers will sow in March and harvest as soon as the crops are ready. Because of this, there will be a period in time in which you will produce no food at all if you’re entirely reliant on farming, so be sure to store some of those vegetables for later. Don’t worry as food doesn’t rot. If you really need to, you can also harvest a field earlier than usual by ordering it, but this expectedly produces much less yield than if the plants were fully grown.
By default, Settlement Survival assigns two farmers per field, which is an alright number of workers. However, if you have other more important jobs, you can get away with just one farmer per field at the beginning of the game as your town is small enough that workers can easily get around. More on this in a bit.
Meat!
Alternatively, you can build Hunter’s Huts to hunt nearby animals.
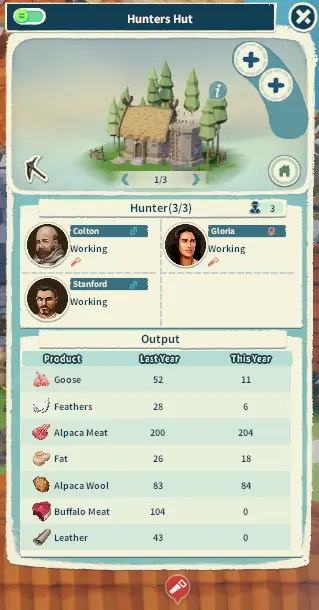
While Hunter’s Huts do produce a good amount of food as well as other byproducts, their inconstant nature makes it hard to predict exactly how much meat you’ll get out of them. It would be great if you could make a domestic holding for animals. Surprise, surprise, you can!
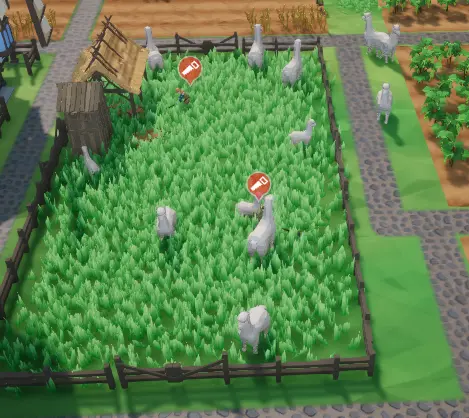
Like finding seeds, your hunters can bring back juvenile animals ready for domestication in a Pasture, which should provide you consistent access to meat, hide, and fur. Here’s the catch though: unlike seeds, livestock expires over time. And unlike seeds, you need at least two animals before they’ll start mating to produce more livestock. It’s also perfectly possible for a pair to refuse to mate, leading to the other animal’s death via old age. These reasons are why I stick to farming.
Controlling Labor
I mentioned earlier that you can get away with just one worker per field at the beginning of the game.
To do this, tap on the field you want to adjust, then tap on the 2nd worker to dismiss them. You can also increase the number of workers you want in a structure via the same method – just tap on the plus icons to open more slots for workers. The more workers a structure has, the faster it’ll work, but beware of redundancy.
Finally, you can temporarily close a structure by tapping on the on/off button at the top of its info panel. This will dismiss all workers from that structure. You can reopen a disabled structure by tapping on the same button.
Keeping The Cold Away
The third and perhaps most vital part of keeping our people alive is warmth. The icy winds of winter are among the number one cause of death in Settlement Survival.
Warmth is generated by two things: clothes and active heating. While your people will wear clothes whenever they’re available, these do run out so you will need to seek a new source of material down the line. Your people are also perfectly capable of surviving the winter completely naked – if our ancestors could do it, so could we.

Active heating is the more important part of keeping warm, and this is generated by burning fuel either at home or in an AOE via Boiler Room – hence my insistence that you build houses for each and every family. Food can be carried around; heat cannot. And while you can go without clothes in winter, a lack of active heating is a guaranteed death sentence, so make sure everyone has a place to call home.
Active heating requires fuel, which can be generated (rather wastefully) via a Chopping House or better yet, a Sawmill. Alternately, you can build a Mine and set it to gather coal as it’s both easier to generate and can be used as-is. If you plan to use coal, note that low-tech mines are finite.

You can also use dung from pastures and latrines as fuel. While they may smell disgusting, I can assure you that digging a communal crap hole is very beneficial to public health– which keeps people from getting sick. Nothing wasted!
Embrace Death
Despite your (hopefully) constant care, there’s no getting around the fact that villagers will die. Whether it’s from starvation, hypothermia, workplace accidents, or old age, everyone bites the bullet.
Graveyards are very important things to have – when a colonist dies, their immediate family gets a temporary happiness hit that gets a lot worse if there’s nowhere to bury the body. Graveyards aren’t expensive either, requiring just a bit of stone. The catch here is that graveyards take up a lot of space, and it takes a long while for tombstones to decay on their own.
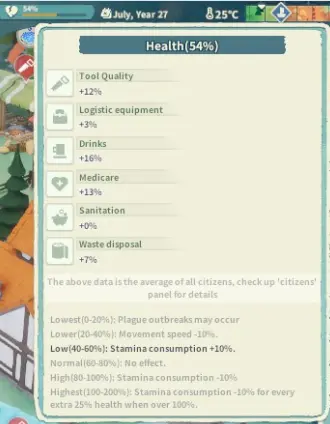
Happiness and Health
By keeping our people well-fed on grass and bugs and keeping them out of the cold by burning their waste, we can keep up morale and public health, as indicated by two bars near the top menu – happiness and health.
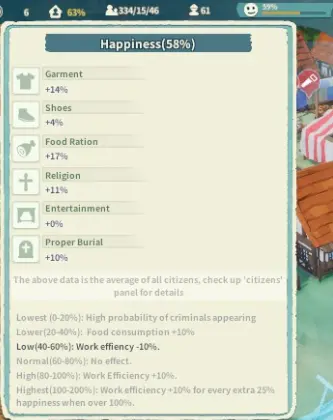
Both these bars have meaningful contributions (and maluses) to our colony. A high happiness score means your people work harder and produce more, while a low happiness score causes lower work output and eventually a spike in crime rate. Health, on the other hand, keeps citizens in tip-top shape, with high health giving bonus stamina and faster work times. Ignore health, though, and you can get random, potentially deadly outbreaks of disease.
At the beginning of the game, your colonists will have a “New Frontier” happiness bonus. As the years go on, they’ll become more demanding and will require several tricks to keep them happy. The best and easiest ways to maintain happiness are to build churches and brew (or import) drinks like beer or whiskey. Just make sure those churches are staffed, and their area catches as many houses as possible!
Health, on the other hand, is a bit trickier to raise. The best you can do for it is to make clinics and herbalist huts, as well as the gatherer’s huts required to find herbs. As with churches, keep your clinics within range of your urban areas.
While high happiness and health are difficult to achieve and maintain, aim to stay in the middle ground – no bonus nor malus – for both metrics.
Raw Materials
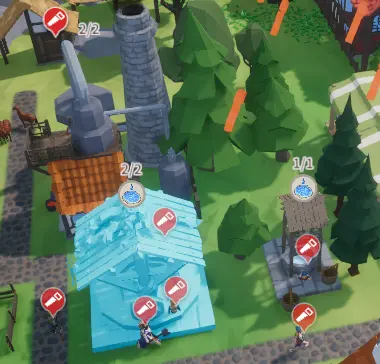
We’ve got quite a long build list, but our raw materials will run out quickly. Fortunately, natural resources are abundant around us. All that’s left to do is to harvest them.
The best and most destructive way to get raw materials is to harvest them from the environment. Tap the commands button, then choose what to take: it can be just plants/herbs, just wood, just stones, or everything. Things do grow back over time, especially if they’re located far from civilization, so don’t be shy.
Once the command has been issued, any laborers you have will get to it. Laborers are workers that have no job designation and will help where they can. It’s always helpful to have some laborers at hand. Workers that cannot do any work due to seasons, such asfarmers in winter, will also chip in.
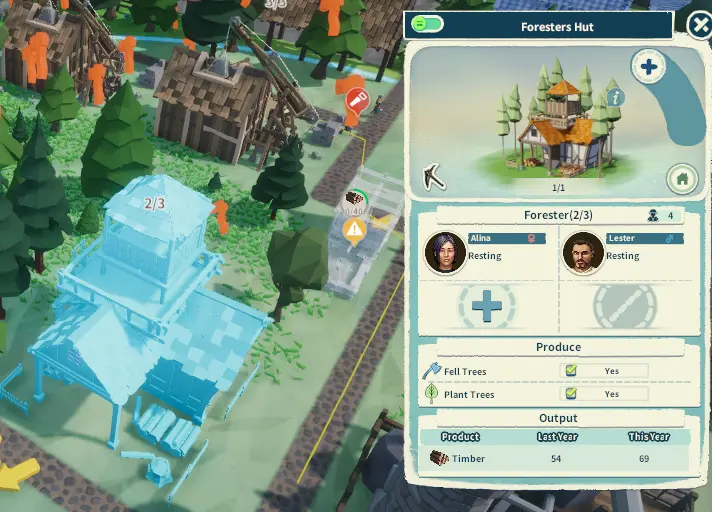
While wood and stone regenerate, it’s also possible for us to create a slow, steady stream of these resources via the Forester’s Hut and the Quarry, which produce wood and stone, respectively. These structures produce resources but do be wary of their downsides: the Forester’s Hut needs space to plant trees and hopefully, you don’t accidentally designate the hut’s groves for chopping. The quarry, on the other hand, is very large and cannot be removed once placed.
Stick Cubed = Pole
Before the first year ends, your people will most likely have gone through most of their tools and some of their clothes. Luckily, replacing them is simple.
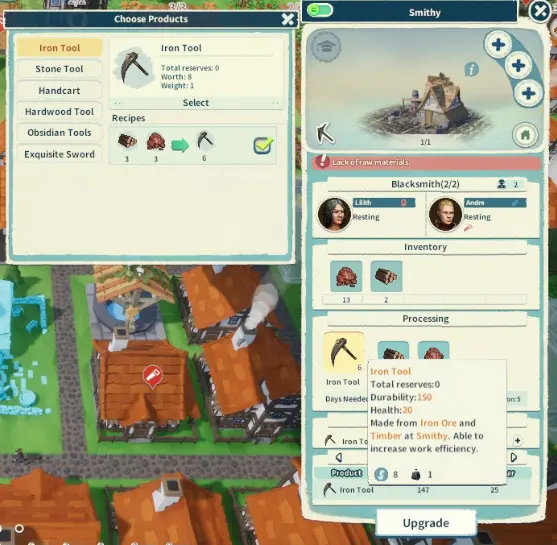
Tools can be constructed at a Smithy. These structures employ smiths, who can create simple tools out of wood and stone. If your colony is wealthy enough, you can switch to using Iron Tools, which are far more effective. Tools aren’t strictly necessary, but they’re nice to have as they not only make work easier for your people but also contribute to public health. I guess the less you have to work, the healthier you’ll be.
As I mentioned earlier, clothes are primarily for staving off the cold. If you’re lucky enough to have a surplus of leather from hunting beasts or maybe got lucky and found flax or cotton seeds, go ahead and set up a Tailor to transform these materials into clothes. It’s worth mentioning here that if you’re relying on flax or cotton for clothing, you’ll need to process these materials at a Weaver’s Hut before they can become usable linen. Do note that footwear also breaks with use,
The Town Hall
The Town Hall is a unique building that represents your political power and serves as a way to make yourself official to the rest of the world. This building has two primary functions: accepting immigrants and appointing administrators.
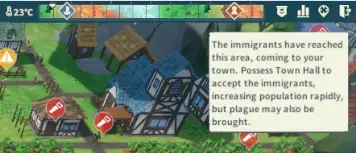
You might have noticed your colonists getting it on, but children take a while to grow up into working adults. On top of that, they’ll consume resources just like normal colonists. Thus, the best way to grow your population in the early game is by accepting immigrants.
Every so often, a group of immigrants will drop by your town hall and ask if they can move in. Say yes, and you’ll get an instant infusion of adult villagers. Hope you’ve got housing ready for them. On the downside, immigrants can secretly be carrying plague, which is devastating if you don’t have the appropriate medical facilities. Luckily, we built that clinic, eh?
Note that unless you have a town hall, this event will not happen. Thus, try to have a town hall before the first immigrant event in year 2.
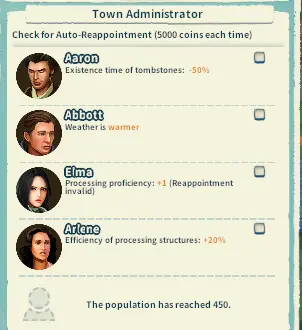
Administrators can be assigned each time you reach a population threshold. These talented individuals come from all walks of life, and each of them provides a passive bonus that remains in play for as long as they have tenure. Administrators are free to hire and will stay with you for several years, but will depart as soon as their time is up unless you can pay the hefty retainer fee of 5000 silver coins.
Tech Points
Before we move on to year 2, it’s wise to spend your tech points. The reason I held off on this is that there are no hard and fast rules for how to spend your points. I believe that each Settlement Survival player has their own top priorities and will thus select different technologies based on what’s available. I will, however, discuss each of the techs a
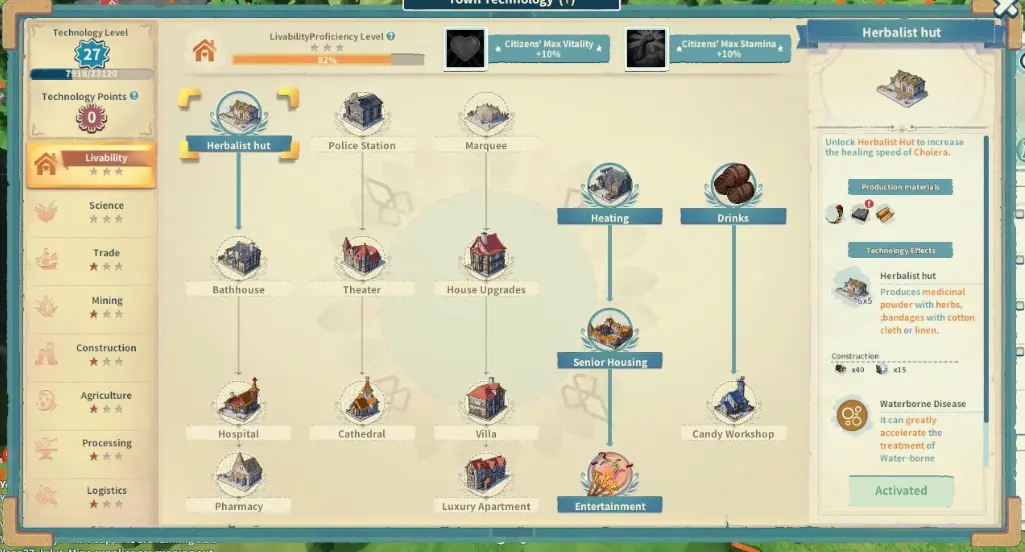
Your colony generates tech points just by staying alive, so don’t fret over your decisions too much. Later on, you can construct a Research Institute that burns paper (or rope, if you’ve unlocked faction bonuses) to generate large amounts of tech experience.
The more points you sink into a single tree, the higher your proficiency becomes. Once your proficiency hits a certain level, you’ll unlock passive bonuses for your people.
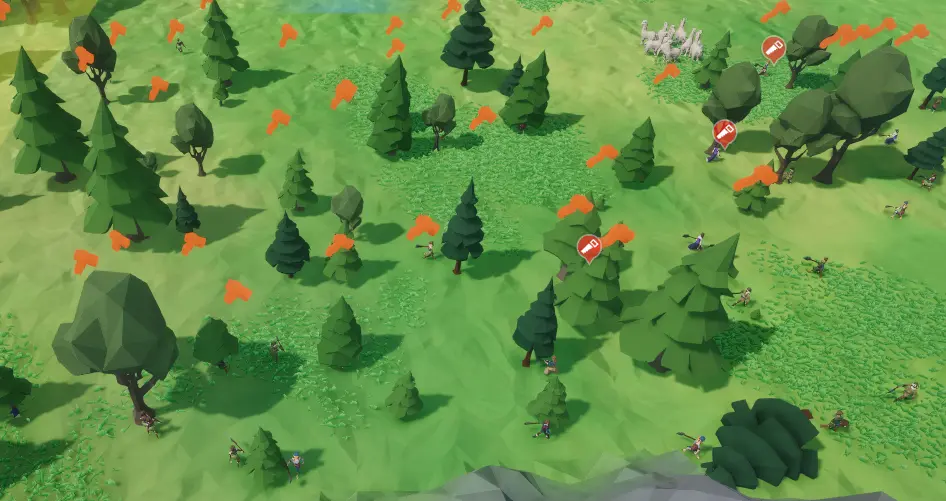
Random Events
Settlement Survival has a slew of random events that occur by tapping on suspicious things on the map. These can range from a gigantic tree to a passing merchant and even a UFO!

When you tap on these things, you’ll need to make a choice, and this choice can lead to good or ill for your people. The giant tree, for example, can be cut down to provide a large amount of timber at once…but it will cause trees to regrow slower for 3 years. If you leave it alone though, trees will grow slightly faster for 3 years. Like most of the game, there are no strict right or wrong answers to random events – you’ll just need to be brave enough to try your luck!
The Mid Years
Now that you’ve got the basics covered, it’s time to upsize our basic services to create a thriving colony. Continue building housing, creating farms, tools, and clothes to accommodate your new people. And while that’s going on, we’ll move onto more advanced stuff like…
- Expanding our logistics network via Marketplaces, Repair Shops, and streets.
- Building schools so we can
avoid child labormake children useful faster. - Upgrade core buildings to provide bonuses.
- Producing better food and drinks to keep morale and health up.
- Creating a trade economy: producing goods to sell and making friends and business partners with other nations.
- Building a Dock to take advantage of passing merchant ships.
Quick Tips:
- Don’t forget to build more Marketplaces and Repair Shops as your town grows.
- The improved movement speed from streets helps a lot.
- Try to move up to refined food/drink by year 5 as the “New Frontier” happiness bonus will likely be gone. I prefer turning wheat and oats into bread and beer.
- Build schools to turn your children into educated adults faster. Educated workers work better than uneducated ones.
- Trade away what you can live without or luxury goods you can make or dig up.
- The more you trade with a faction, the better your relations. Each new relationship value unlocks new stuff, to a maximum of level 5.
- Build a dock and stock it with surplus items to trade with passing merchant ships.
From Hamlet to Town
As your town grows, it’s very easy to forget to upsize your basic services. Certainly, things like farms, wells, chopping houses, and mines come naturally, but some buildings are easy to forget.
Marketplaces serve as a resource hub for your people, so if you’re having trouble getting food and water into homes, consider building more marketplaces or hiring more porters. In the same vein, don’t forget to add clinics and churches for your new residential zones. You’ll also begin to need Repair Shops, which will maintain homes and other buildings. Finally, establish a road network – even a dirt road provides a significant movement speed bonus.
Education
By this time, you’ve probably got a lot of uneducated workers running around and a whole swarm of children doing nothing but eating. Let’s fix that.
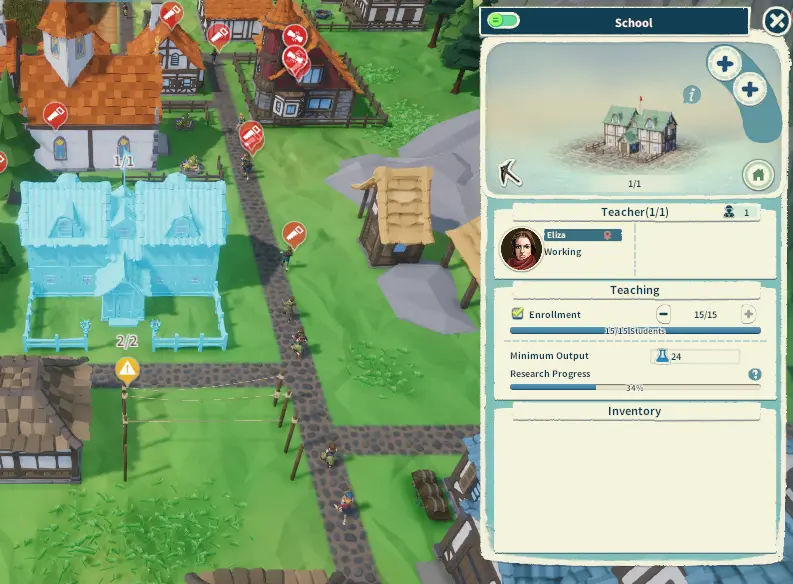
Schools are the solution to both problems. When a child reaches school age (8-9 years old) they will enroll themselves in an educational institute, provided said structure can still accept students. Once their studies are completed, they’ll emerge as an educated adult, which means that they work with higher efficiency. Win-win!
Note that schools technically count as workplaces for children, meaning they have to walk there and return home when they need to eat. To remedy this, you can use higher-level schools like Boarding Houses and Academies which double as student housing. You will need tech points, though.
Remodeling
Most, if not all buildings can be upgraded. To do this, tap the plus icon on the top part of the info panel – this one is above the worker slots.
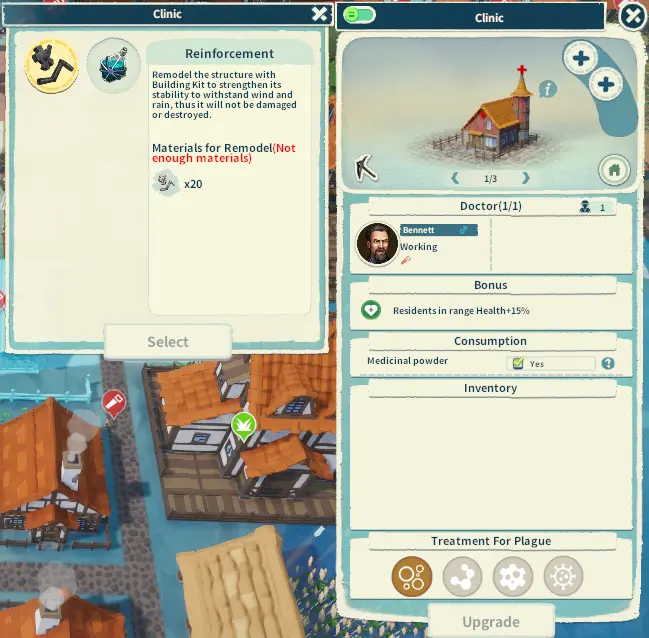
Building upgrades range from simple strengthening to resisting destruction to improving services and even increasing its AOE. However, these upgrades can be expensive and will require you to go out of your way to manufacture or buy the items you need for them. Save these upgrades for core buildings!
Better Nutrition
It’s amusing to keep your people eating nothing but raw vegetables. But it’s also annoying – the health and happiness penalties from raw food can no longer be ignored, especially since by the midgame you’ll have lost the “New Frontier” happiness boost. Thus, it’s time to make some actual food.

This way you’ll have more money to spend on other resources. Your choice of refined food will depend on what you have…
- Vegetables: build a Veg Processing Plant to transform some vegetables into Veggie Salad, which is much better than just eating raw vegetables. You will need the Food Processing technology under Processing to build this structure.
- Meat: meat from Hunter’s Huts can be processed into generic Meat Chopat a butcher. Meat Chop can then be processed further at a BBQ House or a Curing Workshop with salt. You’ll need to get several technologies to fully process meat.
- Fish: basic fish can be salted and cured at a Curing Workshop. Other types of fish, like lobster, can be processed at the BBQ House.
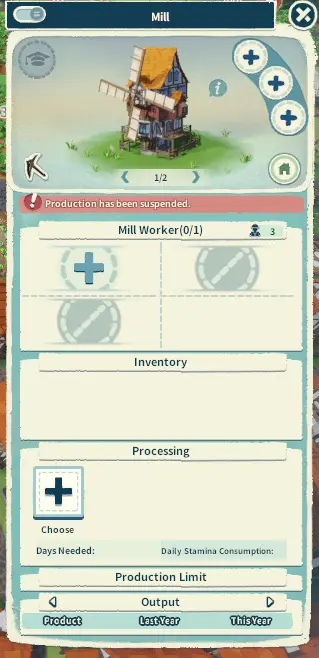
- Wheat and oats: grain crops are special in that they can be made into both food and drink. A Mill can grind these crops into flour for baking at a Bakery, or malt for turning into whiskey at a winery. You can also just produce beer at a winery with raw grains or oats.
Of these refined foods, I prefer planting wheat and oats as they address both better food and drink.
International Trade Routes
By now, you might have run into the problem of something always missing. Whether it’s fuel, refined food, or clothes, it’s difficult to have a surplus of stuff – especially when said stuff is essential to living. This is where trade comes in.
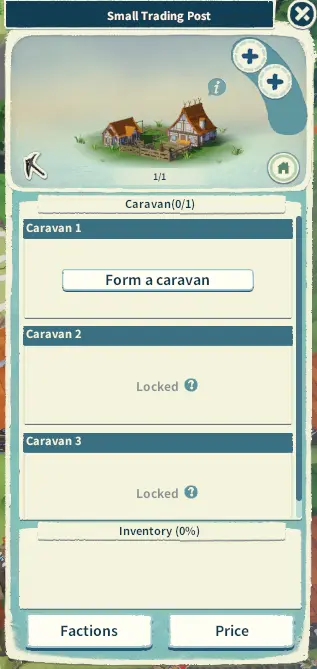
To start trading with other nations, you’ll first need to build a Trading Post. After that, simply select “Form A Caravan” to bring up this second screen:
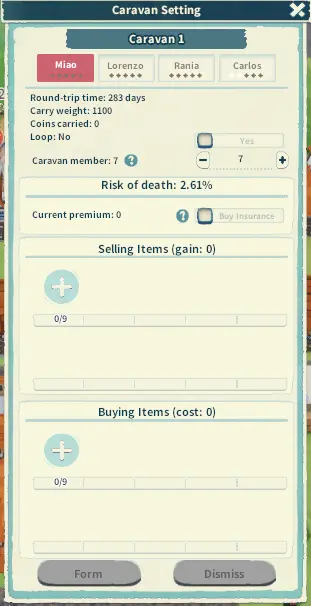
Here, you’ll need to select the following:
- Trade destination: there are four nations you can reach via land. These are Miao, Lorenzo, Rania, and Carlos. Note that each of these factions has different prices on different items!
- Loop checkbox: tap this checkbox if you want the caravan to automatically load up and leave again whenever they reach town.
- Caravan members: how many laborers will join the caravan. Idle farmers are not counted as laborers for this function. The more people a caravan has, the lower the risk of death, and the slower the caravan will move.
- Insurance checkbox: available via tech. You can buy insurance with silver coins to ensure the safety of your caravan.
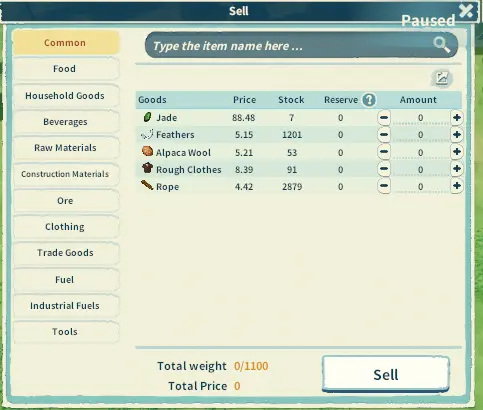
- Selling items: this is where you put items that you want the caravan to sell. Select items in this menu to have your people take those items from storage and load them up. These items will all be sold at the destination for the listed selling price. Do note that caravans have a weight limit.
- Buying items: what items you want the caravan to buy. Note that you must either bring silver coins or stuff to sell to make a successful purchase. These items will be offloaded to your storage whenever your caravan reaches town.
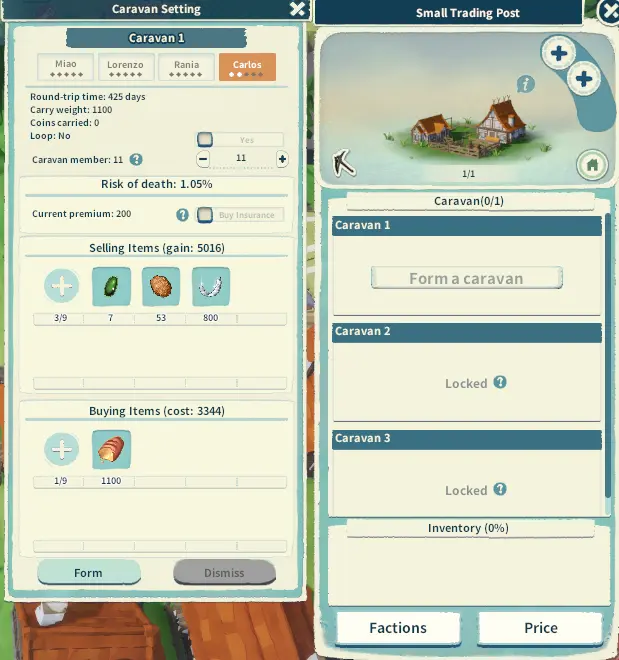
Because of a caravan’s weight limits, it’s prudent to bring stuff that factions will want to buy. Nothing’s stopping you from selling timber and stone, but the more valuable your cargo, the more efficient your trade routes become. This is why you should start creating more refined items to sell.
Jade is an invaluable trade item, but failing that, you can sell refined food and drink such as beer or whiskey, or even intermediate products like linen. You can also invest in tech to unlock pottery, carving, and jewelry workshops that can produce expensive but useless items to trade away. Finally, you can make your own money by researching silver mining and minting.
Later on, you’ll gain access to a Large Trading Post, as well as a Water Trading Post which will let you carry out maritime trade.
Faction Relations
The more you trade with a faction, the more they’ll like you. Eventually, they’ll like you enough to share some of their secrets with you in the form of passive buffs, new technology, and unique buildings.

Miao is based on Chinese culture and offers more generalist bonuses. Among the best things Miao has to offer are Bamboo Farms and Paper Mills at level 1, which will kickstart your research production, as well as Dense Farms, Orchards, and Forest Farms at level 3, all of which have an inherent 50% efficiency bonus. Getting all the way to level 5 grants a passive 5% stress reduction boost on refined foods, as well as the Great Palace, a replacement for the town hall that also magnifies faction relationship gain by 50%.

The hardy people of Lorenzo make their homes in the cold, northern parts of the world. Trade with them, and they’ll teach you how to plant Hardwood Nurseries and craft Hardwood Tools at level 1, which are more easily made and replaced than stone or iron tools. Lorenzo will also teach your colony about Barber Shops and faster hunting at level 2, and rather uniquely, will help you build a Bank at level 4, where you can invest coins.
At maximum level, your citizens will benefit from 100% more maximum warmth, which lets them stave off the cold much easier, as well as the chance to live in the Great Castle, a massive residence that can accommodate up to 80 families or 400 people and provides 25% stress reduction.

The people of Rania are masterful merchants and expert craftsmen who will help you get the most out of your trades. They provide early access to candy materials at level 1 via their Date Farm and Date Sugar recipe. Level 3 relations will teach your weavers how to expertly dye cloth, allowing you to create Dyeing Cloth, a valuable trade good. But if you’re more of the “throw people at it until it works” style, Rania also teaches you how to build a Gem Mine, which yields precious stones that you can trade away.
Rania not only helps you make more trade goods but also helps you control the market. By building the Grand Bazaar at level 4, your buying and selling activities will have less of an impact on prices, allowing you to make the same trades for longer. As if that wasn’t enough, a level 5 relationship with Rania gives a big +25% boost to the selling price of all your trade goods. Snazzy!
Finally, you can build the Sankore Madrasah, a powerful replacement for the school that can educate all villagers (including adults) while producing 50% more tech points than usual.

Carlos is the go-to faction for all things domestic. Their people are based on Central and South American cultures and thus are well-versed in using unorthodox materials to survive in both jungle and desert. At level 1, Carlos will teach your people to plant Cactus Farms and process them into either juice or medicine at Cactus Workshops. Level 2 relations will unlock Agave planting as well as Agave Clothing and Tequila Processing. This level also gives you the ability to use rope instead of paper in your research institutes.
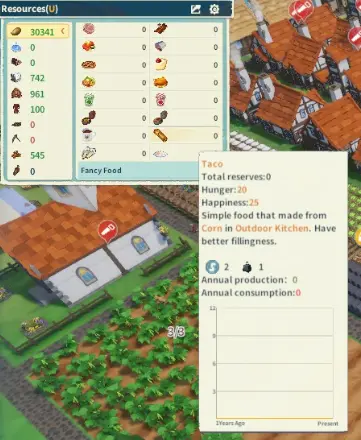
Carlos’ third level gives you Obsidian Mines and tools, as well as new farms that are more effective at planting certain crops, as well as the Outdoor Kitchen which can help with refining rough food. But it’s at level 4 that Carlos really kicks in with their Seed Trade passive which gives a massive discount to seed buying prices from Carlos. This level also gives you the Chichen Itza, a unique graveyard that has unlimited space.
Finally, Carlos offers a trade-off at level five via the Great Temple which confers a massive happiness boost at the cost of some citizens’ lives each month. For those not into human sacrifice, Carlos will also teach your gold and silver miners some of their techniques, doubling the output of mines producing either of these minerals.

Antonio is a special faction of maritime merchants. To trade with Antonio, you’ll need to send a ship via the Water Trading Post. While you cannot raise relations with Antonio, this faction is unique in that they offer constant prices on all items, whether buying or selling. You can also purchase rare blueprints from them, such as the Grand Thermae which consumes large amounts of water to provide a sizeable health boost in a massive area or the Adult Schoolwhere adults, especially immigrants, can go to for education.
Once again, the question will be raised: “Who do I trade with first?”. And once again, the answer is “it depends on your playstyle”. If you want more general bonuses, you can trade with Miao or Carlos for faster tech or quicker access to medicine, respectively. If the cold bothers you, Lorenzo gives earlier access to tools and furnaces. Rania will help kickstart your economy. There’s no right or wrong way to go about this – just keep selling what you can live without and buy the stuff you do need.
Merchant Ships
Apart from trading with other nations, you’ll sometimes see merchant ships passing through your river. This is a great way to trade for a random assortment of goods, though as the game itself says, you’re not going to get coins out of these barters.
Unlike trading posts, you will need to designate what items and how many of them should be stored at the docks for trade. It’s a good idea to leave a small bit of surplus – I leave around 1000 coins’ worth of goods – at the docks in case something nice shows up. Just like immigrants, you can see when a ship will arrive via the timeline in the upper right of the screen.
The Future In Your Hands
With the basics now under your belt, you’re well-equipped for success. Under your steady guidance, you’ll grow from a small band of exiles to a bustling, lively metropolis.
That concludes this beginner’s guide to Settlement Survival, and I hope you were able to learn a trick or two on what to prioritize and how to keep your people alive for another year. If you have any tips you’d like to share or any comments on how to further improve this guide, make yourself heard in the comments below!