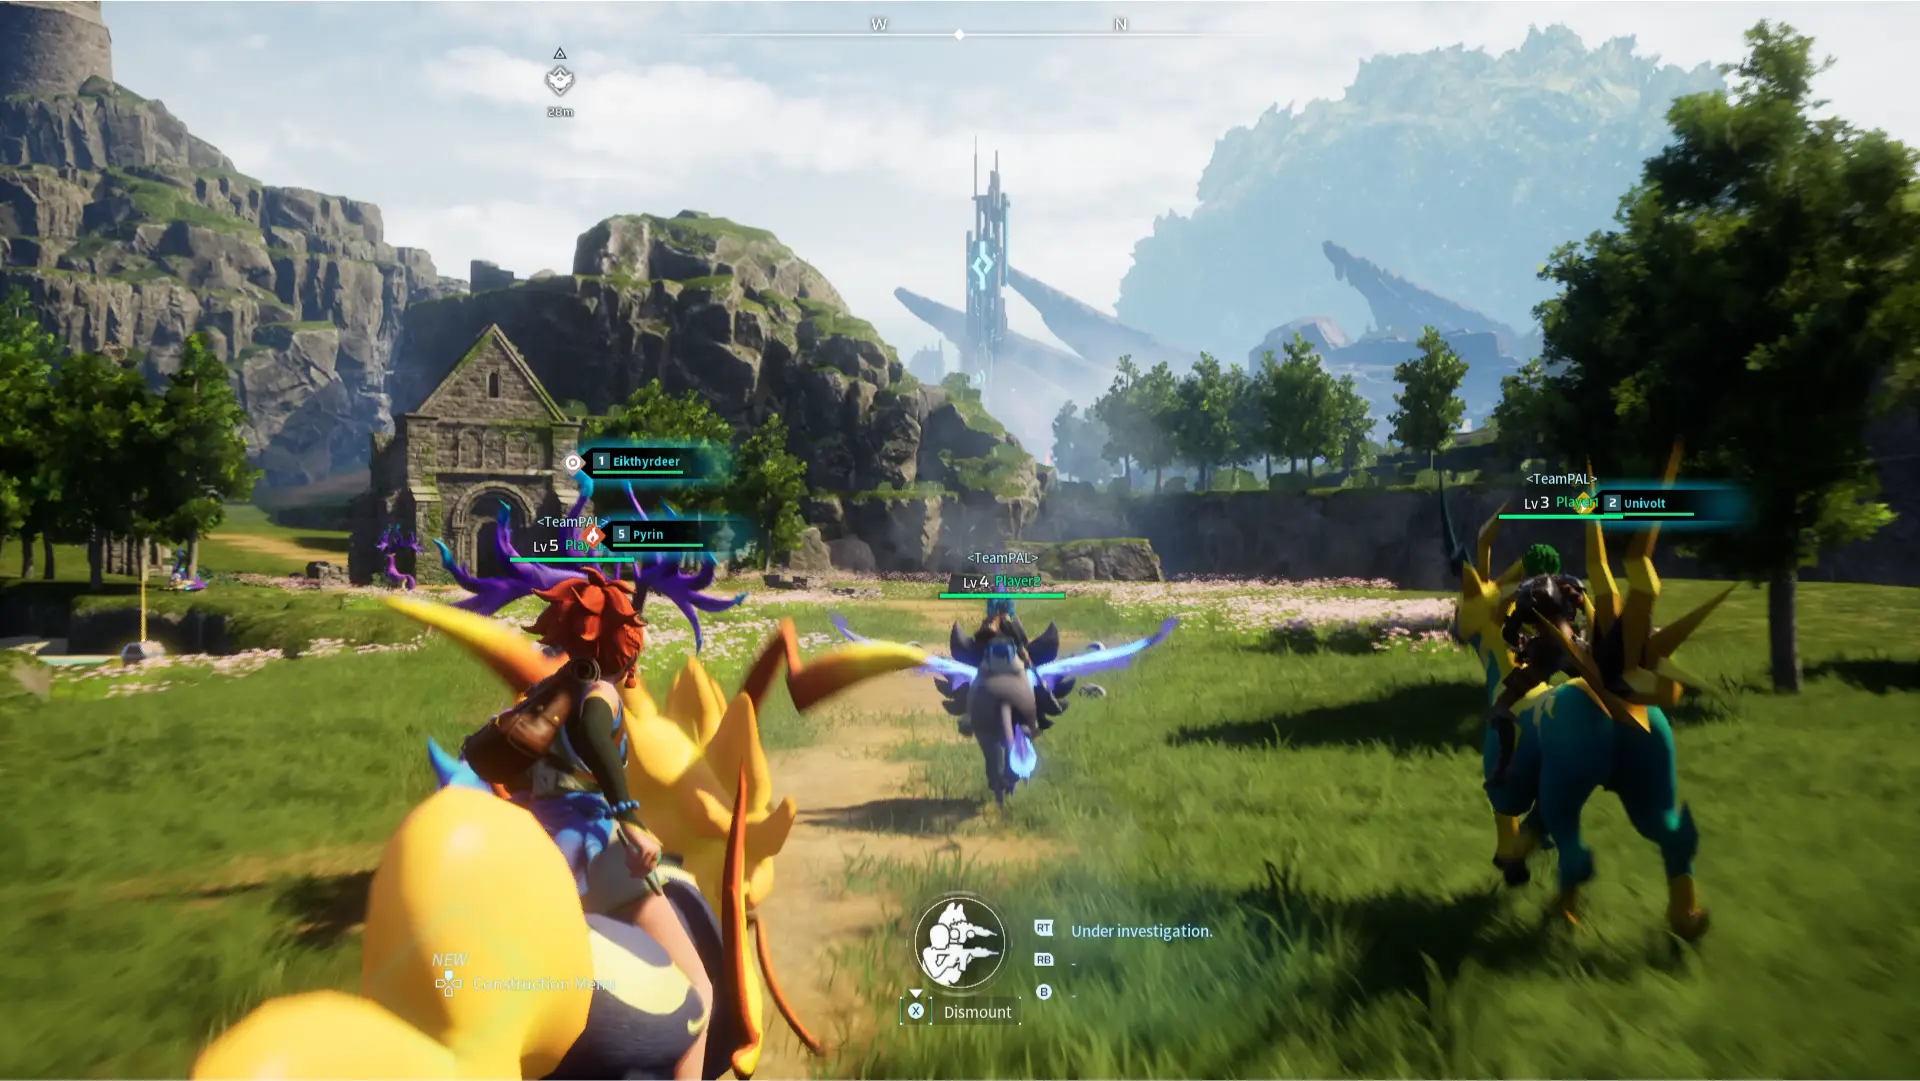
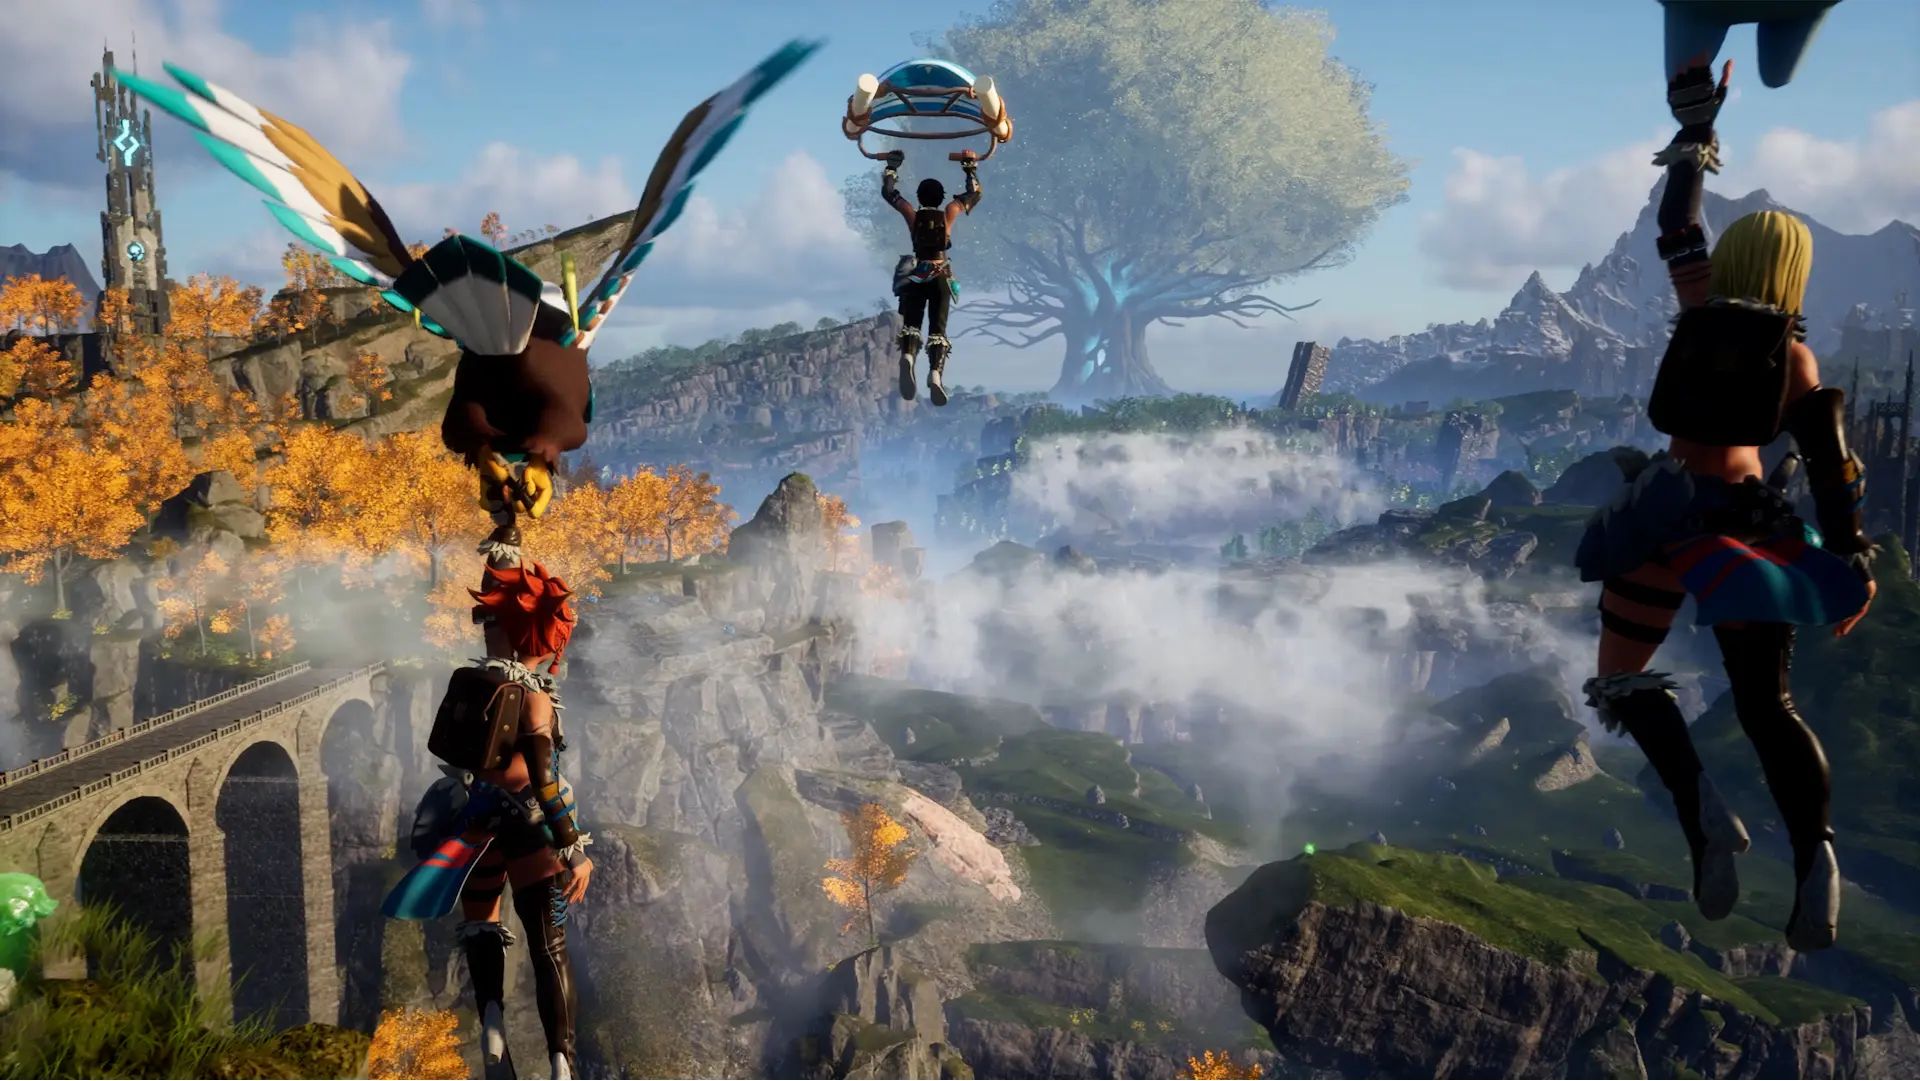
Palworld is, without a doubt, a game that came out of nowhere and sent the internet ablaze. No one can stop talking about this “Pokemon with guns” game created by Pocketpair, Inc., and for good reason. Released on Xbox One, Xbox Series X, Series S, and Microsoft Windows, the game combines the monster-taming concept of Pokemon, the survival gameplay of Grounded, and the vast exploration of Tower of Fantasy.

In just the first hour of our playthrough, the game caught our interest, hook-line-and-sinker, just like the many Pals we had captured. Pal is the moniker given by an unnamed castaway in one of the journals you’ll find on the Palpagos Islands for the strange creatures you’ll encounter in your adventure.

Pals are mostly friendly by nature and won’t usually attack unless threatened. With the help of a device known as the Pal Sphere, you can capture Pals like you would in Pokemon and use them for battle. But unlike the game that inspired it, they took it one step further and gave the player the ability to fight alongside them and gave Pals the ability to assist you in homemaking.
They would, of course, need to be fed, housed, healed, and loved for them to be able to help you when you need them. Unlike most monster-taming games, this game also puts the player in action, letting you fight alongside them as well as build a base with a striving community where you and the Pals you captured can work together in harmony.

But the game isn’t all just sunshine and rainbows. Organizations on these islands regard Pal Tamers from the outside, such as yourself, as enemies and will challenge you as soon as you step foot into their intimidating towers. There are also Syndicates who will not hesitate to harm you, your Pals, and other Pals that they find.
The world is strange. There are many mysteries to discover and questions to answer. With this beginner’s guide we have written, we aim to help you understand the basic mechanics and provide some helpful strategies without completely ruining the excitement of discovery by overloading you with too much information.
The Technical Bits
As you start the game, you’ll encounter a few things that may be new to you if you’ve never played this game before or any other game similar to it. To familiarize you with some of the technical aspects of the game before you get to the practical tips and strategies, we’ll briefly discuss them in this section.
Difficulty Options
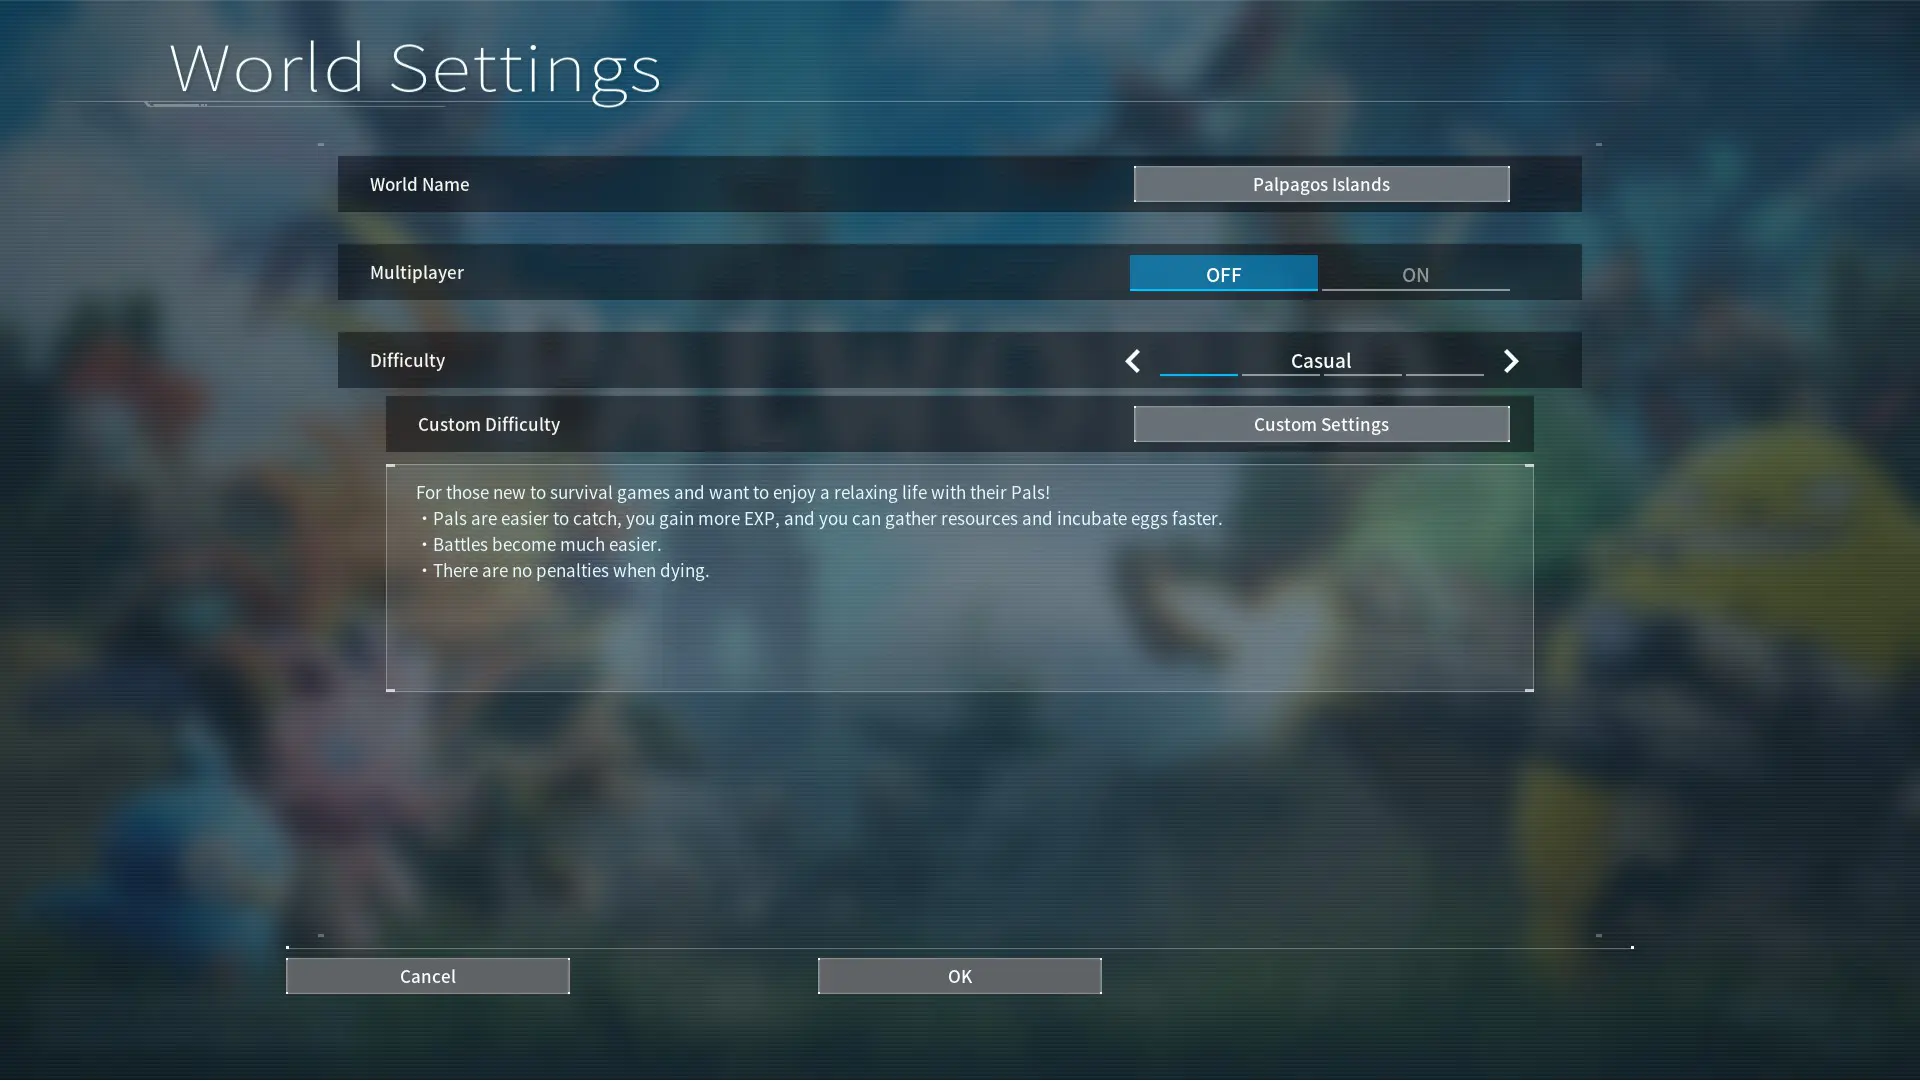
One of the things that will be asked of you is to set the difficulty of the game. There are 3 preset difficulties with a 4th option to customize everything to your preferences. Below is a summary of the differences between the 3 preset difficulties:
| Casual | Normal | Hard | |
| EXP Rate | 1.3 | 1 | 0.8 |
| Pal Capture Rate | 2 | 1 | 0.8 |
| Damage Dealt by Player | 1.5 | 1 | 0.5 |
| Damage Received by Player | 0.7 | 1 | 4 |
| Gatherable and Dropped Items | 2 | 1 | 0.5 |
| Time (H) to incubate Massive Egg and other eggs | 0 | 2 | 72 |
| Death Penalty | No Drops | Drop all items | Drop all items and all Pals on team |
Other settings not changed in the presets but can be changed in Custom are:
- Daytime and Nighttime Speeds
- Pal Appearance Rate
- Damage Dealt and Received by Pals
- Pal and Player Hunger Depletion, Stamina Reduction, Auto-Health Regeneration, Sleep Health Regeneration Rates
- Damage to Structure
- Structure Deterioration Rate
- Max number of dropped items in a world
- Gatherable Objects Health Multiplier and Respawn Interval
- Enable or Disable Raid Events
- Death Penalty – Drop all items except equipment
- Max Number of Guilds
- Max Pals Working at Base
Controls
There are many buttons to remember while playing the game and while it’s usually displayed so you won’t forget, it’s still helpful to have a list to consult whenever you feel lost so we’ve listed them all in the table below. We’ve also included a few actions that were not really mentioned anywhere but we learned along the way.
We do want to let our readers know that because this is an early-access game, the developers are still working on controller inputs and some actions don’t seem to work for the controller. If none of the controls feel right for you, there is an option to customize the controls for both the keyboard and controller pad.
| Keyboard & Mouse | Action | Controller |
| Move Mouse | Camera | Right Stick |
| W, A, S, D | Move | Left Stick |
| E | Throw / Release Pal Ride Skill 2 | LB |
| Q | Throw Sphere | RB |
| B | Build Menu Back (when in a menu) | Up |
| Scroll | Build: Rotate Object | LS |
| C | Build: Disassembly Mode | RS |
| Q, E | Build: Switch Pages | LB, RB |
| 1, 3 | Build: Switch Categories | LT, RT |
| Mouse | Build: Select Object | RS |
| Left Mouse Button | Build: Build Object | — |
| Space | Jump | A |
| Right Mouse Button | Aim | LT |
| Left Mouse Button | Attack | RT |
| F | Partner Skill (while fighting) Interact with item or NPC (when nearby) | X |
| V | Lift (when Pal is nearby) | Y |
| R | Reload | X |
| Mouse Scroll | Change Weapon | Y |
| C | Crouch Ride Skill 3 | B |
| Ctrl | Roll | B |
| Shift | Sprint | LS |
| Shift then C | Slide (Sprint then Crouch) | LS then B |
| 4 | Pal Commands (for released Pal or closest Pal in your base) Repair (when close to a crafted object) | RS |
| 1, 3 | Change Pal | Right, Left |
| 2 | Change Sphere | Down |
| M | View Map | Select or Back Button |
| P | Map: Show Player Location | Y |
| F | Map: Filter | LB |
| E | Map: Marker | X |
| Scroll | Map: Zoom | RS |
| Escape | Open Settings | Return to Home Key |
| Tab | Open Inventory | Start Button |
| Shift + Left Mouse Button | Inventory: Split Stack | — |
| Ctrl + Left Mouse Button | Inventory: Take 1 from Stack | — |
| Right Mouse Button | Inventory: Quick Transfer | — |
As for the game’s HUD (Heads-Up Display), what’s nice about Palworld is not all of them are displayed all the time so your eyes have space to breathe while you play. They will only appear when they are what you need at the moment. As such, we will also be discussing them as they come up in the next sections.
Leveling Up
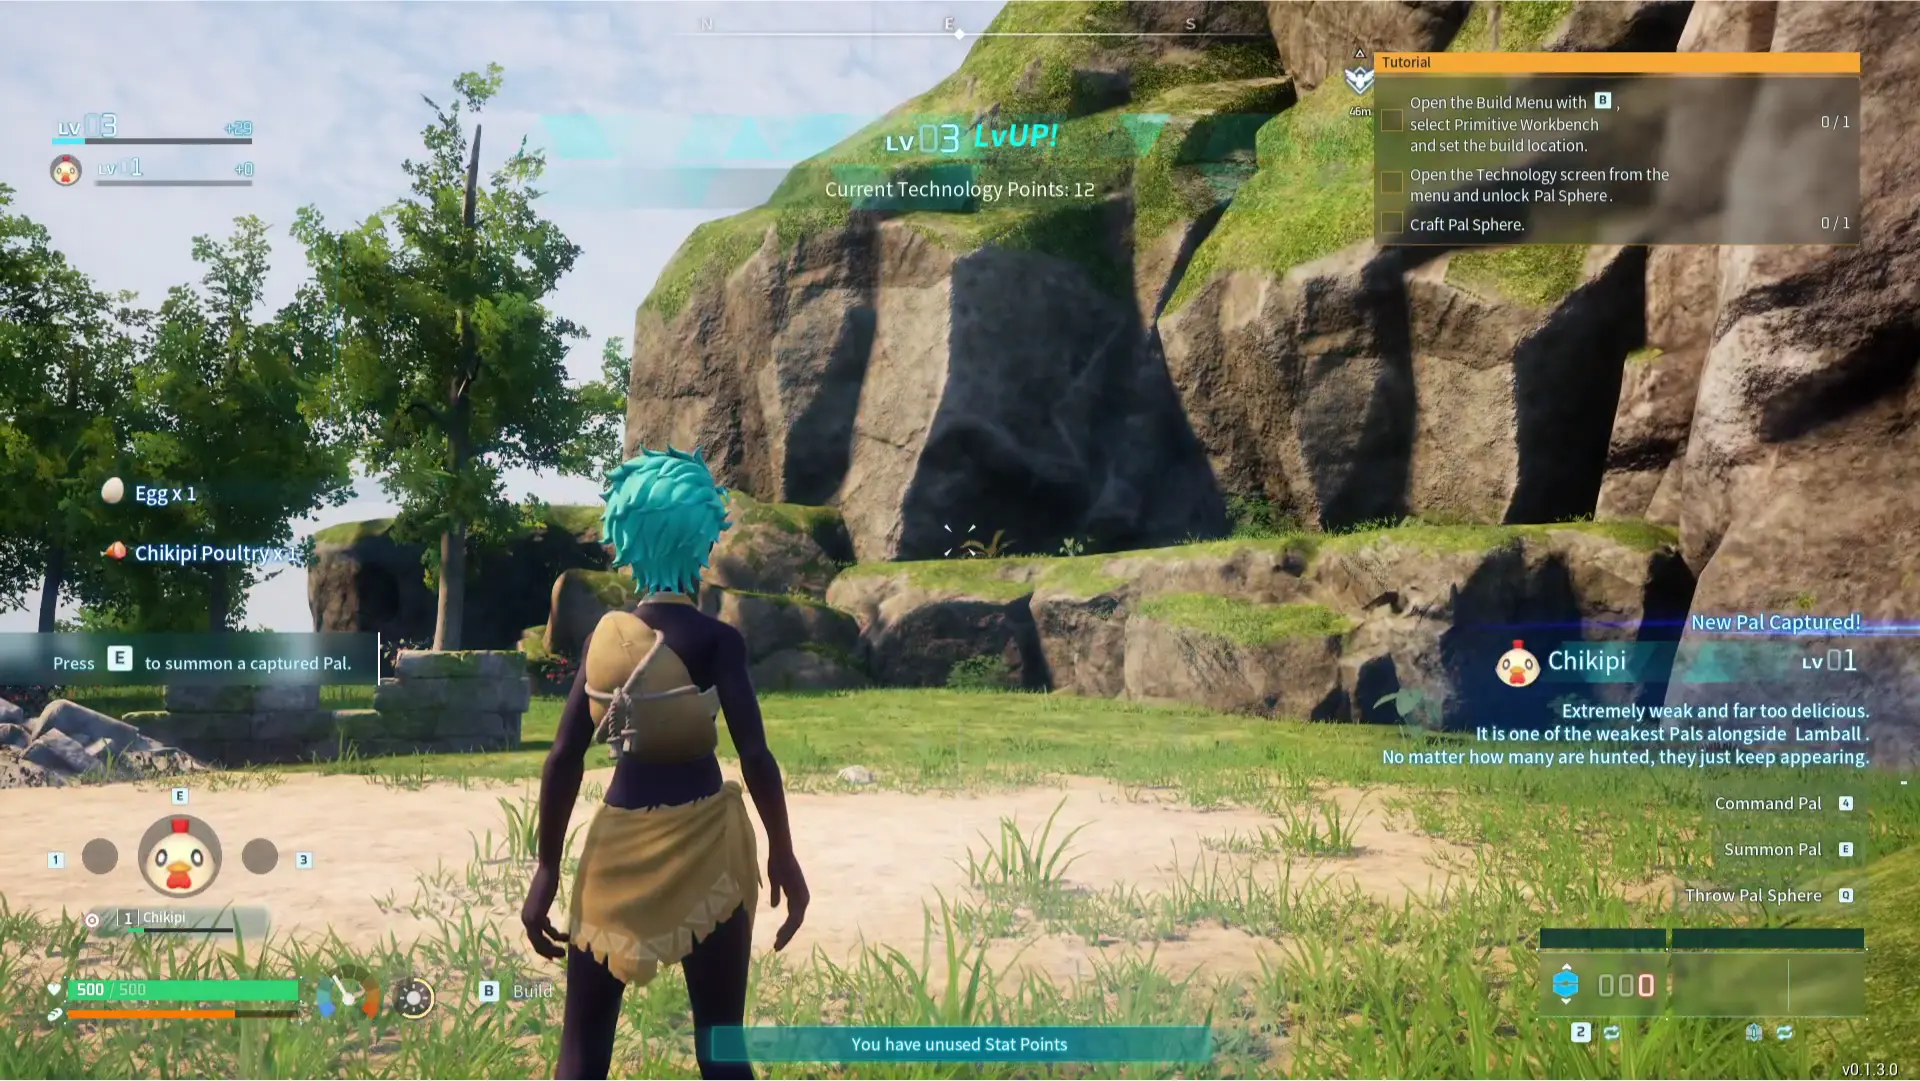
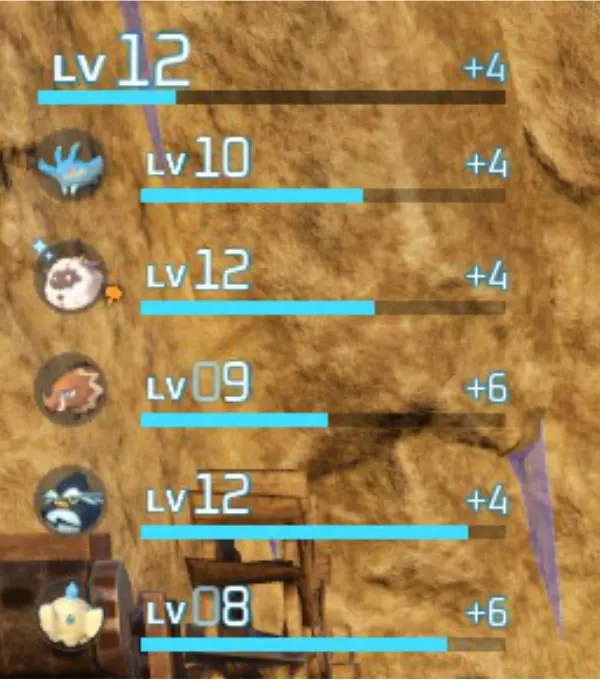
Leveling up in Palworld takes into account every activity you participate in, whether it’s fighting or capturing Pals and NPCs (yes, they can be caught), building your base, crafting items, or doing hard labor and chores. The experience you gain is shared amongst all the Pals that are currently in your party and your progress will appear on the left side of the screen. You can take up to 5 of them with you at a time.
While the game doesn’t actively inform you, the Pals that are active on your base will also gradually increase their experience as they work. The ones stored in your Palbox however will have their experience bars intact. The number of active Pals you can have is set by default at 15 but can be set from 1-20 in the custom difficulty setting.
One thing you’ll need to keep in mind is that while your Pals can level up higher than your character, they will always sync up their levels to yours. So if you want to get the most out of your Pals, you have to continuously work on leveling yourself up! If you have a level-synced Pal in your party, switch it for another one that needs some leveling up so that everyone gets a fair share of experience! Just make sure the ones you do bring along aren’t Pals you’re planning to butcher (yes, you can do that too) or Pals you’re planning to condense (more on that later.)
Contrary to most level and experience-based games, Palworld does not have an EXP death penalty. Even when you set the difficulty yourself, the only penalty you can get is your items and equipment being dropped or Pals getting released.
Enhancing Your Character’s Stats

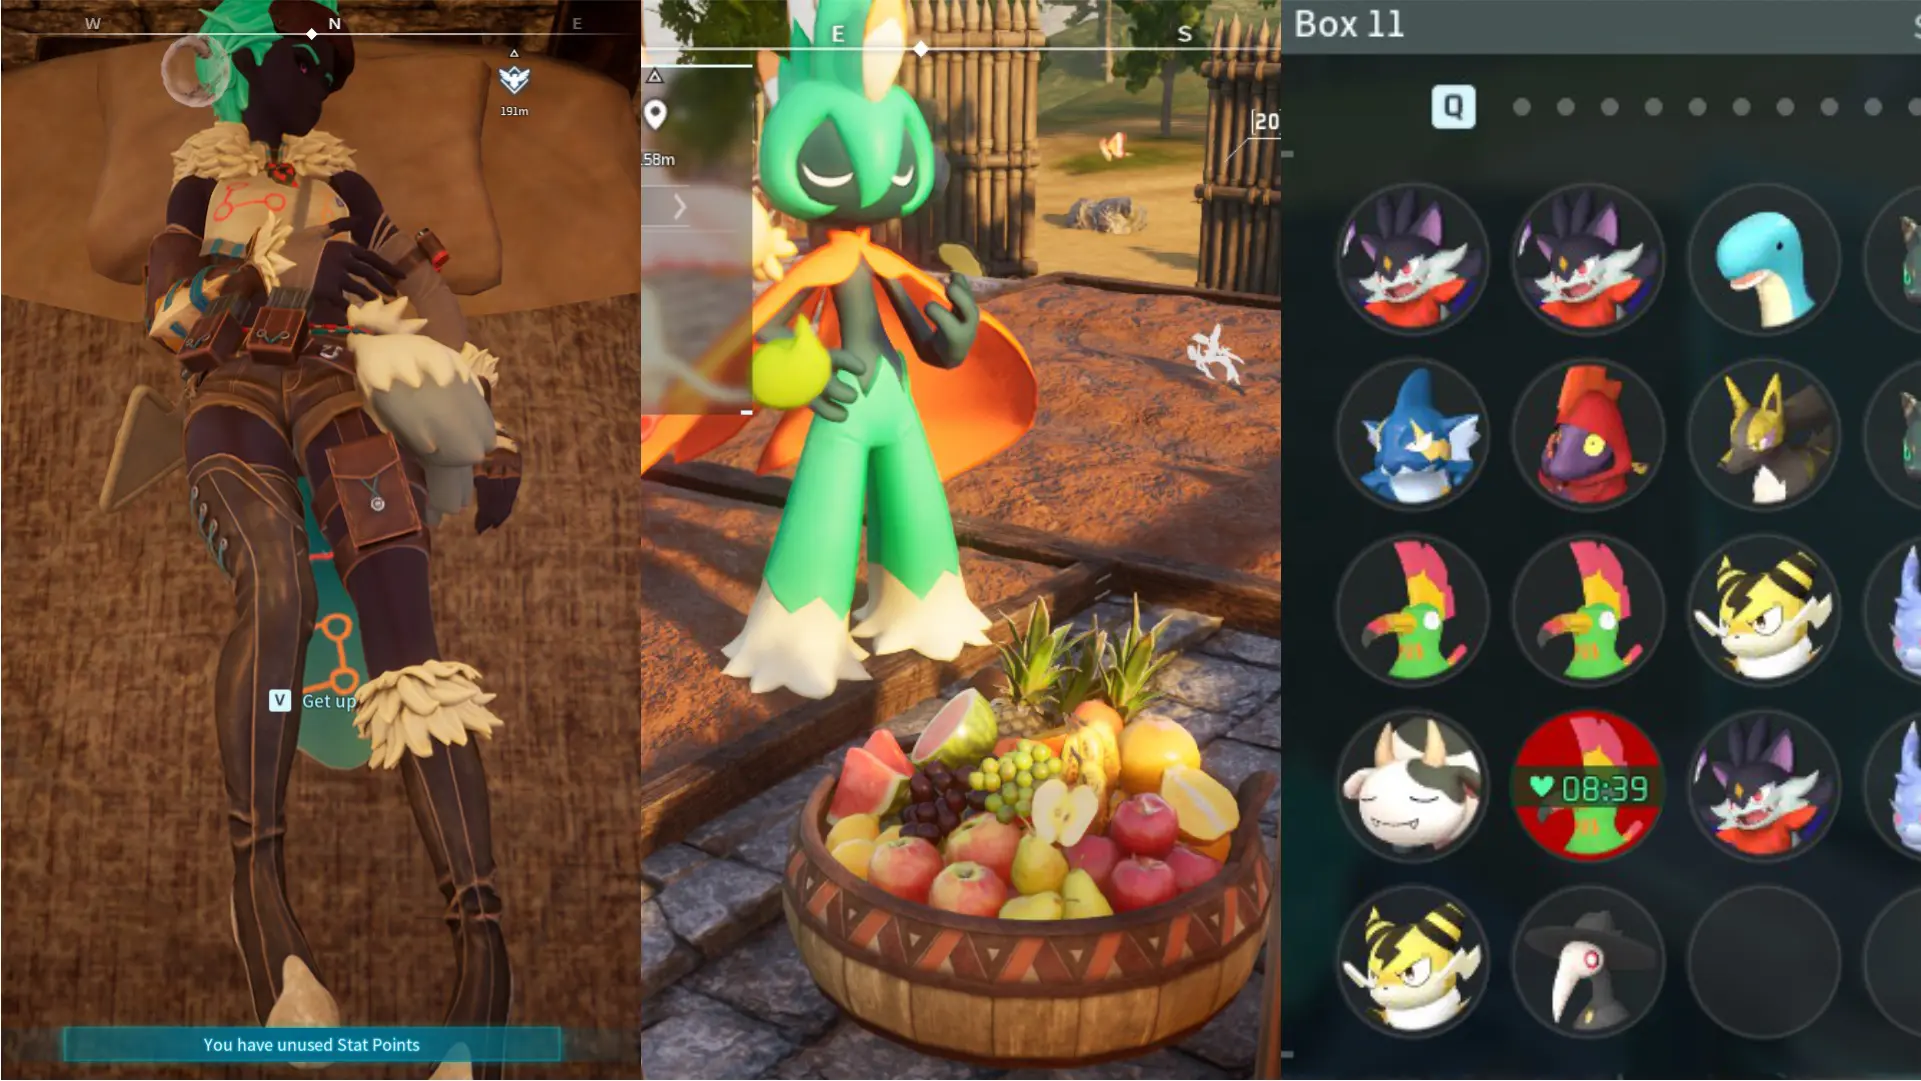
Every time you level up, you are given a stat point that you can freely designate to enhance one of your stats except for Defense. It’s important to note that a single stat point can increase each stat differently. At the time of writing this article, the current max level is 50.
| Stat | Base | Increase per Point | Role |
| Health | 500 | 100 | Determines how much damage you can take before you die without armor. |
| Stamina | 100 | 10 | Determines how long you can constantly do an action such as running, mining, attacking, etc. |
| Attack | 100 | 2 | Determines how much damage you deal to your enemies without weapons. |
| Defense | 100 | n/a | Determines how much damage you can receive from each attack. Can only be increased by your equipment. |
| Work Speed | 100 | 50 | Determines how fast you can accomplish a work task such as crafting, harvesting, cooking, etc. |
| Weight | 500 | 50 | Determines how much weight you can carry in your inventory at a time. |
Keep in mind that you cannot reverse the points you added once you confirm your changes. The only way to reset your stats to zero is by taking Memory Wiping Medicine. This can only be crafted from an Electric Medicine Workbench that can only be unlocked at level 43 and has to be powered by a Power Generator which can only be unlocked at level 26.
With this in mind, what is the best way to build up your character? Every player has a different playstyle so we’ve listed down a few build suggestions. Note that the stats that we assign to these builds are the main stats that need to be increased but it does not necessarily mean that other stats have to completely be ignored for it to work.
The Explorer
- Stamina
- Weight
This is the build we currently use since we are mostly focused on the discovery and exploration of the game to create this guide. Increasing Stamina allows us to do many things. We valued being able to run far, climb up high mountains, and swim long distances even without a mount. We also wanted to have enough energy to fight and harvest the materials we need without always relying on Pals for them. Having points in Weight lets us explore away from home for longer without having to come back to deposit items.
However, because this is how we chose to make our character, we lack fighting strength, HP, and work efficiency. To balance this out, a good set of armor and a strong Pal to fight along with us is important. A Pal that can heal will also be pretty handy. As for any crafting work, you can always do it at home where your Base Pals can gladly assist you. However, if you really need to craft something on the go, like arrows, bring at least one Pal with a Handiwork Work Suitability.
The Tank
- Health
- Weight
This build puts survivability at the forefront of priorities. Having points in Health will allow you to stay in battle for longer. If you’re playing with friends on Multiplayer, they can rely on you to distract the enemy and take most of the damage while they whittle down their HP or attempt to capture them.
On the other hand, Weight allows you to equip heavier, yet sturdier, armor to increase your Defense. Increasing this stat can also allow you to spend a longer time away from your base and prevent you from suddenly slowing down if you happen to pick up too many items. This build also allows you to get close and personal with your enemies and freely use melee weapons without fear.
While the Tank relishes their toughness, the downside to this build is their lack of strength in their blows, their inefficiency with work tasks, and their lack of mobility. You’ll need to make sure you have the strongest available weapon along with a strong, damage-dealing Pal or party member to balance out your low Attack. Work tasks can easily be assigned to your Pals, but you’ll need some good mounts if you want to cover more ground when you’re exploring.
The Ninja
- Attack
- Stamina
This build is the exact opposite of the Tank and puts damage and mobility above everything else. Points in Attack will increase your damage output while Stamina will increase how long you can keep attacking the enemy, making you a killing machine. Stamina can also increase how long you can run, or how often you can dodge, the two most important skills you need to survive when using this build. However, this build requires an experienced hand. You’ll need to really get good at detecting when an enemy is about to strike in order to avoid sudden death.
The biggest challenge you’ll have for this build is getting enough items you need for your travels without getting over-encumbered. You may need to pick only 1 or two of your favorite weapons and be stuck with a low-defense armor since they’re lighter.
Opt for long-range weapons to give you time to see your enemies’ attacks and dodge them. You might want to have a travel buddy player pick up some items for you while you focus on those juicy kills. Tanky players and Pals, as well as Pals that can heal will go a long way to aid with your survival.
The Fighter
- Attack
- Health
- Stamina
- Weight
This build is for those who want the best of both worlds when it comes to battle. It requires you to put points on all 4 stats evenly to make your character well-balanced in all aspects. While you certainly won’t be as tough as a Tank or as heavy-hitting as a Ninja, you’ll be able to fight on your own with or without Pals or party members behind you.
Enhancing Attack and Health is a must to be able to deal significant damage while surviving each strike your enemies befall you. You’ll need the best armor and multiple weapons for various occasions so having some points in Weight is a must. Stamina, of course, will help with mobility and dodging when the opportunity arises.
The main downside to this build, aside from not exceling in a specific stat, is that you won’t be very efficient when it comes to doing work, chores, or crafts but this can easily be taken over by your Pals.
The Homemaker
- Work Speed
- Stamina
This build is for those who prefer to focus on improving their base and doing the work that requires it. Work Speed will make you efficient in handiwork and other jobs in the base while Stamina will make it easier for you to harvest materials like wood or ores. It is best applied when you are working together with other people in a guild but it may not be as effective in single-player. If you do decide to go this route alone, you’ll need to make sure that you have many strong Pals in your party at all times if you travel and explore.
This may also be a nice build for those players who prefer playing in Casual difficulty and aren’t particularly focused on the battle aspects of the game. Once you get to level 19 and unlock the Breeding Farm, you can spend most of your time just tending to your Pals and increasing your army through Pal Reproduction.
The Poacher
- Health
- Stamina
This build is for those who just want to spend all their time capturing as many Pals as they want. However, it’s important to note that while Health will keep you alive and Stamina can keep you running and dodging, you’ll still need good armor for Defense. Stamina can also allow you to harvest materials for a longer time so that gathering Wood, Paldium, and Stone for your Pal Spheres won’t be as difficult.
Attacking from afar with a long-ranged weapon is the safest way to hunt for your new Pals. You may have a hard time starting up your base with this build, but once you have a good set of Pals on your base, they can balance out what you lack. They’ll do all the fighting and all the tedious work for you. The number of items you can carry will be affected, but you can always add a bit of stat points on Weight if you need more.
If you like a nice challenge, this build is worth exploring because it will force you to be on your toes while pushing the limits of your survival. If you do go this route, we highly recommend letting your Pals make the first attack so that your enemy will put their focus on them. Once their health has gone low enough, you can chuck your Pal Sphere at them and capture them. You can also do this with enemies that are fighting each other. Remember: throwing a Pal Sphere at your enemy’s back increases your chances of a successful capture!
Crafting and Building
Crafting and building play a large role in Palworld since most of the things you need to create a home and equip yourself for battle have to be crafted by you. NPCs that sell goods do exist in this world, but most of the items they will sell you are raw materials, ingredients, and Pals.
Crafting and producing items requires a specific crafting station or production machine and can be taken over by Pals that have the Handiwork, Medicine Production, Kindling, and Watering Work Suitabilities. Other stations cannot be used by the player and can only be used by certain Pals. These items can be placed in your inventory or storage boxes and can range from weapons, tools, armor, food, medicine, and so on. Below are some of the crafting stations and workbenches you can unlock and use in your first 20 levels:
| Structure | Required Level | Technology Points | Materials | General Use | User & Work Suitability |
| Primitive Workbench | 1 | — | 2 Wood | Crafts low-level items, tools, weapons and fancy hats. | Player, Pals (Handiwork) |
| Repair Bench | 2 | 1 | 10 Wood | Repairs tools, weapons and armor but cannot craft anything. | Player |
| 10 Stone | |||||
| Pal Gear Workbench | 6 | 2 | 30 Wood | Crafts Pal-specific gear (only needs to be crafted once). | Player, Pals (Handiwork) |
| 10 Paldium Fragment | |||||
| 2 Cloth | |||||
| Crusher | 8 | 2 | 50 Wood | Refines Stone into Paldium, and Wood into Fiber. | Pals (Watering) |
| 20 Stone | |||||
| 10 Paldium Fragment | |||||
| Primitive Furnace | 10 | 3 | 20 Wood | Refines Ore into Ingots and Wood into Charcoal. | Pals (Kindling) |
| 50 Stone | |||||
| 3 Flame Organ | |||||
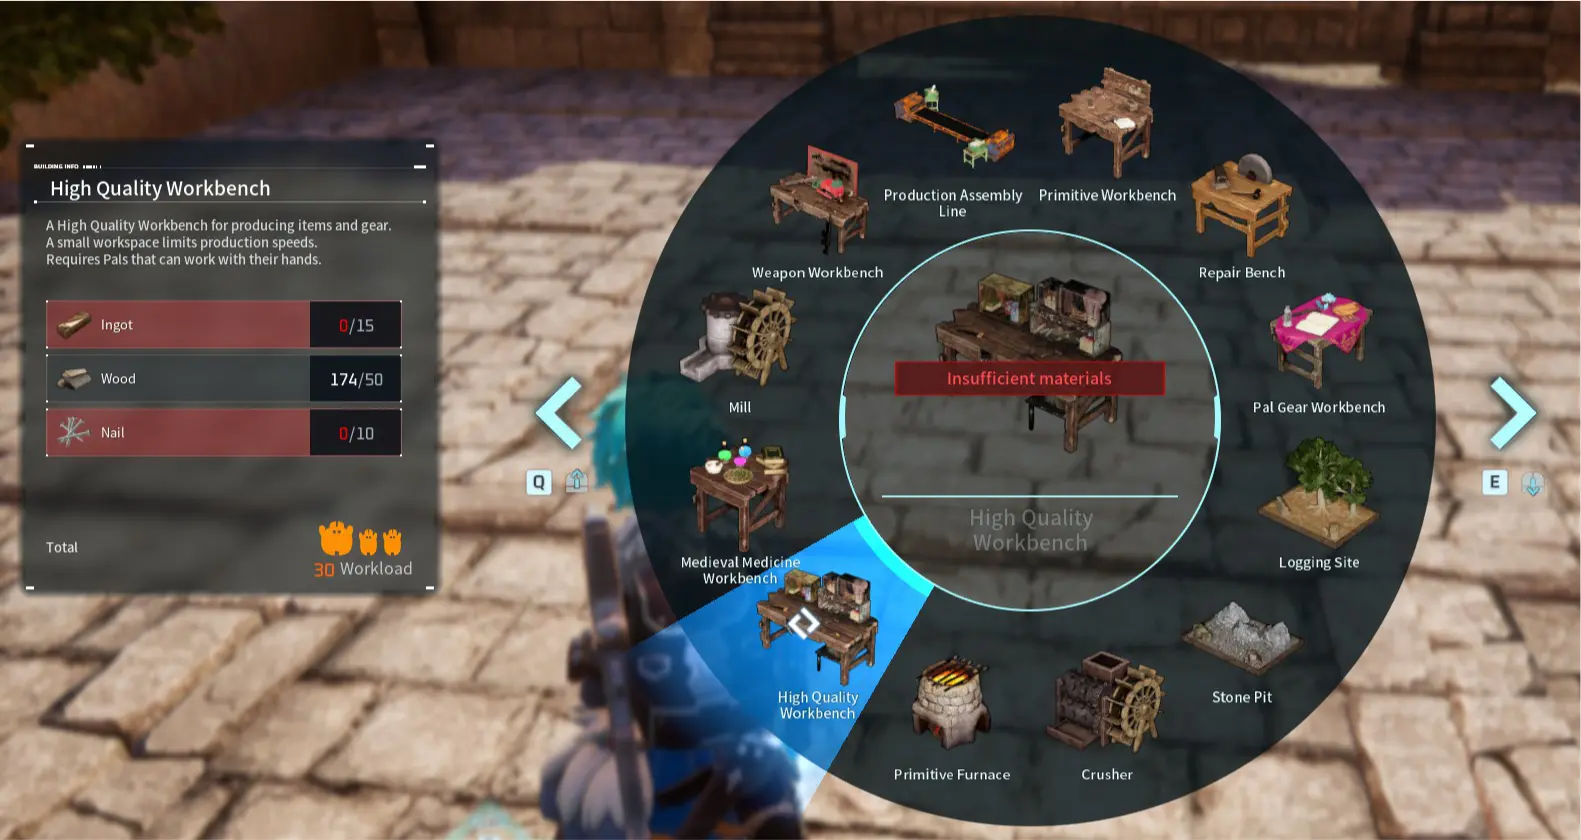
| High Quality Workbench | 11 | 3 | 15 Ingot | Crafts better items and gear than the Primitive Workbench, but cannot craft weapons or Pal Spheres. | Player, Pals (Handiwork) |
| 50 Wood | |||||
| 10 Nail | |||||
| Medieval Medicine Workbench | 12 | 2 | 30 Wood | Produces Medicine used to cure Pal injuries and illnesses | Player, Pals (Medicine Production) |
| 5 Nail | |||||
| 10 Paldium Fragment | |||||
| Sphere Workbench | 14 | 3 | 10 Paldium Fragments | Produces 3 tiers of Pal Spheres. | Player, Pals (Handiwork) |
| 30 Wood | |||||
| 10 Nail | |||||
| Mill | 15 | 2 | 50 Wood | Refines Wheat into Flour. | Pals (Watering) |
| 40 Stone | |||||
| Weapon Workbench | 20 | 3 | 15 Ingot | Crafts more advanced weapons than the Primitive Workbench. | Player, Pals (Handiwork) |
| 50 Wood | |||||
| 10 Nail |
Aside from these stations, there are also farms that can produce crops and ingredients that can be used to create food which will be further discussed in the “Getting Food” section of Survival.
Building structures, workstations, and machines can be done without a workstation as long as you have the materials needed to create them. Items that can be built are displayed in the Build menu (accessed by pressing B or Up).
Foundations, walls, roofs, traps, and doors are built instantaneously as you place them except for the Wooden Gate. Everything else requires your character or your Pal’s effort to complete after being placed on the ground. Like crafting, Pals with the Handiwork Work Suitability can help you complete the task.
Technology Points vs Ancient Technology Points
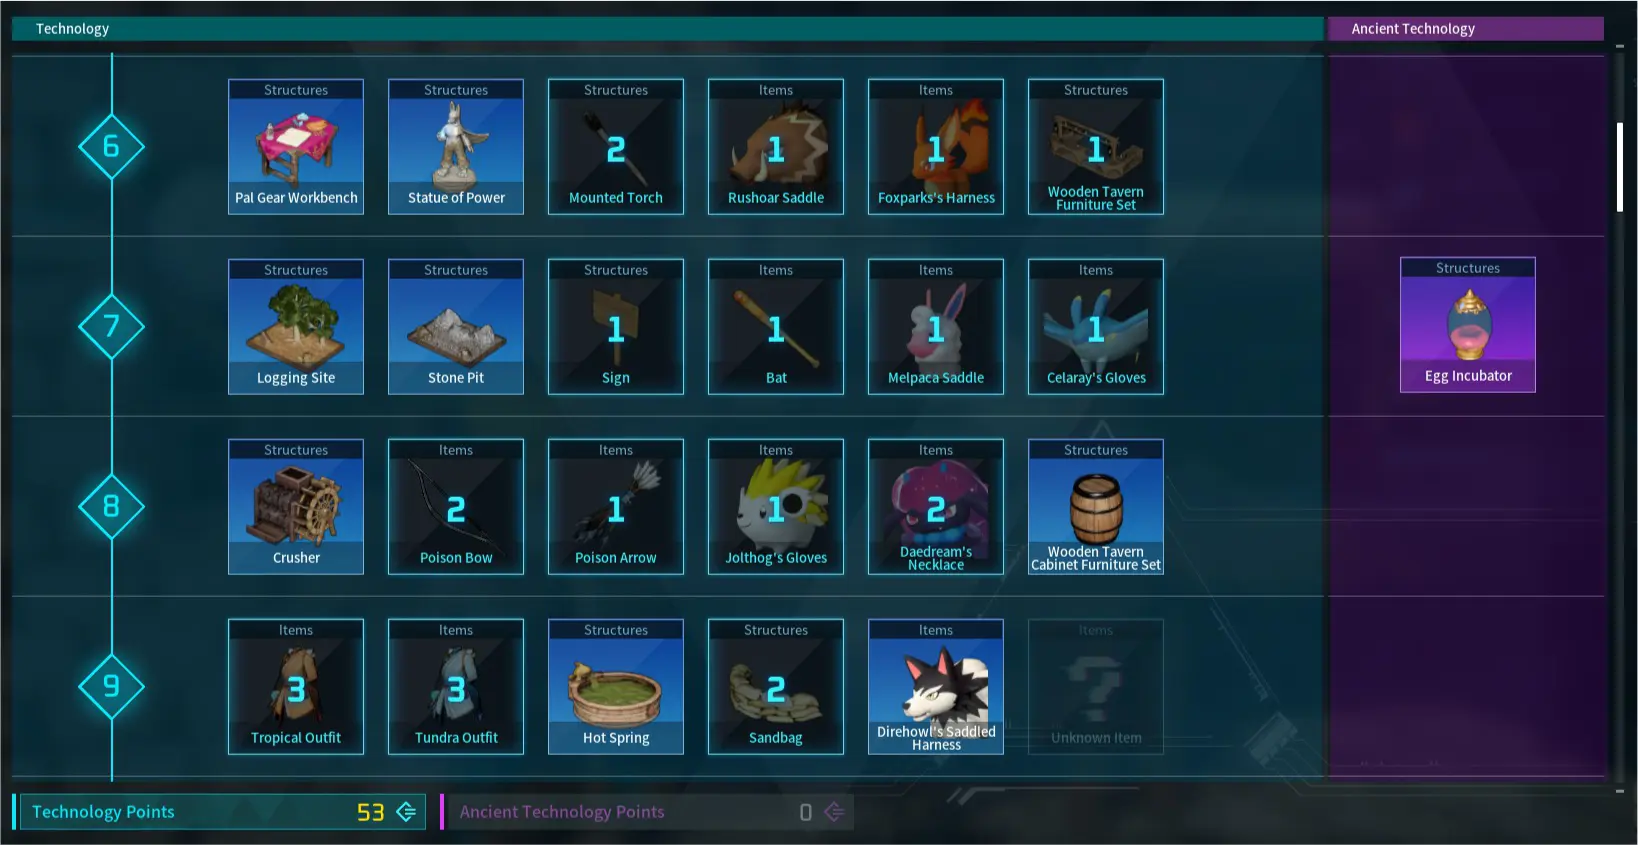
Technology Points are used to unlock items that you can craft or build. You can earn Technology Points by leveling up and activating Great Eagle Statues. Ancient Technology Points on the other hand can only be obtained by defeating Syndicate Tower Bosses, Dungeon Bosses, and Alpha Pals found all over the islands. It’s important to note that you can only obtain these Ancient Technology Points once per boss even though you can still fight them later.
We highly recommend saving your points for items that you immediately need. There are many items in the Technology tab that will become obsolete or useless once you’ve leveled up such as the Tropical Outfit and Tundra Outfit, unlocked at level 9, which will be replaced with Heat Resistant Pelt Armor and Cold Resistant Pelt Armor at level 18.
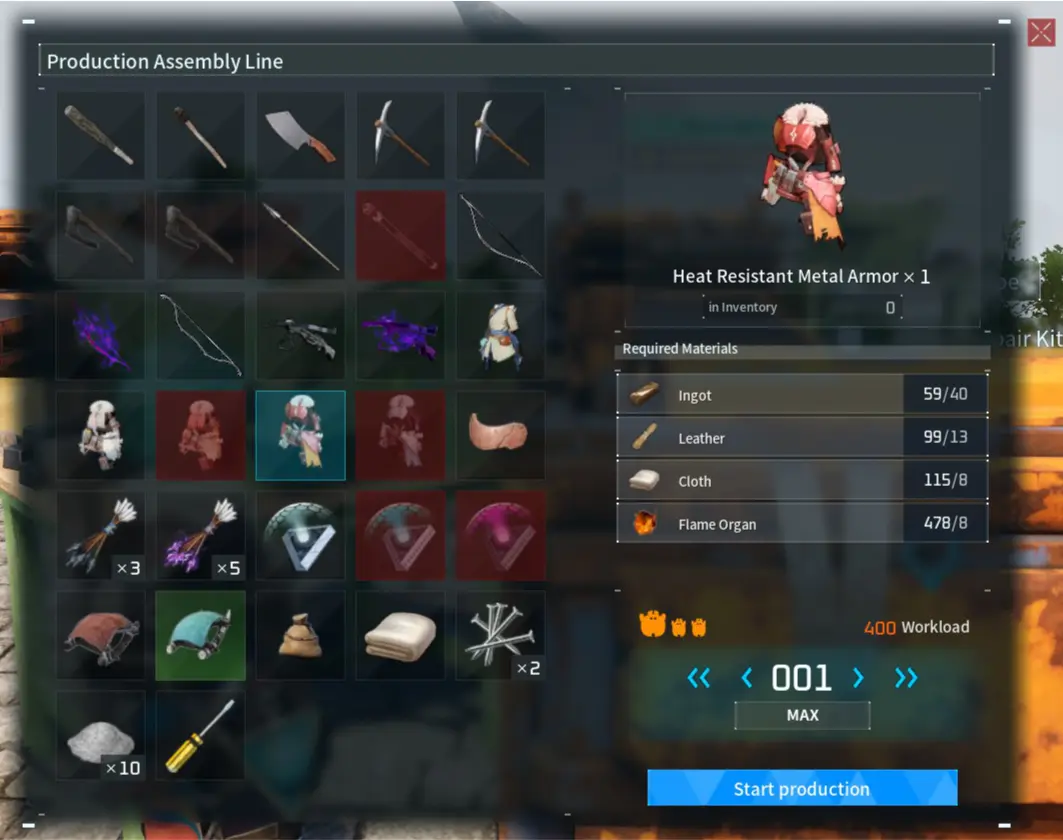
Since we weren’t exploring the cold and hot areas at this time, we just kept leveling up by working on our base and capturing Pals in other areas until we reached level 25 and unlocked Heat Resistant Metal armor and then level 27 for Cold Resistant Metal Armor.

However, items in the Ancient Technology section work differently. Some items cannot be unlocked unless you’ve already learned how to make the lower-tier version of those items. You cannot unlock an Average Feed Bag unless you’ve already learned how to make the Small Feed Bag.
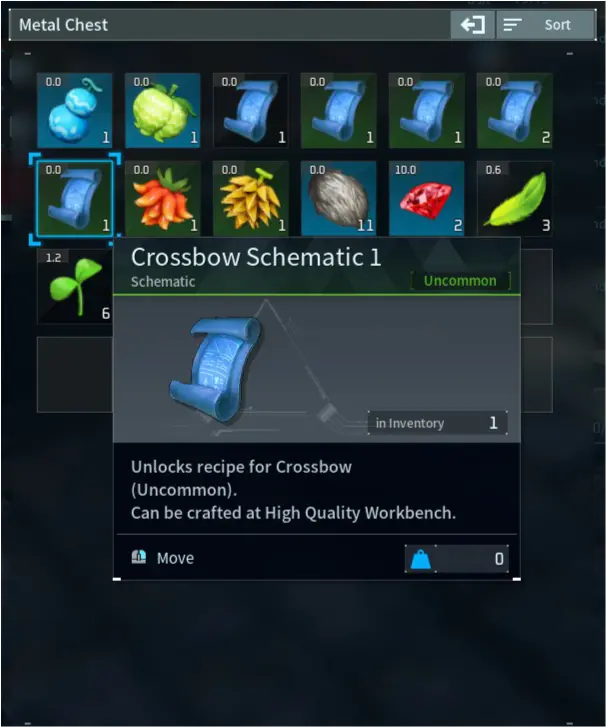
Some items can also be crafted without unlocking the item in the Technology tab if you’ve picked up Schematics. These are obtained from defeating Pals and other enemies or by buying them from the Wandering Merchant. You’ll need to have the Schematic in your inventory whenever you want to craft it. There are also various special equipment that can only be crafted in this manner.
Commonly Used Materials and Ingredients
For all your crafting and building needs, we’ve listed down the most common materials and ingredients you’ll encounter in the game and how to obtain them in alphabetical order. To avoid redundancy, we did not include meats from Pals because their names already state from which Pal they can be obtained. All listed Pals have a 100% drop rate of the item unless stated.
| Material | Dropped by | Harvested From | Wandering Merchant Location | Crafted from | Crafting Station |
| Ancient Civilization Parts | Alpha Bosses, Dungeon Bosses, Lucky Pals | — | — | — | — |
| Beautiful Flower | Special Flower Gumoss, Lyleen, Lyleen Noct, Petallia | — | — | — | — |
| 20%: Wumpo, Wumpo Botan | |||||
| 5%: Ribbuny | |||||
| Berry Seeds | Gumoss, Lifmunk | — | Small Settlement | — | — |
| Bone | Anubis, Bushi, Cawgnito, Dragostrophe, Gorirat, Loupmoon, Maraith, Rushoar, Vanwyrm, Verdash, Vixy | — | Small Settlement, Fisherman’s Point, Duneshelter | — | — |
| Carbon Fiber | Jetragon, Shadowbeak | — | — | Coal, Charcoal | Production Assembly Line I or II |
| Cement | — | — | — | Stone, Bone, Pal Fluids | High Quality Workbench or Production Assembly Line I or II |
| Charcoal | — | — | — | Wood | Primitive, Improved and Electric Furnace |
| Circuit Board | — | — | — | Pure Quartz, Polymer | Production Assembly Line I or II |
| Cloth | Azurobe, Felbat | — | — | Wool | Primitive or High Quality Workbench, or Production Assembly Line I or II |
| Coal | Blazamut, Menasting | Coal Deposits (Dark Gray Rocks) | — | — | — |
| Egg | Chikipi | Chikipi (Ranch) | Small Settlement | — | — |
| Electric Organ | Beakon, Dazzi, Grizzbolt, Jolthog, Mossandra Lux, Orserk, Rayhound, Relaxaurus Lux, Sparkit, Univolt | — | Small Settlement | — | — |
| Fiber | Hangyu, Hangyu Cryst, Hoocrates | Trees | — | Wood | Crusher |
| Flame Organ | Arsox, Blazamut, Blazehowl, Blazehowl Noct, Boltmane, Faleris, Flambelle, Foxparks, Gobfin Ignis, Jormuntide Ignis, Kelpsea Ignis, Kitsun, Leezpunk Ignis, Pyrin, Pyrin Noct, Ragnahawk, Reptyro, Rooby, Suzaku, Wixen; | Flambelle (Ranch) | Small Settlement, Fisherman’s Point | — | — |
| Flour | — | — | — | Wheat | Mill |
| Gunpowder | Tocotoco | — | — | Charcoal, Sulfur | High Quality Workbench, or Production Assembly Line I or II |
| High Quality Cloth | Sibelyx | Sibelyx (Ranch) | — | Wool | High Quality Workbench, or Production Assembly Line I or II |
| High Quality Pal Oil | Digtoise, Dumud, Elphidran, Elphidran Aqua, Flambelle, Grintale, Jormuntide Ignis, Mammorest, Mammorest Cryst, Quivern, Relaxaurus, Relaxaurus Lux, Woolipop | — | Fisherman’s Point, Duneshelter | — | — |
| Honey | Beegarde, Cinnamoth, Elizabee, Warsect | Beegarde (Ranch) | — | — | — |
| Horn | Arsox, Caprity, Eikthyrdeer, Eikthyrdeer Terra, Fenglope, Incineram, Incineram Noct, Reindrix, Univolt | — | Small Settlement, Fisherman’s Point, Duneshelter | — | — |
| Ice Organ | Cryolinx, Foxcicle, Frostallion, Hangyu Cryst, Ice Kingpaca, Ice Reptyro, Jolthog Cryst, Mau Cryst, Pengullet, Penking, Reindrix, Sibelyx, Vanwyrm Cryst, Wumpo, | — | Duneshelter | — | — |
| Ingot | — | — | — | Ore | Primitive or High Quality Workbench, or Production Assembly Line I or II |
| Leather | Chillet, Direhowl, Eikthyrdeer, Eikthyrdeer Terra, Fenglope, Foxparks, Fuack, Fuddler, Galeclaw, Grizzbolt, Gorirat, Incineram, Incineram Noct, Katress, Kitsun, Mammorest, Mammorest Cryst, Melpaca, Mossandra, Mossandra Lux, Nitewing, Nox, Pyrin, Pyrin Noct, Reindrix, Ribbuny, Rooby, Rushoar, Tombat, Univolt, Verdash, Vixy | — | Small Settlement, Fisherman’s Point, Duneshelter | — | — |
| Lettuce | — | Lettuce Plantation | Fisherman’s Point, Duneshelter | — | — |
| Lettuce Seeds | Wumpo Botan | — | Fisherman’s Point, Duneshelter | — | — |
| 50%: Bristla, Broncherry Aqua | |||||
| 20%: Cinnamoth | |||||
| Milk | Mozzarina | Mozzarina (Ranch) | Small Settlement | — | — |
| Mushrooms | Lovander, Mossandra, Mossandra Lux, Tanzee | Forest Ground | — | — | — |
| Nail | — | — | — | Ingot | Primitive or High Quality Workbench, or Production Assembly Line I or II |
| Ore | Digtoise | Ore Deposits (Shiny Rocks with Gray, Red and Brown colors) | — | — | — |
| Pal Fluids | Celaray, Fuack, Gobfin, Jormuntide, Kelpsea, Pengullet, Surfent, Surfent Terra, Suzaku Aqua, Teafant | — | — | — | — |
| Pal Metal Ingot | Astegon, Necromus, Paladius, Shadowbeak | — | — | Ore, Paldium Fragment | Electric Furnace |
| Paldium Fragment | Lunaris | Ground, Paldium Fragment Nodes (Gray Rocks with Blue highlights) | — | — | — |
| Polymer | Jetragon | — | — | High Quality Pal Oil | Production Assembly Line I or II |
| Pure Quartz | Frostallion Noct, Astegon, Jetragon | Pure Quartz Deposits (Light Blue on Dark Gray Rocks) | — | — | — |
| Red Berries | Cattiva, Caprity | Caprity (Ranch), Berry Plantation | Small Settlement | — | — |
| Refined Ingot | — | — | — | Ore, Coal | Improved or Electric Furnace |
| Stone | — | Ground, Stone Clusters (Gray Rocks), Stone Pit | — | — | — |
| Sulfur | — | Sulfur Deposits (Yellow Rocks) | — | — | — |
| Tomato | — | Tomato Plantation | Fisherman’s Point, Duneshelter | — | — |
| Tomato Seeds | Dinossom Lux, Broncherry, Wumpo Botan, Vaelet, Mossandra | — | Fisherman’s Point, Duneshelter | — | — |
| Venom Gland | Cawgnito, Daedream, Depresso, Helzephyr, Killamari, Menasting, | — | Small Settlement | — | — |
| Wheat | — | Wheat Plantation | Small Settlement | — | — |
| Wheat Seeds | Bristla, Dinossom, Flopie | — | Small Settlement | — | — |
| 50%: Robinquill, Robinquill Terra | |||||
| 20%: Cinnamoth | |||||
| Wood | — | Ground, Trees, Logging Site | — | — | — |
| Wool | Lamball, Melpaca, Kingpaca, Ice Kingpaca, Swee, Sweepa, Cremis | Lamball, Melpaca, Cremis (Ranch) | Small Settlement | — | — |
Survival
There are many ways to die in the Palpagos Islands and sometimes it isn’t even battle-related. Being able to recognize danger is essential to survival and each player should know the basics.
Health, Satiety and Sanity

Health and Satiety go hand in hand and their status can be found on the lower left corner of your screen during battle or whenever you switch, call, or release your Pal. It can also be viewed from the inventory screen. The green bar represents your Health while the orange bar represents your Satiety or Hunger.
Health can only be regenerated by waiting for it to naturally fill up, sleeping on your bed, or using your Pal’s healing skill. Medicine that you can craft or purchase from an NPC is used for other things and cannot heal you so don’t be fooled!
Food also cannot heal you but it is one of the most important resources you should always have in your inventory. When your character gets hungry, your Attack, Defense, and Work Speed are affected. If your Hunger meter goes down to 0, it will effectively half all 3 stats and slowly deplete your Health. You and your Pals’ health can be brought down to 1 but Hunger by itself cannot result in death.

Feeding Pals And Replenishing Their Sanity
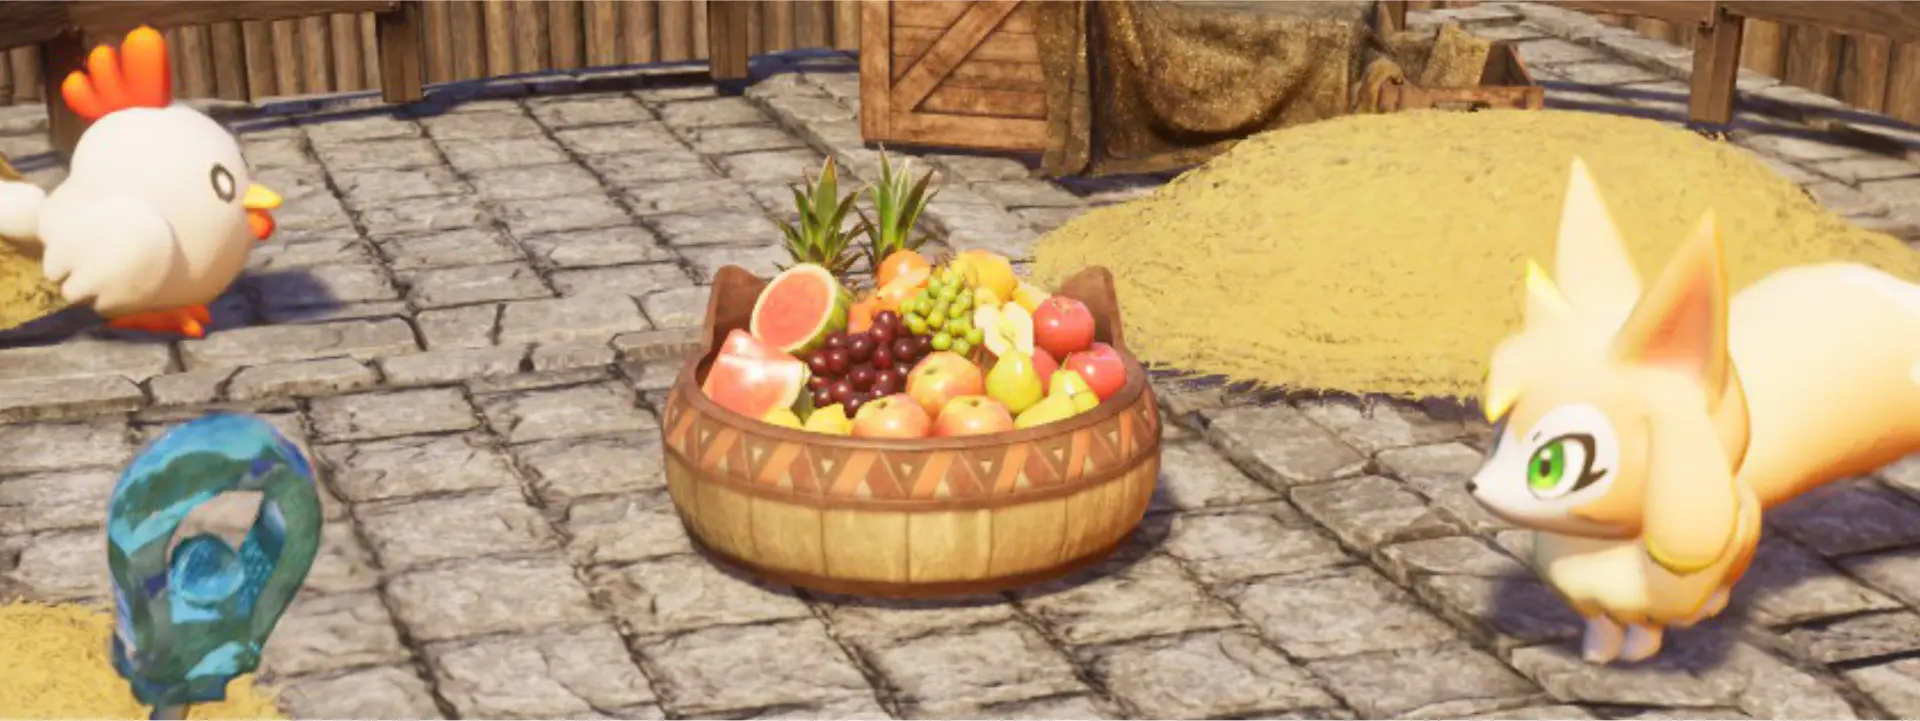
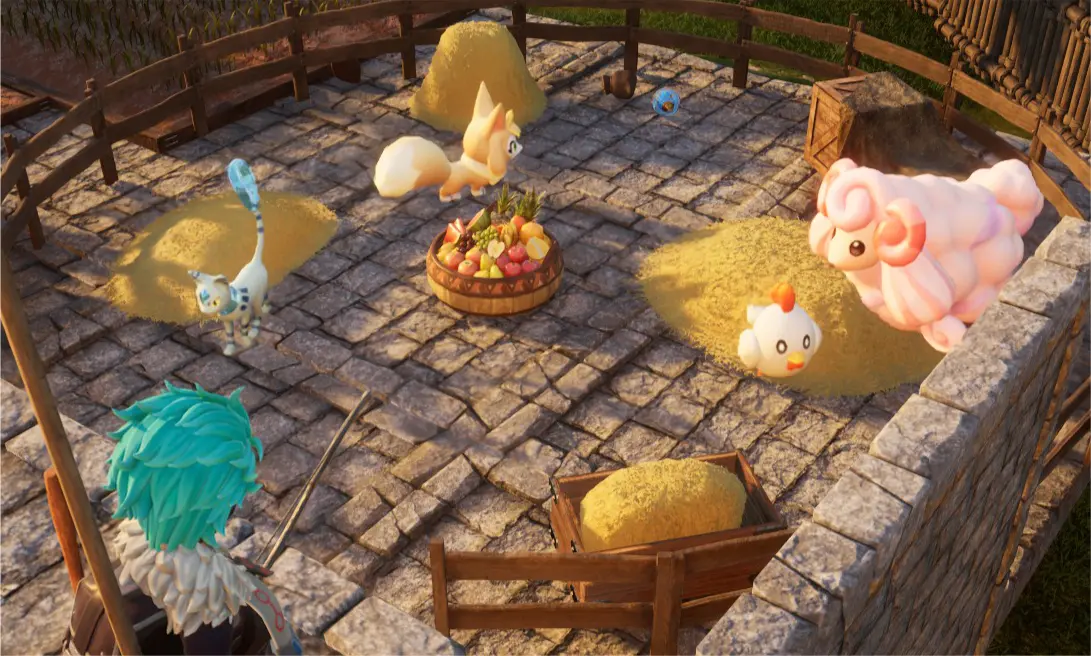
Like real pets, your Pals also need to eat. When they get too hungry and find nothing to eat, their Sanity (SAN) is impacted, affecting their performance. Pals in your base will automatically eat food they find nearby, produce from grazing, or see inside the Feed Box. Apart from the Palbox and the Straw Beds, the Feed Box is the most important structure to build at the start to keep your Pals healthy and happy.
When it comes to the Pals in your party, they will lose more Satiety when they are active and released but won’t lose any when they’re not. You can feed them by using Pal Commands by pressing 4 or RS, but it’s much quicker to feed everyone if you just open your inventory, right click or use RB on a food item and choose your character or a Pal to feed.
Once you’ve unlocked the Small Feed Bag using Ancient Technology Points at level 10, you can put food in the bag slot and it will automatically be consumed by your character and Pals when they need it. Each tier of the Feed Bag that you unlock will open up more slots for additional food items. Wood, Fiber, and Leather are required to make it which is fairly easy to obtain, making it a worthy investment to keep you from starving.
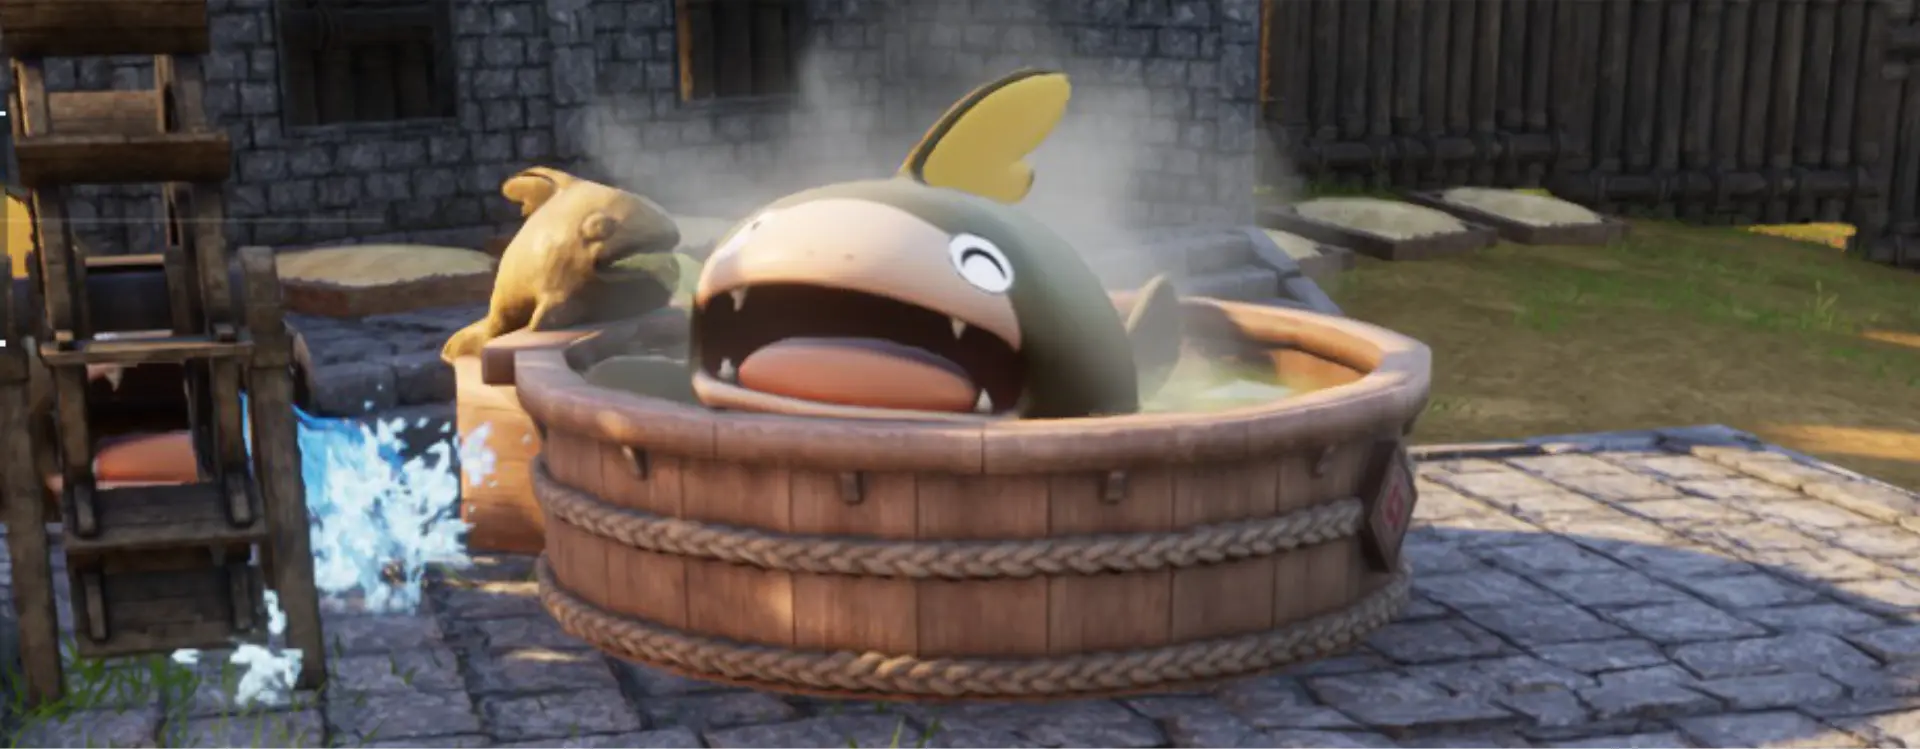
Sanity can also be affected by poor work conditions like not having a bed to sleep on or a Hot Spring to relax in. It’s also important to know that the only food items that can actually recover Sanity are cooked food so make sure to take the extra step to make them or even hunt down some Pals for better food. You can also give them a simple head pat, but that can only raise their SAN by 1 point per pat.
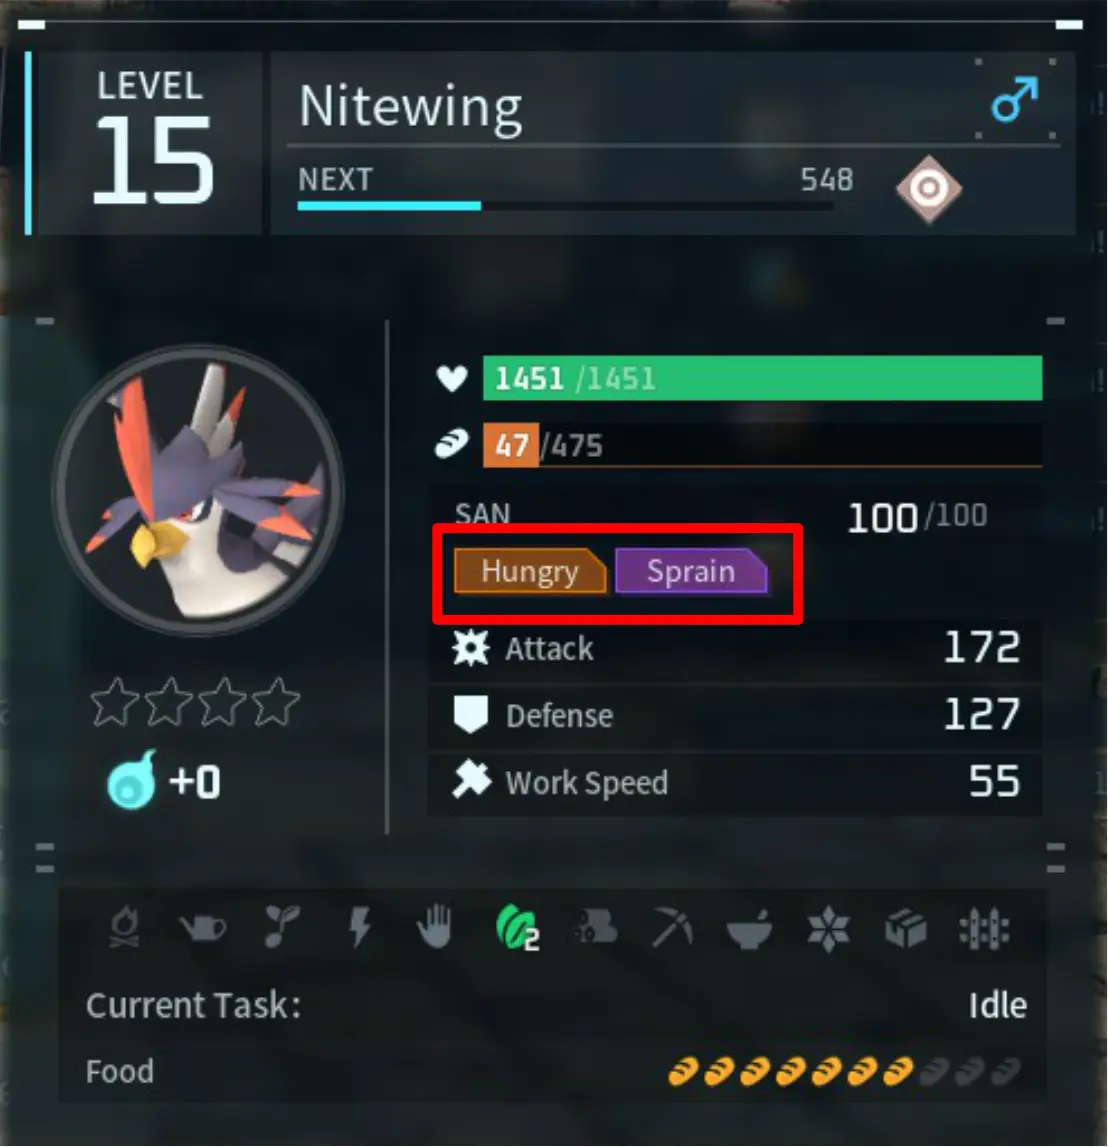
The lower their Sanity, the more unproductive they can get. The stress they gain from it can even result in disastrous effects such as depression and binge eating which can immediately empty out your Feed Box. When this happens, immediately return your Pal to the Palbox where it can recover.
Be warned that while this will recover Sanity and Health, Satiety will stay the same until they are fed. Major and Minor Injuries will heal over time after eating and recovering, but any kind of illness they have that is shown in a purple box will be sustained until they are given Medicine. These illnesses and other status ailments Pals can get will be discussed on part 2 of our Beginner’s Guide.
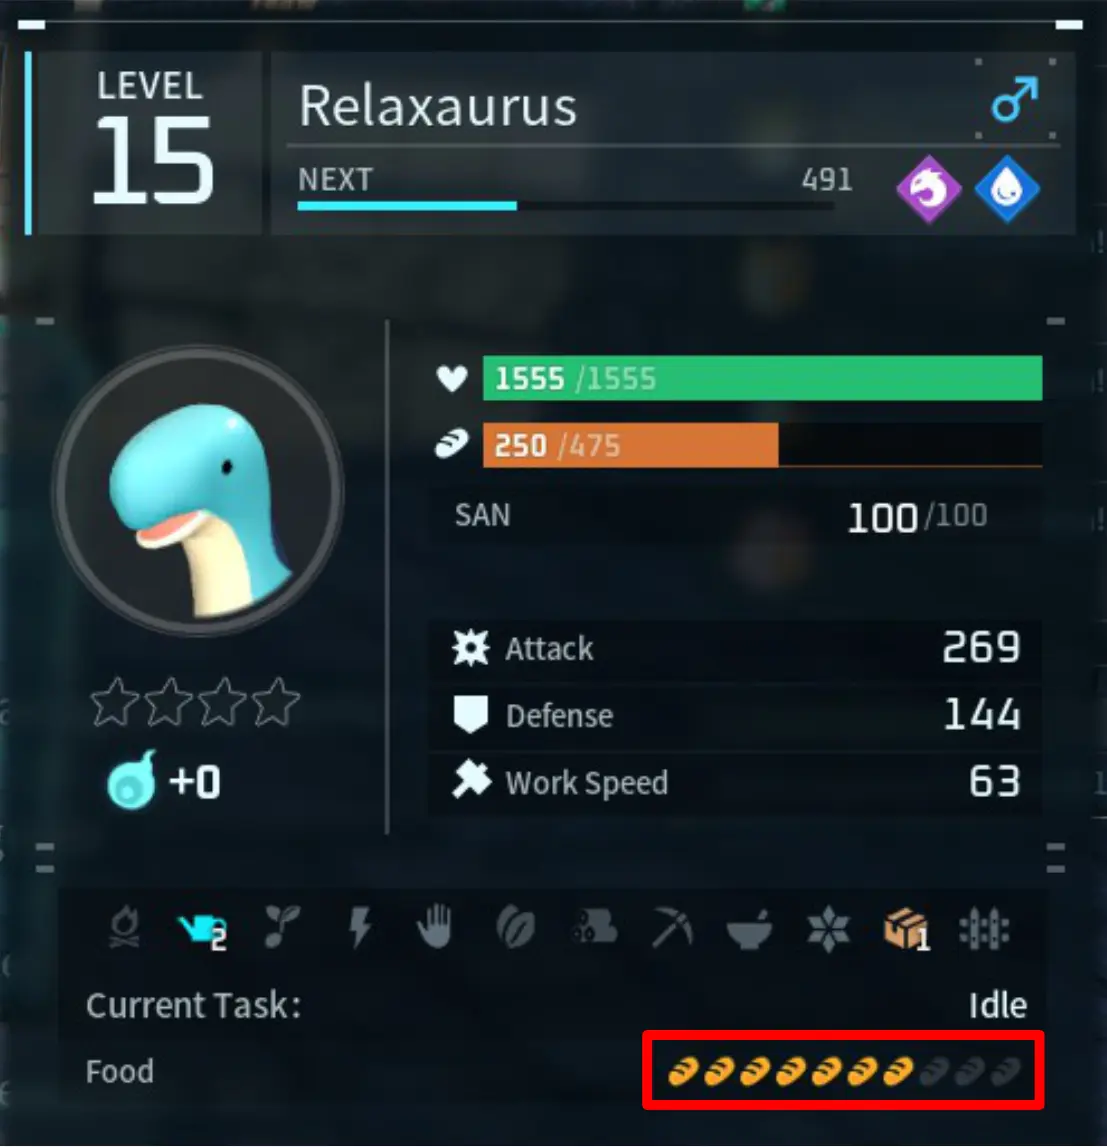
Before you decide on the Pals you want to work on your base or add to your party, keep an eye out on their Satiety level. The more bread icons they have, the more food they require to satiate their hunger. From our observation, the bigger the Pal, the higher their food needs. So if you’re planning to travel with an Alpha Pal or any of the large Pals, make sure to bring some high-quality food to keep them satisfied!
Getting Food

When in a pinch, look for Berries or Mushrooms. They can be found all over the island and are the easiest source of food. But if you want better quality food, you’ll need to hunt down certain Pals. Defeating a Pal will make it drop their own meat, but not all Pals can be turned into food.
At level 12, you can unlock the Meat Cleaver item which you can use to butcher any Pal you’ve already captured. This is a resourceful way to get rid of your weaker Pals or Pals with terrible Passives. Just make sure that the Pal you’re massacring actually has edible meat!
You can also make your own farms that your Pals can work in that will allow you to produce food as you work on your base or go off on your adventures. Below are some farms you can make in your early levels:
| Structures | Required Level | Technology Points | Materials | General Use | User & Work Suitability |
| Berry Plantation | 5 | 1 | 3 Berry Seeds | Grows Red Berries. | Player, Pals (Planting, Watering, Gathering) |
| 20 Wood | |||||
| 20 Stone | |||||
| Ranch | 5 | 2 | 30 Fiber | Pals assigned here produce food ingredients or find items. | Pals (Farming) |
| 50 Wood | |||||
| 20 Stone | |||||
| Wheat Plantation | 15 | 1 | 3 Wheat Seeds | Grows Wheat used to create Flour using the Mill. | Player, Pals (Planting, Watering, Gathering) |
| 35 Wood | |||||
| 35 Stone | |||||
| Breeding Farm | 19 | 2 | 50 Fiber | Breeds Pals. | Assign 2 Pals to work on it by throwing them into the Breeding Farm. Must have 1 Male, 1 Female and a Cake deposited at the box next to it. |
| 100 Wood | |||||
| 20 Stone |
Breeding Farms are primarily for producing new Pals to fill up your Paldeck or team, but they could also be for producing Pals that you can butcher with a Meat Cleaver. However, as tempting as it may be to breed as many Chikipis as your heart desires, Cakes need to be made and used at these farms to produce a Pal Egg.
Cakes are made up of so many ingredients and the workload and time it takes to make them does not make it worth it to spend on breeding Pals for food at early levels unless they are high quality, rare, or difficult to get meat like Mammorest Meat.
But don’t be so hasty to chow down! Cooked food not only fills up your character and Pals’ stomachs more than raw food, they can also boost your Pals’ sanity. If you’re wondering about each Pal’s dietary needs, it’s nothing you need to worry about. As long as it’s food, they will eat it! Even if it’s their own kind!
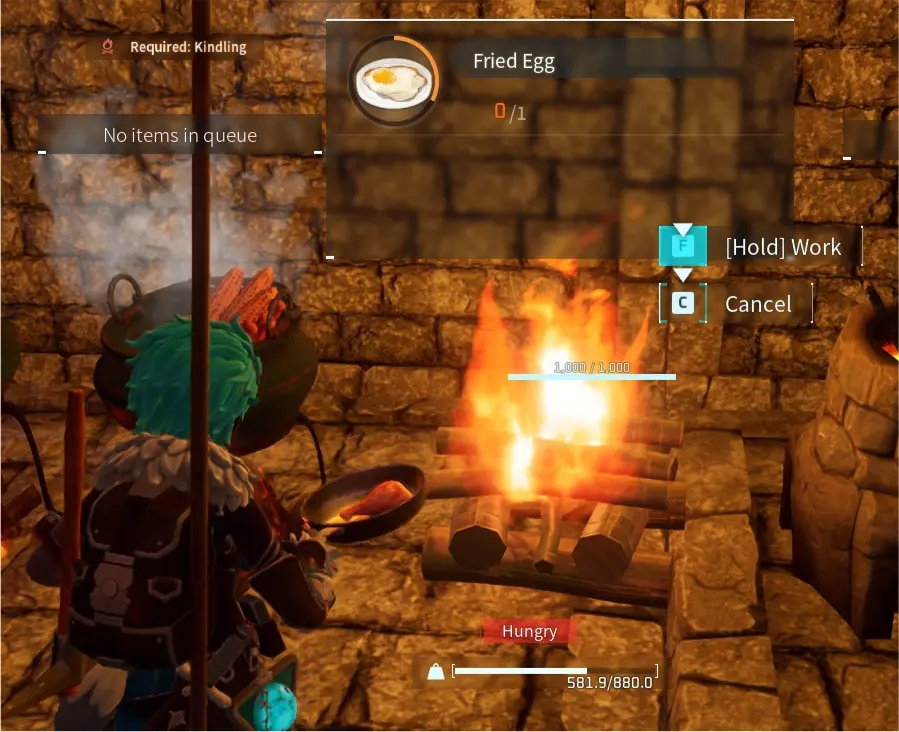
In your first 20 levels, you can unlock the Campfire and the Cooking Pot for cooking food.
| Structures | Required Level | Technology Points | Materials | General Use | User & Work Suitability |
| Campfire | 2 | 1 | 10 Wood | Lights and warms up the area. Cooks simple food. | Player, Pals (Kindling) |
| Cooking Pot | 17 | 2 | 3 Flame Organ | Cooks more complex recipes. | Player, Pals (Kindling) |
| 20 Wood | |||||
| 15 Ingot |
There are 17 food items that can be cooked over a campfire:
| Food Item | Satiety | Weight | Cooked Food | Satiety | Sanity | Weight |
| Red Berries | 15 | 0.2 | Baked Berries | 21 | 1 | 0.15 |
| Mushrooms | 13 | 1 | Baked Mushroom | 18 | 1 | 1 |
| Wheat | 6 | 0.2 | Bread | 27 | 4 | 0.3 |
| Egg | 16 | 0.5 | Fried Egg | 23 | 1 | 0.5 |
| Milk | 12 | 1.5 | Hot Milk | 16 | 1 | 1.5 |
| Chikipi Poultry | 36 | 1 | Grilled Chikipi | 50 | 1 | 1 |
| Lamball Mutton | 37 | 1 | Lamball Kebab | 52 | 1 | 1 |
| Raw Kelpsea | 36 | 1 | Grilled Kelpsea | 50 | 1 | 1 |
| Galeclaw Poultry | 36 | 1 | Grilled Galeclaw | 50 | 1 | 1 |
| Rushoar Pork | 43 | 2 | Roast Rushoar | 60 | 1 | 2 |
| Raw Dumud | 50 | 2 | Broiled Dumud | 70 | 1 | 2 |
| Eikthyrdeer Venison | 50 | 2 | Roast Eikthyrdeer | 70 | 1 | 2 |
| Reindrix Venison | 64 | 2 | Roast Reindrix | 252 | 1 | 2 |
| Caprity Meat | 57 | 2.5 | Herb Roasted Caprity | 80 | 1 | 2.5 |
| Mozzarina Meat | 57 | 2.5 | Mozzarina Steak | 80 | 1 | 2.5 |
| Broncherry Meat | 180 | 5 | Broncherry Rib Roast | 252 | 3 | 5 |
| Mammorest Meat | 180 | 5 | Mammorest Steak | 252 | 3 | 5 |
Among all of these food items, Bread is the one that requires the most steps to produce. It requires you to buy Wheat Seeds from Traveling Merchants for 100 Gold each or obtain them by hunting Dinossom, Robinquill, Cinnamoth, Flopie, or Bristla. Then, you’ll need to build a Wheat Plantation to plant them which is unlocked at level 15.
After harvesting Wheat, you’ll need to use a Mill, which is also unlocked at level 15, to turn it into Flour. A Water Pal is needed to activate it. Once you obtain Flour, you can bake it into Bread. As tedious as it is, it’s worth the effort because it does give the highest amount of Sanity among all the food items that you can make at a Campfire and also weighs the least.

The Cooking Pot can make everything the Campfire can plus 11 more complex recipes that require various ingredients. These food items may be more difficult to make, but they have special uses or additional effects that can temporarily improve your stats. One thing we noticed when it came to these dishes is that they all weighed 0.5, with the exception of Salad which only weighed 0.3. This makes them ideal to bring during adventures.
| Cooked Food | Satiety | Sanity | Temporary Effect | Ingredients |
| Cake | 60 | 7 | None. Used for Breeding at Breeding Farms. | 5 Flour |
| 8 Red Berries | ||||
| 7 Milk | ||||
| 8 Egg | ||||
| 2 Honey | ||||
| Salad | 84 | 11 | Increases Work Speed | 2 Lettuce |
| 2 Tomato | ||||
| Omelet | 67 | 7 | +10% Attack | 2 Egg |
| 1 Tomato | ||||
| Marinated Mushrooms | 60 | 7 | +10% Defense | 1 Mushroom |
| 2 Red Berries | ||||
| Mushroom Soup | 52 | 7 | Slows Satiety Decrease | 1 Mushroom |
| 2 Milk | ||||
| Chikipi Sauté | 92 | 12 | Increases Work Speed | 1 Chikipi Poultry |
| 2 Red Berries | ||||
| Herb Roasted Lamball | 94 | 12 | +10% Defense | 1 Lamball Mutton |
| 2 Red Berries | ||||
| Grilled Lamball | 147 | 18 | Increases Work Speed and slows Sanity Decrease | 1 Lamball Mutton |
| 2 Lettuce | ||||
| Stewed Galeclaw | 92 | 12 | Slows Sanity Decrease | 1 Galeclaw Poultry |
| 2 Red Berries | ||||
| Rushoar Bacon ‘n’ Eggs | 167 | 21 | +10% Attack | 2 Rushoar Pork |
| 2 Egg | ||||
| Reindrix Stew | 132 | 17 | Slows Satiety Decrease | 1 Reindrix Venison |
| 2 Tomato |
Food Rot and Preservation
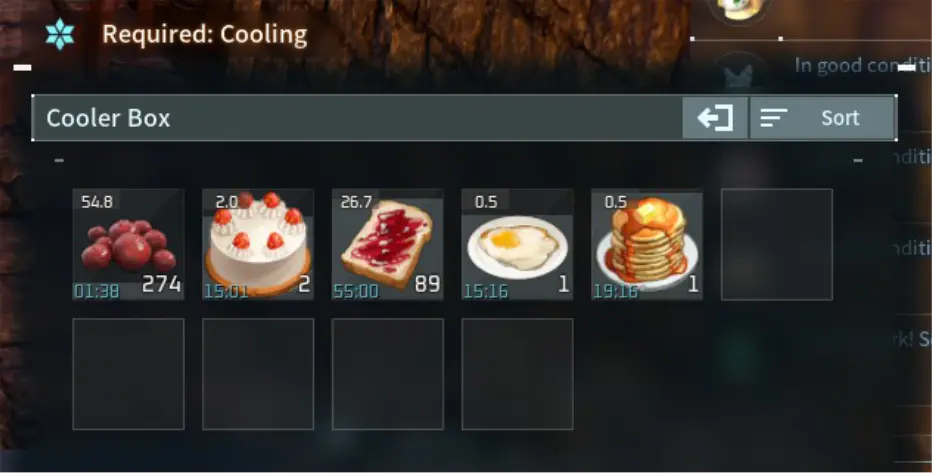
Food in Palworld can rot with time and will vanish once they’ve spoiled. The duration of their freshness can be seen on the time ticking on the lower left side of a food item’s icon. To preserve food, you’ll need to craft a Cooler Box or Refrigerator and assign an Ice Pal to cool it regularly.
| Food Storage | Level Required | Technology Points | Materials | Storage Slots |
| Cooler Box | 13 | 2 | 5 Ice Organ | 10 |
| 20 Stone | ||||
| 20 Ingot | ||||
| Refrigerator | 38 | 2 | 15 Ice Organ | 25 |
| 20 Polymer | ||||
| 50 Refined Ingot | ||||
| 5 Circuit Board |
Another way to make your Food last longer, specifically cooked food, is to keep it on your cooking stations until you need to use it. This is especially important when it comes to cakes since they take a long time to make and can expire in just 20 minutes.
We recommend not making more than 3 per Breeding Farm since Pals also take time to breed. You may also want to split up the number of food you make into different cooking stations so that you don’t take a large amount only to see them expire because you weren’t able to use them immediately.
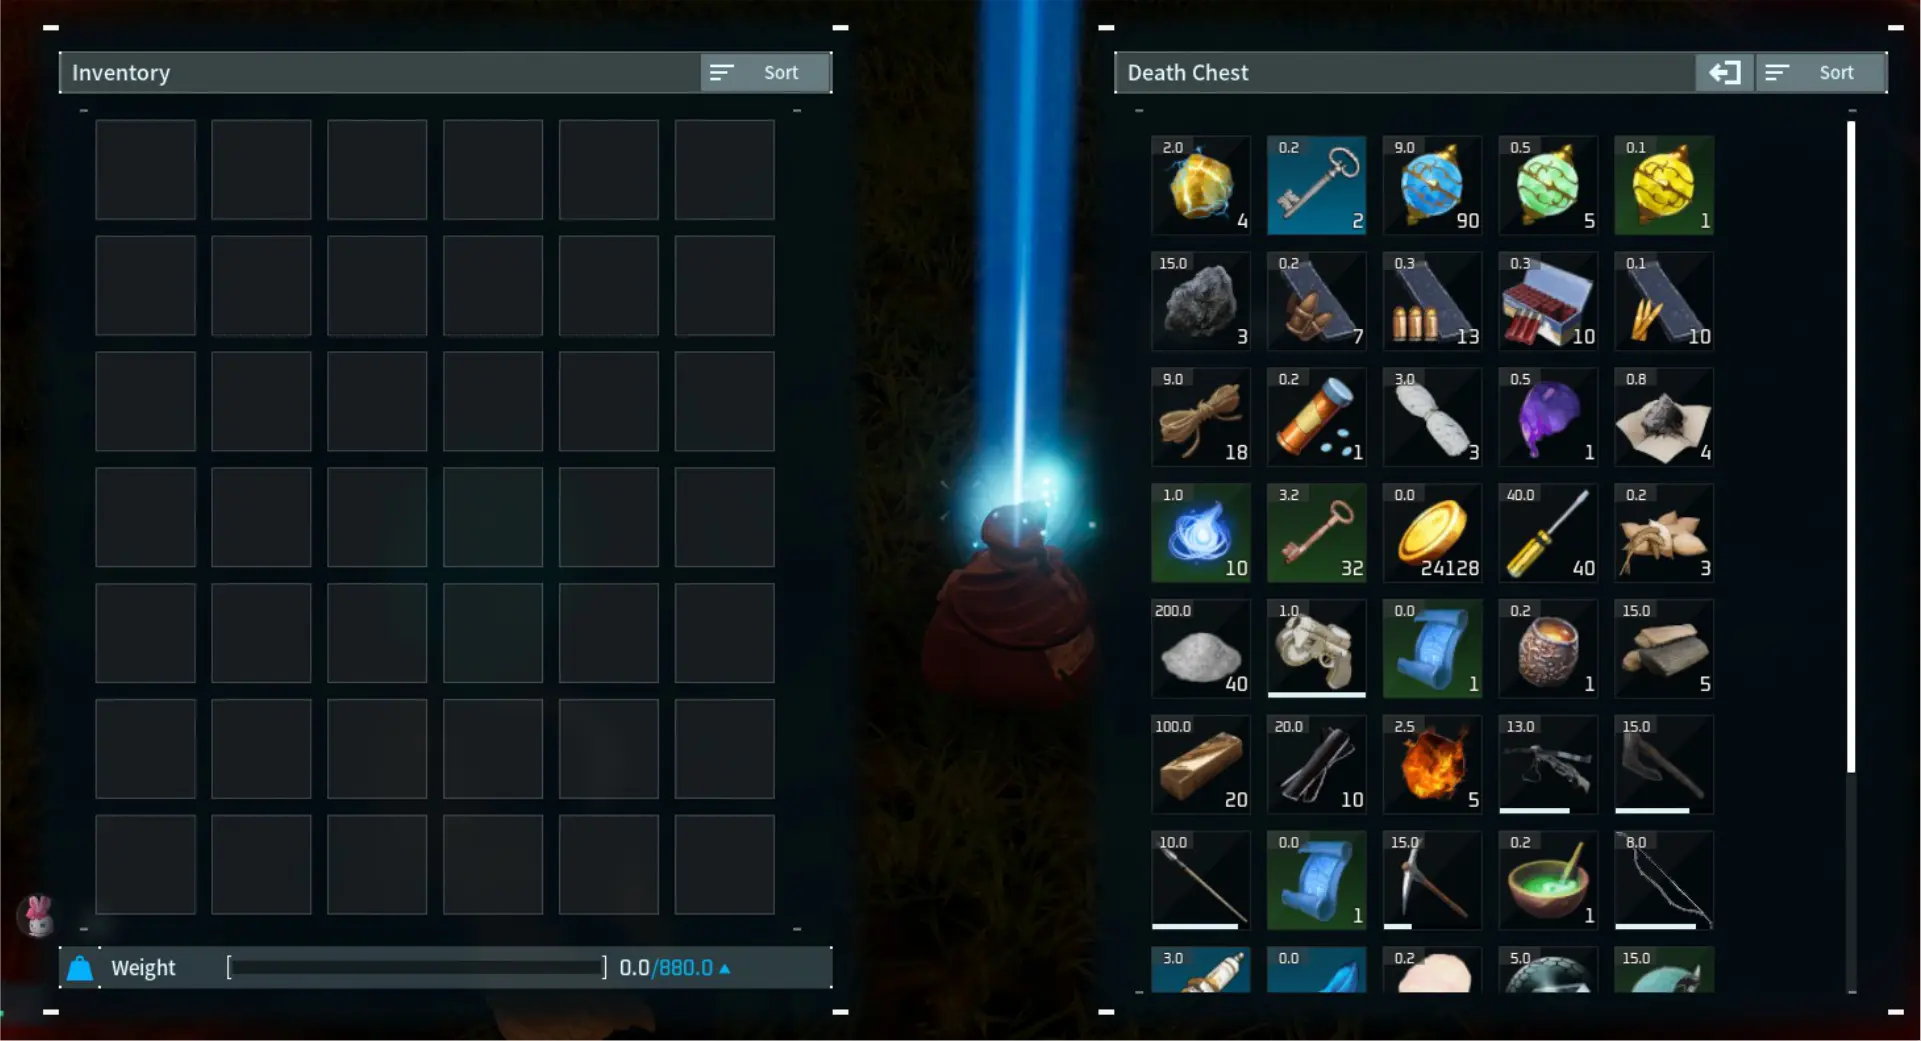
One unorthodox way we’ve discovered to keep food from rotting is by storing it in your Death Chest. This is the small sack that you leave behind every time your character dies. Any food that’s kept in this sack will have its rot timer frozen.
As long as you leave one item behind, it will stay in your world indefinitely. We do want to make it clear that this is a little trick that currently works at the time of writing this article and the way it functions may be changed in the future since it is not naturally created for this purpose.
Temperature Control

In Palworld, getting too cold or too hot can gradually eat up your character’s Health, so knowing how to regulate your body’s Temperature is a must for all occasions. Fortunately, your Pals will not be affected by this so you can rest easy knowing your Pals can tough out any weather condition. Aside from Ice and Fire attacks during battle, Temperature is primarily affected by the time of day, and the area’s climate.
Dealing with the Cold
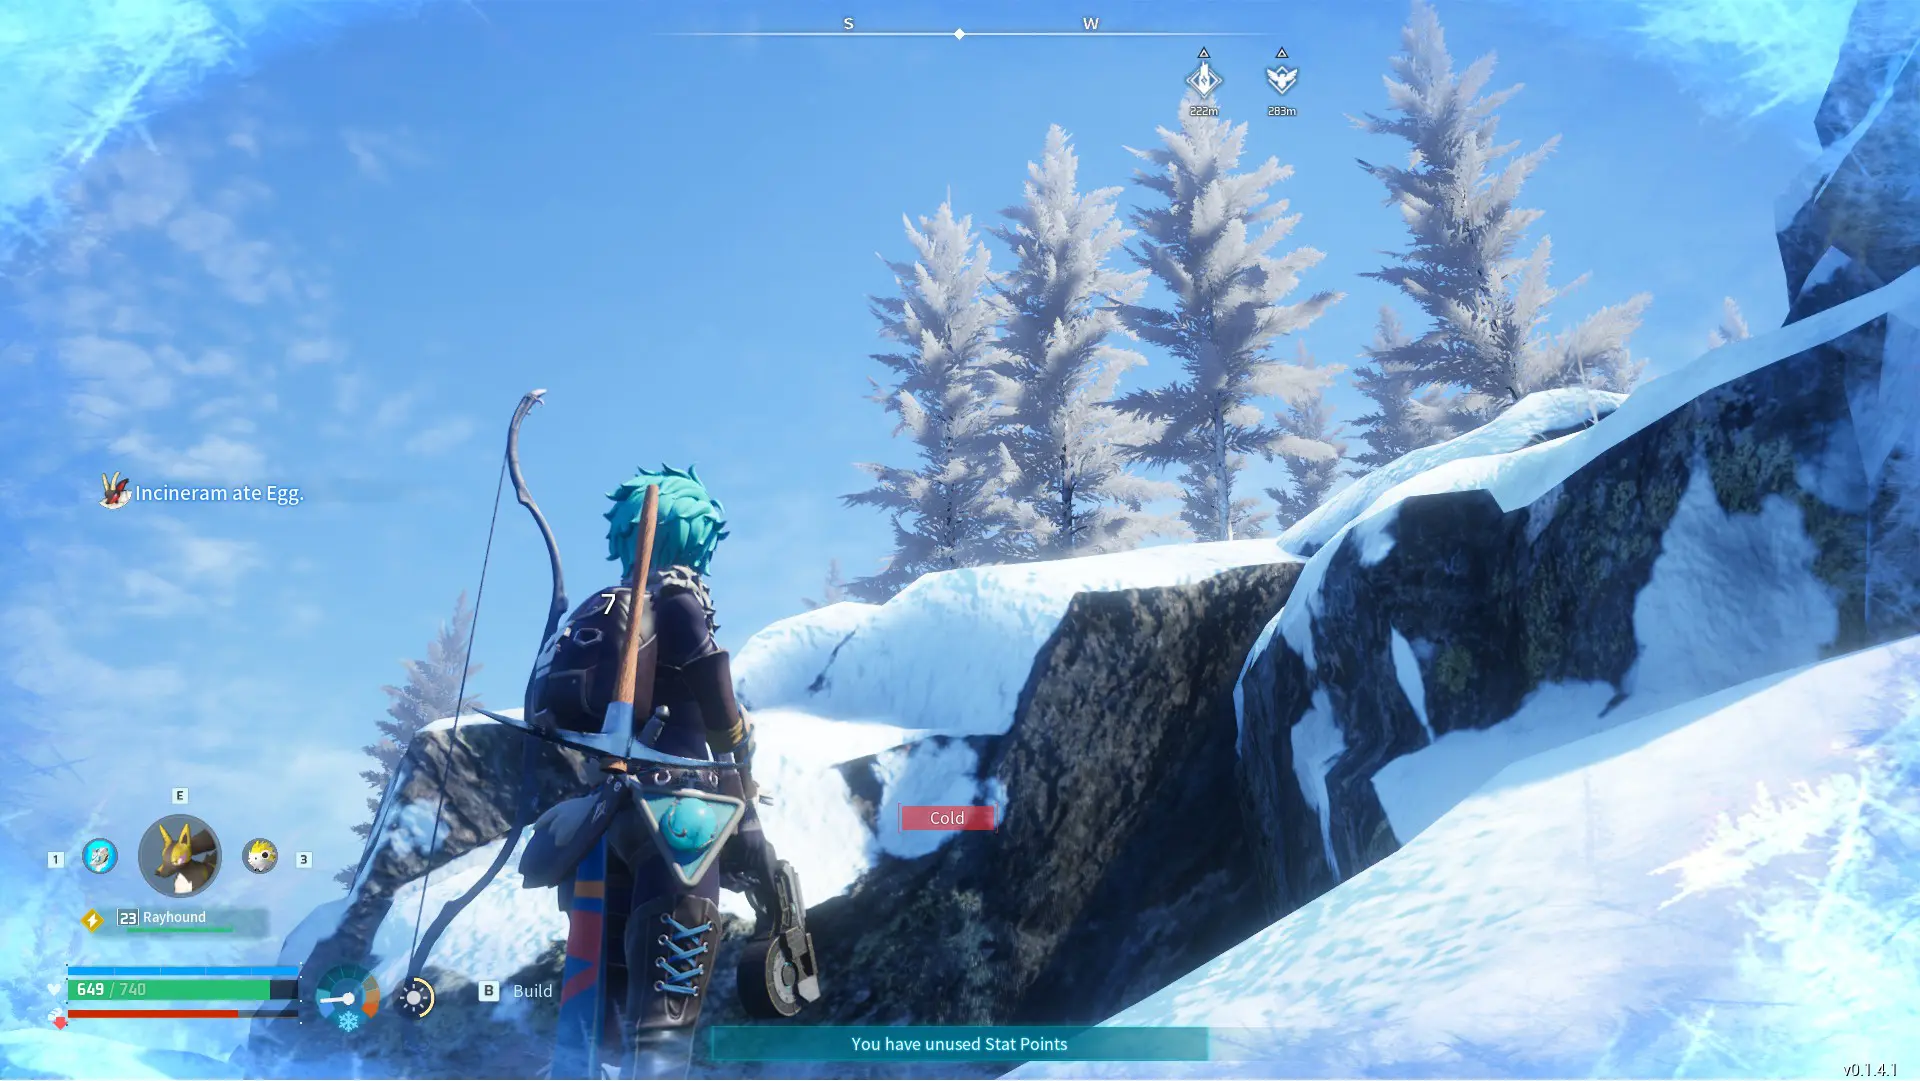
During the night, not only will more dangerous Pals be roaming the land, but the air gets colder as the sun sets and the light disappears. It’s never a good idea to travel at night unless you are fully equipped with a torch or a Pal that can light up the way while keeping you warm. However, when you’re just starting out, we recommend taking your time building up your base and your lively gang of Pals as you focus on doing activities during the day and go to sleep on a bed at night.
However, these nightly slumbers would not help much if you are traveling in cold areas like high-rise mountains or snowy Tundras. In these cases, you’ll need more than a torch and a warm Pal to get through the cold. You’ll need to equip yourself with proper armor.
In your first 20 levels, you’ll be able to make 4 types of armor to protect you from the cold:
| Armor | Level Required | Technology Points | Materials | Workbench | Defense | HP | Durability | Weight | Effects |
| Cloth Outfit | 4 | 2 | 2 Cloth | Primitive Workbench | 15 | 70 | 150 | 4 | Lv.1 Cold Resistant |
| Tundra Outfit | 9 | 3 | 3 Cloth | Primitive Workbench | 25 | 70 | 150 | 4 | Lv.2 Cold Resistant |
| 2 Ice Organ | |||||||||
| Pelt Armor | 12 | 2 | 10 Leather | High Quality Workbench | 35 | 140 | 300 | 10 | Lv.1 Cold Resistant |
| Cold Resistant Pelt Armor | 18 | 3 | 15 Leather | High Quality Workbench | 45 | 140 | 300 | 10 | Lv.2 Cold Resistant |
| 4 Ice Organ |
Dealing with the Heat
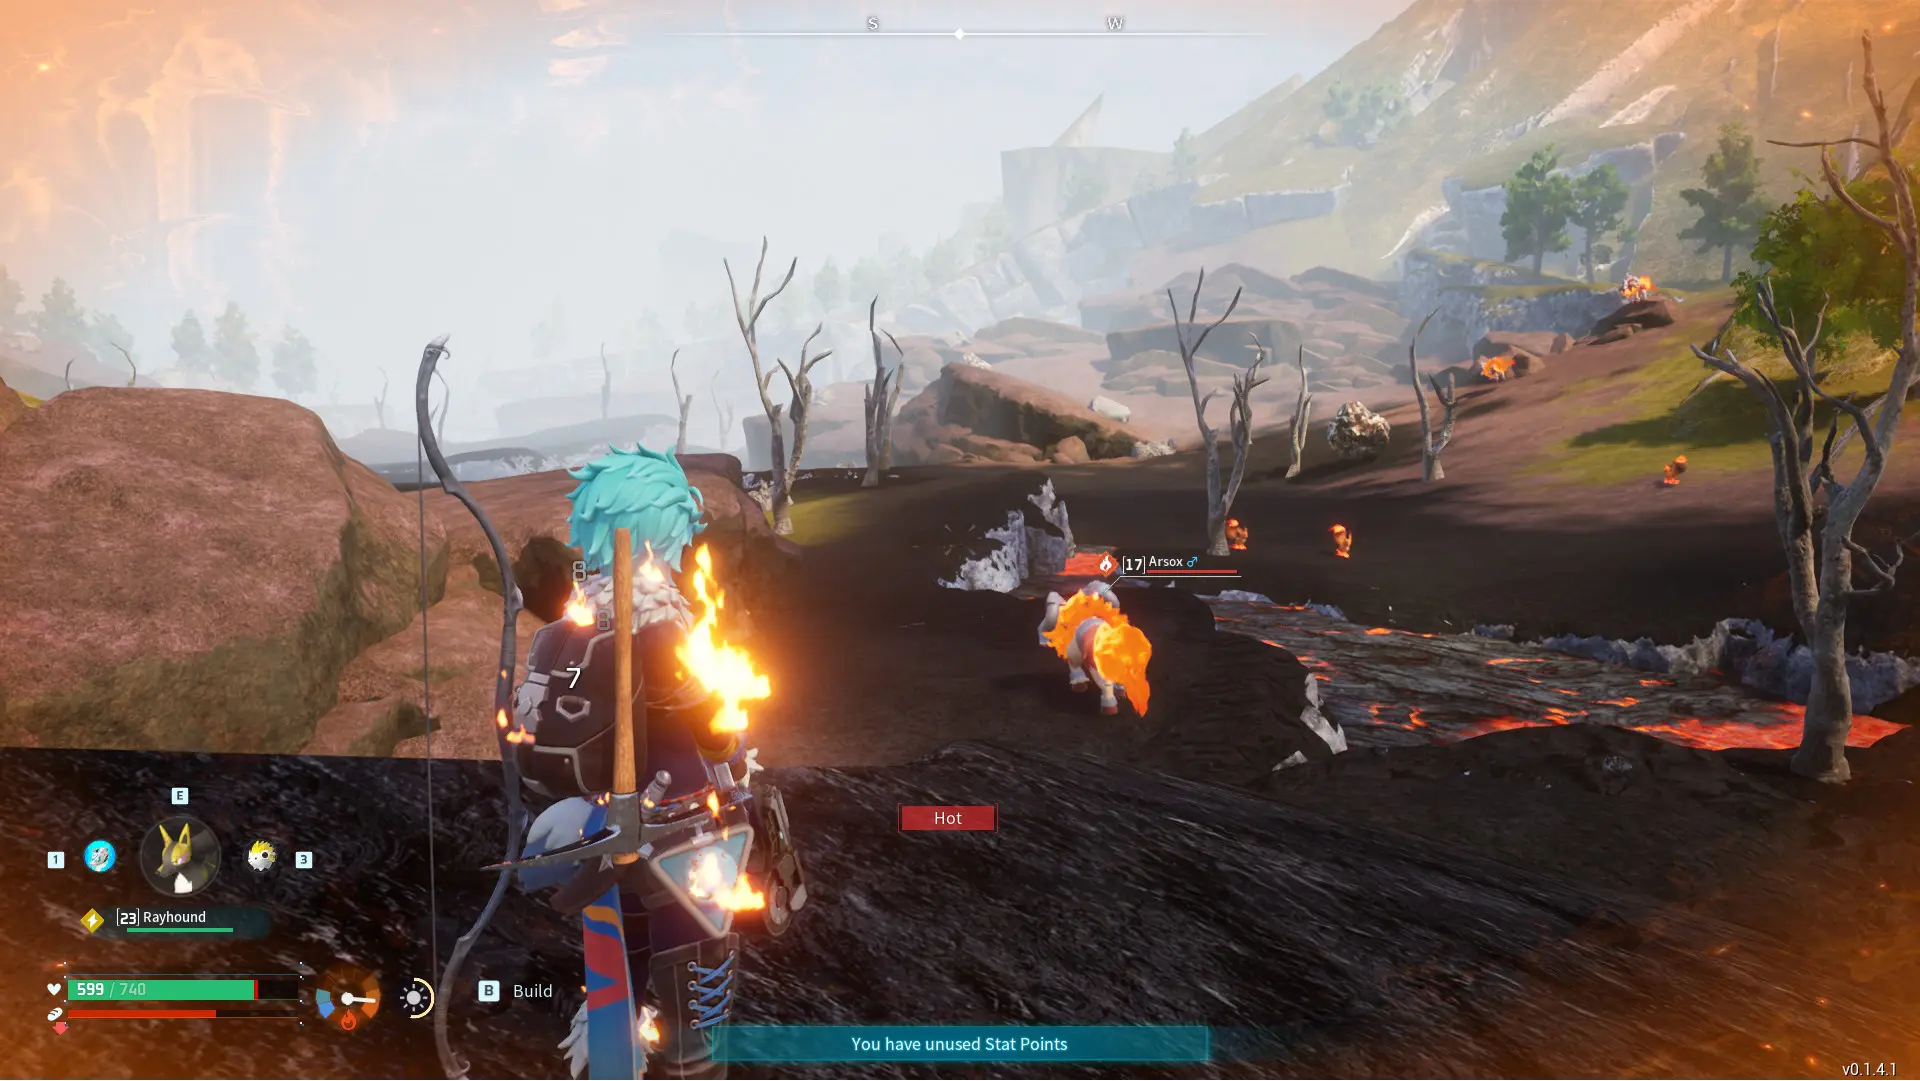
The heat is just as dangerous as the cold in the Palpagos Islands and you’ll need to be just as prepared to deal with it, especially when traveling to certain areas like Sand Dunes or Mount Obsidian. If there are armor for the cold, there are also some designed to beat the heat. There are two types of heat-resistant armor that you can make in your first 20 levels:
| Armor | Level Required | Technology Points | Materials | Workbench | Defense | HP | Durability | Weight | Effects |
| Tropical Outfit | 9 | 3 | 3 Cloth | Primitive Workbench | 25 | 70 | 150 | 4 | Lv.2 Heat Resistant |
| 2 Flame Organ | |||||||||
| Heat Resistant Pelt Armor | 16 | 3 | 15 Leather | High Quality Workbench | 45 | 140 | 300 | 10 | Lv.2 Heat Resistant |
| 4 Flame Organ |
Just like how Fire Pals can help with the cold, Ice Pals can effectively cool you during the heat so be sure to have one in your party when traveling, especially if you’re planning to explore the game without looking up a full map. You’ll never know when you’ll need them!
If by chance you stumble upon one of the hot zones without any heat-resistant equipment and can’t get back to your base to prepare for it, one thing you can do is explore the area during the night. The night can still be a little chilly, but as long as you have even just the Cloth Outfit and a Fire Pal, you’ll be alright.
Other Protective Measures
As an extra layer of protection, make sure to craft yourself a shield. When the cold hits or the heat breaks, the shield can take the initial damage while you find yourself a safer spot to rest, summon the appropriate Pal type, or take out your torch. Below are the shields you can create in your early levels:
| Shield | Level | Technology Points | Materials | Workbench | Shield Points | Durability | Weight |
| Common Shield | 4 | 2 | 10 Fiber | Primitive Workbench | 100 | 1000 | 5 |
| 20 Wood | |||||||
| 20 Stone | |||||||
| 10 Paldium Fragment | |||||||
| Mega Shield | 16 | 2 | 30 Paldium Fragment | High Quality Workbench | 260 | 1500 | 5 |
| 5 Ancient Civilization Parts |
All of these items are easy to obtain from nature except for the Ancient Civilization Parts which can only be obtained by defeating an Alpha Boss Pal. You can find these Pals inside Dungeons or just roaming all over the Palpagos Islands. Once you’ve crossed their path, their icon will automatically be marked on your map for future reference.
Stamina and Travel

Stamina is measured by a gauge that appears whenever you’re doing certain activities like running, dodging, mining, swimming, and so on. While running out of Stamina will normally not negatively affect your health, it can be dangerous in two specific circumstances: swimming in water, and climbing high up.
Once you step foot in the water and assume a swimming position (feet not touching the ground), your Stamina will start decreasing even if you’re just staying in one spot. If you increase your speed by pressing Shift or LS, your Stamina will lower even faster. Once your Stamina is fully depleted, your Health bar is next, gradually lowering until you successfully exit the water or until your character meets their demise.
When it comes to climbing high mountains, rocks, or structures, the minute your Stamina hits zero, your character will stop climbing and just fall until they land on something. You might be able to survive if the distance is not too high or if there’s a small cliff or rock that breaks your fall, but if you were ambitious enough to climb those really tall rocks, you might not be so lucky.
As a general rule, you need to be strategic when choosing how to travel such long distances. Before you get in the water, it’s better to have a specific destination in mind, preferably somewhere your eyes can see instead of a random direction. Swimming small distances between pieces of land and resting in between will be much safer than traversing a large mass of water.
The same can be said of climbing. If you can find cliffs and flat surfaces, direct your character there so they would have a chance to rest and regain Stamina. Still, even with this strategy, it’s unavoidable to find areas that are just impossible to explore can’t because of the limits of this stat. You can increase your Stamina bit by bit as you level up but sometimes even that’s not enough. In these cases, you’ll need the help of Gliders and Mounts.
Gliders
Gliders come in two forms: craftable equipment and Pals equipped for gliding.
For the craftable equipment, there are two you can make in your first 20 levels:
| Glider | Level Required | Technology Points | Workbench | Materials | Weight |
| Normal Parachute | 5 | 2 | Primitive Workbench | 10 Wood | 10 |
| 1 Cloth | |||||
| Mega Glider | 18 | 2 | High Quality Workbench | 50 Wood | 15 |
| 10 Bone | |||||
| 20 Cloth |
For the Glider Pals, you’ll need to craft special equipment for them in order to use them as Gliders. This is where the Pal Gear Workbench comes in. This workbench can be unlocked at level 6 and requires 30 Wood, 10 Paldium Fragments, and 2 Cloth to create. Once you’ve crafted the necessary equipment for the Pal that you’ll be using, you won’t need to recreate it again if you want to use a different Pal of the same species. This is also true for any Pal Mounts.
Celaray and Killamari are the first two Glider Pals you can obtain. Between the two of them, Celaray seems to be much faster.
| Glider Pal | Equipment | Level Required | Technology Points | Materials |
| Celaray | Celaray’s Gloves | 7 | 1 | 3 Pal Fluids |
| 5 Paldium Fragment | ||||
| 5 Cloth | ||||
| Killamari | Killamari’s Gloves | 9 | 1 | 5 Venom Gland |
| 10 Paldium Fragment | ||||
| 5 Cloth |
Once you’ve equipped your Glider or added your Glider Pal to your party, you can freely jump from high places without worry of falling flat to your death. Of course, you’ll still have to activate your Glider with Spacebar or A! But this won’t only be useful when climbing.
Once you get to an elevated area, you can glide down, getting as much distance from the island as you can before you reach the water and start swimming. This way, you won’t need to swim as far to your destination. While gliding, you and your Pals cannot do any other action until you land.
Mounts
There are 3 types of mounts that Pals can fall into: Ground Mounts, Flying Mounts, and Swimming Mounts. These mounts will have their own Stamina bar apart from yours. This means that if your mount ends up emptying its Stamina, you can dismount and continue your travels. This can effectively increase the distance you cover when swimming but may not be as effective when it comes to climbing unless it’s a path that your Ground Mount can jump on or unless you’re using a Flying Mount.
One thing you can count on when riding a mount is the fact that your character and Pal won’t take any fall damage no matter how high the fall is. And unlike Gliders, you can interact with items, attack and command your Pal to use their skills as you ride.
| Mount Pal | Equipment | Level Required | Technology Points | Materials |
| Rushoar | Rushoar Saddle | 6 | 1 | 3 Leather |
| 10 Stone | ||||
| 5 Paldium Fragment | ||||
| Melpaca | Melpaca Saddle | 7 | 1 | 3 Leather |
| 5 Wool | ||||
| 5 Paldium Fragment | ||||
| Direhowl | Direhowl’s Saddled Harness | 9 | 1 | 10 Leather |
| 15 Fiber | ||||
| 20 Wood | ||||
| 10 Paldium Fragment | ||||
| Eikthyrdeer | Eikthyrdeer Saddle | 12 | 2 | 5 Leather |
| 20 Fiber | ||||
| 3 Horn | ||||
| 10 Ingot | ||||
| 15 Paldium Fragment |
Flying Mounts

These mounts can soar through the open skies and bring you to high peaks with ease. Unlike Ground Mounts, there aren’t that many Flying Mounts available below level 20 except for Nitewing so we’ve also added Vanwyrm whose Pal Gear can be unlocked at 21.
| Mount Pal | Equipment | Level Required | Technology Points | Materials |
| Nitewing | Nitewing Saddle | 15 | 2 | 20 Leather |
| 20 Fiber | ||||
| 15 Ingot | ||||
| 20 Paldium Fragment | ||||
| 10 Cloth | ||||
| Vanwyrm | Vanwyrm Saddle | 21 | 2 | 20 Leather |
| 30 Fiber | ||||
| 10 Flame Organ | ||||
| 15 Ingot | ||||
| 20 Paldium Fragment |
Swimming Mounts

These mounts are the rarest type of all with only 3 species currently available in the game as of writing this article. One of them can be ridden as early as level 10.
| Mount Pal | Equipment | Level Required | Technology Points | Materials |
| Surfent | Surfent Saddle | 10 | 1 | 5 Leather |
| 5 Pal Fluids | ||||
| 10 Paldium Fragment |
Other Stamina-Saving Tricks
Sliding
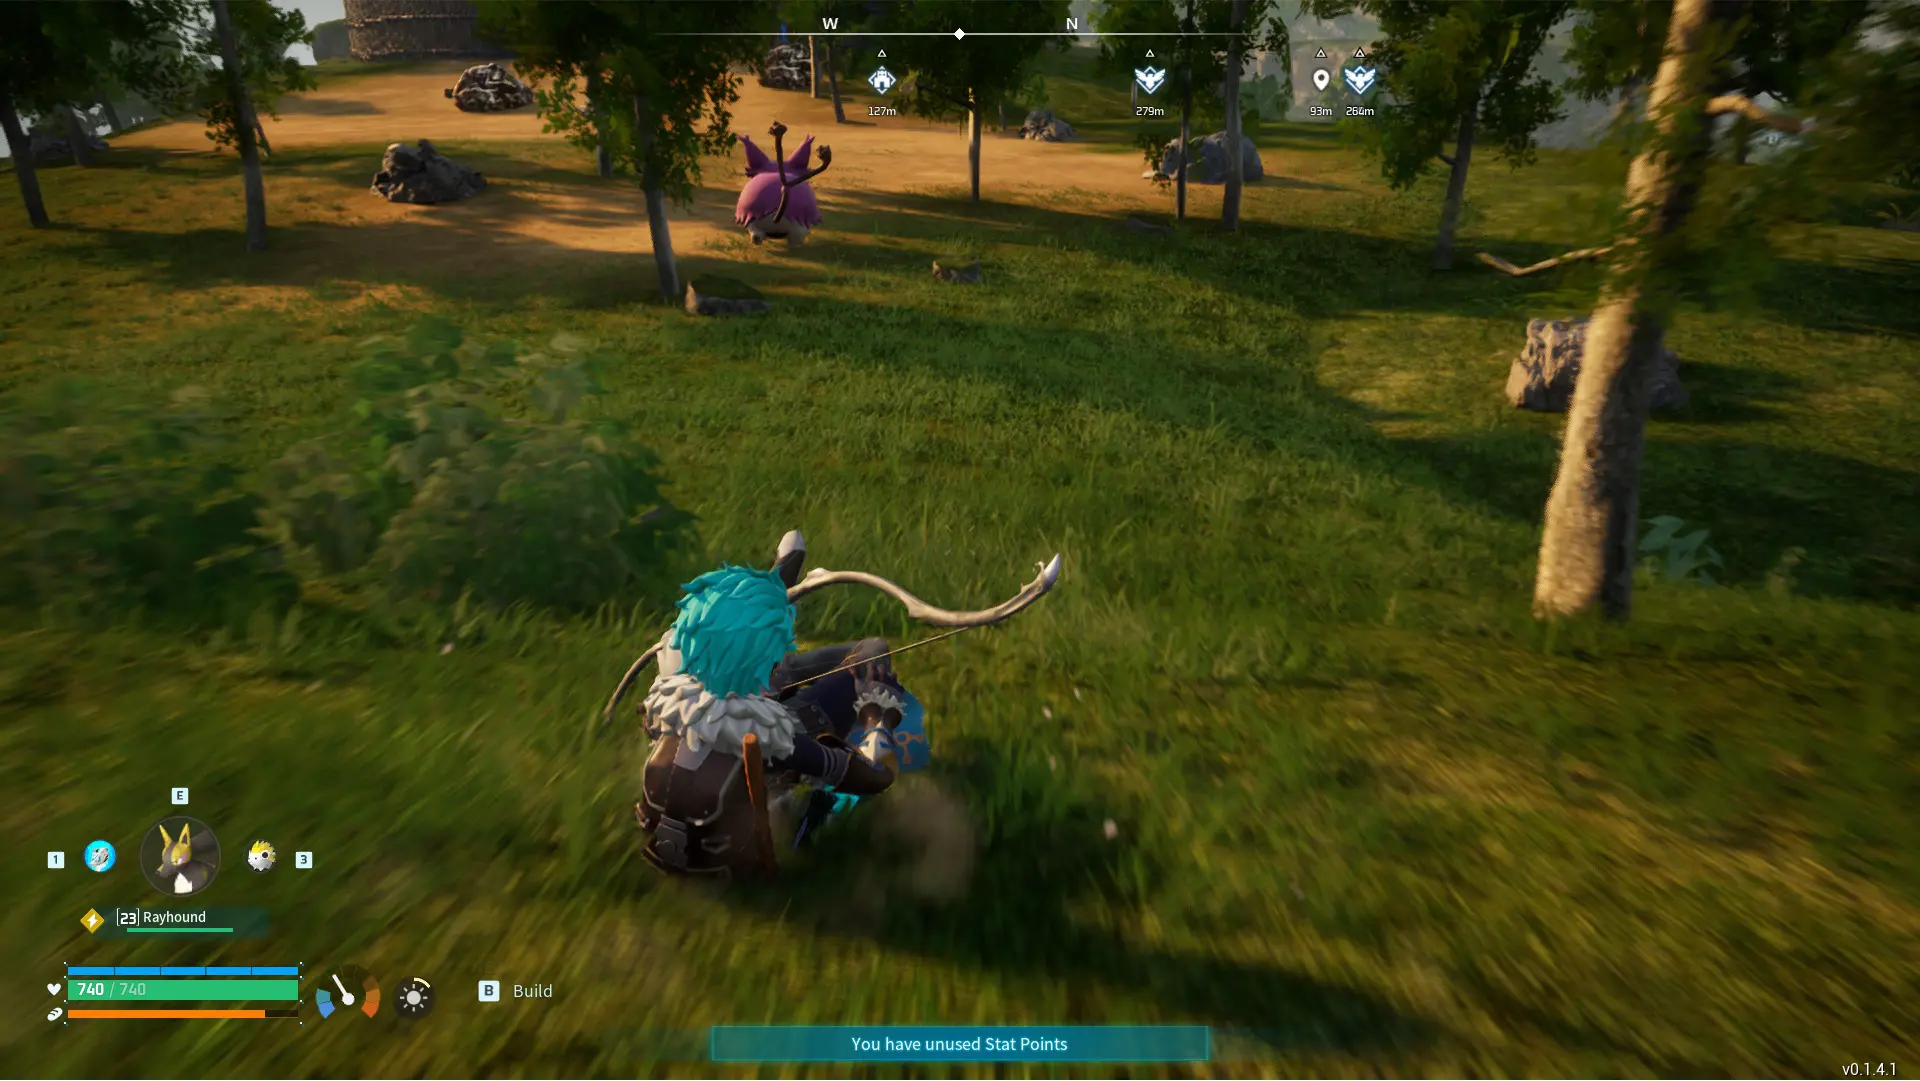
One fun trick we’ve discovered while roaming around the Palpagos Islands is sliding. This action does not require any stamina but cannot be done while mounted. To do this, you’ll need to be in an area with an incline. Press the run button (Shift or LS) as you move down the slope then press the crouch button (C or B) to start sliding. Your character will only stop sliding once you’ve reached a flatter area. What’s cool about this trick is that you can use your tools or weapons while you do it!
Using a Grappling Gun
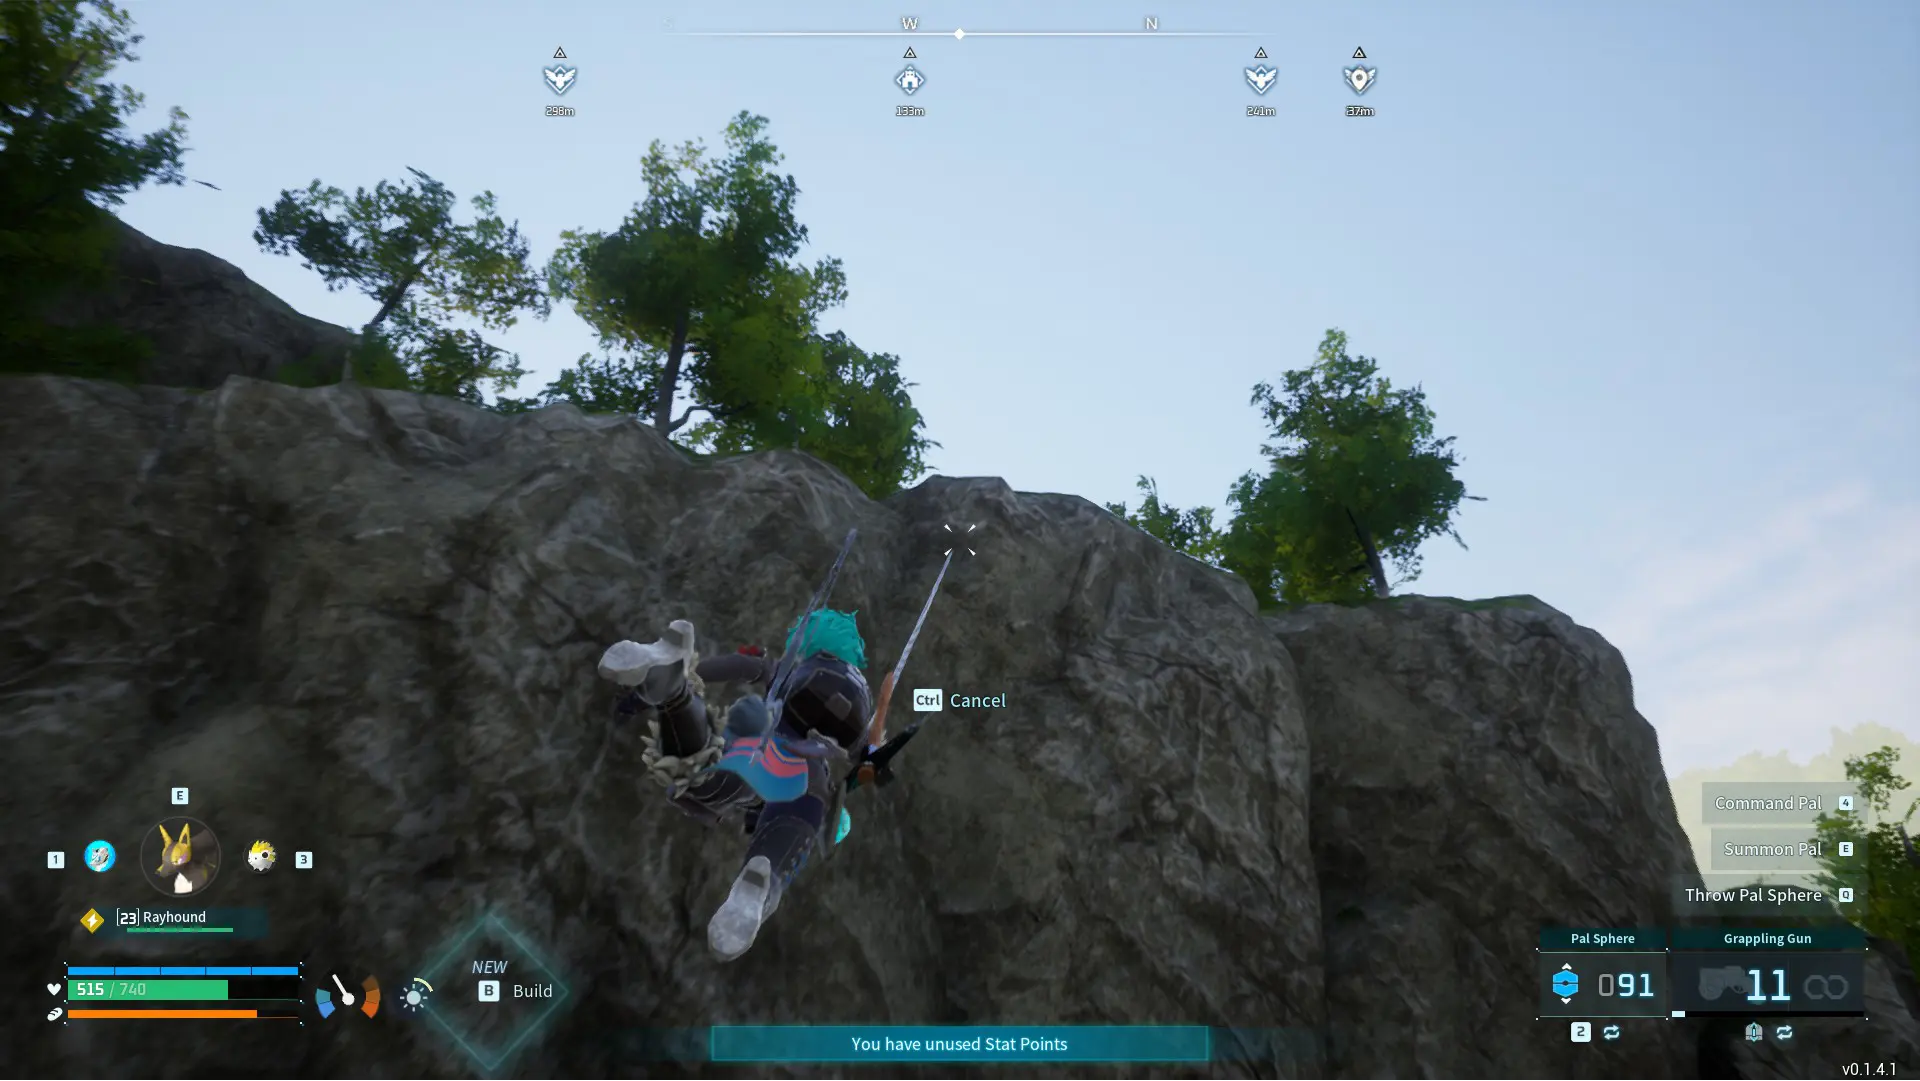
Another great Stamina-saver and time-saver is the Grappling Gun. This tool can be crafted at a Primitive Workbench or Weapon Workbench at level 12 once you unlock it with 1 Ancient Technology Point. It shoots a hook that latches onto the nearest in the direction you point to. This includes rocky cliffs, straight walls, and uneven ground. The surfaces we have found that it doesn’t seem to attach to are slanted rooves, stairs, open doors, workstations, certain structures, and mineable clusters.
The Grappling Gun may indicate that it needs Handgun Ammo, but it doesn’t seem to get used so you won’t have to go looking for it just to use it. There are 4 tiers of this gun which are unlocked as you level up and obtain more Ancient Technology Points. The higher the tier, the better the durability, and the longer the range.
Unfortunately, it doesn’t seem to change its cooldown which is 12 seconds in between uses. Some players would equip multiple grappling guns and use them interchangeably to overcome this limitation.
Exploration
Every explorer needs to learn how to properly navigate and use the tools they have at their disposal. The game has both a map and a compass that can ensure that you won’t get lost in your travels.
Navigating With Your Map
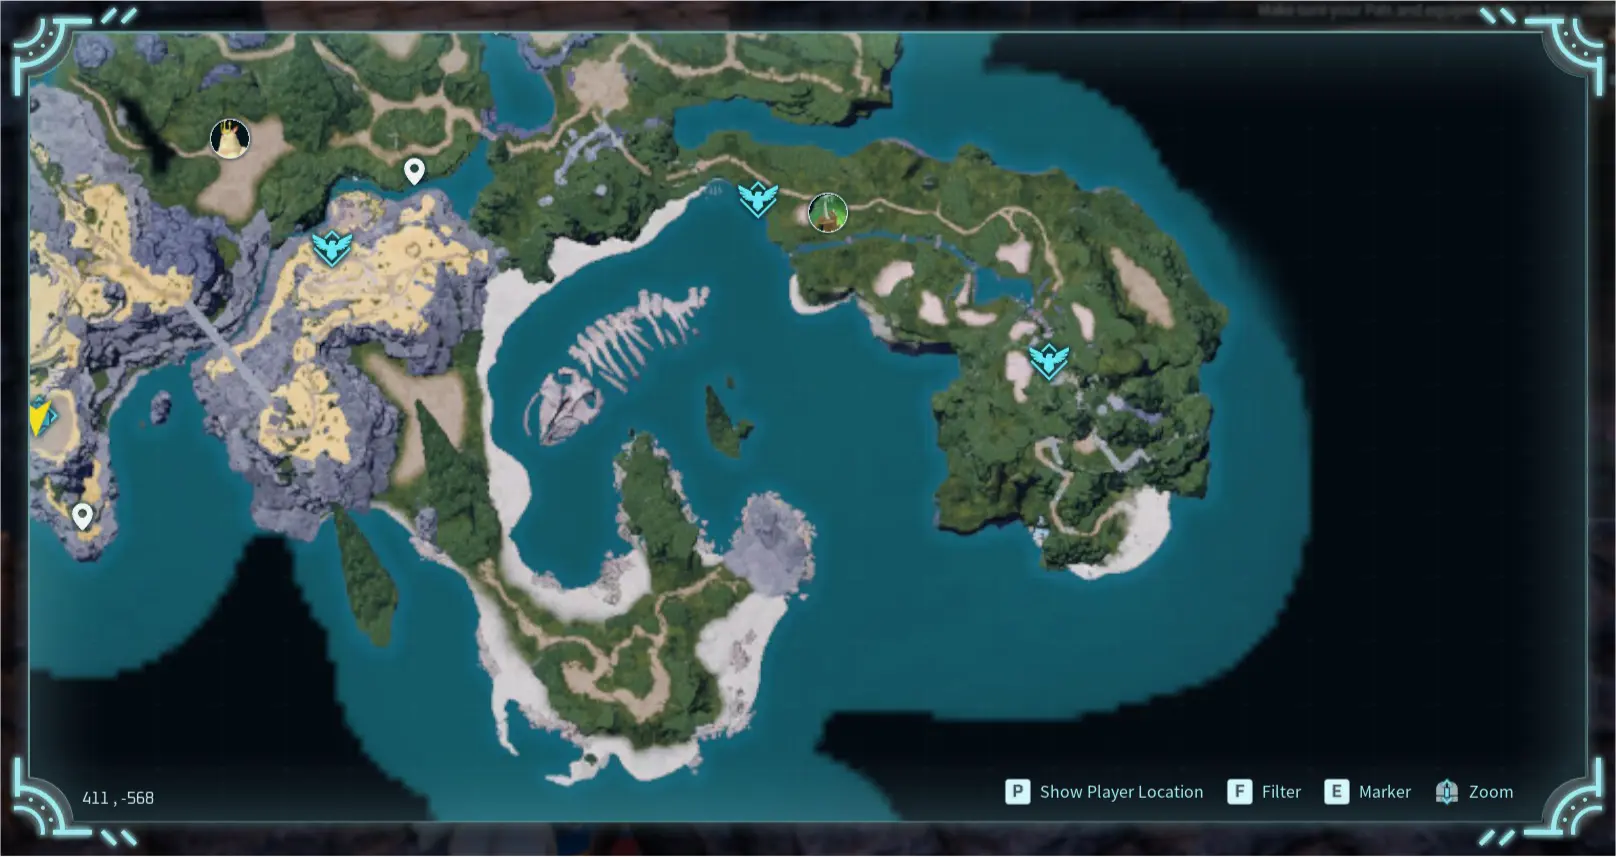
The map can be accessed by pressing M or the Select or Back Button on your controller. At the start, most of the map will be covered in darkness and will slowly reveal the rest as you explore these hidden areas. The numbers at the lower right side of the map indicate the coordinates of the spot where your cursor is currently at. To understand what the icons on the map are, we’ve listed down what they represent below:
| Icon | Name | Legend |
| Yellow Arrow | Your current location. | |
 | Red X | The spot where you died. Marker and Death Chest will disappear after collecting everything inside it. |
 | Blue Icons | Automatically marked and cannot be removed manually. All of these icons can be used for fast travel. Will be gray until activated. In the case of Bases, it will be gray until the Palbox is built. |
 | Great Eagle Statue | Great Eagle Statues used for Fast Travel Purposes. |
 | Syndicate Tower | Syndicate Towers where you can fight a Tower Boss. |
 | Base | Your base. Can have up to 3. |
 | Alpha Boss | Automatically marked and cannot be removed manually. Marks the location of Alpha Bosses in the open field. Will have a checkmark on the ones you’ve already defeated. |
 | White Icons (Custom Markers) | Manually marked by the player by positioning your cursor and pressing E or X. There are 8 different markers to choose from but you can only place 99 markers at a time. |
Using Your Compass

Your Compass can be located at the top of your screen. As you move around, you’ll notice that the locations of the markers as well as the North, East, and South West indicators move with you. The numbers below each marker show your distance from them. These markers will only appear once you are at least 300 meters away from them. The compass can also show you when a Great Eagle Statue or Tower is nearby even if you haven’t activated it yet or defeated the boss.
Objects and Locations You May Encounter
If you want an unspoiled experience, feel free to skip this section. But if you want some information about something you will or have encountered in the game, you can use the table below as a reference for your travels.
| Image | Discovery | What is it? |
 | Journals | Picking it up unlocks a journal entry that tells you more about the lore of the Palpagos Islands. |
 | Lifmunk Effigy | These can be offered to the Statue of Strength to improve your capture power. |
 | Pal Soul | These can be found on the ground, in treasure chests or obtained from enemies. They can be Small, Medium or Large and can be offered to the Statue of Strength to enhance your Pals’ Max HP, Attack, Defense and Work Speed. |
 | Churches and the Statue of Strength | Churches can be found among the islands and will usually house a Statue of Strength along another item of interest (treasure chest, eggs, etc.). Statues of Strength are offered Lifmunk Effigies and Pal Souls for Player and Pal improvements. |
 | Treasure Chests | Contains various items and Gold. Chests with Purple or Gold Glow are common and does not require a key to open. Chests with Red Glow needs either a Copper, Silver or Gold key to open. Keys can be obtained from other chests, from Leezpunk, and the Black Marketeer. |
 | Ammo Boxes | Contains a random type of Ammo used for guns. |
 | Pal Eggs | Can be hatched with an Egg Incubator to obtain a random Pal. The type of egg dictates what element that Pal will be. Can be a regular size, a Large size or a Huge size. |
 | Skill Fruit Trees | Produces Skill Fruits that you can feed to your Pals to teach them specific skills. Some Skill Fruits can also be found lying on the ground. |
 | Lucky Pals | Giant, glowing, and sparkling Pals with the Lucky Passive Skill. You’ll hear a humming noise when they’re nearby and are very rare. |
 | Alpha Pals | Giant, powerful Pals that are found all over the islands and in Dungeons or Sealed Realms. |
 | Wandering Merchant | Can be found in the Small Settlement, Fisherman’s Point or Duneshelter. In rare cases, they could visit your base. They sell goods depending on the color of their uniform. Red - Sells a variety of goods ranging from schematics, medicine, ingredients and materials. Blue - Sells Pals. Green - Sells schematics, weapons, armor and ammo. |
 | Black Marketeer | Sells rare Pals that are often found in remote and restricted locations that are considered contraband. |
 | Random Campers | These campers can be found close to Great Eagle Statues and in front of a campfire with a pot. They usually have different names like Cowardly Victim, Expedition Survivor and so on and may give you materials if you talk to them. |
 | Boss Towers | Contains a Boss that you can fight to obtain Ancient Technology. Boss fights can be attempted repeatedly but it has a time limit per battle. |
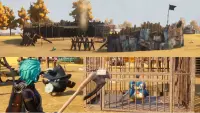 | Syndicate Camps | Camps filled with Syndicate enemies. You can find a Pal imprisoned in the middle of their encampment. If you’re fast enough or if these Syndicates are distracted, you may be able to free the Pal before they start attacking you. The Pal you free will immediately join your party or be transferred to your Palbox. |
 | Dungeons | Are usually caves hidden around the islands and contains many mineable clusters, treasure chests, Syndicates and Pals. Contains an Alpha Pal deep inside it. |
 | Sealed Realms | Transports you into an isolated location where an Alpha Pal resides. |
Getting Early Game Fast Travel Advantage
Now that you know the basics of crafting, survival, and exploration in Palworld, we’ll share with you a little trick that we learned that can greatly benefit your adventures in the Palpagos Islands. You can do this at any point in your gameplay, but you’ll get the most benefit out of it in a new game or early in your playthrough.

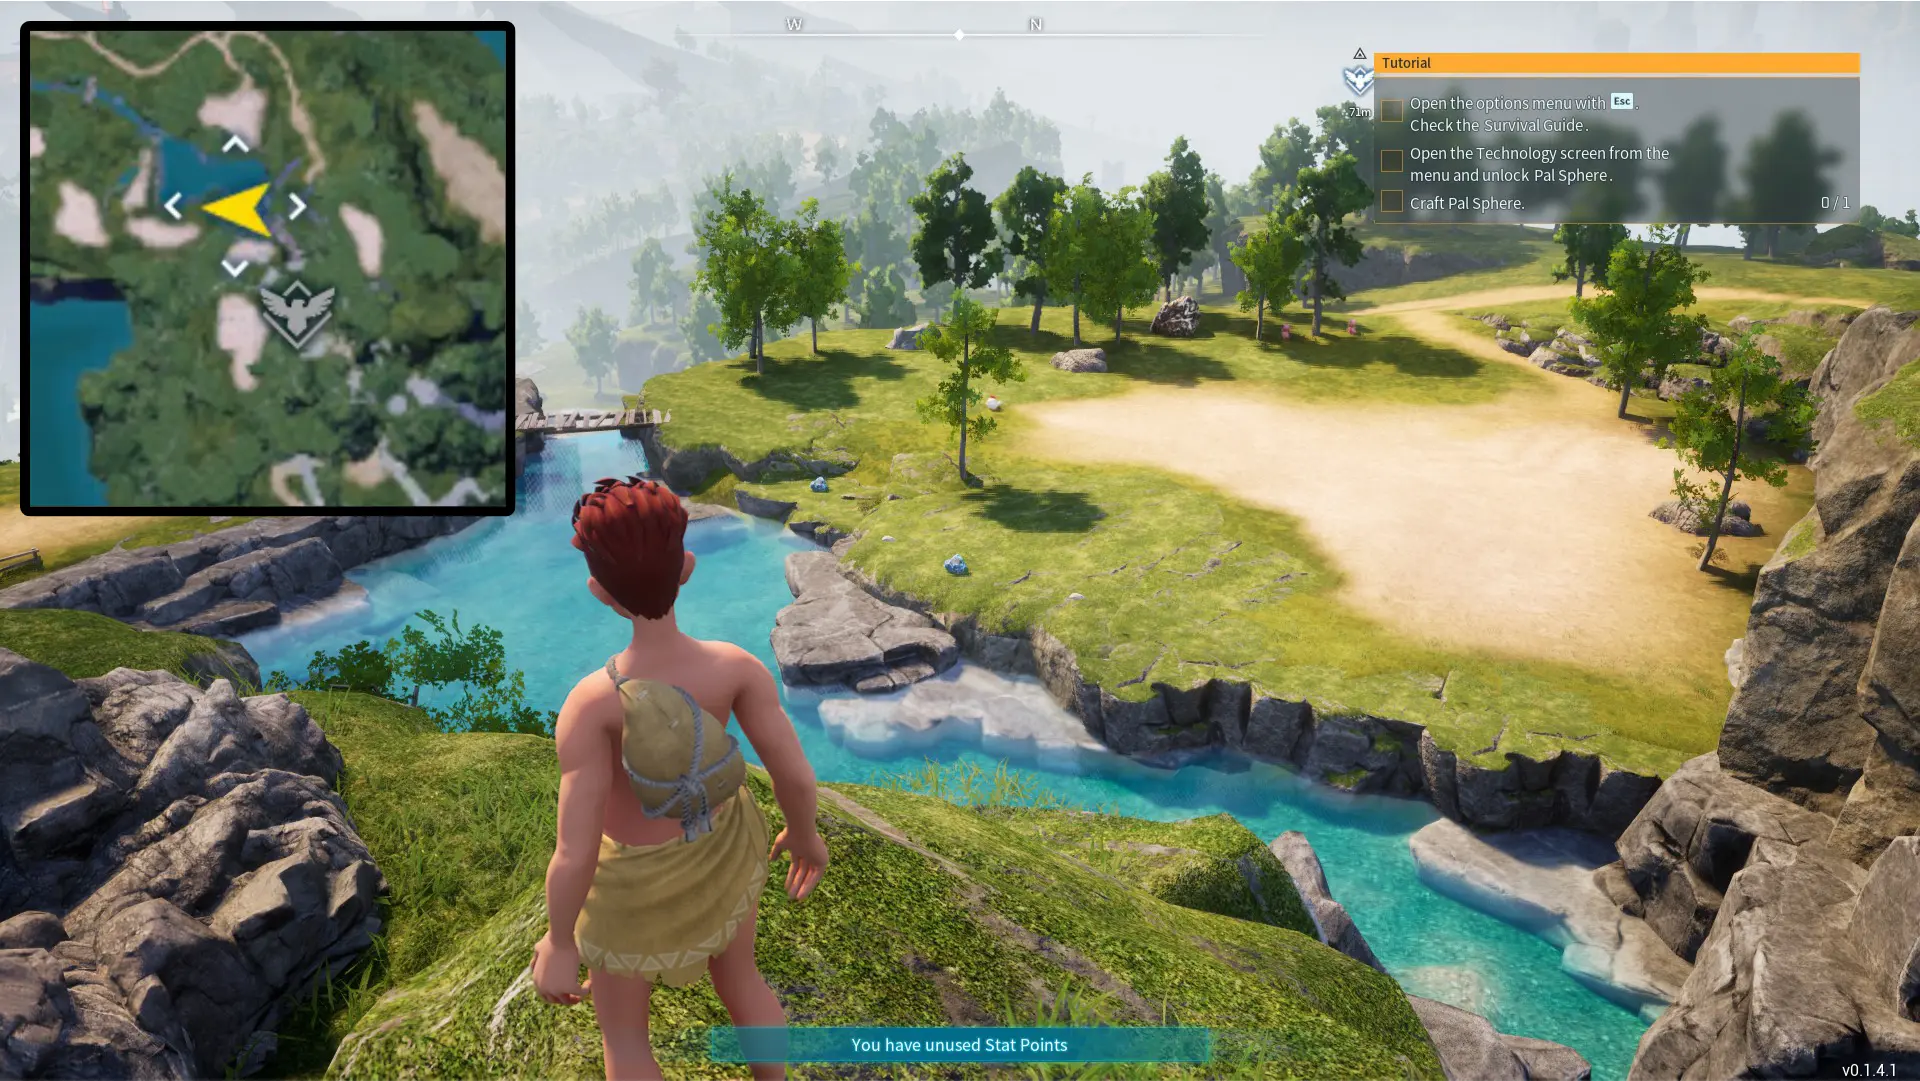
When you first start out, the first thing you’ll need to do is to start collecting Stones, Wood, Paldium Fragments, Pal Spheres, Eggs, and Berries lying around the island. You’ll need the materials to craft your first tools, the food to keep yourself from getting hungry and losing health, and the Pal Spheres for capturing your first Pals. Just by picking up stuff, you can easily level up to level 3.
If you’re not sure where to put your stats yet, you can save it for later or put it in Stamina. Stamina is always a good stat to invest in since it is required for many of your character’s tasks and actions. Make sure to interact with the Great Eagle Statue at the front of the ruins to unlock Fast Travel and obtain a Technology Point. If you talk to the Expedition Survivor next to it, you can obtain some materials. As tempting as it is, don’t try to attack the NPC. More NPCs will spawn to beat the living daylights out of you.
Once you get at least 12 Stones and 14 Wood, craft a Primitive Workbench and use it to craft these 3 essential tools:
- Torch – this is by far the most important tool in your arsenal, especially at night. It can light up your path and keep you warm.
- Pickaxe – this will allow you to mine Stone, Ore, and Paldium clusters a lot more easily.
- Axe – this will allow you to cut down trees efficiently to obtain Wood.
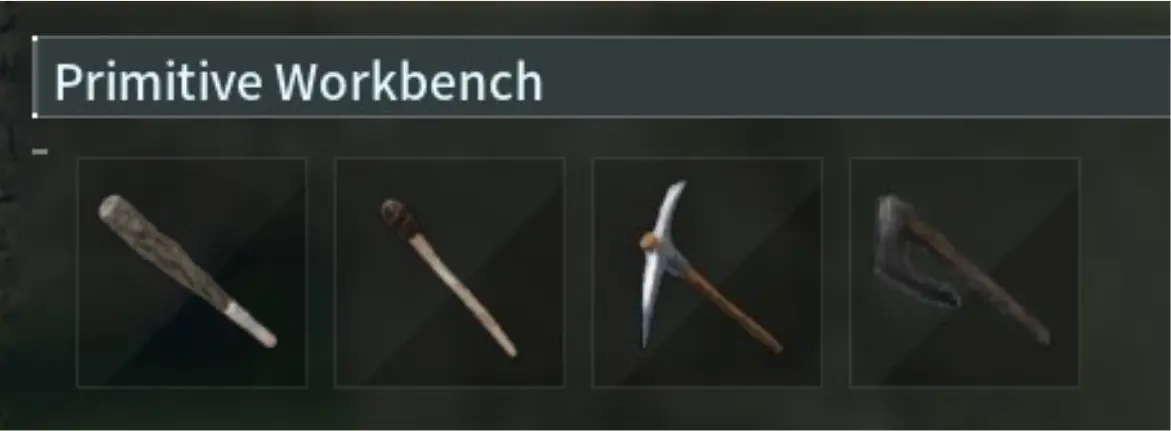
All three tools can be used as a weapon. Axe and Pickaxe have 20 Attack while the Torch has 10 Attack. While it is the weakest out of the four tools you can create at the start, the Torch deals Fire elemental damage and can inflict the Burn status on your enemies. It is also highly effective against Grass types and Ice types but won’t be as powerful against Water types. However, if you have an extra 5 Wood and want a bit more power in your strikes, you can also craft a Wooden Club that deals 25 Attack.
After reaching Level 2 and obtaining at least 1 Paldium Fragments, 23 Wood, and 18 Stones, it’s time to start finding a spot for a temporary base. The starting area is a pretty nice place to make it, but we personally chose the area just north from there where the waterfalls are because of the amount of Paldium clusters surrounding its lake. Paldium can be a little tedious to obtain in your first few levels so having a base near the water (where most Paldium clusters appear) is ideal. There are also plenty of Stone Clusters and Trees and even an Ore Deposit nearby.
Don’t take too much time or put too much effort into it as it will only serve as a temporary spot to store items and craft anything you’ll need. The most important thing you want to make is a Primitive Workbench, a Palbox, and 1 or more Wooden Chests for your items. You’ll need to look at your Technology Tab and unlock the Palbox and Wooden Chest first before you’re able to build them in the Build Menu.
At this time, you’ll want to start hunting down some Pals. The best way to capture them is by whittling down their HP to 1/4 or 1/8 of their health bar and throwing a Pal Sphere at them. You can have up to 5 Pals on your party at a time while the rest will automatically be stored in your Palbox, regardless of whether or not you’ve built it yet.
If you can’t find Pal Spheres lying on the ground or in treasure chests, you can also craft them on a Primitive Workbench once you unlock it in the Technology Tab at level 2 with 1 Paldium Fragment, 3 Wood, and 3 Stones. If possible, having at least 1 Fire Pal will be very beneficial to you since they can provide light and warmth on cold nights when they’re active.
Once you’ve got a full party of Pals, store every item in your Wooden Chest and kill your character. You can do this quickly by attacking a friendly NPC, attacking the Mammorest, falling from a height, or drowning in water. Yes, we’re serious. However, we do want to preface that having a full party before death will only be beneficial to you if your difficulty setting is set to Casual, Normal, or Custom with a death penalty that does not include releasing Pals.
When your character dies and you click the respawn button, the game will ask you where you want to respawn. There are 8 different spots to choose from and each spot is usually close to a Great Eagle Statue, with the exception of some spots. Activating fast travel to those Great Eagle Statues at the start will make it significantly easier to travel to various places and access Pals of different kinds.
While it will require you to kill your character several times, it will be all worth it because it will also give you a chance to view the different locations and help you decide on your first official base. While you’d be weaponless and itemless, you’d at least have some Pals that can aid you in your journey and protect you.

Alternatively, if you don’t have the time or patience to do all the prep work that we’ve just discussed, you can simply kill your character at the beginning and start your hunt for the Great Eagle Statues immediately. However, without any Pals to help you, this can be very tricky, especially if you encounter any aggressive enemies like Syndicates, Rushoars, or Direwolves.
Another somewhat unorthodox tip we have when it comes to items is making use of your Death Chest (the sack that’s left behind when you die) to keep your items instead of Wooden Chests when you do your Great Eagle Statue Hunt. They have a lot more slots than a regular chest and you’ll never lose its location because it’s marked on the map and a bright ray of light comes out of it. Just make sure that you leave at least one item inside it at all times because once it’s empty, it will disappear.

And this marks the end of our Beginner’s Guide to Palworld, Part 1! We hope that it successfully aided your quest to collect numerous Pals, create a harmonious workforce, build an unstoppable army, or simply make the experience of learning the game much smoother. Make sure to also check out Part 2 of our guide!
While we cannot cover every topic in this article, we do recommend checking out the game’s official Reddit page (https://www.reddit.com/r/Palworld/) and their official Discord server (https://discord.com/invite/pocketpair). They’re the best place to get firsthand accounts of other players’ experiences and what they’ve learned as they played the game.
Is there any other topic in Palworld that you’d like us to cover? Let us know in the comment section!