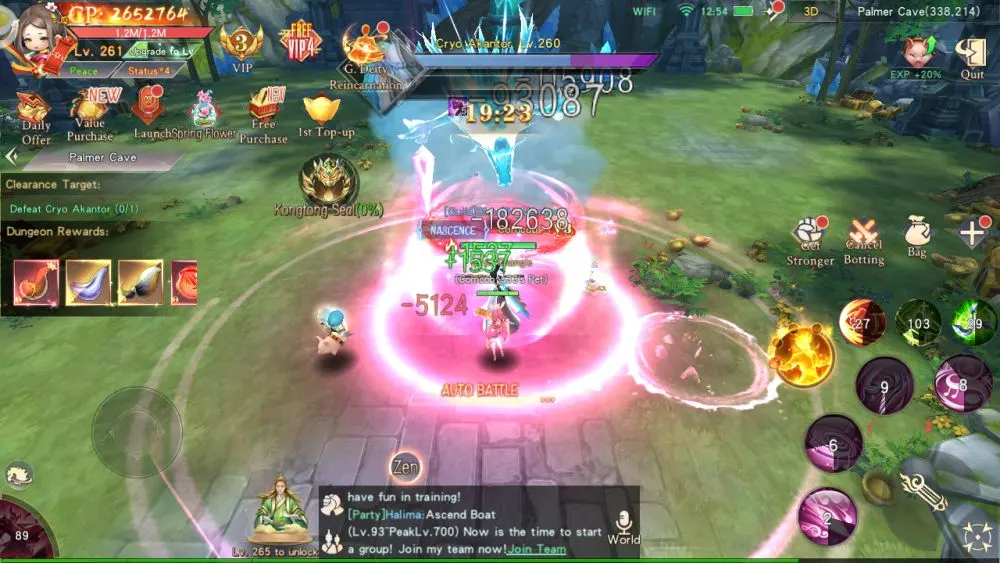
Welcome to our Mirage: Perfect Skyline beginner’s guide! Mirage: Perfect Skyline is an MMORPG set in an Eastern high fantasy world, though you’ll worry less about the story and more about your stat upgrades. It looks a bit like an Asian-themed Stella Arcana with detailed anime graphics, with the option for manual controls and red hitbox attacks coming from enemies.
There is less emphasis on dodging attacks and a lot more on autogrinding and keeping track of your upgrades though. The writing can more or less be ignored until they get better translators, and the focus is getting your CP number higher, higher, ever higher. You’ll be fighting giant golden frogs, various bandits, elementals, ne’er do wells, dragons, deranged cultists, and deities on your quest to beat the heck out of everything in the Far East and take their stuff.
Now, that we gave you a brief description of what you can expect from the game, stay with us and read our Mirage: Perfect Skyline beginner’s guide for some useful tips, tricks and strategies to dominate your enemies!
GENERAL TIPS
Considering the autogrind-heavy nature of Mirage: Perfect Skyline, most of your time will be spent navigating the various, many upgrade screens and the quest pre-battle screens within the game. You could manually control your character, but the way the stats are distributed for you and your foes generally ensures that whoever has the higher overall CP count will win. Instead, you’ll need to keep up with your upgrades so that CP keeps going up.
Four Important Buttons
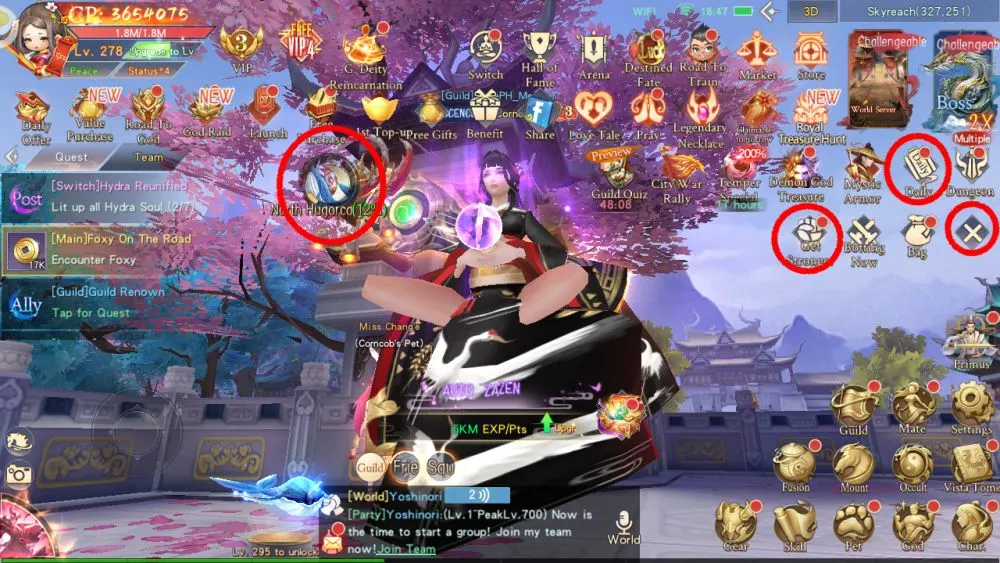
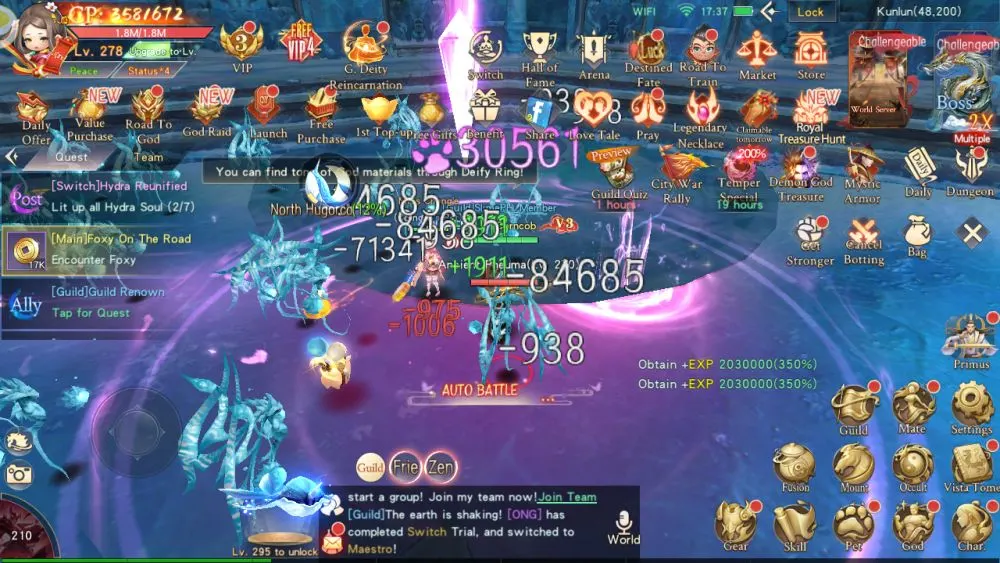
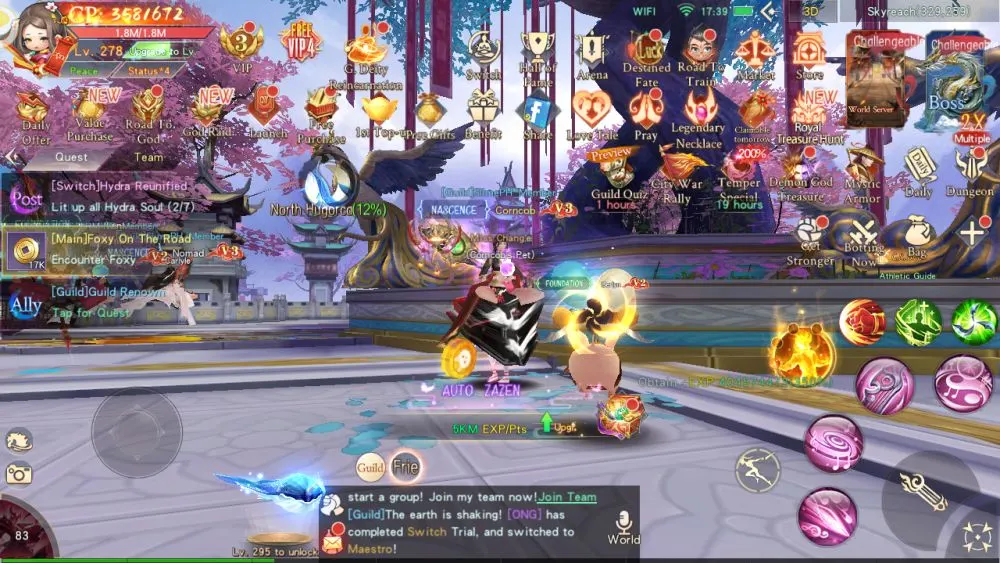
The rather cluttered UI can be quite overwhelming for a newbie jumping in, especially since a lot of it (particularly the top left of the screen) is dedicated either for events, the various cash shop deals, or any free rewards you might want to nab.
The four most important buttons in the game amid all that though are the Daily button, the Get Stronger Button, your current Fate Book Quest, and the + button. While there are a bunch of buttons you can use to enter places in the map, the Daily button condenses all your tasks into a helpful, clean list with no frills.
The Get Stronger Button notifies you if you have any materials ready to spend for upgrades, so keeping an eye on it, especially at the start of your daily login (which comes with free stuff), is important. Especially since it again condenses everything into a nice, clean list.
The weird button with a name and percentage to the right of your quest list is your Fate Book Quest, which is your long term progression mission, which unlocks new game systems as you finish them. And finally, there’s the + (x if it’s activated) button, which expands the UI so you can actually find the Daily button!
As a sidenote, if you see quests in your left-side quest list with green text instead of white text, that means the rewards are ready to collect. Tap it to grab it.
Another Where To: Tapping Mats
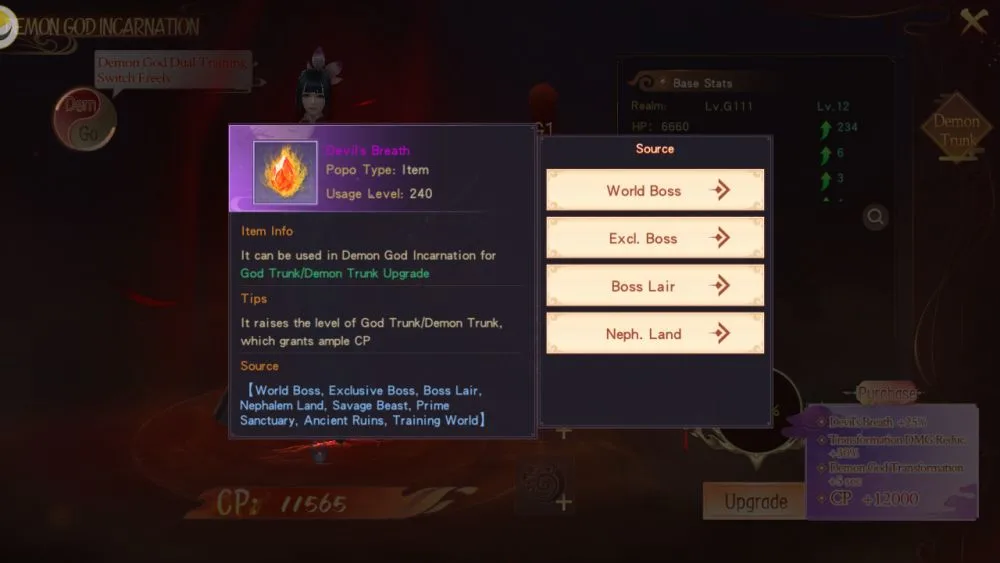
You can tap on a material to check where it drops from. Some materials don’t have buttons for this, such as the various upgrade orbs found specifically in the character screen’s tabs, though they still tell you where to get it at the bottom of their item description.
Others though, do have buttons at the side that will immediately teleport you to their grinding spot, or failing that, to the screen where the fight can be entered. This will save you more time than looking through the cluttered menu manually to find out wherever the heck you’re supposed to go.
Sychees and the Player Market
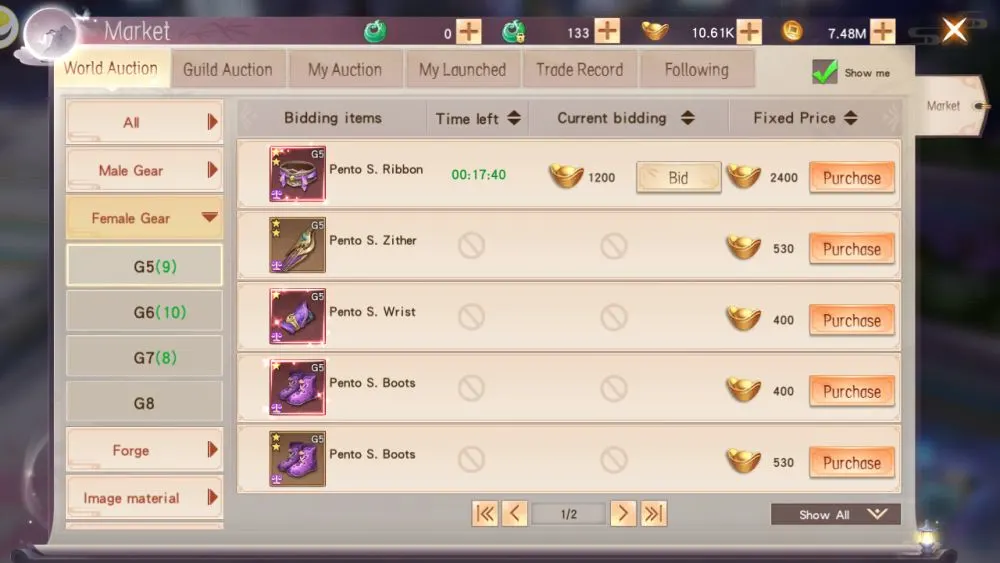
While Jade and Bound Jade exist as the real premium currencies of the game, your real main currency are Sychees, for a simple reason: It’s the currency used by the game’s player Market. You can buy Red Gear here in case the game decides not to drop the equipment you want. There’s also the Sychee Store, which sells certain items important for people starting out, along with general use items you’ll be using throughout the game.
When buying gear, don’t just check the tier color and G-number of the equipment: Those are important, but it’s easy to miss an item’s star level. Each star marks an extra stat boost the item has, and they’re usually large enough that between a pair of G7 Hepto items, the lower tier Orange one with 2 stars is going to beat out the higher tier Red one with 1 star.
The game is helpful enough to put a green upward pointing arrow on any items that are stronger than what you’re wearing at the moment. The star level is usually referred to as an S#. For Equipment Fusion as an example, it will tell you the requirement is say, 4 pieces of G4 S2 Orange tier gear, meaning an orange tier G4 gear with 2 stars. That way, you know what to buy in case you’re buying it as fusion fodder and you’re out of daily bossfight attempts,
THE EVER CONVENIENT GET STRONGER BUTTON
If ever you actually run into a fight that kills you, like say, one of the Mortal Training bossfights, you might not have tapped the Get Stronger button in a while. This button provides shortcuts to various levelling and equipment screens for your character, specifically places where you have upgrade materials ready to spend. These may also be found in the bottom right of the screen once you tap the + button.
Skill Levels
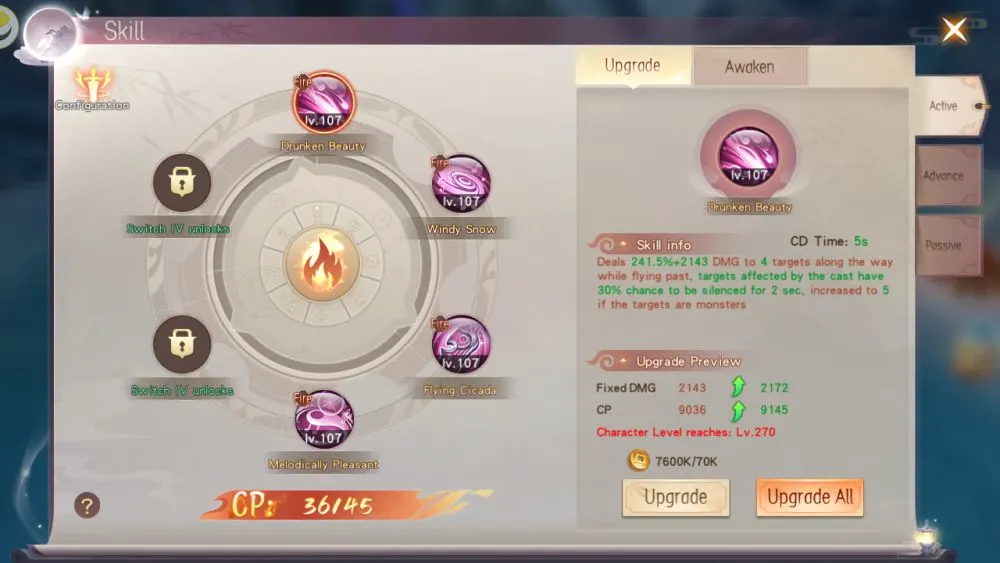
Also found under the Skill Button to the bottom right of the screen with the extended UI, The Level Up Screen does exactly it says and levels up your character’s skills. Here, the only thing you need to level up your skills are the basic Gold coins, and to be at an appropriate character level.
You can do it manually if you’ve got a build in mind, but it’s generally a safe option to press the Auto-level button, which immediately makes the game do its best to ensure all your skills are at an equal level with each other, depending on whether or not you have enough gold to pay for it.
As for the Advance and Passive tabs, they’re full of passives that you need to do Switch quests for, and you often just leave them alone for the majority of your play, since Switch quests aren’t available until you hit certain level thresholds. Unfortunately, for the Awaken Tab, you need the Tome-Purple Rainbow Item, which can only be bought after reaching VIP 4, which takes a while. Keep your Sychee count up until then!
Guild Training
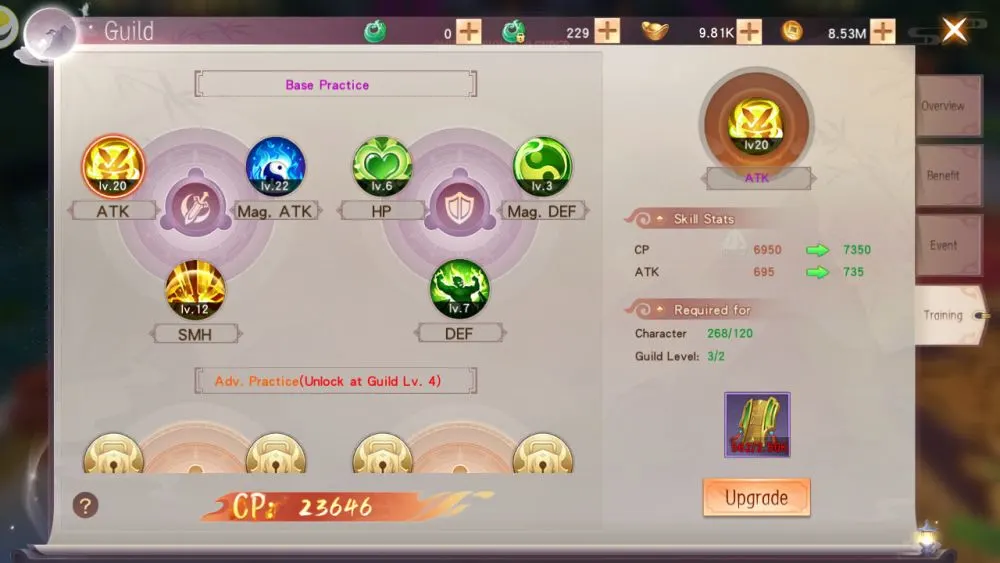
Once you have a guild, the Guild tab becomes available to you. Under it is the Guild Training tab. Here, you spend Guild Contribution points to upgrade various stats for your character. You get Guild Contribution mainly from doing your Guild Renown and Guild Weekly quests, available in the Daily tab.
The stronger your guild is, the more access you have to more advanced stat upgrades, with the first level being the important bread-and-butter basic stats like ATK, SMH (armor-pierce), DEF, HP, Penta DEF and Penta DMG (essentially Magic defense and damage).
Mount Upgrade
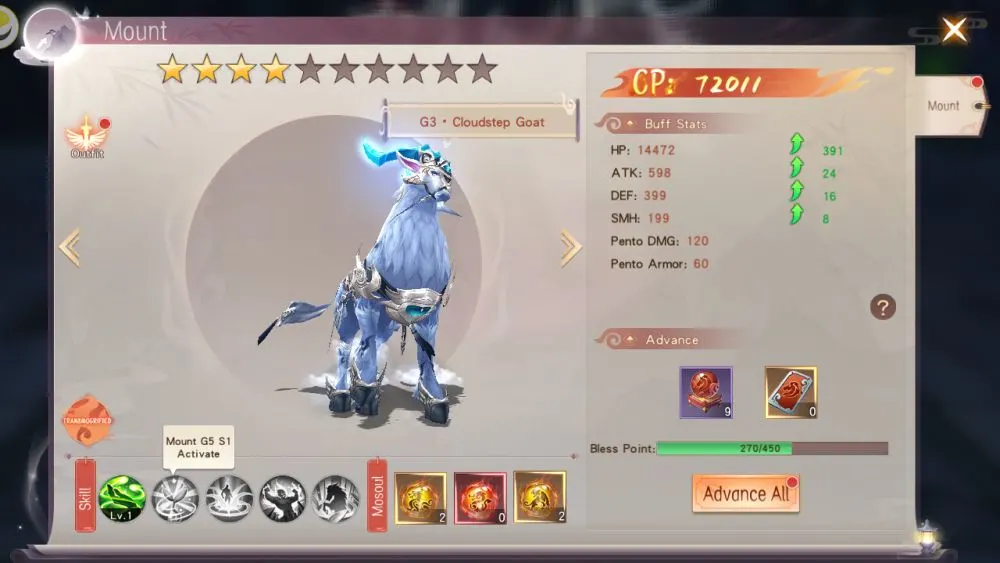
Here is where you upgrade your mount’s mostly passive skills, and unlock new ones. To do this, you need Mount Advance Orbs, typically given to you simply by general grinding or CS 1v1 PVP. There are also Spirits, such as the defensively focused Kylin Spirit, the stronger general stat-buffing Voltron Spirit, and the offensively focused Nether Tiger spirit.
These spirits are typically given out for CS 1v1 PVP, though the auto-battle Arena fights will give out the yellow ones. If you had bought a mount, say, the Punk Pigg from the Sychee Store, the tiny little Outfit button on the top left of the Mount screen allows you to level it up too, along with its own skills separate from the actual mount under it. As for visuals, always look for a Transmo button in any tab. Tapping it will allow you to use the Pigg (or your basic free mount if you like, and various other costume items in other tabs all over the game) as a visual.
The Entire Gear Tab
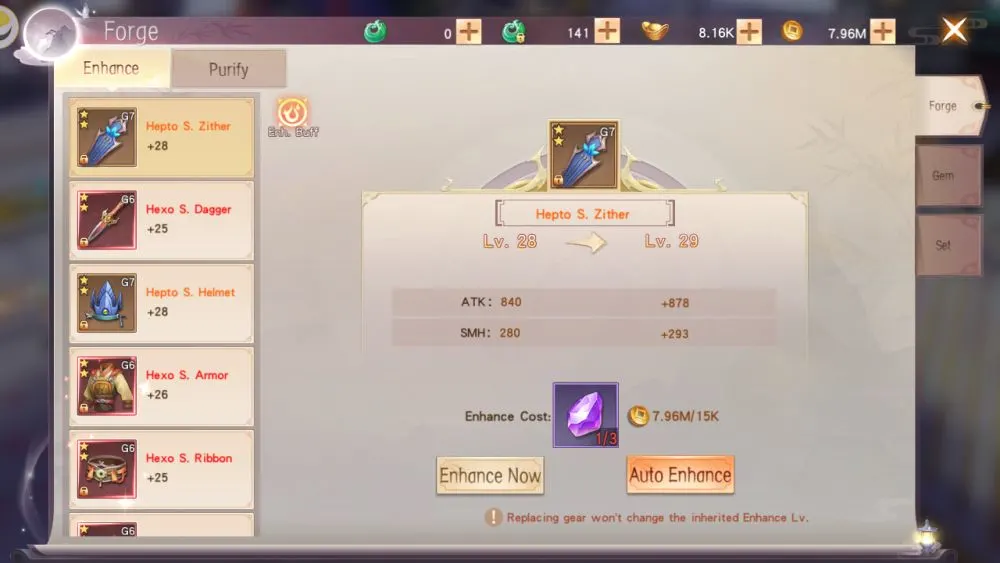
The first thing you will see is the Forge tab. Under it are the Enhance and Purify tabs. Under Enhance, you use Enhance Gems (available through regular grinding and the Sychee Shop) to power up your equipment.
The Auto Enhance button dumps all your materials into a single piece of gear, so you have the option of powering up a slot depending on what you want to do (Want more damage specifically? Just dump everything into your weapon or dagger) or manually levelling everything up evenly.
Or leveling items up one at a time to even it out, albeit more slowly. The gear slot gets upgraded, not the equipment itself, so don’t worry about wasting gems upgrading your starter equipment. We’ll go over the other tabs before the Purify tab since they’re more similar.
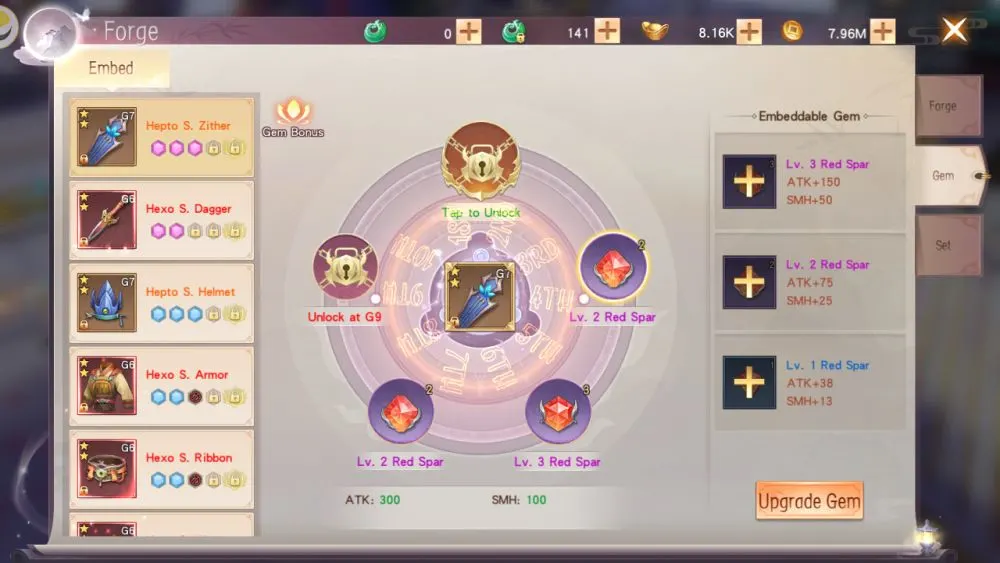
As for the Gem tab, it’s the same rule: You socket gems into the slot itself, so gem wastage is not a problem. These gems give out stat bonuses, simple enopugh.
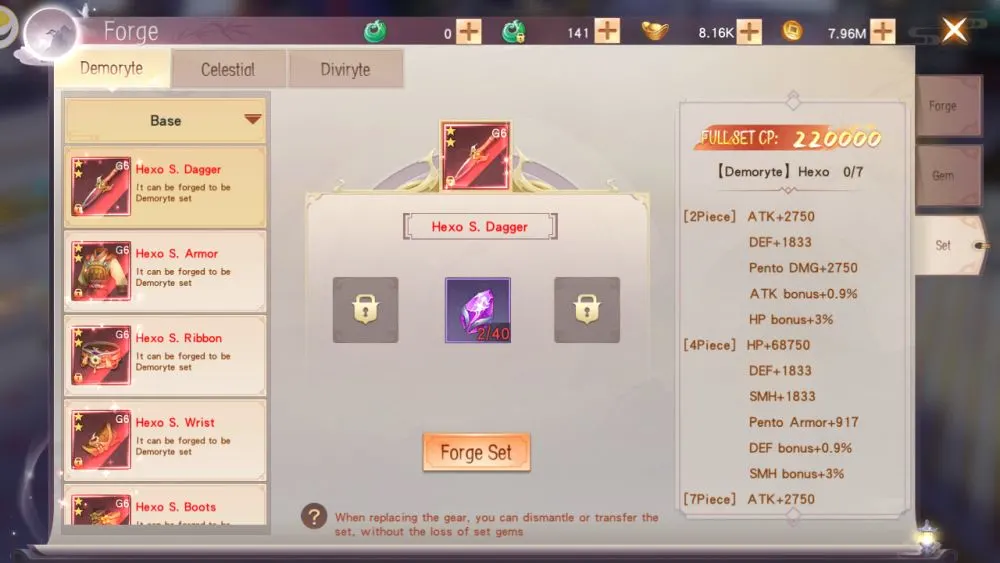
The Set tab forges a slot into whatever kind of equipment the gem is named after (A Demoryte (F) Armor gem makes Demoryte Armor for female characters), and it follows slightly different rules: Since Set tab gems only upgrade specific types of armor, they get refunded if you swap out to something the gem isn’t compatible with. Easy!
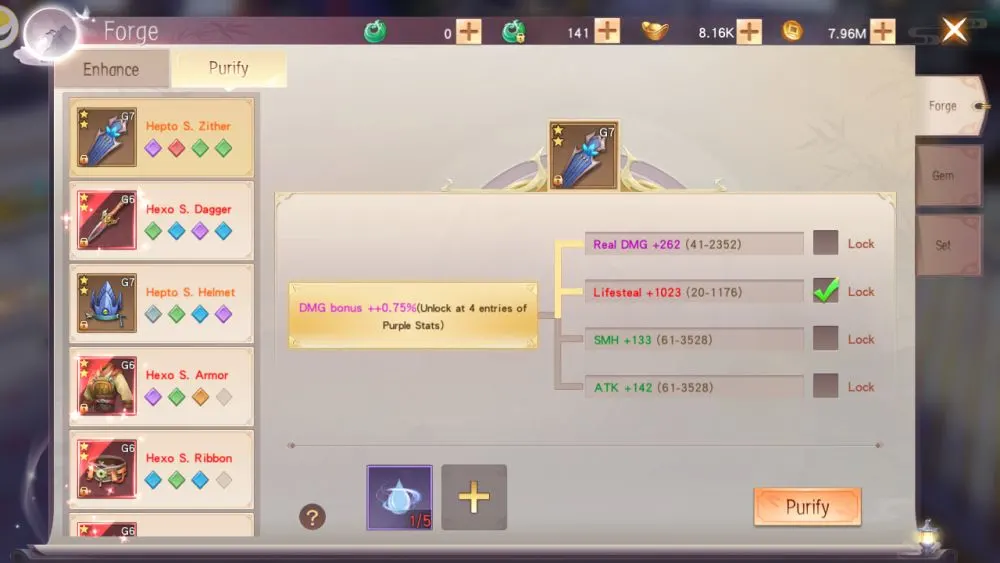
Finally, there is the Purify tab under Forge, where you can add substats to your gear. Save some Bound Jade for this, since Bound Jade let you unlock more substat slots for each gear slot. As for making use of those slots you just unlocked, you need Purify Dew to put actual substats in them.
Everytime you do this, you get a random substat, with the best ones being Red and Orange tier ones. If you have multiple slots on a piece of gear, you can lock one down (Usually one of the Red or Orange ones since they’re rare) so it doesn’t change when you do it.
Equipment Fusion
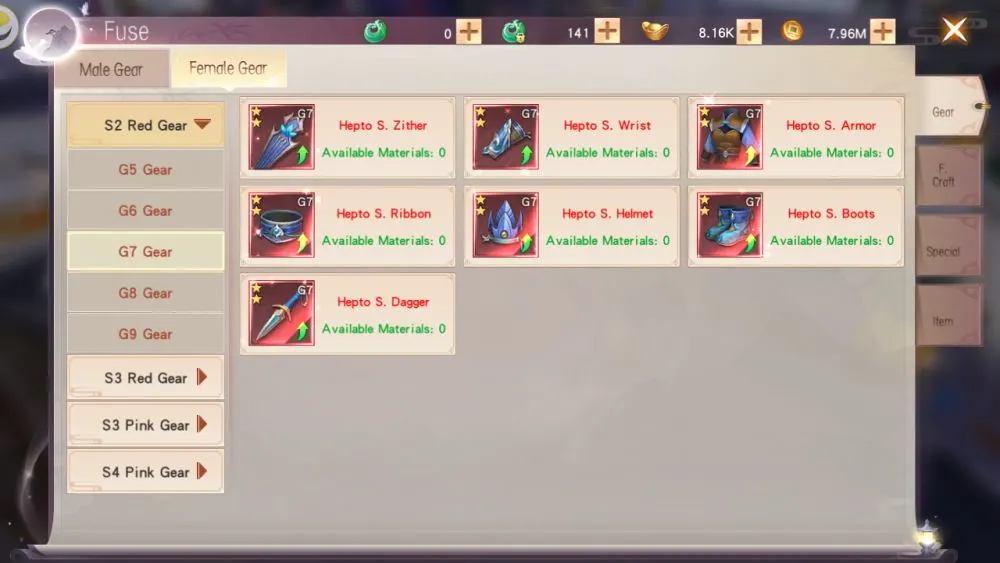
One reason not to immediately throw weak gear (to be specific, Orange and Red tier gear) into the player market is Equipment Fusion, where you use lower tier gear to craft higher tier gear of the same type (Not three helmets to make a better helmet, but 3 Pentos to make a better Pento piece of your choosing). You’ll need to do this to unlock set buffs for your equipment in the form of Mystic Armor upgrades.
For fusion, you look for the Fusion button in the lower right of the screen, and the Mystic Armor upgrades are to the left of the screen after pressing the + icon. As for the other Fusion tabs, you generally won’t make use of them very often since they require extremely rare stuff, or stuff you need unbound Jade for. If you ever get to use them, it’s a pretty good day for you!
Switch? You Mean Job Advancement?
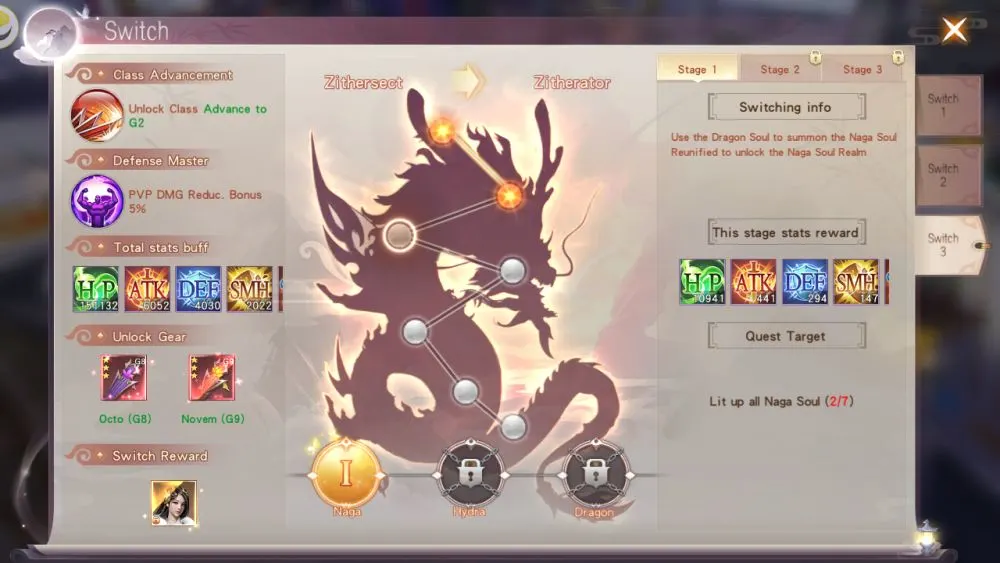
You’ll notice the Switch button on the top right of your screen if you press the little + button to the middle right. If this is lit up with a red notification circle, this means you’re ready to advance to the next tier of your class. Tap the Accept Quest button and you’ll be teleported to the quest, which works pretty much the same as any other quest in the game.
There are three quest stages to finish every Switch advancement, and beating them all gets you a new passive skill along with a new costume for your character for the first two Switches. The third Switch gives you a relatively hefty general stat buff, high tier gear weapons, and a fancy new chat avatar for your character.
Vista Tome
The Vista Tome is a collection of cards that give you small stat boosts all around simply for having them. You get them from the hardest fights in the game: the Mortal Training quests. The cards can also be upgraded with Vista Tome fragments to increase their boosts, another drop from Mortal training battles, either directly or via dismantling Vista Tome cards you already own.
Primus Activation
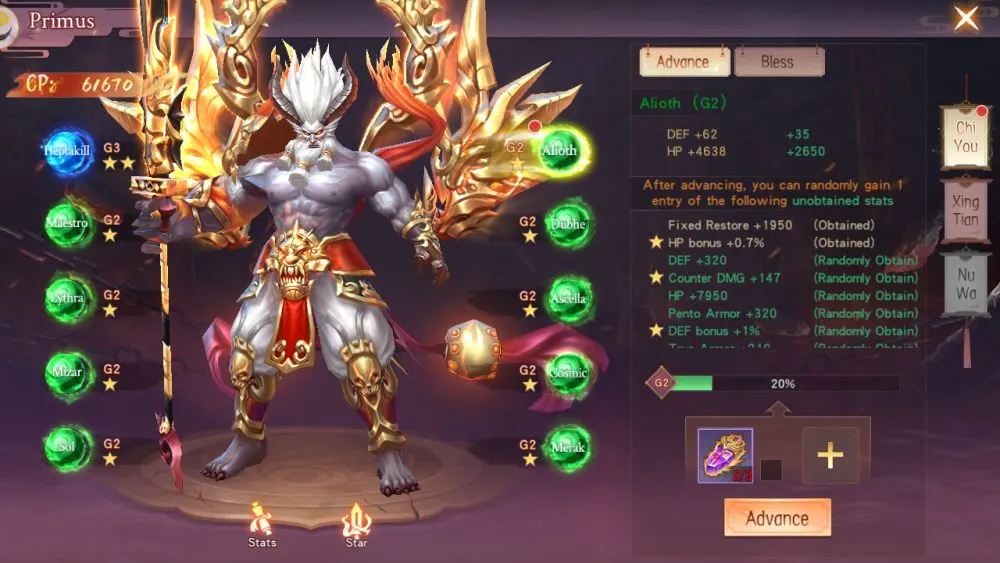
Primus Activation allows you to trade old equipment in for a random stat boost, of which you have 10 slots. This is another reason not to immediately throw unused equipment (specifically Red Gear) into the Auction house for Sychees. There is a set number of buffs you can get from every slot, which you get by leveling it up and dumping more equipment and Fire Runites (Available only in the Sychee Shop), and it gets more expensive everytime you upgrade the same slot.
Instead of focusing on a single slot, upgrade all the slots that you can one at a time, then do it again once they’re all up a level. Activating these also allows you to enter the Star Master screen, where you unlock nodes and unlock more passive abilities, which you will get a prompt for.
Occult Dragonsouls Dug Out of The Ground
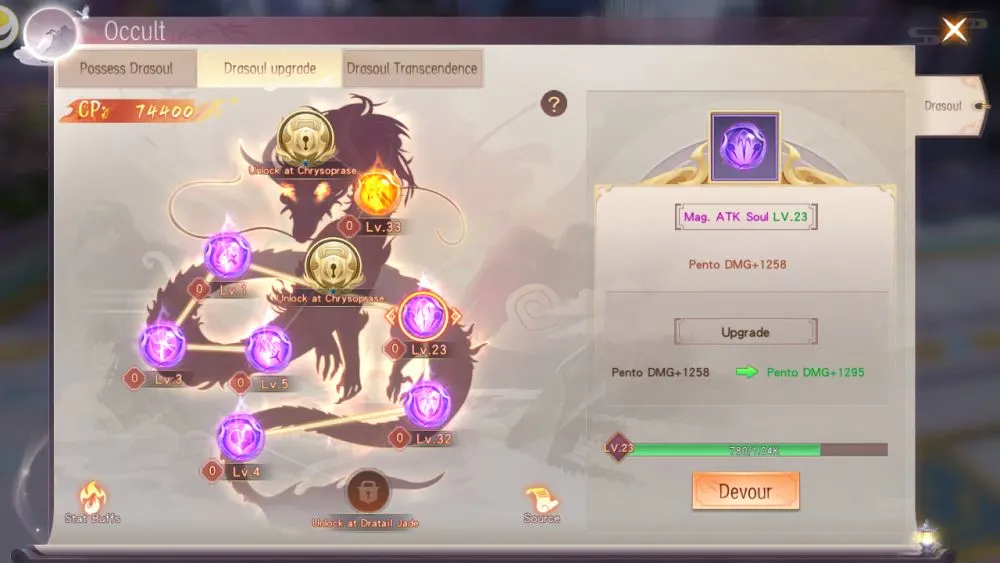
No, this does not involve summoning evil eldritch beings to annihilate the planet. This is instead a system where you socket Drasouls into a network, adding more stat boosts to your character. You can consume unused Drasouls (also called Dracosouls) to power up the ones you already have slotted in, and high tier orange and red Drasouls can be Transcended in the third tab. You can find Drasouls in the Palmer Hunt, usually a lot of the lower tier ones to act as fodder for the higher tier ones, which you can find there more rarely if you run into a bossfight.
CHARACTER SCREEN
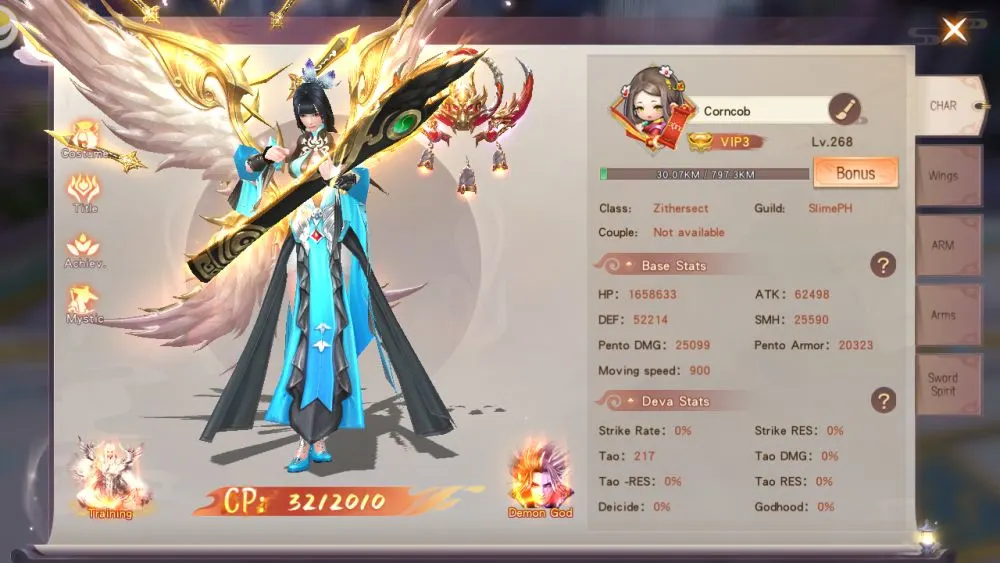
The Character tab, located in the very bottom right of the screen if you press the + button, has a lot of subtabs under it that all contribute to upgrading your character’s general stats. There’s enough of them that we separated this into two sections.
CHAR, The Main Tab
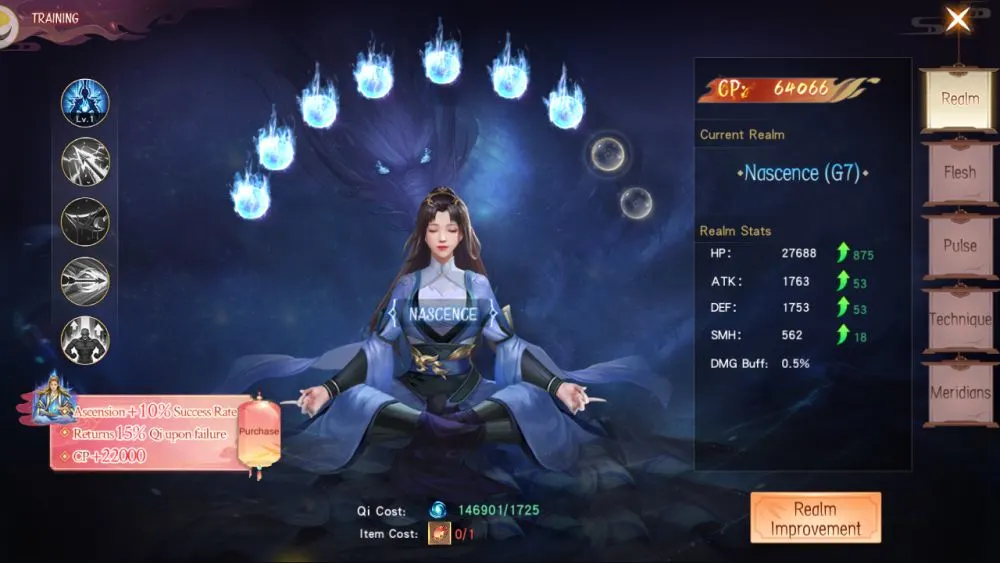
The CHAR tab is your main hub, with the actual upgrades in it being from the Training Screen. The Realm tab under Training gives you general stat boosts when you upgrade it with Qi and Training Breakthrough Gems from Mortal Training bossfights.
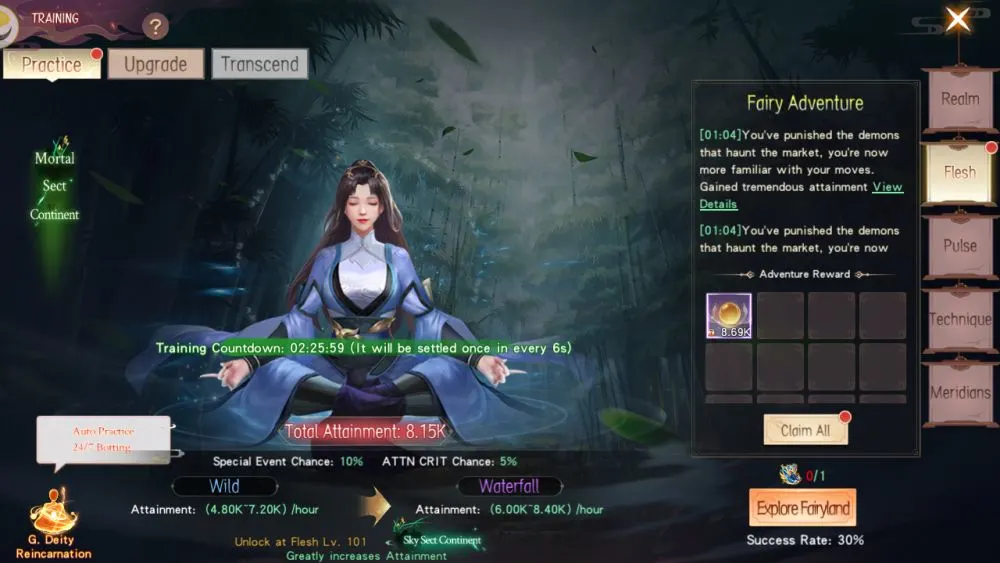
The Flesh Tab does the same when you enter its Upgrade tab, and the Practice Tab autogenerates items for such upgrades. Just like the Realm Tab, you get stat boosts for upgrading this.
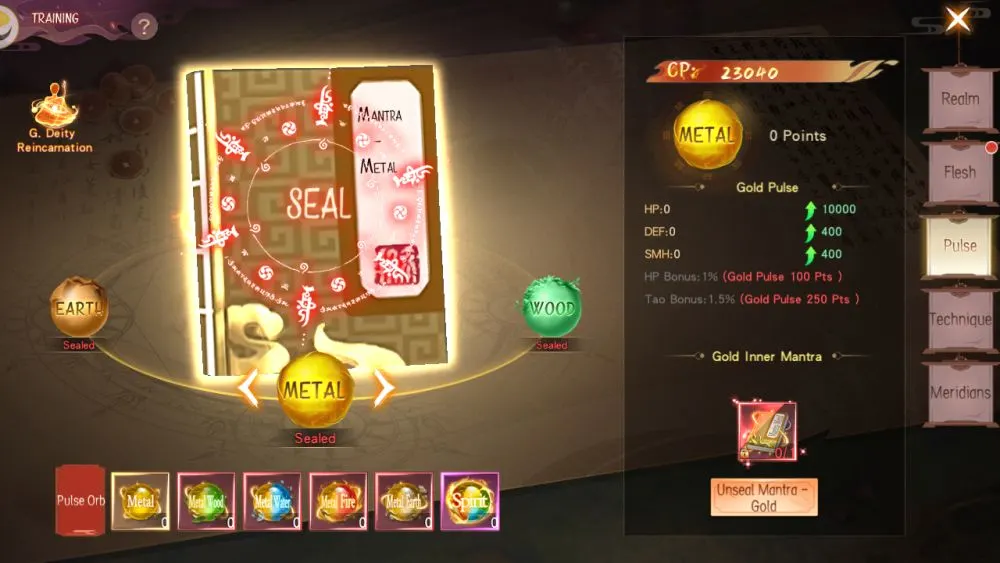
For the Pulse tab, you need Mantra books, available in the B. Jade (Bound Jade) shop to unlock an element, with the element unlocked determining what stats get upgraded.
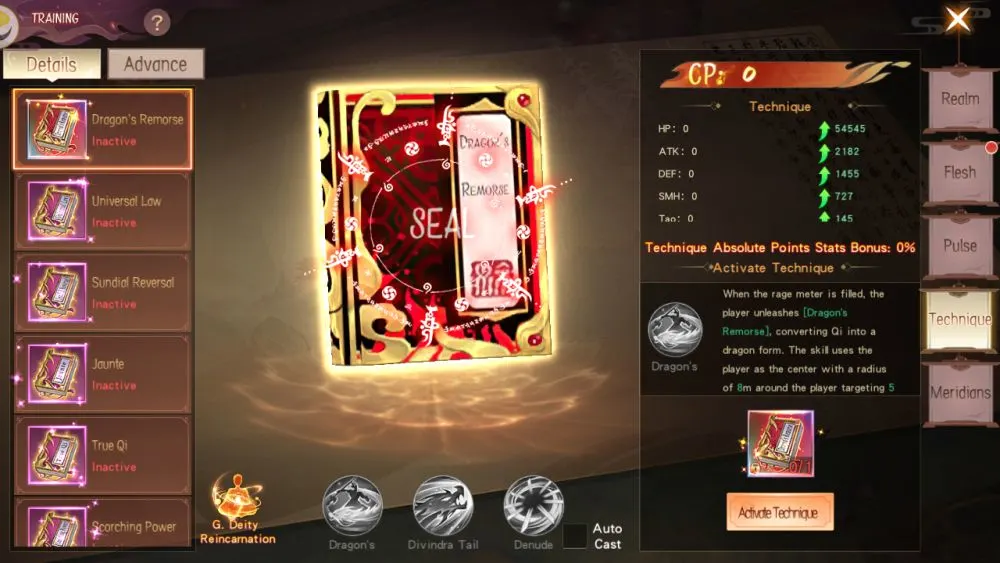
The Technique tab is generally going to be a more long-term goal, considering the upgrade books you need for that are only available from Events. This allows you to unlock a new active skill depending on which book you set to active at the time.
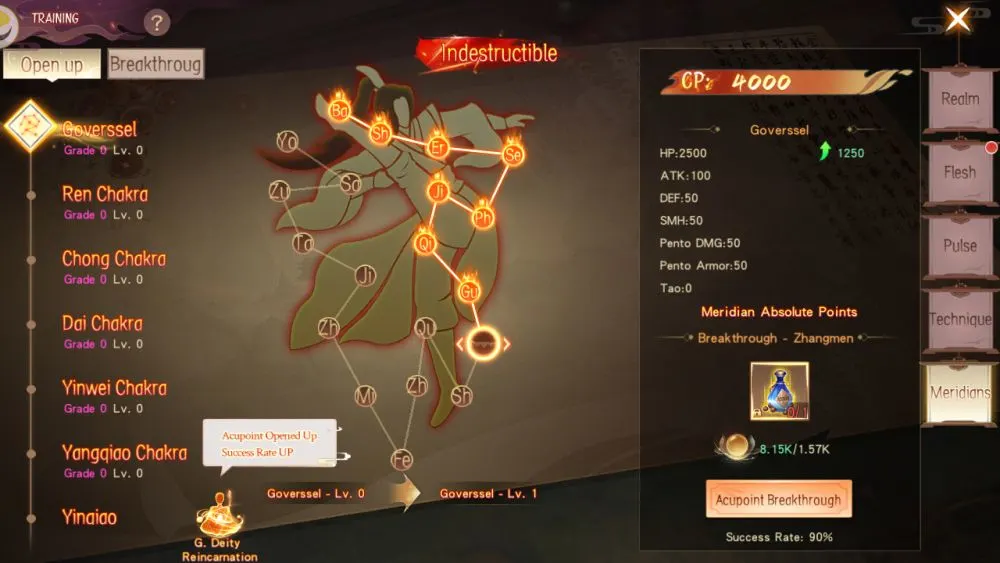
The Meridian tab uses Acupoint Orbs to unlock nodes that, again, give you passive stat boosts. You can get these from the Flesh tab’s Practice tab too, so there’s not much to worry about for this one.
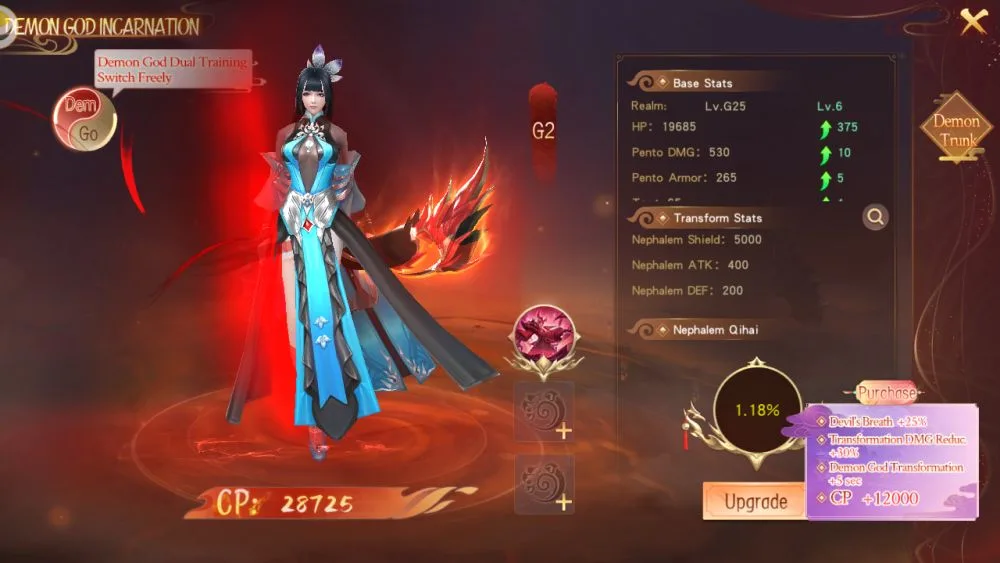
While the Demon God tab doesn’t belong in the Training tab, it’s simple enough to belong here. You unlock this later in the game once you get your second transformation skill, which powers your character up rather than transforming them into someone else. To upgrade this form (along with your base stats!) you need Devil’s Breath materials to pump into it. You can get these from everything in the Boss screen.
The Other Character Tabs
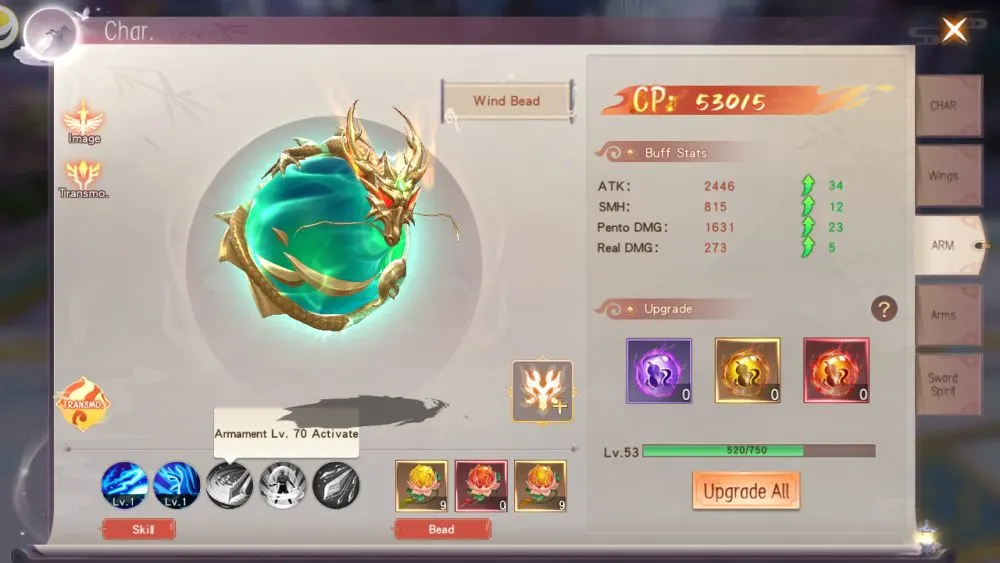
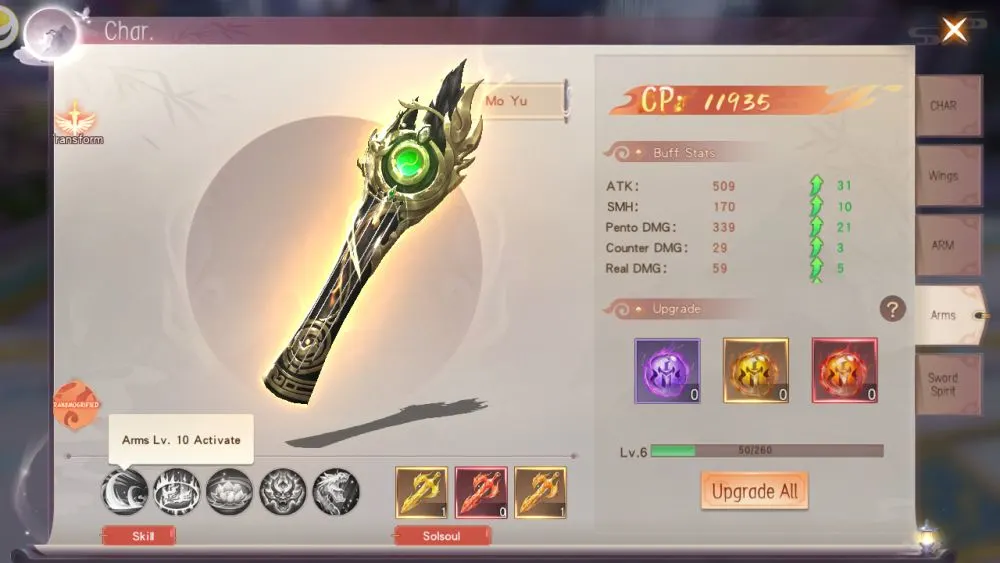
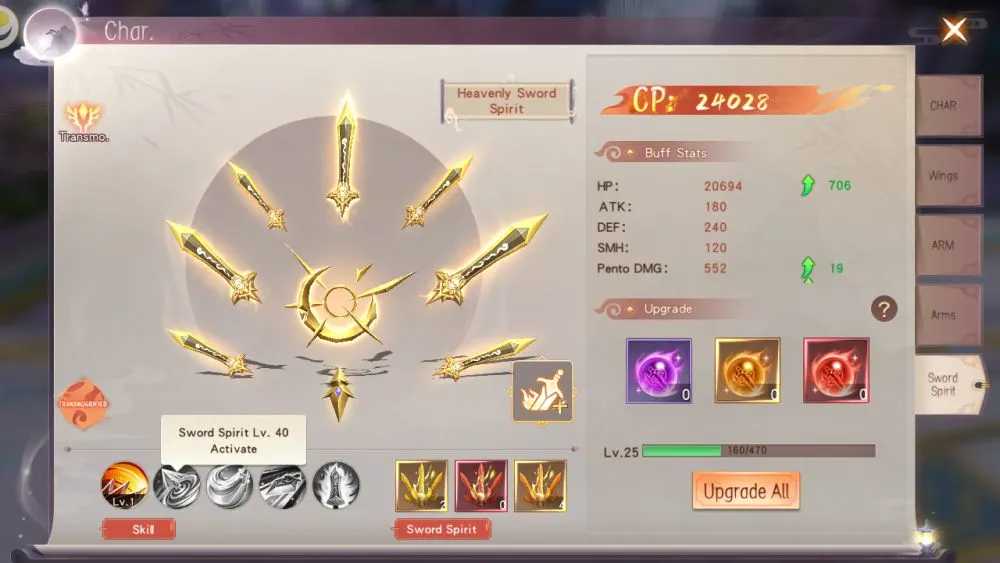
As for the other tabs, the Wings, ARM, Arms (Yeah, that’s not a typo), and Sword Spirit tab are all very similar. They each require their own upgrade orbs to level up, and their own set of secondary stat boosting materials for even more passives.
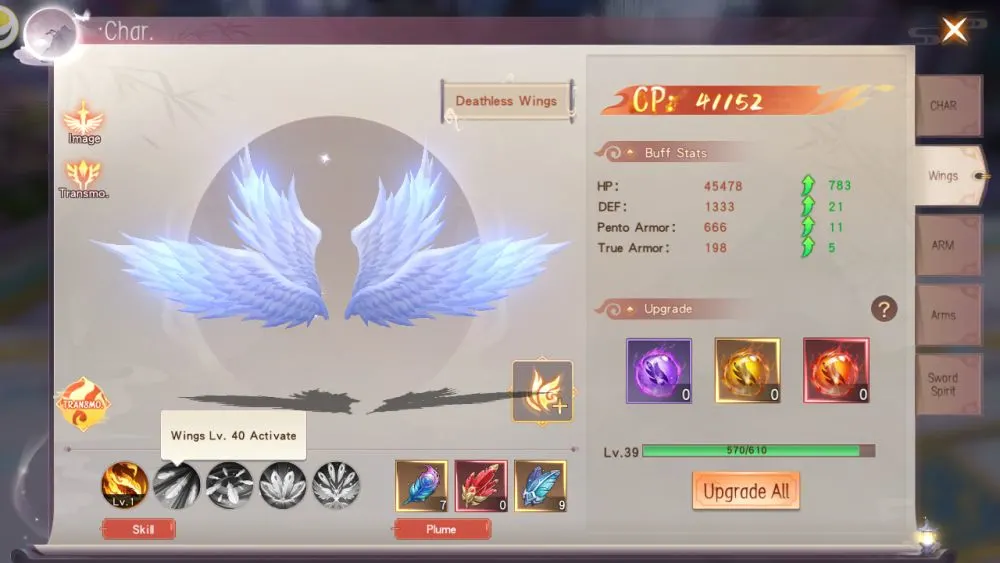
For the Wings tab, you get Wings Essences from Fairy Escort daily missions, and Plumes from Exclusive and World Bosses, with the strongest Golphoenix plumes only available in events.
For the ARM tab, you need a Guild before you can upgrade it. You get Armament Essences from Guild Daily quests, and upgrade Beads from Boss Lair fights. As usual, the stronger Evoke beads are only available from Events.
The Arms Tab also requires a guild, and is even slower to upgrade. Arms Essneces level it up, and you can get the ADV Arms Essence from your Daily Giftpack, and the basic Pri. Arms Essence from Guild Sieges and Guild Quizzes, which don’t happen very often. Sword Animas for the secondary upgrades are given to you slowly via Daily Giftpacks, and the stronger Alnia Swordsoul has to be bought via real money from Value Purchases.
The slowest to upgrade of them all is the Sword Spirit tab, which requires you to do CS 3v3 PVP battles, which are only available on certain days for a few hours. It goes the same for the Sword Spirit secondary upgrade items.
DAILY QUESTS, POINTING YOU IN THE RIGHT DIRECTION
If you’re unsure what to do next, check out the Daily button for a set of daily tasks. There are a lot (And we do mean a lot) of tasks you could be doing right now. While setting the game to autogrind and putting your tablet aside is an option, you can use this tab to point your character in a more effective direction while they do so.
Bounty Quest
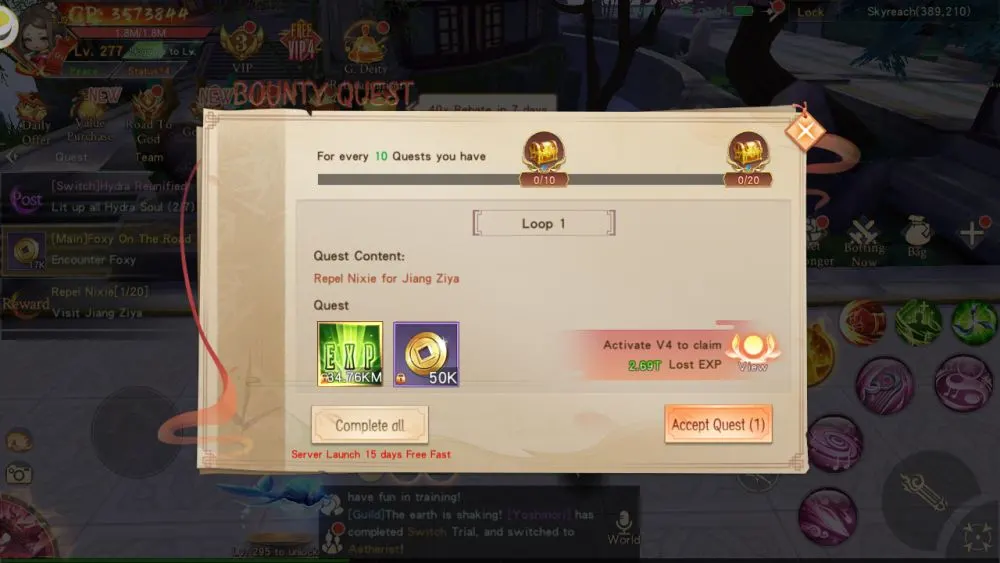
The most basic type of quest, this is the first thing you ought to tick off unless you have a Guild. It’s a set pf 20 small daily quests where you go about doing busywork for the people in the city. It can range from beating up the local monsters and criminals, to inspecting wine and taking care of little fish in ponds. The rewards are pretty ordinary but important, usually Gold or EXP. As for the chests on top of that little window, they drop
Guild Renown
If you’ve joined or made a Guild, the Guild Renown and Guild Weekly missions will be available to you in the Daily button.
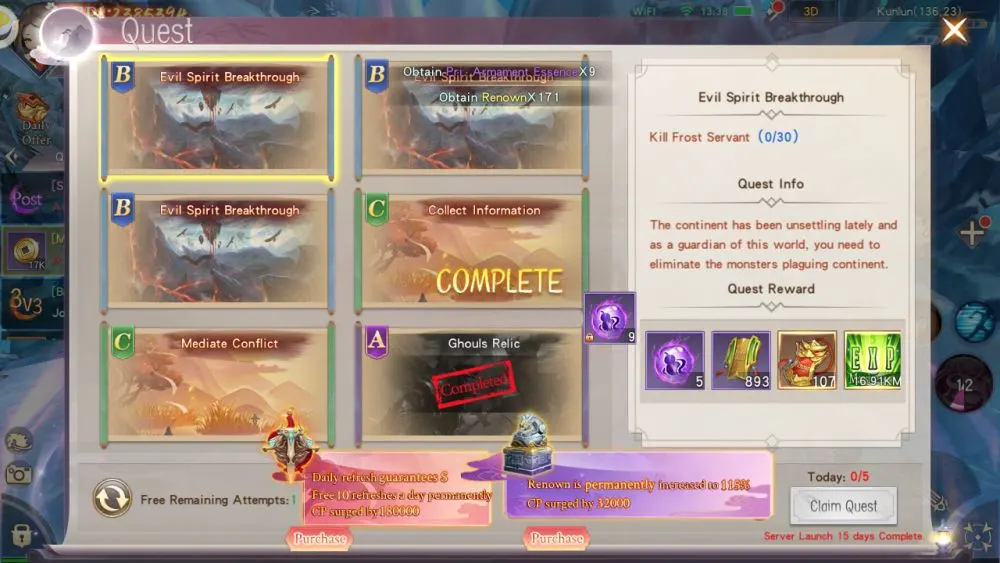
For Guild Renown, you’re given six quests of differing quality, three refreshes you can use to get higher quality quests in case they all have poor rewards, and five tries total. Try to get the highest quality quests available, then refresh rather than doing the C quality quests.
That way, you make the most out of your five daily tries. As for what those rewards are, you get Beads for the ARM tab upgrades, and Guild Contribution which you can use for Guild Training. Ideally, this is the first thing you should do upon logging in, at least if you have a guild.
On the other hand, Guild Weekly is a set of 70 quests meant to be done over the course of the week, and should be the last thing you do barring either Wild Botting or meditating in Skyreach. These quests might have you delivering items, picking fights with the local deranged cultists, and generally going around beating everyone up.
These quests give you Guild Renown much like the Guild Renown daily quests, needed to level up your stats via the Guild Practice screen. Yeah, it’s not technically a Daily quest but it’s still on the Daily tab to remind you to keep up with them.
You can do 10 a day, but these quests are small enough that you can tell your character to autogrind them, go out to wash those dishes piled up in your kitchen, then come back and see that the 70 quests are done. It’s very similar to Bounty Quests.
Arena Combat
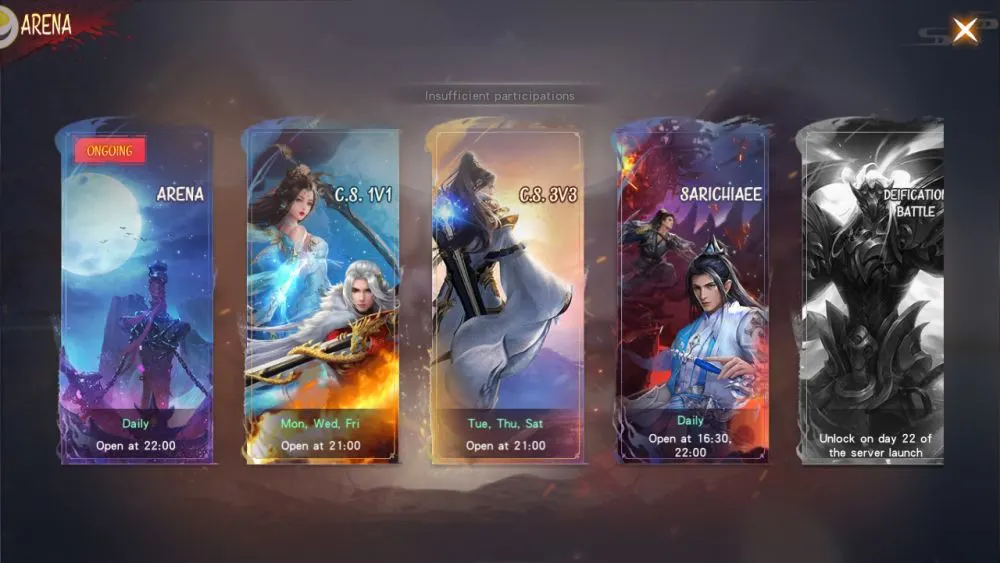
Like most mobile MMOs, you eventually unlock the PVP option, this time under the Arena button. You have 10 attempts per day, and the game immediately points out which players you can bully by marking weaker foes in green, and stronger foes in red. Considering you have absolutely zero control of your character while this goes on, you might as well pick the weaker opponents.
This is your primary source of Mount Advance Orbs, which you get by ranking up the ladder and peeking inside the chest in the pre-battle screen. You also have the CS battle modes, which appear on certain days and allow you to fight in real time with full control. You can also get Mount upgrade Spirits depending on what mode you fight in, with the CS battle modes having more spirits available than basic Arena.
Sarichiaee is a daily battle mode that unlocks later on once you get Deific armor and weapons (an entirely separate tab from your actual, real equipment) that involves controlling points around the map with two huge teams of players bashing each others’ heads in, and yes, you can bring both kinds of Transformation here! It drops Carve gems and Advance Jades for upgrading both the Deific Weapon and Armor respectively.
Boss Busting
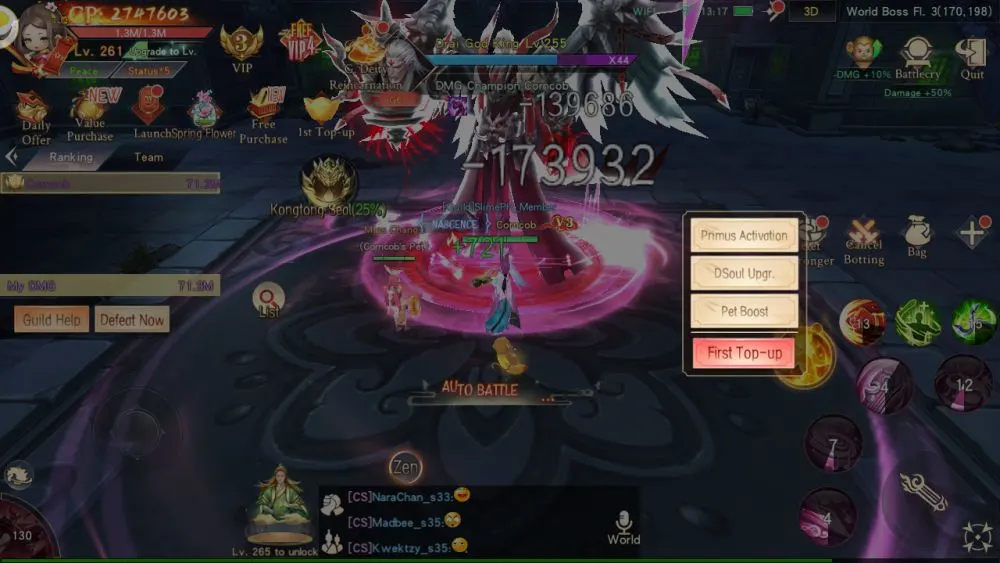
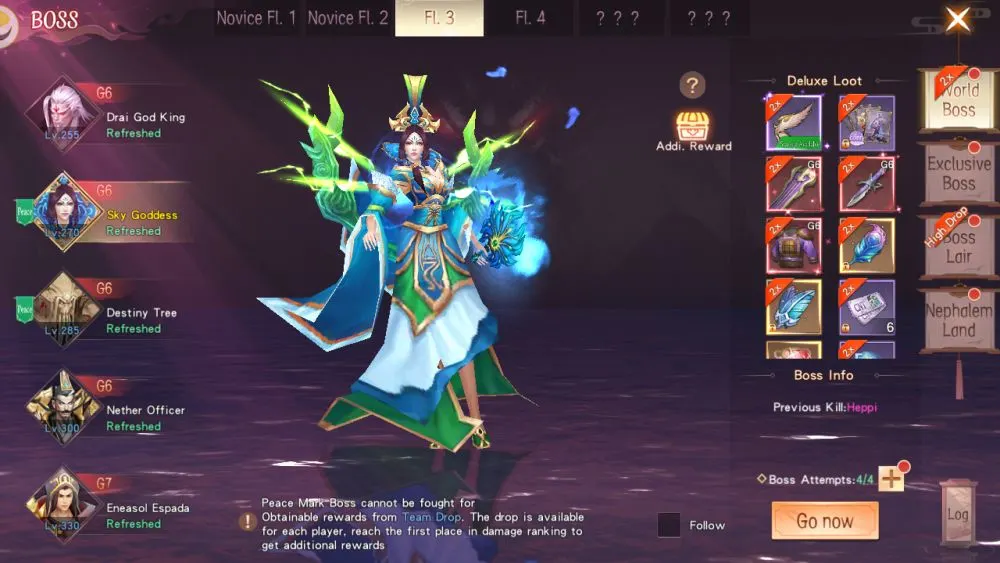
Eventually, the World Boss and Boss Lair will be available to you, and both of these buttons take you to a different tab on the same screen. You have several attempts a day to fight each boss, differing on which bossfight you enter.
This is your main source of equipment, along with the chance for stuff like pet eggs and other rewards. You’re stuck on the entry floor unless you fork over some cash to be a VIP (It says VIP doesn’t cost a cent, but it costs unbound Jade, which DOES cost money, so it still comes down to forking over real cash money dosh), so you might as well stay there.
Keep in mind that bosses need time to refresh and rest up after you break their kneecaps, so you can’t just spamfight them until you run out of attempts. You can use the little Boss Retrieve button to check out which boss is currently active, within your power level to beat, and awaiting a punch to the face, so you don’t waste your time waiting several minutes for them to respawn.
Periglenes Vault, An Environmentalist’s Nightmare
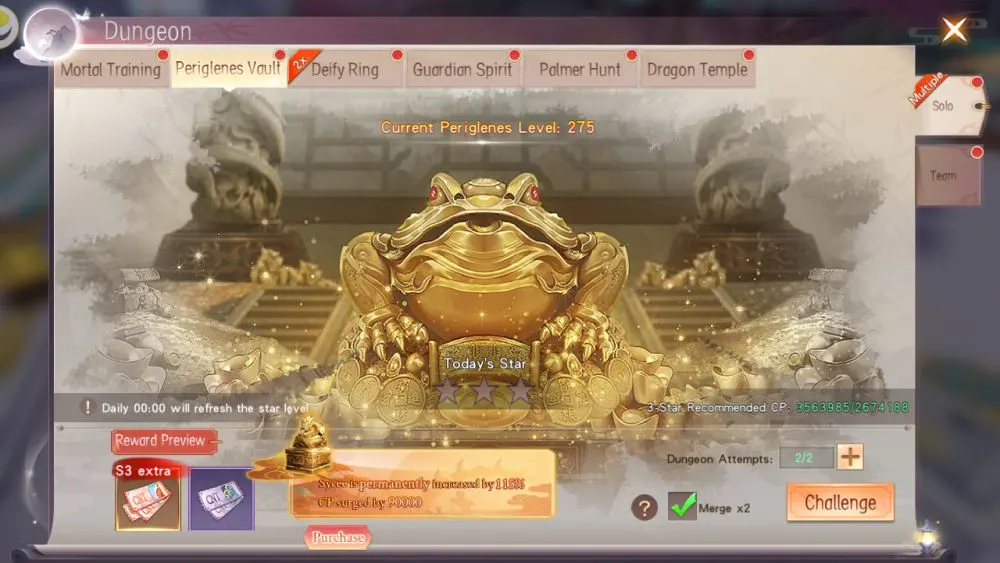
The incilius periglenes (also known as the Golden Toad) species of frog is extinct in our world. And if you want Sychees badly, you’ll want to help make them extinct here too. This dungeon gives you Sychees both for beating the tar out of the local giant golden toad, and its protectors.
You have two daily attempts for this, and it’s an easy enough fight, so go shake that frog down for his lunch money. You’ll need Sychees for Primus Activation upgrades later on, not to mention it’s the currency for the player controlled Auction House, so this is pretty high on your priority list.
Fate Book Quests
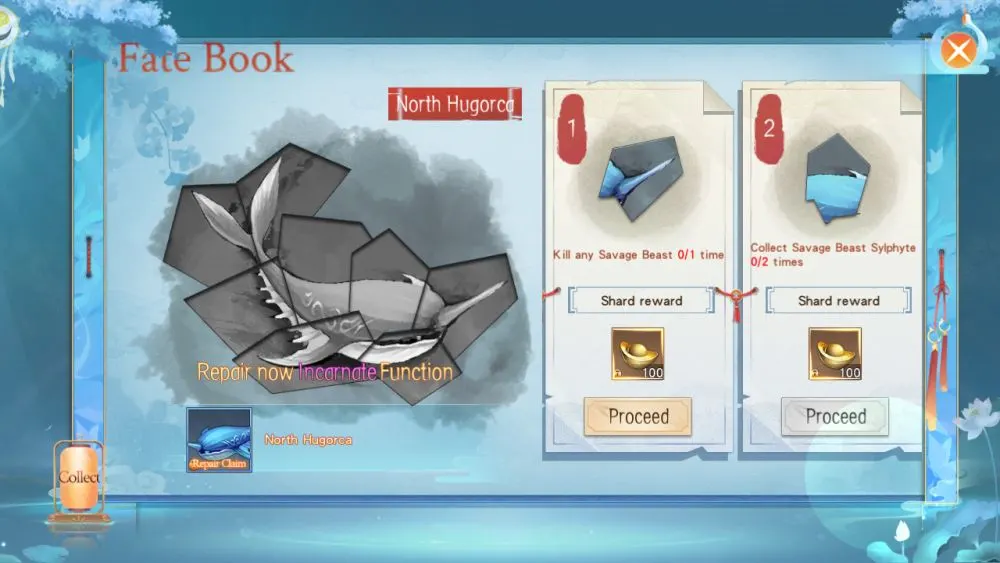
On the left side of your screen, there is usually a large icon with a percentage on it, especially early in the game. Those are Fate Book quests, which allow you to unlock new systems in the game. Just tap on it and press Proceed on the list of quests in them to finish them.
Once you beat one of them, press Fix to claim a reward and a Shard. Once you have all the shards, a new system is unlocked, typically a new type of upgrade screen. This is your main progression above all others, since following its quests often unlocks new places to go, like new bossfights or grinding areas.
Mortal Training
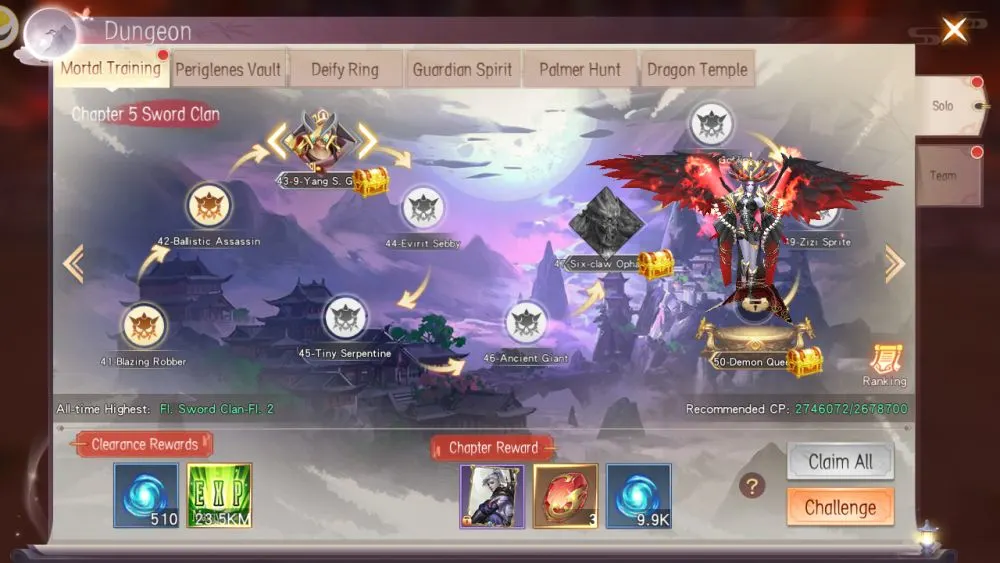
Mortal Training, also available in the Dungeon button, are a set of bossfights that are of a higher difficulty than normal. This is where you’re likely to meet your first death barring a PVP match of any sort, though keeping up with your character upgrades and grinding some more will still help you beat this in short order.
Upgrading these gives you general buffs, and upgrading past the first tier also unlocks the other tabs, in particular the Flesh tab that generates free resources after a certain amount of time. Keep going until something kills you, then go back to normal grinding so you can break the last guy’s kneecaps later. Remember to claim the chests on the pre-battle node map too!
Deify Ring
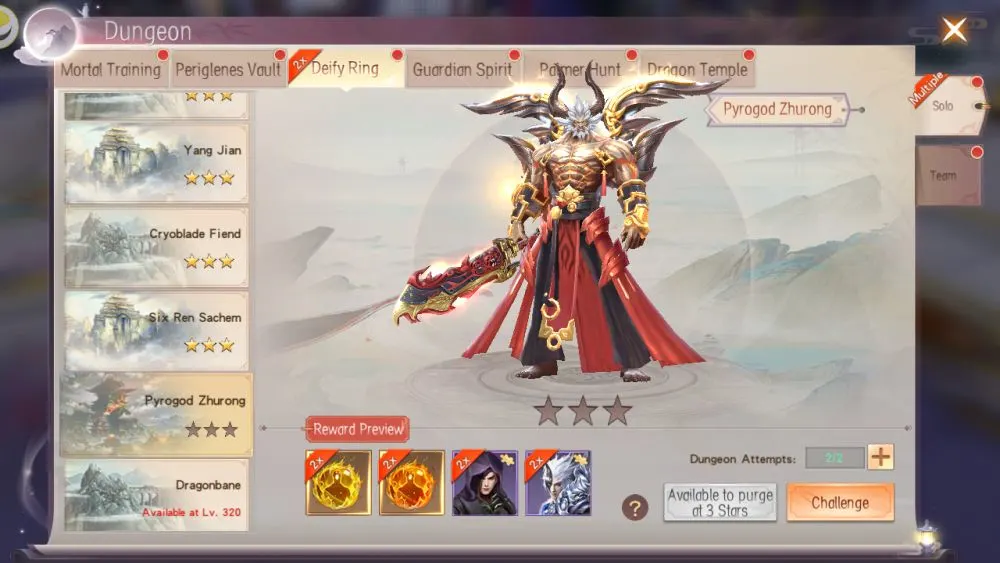
Tied to the God Transformation system, Deify Ring is where you get shards for more transformations, and shards to upgrade those transformations. As usual, you have to fight a boss and beat the rewards out of them. This is also where you can get Might orbs and God Psyche orbs, items needed to enhance the transformations you already have access to.
Guardian Spirit (You, Not Them)
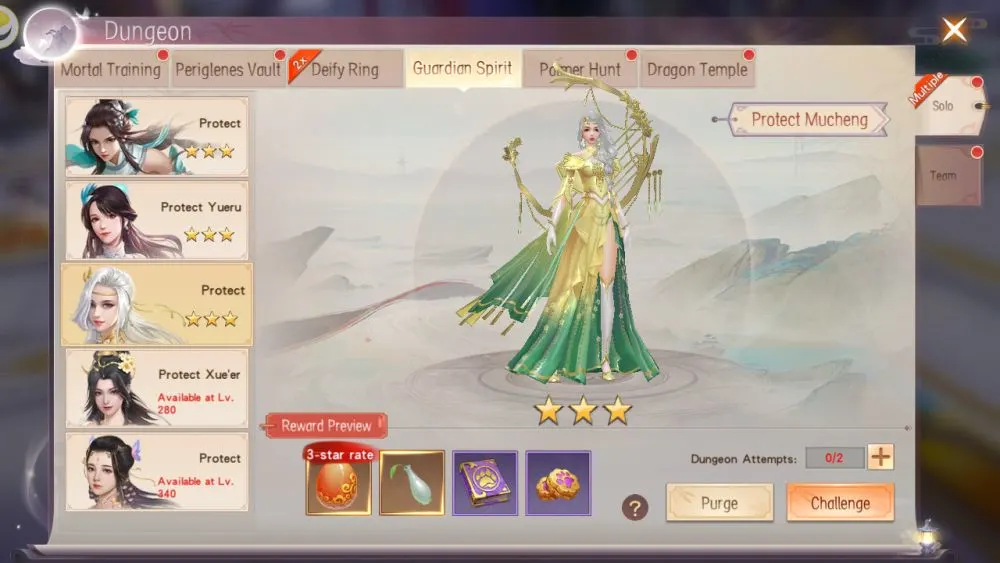
A defensive action where you protect a character from several waves of mooks who want to eat their face. This is your go-to to upgrade your Pets and get higher tier ones, as even the lower level missions have a chance to drop Orange pet eggs. More realistically, it will instead drop upgrade items like pet food for levelling, and Pure Amritas for ascending said pets, which increase their stats when used.
Ascend Boat? Did It Sink The First Time?
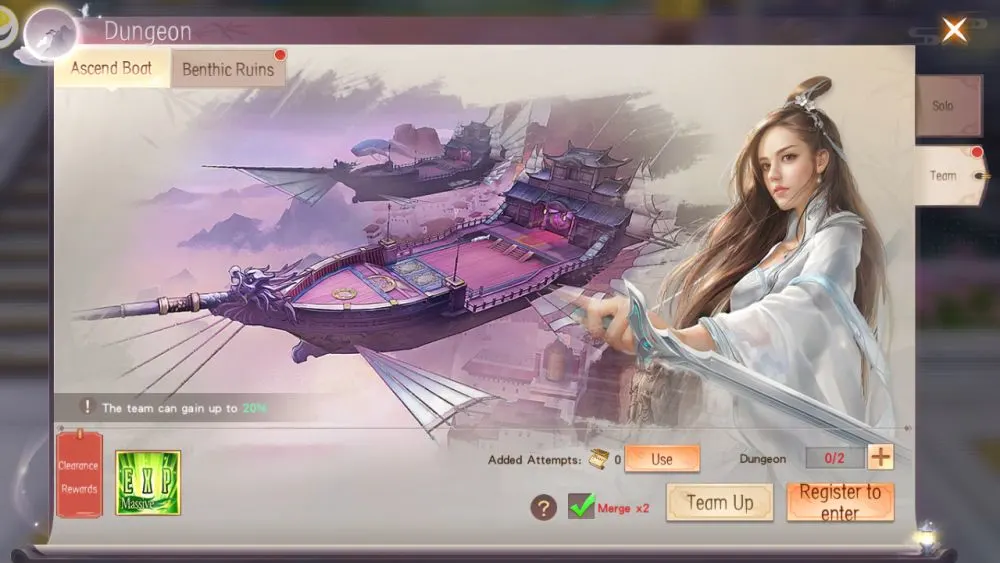
The Ascend Boat is a grinding spot for EXP, where as the name implies, you and your party are on a boat kicking enemy boarders off into the water to feed the sharks. There is a timer, and the goal is to kill as meny enemies as possible until the timer runs out. You can use EXP Boost potions before starting the fight, and you can bring Knights (bots in place of actual players) in the pre-battle screen if you don’t want to wait for a party.
Palmer Hunt
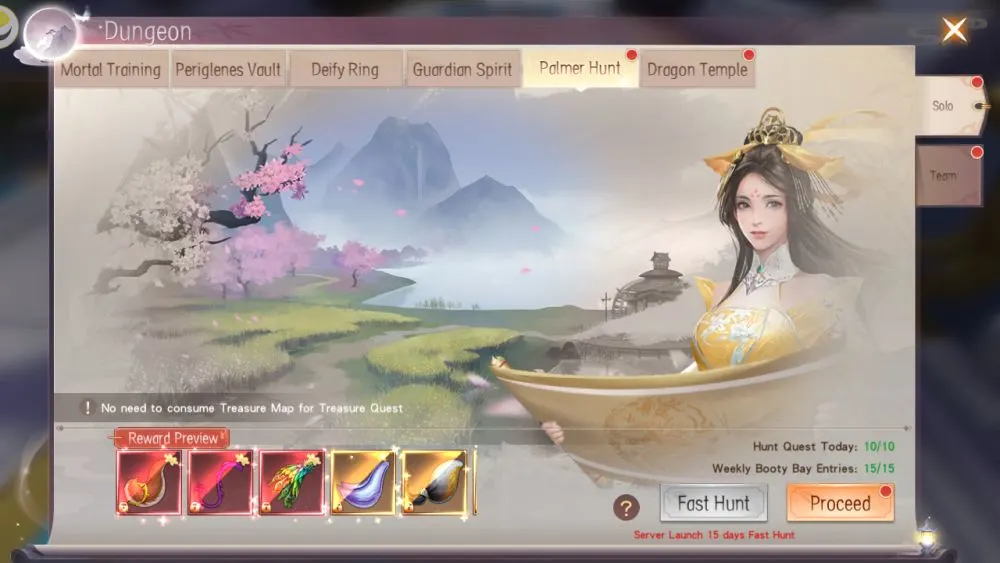
Palmer Hunt is one of the less violent quests. Your character heads off to a calm island, and digs in the ground for treasure, auto-pathing all the way. While you don’t need any treasure maps to find loot in this mode, the maps do improve the drop rate of a dig site. This is your primary place to find Drasouls, for the Occult screen upgrades. Your character can dig a maximum of 10 times a day.
Wild Botting
The basic option, pressing the Wild Botting key teleports your character to a place full of mooks for your character to beat up. This or Skyreach is probably the last on your to-do list, since you can do either one while AFKing. Either way, you’ll come back to your character likely levelled a bit higher than last time.
Skyreach
And finally, once all that is done, you can go to Daily and press the Skyreach button before logging off, just to make sure you gain EXP while your character takes a nap while floating in midair. Nothing more to it than that!
And this ends our Mirage: Perfect Skyline beginner’s guide. We hope the tips and tricks we shared in this article will help you out during your gameplay. If you have tips to add, feel free to leave a comment below!

