Robin Hood, Legolas, Katniss Everdeen, Merida, Hawkeye—it’s hard to have a mental image of any of these characters without their trusted weapon of choice: the bow and arrow. It’s part of what made them iconic and memorable, and it’s always a treat to see them display their skills in archery, which, in modern times, has undeniably become a pretty niche hobby or sport.
Back in the day, though, knowing how to use a bow was a skill that most people practiced for hunting and, of course, warfare. Archers were an integral part of the ancient battlefront as they can effectively dwindle the numbers of enemy infantry or cavalry (provided they have a competent commander, of course). After all, it’s pretty hard to dodge a rain of arrows, and even shields or armor can get worn by what are essentially smaller spears coming down from the sky.
Being an expert bowman naturally requires an understanding of simple physics since arrows can’t just be fired willy-nilly. An aspiring archer must also have the strength to pull a bow string taut, which is way, way harder than it sounds. Fortunately, you can have a fun time understanding some basic principles of archery when you play Merge Archers: Bow and Arrow.
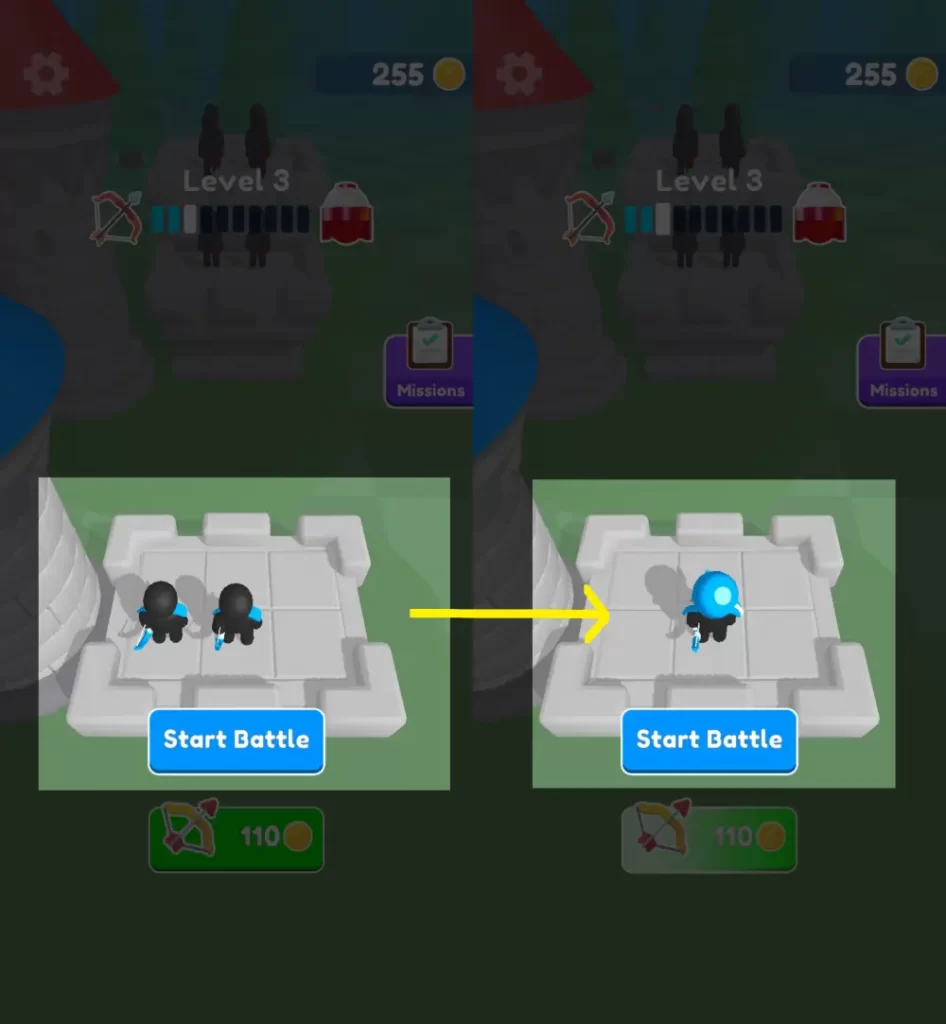
Released by Azur Games, Merge Archers: Bow and Arrow is, as its name suggests, all about archery with a little bit of the merge mechanic on the side. The gameplay is fairly simple: you begin with 3D stickmen archers situated atop a platform at the side of a fortress. This platform has grid lines where you can summon more stickmen archers, which are considered the most basic unit of the game.
If you merge 2 stickmen archers together, they’ll form a single slightly bigger, slightly stronger archer that can shoot more arrows and has better armor. The more you merge 2 archers of the same type, the stronger the resulting archer would be.
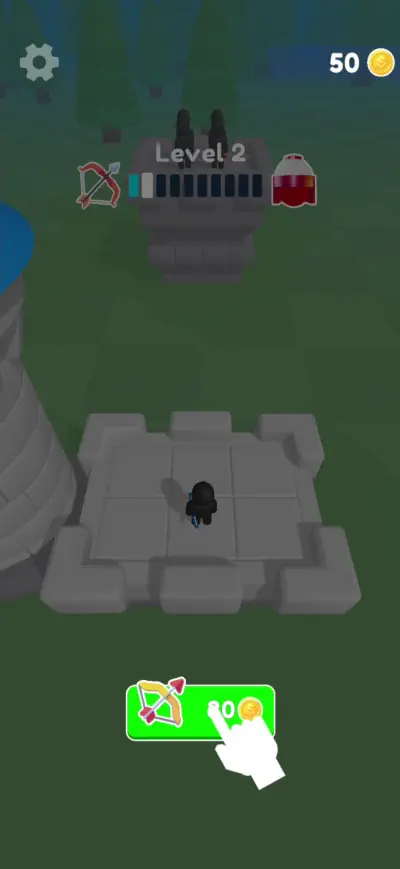
The only caveat is that you need to spend gold to summon archers (even in a game, you can’t ask soldiers to fight for you without some battle stipend). The more stickmen archers you summon and the more you fight, the higher the cost of summoning would be. Fortunately, the gold you earn as spoils of war with each battle won also increases, and the cost of summoning archers caps at around 13,760 gold.
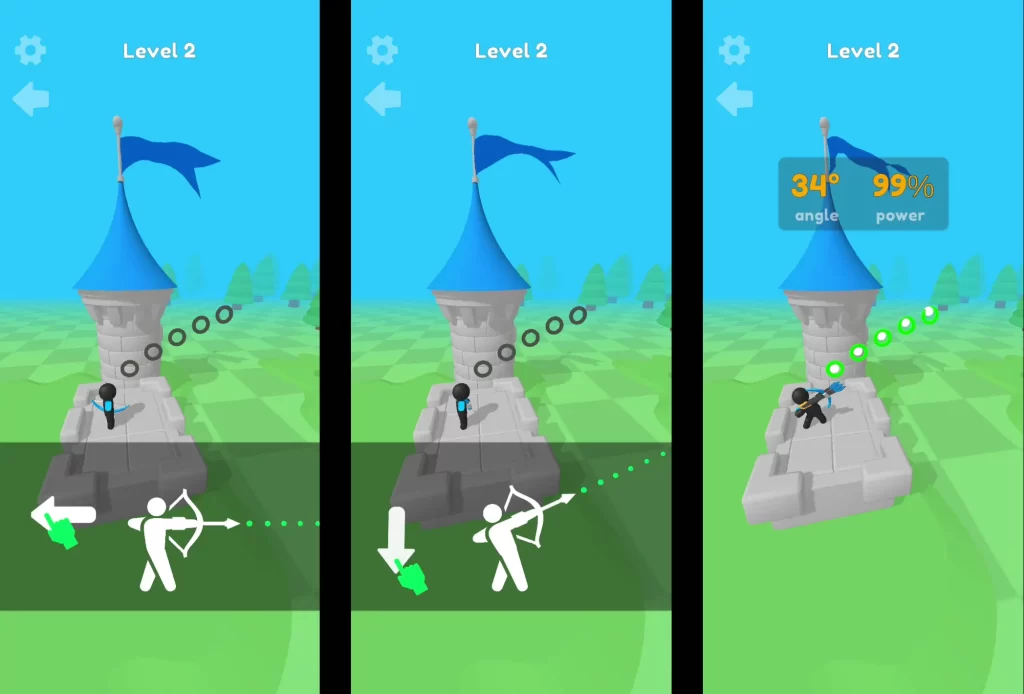
The battle mechanics for this game are also pretty straightforward: when you’ve summoned and merged your archers, and have formally begun a fight, all you need to do is move your finger left or right to determine how much power your archers should exert in pulling the string of their bows, and up or down to determine the trajectory of their collective shot. Values for the angle of the shot and power of your team will appear at the top of the screen. Release your finger once you’re satisfied with both the angle and power you want your archers to exert.
Since it’s a turn-based game, you and your enemy each get to make a move alternately until one force has been completely decimated. As the player, you always have the first move by default, which is already somewhat of an advantage. What makes the game challenging is that you’re not really given the opportunity to map out the position and numbers of the enemy force until you make the first shot.
You’re only given an incomplete preview during battle preparations since you can’t move your screen to change your viewpoint. The way it works is that you can only really tell how the enemy force is arranged and how big they are when your arrows fly toward the enemy and reveal their position.
Apart from the collective power of your archers, you also get a few bonuses in the form of Magic. After 2 turns, you get to fill up your Magic meter and use whatever Magic is available or that which you’ve chosen on your second turn. There are different types of Magic that each have their own unique effect, which can debilitate and wipe out enemies, or heal your allies.
Overall, the game appears easy enough to understand, but losses are not an impossibility, especially when faced with an enemy AI that’s a little smarter than what you expected. To become an effective commander of your archers, we’ve put together this beginner’s guide for Merge Archers: Bow and Arrow so you can get all the Magic you need, earn and spend your gold wisely, and shoot your way towards a shining victory!
Approximate, Adjust, Adapt, Add
As we’ve previously explained the basic game mechanics in our introduction, let’s look a little deeper into the nitty-gritty of battle. In the tutorial stages, you’ll see a suggested trajectory for where your arrows should travel. All you need to do is align the angle of your archer’s collective shot to a curve of gray dots that extend toward the right of the screen.
If you release your arrows at exactly that angle, you’ll be able to see the entirety of the enemy force as the arrows travel, as well as hit the opposing contingent with ease. In the latter stages, however, the supposed training wheels will be off and you’ll have to apply a quadruple-A mindset while playing: approximate, adjust, adapt, and add.
Approximate
Approximate the angle at which your archers ought to release their arrows. Since you always have the first move by default, this can feel somewhat like a shot in the dark since you will only have a vague idea of how big the opposing force is and how they’re arranged on the battlefield. During the early stages, the enemy team is placed just in front of yours. They may be composed of a handful of archers and their types may vary. They can be a mix of basic stickmen archers and a couple of higher-level archers (those with helmets, shields, huge spears, or even mounted on horses, etc.), or they can all be high-level archers.
But as you continue playing, you’ll have to contend with more than one cluster of enemies, and some of them can be situated on higher or lower vantage points depending on the structure of the enemy’s fortress. A cluster of enemies can be found in front of a fortress while others are protected by the walls and can only be reached by arrows if you manage to figure out the right combination of angle and power that will give you the chance to quell their numbers. In some cases, enemies can be found on top of hot air balloons or other floating objects above the fortress. Conversely, some enemies might be located way lower than your team’s direct line of sight.
Since you’ll only be able to discover key information like enemy numbers and placement after the first shot, we highly recommend using this first shot as something of a reconnaissance shot. With a high-angle trajectory (around 40 to 45 degrees should be good) coupled with maximum power, your arrows will fly high and cover the most mileage, which will basically give you a bird’s-eye view of the enemy forces below. From here, you can determine how much power and and at what angle your arrows need to be depending on the placement of the enemy team. Besides, who knows—you might actually get lucky and hit some of the enemy troops with your reconnaissance shot.
Adjust
Adjust based on the knowledge you’ve gained in the previous turn. As the battle progresses with each turn, you’re still going to have to approximate the right combination of angle and power to wipe out enemy forces. The good news is that you can see the angle in which you’ve released your previous shot, making further adjustments much easier. Maybe you just missed the mark by a few degrees so use the gray dots indicating the previous trajectory as your guide when adjusting the angle in your current turn.
In terms of power, using maximum power is a good idea, but not all the time. In some cases when the enemy force is situated at a lower vantage point, you might need to pull back on that power to allow your arrows to properly curve downward since you’ll have to adjust the angle to a much lower degree. Too much power will cause your arrows to have a slightly more linear curve as opposed to having a more defined arc when released at a lower angle.
Conversely, maximum power and a high angle will cause your arrows to fly following a larger curve and cover more distance. It’s all a matter of adjusting with the rules of basic physics in mind.
Adapt
Like any good commanding officer, adapt to the situation. Sometimes, the game throws you a bit of a curveball and the enemy team calls on reinforcements, either from inside their fortress or even from the sky (remember those hot air balloons we mentioned?). Just when you thought you’ve wiped out a clump of enemies, they’re immediately replaced by more troops or stronger ones!
Fortunately, you get to see where these reinforcements are situated so it’s not difficult to determine how to quash their numbers or get that satisfying bull’s eye.
Of course, adapting to the situation also means being able to make the necessary adjustments when your own force gets hit and you lose some archers in battle.
The good news is that they’ll be resurrected in the next fight; the bad news is you can’t reposition your archers on your fortress. What you can do is decide whether to take out enemy clusters that either have more archers but are of a lower level, or hit enemy archers of a higher level but are of lesser number. This may be a good time to use your Magic (provided its meter is filled), which we’ll talk more about later. In case you don’t have any Magic available for use, then you may defer to our initial recommendation and cross your fingers.
Add
Before any battle starts, don’t forget to add more archers to your team! Though you might only be limited by the amount of gold you have, continue to summon archers as much as you can afford so you’re able to merge them and bolster your team’s power. Keep in mind that the more you merge archers, the stronger they will be.
Not only will they get reinforced armor, but they’ll also be able to release more arrows if they’re at a high level. Basically, just having 2 high-level archers with a full regalia of helmets, armor, and more than a handful of arrows are already a force to be reckoned with.
Though their number might be rather small, their strength more than makes up for the lack. However, you can’t get any of these high-level archers if you don’t keep summoning basic archers to merge them. Thus, be diligent in this regard. In time, you’ll get to make many high-level archers that can take on any opposing team of any size.
Since we’re on the topic of adding more archers, we’d also like to add that there are times when you’ll have a team composed of archers of different levels. We recommend placing your strongest archers at the back of your fortress and the weakest ones in front.
This won’t really prevent your strongest archers from being hit by enemy fire, but we’ve noticed that archers at the front of your team are more likely to get struck than those at the back. However, there’s no guarantee as the enemy might just get lucky themselves and do some damage to your strongest troops. Fortunately, armored archers won’t immediately die unless inundated by enemy fire and will typically survive an onslaught of arrows or spears thanks to their shield and armor.
Use Your Magic
Besides creating a formidable troop of archers to achieve victory, the game also gives you Magic at your disposal. As mentioned before, Magic can be used after 2 turns, when its meter has been filled. After that, you need to watch an ad to use your Magic again.
Each type of Magic can gradually be unlocked as you play the game and each one has a unique effect that can turn the tide of battle. All in all, there are currently 14 Magic types that you can get, though it looks like more will be added in future updates of the game.
Here’s a quick summary of the 14 Magic types that will be available to you:
- Bomb: This is the very first Magic power you gain. Simply put, it lets you throw a bomb at the enemy, but you have to aim the cannon from which the bomb is released.
- Meteor Shower: Summon a literal meteor shower on your enemies. Often, it targets the enemies that are farthest from you.
- Magic Shield: Protects your troops against enemy fire for 2 turns.
- Polymorph: Turns all your enemies into defenseless sheep for 2 turns.
- UFO: Summons an alien spaceship that transports your enemies out of the battlefield.
- Blizzard: Freezes your enemies for 4 turns.
- Plague: Poisons all enemies for 3 turns. Some enemies won’t be killed outright, unless they’ve already been severely damaged by previous fire.
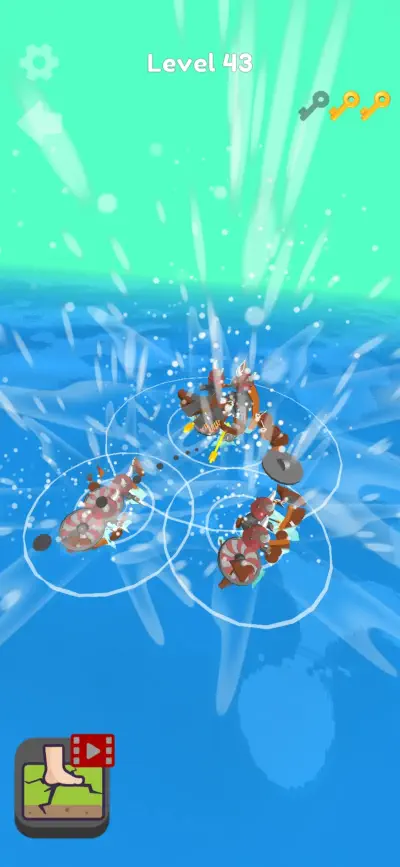
- Earthquake: Destroys enemy fortifications, which can come in handy when an opposing team has a huge fortress to cover them.
- Shooting Star: This is similar to the meteor shower, except stars fall from the sky to hit enemies.
- Resurrection: Resurrects your strongest archer in case they fall in battle.
- Thunderstorm: Enemy archers are struck by lighting when activated.
- Black Hole: Works similarly to the UFO, but it will be black hole that pulls enemies into the void.
- Tornado: Summons a destructive fire tornado.
- Divine Heal: Heals all your injured archers, preparing them for a retaliatory attack. Archers who have died will remain dead throughout the round.
Any type of Magic will work well as they give you a significant edge in a fight. What’s important about using Magic basically boils down to timing: unless it heals or resurrects troops, use any type of offensive Magic as soon as you have the chance (this includes Polymorph since it renders your enemies useless for a time).
This should reduce enemy troops and tip the fight to your advantage. Keep in mind that battles can be extremely short and might even be finished in 2 turns if you’re unlucky enough to face enemy troops that just so happen to wipe out your team during their first turn. That said, don’t waste the opportunity and use any offensive Magic as soon as it’s available. Conversely, use healing or resurrection Magic only when you have dead or injured archers.
Boss Fight: Aim for the Head
Every 10 or so levels, you’ll be faced not with the usual enemy troops but a boss fight! Bosses take the form of giant creatures such as giant stickmen, giant dragons, giant amazons, etc. depending on the island you’re fighting on (more on this in the next section). Sometimes, there might only be one boss you have to bring down; other times, there’s a main boss and a few sub-bosses you have to defeat.
These bosses will try to destroy your faction’s fortresses within the area and your objective is to kill them before all the fortresses, along with ally troops, are smashed to bits. Each boss has a health bar on top of them and while their health bar seems commensurate to their massive size, the good news is that they move slowly and clunkily across the battlefield.
Boss fights work slightly differently from regular battles: during boss fights, you get to aim where your troops fire using a mechanic akin to first-person shooters. By swiping your fingers over the screen, you can aim the crosshairs towards your target. If you release your finger, your troops will fire in the direction you’ve chosen.
Since bosses move in a lumbering manner, make every effort to aim for their head when firing. This should do the most damage, as well as prevent the enemy boss from attacking ally fortresses for a short while. Aim quickly, aim true, and aim for the head—unless you want the boss to come for you!
Island Fights: Pick the Weaker Foe
In the previous section, we’ve mentioned that the form bosses take on will depend on the island upon which you’re currently waging a campaign. This is because you get to travel across different islands, which are essentially just modern-day countries still locked in their ancient time frame. For instance, if you traveled to the “island” of China, the boss you’ll fight will take the form of a flying eastern dragon that shoots a fireball out of its mouth. If you go to the island of the amazon warriors, the boss you’ll fight is a giant amazon, and so on.
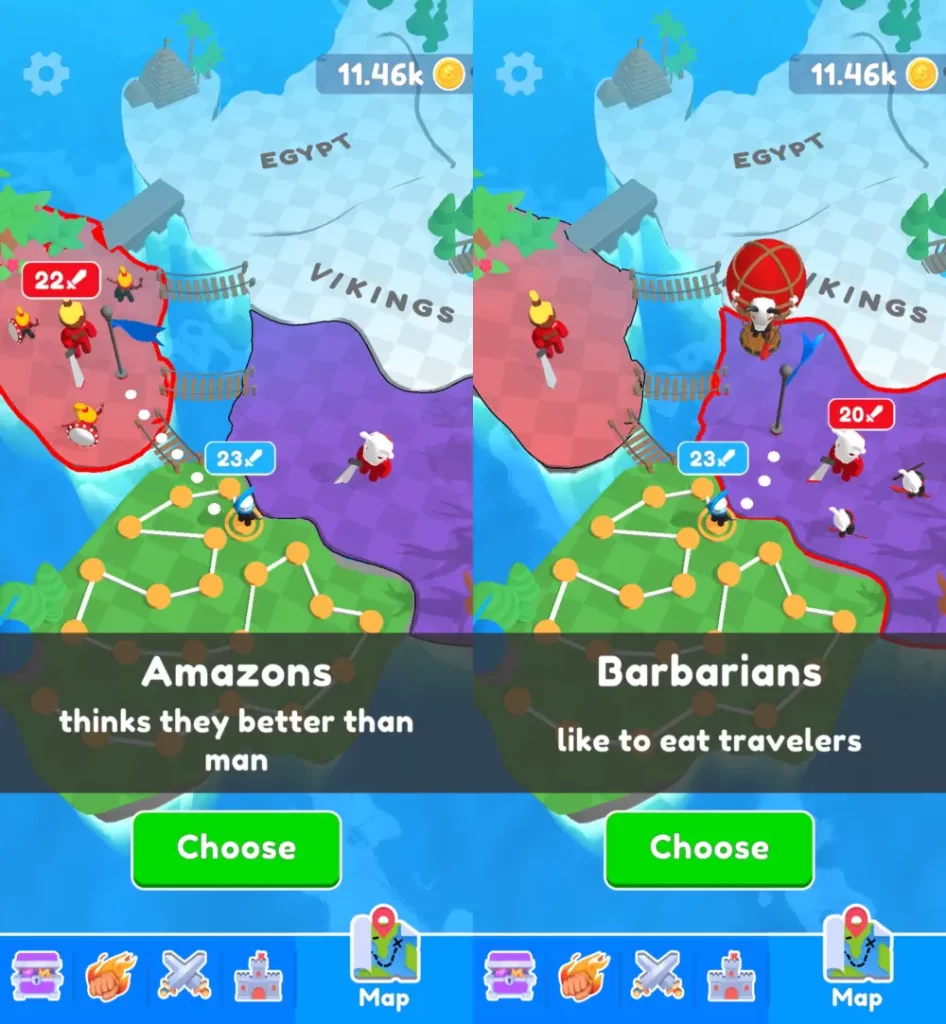
There are different islands and you can see where you are on the map. When you’re done with the current island you’re in, you get to pick which one you’ll conquer next. Often, you’ll be presented with 2 choices and if you look closely, you’ll see that the representative for a specific island has a number on top of their head.
The representative of your troops also has a number, which indicates your team’s fighting power. Naturally, pick the island whose representative has a lower number than yours. This is because a quick auto battle between the two representatives will ensue before you get to actually travel through the stages in that particular island. If the enemy has a lower number, your win should be guaranteed.
Speaking of different islands, you’ll actually get an idea of what islands are available when you start unlocking skins for your fortresses whenever you get to collect 3 keys to access a treasure room. Fortress skins don’t do anything to boost your troop strength—they only make your fortress change its appearance.
There are currently 13 available fortress skins, including Big Ben, a windmill from The Netherlands, the Eiffel Tower, an Egyptian pyramid, the Leaning Tower of Pisa, and so on.
Get Bonus Rewards by Watching Ads
Now we come to the last part of our guide, which is all about what watching ads can do to give your troops some bonuses in and out of a fight. We know, we know—ads can be a little distracting, but watching the occasional ad won’t hurt since they provide the following rewards:
- Summon extra archers: When you’ve run out of gold to summon archers before battle, you can watch ads to summon more.
- Use Magic a second time: Once you’ve used any type of Magic in a battle, you can watch an ad to activate this a second time if necessary.
- Fast-track unlocking Magic and fortress skins: Magic and fortress skins can be unlocked as you play, but you can fast-track this once you watch an ad whenever you access the Magic or Fortress tabs. You can choose to unlock these features the regular way, which is to continuously play the game, but you have to still watch an ad when you do, so you might as well fast-track the process if you have the time and patience for it.
- Get extra keys: From time to time, you’ll be able to collect keys hanging around the battlefield whenever your arrows go through them. When you collect 3 keys, you get to access a treasure room where you can open 3 chests with gold. If you haven’t unlocked any of the fortress skins, this is where you can get them if you find a skin inside a chest. After spending 3 keys, you can watch ads for additional keys to open the remaining treasure chests.
- Skip waiting time for missions to refresh: At the right side of the screen before battles, you can see a mission list where you can accomplish 3 tasks at a time. Completing all these tasks—such as merging archers, defeating a number of enemies, getting headshots, and so on—will grant you gold rewards. However, if you’ve completed all the listed tasks, you’ll have to wait around 16 hours before the list can be refreshed. You may skip the long waiting time to refresh the mission list by watching an ad.
- Multiply rewards after battle: Successful battles yield a ton of gold and from time to time, you’ll be able to double, triple, or even quadruple your rewards by watching an ad. How big your reward will be will depend on the multiplier value the ticker will land on.
With this, we conclude our beginner’s guide for Merge Archers: Bow and Arrow! Hopefully, our guide has taught you a trick or two (or more!) about how to win battles quickly and decisively, as well as how to get a surplus of those shiny war spoils on the side. Which Magic skill has proven to be the most useful or reliable for you in battle? Do you have a favorite fortress skin? Which boss or group of people did you have the most difficulty fighting? Share your thoughts in our comment section below!








MONTGOMERY
Tuesday 11th of July 2023
I've somehow gotten into the situation where each of my 6 archers is a different level. As a result, none of them can be merged and leveled up. What do I do?