Tower defense games have always been an attractive and exciting genre, especially for players who revel in strategy games and similar brain-teasers. In contrast, virtual board games span a variety of themes and subgenres on their own but have become an avenue for strategy-oriented gameplay as well. In essence, both these genres center around the necessity for players to plan ahead and think every action through before initiating it, although luck and probability being mixed in exponentially increases possible long-term outcomes as well as the game’s replay value.
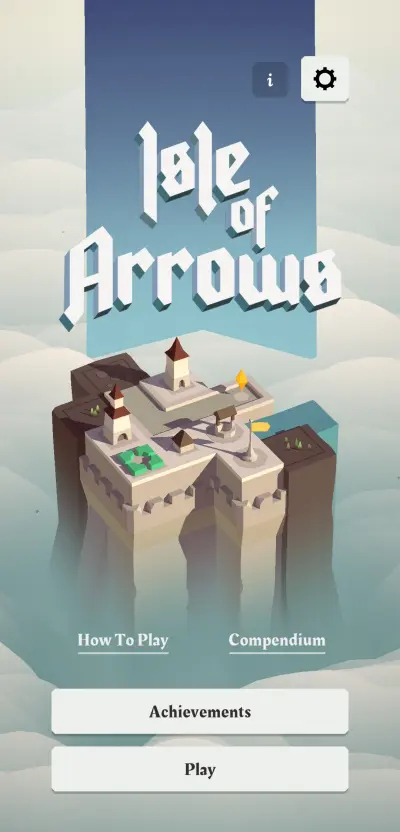
Gridpop’s latest title Isle of Arrows, available on mobile platforms as well as on PC, combines gameplay mechanics of conventional tower defense games with card-based board games, mixing in plenty of unique features as well.
From the title itself, your adventure starts in a small, practically deserted isle where enemies that spawn from one point must be eliminated before they reach the end of their march. Cards are drawn each round and can be placed as tiles to expand your isle as well as strengthen its defenses against the succeeding waves of enemies.

Beyond the arrow towers that stand as your main line of offense and defense against the hordes of enemies that come with each wave, there are modifiers and various other game elements that can either help you in your crusade or make it a bit more challenging. In any case, these unlockable extras along with various game modes ensure that every tower defense adventure you have will be unlike any other.
Isle of Arrows is surely one of those games that are rather easy to pick up and play but takes some time and effort to fully master. There are tutorials as well as in-game guides for you to learn from but experience in actual runs as well as planning and patience will serve as the top tools of the trade.
If you have just started your adventure in the world of Isle of Arrows, or are about to do so, and want a head start in your journey, then you came to the right place. We have compiled a detailed Isle of Arrows Guide, including tips, tricks, and strategies to dominate your enemies and extend your runs.
1. Master The Basic Mechanics
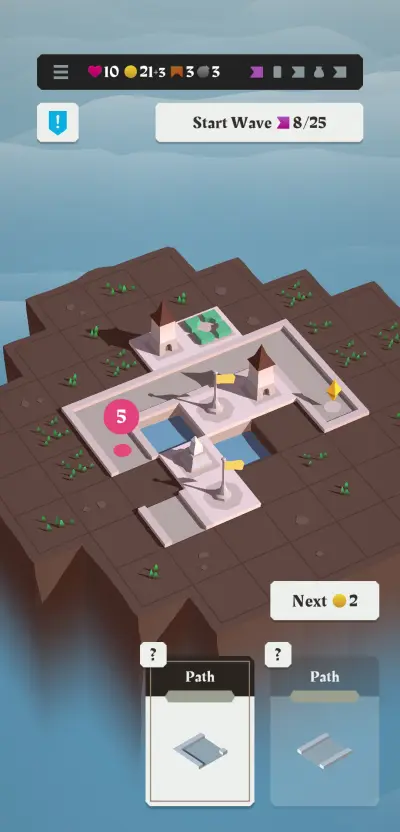
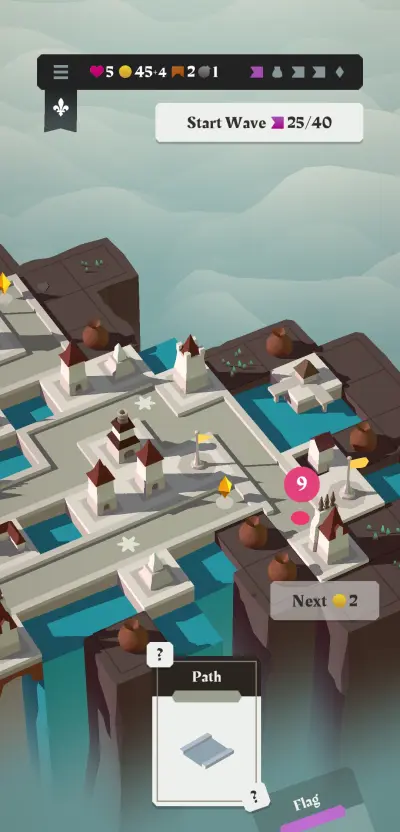
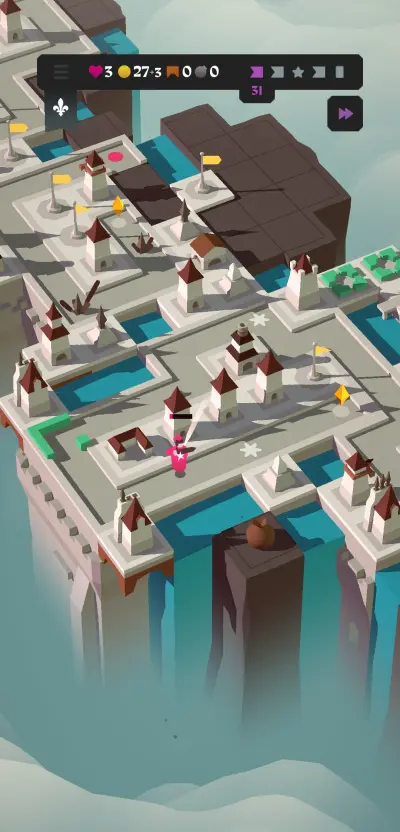
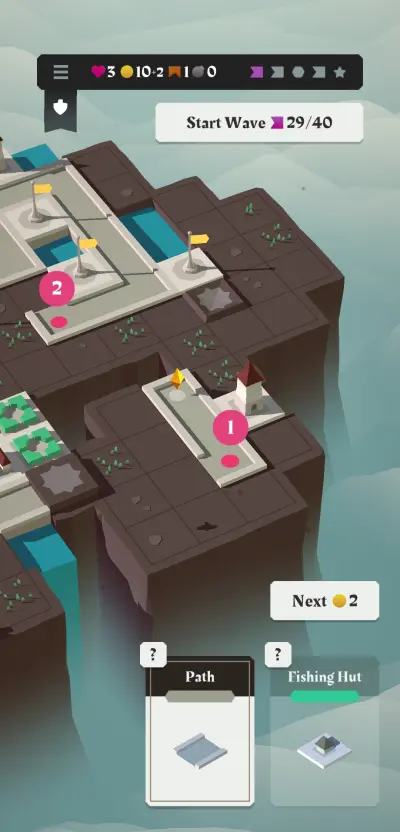
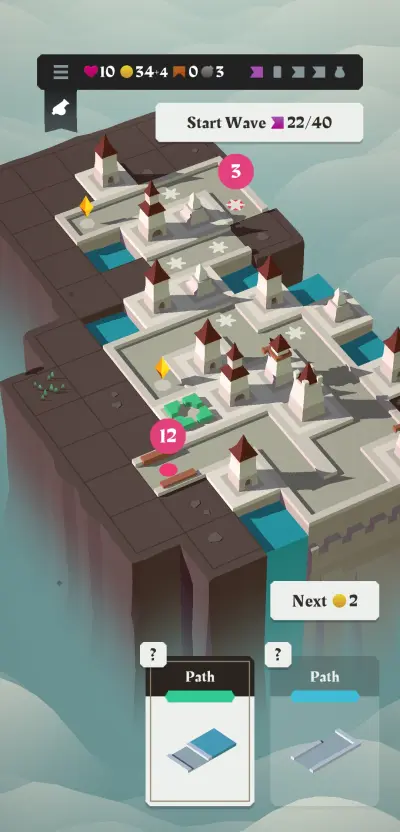
Isle of Arrows will have various elements affixed to different game modes you will have adventures in but some constant mechanics remain consistent across all of them, unless otherwise specifically provided. There are 2 important points to keep in mind: The Compass Stone, indicated by a yellow diamond pointer; and the Enemy spawn point, indicated by a red dot on the track. Your constant objective is to protect the Compass Stone from waves of enemies coming from their spawn point.
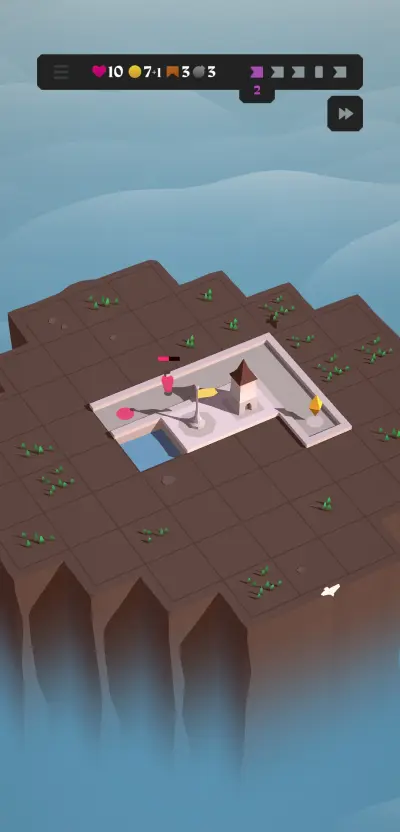
The Compass Stone has hit points or HP, indicated by the heart at the upper left side of the screen. Each enemy that makes contact with the Compass Stone will damage it and reduce its HP by 1. Your run ends when the Compass Stone’s HP is reduced to 0 or if you succeed in protecting it from all the incoming waves. Waves start only after you initiate it but enemies will continue to move from their spawn point to the Compass Stone once it does.
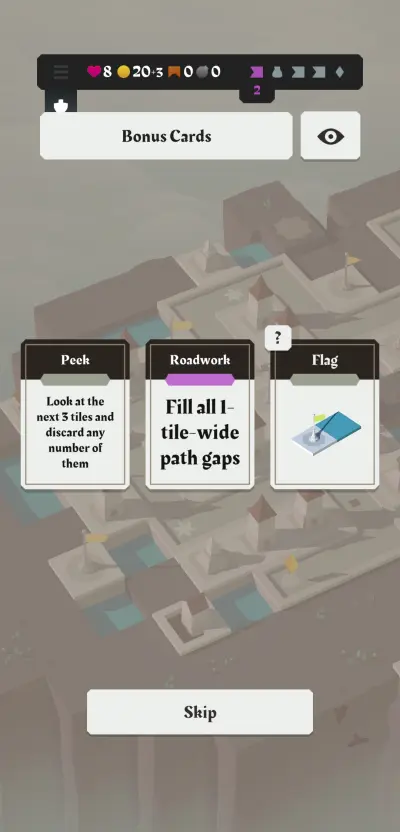
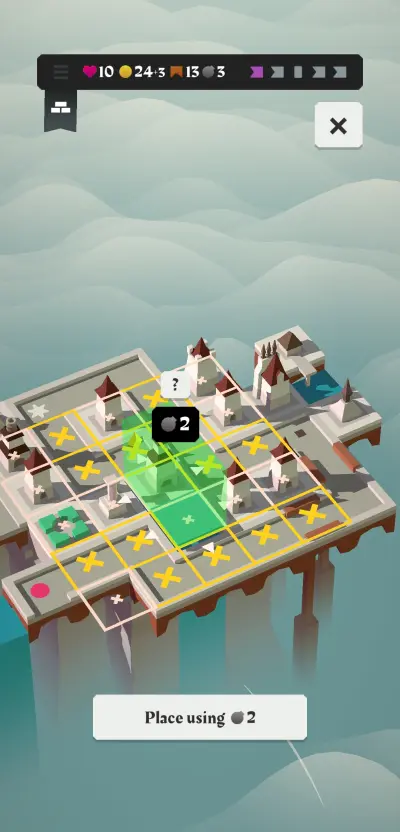
Before the start of each wave, you can place a tile or tiles on the map. A new tile becomes available between each wave and you can skip the present one at the cost of 2 coins. Coins are an important resource for skipping cards and making some purchases. You mainly earn coins after each wave but there are special tiles that also grant you coins. Coins can be seen at the top of your screen just to the right of the Compass Stone’s HP. The income to be earned after each wave is also indicated right beside it.
It is important to note that there are perquisites attributable to the number of coins you hold after each wave. Although by default you only earn 1 coin after each wave is completed, having at least 10 coins at the end of a wave will earn you 2 coins, and an extra 1 with every 10 more you earn up to a maximum of 4 coins.
Unused tiles will be replaced on your next turn as well but skipping has no limits so long as you have the coins to spend on them. The most basic tiles include paths that can extend the travel distance between the spawn point and the Compass Stone.
Although each adventure comes with a random starting layout, the Compass Stone’s location will stay consistent throughout the run while the enemy spawn point will be moved to the farthest path. If there are gaps in the path, however, the spawn point will be placed on the farthest tile path that still connects to the Compass Stone.
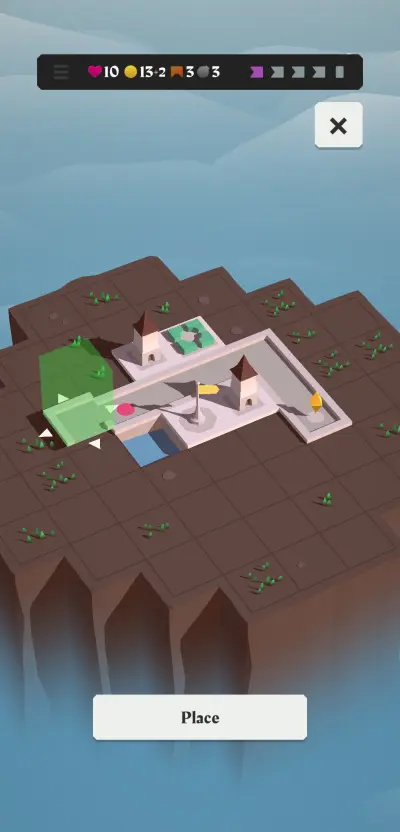
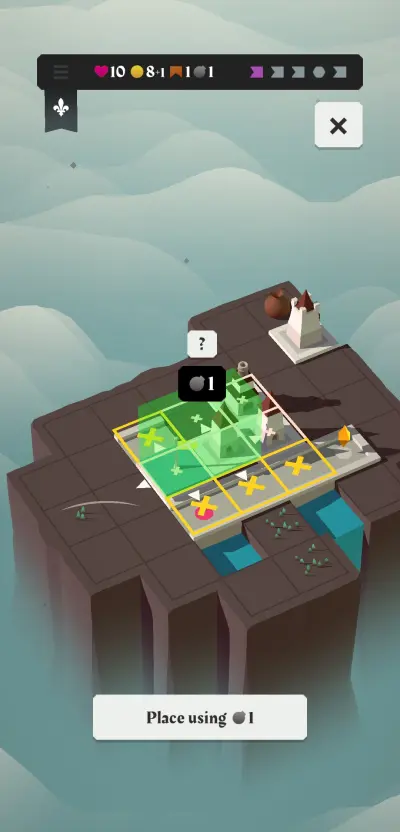
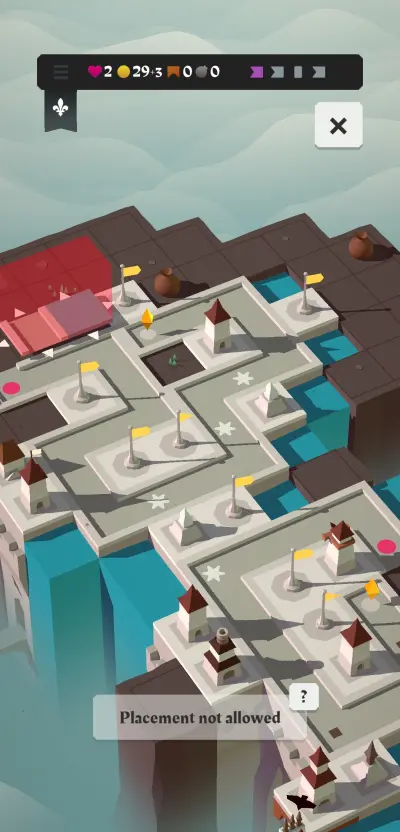
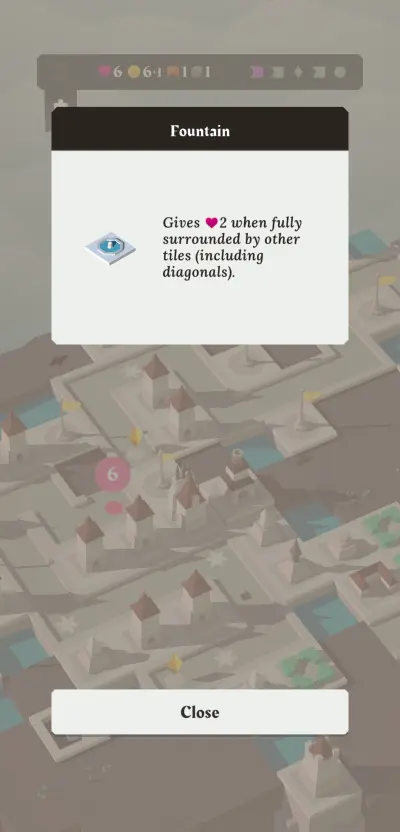
As Isle of Arrows is a tower defense, another basic tile you will encounter and place on the map is towers. Towers may have various types but each one automatically shoots at enemies within their range. Once a card is being used, you will see where it fits by an indicator that turns green when it is allowable, while red indicators mean that placing a tile is not allowed for different reasons. In case of towers, you will also see the range and direction of their attack.
Bridges are consumable items that enable you to place tiles outside of the isle. Given that the isle will always start out small in every adventure, you are certain to need bridges to have a little more freedom in the building. Each tile outside of the isle requires one bridge, so be sure to use it sparingly.
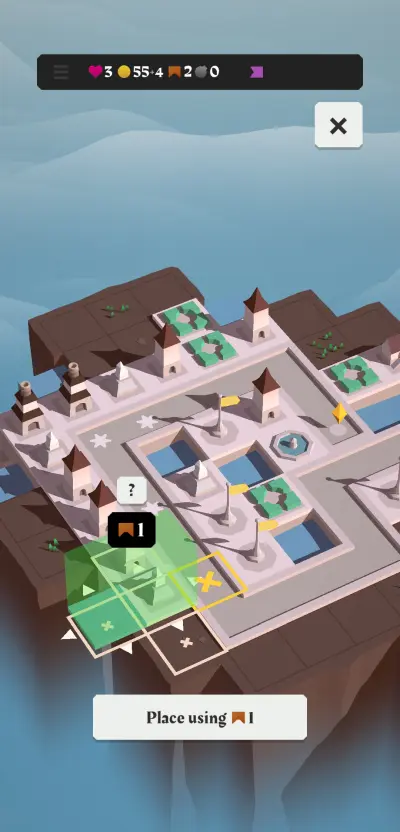
Another important consumable is the bomb, which enables you to build over existing tiles. Having bombs make it possible for you to alter your construction’s layout and give you more freedom in placing cards that are made up of more than 1 tile. Like bridges, bombs are also very valuable and should be managed with utmost prudence.
2. Learn The Basics From The Training Grounds
Although completing the Training Grounds is a requirement in Isle of Arrows for you to be able to proceed with your other adventures, you can complete it and still require a bit to learn from it. Although the term “Training Grounds” spells just how basic the game mode is designed to be, this supposedly short adventure still stretches 25 waves and can be a challenge to completely conquer for complete newbies.

Only the most basic tiles are available in the Training Grounds but some of these tiles will still need to be unlocked in the early parts of the campaign. Dragging and dropping tiles, as well as rotating them for the best fit, forms part of the basic lessons that you will get accustomed to in the Training Grounds.
Knowing what each of the basic tiles is for is just half of what needs to be learned about them as placing them with utmost efficiency may take more than a session on the Training Grounds. With limits set on the isle’s boundaries and with some cards being a combination or mixture of tiles, laying out your tower defense path requires a lot of strategic planning and a bit of luck.
One of the most important decision points relating to layouts in Isle of Arrows relates to skipping paths. Suppose the next path tile you need is a straight one but random cards only give you curved ones; you can always opt to place it away from the connecting paths. While the game provides tips on the risks involved in doing this, there are recommendations as well hinting at using every tile you get as much as you can. This is again counteracted by a tip about how it will sometimes be a smarter move to simply skip a tile and leave it unused.
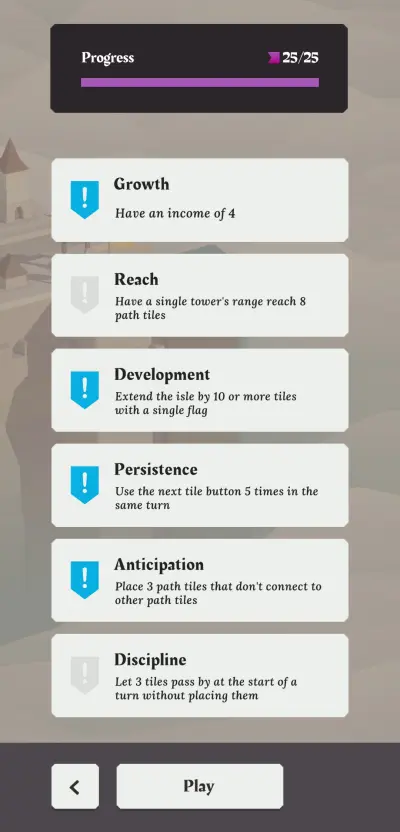
Although you can move on to the other challenges in Isle of Arrows so long as you complete all 25 waves of the Training Grounds, we recommend that you accomplish as many of the training objectives as you can. There are only 6 of them and you do not necessarily have to achieve all 6 in one run. While no extra rewards are earned for satisfying these conditions, being able to pursue and accomplish each one will prepare you much better for the coming challenges later on.
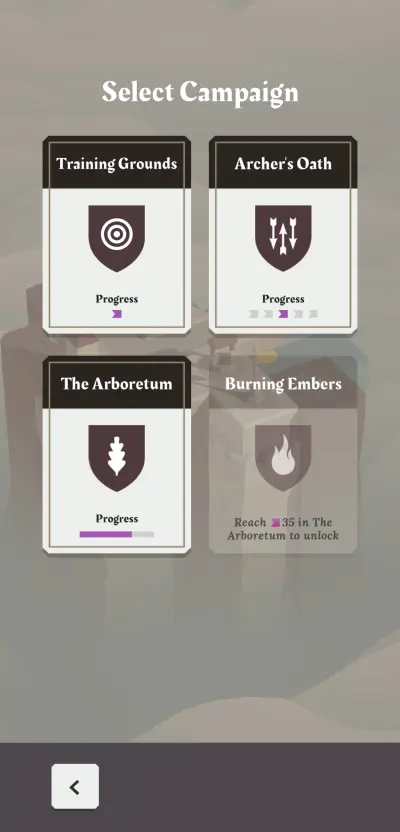
3. Master Each Guild In The Archer’s Oath
With the Training Grounds serving as the introductory level to the many adventures that await you in Isle of Arrows, Archer’s Oath stands as the primary proving ground for your strategic prowess as a tower defender. Archer’s Oath will not just let you apply everything you have learned so far from training, but it also introduces new features and mechanics that can be unlocked as you progress through the campaign.
The Archer’s Oath campaign requires you to complete 40 waves of enemies, although it is highly unlikely that you will be able to accomplish it on your first attempt. There are milestones based on how many waves of enemies you can clear to unlock new tiles, bonus cards, relics, and encounters that add more spice to your subsequent runs. Clearing 30 waves of the first guild also unlock the next one.

In contrast with how most players may perceive guilds as player groups in almost every other online game, the concept of guilds in Isle of Arrows works very differently. A guild in Isle of Arrows provides a unique play style that comes with its own set of advantages and limitations. Each of the 5 guilds will have to be mastered one after another and playing through each one surely provides its own brand of experiences and learnings.
The Founders will be the first of the 5 guilds you will be able to use and this guild gives you 1 HP with every 10 ways you complete. Flags, bombs, and bridges are all available for this guild and this resembles the mechanics you enjoyed in the Training Grounds. Compared with all other guilds, this is the simplest to secure a firm grasp of but will most likely yield you the least number of waves conquered on your first attempt. This guild, however, will be fundamental to unlocking numerous features that can make the latter runs with the other guilds a lot easier.

The Architects Guild will become available once you have cleared at least 30 waves using the Founders Guild. Architects do not have access to flags but earn 1 bridge every turn. Although flags are the best and easiest way to expand the isle and provide yourself more opportunities to lay out your defense in several ways, having better access to bridges can fairly compensate for that. Although each space outside of the isle requires 1 bridge, you will not be compelled to use it as prudently as you would with any other guild.
The third guild is the Cannoneers, stuck on a small isle without access to flags as well. What constraints Cannoneers to an even tighter work area is that bridges and hearts you earn with this guild are instantly converted to bombs.

The idea of only having bombs and having a very limited area to work your plans on will naturally seem overwhelming at first but the Cannoneers were actually the first guild that we used for clearing all 40 waves of the Archer’s Oath Campaign. A limited area does not necessarily mean less space since bombs are used for swapping out unwanted tiles with more important ones for your urgent or longer-term needs.
Another interesting twist of mechanics comes with the Merchants Guild. This guild is the only one that does not let you earn income each round. However, pots that contain coins are constantly generated within the isle. Placing a tile atop these pots will earn you coins. Although the coin pots are also generated randomly like every card you come across, playing the Merchants does not leave you needing coins more than any of the other guilds. This is among the guilds that do not leave you with a much different strategy as you will naturally be using coins as you should using any other guild.
Last, but not least, is the Pathfinders Guild. This is the only guild that can cut off paths and extend them both ways. As a downside, however, using the Pathfinders Guild tends to spring more path tiles than their usual amount, leaving you with bigger needs for towers to defend the Compass Stone.
4. Begin With An End In Mind
Regardless of which adventure or game mode you take on in Isle of Arrows, and regardless of the guild you choose to play a constant strategy to always be ready with is planning on how to lay out your line of defense in the isle. Every start of your adventure leaves you with a random starting design and given that cards you pull as well as events, relics, and all other added features you come across are random as well, it can be quite a challenge to adhere strictly to any design plans.
To start, what you would want to consider is the initial area made available to you before the start of the first wave. With it, you should be able to make plans as to how you will carve a path. Naturally, any extension of the path that leaves your enemies farther from the Compass Stone already helps. However, without a solid enough plan and execution about placing towers and traps, merely extending the waves’ travel time becomes pointless.
Laying out towers and traps would become too easy if each of these structures remain as standalone tiles. Following a series of runs in your earlier adventures, though, you will easily discover that this is hardly the case. Tower tiles will often come with an attached water tile or even a path tile that makes them a little more difficult to just place anywhere you, please. Bombs and bridges help ease down potential limitations, but these valuable resources are not as abundantly available as well.
Most especially in the absence of flags that extend the isle and provide you more open spaces to place tiles, it becomes very critical to ensure that paths will always be open for further extensions with ample open spaces for towers and other defense structures that you may draw or purchase.
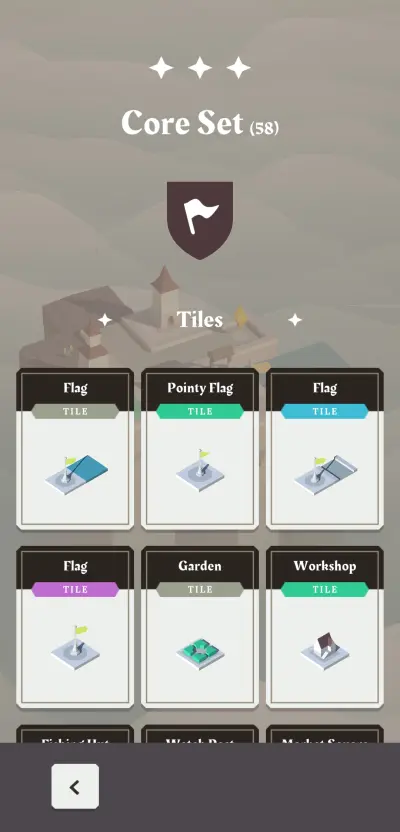
Gardens, Workshops, Fishing Ponds, and similar utilities will always likely appear in the cards. Keep in mind that these are tiles that should never be considered as among those you line up close to the pathway.
There are Watchposts and other structures that require being adjacent to towers for their effects to activate but the Watchpost is the only one to be considered as important as the towers and traps themselves. As such, be sure to identify tiles that are best placed as far away from the path as possible to not hinder the defense portion of your run.
Every run in Isle of Arrows is designed to make each new wave more challenging than the previous one so what you have to set in mind is a design that is not just built to withstand the succeeding wave. Rather, always focus on the idea that what you are building will be able to withstand all waves up until you clear the adventure.
5. Always Be Ready For Multiple Spawn Points
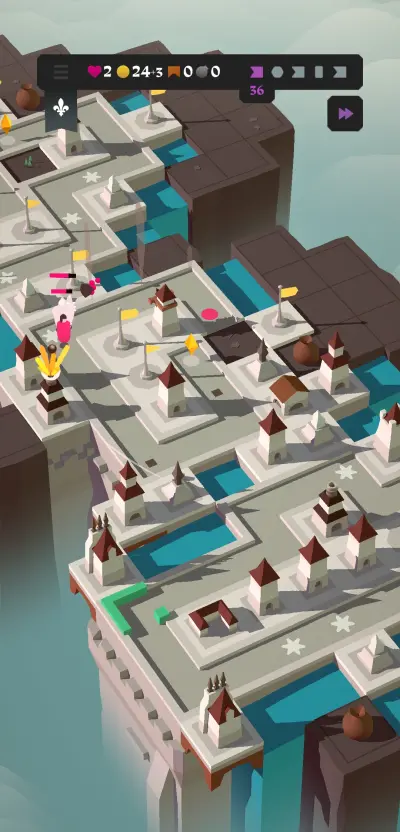
Although focusing on the initial path available to you can already be a huge challenge, especially for beginners, one of Isle of Arrows’ features to further test your planning and strategic skills come with placing multiple spawn points and Compass Stones as you progress through your run. Once you clear 20 waves, a new set of path with its spawn point and compass Stone will randomly appear on the isle and another one will also become available when you clear 30 waves.
Multiple sets of paths do not come with a faster rate of income or more available tiles to place on the isle. In this sense, a more thorough planning of how to allocate tiles across the 3 separate sets of paths should be considered. Beyond that, limited resources such as coins, bridges, and bombs will also tend to become more valuable the further you head into the waves as having multiple sets of paths will potentially require makeovers, extensions, and even card skips to get you the cards you need.
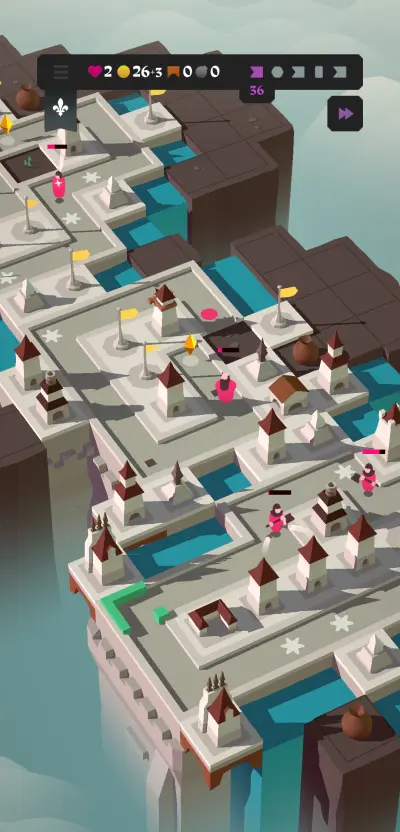
Another critical point to consider is the Compass Stone’s health. When your Compass Stones appear on the map, HP will not be separate and distinct for each one. This means that whatever HP you have left once you reach wave 20, will be the one to manage with multiple Compass Stones. Ultimately, this scenario will triple the number of threats to ending your run as there are 3 simultaneous waves of enemies to be ready for on each turn.
With multiple consecutive sets of paths to prepare for, another point to keep in mind is the tiles other than defensive ones and pathways. These tiles will have to be placed while keeping in mind the ultimate layout you have in mind. Though it can happen that the next set of paths will spawn in the area where you stockpiled unnecessary tiles, it still pays to assume how the last stretch of your run will look like and decide on the tiles you actually need to use more thoroughly.
6. Tricks To Maximizing Tower Potential
Isle of Arrows makes it easy enough even for complete beginners to understand that towers generally have to be placed right beside the path for them to reach the enemies marching on the path. As you place a tile tower on the isle, you can see surrounding blank tiles around it, depicting its range of attack. More yellow squares as you place the tower tile usually means better as it means that the tower will be able to reach more areas. However, planning and strategic thinking do not necessarily push you to consider a tower’s value immediately after its deployment.
One of the basic tricks to consider in Isle of Arrows, relative to placing towers and other defensive tiles, is to build a path that touches at least 2 sides of each tower. Think of it like a skyscraper with roads all around, except you cannot lay out a path in Isle of Arrows where all sides of a tower will be surrounded immediately by one path.

In terms of planning a layout, you should consider a path like an imaginary road in the shape of an “S” or anything close to that. With that, consider the space inside the pathway as your prime spot for towers and traps. With this strategy, each tower will prove more useful, reaching enemies more than once in their march toward the Compass Stone.
It will certainly have its own set of challenges given towers that come attached with an extra tile and path tiles that appear randomly, making it difficult to consistently follow the “S”-shaped layout you have in mind. You do not, however, need to adhere to this format strictly as you only need to grasp the idea when laying out paths.
Sniper Towers and towers on high grounds will have farther reach, enabling you to utilize this concept even more effectively. To some extent, being able to pull this off more consistently may warrant the utilization of bridges and bombs in your possession.
Executing this strategy is not limited only to one set of path as this tactic is also especially useful when facing multiple enemy spawn points and protecting multiple Compass Stones. The once outer edges of the initial path where towers will only have 1 chance of targeting enemies can be utilized for the succeeding spawn points in waves 21 and 31. The idea is to design the succeeding sets of paths to run close to the initial one as much as possible so towers and traps will be utilized more.
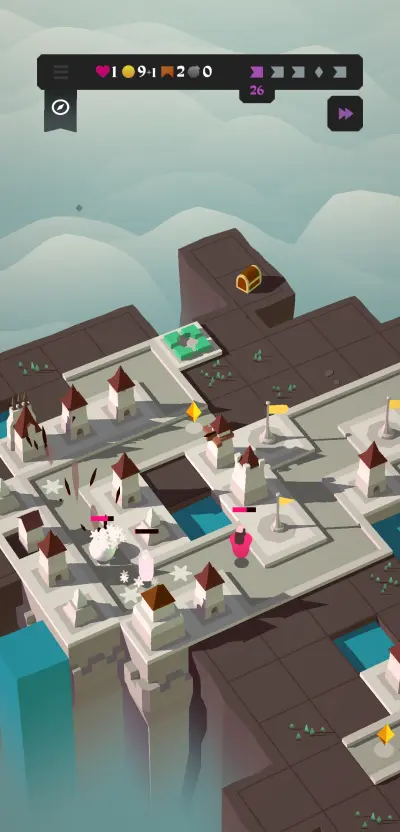
Keep in mind that like towers, ice traps, and even spike traps can impact multiple tile paths. The more tile paths are placed around these traps, the more often their effects will impact enemies. Relative to this, ice paths should also be strategically positioned for efficient use. An ice trap situated in an area where enemies are beyond a tower’s reach does not serve any purpose. To use them effectively, enemies have to be slowed down while they are within the firing range of towers.
7. Visit The Compendium To Learn More
Although tiles, cards, relics, and encounters provide a simple and concise description of what they do when you pick them up, the road toward fully mastering Isle of Arrows requires a solid grasp of every item you can come across in your adventures. Surely enough, random elements make it highly unlikely that you will encounter each one in every run, but knowing the best choices for every scenario will more likely lead to a successful run.
On the home screen, be sure to check out the Compendium and browse through the items you have unlocked. While it is easy for you to understand what each item does, browsing through everything can spark some ideas of how all these tiles and cards can be used for the best results.
There are core sets that are available throughout every adventure and there are also tiles and cards that can be unlocked from the other game modes. At some point, having unlocked most, if not all of these items will still leave you checking them out when you encounter them in a run.
8. Challenge The Other Game Modes
The Archer’s Oath stands as merely the first step towards conquering the challenges within the Isle of Arrows. The Arboretum as well as the Burning Embers holds about as many unique tiles and cards to unlock as Archer’s Oath does. Although you will readily be able to choose any of the 5 available guilds when taking on these other campaigns, it will prove to be a bigger challenge from familiarizing yourself with the new cards and tiles as well as strategizing on how to incorporate them with the tactics you have learned from before.
Once you have cleared any of the 40-wave campaigns with a guild, you can take further challenges with that guild on the Gauntlet. The Gauntlet finally lets you use all the cards and tiles you have unlocked in the campaign but imposes additional rules to further make the run challenging. There are 6 levels to conquer, each one more difficult than the previous, and campaign milestones are required to engage them.
Conquering all the above challenges will be a long and exciting journey and once you feel that you are ready to take your wits and strategic prowess to the next level, consider taking on the Daily Challenge. Beyond every other game mode we have discussed so far, the Daily Challenge ensures that you will have a unique adventure each day.
A chosen guild and campaign will be selected and there are unique modifiers to make the challenge even more exciting. Your best score among as many attempts as you can try can be compared with the performance of other players via the Leaderboards and, hopefully, with the help of the basic tips and strategies we shared here, you will be able to slowly climb the ranks and ultimately become a top Isle of Arrows tower defender!

And that wraps up all we have for you on our Isle of Arrows Beginner’s Guide. We hope that you enjoyed this adventure as much as we did and that you will be able to apply the simple tips and strategies we covered on your journey toward becoming an ace tower defender. If, by chance, you have uncovered some noteworthy tips and strategies of your own and would like to share them with us as well as your fellow readers, do not hesitate to do so and share away down in the comments!