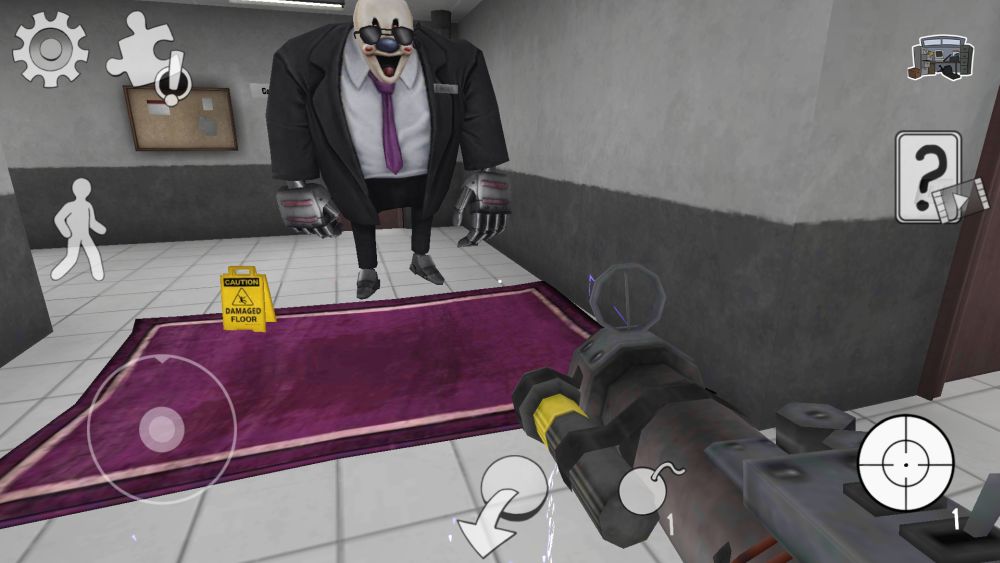
Ice Scream 4: Rod’s Factory is a horror stealth game by Keplerians where you and three of your friends have been kidnapped by an insane ice cream man named Rod, and imprisoned within his dilapidated factory. Your objective is to find a way to freedom before Rod literally squeezes the flavor out of you. Guarding the factory grounds are robotic “Mini Rods” that, while not dangerous on their own, will alert their master to your location and stun you, so be on your toes.
Like Keplerians’ previous games, such as Evil Nun 2, Ice Scream 4 has you solving various puzzles in order to make progress, all while avoiding the gaze of patrolling enemies. You can only carry one item with you at a time so expect some backtracking during gameplay. Thankfully, the overall map area is not that large, so you can beat the game if you know what you are doing.

Ice Scream 4 has a surprisingly thorough hint system regarding the items and puzzles you can find, and specific solutions such as their locations; their related goals can be uncovered by watching an ad for each of them. Our Ice Scream 4: Rod’s Factory walkthrough guide aims to help you beat this game at any difficulty without consulting the hint system. Stay with us and learn how to finish Ice Scream 4!
Starting Options
Ice Scream 4’s gameplay involves hiding from the sights of your captors while solving puzzles and collecting key items in an effort to gain freedom. Evidently, Rod cannot be in two places at once, though his ability to follow you through vents and ladders can make it appear this way. He relies on his Mini Rods to guard the factory and warn him of escapees.
Mini Rods look after a specified area, occasionally checking any available rooms in their patrol routes. However, they may investigate any open doors even if they fall outside their routes before returning to their stations. If you have to evade a chasing foe, or you are just waiting for them to pass by, you can hide in wardrobes scattered around the factory.

If a Mini Rod spots you, it will give chase. If it catches you, it will emit an electric pulse that stuns the player. During this time, the Mini Rod shuts down for a while before reactivating. The stun itself is not dangerous, but the commotion will draw Rod to your location. To break free from a stun, quickly tap the screen until the gauge in the middle empties.
You carry a bomb on your person that can incapacitate Rod if he walks on it, and you can get more bombs by watching an ad. As a last resort, if Rod is chasing you and you are carrying an object, you can throw it at his face, dazing him long enough to make a break for it.
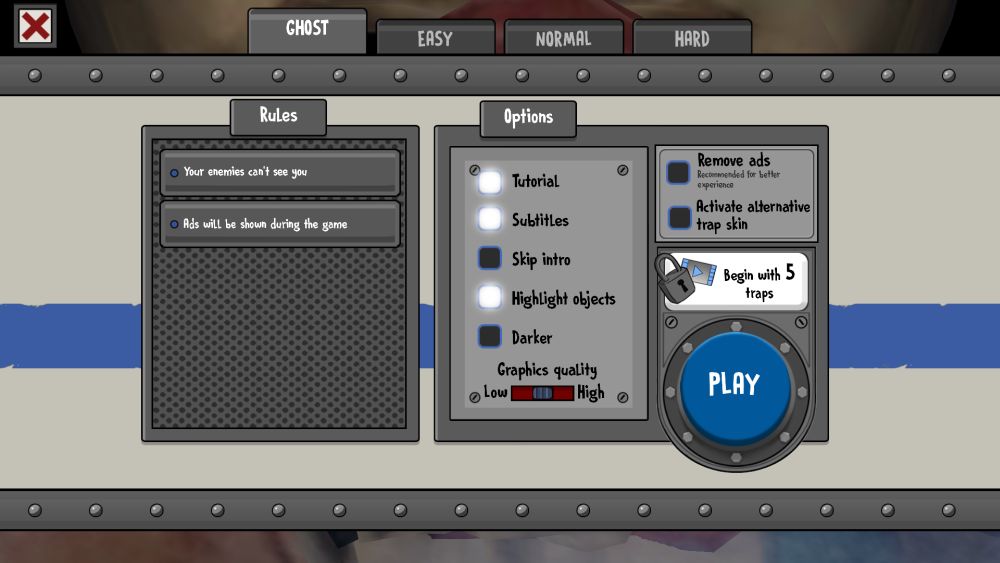
Ice Scream 4 has four difficulty modes to select from, each adjusting how enemies behave towards suspicious activity and how fast they can move:
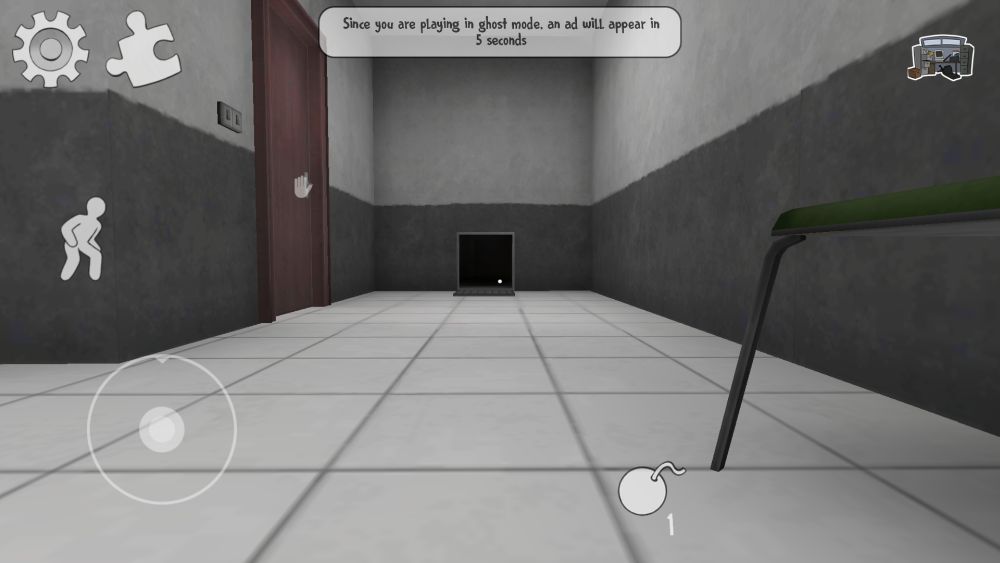
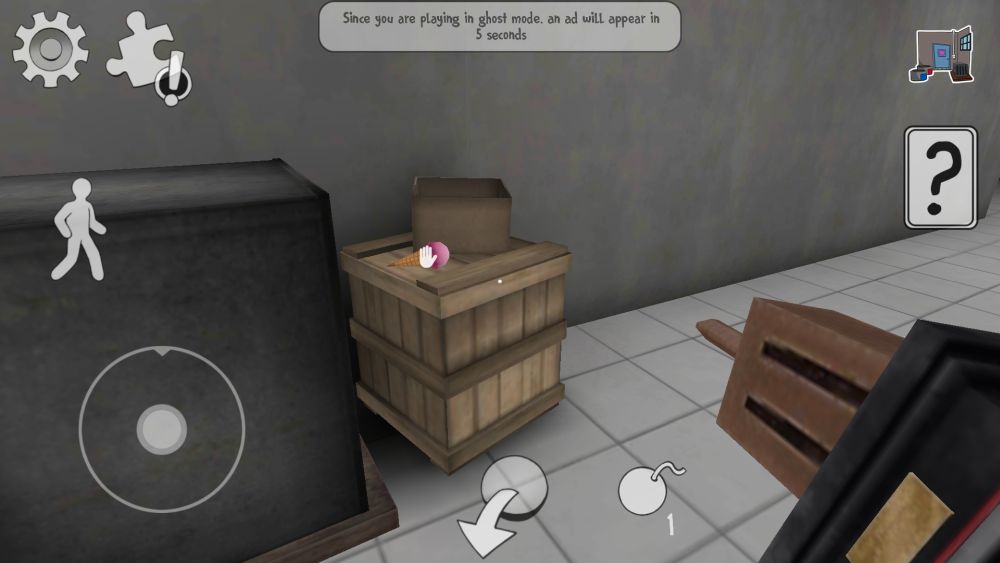
Ghost: This is the easiest difficulty where neither the Mini Rods nor Rod himself will react to your presence. This mode is great for practice runs, but be prepared for ads that will interrupt your gameplay experience every few minutes. You can disable these ads by making an in-app purchase, or you can turn off your mobile device’s internet connections before starting the app altogether. This will prevent ads from loading, but also disables hint usage and bomb refills.
Easy: This is the first difficulty where you can lose. Enemy senses are basic and they do not move as fast. You can only get caught by Rod three times before a game over.
Normal: Average difficulty where enemy senses and movement speed are improved, but you still have three tries before a game over.
Hard: This is the highest difficult available. Enemies are at their fastest and their most sensitive, and you only have one try.
Aside from this, there are some options to enable or disable certain forms of assistance, such as activating the tutorial or highlighting key items when you look at them. You cannot save a game of Ice Scream 4 in progress, so you will have to start from the beginning in case you have to leave the application. As we mentioned before, the playable area is not large, courtesy of the factory being run down in some areas and effectively blocked off from access. This means that any lost progress should not be much. For this guide, we used Ghost difficulty, so we could solve the puzzles and explore the map without interruption.
Breaking Out
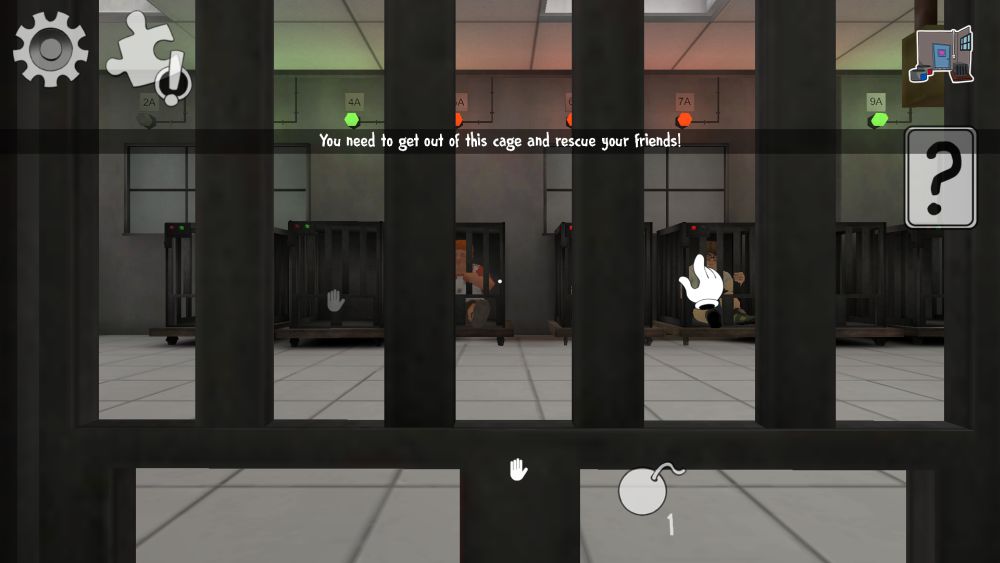
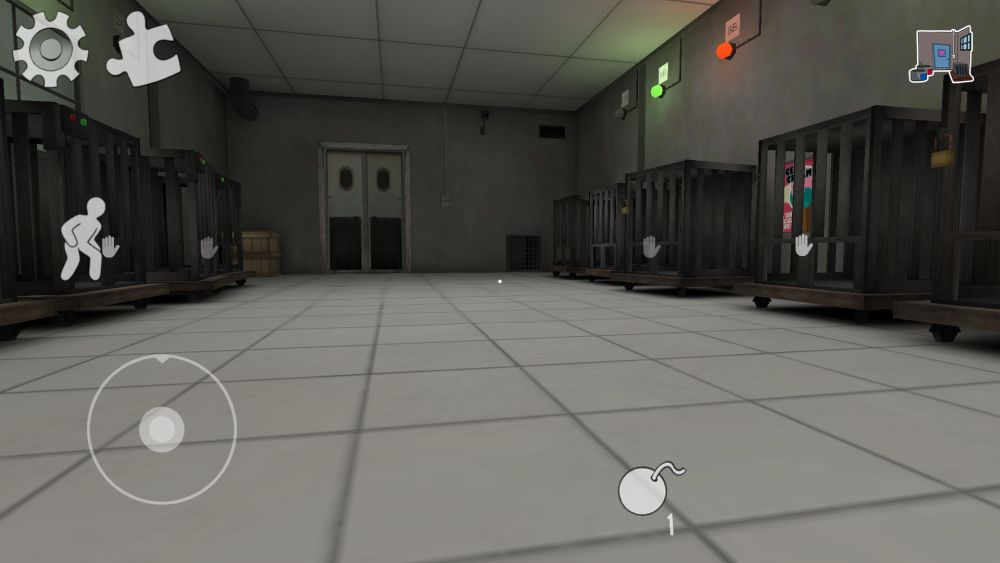
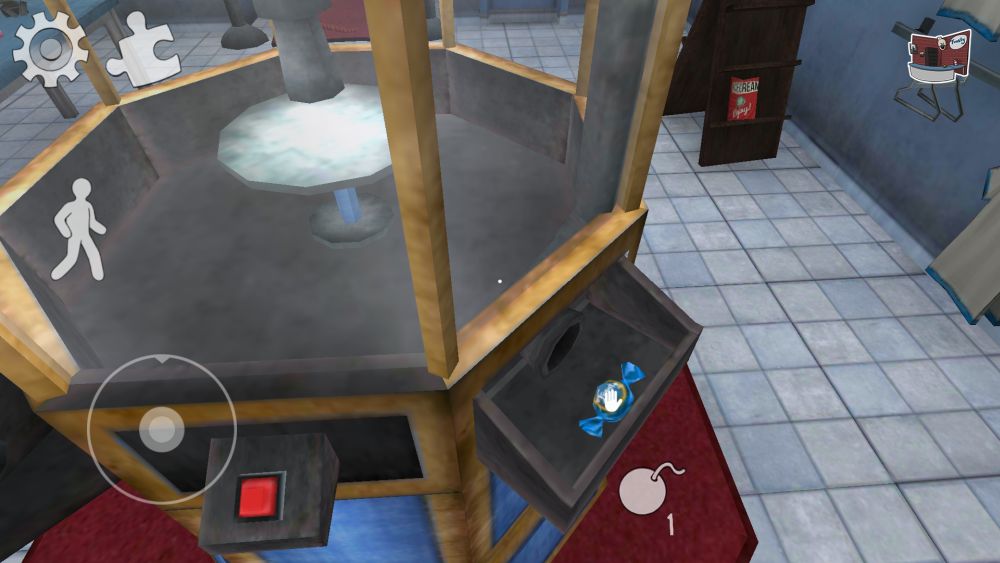
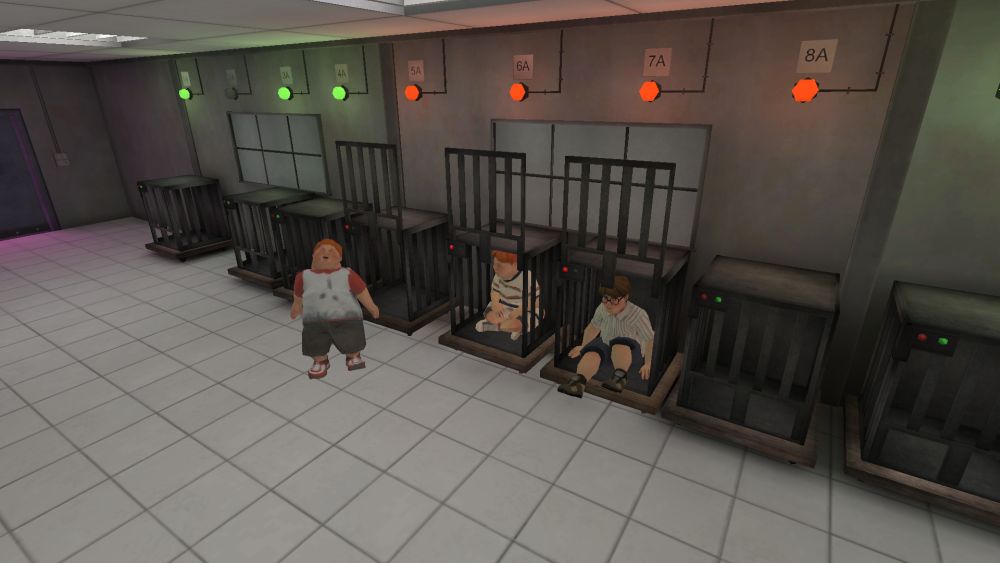
You and your friends start the game locked in separate cages in the Quality Control room; a patrolling Mini Rod will be guarding the area. To break out of your cage, turn your camera to the left and look for a table beside you. The table has a wrench on it; push the table to make the wrench drop to the ground. Pick up the wrench and use it to bash the lock to your cage.
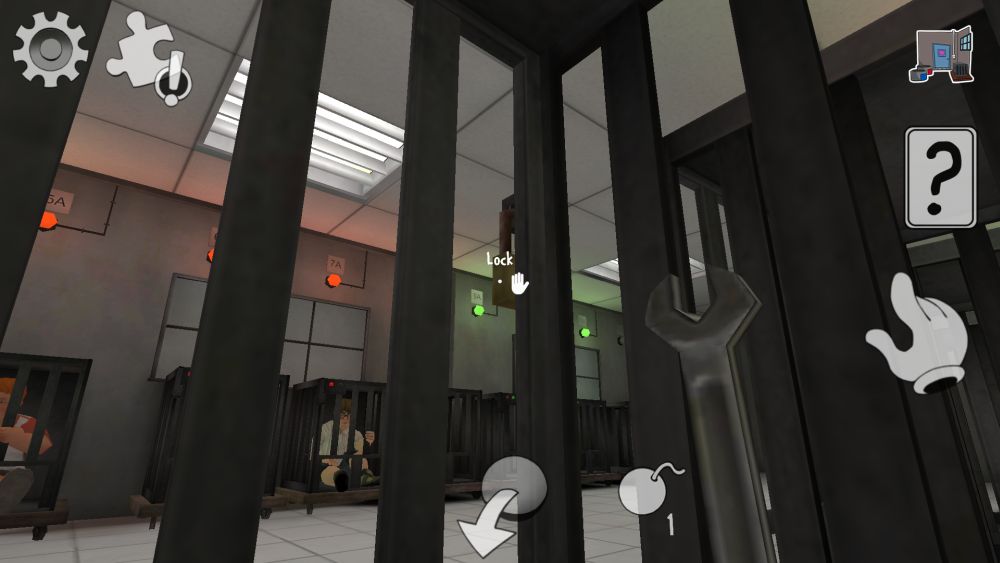
You might notice a vent next to your cage, but you cannot open it from this room. Instead, look at the far end of the hall to find another vent next to a locked door. Make your way to that vent while avoiding the Mini Rod. If in case you feel like you cannot reach the vent in time, you can hide in one of the vacant cages until the Mini Rod moves past; the Mini Rod will not bother you as long as you are in a cage. Once you reach the vent, open it and make your way to the restroom. The restroom door is unlocked, leading to a hallway.
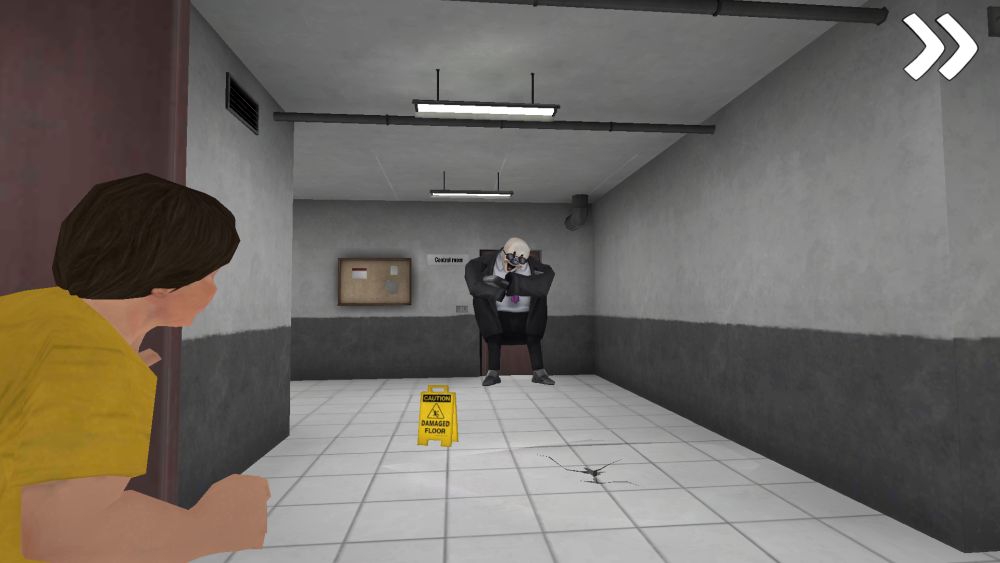
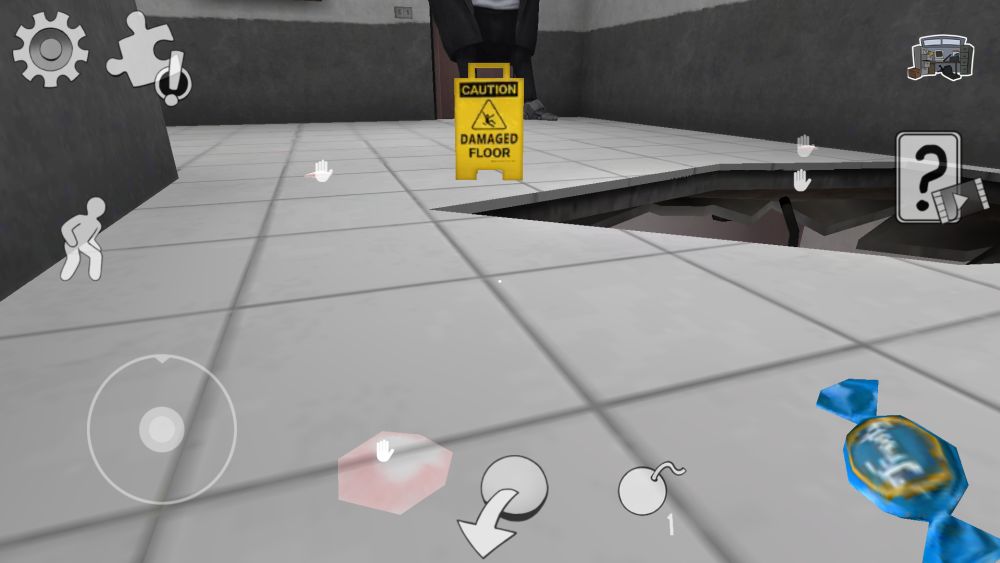
A cutscene will play introducing the player to Boris, a much larger robot who guards the Control Room. The Control Room keeps your friends’ cages locked, so you have to find a way to get rid of Boris. Thankfully, he will not pursue the player like the Mini Rods nor warn anyone if you are in sight; you can walk around his hallway with little trouble. Take note that the floor in front of Boris is visibly cracked.
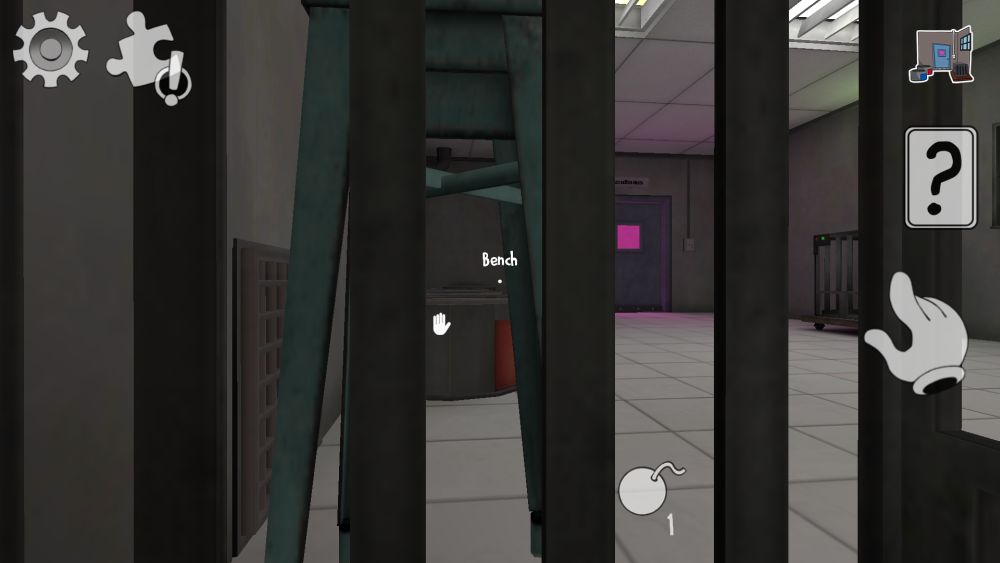
Across the restroom is another vent which leads back to the Quality Control room. This is the same vent next to your cage. That vent has a nearby door leading to the Offices.
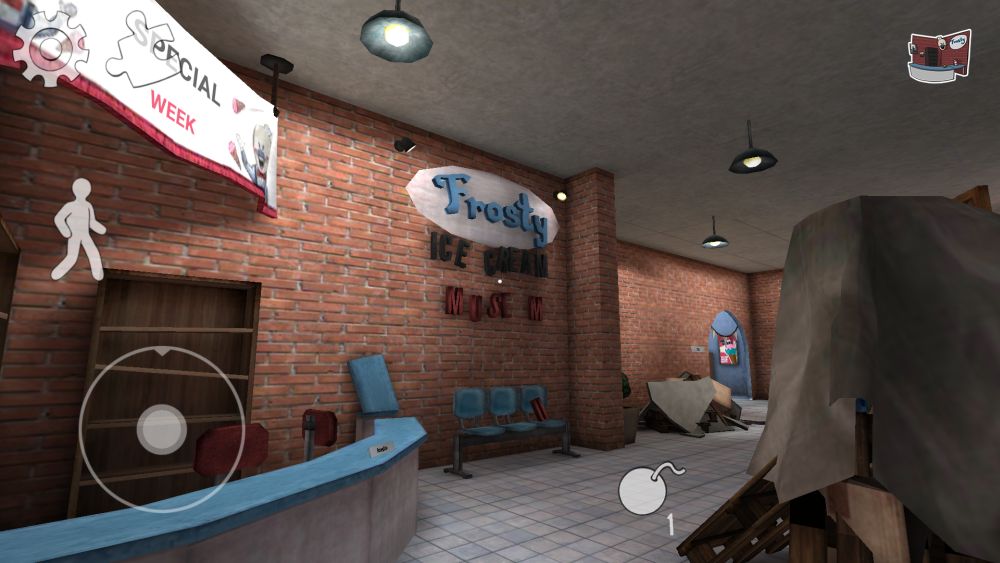
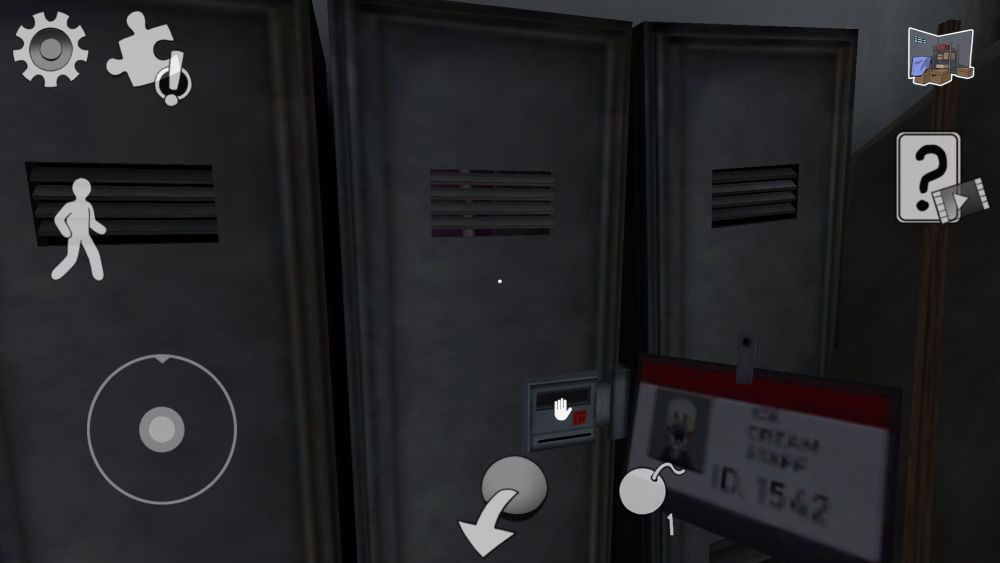
The Offices are located in an L-shaped hallway with a Mini Rod guarding the corridor. There is a wardrobe nearby if you have to hide, and there are four rooms to take note of in the Offices: conference rooms at each end of the hallway (1 and 2), a storeroom whose door that has been boarded up (3); and a room with some work cubicles (4). While avoiding the Mini Rod, you should look for the following items:
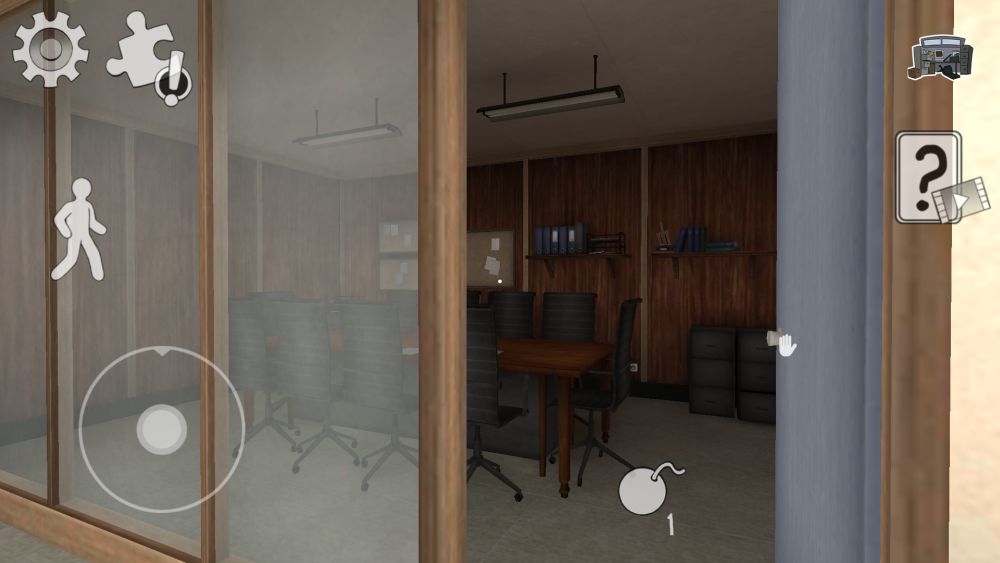
- A trophy for The Best Ice Cream Maker, where your character will remark that the tip of the trophy can work as a screwdriver. It is either in the room with work cubicles (in one of the cubicles) or on a shelf in the far conference room.
- A pink ice cream cone, which can also spawn in the far conference room. If it is not there, it should be outside the Offices.
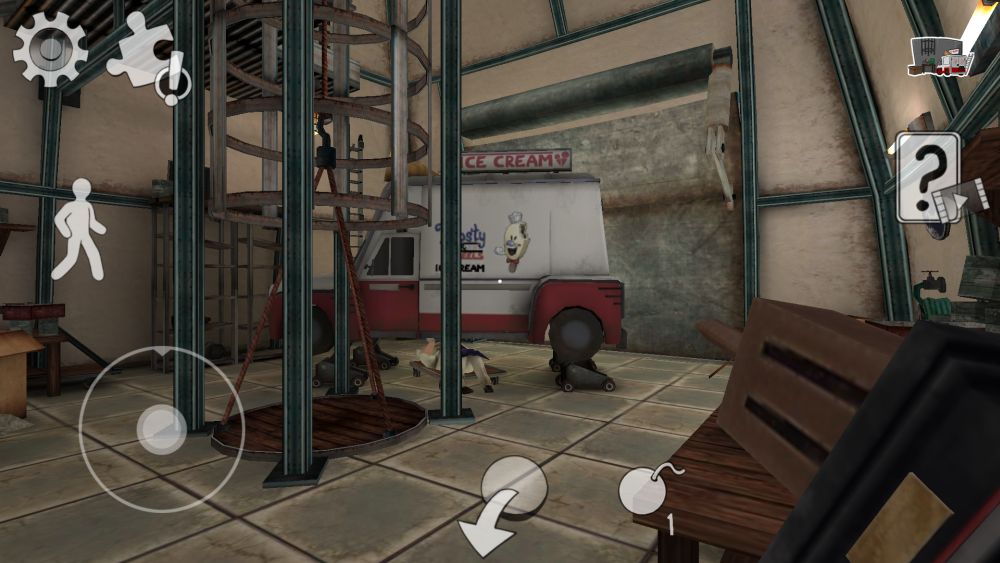
Keep track of the ice cream cone’s location, and pick up the trophy. The far end of the offices has a door leading to a corridor connecting the Offices to the Quality Control room and the Garage. If the pink ice cream cone was not at the conference room, it should be on a shelf across the Garage. You can find Rod himself working on his ice cream truck, occasionally standing up to get some tools. He will not leave the Garage unless he has been alerted, so either try to lure him out by letting him see you or carefully sneak past him.
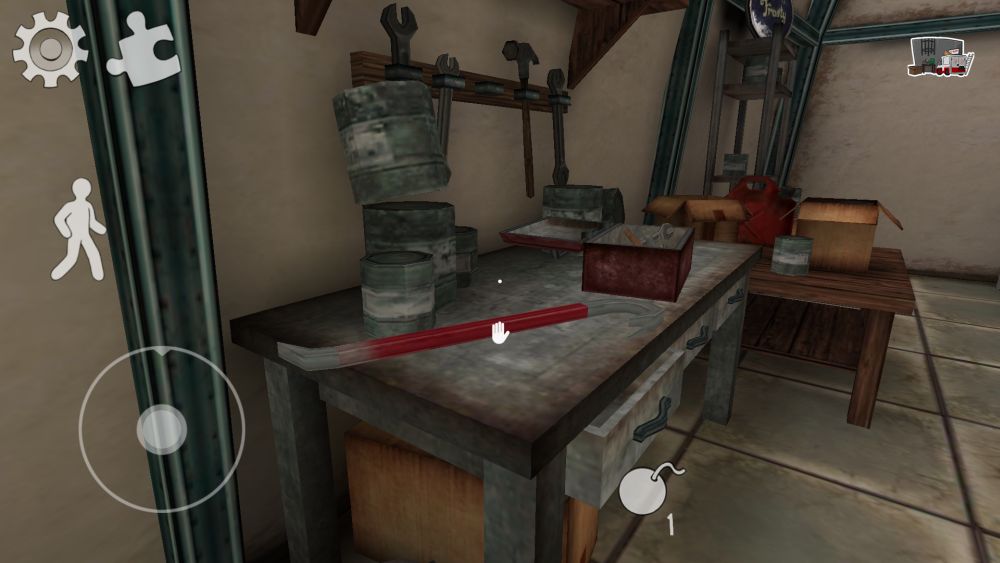
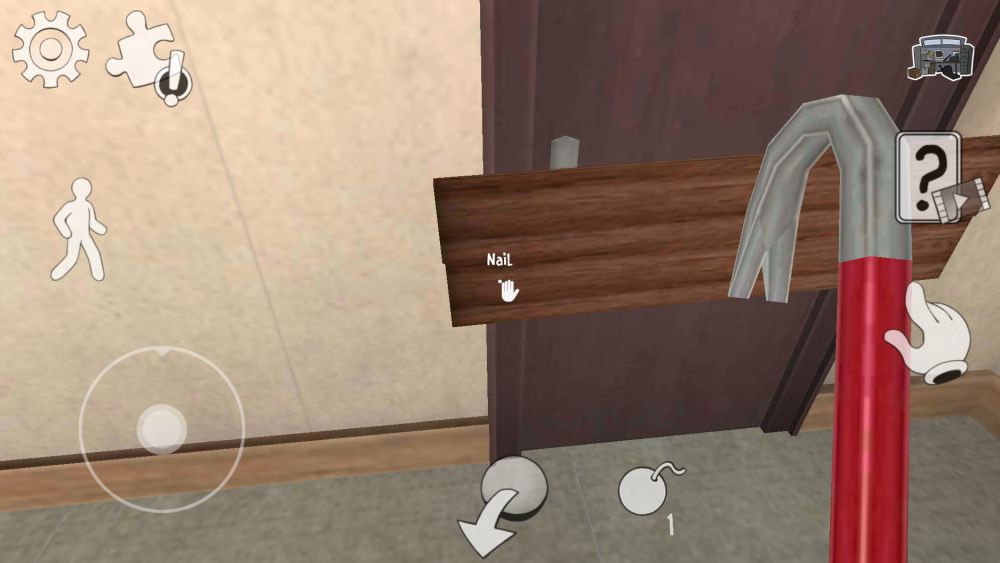
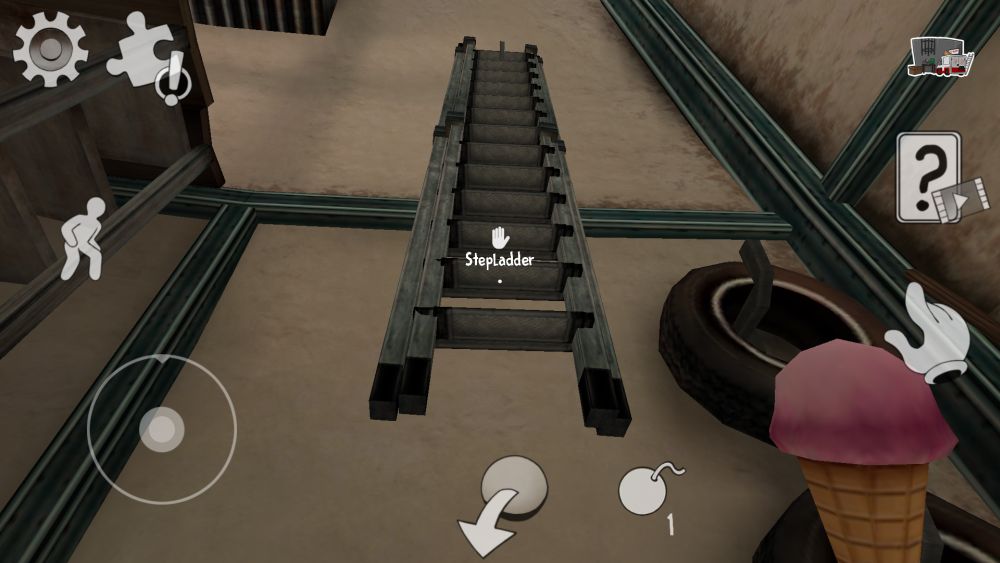
Look for a workbench in the Garage. Pick up the crowbar on it. Remember that boarded-up door in the Offices? Head back to that door. Once you reach the boarded-up room, use the crowbar to pry off the nails holding the boards in place. You must stay still in order to remove a nail; ducking into the cubicles to avoid the Mini Rod might be necessary. Removing the boards will lead to a storage room with a stepladder that you can pick up. Grab that stepladder and head back to the Garage.

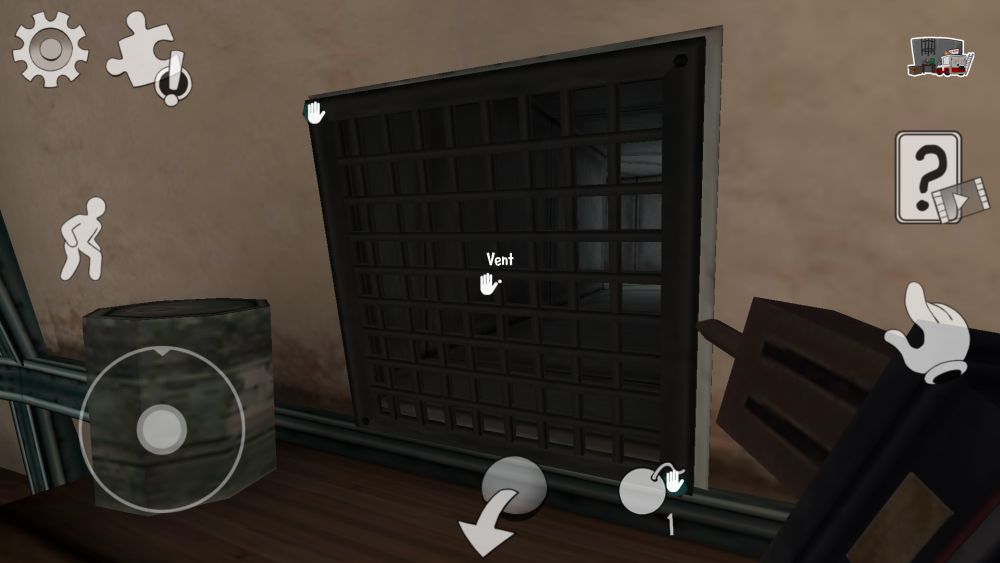
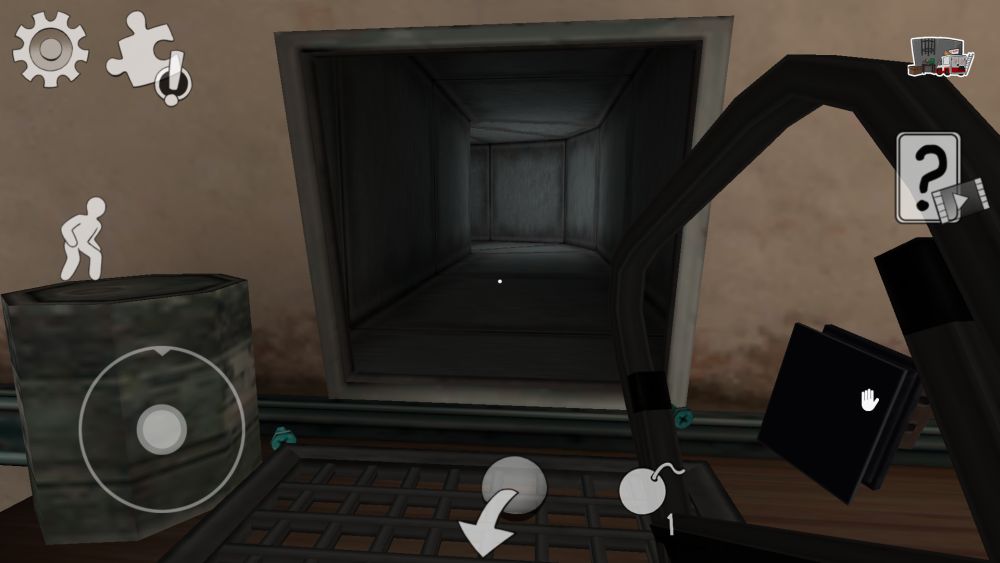
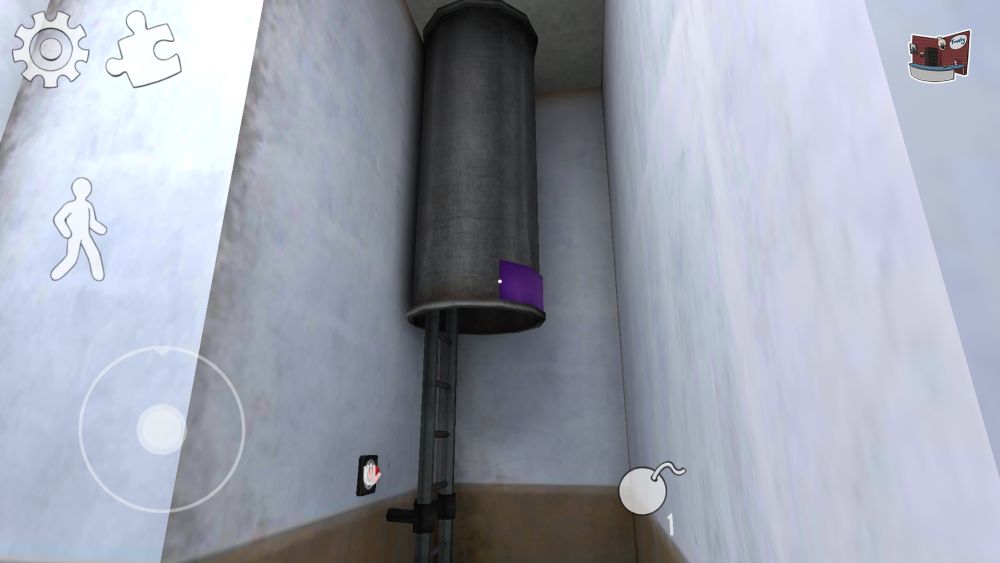
Under the catwalk of the Garage is a shelf with a nearby ladder. Move the ladder closer to the shelf so you can climb to the top, discovering a vent secured with two screws. This is where that trophy comes in handy. Remove the screws with the trophy so that you can crawl inside it and get access to the first floor. Regardless if Rod is chasing you or not, a cutscene will play where he is crawling through the same vent, then decides to return to the Garage, commenting that there are Mini Rods patrolling the ground floor as well.
Museum Of Terror
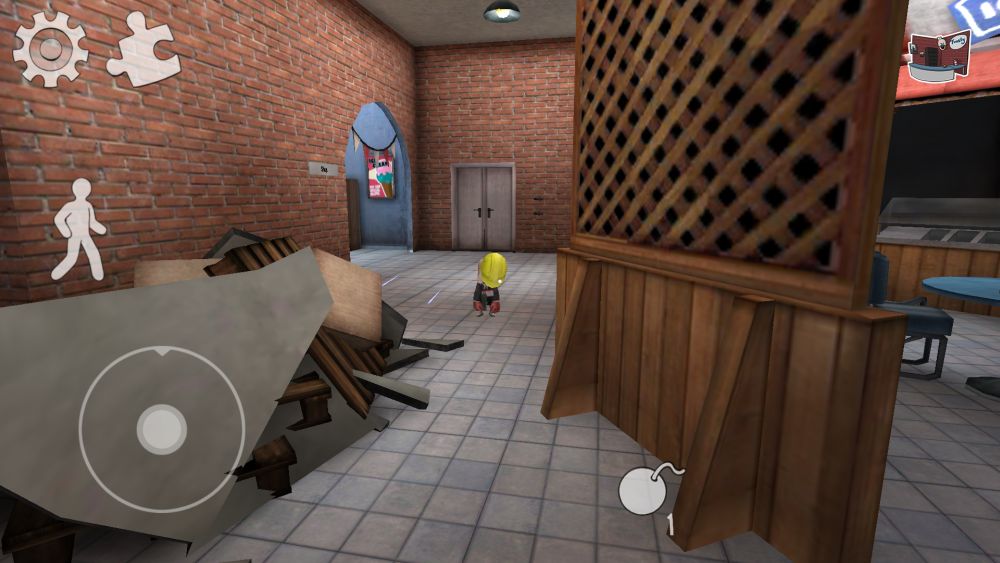
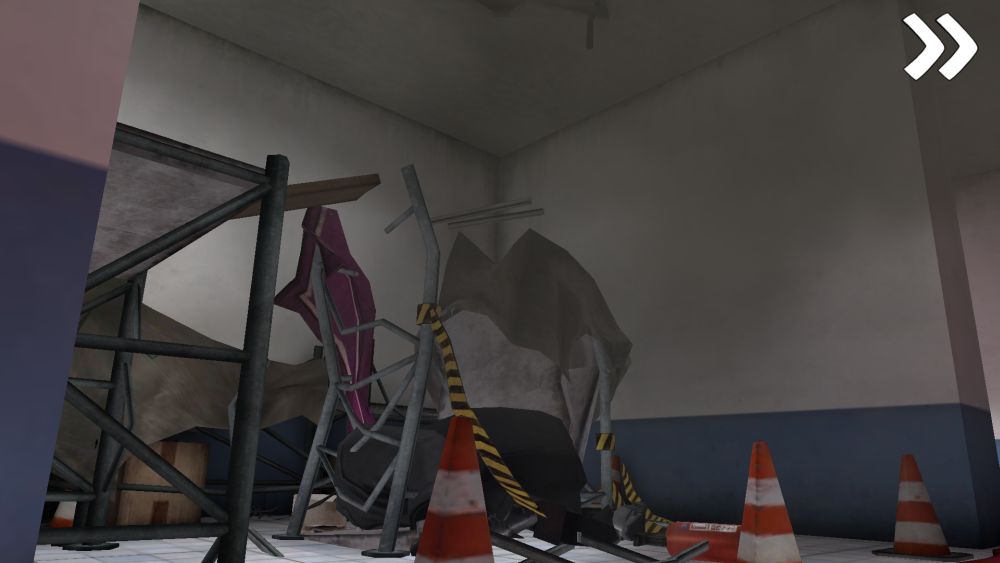
The first floor of the factory is in a very poor state, with debris blocking off portions of the floor. The Mini Rods patrolling the area wear different outfits but otherwise behave similarly to their second-floor counterparts. As the previous cutscene points out, Rod will still enter this area via the vent you just entered so do not think you are safe from him just because of the ruined state of the building. The first floor has cardboard cutouts of Rod scattered about: keep this in mind when you are trying to avoid him as they can easily confuse you.
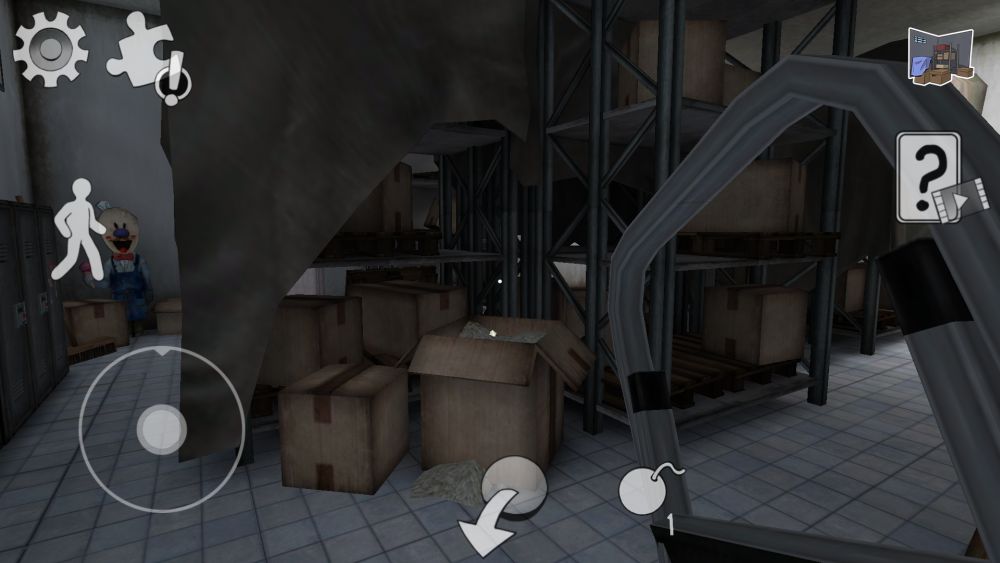
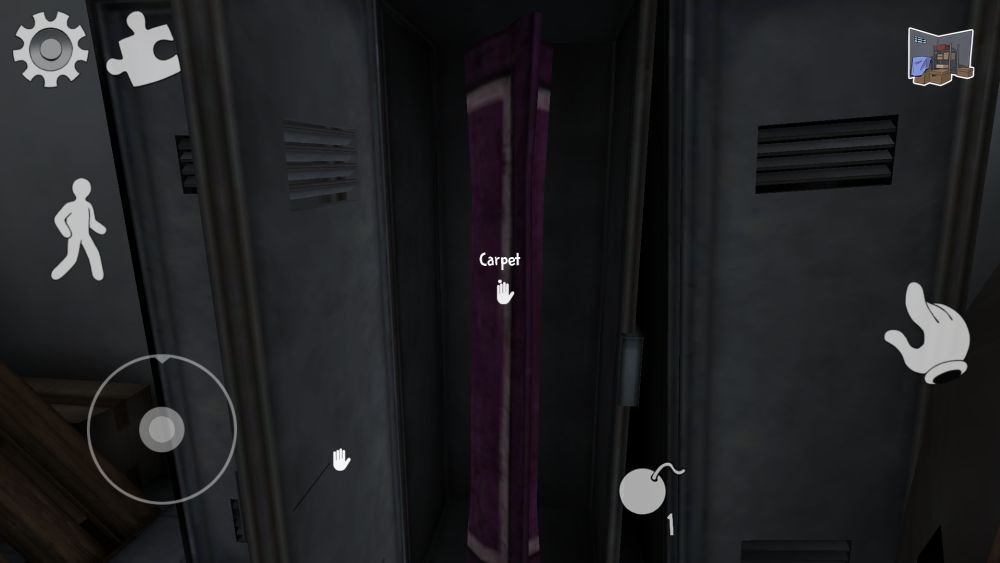
The vent you entered should also lead into a warehouse stacked with boxes, with lockers lining the walls. There is another ice cream cone, with green ice cream this time, located exclusively in the warehouse. It can spawn in three possible locations, so remember where it is for the time being;
- Directly under the ramp leading down to the warehouse;
- In a crate close to the ramp, roughly between the ramp and the nearby corner; or
- Across the ramp, where it is lying on a shelf
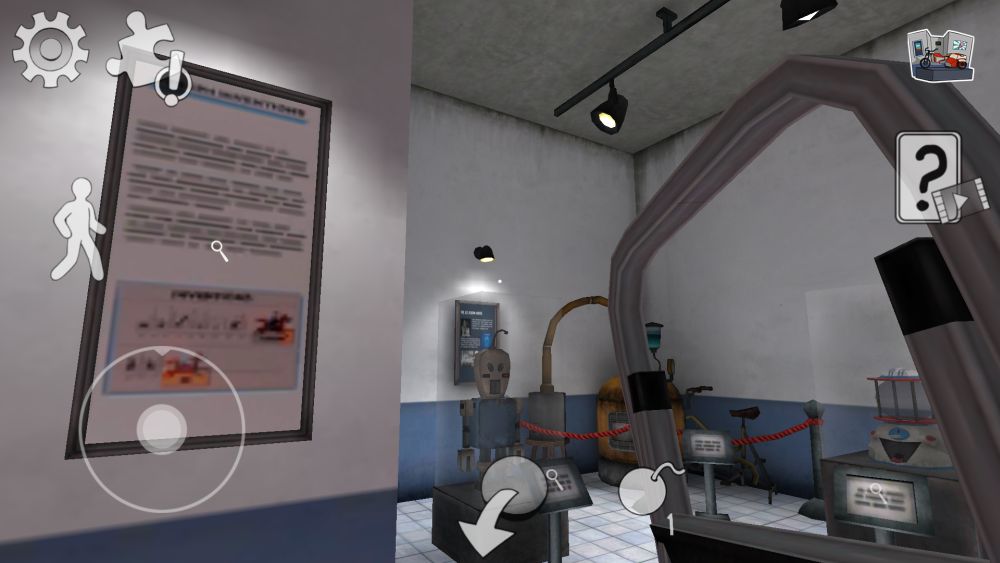
Across the vent you just entered, there should be some doors that will lead to a narrow hallway where you may spot a lurking Mini Rod. Turn right, go down the hallway, and turn left to find yourself in a small museum, which discusses the success of Rod’s father. There should be numbers written in various places around the museum. Behind display cases, on the walls, even behind a cutout from time to time.
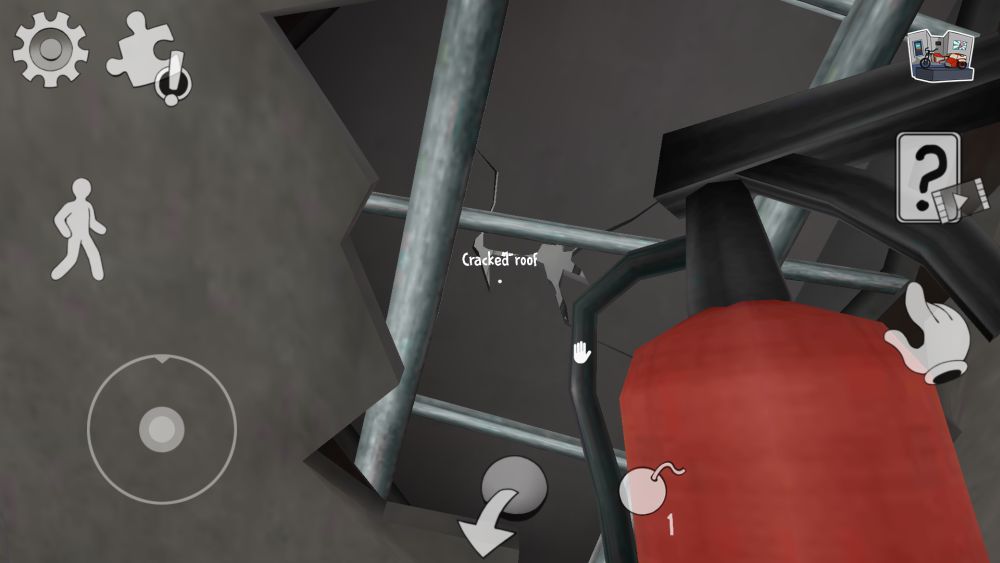
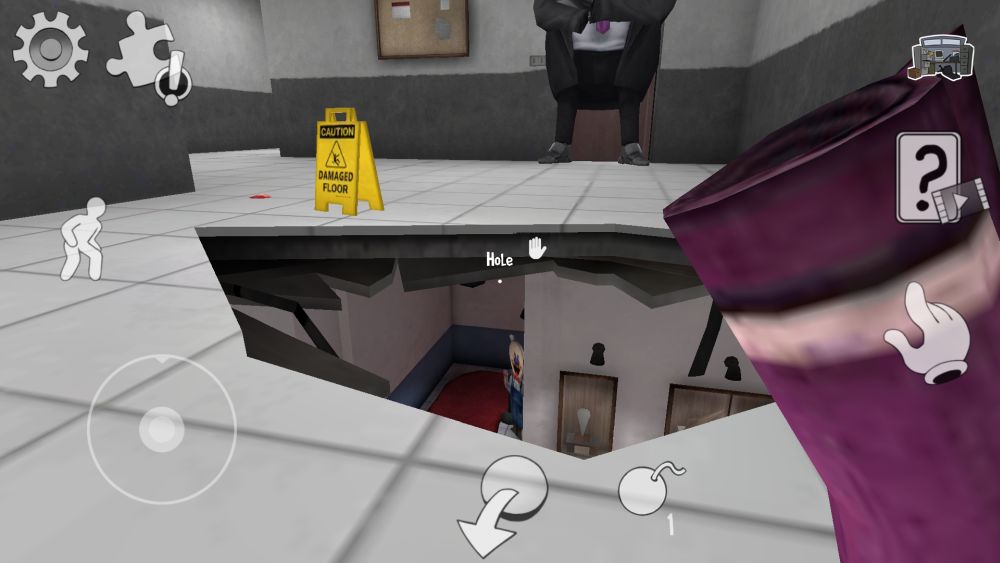
The hallway you are in should split into two paths: one path is a short walk to a dead end, while the other path leads to a larger room. There is a large pile of junk in the middle of the room, all leading to a crack in the ceiling. This crack corresponds to the crack in front of Boris up in the second floor. Now you have an idea on how to get rid of him.
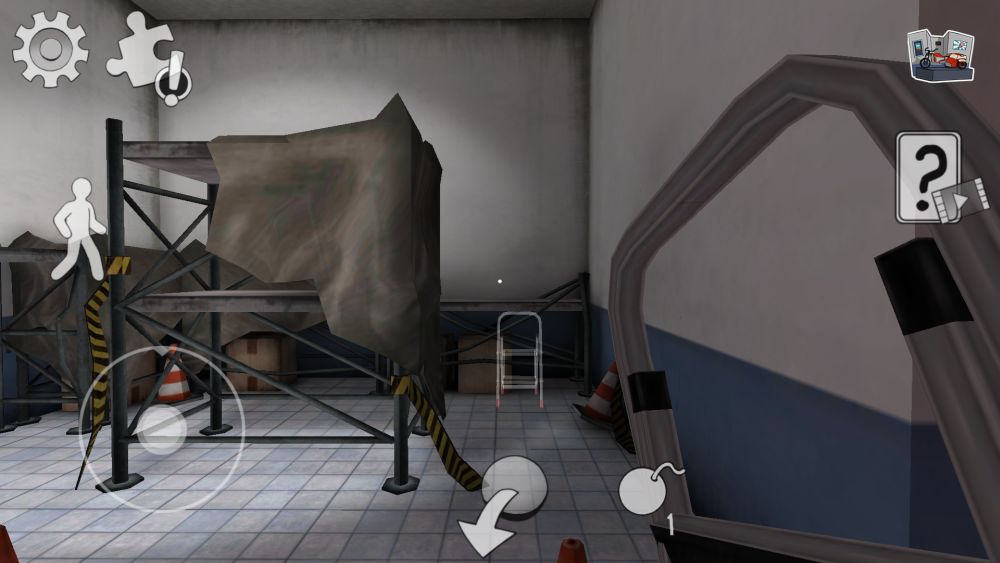
The bottom of the floor should have a ghostly copy of the stepladder near some scaffolding. Put the stepladder you retrieved from the boarded-up room in the Offices there so that you can reach the crack in the ceiling. All you will need now is something to break the crack open. Nothing nearby is bulky enough, so ignore the crack for now. Follow the museum carpet to look for additional numbers and the way to the reception area.
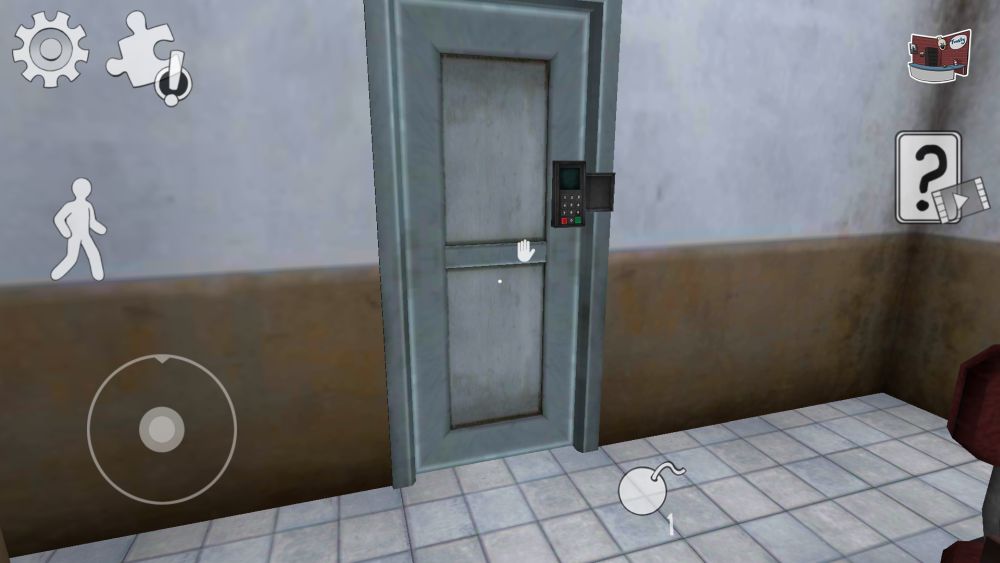
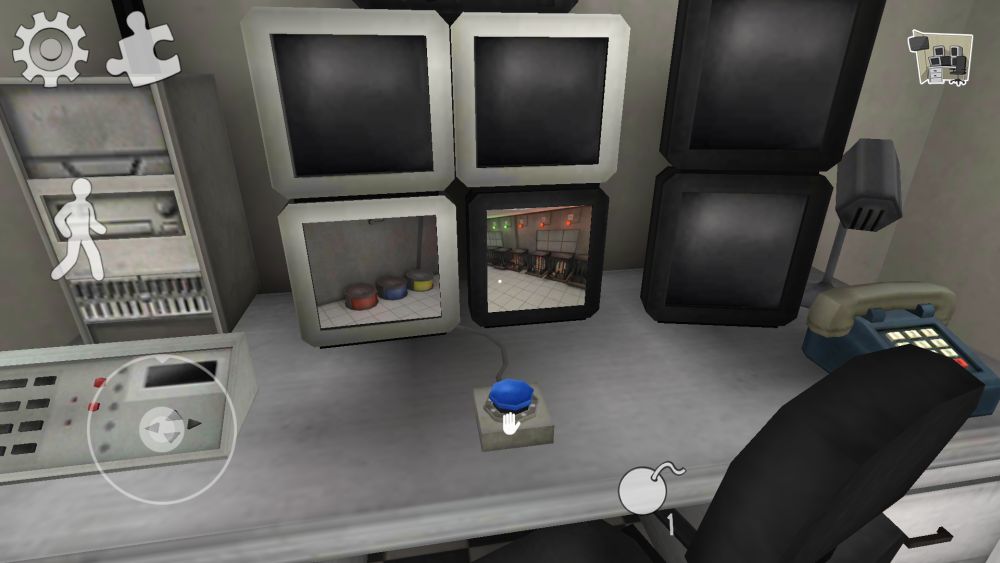
Close to the entrance of the museum is a door labeled “Restricted Area.” Inside the Area is a ladder closed off with a hatch. Press the nearby button to open its hatch, leading back up to the Quality Control room. Do remember that if Rod is in pursuit, he can climb up and down ladders just like you. At the same time, you no longer have to travel through the Garage to get back to the second floor, thus taking more time to get back upstairs. Note that there is also a locked door with a keypad that accepts a four-digit code, which we will get to later in the guide.
The reception area is as run-down as the other rooms, and the front door is locked; you and your friends cannot use it to leave the factory. Other points of interest include:
- A gift shop close to the main entrance, where a sample of very sticky chewing gum is prominently displayed in the middle of the room. The button on the display case does not work so you cannot get that gum;
- A small café where a Mini Rod similar to the ones in the second floor can be found. It sparks and occasionally shuts down, allowing you to walk in front of it before it reactivates. It otherwise behaves similarly to other Mini Rods in the factory;
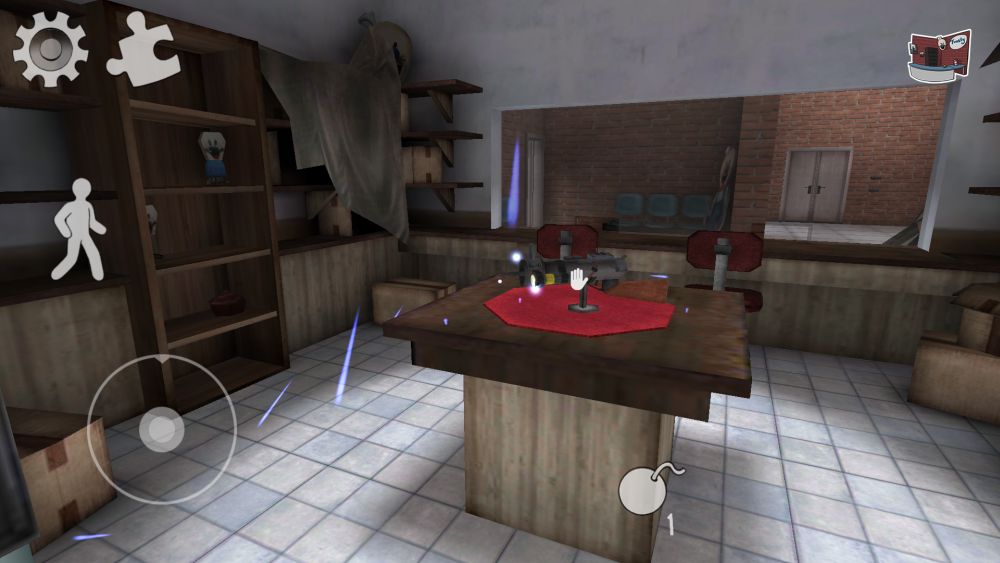
- A lost and found room next to the reception desk where a curious gun can be found on a desk. The keypad-locked door in the Restricted Area leads to it;
- A restroom close to the lost and found room, where one of the stalls has a vent that connects to other parts of the first floor; and
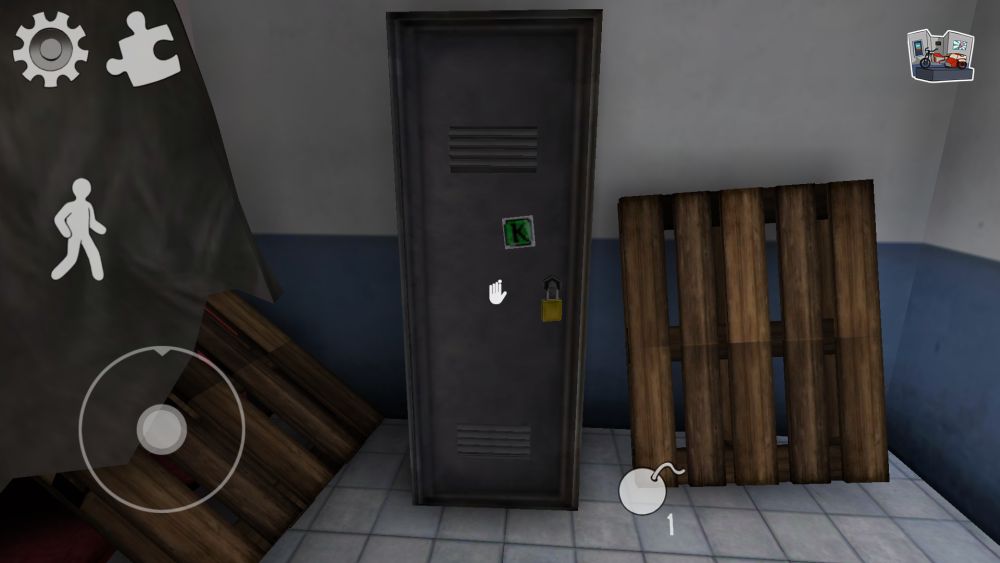
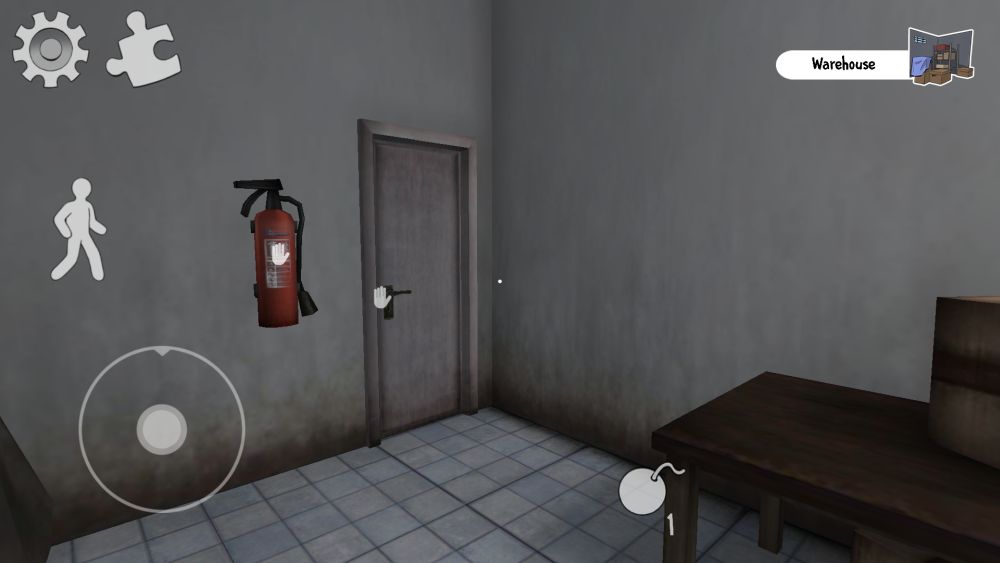
- More storerooms with lockers located past the gift shop, though the game still labels them warehouses. One of these storerooms has a fire extinguisher that looks heavy enough to bash that crack in the ceiling, while another storeroom has a peculiar locker with a Green “K” sticker on the door and a padlock keeping it closed, hiding an optional secret. We have yet to figure out how to unlock this locker for the time being, so let us focus on escaping the factory.
Now that we know what is in both floors, it is time to put the escape into action. Before doing anything, make sure to gain access to the ladder leading back to the Quality Control room.
Pulling The Rug From Under Boris
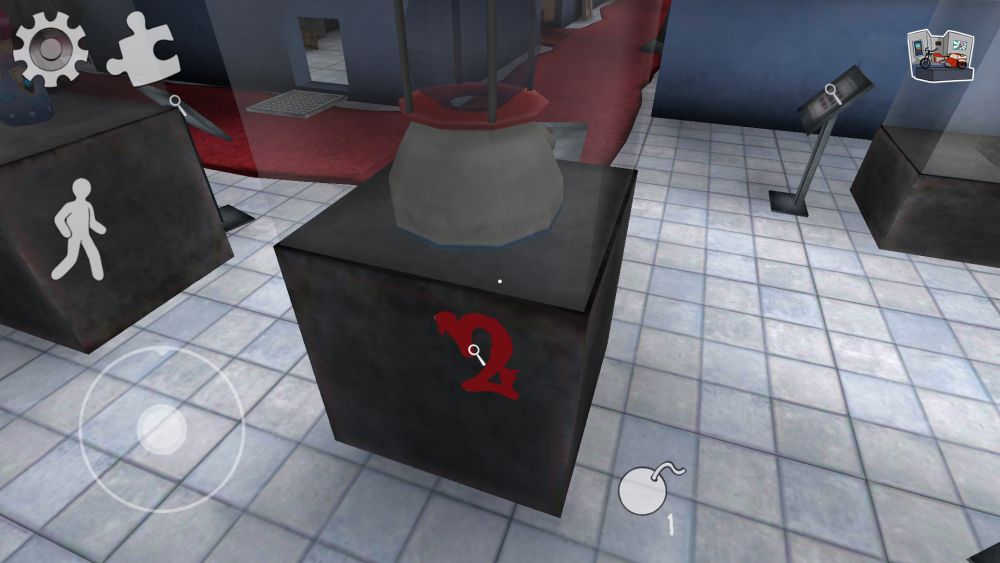
Our first order of business is bashing open that crack in the first-floor ceiling, so head to the storeroom with the fire extinguisher and pick it up. Assuming you placed the stepladder on the scaffolding, you can climb up to the top of the junk pile and bash that crack wide open. Note that the hole allows items to fall through it which is useful for cutting down backtracking. It also means that key items can fall back to the first floor as well. Once the hole has been made, you can get rid of the fire extinguisher.
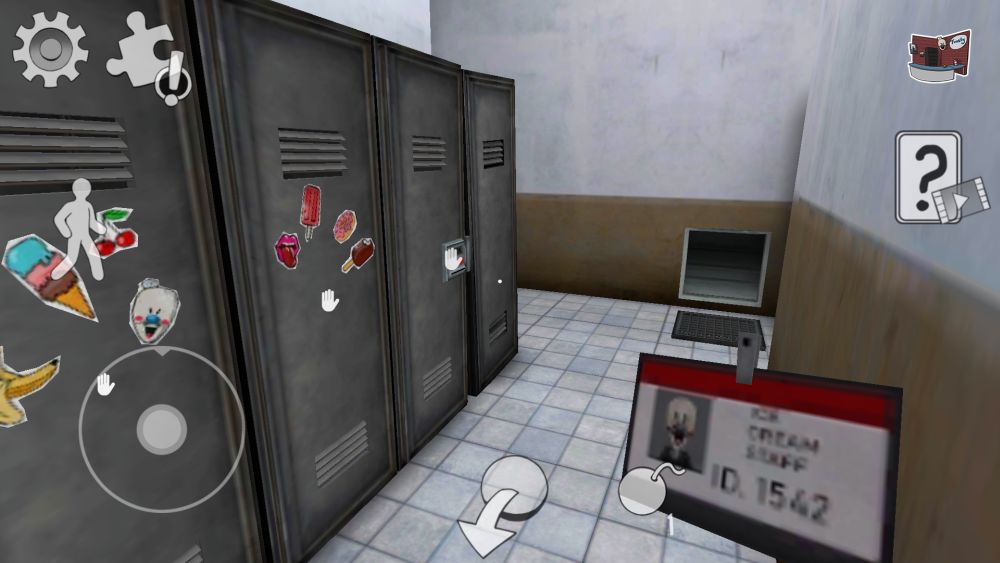
Remember the malfunctioning Mini Rod in the reception area? That Mini Rod is carrying an ID that will unlock one of the lockers on the first floor. Wait until the Mini Rod shuts down, then grab the ID. The locker the ID works on is randomized, but is limited to lockers in the large warehouse. The correct locker will unlock and spawn a purple carpet which you can use to cover up the hole, but now you will need something to secure it. The carpet can be seen from the locker vents in case you are having trouble.
The pink and green ice cream cones you found in the factory are used to get the gum in the gift shop. However, you will need one more cone, a yellow one, before you continue. This cone is found around the reception area in one of the following places:
- In one of the sinks at the restroom, or on top of one of the toilets;
- Lying on a counter in the café; or
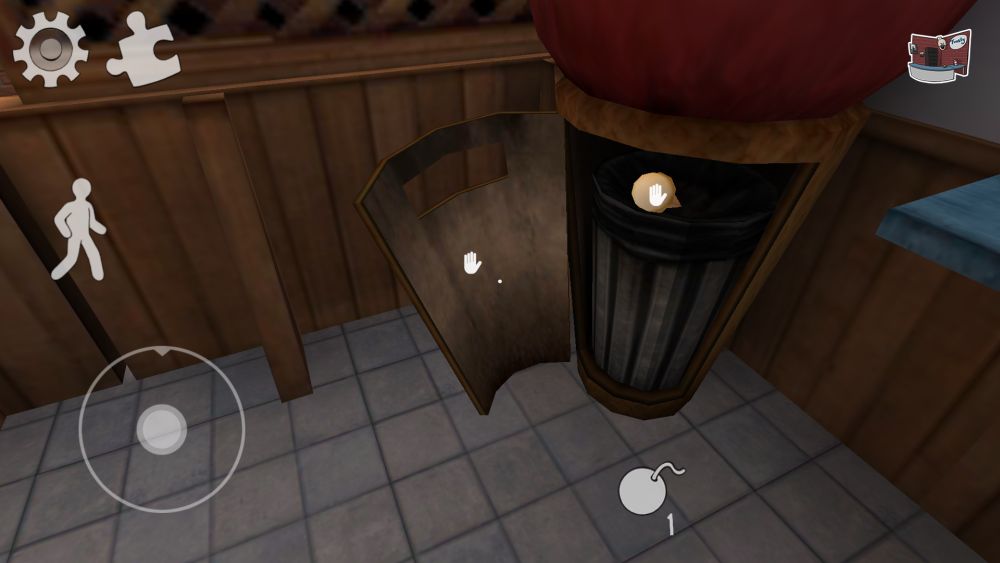
- Inside one of the ice cream-shaped trash cans. In this case, it is visible from a distance and you can interact with the trash can in order to open it and gain access to the ice cream cone.
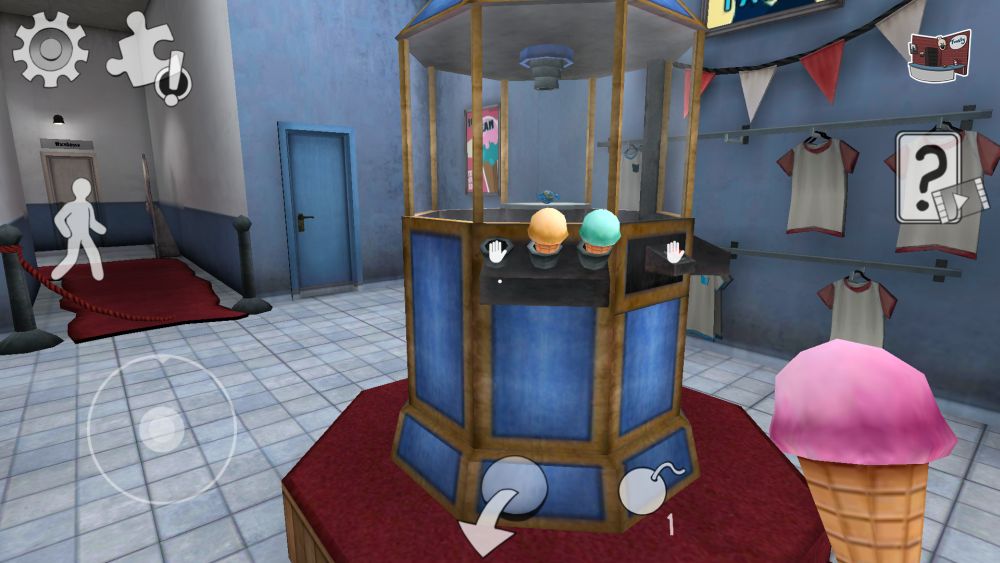
Get all three ice cream cones and place them on the gum’s display case, the order does not really matter. Once the gum has been released, head back to Boris’s hallway and stick it on four corners around the hole. With the gum in place, you can secure the carpet to properly cover up the hole. Boris will be completely inert while you are doing this so no need to worry about him. Now you just need a way to lure him to the hole, and the solution to that is in the lost and found room.
If you recall, there are numbers written around the museum, and both their positions and digits displayed will randomize on each playthrough. The code to unlock the lost and found room are these four numbers written throughout the museum, their order based on the museum’s path from the entrance to the exit. Bear in mind that the last number can spawn on the last item on the museum: a scale model of the factory itself.
However, since the path is blocked off with debris, you will have to enter the museum via the gift shop in order to find that number. Entering the code will unlock the lost and found room, leading to the curious “Electrogun” stored inside.
The Electrogun only has two shots, and only works on Rod and Boris. The Electrogun stuns Rod far longer than simply tossing items to his face, but since ammo is limited, save your shots for Boris unless you really need to use it. Make sure the carpet and hole are in place and climb back to Boris’s hallway. Take aim and fire, and while it will not stun Boris, it will anger him and make him try to catch you. If all goes well, he will ignore the hole in the floor and fall right through, taking him down.
With Boris finally out of the way, you can head to the control room and unlock the cages. Your friends are free and will travel down some hatches; they will barely avoid getting caught by Rod once more. Unfortunately, Rod muses that their escape route only leads deeper into the factory, and you still need a way to evade Rod who is currently on the same floor as you are…
And that concludes our guide to Ice Scream 4: Rod’s Factory. We hope that our guide helps you escape the clutches of Rod and his cronies. You can always practice on Ghost difficulty before deciding to tackle the harder difficulties, and you might find a way to unlock that mysterious green locker on the first floor. If you have any secrets and tips to share with us, please let us know in the comment area below! Have fun, and game on!
Weston
Sunday 7th of November 2021
can you tell us what exact items that you will use in the game please
Jefferson
Sunday 4th of July 2021
Realmente o pessoal da Keplereans inovaram com os mini Rod's. Jogo ficou muito top.