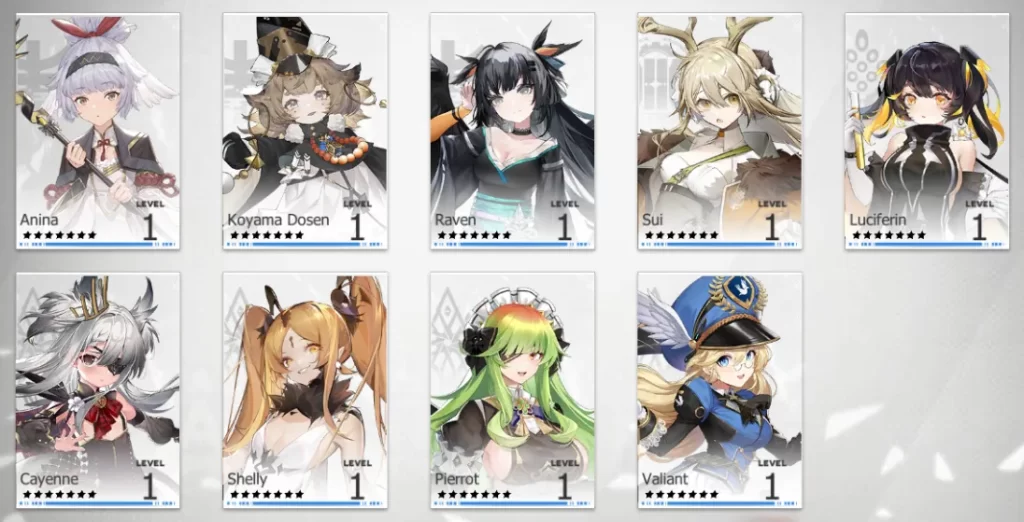
Welcome back, kemono enjoyers, to the world of Echocalypse. In this tier list, we’ll be going through every unit in the game and some of their strengths and weaknesses to hopefully help you sort through your own roster – whether you’re here just to confirm your own choices (I don’t judge, I’ve been there before) or want to see if you might have overlooked a rising star in your own team.
A Foreword
Remember “scope and limitations” in your high school or college papers? This is that part – read on so you’ll know what to expect.
- Characters will be ranked via letter grade, with S as the highest and D as the lowest.
- S-tier characters are paragons of their roles. If you have them, use them.
- A-tier characters are great. While not excellent, they’re reliable and are a solid pick.
- B-tier characters are just “okay”. Not great, not terrible. These characters usually serve as filler in the early game and as fallback units in the late game.
- C-tier characters are eh. They don’t do very well in their purported role, and finding someone better isn’t a difficult task.
- D-tier characters are bad. Whether it’s because of gimmicky movesets, lacking punch, or just being plain hard to use, try to avoid affording these characters a spot on your team.
- Characters will be sorted based on their role/traits as found in their character sheets. As there’s no way to group characters in the game, I’ll use this system instead:
- The Damage Dealer tier list willcover the following traits: Offense & Defense, DPS, Burst Damage, Burn, Extra Burn, AOE Burning, Tear Wound, Unyielding Will, and Defensive Counterattack.
- The Defender tier list will cover the following traits: Counter to High Attack, AOE Shield, Offensive Defense, Omnipotent Protection, Shield Counterattack, Unyielding, Defensive Clone, and DMG Absorption.
- The Support tier list will cover the following traits: Support, Control, AOE Control, AOE Debuff, AOE Healing Reduction, Rage Break, Soul Possession, Armor Break and Control, Control, Debuff, Weakening Restrictions, Back to Life, Rage Recovery, Healing Reduction, Freeze Control, and Single Unit Control.
Finally, take this Echocalypse tier list with a grain of salt. It was made with my (and my friends’) experiences in mind, and thus it intrinsically has a bias. Don’t take this tier list as absolute truth; I highly recommend using this one in conjunction with other lists and the opinions of other players so that you can make up your own mind on who to use and who to avoid.
Now that the preamble is done, let’s get to ranking everyone in Echocalypse!
Damage Dealer Tier List
| S | Fenriru, Kiki, Aiken, Nile, Vedfolnir, Yora, Anubis, |
| A | Kyubey, Mordred, Raeon, Horus, Mori, Beam, Taweret |
| B | Awakener, Set, Kuri, Nyla, Vera, Camelia, Shalltear, Gryph, Firentia, Shiyu, Regina, Stara, Yanling, Snezhana, Senko |
| C | Sova, Panther, Sil, Xen, Gura |
| D | All R Characters |
S-Tier
Fenriru
Trait: DPS
Pros:
- Free AOE DPS that can carry you through most content.
- Normal attacks pierce a row.
- Bifrost SSR helps you get started with Leader Bonuses.
Cons:
- Random targeting on her Rage skill.
Fenriru is a free day 2 login reward for new players, and if you haven’t pulled an AOE DPS yet, she can easily fill that niche. Fire Coverage is a very nice Rage Skill, though it does suffer from random targeting. Still, for a free unit, Fenriru is excellent.
Kiki
Trait: DPS
Pros:
- Instant Rage skill.
- Normal attacks pierce a row.
- Both Rage skill and normal attack become stronger against low-HP targets with investment.
Cons:
- Rage skill hits a random row.
Kiki is a no-nonsense damage dealer who has an awesome passive that causes her to hit the field at full Rage. Her Tsunami Rage skill is powerful and with some investment, becomes even stronger against enemies with low HP. The only problem? The target is a random row, which sometimes causes Kiki to miss out on DPS opportunities when she hits a row with only one enemy in it. Still, the power of an instant Rage skill against one row cannot be understated, and so Kiki earns her place in this tier list.
Aiken
Trait: DPS
Pros:
- Great AOE Rage skill with some true damage; gets bonus crit damage with investment.
- Powerful passive allows Aiken to ramp up as a battle goes on.
In a game where AOE reigns supreme, you don’t need to do much to make it to the top of the damage dealer tier list – all you need is to do massive AOE damage, which Aiken delivers. Aiken’s Boom-! is a great Rage skill that hits the entire enemy team for both magic and true damage, against which there is no defense.
Related: Echocalypse Beginner’s Guide: Tips, Tricks & Strategies to Lead the Kemono Armageddon
With further investment, Aiken’s Rage skill gains hefty bonuses in crit damage, which synergizes perfectly with her Battlefield Study passive that grants Aiken a permanent stacking critical hit rate buff whenever an ally uses a skill. A simple kit, yes, but brutally effective.
Nile
Trait: Unyielding Will
Pros:
- Normal attack deals true damage relative to max HP.
- Ramps up in strength as the battle goes on.
- Drunken Breath buffs are crazy good.
While other DPS units might have to jump through some hoops to get their engines going, Nile just literally gets drunk. The crux of her kit is her Drunken Breath status, which she gains from using normal attack, her Rage skill, or when 2 other skills go off.
So what does Drunken Breath do? For starters, each stack gives Nile 5% (base, tied to her Rage skill) damage; with a maximum stack size of 5, that’s 25% bonus damage. But while already good, Nile goes the distance. Her normal attack hits the front row, but per stack of Drunken Breath, she hits an additional target. Yes, you read that right – get her drunk enough and her normal attack becomes a party-wide AOE.
But wait, there’s more! Accumulating 5 stacks of Drunken Breath also triggers the Intoxication status, which boosts Nile’s crit rate by a very respectable 30%. Breakthrough investment boosts this crit rate boost, and at the last 2 breakthrough levels also gives Nile life steal on her attacks. Getting 5 stacks of Drunken Breath also triggers her Hunting state, which causes Nile to get free attacks (they don’t generate Rage – they have to limit her somehow!) on the enemy with the highest HP, marked at the beginning of the battle. Oh, and if she isn’t in Hunting, Nile innately takes 10% less damage.
All in all, Nile is a fantastic unit that’s worth sinking dupes into.
Vedfolnir
Trait: Burst Damage
Pros:
- Very effective burst damager with skill spam.
- Has some AOE.
- Can consume HP in lieu of Rage.
Cons:
- Needs breakthrough investment to bring out her true damage potential.
Like Anubis, Vedfolnir is touted as a burst damage Case. I’d rank Vedfolnir slightly above Anubis in that regard as Vedfolnir does have AOE via her Rage skill. She also gets a free attack against enemies she marks with The Hunt, though keep in mind that Vedfolnir can only make basic attacks during these extra turns, which does allow her to generate Rage at a faster pace.
Speaking of Rage, Vedfolnir’s passive, Down from Above, gives her a unique perk in that she can use HP in lieu of Rage for her skill if her HP is above 80% and her passive is at max level, allowing her to both deal AOE damage and mark foes more reliably. Because of this and her free Rage when triggering normal attacks on marked targets, Vedfolnir’s Rage skill is an omnipresent threat throughout a battle.
Yora
Pros:
- Gets stronger as the fight goes on.
- Each use of her Rage skill increases its crit damage; each normal attack reduces the cost of her Rage skill.
- Guaranteed crits, converts crit rate to crit damage.
Cons:
- Requires a Rage battery to shine.
Yora is a strong crit-based character who innately crits, no matter what she does. Thankfully, while this means that you’ll ideally want to build more crit damage on her, her passive skill causes any crit rate to be converted to crit damage at a 50% ratio.
This means that, even with standard crit sets or buffs, when she hits, she hits hard. But it’s not just her passive that allows Yora to hit like a truck as her Rage skill, Chaotic Banquet, gains more crit damage every time it’s used until a cap. This means that ideally, you’ll want to run Yora with a character that generates Rage to facilitate her skill spam.
Anubis
Trait: Burst Damage
Pros:
- Good at bursting down single targets; HP-based targeting makes picking who to nuke easier.
- Ba charges allow Anubis to cycle through her Rage skill quickly.
Cons:
- Single-target damage isn’t as good as AOEs.
Sometimes you want a single target not just dead, but completely obliterated and smashed into dust. For those scenarios, Anubis has your back.
Anubis is one of, if not the best single-target burst damager in Echocalypse. Thanks to her normal attack and Rage skill focusing on the enemy with the least HP, you have some modicum of control over who to burst down. Deity of the Deceased also deals true damage based on the number of Ba and Ka fragments that Anubis consumes, which is fantastic for piling on the numbers.
With all that said though, I’ll once again reiterate my stance that, in general, AOE damage is superior in Echocalypse. Still, if you need a really big gun to counter a specific Case, Anubis is unmatched in that niche.
A-Tier
Kyubey
Trait: Defensive Counterattack
Pros:
- Proactive defense and counterattack.
- Brutal at punishing the back row.
- Full rage upon entering the field.
- Innate damage reduction for the first 3 attacks.
- Random targeting can be alleviated via See Through stacks.
Cons:
- Reliant on being attacked to proc more stacks of See Through.
- Does almost nothing to the enemy front row.
The longer you play Echocalypse, the more you’ll realize that the game tends to favor offense over raw defense. Kyubey is a character meant to meet this approach in the middle – Kyubey is technically a defensive character by trait classification (at least by my sorting) – but with a more aggressive approach to damage mitigation. Enemy DPS is 0 when they’re dead, right?
As listed in the trait section, Kyubey is a unique Defensive Counterattack tank. Most of Kyubey’s skills revolve around placing and consuming See Through stacks on the back row. Said stacks not only reduce the dodge rate of their bearer, but also cause Abyssal Water – Deep Scar to proc a lot of bonus effects, such as more damage, attack stealing, and refreshing Kyubey’s passive defense buff.
Mordred
Trait: Defensive Counterattack
Pros:
- Dragon’s Breath stacks facilitate physical damage teams.
- Good burst damage with her Rage skill and high ATK.
- Easy to build counterattack stacks.
Cons:
- Needs at least 3* to start using Frenzy for more consistent Dragon’s Breath application.
Where Kyubey is a more self-oriented Defensive Counterattack Case, Mordred leans more towards support due to Dragon’s Breath, a stacking Armor debuff that enables physical-based DPS Cases. Coincidentally, Mordred is one such case. Who would’ve thought?
Dragon’s Breath can stack up to 10 times, though you will need to at least get Mordred to 3* so that her Rage skill applies Frenzy to her allies, making it that much easier to put Dragon’s Breath stacks on her foes. And while Mordred does serve as a support, she’s more than capable of beating enemies down on her own as the payoff for consuming stacks with her Rage skill is big and gets even better the more dupes you decide to invest in her.
Raeon
Trait: Extra Burn
Pros:
- Superb payoff for burn teams.
- Innate crit rate and crit damage up per round thanks to her passive.
Cons:
- Requires a more consistent source of burn as her own chance is middling at best.
Raeon is designed to be used almost exclusively in burn teams. I know I say that a lot, but a glance at her Heavenly Trigram Rage skill will show you that it does a lot more damage towards enemies with burn – so much so that not using a burn team feels like a spectacular waste. Thanks to Raeon’s passive granting her extra crit chance and damage, you can be sure that when the lightning hits, it hits hard.
However, Raeon isn’t without weaknesses. Even at maximum breakthrough levels for her normal attack, her own chance to inflict burn ranges from awful to middling, so she’ll want allies who can reliably spread the status around.
Horus
Trait: DPS
Pros:
- Great all-around damager.
- Very powerful opener thanks to her passive.
Cons:
- Requires consistent source of Armor Break to be at her best.
Horus has a simple yet effective kit. If you’ve gone through any of my other tier lists or articles on this site, you’ll know that these kinds of characters tend to be my favorite.
Horus’s kit is straightforward – she deals damage to rows, with her Rage skill hitting significantly harder on enemies with Armor Break (that’s a hint, by the way). Horus’s Falcon Heart passive makes shutting her down more difficult, as she becomes immune to Rage reduction for the first 2 rounds of a fight, as well as granting her a good chunk of bonus stats that assist her in dealing damage.
Mori
Trait: DPS
Pros:
- Good DPS that’s more effective against back row DPS enemies.
- Rage skill has a chance to recover Rage.
Cons:
- Single target on both her attacks.
Character design aside, Mori is a great DPS who excels at not only killing, but profiting off other enemy DPS characters. Her Wind Erosion passive is fantastic at checking back row threats as it causes Mori’s attacks to permanently steal a percentage of the enemy’s ATK when she hits them – at max tier, she can steal up to 40% ATK, which both vastly weakens your opponent’s damage output while greatly bolstering Mori’s own.
Mori’s Riding High Rage skill is also worth mentioning as it boasts a very high multiplier even at breakthrough 0. Not only does it deal a big chunk of damage, but it also has a decent (40% base) chance to restore 2 Rage for Mori, allowing her to spam the skill with abandon.
Beam
Trait: DPS
Pros:
- Fantastic AOE DPS.
Cons:
- HP manipulation mechanic can be tricky to maximize.
Beam’s main gimmick is that she benefits from being low on health. The payoff for this is immediate, as her Time to finish things! Rage skill not only has a high base multiplier and AOE damage but also deals bonus damage commensurate to how much HP Beam has lost. To help her deal the most damage, Beam’s passive grants her 1 more turn of life when she would die, though even with the life drain, she’ll probably die next turn anyway.
Taweret
Trait: DPS
Pros:
- Reliable source of Armor and Resistance debuff; condition is relatively simple to meet.
- Has a follow-up attack on kill.
Cons:
- Follow-up passive could be a lot better.
Taweret’s main draw for me is her easy access to an Armor and Resistance debuff. While it’s not always active, it does boast very hefty drops (20% base) and has a relatively easy condition to meet – just keep Taweret’s HP percentage below that of her targets. This means that you generally want to put Taweret in front to ensure she takes some hits so she can proc her debuff.
She also has a follow-up attack on kill, but it’s hardly relevant. She could do with a much better passive, in my opinion.
B-Tier
Awakener
Trait: Offense & Defense
Pros:
- Free.
- Decent AOE that can stun.
Cons:
- Improvement intimately tied to story progression.
- Stun targets the highest HP enemy.
- Passive is pretty useless.
There’s not much to say about generic isekai man/woman. They can fill a slot on your team early on, though because their breakthrough progress and rarity increases are tied to your progression through the game, they can easily fall behind compared to characters who might (depending on your gacha luck) have multiple breakthroughs available soon after you start playing.
Tune is a decent AOE that stuns – the trouble here is that the stun goes after the enemy with the highest HP, which isn’t ideal in every case. That’s about it.
Set
Trait: DPS
Pros:
- Normal attack is a weak AOE.
- Front row AOE Rage skill.
- Passive has a chance to give her a damage buff.
Cons:
- Requires a burn setup to be at her best.
- Passive does nothing outside of her Rage skill.
Set is a conditional damage dealer. If you have someone that can facilitate burns, Set is a great teammate as her Chain of Abomination is a front row AOE that gets even stronger against burned targets. Set’s Vengeance passive further cements her role as a skill spammer as it does absolutely nothing outside of Chain of Abomination but has a chance to proc a very respectable bonus damage buff for Set if it triggers.
The thing with Set is that she needs a burn team to be at her best, and outside of a burn team – which in itself is tricky to set up as it requires specific characters – Set is middling at best.
Kuri
Pros:
- Burn team enabler.
Cons:
- Only really makes sense in a full-on burn team.
As I mentioned above with Set, burn teams in Echocalypse take a bit to get going, and the results are usually not as good as a full set of 6 plug-and-play characters. If you really want to go for it, though, you should probably use Kuri as she passively enables burn teams by spreading the status around (though only up to thrice, via her passive).
Other than that, there’s not much to write about. Again, burn teams are pretty strict on who you want on them, so Kuri likely won’t see much use outside of a dedicated burn team.
Nyla
Pros:
- Simple and effective kit.
Cons:
- Single-target damage isn’t that good in Echocalypse.
Nyla is a (pun intended) point and shoot character who excels at dealing damage to the farthest foe from her, even getting an alternate Rage skill mechanic and a passive that helps her in doing so. If this was any other game, she’d probably be an A-tier, but alas – AOE is king in Echocalypse and it’s hard to justify a higher place when there are a lot of characters who can technically do more total damage than Nyla thanks to their AOE.
Vera
Pros:
- Bleed is nice, I guess.
Cons:
- DoT damage is slow.
Vera is…okay, all things considered. Her normal attacks and Rage skill have a chance to inflict bleed (note that these are different types of bleed, though as I don’t personally have Vera, I can’t run tests to see if they stack). Bleed damage is middling and probably won’t kill anything by itself, though I suppose the extra damage is nice.
Camelia
Pros:
- Good survivability with her life steal.
- Chance to inflict bleed.
Cons:
- Nothing stands out in her kit.
Camelia is, for me, the poster child of “average fighter” for Echocalypse. She’s someone who’s “okay” at everything – decent damage, decent tankiness, and an okay passive. But Camelia lacks that special oomph that separates an okay damage dealer from a good one (much less a great one) – look at characters like Anubis, Vedfolnir, or Aiken for example, and you’ll see how overshadowing Camelia isn’t a difficult thing to accomplish.
Shalltear
Trait: DPS
Pros:
- 100% block rate once she enters frenzy, at the cost of her Blood Pool.
Cons:
- Reliant on Blood Pool to keep alive and deal damage.
If you’ve watched Overlord, you know how Shalltear gets (and how she looks) when she drinks blood. That sort of carries over to her Echocalypse incarnation – each of her attacks drains some of her damage (and adds some of her max HP) to her Blood Pool. Once she hits 40% health or less, she enters a Frenzy, doing more damage based on her missing health as well as blocking attacks by consuming her Blood Pool.
It’s a solid idea, but it has its weaknesses. The Blood Pool is a nice mechanic, but you absolutely need to fill it up to ensure that Shalltear can sweep once her Frenzy activates. The trouble with this is that it takes a while to fill the pool up, and if you can’t, you have a pretty average damage dealer on your hands. When she’s good, she’s very good, but it does take a while to get there.
As with Albedo, remember that collaboration characters basically never ever get a rerun. If you’re playing on Global (where the Overlord collab hasn’t hit yet IIRC), really want Shalltear (and you’re not averse to spending), you probably should swipe.
Gryph
Trait: Burn, Ignition
Pros:
- Raeon lite.
Cons:
- Needs more consistent burn applier to shine.
Take everything I said about Raeon, tune it down a bit, switch it to magic damage, and you get Gryph. As with Raeon, you’ll want a more consistent burn applier, though Gryph’s passive does give her a bit more wiggle room, though you don’t want enemies hitting Gryph to begin with; she’s a DPS, not a defender!
Firentia

Trait: DPS
Pros:
- Good all-around performance…
Cons:
- …but lacks oomph.
Firentia is a very vanilla fighter, by which I mean she doesn’t have any specific gimmicks that make her stand out. She’s just kinda there, and that’s all I have to say about her.
Shiyu
Trait: AOE Burning
Pros:
- Great at inflicting and spreading burn while dealing decent damage herself.
- Has an extra life, counters with burn at higher augmentation levels.
Cons:
- Normal attack doesn’t have a burn proc.
Shiyu is a worthy contender for a slot in a burn team. While her normal attacks can’t get the fires started, her Supernova AOE Rage skill does have a decent 40% chance to start the burn chain, even at breakthrough 0. Shiyu’s Nirvana Tactics also give her an extra life, and with augmentation investment, allow her to retaliate with another nuke and a guaranteed burn on her revival.
Regina
Trait: AOE Burning
Pros:
- Good at inflicting burns, decent proc chance even at breakthrough 0.
Cons:
- Not much else going on in her favor.
Regina is pretty much a burn facilitator. Her Splendor Rage skill gives her a decent chance (40% base) to inflict burn even without investment. Unfortunately…that’s about all there is to say about Regina’s kit. She does put out some decent numbers, but the only real standout is her ability to burn.
Stara
Trait: DPS
Pros:
- Specialized against enemies with shields.
- Normal attack is a front row magic attack.
Cons:
- Not much else going on in her favor.
Like Regina, Stara is an okay all-around damage dealer who specializes in hitting enemies with shields. And that’s about it. You could do better; you could do worse.
Yanling
Trait: DPS
Pros:
- Good early game backrow DPS.
- Has burn tacked on to her Rage skill.
Cons:
- Overshadowed in sheer weight class by SSRs.
Yanling is a surprisingly decent SR DPS, only let down by her rarity and thus lower stats. Nonetheless, she’ll serve you well in the early game – up until you get someone who can do the same job as her, but better.
Snezhana
Trait: DPS
Pros:
- Good early game magic counter.
- Does more damage against the foe with the highest HP.
- Becomes stronger when an ally is under a crowd control effect.
Cons:
- Passive is situational at best.
You’ll see a lot of Snezhana’s Rage skill animation at the start of the game. Does it look like it hurts? Because it does. Snezhana is a potent SR DPS who excels at busting down the enemy’s front row thanks to her row-wide magic damage. As a nice added bonus, this Rage skill does more damage against the foe with the highest health, allowing Snezhana to dismantle defensive formations with ease.
As with other non-support SRs, I don’t recommend keeping Snezhana around after you’ve gotten a set of SSR DPS. Still, she’ll serve you well until that point.
Senko
Trait: Offense & Defense
Pros:
- Decent damage and survivability.
Senko’s kit is literally just “generic frontline guy”. Row damage and life steal. Sometimes all you need is a hammer to smash things with, and if you got Senko, good for you. But once again, let me remind you that there are better SSR options down the line, so don’t get too attached to her.
C-Tier
Sova
Trait: DPS
Pros:
- Free.
- Rage Skill has a decent chance to generate more Rage.
Cons:
- Not really an AOE DPS.
Sova is one of your first free characters. While she’s not fantastic, she’s not too bad either. Banks Archery serves you well in the early to midgame as it’s a row-piercing Rage skill that has a chance to refund some of its cost. Do note it’s not a true AOE – it only hits up to 2 enemies at once and thus you’ll want a real AOE DPS in the future, such as Fenriru.
Panther
Trait: Offense & Defense
Pros:
- Front row Rage skill that has a chance to inflict a life steal mark on highest HP target, contributing to team survivability.
Cons:
- Low chance to proc Blood Support without breakthrough investment.
- Passive only affects normal attacks; single-target hits aren’t very good in Echocalypse.
Panther is a generic brawler whose only real highlight is her Blood Support proc on her Rage skill. While under Blood Support, attacks against a unit have a 10% life steal. It’s not much, but it’s an okay effect that can contribute to your team’s survivability. Unfortunately, the base proc chance is 30% and increasing it requires breakthrough levels, so it’s a wiser decision to invest in a more direct (and guaranteed) healer.
Sil
Trait: AOE Burning
Pros:
- Can burn.
Cons:
- Pales in comparison to pretty much every SSR burn facilitator.
Sil is competing in a niche that demands that all participants bring their A-game, whether that’s inflicting and spreading burn or capitalizing on that status. Sil does neither of those particularly well.
Xen
Trait: DPS
Pros:
- Decent single target damage…
Cons:
- …you have to be really good at it to place higher. Look at Anubis and Vedfolnir.
As I’ve said multiple times in this list, AOE is king in Echocalypse, and the few single-target damage dealers that do exist must be absolutely stellar if they want people to play with them. Xen is not one of those single-target aces. She’s cute, I guess, and you can use her in the early game if you really want to.
Gura
Trait: DPS
Pros:
- Easy access to defense debuffs despite low hit chance.
Cons:
- Maximizing her defense debuffs requires breakthrough levels at which point you might already have an SSR that can do the same job.
Gura is decent. She’s an okay early game AOE DPS who also has access to a defense reduction effect, though the hit rate and defense strip are rather low. Maximizing these also means investing in breakthrough levels, by which time you might already have an SSR who can do the same job.
D-Tier
All The R Characters
Pros:
- Really easy to build…
Cons:
- …but vastly overshadowed by everyone else.
You’re going to pull a bunch of R characters in the gacha. You’re going to slot them once in your team – at the start of the game when you don’t have anyone else – and once you get an SR to fill that slot, you’re going to remove the R character. That’s just how it goes.
And yes, all of them are listed as DPS units.
Defender Tier List
| S | Guinevere |
| A | Brown, Rie, Lumin, Yulia |
| B | Taisei, Babs |
| C | Nanook |
| D | Wadjet, Kurain |
S-Tier
Guinevere
Trait: Unyielding
Pros:
- Allies are unkillable as long as Guinevere is standing.
- Provides debuff protection, full party warding, and full self-heal at high breakthrough levels.
Cons:
- Breakthrough investment needed to ward entire party.
- Maximum breakthrough needed to trigger Dragon Heart buff.
Warding tanks are finally making a comeback, it seems; we had the amazing Fu Xuan in Honkai: Star Rail, and now we have Guinevere in Echocalypse.
Guinevere’s main shtick is that allies protected by her Dragon Scales buff are technically unkillable as their health won’t drop below 5%. The drawback to this is that any damage they take isn’t negated but transferred to Guinevere. On the other hand, this also means that as long as Guinevere herself is still standing and her allies have Dragon Scales, they’re technically immortal. Guinevere herself also has a passive (requires augmentation levels) that prevents her own HP from dropping below 5/10% for one round, guaranteeing you a round of technical invulnerability. Simple, but powerful.
While Guinevere is already useful at no breakthrough levels, her full potential is locked behind them. By default, her Rage skill affects allies on row Guinevere isn’t on. You’ll need to bring her up to 5* for her Roar of Light! to affect all allies, and 7* to unlock her Dragon Heart self-buff, which grants her protection from her HP falling below 50% and a full heal the next turn after it protects her.
A-Tier
Brown
Trait: Omnipotent Protection
Pros:
- Very big damage reduction.
- Catch-all defense.
Cons:
- Cloudweaving requires breakthrough levels to access all of Divine Triplicate’s features.
- Damage reduction from Cloudweaving only applies to the next attack.
“Omnipotent protection” is a bit of an overstatement, but Brown’s kit is solid regardless. Omnipresent would be a better word as Cloudweaving, Brown’s damage mitigation Rage skill, borrows a lot from her passive, Divine Triplicate.
Essentially, Brown has extra protection versus status effects, rage loss, and will dispel a buff from the strongest foe when the party’s HP dips below 30%. Investing in breakthrough levels allows Cloudweaving to borrow these strengths from Divine Triplicate, extending their effects to all allies and punishing foes for using said tactics. The catch here is that to do so, you’ll need breakthrough levels. Yeah.
You should also note that while Cloudweaving does offer massive damage mitigation, it only activates for the next hit after it’s cast. Thus, Brown may run into trouble with enemies that manipulate Rage as you might not be able to get her own Rage skill online fast enough to protect against the enemy’s!
Rie
Trait: Shield Counterattack
Pros:
- Potent back row protection and support tied to her normal attack.
- Rage skill both deals damage off her shield and creates new shields for herself and her allies.
- Scales entirely with HP.
Cons:
- Can make the rest of your team rigid with her strict placement requirements.
Rie is a generic shielder. That doesn’t mean she’s bad, she just doesn’t offer much outside of shields. But what she does, she does very well: her normal attack removes debuffs and applies a shield to her back row, her Rage skill detonates her current shield and creates a new one for herself and surrounding allies (meaning you pretty much always want to put her in the front middle row), and her passive creates a shield when she enters battle. All her shields scale off her max HP, so building Rie is quite straightforward.
Lumin
Trait: Offensive Defense
Pros:
- Normal attack lowers ATK for the strongest foe in range.
- Removes enemy Rage, strips enemy buffs.
Cons:
- Hard to control which of Shared Destiny’s modes will activate.
You probably know about stance dancers – they’re units that operate differently depending on what mode they’re in. Lumin brings a boiled-down version of this mechanic to her entire team via the Guardian Weave status, an effect that mitigates and reflects incoming damage if the ally is at or above 50% of their HP while dealing a *lot* of extra true damage if their HP is below 50%. By the way, these effects are permanent.
Lumin’s normal attacks also reduce the ATK of the strongest foe she hits, so that’s the front row. Hardly the main attraction of her kit, but it’s still very nice to have.
Yulia
Trait: DMG Absorption
Pros:
- Taunt tank.
- Gets sturdier the less HP she has.
Cons:
- Taunt effect is chance-based.
- Only taunts the front row.
Yulia is a traditional tank, which is a rarity among Echocalypse’s more defense-oriented characters. Her main claim to fame is simple: taunt the enemy’s front row to force them to attack only her, while utilizing the power of her passive to become tougher to kill the less health she has. Simple yet effective.
Do note that Yulia does have her shortcomings. For starters, her taunt has an innately low hit rate (30% at base, 60% at max breakthrough) and that it will only ever target the front row, making it less effective against compositions that run back row damage dealers.
B-Tier
Taisei
Trait: Defensive Clone
Pros:
- Magic Hairs provide a dodge-based defense that stacks.
Cons:
- Offers nothing to her team.
Taisei is…okay, I guess. The main issue with her kit is that she offers nothing to her team aside from extra damage, at which point you’re probably just better off running a second DPS. It would be great if her clones could take damage for other characters within Taisei’s row, but nope, they only protect her.
Babs
Trait: DMG Absorption
Pros:
- Taunt targets enemy with the highest ATK.
- Upfront damage reduction allows her to weather powerful opening plays.
Cons:
- Taunt has a low base chance.
Babs would be higher on this list if only her taunt was guaranteed. Forcing the enemy’s carry to focus you down is a great effect, but unfortunately, it’s only got a 30% hit rate. Still, Babs is a nice counterplay to enemy teams with strong openings as her passive gives her even more durability at the start of a battle. However, there are better defensive options, such as shielders.
C-Tier
Nanook
Trait: AOE Shield
Pros:
- Free.
- AOE normal attack (though not very strong).
Cons:
- Mixed scaling on her shield – shield HP scales off her max HP but is capped by her ATK – which forces you to split investment.
- Offers no protection to the back row.
Your first forced pull is guaranteed to give you Nanook, and she’s…uh. I suppose that she’s okay in the first part of the game as you likely won’t have a shielder or defensive unit yet, but as you push through the campaign stages, the cracks in Nanook’s kit will quickly reveal themselves – such as having no way to protect the back row, no way to redirect attacks towards herself, and no way to mitigate damage outside of an awful passive that’s only active at the start of a fight.
Replace ASAP.
D-Tier
Wadjet
Trait: Counter to High Attack
Pros:
- Nice art and is cute.
- …I’m having a hard time thinking of anything here.
Cons:
- Mummification is not a hard shutdown and is very circumstantial.
Yes, turning enemies into mummies is funny. But it’s so, so circumstantial. For starters, the mummification process only works on enemies with 3 or more Rage, which narrows the window when it will be effective as you don’t have control over when Wadjet will use her skill – and even if you do use characters like Audrey to time your Rage skills better, you’re still dependent on an enemy status to trigger the effect.
Oh, so you’d think that with all those restrictions in play, mummification is guaranteed, right?
Wrong. Even if the stars align and Wadjet uses her skill just as the enemy is about to pop their Rage skill, you still have to contend with the low hit rate of the effect (20% base, 35% at max breakthrough). The devs had absolutely no mercy when designing Wadjet’s kit.
Finally (and this is admittedly a nitpick), mummies aren’t hard disabled – they can still attack, even if said attack is weak. I think the ideal situation is that they’ll instead burn their Rage using the crappy mummy skill, but that’s a best-case scenario.
With how many hoops Wadjet has to jump through just to disable the enemy team, let me ask you a question – why not just use a stunner, or heck, anyone better at managing enemy Rage like Akira or Vivi?
Kurain
Trait: Counter to High Attack
Cons:
- Damage reflection on the enemy’s carry is not a good counter to high attack (despite, you know, being a literal counter to high attack).
Kurain’s idea of countering the enemy’s carry is to slap them with a debuff that causes them to take damage when an ally does. Not only is this a garbage effect but it also only lasts up to 2 rounds.
Support Tier List
| S | Caroline, Ring, Audrey, Levia, Lilith, Pan Pan |
| A | Note, Akira, Banshee, Nue, Hera/Hela, Chiraha, Zawa, Vivi, Nephthys, Niz, Deena |
| B | Eriri, Dorothy, Cera, Ifurito, Albedo, Bastet, Iori, Nightingale, Baphomet, Aurora, Katch, Rikin |
| C | Hemetto, Toph, Garula, Yarena |
| D | Parvati |
S-Tier
Caroline
Trait: Support
Pros:
- Gigantic array of great buffs makes her a universally useful support.
It’s hard to pin down exactly what Caroline does as her skills give a huge selection of great buffs that any team can utilize. To help you understand Caroline, here’s a short list of what she can do:
- Her normal attack hits 3 random enemies and adds a stack of Ring of Fire. When allies act, consume 1 stack of Ring of Fire to remove 1 control effect on themselves; that attack also deals true damage that scales off Caroline’s Armor and Resistance.
- A Myriad of Dead Ends deals hefty damage to 3 random targets and grants the 3 strongest Cases on her side the Chimera’s Claw buff, which causes attacks that deal no damage to pierce enemy shields to a degree. Investment into her Rage skill also leaves a 1-turn debuff that negates incoming shields or healing, causing them to take damage, as well as the Chimera’s Shell buff for Caroline’s allies, which dispels debuffs when attacked and reflects damage back as true damage, once again scaling off Caroline’s Armor and Resistance.
- Heart of a Cornered Beast creates one of three random party-wide buffs (10% ATK, 15% Armor/Resistance, 20% healing and shield) when Caroline hits 99%, 50%, and 1% HP. This passive is also guaranteed to proc 3 times as it prevents Caroline from dropping below 1% of her HP until her turn comes up again.
As you can see, Caroline is an all-in-one support package whose massive selection of buffs allow her to fit easily into any team composition – not to mention that her normal attacks and Rage skill also hit randomly, giving Caroline some pseudo AOE damage ability.
Ring
Trait: Support
Pros:
- Her normal attack is a party heal.
- Gains ATK from healing allies, allowing her to heal even more.
- Prayer stacks allow Ring to reactively heal allies and chip out some true damage on enemies.
Cons:
- Prayer stacks are applied to random Cases.
“Her normal attack is a party heal” is a good enough write-up for some people, but if you want me to hard sell Ring to you, here you go.
Ring’s Rage skill also generates powerful effects for 3 random lucky or unlucky targets on the field – allies will recover some HP upon getting hit, while enemies lose HP via true damage. Further investment will allow her Rage skill to apply even stronger buffs/debuffs such as follow-up attacks with true damage and damage reflection on enemies who attack Ring. Did I mention that under certain conditions, you can pop every Prayer stack at once?
Just to clarify: “Prayer” and “Wish” stacks are the same thing. Someone needs to proofread skill descriptions in the game.
Audrey
Trait: Support
Pros:
- Provides her back row with free Rage; chance gets higher the more breakthrough levels she has.
- Also provides regeneration.
Yup, free rage. You could take away the regeneration on her Rage skill and she’d still be an S-tier. There’s no reason to not run Audrey with a team of back row DPS characters.
You don’t need to have 6 paragraphs to be good – Audrey is proof of that.
Levia
Trait: Rage Recovery
Pros:
- Audrey 2.0; provides her opposite row with Rage.
- Normal attack has a chance to generate Rage for herself.
Levia is basically a more offensive Audrey, foregoing the regen buff on her Rage skill in favor of a party-wide nuke. Her use case, however, is pretty much exactly like Audrey in that her main role is serving as a battery for the rest of your team. Who should you use? It’s a matter of personal preference – both Levia and Audrey are fantastic units and you should have at least one of them.
Lilith
Trait: AOE Control
Pros:
- Normal attacks strip Armor and Resistance of front row enemies.
- Protects self via the Temptation status buffs, controls enemies by inflicting Obsession on enemies with Temptation.
- Cross-shaped AOE allows for some damage output.
Cons:
- Requires augmentation investment to fully utilize her kit.
In gacha games, there’s usually one character whose entire gimmick revolves around charming enemies. Lilith is one of the few cases where that shtick actually works well. No matter how you slice it, Lilith is a very disruptive support.
Instead of going the usual route of “charm an enemy to make them fight for you”, Lilith turns that into a bonus instead of her main trick. Lilith works by innately inflicting foes with the Temptation debuff at the start of battle – the higher her passive level, the more foes are affected (up to the entire party) – which causes enemies to not target Lilith. Do note that this doesn’t mean Lilith is immortal as AOEs can still catch her and the effect is negated if she’s the only target left.
Lilith’s Rage skill, Dream-like Bliss, is the crux of her kit where she hits enemies in a cross-shaped AOE – allowing you to get some damage in – but what’s even better is that any enemies she catches in a hit that already have Temptation have a chance to become Obsessed with Lilith’s dreams, which serves as a stun unless they get hit by a sufficiently strong attack. Pair this with Lilith’s augmented passive where she gains 1 Rage per enemy with Temptation at the start of a battle and you have an almost free first round. If that wasn’t enough, breakthrough investment into Lilith also causes random targets with Temptation to attack their teammates instead.
Pan Pan
Trait: Support
Pros:
- Steady and reliable source of shields.
- ATK debuff on her normal attack.
Cons:
- Maximum breakthrough required to shield entire party.
Note: I’m running on the SEA version of Echocalypse. I’m aware that the Global version of Pan Pan says that she reduces Hit Rate on her normal attack and as I don’t have access to an account with Pan Pan, I can’t countercheck if the SEA version is just wrongly worded.
Want shields? Pan Pan has your back. The core of Pan Pan’s kit is her Lab No Liability Rage skill, which erects a shield that scales off her max health for herself and 2 allies. While powerful on its own, do note that she gets a party-wide shield at maximum breakthrough. Her normal attack also packs a potent ATK debuff, which is nice to have if you were going for breakthrough levels anyway.
There’s not much more to say about Pan Pan other than she just keeps her head down and builds shields for your team. Very reliably, too.
A-Tier
Note
Trait: Freeze Control
Pros:
- Highly versatile support.
Cons:
- Has a lot of positioning gimmicks that you’ll need to master.
- Needs breakthrough investment to start buffing allies with Rage skill.
As with most ice-based characters, Note excels at freezing enemies. What’s different here is that her Freeze stacks are actually beneficial to allies, who gain damage reduction and a shield based on Note’s max HP. Enemies, on the other hand, do less damage and have a low chance to fumble, missing their turn entirely. Further Freeze stacks will transform into Frostbite, boosting their previous effects – allies gain damage immunity up to a degree and will gain a shield when said immunity expires, while enemies are simply frozen solid.
However, all this comes at a price, namely Note’s positioning. While her kit encourages you to build her HP (ensuring that she’ll at least be bulky enough to survive even on the front row), you’ll need to carefully consider whether to use her Freeze stacks offensively or defensively and place her as needed – which can foul up some compositions.
Akira
Trait: Rage Break
Pros:
- Destroying enemy Rage is a powerful effect.
Cons:
- Needs to build up to Falling Thunder to hit all enemies.
- Passive only works once in a battle.
In a game where unleashing Rage skills is often the deciding factor in who wins a fight, the ability to deprive your enemy of those skills is undoubtedly a powerful effect. Akira knows this – her entire kit is dedicated to draining away Rage even at the cost of her damage. The only problem she faces is that her Thunder of Terror requires you to build up Falling Thunder to be at peak efficiency. This requires building up 4 stacks of Lightning Spark.
While she does gain Lightning Spark stacks from all her skills, note that her passive only triggers once when she’s either hit or takes an action, and her normal attack always only generates 1 stack. The most consistent way to build these is to invest in her breakthrough levels, which may not be an option if you’re fully F2P. Either that, or just accept that you won’t be able to catch every Rage skill consistently.
Banshee
Trait: Soul Possession
Pros:
- AOE damage with her ult.
- Both Thorn and Ghost are good buffs.
Cons:
- Rage reduction/gain is tied to breakthrough levels.
Banshee has a weird kit on paper, but what it essentially boils down to is that her Rage skill damages enemies then grants an ally on her row a buff similar to hers: Thorn if in the front row (temporary shield), or Ghost in the back row (50% increased dodge, 30% physical damage reduction). Essentially, Banshee serves to make whoever is in the same row as her hardier while making herself invulnerable.
Banshee also gets rage draining and later, rage gaining mechanics in her normal attack, though that requires breakthrough levels.
Nue
Trait: Weakening Restriction
Pros:
- Powerful debuffs that persist throughout the fight.
- Facilitates burn teams while being a universally useful support.
Cons:
- Random targeting nature of normal attack and Rage skill makes it difficult to focus on a single enemy.
Nue has a unique approach to debuffs – instead of slapping them on an enemy, put the debuff on the ground below them. This is reflected in Nue’s unique Scorched, Lava, and Inferno Land effects. The hotter the ground an enemy stands on, the worse the debuffs get, with Scorched Land inflicting burn as well as -10% damage dealt, Lava Land giving a 20% chance for normal attacks to not grant Rage and a 20% chance on skill use to increase its Rage cost, and Inferno Land reducing critical resistance by 15% and giving burn DoTs a 50% crit chance.
You might read all this and wonder if Nue does work in a burn team and outside of it, and the answer is yes – while her Scorched Land inflicts burn (and Nue spreads the status quite quickly), the general nature of her buffs means that she does get mileage even outside of dedicated burn teams. However, do note that because of the random targeting of her normal attack and Rage skill, it can be difficult to focus down a single target with debuffs.
Hera/Hela
Trait: Back to Life
Pros:
- Resurrects the dead.
- Passive life steal for allies when she attacks.
Cons:
- Expensive resurrection effect.
- HP healed via resurrection depends on how much healing Hera/Hela has received herself.
Note: I’m referring to this character as Hera/Hela as there seem to be some ambiguity on what her name is in-game.
Hera/Hela is a potent support with a unique perk in that she’s one of two characters that can bring the dead back to life. However, this is expensive (as you may imagine) – it requires a whopping 7 bars’ worth of Rage, and as I don’t have Hera/Hela myself, I can’t thoroughly test exactly what this implies, such as if her Rage can accumulate beyond 4 points, if she uses just the damage form if she’s at 4, or if she can only use the whole thing at 7 points.
Apart from this, Hera/Hela also has some use as a general healer as her attacks also have life steal for her entire team. Very nice!
Chiraha
Trait: Back to Life
Pros:
- Resurrects the dead (sort of), heals allies.
- Provides shields to the most vulnerable teammates.
- Strips Armor and Resistance with her normal attacks.
Cons:
- Requires augmentation investment to improve her Tail count.
- Since Tails activate automatically, it can be hard to control whether they should be used for emergency heals or resurrection.
If Hera/Hela’s offensive spin on resurrection isn’t your thing, give Chiraha a go. This fox uses the power of her nine tails to both activate emergency heals and prevent allies from retreating (as well as healing them in the process), so it’s a pseudo-resurrection effect. Chiraha also packs shield and Armor and Resistance stripping on her normal attacks, which help her keep her allies alive and also help them do more damage.
That said, Chiraha requires heavy augmentation investment as her resurrection and heals are tied to consuming Tail charges, of which she only has 3 at augmentation level 1. You’ll want to rush Chiraha to passive level 3 to get the most mileage out of her.
Zawa
Trait: Counter to High Attack
Pros:
- Niche application but nobody else can take her job.
- Normal attacks blind with augmentation investment.
Cons:
- Buff stealing effect has a low hit rate.
Zawa’s unique buff-stealing kit gives her supreme job security. While her ability to steal buffs and lord over her opponents with her stolen buffs isn’t always applicable, her presence alone serves as a deterrent against such teams. Unfortunately, chance is Zawa’s bane as even at full breakthrough, she only has a 50% proc rate on her buff steal.
Outside of her buff steal, Zawa also has the distinction of inflicting blind with her normal attacks, with augmentation investment. Even outside of buff-heavy enemy teams, Zawa is still relevant.
Vivi
Trait: AOE Control
Pros:
- Snipes enemies with low HP via her normal attack.
- Losing HP makes back row allies stronger.
- Rage skill gets stronger the more enemies have died.
- Rage removal effect.
Cons:
- Rage removal has a low proc chance.
Vivi is not a dedicated Rage removal character, but she does offer a lot of utility.
Like Akira, Vivi has a kit whose main focus is Rage removal. Unlike Akira, Vivi doesn’t focus solely on that one role. Instead, Vivi goes for a slew of utility effects – her normal attack helps her chip out damage against the foe with the least HP while her passive bolsters her back row allies with more crit damage (always useful) when Vivi hits certain low HP thresholds.
This selection of buffs and support skills means that while Vivi isn’t a must-have for a Rage removal team, she nonetheless offers all-around utility that makes it easy to slot her into a team.
Nephthys
Trait: Support
Pros:
- Her normal attack is a heal.
- Good all-around healer that works better in burn teams, though is not strictly a burn team character.
- Free burns at the start of battle.
Cons:
- Healing is restricted to her own row.
While Nephthys does work better in burn teams thanks to her free passive burn at the beginning of a round, she can function just as well outside of them. God’s Gift is a great healing Rage skill that gains bonus potency per burned enemy while Divine Grace allows Nephthys to keep her allies alive even outside of her Rage skill turn.
Do note that Nephthys does have some weaknesses too, the biggest of which is that God’s Gift only targets her own row. Keep this in mind when facing foes that like to prioritize different rows and rotate healers out as needed.
Niz
Trait: AOE Control
Pros:
- Good all-around disruptive support thanks to her freeze procs.
- Full rage at start of battle via passive.
Cons:
- Crappy damage returns on her breakthrough levels.
- Normal attack can freeze but requires breakthrough investment.
Niz is a simple yet effective control-type Case who utilizes freeze via her Rage skill (and normal attack if you drop enough breakthrough levels). That’s it.
Do note that going for breakthrough levels gives garbage returns on damage. However, it does vastly help Niz freeze enemies, with normal attacks gaining a freeze chance as mentioned above and her Rage skill having a higher freeze proc chance.
Deena
Trait: Support
Pros:
- Heals and debuffs.
Deena is a great all-around support who provides both heals and debuffs, though her debuffs require breakthrough investment. I can’t really comment on her passive as it’s worded weirdly in the SEA version, but apart from that, Deena is a superb plug-and-play healer.
B-Tier
Eriri
Trait: Support
Pros:
- Free.
- Normal attack heals.
- Front-row heal.
Cons:
- Rage skill doesn’t affect back row nor does it heal the ally with the least HP (which is kind of the whole point of healing).
Eriri is a decent free healer if a bit rigid. The fact that her normal attack heals is very nice, but she’s also let down by her Rage skill only targeting the front row. I should also mention that said Rage skill also doesn’t heal the ally with the least HP (unless they’re already on the front row), instead giving them 10% Armor and Resistance.
Dorothy
Trait: Support
Pros:
- Normal attack hits 3 enemies.
- Brilliant Idea can give free Rage skills.
Cons:
- Brilliant Idea has a low proc chance.
- No innate support abilities.
Dorothy is a simple but effective support – she follows up ally attacks with her Rage, and her Inspiration – Brilliant Idea loop has a chance to negate Rage cost. The caveat is that you can’t influence who will get the Brilliant Idea buff nor can you do anything to alleviate the low 20% proc chance. You’ll also need breakthrough investment into Dorothy to make her buff allies. Is it worth the Iridimorphite? Your call, but not for me.
Cera
Trait: Control, Debuff
Pros:
- Lots of debuffs.
- Facilitates damage dealers via her Bite status, also stuns.
Cons:
- Needs heavy breakthrough and augmentation investment to have more consistent disables and faster Bite spread.
- Bite isn’t a hard crowd control on its own thanks to its low proc chance.
Cera is a character who gets a lot better the more resources you sink into her. I know that sounds like it would apply to everyone, but if you look at Cera’s kit at breakthrough 0, it’s…underwhelming. A 20% chance to inflict Bite with her Rage is terribly low and makes her performance inconsistent.
However, with proper augmentation investment (level 3 Gatekeeper of Hell procs a 50% Bite chance attack) and some breakthrough levels (3 stars changes her Rage bleed proc to blind or silent, more levels increase her Bite proc chance with her Rage skill), Cera starts serving up consistent, irritating debuffs.
If you’re planning to use Cera at all as an F2P, I strongly suggest at least getting her passive to level 3 if you aren’t going to focus on her. This way, you’ll be able to push your advantage more without needing to sink valuable Iridimorphite on her dupes.
Ifurito
Trait: AOE Control
Pros:
- Constant Soulburn procs prevent enemy teams from using Rage.
Cons:
- Reliable stun needs two Heart Flames, which is hard to achieve thanks to constant Soulburn.
Ifurito is a character who relies on combining her two types of flame – Scared and Heart – to trigger debuffs on her enemies. Mechanically, this sounds great; in practice, it can be finicky to get the right type of debuff you want as Ifurito’s passive automatically combines flame types to create a “Burn” effect.
Most likely you’ll end up with Soulburn or Bloodburn; the former prevents enemies from using Rage skills on the next turn (which is good) while the latter has a (Missing HP)% chance to stun the enemy and prevent them from acting (which is virtually useless in the opening rounds of a fight). Your call on whether to use Ifurito or not – she’s not bad, but I like consistency in my teams.
Albedo
Trait: Support
Pros:
- Bulky support with passive regeneration.
- Normal attack raises her own defenses as well as an ally’s.
- Reliable source of Armor Break but requires another defense debuff to inflict the status.
Cons:
- There are better shielders/defenders and in general, it’s better to raise offensive stats.
Yes, this is that Albedo from Overlord. I know that she isn’t out in Global yet, but I’m playing on SEA.
Albedo doesn’t really bring anything new to the table in Echocalypse. Sure, her normal attack improves her defenses (as well as those of the ally with the lowest defenses) and she has a passive that causes enemies with less total defense than her to deal less damage as well as regenerate HP based off her defenses. This makes Albedo an incredibly bulky support who can take to the frontlines easily.
Her Rage skill, VANISH! is handy in that it provides an Armor and Resistance stripping effect, which gets even stronger if the enemies she hits already have any defense debuff. This makes Albedo one of the few (if any, and if my memory is correct) sources of consistent Armor Break, which characters like Horus greatly appreciate, though you will have to run Albedo with a secondary source of Armor and Resistance reduction to ensure that Armor Break goes through.
As a collaboration character, Albedo’s main strength lies in her rarity. Precisely because she’s a collaboration character, she can be run with any kit and people are going to pull for her, for good reason, because collaboration characters very rarely rerun. Like ever. So if she’s your waifu and you’re already committed to playing Echocalypse and you’re willing to spend (don’t spend just for her, please – there are better characters) I’d strongly urge you to pull for her.
Bastet
Trait: Support
Pros:
- Armor Break is a good effect…
Cons:
- …but let down by low hit chance.
Bastet is a mixed bag. Armor Break is a good effect, as is anything that lets you push out more damage. The trouble here is that while Bastet has an AOE Armor Break, it’s let down by a low proc chance of 20%. Even getting her to 7* still doesn’t make the hit chance 100%. I don’t know about you, but I’d take guaranteed defense downs even if it doesn’t trigger Armor Break. Your call.
Iori
Trait: Support
Pros:
- Surprisingly consistent healer for an SR.
- Great healing coverage.
- Also buffs the back row.
Cons:
- Low base healing on normal attack.
- Healing effect boost from her passive is tied to losing HP, making it less useful.
Iori is a surprisingly consistent unit for an SR. Normally, SRs pale in comparison to their rarer cousins, but Iori does manage to carve out a niche for herself as she technically has full party coverage with both her normal attack and Rage skill heals.
However, do note that her First Aid normal attack has low multipliers despite healing the entire front row. Iori is also overshadowed by her rarer brethren thanks to her lower statline but can still soldier on as a good sideline healer if you haven’t drawn anyone better yet.
Nightingale
Trait: AOE Control
Pros:
- Can silence enemies.
- Normal attacks reduce crit rate (requires breakthrough levels)
- Powerful defense stripping effect via her passive.
Cons:
- I’d argue that silencing enemies isn’t as effective as reducing Rage.
Let me get this out first – I posit that reducing enemy Rage is a much more effective way of controlling them rather than a 40% (base) chance of silencing them. However, there are also Cases who are immune to Rage reduction (such as Horus), so Nightingale does have a niche use case.
Her ability to drop enemy crit rate is nice, and it targets the enemy with the highest ATK, making it relevant throughout a fight. Finally, Nightingale has a very dangerous passive that inflicts all enemies with a massive Armor and Resistance penalty once she drops below a certain HP threshold!
Baphomet
Trait: AOE Debuff
Pros:
- Reduces enemy block rate.
- Normal attack is magic and targets front row.
- Revenge mechanic.
Cons:
- Very specific niche.
Baphomet is a decent debuffer whose main claim to fame is her ability to inflict Block down, which is (oddly enough) quite a rarity. This means that she’s not universally useful, but in the rare cases that you do need to focus on block reduction (especially against bulky frontliners), Baphomet can help open them up for the rest of your team to deal damage.
Speaking of damage, Baphomet also has the advantage of a front row magic attack. While the multipliers are low, frontliners do tend to build more towards Armor. Either that or I’m just unlucky.
Finally, Baphomet has an interesting passive. When she dies, she distributes a certain percentage of her attack to all remaining allies, spurring them on to avenge her. It’s a nice effect, but do try to not get Baphomet killed just for that as I’d argue that her retreating is still a bigger loss.
Aurora
Trait: Support
Pros:
- Plug and play healer/shielder.
Aurora is a very decent SR unit who serves as a simple yet effective plug-and-play healer. If you don’t have Deena or just need heals, Aurora has your back.
Katch
Trait: AOE Debuff
Pros:
- Good early game debuffer.
Cons:
- As with most Armor Break appliers, has a hard time actually putting the debuff up.
One thing Katch has going for her is that her Armor Break isn’t tied to some stupid gimmick like dying. Looking at you, Toph. While the hit chance is low, the fact that it’s just a straight-up roll to apply the status makes it at least somewhat consistent.
That said, Katch is only good in the early game. As Echocalypse evolves and hopefully adds more and better ways to proc Armor Break, Katch will struggle for relevance thanks to her lower rarity.
Rikin
Trait: AOE Debuff
Pros:
- Plug-and-play healer/buffer.
Cons:
- Very weak buff.
Rikin, like Aurora, is a great plug-and-play healer. Unlike Aurora, Rikin has a more offensive spin on things with her Rage skill also granting a (minor) ATK buff. Still, a buff is better than no buff, right?
As with Aurora, keep Rikin around until you find an SSR healer or shielder that you like better.
C-Tier
Hemetto
Trait: AOE Healing Reduction
Pros:
- Attacks back row.
- Rage skill hits entire back row and lowers incoming healing.
Cons:
- Passive only works on her own attacks and only on enemies with a shield.
Hemetto is a decent back row nuker with a healing reduction Rage skill and a passive that works better against shielded enemies. Unfortunately, these are pretty situational scenarios and even if you do choose to use Hemetto solely to snipe the back row, there are better characters for that role.
Toph
Trait: Armor Break and Control
Pros:
- Analysis provides extra damage potential via follow-up attacks.
Cons:
- Follow-up attack via Shooting Stars scales off ATK so it’s not universally applicable.
- Stun takes a while to activate.
- Armor break is tied to her dying.
Toph is a good character on paper. Her Shooting Stars cause her to launch follow-up attacks on enemies afflicted with her Analysis debuff, which comes from her Rage skill. These follow-ups scale off Armor and Resistance, so you can build Toph to be a bulky support.
In practice, Toph lacks the consistency that other supports like Note (much less Caroline or Audrey) have. Her stun isn’t an on-demand effect as it either requires Analysis to expire after 2 rounds or proc a stun after 10 hits, necessitating a team to be built around activating multiple hits. Instead of, you know, the support catering to the rest of the team. And despite Toph being touted as an “Armor Break” character, she has to die to trigger this effect.
Garula
Trait: Healing Reduction, Debuff
Pros:
- Crit res reduction is technically a good effect.
Cons:
- Requires breakthrough levels to actually start doing stuff.
Garula is a character that started with a good idea but got sidetracked somewhere. For starters, despite having “Healing Reduction” as one of her traits, she doesn’t inflict the status unless you get her to 5*. While she admittedly does have a good debuff in crit resistance reduction, I don’t think I want to spend precious Iridimorphite on a character who needs multiple breakthroughs just to start working as they’re supposed to. Save and skip – there are characters much more worthy of investment.
Yarena
Trait: AOE Debuff
Pros:
- Dark skin with pink hair is a wonderful aesthetic.
Cons:
- Is not an “AOE Debuffer”, but an “AOE” and a “Debuffer”, both roles in which it’s not hard to find someone better.
Yarena can be forgiven for placing C-tier in this list as she’s an SR. While she does technically have good effects, the fact that her Rage skill debuff only affects the hardiest among hit targets really hurts her case, forcing her into a niche tank buster role – which is why I said she’s either an AOE or a Debuffer, not an AOE Debuffer. And since she’s just an SR, she’s easily replaceable.
D-Tier
Parvati
Trait: Single Unit Control
Cons:
- What the hell is “single unit control” even supposed to be?
So…yeah. We have a unit whose best description is “she stuns one enemy at a chance”, because the devs decided that giving her better offensive options is out of the question. Look – if single-target DPS units have to really hustle to reach A-tier, much less S-tier, where do you think a single unit stunner lands?
Play It Your Way
And that’s the end of the tier list. Now, despite my own opinions on some of the characters, let me remind you again – this tier list is not objectively correct, and hell, none of them are. Ultimately, the best way to progress through any character collector game is to pick and play with your favorites!

