Once again, the end of the world. No one knows why the Calamity occurred – and those who survived it were unequivocally changed, awakening new power within themselves and transcending the chains of humanity. In this grim world, the only question worth asking is “How do we live to see another day”?
But it’s not all bad – we have kemono girls.
Echocalypse is a character collector AFK RPG. In this game, you’ll be stepping into the shoes of an Awakener, an individual dragged into a larger conflict between several factions, because drama makes for a good story. To navigate this brave new anime world, you’ll need to not only master command of the various Cases under your command but also ensure that they’re well-equipped to take on any new threats that the end of the world can throw at you. It’ll be fun. Echocalypse is available on both iOS and Android.
To be honest, Echocalypse doesn’t bring too much new to the table of mobile AFK RPGs. But while that may be the case, the game features great production values with fantastic character art, voice acting, and an intriguing backstory that may just suck you in. Veterans of other character collector RPGs on mobile (take your pick, there are a lot of them) will very likely not need this guide or will just need to peruse it lightly to figure out the names of the systems in place.
If, however, this is your first foray into the world of mobile strategy AFK RPGs, you’re in the right place, and I bid you welcome!
In this beginner’s guide to Echocalypse, we’ll be going over:
- Learning to read your Cases, because succeeding in any RPG requires at least a cursory understanding of your units.
- Strengthening your Cases. Strategy goes a long way, but you still need enough firepower and brute force to actually achieve victory.
- The post-apocalyptic economy: specifically, where to farm the various materials that you’ll need to ensure that your Cases stay ahead of the pack.
- The game’s combat system. While yes, you can just let the game play itself, a better understanding of Echocalypse’s core combat concepts may just be the edge you need to eke out a win.
- The gacha system: because you really should know what you’re getting into.
Case Basics
All character gacha games require players to thoroughly understand each of the playable characters (called Cases) in the game. In this section, we’ll be going over the basics of each Case in Echocalypse.
Quick Tips:
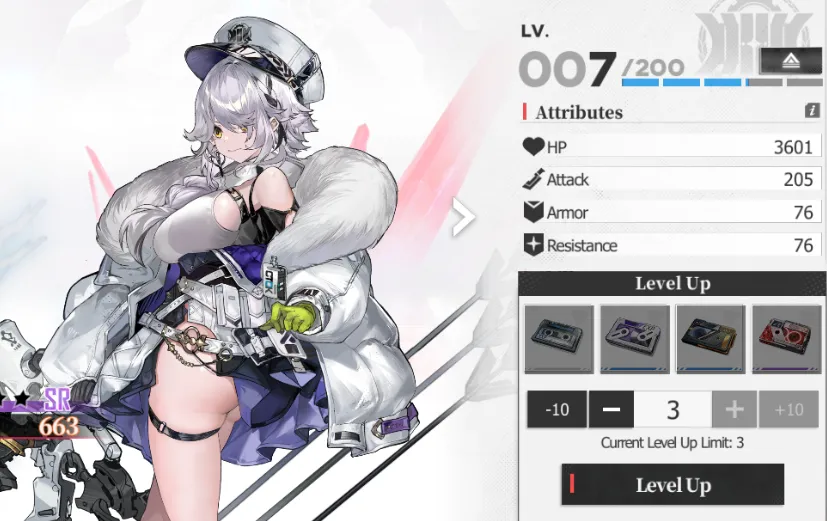
- All Cases have stats. The four basic stats in Echocalypse are HP, Attack (covers physical and magic), Armor (physical defense), and Resistance (magic defense).
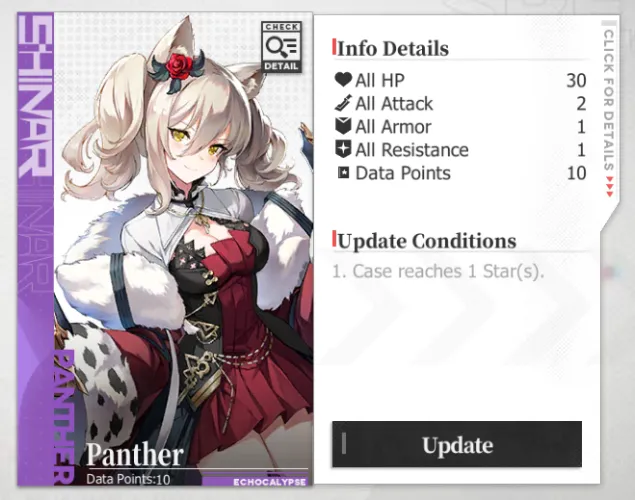
- You can tap on the info panel in a Case’s screen to open a more detailed stat panel.
- Combat power is a rough estimation of the sum of a Case’s stats, skill investments, and other augmentations.
- All Cases have three skills – one normal attack, one Rage skill (ultimate), and one passive.
- Passive skills are not automatically active; you will need to invest some resources into a Case to bring their passive skill online.
- Each Case can equip up to 4 pieces of gear to boost their stats. Each piece of gear also belongs to a set; equipping more items from the same set triggers a set bonus, which gives extra boosts.
- Each Case has a rarity. In ascending order, rarities are R (blue), SR (purple), and SSR (gold). The higher a Case’s rarity, the better it usually performs.
- SSR rarity Cases are essentially for triggering Leader Buffs.
- Each case belongs to one of four factions. Factions, like rarities, are important in triggering Leader Buffs.
- Note that there’s no text that indicates what faction a Case belongs to – you’ll need to memorize each faction’s emblem.
- Some Cases have special bonds, which manifest in the form of link bonuses. Link bonuses are active when the characters involved in the link are all present in your active squad.
- Note that link bonuses are one-way: if Case A gets 10% ATK if Case B is in the party, that doesn’t automatically mean Case B also gets 10% ATK.
Case Stats
Of course, all Cases have stats.
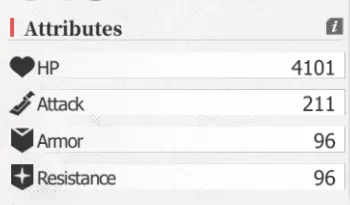
Fortunately, Echocalypse has a very boiled-down stat system. The basic stats in Echocalypse are:
- HP: hit points. How much damage a character can take before it dies and retreats from the current battle.
- Attack: attack power. Used for virtually all damage or healing computations. Attacks are classified as dealing either Physical or Magic damage.
- Armor: defense only against Physical attacks.
- Resistance: defense only against Magic attacks.
In addition, you can view more advanced stats by tapping on the info button to the right of the stats panel (either from the “Case” view or by boosting the character in question). This will bring up a unit’s advanced stats.
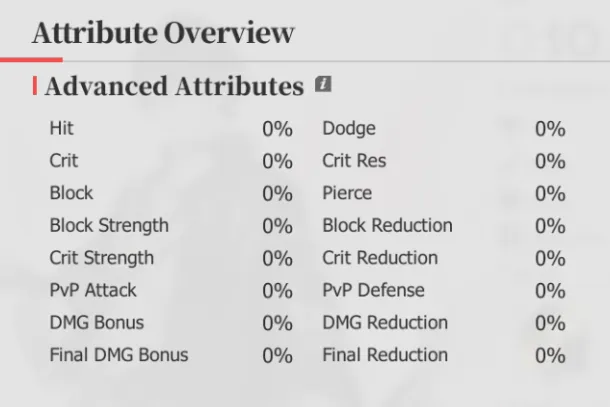
Note that as a new player, you shouldn’t be concerning yourself with these stats with the exceptions of crit and crit strength, which improve the chance of landing a critical hit and the damage said critical hit does.
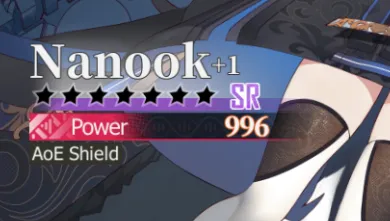
Finally, there’s a third stat, simply labeled “Power”.
A Case’s power stat is a rough estimation of its combat strength. This score considers factors such as the Case’s stats, skill level investments, and other augmentations that have been performed on it. In close matches, sheer power can still be beaten, but if your power is significantly lower than your opponent’s, watch out!
Related: Echocalypse Tier List: A Complete Ranking of Each Character in the Game
Note that, as of writing (January 2024) power is displayed as 0 if the Case in question isn’t in your active squad. I’m not sure if this is a bug.
Case Skills
All Cases have three skills: one normal attack, one Rage skill (ultimate), and one passive.
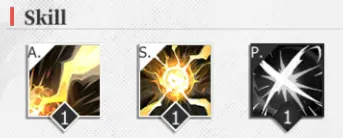
Each skill can be leveled up multiple times, which we’ll go into in greater detail in the “Strengthening Your Cases” section. Note that most Cases do not have their passive skill active when you get them and will require some investment to get going.
You can tap each skill to get a more detailed readout of what it does – including any number changes that the skill gets from level to level. This is very handy as it will help you decide if you want to invest in skills for a character or not!
Case Equipment
Each Case can also equip up to 4 pieces of equipment, each of which improves their stats. Each piece of gear also belongs to a set, and equipping a certain number of items from that set provides a potent stat bonus.

The gear system is initially locked until you unlock the Abyssal Dive game mode – keep playing and you’ll get it!
Rarity
Each Case has a rarity. In general, the higher a Case’s rarity, the better their performance.
Rarity can be seen in the lower left of a Case’s character sheet. R Cases are color blue and are the most common, SR Cases are purple and are uncommon, while SSR Cases are gold and are rare.
Rarity is also important for triggering Leader Buffs, which we’ll discuss in the “Strengthening Your Cases” section.
Factions
Each Case belongs to one of four factions in the world of Echocalypse.

These four factions are Empire, Bifrost, Eastrise, and Nebu. When you view a Case in their character sheet, their faction’s emblem will be displayed behind them. Note that there is no text that indicates which faction a case belongs to, meaning you’ll need to memorize each of the four emblems.
As with rarity, factions are important when triggering Leader Buffs.
Roles
To help you with team building, a Case’s expected role is indicated below their name in the lower left of their character sheet.

Note that these roles are a suggestion, not a rigid rule. It’s ultimately up to you how to use your Cases, though in most scenarios, it’s best to play to their strengths. Put bulky shielders in front to take the brunt of your enemy’s hits and protect your squishy support and DPS units by putting them in the back.
Links
Cases aren’t just faceless units you send to fight in your name. Each of them has relationships with one another, whether that’s as siblings, as friends, or as rivals. These bonds come into play in the form of links.
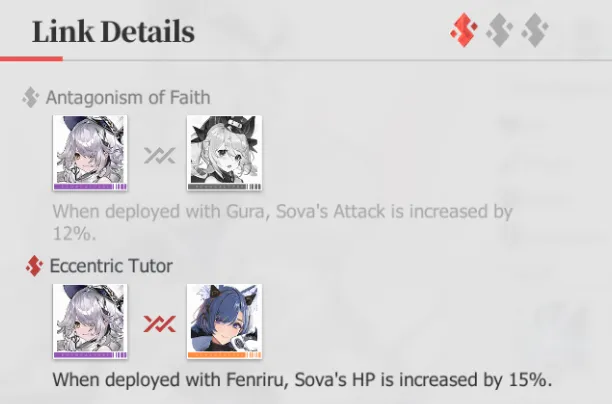
Link bonuses are activated when Cases that share a link are on the same team. The image above shows two of Sova’s three links – in this case, because Fenriru is on the same team, the Eccentric Tutor link is active, further boosting Sova’s HP. However, note that links are one-way. Just because Sova has a link with Fenriru doesn’t mean that Fenriru has one with Sova.
A Case’s number of available links is visible as a number of symbol pips below the “Link” panel. Each highlighted pip indicates a link that’s currently active. As links are one-way, you’ll have to pick and mix which links you want to keep active and hope that the Cases involved can make a cohesive team.
Strengthening Your Cases
The next logical step after understanding your Cases is knowing how to make them stronger. In this section, we’ll be going over the various methods for improving your Cases’s combat abilities and ensuring that they’ll be strong enough to face whatever challenge comes their way.
Quick Tips:
- Leveling up a Case increases its base stats.
- A Case’s level cannot exceed your account level.
- Breakthroughs are achieved by pulling and spending duplicates of a character. Each breakthrough adds one star to a character and vastly improves its performance. The maximum breakthrough level is 7*.
- Normal attacks and Rage skills can only be leveled up via breakthrough.
- When you get a new character or grant a character a breakthrough upgrade, be sure to fill in their bio in the Showroom at the Complex for some extra stats.
- Characters can be augmented to improve their stats. The maximum augmentation level is +20.
- Augmentation not only gives you bonus stats per augmentation level (even incomplete augmentation levels give stats) but also unlocks and levels up a character’s passive skill.
- Augmentation Protocols are a little hard to earn as a pure F2P, especially in the early game.
- Gear can be leveled up and modified to improve its performance and give better stats.
- Leader Buffs are triggered when you have at least 2 SSR Cases from the same faction in your squad. These buffs apply to all units, not just Cases from that faction.
- Neoliths not only grant you access to powerful skills in combat but also give all active squad members hefty stat boosts. You can equip up to 4 Neoliths at once.
- Affinity can be raised by giving a character gifts. Higher affinity levels yield bonus stats. It’s not much, but it’s an extra way to squeeze more performance out of certain characters, such as your favorites.
- By getting more characters from each organization and raising their affinity levels, you can grant each of those members a minor stat boost.
- The Archives in the Complex (labeled Intelligence Center) allows you to file Relic Fragments and Memory Bonds for story chapters and regression stories you’ve already completed. Each filed fragment or bond nets you a roster-wide boost, and hitting certain thresholds nets you some nice bonuses.
- The Archives are also how you give the main character breakthrough levels as you can’t pull them in the gacha.
Leveling Up
As with most RPGs, the easiest way to make your Cases stronger is by feeding them levels.
This is done by giving a Case Mission Data, which can be acquired from farming regular stages as well as from the complex. Each level increases a Case’s base stats by a small amount. It’s not much, but the extra numbers do add up. In addition, Cases need to hit certain level thresholds to undergo other strengthening methods.
Note that a Case’s max level is your account level. As with any other gacha game, it’s important to burn through as much of your stamina as you can daily to bolster your account level, and thus your Case levels.
Breakthroughs
Pulling duplicates in Echocalypse is very important as character dupes allow you to perform breakthroughs.
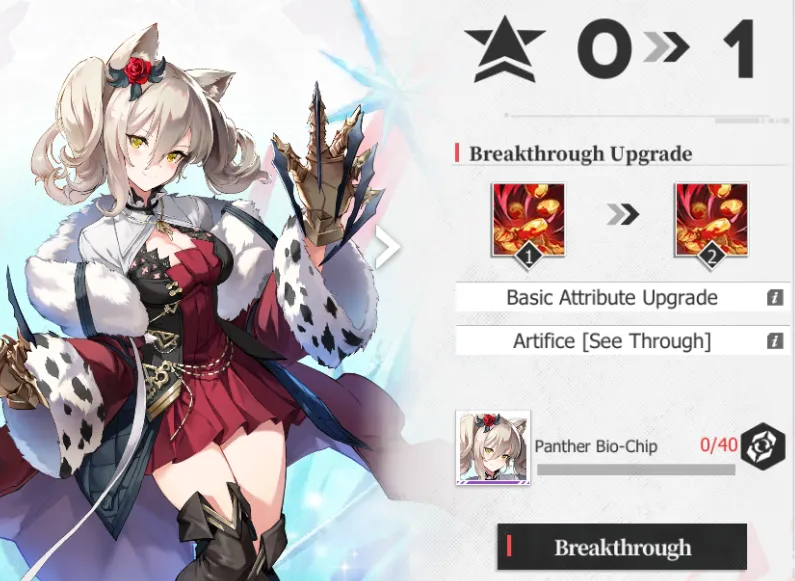
Each time you get a character that you already own from the gacha, that character will be converted into bio-chips. These bio-chips can then be spent in that character’s breakthrough screen. Once you’ve given a character enough chips, they’ll earn a star, to a maximum of seven. In the case of the main character (who you can’t pull in gacha), breakthroughs are achieved via the archives – more on that in a little bit.
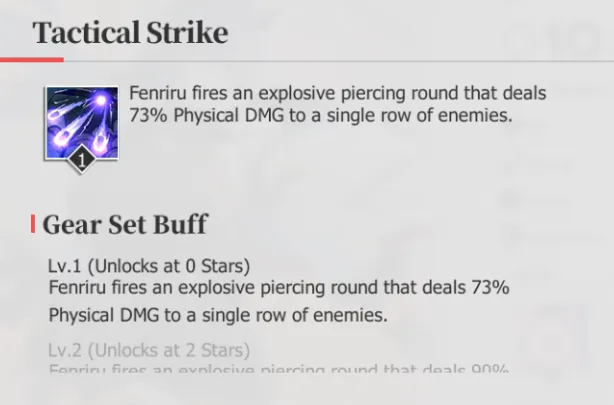
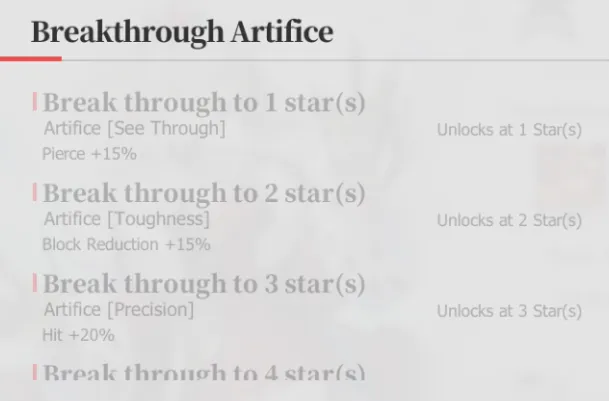
These breakthrough stars are very important as each star not only gives a Case a significant boost in performance but also level up their normal attack and Rage skill. To see what bonuses each Case gets at what breakthrough level, you can tap the info button in the breakthrough screen.
Make no mistake – breakthroughs are expensive but are well worth the amount of resources they consume. Fortunately, there are other ways of earning bio-chips aside from the gacha. You can get them rarely from PVP, or more reliably from Syndicate (guild) missions, though as that’s more of a mid-game thing, I won’t cover guilds here.
Finally, each breakthrough (or getting a unit for the first time, as that’s technically breakthrough level 0) allows you to update a character’s bio.
To do this, go to the Complex, then go to Showroom, and then Bios. This will net you some bonus stats. Again, they’re tiny, but every little bit helps!
Augmentation
Just like weapons, your Cases can be honed to a razor’s edge with the right materials and a process called augmentation.
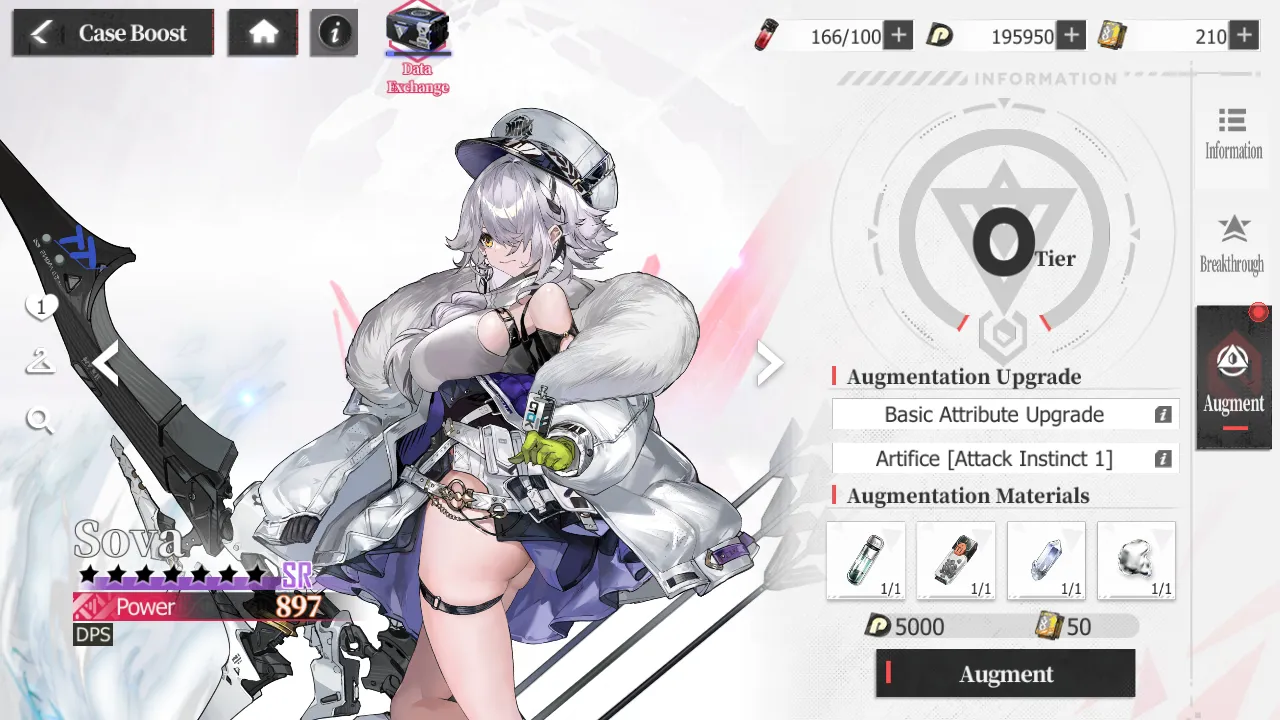
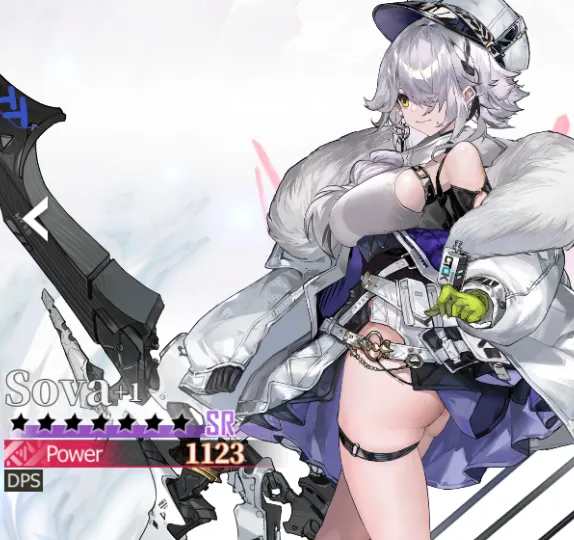
By feeding characters specific materials, you can improve their combat abilities and unlock (and level up) their passive skill. Each augmentation level that a character achieves appends a plus to their name, the number of which indicates at which augmentation level they are.
Higher augmentation levels often require several steps and multiple materials. You’ll also be constrained by a character’s current level – though I will say that you really should be leveling up your main squad. However, note that even partial augmentations (for example: you need to augment twice to reach +2) give some bonus stats, making the entire process well worth the time and effort involved.
On a side note, I’d also like to caution you against being too liberal with augmentations: at the beginning of the game, you may have a lot of Augment Protocols, but these are tricky to replace, so I suggest exercising a modicum of restraint and try to augment only those character you know you’ll be using – yes, this means you should go augment Fenriru if you don’t already have an AOE DPS.
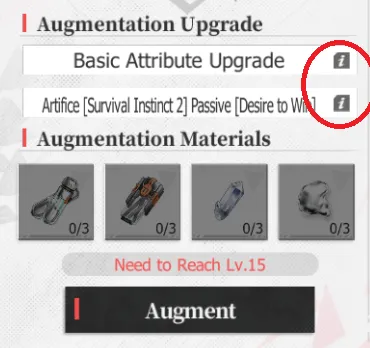
Characters can be augmented to a maximum of +20. If you want to preview the bonuses they get at each augmentation level, you can tap the info button in the augmentation screen:
If you need to farm augmentation materials, just tap on the materials you don’t have. In general, these items have a 100% drop rate, at least in the early game. The higher the augmentation level you’re going for, the further you’ll need to search in the campaign. Once again, burn your stamina and push as far as you can go with each play session!
Upgrading Gear
Equipping gear isn’t a one-and-done thing. You’ll need to upgrade your equipment to get the most out of it.
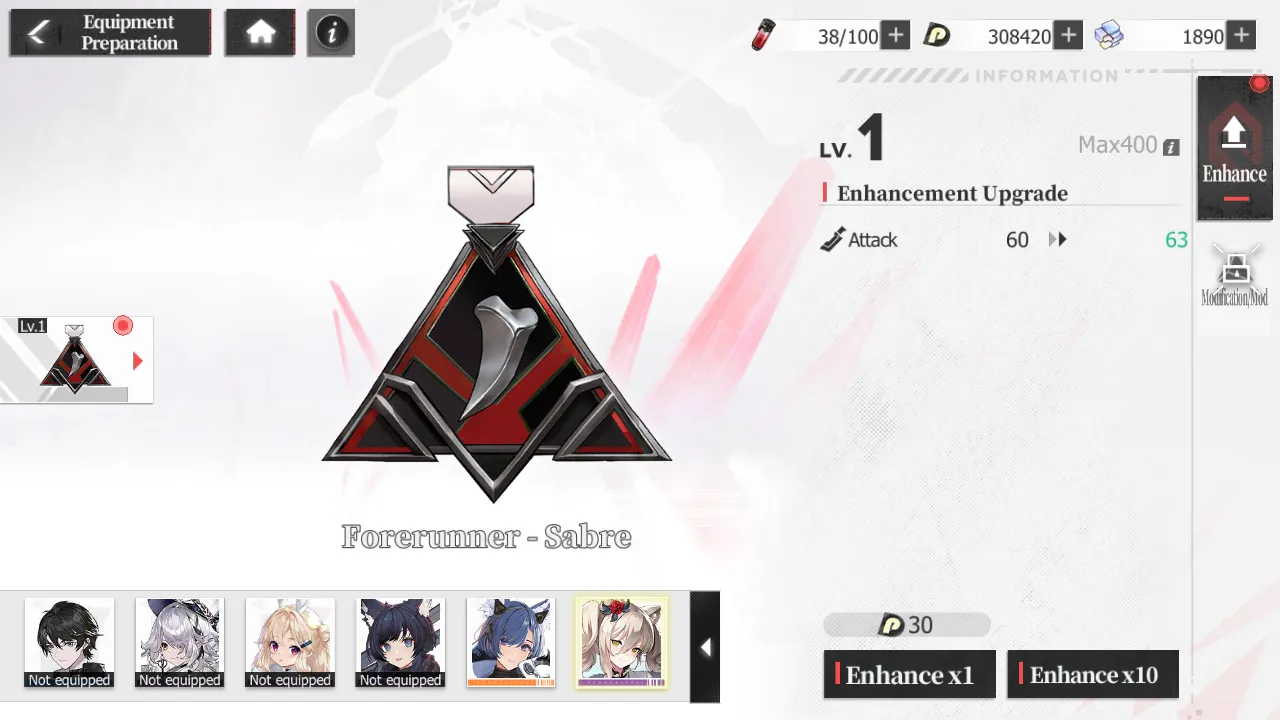
To upgrade gear, tap on its icon (either via the equipment screen when viewing your Cases or via the Storehouse), then tap Preparation. After that, all you need to do is to feed it Tribute Points – which you probably have a ton of – and bam, new gear levels.
Note that gear can only be upgraded to 2* your account level.
As you progress through the game, you’ll eventually unlock gear Modification, which allows you to further hone your equipment – though we won’t talk about that in this beginner’s guide.
Formation Bonuses
A Case’s rarity and faction aren’t just for showing off.
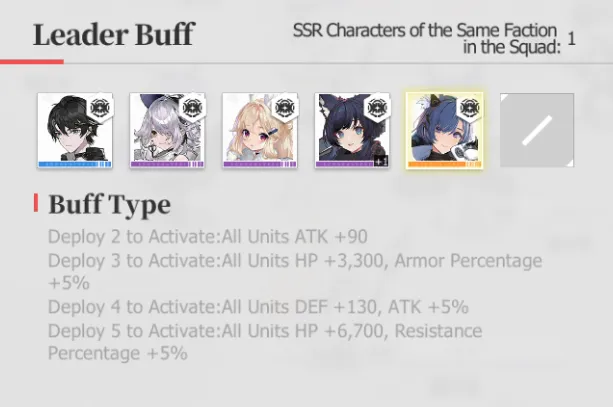
By putting enough cases from the same faction within a squad, you can trigger a Leader Buff, a powerful passive effect that grants all units buffs:
- Two Leader Buffs: ATK +90.
- Three Leader Buffs: HP +3300, Armor +5%.
- Four Leader Buffs: DEF +130, ATK +5%.
- Five Leader Buffs: HP +6700, Resistance +5%.
These bonuses are cumulative; at five Leader Buffs, you’ll have 90 ATK, 5% bonus ATK, 130 DEF, 10,000 HP, 5% Armor, and 5% Resistance – so don’t neglect these buffs if you have the right SSRs to pull them off.
Lastly, remember that formation buffs and leader bonuses only trigger with SSR Cases.
Neoliths
Neoliths are artifacts that your squad brings with them into battle. The first one you’ll get is the Leraje Broken Bow; if you’ve played around with it, you’ll know that it gives you access to an AOE attack. We’ll talk more about those skills later.
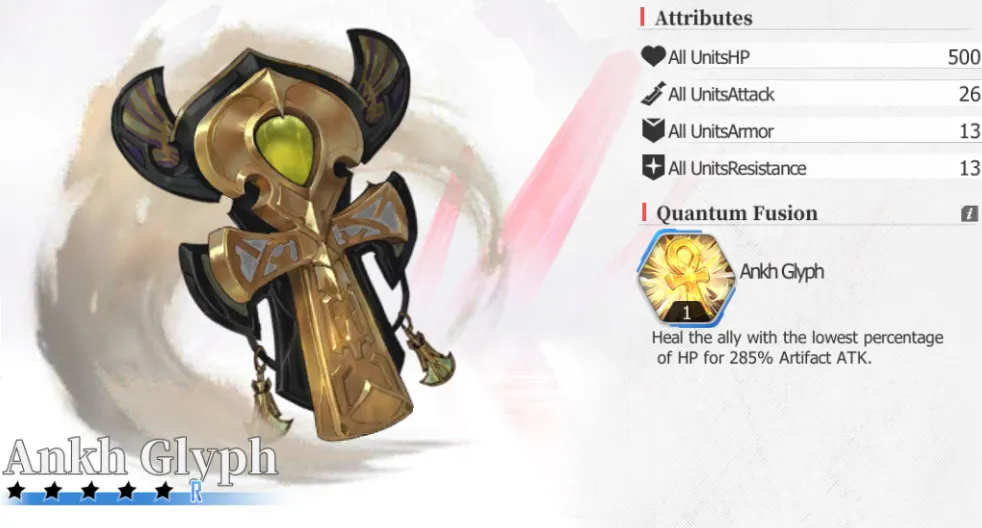
While you know by now that you can use Neoliths in battle to activate powerful abilities, what may have slipped your attention is that Neoliths give your deployed squad bonus stats. The higher the level of each Neolith and the rarer it is, the better the stats it imparts to your deployed Cases.
You can deploy up to 4 Neoliths at once. Try not to leave any empty spaces here even if you’re not planning on using their Fusion Skills as the bonus stats help.
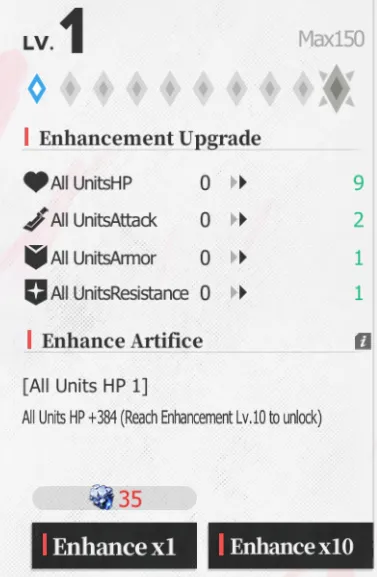
As with your Cases, Neoliths can be strengthened.
- Enhancement both levels up a Neolith and serves as its augmentation at certain levels. To perform this operation, you’ll need to spend Artifact Matrices, which you get from the Work Agency in the Complex. More on the Complex later.
- Neoliths can also undergo breakthroughs – this also requires duplicates. Like Cases, performing a breakthrough on a Neolith boosts its skill level, but is also expensive as it requires you to pull on the Neolith gacha.
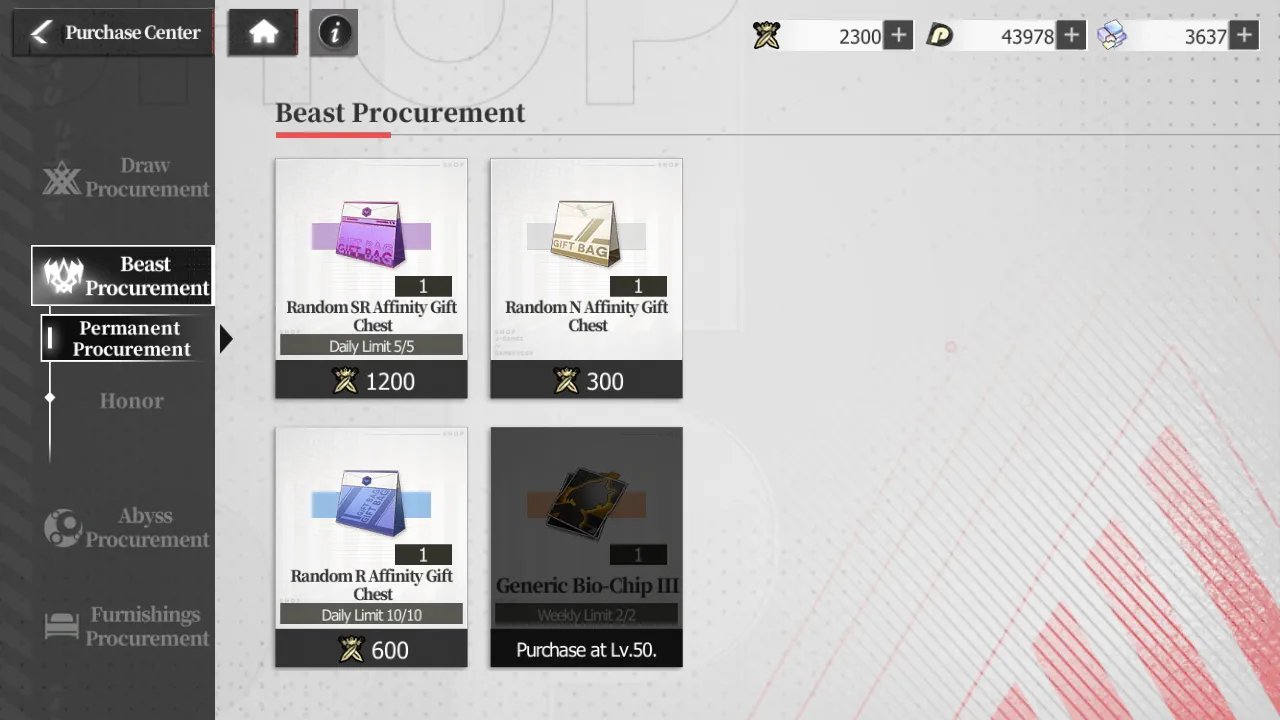
Affinity
You can bribe improve relations with your Cases by giving them gifts.
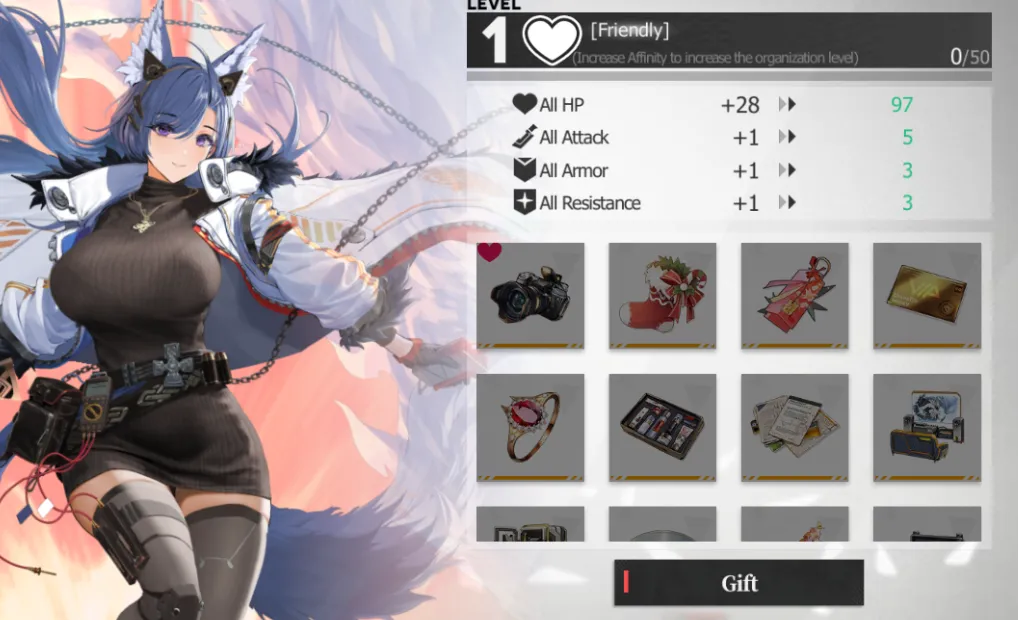
Each new relationship level grants a minor increase to a Case’s stats. While the benefits aren’t very big, it’s a nice way to get more mileage out of your favorite characters. Oh, and you’ll also unlock their personal stories along the way, which is a nice bonus.
Organizational Bonuses
Think about it – if you’re nice to someone, you also passively improve the opinion of their friends about you. In Echocalypse, this manifests via organizational bonuses.
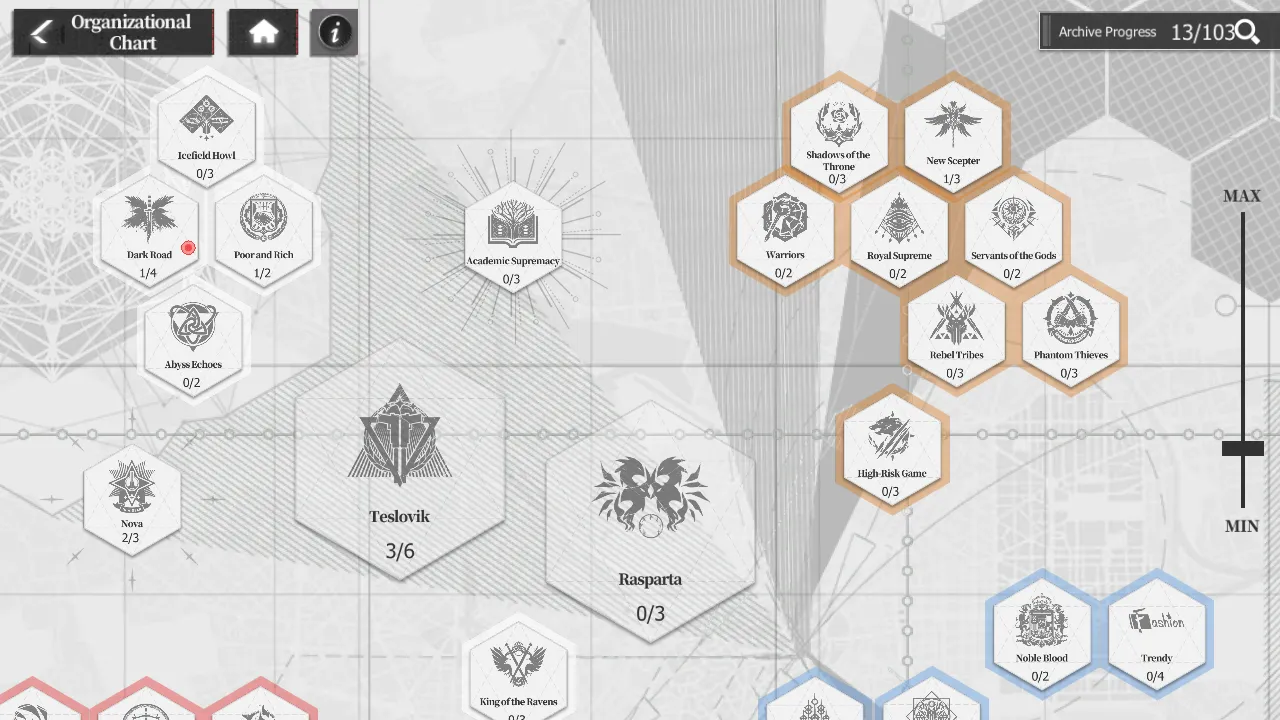
Each Case belongs to an organization, and each time you pull a new Case that belongs to that organization, you’ll get a minor bonus. On top of that, if you cultivate your relationships with members of an organization, said organization also gets a minor stat boost. Like affinity bonuses, it’s not much, but hey – every little bit helps!
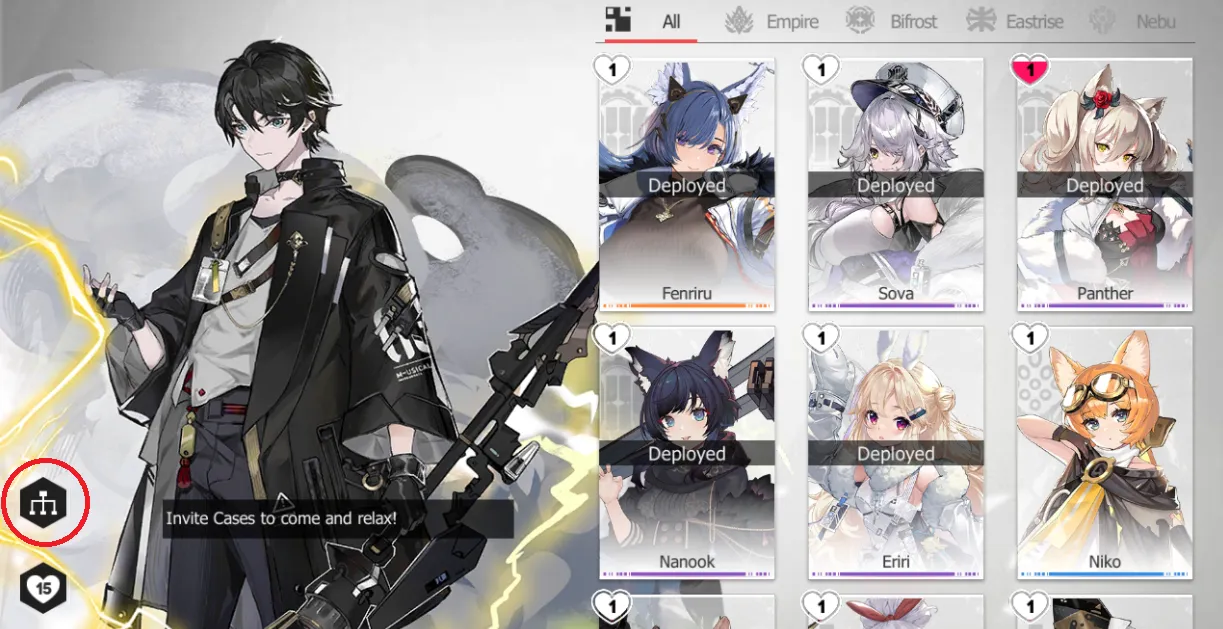
You can access this menu via the Leisure Center in the Complex and tapping on this button:
Archive Bonuses
As you complete campaign levels and Regression stages, you might have noticed that you’ve been getting Relic Fragments and Memory Bonds. These are used to complete stories in the archives, which has a two-fold purpose.
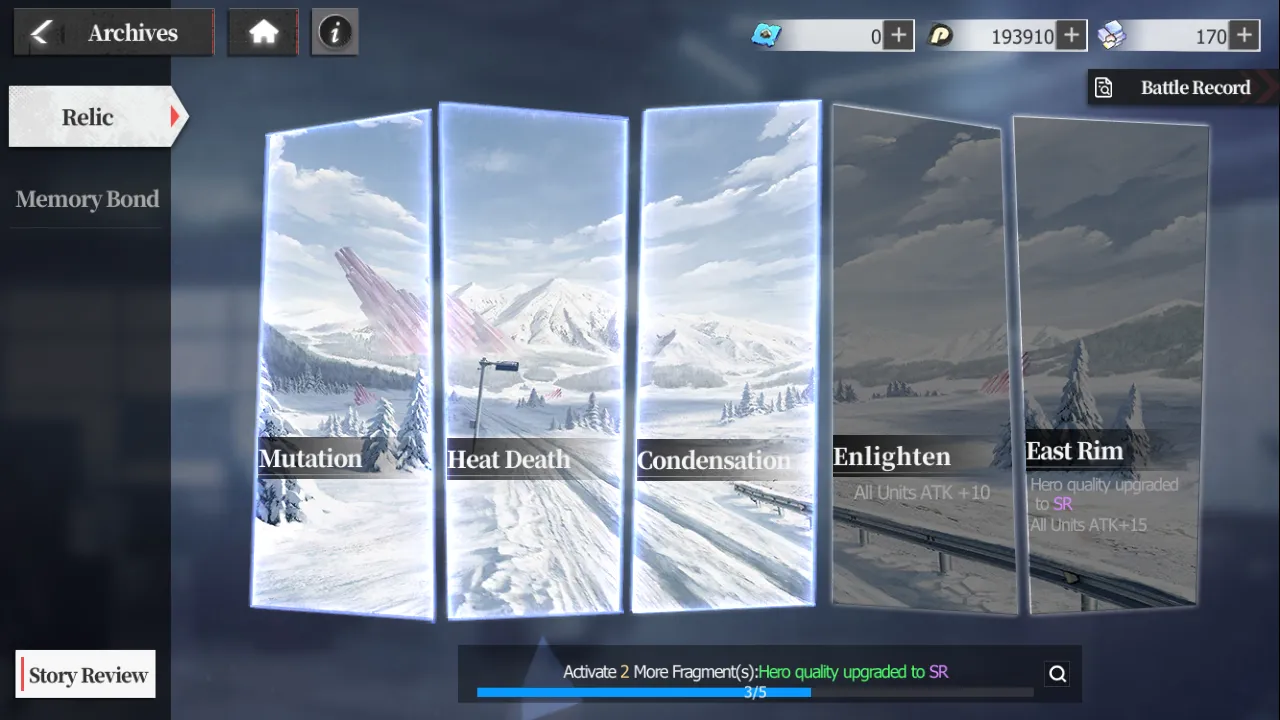
The first purpose of these items is to file them in completed chapters. Each filed Relic Fragment or Memory Bond gives a passive bonus to your entire roster. But that’s not all – as you file more Relic Fragments or Memory Bonds, you’ll also gain progression towards thresholds which give you great rewards for completing them.
In particular, filing enough Relic Fragments augments the main character, boosting their rarity and breakthrough levels (remember when I said the main character needed the Archives?), allowing them to stay relevant throughout the game. And even if you don’t plan on using them, the bonus stats are enough of a reward.
We’ll talk more about the Complex in a little bit.
Securing The Supply Lines
Next, let’s talk about the economy of Echocalypse. From sourcing materials to quality-of-life upgrades, here’s a rundown of getting the resources you need, at least in the early game.
Quick Tips:
- You can tap on any item in your inventory (Storehouse) to see where to get more of it.
- Blitz through campaign stages as quickly as possible to unlock new features. This will also raise your account level, allowing you access to new content.
- Utilize Echocalypse’s QOL features to quickly rush through stages. Increase combat speed, use auto Fusion Skills, and auto-resolve combat whenever you can; once you can turn off skill animations, I strongly recommend doing so.
- The Complex lets you assign Cases to specific rooms to generate resources. The higher a Case’s rarity, the more resources they generate.
- Generating resources costs focus. Tired Cases should be assigned to a dormitory room/floor so that they can regenerate focus and continue working.
- Don’t forget to unlock new rooms and upgrade the ones you already have. Fusion Metal is acquired from the Work Agency – it’s in the first room you got for free.
- Quests give out materials. Each completed quest yields activity points. Get enough points and you can open a special box that contains Iridimorphite, Tribute Points, and extra stamina.
- Do your Battle Pass missions. Even the free BP gives out some nice items.
- Regression stages give out a ton of resources, but most importantly they serve as a renewable way to earn the bio-chips of certain characters (mostly your starters) as well as a way to get Draw Points without spending in the gacha.
- Regression battles require you to spend Regression Counts, which regenerate slowly over time. You can hold up to 10 Regression Counts at once.
- Cage Fights (PVP) pit you against other players. A daily reward based on ladder position is handed out at 10:00 pm. Fighting nets you Tribute Points, random rewards (including Iridimorphite) via a card system, and Cage Points which can be spent to buy affinity items.
- Abyssal Dives yield gear at certain checkpoints, as well as Tribute Points, Abyss Points, and Abyssite. Abyss Points can be exchanged in the shop for more gear.
- The lower into the abyss you go, the better (read: higher rarity) the recipes for exchanging points become.
- Harvest mode allows you to farm vast quantities of certain resource types. Different stages are open each day and you can only enter a limited number of times per day.
- Finally, I’ve included a table of freebies that you can get as a new player.
Information is Your Friend
There’s quite a lot of information to unpack in Echocalypse. It’s not uncommon to ask “What is this item for?” and afterward, “Where do I get more of this?”. Fret not, for Echocalypse allows you to easily search where to get more of an item. All you need to do is tap on the item in question and it’ll show you where to get more of it!

Rush The Campaign
Perhaps the single most important piece of advice I can give to new players is this – blitz through the campaign as quickly as you can!
This is because a lot of Echocalypse’s quality of life features (such as auto combat and combat speed up) as well as content (such as the Complex) are locked behind both campaign progression and account level. Thus, it behooves you to unlock both of these as soon as possible so that you can source the materials you need much easier.
To help you run through these levels faster, you can make use of Echocalypse’s QOL features. In battle, these are located in the upper right of the screen.
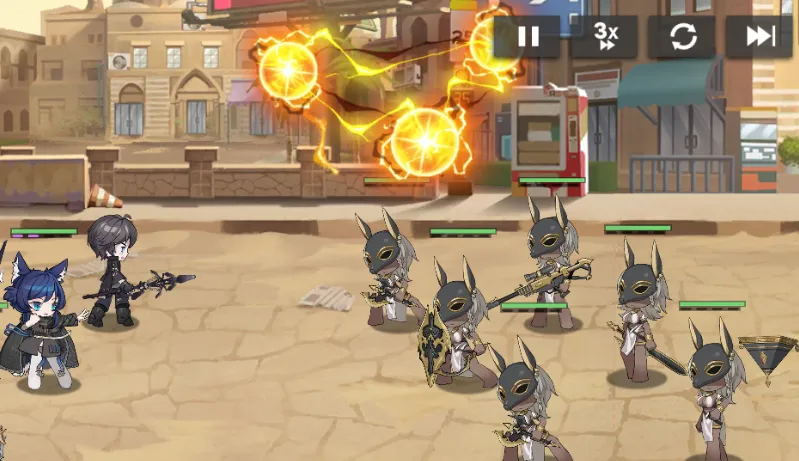
From left to right, these are increased speed, automatic Fusion Skill use, and auto-resolve. Note that auto-resolve is only available in battles with nameless (read: generic Cases that you can’t get) mooks.

You can also turn off skill animations by going to the game’s settings (tap your profile picture in the upper left of the main menu) then going to settings on the left side, and changing “Skip CG animation” to “Skip”. You’ll need a certain account level to do this, however – I believe it’s around 20-ish.
The Complex
Speaking of the Complex…
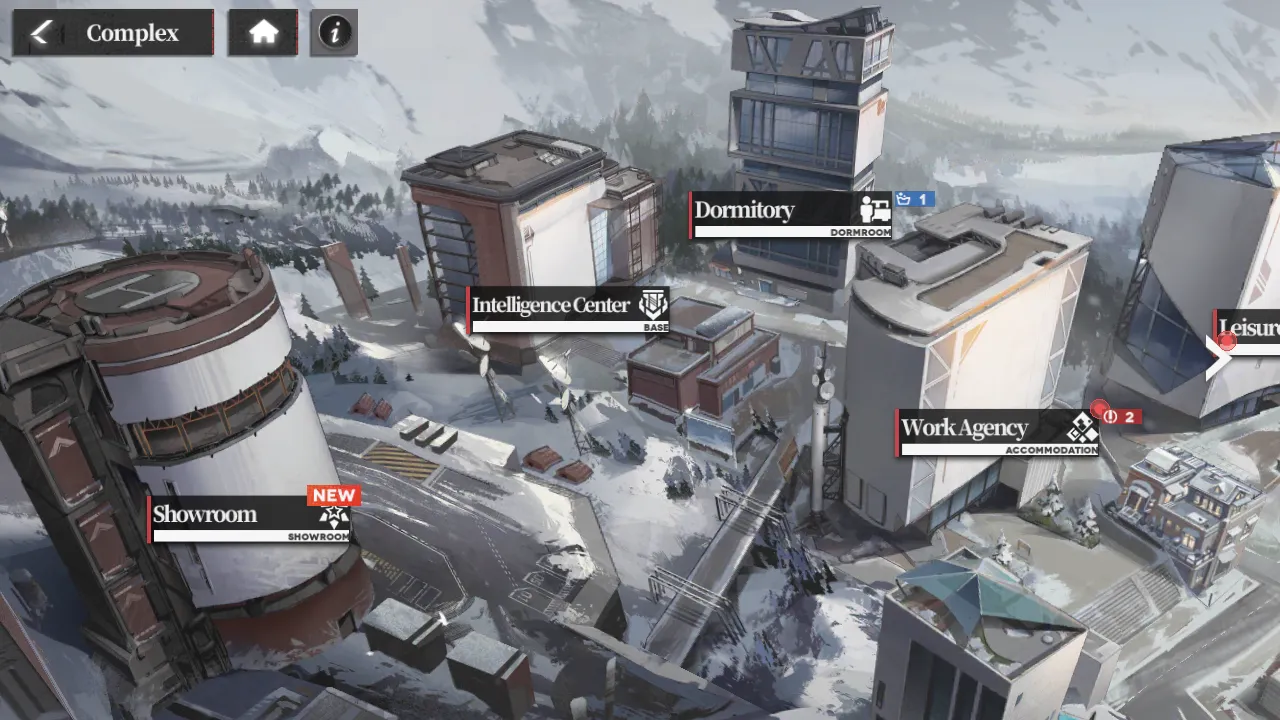
The Complex is, as its name suggests, a set of facilities that have various purposes. Our main concern here is the Work Agency, which serves as a resource generator – you put Cases in, and they’ll work to generate specific resources. The higher the Case’s rarity, the more resources they generate. However, even augmented humans need a break, and as a Case works, they’ll lose focus. When this hits zero, they can no longer work, and they’ll need to take a break in the dormitory.
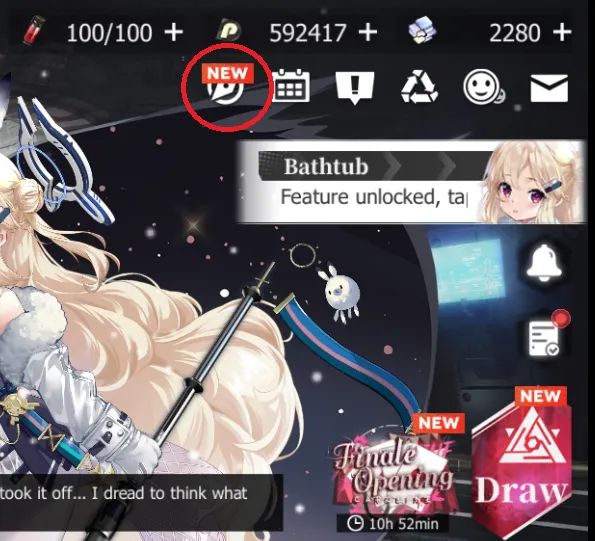
As with other gacha RPGs, the dormitory serves as a place for your Cases to rest and relax. Quite literally, in this case, as Cases assigned to a dormitory room/floor will regenerate focus, allowing them to continue working. The nicer the dormitory is, the faster the recovery rate of the Cases living in it will be. You can get some starter furniture from clearing campaign stages, some of which have extra features, such as the bathtub which quickly regenerates focus for whoever uses it. You can also get more furniture by buying it from the Purchase Center, in which case you’ll need to earn Decoration Points via a Work Agency facility (hint, hint).
In the beginning, you’ll only have access to a few rooms in the complex. Always remember to not only unlock new rooms when they become available but also upgrade the rooms you’ve unlocked – higher level facilities allow more Cases to work in them and generate resources faster, while a higher level dormitory allows you to house more Cases.
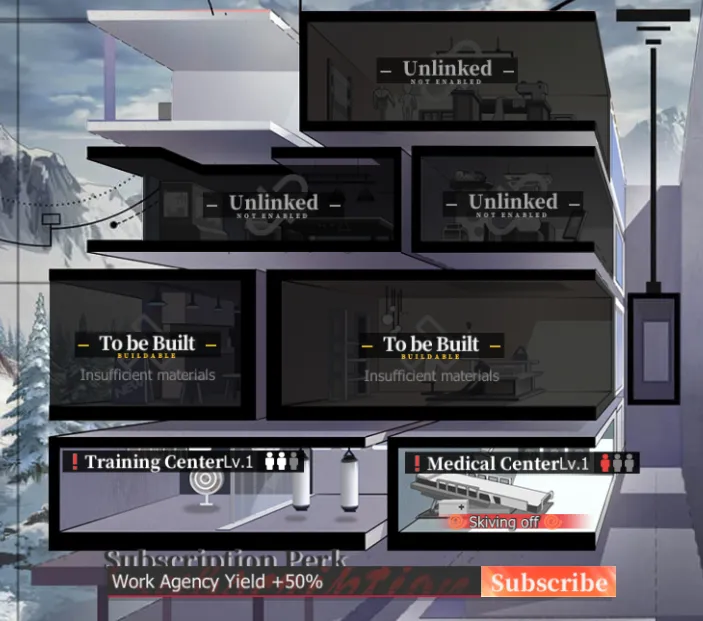
To get Fusion Metal to build and upgrade existing facilities, assign Cases to the Training Center room – it’s the very first facility you get in the Work Agency and is unlocked free of charge.
Note that Cases assigned to a dormitory will not be working (yes, you need to manually assign Cases to ensure a consistent flow of resources), and generated resources are not deposited automatically into your stores. Be sure to rotate people out so that your Work Agency is constantly producing!
Quests
What kind of RPG doesn’t have quests? In Echocalypse, you can access quests via the clipboard on the right side of the main menu:

Each quest that you complete in this section gives you not only some materials but also some activity points, which go to the bar on top of the screen. Reach certain activity point thresholds (15, 30, 45, 60, and 80 points) and you can tap on the boxes on the bar to claim even better rewards.
Note that Echocalypse only has daily quests.
The Battle Pass
Yes, there’s a battle pass. It can be accessed via the blue paper just to the left of your name in the main menu.
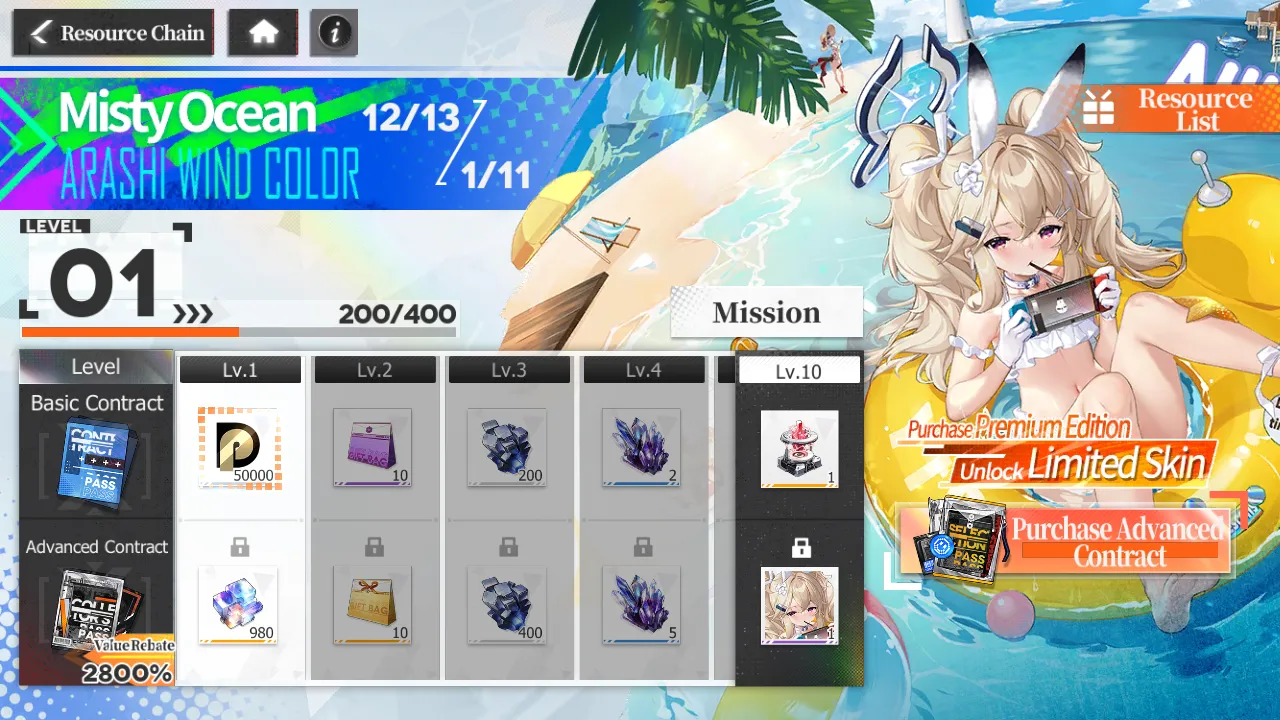
As with most battle passes, this one comes in both a paid and free version. Try and do all the missions if you can – even the free version has some nice stuff up for grabs. Note that missions for the battle pass are divided into dailies, weeklies, and one-time (periodic) missions.
Regression Missions
Regression missions are a kind of special story quest where you get to experience the memories of your Teslovik comrades.
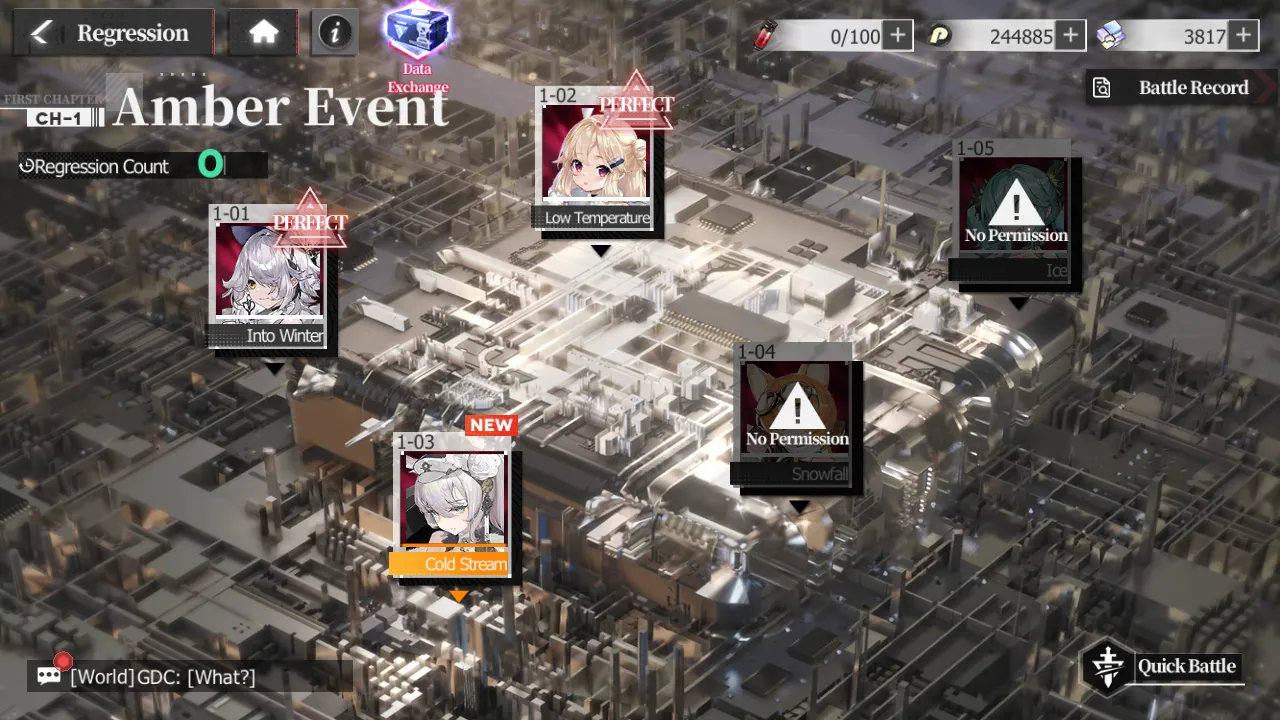
Regression missions are important not just for the Memory Bonds you get from clearing them, but also because they provide a reliable way to grind for the bio-chips of certain characters and get Draw Points for the gacha store without actually pulling. As always though, there’s a catch – on top of the stamina cost for battles in a Regression, you’ll also need to spend Regression Counts, a special resource that slowly regenerates over time – to a maximum of 10 counts. Still, these are very nice, so don’t forget to clear Regression battles whenever your count is full!
Cage Fight
What fun is the apocalypse if we can’t beat each other up? That’s what cage fights are for.
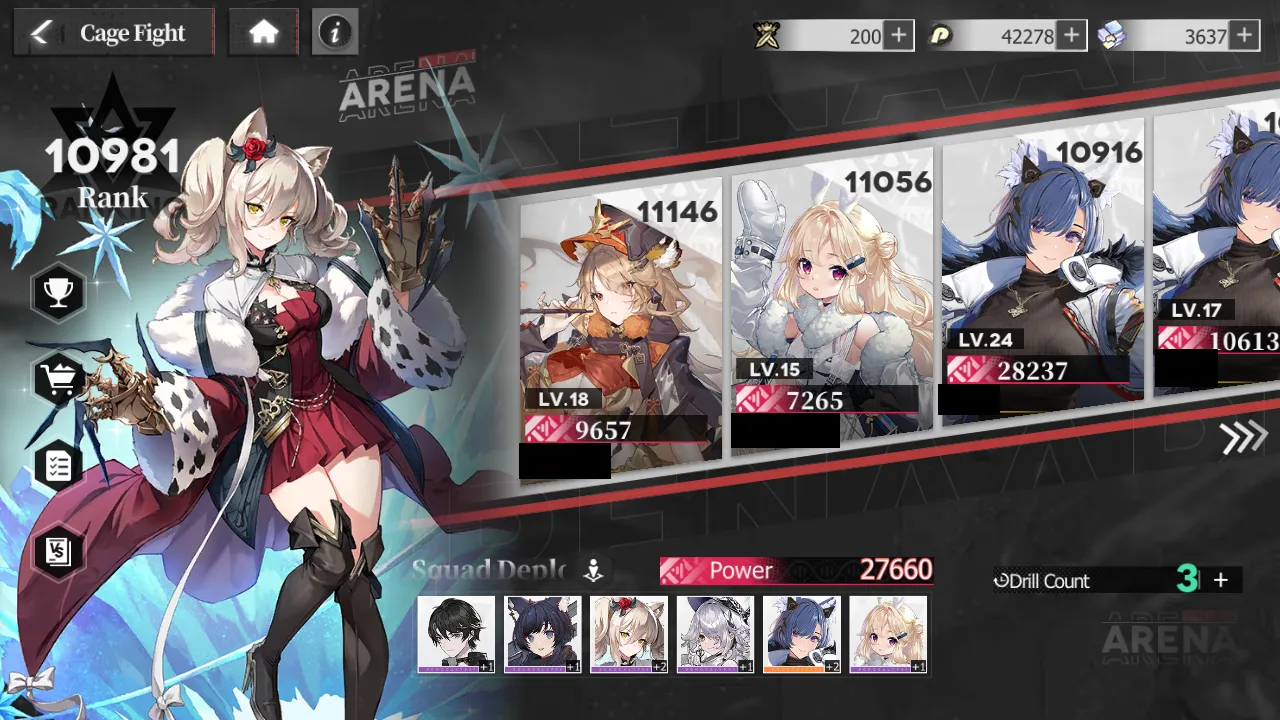
In cage fights, you’re given the option to fight other players for glory, and more importantly, profit. Each PVP fight you do yields some resources – mostly Cage Points, but also a random reward, which can include Augment Protocols, extra stamina, Generic Bio-chips, and even Iridimorphite. Whenever you win, you take some of your defeated foe’s points and climb up the ladder. However, other players will be trying to do the same to you, so watch out!
Rewards for ladder placement are handed out at 10:00pm daily.
Your PVP team is the same team that’s deployed in missions, so you’ll need to go to the Squad menu to change it. You can participate in 5 PVP fights per day, with the count refreshing at midnight. If you’re so inclined, you can also buy more PVP fights. Your foes are randomized and are arranged in ascending order – the leftmost foe has the lowest ladder ranking, while the rightmost has the highest (and usually has a better team). Note that unlike in most gacha RPGs, you can’t refresh your PVP foes. Choose your opponent carefully, and good luck.
If violence isn’t enough of a reward for you, you’ll be glad to know that you can spend your Cage Points to get affinity items. You also get free affinity items for the first 5 PVP fights you do in a day – just tap the clipboard icon to the left of the PVP screen.
Abyssal Dive
The Abyssal Dive is a roguelike mode available once you’ve made enough progress in the main campaign. If you’ve been following this guide, you’ll also know that it’s where you source equipment for your Cases.
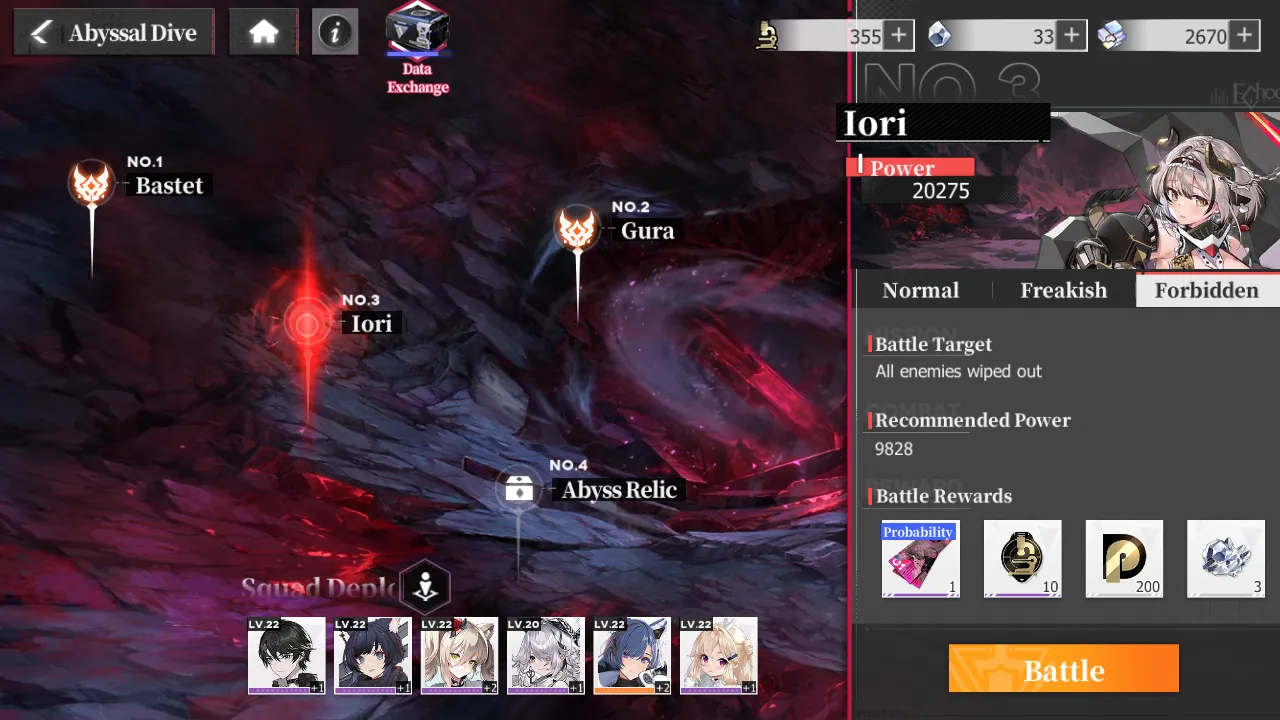
In essence, exploring the abyss consists of clearing stages of increasing difficulty. Stages come in three selectable difficulties on the right-hand panel – Normal, Freakish, and Forbidden, with Forbidden as the hardest difficulty and yielding the most rewards. There’s no shame in turning the difficulty down to Normal to rush through the abyss as quickly as possible and reap the most rewards!
Each floor you clear causes you to delve deeper into the abyss, which ramps up the difficulty. It’s not all bad though, as you can select from one of three permanent buffs to help with your expedition.
Apart from the standard victory condition of wiping out enemy mobs, abyss stages also have a secondary objective that must be completed – failure to do so will result in you losing the battle anyway. You can accumulate up to 3 losses before your abyss run ends; these losses are tracked in your Evacuation count at the upper right of the screen.
The abyss resets at midnight, daily.
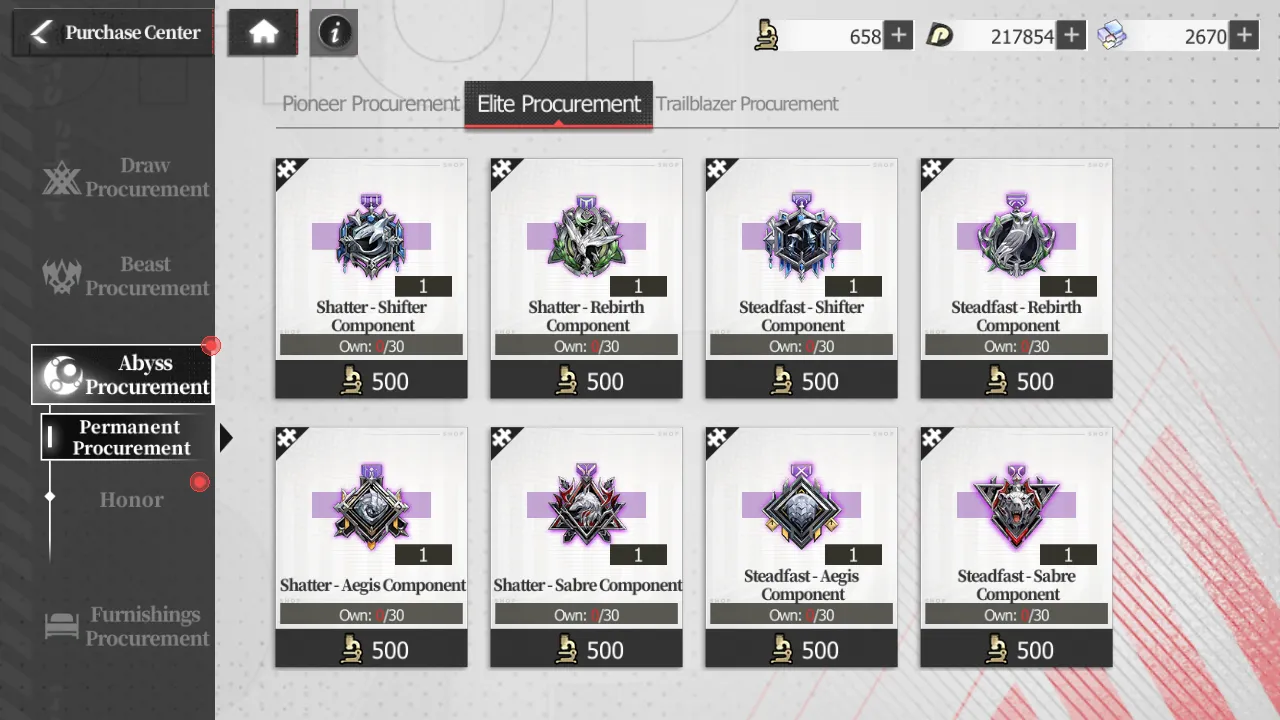
Finally, clearing abyss stages also nets you Abyss Points, which can be exchanged in the Purchase Center on the main menu for white tier (read: crap) gear, components for blue or purple gear, or modification experience. Note that these recipes aren’t unlocked by default. The deeper you’ve managed to go, the more exchange recipes become available!
Harvest
You’ll eventually unlock harvest mode as you progress through the campaign.
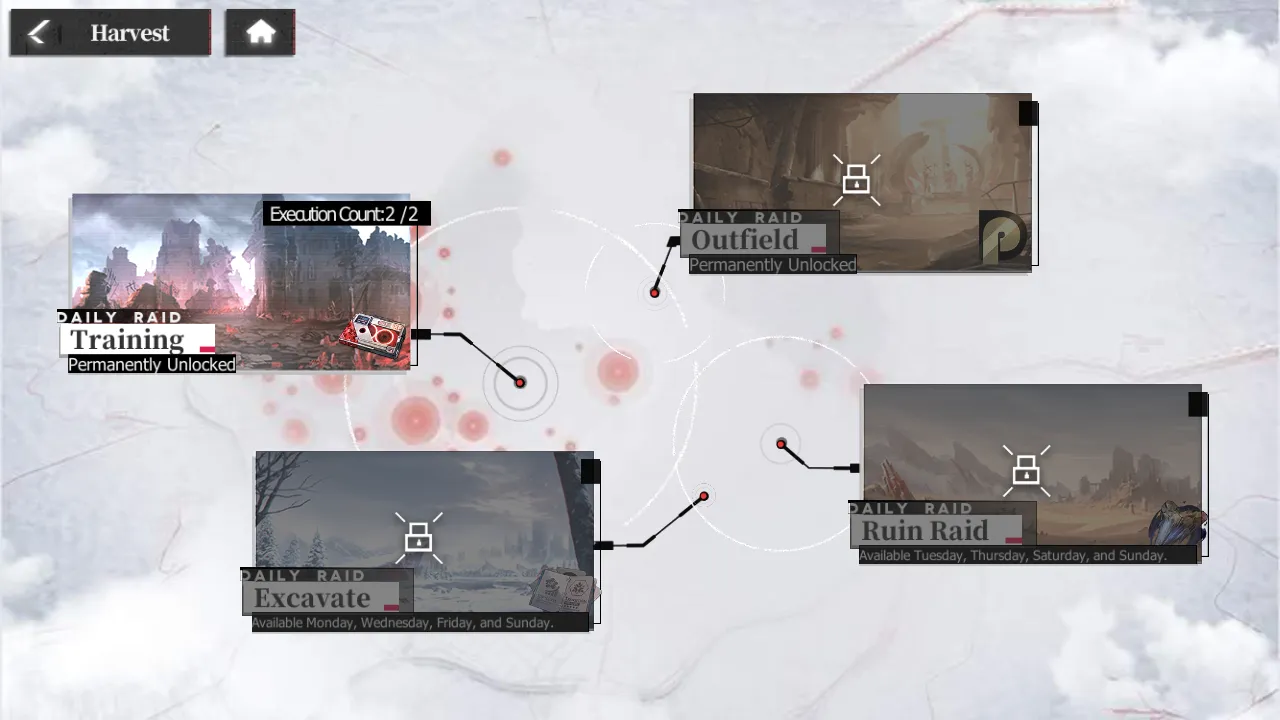
Harvest mode stages pit you against special bosses which will yield large amounts of a single resource type, allowing you to efficiently farm for materials such as Mission Data, Tribute Points, and more. These stages come in increasing difficulty; naturally, the higher the difficulty, the more prizes you get – especially on a perfect clear.
Note that which harvest stage is open depends on the day, and there’s limited entry for each of those types. On the other hand, the first clear of a new difficulty does not expend one of the day’s attempts. You also cannot sweep these.
Freebies
There are a ton of freebies up for grabs in Echocalypse – all you need to know is where to look.
Here are some of the freebies you can get:
- New players get a 7-day login bonus, which yields some pulls for both Cases and Neoliths, some Iridimorphite, as well as the SSR character Fenriru on day 2 as well as her Exclusive Sundae skin on day 7. Fenriru is a great AOE DPS unit who can carry you through most content if you haven’t already gotten another AOE DPS.
- Apart from this, there’s a standard login event. Try to complete this monthly as every 7th day gives you some S-Elementium for Case banners.
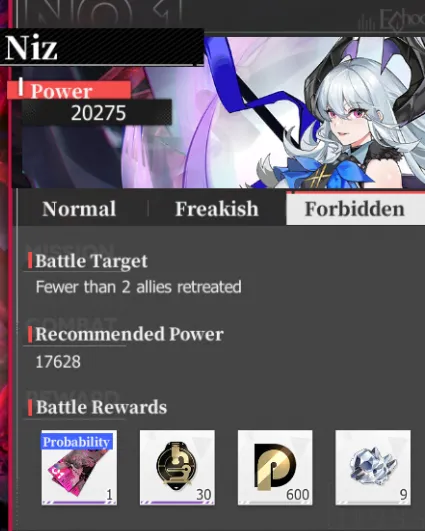
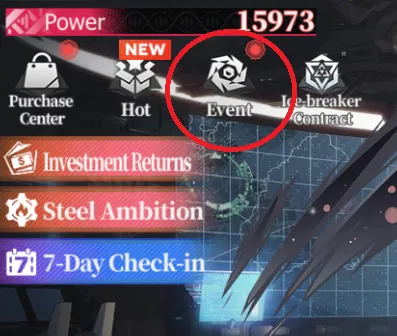
- The Steel Ambition newbie event gives you a series of missions with some crazy rewards – including the SSR Case Niz. Access this event via the big banner on the left side of the main menu. Note that this event is permanent and will only vanish once you’ve cleaned it out.
- Tap on “Event” in the main menu to go to the menu screen to get some daily freebies, such as 100 stamina (twice per day, once from 12:00 pm – 6:00 pm and again from 6:00 pm – 12:00 am), random gifts, and prizes for reaching certain account levels.
- Each level in the campaign has 3 stars – one for clearing it and two more for clearing it with minimal/no casualties. These stars count towards the Battle Merit reward for each chapter, which gives out a decent amount of Iridimorphite, Augment Protocols, Tribute Points, and more. Tap the chest on the lower left of each chapter or on the right side of the chapter selection screen of the campaign.
- The Showroom in the Complex has some Iridimorphite and Tribute Points for grabs. Visit the Memory section for some lore and loot.
- In the same area, tap on Hall of Fame to view your achievements and claim your rewards.
- The Function Guide not only introduces you to new content but also rewards you for achieving certain milestones in said content. These missions are easy, so the prizes are pretty much free!
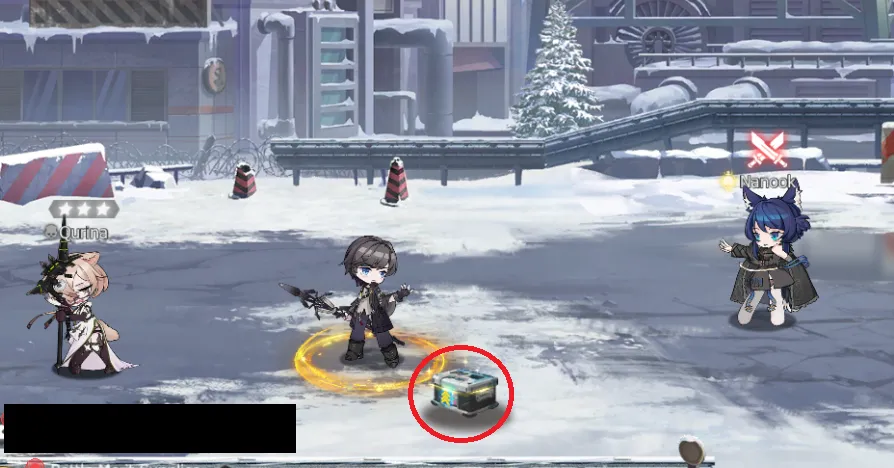
- While you’re mopping up your stage completion rewards, don’t forget to pick up the boxes in the way. In case you forget – yes, you can tap to move during campaign screens, so go near those boxes and pick them up!
- Add friends! Friends can help each other by cleaning dorms, which also gives a random affinity gift.
Combat 101
Now that you know how to read your characters and make them stronger, it’s time to run through the combat basics. While you’ve undoubtedly plunged into several battles by now, it’s always a good idea to go through a game’s combat systems to understand how it works and how you can best leverage its mechanics to your advantage.
Quick Tips:
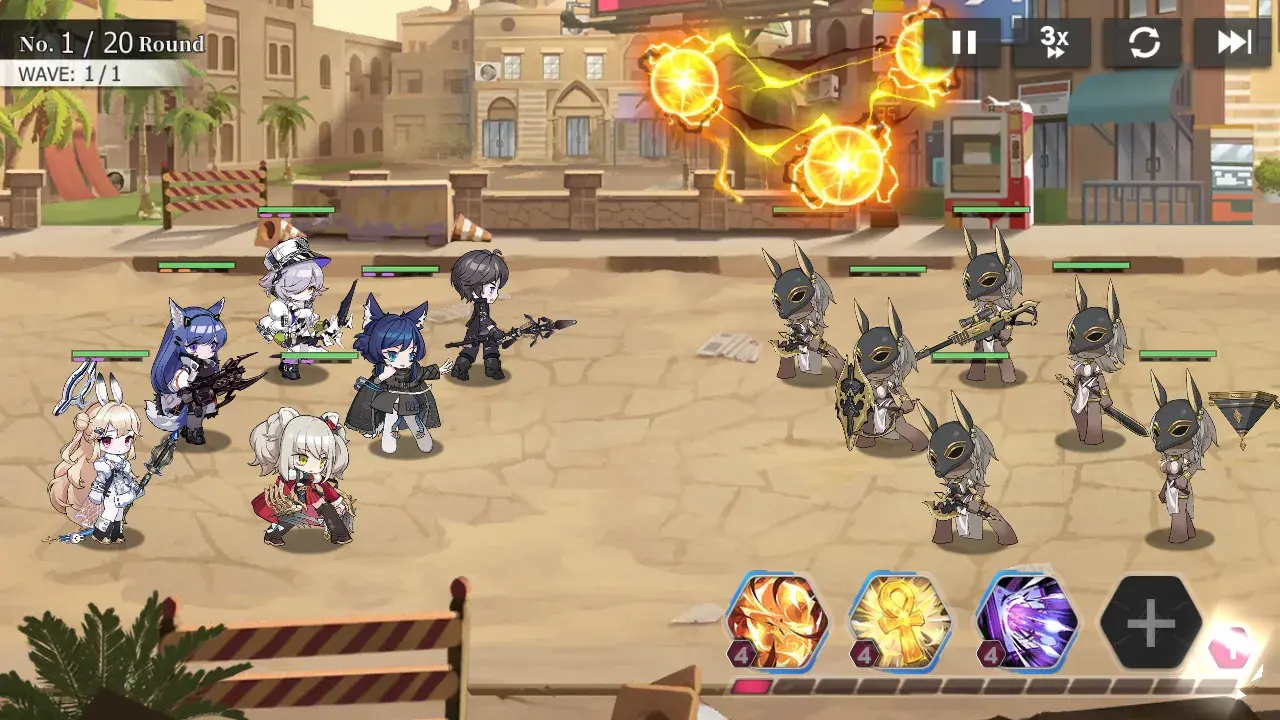
- Echocalypse’s combat is automatic and turn-based.
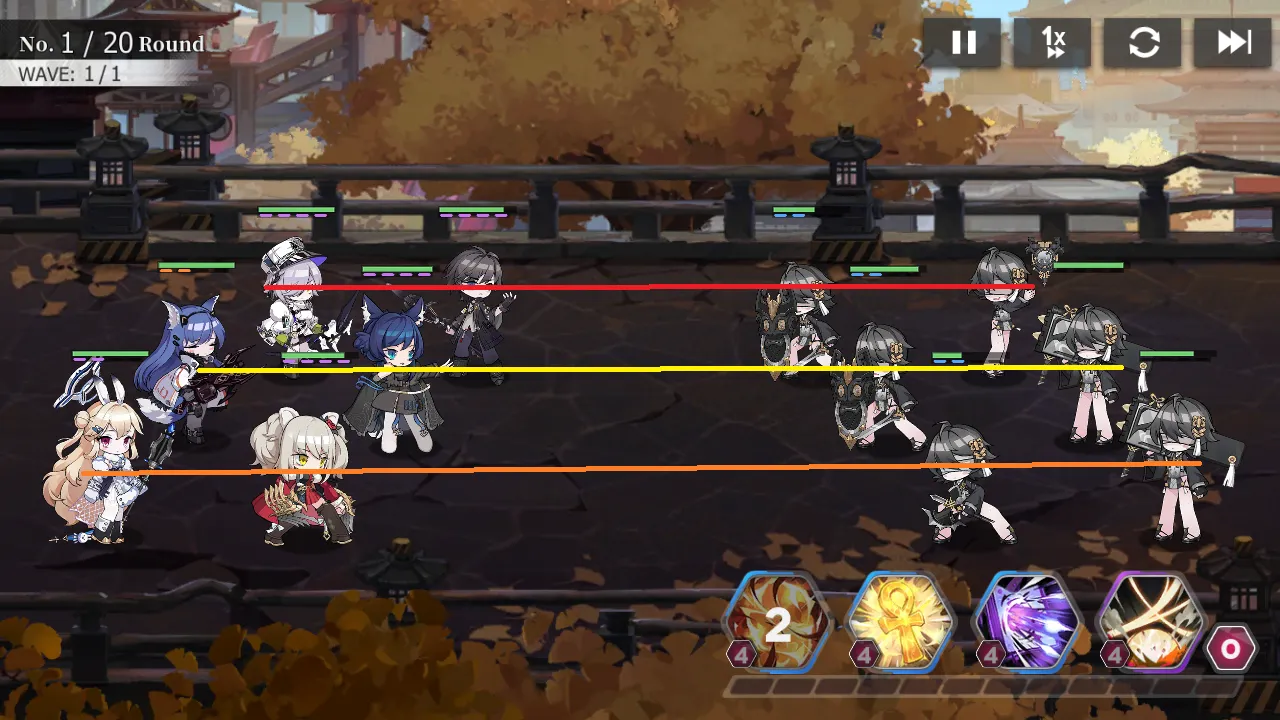
- Characters are assembled into two rows with up to 3 Cases per row.
- Characters will prioritize attacking enemies on the same lane as them and will only attack other enemies if their lane is empty.
- Pay attention to a character’s normal attack description – some Cases have ranged attacks that target the back row instead of the front row!
- You can tap on any unit during battle to bring up a small info panel that shows its buffs and debuffs. Bosses will additionally have a pre-battle info panel that shows their skills, tactics, and expected role.
Combat Flow
Echocalypse’s combat system is best described as “automatic turn-based”. Combat takes place between two teams, where characters take turns attacking each other based on their positions. This continues until one side drops or the round limit runs its course.
This means that much of the combat in Echocalypse revolves around careful team building and planning.
Rows and Formation
Combat in Echocalypse takes place via two rows – the front and back row.
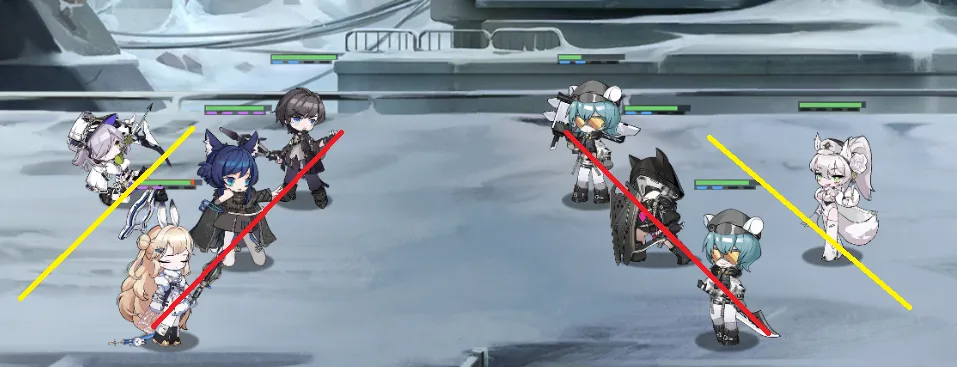
Cases will automatically attack enemies that are in the same (horizontal) lane as them and will only gang up on other Cases if they have no other target. This means the loss of a single Case puts significantly more pressure on the losing team as whoever is next in their formation will need to face off against a lot more damage.
Be mindful that just because a character attacks an enemy in the same lane doesn’t mean they won’t attack the back row. Some characters have normal attacks that jump over the front row, so while the “three frontliners/three supports or archers” is a reliable strategy, watch out for tricky characters that can snipe your rear lines!
Rage
As with most mobile RPGs, a character’s skills are locked behind a cost. To use these powerful abilities, you’ll first need to build up a character’s Rage gauge.
Characters gain Rage whenever they act. Each action yields one Rage point, and once their Rage gauge is filled, they’ll automatically use their ultimate on their next turn. Be mindful that it’s not just your characters who accumulate and use Rage!

A character’s Rage is visible below their health bar, via four pips. Each of these pips will light up when a character gains Rage – by default, a Rage skill requires four bars of Rage to use.
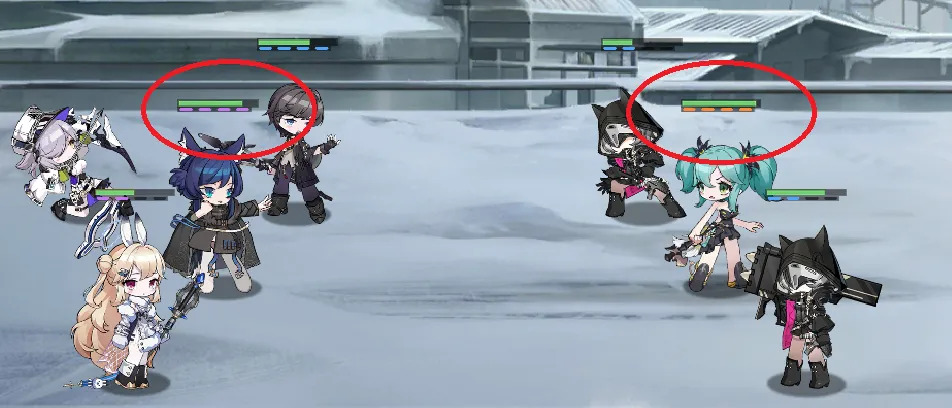
Pay attention to these gauges – they’ll highlight when to push the offensive (i.e., your team is ready to rock) or when to play defensively (such as when the enemy team has multiple Rage skills ready).
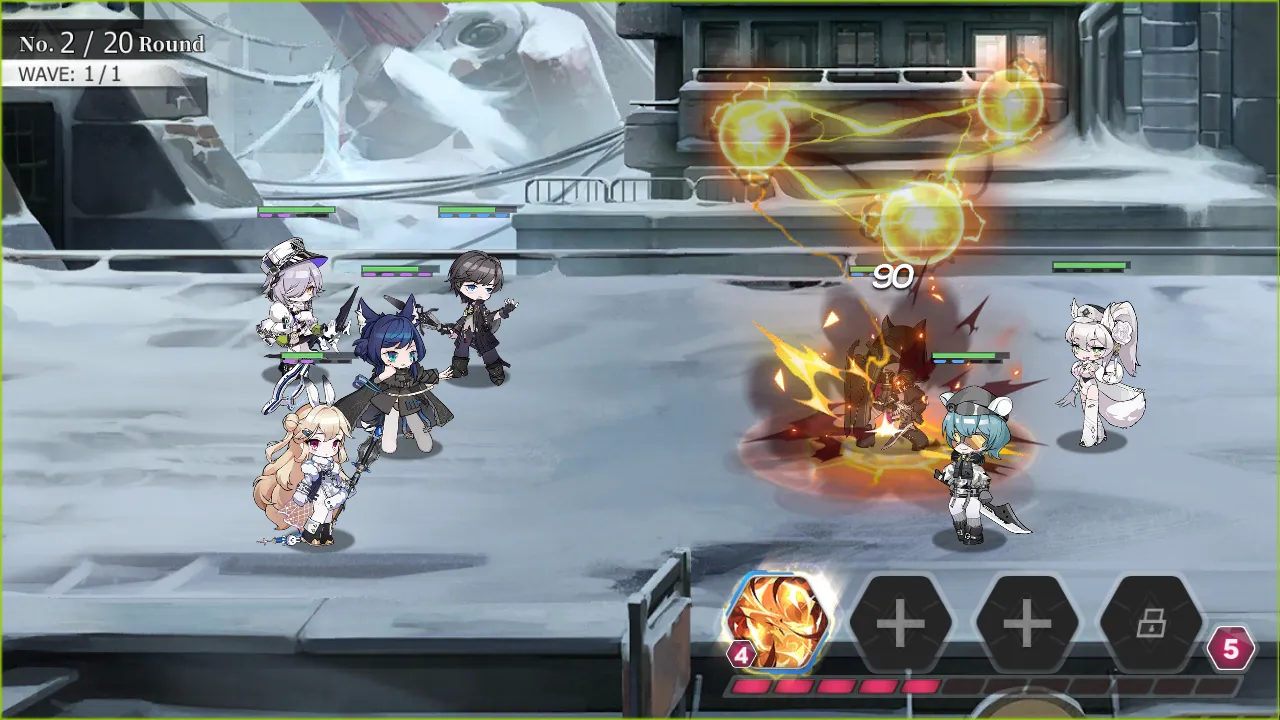
Fusion Points and Neoliths
Rage isn’t the only thing that builds up during a fight. Each time one of your characters moves, you’ll also gain one Fusion Point. Fusion Points are used to execute powerful maneuvers via your Neoliths; however, unlike Rage skills, you have control over when and where to use your Neolith skills.
Neolith skills are incredibly powerful not just because they boast good multipliers but also because they offer you tactical options. Opponent swarming you with lots of units? Use an AOE Fusion Skill. Dangerous Rage skill coming up? Use a stun Fusion Skill. You’ll need to pick and match which Fusion Skills you want to bring into combat, so choose wisely.
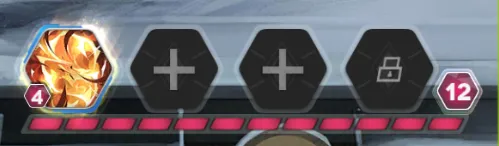
You can use a Neolith skill at any time as long as you can pay its Fusion Point cost. Your current Fusion Point stock can be seen in the lower right of the screen; this bar can only accumulate 12 points, so be sure to pop those Fusion Skills. Tapping on a Neolith skill immediately executes it after the current character’s turn. While Neolith skills are undoubtedly powerful game-changers, be mindful that they go into cooldown once you use them. Once again, be smart about when and where to use them.
Note that you can only have 4 equipped Neoliths at once.
Battlefield Information
Knowledge is power. At any time during a battle, you can tap on a unit – allied or enemy – to view its buffs and debuffs.
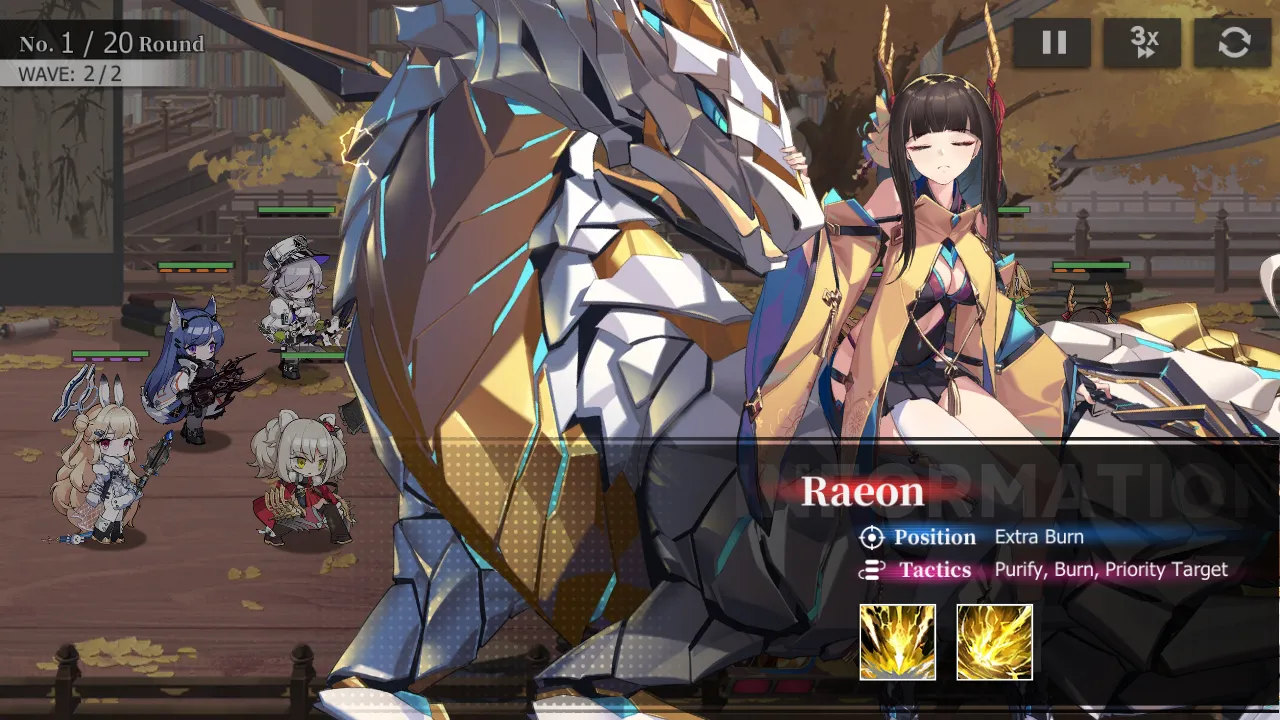
Before fighting a tough foe for the first time, you’ll also get a helpful info panel that shows said enemy’s intended role, skills, and preferred tactics. Forewarned is forearmed!
Understanding the Gacha
Finally, the gacha. Playing a gacha game usually means committing quite a bit of resources to it – whether it’s time or money. As a new player, it’s important for you to understand Echocalypse’s gacha system as early as possible so you can not only make well-informed decisions on when and where to spend your pulls but also conserve as many resources as possible!
Quick Tips:
- Iridimorphite is the game’s premium currency. You can use it to buy S-Elementium for Case banners or Identification Applications for Neolith banners.
- Iridimorphite cannot be used to pay for things that would cost real money, such as VIP, costumes, the premium battle pass, and more.
- There are three types of character banners – Event, Rotating, and Advanced Draw (standard). Pity is shared between types, not across all banners.
- The more you pull on a Case banner, the higher draw weight becomes. Soft pity is at 50 pulls (guaranteed SSR) while hard pity is at 200 pulls (guaranteed rate-up character).
- There are two types of Neolith banners – Mystery Amber and Ancient Amber. Every 5 pulls are guaranteed to yield 5 of a banner-specific resource (Quantum Shard for Mystery Amber and Quantum Fragment for Ancient Amber) which can be exchanged in the respective store. There’s still a low chance you can pull a complete Neolith.
- Just to be clear – you cannot spend Quantum Shards in the Ancient Amber store nor spend Quantum Fragments in the Mystery Amber store. Make sure you’re pulling on the right Neolith banner to get the right currency!
- New players get the First Appearance Draw which gives you 3 pulls of 10, each with a guaranteed SSR character. You can pick one of those pulls to get, but you’ll need to complete a series of missions to add those characters to your account. Use this to patch up holes in your team or find a powerful damage dealer or support if you’re lacking those.
Iridimorphite and You
Iridimorphite – those shiny cubes you hopefully have a good stock of by now – is the game’s premium currency. It’s used to pay for a lot of things, such as cash shop items or services. However, the most important thing you can buy with it is more rolls for gacha. You can buy an S-Elementium for Case banners or Identification Applications for Neolith banners with Iridimorphite, at 200 Iridimorphite per pop.

Note that Iridimorphite cannot buy certain items that require real money, such as premium subscription services, costumes, the paid battle pass, and other packages. That wouldn’t be fair to people who shelled out real cash to get those.
Banners and Pity
There’s a lot going on behind the scenes of Echocalypse’s gacha system, so here it is, boiled down.
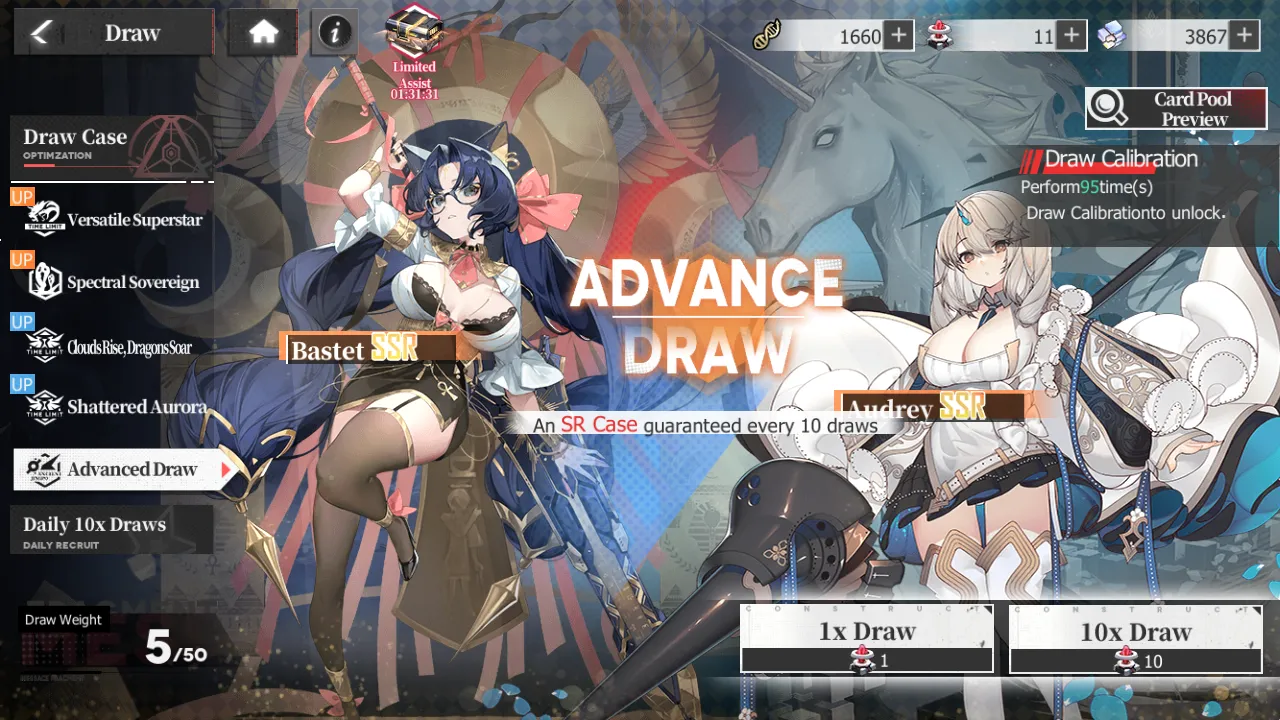
- There are three kinds of Case banners: Event (orange “up” on the left-hand side), Rotating (blue “up” on the left-hand side), and Advanced Draw (standard banner).
- There are two Neolith banners: Mystery Amber (yields Quantum Shards, the purple crystals, and is limited) and Ancient Amber (yields Quantum Fragments, the red crystals, and is permanent).
- There’s also a daily free 10 draw – you can claim one ticket in the mail every day. The rewards here are based on the current level of your Ka Pool. Essentially, just keep pulling here and you’ll eventually get a bigger (and better?) prize pool. And hey, free is free.
So, is there pity? Yes, but…it’s quite convoluted.
Here’s a breakdown of the pity system for Cases:
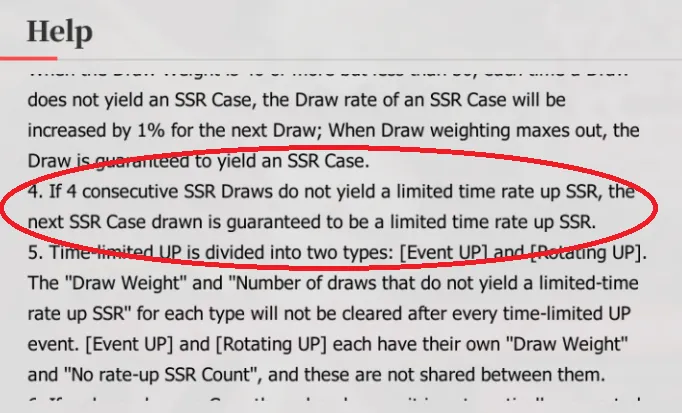
- The more you pull, the higher the chance of getting an SSR. Effectively, each pull gives you something called draw weight, and each point of draw weight affects the chance of getting an SSR differently, with the last 10 pulls having a better rate. The long and short of it, however, is that SSRs are guaranteed after 50 pulls.
- However, only the 4th SSR is guaranteed to be the rate-up character on a banner. This means that in the worst-case scenario, you’ll need to pull 200 times to get a rate-up character.
- Pity does carry over between banner types. Event banners share one pity pool, rotating banners share another, and the standard banner has its own pity.
For Neoliths, it’s different:
- There’s no draw weight system in play, but every 5 pulls on a banner guarantees at least 5 of that Neolith banner’s respective currency. Again, that’s purple Quantum Shards for Mystery Amber (limited) and red Quantum Fragments for Ancient Amber (permanent).
- Shards can be exchanged for Neolith fragments in their respective store. Both the Mystery Amber and Ancient Amber banners have their own store – make sure you’re pulling on the right banner!
- You can pull complete Neoliths from either banner at a low rate.
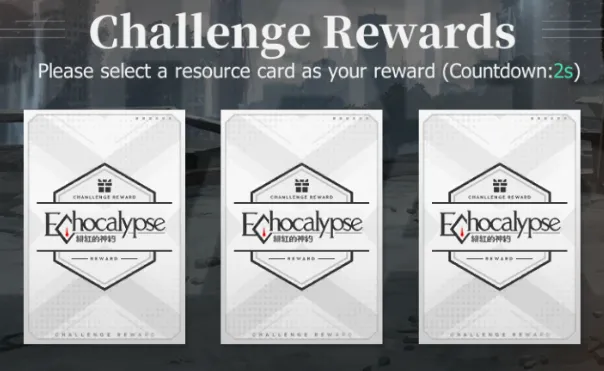
First Appearance Draw
To help you kickstart your adventure in Echocalypse, you’ll be given 3 random sets of 10 pulls, each of which has a guaranteed SSR. However, to claim them, you’ll need to complete a duo of missions.
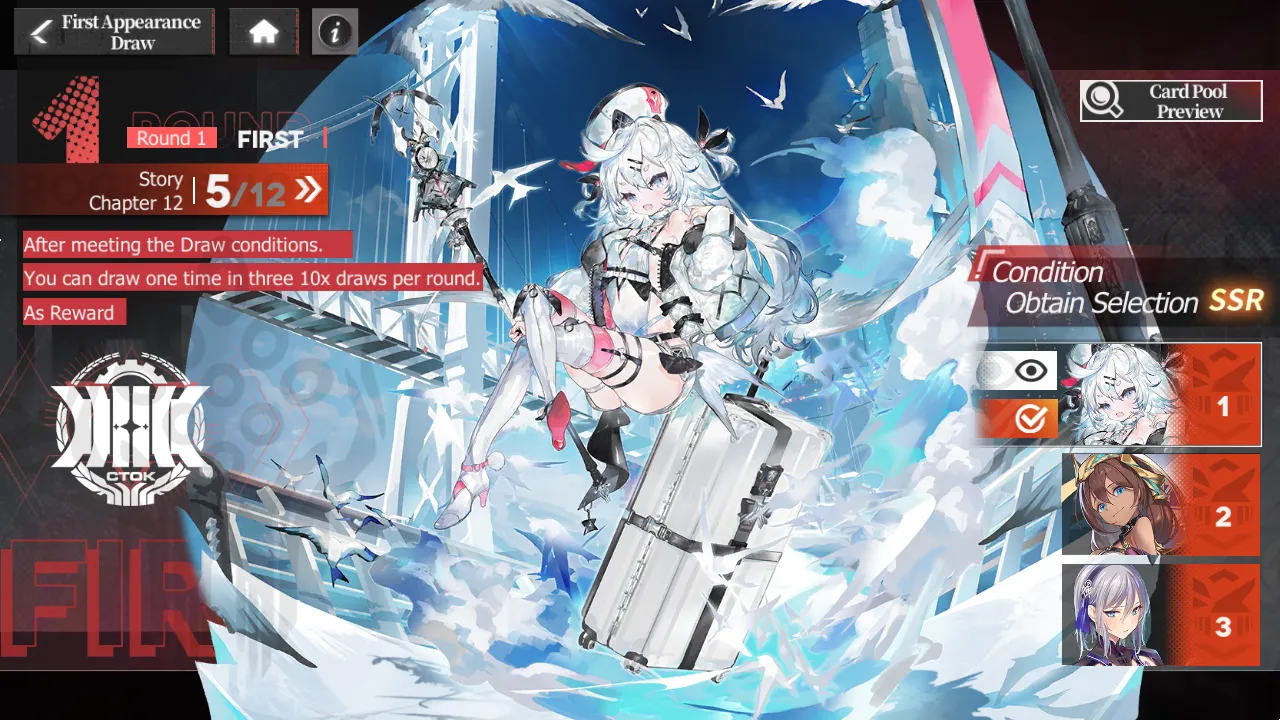
Use this function in conjunction with your regular pulls to patch holes in your roster and pick up characters that will vastly improve your combat performance. If you don’t have a strong AOE DPS yet, I strongly suggest getting somebody such as Kiki or Aiken. If, however, you were lucky enough to get an AOE DPS you’re happy with, you might want to pull for supports such as Audrey, Vivi, or Deena.
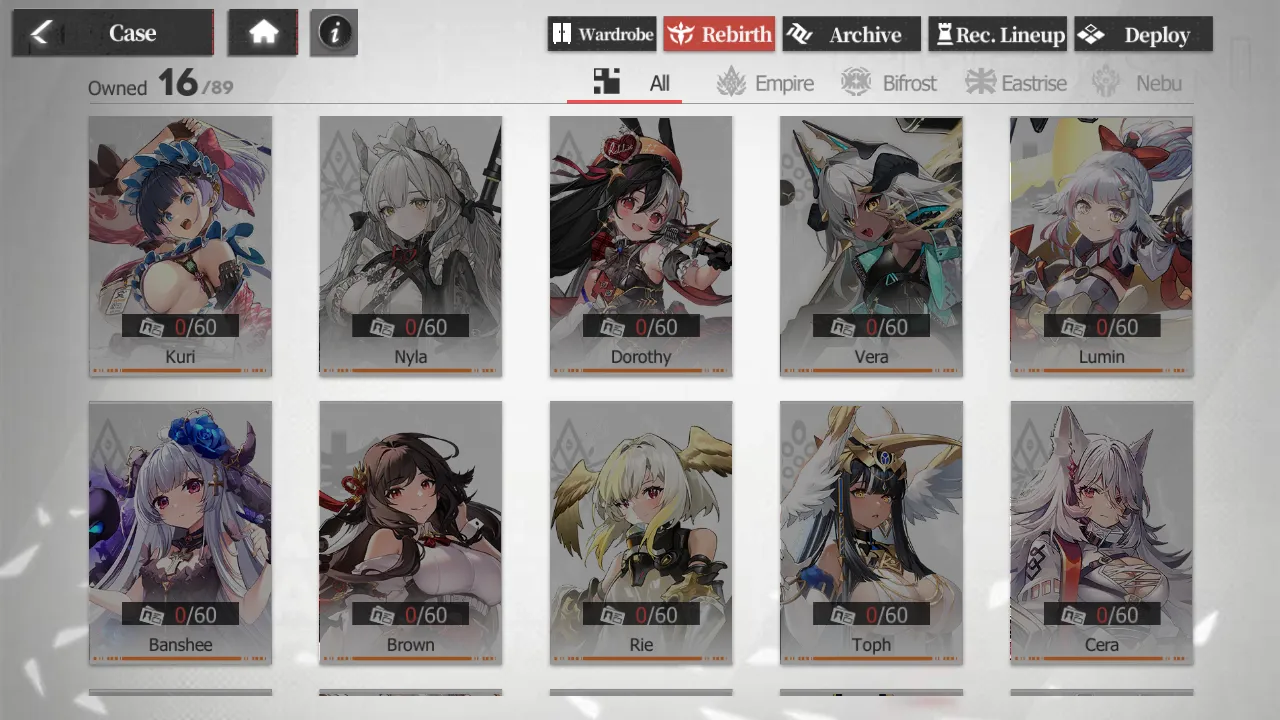
Remember – you can read up on any Case, even the ones you don’t have yet, by tapping on Case in the main menu and selecting their portrait. Use this to evaluate which among your guaranteed draws you should go for!
A Brave New World
The world has ended, true, but it’s not all bad. Even in the frozen wasteland, we’ll find friendship, camaraderie, and people still willing to fight the good fight, no matter what it takes.
That wraps up my beginner’s guide to Echocalypse, and I hope I was able to help you gain a better understanding of the game’s basic systems and pave the way for your future conquests. If you have any tips on how to improve this beginner’s guide or are feeling generous and would like to share some tips and tricks of your own, let us hear your voice in the comments section below!