Imagine just walking and minding your own business, going about your daily patrol then, without warning, the ground shakes.
Is there an earthquake? What’s that odd noise coming from below?
But before you could fathom what’s happening, the ground finally crumbles and you get swallowed up and thrown into absolute darkness. You hit your head and pass out.
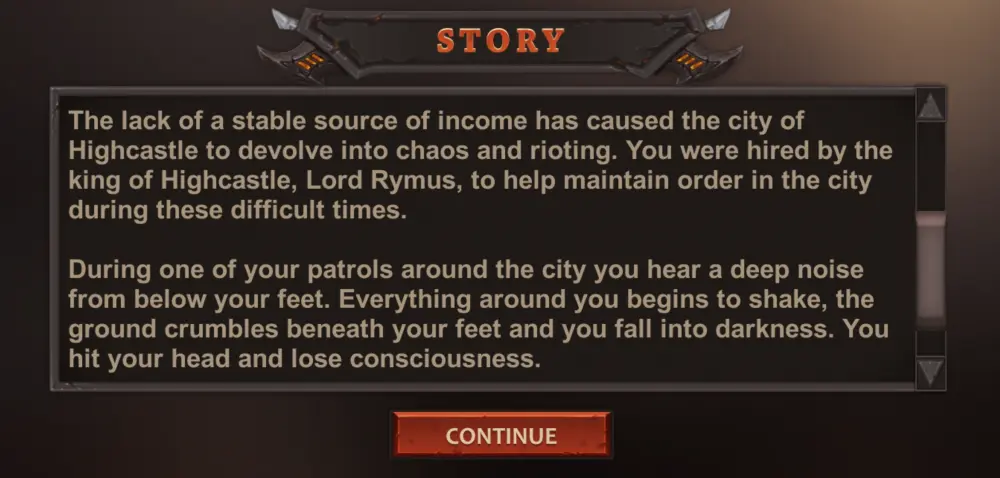
When you come to, you find yourself in the Dwarven Tomb. Goblins are scurrying about trying to loot the crypt. With no weapon on hand, you have no means to defend yourself. Fortunately, you’re not just any Tom, Dick, or Harry—you were actually hired by Lord Rymus, king of the human city of Highcastle, to guard and keep the peace in the riotous city.
But as you find yourself seemingly in the underground city of Stoneforge, you have no choice but to fight your way out of the tomb and find out what has happened to the dwarves, who have ceased all trade and contact with the humans, thus plunging Highcastle into chaos.
This is how your adventure in Dungeon Ward begins. Created solely by Czech indie developer František Liška, this dungeon crawler hearkens back to classic RPGs where you pick a class and go on a story-driven and mission-oriented journey in the fantastic world of dwarves, goblins, trolls, dragons, and a host of otherworldly creatures out to challenge your skills and spirit as a warrior.
Dungeon Ward is currently in early access but anyone who loves classic-style RPGs will be in for a treat when they try it out. As an offline, single-player RPG, Dungeon Ward is a breath of fresh air from the plethora of modern mobile games that have gimmicky loot boxes, multiplayer co-op, and a gacha system.
In this game, you’re the hero of your journey and there’s no one you can rely on but your skills and tactics. It’s fun, immersive, and challenging all at once—and truly a labor of love from the developer who managed to work on this game by himself, in the evenings, for the last five years.
To begin Dungeon Ward, you must choose between 3 classes, each of which have their own specific qualities:
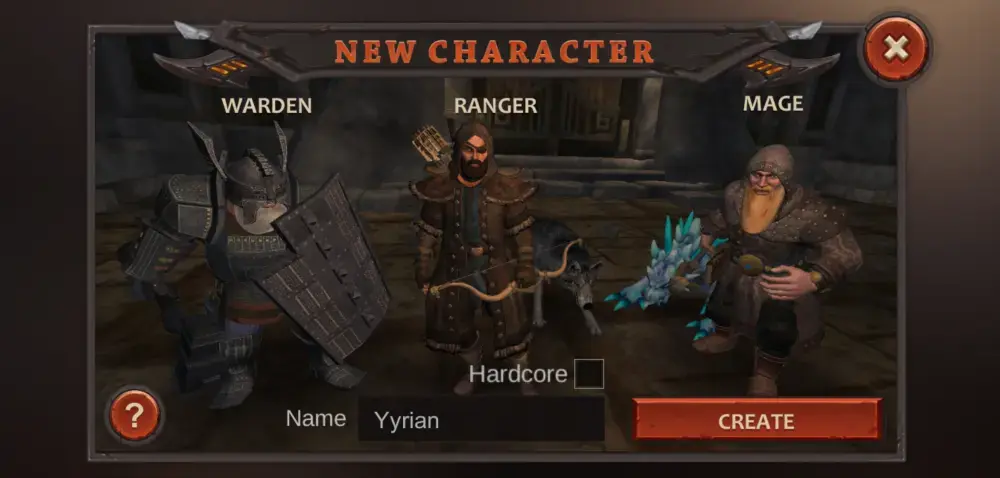
- Warden: This is your melee character equivalent to a warrior type with a close-range fighting style. Your main weapons can vary from swords to axes, clubs, etc. You can equip either two-handed weapons or a weapon and shield combo. Guarding or blocking with a two-handed weapon is still doable, with the weapon acting as your shield.
- Ranger: As suggested by its name, picking a Ranger means you have an advantage when fighting from a distance. Your primary weapon is a bow, though you may still equip a melee weapon for close-range combat, usable only when an enemy gets too close. You may also equip a shield for blocking. Traps, explosive arrows, and other tools can also be utilized by a Ranger.
- Mage: The Mage class is similar to the Ranger in that they have an advantage when fighting from a distance since the Mage can dispel projectiles and cast spells. However, unlike the Ranger, a Mage’s primary weapon, which is a wand, can double as a melee weapon during close combat. Because of this, a Mage cannot equip a melee weapon per se, such as a sword.
After selecting a character, you will be given a brief background of the story and the world.
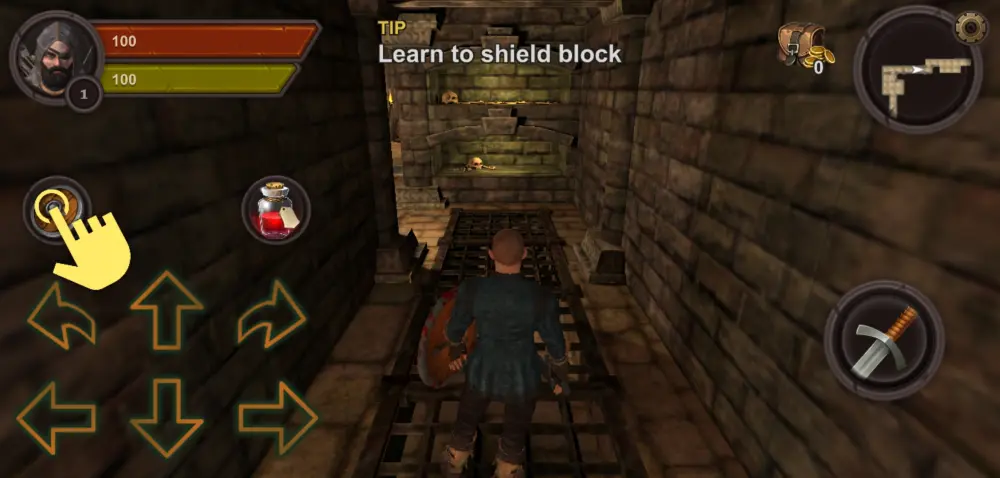
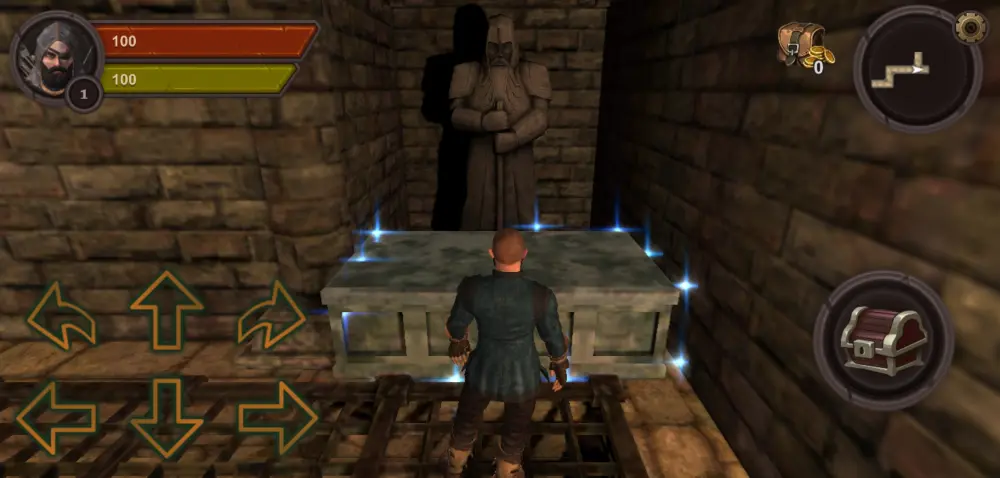
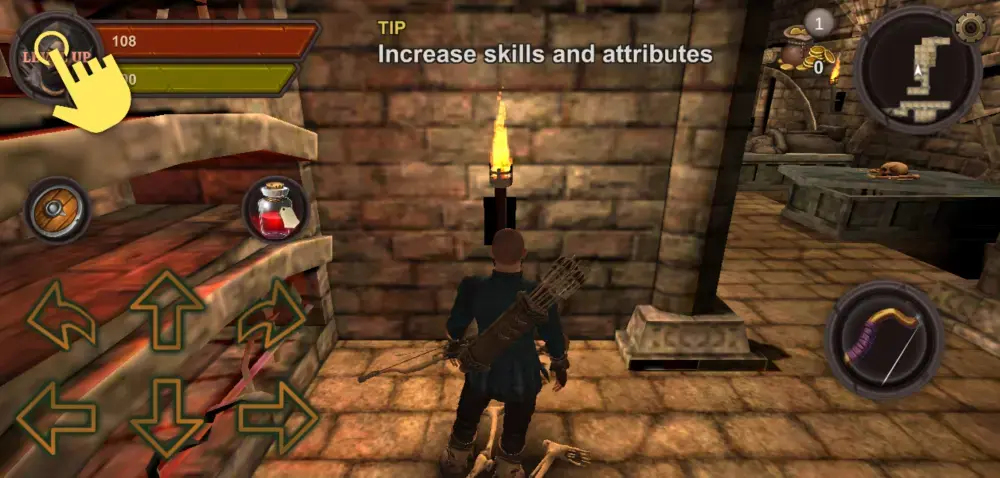
As you fall into the ground and wake up, you are thrust into a brief tutorial stage inside the Dwarven Tomb. This is where the game will teach you some basic mechanics, such as moving, guarding, attacking, looting, allocating Skill and Attribute points, and so on. You’ll also encounter a few low-level enemies, such as skeletons, as well as simple obstacles and traps, like a spider’s web or an arrow triggered by a pressure plate on the ground.
Depending on your chosen character, you’ll be able to pick up a primary weapon suited to your fighting capabilities. However, the rest of the tutorial will play out in a similar way regardless of the class you pick.
When you successfully emerge from the Dwarven Tomb, you will find yourself in the City of Stoneforge. Here, you will be greeted by Captain Grendar, who is one of the people from whom you may receive quests.
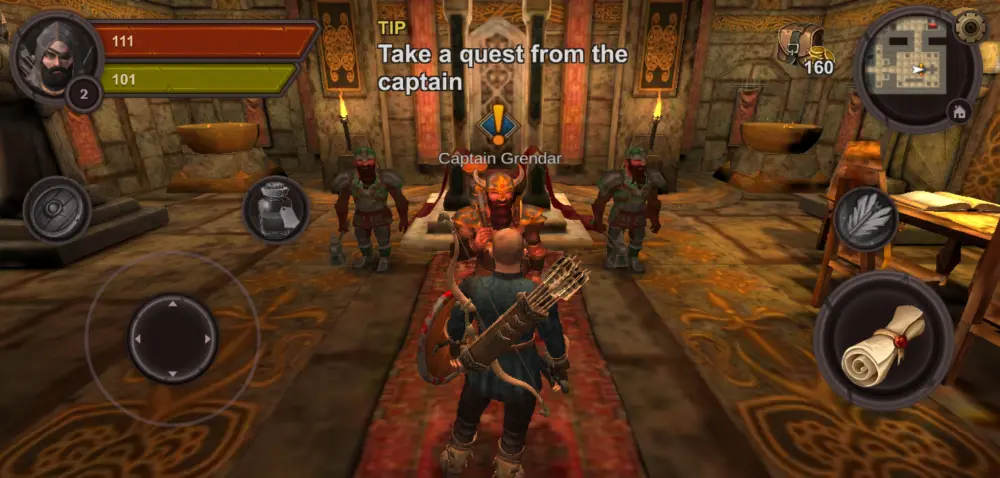
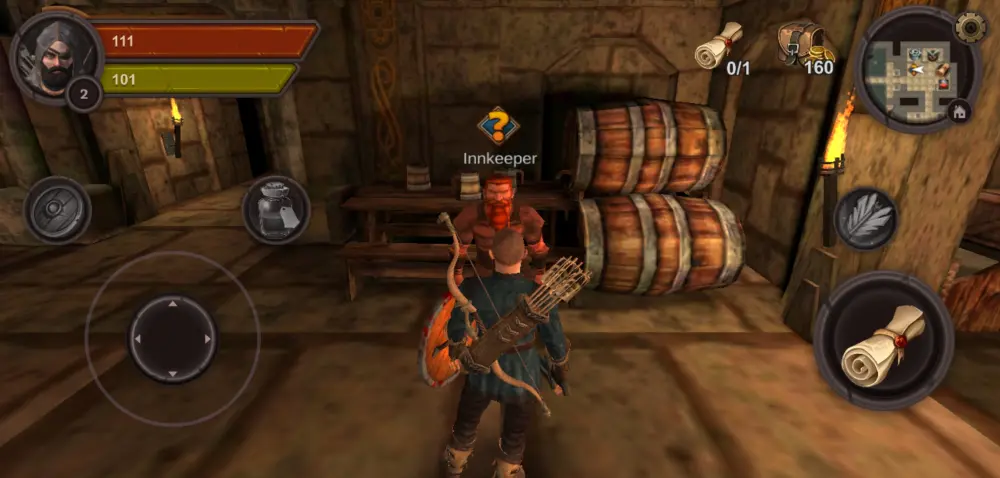
Another quest giver is the Innkeeper, who is also found within the City of Stoneforge (he’s in the room next to Captain Grendar). You’ll know which person has a quest waiting for you or who you need to talk to when they have an exclamation point or question mark over their head.
From here on out, you’ll be accepting and completing quests as they come. As with any dungeon crawler, fighting enemies will eventually level up your character. Upon leveling up, you may allocate Skill points and Attributes (more on these later).
Since Dungeon Ward is a game that caters to those who love the classic-style, single-player RPGs of old, it’s evident that your journey will be fraught with difficulty. With that, it pays to have a helping hand with this beginner’s guide for Dungeon Ward.
We’ve tried playing all 3 classes to see how they differ from each other and what you can expect when selecting a particular class, though there are tips we’ve listed that can apply to all. With the help of this Dungeon War guide, we’ll explore how to survive the dungeons, defeat enemies and bosses, and get the best equipment gold and gems can buy.
Let’s dive right in!
Set Your Control Scheme

If you’re used to playing modern mobile games, then Dungeon Ward’s default control scheme can take some getting used to. Upon being thrown headfirst into the tutorial stage, you’d initially have to move around using a set of 6 directional buttons located on the left side of your screen.
If you’re the type who prefers this setup then you don’t have much to worry about. But if you’re not used to this kind of control scheme, the simple act of moving around can get a little bit frustrating. Fortunately, you can easily access the Menu by clicking the gear icon on the upper right-hand corner of the screen. If you click on Settings, you can see that the control scheme can actually be changed between a directional button setup and a joystick setup. You may also choose between a split or grouped setup for directional buttons.
Try out which control scheme is the most comfortable so you can move, attack, and defend with relative ease. Out of the 6 available control schemes, we found that Joystick 2 is the most comfortable but we recommend trying out everything to find what works best for you. After all, you’re going to be doing a lot of moving and dodging, the importance of which we’ll discuss in another section of this guide.
Loot, Equip, Sell
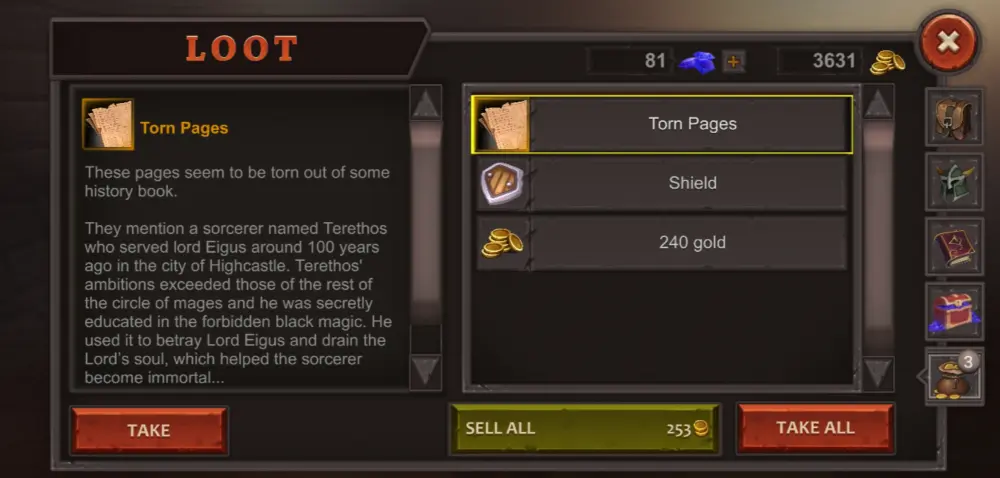
In keeping with classic-style RPG mechanics, you can loot dead enemies. Loot you obtain can be accessed via the inventory button (next to the Settings button) and you may select which among the loot you want to keep or discard. If you pass loot with yellow sparkles, this usually means gold, which will automatically be added to your purse. Loot that has blue sparkles, on the other hand, means you may acquire various items ranging from weapons to armor, other equipment, keys, and gems.
You may also find loot inside chests, which are also marked by blue sparkles.
As a beginner, we recommend getting as much loot as you can since you’ll likely have an ample amount of space in your inventory. Even if you feel as though you don’t have any need for certain items, you can still sell them and earn a handful of gold that you can use to purchase items from the shops (more on this in the next section).
How much you earn will depend on how good the item is that you sell. Basic items can get you around 5 gold while items with higher qualities and stats will, naturally, get you much more gold upon selling them.
Items you obtain from looting often align with your chosen class. This means that if you’re a Ranger, weapons you obtain from looting will likely be bows, if not a melee weapon for close combat. However, as a Ranger, you won’t get wands or any other weapon you can’t use during your run.
Occasionally, though, you may get weapons, armor, or items that may require you to reach a certain level in Attribute points. While we do have recommendations for which Attribute points work best for which class (more on this later), you can always choose to allocate points to certain Attributes if you plan to use a specific weapon.
You may always view weapon, armor, or item stats on the left side of your screen when you access your inventory. This will help you decide whether your current equipment works well or if you need to replace them with better items that have upgraded stats or bonuses.
Overall, as a beginner, get as much loot as you can, use what you can, and sell those you’ve outgrown. As much as possible, equip items that have stat bonuses and pick those that align well with your class or other equipment. We’ll go into more detail about this in the sections specifically discussing point allocation and combat.
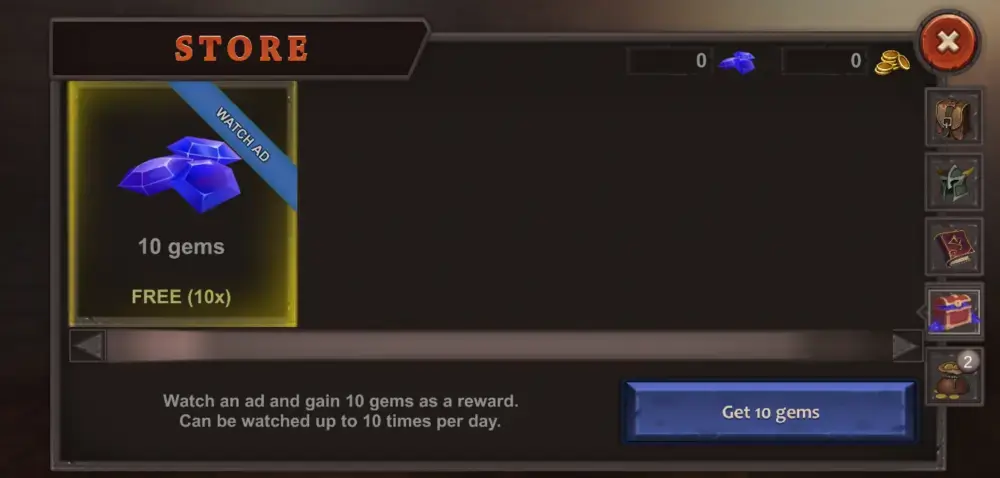
Upon completing a mission, you’ll be rewarded with gold and gems, which you can double by watching an ad.
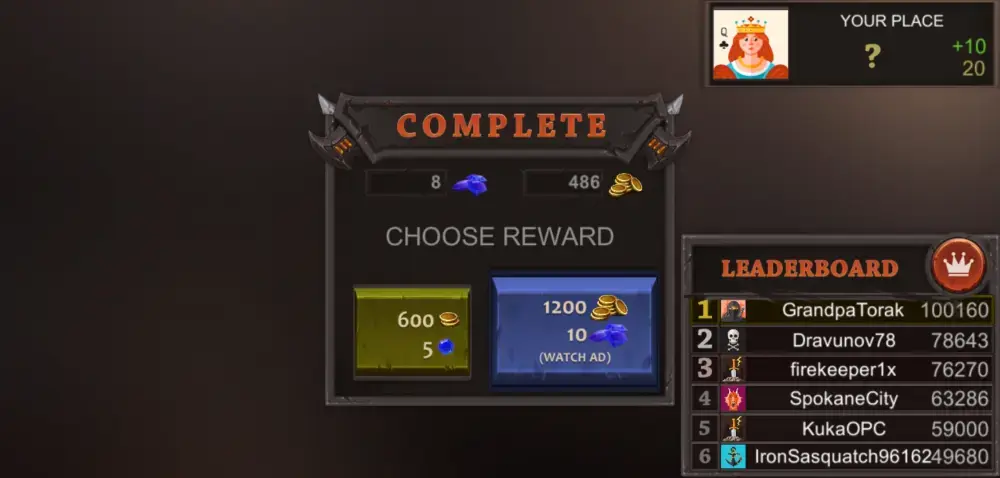
This is purely optional and while ads can be a little distracting for some players, we recommend taking advantage of this option anyway as you’ll need as much gold and gems as you can gain to buy the best items from the shops.
Go Shopping before Sorties
When you’ve managed to get past the tutorial and have arrived at the City of Stoneforge, you’ll be able to access different shops when you talk to the different shopkeepers. Along with the Innkeeper, you’ll find 4 shopkeepers from whom you can purchase various items:
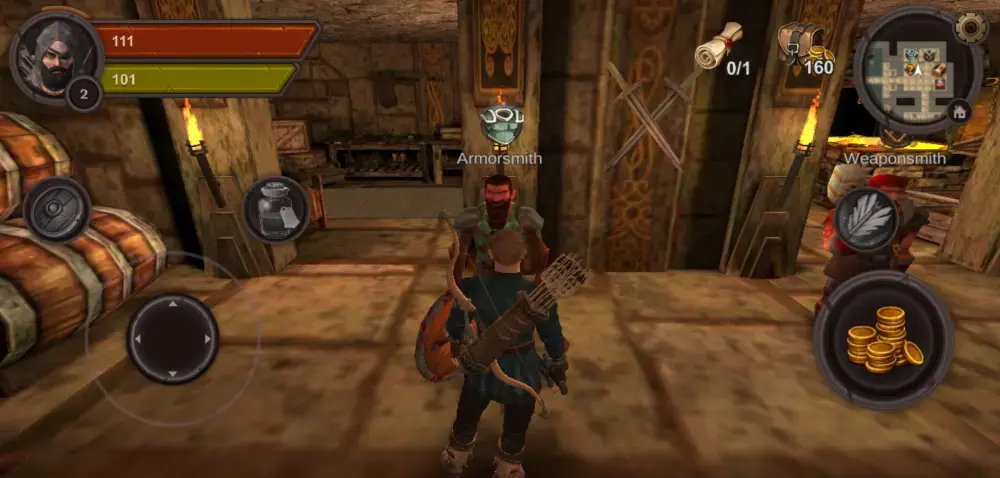
- Armorsmith: This is where you can get armor pieces like vests, helmets, shoulder guards, belts, gloves, hoods, boots, caps, and the like. Armor doesn’t just add to your defense. Certain pieces can increase other stats like Attributes, dodging, critical chance, etc. Armor pieces, in particular, are divided into 3 categories: Heavy, Medium, and Light. While each class can use any type, individual armor pieces have different stat requirements (when they have stat requirements at all) and affect different things.
- Light armor: Raises your character’s Magic Resist and usually affects your character’s Intelligence stat.
- Medium armor: Raises Dodge chance and affects your character’s Dexterity.
- Heavy armor: Raises your character’s overall defense and affects attributes like Strength or Vitality.
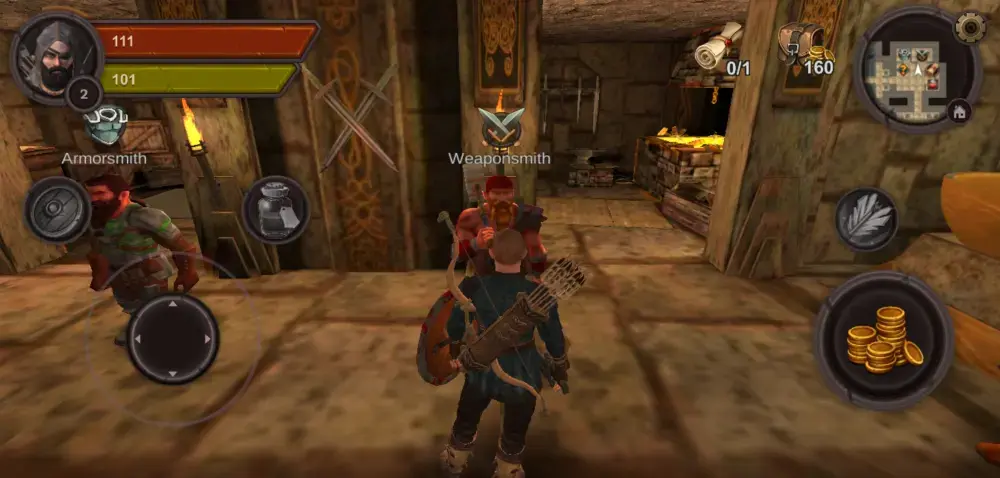
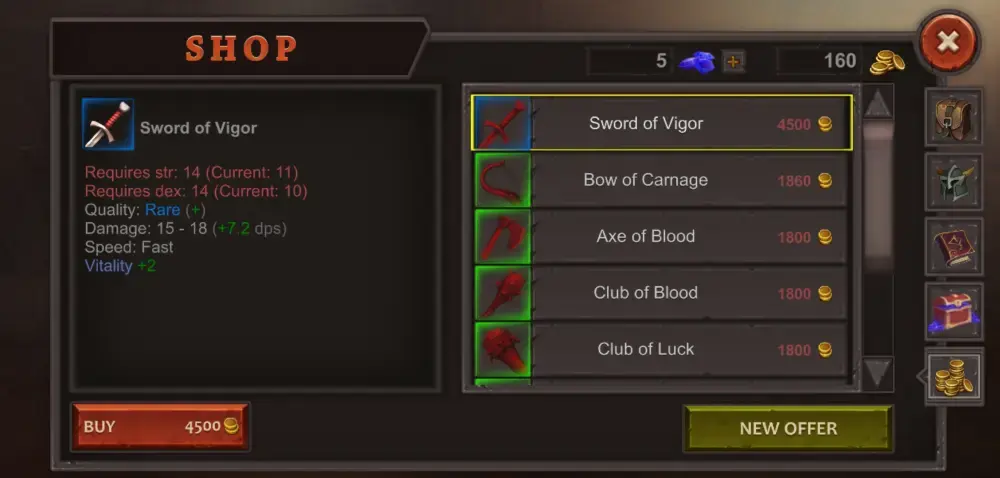
- Weaponsmith: Depending on your class, you can buy a myriad of weapons here. Wardens can choose from swords, clubs, maces, axes, etc.; Rangers can choose from different bows for their primary weapon, as well as pick different secondary weapons for close combat, the options of which are similar to those that Wardens have, except Rangers can’t wield two-handed secondary weapons; Mages can choose from different wands. Shields are also available for the Warden and Ranger class, while Books take the place of shields for Mages but still possess the same function of allowing you to block against attacks.
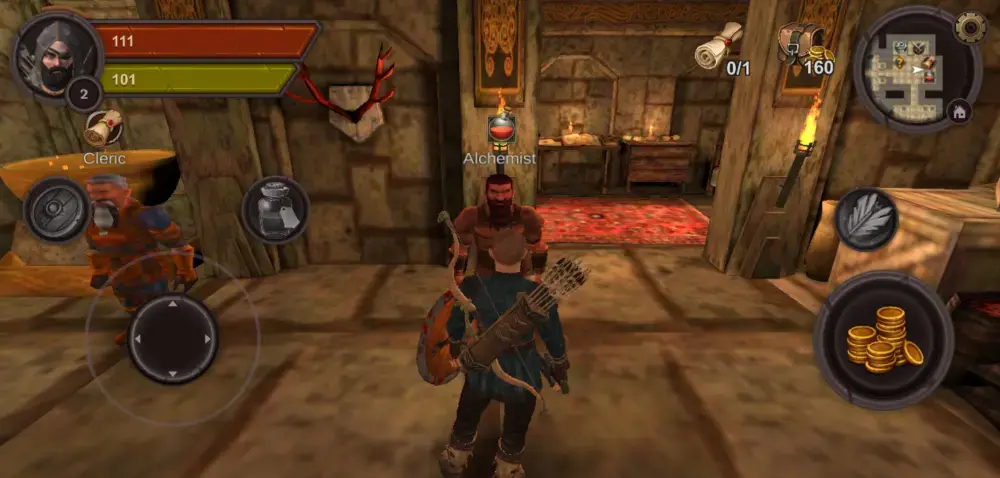
- Alchemist: This is where you can buy other supplementary items with bonuses, such as rings, amulets, potions, and the like. When equipped, these items can increase other stats as well.
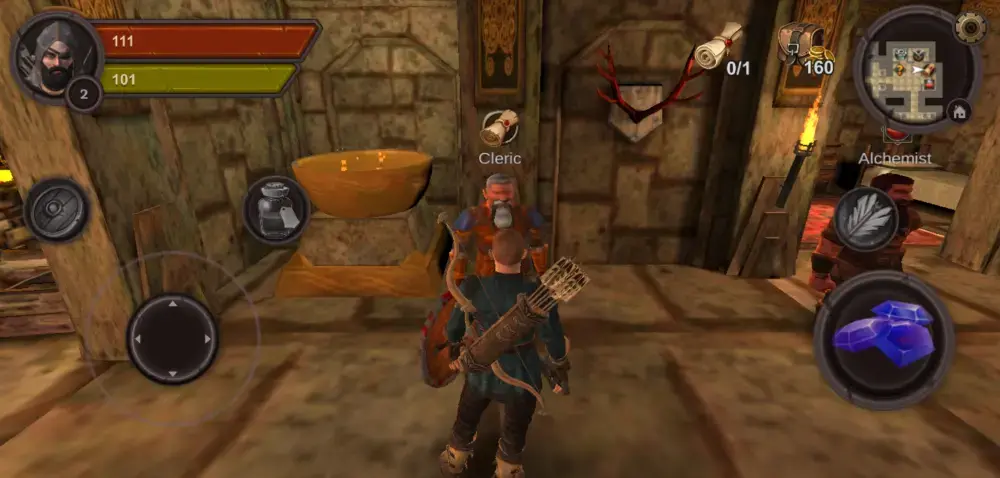
- Cleric: Through the Cleric, you can purchase enchanted scrolls that can give additional bonuses to certain armor pieces, weapons, or items. Each scroll has its own bonuses for different stats and may only be used for specific items. For instance, if you buy an Enchant Scroll of Intellect, you can get +4 in your Intelligence Attribute, but the scroll can only be used for rings, necklaces, or potions. On the other hand, if you buy an Enchant Scroll of Avoidance, you get an +4% in Dodge, but the scroll can only be used for light or medium armor.
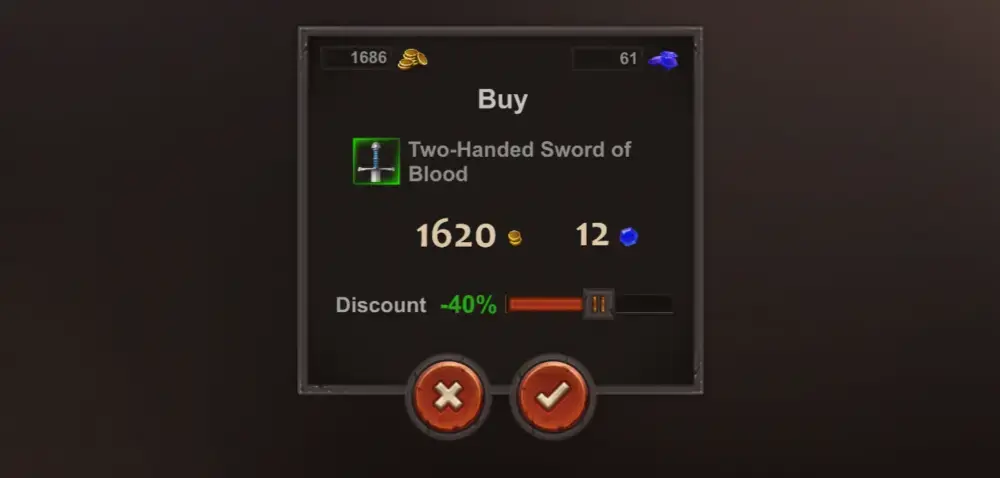
Unlike other items, scrolls can only be bought with gems. Otherwise, everything else can be bought using gold or, if you don’t have enough gold, you can buy an item using a combination of gold and gems. How this works is that if you’re lacking gold to purchase a certain item, you may supplement the lack with gems—but you need to have enough gems to cover the remaining expense. If the item is too costly, you still won’t be able to purchase it even if you use both resources.
Fortunately, you can get 10 extra gems by accessing the store and watching ads. You can watch ads for a maximum of 10 times each day, which can gain you 100 gems in total. Every time you watch an ad, you need to wait for around 3 minutes before you can watch another.
When you have enough resources to buy items, it also pays to look at their specific quality so you can make the best purchase. Qualities are basically an item’s rarity. There are 4 qualities that items have, which are indicated by the color of the border surrounding their icon:
- No border: Common
- Green border: Uncommon
- Blue border: Rare
- Purple border: Outstanding
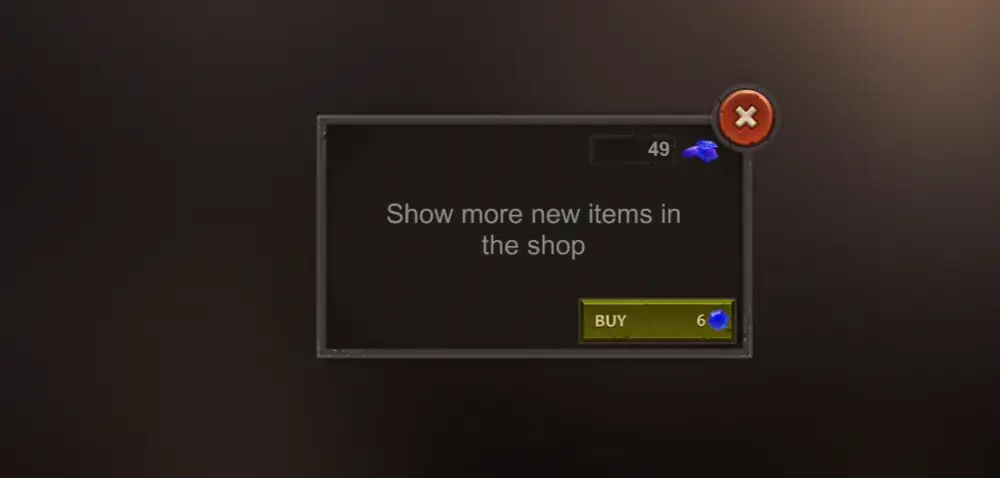
Naturally, the higher the quality of the item, the better its stats—at least for the most part. Keep in mind that some items may do well in some areas but not in others regardless of their quality rating. Review the item’s stats so you can decide which areas you want to have bonuses. If you feel like none of the shop’s offers are to your liking, you can refresh the list in exchange for a few gems. New offers will be at random and you can keep refreshing the list as long as you have enough gems to spare.
That said, make it a point to visit the shops before heading out on a quest. While you may find items in the dungeons themselves, it pays to check the shop if you want items with specific bonuses. Moreover, enchanting items with scrolls can definitely increase your overall survivability. You can also buy better potions, which are important when you want to stay alive. Do some shopping before questing and pick up something good that will give your enemies a run for their money.
Check the Map
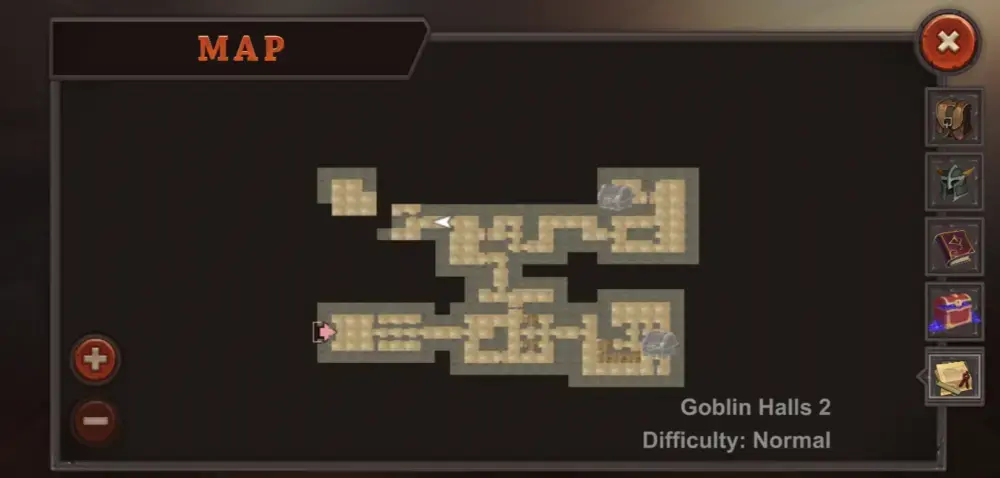
Aside from picking the right items at the shops, one other small but rather important thing that will help you during quests is your map. Checking it may seem like a trifle, but believe us when we say that your map is more than just a way to navigate dungeons. Viewed from the upper right corner of your screen, maps don’t just reveal where you can go or where hidden chests are—maps can also tell you where enemies are (marked by red dots) and how many are close to your location.

Since moving and attacking with ease may take some getting used to, discovering where enemies are lurking nearby can help you prepare to either attack them or buy yourself some time to heal. If you don’t have potions or if you’re still waiting for your potion to refresh its timer, you can heal your health bit by bit when you don’t receive any damage.
To this end, you may also use the map to find out where narrow hallways are so you can pass them quickly. It’s never a good idea to get trapped in a small passageway and end up getting backed into a corner, especially if your enemy is larger than you and has a ton of health and damage. Even if you manage to block their attack, your guard will eventually be broken and you can’t escape a narrow passage.
By checking your map, you can pinpoint areas in the dungeon that will provide you with enough room to move, dodge, and escape until such time you’re ready to face enemies once more. The only time narrow passageways may be of use is when you’re a Ranger or Mage as you can exploit the distance between you and your foe, but make sure that there’s always a place you can move to escape.
As a Warden, this can be a disadvantageous position unless you equip a Skill that allows you to attack multiple enemies with one blow or invest in a Passive Skill that allows you the chance to cleave when using ordinary attacks.
Speaking of enemies, the map can also tell you if an enemy is about to come up from a blind spot. This way, you can either move away or draw them to a hallway where you can try to take them on one by one as they form a straight line in front of you.
Without looking at the map, you may also exploit corners by hiding behind them and checking where enemies are moving about.
Unless you’re in their direct line of sight, there’s a chance an enemy won’t spot you hiding behind a corner. Use this to launch a surprise attack or lure an enemy to a position in your advantage.
When moving about, tread carefully and don’t rush to minimize your risk of being attacked or dying in a corner.
When checking your map, also spot places that may be dead ends, as well as areas that are yet to be explored or may contain treasure chests. Some parts of the dungeon may be accessed through stairs while hidden areas containing chests may be accessed by pulling levers nearby. Don’t forget to be wary of traps, though they are not marked on the map.
Build Your Character the Right Way
Let’s pause for a moment and consider this: in real life, each individual has their own set of talents and areas of expertise. Some are good at singing, others are good at dancing, some are skilled builders while others make for great scientists, etc.
Every person has something they excel in, even in their own little way. You can say, then, that classes in Dungeon Ward work in a similar manner: each class excels in their area of expertise and if you invest in these areas, you’re more likely to bring out their best qualities in battle.
As a beginner, it can be tempting to try and allocate points to every Skill and Attribute thinking that you can achieve a well-balanced, well-rounded character, but you know what they say about being a jack-of-all-trades: they’re a master of none. Spreading yourself too thin and randomly allocating points with the mistaken notion of achieving balance may not always be in your favor.
That said, what are Skills and Attributes, and what’s the best way to allocate them?
Attributes
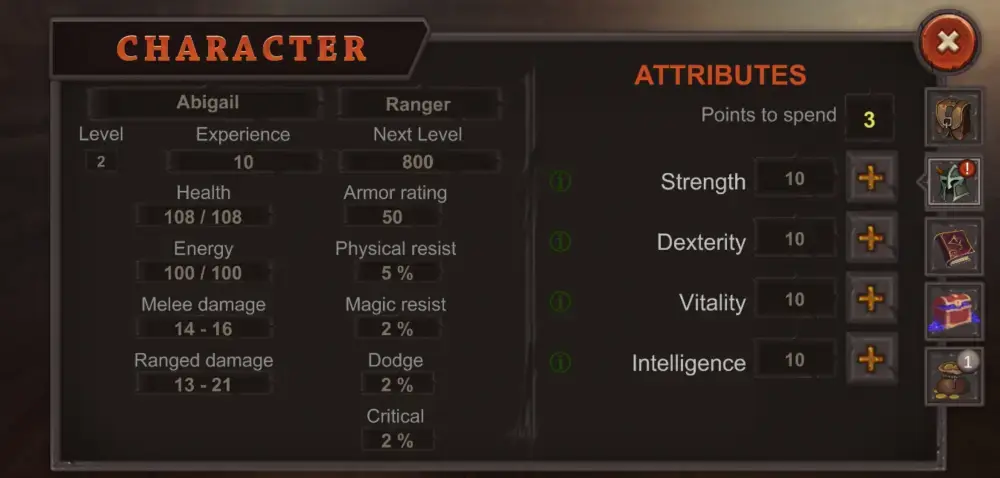
Attributes are universal characteristics that each of the 3 available classes possess. Regardless of your chosen class, you will begin with a base point of 10 for every Attribute. There are 4 types of Attributes to which you can allocate points depending on how you want to build your character:
- Strength: Every 2 points allocated to this Attribute adds 1 melee damage to melee weapons like swords, hammers, and axes.
- Dexterity: Every 2 points adds 1 damage for bows; every 4 points adds 1% each to your dodge and critical chance.
- Vitality: Every 1 point adds 3 HP while every 100 points adds 1 to health regeneration.
- Intelligence: Every point adds 1 to energy; every 2 points adds 1 damage for wands; and every 4 points adds 1% to magic resistance.
As you can see from these figures, specific Attributes will work better for a specific class. On the whole, Vitality should be an Attribute to which Skill points ought to be allocated regardless of your chosen class. However, when it comes to a class in particular, invest in Strength if you have a Warden, Dexterity if you have a Ranger, and Intelligence if you have a Mage.
Generally speaking, this should be your priority when allocating Attribute points. However, it does pay to invest a few points into Attributes that may not directly align with your chosen class as there are instances when you need these Attributes to reach a certain level, such as when using specific weapons or when you’re up against certain enemies that can exploit this lack. For instance, melee weapons and heavy armor will often require Strength; light armor and ranged weapons will often require Dexterity; cloth armor and magic weapons will require Intelligence.
Occasionally, some other stats will be needed. For example, some swords may require both Strength and Dexterity to wield. In this case, it’s a good idea to occasionally invest in Strength for your Ranger since you’d still be using a melee weapon for close combat. On the other hand, a few points allocated to Dexterity might benefit your Warden so you can dodge better, and so on.
If you want to change up where you’ve allocated Attribute points, you may always reset this in the Attributes tab in your inventory in exchange for a few gems.
Attributes are just one part of what makes up the entirety of your character’s stats. You also have Skills to which you can also allocate points upon leveling up.
Skills
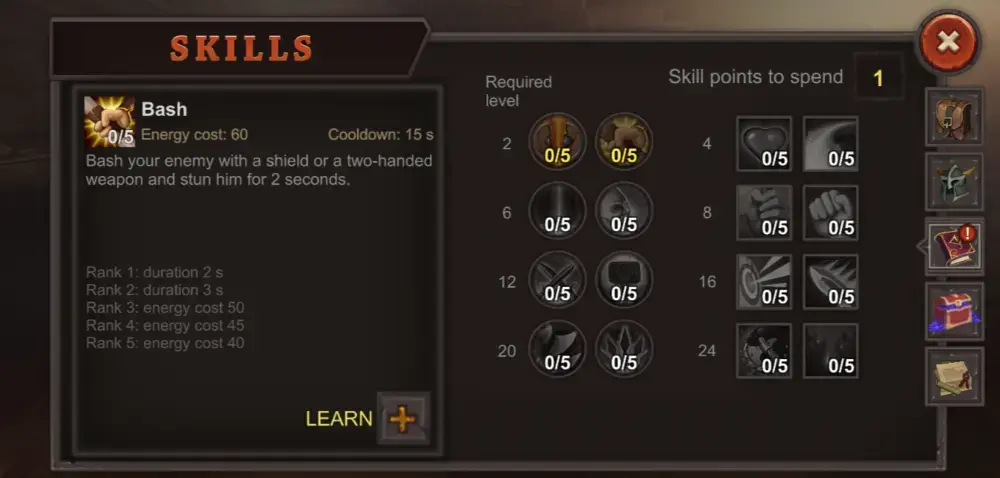
If Attributes are universal, Skills are unique to your chosen class. You may choose to allocate points into learning a new Skill or upgrading an existing one until it’s maxed out to Level 5. Some Skills may be passive while others are active, and you need to reach a certain level to unlock other Skills.
For every class, you can invest in 8 active Skills and 8 passive Skills, giving you a total of 16 Skills to choose from. You can assign 5 active Skills at a time and rearrange where their buttons are located when you click the Assign button upon viewing a specific active Skill. Every time you allocate a point to a Skill, you will gain a bonus specific to that Skill in that level.
Since Skills are unique to each class, picking which ones to allocate points to will depend on your style of gameplay and your goals for building your character. Do you want your character to hit harder or have more HP? Are you having a particularly hard time dealing with enemies that have magic damage or physical damage? Are you more comfortable with an aggressive or defensive playstyle? These questions and more can help you decide which Skills will work best for your class and playstyle.
Of course, it’s important to understand that there would always be some sort of trade-off as you can’t reasonably have a character that does well in all areas, though achieving a healthy balance is not impossible.
Also consider what kind of weapon you’re wielding and its stats. Would it compliment a particular Skill or will the Skill make up for a weapon’s lack?
Armor, items, and enchantments also give bonuses so work around these, too, when choosing skills.
If you’re not happy with the way you’ve invested in your current Skill set, you can always reset the points you’ve spent in exchange for gems. We recommend doing this if you want to experiment on different Skill combinations until such time you find something that generally works for you. On the other hand, if you find that your current Skill set isn’t doing as well for a particular dungeon, you may always access your inventory and go to the Skills tab to reset your points while in the middle of your dungeon run.
Combat
Now that we’ve talked about Skills and Attributes, it’s time to discuss some combat tactics. Naturally, how you fight will depend upon your chosen class. Wardens are better at close combat, Rangers can attack from afar and use traps, and Mages can utilize a variety of spells. Each attack you perform spends energy, which is indicated by a green bar below your red health bar. If you hold the attack button, you can perform a power attack, which hits much harder than a normal attack but spends more energy.
Your chosen Skills, of course, will also come into play when you fight. Naturally, this varies across characters. Otherwise, there are general combat tactics you may apply whatever your chosen class may be. Here are some of them for your consideration:
Know Your Enemies

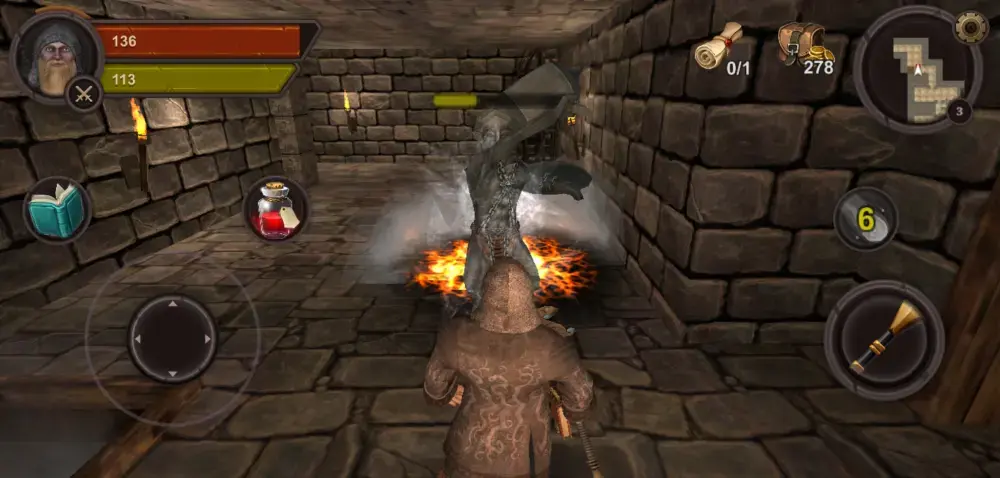
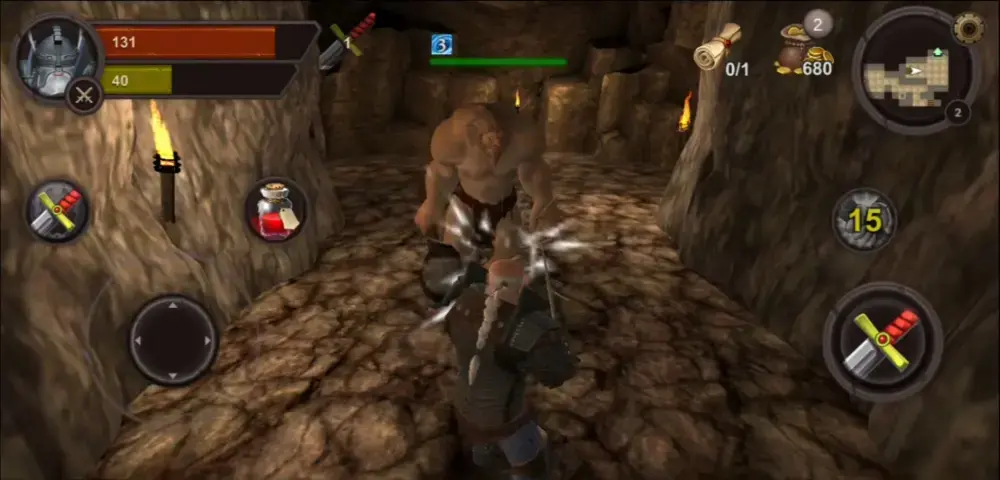
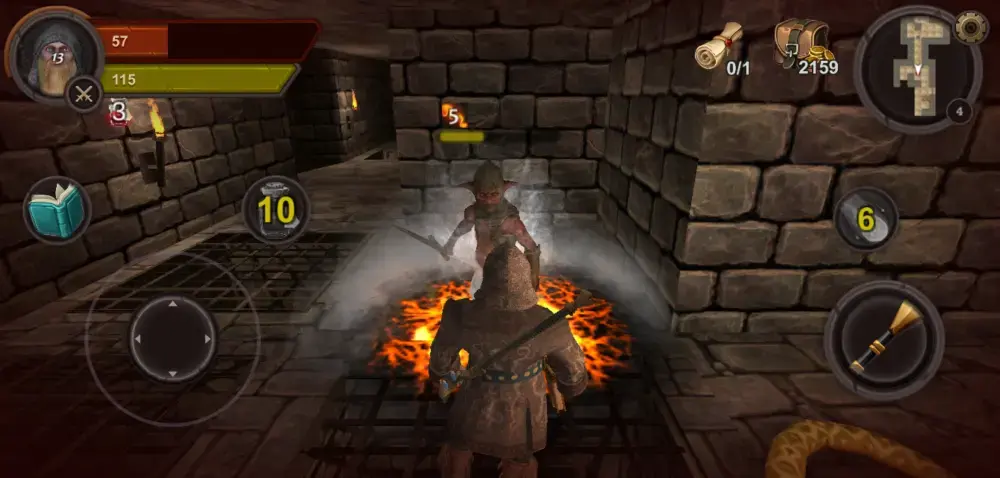
Knowing who or what you’re up against is half the battle won. In Dungeon Ward, you’ll encounter a sundry of enemies who are capable of different attacks. Some are pretty standard like skeletons who’ll fight you with swords, while others can catch you off-guard if you’re not careful, such as the exploding goblin or the angry snake. Being familiar with the different types of enemies as you go along will help you survive better in succeeding quests since you’d know what to expect and what they’re capable of.
Of course, you can’t reasonably be expected to know who enemies are and what they do when you’re in the very early stages of the game. In this case, be observant about the different enemies you encounter.
Take note of their speed, attack, how often they guard at what intervals, or if they can perform special attacks like explode, shoot venom, etc. Getting a feel of how chunky they are in terms of health and defense can also increase your odds of surviving and defeating these enemies. You wouldn’t want to directly engage a giant troll when there are goblins around it that can chase after you.
Often, the size of enemies can tell you about how much health they have or how tanky they are. Fortunately, boss battles are often like duels as you typically face them one-on-one in a separate area. However, that doesn’t mean you won’t encounter some pretty large enemies that have smaller creatures alongside them.
That said, it’s best not just to become familiar with enemies, but to also take them on one at a time. As much as possible, provoke or engage one enemy at a time instead of all at once—unless you have a Skill that can deal area-of-effect damage or stab through multiple enemies. Otherwise, try to dwindle their numbers piecemeal and later on bring it down to an even fight.
Defending Yourself and Minimizing Damage
Part of what’s both challenging and appealing in Dungeon Ward is its deliberately clunky control scheme. It really brings back that old game feel where you have to work around this slight handicap of having limited movement. Even so, you’re going to have to do a lot of dodging and sidestepping (preferably the latter).
Regardless of your chosen control scheme, turning to the side can be a bit of a pickle, so as much as possible, make it a point to step to the side instead as this is a faster and more effective way to dodge attacks. By sidestepping, your enemy can still remain within your line of sight and it’ll be easier for you to adjust your position to an offensive one compared to when you turn and put the enemy in a potential blind spot.
This is why we recommend keeping away from narrow passageways that hinder you from sidestepping attacks. Of course, you can always block with your shield or book, but your guard will eventually be broken after receiving a certain amount of hits.
During crucial moments, sidestepping can also buy you a bit of time to heal if you manage to avoid getting hit.
Additionally, some attacks can be dodged by sidestepping. If the enemy’s windup animation is long enough, it’s better to dodge that than to block it. It’s often a strong attack that breaks your guard and cannot be parried.
Speaking of parrying, there is a parry system in Dungeon Ward: if you block an attack, your guard meter is likely to deplete faster. But if you parry an attack—or, simply put, block at the exact moment an enemy’s attack strikes you—your guard meter depletes much less compared to when you block.A successful parry will cause the enemy to stagger. Compared to a block, parrying will show the enemy’s attack being blown backward while a block will let an enemy’s attack animation finish.
Now parrying can take some practice to perfect, but it’s well worth the effort, especially if you’re a Warden or are cornered. Bigger enemies are easier to parry than smaller ones because the former tend to move much slower. This will definitely come in handy during boss battles so practice parrying as much as you can.
Use the Power Attack as Much as Possible
Sometimes, regular attacks just won’t work even if you are wielding a competent weapon with bonuses. After all, there are enemies that can block, and there are certainly those who can tank regular hits like they’re nothing, especially if it’s a boss. In this case, you can use power attacks, which are performed when you hold the attack button. Power attacks deal more damage, but it also uses up more energy than regular attacks.
When using power attacks, timing it right is a key factor. For Wardens, you have no choice but to get in an enemy’s face and do a power attack when they’re not blocking. Since it expends a large amount of energy, you can follow up your power attack with a shield block to let your energy regenerate, then perform the power attack again provided your guard hasn’t been broken.
Otherwise, you can continuously step back or to the side after a power attack to dodge enemy hits, then perform the power attack again once your energy is restored. Parrying is also a viable option when waiting for the right time to launch a power attack.
For Rangers and Mages, a good time to perform power attacks is when the enemy is still a little bit far off. This can take off a good chunk of their health and you can either follow it up with a few regular attacks, or move farther away from the enemy to let your energy regenerate in time for another power attack.
Power attacks can also be followed up with at least one Skill. In some cases, using a Skill may be more favorable than using a regular attack.
On the whole, use power attacks as much as you can to make short work of lower-level enemies and deal extra damage to bosses. Depending on the situation, you may choose to perform a regular attack or a Skill, move away, block, or parry until such time you’re ready to dish out another power attack.
Spam Your Skills
Speaking of Skills, use them as much as you can as you would power attacks. This particularly refers to your active Skills. Depending on your total energy, it will probably be difficult to activate all your Skills in succession, but at least two well-timed ones can help bring enemies to their knees. Depending as well on the level or type of Skill, each one has varying cooldown times before they can be used again.
Again, Skills you invest in should complement your style of gameplay, but we do recommend having at least one Skill that deals extra damage and another that deals damage to multiple enemies or has an area-of-effect damage.
Heal while Blocking
As we mentioned before, you can heal a bit of your health when you don’t receive damage. Another way you can get back some HP is by using a potion. In some RPGs, potions are limited to a certain number but the way potions work in Dungeon Ward is different: you can use a potion as many times as you want but you need to wait several seconds for it to refresh and be used again. You also don’t need to access potions via your inventory but simply need to click the potion button next to the block button.
Similar to other items, you can choose from different types of potions, which you may buy from the Alchemist or pick up during dungeon runs. However, you can only equip one. Depending on the quality of the potion, it can heal a specific amount of HP, as well as have a specific waiting time. Potions can also be enchanted with scrolls.
If you find yourself engaging an enemy and have taken a particularly bad hit, you can use a potion while blocking or even while attacking. Of course, it’s better to heal without taking damage so as to hasten HP recovery, but it’s not a bad idea to try and heal while in the thick of a fight. Between healing while attacking and blocking, the latter is a better idea.
Beware of Traps
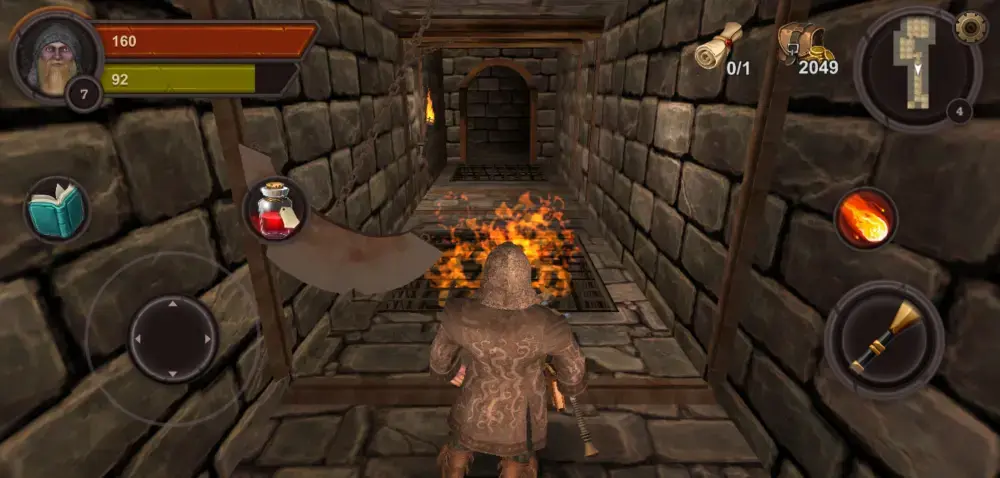
Traps come in all shapes and sizes—you have arrows flying from walls, rotating saws moving on the floor, fire coming out of grills, blades swinging dangerously from the ceilings, and so on. Beware of these traps and avoid getting him by them as much as you can. Additionally, make it a point to never fight enemies if you have to simultaneously deal with traps nearby. Instead, try to lure them to a place where you won’t have to worry about the presence of traps and then take them out there.
Conversely, it’s possible to use traps to your advantage by luring enemies to a spot with traps and get these traps to do the attacking for you. For instance, if you’re a Warden, you can stop just right in front of a trap on the floor, such as the rotating saws, to force an enemy to engage you while stepping on that particular trap. The longer they stay on that spot, the more they can get damaged by that trap while you’re attacking them at the same time.
On the other hand, if you see a pressure plate on the floor, try to lure an enemy into the path of the trap and step on the plate to inflict massive damage on your foe. Instead of getting hurt by traps, use them to dish out damage to enemies instead.
Exploit Gates and Doors
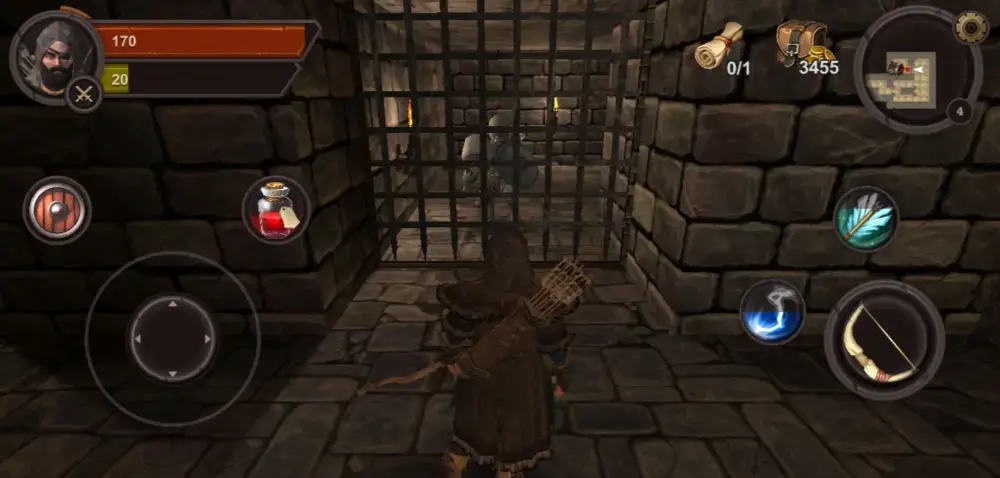
This tip specifically applies to Rangers and Mages: if you see an enemy behind a gate, don’t open the gate yet but instead deal damage from afar. Enemies aren’t able to open gates and doors so use this opportunity to keep them in place while attacking them from a convenient and relatively safe spot. As long as you can see an enemy behind a closed entrance, it’s possible to attack them from a distance without them making a beeline for you.
Of course, if you’re a Warden, you have no choice but to open the door or gate, and let the enemy come close. The only advantage you have is that when an enemy gets in your face, you’d be in your element and deliver swift justice.
Treat Failure as Learning
As with any game, the prospect of defeat hovers over you like the blade of a guillotine. But instead of being discouraged, treat failure as a learning experience. In fact, defeat can sometimes provide you with more insight into what you need to accomplish quests compared to when you’re victorious all the time. With defeat, you’ll be challenged to take another look at what Skills might work best for you, or if you’ve invested in the right Attributes or equipment.
Mistakes and losses can encourage experimentation, which can go a long way in developing your chosen class, thus offering a more enjoyable experience in the long run. Adapt, learn from your mistakes, and emerge triumphant with the lessons that you’ve gained.
With that, we come to the conclusion of our beginner’s guide for Dungeon Ward. Have you tried playing all 3 classes? Which one is your favorite? What Skills did you combine and how did they work out for you? Which enemy was the hardest to kill? Feel free to share your thoughts in our comment section below. Goodspeed, hero!