Not too long ago, comic book superheroes were pretty much a niche thing. But thanks to the success and popularity of superhero movies as of late, more people have become fans of comic book characters. Many have devoted their time to following superhero movies and TV shows, anticipating their release every year.
With the hype for superhero movies at an all-time high in the past couple of years, it’s no surprise that games featuring these characters and all those related to their story have also risen in popularity, giving fans more media to enjoy while also introducing these stories to those who might not have been interested at first.
One such game that capitalizes on the hype for superheroes (and supervillains!) is the newly released DC Heroes & Villains Match 3.
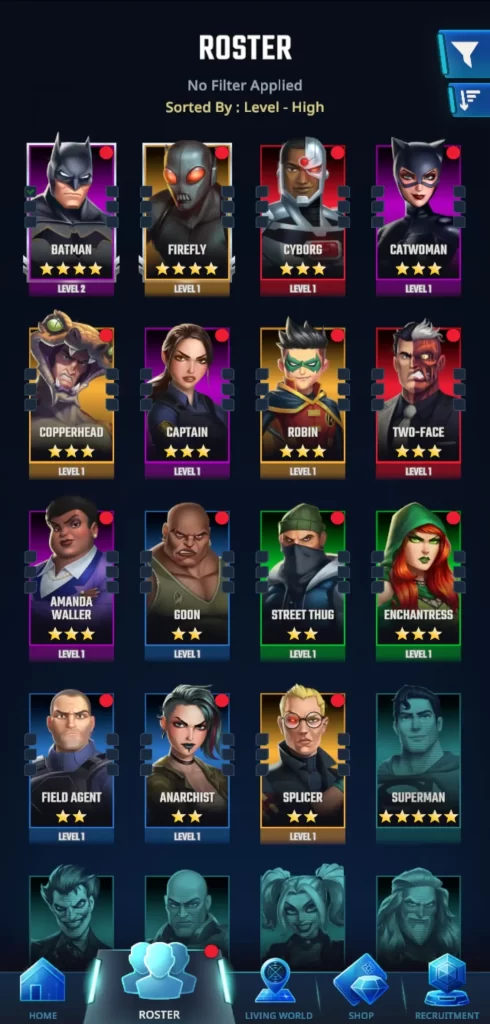
Hot off the press from Ludia Inc. in July 2023, DC Heroes & Villains: Match 3 is a puzzle RPG match-3 with some PvP on the side. As you might have guessed, you get to play characters from the DC universe—whether they’re superheroes or supervillains—all of whom have unique stats, skills, attributes, etc. that can spell either victory or defeat for your team.
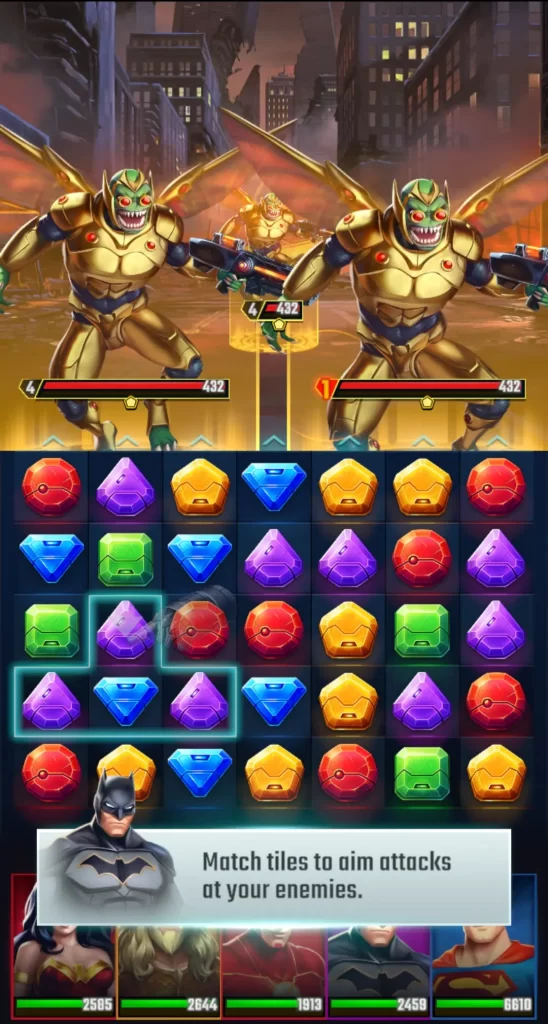
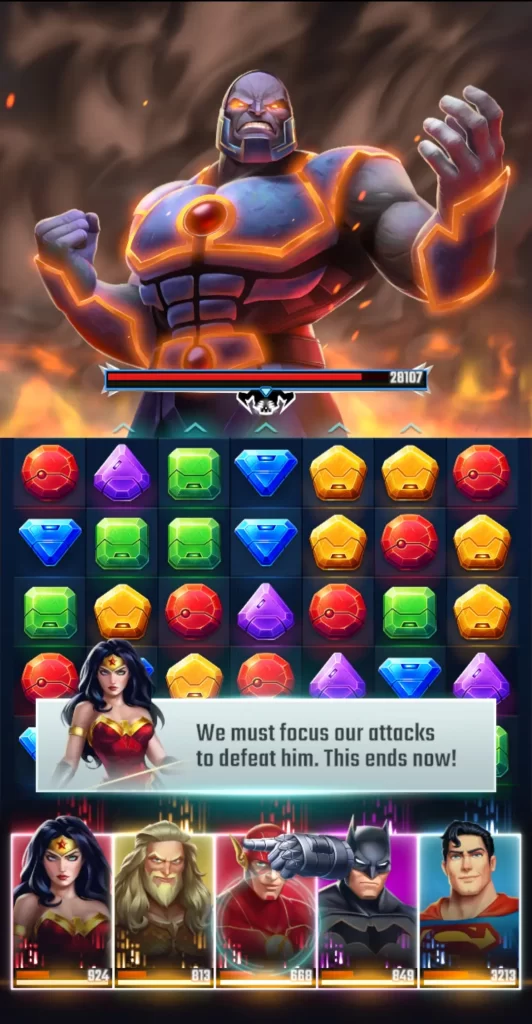
Though its gameplay mechanics can get a little more intricate when individual character stats are taken into account, at the core of DC Heroes & Villains: Match 3 is as its name suggests—a match-3 game. For those unfamiliar with how match-3s work, this type of game is basically played by matching at least 3 tiles of the same color on a play board.
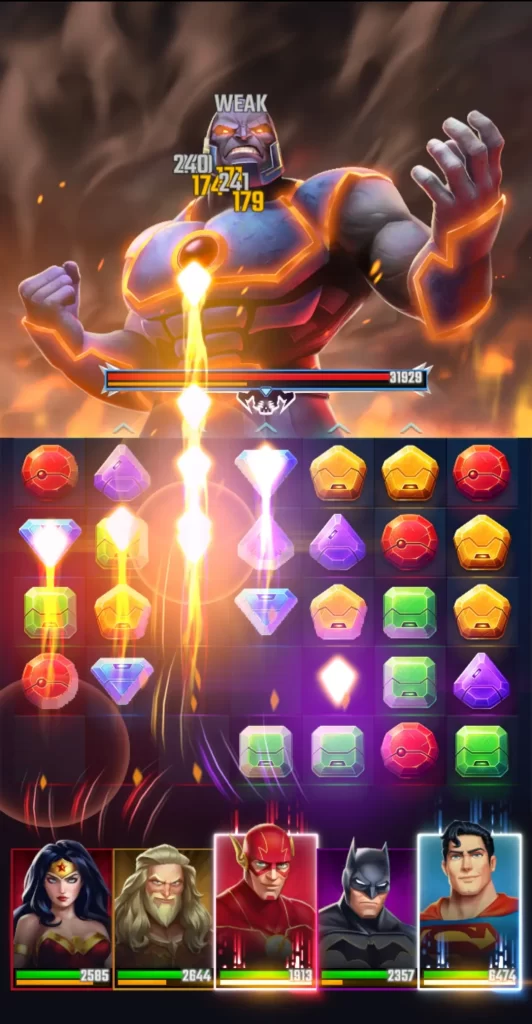
In DC Heroes & Villains: Match 3, making matches enables your team to attack enemies, wherein the strength of attacks will be based on the color of the match. We’ll discuss the color wheel mechanic of the game in more depth when we later dive into strategies for efficient team assembly.
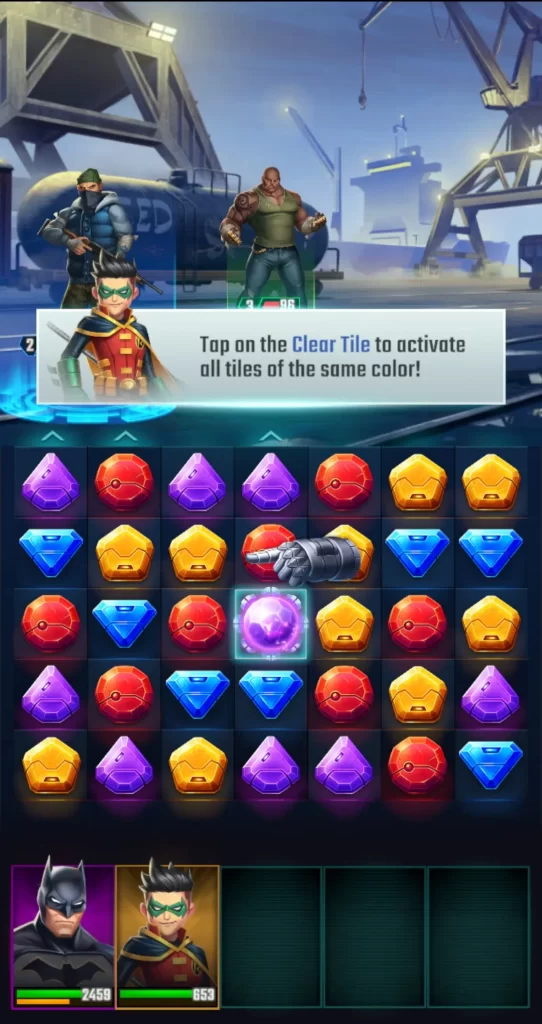
On the other hand, matching more than 3 tiles of the same color will result in special tiles that can be activated simply by clicking on those tiles. Special tiles have varying effects depending on the way they’re matched. For instance, if you match 4 tiles in a horizontal line, you’ll get a special tile that, when activated, clears several tiles in the same row as that special tile.
Tiles that have been cleared regardless of their color will be equivalent to an attack. Matching 5 tiles in either a horizontal or vertical line will get you a special tile that, when activated, clears all tiles of the same color, which will also result in a stronger attack.
Further to making matches and attacks, the direction and placement of attacks will depend on where you’ve made matches on the playboard. For instance, if you made a match on the right side of the board, the attack will hit an enemy directly across that location. If there’s no enemy in that location, the attack will not hit anything.
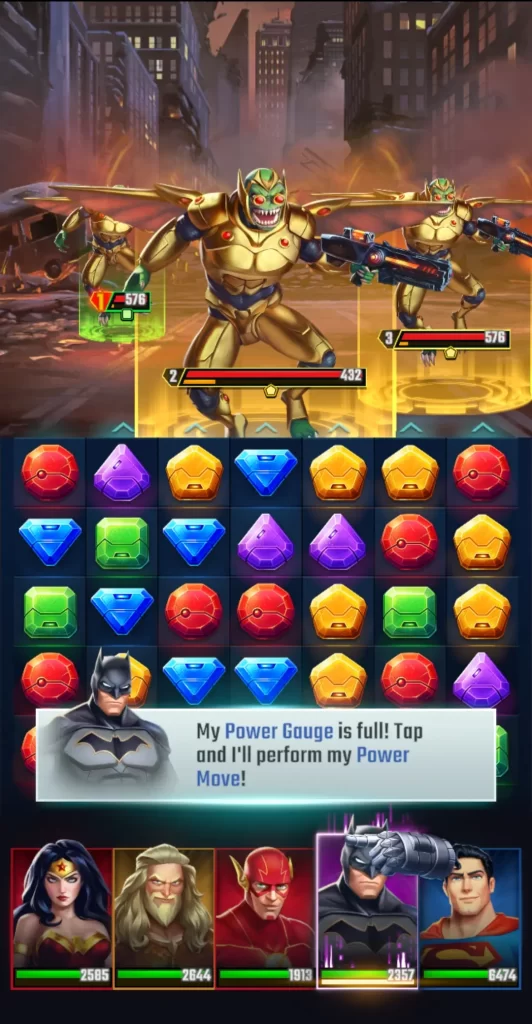
Making matches of a particular color also charges up the Power Gauge of the characters in your team. For every mission, you can deploy a team composed of a maximum of 5 characters from any alignment, whether they’re heroes, villains, or neutral characters. Each character is assigned a particular color by default. If you make enough matches of a specific color, the Power Gauge of characters belonging to the same color will be filled. The Power Gauge is the yellow bar below a character’s health bar, which is the green bar on their icon.
With the Power Gauge filled, a character can use their Power Move, which is essentially a character’s ultimate skill. Each Power Move has unique effects depending on a character’s stats and attributes (more on these later). Some characters’ Power Moves may focus their attack on one enemy or affect all enemies present during a round. After using their Power Move, some characters may also heal or buff allies after performing an attack.
Speaking of rounds, missions are typically divided into multiple rounds, wherein you have to defeat a set number of enemies. However, you won’t fight all these enemies at once. Rather, around two or three enemies will be present on screen, and you will need to defeat one or two before more enemies will show up, usually at the far end of the screen. Enemies will continue to be added on screen until such time you’ve defeated the total number indicated for that mission.
In the last round, you’ll usually have to contend with a single boss enemy or more. Bosses can be minor or major characters. Take note that defeating bosses who are major characters won’t mean you’ll be able to acquire them for your roster. Obtaining characters can only happen when you open capsules in the Recruitment section of the game (more on this later).
To sum up the most basic gameplay mechanic of DC Heroes & Villains: Match 3:
- You enter missions and deploy a maximum of 5 characters, each of whom have varying stats, skills, attributes, alignments, and colors.
- Missions will be divided into rounds wherein you contend with two or three enemies at a time until you reach the boss.
- Attacking entails matching 3 or more tiles of the same color. The direction of the attack will depend on where tiles have been matched on the playboard.
- Matching more than 3 tiles will get you special tiles, each of which have different effects and can result in stronger attacks.
- If you make enough matches of the same color, this will fill up the Power Gauge of a character bearing that specific color, thus allowing them to use their Power Move. Power Moves are a character’s ultimate skill, which may debuff enemies and buff allies depending on what that skill can do.
As simple as these may sound, there are definitely more features of the game that you need to take into account if you want to significantly progress in level, earn a ton of rewards, and collect more characters to be included in your roster.
And that’s what our beginner’s guide for DC Heroes & Villains: Match 3 is all about! With our tips and tricks below, you’ll be able to assemble a mighty team, strengthen your characters, earn and spend rewards wisely, understand how battles work, and emerge victorious against any foe that you come across.
Let’s get right into it!
Go on the Campaign Trail
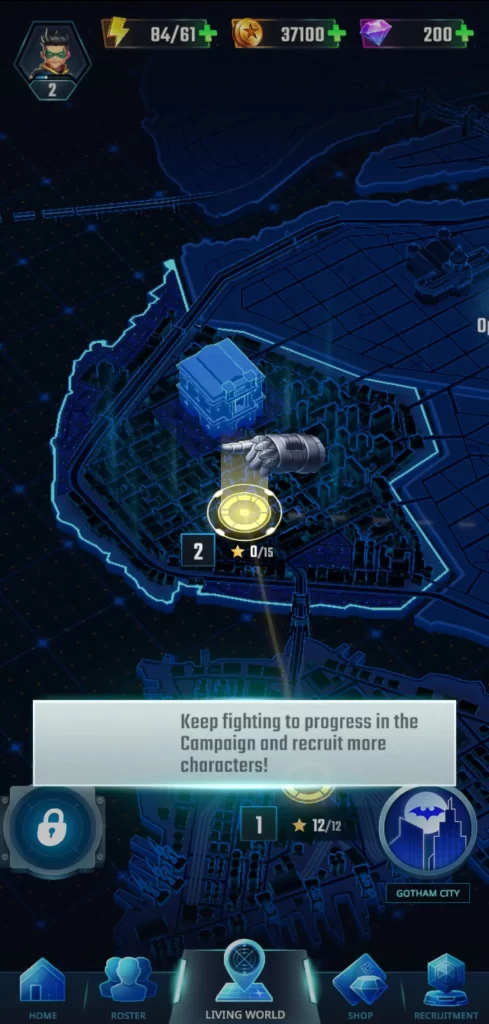
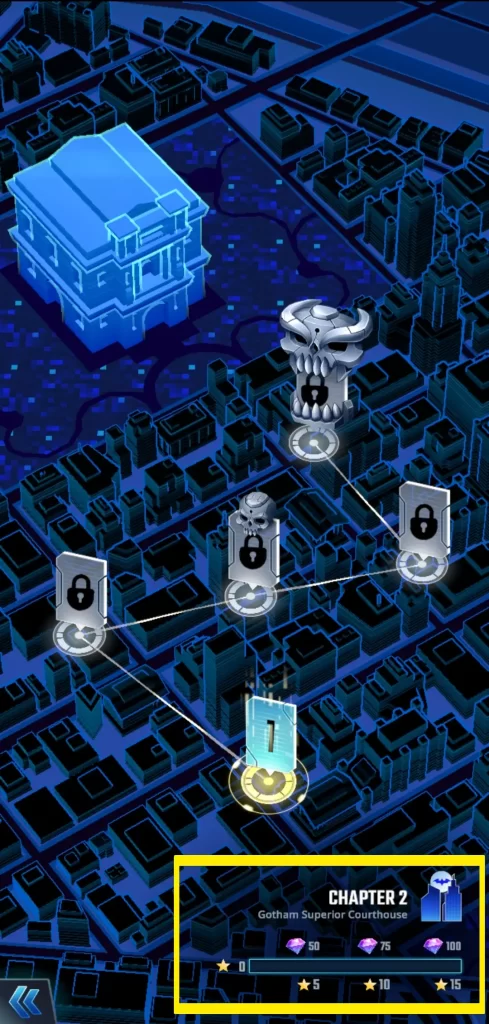
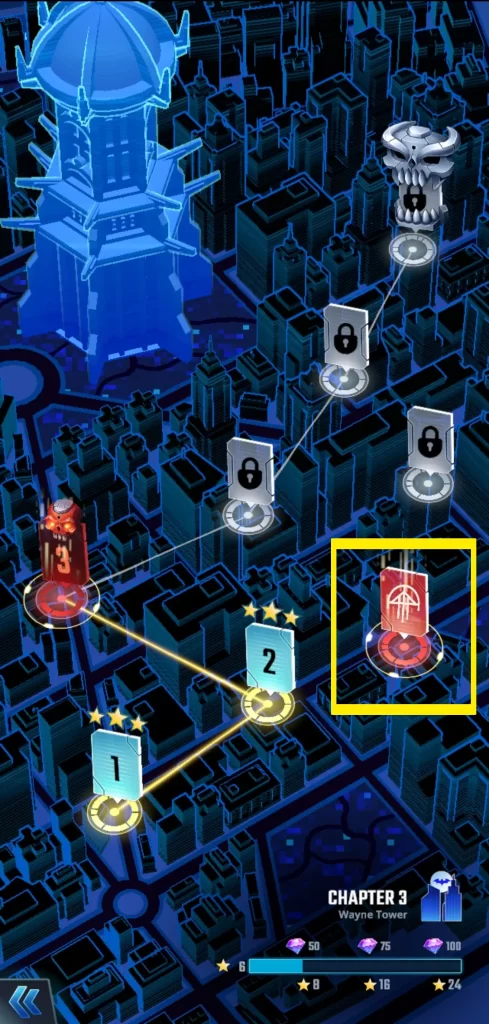
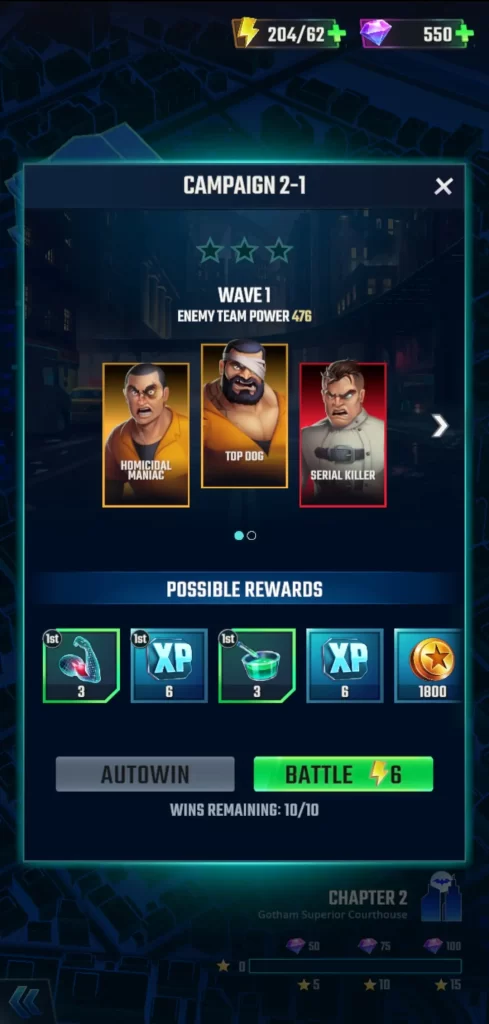
When it comes to progressing not only through levels but also the storyline, the main campaign trail is what you ought to follow and diligently complete. You begin the campaign trail in Gotham City, which is divided into several sectors. Each sector of the city is considered as a chapter of the storyline and features a varying number of missions. For example, the sector for Gotham Superior Courthouse, which is Chapter 2 of the campaign trail, has 5 missions. Meanwhile, Wayne Tower, which is Chapter 3, has 6 missions.
Successfully completing each mission will require you to assemble a team of no more than 5 characters and defeat all the enemies in that particular mission.
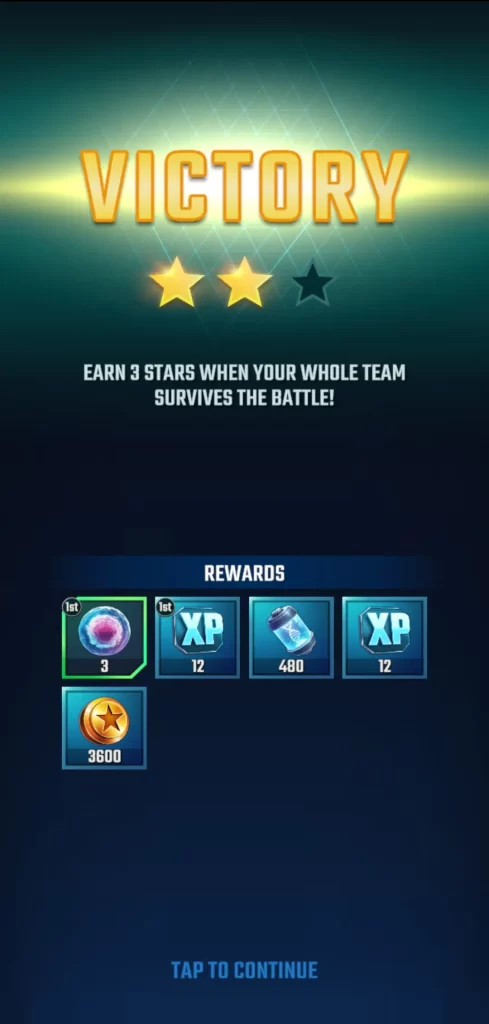
If none of your characters die, you will complete the mission with a 3-star rating. Otherwise, you can get either a 2-star or 1-star rating depending on how many characters survive at the end of the mission. You may replay the mission as many times as you want until you get a 3-star rating.
The number of stars you collect for each sector will determine how many gems you’ll be able to earn as additional rewards. For instance, in Chapter 2, if you manage to get 5, 10, and 15 stars, you’ll be able to receive bonus rewards in the form of 50, 75, and 100 gems respectively. In Chapter 3, getting 8, 16, and 24 stars will earn you 50, 75, and 100 gems respectively.
As you can see, the more you play, the higher the star requirement to obtain gems. Nevertheless, make it a point to complete each mission with a 3-star rating to get bonus gem rewards as these will come in handy later when you want to make important purchases in the shop.
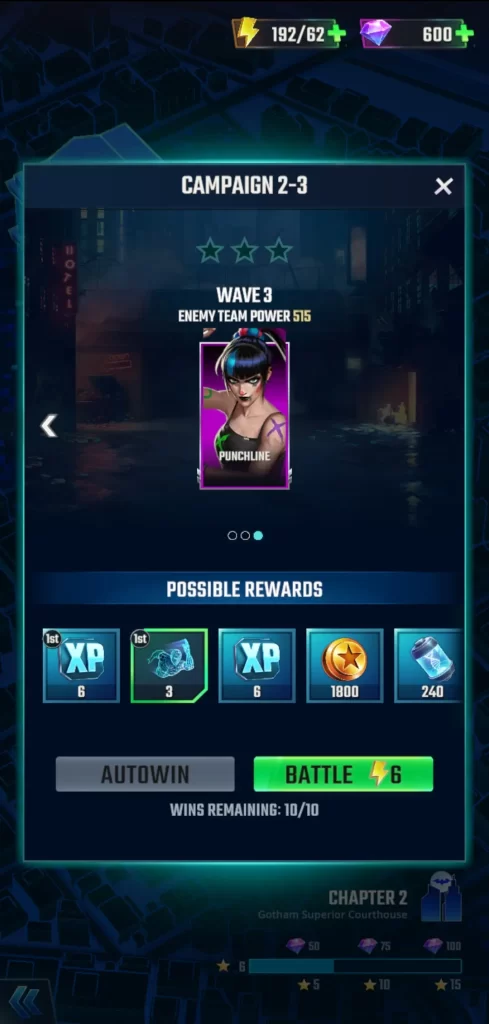
One other important thing to remember about going on missions is that each time you enter one, you will have to spend Campaign Energy. Think of this as something similar to an entrance fee. Early missions will require you to spend a minimum of 6 units of Campaign Energy. The more you progress through missions, the more Campaign Energy is required for you to engage in battle. That said, if you’re ever going to replay a mission to achieve a 3-star rating, take note of how much Campaign Energy you have.
Main campaign missions offer a ton of rewards such as experience points, Metatopes, credits, Capsule Keys, and other items that you will need to progress and strengthen your team. We’ll get into these in succeeding sections of the guide.
Aside from the main campaign trail, you’ll also gain access to side quests if a particular sector features them. Side quests can be found next to main missions. The total number of stars you can collect from a specific sector includes the stars you can gain from completing a side quest.
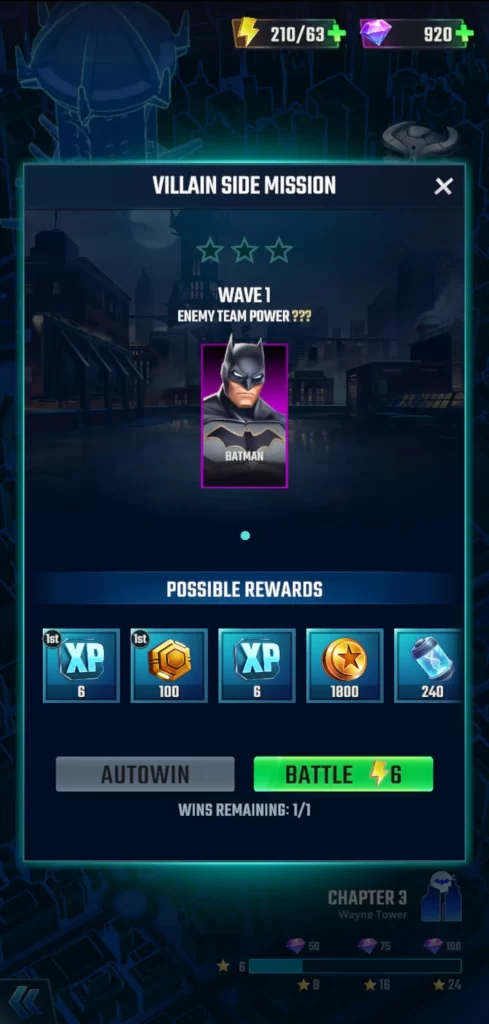
The challenge specifically with side quests is that they may impose certain restrictions that will limit your team composition. For instance, a side quest you’ll encounter is one where you have to fight Batman with a team composed only of characters who have either a villain or neutral alignment.
The bigger challenge here is that Batman’s team power isn’t disclosed in the mission preview, but when you fight him, you’ll discover that his team power is 10,000 points, which is a huge amount when pitted against a beginner team. The good news is that you can go back to this side quest later when you’ve managed to obtain more characters or leveled up the ones in your roster.
Fortunately, other side quests will not be as difficult to overcome. Some feature enemies that are easier to defeat and some will limit your team composition to heroes or neutral characters only. Similar to main campaign missions, side quests also offer significant rewards for level progression and character leveling.
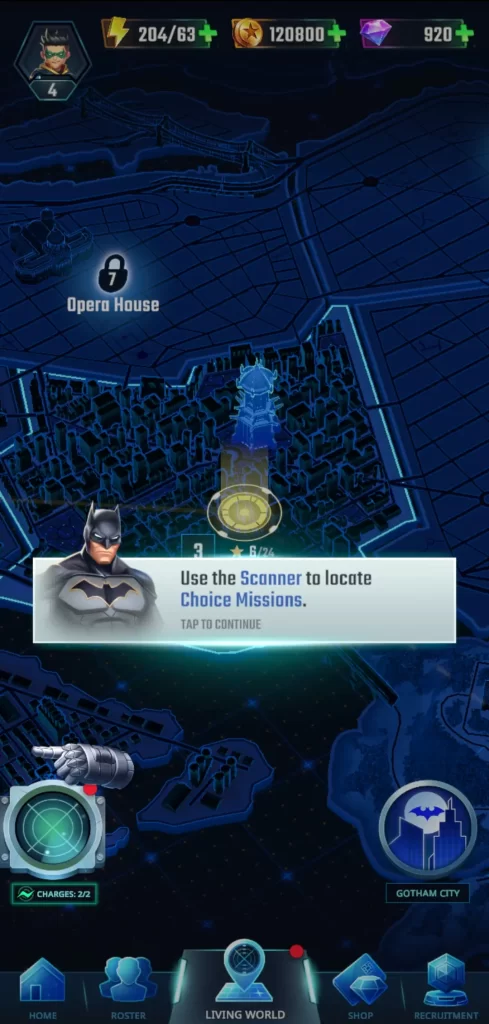
From time to time, you’ll also be able to use the Scanner to access Choice Missions. The Scanner has 2 charges at a time and will refresh after a few hours.
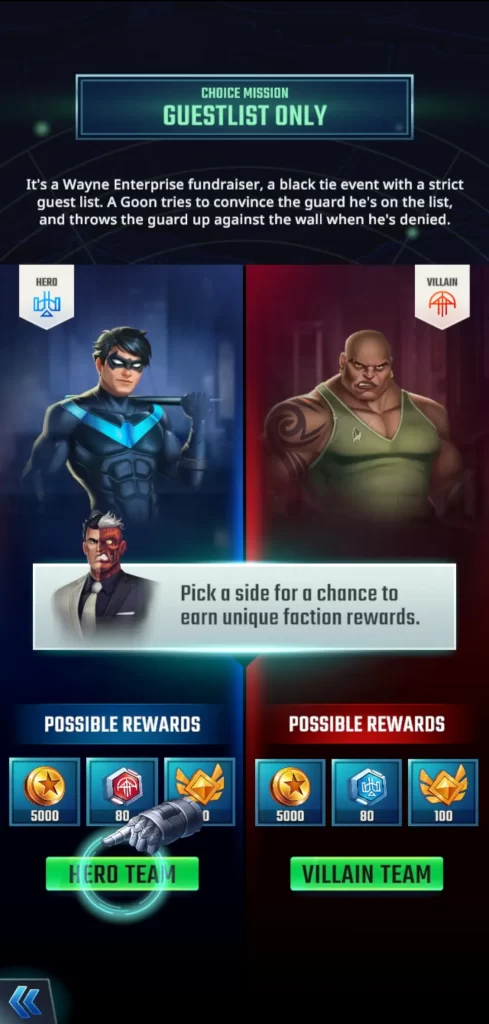
Choice Missions are similar to side quests, though they have different conditions for battle. Usually, engaging in a Choice Mission will require you to pick either the hero side or villain side. If you pick the hero side, you will naturally have to fight using only hero or neutral characters, while picking the villain side will only allow you to fight using villain or neutral characters.
A significant determining factor for picking a side are the rewards: if you choose to fight for the hero side, you’ll get rewarded with Villain Capsule Keys, which are used to obtain characters with a villain alignment.
On the other hand, if you choose to fight for the villain side, you will get rewarded with Hero Capsule Keys, which are used to obtain hero characters. Choosing to fight for either side will also get you other rewards, such as credits and Battle Pass points.
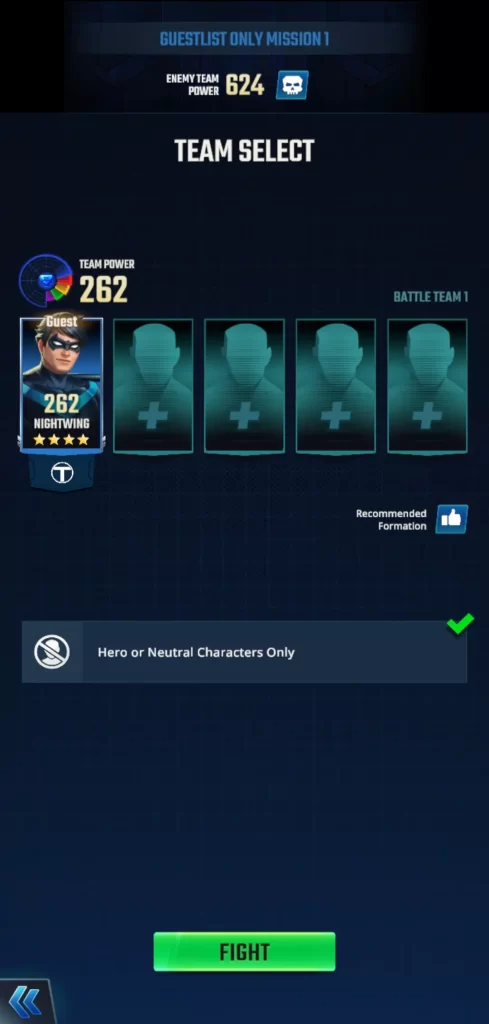
Depending on the conditions of the Choice Mission, you might get the chance to use a character that has yet to be included in your roster. For instance, in the Choice Mission pictured below, picking the hero side will let you use Nightwing as a guest character. As an Epic-tier character, not too many beginners will get Nightwing unless they’re incredibly lucky.
Much like completing main missions and side quests, going on Choice Missions is worth the effort primarily because of the Capsule Keys you can acquire when successful. Furthermore, Choice Missions won’t require you to spend Campaign Energy so you can fight as long as your Scanner has charges.
On the whole, the main campaign trail should be your priority but don’t scoff at side quests and Choice Missions either. Do your best to succeed in each mission so you can get all the rewards that are up for grabs!
Recruit Characters
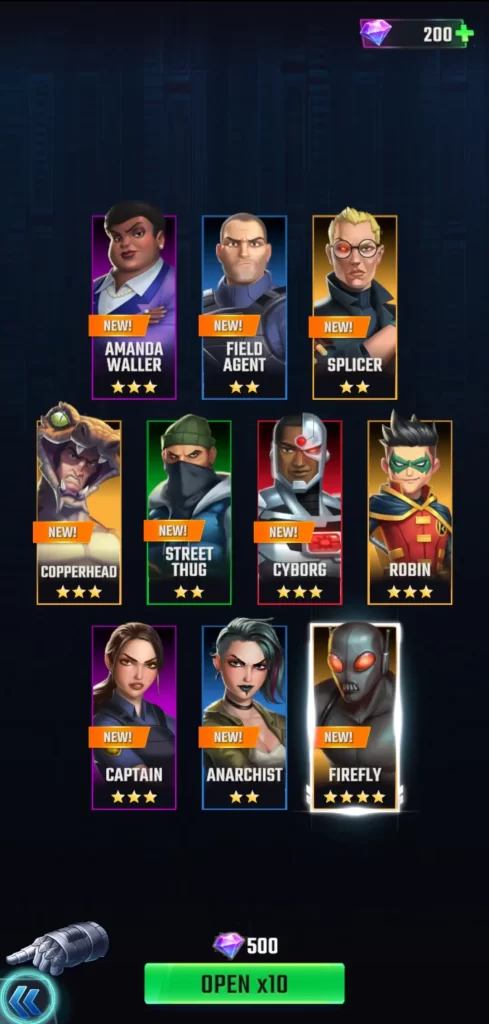
Before we get into assembling your dream team, we need to recruit members first! In the lower right-hand corner of the game’s lobby screen, you can find the Recruitment tab, which is primarily where you’ll be able to pull for more characters. Capsule Keys are used to pull for characters, and there are different kinds depending on the character you want to pull for. If you don’t have Capsule Keys to spend, you may use gems, but it will be expensive.
You can pull for a single character or 10 characters at once. Of course, pulling for 10 characters will require more Capsule Keys compared to when you only pull for an individual character. The likelihood of obtaining a certain character will also depend on their rarity tier. The 4 rarity tiers available in the game are:
- Legendary (5 stars)
- Epic (4 stars)
- Rare (3 stars)
- Uncommon (2 stars)
The higher the rarity tier, the harder it is to pull for a character. But when you do get lucky and pull for a character with a high rarity tier, you’ll be rewarded with better starting stats and can only go up from there as you level up that character.
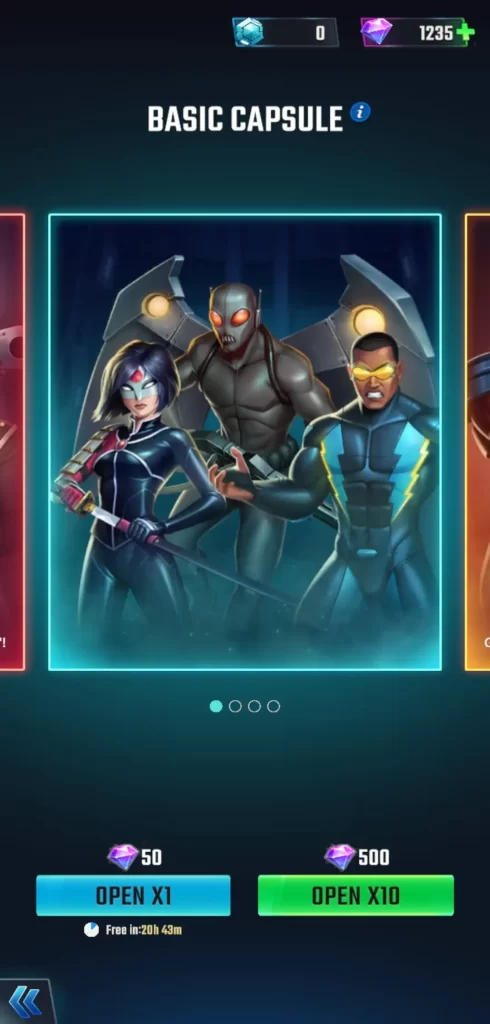
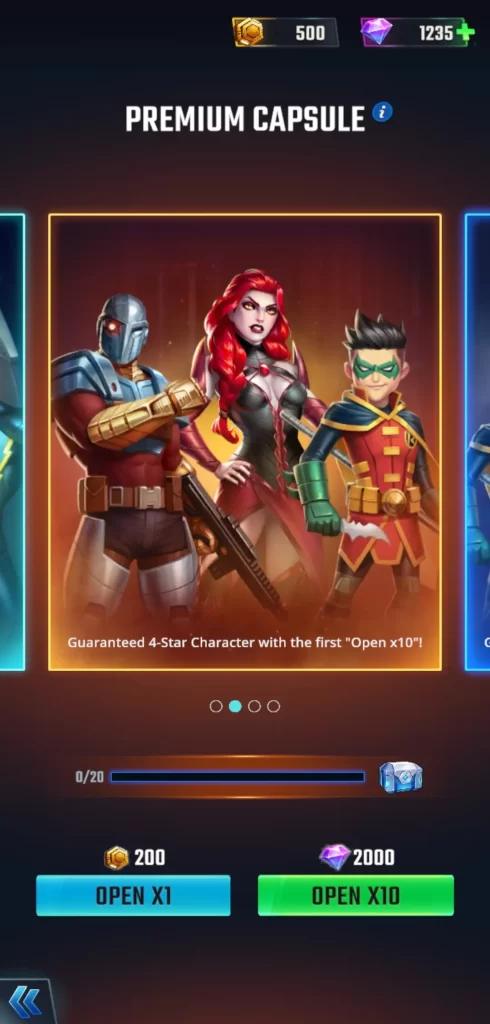
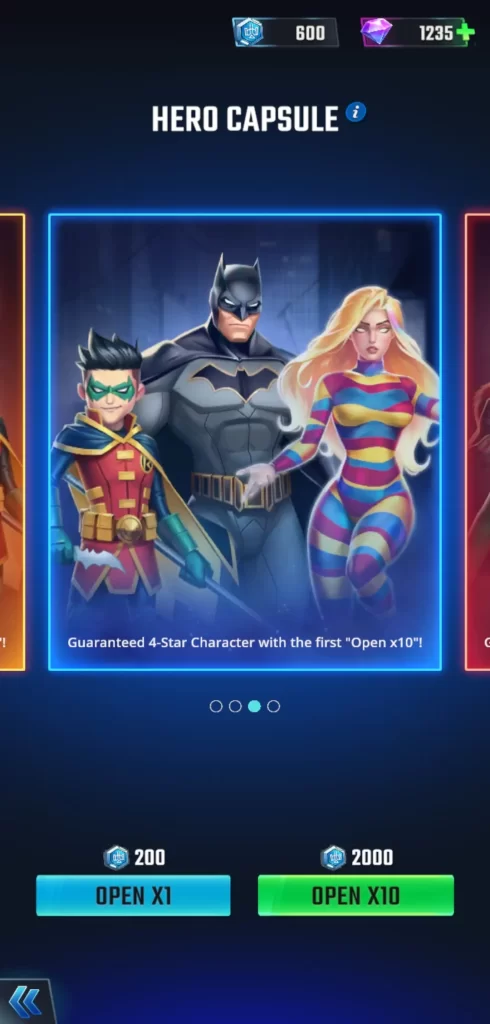
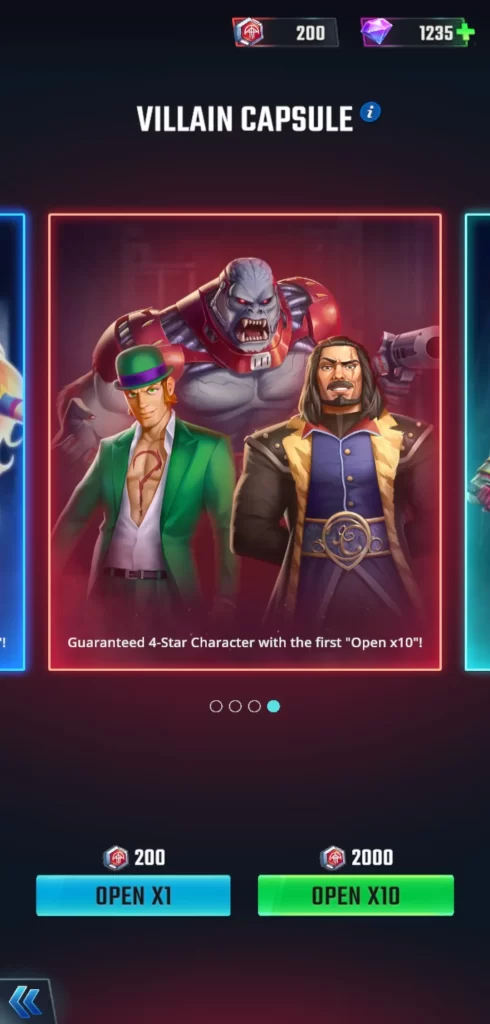
There are 4 ways you can pull for characters, each one requiring a specific Capsule Key. These include the following:
- Basic Capsule: This requires the use of Basic Capsule Keys to pull for characters of any alignment. You can’t get a Legendary character from this pool, but you do have a 6% chance to get an Epic character, a 40% chance to get a Rare character; and a 54% chance of getting an Uncommon character.
- Premium Capsule: This requires the use of Premium Capsule Keys to pull for characters of any alignment. From this pool, you have a 1% chance of getting a Legendary character; a 15% chance of getting an Epic character; a 40% chance of getting a Rare character; and a 44% chance of getting an Uncommon character.
- Hero Capsule: This requires the use of Hero Capsule Keys to pull for characters specifically of a hero alignment. Chances of pulling for hero characters in this pool are the same as those indicated in the Premium Capsule pool.
- Villain Capsule: This requires the use of Villain Capsule Keys to pull for characters limited only to the villain alignment. Chances of pulling for villain characters in this pool are the same as those indicated in the Premium Capsule pool.
Although pulling for characters in general essentially means praying to the gacha gods for good luck, regularly recruiting does have its benefits even if you can’t always get high-rarity characters. For one thing, getting duplicates of a character you already have can be converted into Character Credits or Elite Character Credits (more on these later). Additionally, a duplicate is required to level up a character’s Passive Move, which will result in better stats and strengthened team composition.
Furthermore, getting new characters regardless of their rarity tier or alignment will give you a broader pool to choose from, especially when you’re going on missions whose conditions limit you to use only certain characters. In some cases, you may need to have more than one character of a specific color to up the odds against enemy teams. With more characters in your roster, you’ll be able to fill in those requirements better and have a higher chance of successfully completing missions.
We don’t generally recommend using gems as an alternative to Capsule Keys when pulling for characters in any pool, though you may do so if you have a lot to spare. Typically, though, using Capsule Keys are the most affordable way to pull for characters so be sure to collect as many keys as possible and roll to increase allies in your roster.
Assembling Your Team
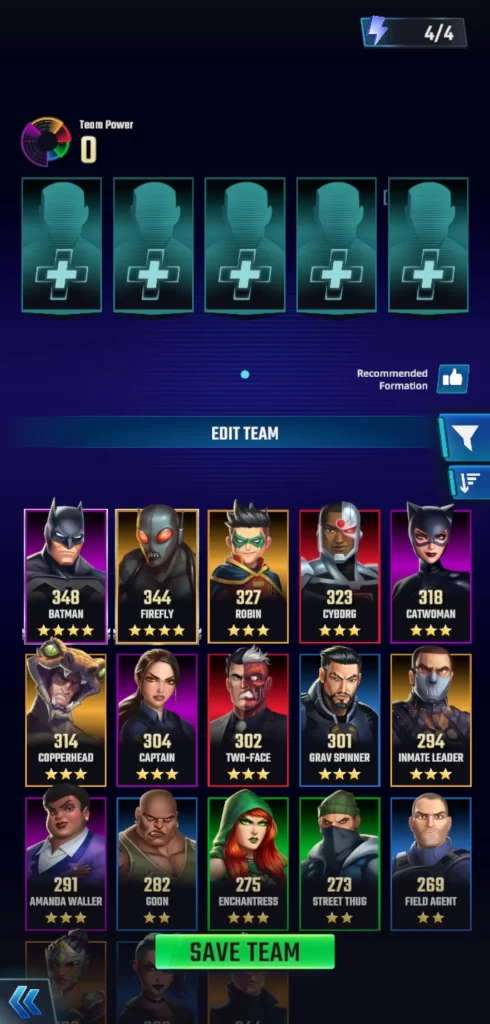
While pulling for characters is an important aspect of building your team, knowing how to assemble the members you already have will ultimately spell victory or defeat for your crew. The foundations of proper team composition hinge upon knowing how battles generally work, what skills and attributes characters have, how factions and alignment can affect team stats, how Passive and Power Moves can turn the tide of a fight, the importance of training and equipping gear, and whether or not you should defer to default team recommendations or manually select team members for a fight.
As mentioned in the beginning of this guide, you can only enter missions with a maximum of 5 team members. Each mission may have different conditions, particularly side missions or Choice Missions. Sometimes, you may even have a guest character as a default member of your team. Regardless, it’s important to understand one of the key aspects of fighting and team composition by being familiar with the color wheel mechanic of the game.
Understanding the Color Wheel
In DC Heroes & Villains: Match 3, characters are assigned 5 different colors that each affect the strength and weakness of an attack based on a color wheel mechanic. The 5 colors assigned to characters include the following:
- Blue
- Green
- Red
- Yellow
- Purple
Below is a summarized table indicating which characters are assigned which colors:
| Hero | Villain | Neutral | |
| Blue | Black Lightning Blue Beetle Field Agent Nightwing Nubia Superman | Anarchist Fin Carver Goon Grav Spinner Livewire Shell Breaker Vandal Savage | |
| Green | Beast Boy Martian Manhunter Sonar Master Wave Shaper | Cheshire Lex Luthor Poison Ivy Street Thug The Riddler | Enchantress Killer Croc |
| Red | Artemis Grace Cyborg Halo Katana Shield Bearer The Flash Wonder Woman | Circe Gorilla Grodd Pulse Runner Serial Killer Trapper Two-Face Ultra-Humanite | Deadshot Harley Quinn |
| Yellow | Archer Aquaman Robin Royal Guard Warrior | Cheetah Copperhead Disintegrator Firefly Homicidal Maniac Inmate Leader Splicer Top Dog | |
| Purple | Batman Captain Catwoman Donna Troy Huntress Raven Riot Control | Parasite Penguin The Joker | Amanda Waller |
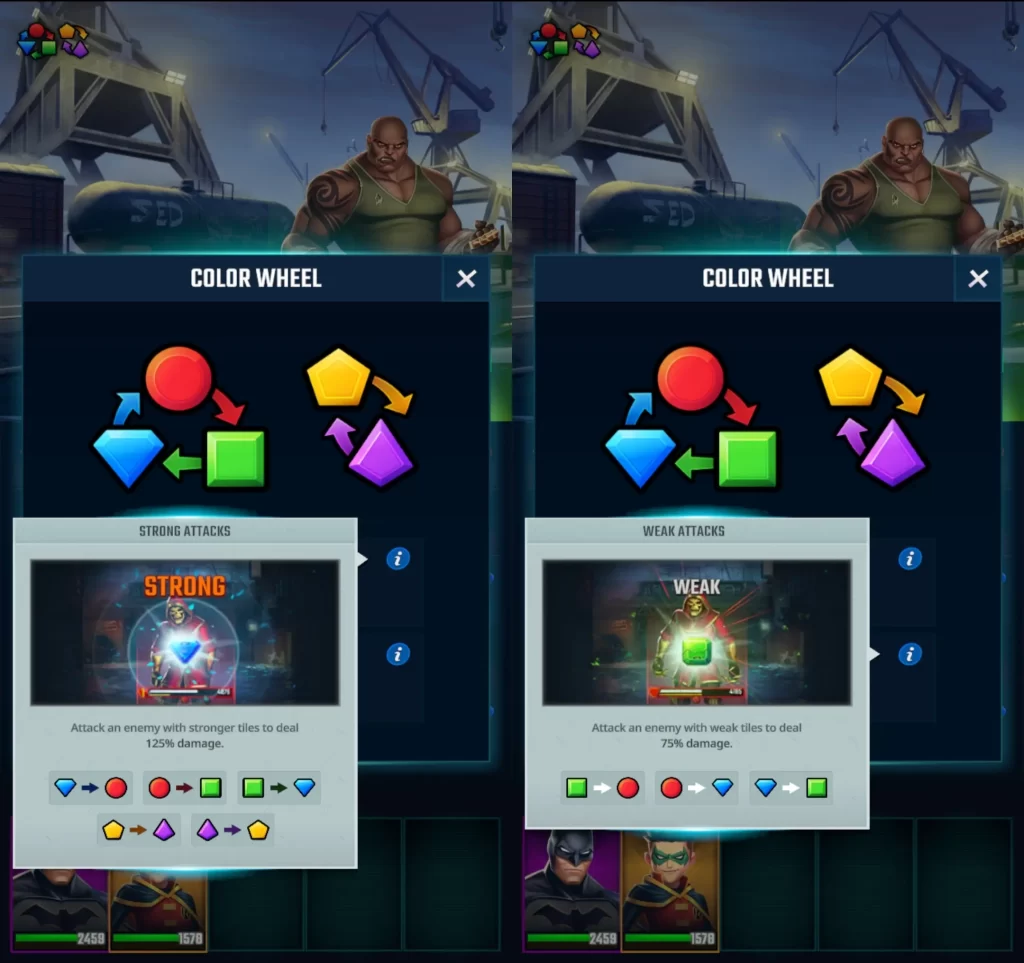
As you can see from the screenshot below, this is how the color wheel mechanic works:
Strong attacks cause 125% damage while weak attacks only cause 75% damage. Though red, blue, and green characters directly affect each other, allies bearing these colors can still damage purple and yellow enemies and vice versa, though attacks will be classified as neither weak nor strong.
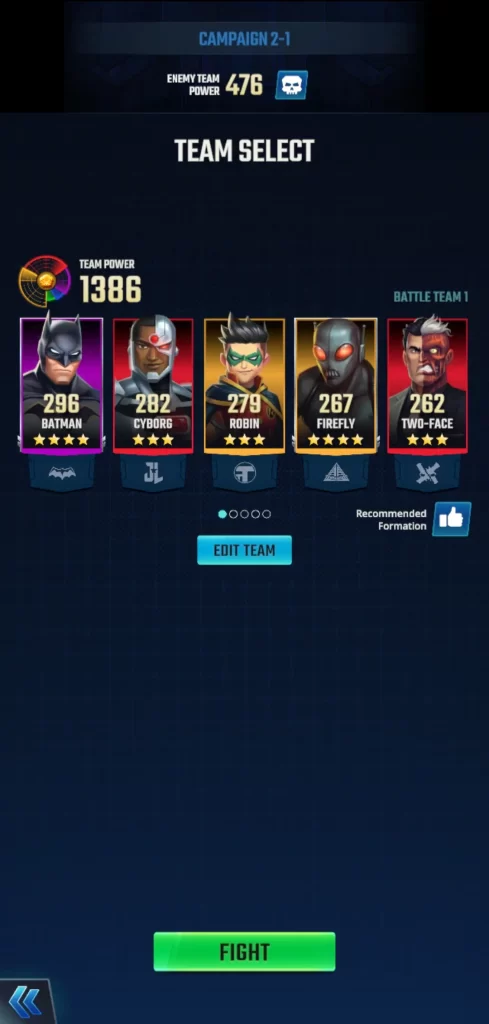
Before entering a mission, you’ll be able to view the enemy’s lineup, which will help you select the appropriate members for your team. In the example below, we can see the first wave of enemies, which are composed of 2 yellow characters and 1 red character.
This means that your team should have at least 1 purple character and 1 blue character. If there are no blue characters from the enemy team, consider not including a green ally as they would have a disadvantage against red enemies.
However, keep in mind that not including a green character on your team lineup will mean that whenever you match green tiles on the board, they won’t be as effective in attacking enemies since no green character is present on your team. Green tiles will still be counted on the board and you may occasionally have to make those matches just to free the board up and replace green tiles with colors aligned with your team composition.
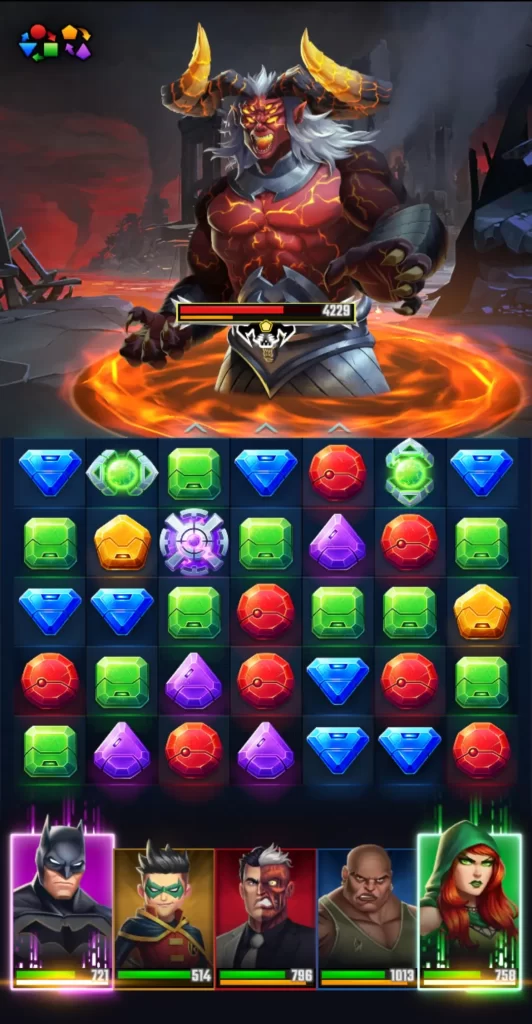
Further to colors and attack effects, where you match tiles on the board will also play a role in how effective attacks can be. When entering a fight, your screen is split between the tile board on the lower half and the enemy waves you need to fight on the top half. Enemies can be positioned on the left, center, and right of the screen.
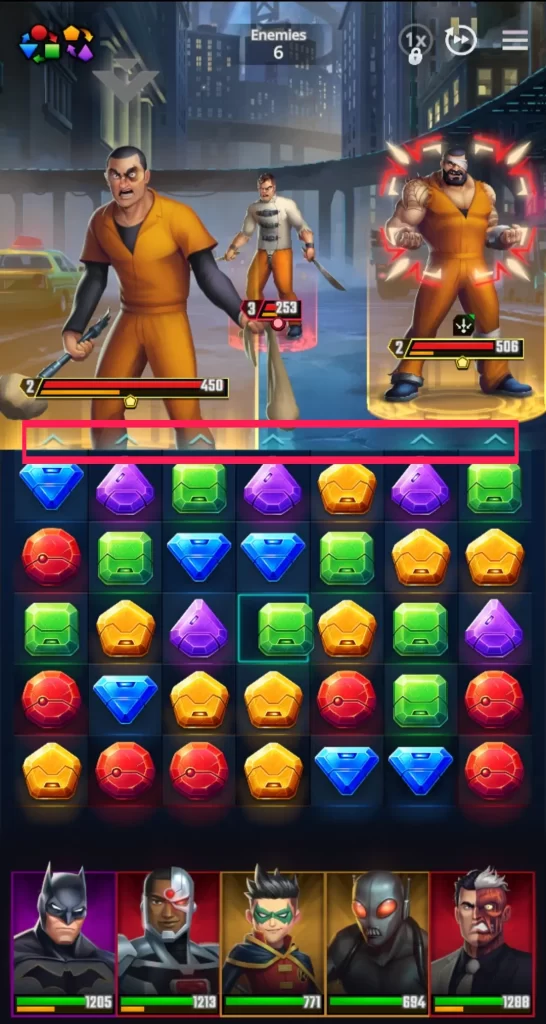
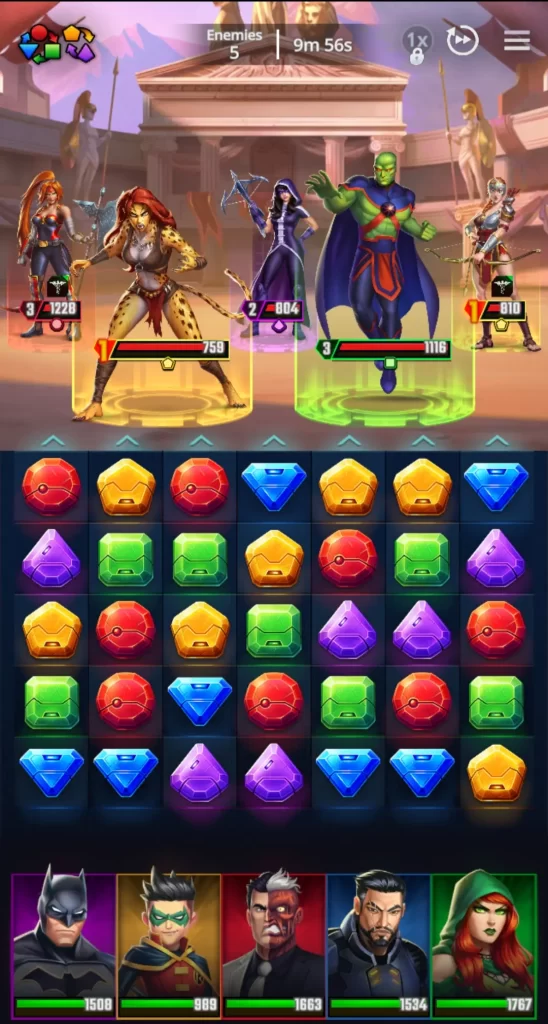
Some enemies will be farther away while others will be closer. Where you make matches on the board will determine which enemy will be hit with an attack. For instance, if you make a match anywhere on the first 3 columns on the left side of the board, the enemy directly across will be hit completely. In the screenshot below, you can see that there are faint blue arrows at the top of the tile board, which indicate where you should match tiles to successfully hit enemies.
As you can see, the third column from the right doesn’t have a faint blue arrow above it, which means any tiles matched here will not hit any enemies.
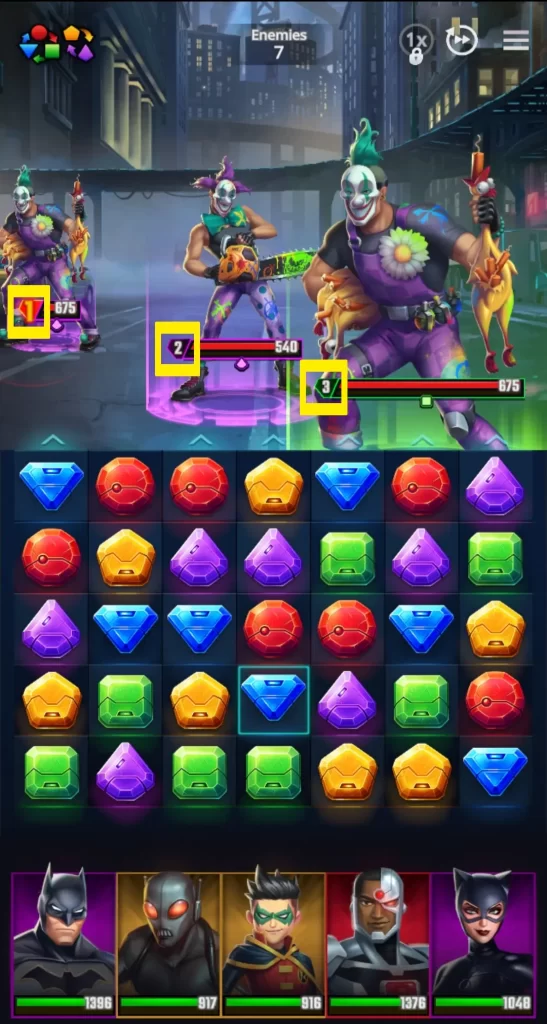
As a side note, you’ll notice that there are numbers beside the enemy’s health bar. This number indicates how many turns it will take before an enemy attacks. Take note of which enemies are about to attack so you can either debuff them or eliminate them completely to mitigate damage to your team. Similar to your characters, enemies also have Power Gauges under their health bars so prioritize attacking enemies whose Power Gauges are full and are next in line to attack.
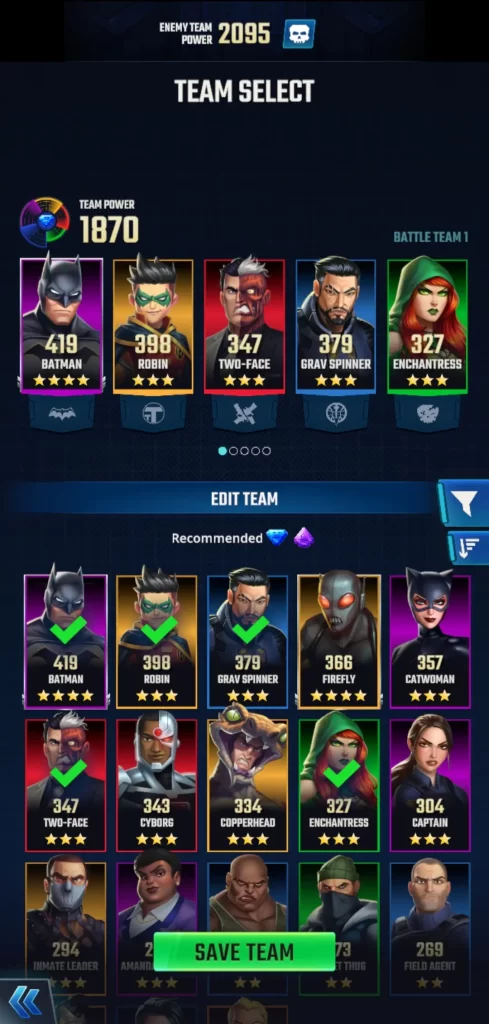
When it comes to forming your team for a specific mission, the game gives you the option to defer to a default recommendation wherein it automatically picks the best characters to include in your team. But while this is a nifty feature, it often prioritizes the character’s color and individual power when there are other factors that can affect the effectiveness of your team composition, such as the faction to which characters belong.
Faction
We’ve mentioned previously that characters can either be classified as heroes, villains, or neutral. But aside from their alignment, characters also belong to different factions or groups. For example, Superman, Wonder Woman, Cyborg, Aquaman, Martian Manhunter, and The Flash are all part of the Justice League faction.
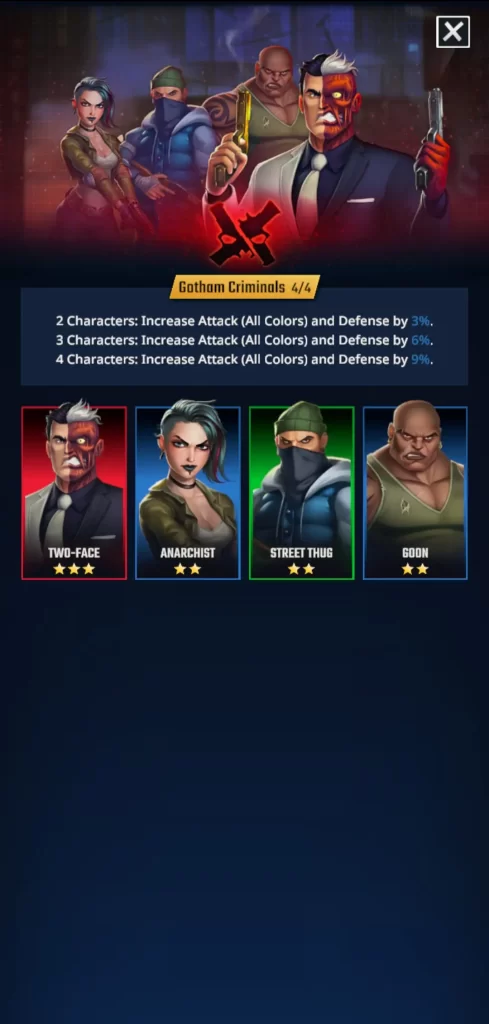
On the other hand, the faction Arkham’s Most Wanted consists of Poison Ivy, Firefly, The Joker, The Riddler, and Penguin. If you deploy a team that has characters of the same faction, you get a bonus, specifically an increase in attack for all colors, as well as defense across the team. Here’s how this bonus works depending on the number of characters of the same faction selected for your team:
- 2 characters = +3%
- 3 characters = +6%
- 4 characters = +9%
- 5 characters = +12%
Basically, if you deploy a team composed of, say, 5 Justice League characters, you get an attack and defense bonus of 12% for that mission.
Take note that not all factions have 5 or more characters as part of that group so you might not be able to get the maximum bonus if you pick characters from those factions alone. Some factions only have 2 characters at most (like the Titans faction), and so far, the Batman Family faction only has 1 character, which is Batman.
However, specifically for Batman, if you include Robin or Catwoman on the same team, you can still receive a 6% attack and defense increase as they’re somehow considered part of Batman’s faction even if they belong to separate factions themselves.
Below is a table that summarizes the alignment and faction of all the characters available thus far in DC Heroes & Villains: Match 3:
| Alignment | Faction | Characters |
| Hero | Amazons | Nubia Archer Artemis Grace Shield Bearer Warrior |
| Atlanteans | Royal Guard Wave Shaper Sonar Master |
|
| Batman Family | Batman | |
| Birds of Prey | Catwoman Huntress |
|
| Gotham City Police Department | Field Agent Captain Riot Control |
|
| Justice League | Cyborg Wonder Woman Aquaman Martian Manhunter The Flash Superman |
|
| Outsiders | Black Lightning Katana Halo |
|
| Teen Titans | Robin Raven Blue Beetle Beast Boy |
|
| Titans | Donna Troy Nightwing |
|
| Villain | Arkham’s Most Wanted | Poison Ivy Firefly The Riddler The Joker Penguin |
| Crazed Inmates | Serial Killer Homicidal Maniac Top Dog Inmate Leader |
|
| Gotham Criminals | Two-Face Anarchist Street Thug Goon |
|
| Intergang | Splicer Disintegrator Grav Spinner Pulse Runner |
|
| Legion of Doom | Lex Luthor Parasite Cheetah Gorilla Grodd Circe |
|
| Secret Society of Super Villains | Copperhead Cheshire Ultra-Humanite Livewire Vandal Savage |
|
| Xebel | Fin Carver Shell Breaker Trapper |
|
| Neutral | Suicide Squad | Deadshot Harley Quinn Enchantress Killer Croc Amanda Waller |
That said, aside from the assigned colors of characters, consider picking team members that belong to the same faction to get a boost in attack and defense. If they’re all in your roster, consider choosing characters from the same faction for all 5 slots. Otherwise, you can mix and match factions by deploying 2 members each from 2 different factions and leaving the last slot for a character whose color, skills, or attributes will complement the rest of your team.
Attributes
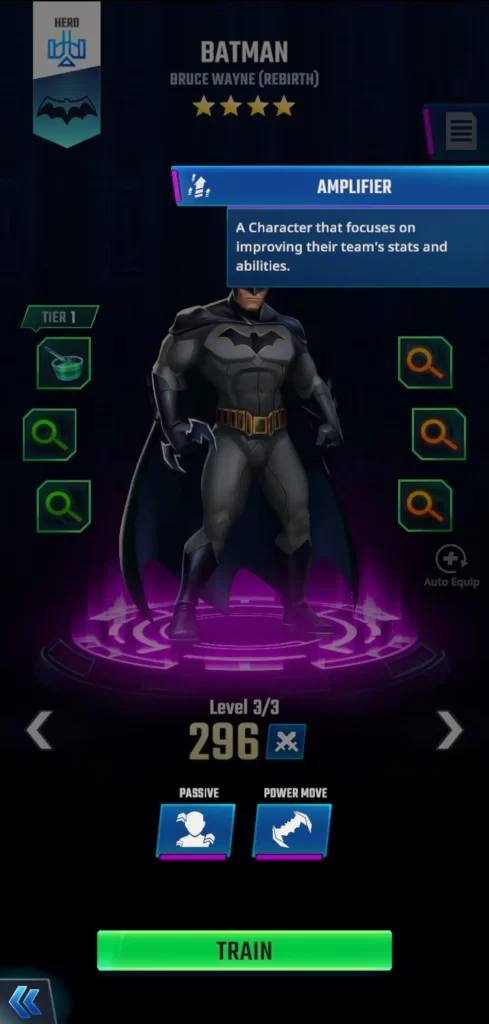
So far, we’ve discussed how the colors and factions of characters can significantly affect how you select team members and how they function in battle. Add to this their attributes, which are stats that you need to take into consideration as well. Attributes are found on the upper right side of a character’s profile and each one is represented by a different icon. The picture above shows Batman’s attribute, wherein he’s classified as an Amplifier.
Basically, each character has their own attribute aligned with their individual skills. Character skills are unique and come in the form of Passive Moves and Power Moves, which we’ll delve more into in the next section. In the meantime, attributes generally classify a character’s skills and tell you what their abilities focus on. There are 5 attributes in the game, namely:
- Amplifier: A character that focuses on improving their team’s stats and abilities.
- Disruptor: A character that focuses on hindering the opposing team’s stats and abilities.
- Sentinel: A character that is tougher than average and focuses on protecting others.
- Supporter: A character that focuses on keeping their allies alive, either by healing them or providing barriers.
- Warrior: A character that focuses on dealing high damage to enemies.
Here’s a table summarizing which characters possess which attributes:
| Blue | Green | Red | Yellow | Purple | |
| Amplifier | Grav Spinner Nightwing | Lex Luthor | Artemis Grace The Flash Trapper Two-Face | Crazed Inmate Leader Warrior | Amanda Waller Batman Captain |
| Disruptor | Anarchist Livewire | Sonar Master The Riddler | Halo Harley Quinn Pulse Runner | Aquaman Archer Copperhead Homicidal Maniac | Catwoman Raven The Joker |
| Sentinel | Gotham Criminal Nubia Shell Breaker Superman Vandal Savage | Beast Boy Killer Croc | Cyborg Gorilla Grodd Shield Bearer | Disintegrator Top Dog | Parasite Penguin Riot Control |
| Supporter | Black Lightning Blue Beetle | Enchantress Martian Manhunter Poison Ivy Wave Shaper | Circe Ultra-Humanite | Splicer | |
| Warrior | Field Agent Ultra-Humanite | Cheshire Street Thug | Deadshot Katana Serial Killer Wonder Woman | Cheetah Firefly Robin Royal Guard | Donna Troy Huntress |
Ideally, a well-rounded team will contain characters that each represent these 5 attributes, though this can be difficult to achieve if you also need to consider a character’s color and faction. As you can also see from the table above, some factions have characters that possess either the same color or the same attribute. This may work to your advantage if you want your selected team to focus on one attribute but likely for the price of getting the bonuses provided by having characters belonging to the same faction.
However, having a well-rounded team can still be possible while getting faction bonuses. For instance, if you team up Poison Ivy (green, Supporter), Firefly (yellow, Warrior), and The Joker (purple, Disruptor)—all of whom belong to the faction Arkham’s Most Wanted—with Superman (blue, Sentinel) and The Flash (red, Amplifier), both of whom belong to the Justice League Faction, you’ll be able to have all the colors on your team, all the attributes, and a 9% faction bonus that increases both attack and defense for all colors.
After all, the game and the story itself encourages you from the beginning to mix and match heroes and villains so they can work together to bring down a greater enemy. This is also one good reason to continue using Capsule Keys to recruit characters so you have more characters to choose from when you’re assembling your team.
Training and Gear
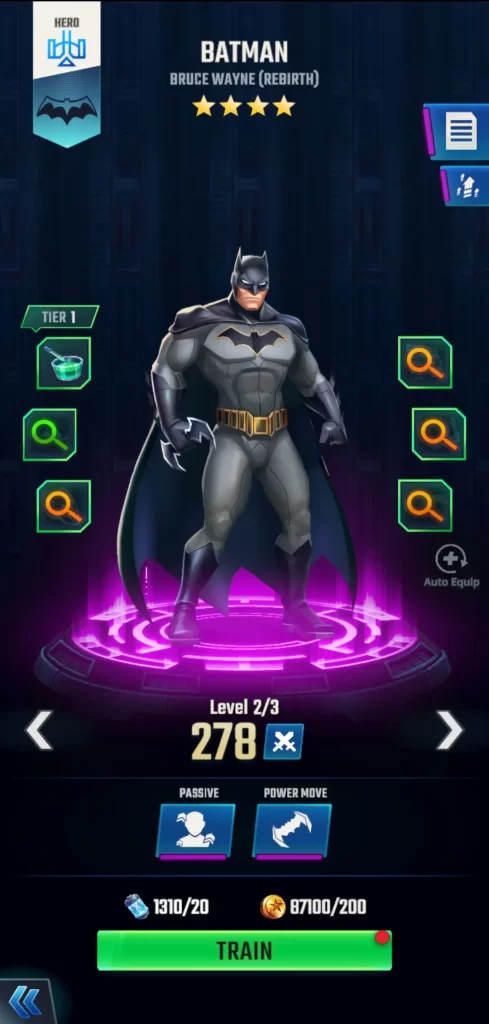
Now that we’ve covered the basics of effective team composition, it’s time to hone in on individual characters by continuously training them and giving them gear. Training characters will only require you to spend Metatopes and credits, which the game will generously provide if you’re able to successfully complete missions and quests. Training characters and giving them gear items will increase their stats overall.
However, it’s important to remember that how much you can train characters will depend on your level as a player. Basically, if your player account is Level 5, then you can only train your characters up to Level 5. If you want them to reach Level 6, your player account should also be Level 6.
Equipping gear, on the other hand, is limited by the resources you’ve obtained throughout battles. There are various resources you will get alongside Metatopes, credits, and other currencies and rewards. These resources can also be found in the shop and are used to craft gear for characters.
Each character can have 6 gear items equipped. If you manage to equip all 6 gear items, their gear tier will go up one level, for which you have to craft another set of 6 gear items. The first 5 gear items are generally the same for each character, but the 6th gear item is unique to each one and can require different materials from the rest.
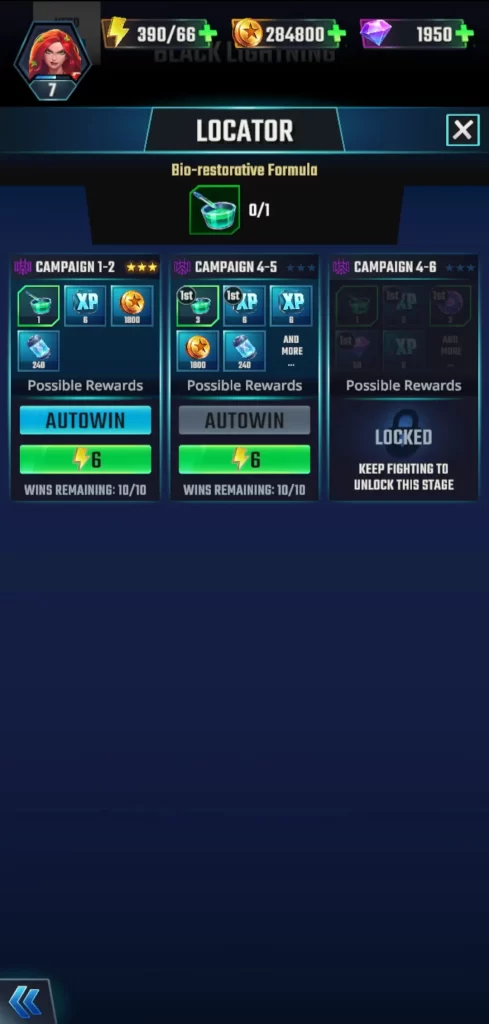
You’ll know that a character can be equipped with a certain gear item if the slot for that item has a green + sign. For items that you don’t have or are lacking resources to craft, you may click on the green magnifying glass on that slot, which will let you locate the resources for that specific gear.
Locating gear basically means you can auto-win missions that you’ve already unlocked and completed with a 3-star rating. For missions that you have yet to complete with a 3-star rating, you will have to play that specific mission again to get the resources indicated as rewards. Take note that you will still need to spend Campaign Energy to auto-win missions for resource gathering.
If you have enough credits and Metatopes, we recommend training most, if not all, characters in your roster as a beginner. Eventually, though, you will have to thoughtfully distribute resources when your character pool expands as you might not be able to afford training everyone in your roster.
For this, we recommend considering the rarity tier of characters as those with higher-rarity tiers start out with better stats, which you can only increase from there. Characters that have 2 stars are rather negligible and can be relegated to the bottom of your priority list when distributing resources for training and gear. Pay more attention to characters that are 3 stars and above.
Passive and Power Move
Besides training and gear equipment, characters also possess individual Passive Moves and Power Moves. As mentioned, Power Moves are a character’s ultimate skill and can be activated in battle once their Power Gauge has been filled. Some Power Moves focus on one enemy while others affect all enemies present on screen.
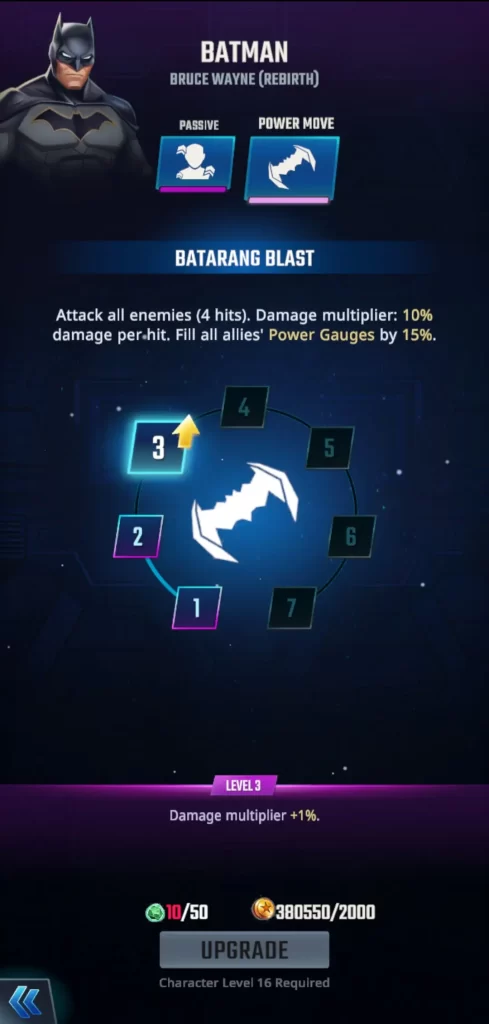
Power Moves can reach a max level of 7 and can be upgraded by using credits and Basic Elements. However, upgrades are capped by the character’s overall level. For instance, to upgrade a Power Move to Level 3, that character needs to reach Level 16.
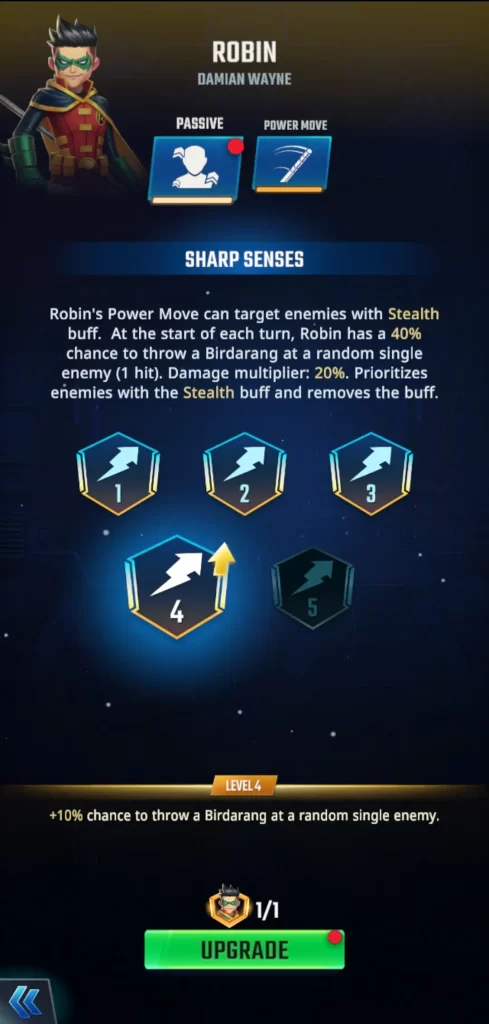
Passive Moves, on the other hand, are activated anytime during battle if certain conditions are met. For instance, a character’s Passive Move may target enemies with a certain buff every time they attack, or begin every turn with a chance of attacking a random enemy. Some Passive Moves may also be activated when the Power Move of a character belonging to the same faction is activated.
Passive Moves can be upgraded up to Level 5 and will require the use of Character Tokens, which are often gained by pulling duplicates of a character via the Recruitment tab. Keep in mind, though, that 2-star or Uncommon characters do not have Passive Moves. If you get duplicates of them, they will simply be converted to Character Credits or Elite Character Credits.
Passive and Power Moves aren’t a huge factor to be considered for team composition—they’re more like a byproduct of selecting the right team members for the job. Of course, some Passive Moves may work better with team members that belong to the same faction, but this isn’t always the case. After all, Passive and Power Moves are individual stats that strengthen your team overall. What’s important is to upgrade these stats to their highest level possible, especially for characters you typically use since these provide buffs, debuffs, and damage multipliers.
Tips for Assembling Your Team
Now that we’ve gone over the details of what you need to consider when composing your team, here are some recommendations we have when assembling your 5-character crew. Some of these have already been mentioned in their respective sub-sections, but we’ve neatly lined them up in bullet points below and added in a few more:
- First and foremost, have a basic understanding of the color wheel mechanic. The color of a character should be the primary factor for whether or not they should be selected for certain missions. Ideally, you should have all 5 colors represented by at least 1 character on your team, but this isn’t a hard and fast rule. Some enemy lineups don’t exactly feature enemies of all colors so it’s best to check first what you’re up against and select allies whose colors will always be advantageous against the enemy team’s lineup.
- You may defer to the game’s default team recommendation for easier team assembly, but we still encourage you to handpick team members as the default recommendation doesn’t always guarantee the best picks. In some cases, you may need to have more than 1 character with the same color on your team simply because the enemy lineup also has multiple characters of the same color.
For instance, if the enemy team has 3 yellows, then it might be best to pick 3 purples to counter that. Sometimes, the default recommendation will not pick this kind of setup as it tends to choose characters with a higher power regardless of color. - As much as possible, try to pick team members belonging to the same faction so you can receive attack and defense bonuses for all colors. If a faction can’t fill in all 5 slots of your team, you can always pick 2 characters each from 2 different factions with the last character belonging to another faction, or pick 2 characters from 1 faction and 3 characters from another faction. All these will still garner bonuses even though they might not add up to the 12% max faction bonus.
- Don’t forget to take into account a character’s attributes. Similar to colors, there are also 5 different attributes that each have an effect on how a character’s skills work. Study how attributes work and decide whether you want to focus on attacking enemies, protecting allies, or buffing and debuffing.
A well-rounded team should ideally have all attributes represented by 1 character each, but again, this isn’t a hard and fast rule especially since you need to take into account their colors and factions first. Still, strive to achieve a team with all attributes present if possible. At the very least, characters that have a Supporter attribute should be a mainstay in your team since they can heal or provide barriers. - Keep training and equipping your characters with gear to increase their overall stats. Eventually, though, you will have to be mindful about distributing resources so prioritize characters that are 3-star and above since 2-star characters don’t have Passive Moves. In terms of team assembly, choose characters of a high rarity tier as they begin with better stats overall. Only include 2-star characters in your team if only absolutely necessary.
- When it comes to activating Power Moves, consider timing them depending on what these skills do. For instance, if a character’s Power Move heals, wait to activate it until such time that allies have been injured enough to need healing so the buff doesn’t go to waste.
For Power Moves that affect all enemies, consider activating them when there are multiple enemies on the screen and not just one to really maximize its effects. Study how each character’s Power Move works to determine the best time to activate them. - Don’t discriminate based on alignment. You may be tempted to just upgrade either heroes or villains (or even just the neutral characters), but this approach definitely lessens your chances of winning missions and getting more rewards. Some missions may limit you to using only hero or villain characters (alongside neutral ones) so make sure you have a robust lineup from all 3 alignments.
- A good gauge you can use to determine how well your team will fare against enemies is comparing your overall team power with the enemy team’s overall power. Usually, the game will alert you if the enemy’s team power is too high, rendering your chances nil. This usually happens when you’re about 1,000 points below the enemy team power.
If you’re 500 points below, you still have a chance of winning provided your team composition is solid. Even with difficult side quests like the one we mentioned where you’d fight against Batman with 10,000 points, team composition will make all the difference, as well as the tile-matching strategies you employ during battle.
Tactics on the Tile Board
With a solid team for deployment, you’ve basically won half the battle. The other half, of course, relies on how well you’d be able to make matches on the tile board. Unlike some match-3 games, a tile color that isn’t represented by a character on your team doesn’t render this particular tile void. At most, it just reduces the attack effect of that tile color. For instance, if you don’t have a green character on your team and match green tiles on the board, the attack won’t be as numerically strong, but it will still be counted as a strong attack against blue enemies. It will be even weaker in terms of numerical value against red enemies.
As mentioned, you need to be able to “aim” your matches directly against enemies depending on their location on the screen. Above the tile board are faint blue arrows indicating which columns you should make matches in to actually hit enemies directly in front of tiles. Always check the positioning of your matches based on the arrows above the tile board.
One other important aspect to remember when it comes to matching tiles is that unlike most match-3 games where the tiles flow downward, the tiles in this game flow upward. Basically, if you match anywhere on the board, the tiles that will replace those that have been sent to attack enemies will come from the bottom of the board going up instead of the other way around.
Something that DC Heroes & Villains: Match 3 does share with other titles of the same genre is that matching more than 3 tiles gives you special tiles. Special tiles have different effects and can be activated either by clicking on a special tile or matching them with tiles of the same color. The way special tiles work in this game is that, when activated, they eliminate tiles within a row or a column. Eliminated tiles, regardless of color, are counted as attacks against enemies.
In other match-3 games, you may combine special tiles for a greater effect, but no such feature is present in DC Heroes & Villains: Match 3. Regardless, matching special tiles won’t just make attacks stronger, but these can also affect the board in a significant way by replacing tiles potentially to your advantage. It goes without saying that a viable strategy for creating and activating special tiles is to make sure their effect is directed towards a weaker enemy or that the tiles they will eliminate are those aligned with weaker enemies.
Below are additional strategies you may consider employing overall to make matches more effective:
- The color wheel is paramount. As much as possible, attack enemies with tile colors that will have a strong effect on them. If there aren’t any of that color, you can attack an enemy with any other color except for that which will have a weak effect.
- Prioritize matching directly against enemies that are 1 turn away from performing an attack so you can debilitate or completely eliminate them, thus mitigating damage to your team.
- When creating special tiles, try to put them close to each other so activating one special tile can lead to automatically activating another without having to spend an additional turn.
- Further to special tiles, don’t hoard them. If you have 2 or 3 special tiles present on the board, activate at least 1 as opposed to filling the board with them. Remember that your objective is to eliminate enemies, not collect as many special tiles as you can since the game doesn’t operate on a point system.
- When matching tiles, try to also induce combos or combo streaks. Combos happen when one or more additional matches are made as a result of tiles flowing up the board due to one match. Combo streaks are multiple succeeding matches made after a combo. Combo streaks will result in continuous attacks against the enemies and may even happen across the board depending on how the tiles flow. This will also recharge the Power Gauge of allies faster, allowing you to activate them sooner.
- Sometimes, you may have to match tiles that won’t hit any enemies just to change up the board’s arrangement in your favor. This is a viable tactic, but it should be used sparingly and thoughtfully as each turn should count, especially when battle conditions demand that you beat all enemies within a limited number of turns.
- Depending on the situation, you may also focus on matching tiles of a particular color if only to fill up the Power Gauge of a certain character faster. For instance, your allies have been injured and you want to activate the Power Move of a Supporter character so they can heal their teammates. Match tiles of that character’s respective color so you can quickly fill up their Power Gauge and activate their Power Move within a few turns.
These are just a handful of strategies that you can use when matching tiles, and your tactics should always take your battle circumstances into consideration. A solid team coupled with thoughtful tile matching will definitely spell victory for your team!
Go Shopping
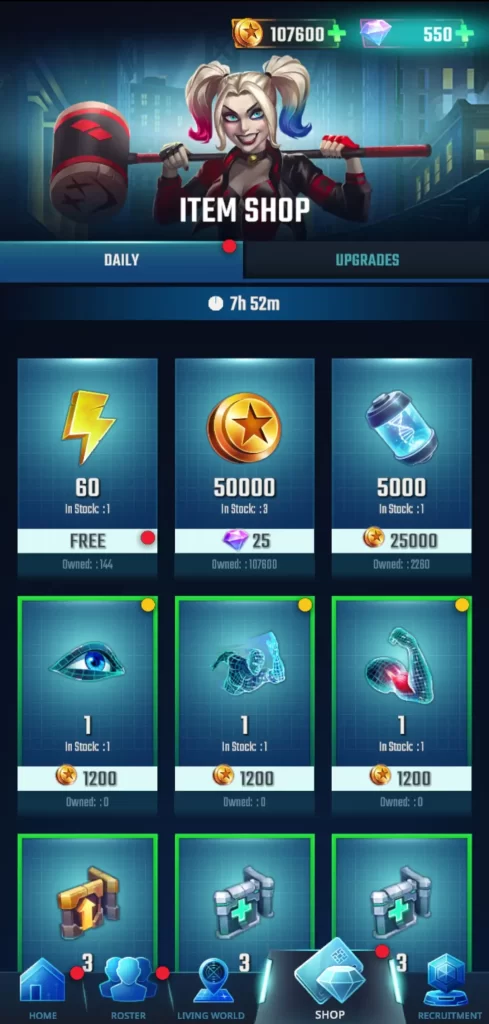
As you gradually progress through the game, you’ll be able to amass quite a few resources that will allow you to upgrade characters as well as purchase items from the Shop. The Shop is actually a good place to search for gear items if you have yet to unlock missions that can provide certain gear through the auto-win function for resource gathering. If you have enough credits, you can buy several gear items to equip your characters with and increase their overall stats.
Credits aren’t the only currency accepted in the Shop, though. You may also purchase items using gems, which are considered a premium currency, as well as Character Credits and Elite Character Credits. Gems, like credits, can be earned during missions or when finishing quests (more on this later), while Character Credits and Elite Character Credits are obtained whenever you pull a duplicate of a character whose Passive Moves have already reached their max level. These duplicates can either be converted into Character Credits or Elite Character Credits, which can also get you more than a handful of useful items in the Shop.
Assault Credits are also another type of currency accepted in the Shop, and these are earned whenever you successfully complete missions in Assault mode (more on this later).
However, the one important reason you should visit the shop daily is because you can get free Campaign Energy! Again, Campaign Energy is like an entrance fee for campaign missions, as well as a sort of fee whenever you use the auto-win function to locate gear. Campaign Energy is basically what keeps you playing through campaign missions so don’t miss out on the freebie and check the Shop regularly so you can avail of them.
Since the game can be rather generous with rewards, take a stroll down the Shop from time to time and spend your money wisely on gear and other upgrade materials. It’s well worth the expense when every penny is spent strengthening allies in your roster. Just be careful of clicking items in the Shop as a single click will mean an automatic purchase. If you want to know what exactly you’re buying, long click on the item to view its name and description first.
Complete Challenges and Participate in Events
Challenges and events feature missions outside of the main campaign and you don’t generally need Campaign Energy to enter into one.
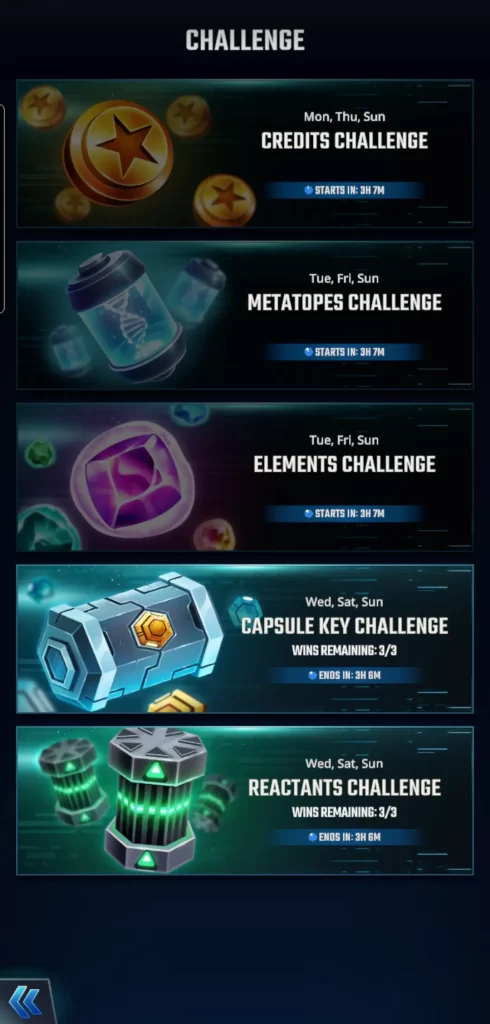
There are 5 different challenges each week, with each one accessible only through certain days and will last for only a limited time. Instead of spending Campaign Energy, you have to spend Challenge Energy to enter challenge missions, and you’re only limited to 3 Challenge Energy units at a time. The good news is that Challenge Energy will only be spent once you’ve successfully completed a mission. Depending on the challenge, completing missions can get you specific rewards, namely credits, Metatopes, Elements, Capsule Keys, and Reactants.
Keep in mind, however, that true to its name, challenge mode is quite, well, challenging. Enemy power levels can sometimes be well beyond your reach, but it is a good motivation to continue improving your characters’ stats. Keep an eye out for which challenge modes are available on certain days and try your luck if you specifically want to get a particular resource as a reward.
Events, on the other hand, are somewhat like challenges, as they also run for a limited time. What differentiates events from challenges is that the former typically has a theme that limits your team composition based on that theme.
For instance, if you enter Themyscira’s Toughest, you can only deploy characters related to the Themyscira lore, such as Wonder Woman, members of the Amazon faction, and Donna Troy. Sometimes, even though you have none of these characters present in your roster, the game will still allow you to participate in an event by providing you with guest characters.
The caveat is that you can’t change guest characters unless you have characters aligned with the theme of the event you’re entering. Still, participating in events is recommended as you won’t spend any kind of energy to enter a mission and rewards can vary, from credits to gems and other resources.
Play Assault Mode
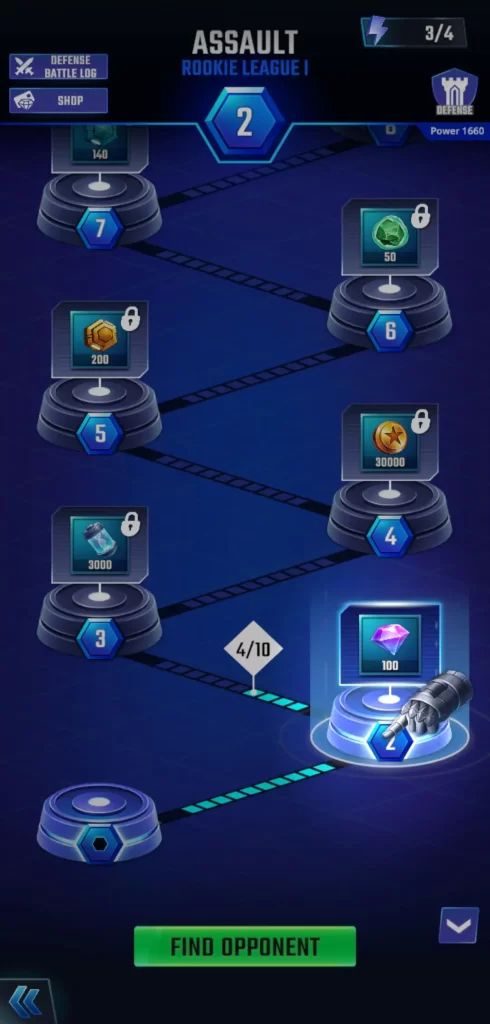
Another mode that you can play separately from the main campaign is Assault. But unlike challenges or events, Assault mode pits you against other players in the same league you’re in. It’s basically PvP where you need to build a formidable assault team against other players’ defense teams. In turn, you’ll also need to put together a defense team that other players will go up against.
As a beginner, you’ll start in Rookie League I and work your way up from there. Going up the league ladder entails winning against the defense team of other players, which will get you points. Each opponent will earn you various points depending on which level they are in the league ladder. For instance, some opponents can give you 3 points while others can give you 5 points if you defeat them.
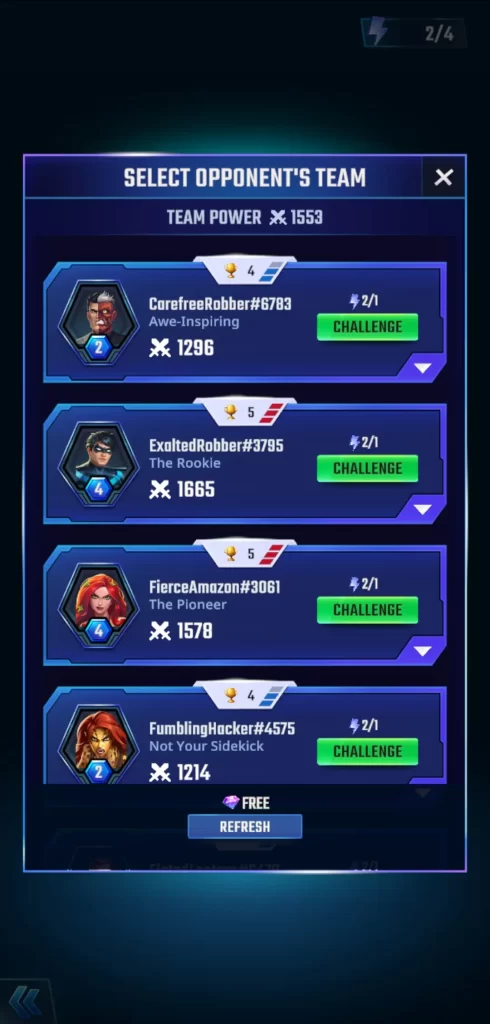
Collecting enough points will allow you to move from one level to the next in the current league you’re fighting in. Each level will provide a different reward. If you reach Level 10 of your current league and win, you’ll be able to move to the next league. The good news is that you’ll be given the chance to choose which opponents you want to engage, preferably those whose defense teams have weaker power levels compared to your assault team, as well as provide the most points you can gain.
Similar to challenges, Assault mode requires you to spend Assault Energy, of which you have a maximum of 4 to begin with. Depending on your opponent, some may require you to spend more than 1 Assault Energy. However, this will refresh after a few hours so regularly check Assault mode to see if you’re eligible to play.
Winning in Assault mode will basically require a similar approach to winning any other mission. One primary difference is that in Assault mode, opponents don’t come in waves. Rather, all your enemies are on screen and are positioned there reflecting the slot that they occupy when they were picked for the team.
Thus, this can give you an idea of how to form your own defense team. Here are a few tips we have:
- Build your defense team based on their color and individual power. If you can squeeze in a bit of that faction bonus, do so. But primarily, consider the color and power of team members you want to select. Ideally, all colors should be represented by at least 1 member as this won’t just make for a well-rounded team composition, but also limit your enemy’s chances of exploiting which you don’t have or have multiples of.
- Select your defense team members based on how you want them positioned on the screen. Characters selected for slots 1, 3, and 5 are usually placed at the back, while those in slots 2 and 4 are placed up front like a vanguard. Warriors and Sentinels are good picks for slots 2 and 4, while the rest can be Supporters, Disruptors, or Amplifiers. Hopefully—since your defense team will be piloted by an AI when challenged by players—your vanguard should weather the attacks while those in the backline will take care of either dealing damage to opponents or healing your allies.
- Further to positioning, try to also keep certain character colors away or close to each other. For instance, yellow and purple characters should be on either side of the team. This is because if they’re next to each other, your opponent can easily damage them both with a yellow or purple attack within 3 or 4 columns. If they’re apart from each other, only one character will take the damage should a disadvantageous match be made.
- Regularly check who are included in your defense team to make sure you’re deploying the strongest or the most effective combinations from your roster.
Keep fighting players in Assault mode and show them who’s the top dog!
Finish Quests
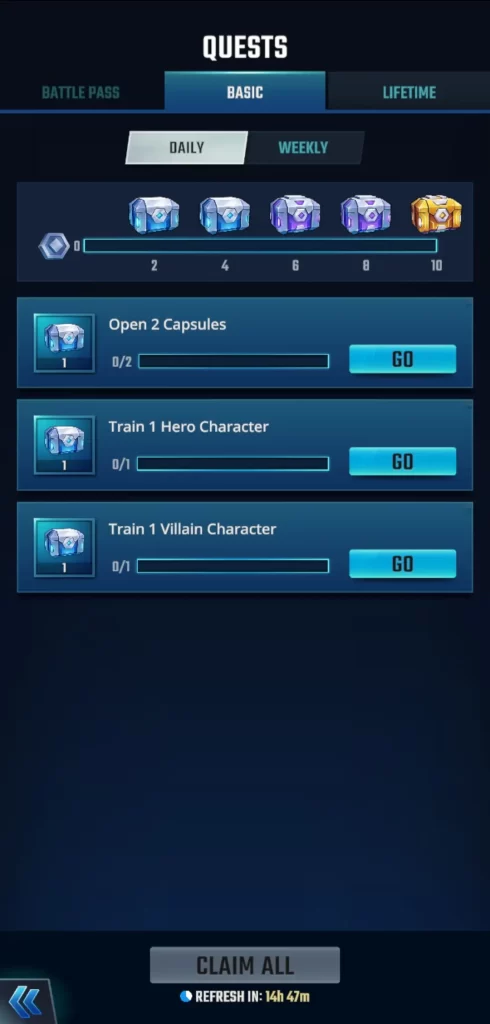
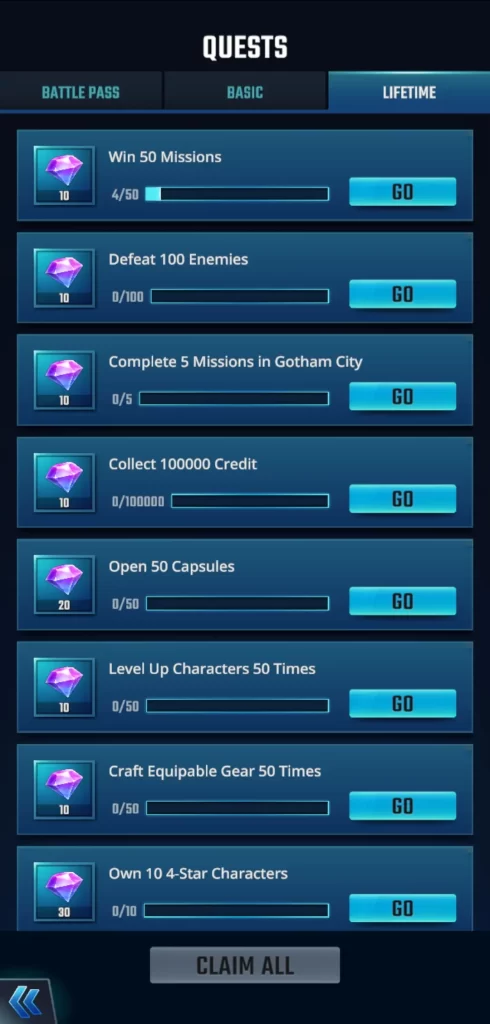
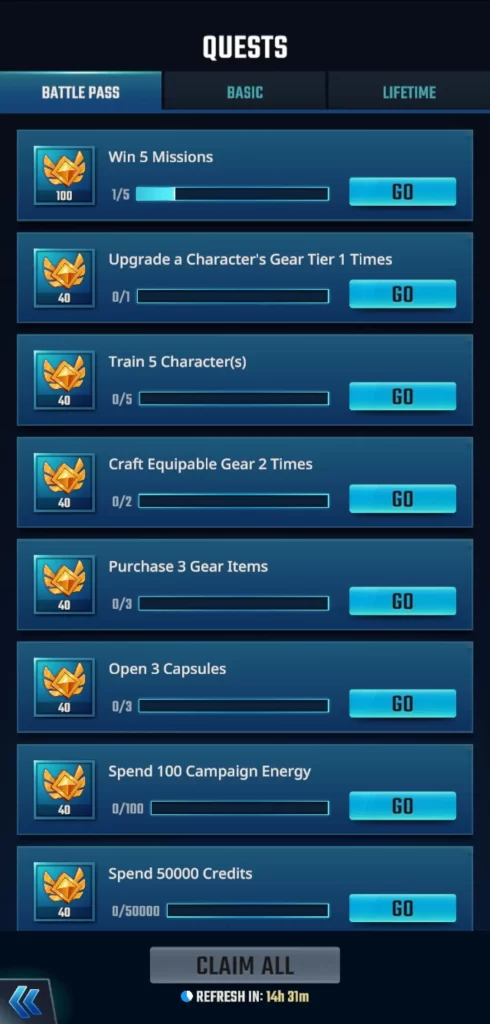
As you continuously play the game, you’ll be able to complete various quests—sometimes without even knowing it! Quests are basically achievements for which you’re rewarded with different items and currencies. There are 3 kinds of quests you can complete:
- Basic Quests: These are generally quests that you can complete by doing simple things in the game, such as training characters, opening capsules, completing missions, etc. Basic quests are divided into Daily and Weekly quests, wherein the former are more short-term and can be accomplished within the day, while the latter take longer to finish. Complete enough of both Daily and Weekly quests and you’ll be able to open chests that include more rewards.
- Lifetime Quests: These quests are long-term achievements that you can complete, such as finishing multiple missions, opening a number of capsules, collecting a certain amount of credits, and the like. Completing Lifetime quests will earn you gem rewards.
- Battle Pass Quests: These quests are like a combination of Daily, Weekly, and shorter-term Lifetime quests, and may even overlap with some of those found in the aforementioned sections. Completing these will earn you points for the Battle Pass. Battle Pass points, when collected, will also earn you rewards from the Battle Pass lineup. In some cases, you may even acquire a new character if you manage to collect enough Battle Pass points to complete the entire list of rewards.
For a match-3 game, DC Heroes & Villains: Match 3 is quite enjoyable, not just for the varied gameplay, but also for its overall production value. True to the comic book aesthetic, this game is visually incredible as character portraits, poses, designs, animations, and the like are well rendered and captivating. In following the story, you won’t get bored, even if you aren’t at all well versed in the DC lore. It has something entertaining for both fans and non-fans alike.
As for the missions and gameplay modes themselves, they’re rather easy for beginners to get a hang of, though we should warn you that the difficulty spikes up a bit when you get to Chapter 4 of the main campaign. You likely have to dedicate time playing modes outside of the campaign missions (side quests and Choice Missions included) to get rewards that can increase the overall stats of your team. Regardless, these missions are just as entertaining, especially if you’re the type who welcomes challenges.
With that, we conclude our in-depth beginner’s guide for DC Heroes & Villains: Match 3! Who’s your favorite character so far? Is there a character you really want to get but can’t seem to pull from the gacha? Which enemy or gameplay mode did you find the hardest to beat? Do you have additional tips for fellow players? Don’t hesitate to share your thoughts in our comment section below!

