Everything seemed so normal on the day the toxic mist arrived. And when it hit, it subsumed everything. Hero or villain, it mattered not to the mist – it just wanted to eat, and eat, and eat. But just when things began to look hopeless, a hero was sent by the Monitor, a hero who would rally both law bringers and ne’er-do-wells to fight back the mist and take back our home.
That’s you, by the way.
DC: Dark Legion is a mobile empire builder game where you’ll work alongside iconic heroes from the DC Universe in a bid to save the world from utter destruction from a mysterious toxic mist. While at its core, DC: Dark Legion’s gameplay has a lot in common with games like Evony: The King’s Return, it takes great pains to distinguish itself via its aesthetics, savvy use of the DC brand, and great focus on its characters. The end result is a tight-knit, snappy mobile game that marries the best parts of each of its inspirations. Whether you’re team Android or iOS, you can grab DC: Dark Legion from your app store of choice.
DC: Dark Legion falls into the common theme park trap – namely, pelting new players with quests and buttons to press. If you’ve already played empire builder games before, these reskinned concepts should be easy enough to intuit, but players totally new to the genre might feel lost. Regardless, you’ve come to the right place if you’re looking for DC: Dark Legion tips and tricks to help you get started.
Join us on this journey as we break down the essentials of DC: Dark Legion, including:
- Running Your Base – every empire builder game requires you to thoroughly understand the ins and outs of running your base.
- Hero Basics – building your heroes is a simple if lengthy affair. Here’s all the ins and outs of heroes, as well as where to get more of them and where to spend your Source Energy Gems.
- Picking Fights – superheroes (and super villains) need enemies to fight. In this section, we’ll talk about how to get into DC: Dark Legion’s many battlefields and the benefits each will grant you.
- League Basics – heroes are always stronger together. Leagues have a lot to offer any player, and you’re seriously missing out if you don’t join one.
- Gathering Freebies – last but not least, I’ll show you where to get a bunch of freebies. They’re not much, but such is the F2P life.
If you’re looking for an even faster read, feel free to jump to the “Quick Tips” subsections.
Running Your Base
With the surface world in shambles, it’s important to establish a solid base of operations from which you can launch missions and keep your heroes healthy. Here’s the basics on how to navigate, upgrade, and optimize your base.
Quick Tips
- Each room plays an important role in DC: Dark Legion. I’ve included a quick list of rooms in the early game.
- New rooms can be built by tapping on the construction icon when it appears.
- Progression is tied to the War Room’s upgrade level. Prioritize upgrading your War Room.
- Rooms can be upgraded to improve their efficiency.
- To upgrade a room, you’ll need to upgrade all its facilities first. Just hold the “upgrade” button to do that.
- Once all facilities have been upgraded, you can upgrade the entire room for a considerable boost. Note that max room level is tied to your War Room.
- You can use Source Energy Gems or Drones to accelerate the upgrade timer. Each Drone reduces the timer by one minute. Save your skips for vital War Room upgrades – the timer will quickly hit several hours, then days!
- Upgrading only costs money except for the War Room, which also requires Reputation. You get Reputation from doing campaign stages or doing overworld missions.
- You can only upgrade one room at a time, unless you get a second construction worker – not the ones you build in the Drone room.
- You need to pay real cash to get this upgrade, but it’s permanent.
- Virtually every room in your base draws power. Power is generated by the power plants located in the upper left section.
- If power generation < power draw, you get a base-wide debuff that decreases production.
- If power generation > power draw, you get a base-wide buff that increases production.
- Some rooms generate resources, such as power, experience, and drones. Heroes can be assigned to these resource generators to increase their output.
- Heroes will occasionally need to rest when assigned to a room.
- Resource generators gain more hero slots as they’re upgraded.
- Morale is made up of four needs: health, stamina, mental acuity, and camaraderie. These are restored via the Medical Bay, Living Quarter, Library, and Lounge, respectively.
- Meeting the morale requirement of your heroes improves how effective they are at generating resources.
- The Research Laboratory lets you research techs – passive boosts that affect both construction and combat. Your lab should always be researching something.
- If possible, beeline getting your War Room to level 8 to unlock the Research Lab, since one of the first techs lets you deploy a second squad.
- You can also use Drones to fast forward research.
- Civilians you rescue can be resettled in the surface section of your base. Settlements generate cash for your base.
- Settlements are unlocked via War Room level and built by spending civilians.
- Civilians come from campaign stages or PVE fights.
- Settlements can be upgraded by spending more civilians. At level 3, a settlement can choose a boost zone to upgrade to. Boost zones provide passive bonuses. All settlements passively generate money.
- You need to manually collect the cash provided by settlements.
- You can change your choice of boost zone, but it’ll cost 100 gems.
- The most important boost zone to build is the Construction Center as it reduces build timers. Prioritize getting two Construction Centers up.
Room Basics
By now, you’ve already been taken for a spin on how to run the base, mostly by the game telling you to tap on ruined rooms to rebuild them. What the game doesn’t dwell on is the importance of each room.

Each room in DC: Dark Legion serves a unique purpose, and knowing what a room does is vital for conserving resources and spending them efficiently. Here’s a list of early game rooms and what they do:
- War Room: gates your progression.
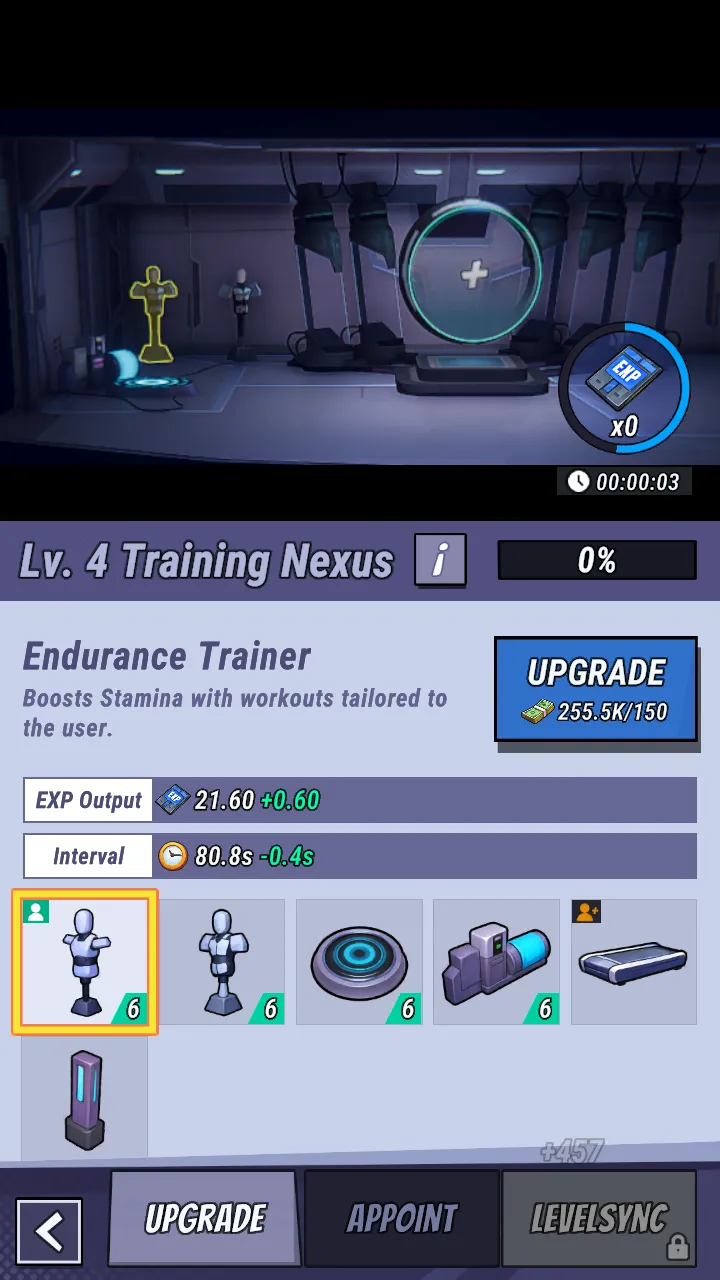
- Training Nexus: generates experience items that can be fed to any hero.
- Power Plant: provides power to every room. Can give a buff/debuff based on the rate of generation/consumption.
- Genesis Chamber: where you open your Energy Keys/gacha boxes.
- Medical Bay: provides Health, which contributes to morale. Heroes will come here to replenish this need.
- Living Quarters: provides Stamina, which contributes to morale. Heroes will also come here to replenish this need.
- Library: provides Mental Acuity, which contributes to morale. And yeah, heroes low on this stat will run here too.
- Lounge: provides Camaraderie, which contributes to morale. Yes, they run here too.
- Drone: very slowly provides Drones, which can be used to speed up construction. Needs a staffed hero to work at all at lower levels.
- Bio Lab: produces Stimulators for raising hero level caps.
- Armory: manufactures equipment at the cost of blueprints, alloys, and cash. Higher armory levels allow you to use rarer blueprints.
- Wayne Steel: produces Alloys.
- Research Laboratory: researches tech at the cost of time and chips. More on this in a bit.
- Wayne Chips: produces chips.
To build a room, tap on its ruins (a room can be rebuilt if it says “broken [room name]”). However, new rooms are dependent on the War Room’s upgrade level. This means that the War Room should be a top upgrade priority.
Room Upgrades
Now, let’s talk about upgrades. Upgrading a room improves its performance by allowing it to provide resources faster and work better.
To upgrade a room, simply tap on it, then tap on the upgrade button. You’ll need to upgrade each of its facilities (which provide small bonuses on their own) to be able to upgrade the entire room. Luckily, you can just hold down the upgrade button.
Once every facility has been maxed out, the room itself can be upgraded. This will cost a construction slot and some resources. Pay the cost, wait the timer, and voila – upgraded room. Note that you can skip the timer by either paying Source Energy Gems or by using Drones. As a new player, I strongly urge you to save your time skips for later. A few seconds or even minutes of waiting time is nothing compared to the wait timers you’ll get later. Case in point: the War Room will quickly hit 8 hours (and more!) of upgrade time.
Now, I mentioned how important it is to upgrade your War Room, since the War Room gates every other facility. Upgrading the War Room is similar to upgrading other rooms with the exception that it also needs a currency called Reputation.
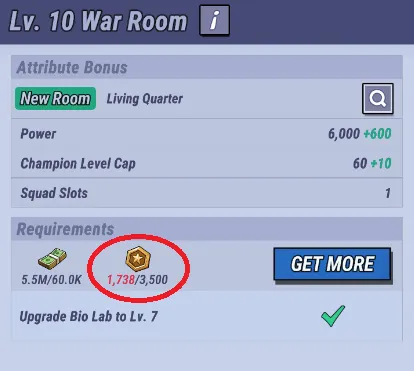
Reputation is earned by doing campaign stages or by clearing PVE nodes in the overworld. Just keep doing your story quests – the ones with gold tacks on the map – to get a lot of Reputation quickly.
Upgrading the Armory is crucial as well, as it allows you to craft higher rarity gear. Higher rarity gear offers additional bonuses when set pieces are equipped, significantly improving your heroes’ performance in battles.
Finally, keep construction limits in mind. Empire builders like DC: Dark Legion have an annoying restriction where you can only build or upgrade one room at a time…unless, of course, you shell out real cash for a second construction queue.
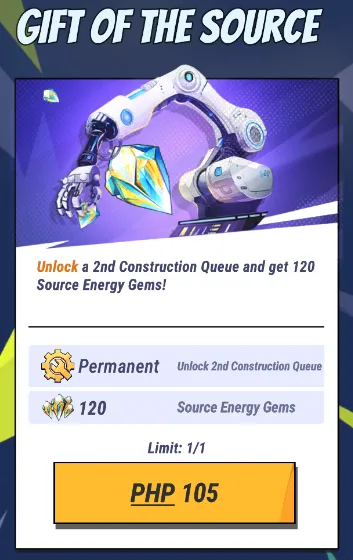
If you’re in the game for the long haul, keep this option in mind.
Power
Every room in your base runs on power, and all power is produced at the power plant.
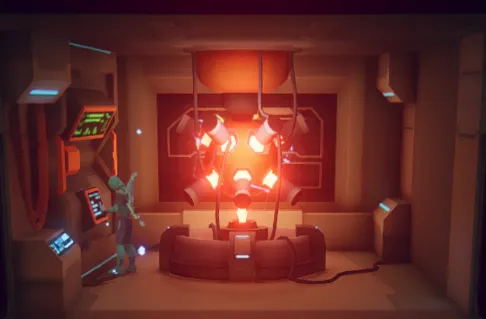
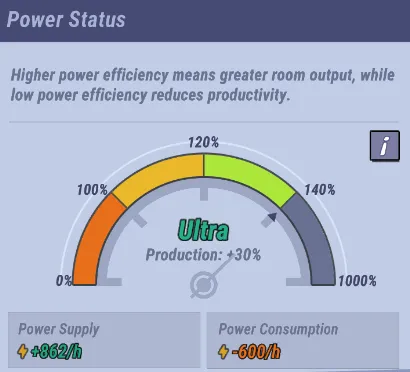
By tapping on the power plant, you’ll be able to see a meter that shows both your hourly power production and consumption. You can get production bonuses or penalties depending on how evenly balanced your power draw and energy generation are:
- -20% production if consumption > generation.
- No bonus or penalty if consumption more or less equals generation.
- +20% production if consumption < generation.
- +30% production if generation is way higher (around 50% more) than consumption.
Bear in mind that both upgrading and building rooms will increase your power draw, so make sure that you’re keeping your power plant in tip-top shape. At the very least, try to keep it apace of your War Room.
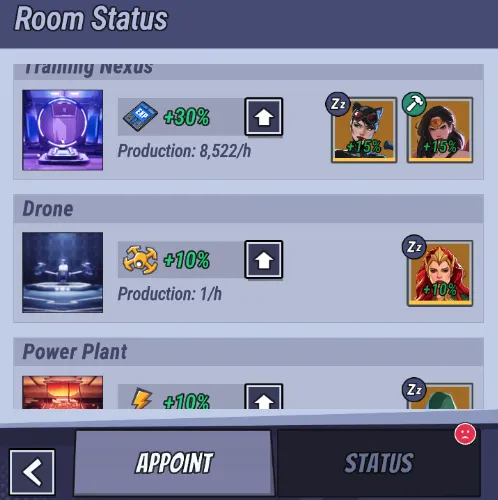
Resource Generators
Some rooms generate resources, such as power, experience, or drones. These rooms can be staffed by heroes to improve their production, generating valuable resources for base operations.
Keep in mind that having a hero staff a room will decrease their needs (Health, Stamina, Mental Acuity, Camaraderie), and that hero will run to the appropriate facility to restore that need.
While any hero can be slotted into a room, keep an eye out for heroes who specialize in the production of whatever resource is in that room. For example, Green Arrow, Wonder Woman, and Catwoman all grant a +15% bonus to the Training Nexus via their backstories, compared to the standard +10% that other heroes grant. As you get more heroes, be sure to check your resource generators to see if they can slot someone better in.
Finally, keep in mind that some resource generators gain more staff slots as they’re upgraded.
Morale
Superhuman they may be, but even heroes have needs. As mentioned earlier, these are Health, Stamina, Mental Acuity, and Camaraderie, and heroes whose needs dip too low will run to an appropriate room to recover that need.
The sum of these needs can be seen in your satisfaction tab, which you can access by tapping on the paper icon below the menu icon (three lines) on the left.
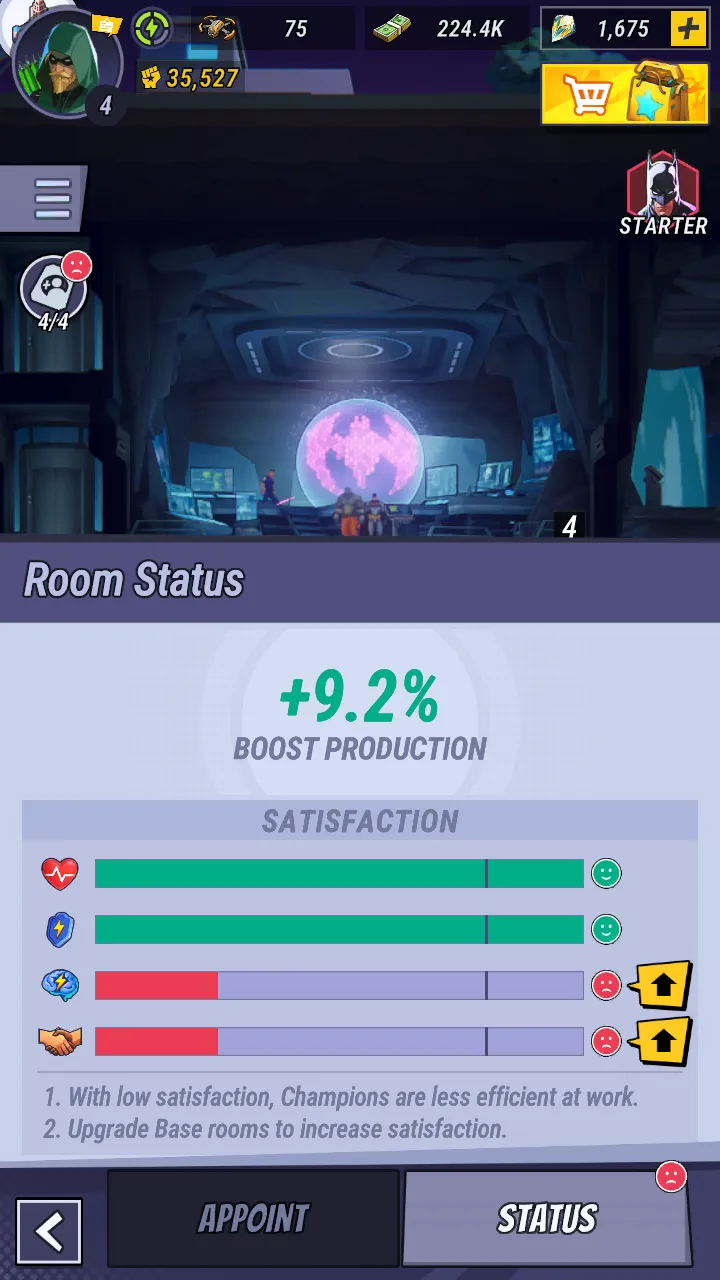
The more satisfied your heroes are, the better they’ll work, which is reflected as an overall production bonus. Keep satisfaction high by building and improving Medical Bays, Living Quarters, Libraries, and Lounges!
The Research Laboratory
The Research Laboratory is unlocked once you hit War Room level 8, and this room is going to be extremely important throughout your DC: Dark Legion playthrough. This is because you can research tech here that provides sweeping passive bonuses to both construction and combat.
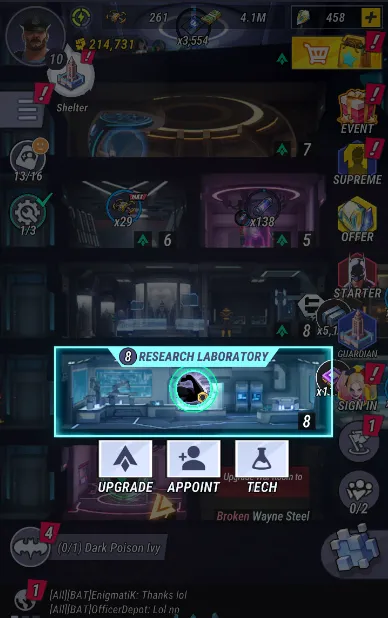
To research a tech, tap on the Research Laboratory, then tech, then the branch you want, and finally the tech you want to research. Technologies are laid out as a tree, and you’ll need to research prerequisite techs to get further down. Each research project consumes Chips (purple computer chips) and time; more advanced techs will need more of both. Your lab should always be researching something.
The first, and perhaps most impactful thing you should research is the very first tech in the construction tree, New Squad. This gives you a second squad slot, allowing you to field a second team!
The Overworld Section
Last but not least is the overworld section of your base. Your heroes keep talking about civilians, and this is where the common folk go. To access this section, head to the top of the elevator in your base, then tap the bubble that says “Shelter”:
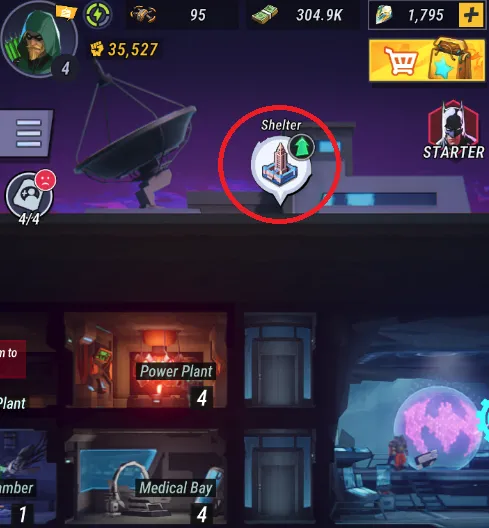
This will bring you to the surface level of your base:
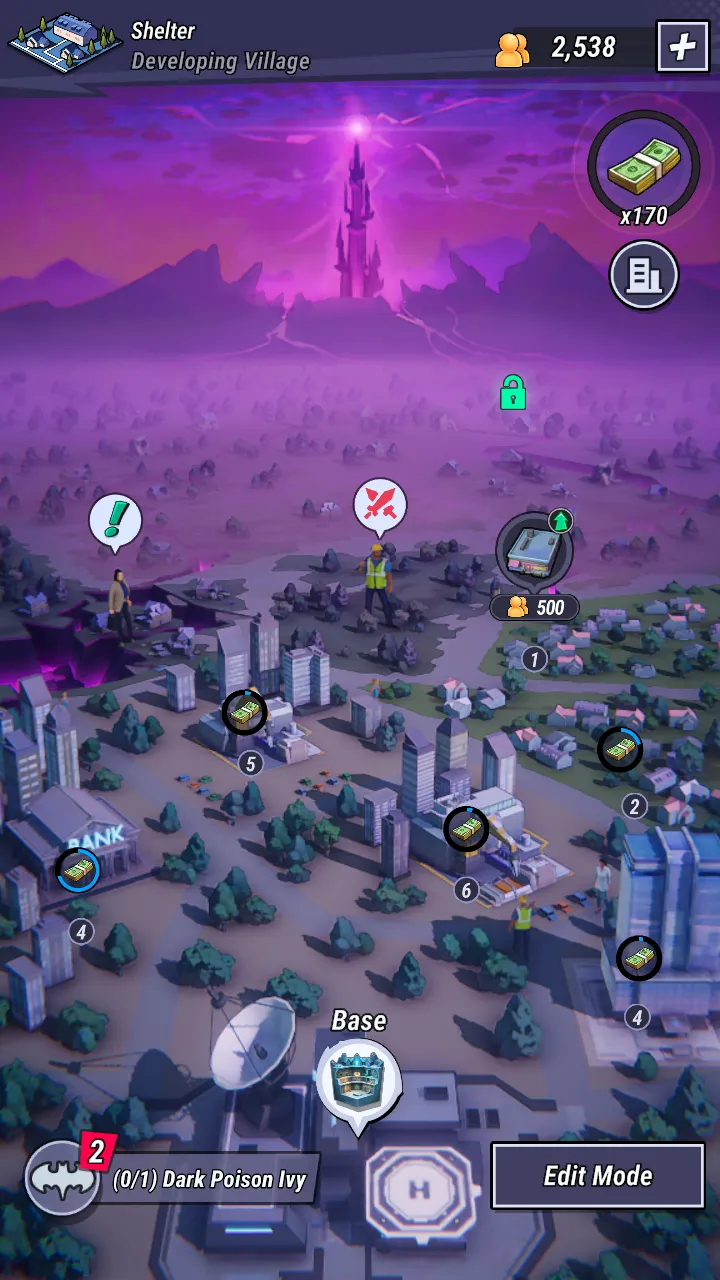
On the surface, you can unlock plots of land where you can settle the civilians you’ve rescued. This isn’t a one way street, as each plot becomes a settlement that provides cash per hour. Do note that you have to collect this cash manually by tapping on the upper right button.
More importantly, each settlement can become a boost zone, which provides a unique bonus. Each plot of land has specific boost zones it can transform into. However, the most important boost zone is the Construction Center. This boost zone slightly decreases build timers, so it’s imperative to build two of them first.
If you want to switch boost zone bonus, you can change your boost zone choice for 100 gems. That’s a lot of gems, so try to get things right the first time.

You unlock plots by raising your War Room level. Settling and upgrading these plots costs civilians, which you get from the campaign or from overworld PVE fights. Exploring different regions on the world map is crucial for gathering resources and enhancing your overall gaming experience.
Hero Basics
Now, let’s talk about how to get and raise your heroes. While most of the standard RPG fare is here, DC: Dark Legion’s hero system has enough peculiarities that you’ll need to navigate in order to get the most out of your heroes.
Quick Tips
- Heroes mostly come from either the Mother Box or from The Bleed.
- Mother Boxes come in different rarities. Higher rarities drop better heroes.
- Note that more often than not, you’ll get hero shards from boxes. Hero shards can be used to redeem a hero if you have 10 of them, and are also required for evolution.
- The Bleed is closer to a standard gacha game banner.
- The Bleed always drops full characters; it only gives you shards if you already own that character.
- Pity: guaranteed Legendary or higher champion/Legacy Piece in 10 pulls. Guaranteed Mythic champion/Legacy Piece in 50 pulls. If you fail to get the rate-up champion or Legacy Piece three times, the fourth one is guaranteed to be that champion or Legacy Piece.
- There are a few ways to convert Source Energy Gems into World Anvil Shards:
- Daily deals at the Mystery Store
- On weekends, the Interstellar Visitor event goes up, allowing you to trade Source Energy Gems into resources like World Anvil Shards. Doing this is very important.
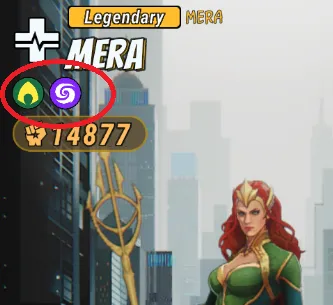
- Heroes are defined by their class. You can see a hero’s class via the icon in the upper left of their profile.
- Heroes have stats. As a new player, it’s fine to focus on buffing the four main stats: ATK/HP/DEF/MEN.
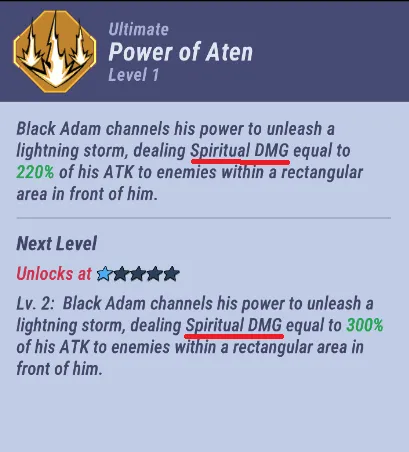
- MEN only counters spiritual damage. This damage type comes from Magical heroes.
- Attacks that deal spiritual damage often explicitly state it in their descriptions.
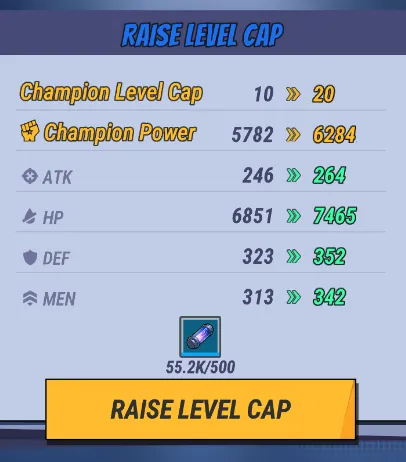
- The easiest way to strengthen your heroes is by leveling them up. To level up, just feed a hero experience and money on their profile.
- Level caps can be broken by using stimulators. These come from quests, but the Bio Lab facility in your base also produces these.
- Leveling up gets very expensive very quickly. The LevelSync function allows you to skirt this.
- LevelSync allows you to grant up to 4 heroes temporary levels to match your 5 highest level heroes.
- LevelSync will match the lowest level among your five highest. If your 5 highest are levels 55, 50, 49, 47, and 40, heroes assigned to LevelSync slots become level 40.
- Thus, you can just focus on 5 heroes.
- Swapping out a hero in a LevelSync slot puts that slot into a 1-hour cooldown.
- As long as a hero is below level 300, you can reset them to get all your invested materials back. This has a 5-minute cooldown. Reset button is in the upper right corner of their profile.
- Resets do not refund Multiversal Force nodes.
- Heroes have a rarity: Purple (Epic) -> Orange (Legendary) -> Red (Mythic).
- Rarity determines both how strong a hero is and how much they can grow. Don’t invest in purple (low rarity) heroes – they can’t evolve via stars.
- Star Ups/Evolution grants heroes substantial stat boosts and new skills/skill levels. Only Legendary or Mythic heroes can get more stars.
- Star ranks start at 0 white stars; every 5 stars increases the color (white -> blue -> purple -> orange -> red). This means you can star up a total of 25 times.
- You need to spend hero shards to increase a hero’s star rating. The higher the level, the more shards needed. Shards come from Mother Boxes or The Bleed.
- This also means that upgrading Mythic heroes will be much harder, especially if you’re F2P.
- Since purple rarity heroes cannot have dupes and thus shards, they’ll be converted to AC/DC Shards instead, if you pull a duplicate.
- Gear boosts hero stats. Each hero has slots for 5 pieces of gear and 1 Legacy Piece.
- Note that gear is restricted by class.
- Gear comes from PVE fights, quests, and crafting.
- The higher the level of your Armory, the higher the level of the blueprints it can use. Armory crafting requires blueprints, alloys, and money.
- In general, it’s easier to get higher level gear from the Armory than grinding it out in stages. Mind that each blueprint has a “drop table”, with higher level gear having a lower drop rate.
- Garbage/low rarity equipment can be scrapped in the Armory (tap “Deconstruct”) for Building Blocks, which you need to upgrade the Armory.
- Legacy Pieces are unique pieces of gear that offer different types of boosts. These come exclusively from The Bleed.
- Like heroes, Legacy Pieces have a star rating. Consume duplicates to increase a Legacy Piece’s performance.
- Multiversal Force is a tree of passives unique to each hero.
- You need AC/DC Shards and cash to buy nodes in a hero’s Multiversal Force tree. AC/DC shards mostly come from the battle pass, quests, and the Mystery Store.
- Nodes can be gated by minimum hero level or other nodes.
- Deploying heroes of the same faction grants them some minor stat boosts. Heroes can belong to more than 1 faction.
Getting Heroes
The first thing we need to talk about is how to get more characters. Don’t worry: you have access to both superheroes AND super villains in this game!
DC: Dark Legion thankfully provides you a holy trinity of tank-DPS-support off the bat with Wonder Woman, Green Arrow, and Mera. While all three of them are reliable characters (who are three of the best characters for F2P players on our tier list) that are definitely worth building, they can’t handle everything on their own. You’ll want to reinforce them with more allies ASAP.
The simplest way to get more heroes is to use the Mother Box in the Genesis Chamber.
Think of the Mother Box as a free gacha system. Each box you open has a very low chance to drop a full hero. More likely than not, you’ll get hero shards and cash. It’s not all bad, though, since getting enough shards lets you redeem that hero, and you need the shards for evolving your heroes anyway. You’ll also be getting a lot of boxes for free.
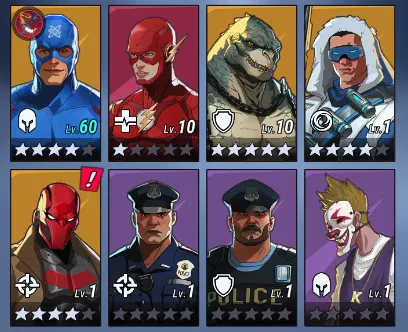
There are multiple rarities of boxes. In ascending order, these are green, blue, purple, orange, and red. The higher the rarity of the box, the higher the rarity of the theoretical shards you’ll get.
Opening a box also gives you pity points in the upper right:
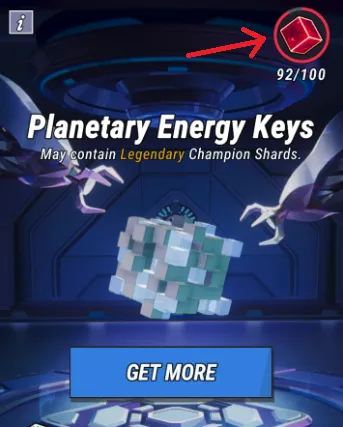
Get enough pity points and you’ll get a free box of whatever color the pity box was.
The more reliable way to get heroes is to pull them via The Bleed, which operates closer to a traditional gacha banner. This is the main way to get Mythic characters, such as Superman, The Joker, Lex Luthor, and more.
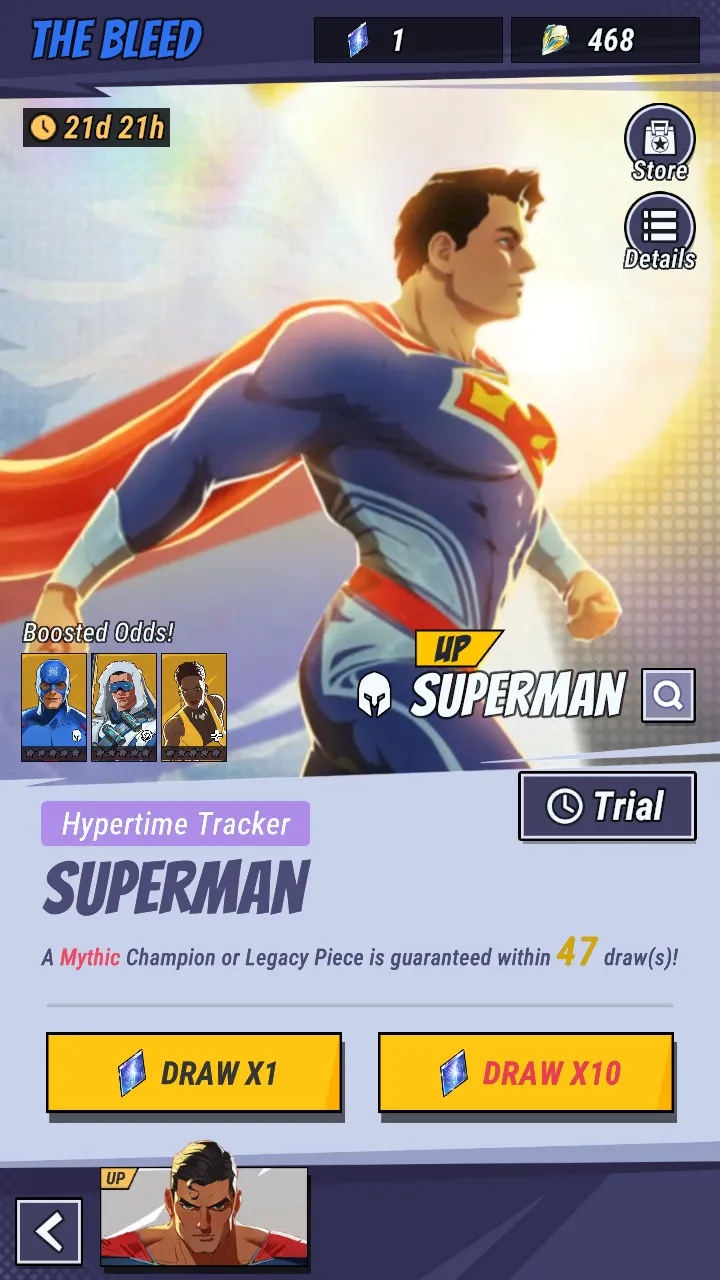
Unlike Mother Boxes, The Bleed doesn’t drop hero shards – you either get a hero or a Legacy Piece, which we’ll discuss later. The only time you get shards from The Bleed is when you pull a duplicate of a hero you already have.
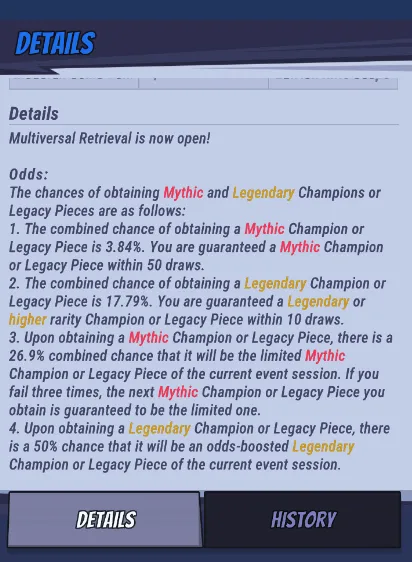
The Bleed also has a pity system in place:
- You get a guaranteed Legendary or higher champion/Legacy Piece per 10 pulls. There’s a 50% chance that any Legendary champion or Legacy Piece you draw will be one of the rate-ups.
- You get a guaranteed Mythic champion/Legacy Piece per 50 pulls.
- If you fail to get the rate-up champion/Legacy Piece three times, the fourth one is guaranteed to be it. It’s not 50-50, but 25-25-25-25. There’s a combined 26.9% chance that any Mythic you draw will be the rate-up.
Pulling in The Bleed requires World Anvil Shards. These are hard to get, and there are only a few opportunities to convert your Source Energy Gems into World Anvil Shards. The most reliable ways to get shards are:
- You’ll get most of your shards from your beginner quests.
- The daily Mystery Store stocks shards in variable quantities; be sure to buy them each day.
- On weekends, the Interstellar Visitor event goes up, which lets you trade your Source Energy Gems for World Anvil Shards, among other resources. Do not miss this as this is the best way to bulk buy shards.
Hero Classes
Now that you’ve got some heroes from boxes or The Bleed, let’s take a closer look at them. Let’s start with classes.
DC: Dark Legion has a lot of hero classes. This isn’t just for show, as each class has very clear-cut combat roles, and knowing what class each hero belongs to makes teambuilding that much easier. A hero’s class can be seen in the uppermost left of the screen:
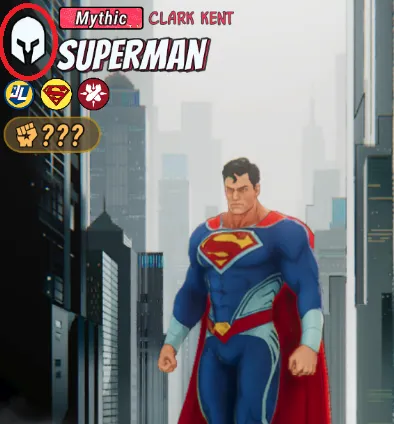
- Warriors use a helmet as their class icon. Warrior heroes are all-around melee fighters who can both deal and take respectable amounts of damage.
- Assassins are represented by a hooded figure. The best defense is a good offense for these heroes: their damage allows them to rapidly dispatch foes, but they suffer from a lack of defensive tools.
- Guardians rally under a shield icon. These beefy heroes excel at keeping their allies alive through defensive and control skills, at the cost of their own attack power.
- Magical heroes are represented by an open book with an icon above it. These champions use mystic arts (spiritual damage) to deal spectacular AOE and single-target damage.
- Supporters identify themselves via a cross icon. While they’re not as strong in direct combat, supporters are nonetheless necessary as they provide healing and buffs, both of which are crucial to victory.
- Intimidators are represented by a spiked circle. These heroes take a tactical approach to combat, preferring to debuff and weaken their foes to allow either themselves or their allies to land the finishing blow.
- Firepower heroes use a targeting reticle for their icon. These heroes boast superb ranged DPS but lack survivability.
Understanding these different abilities is crucial for tactical gameplay, as it allows players to adapt to various challenges and make their teams more versatile.
Stats and Basic Improvement
Now that we can classify our heroes, it’s time to take a closer look at their stats.
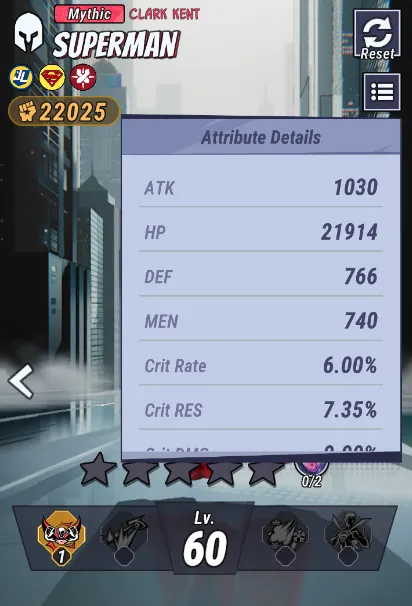
Let’s go over each of these quickly. I’ll be using the in-game definitions here:
- ATK – damage that the hero does. 1 ATK = 1 damage.
- HP – how much damage your hero can take before getting incapacitated.
- DEF – reduces damage taken from physical attacks.
- MEN – reduces damage taken from spiritual attacks. Spiritual attacks usually come from Magical heroes; attacks that deal spiritual damage explicitly state that they do that damage type, like this:
- Crit Rate/RES – increases the likelihood to land physical critical hits and avoid them, respectively.
- Crit DMG/DMG RES – affects the multiplier for crits inflicted and received, respectively.
- Spiritual AMP – increases spiritual damage.
- Dodge – chance to dodge physical attacks.
- ACC – increases chance to land physical attacks.
- Physical/Spiritual PEN – increases damage of physical/spiritual attacks by penetrating a certain amount of the enemy’s DEF/MEN.
- Energy Gain Bonus – rate of gaining bonus energy for ultimates.
- CD – decreased skill cooldown reduction rate.
- Healing Up – affects the amount of healing done by this character.
- Effect ACC/RES – increases/decreases the chance to hit/be hit with debuffs.
As a new player, it’s fine if you just focus on building up the four core stats of ATK, HP, DEF, and MEN. The easiest way to do this is by leveling up your heroes.
To level up your heroes, all you need to do is feed them experience items and money, both of which can be produced aplenty in your base via facilities (Training Nexus, surface settlements) or by clearing quests. Each level gives a hero a slight boost in stats. Like I always say – nothing fancy, but always useful.
At certain levels, a hero will need to use Stimulators to surpass their level cap. You can get these from quests, or from the Bio Lab at your base. You have been upgrading your resource generators, yes?
Bear in mind that while leveling heroes and breaking their level caps is a simple process, this gets very expensive very quickly. That’s where the LevelSync feature comes along.
Level Sync
LevelSync is unlocked by upgrading your Training Nexus and allows you to maximize your resources by only spending on 5 heroes.
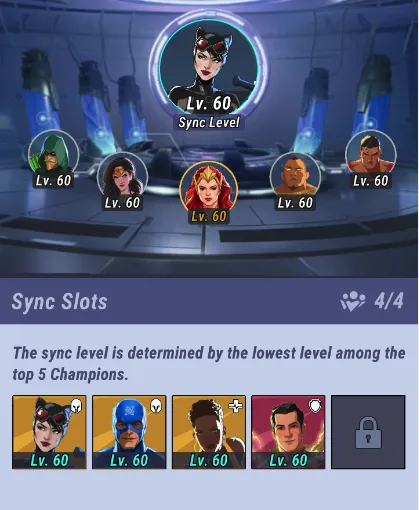
LevelSync works by granting temporary levels to heroes assigned to its slots – 3 by default, and more as you upgrade. Slotted heroes will gain enough levels to match the lowest level among your 5 highest-level heroes. For example, if your five highest-level heroes are at levels 55, 50, 49, 47, and 40, heroes in LevelSync slots will become level 40 – with no need for any actual investment. See what I mean about only needing to spend resources on 5 heroes?
The best part is that you can swap heroes in LevelSync slots as you please, though do note that there’s a 1-hour cooldown when releasing someone from a slot.
Resetting
Now that you know about LevelSync, you might now be wondering if you’ve made a mistake in spreading your starter resources too thin. Worry not, there’s a handy reset feature in the game.
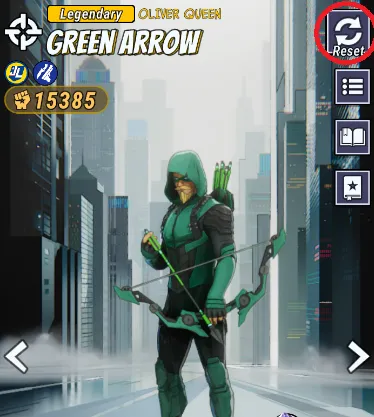
Any hero below level 300 can be reset to get a 100% refund on your invested materials. To do this, tap on the Reset button in their profile. Note that this has a 5-minute cooldown.
Lastly, though we haven’t discussed this yet – keep in mind that resetting a hero does not refund their Multiversal Force tree nodes. More on that in a bit.
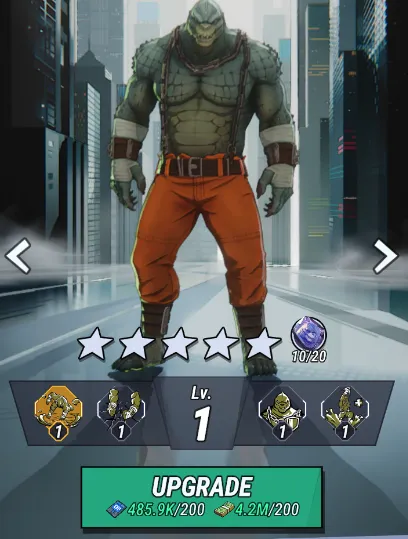
Rarity and Stars
Another way to improve your heroes is by increasing their star rating. The star system is tied to hero rarity, which is the background color of a hero. Epic heroes are purple, Legendary heroes are orange, and Mythic heroes are red.
These colors aren’t just for show as they show you how far a hero can grow. All you really need to remember is that purple (low rarity) heroes cannot grow via stars; only Legendary or Mythic heroes can. Don’t invest heavily in your purples, and if you have, go ahead and reset them!
Now, for the stars. You can see a hero’s star rating in their profile:
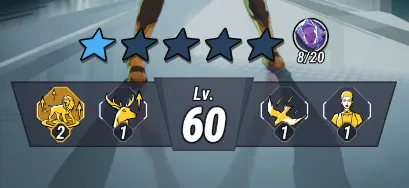
Each star that a hero has not only substantially increases their stats (think percentages), but also unlocks different abilities or increases their skill levels. Increasing a hero’s star count requires collecting duplicate shards, which enhances the hero’s overall abilities and base stats.
Star ranks start at 0 stars, and each star up adds one star. At 5 stars, you’ll reset to 1 star with a different color; in ascending order, these are white, blue, purple, orange, and red. That’s a total of 25 star ups!
To increase a hero’s star rating, you’ll need to sacrifice shards – the same ones from Mother Boxes and The Bleed. The higher a hero’s star rating, the more shards they’ll need for the next star. This also means that it’ll be much harder to max out Mythic heroes as a F2P player, since those only drop from purple, orange, or red (guaranteed) boxes or The Bleed.
Two more things. First – purple heroes can’t have dupes, since they can’t grow via stars. You’ll just get AC/DC shards if you pull copies of them. Second – you can “unlock” heroes in your roster if you have enough shards.
Gear and Legacy Pieces
Another way to improve a hero’s efficiency is by giving them equipment.
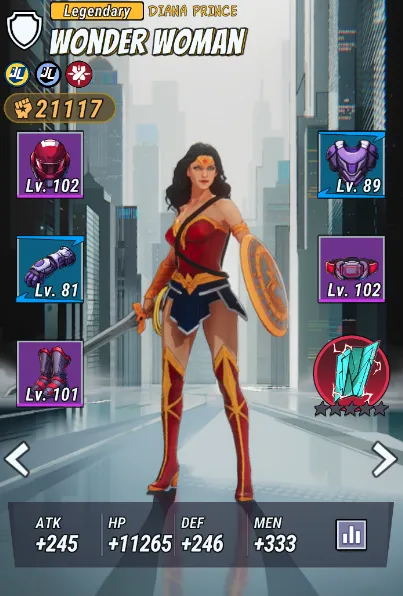
Each hero has slots for 5 pieces of equipment (helmet, body armor, gloves, belt, boots) and 1 Legacy Piece. At the bottom of the screen, you can see the total stats that hero’s gear gives them.
Let’s focus on the 5 standard pieces first. Each of these items raises a hero’s stats, with higher level and higher rarity gear giving a more substantial bonus. Selecting the right gear piece is crucial for enhancing a champion’s power. Note that gear is restricted to certain classes. You’ll also be happy to know that while there are thematic gear sets (by name), they don’t really do anything. Just wear the highest, rarest items you have.
Getting more gear is simple: you get it from quests, PVE fights, or crafting. Of these three, crafting is by far the most reliable way to get gear. To craft, you’ll need to head to the Armory at your base, where you can spend blueprints, alloys, and cash to forge equipment. The higher the level of your Armory, the rarer the blueprints it can use. You have been upgrading your Armory, right?
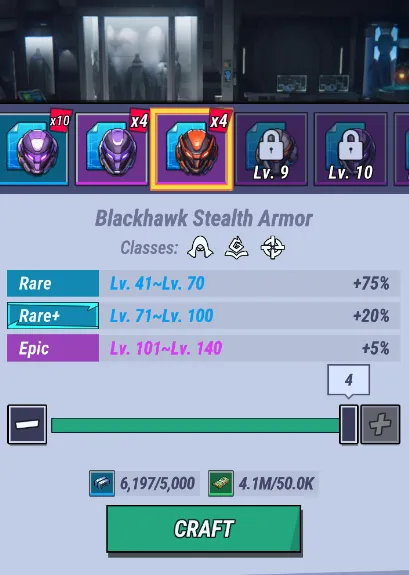
Each blueprint spent at the Armory has a “drop table”; the higher the rarity of the blueprint, the higher the chance they’ll drop stronger, rarer gear. It’s still a gamble, though, so you’ll end up with a lot of garbage pieces. They still have a use though: unwanted or low rarity equipment can be dismantled at the Armory to get Building Blocks, which you need to upgrade the Armory.
Next, let’s talk about Legacy Pieces. Unlike your base gear – helmets, body armor, etc., – these run the gamut from advanced pieces of tech to alien and magical artifacts. Legacy Pieces go into the 6th equipment slot, and provide unique and powerful bonuses, including passive skills.
Legacy Pieces come in different rarities – purple, yellow, and red – which you’re familiar with at this point. The higher the rarity, the better the Legacy Piece’s base stats.
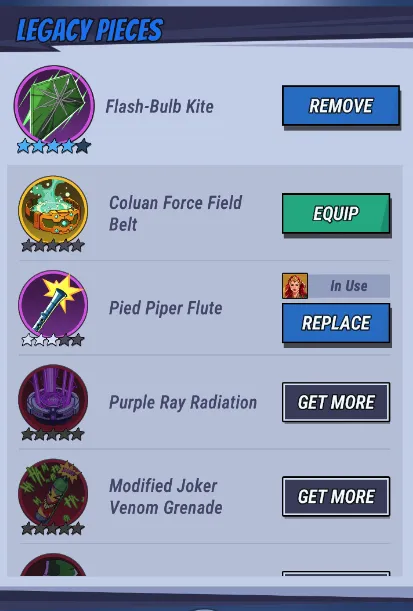
Unlike regular gear, the only way to get Legacy Pieces is to pull in The Bleed.
This also means that you’re going to end up with Legacy Piece duplicates. Worry not – as with heroes, Legacy Pieces have a star rating, meaning you can fuse duplicates to improve their base stats!
Multiversal Force
The last aspect of active hero development you need to learn about is Multiversal Force. Don’t be intimidated by the name, this one’s simple.
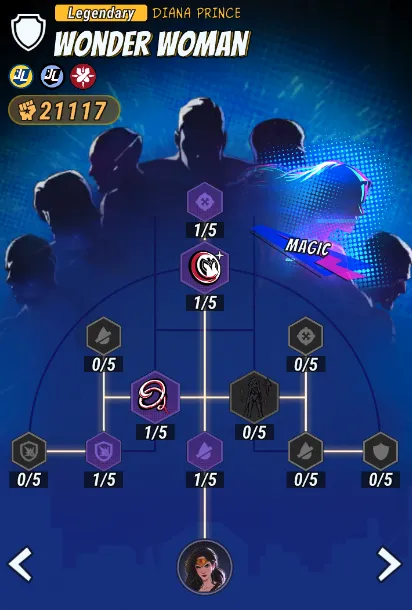
Multiversal Force is essentially a tree of passives that a hero can benefit from. Each hero has a unique Multiversal Force tree, but you’ll always need both cash and AC/DC Shards to buy nodes in this tree. Shards mostly come from the battle pass, quests, and the Mystery Store.
Nodes in the Multiversal Force tree are gated either by a minimum level or by a prerequisite node.
Factions
Finally, there are factions. Each hero belongs to at least one faction, which you can see here:
Factions have bonuses for deploying members of the same faction; the more members of the same faction in your squad, the bigger the boost. For example, deploying multiple heroes from the Justice League can unlock synergy buffs, providing additional stat boosts and strategic advantages in combat. You can tap on each faction icon to see what bonuses that faction grants.
Picking Fights
You’ve probably fought a bit at this point, but with how quickly the game tells you to tap on things and press on shiny buttons, you might not have found every single battlefield you can participate in. Strategic decisions, such as utilizing manual controls to effectively maneuver captains during battles, are crucial to emerge victorious in challenging encounters. Here’s a list of places you can pick fights – and the rewards for doing so.
Quick Tips
- All combat in DC: Dark Legion is automatic. All you can really do is choose when to use ultimates, and on what target.
- You can turn on double speed, cancel ult cut-ins, and enable auto-skill use to streamline combat.
- The main story involves completing chapters. Several of these chapters require you to run around a story map.
- In story maps, tap the big button to make progress – some steps will require fights.
- While you’re at it, make sure to tap on collectibles on the map screen for extra resources.
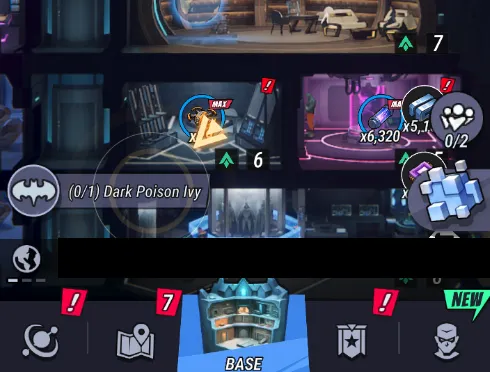
- You’ll also need to fight certain Dark Legions. Tap on the red nodes to fight these dark doppelgangers.
- Refer to your chapter quest list in the bottom left to find Dark Legions that will grant you progress.
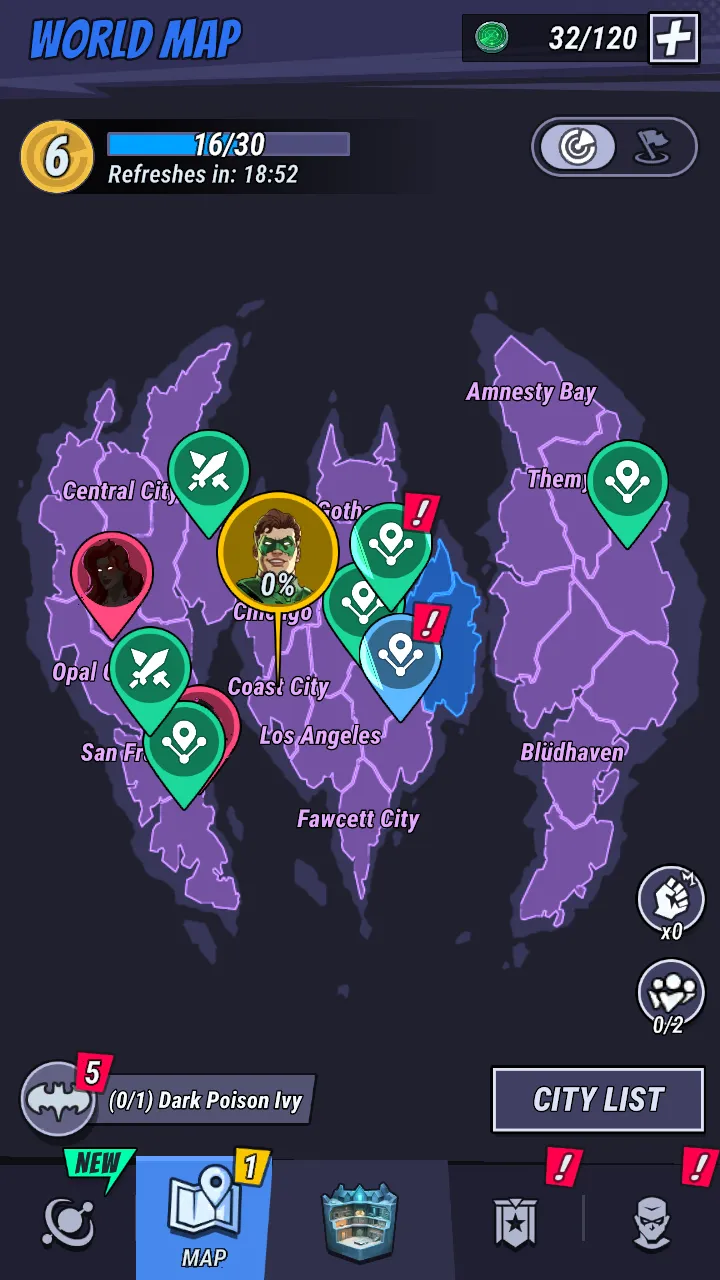
- Crisis Response mode is freeform PVE. You can either pick a fight (sword icon) or go on patrol (linked circles icon). Both net you small amounts of resources but can be done pretty much infinitely.
- Don’t forget to retrieve your loot; any node with an exclamation point is ready for claiming.
- You can tap on the squads button to auto-locate patrol areas.
- The number of teams you can deploy at once to patrol missions depends on the number of squads you have available. One squad is a team of 5. By default, you only have 1 squad.
- This is why I said to get the Research Laboratory up ASAP, so you can have a second squad.
- Squads don’t really matter if you’re just doing overworld combat missions.
- While in Crisis Response mode, you can infiltrate (attack) other players. This will initiate a PVE fight with their team. Win and you get a chest with better loot drops, while they lose some of the resources they would’ve gotten. Lose, and you get your attempt back.
- You only have 3 successful infiltration attempts per day.
- The stronger the enemy is compared to you, the better the chest you’ll get.
- Meta Brawl (PVP) is mostly used to gain resources. Beat an enemy to get ladder points.
- You need to set up a defense team, which other players will fight when they choose you as their opponent.
- PVP fights give bonus resources whether you win or lose.
- Ladder placement is settled every week. You’ll be moved depending on your placement in your current tier.
- You get daily rewards based on your current ladder ranking, as well as a big one-time reward for entering a higher tier for the first time.
- PVP battles give you House Chips, which can be spent in the Meta Brawl store.
- This in game currency can only be won from PVP, and the PVP store has nice stuff for sale. Long story short: join PVP battles whenever you can.
- The Anti-Crime network lets you grind for essential resources: experience, alloys, chips, and stimulators.
- The higher the difficulty of each network, the bigger the rewards.
- You can also choose to sweep (auto-clear) network stages on the highest cleared difficulty.
- Fighting in the Anti-Crime network requires Intel Points (stamina) which regenerate over time.
- The Training Simulator is a series of increasingly difficult PVE fights. Clear stages to get prizes.
- Clearing 10 stages in the simulator increases the simulator’s level. The Training Simulator passively produces experience based on its level.
- Everybody on the server receives a prize the first time any player on that server hits specific levels on the simulator.
- Each stage requires 1 Simulation Quota to enter, which regenerates over time.
- Combat Cycle pits you against a powerful boss with a highly-specific move set. The more damage you do to the boss (damage milestones), the more experience you’ll earn.
- There are daily prizes based on your Combat Cycle score. The higher your rank, the better your daily prize. Just having a score qualifies you for a 10 Source Energy Gems via daily reward.
- You have unlimited tries in Combat Cycle.
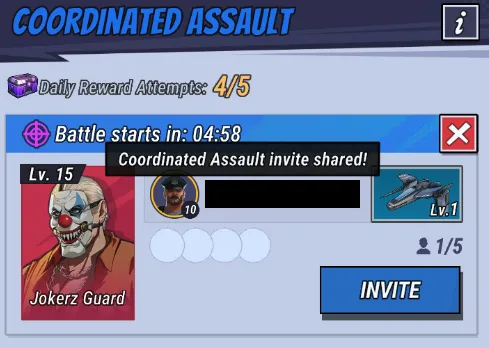
- Coordinated Assaults let you assemble a party to fight a tough foe.
- You can send an invite to friends and league mates via the invite button.
- Coordinated Assault enemies have a strict combat power requirement – you need to meet this minimum to join or initiate a fight with that enemy.
- Each deployed team in Coordinated Assault will eat up one squad slot. If initiating a fight, you cannot attack the same target twice.
- Coordinated Assault combat is auto-resolved behind the scenes.
- You can only get rewards from Coordinated Assault five times per day. You do not have to initiate to get maximum rewards.
- Don’t forget to claim your spoils via the squad tab, just like in overworld PVE fights.
Combat
First, let’s talk about combat in general. Like most mobile games, battles in DC: Dark Legion are automated, and there’s not much you can do to influence the outcome of combat aside from manually using ultimates and designating targets.
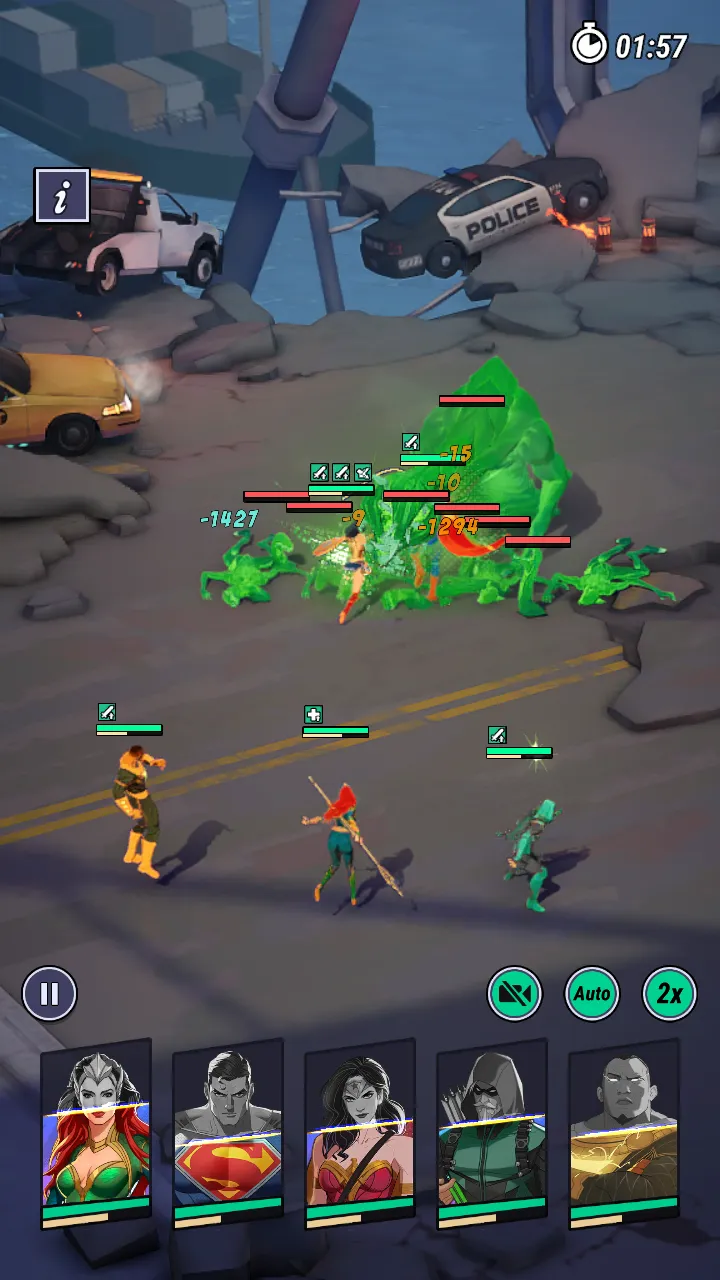
Since most of the fight is determined in the pre-planning step, you can opt to use double speed, cancel ultimate cut-ins, and allow automatic ultimate use to speed up battles. These buttons can be found above your hero lineup.
Campaign Stages
Now that that’s out of the way, let’s talk about how to progress through stages. Campaign levels are very important at all levels of the game as they grant huge amounts of Reputation, which you need to upgrade your War Room.
Start a campaign stage by going to the map, then tapping on a gold node.
This will bring you to that campaign level. Luckily, there’s not much you need to do here – just tap the button at the bottom of the screen to watch the story unfold, and occasionally, you’ll need to play a minigame or fight.
One thing you should watch out for is bonus resources in a campaign stage. These can be found strewn about:
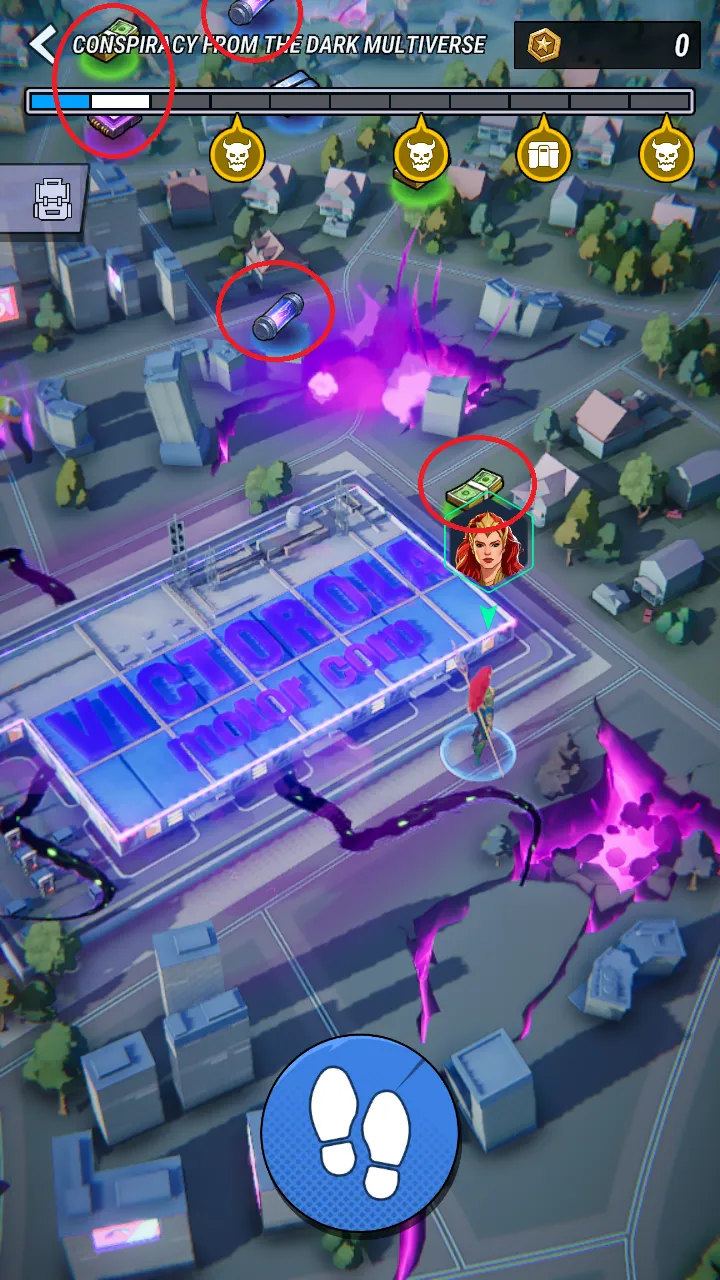
These don’t give many resources, but they’re missable.
Dark Legion Fights
The other half of campaign progress comes from picking fights with the Dark Legion, DC’s evil universe counterparts from the Dark Multiverse. These evil doppelgangers are indicated by red nodes on the world map screen:
Be sure to check with your chapter progress (lower left of the screen) to see which Dark Legions you need to subdue to make progress. These do count retroactive progress, but they’re also very challenging, so make sure you’re picking the right fights!
Crisis Response Mode
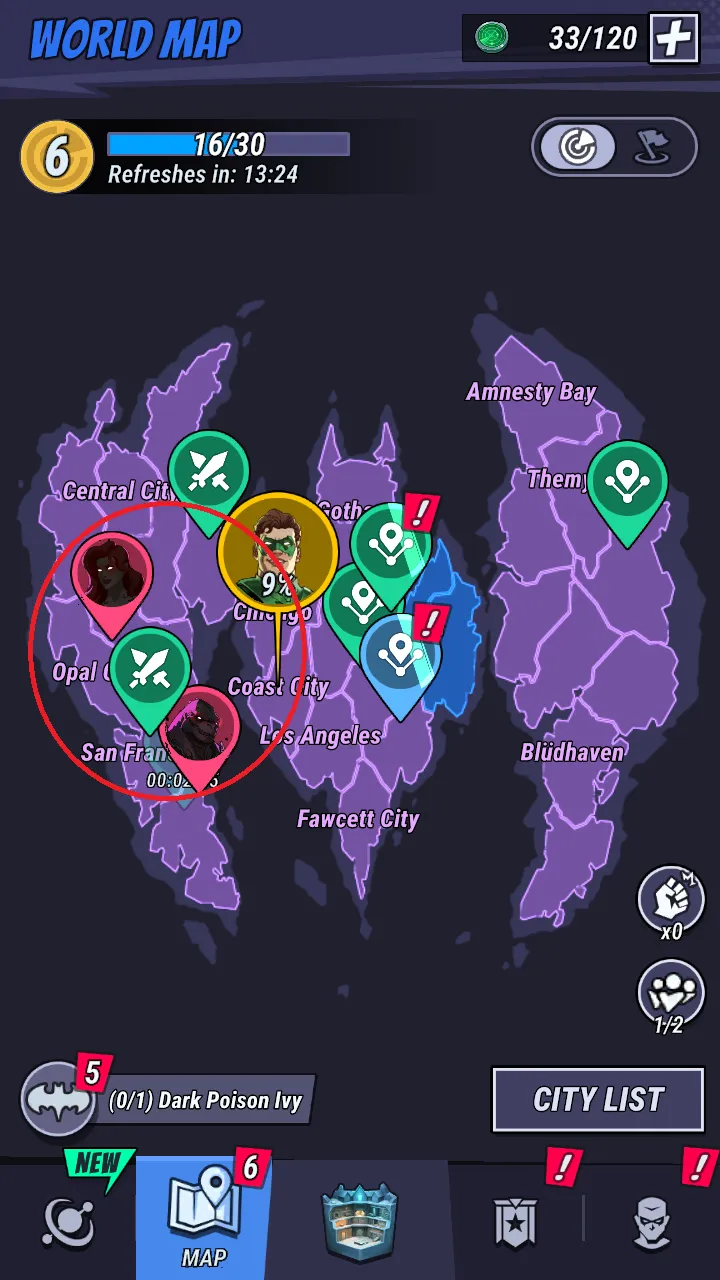
Crisis Response mode is DC: Dark Legion’s equivalent of the overworld in other empire builders. To access PVE fights on this layer, tap on any non-story node in the world map.
There are three types of fights you can pick on the overworld:
- Combat via the sword icons. These will immediately plunge you into combat with an enemy team.
- Patrol via the linked circle icons. This requires both a squad and some time.
- Infiltration, which we’ll talk about in a separate section.
Clearing combat and patrol nodes gives you a small number of resources but note that loot from these nodes must be manually collected. If you see a node with a red exclamation point, that means that you have loot there waiting to be claimed.
If you want to quickly locate a patrol to clear, you can tap on the plus on the squad icon on the lower right.
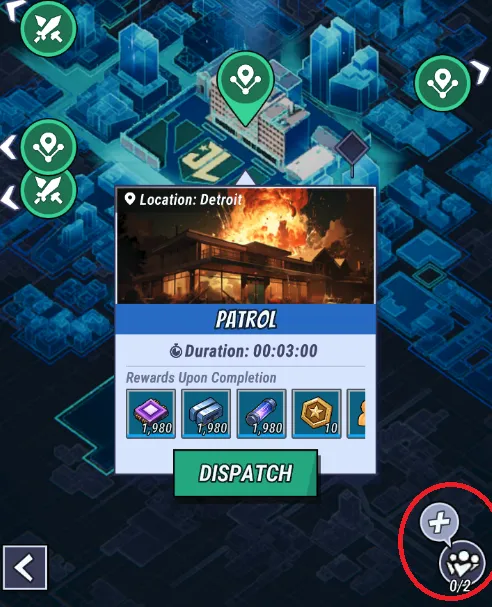
Tapping on the squad button (the big one, not the plus) also brings up a list of your squads and lets you claim any rewards from fights they got into.
If you haven’t gotten the Research Lab up and running yet, *this* is why I said to rush it. You can only deploy heroes if they’re in a squad, and if you have more than one squad, you can hit more patrol zones at once, greatly improving your resource gain!
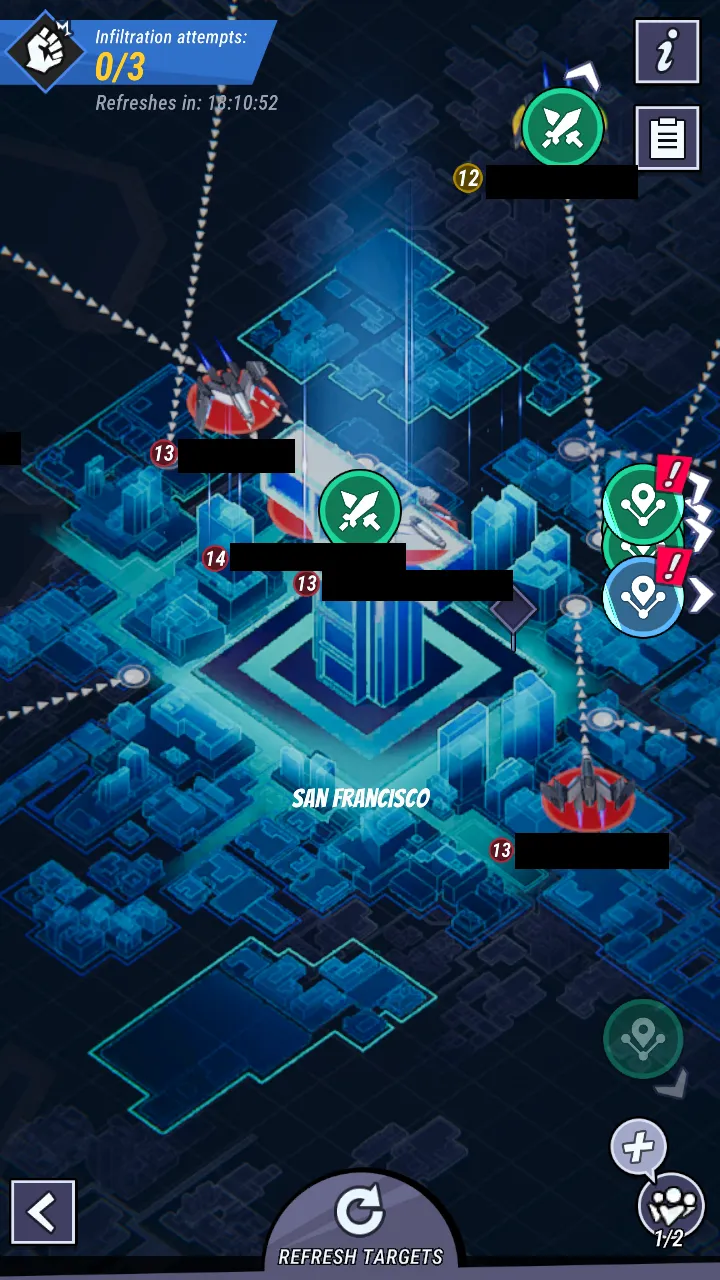
Infiltration
Infiltration is the third action you can take on the overworld, and it’s a pseudo-PVP mode.
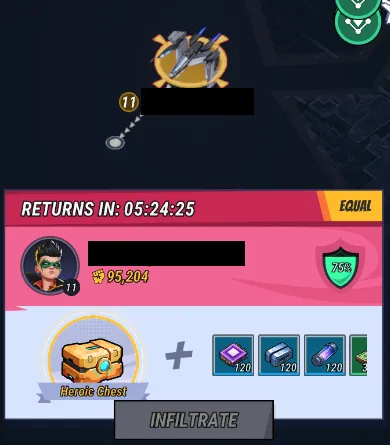
Infiltrating a player means attacking one of their squads on the overworld and fighting whatever team they sent out. Winning means you’ll get a portion of whatever resources they got (they’ll lose some of the gains) as well as a chest with better loot. The stronger the enemy is compared to you, the better the bonus chest you’ll get. You only get 3 shots at infiltration each day, but note that losing does not consume an attempt.
Unlike other empire builders, lost battles aren’t that big of a setback here considering how quickly overworld nodes appear, and how many ways there are to gain resources.
Meta Brawl
If you’d rather punch other players in honorable combat, you can take it to the Meta Brawl arena.
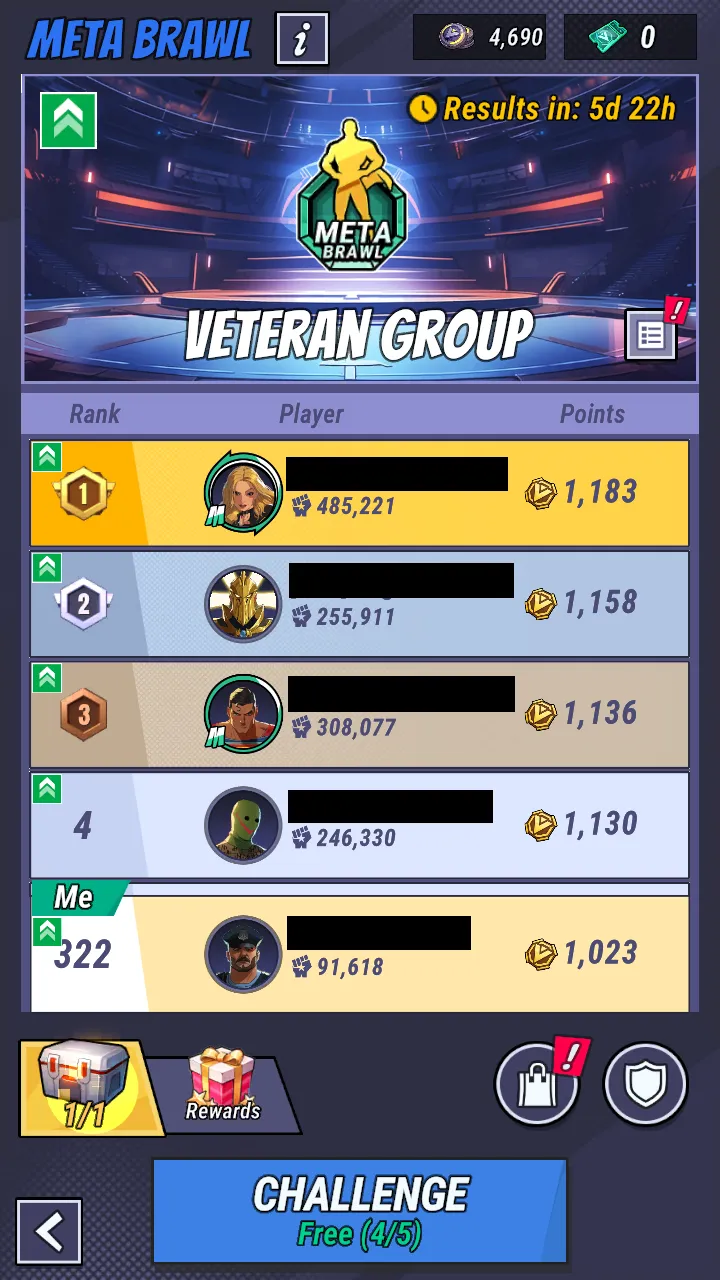
There’s a ranking system in Meta Brawl. Players will be sorted into different brackets based on their strength. Picking fights with them will earn you ladder points (or lose them, if you lose). These fights, once again, are all in auto-combat. After seven days, all participants will be tallied and will change their position on the ladder (including rank up/down) based on their ladder points.
Fights in Meta Brawl will have you square off against your opponent’s preset defense team. Don’t forget to set your own team for defense, via the shield icon on the right side to protect your hard-earned points – and especially do not forget to update your own team as you climb higher in the ranks. Unless you like getting farmed for free ladder points, of course.
The Meta Brawl isn’t just a good way to pick fights, it’s also profitable:
- Finishing all five of your free daily PVP battles nets you some sweet resources whether you win or lose: 25 Source Gems and 250 House Chips are up for grabs each day.
- There’s also a ranking system in play. You get daily rewards based on your ladder position in your bracket. The higher your position, the more you get.
- You get a big one-time reward the first time you enter a new PVP bracket.
House Chips, which come from just taking part in PVP battles, can be exchanged for some neat stuff at the Meta Brawl store. You’ll be able to nab some neat exclusive rewards from this store, so yes, you absolutely, 100% should participate in PVP.
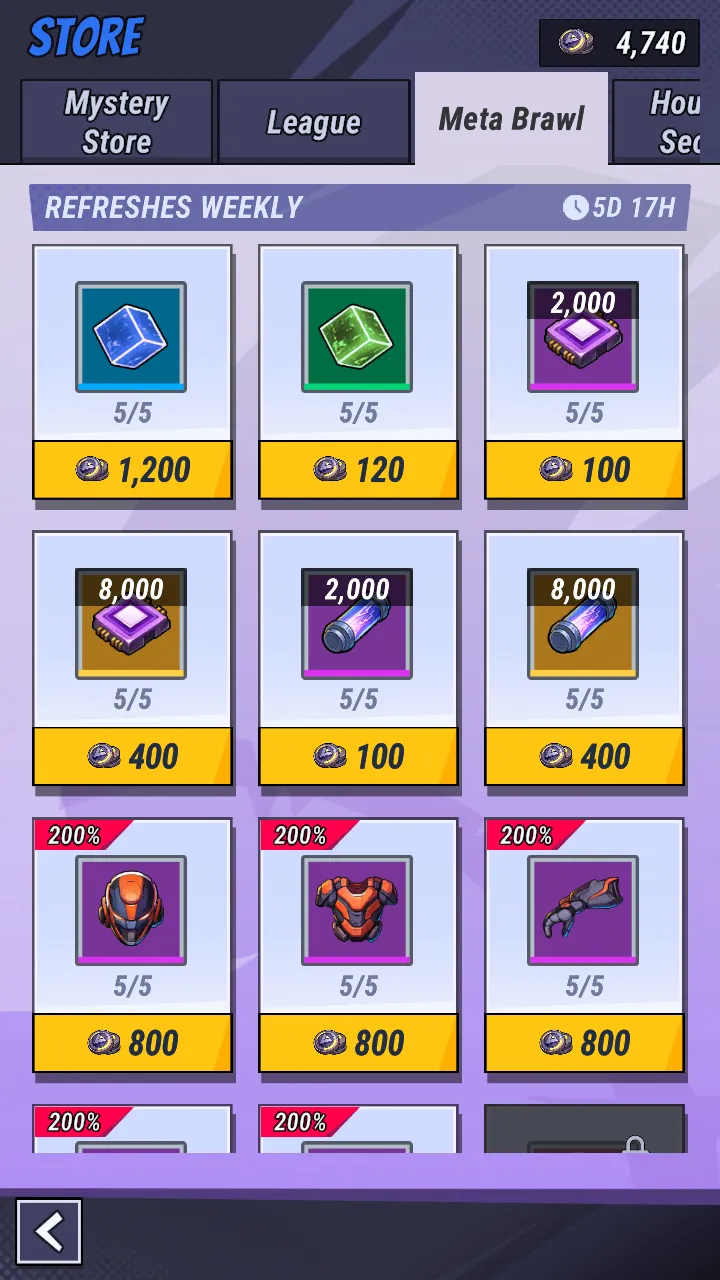
You can access the PVP store either via the shopping bag in the Meta Brawl screen (beside the defense team icon) or entering the store from the main menu.
Anti-Crime Network
The Anti-Crime Network is DC: Dark Legion’s way of letting players directly grind for essential resources en masse: experience, alloys, chips, and stimulators.
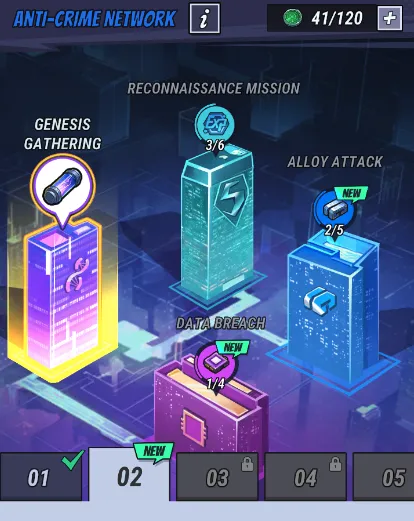
The nice thing about the Anti-Crime Network is that you can choose which resource to grind for. Resource yields will also improve as you grow stronger, since higher-level network stages drop more resources. If, however, you can’t clear a stage, you can always choose to sweep (auto-clear) the highest difficulty of a network you’ve already cleared. Great if you don’t have time to spend.
Each fight in the Anti-Crime Network costs 20 Intel Points (think of them as stamina), and these regenerate over time.
The Training Simulator
The Training Simulator is a ramping series of PVE fights that will truly test your mettle.

In the Training Simulator, you’ll face off against sets of enemies. Completing a stage nets you some prizes, and each set of 10 will increase the simulator’s level – giving you a one-time reward and passively improving its experience gain (don’t forget to claim). The higher the simulator’s level, the harder the enemies will be, and the bigger the passive prizes.
As the Training Simulator is made to make everyone better, every player on a server will receive a reward the first time any player reaches specific stages. These rewards can be claimed by tapping on the trophy in the upper left.
Each attempt in the Training Simulator costs 1 Simulation Quota, and these regenerate over time.
Combat Cycle
The Combat Cycle is a difficult PVE battleground where, instead of a bunch of bad guys, you’ll have to face off against a single, powerful boss with a very specific move set.

You’re not supposed to win the Combat Cycle. Instead, you get experience based on how much damage you did to the boss – which requires you to thoroughly understand its skillset and build a team to counter it. The more damage you inflict and the more milestones you achieve, the more experience you’ll get.
All players on a server who participate in the current Combat Cycle will have their scores tallied. Higher ranks mean better prizes, but everyone who’s scored in the Combat Cycle will receive some Source Gems as a daily prize.
As Combat Cycle is meant to be a challenge of mastery, you have unlimited tries here.
Coordinated Assault
Coordinated Assaults, as the name implies, are coordinated attacks against powerful targets.
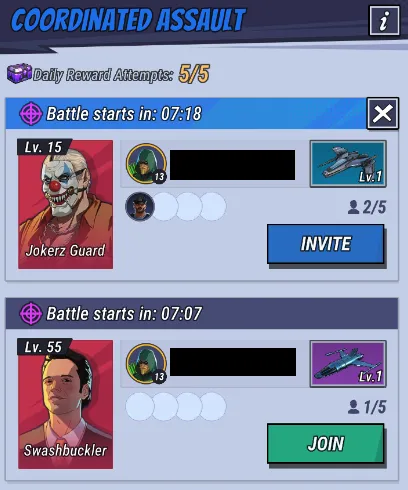
Uniquely, Coordinated Assaults can allow friends and leaguemates to join an attack to make it easier. Each player that dispatches will help with the fight, and everyone who chips in will get rewards. Note that there are strict combat power requirements to fight Coordinated Assault enemies – if your team doesn’t have enough combat power, you won’t be able to join at all.
A few things to keep in mind:
- When deploying a team to a Coordinated Assault, you’ll need to consume one squad slot. Again, if you haven’t gotten your Research Laboratory up yet, now’s the time.
- You cannot start multiple attacks on the same target, but you can join attacks against them as long as you’ve got squads to spare. For example, if you start a fight with the Jokerz Guard, you can’t start another Jokerz Guard fight, but you can join a leaguemate or friend in their attack if you have free squad slots.
- You can only claim rewards from Coordinated Assault five times per day, but you don’t need to be the player initiating the attack to get rewards. Don’t forget to claim your spoils via the squads tab – just like in overworld fights!
League Basics
While DC: Dark Legion isn’t as heavy on PVP as other empire builders (yet), joining a league is still a very important step for new players. In this section, we’ll quickly run through what a league can do for you – and why you should join one ASAP.
Quick Tips
- League members can offer small boosts to anything that has a timer by tapping on the help button (yellow handshake).
- Each League member that helps with a project reduces the wait timer by a small amount.
- Active help requests will appear near the league button as a yellow handshake. Tap on it to provide help to all active requests.
- Helping costs nothing but a tap.
- League technology provides a second layer of passive upgrades, just like your normal tech tree.
- Completing League tech research requires members to donate cash or gems. Cash donations are limited and replenish over time; gem donations can be made infinitely.
- Try to contribute towards the tech marked by your league leader (marked with a thumbs up), as this tech will get a bonus towards its completion.
- Leagues provide an easy way for players to find a party for Coordinated Assaults.
- Leagues can also join raid bosses. The more damage your league does, the more prizes all participants get.
- Chests appear based on league member daily activity. These provide small but useful infusions of resources.
- Bigger chests appear if anyone in a league buys stuff from the cash shop.
- Leagues have daily income based on how many territories they own. These can only be taken via the Guardian Challenge.
- Helping your league members out nets you League Contribution, which can be spent at the League Store.
- The higher your league’s level, the bigger the league store’s stock gets.
League Assistance
At this point, you’re probably used to all the timers in DC: Dark Legion. Building, upgrading, researching – all these things run on a timer. Joining a league will alleviate some of that waiting.
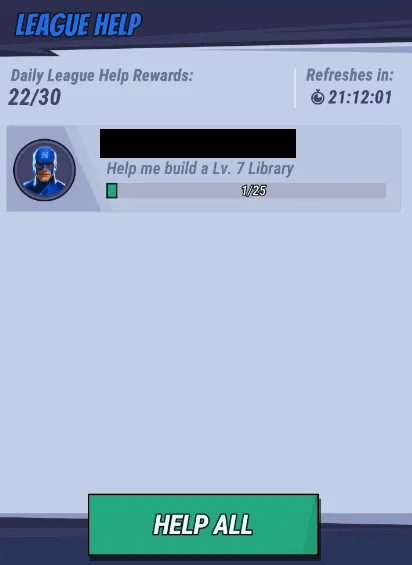
While in a league, you can request assistance with any timed project by tapping on the help button (the yellow handshake) that appears near that timer. This will send a call to your leaguemates for help, and any of them that respond will speed up that timer by a very small amount. It’s not much, but every little bit helps!
Of course, you can help your leaguemates too. If any help requests are up, they’ll appear as another handshake bubble near the league button. Simply tap on it to provide assistance with whatever projects are up.
Note that providing help costs you nothing but a tap.
League Tech
Your Research Lab’s tech tree is good, but what if I told you there was a second layer to it? That’s where league tech comes in.
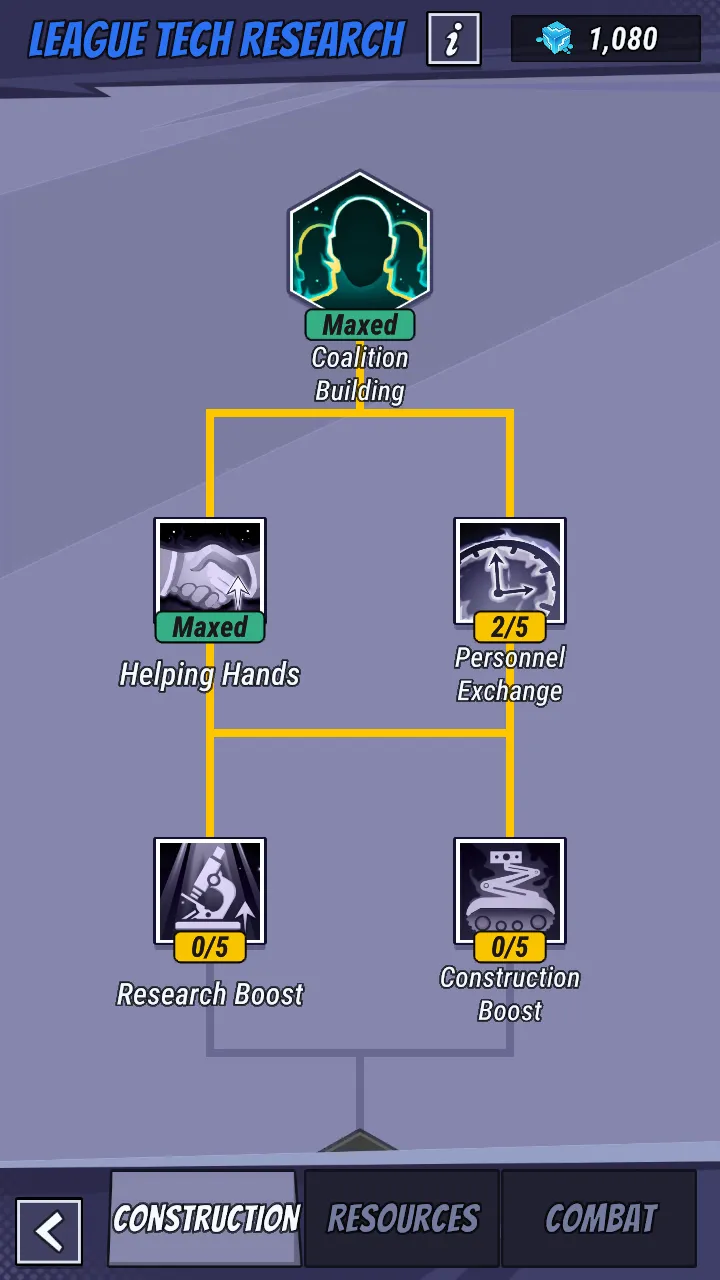
Unlike the Research Lab, the league tech tree works differently:
- Research requires league members to invest either cash or gem into the project. Each donation increases research progress.
- Cash donations can only be done a limited number of times per day, while gem donations are unlimited.
When choosing a tech to donate to, check around to see if any tech has a thumbs up on it. That means that your league leader is suggesting to focus donations on that tech – and any donations made to that tech contribute more.
League Fights
Joining a league means you’ll have plenty more allies to call upon for difficult battles, such as Coordinated Assaults.
By tapping the “Invite” button when you start a Coordinated Assault, you’ll send an aid request that can be seen in your league chat channel. You’ll also be able to quickly join your leaguemates in their attacks, as the Coordinated Assault screen will now also show any open Coordinated Assaults.
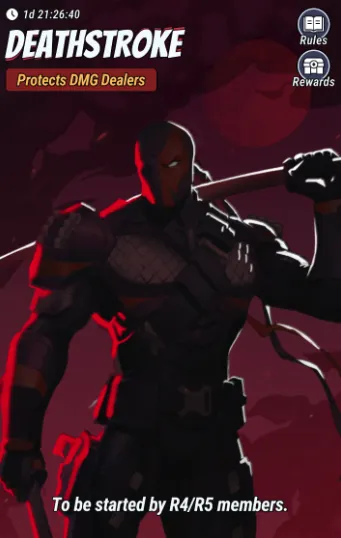
At higher levels, leagues can also join in periodic boss fights. These fights will reward the league – and all participants – based on the damage they deal to the boss. Boss fights must be initiated by higher-ranking league members.
League Chests
Leagues provide small but useful pockets of common materials like alloys and cash.
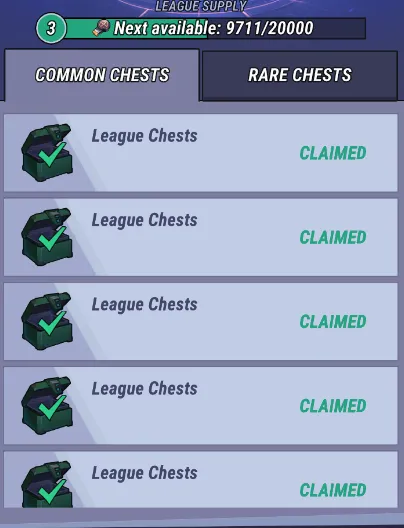
Chests are generated based on the daily activity of your leaguemates. These chests are sent to everyone, so go ahead and open them all. They don’t hold anything exciting, but with how many things you need to spend resources on (especially alloys), free is always welcome.
Note that sometimes, rarer chests will appear. These chests spawn if anyone in your league buys stuff for real life. It’s a nice trickle-down effect.
Territory
Leagues have a daily income and resource bonus that depends on how many cities they hold.
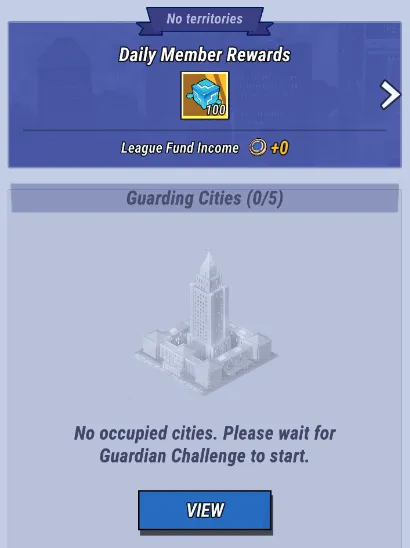
This income can be increased by taking on – and winning – the Guardian Challenge that appears every so often. Be warned, though, as this is essentially a PVP mode that everyone will be striving to win!
If you’re in a casual league, don’t fret. You get 100 League Contribution per day just for existing. Be sure to claim it via the “Territory” tab in your league!
League Store
Helping out your league via help timers or donating to research doesn’t just foster a better sense of camaraderie – it also gives you tangible rewards in the form of League Contribution. This League Contribution can then be spent in the League Store for some nifty items.
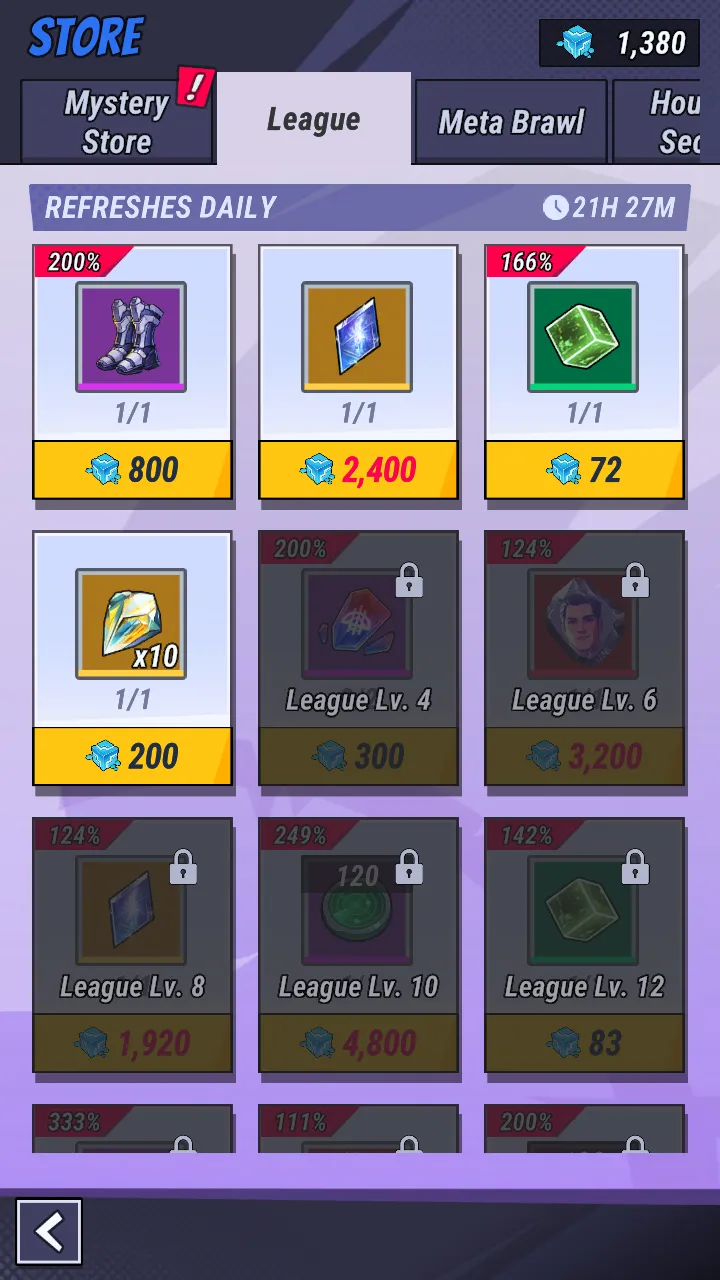
The higher your league’s level, the more things the League Store will have in stock.
Gathering Freebies
We’re almost done! The last thing you need to know is where to get freebies. With how resource-intensive DC: Dark Legion is, we’ll want every last free resource that we can get. Here’s a quick rundown on scoring free stuff.
Quick Tips
- Always join events. You can see current events – and future ones – by tapping on the “Event” button in the upper right.
- Events with an exclamation mark means that there’s something to claim or there’s something you can join.
- The Path of Justice is a series of quests aimed at new players. Make sure to complete this to get a Mythic hero and a ton of resources!
- The 7-day sign in bonus for newbies gives you a few resources. More importantly, it nets you Harley Quinn, a great Mythic hero.
- You need to manually claim your prizes by tapping on each of them in the sign-in menu.
- Target quests net you small one-time prizes for hitting certain easy milestones.
- Daily quests are tied to the battle pass (called The Monitor’s Legacy). Each completed daily quest nets you some daily activity points. At certain milestones of daily activity, you can open a chest to get some resources and battle pass experience.
- The “Gift of the Source” and “Daily Deals” pages in the cash shop give you a tiny amount of free daily resources.
- Hero backstories can be read for a small number of resources. You need to increase star ratings to unlock more stories.
- Getting new heroes and Legacy Pieces and increasing their star level nets you points in the Collection. At certain milestones, you can redeem a reward.
- Pre-registration bundles are in your inventory. They give some resources, but the red box gives you a Mythic hero selector. Choices are limited, but hey, free red hero!
Events
The primary source of freebies in any live service or mobile game is events. You can view current events, as well as upcoming ones via a calendar, by tapping on “Events” in the upper right. You can then scroll through current events. Pay close attention to those with an exclamation mark, however, as that means there’s either something for you to claim or something you can join in. Always join events whenever you can.

There are two events you should focus on as a newbie – the Path of Justice and the 7-day login for Harley.
Let’s start with the Path of Justice, which is the first and probably most important source of newbie freebies. This event tasks you to complete certain challenges over 5 days, such as upgrading rooms, taking part in game modes, improving your heroes, and so on. Note that there’s no time limit for this, quests count retroactively (you can do them in advance, and it’ll count towards the objective), and you can always go back to any day to do its quests.
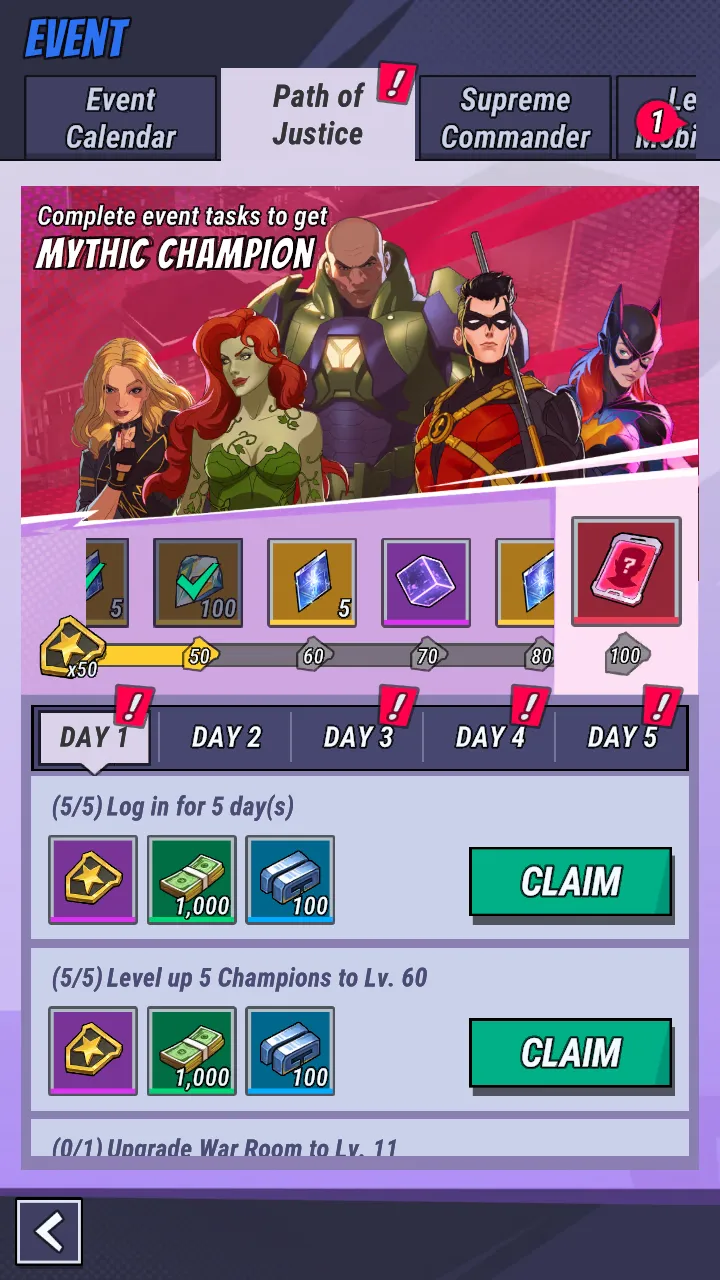
Each completed quest gives a small amount of resources but also gives you some points towards filling up the Path of Justice’ meter. At certain milestones on the meter, you can claim some nice goodies such as World Anvil Shards, Source Energy Gems, and boxes.
Most importantly, reaching 100 points in the meter allows you to claim the Path’s ultimate prize – a Mythic hero!
The second big event for new players is the 7-day login bonus. This one isn’t accessed via the event menu, but by tapping the “Sign In” button to the right. Signing in each day for 7 days as a new player will net you some modest resources – boxes and Source Energy Gems.
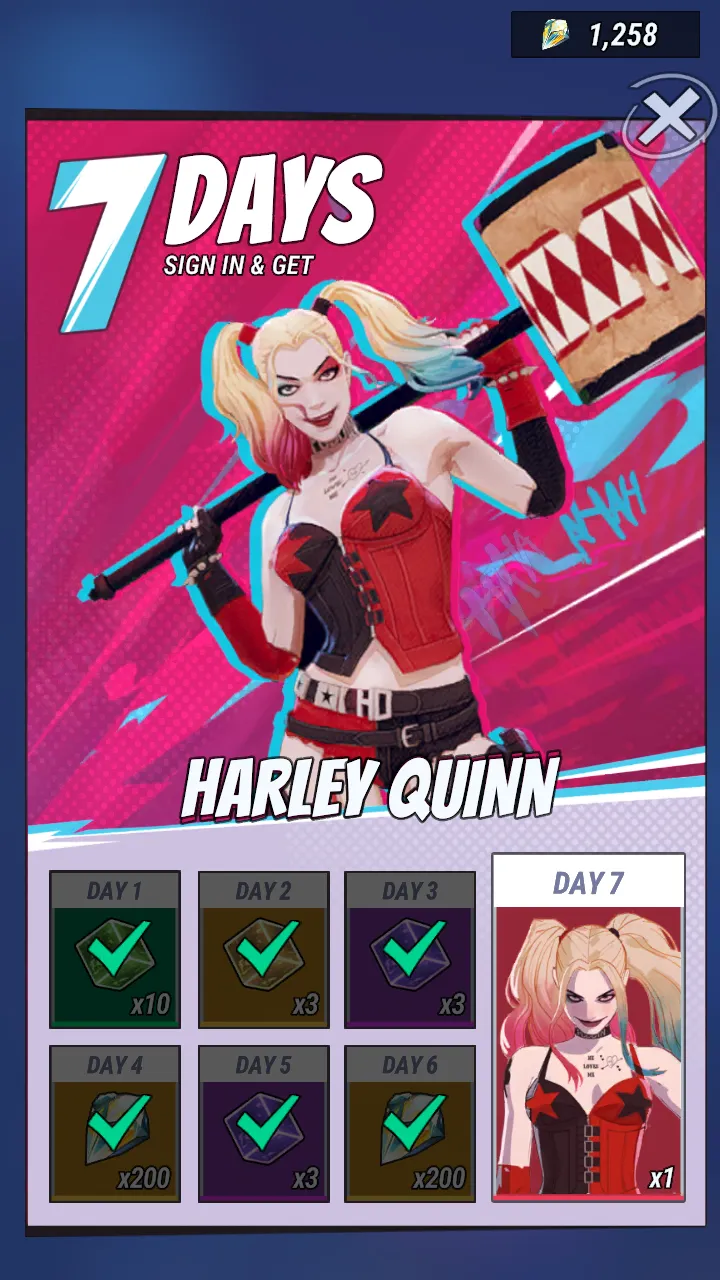
However, the real prize is on the 7th day. This will net you yet another Mythic hero, Harley Quinn, who’s a very decent brawler!
Quests and The Battle Pass
Chapter quests aren’t the only tasks you need to complete in DC: Dark Legion. You have both target and daily quests, which you can access via the same menu as your chapter quests:
Target quests are one-time rewards for completing certain small milestones. Just play the game to complete these – by now, you already know how to fight, upgrade, and build, so these will be easy.
On the other hand, daily quests are tied to the battle pass, which is called The Monitor’s Legacy. Let’s talk about the battle pass first.
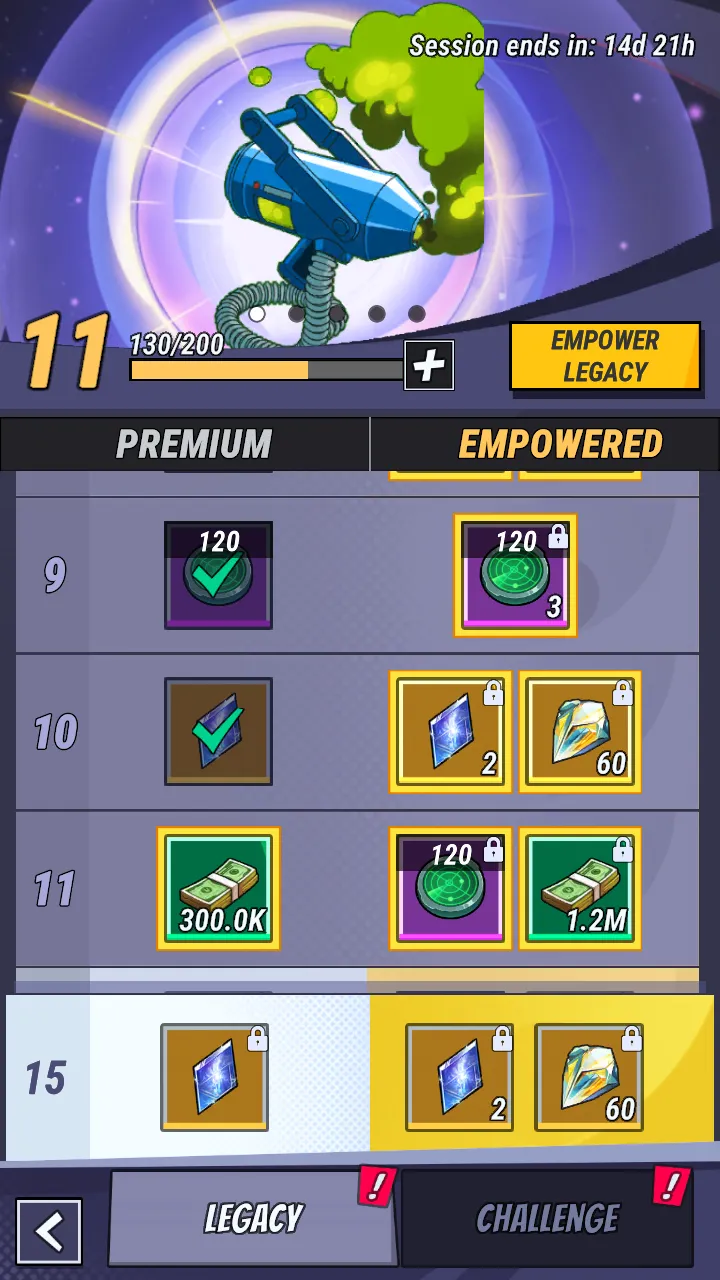
To access The Monitor’s Legacy, tap on the main menu (three lines on the left side of the screen), then select Legacy. As with all battle passes, this one has both a paid and a free version. Be sure to claim your freebies by tapping on each icon.
Progressing the battle pass requires you to complete both one-time challenges and daily quests. One-time challenges can be seen (and redeemed) by tapping on “Challenge” in the battle pass menu. Daily quests, on the other hand, can be seen on the quests menu.

Each daily quest you complete adds some daily activity points to the meter. At certain thresholds, you can open a chest via the meter, which nets you some minor resources and battle pass experience.
Shop Freebies
Next are shop freebies.
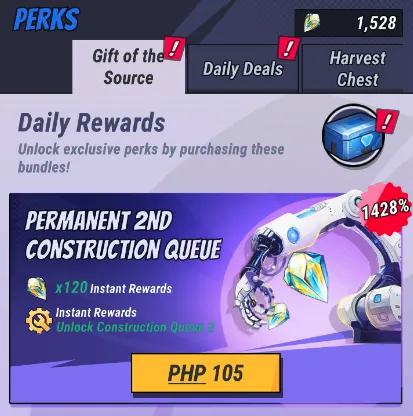
To enter the cash shop, tap on the gold shopping cart banner to the upper right, just below your Source Energy Gem count. Once you’re in the shop, you can claim freebies from both the Gift of the Source and the Daily Deals page. They’re really not much, but we take all we can get.
Hero Backstories
Not much point collecting heroes if we don’t dive into their stories. To view a hero’s stories, tap on the book icon (upper right) in their profile.
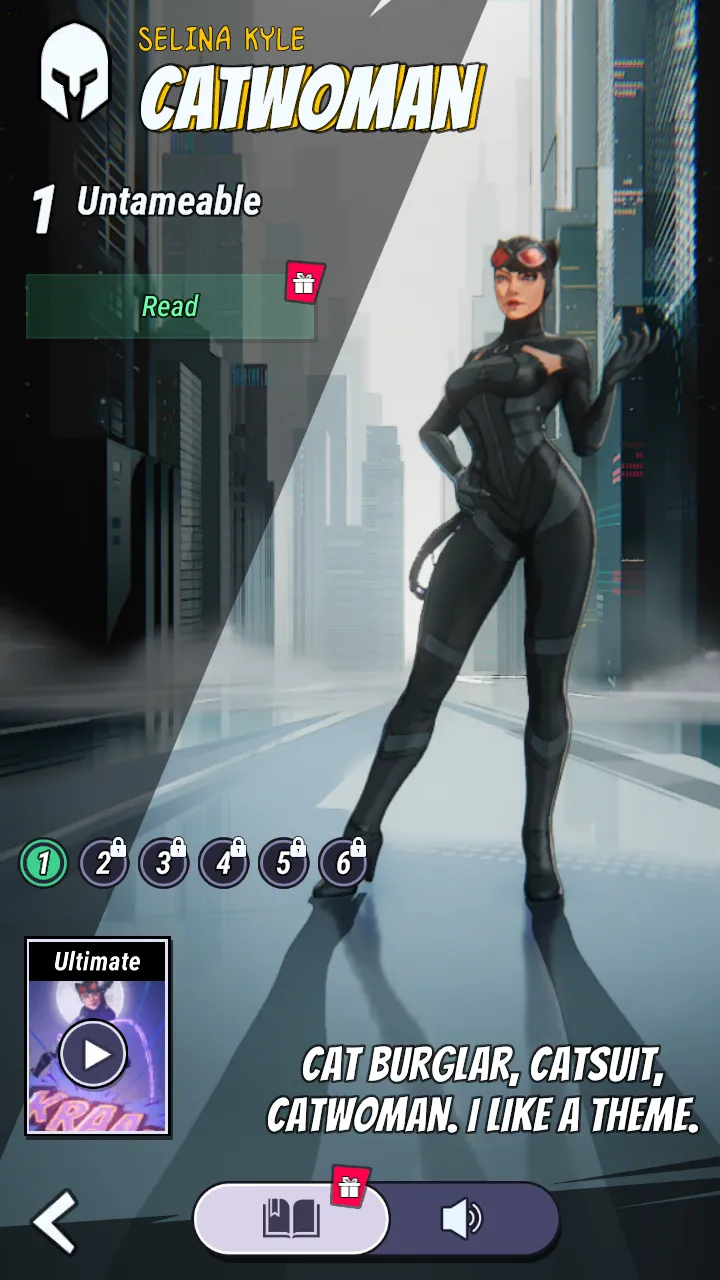
This will give you a short blurb about the hero – their backstory, their motivations, and other interesting snippets. In the interest of free stuff, it’ll also give you some resources, such as AC/DC Shards and cash.
To unlock more stories, raise the hero’s star rating.
Collection
As you play DC: Dark Legion, you’ll collect a huge amount of heroes and Legacy Pieces – and you’ll get rewards just for owning them. To view the Collection, tap on the main menu (three lines, upper left), then “Collection”.
For every hero and Legacy Piece you have on your account, you’ll get some points; you’ll also get some more points for increasing the stars of both heroes and Legacy Piece. Fill the meter at the top with enough points, and you’ll be able to redeem a minor prize – usually some Source Energy Gems.
You can also use the Collection to view heroes at maximum investment level, with their intended Legacy Piece.
Pre-Reg Bundles
Last, but definitely not least, are pre-registration bonuses. Even if you didn’t pre-register for DC: Dark Legion, you’ll still receive these freebies – though I’m not sure until when they’ll be available. As of writing (April 2025), they’re still up for grabs.
To get your pre-reg bonuses, open your inventory via the main menu then “Inventory”. They should be at the very bottom of the page.
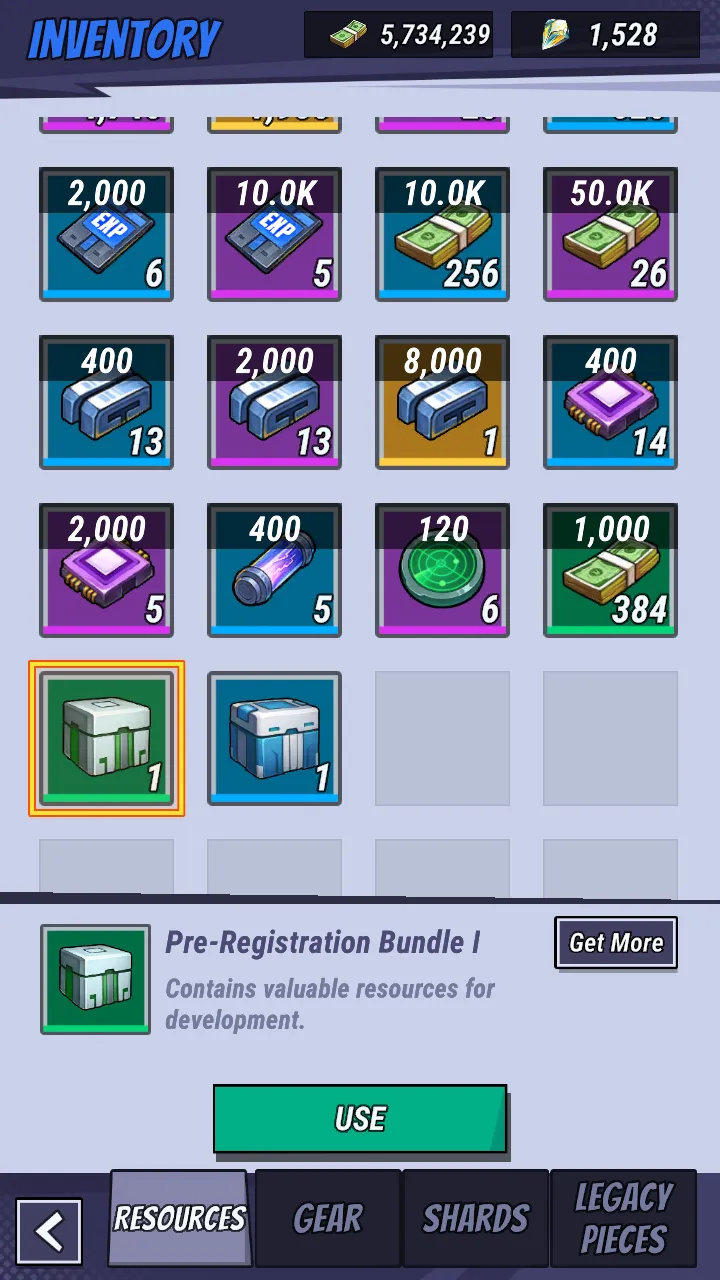
These contain a modest number of resources, except one – which contains a Mythic hero selector. The choices are limited, but still – free Mythic!
The World Awaits!
We’ve covered a lot in this guide, but that’s it for the basics. Now that you know the ins and outs of DC: Dark Legion, you’re armed with the knowledge to face whatever challenges appear in the future, whether it’s the toxic mist, Dark Legion attacks, or PVP foes.
If you have any suggestions on how to improve this guide or have any corrections to make, please let us know!