Fishing had been a means of providing food for survival from as early as possibly the Upper Paleolithic period between 40,000 and 10,000 years BCE. As years passed by, fishing developed into a sport and a recreational activity, mostly for those who wish to take a break from the city and take in a breath of fresh air from nature. However, not every person has the luxury of pausing their responsibilities in life just to have a few hours casting lines and reeling fish.
Since games were made with the purpose of entertaining and escaping from the demands of daily life, a few game developers have made their own versions of the fishing activity in their own projects. Some are more competitive than others while some are more focused on its calming aspect. The game for this guide is one such game that is focused on the latter.
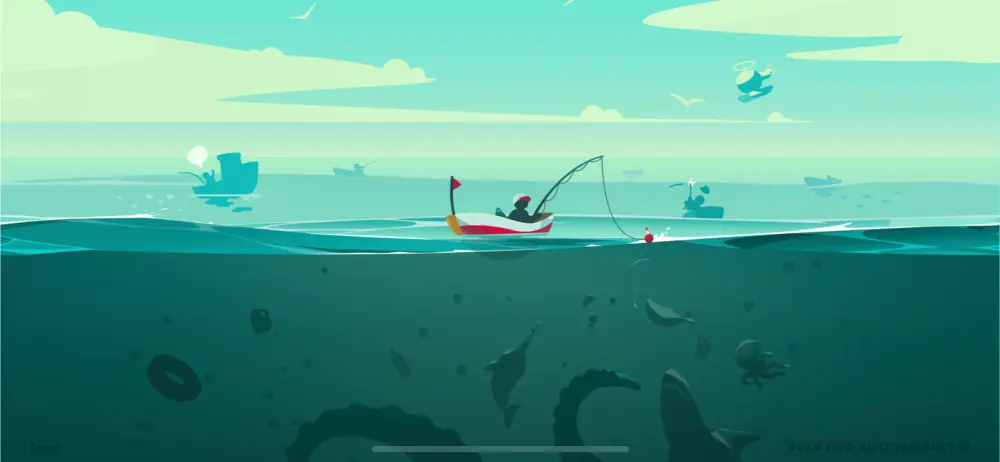
From the creators of Let’s Create! Pottery 2, Crazy Dino Park, Jolly Defense, and Sky Force Reloaded comes a cute and calming game about fishing: Creatures of the Deep. Sharing the fishing genre with games such as Hooked Inc., Let’s Fish: Fishing Simulator, and Fishing Break, this game takes a more relaxing approach to its gameplay and has a rich atmosphere that imitates the soothing vibes of a fishing day in the great outdoors.
This iDreams (Infinite Dreams) game had only been recently released a few months ago back in 2022 and has already amassed a vibrant and active community built upon discovering what creatures live in the deep. Our Creatures of the Deep guide aims to help players get started with their fishing journey and explain certain features that aren’t immediately apparent to beginners.
1. Observe the Water
A player’s skill of observation is the most important ability to utilize in a game like Creatures of the Deep. The game does not always give you hints on what to do or how to do it so you will need to be mindful of your surroundings.
Collect Floating Objects

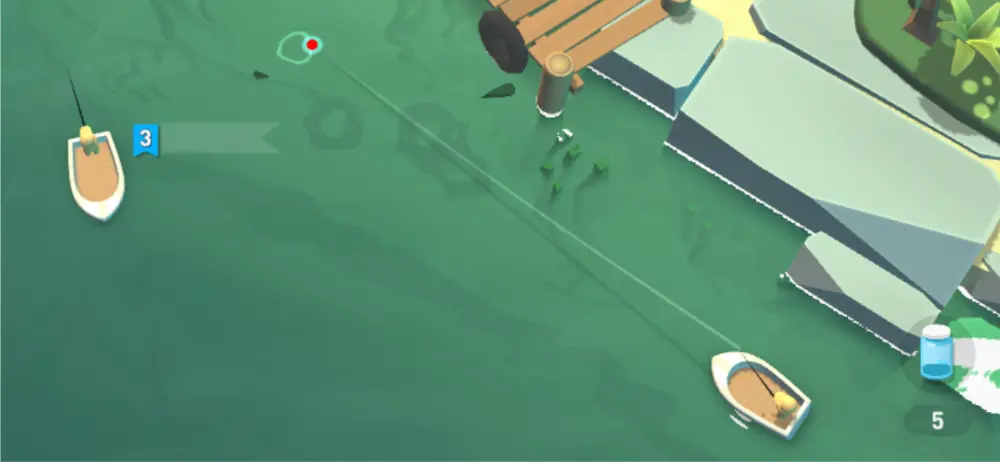
Random objects can sometimes be found floating in the sea at one of the islands or at the Pier:
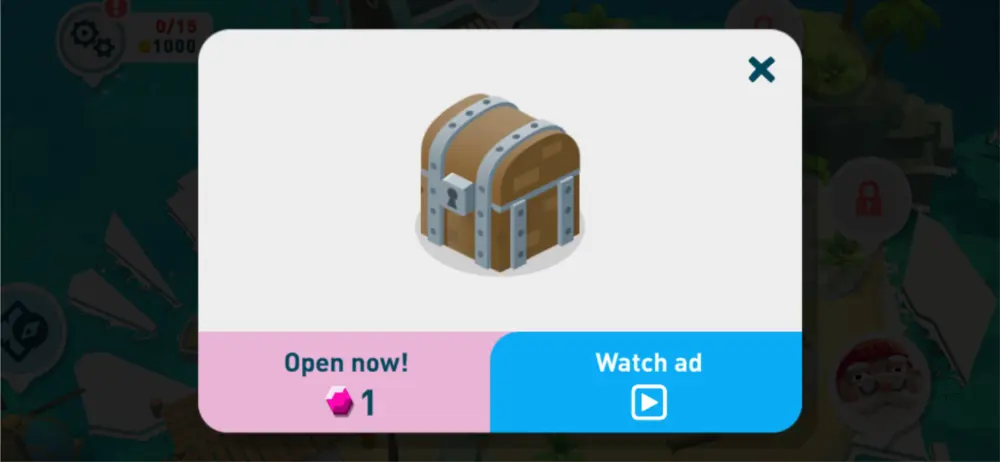
- Chests – These contain roughly around 100-500 Gold. You can watch an ad or pay a Gem so you can pay to open and collect it. These can only be found at the Pier.
- Crates – These contain some Gold inside of them. If you collect enough, you will eventually earn 100 Gold. These can be found at both the Pier and the islands.
- Debris – These may look like wooden planks but not all Debris contains Wood. Some may contain Trash instead but both can be sold to the This & That Purchase Store to earn 100 Gold. These can be found at both the Pier and the islands.
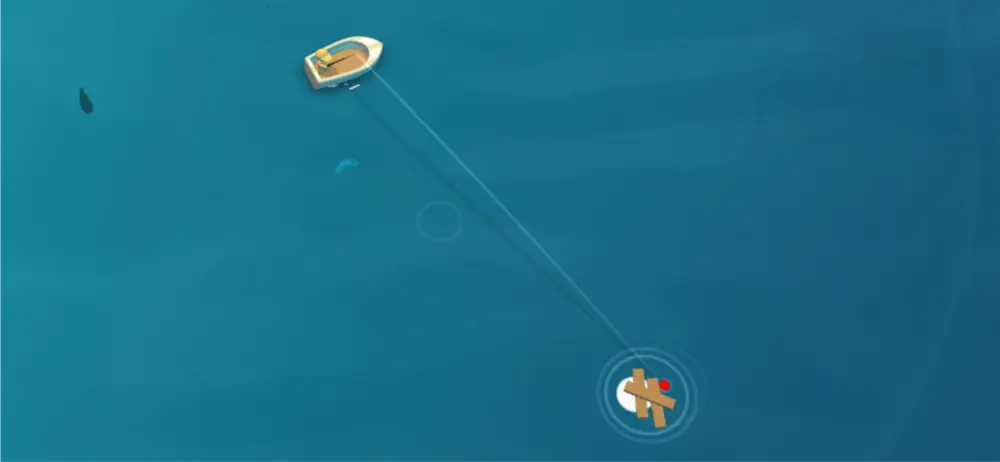
To collect these floating objects when you’re at one of the islands, you can choose to run over them with your boat or fish them out by casting near them and reeling them in.
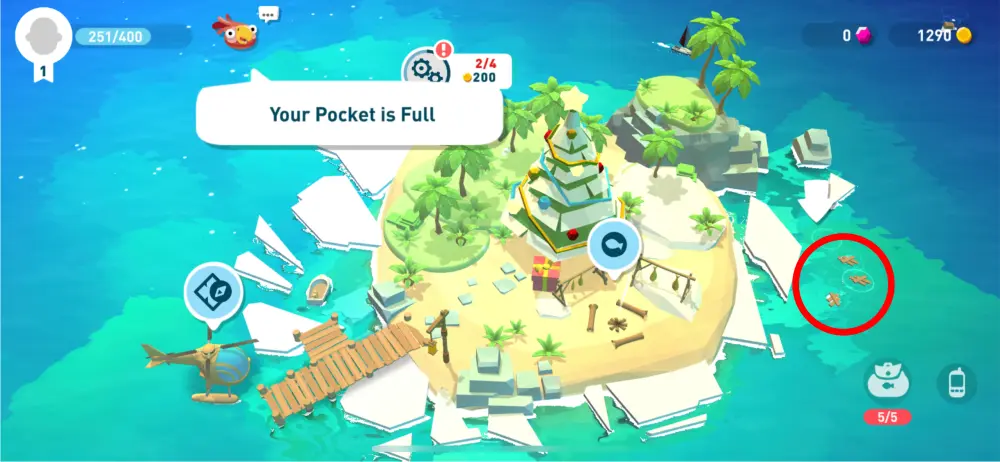
To collect them when you’re at the Pier, you can simply click on them when they appear. We recommend dragging the island around to rotate it and see all the other angles since some of these floating objects could be seen better when you do so.
Explore Interesting Locations
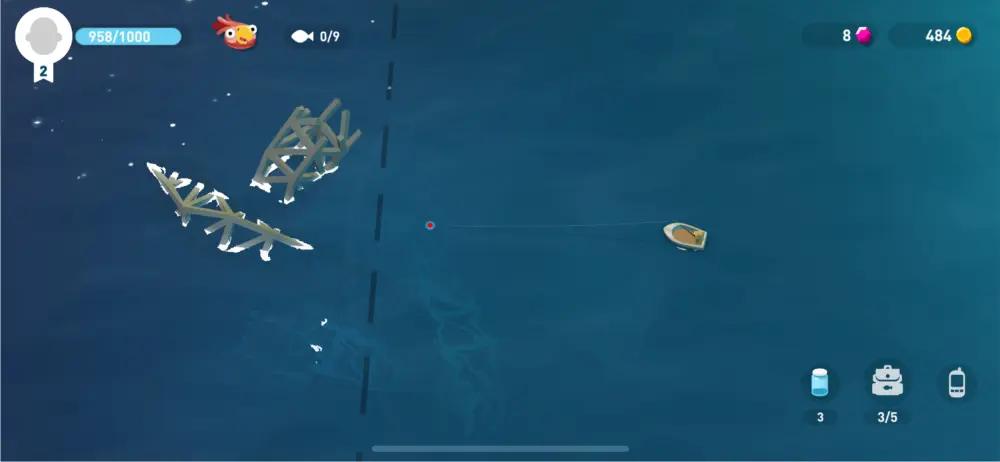
The best places to fish are usually the spots near interesting landmarks or objects. The fish you have been looking for may have been lurking in one of these areas. It’s also a good idea to try fishing in areas where other boats are parked, especially the heavily populated ones. These boats are actual players who are also fishing alongside you. Be sure to experiment with different methods of fishing when exploring these areas to get the best results!
Pay Attention to Silhouettes
Silhouettes can tell you a lot about the fish swimming underneath the water. Small fish tend to be pufferfish. Medium fish are usually Common fish such as Tuna or Bluefish. Very big fish, that seems even bigger than the boat, are typically Rare or Epic fish. However, not all fish can be found just by basing off of silhouettes you see in the water. Some only appear after casting the line and waiting.
Know the Telltale Signs of a Bite
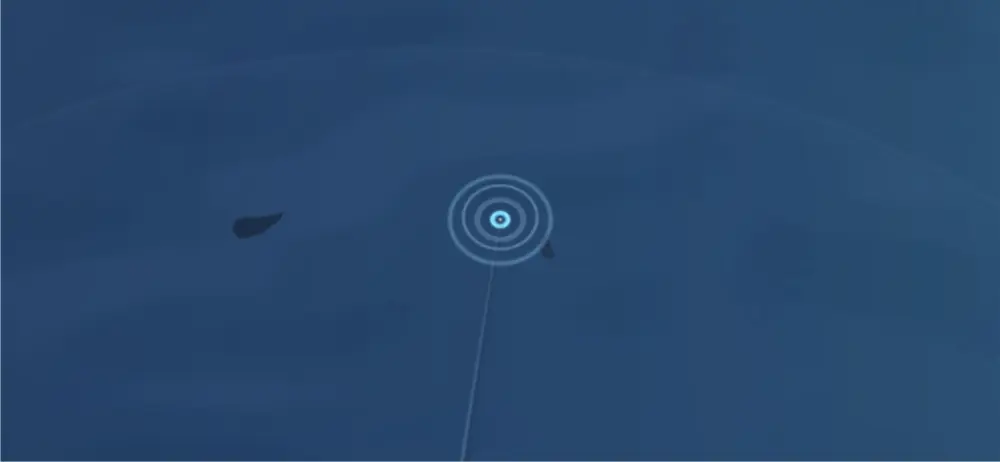
You’d know that the fish is biting if you notice your game moving the camera closer to the location of your bobber. When a fish starts to nibble, the red bobber starts going up and down. Keep your finger close to the screen but don’t press it until the bobber completely sinks in the water and sends out water ripples. You usually have a second or less to react so do not take your eyes off of it once the camera has zoomed in.
2. Apply Different Methods of Fishing
In Creatures of the Deep, there is more than one method to catching fish, creatures or trash:
Cast and Drop
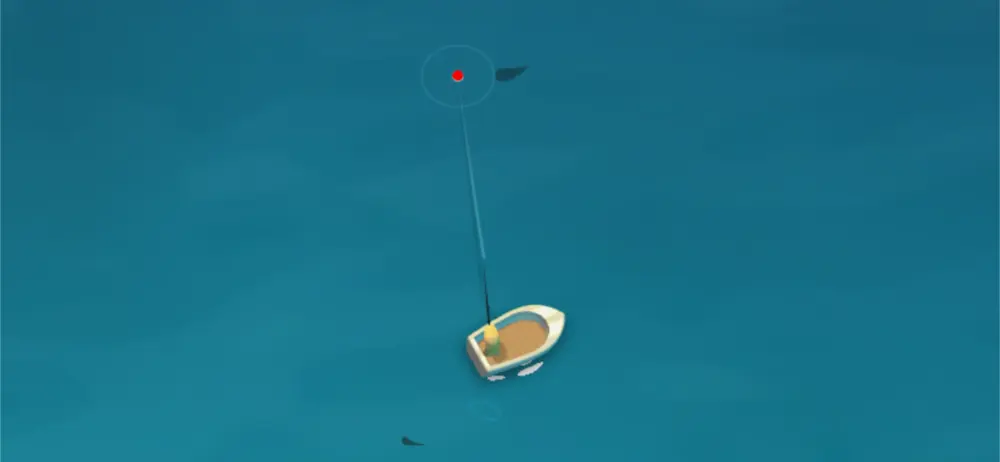
Cast and Drop is the first method introduced to the player. It requires you to observe the water for fish silhouettes and cast your line close to them. But don’t drop it too close to it or it will swim away. You need to drop it just close enough that it will notice it and eventually bite. Once it bites, tap to catch it.
Cast and Wait
You don’t necessarily need to wait for silhouettes to appear before you cast your line. You can simply cast your line at any part of the water and wait until the fish start to bite. It may take a lot longer than Cast and Drop, but this method attracts certain fish that the previous method does not.
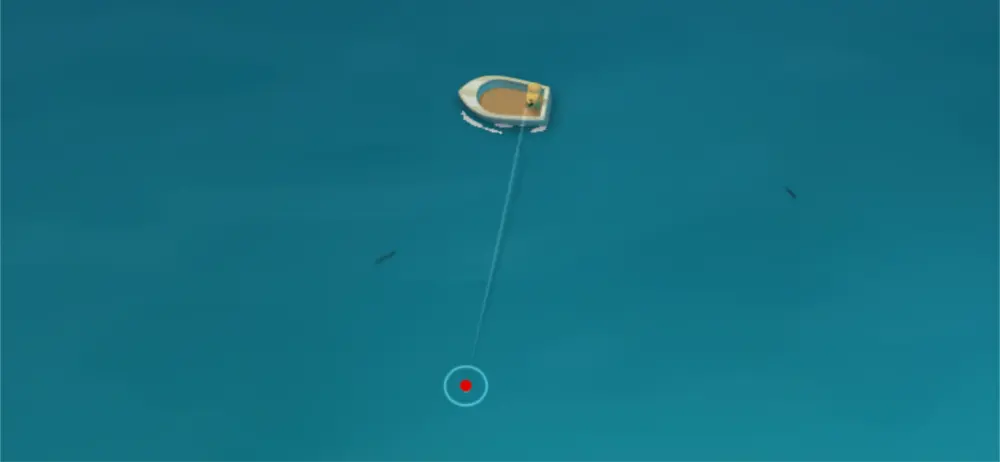
Cast and Reel
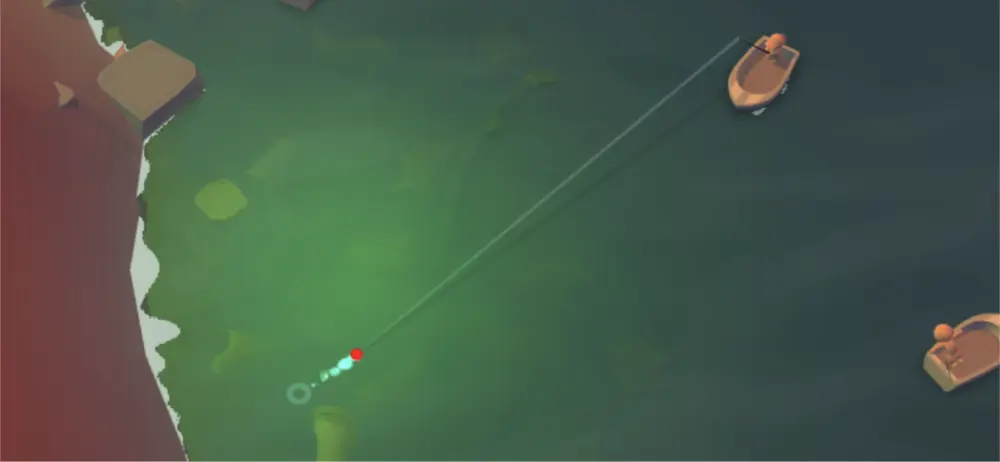
Cast and Reel require you to reel in your line right after casting it. This works best for collecting trash and some creatures but may also successfully reel in some fish. In our experience, we got the best results by letting the bobber drop and waiting until the water ripple from it disperses before we start reeling.
You could automatically get a bite by just reeling it in, but in some cases, your line could get stopped midway. When this happens, do not attempt to reel again. Just wait for the fish to bite then tap to catch it.
Fishing Net
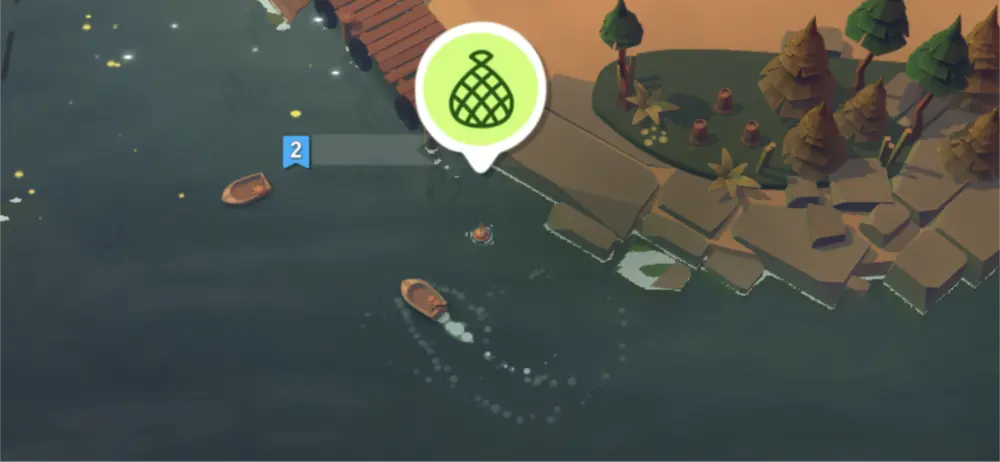
The Fishing Net requires you to cast your net on an area and leave it for a few hours. It will catch fish on its own and is good for busy players. However, it will disappear in a day so be sure to check it and collect your fish before 24 hours.
Catching Rare Fish
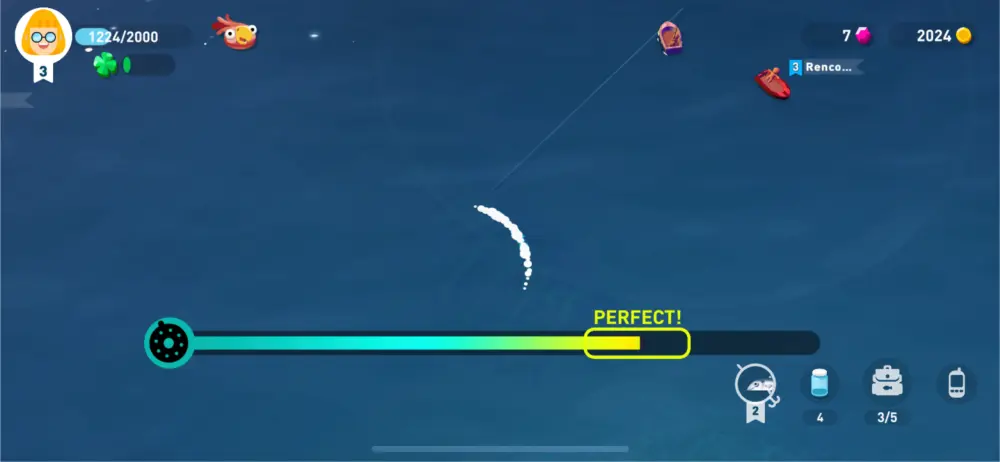
Catching rare fish is tricky as you’ll never really know when you’ll get one until it bites. When catching normal fish, you just tap it once and let your fisherman do their thing. For rare fish, you have a more active role. A bar suddenly appears at the lower part of your screen. Your goal is to keep the bar and the small box overlapping until the fish reaches your boat.
To do that, you just need to press and hold to increase the length of the bar, moving it further to the right or releasing it to decrease its length and move it to the left. If it stays to the left or right of the box for too long, your line will snap. Keep a steady hand, focus on the bar and you will eventually catch the fish.
3. Improve Your Chances at Catching Fish
There are many ways you can improve your chances at catching fish and we’ve listed down each tip and method below:
Use Bait
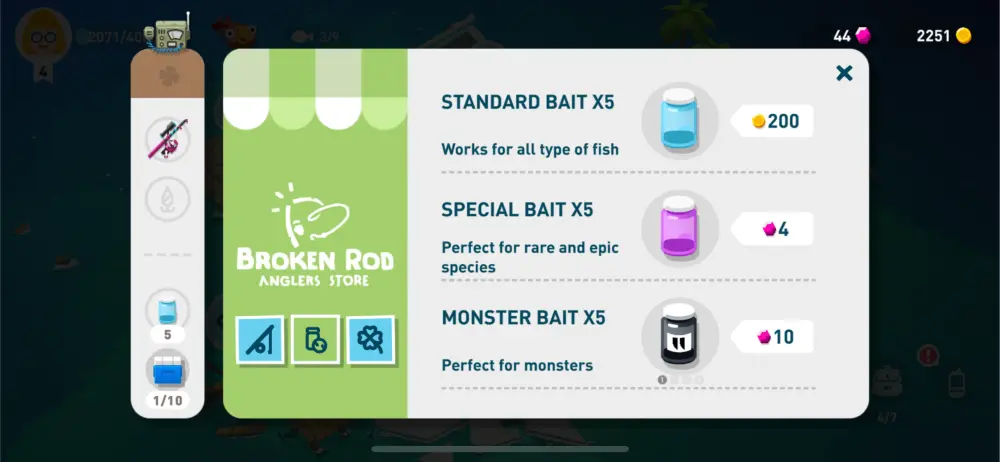
Using Bait on the water before casting your line is not always necessary but will increase your chances of catching a fish. Standard Bait is good for common fish but can also attract rarer ones. Special Bait has a higher chance of helping you get rares and epics. Monster Bait on the other hand is especially used for capturing Monsters.
Use Lure

Once you capture a certain fish enough times, it will level up, giving you the option to equip it as a Lure. Lures increase your chance of attracting a fish and your odds for better fish increase the higher its level is. However, each Lure can only be used on the island they were captured from.
Upgrade Your Rod
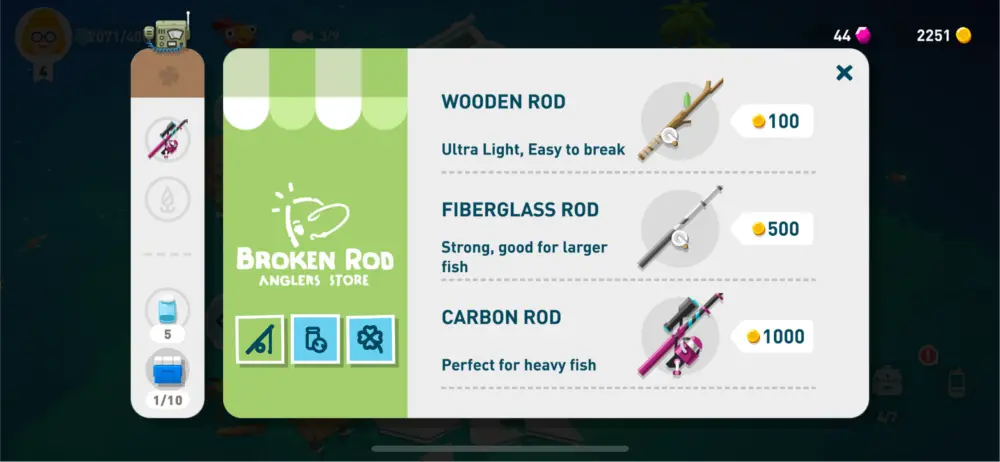
At the start, you’ll find your rod breaking every once in a while. Not only does it affect the success of your catch when it breaks, but it also makes you spend money on transportation and buying a new rod. To avoid this, we recommend buying the most expensive rod available as soon as you are able to. It may seem pricey at 500 or 1,000 Gold, but it’s better to spend it on that than missing out on a good, and possibly rare, catch.
Listen to Coco
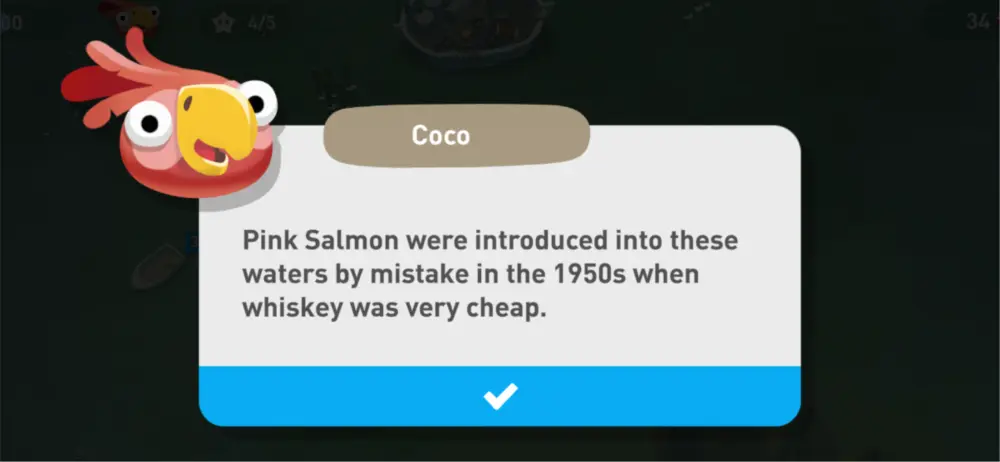
Coco is more than a tutorial guide or a commentary buddy. He also gives helpful hints every now and then and will sometimes comment when there is a lot of fish in the area you are passing. He will also comment when a particular spot may not be a good spot to fish while you are waiting for a bite. In our experience, he is often correct.
Improve Your Karma
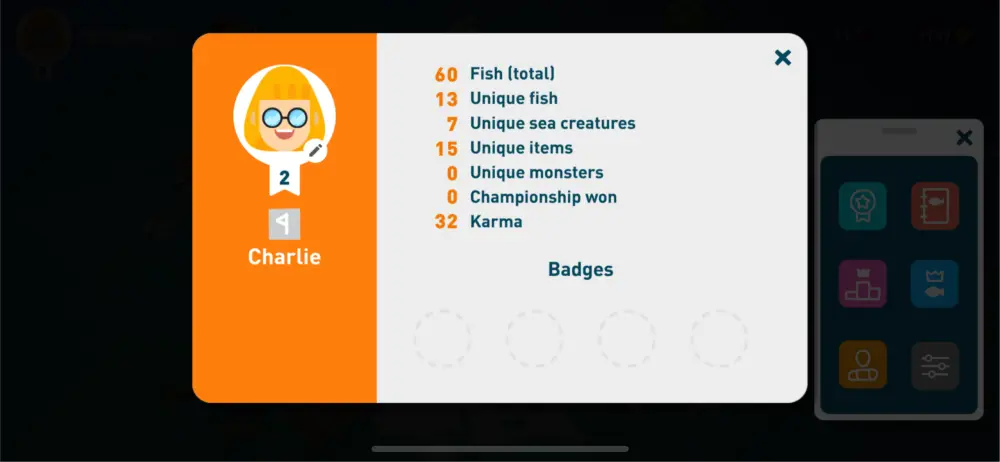
Collecting Trash and selling it will add points to your Karma. Karma increases your chances of catching a fish, especially rarer ones. Karma points will only be added once you sell them. Throwing Trash back into the ocean will do the opposite and subtract from your points. Once you’ve sold 50 Trash, you can get a free luck booster which lasts for 1 hour. You can check how much Karma you have by going to your menu and checking your Profile.
Buy Temporary Luck
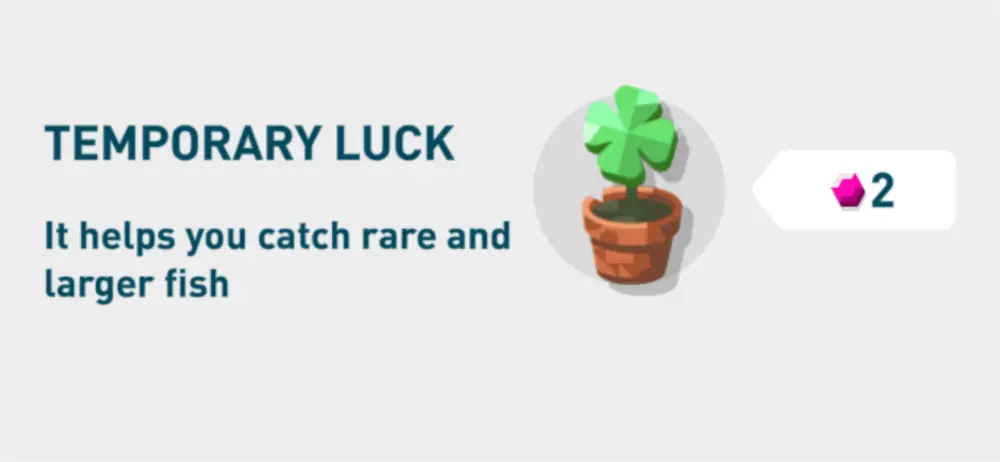
If you don’t have enough time to fish out 50 Trash, you can also buy a Temporary Luck Booster for two gems in the This & That Purchase Store.
Check Your Bestiary
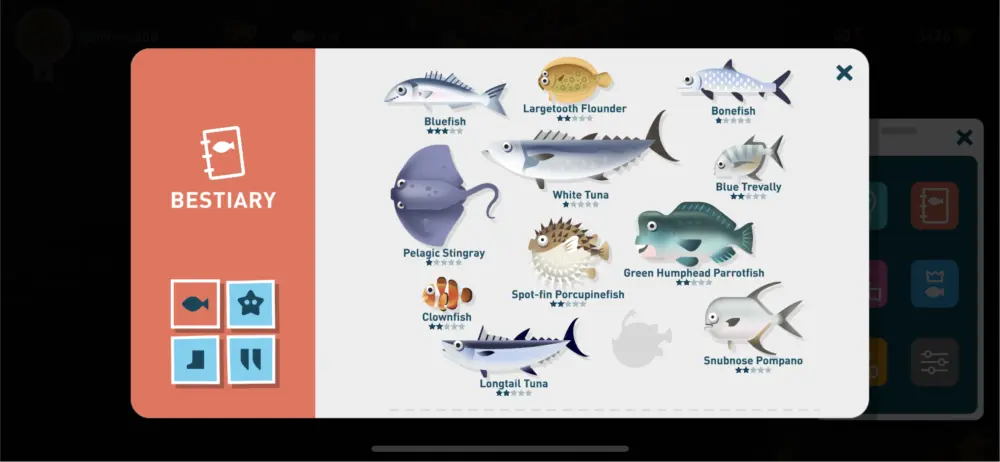
The availability of certain species of fish is based on the time of day and what month of the year it is. If you’ve already caught the fish, you can look it up on your bestiary to see what time of day and month they are most active.
Some fish can only be caught during the day and will have a sun symbol at the lower right part of their information card while those more active at night will have a crescent moon symbol. The roman numerals in gray circles below represent what month the fish is most active and more likely to bite while the ones in lighter gray are the months they are least active.
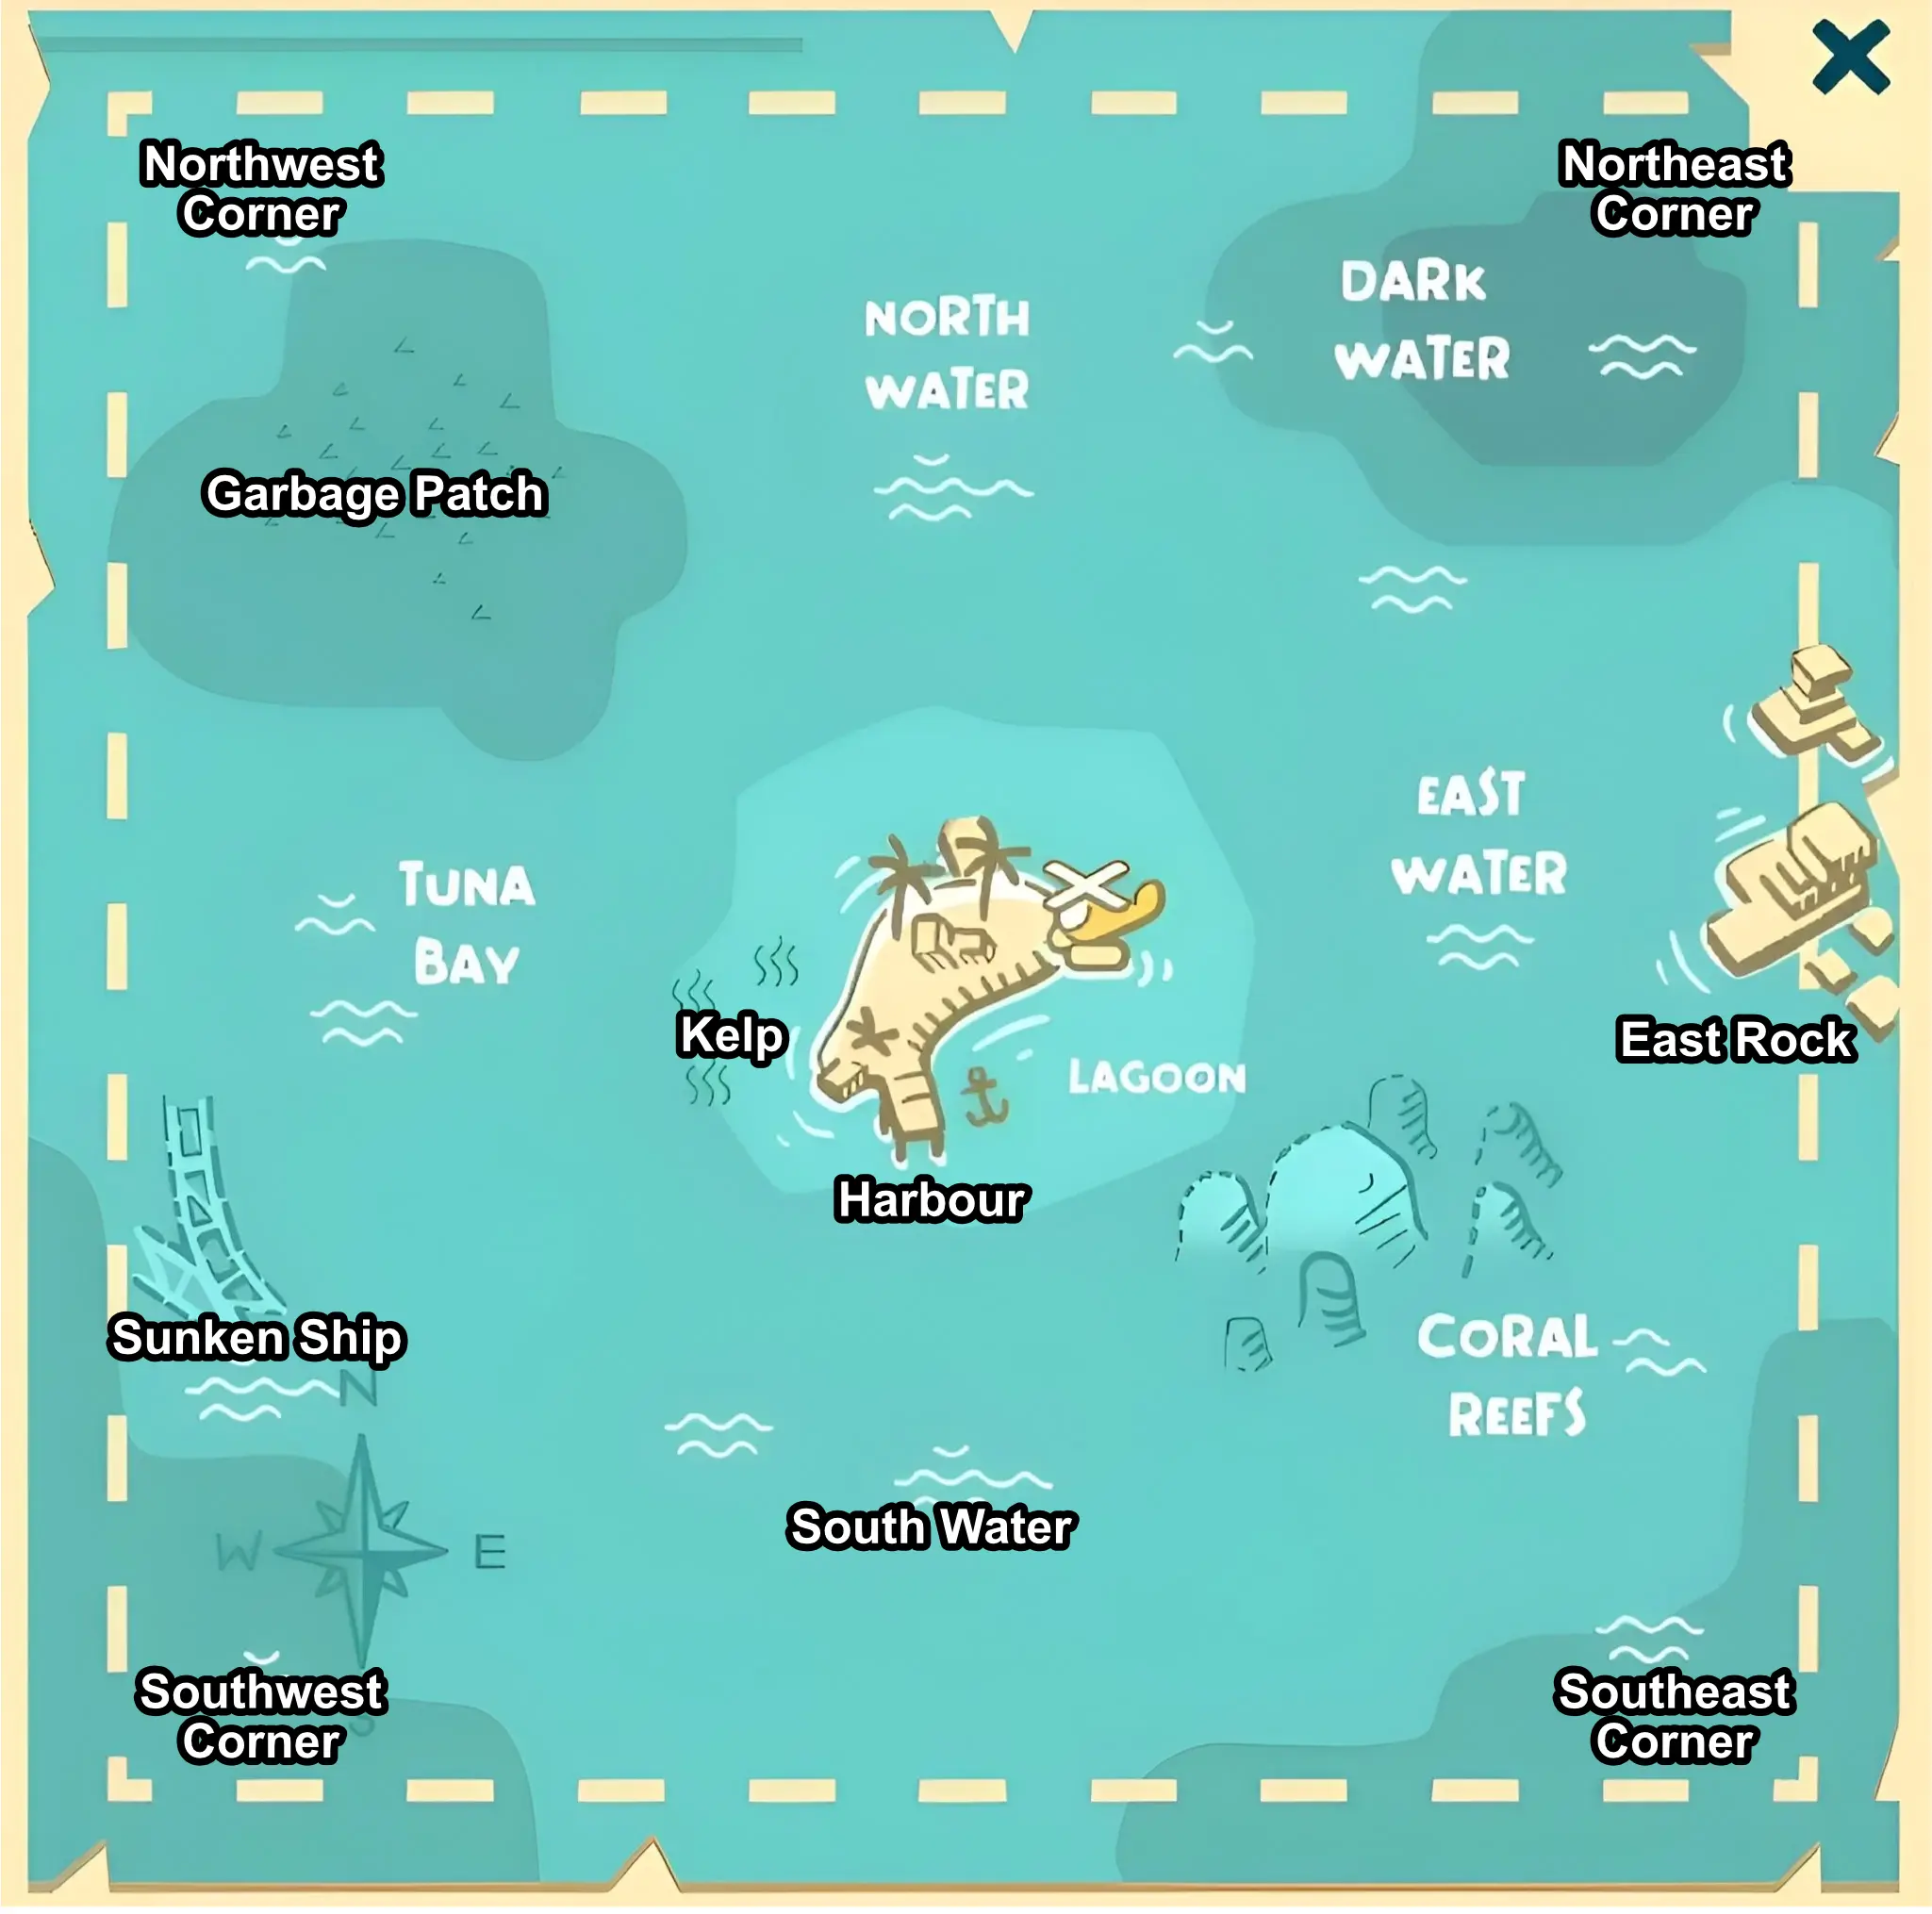
Location Hints
To get you started on your collection, we’ve compiled information about fish, creatures, and trash for each island. These locations are based on the map uploaded on their fandom wiki.
Paradise Island
● Primary NPC: Cap’n Slappy
● Unlock Cost: None
● Cost per Trip: 100 Gold
● Discoveries: 37
○ Fish: 12
○ Creatures: 5
○ Trash: 19
○ Monsters: 1
FISHES
| Fish | Time | Known Locations |
| Bluefish | Day & Night | North Water |
| Largetooth Flounder | Day & Night | South Water |
| Bonefish | Night | Dark Water, North Water, Northwest Corner, Southeast Corner, South Water, Southwest Corner, Sunken Ship |
| Pelagic Stingray | Day & Night | Northwest Corner, Southwest Corner |
| White Tuna | Day & Night | East Rock, North East Corner, Tuna Bay |
| Blue Trevally | Day & Night | Dark Water, Harbour, North Water, Northwest Corner, South Water, |
| Spot-fin Porcupinefish | Day & Night | Garbage Patch, East Water |
| Green Humphead Parrotfish | Day | Garbage Patch, Southeast Corner |
| Clownfish | Day & Night | Coral Reef |
| Longtail Tuna | Day & Night | Tuna Bay |
| Pacific Footballfish | Night | Northeast Corner, Southwest Corner |
| Snubnose Pompano | Day | Dark Water, East Water, Lagoon, North Water, Southwest Corner |
CREATURES
| Creature | Time | Known Locations |
| Mimic Octopus | Day | Dark Water, Kelp Area |
| Peacock Mantis Shrimp | Night | Northwest Corner |
| Flower Tube Sea Anemone | Day & Night | Dark Water, Garbage Patch, Harbour, South Water |
| Sand Striker | Day & Night | Dark Water, Harbour, Northwest Corner, South Water |
| Red Starfish | Day & Night | Lagoon (Starfish Shore) |
MONSTER
| Monster | Time | Known Locations |
| Shredder | Night | North Water |
TRASH
| Trash | Known Locations |
| Old Phone | Harbour |
| Empty Bottle | Dark Water, Garbage Patch |
| Pinacolada Drink | East Rocks, Harbour, Sunken Ship |
| Can Fish | Dark Water, Garbage Patch, Harbour |
| Sea Weed | East Water, Garbage Patch, Harbour |
| Wilson Ball | Harbour, Dark Water, Kelp Area, South Water, Tuna Bay |
| Plastic Bottle | Dark Water, Garbage Patch, Harbour |
| Straw Hat | Garbage Patch, Dark Water, Sunken Ship |
| Mask | Garbage Patch, Harbour |
| Plastic Bag | Garbage Patch, Harbour |
| Rubber Duck | Garbage Patch, Sunken Ship |
| Message in a Bottle | Garbage Patch |
| Gear | Sunken Ship |
| Key with a Skull | Sunken Ship |
| Chest with a Skull | East Rocks |
| Chips | Dark Water, Garbage Patch |
| Can | Harbour |
| Flip Flops | Dark Water, Garbage Patch |
| Kelp Leaf | Kelp Area |
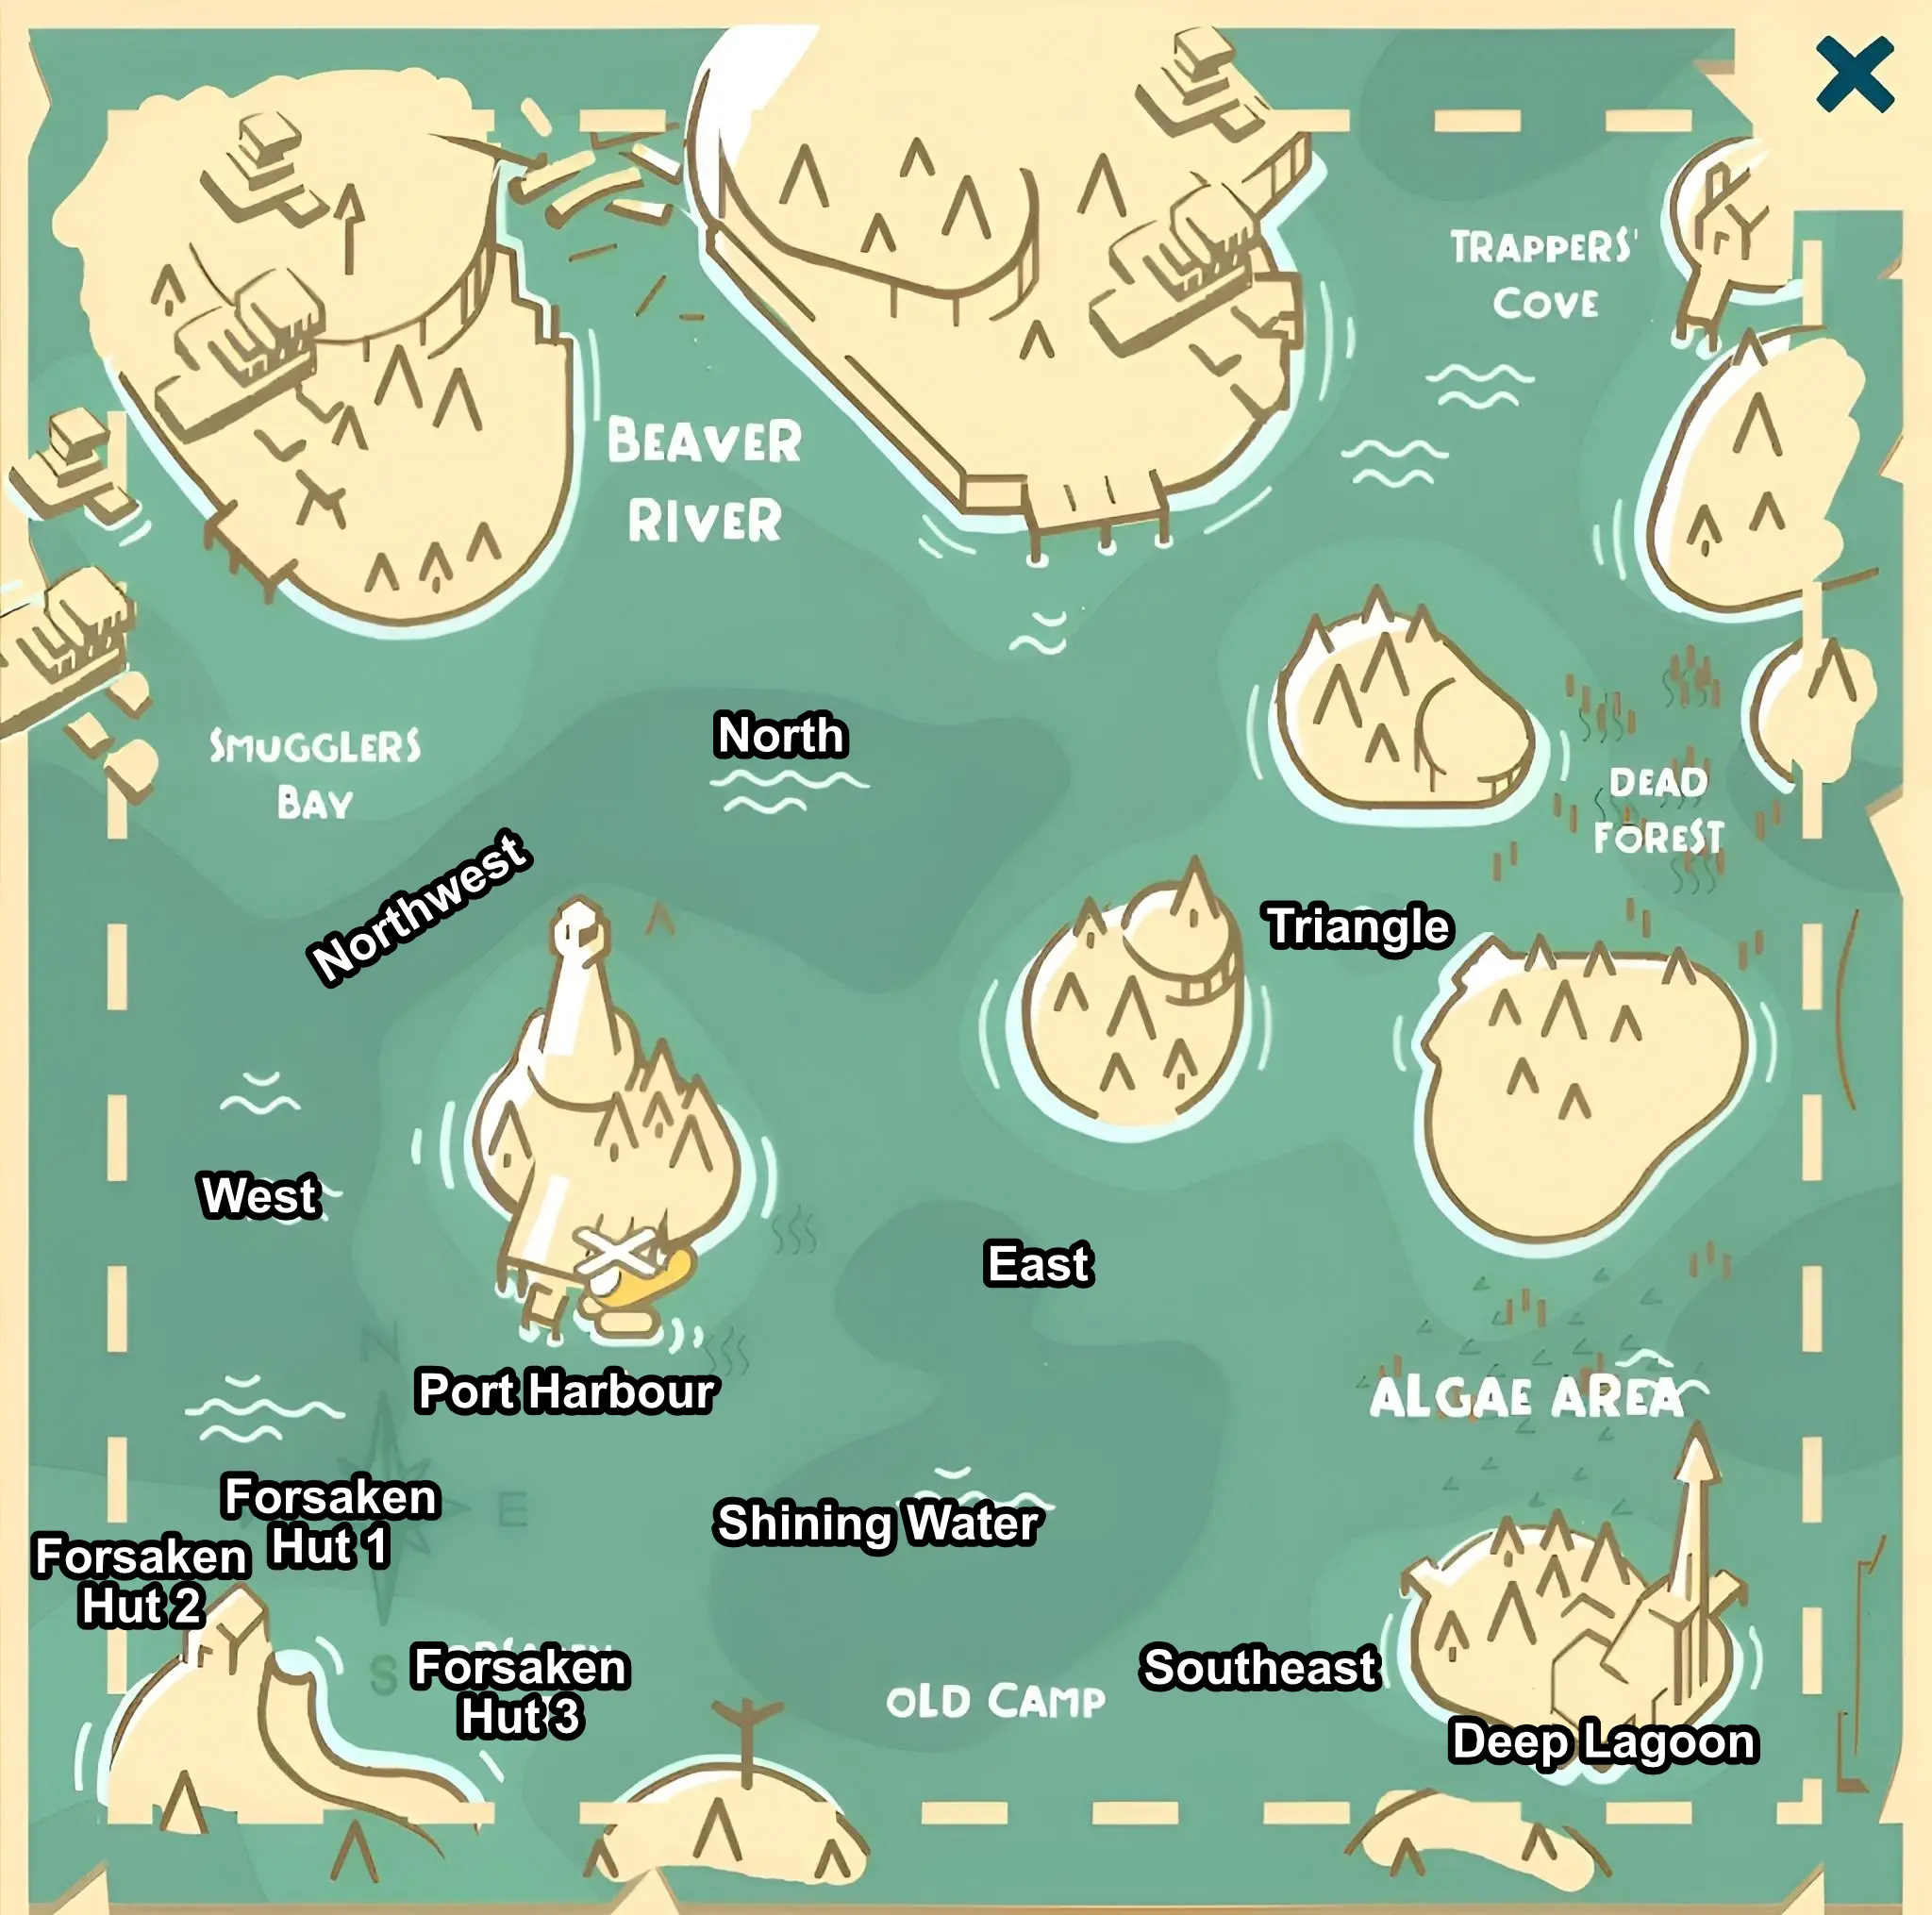
Great Lakes
● Main Quest Giver: Jack Trimble-Lake
● Unlock Cost: 2,000 Gold
● Cost per Trip: 100 Gold
● Discoveries: 63
○ Fish: 24
○ Creatures: 9
○ Trash: 29
○ Monsters: 1
FISHES
| Fish | Time | Known Locations |
| Brook Trout | Day & Night | East, North, West |
| Muskie | Day | Dead Forest, East, North, Smuggler’s Bay, Trapper Cove, Triangle, West |
| Largemouth Bass | Day & Night | West |
| Redear Sunfish | Day & Night | West |
| Chinook Salmon | Night | Forsaken Hut 1, North, Old Camp, Shining Water |
| Bloater | Day & Night | Beaver River, Forsaken Hut 1, Smuggler’s Bay, Southeast, Triangle |
| Smallmouth Bass | Night | West, East, Triangle |
| Sea Lamprey | Day & Night | Algae Area, Deep Lagoon, Old Camp |
| Brown Trout | Night | North, Old Camp |
| Channel Catfish | Day & Night | Trapper Cove |
| White Crappie | Day | Algae Area, Deep Lagoon, Harbor, Old Camp, Smuggler’s Bay, Trapper Cove, Triangle |
| Flathead Catfish | North | Forsaken Hut 3, North |
| Yellow Perch | Day & Night | Beaver River, East, Smuggler’s Bay, Trapper Cove |
| Walleye | Night | Algae, Deep Lagoon, North |
| White Bass | Day & Night | Beaver River, Dead Forest, East, Forsaken Hut 1, Smuggler’s Bay, Trapper Cove, Triangle, |
| Round Whitefish | Day & Night | Beaver River, Forsaken Hut 1, Southeast, Smuggler’s Bay, Triangle |
| American Eel | Night | Southeast |
| Alewife | Day & Night | Algae Area, Beaver River, North, Smuggler’s Bay, Triangle |
| Pink Salmon | Day | East |
| Lake Sturgeon | Day & Night | Northwest |
| Goldfish | Day | Triangle |
| Longnose Gar | Night | Forsaken Hut 1 |
| Coho Salmon | Day & Night | East |
| Lake Trout | Day | Deep Lagoon, Trapper Cove |
CREATURES
| Creature | Time | Known Locations |
| North American River Otter | Day | Northwest |
| Chinese Mystery Snail | Day & Night | Forsaken Hut 2, North, Trapper Cove, Triangle |
| Bullfrog | North | Algae Area, Dead Forest |
| Queen Snake | Day | Algae Area, Forsaken Hut 2, Southeast, Trapper, Triangle |
| Common Musk Turtle | Day & Night | Dead Forest |
| Zebra Mussels | Day & Night | Algae Area, Harbor, Northwest, Southeast, Triangle |
| Quagga Mussels | Day & Night | Algae Area, Beaver River, Forsaken Hut 2, Smuggler’s Bay, Triangle |
| Eastern Massasauga Rattlesnake | Day | East, Northwest, Southeast, Smuggler’s Bay, Triangle |
| Beaver | Day & Night | Beaver River |
MONSTER
| Monster | Time | Known Locations |
| Bessie | Day | Algae Area, Southeast |
TRASH
| Trash | Known Locations |
| Arrow | Old Camp |
| Beaver Hat | Trapper Cove |
| Toxic Barrel | Forsaken Hut 3 |
| Al’Capone Cap | Lagoon, Southeast |
| Beverage can | Forsaken Hut 3, Harbour, Smuggler’s Bay, Triangle |
| Baseball Hat | Southeast, Trapper Cove, Triangle |
| Basket ball | Trapper Cove, Triangle |
| Chip bag | Shining Water, Triangle |
| Boom Floppy Disc | Northwest, Lagoon |
| Sunglasses | Southeast |
| Pipe | Old Camp |
| Concrete Shoe | Deep Lagoon, Southeast |
| Glass Bottle with XXX sign | Southeast |
| Fish Can | Forsaken Hut 3, Harbor, Shining Water, Smuggler’s Bay, Trapper Cove, Triangle |
| Grey Cassette Tape | Southeast |
| Green floppy dish | North, Southeast, Triangle |
| Meat Can | Beaver River, Southeast |
| Colorful headdress | Camp |
| Hot Dog | North, Shining Water, Trapper Cove |
| Plastic Bottle | Forsaken Hut, Triangle |
| Old Tire | Harbor, Smuggler’s Bay |
| Can Soup | Forsaken Hut, West |
| Mouse Glove | Triangle |
| Vegetable can | East, Forsaken Hut, Shining Water, Trapper Cove |
| Video cassette | Algae Area |
| Wilted leaf | Dead Forest, East, Triangle |
| Old Branch | Beaver River, East, Shining |
| Vinyl Record | Deep Lagoon |
Costa Rica

● Main Quest Giver: Dr. Jules
● Unlock Cost: 5,000 Gold
● Cost per Trip: 150 Gold
● Discoveries: 62
○ Fish: 22
○ Creatures: 9
○ Trash: 30
○ Monsters: 1
FISHES
| Fish | Time | Known Locations |
| Barracuda | Day | Crocodile Beach, East, Great Depths, Pirate Cave, North, West, South, Surfer’s Beach |
| Broomtail Grouper | Day | Volcano Coast |
| Dorado | Day & Night | Pirate Cave, South |
| Cubera Snapper | Night | East, Great Depths, North |
| Jack Crevalle | Day | Great Depths, North, Pirate Area, South |
| Pompano | Day & Night | East, West, Volcano Coast |
| Roosterfish | Day & Night | Crocodile Beach, Drake Bay |
| Pacific Sailfish | Night | Crocodile Bay, Crocodile Beach, Great Depths, Great Reef |
| Wahoo | Night | Crocodile Bay, Great Depths, North |
| Snook | Day & Night | East, Great Depths, Pirate Cave, North, South |
| Tarpon | Day & Night | East, Great Depths, North, South, West |
| Black Marlin | Night | Great Depths |
| Yellowfin Tuna | Day | Great Depths, East, West, South |
| Bull Shark | Night | Great Depths |
| Whitetip Shark | Day & Night | Great Depths |
| Whale Shark | Day | Great Depths |
| Nurse Shark | Night | Great Depths |
| Striped Marlin | Day | Flamingo Beach, Great Depths, Pirate Cave, Shipwreck, West |
| Sierra Mackerel | Day | Crocodile Beach, East, Great Depths, Great Reef, Harbour, North, South |
| Tripletail | Day | Crocodile Beach, Crocodile Bay, Drake Bay, Great Depths, Great Reef, South |
| Blue Marlin | Day & Night | Great Depths |
| Hammerhead Shark | Day & Night | Great Depths |
CREATURES
| Creature | Time | Known Locations |
| Blue Sea Dragon | Day & Night | Pirate Cave |
| Brown Sea Cucumber | Day | Crocodile Bay, Great Depths, Great Reef, Pirate, Shipwreck, West |
| Pacific Land Crab | Day | Crocodile Beach, Great Reef, Flamingo Rock, Surfer’s Beach, |
| Olive Ridley Sea Turtle | Day & Night | Castaway, Great Depths, Shipwreck |
| Nudibranch | Day & Night | Lookout Point, Flamingo Beach, Flamingo Rock, Great Reef, Volcanos Isthmus |
| Red-ridged Clinging Crab | Night | Crocodile Bay, Crocodile Beach, Great Reef, Volcano Coast |
| Pink Jellyfish | Day & Night | Great Depths, Crocodile Bay, Costal Reef, Mangrove Bay, Palm Leaf, Surfer’s Beach |
| Yellow-bellied Sea Snake | Day & Night | Flamingo Rock |
| American Crocodile | Day | Crocodile Beach |
MONSTER
| Monster | Time | Known Locations |
| Don Pedro | Night | Crocodile Bay, Crocodile Beach, Mangrove Bay |
TRASH
| Trash | Known Locations |
| Anchor | Spanish Shipwreck, Sunken Ship |
| Ancient Key | Flamingo Rock, Great Depths, Mangrove Bay, Spanish Shipwreck, Sunken Ship |
| Fish Can | Great Depths, Harbour, Palm Leaf, Spanish Shipwreck |
| Orange Cassette Tape | Castaway, Great Reef, Mangrove Bay, Spanish Shipwreck |
| Bicycle frame | Crocodile Beach |
| Oil Barrel | Great Depths, Sunken Ship |
| White Bottle | Flamingo Beach, Pirate Cave, Sunken Ship, Surfer Beach |
| Waterproof Watch | Lookout Point, Pirate Cave, Sunken Ship |
| Coral | Great Reef |
| Chip Bag | Crocodile Beach, Pirate Cave |
| Bikini Top | Coastal Reef, Surfer Beach |
| Yellow Floppy Disk 5.25 | Monkey Island |
| Coconut | Coconut Island |
| Flipper | Spanish Shipwreck |
| Costa Rican Vase | Sunken Ship |
| Scuba Diver Mask | Great Reef, Spanish Shipwreck |
| Mysterious Stone Sphere | Spanish Shipwreck, Sunken Ship |
| Rubber Crocodile | Crocodile Beach |
| Oxcart Wheel | Sunken Ship, Surfer Beach |
| Palm Leaf | Palm Leaf |
| Ship Bell from Santa Maria | Sunken Ship |
| Watermelon Vinyl Record | Crocodile Bay, Great Depths, Shipwreck |
| Bottle Santa Maria | Great Depths, Sunken Ship |
| Treasure Chest | Sunken Ship |
| Surfboard | Flamingo Beach, Surfer Beach |
| Volcanic Rock | Crocodile Bay, Flamingo Rock, Great Reef, Shipwreck |
| Steel Hook | Spanish Shipwreck |
| Wooden Leg | Spanish Shipwreck, Pirate Cave |
| Pirate Hat | Monkey Island, Sunken Ship |
| Pirate Spyglasses | Sunken Ship |
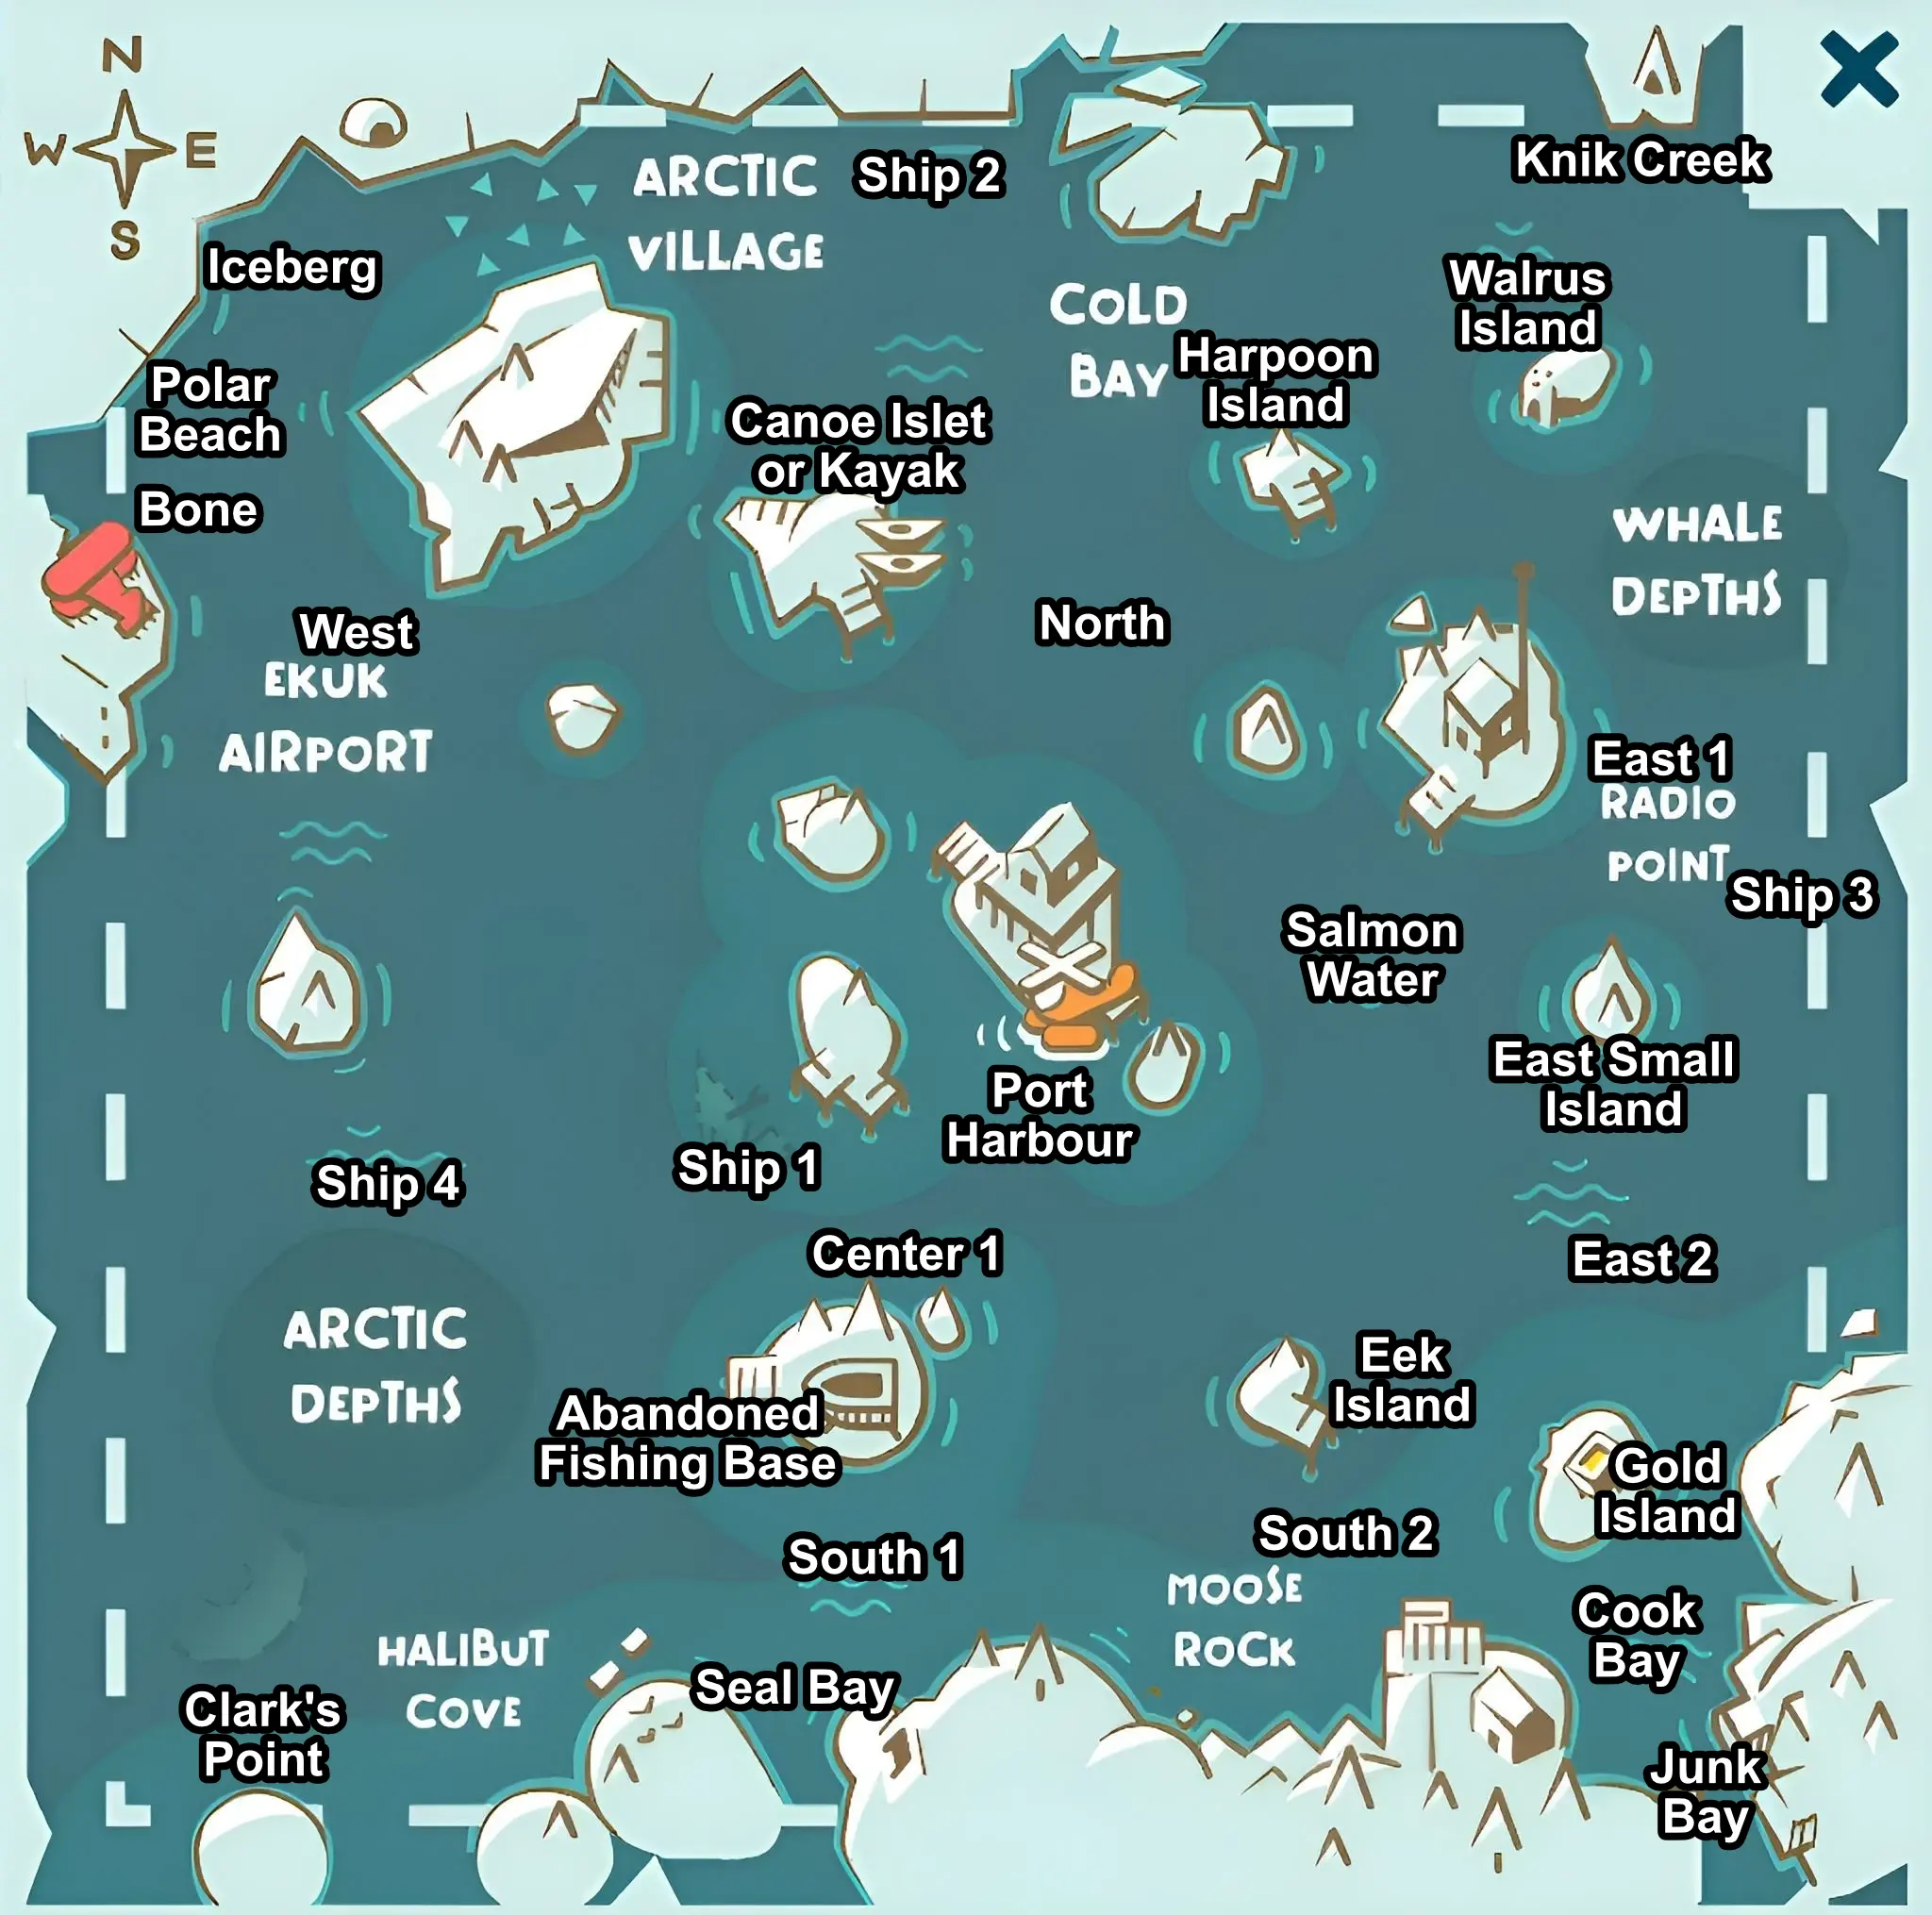
Alaska
● Main Quest Giver: Ava
● Unlock Cost: 10,000 Gold
● Cost per Trip: 200 Gold
● Discoveries: 64
○ Fish: 25
○ Creatures: 14
○ Trash: 24
○ Monsters: 1
FISHES
| Fish | Time | Known Locations |
| Arctic Char | Day & Night | Center 1, East 2, South 1, West 1 |
| Chum Salmon | Night | Arc Depth, Cold Bay, Knik Creek, Salmon Water |
| Arctic Greyling | Day | Canoe Islet, Cook Bay, Iceberg, Whale Depths |
| Burbot | Night | Iceberg, South 1 & 2, Whale Depths |
| Bigmouth Sculpin | Night | East 2, Iceberg, Salmon Water, South 1 |
| Capelin | Night | Arc Depths, Cold Bay, Junk Bay, Whale Depths |
| Coalfish | Day & Night | Center 1, North, South 1, West 1 |
| Humpback Salmon | Day | Arc Depths, Center 1, Salmon Water, West 1 |
| Dolly Varden | Day & Night | Center 1, East 1, South 1 & 2 |
| Halibut | Day & Night | Arc Depths, Halibut Cove |
| Rougheye Rockfish | Day & Night | Arc Depths, Cold Bay, East 1 & 2, Whale Depths |
| Soceye Salmon | Day & Night | Center 1 & 2, Salmon Water, South 1 |
| Silver Salmon | Day | Center 1, East 1, Salmon Water, Whale Depths |
| Steelhead | Day | Salmon Water |
| Lancetfish | Night | East 2, North, Salmon Water, South 1 & 2 |
| Atka Mackerel | Day | Canoe, Cook, East 1, Whale |
| Blue Lingcod | Day | Arc Depths, Cold Bay, East 1, East 2, Whale Depths |
| Pacific Sleeper Shark | Day & Night | Salmon Water, South 1, Whale Depths |
| Ocean Sunfish | Night | Arc Depths (UFO) |
| King Salmon | Day | Salmon Water |
| Yellow Irish Lord | Day & Night | Center 1, East 1, South 1, West 1 |
| Pacific Herring | Day & Night | Arctic Depth, Arctic Village, Cold Bay, Knik Creek, Polar Beach, Salmon Water |
| Wolf Eel | Night | East 2, South 1 |
| Salmon Shark | Day & Night | Salmon |
| Spiny Skate | Day & Night | Arc Depth, Iceberg, Salmon Water, South 1, Whale Depths |
CREATURES
| Creature | Time | Known Locations |
| Adelie Penguin | Day | Cold Bay |
| Beluga Whale | Day | Whale Depths |
| California Sea Cucumber | Day & Night | Arc Depths, Center 1, East 1, Salmon Water, South 1 & 2 |
| Moon Jelly | Day & Night | Arc Depths, Canoe Islet, Cold Bay, East 1 & 2, Iceberg, Whale Depths |
| Polar Bear | Day | Iceberg |
| Killer Whale | Day & Night | Whale Depths |
| Spot Prawn | Day & Night | Arctic Village, Canoe Islet, East 2, Iceberg, Junk Bay, Whale Depths |
| Razor Clam | Day & Night | Arc Depths |
| Rose Star | Night | Arc Depths, Cook Bay, Junk Bay, Knik Creek, Whale Depths |
| Seal | ??? | Seal Bay |
| Narwhal | Night | East Island, Whale Depths |
| Red King Crab | Night | Arc Depths, North, Polar Beach, Seal Bay, Salmon Water |
| Walrus | Day & Night | Walrus Island |
| Humboldt Squid | Night | Arc Depths, Whale Depths |
MONSTER
| Monster | Time | Known Locations |
| Kraken | Day & Night | Walrus Island, Whale Depths, Cold Bay[1] |
TRASH
| Trash | Known Locations |
| Life Jacket | Canoe Islet, Iceberg, Salmon Water, Seal Bay, Ship 2 |
| Compass | Abandoned Fishing Base, Center 1 |
| Blue Cassette Tape | Junk |
| Frozen Acorn | Arc Depths, Cook Bay, Junk Bay, Whale Depths |
| Water Resistant Watch | Arc Depths, Iceberg, Knik Creek, Whale Depths |
| Oil Barrel | Ekuk Airport |
| Chip Bag | Cold Bay, Junk Bay, Knik Creek |
| Harpoon | Harpoon Island |
| Meteorite | Arc Depths, Clark’s Point |
| Ham Can | Arctic Village, Polar Beach, Seal Bay, Ship 1 & 2 |
| Tetrix Floppy Disk 3.5 | Arc Depths, Arctic Village, Center 1, Seal Bay |
| Inner Tube | Junk Bay, Knik Creek, Ship 1 |
| Ski | Canoe Islet |
| Moose Antler | Canoe Islet, Junk Bay |
| Snow Shovel | Canoe Islet, Knik Creek, Seal Bay, Whale Depths |
| Snowshoe | Radio Point |
| Gold Nugget | Gold Island |
| Viking Helmet | Ship 2 |
| Vinyl Record | Abandoned Fishing Base, Cold Bay, Cook Bay, Eek Island, Knik Creek, Seal Bay, Walrus Island |
| Video Cassette | Arc Depths, Cold Bay, Eek Island |
| Walrus Tusk | Ship 1, Walrus Island |
| Gold Pan | Gold Island |
| Snowman Hat | Arc Depths, Eek Island, Knik Creek Seal Bay |
Australia
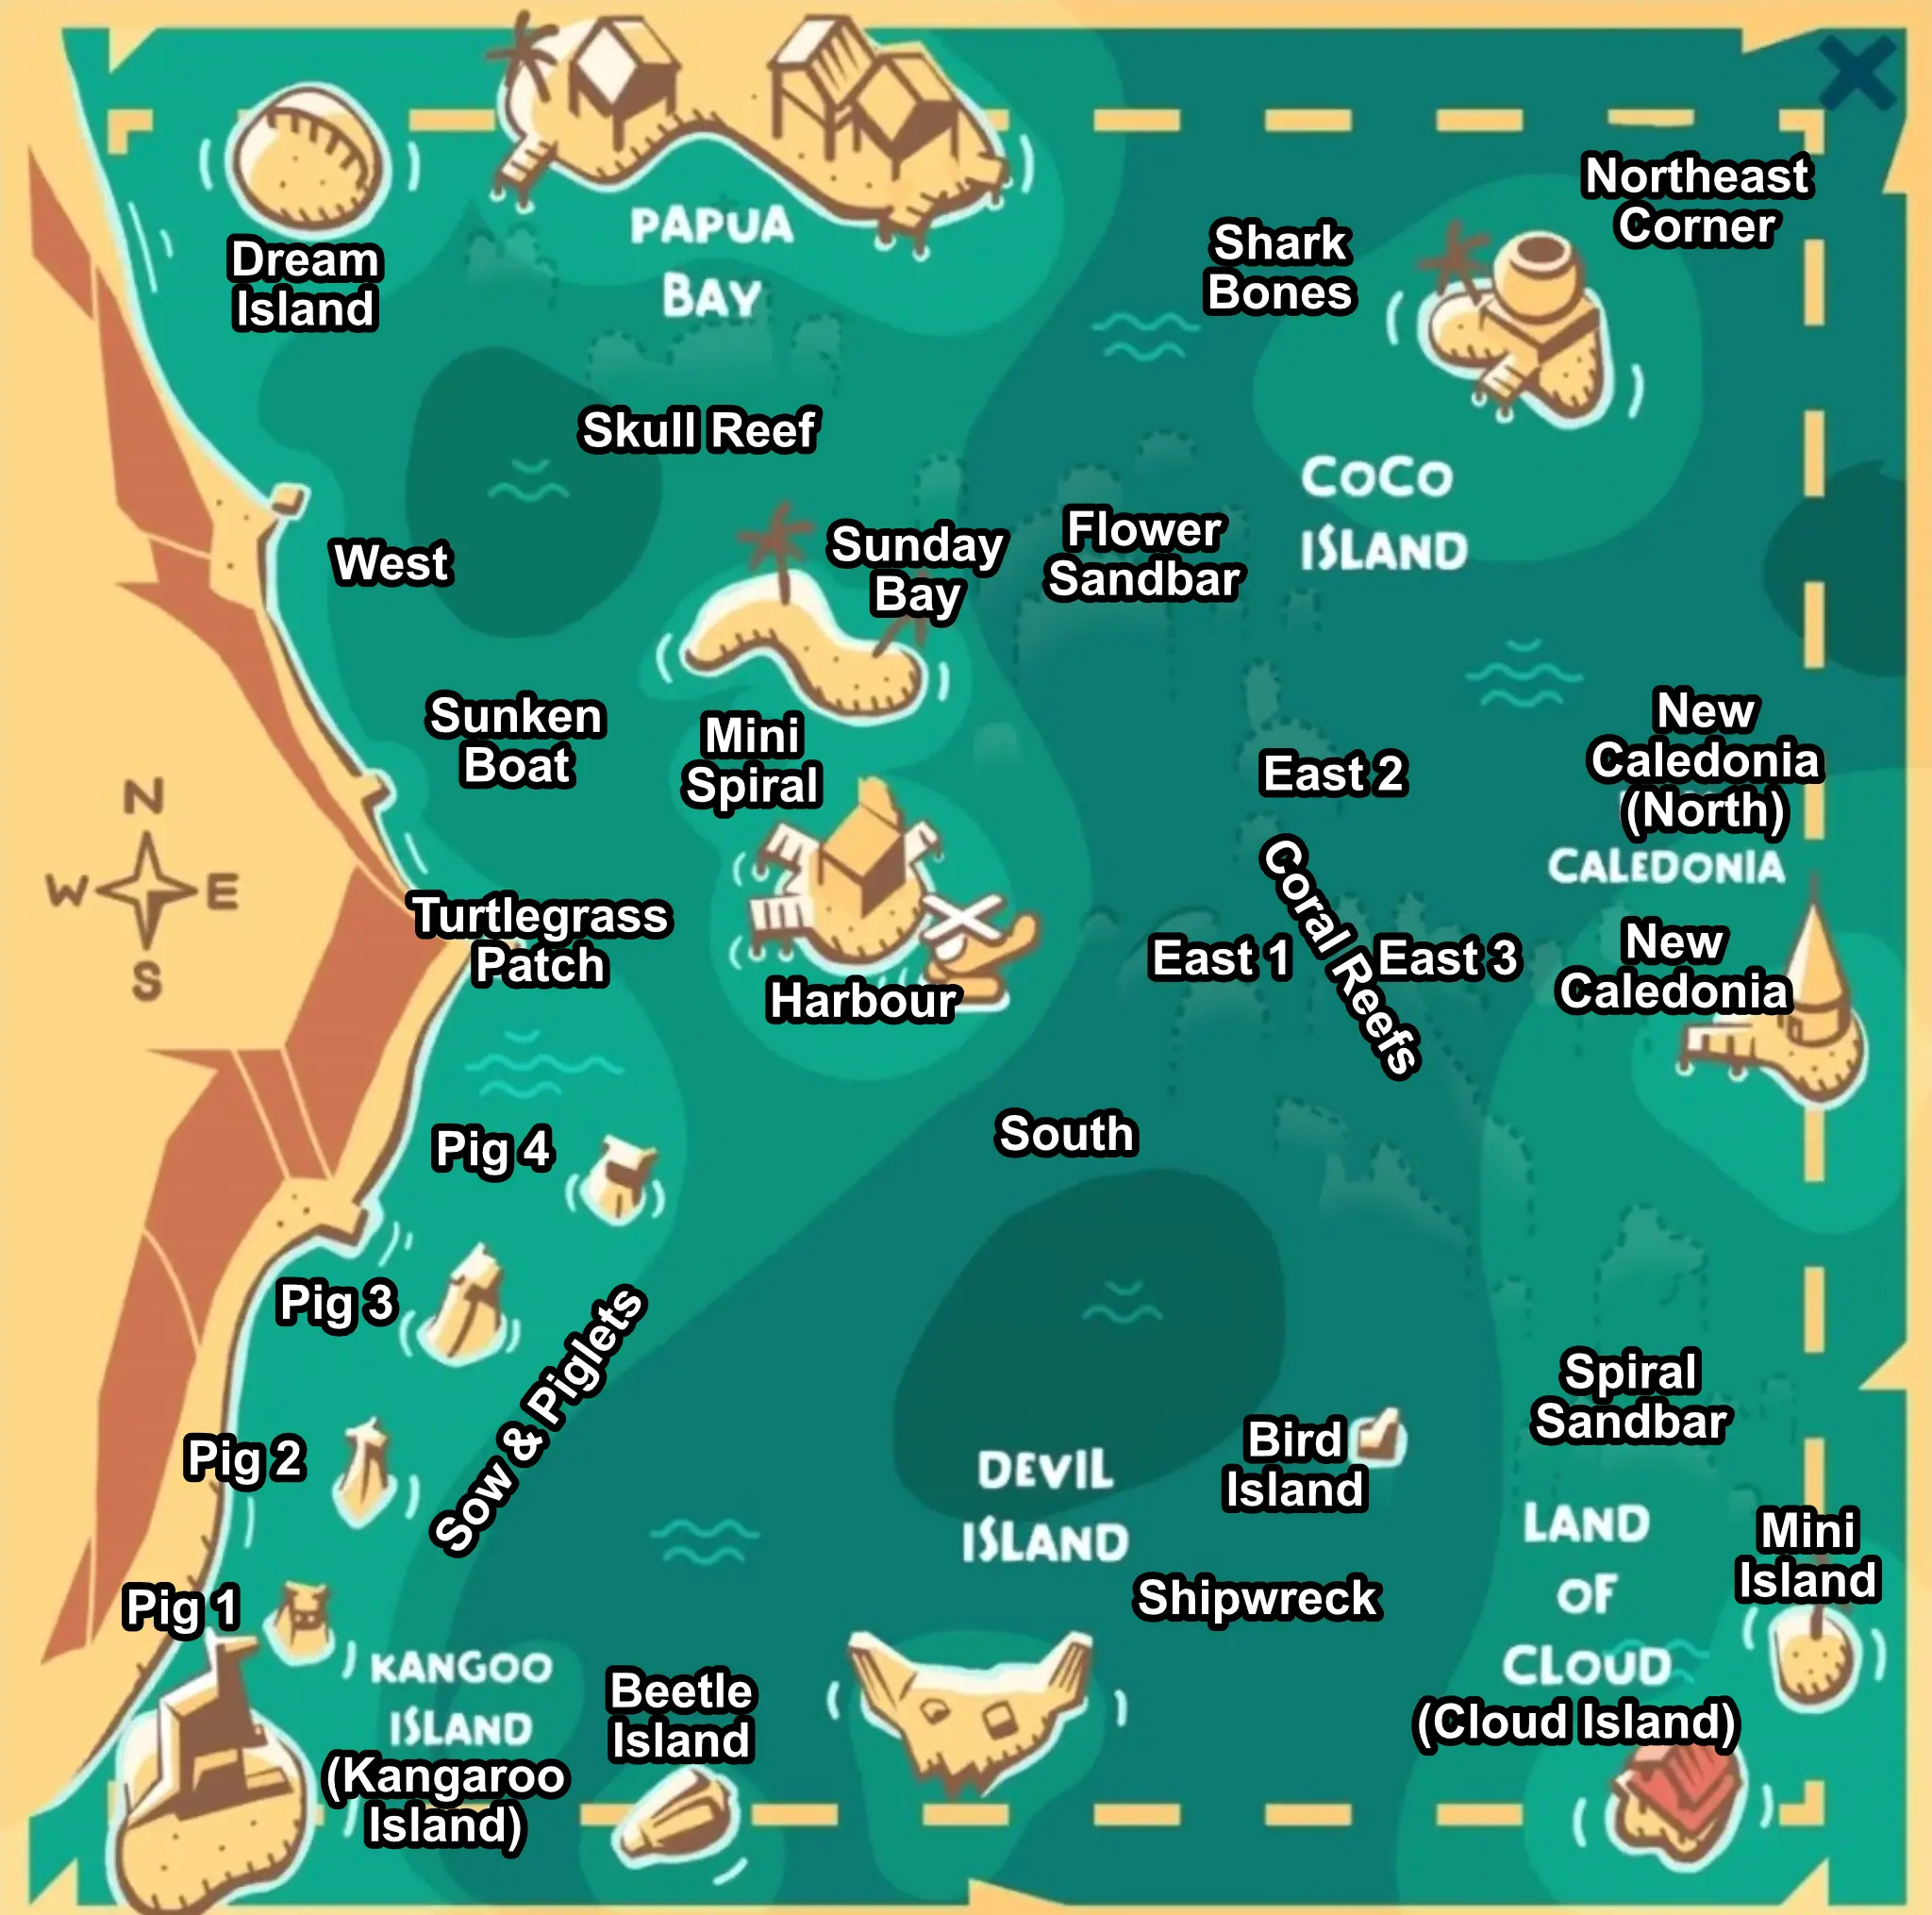
● Main Quest Giver: Steve
● Unlock Cost: 20,000 Gold
● Cost per Trip: 200 Gold
● Discoveries: 70
○ Fish: 30
○ Creatures: 12
○ Trash: 27
○ Monsters: 1
FISHES
| Skipjack Tuna | Day | Skull Reef, East 1, Sow & Piglets (between Pig 2 & 3), Kangaroo Island, North of Sunday Bay, Shark Bones, Northeast Corner |
| Barramundi | Day & Night | Papua Bay, Sunday Bay, Sow & Piglets (North and West Side of Pig 4, and between Pig 2 & 3) |
| Coral Trout | Day | Turtlegrass Patch, Flower Sandbar, Mini Spiral, South of Shipwreck, Northwest Side of Pig 4, Southeast Side of Pig 3, Northeast of Sunday Bay |
| Black-Saddled Coral Grouper | Day & Night | Sow & Piglets (Between Pig 2 & 3), Devil Island, Spiral Sandbar, Flower Sandbar, South of Shipwreck |
| Hoodwinker Sunfish | Day | South of Shipwreck |
| Black Bream | Day & Night | Coco Island, Shipwreck, Northeast Corner, Sow & Piglets (Between Pig 2 & 3), North & Northwest Part of Devil Island (left horn) |
| Giant Trevally | Day & Night | Skull Reef, Southwest of Devil Island, Cloud Island |
| Luderick | Day & Night | Spiral Sandbar, Skull Reef, East 1, East Side of Pig 2, Between Devil Island & Beetle Island |
| Fingermark | Night | North of Devil Island, North & East of Sunday Bay, South of New Caledonia, Cloud Island |
| Port Jackson Shark | Day & Night | Sow & Piglets (North of Pig 2), Between Papua Bay & Skull Reef |
| Red Emperor Snapper | Day | Sow & Piglets (South of Pig 3), Northwest part of Devil Island (left horn) |
| Manta Ray | Day & Night | Flower Sandbar |
| Albacore | Day | North East Corner, North of New Caledonia, South |
| Carpet Shark | Night | Flower Sandbar, Spiral Sandbar |
| Leafy Seadragon | Day & Night | Northeast Part of Sunday Bay, Turtlegrass Patch |
| Shortfin Mako Shark | Night | North of New Caledonia, Northeast Corner |
| Unicorn Leatherjacket | Day | East and West of the Harbour, Northwest Part of Devil Island (left horn), Sow & Piglets (Pig 3), East of Flower Sandbar |
| Queensland Grouper | Day & Night | Spiral Sandbar, Flower Sandbar, Cloud Island |
| Mangrove Jack | Night | East Part of Coco Island, Flower Sandbar, North Side of Pig 4 |
| Dusky Flathead | Day | Between Spiral Sandbar & Cloud Island, Papua Bay, Northeast Part of Beetle Island |
| Golden Trevally | Day & Night | East of the Harbour, Spiral Sandbar, North and Southeast of Devil Island, Sow & Piglets, Bird Island, Skull Reef, South of Shipwreck, Papua Bay, Coco Island |
| Tiger Shark | Night | North of New Caledonia, Shark Bones |
| Spotted Handfish | Night | Northeast Part of Devil Island (right horn) |
| Rocky Flagtail | Night | North of Devil Island, Skull Reef, Northeast Corner, North Part of Cloud Island, East Part of Sunday Bay |
| Swordfish | Day & Night | North of New Caledonia, East Part of Coco Island |
| Common Stargazer | Day & Night | Skull Reef, Sow & Piglets (Between Pig 3 & 4), North of Devil Island, South of Shipwreck |
| Tailor | Day | West and East of the Harbour, Sow & Piglets, Papua Bay, Sunday Bay, Spiral Sandbar, Skull Reef, North East Corner, South of Shipwreck |
| Smooth Oreo Dory | Day & Night | East of Coco Island (by the edge), North of New Caledonia, Northeast Corner |
| Spanish Mackerel | Day & Night | Skull Reef, South Part of New Caledonia, Between Pig 2 & 3 |
| John Dory | Day & Night | North East Corner, Southwest of Dream Island, North of Devil Island (in between horns), North of New Caledonia |
CREATURES
| Creature | Time | Known Locations |
| Biscuit Seastar | Night | Northeast Part of Devil Island, West Side of Pig 3, South Part of Dream Island |
| Saltwater Crocodile | Day & Night | West |
| Giant Cuttlefish | Night | North of Devil Island (between the horns), North of New Caledonia |
| Blue Ringed Octopus | Day & Night | West Side of Bird Island |
| Sea Cow | Day | East Side of Beetle Island |
| Pinctada | Day & Night | South of Shipwreck |
| Purple Sea Urchin | Day & Night | Southeast of the Harbor, East Part of Papua Bay |
| Box Jelly Fish | Day & Night | Cloud Island, North Side of Pig 3 |
| Sand Cucumber | Day & Night | West of the Harbour, Sow & Piglets (East Side of Pig 3) |
| Portuguese Man O’ War | Day & Night | Sow & Piglets (Pig 2) |
| Cauliflower Coral | Day & Night | West Side of Pig 3, Southwest of Shark Bones, East of Coco Island, Northeast Corner, Shark Bones |
| Sand Anemone | Day & Night | East Part of Sunday Bay, South, West Part of Beetle Island, Coco Island |
MONSTER
| Monster | Time | Known Locations |
| Bunyip | Day | Coral Reefs (East 1, 2 & 3), Area between Devil Island and Shipwreck |
TRASH
| Trash | Known Locations |
| Boomerang | East Side of Dream Island |
| Bottle of Suntan Oil | Shark Bones, South of the Harbour |
| Koala Hat | Between Beetle Island & Devil Island |
| Explorer Diary | Shipwreck |
| Cork Hat | Southeast Side of Pig 2, Between Beetle Island & Devil Island, Between Devil Island, Bird Island & Shipwreck, East Part of Papua Bay |
| Turtlegrass | West of the Harbour, Sow & Piglets |
| Aussie Rule Ball | West Side of Pig 2, South of Shipwreck (by the edge) |
| Beer Can | South Side of Pig 2 |
| Kangaroo Road Sign | Sow & Piglets, Sunken Boat, Between Turtlegrass Patch & the Harbour, Kangaroo Island |
| Parrot Feather | Papua Bay, North and Southwest of New Caledonia, South and Southwest of Dream Island |
| Australian Cricket Bat | Between Cloud Island and Mini Island |
| Surfboard | Between Pig 1 & Pig 2 |
| Giant Shark Tooth | Shark Bones |
| Plastic Barrel | Shipwreck, Kangaroo Island |
| Floppy Disc | Skeleton Reef |
| Maori Jewelry | Shipwreck |
| Rock with Aboriginal Painting | Sow & Piglets (West of Pig 2 (by the shore) |
| Sunglasses | South Part of Coco Island |
| Didgeridoo Flute | Southeast Side of Pig 2 |
| Plastic “Dory” Fish | South Part of Coco Island, Between Mini Island & Spiral Sandbar |
| Lawn Chair | West Part of Papua Bay |
| Pearl | Cloud Island, Twirl Reef, Coco Island, Bird Island, East Side of Sunday Bay |
| Treasure Chest | Shipwreck |
| Eucalyptus Branch | North Side of Pig 1, Northeast Corner |
| Wooden Crate | Turtlegrass Patch |
| Marine Trap | North of Devil Island, Shipwreck, East of Kangaroo Island (by the edge) |
| Vegemite | Between the Harbour and South Area |
4. Accomplish Quests, Tasks and Achievements
Take on NPC Quests
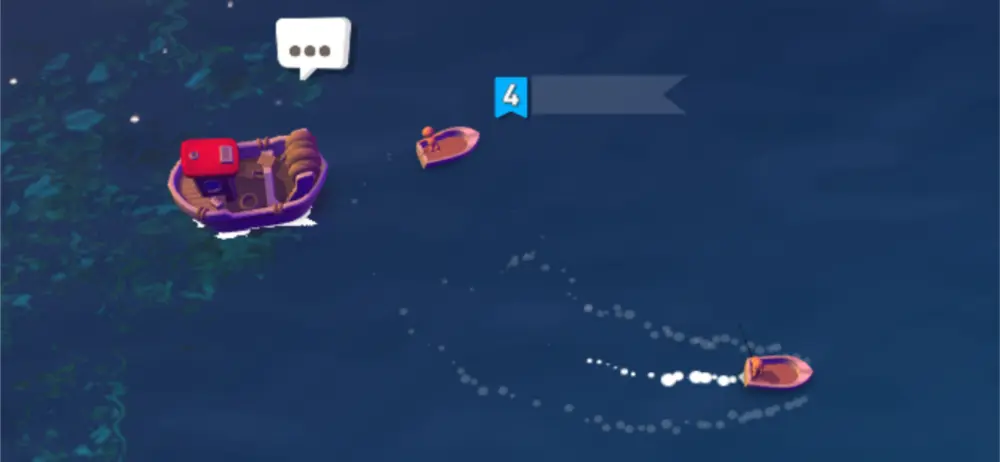
Boats with three dots or ellipses in a speech bubble indicate a quest. Quests are an alternative way to earn Gold and may sometimes even give you other items. These quests range from catching fish in certain areas or finding items underwater. Make sure to list down your quests on paper so you don’t forget them! If you want a more convenient, in-game method of remembering quests, you can go to the Broken Rod Anglers Store and buy a Notebook for 1,000 Gold.
Finish Daily Tasks
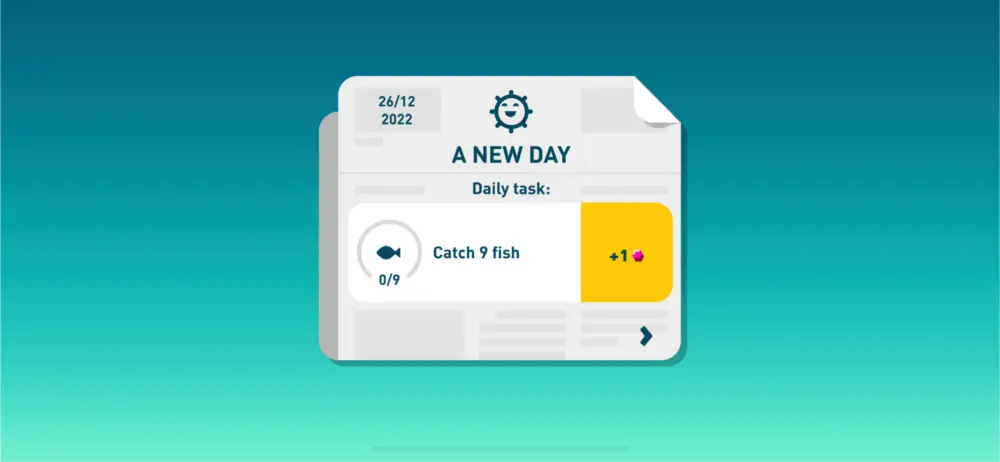
Upon opening the game for the first time in the past 24 hours, you will be greeted with a Daily Task. These tasks usually challenge you to catch a certain number of fish or creatures or collect a certain amount of trash. After completing the task, you will earn 1-2 Gems.
Get Achievements
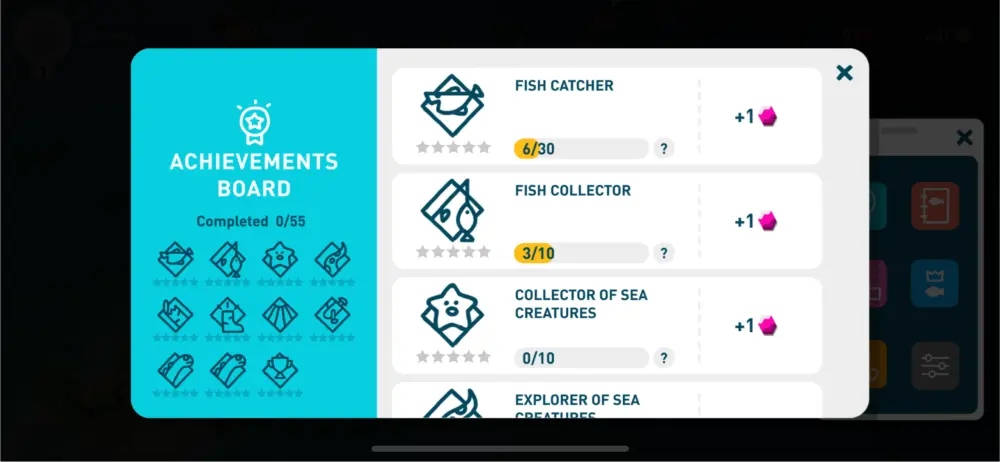
The game has certain milestones that each player can hit just by playing the game. They range from collecting a number of fish, finding your first monster, reeling in trash and so on. Each achievement rewards you with Gems.
5. Be Mindful of Your Inventory
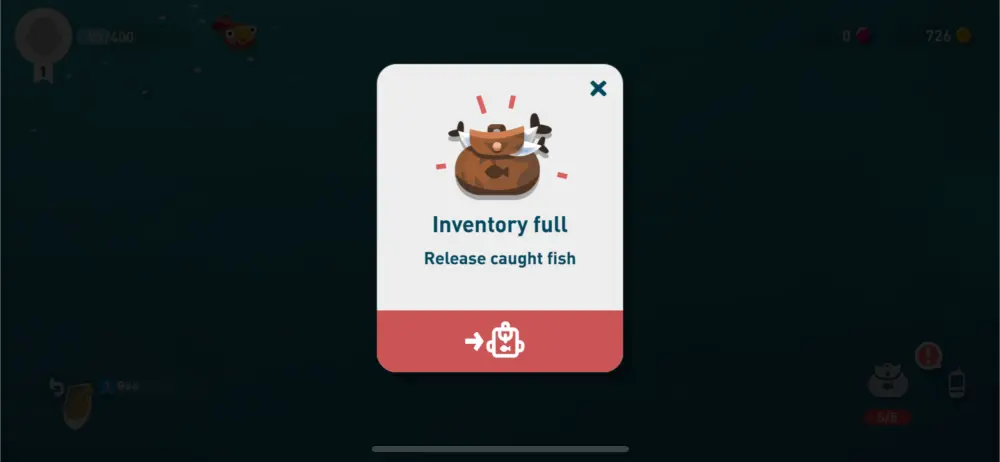
At the start of the game, you only have 5 slots in your inventory. If you are trying to save up for something or want to focus on earning money, do not collect any floating Debris you find. While some Trash can sell for a good profit, not all of them do and you might end up with Wood which only sells for 14 Gold. You will want to fish for the best and most expensive Fish you can find around the island so you do not want to use up your space for something like that.
If you end up catching Fish or Creatures that sell for cheap, you can always release them back into the water. But if you get Trash or Wood that isn’t very profitable, you will lose Karma Points if you throw them back into the ocean which may affect the success of your next fishing attempts.
If you want to increase the number of slots you have in your inventory, you will need to first build the Dock at the Pier. Once you unlock the Dock, you’ll be able to add up to 5 extra slots. Each slot is not cheap, costing Gems and increasing in price for each one you unlock.
6. What not to do
As we played the game and shared our experiences with other players, we ran into some common problems. To help you avoid them, we’ve listed them below:
Don’t buy the Boat Radio
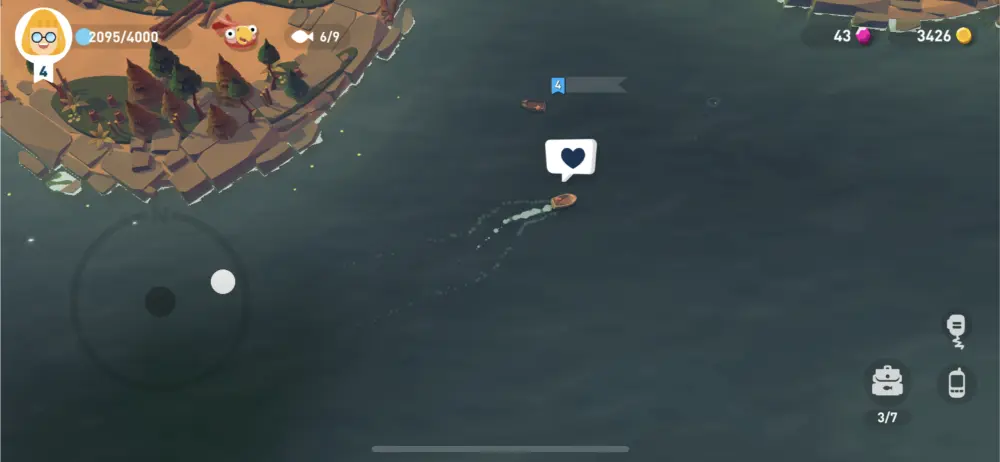
With the very short and vague description of what the Radio does, any player would be tempted to buy it to find out. The Boat Radio basically lets you use emotes to communicate with other players on the map. They may communicate back with their own emotes if they have them, but for the most part, it doesn’t really contribute much to your game if you just want to focus on fishing.
At the time of writing this guide, the game does not give players a way to communicate in other ways like chat or voice so the boat radio is more of a fun add-on and not really mandatory to get. Since it’s also pretty costly, we highly recommend not buying it or prioritizing buying other things first.
Don’t get Stuck
Traveling using the helicopter costs, at minimum, 100 Gold. At the start of your fishing career, you won’t be making much money with the fish you catch so be wary of spending too much Gold on things. Do not let your wallet go under 100 Gold or else you will find yourself stuck at the Pier or Sea. When you do get stuck, don’t panic as there are many ways to get yourself out of it.
How to Leave the Pier
To leave the Pier, you need to wait for Chests or Crates to appear to collect Gold. The Debris you may also find could be sold to This & That Purchase Store for more Gold.
How to Leave the Sea
Unlike the Pier, there is no Store on the other islands to sell your stuff to. Instead, you can collect Crates to get enough Gold or accomplish quests given by NPCs in boats. These quests often require you to collect fish or trash in exchange for payment.
Don’t Sell Wilson!
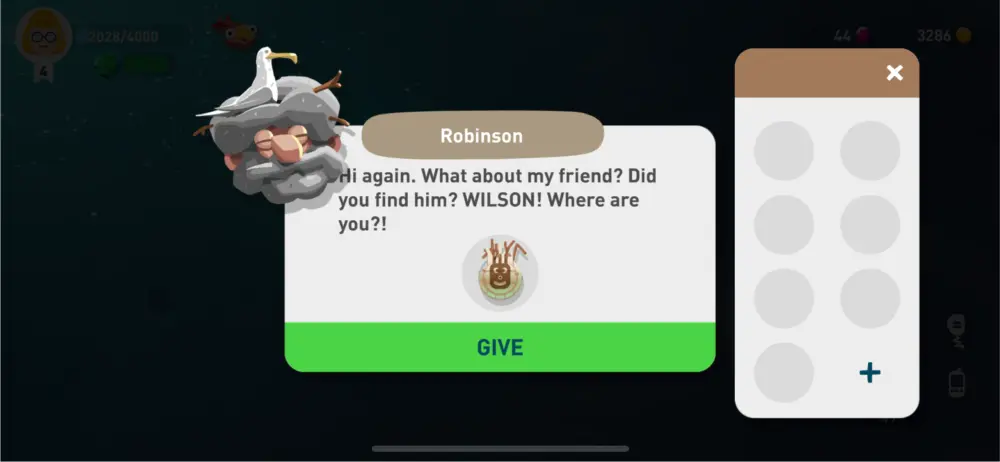
Wilson is a volleyball with a face drawn on it and is a reference to the movie Cast Away (2000). The main character treated a volleyball they found as their companion as they were stranded alone on an island for years. At around level 3, you may see a man on a raft named Robinson who is looking for that ball.
However, if you talk to him, he will send you away saying you need to level up more (since you need to be level 4 for this quest) even if you already found the ball. Keep the ball in your inventory until the quest becomes available to you once you’ve found it since it is a very rare and difficult item to find.
The same goes for other quest item trash. If it seems unusual or unlike any of the common trash you find, keep it on hand or check their official discord to see if it is a quest item. Once you finish the quest, you could still fish out these items but there will no longer be a point to keep them so feel free to sell them after.
And that marks the end of our Beginner’s Guide to Creatures of the Deep! We hope that our research on this game paid off and assisted you in your journey to complete your collection of fish, creatures, and trash!
As this game is constantly updated and many of its secrets are still being discovered, we highly recommend visiting their Official Subreddit or Discord Server where the developer himself also resides. The community is steadily growing and there are always players ready to give helpful pointers and strategies. Do you know any tips and tricks we may have missed or would like to share with fellow players? Let us know in the comment section!
Lisa
Wednesday 4th of February 2026
How do I increase my inventory, I am desperate for the Monster Rod and only have 3 spots and apparently you need 4 to purchase. I have searched for the answer and see that players are saying to build a dock, which I have but still can't get the 4th spot. Please Help !! Many thanks
Seabee
Thursday 2nd of October 2025
The ABS was a mistake don’t even no how I text that
Seabee
Thursday 2nd of October 2025
I love this game ABS I am old . I just got Thailand & cannot find the map? Can you help me?
Adit
Wednesday 18th of October 2023
Hai, where u can find most valuable fish? So i can sell it multiple time to get money
Brian
Sunday 28th of April 2024
Yes! Please give a general recommendation on which fish to catch for the most money in an area!
affaf
Friday 25th of August 2023
hi, I want to ask something. I bought an extra slot for 15 gems, but sunddenly the extra slot disappear and I only have 5 slot inventory right now, why is that happen? do I have to buy it everytime I go to other island?