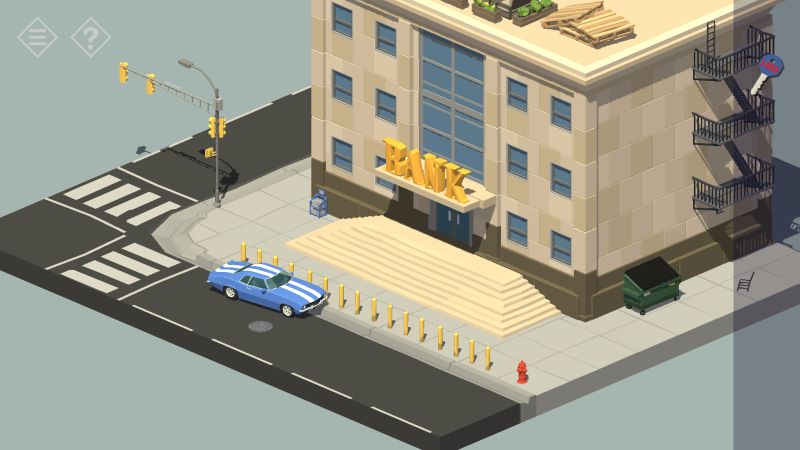
Tiny Room Stories: Town Mystery is a puzzle game developed by Kiary Games where you play as a detective who visits the Town of Redcliff after receiving a letter from his father asking for a visit. When you get there however, all points of entry have been closed off and the town itself appears deserted. It is time to put your investigation skills to use and figure out what has happened.
The game utilizes an isometric view of the given level, and you can rotate the camera by swiping to the left or to the right. This is important to remember as some things can only be seen, let alone interacted with, from the correct angle. Not every area will allow for full camera rotation, but that should not be an issue for whatever puzzles are currently in that room. You can also zoom in the camera a bit, but by tapping on most things, you will get a closer look; tap the back button to zoom out.
Tiny Room Stories is divided into three acts, with the first act available for free while the other two acts must be purchased to complete the story. While the game’s puzzle seems easy at first, some of them can get quite obtuse with regard to their solutions, so stay with us if you want to know how to solve the first act’s more difficult challenges. There is a lot of ground to cover, so our Tiny Room Stories walkthrough guide has been split into two parts.
Prologue: The Blockade
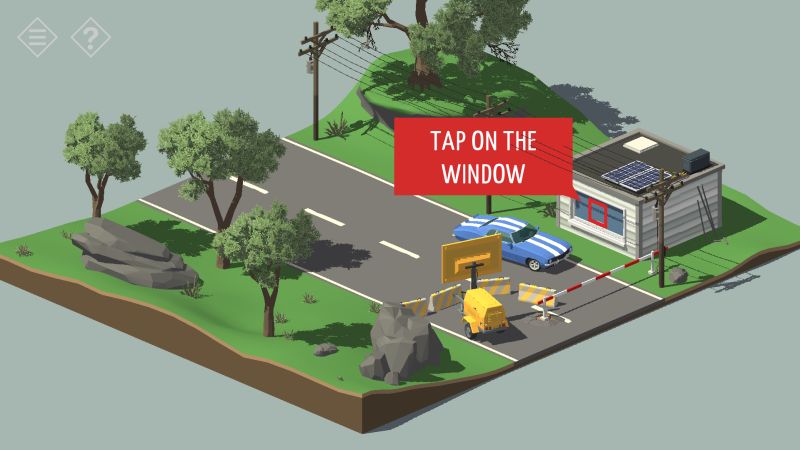
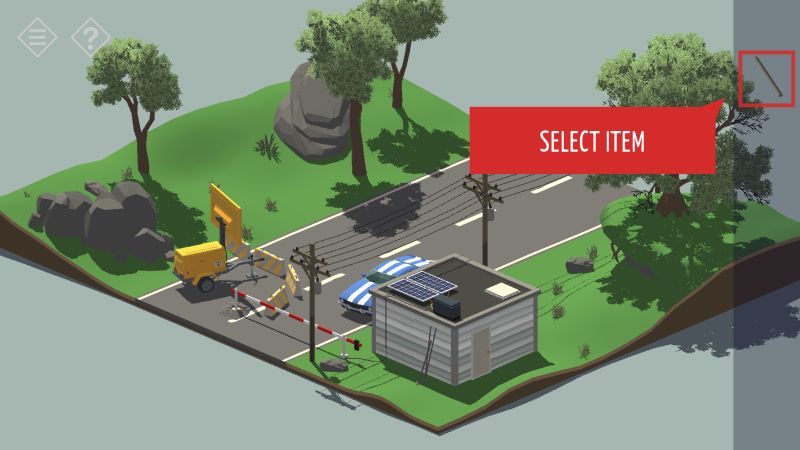
The game’s prologue, which doubles as the tutorial, has your entry to Redcliff blocked by a boom gate, and it seems that there is no one manning the guardhouse. Swipe the camera to the left to see a locked door opposite the guardhouse window, and a couple of pipes leaning on a nearby wall. Tap on the pipes to pick one up and use that pipe to open the door. This will give you access to the guardhouse.
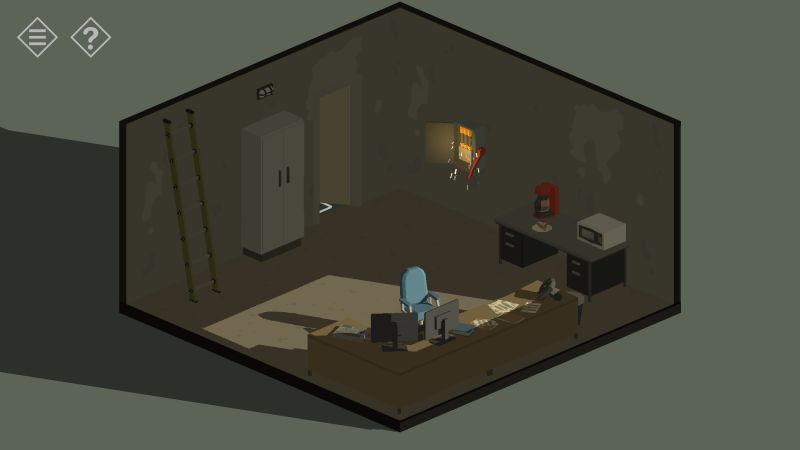
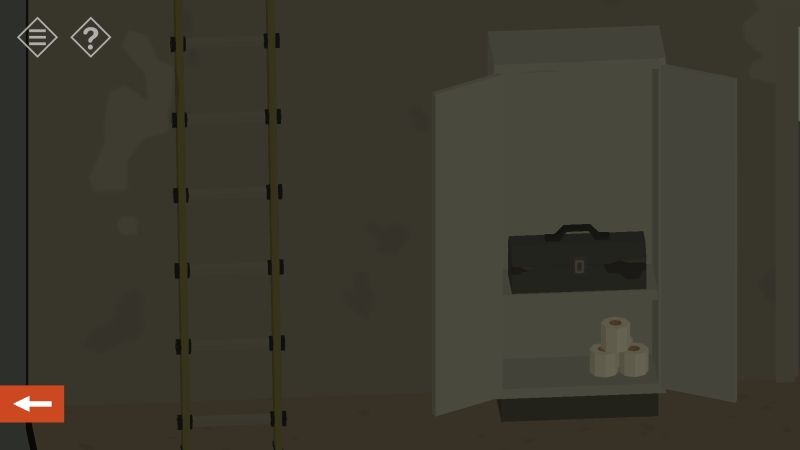
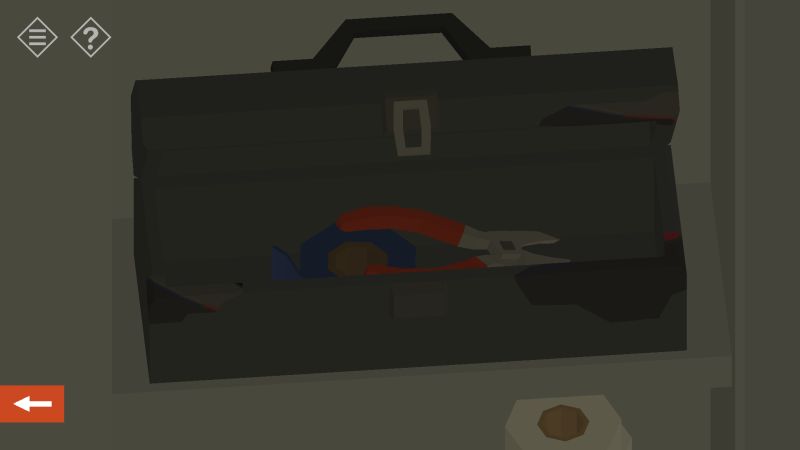
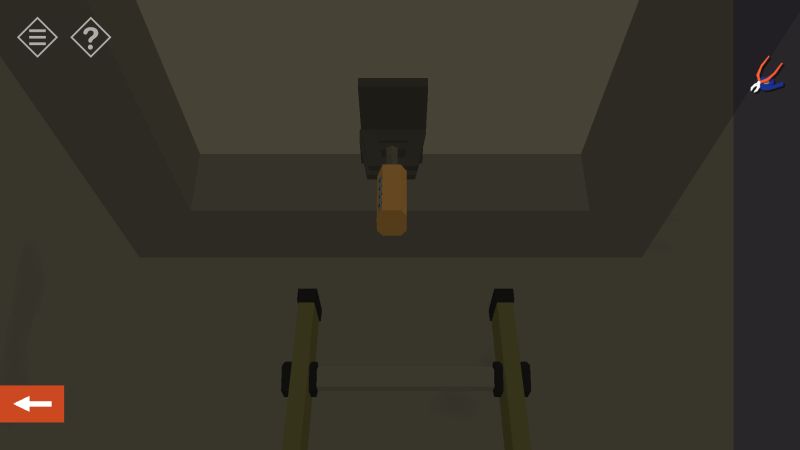
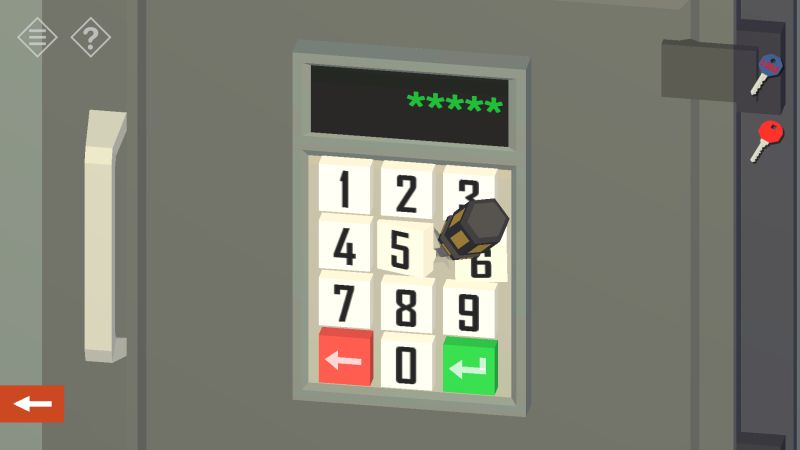
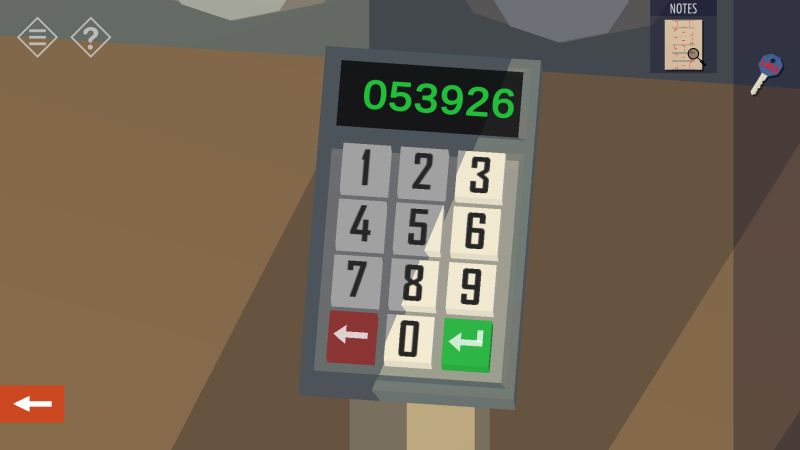
The guardhouse appears to have lost power, and swiping the camera to the left reveals that the main switch has a busted wire that you will have to fix. Next to the door should be a closet with a toolbox inside. In the toolbox, you will find a set of tools, namely some pliers and electrical tape. Pick those up. You should notice a ladder next to the closet that leads to the roof, with a locked hatch that requires a four-digit code to open. Ignore that for now and interact with the main switch.
Switch off the power main first before repairing the busted wire with the tools, then switch the main back on to power up the guardhouse.
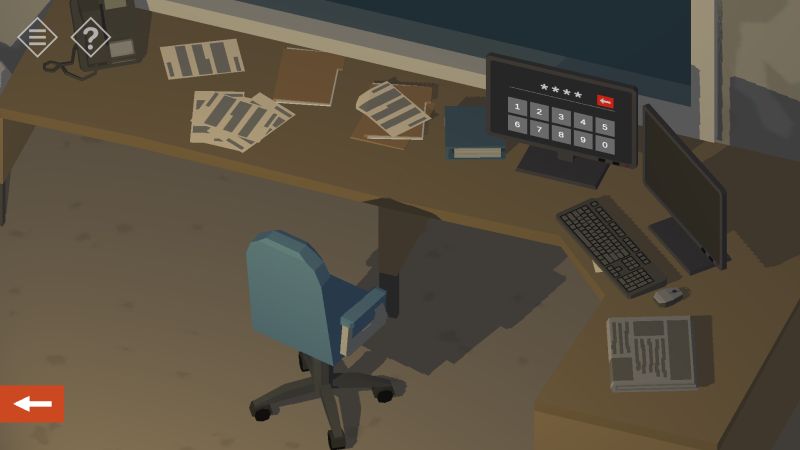
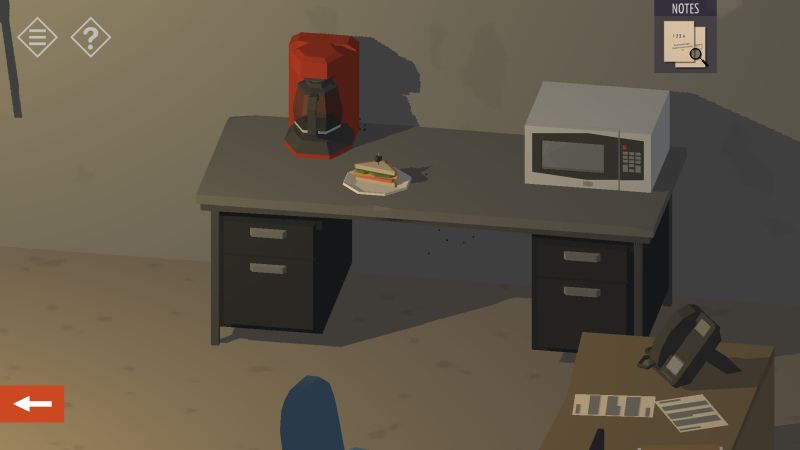
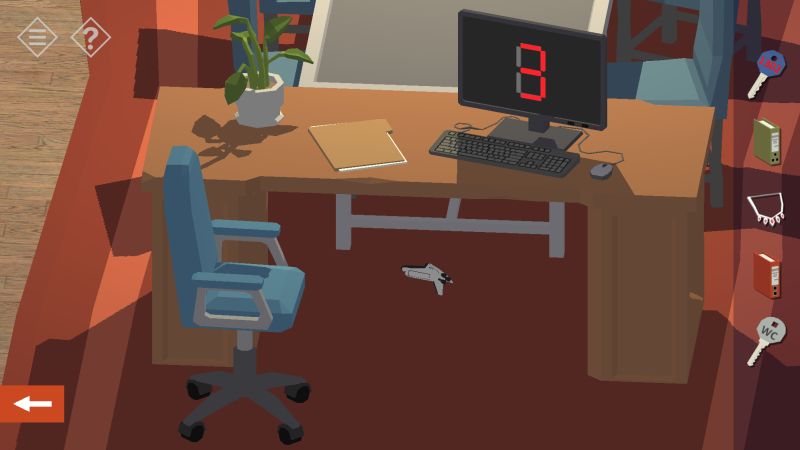
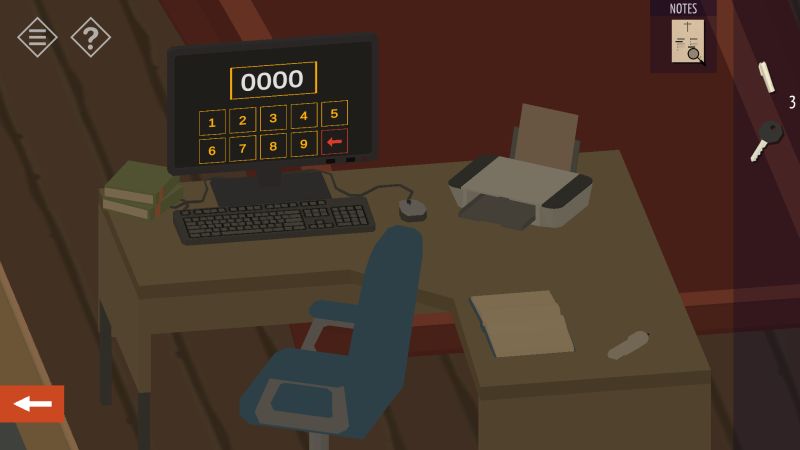
There are two desks in the guardhouse. The first one is facing the window and it has some papers and a computer on top of it. The second desk is against the same wall as the power main. It has some drawers and a rotten sandwich on top. The computer is password-protected, but thankfully the guard who was manning the place was “kind” enough to write the password down.
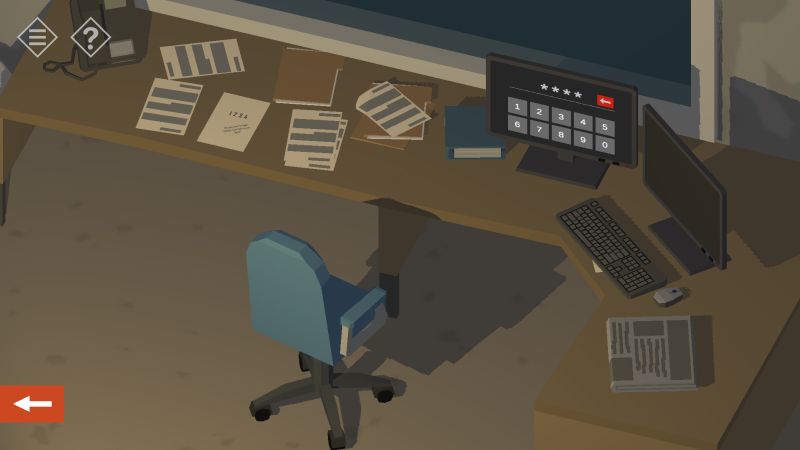

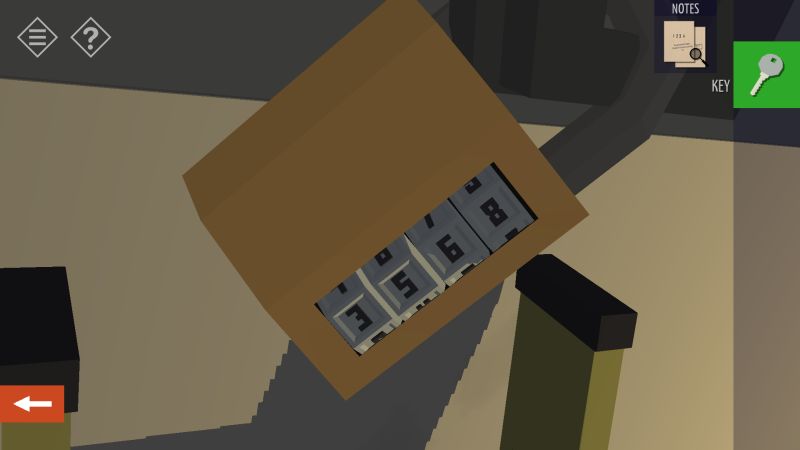
Tap on the papers located on the computer desk to uncover the four-digit password for the day. However, if you try to input those numbers, the computer will remain locked. Tap on the keyboard to uncover another sheet of paper with the order of the numbers written down. Type them down as instructed to unlock the computer.

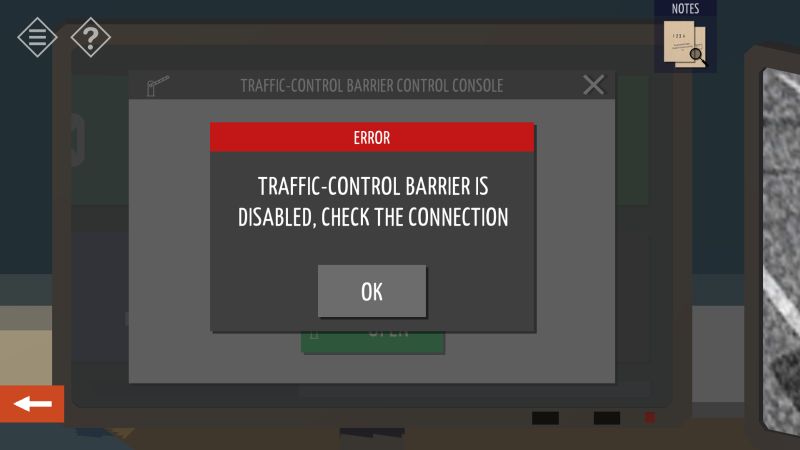
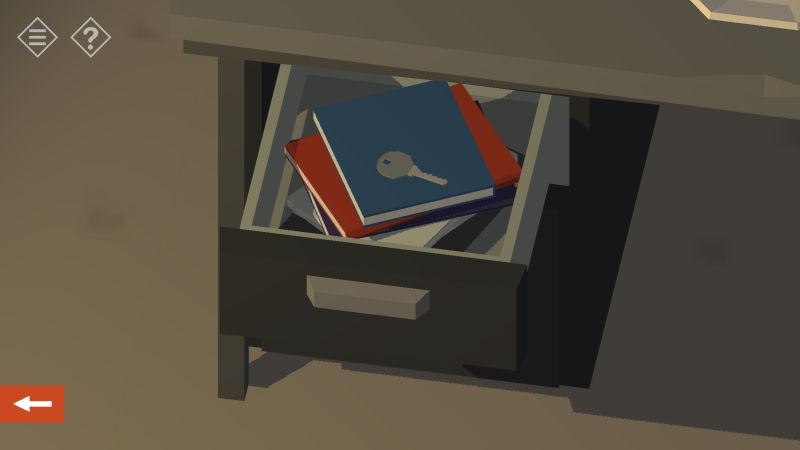
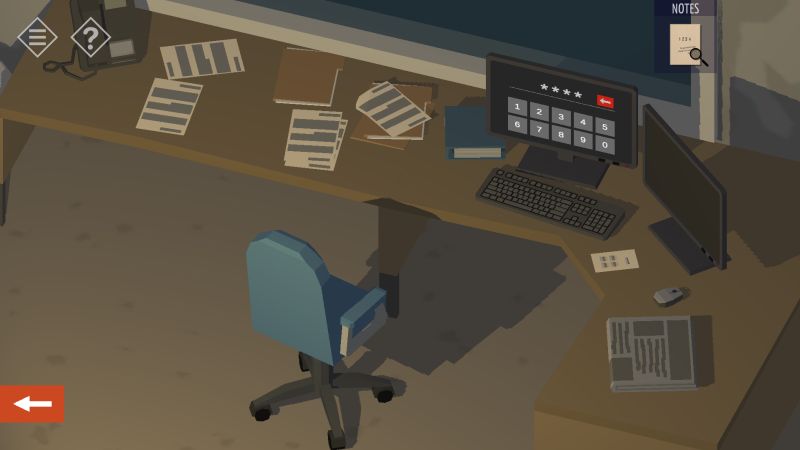
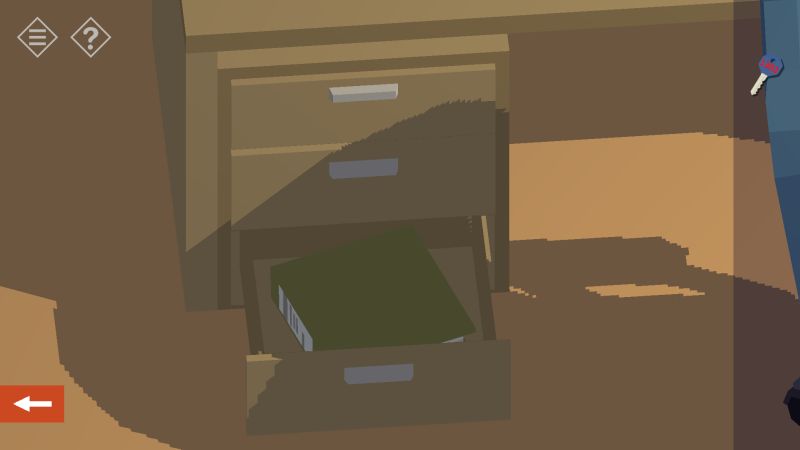
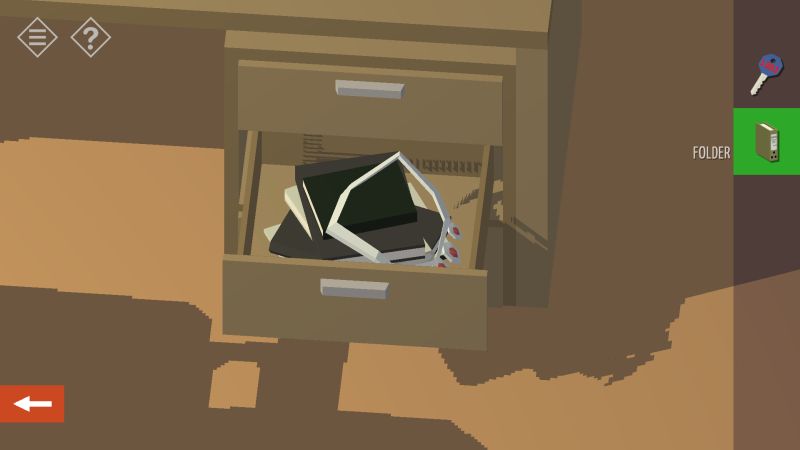
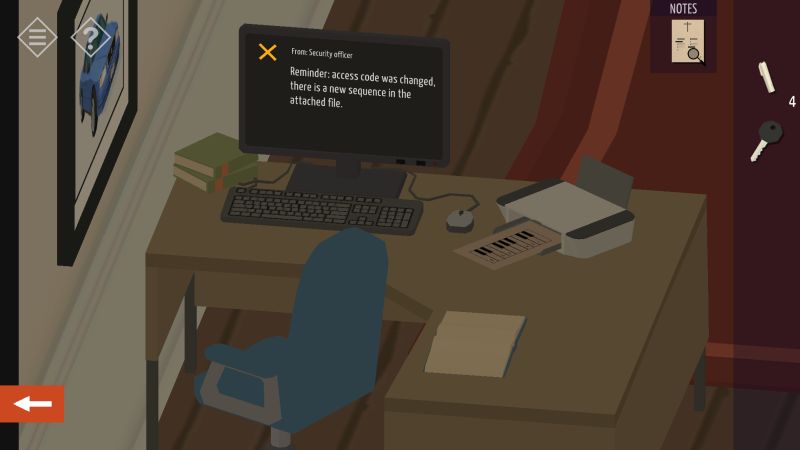
Aside from links to the developers’ previous games and social media accounts, scrolling the computer screen reveals the controls to the boom gate. Unfortunately, the computer will report that the gate’s connection appears to be malfunctioning. After trying to open the gate, tap on the notepad icon to learn the code to the roof padlock. Before you head to the roof, go to the sandwich desk and tap on the upper-left drawer; there should be a key on top of some documents. Take it.
On the roof, you should see an electrical enclosure with two doors. The door on the left is unlocked, but the door on the right is locked. Use the key from the desk to unlock the door on the right and uncover the problem with the gate; one of its cables is unplugged. Plug the cable back in, head back to the computer, and lift the boom gate. Now you can enter with your car and visit your father to see what is wrong.
Chapter 1: A Family Visit
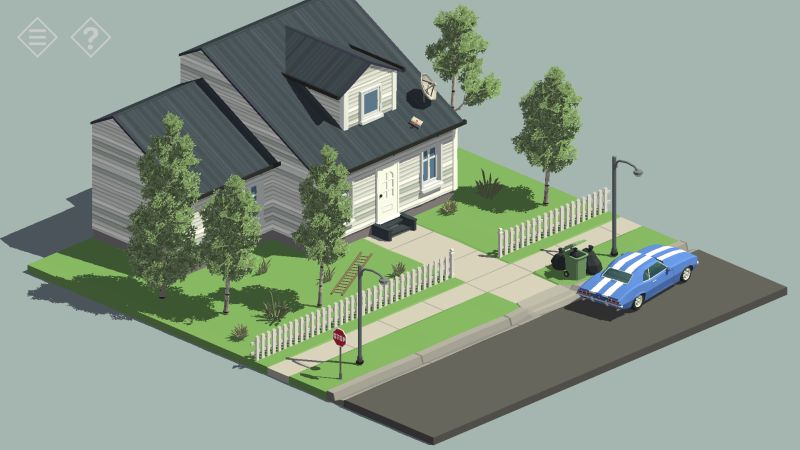
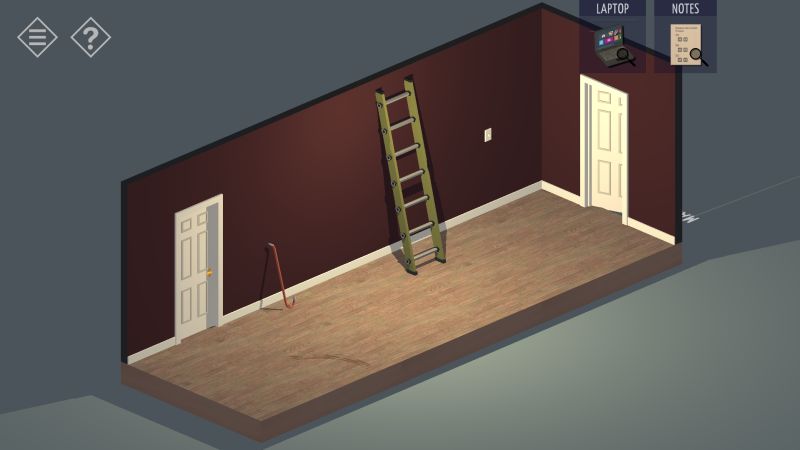
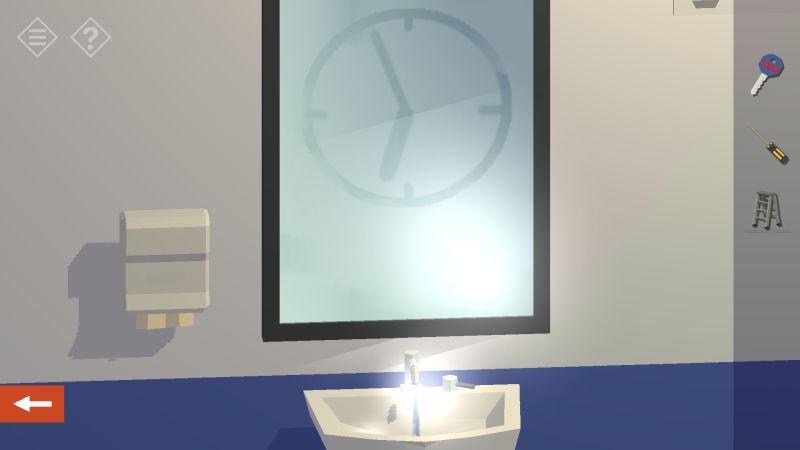
Your father’s house is locked, with a ladder strewn on the yard and the mailbox somehow on the roof. Pick up the ladder and move it to the roof to get to the mailbox, which has the key to the front door. Climb back down to unlock the door…

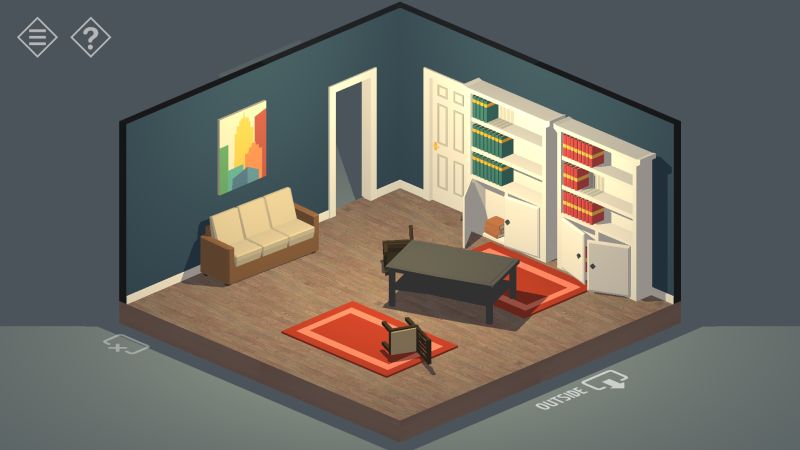
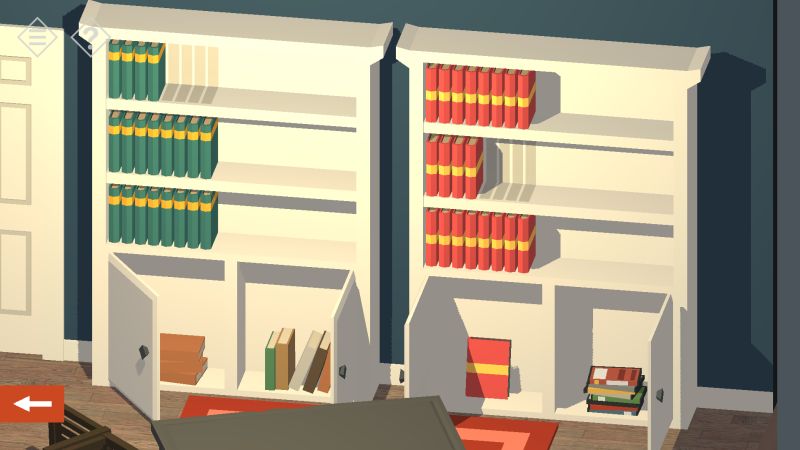
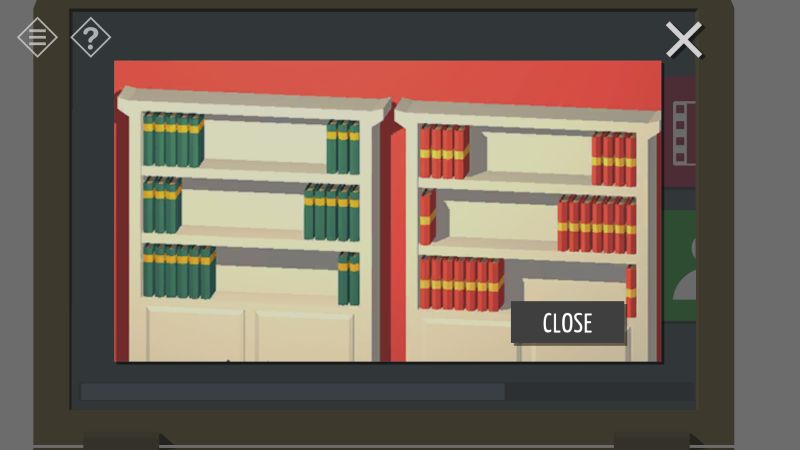
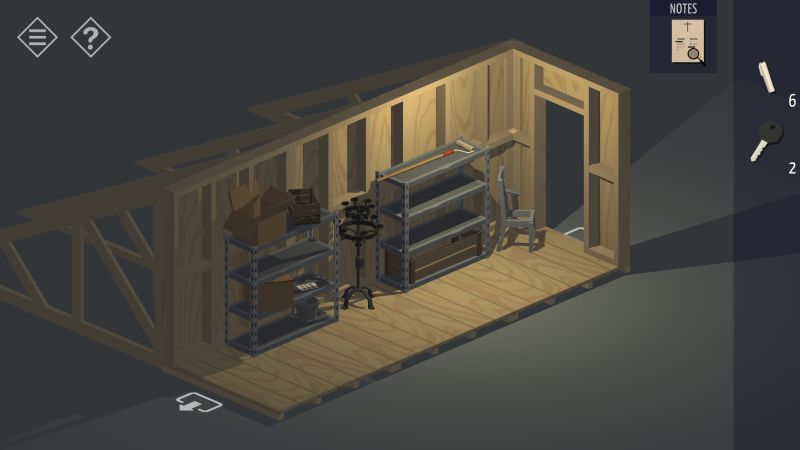
…Only to learn that someone has ransacked your father’s house, with the living room a complete mess. The first things you will notice are a couple of cabinets with eight books missing from the bookshelves, which are colored green or red, as well as a locked door next to those cabinets. We will locate these books as we go through the house.
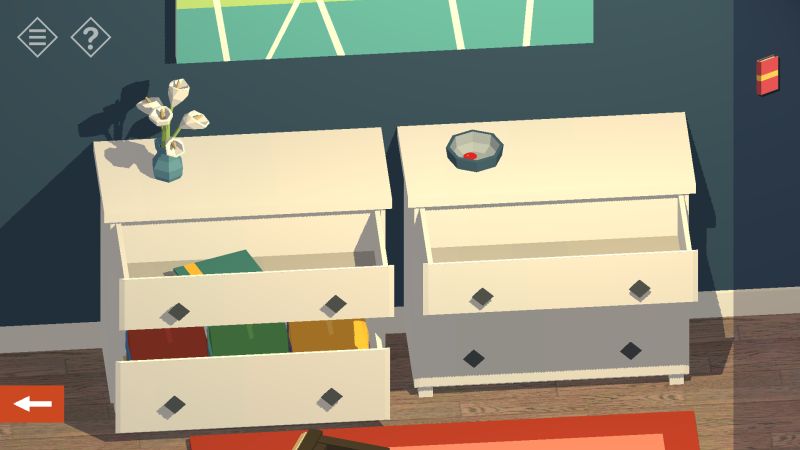
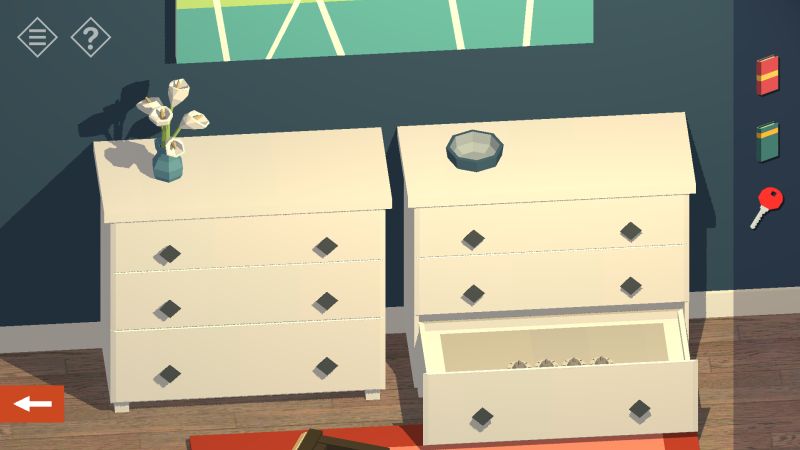
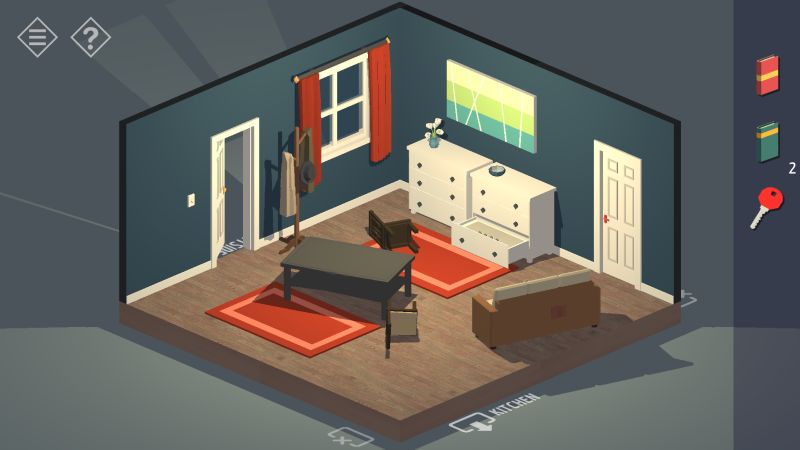
One red book (1 red) is found in a shelf below the red bookshelves. On the side opposite of the bookshelves is a pair of dressers. There is a bowl with a red key on the right dresser and the lowest drawer has a safe with four dials. Meanwhile, the highest drawer of the left dresser has a green book (1 green). Pick up the books and the key. Push the couch out of place then turn the camera around so you can interact with the back of the couch, and you should find another green book (2 green) underneath the coffee table. The couch itself has a mysterious patch, but you do not have a way of cutting the patch open to see what it is hiding. Ignore the couch and head to the kitchen which is directly across the front door.
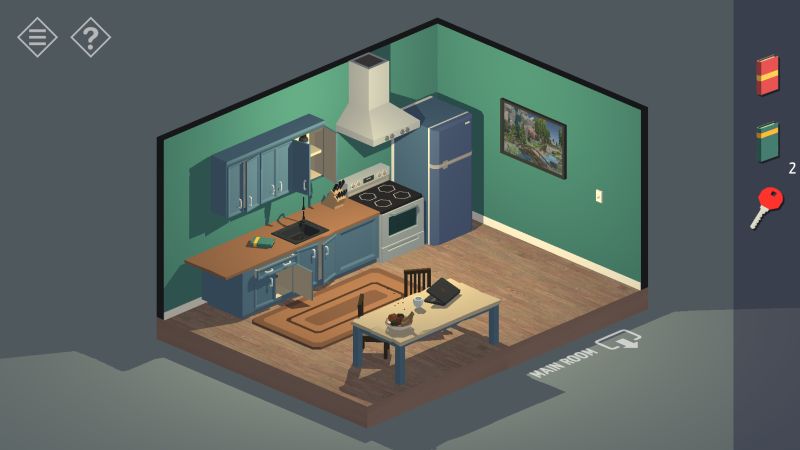
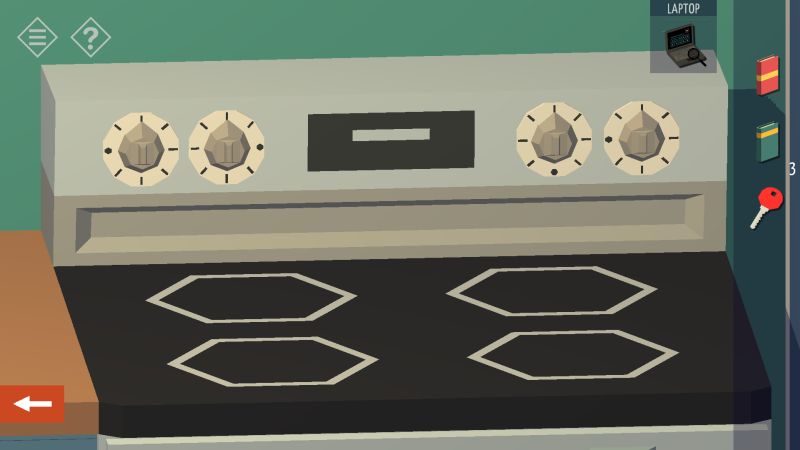
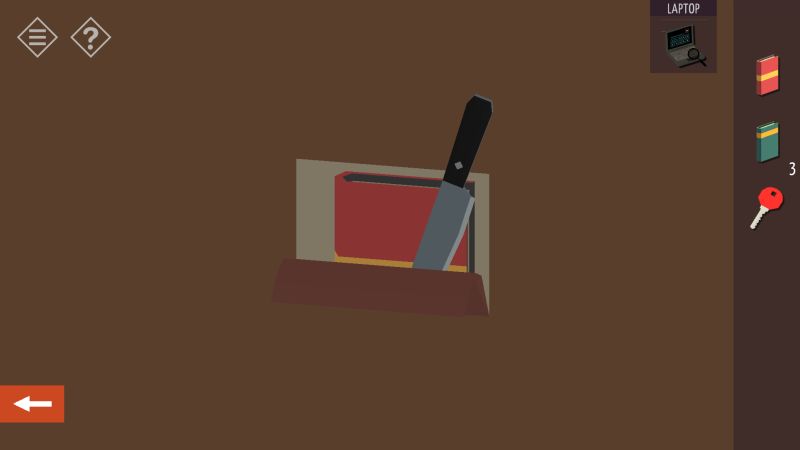
There is rotten food in the kitchen, and a laptop that uses symbols for its password. While you are in the kitchen, there is a green book lying on the counter in plain sight (3 green). Aside from those items, tap the knife block to pick up a knife for cutting open the couch patch. Interact with the stove to learn the dial combination for the safe where you found the red key, which are indicated by dots; read it from left to right. With all these items and the laptop in your possession, head back to the living room.
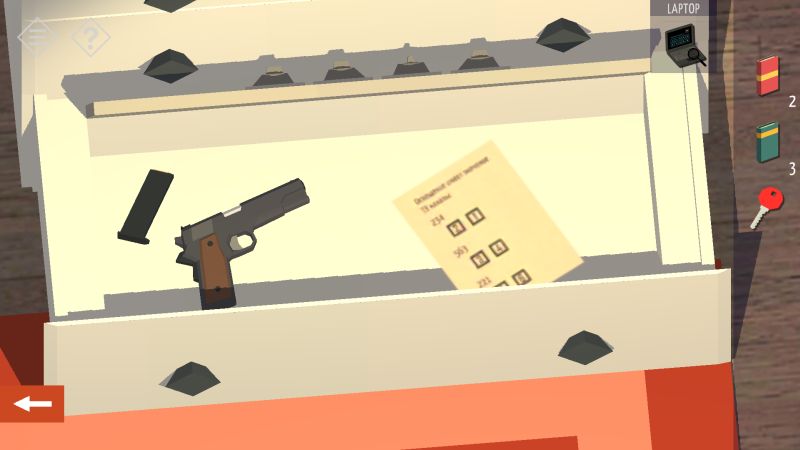
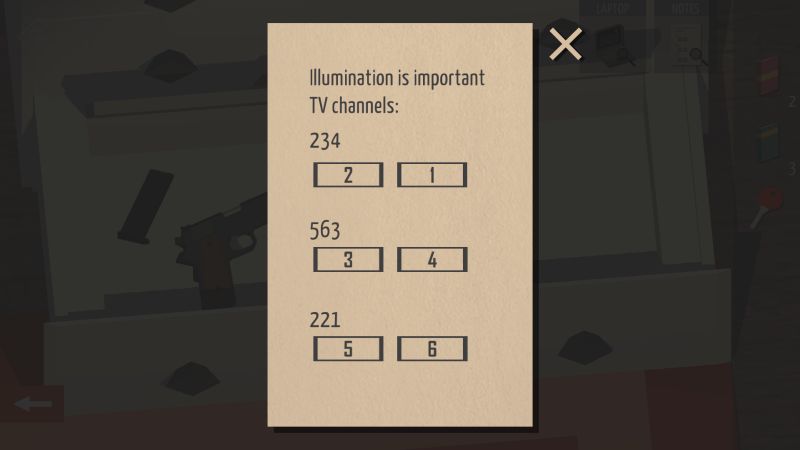
With the knife equipped, interact with the couch patch to cut it open and discover another red book (2 red). After that, unlock the safe using the combination you learned from the stove. Inside the safe are two items: a gun which you cannot pick up, and a note that mentions several TV channels, a numbered sequence, and the phrase “Illumination is Important.” Head to the master bedroom located next to the dressers, which you can unlock with the red key you found in the bowl.
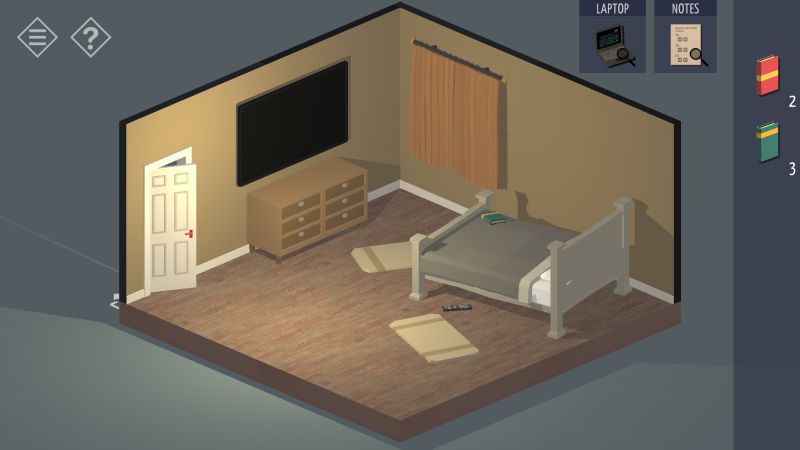


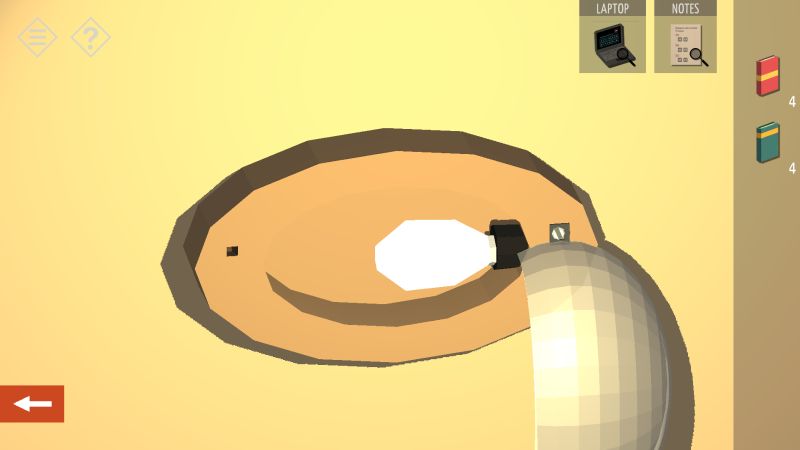
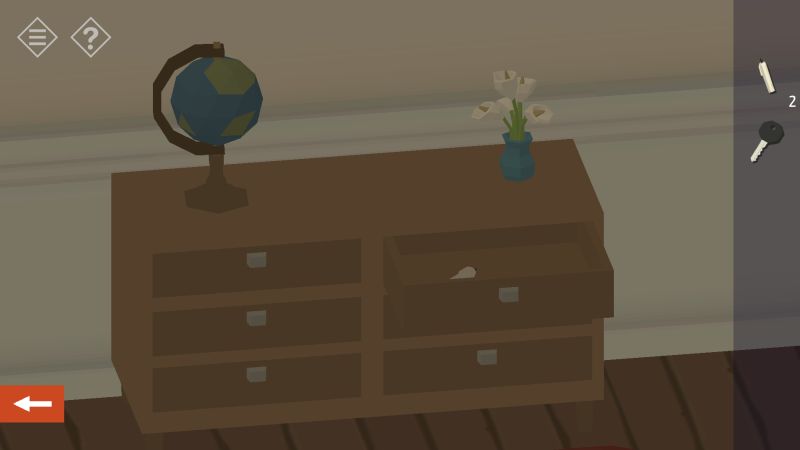
Your father’s bedroom is also a mess, with the last green book (4 green) on the bed and a remote control on the floor. Pick both items up and open the middle drawer of the end table to find a screwdriver. Rotate the screen to find the TV with a dresser beneath it, a cabinet, a loaded laundry basket, and a wall light with a broken switch. The last two red books (3 and 4 red) are in the cabinet area, with one in the cabinet itself and the other one underneath the basket. This should give you four red books and four green books. You can input the channels you found on the note in the safe from the living room by using the remote with the TV. However, all it will do is make a pair of drawers open by themselves. Remember the phrase written on that same note/channel list? Since the light switch is broken, use the screwdriver to detach the light shade and unscrew the bulb manually—the secret reveals itself.
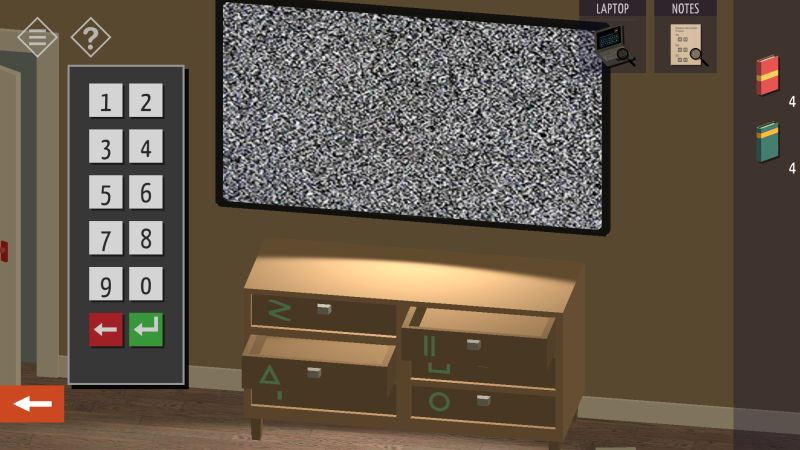
The dresser’s drawers have symbols painted on them with glow-in-the-dark ink. These symbols match with the ones used for the laptop password. Input the channels in the order found on the note, remembering which drawers open up. Then, enter the symbols that appear in the sequence the drawers open to unlock the laptop. The laptop’s interface is similar to the one found back at the guardhouse, but the important thing is to tap the camera icon; this will show the books placed in a specific pattern.
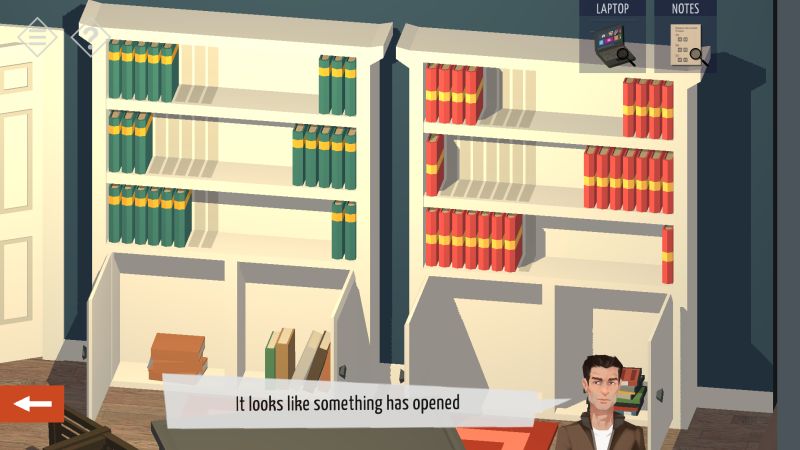
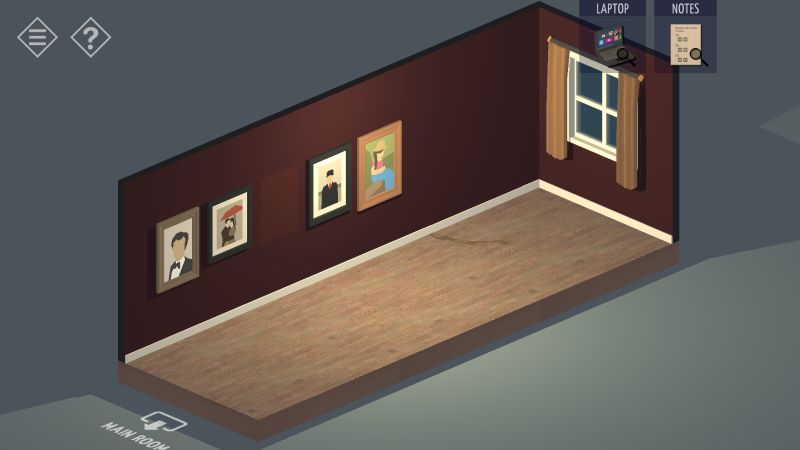
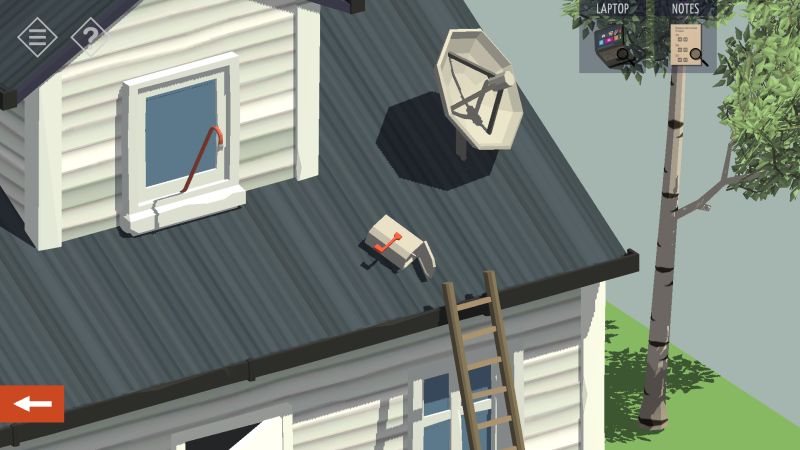
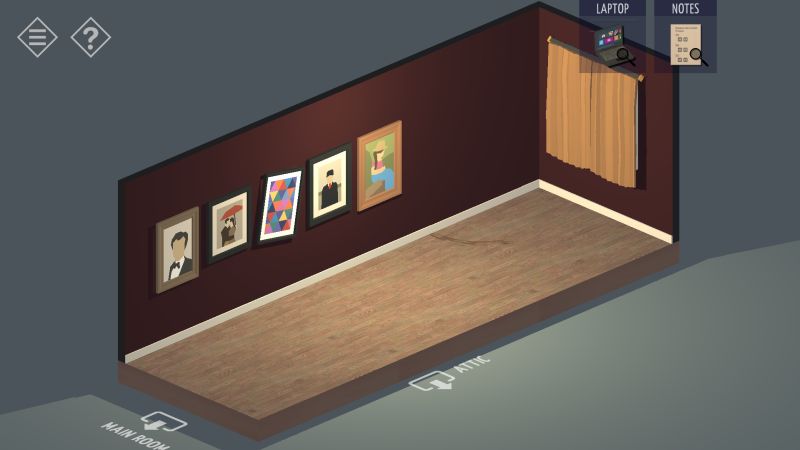
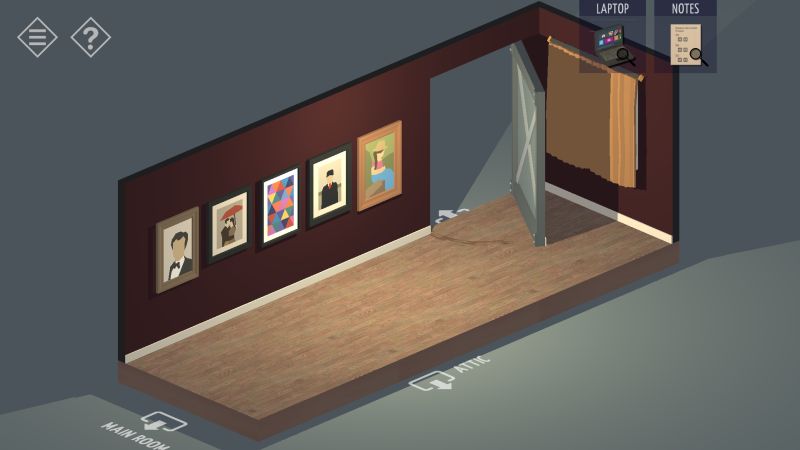
Head back to the living room, place the books back on the bookshelves, and start moving them in the positions indicated on the laptop by tapping on them. Once the books are in position, the door next to the bookshelves will open. Here you will find a hallway with a ladder that goes up to the attic, as well as a crowbar on the floor. In the hallway, you will find one wall with a set of paintings, one clearly missing from the lineup. You will also notice that the attic appears to be blocked off. Back outside, there was a window near the mailbox that leads to the attic. Pick up the crowbar and head back to the roof, opening the window with the crowbar to get in.

In the attic there are three things to take note of: (1) a crate that is blocking access from the hallway ladder, (2) the missing painting, and (3) some blueprints indicating that this house has a basement. Pick up the painting and move the crate out of the way, allowing you back downstairs. Put the missing painting back into place, and you will notice that it gets crooked the moment you place it. For every painting you straighten out, two paintings become crooked. The goal here is to get all of the paintings straightened. Once all five paintings are straight, a secret door opens that leads to the basement.
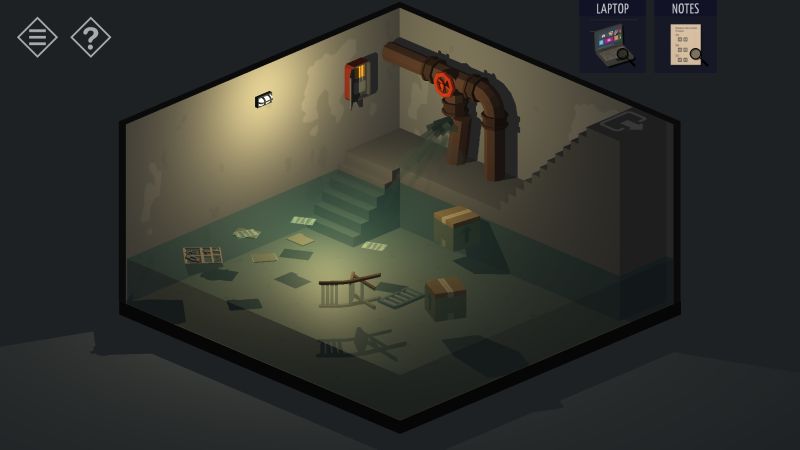
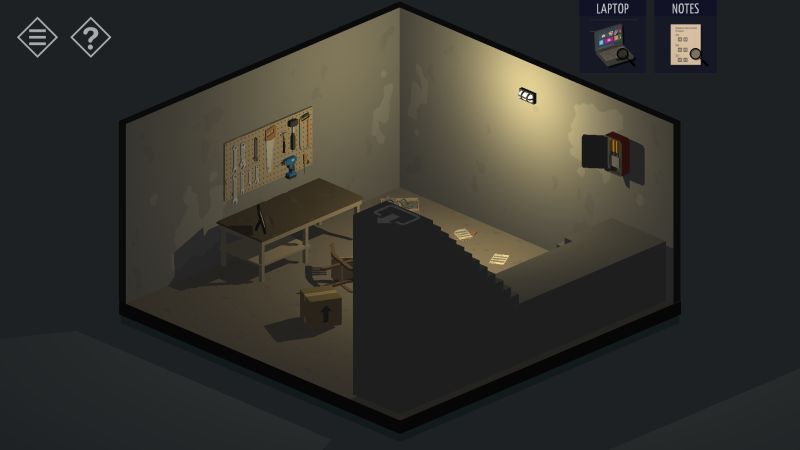
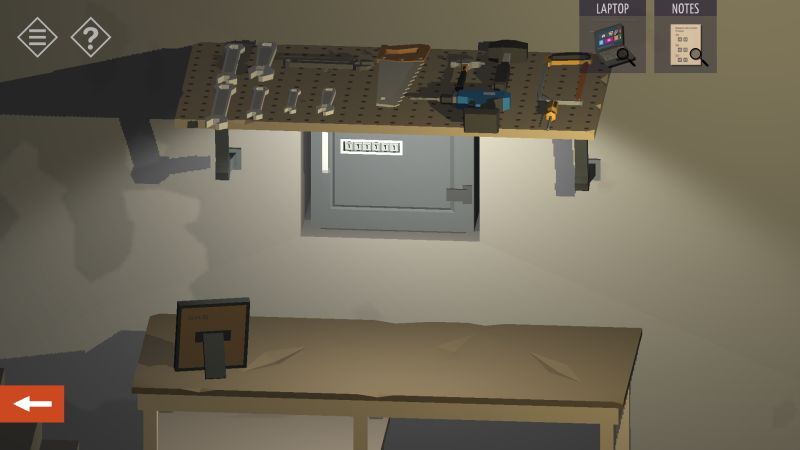
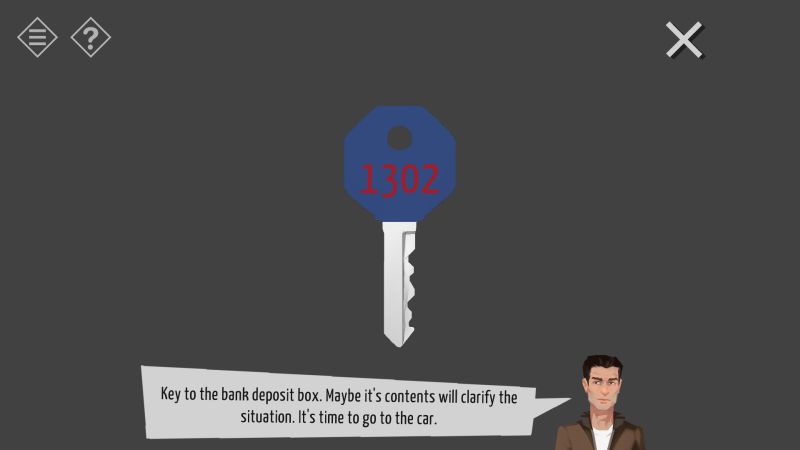
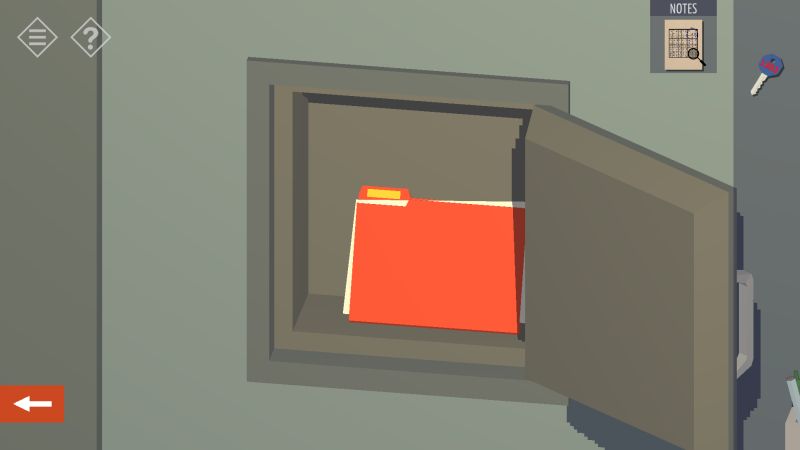
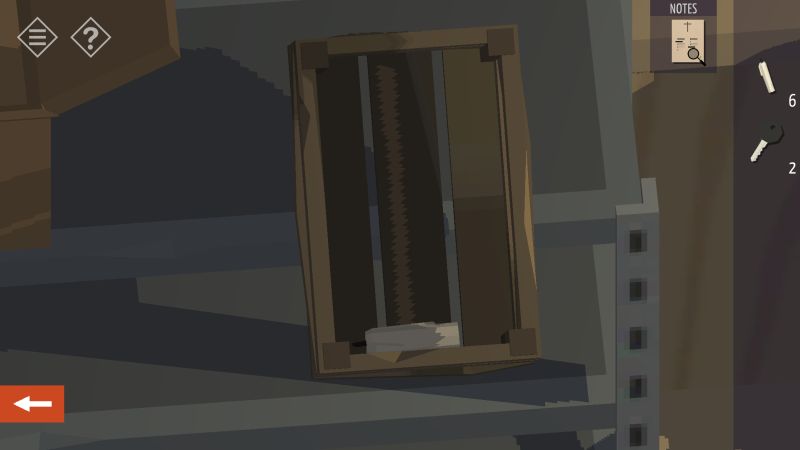
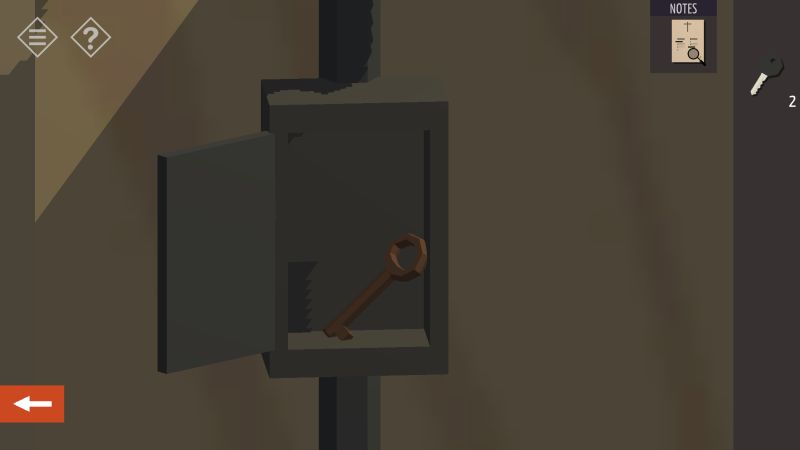
The basement’s lights are out, so just tap the small, red light in the darkness to power the place back on. You will see that the basement is flooded, but there is a nearby valve that lets you drain out the water. Once all the water is drained from the basement, you can go to the workbench across the room. Most of the tools on the tool rack do nothing, but the dark gray wrench twists to reveal a safe underneath the rack. It uses a six-digit code to unlock, which happens to be written behind the nearby picture frame on the workbench. Input the code to get a safety deposit box key, which means a visit to the local bank.
Chapter 2: Making A Withdrawal
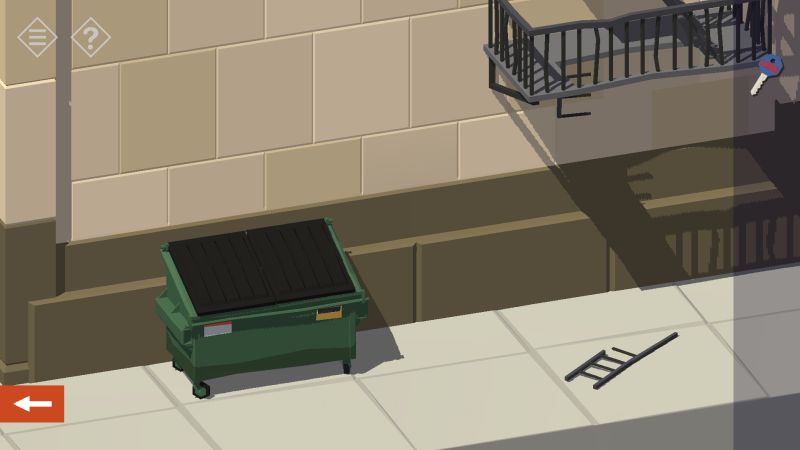
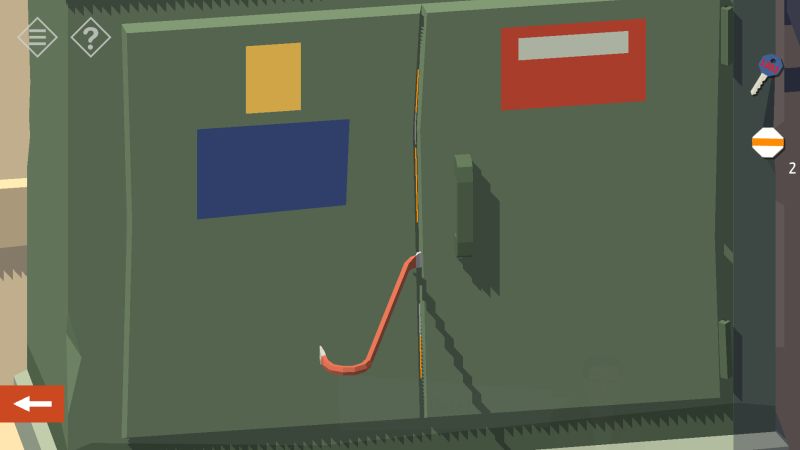
With Redcliff still deserted, the bank should have no lines to deal with, but the front door is locked tight. Swipe the camera to the right to see the fire escape that could let you get up to the roof. The busted ladder is not going to help you though, so you use the nearby dumpster as a substitute. Tap it to push the dumpster into position.

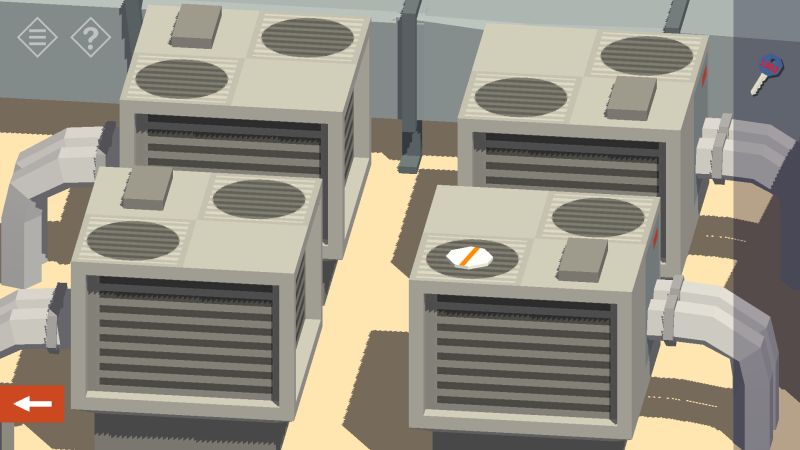

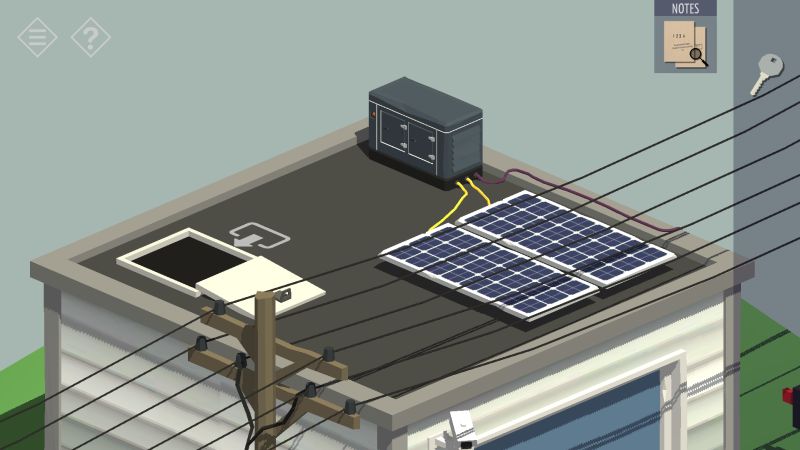
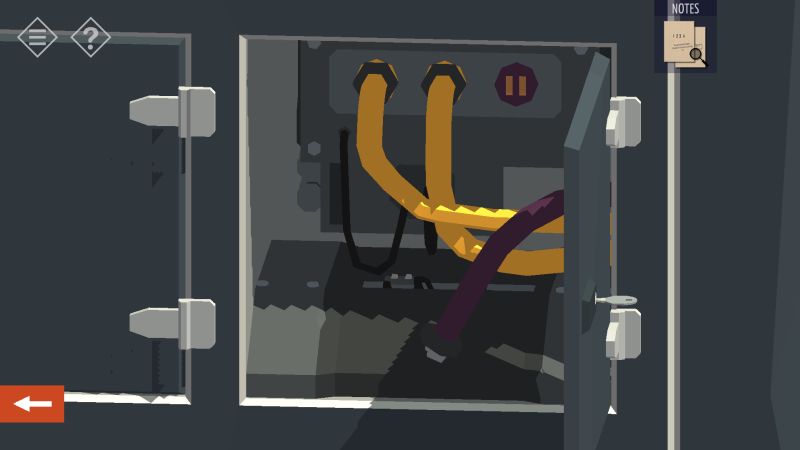
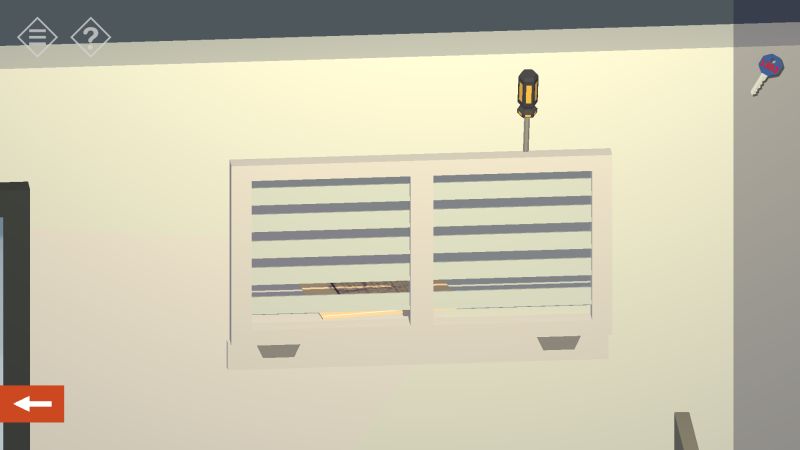
Once you are on the roof, you might notice a white tile (referred to as a “device part”) with an orange line running through it placed on a coffee table. There are three of these tiles on the roof, with one tile located atop an exhaust fan and the other tile underneath the pile of pallets close to the fire escape. There is another electrical enclosure located next to the door, and behind the enclosure is a crowbar you can use to pry open the enclosure.
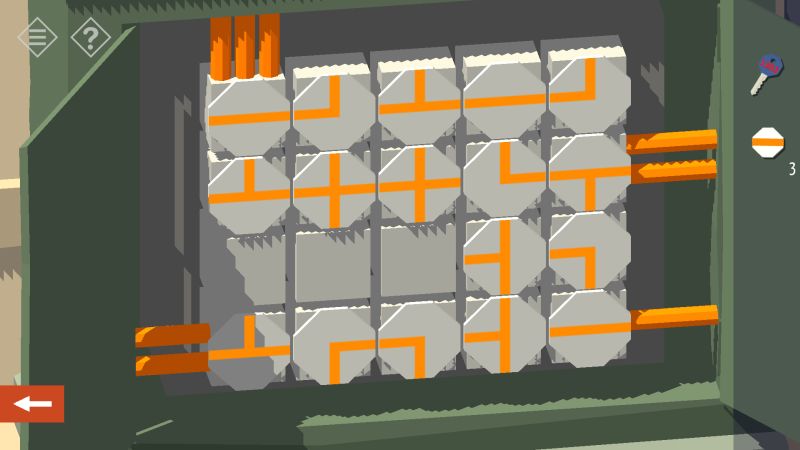
Inside is a tile puzzle where you have to make the four orange wires align. The three tiles you found on the roof correspond to three empty spaces on the board. You rotate each tile counterclockwise by tapping it, and the puzzle itself should not be too hard to solve. Once all the wires are aligned, the door unlocks and you can head inside. The third floor has nothing of note, so go down to the second floor.
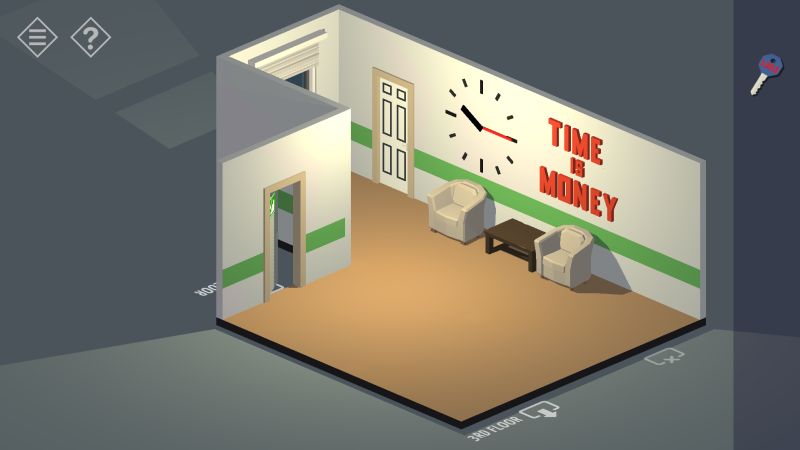
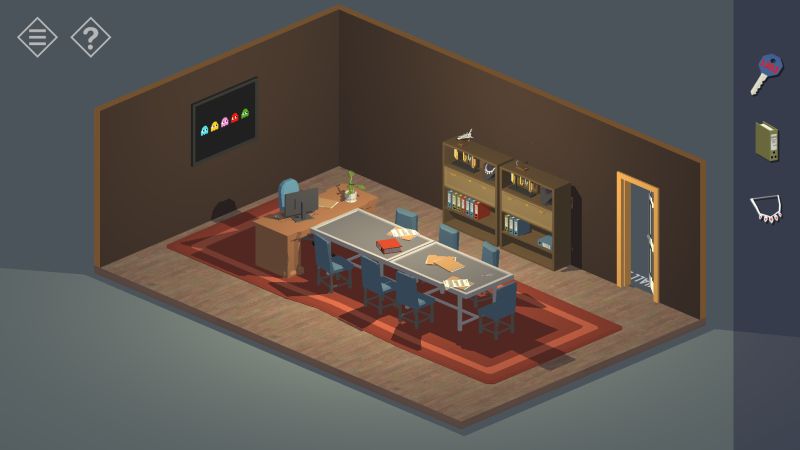
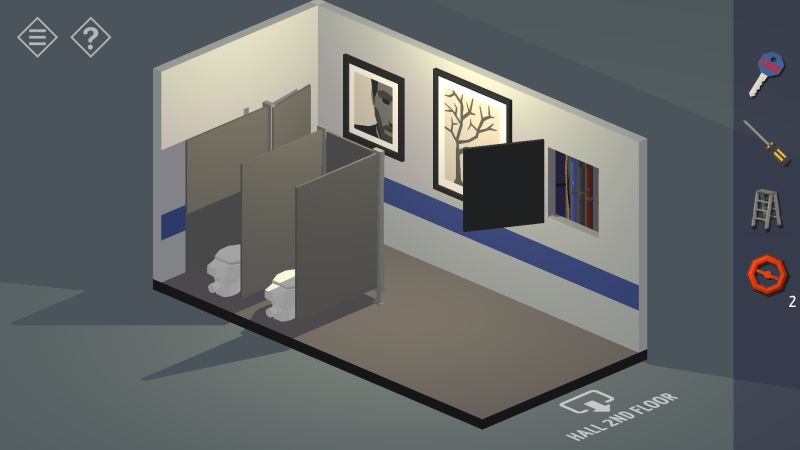
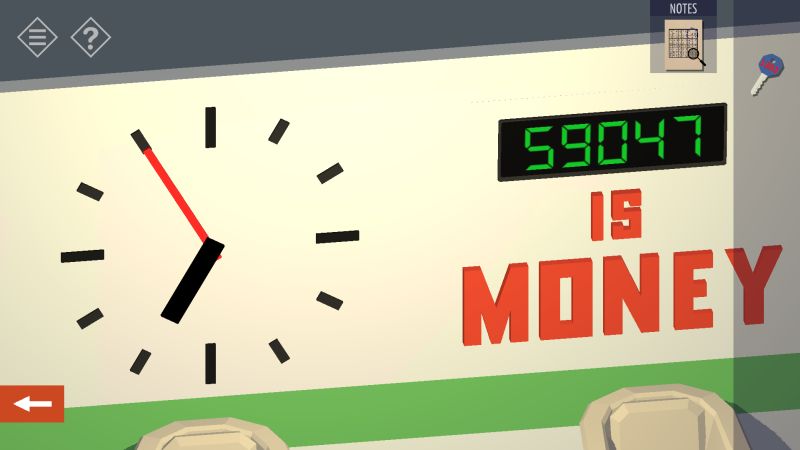
On the second floor are three doors: one door leads to the ground floor, one door leads to the restroom, and the last door leads to a conference room. There is also a clock next to the conference room door with the phrase “Time is Money” prominently displayed nearby. For now, the restroom and conference room are locked so head to the first floor.
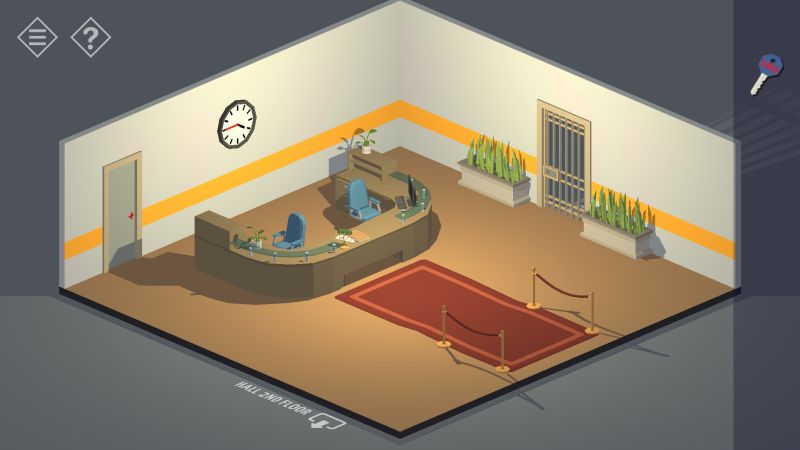
In the first floor, take note of the time displayed on the wall clock and while you are there, search the front desk for some items. The front desk computer is locked with a five-digit number, and the only clue it gives you is “Financial Report.” Meanwhile, the drawers on each side have some things to pick up: a green folder in the lower left drawer and a necklace in the middle right drawer.

With the folder and the necklace, go back to the second floor and interact with the clock. Adjust the clock so that its time matches the time displayed on the first floor by tapping on the hour and minute hands. Once the time matches up, the door to the conference room should unlock. Inside the conference room, you should see a red folder and a key to the restroom on the table. After picking those up, rotate the camera so you can access the desk. Pull the chair back and pick up the toy spaceship on the floor. The shifting number that serves as the computer screensaver will come in handy later.
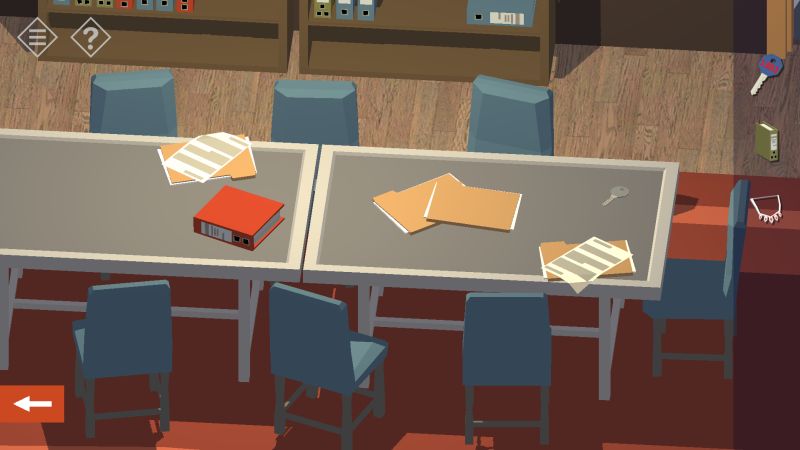
Before you continue in the conference room, use the restroom key to unlock the restroom. In the restroom there should be a red key on the sink, and another red folder in one of the bathroom stalls. Pick those up and return to the conference room.

On the same wall as the door to the conference room is a pair of shelves with near-identical contents, though the shelf on the right is missing some things. Apart from the keys, the items that you have collected (green folder, necklace, red folders, and spaceship) are to be placed on the right shelf in order to match the contents of the left shelf.
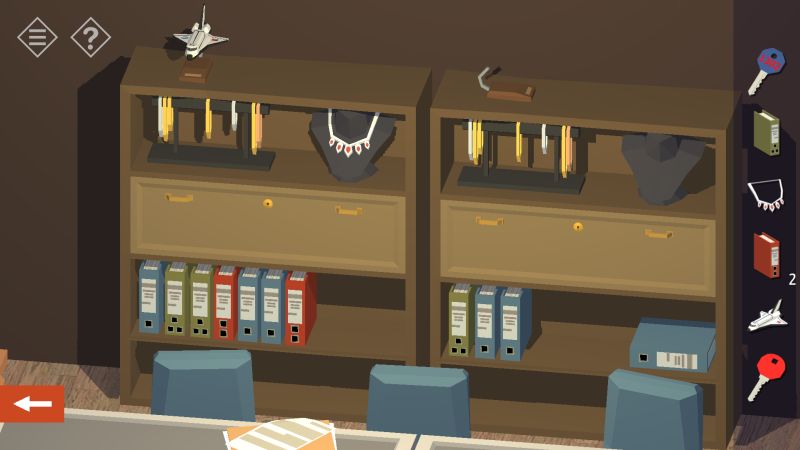
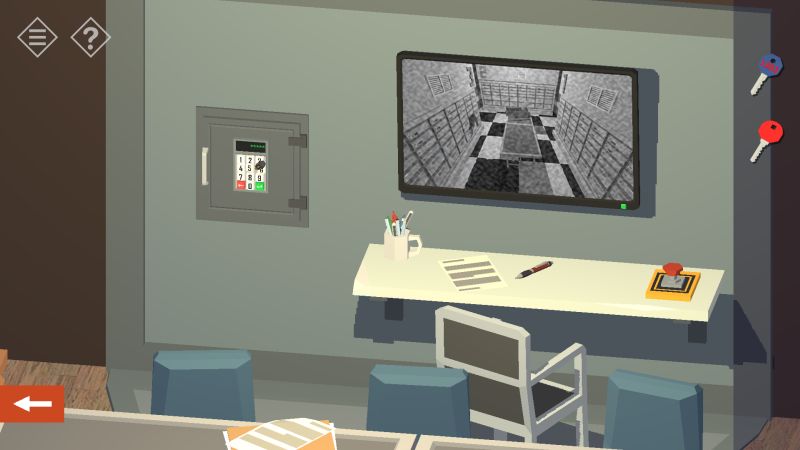
Once the contents of both shelves match, the door on the right shelf will swing open to reveal a button. Pressing the button will make the wall rotate, revealing a secret compartment containing a TV, a safe, and a button to rotate the wall back into position. The safe’s keypad has a screwdriver jammed in while the TV is connected to a camera installed in the bank vault. Take the screwdriver and leave the compartment alone.
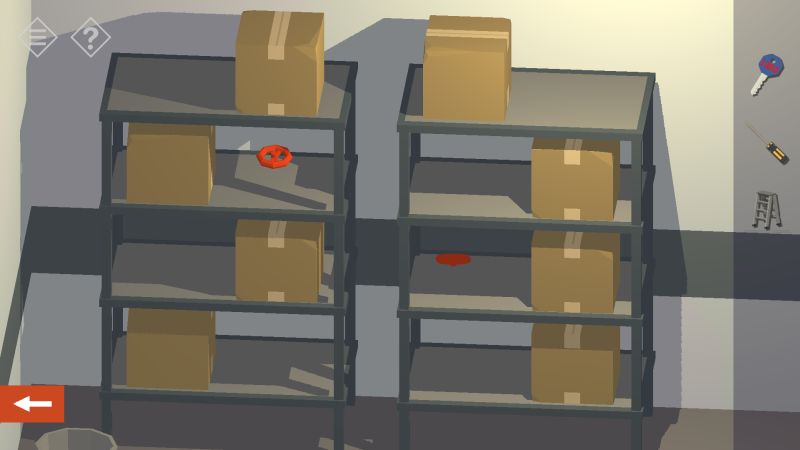
Go down to the first floor and unlock the room behind the front desk with the key from the restroom, leading to a storeroom. Pick up the stepladder directly across the door and while you are there, rotate the camera to find two shelves full of boxes. One box on each shelf has a valve hidden behind it. Tap the boxes to uncover and collect the valves.

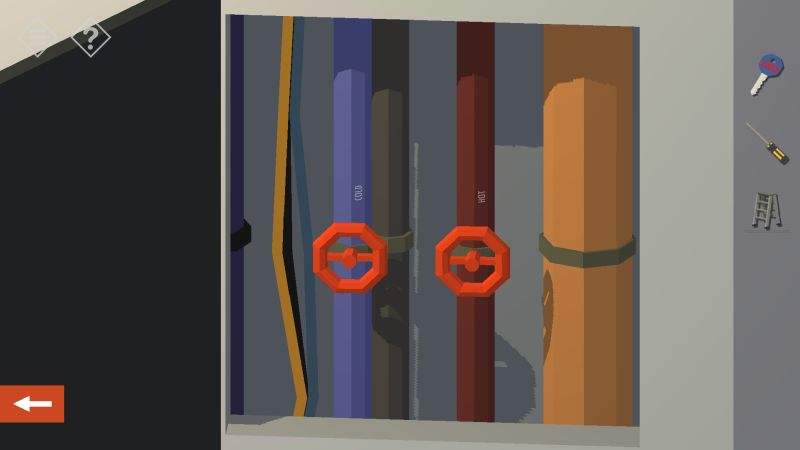
With both valves and the stepladder in your possession, go to the restroom and tap the painting closest to the door, opposite the sink. This should expose the water main which just so happens to be missing those valves. After putting the valves back on, you could turn on both the hot- and cold- water pipes. However, for the purpose of progressing through this chapter, only turn the hot water pipe back on. Turn the camera to face the sink and turn on the faucet. The steam will reveal another time you can adjust the second floor clock to.
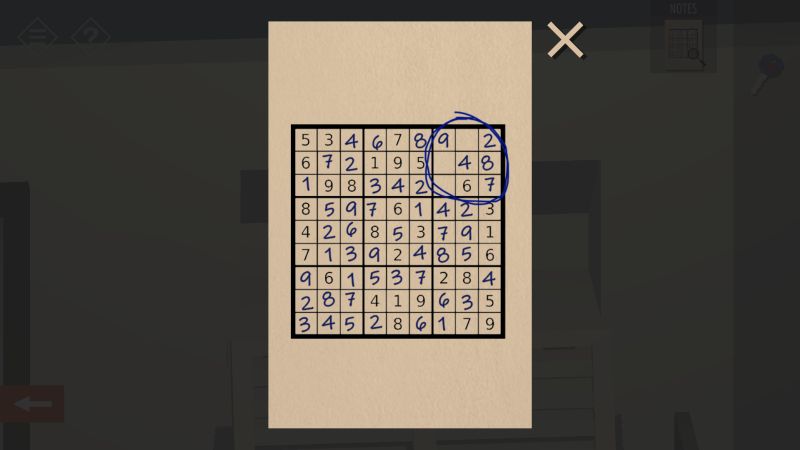
Before leaving the restroom, there should be a vent between the mirror and the bathroom stalls, with something inside that is just out of reach. Place the stepladder beneath the vent and use the screwdriver to unscrew the grate, revealing a Sudoku puzzle that was almost completed with the upper right grid encircled.
Go back to the second floor hallway and adjust the clock to match the time drawn on the mirror. As soon as you get the hands into position, the “Time” portion of the “Time is Money” writing should flip to reveal a five-digit code. This code corresponds to the safe in the conference room, but thanks to the screwdriver sabotage from earlier, the keypad is malfunctioning. All the keys will input the number after it: pressing “5” means “6”, pressing “2” means “3”, and so on. Therefore you will have to input each number in the code one digit back in order to unlock the safe, with “0” going to “9”. The safe itself contains the financial report, with the second page having the password to the front desk computer.

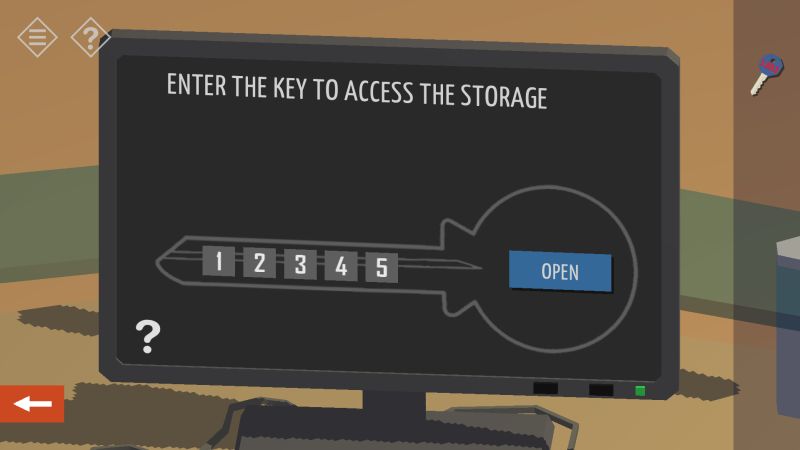
Return to the first floor and carefully input the password by tapping the corresponding number until it reaches the value on the report. Unlocking the computer will grant you access to the vault room. The vault is protected by two keypads, and there should be a yellow key on a nearby desk.
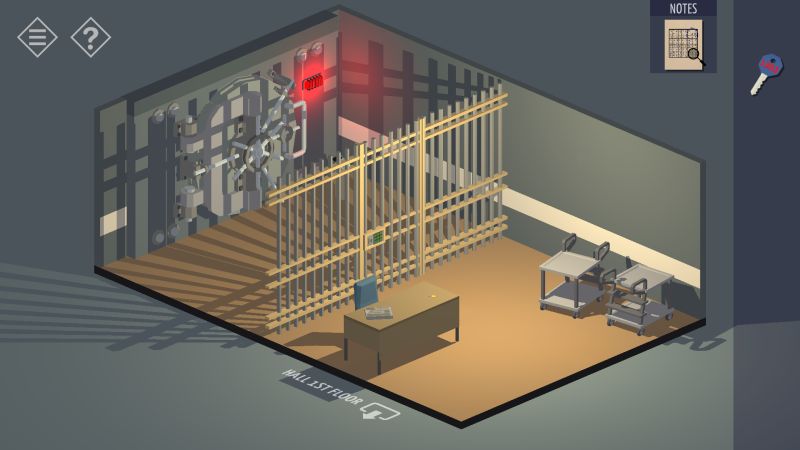
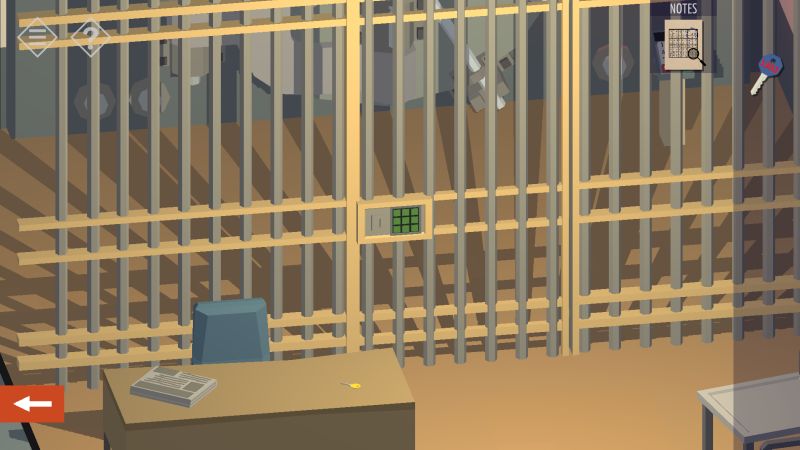
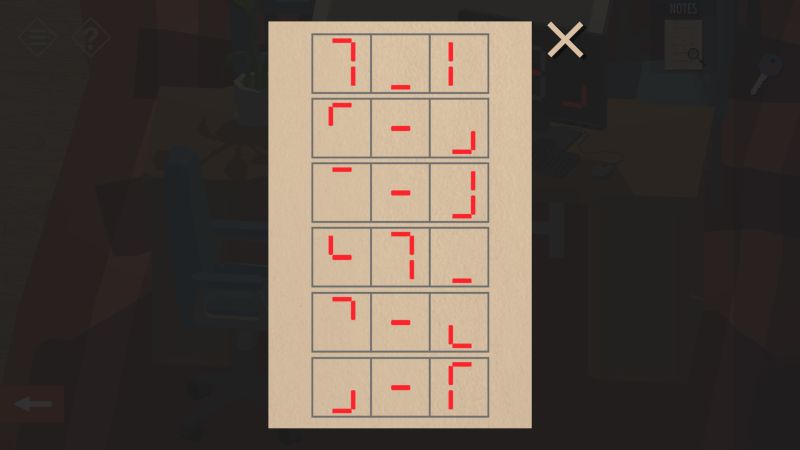
The first keypad on the gate has blank keys, and its code is based on the Sudoku puzzle you found in the restroom. As a quick refresher, the main goal of Sudoku is to fill each row, column, and grid space with all the numbers from 1 to 9, ensuring none are repeated. You can try solving this puzzle yourself to uncover the code, but if you are having trouble, the missing numbers are, from top to bottom, 1, 3, and 5. The numbers in that grid space are the order in which each key on the first keypad must be pressed. Follow the grid to unlock the gate, leaving you with another keypad that secures the vault. You can find the solution back at the conference room, so go back there, remembering to take the yellow key with you.

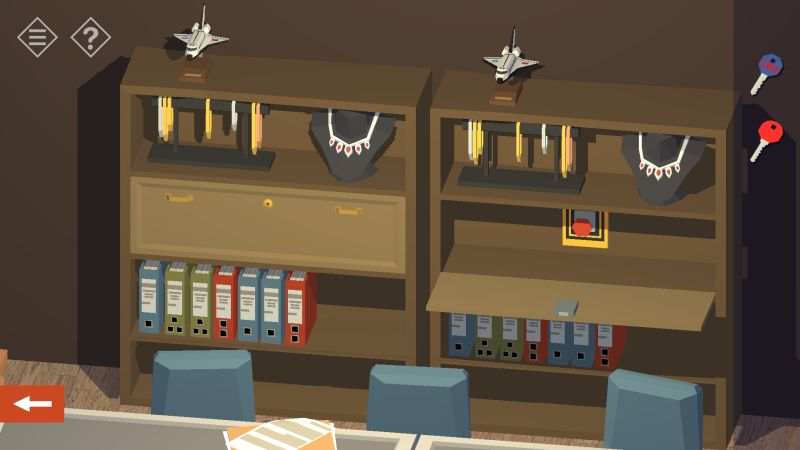
In the conference room, press the button of the secret compartment to return to the shelves. The yellow key unlocks the door on the left shelf, revealing a sheet of paper with odd symbols from top to bottom. These symbols can be decoded via the screensaver found on the computer nearby, but for those having trouble translating those symbols, the code is displayed below.
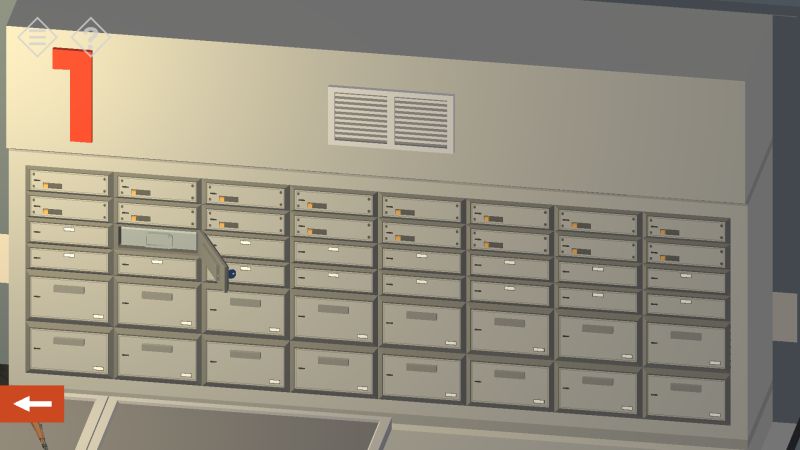
With the vault unlocked, your last objective in the bank is to find the safety deposit box that matches up with the key you picked up from your father’s house. One of the walls should have a chart explaining how to locate the deposit box you want:

– The first digit ranges from 1 to 3 and directs you to the specific wall of deposit boxes your key belongs to;
– The second digit ranges from 1 to 6 and denotes the row where your deposit box is; and
– The last two digits range from 01 to 08, indicating which column your deposit box falls under.
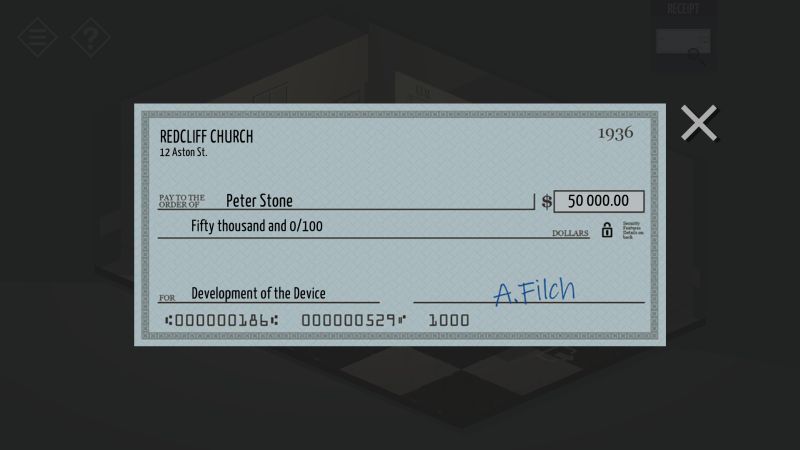
If you are having trouble deciphering how the deposit boxes are arranged, we have the location of the box that the key unlocks. Inside the deposit box is a check signed by your father, donating a rather large sum to the church. Whatever that money was for, your investigations now direct you to the church in town.
Chapter 3: The Empty Church
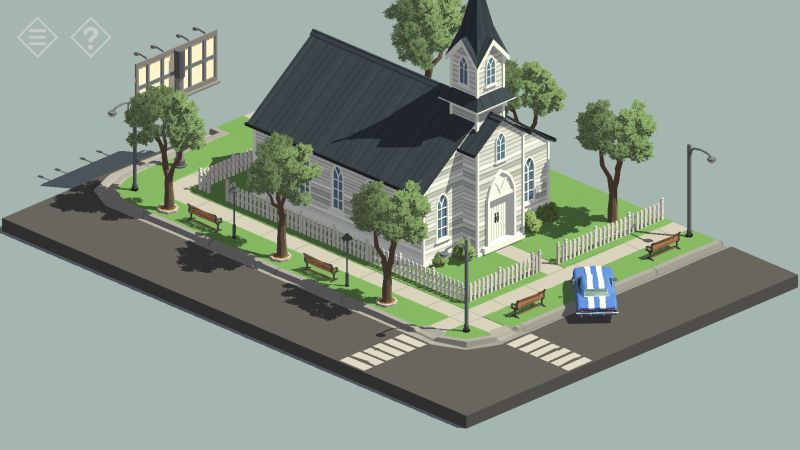
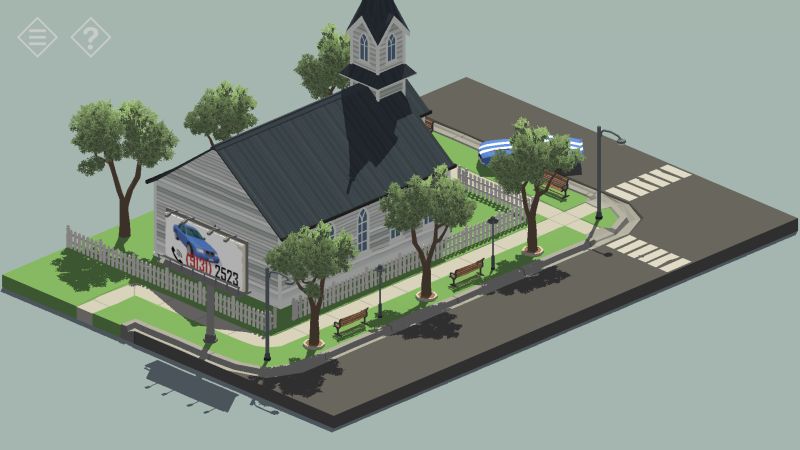
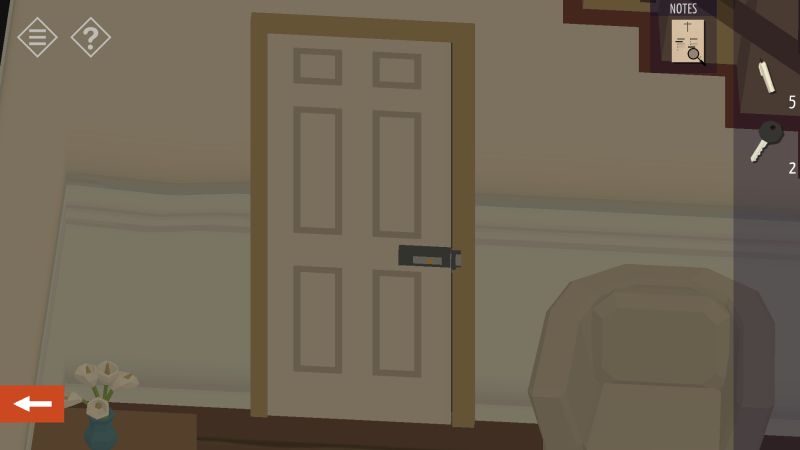
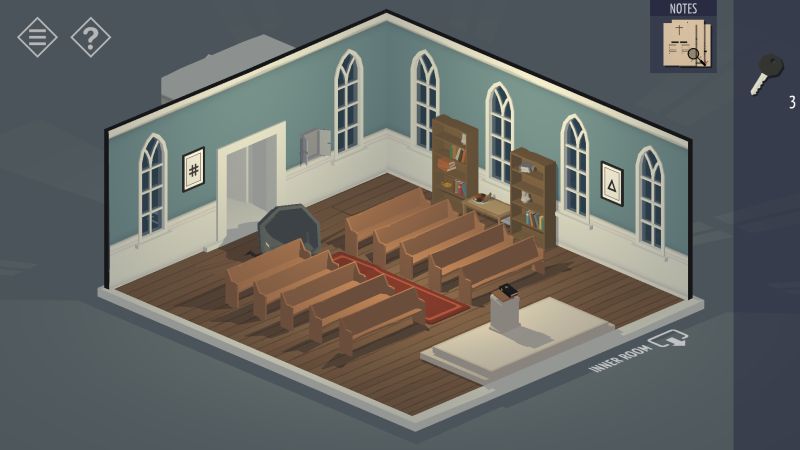
You park your car near the entrance of the church, and the front door is thankfully unlocked this time. Before you enter, we recommend turning the camera to look at the nearby billboard showcasing a car for sale. Take note of the numbers written in black; these will come into play while you are inside the church. The church itself has all its lights turned off, with no evidence of any recent sermons. You can turn the lights back on via a switch at the far end of the room if you are having a little trouble looking around.


You can play around with the piano if you want, but remember to collect the candle (candle 1) that is on top of the piano. There are seven candles in total to find around the church, all of which are used in another puzzle.
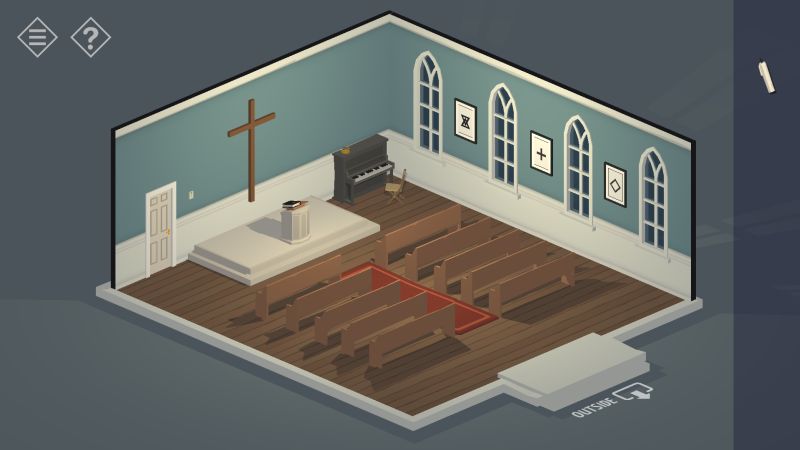

Hanging around the church are five paintings with symbols on them, three of which are on the same wall, and rotating the camera shows a locked box next to the church entrance. The box uses the symbols as its code but it does not tell you what order you should put the symbols in. Move the camera to the three paintings and tap the one in the middle, revealing an arrow pointing the order of the box’s code. Unlock the box to find a black key.
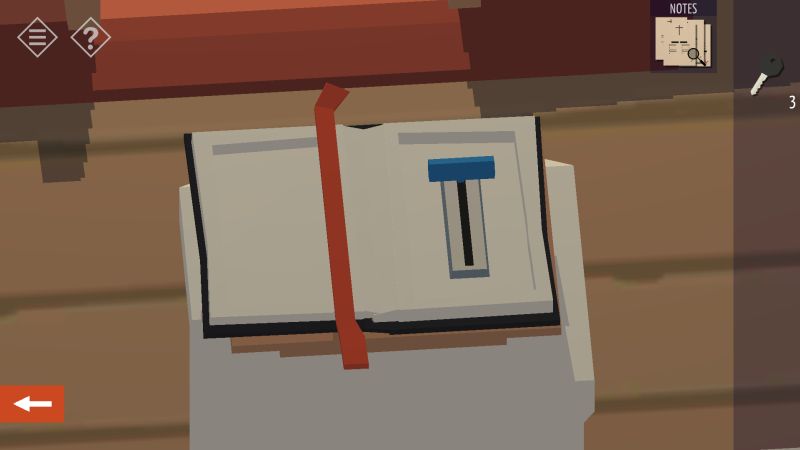
![]()
![]()
There are a couple of bookshelves in the church, and one of them has another candle (candle 2) to pick up. Get both candles and the key before heading deeper into the church.

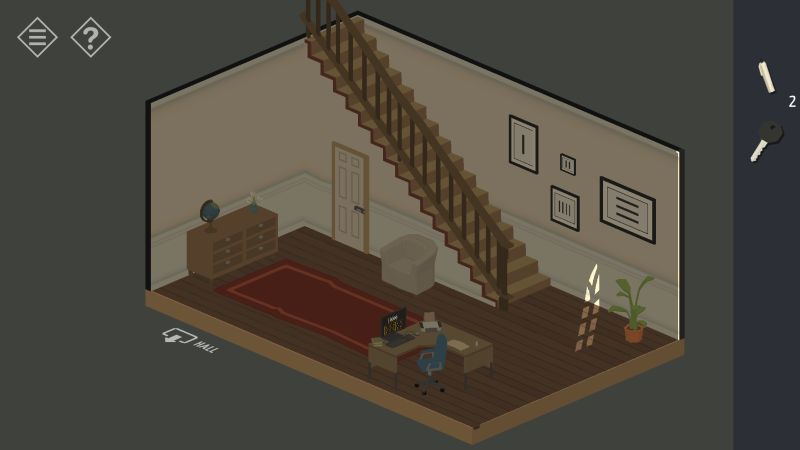
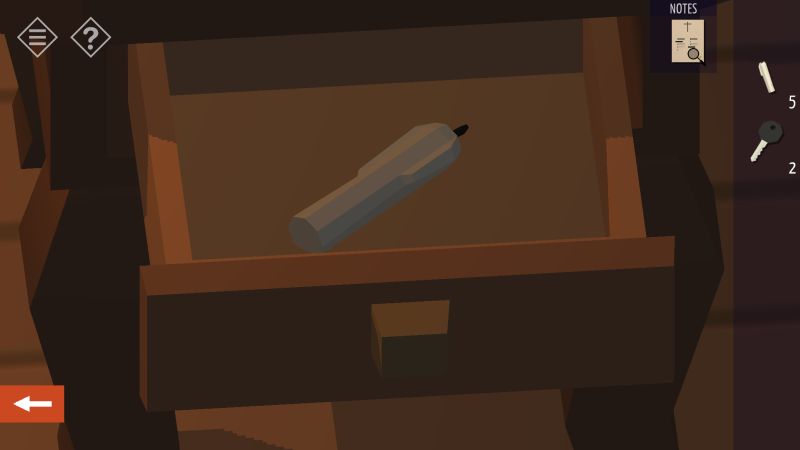
In the church’s backroom, go to the dresser and open the upper right drawer where you will find another candle (candle 3). Next to the drawer is a locked room under the stairs and a chair next to the stairs. Move the chair away to find a sheet of paper indicating a pair of pews that have to be moved in certain positions, using the cross for reference.

Across the room should be a desk with another candle (candle 4) lying on top of it and a locked computer. Turning the camera should show a car similar to the one featured on the billboard outside, and sure enough, the billboard numbers written in black serve as the password to the computer.
The computer has two options for you to select: controls that open a guarded box with three key slots and an email that prints out an access code. That black key you found earlier is one of three keys that fit into those slots, and the access code will be played using the piano outside. There is also a note on the desk mentioning glowing ink, which is related to the piano puzzle. Make sure you have opened the box and collected the access code before heading back to the church.
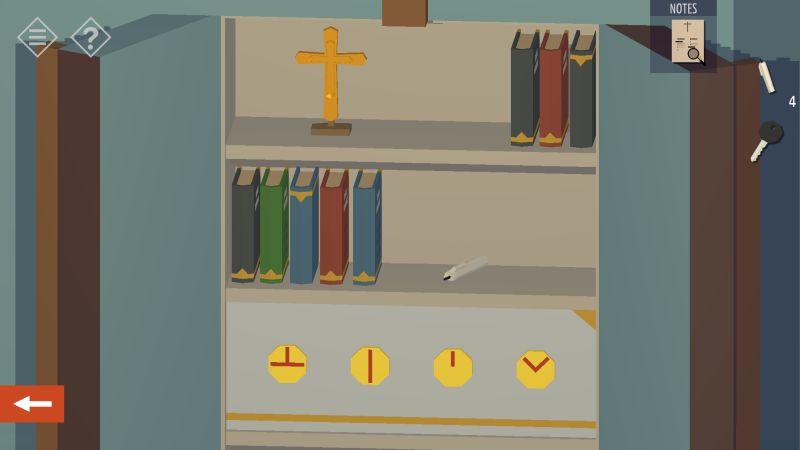
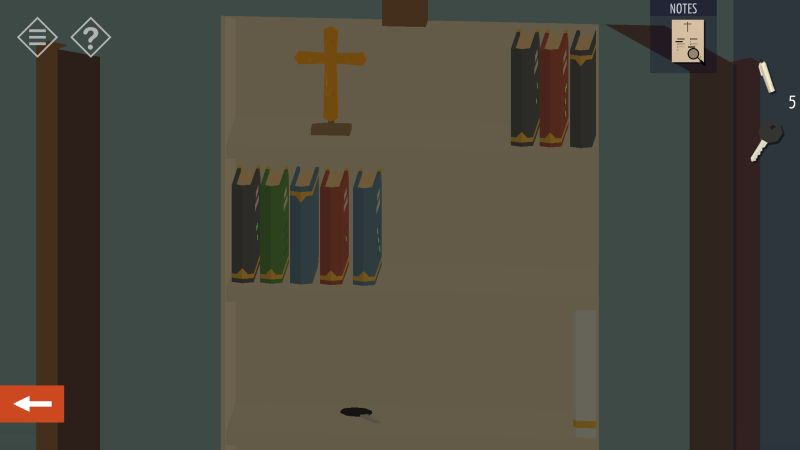
Back in the church, play the access code on the piano to open up a hidden shelf behind the cross. The shelf has a locked compartment with four dials, each with its own set of lines, another candle (candle 5) for you to pick up, and some books with a 3×3 grid of dots on their covers. Turn off the church lights to reveal glowing ink drawn on the dots, some of which match the lines drawn on the dials in different orientations. Turn the dials to match the lines to the dots, but keep in mind that two of the related books are flipped upside-down. Their patterns must be turned accordingly. Matching the dials unlocks the compartment where you will find another black key. Pick that up and return to the backroom.

The door leading under the stairs only has a simple deadbolt keeping it shut, so just unlock it to go inside. The small room only has a lamp, an end table, and a locked trunk, with the end table’s drawer containing one more candle (candle 6). Grab it and head to the attic above.

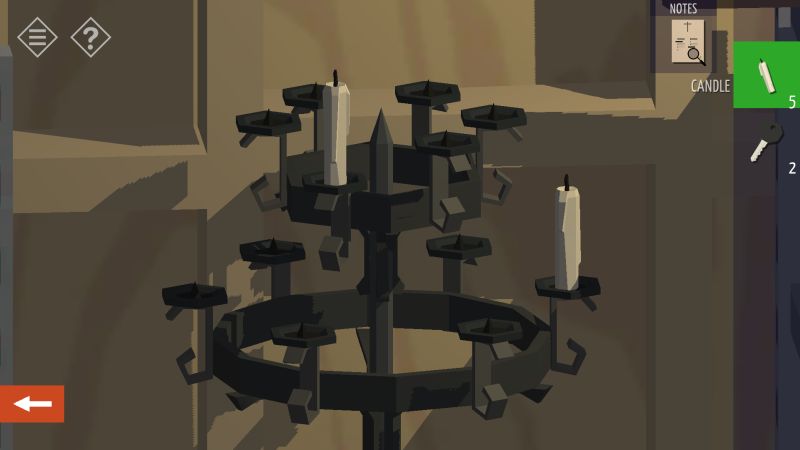
In the attic is an empty candelabrum with a locked box underneath it. This is flanked by two metal shelves. The candles you have collected throughout the church go here, but there is still one more candle unaccounted for. That candle is located in a small crate on top of the left shelf (candle 7). With all seven candles accounted for, we can do the candelabrum puzzle.
The main goal of the candelabrum puzzle is to find the candle holders that are weighed down by the candles; there are twelve candle holders in total. You can tap each ring of candle holders to cycle to ones that are too far away for you to interact with, and because of that we cannot give you the exact candle holders that are affected. All we can say is that the lower ring uses three candles and the upper ring uses four candles. Once all the candles are in position, the compartment under them should unlock, giving you a brown key. Moving back to the shelves, go to the left shelf where you will find another sheet of paper depicting a pair of pews in a position that should NOT be followed. Pick that up, and continue to the bell tower on the other end of the attic.
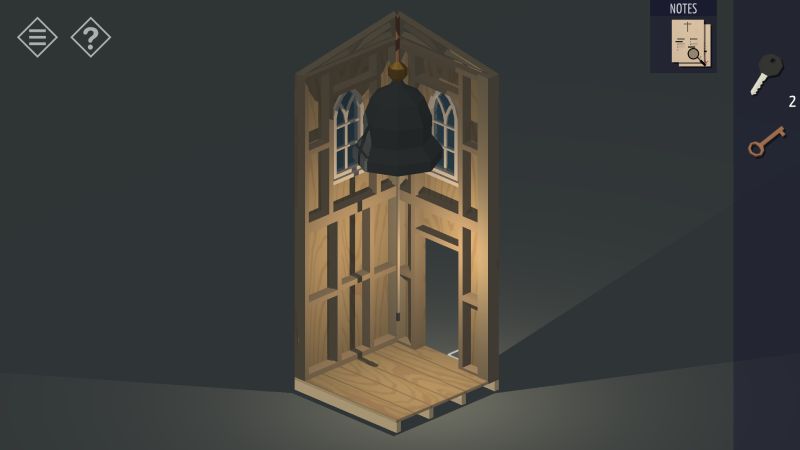
The bell tower is nothing special, aside from the old bell on the ceiling that might fall off any moment now. Ring the bell enough times and the bell falls from the ceiling and through the floor, landing in the church below. There is good reason for this, just head back downstairs.
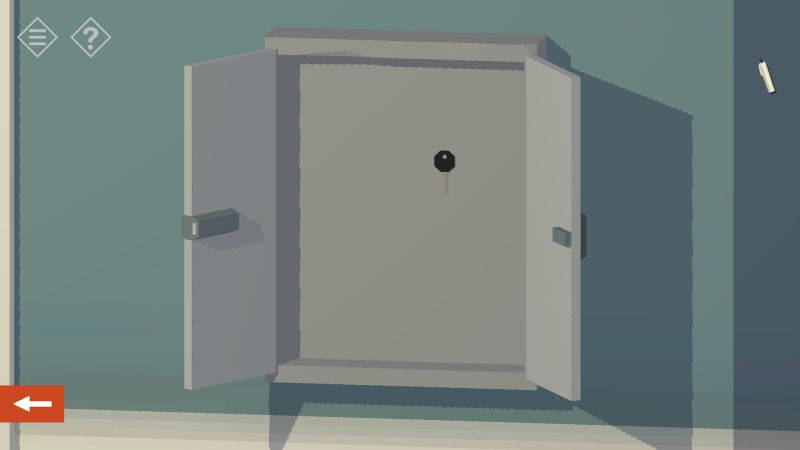
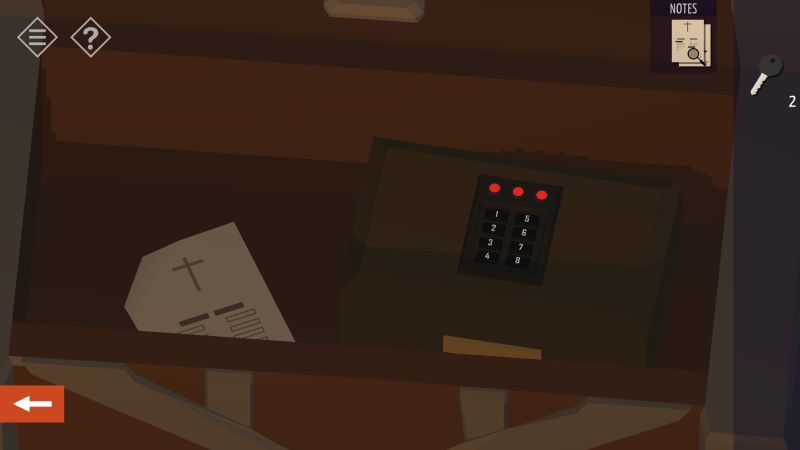
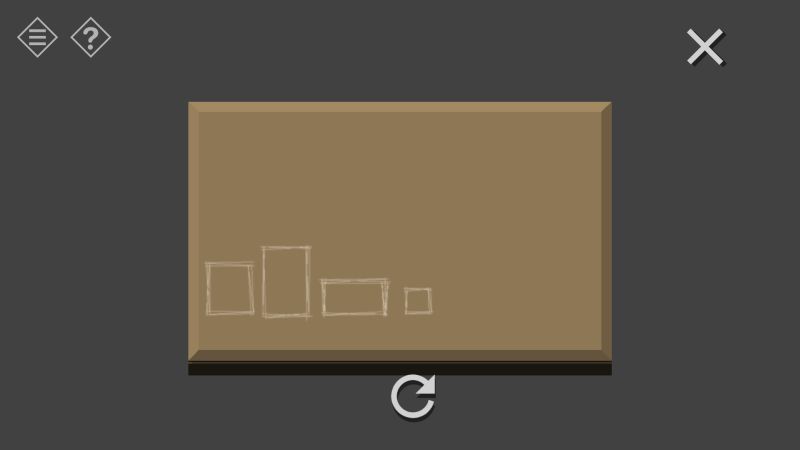
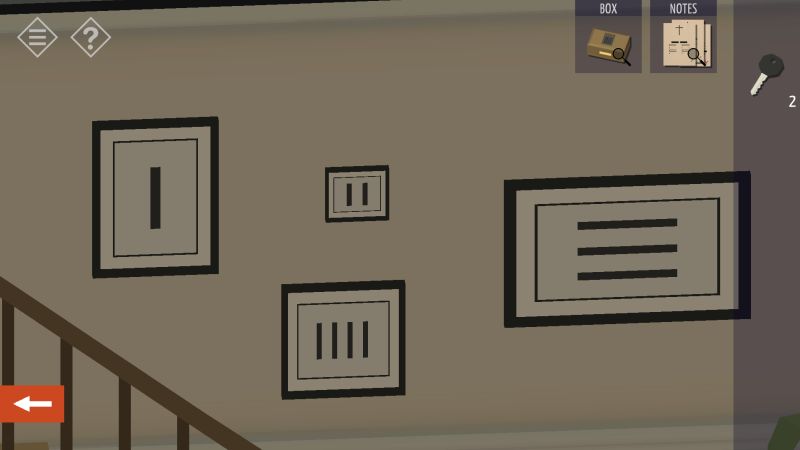
Return to the room under the stairs and use the brown key to unlock the trunk, finding another pew pattern and a locked box with a keypad. Viewing the locked box’s underside reveals four rectangles scratched on the surface, which match the shape of four paintings hung close to the stairs. Following the order of the rectangles, input the code to unlock the box and find the last black key. Return to the church.
Back at the church, you should see the fallen bell on the opposite end of the pulpit. Turn the camera around to look at the bell’s underside, and you should find a sheet of paper stuck to the inner surface. That paper holds the last pew pattern you need and with all four sheets, you can arrange the pews in the positions depicted. Remember to rotate the camera so that the cross is in the same place as the sheets, otherwise you might end up putting the pattern upside-down.

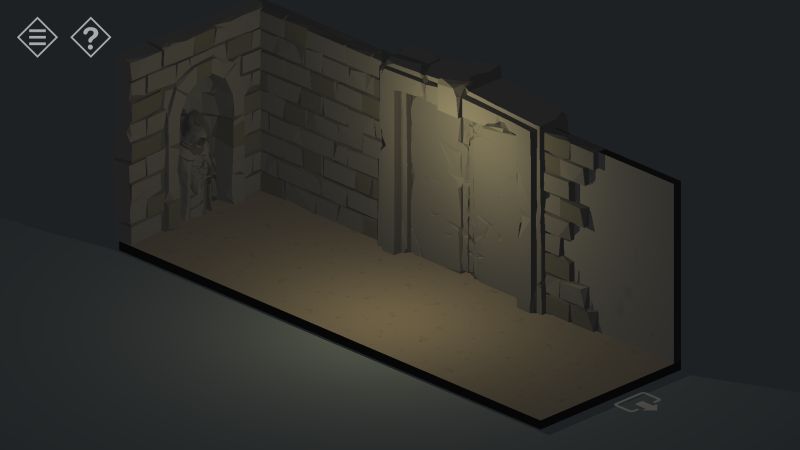
Once the pews are in place, head to the pulpit and open the Bible, revealing a hidden lever. Pull it, and if the pews are in the right spots, a secret staircase descends to a room under the church. This room houses that box you saw on the computer, and if the box is open, you can use the three black keys to unlock the door nearby, revealing some ancient ruins.
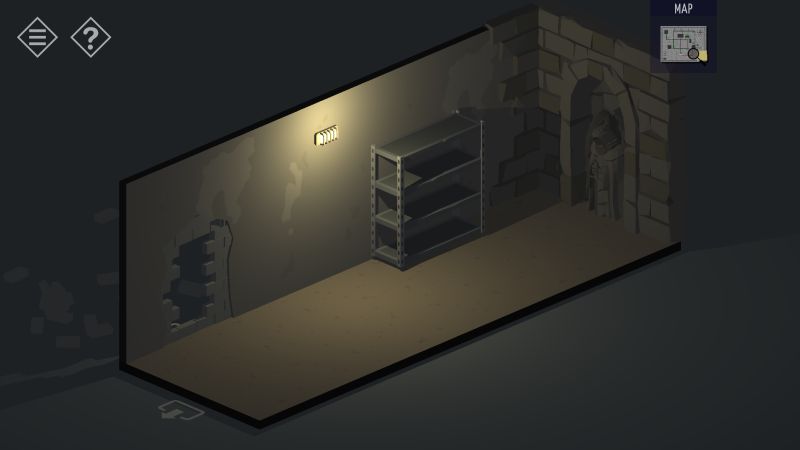
There should be a pair of stone doors that do not budge, and across those doors is a shelf with a sledgehammer on it. Pick up the sledgehammer and the map close to the entrance, which depicts some maintenance tunnels under the streets. The wall behind the map is weak, so use the sledgehammer to break open the wall and enter the next chapter.
And that concludes the first part to our Tiny Room Stories walkthrough guide. If you have any secrets to share with us, please let us know in the comment section. Stay tuned for our second part of Act One, have fun, and game on!