Following the conclusion of The Walking Dead comic book in its 193rd and final issue 2 years ago and the upcoming final season of the equally popular TV series this coming August, the TWD fan base continues to grow in size and number as the passion towards anything related to the genre-defining zombie apocalypse franchise refuses to die down. With multiple specials in the comic universe, spinoff series, and adaptations in various other media, the TWD universe’s incarnation in every version has almost always proven to be a successful.
Galaxy Play Technology’s The Walking Dead: Survivors takes on yet another different spin on the TWD franchise. Although base-building strategy games set in a post-apocalyptic, zombie-infested environment are abundant in the mobile gaming industry, The Walking Dead: Survivors offers plenty of new mechanics and features guaranteed to wow even experienced and veteran players of the genre.
Hardcore fans of the popular comic book and TV series franchise are certainly treated to a massive cast of colorful characters but how each of the characters you recruit coordinate and work together certainly provides an immersive and exciting experience for everyone.
If you are a fan of The Walking Dead, or have played any zombie apocalypse strategy game for that matter, then you already know that the undead themselves are the least of your problems. Surely enough, hordes of zombies abound in the open world and will even “visit” your settlement from time to time.
The entire idea of The Walking Dead: Survivors, however, centers around gathering as many people as you can to build your own city, align yourself with like-minded colony leaders like yourself, and survive a world where a plethora of other factions continuously gather resources and power.

The Walking Dead: Survivors is certainly not a cakewalk, but the in-game tutorial provided sets you up with everything you need to learn as far as the basic mechanics and features are concerned. Every new function you unlock naturally comes with a quick guide on how it works and there is an abundance of tips as well that walks you through your first experience of every feature.
Patience and hard work stands as your best tools to survive the world of The Walking Dead: Survivors. If you have just started on your adventure and want an edge as far as building your city and strengthening your army is concerned, then check out our The Walking Dead: Survivors beginner’s guide below!
1. Follow The Chapter Quests
The Walking Dead: Survivors holds tons of activities for you to engage in and as you continue to expand and progress your settlement and recruit more and more survivors into your fold, one of the many challenges that will come your way is determining which from among the various tasks ahead of you should be prioritized.
While there are no strict rules that should apply to you as the leader and commander of your very own town and that staying active will ultimately lead to progression, settling to let tasks serve as your primary guide in prioritizing activities can lead to a more efficient growth.
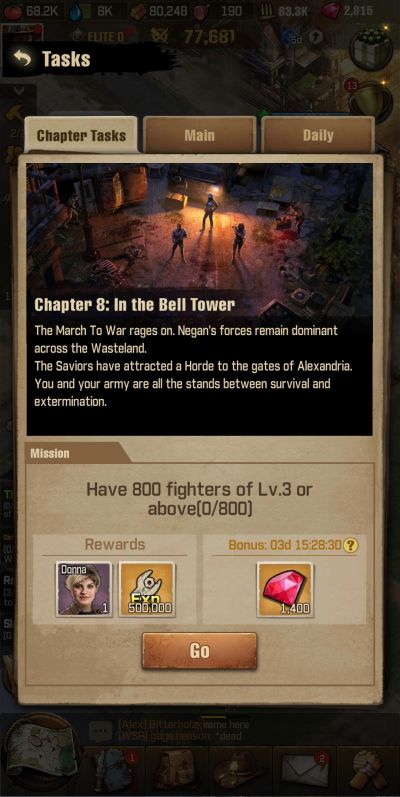
Beyond the nifty graphics and gameplay that The Walking Dead: Survivors has to offer, it comes packed with its own unique storyline. The storyline is actually anchored on the chapter tasks, which will be your main basis of progression early on. Each objective you accomplish under the chapter tasks, not only sequentially unlock other features and succeeding tasks, but also earn you rewards that cover the most basic resources you will need in the accomplishment of the other objectives.
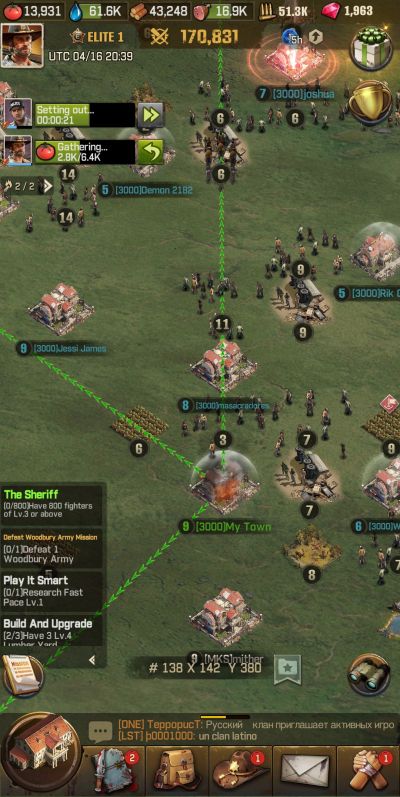
The most important tasks can always be seen at the lower left side of the screen. This list can often be longer than what you can see at one time, so be sure to scroll through its entirety if some of the objectives presented are still in the process of completion. As far as constructing and upgrading buildings are concerned, there are only a few that comes dependent on others, most particularly dependent on the town hall. There are plenty of objectives you can accomplish simultaneously so feel free to pursue as many as you can at a time.
The chapter tasks initially present a list of objectives but as you progress further, it will eventually be trimmed down into a single goal. The chapter task, however, determines the objectives that appear under the main task group. It is important to remember that there are some objectives that you can clear even before they pop up. The reason why it becomes important to take note of and prioritize the accomplishment of some objectives is to claim the rewards from them sooner.
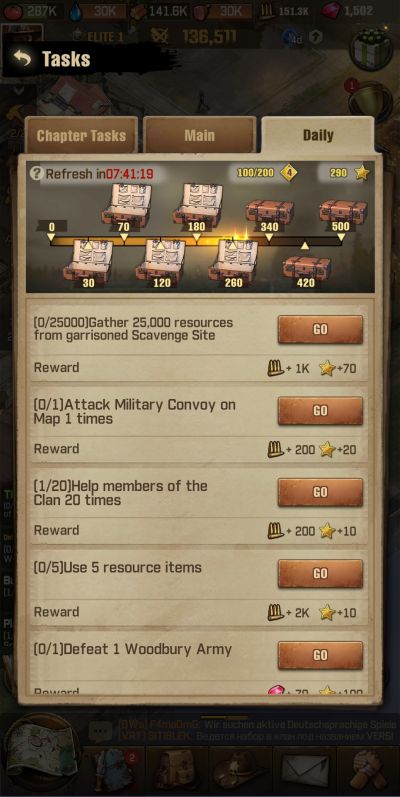
Daily tasks provide the same objectives each day. These objectives are typically the easiest tasks to accomplish. Each feat cleared earns you bullets as well as activity points. Activity points earned within the day unlock treasure chests at the top of the page that contain various rewards. For best results, make an effort daily to unlock all of the chests.
2. Set Your Multitasking Skills On Max Level
We have played a lot of base-building strategy games before to know that multitasking is an important key towards achieving rapid progression and, ultimately, survival. To be honest, The Walking Dead: Survivors is among, if not, the top strategy game when it comes to giving players opportunities to take their multitasking skills to the limit. As a basic requirement in terms of succeeding in these games is actually spending time online, the more crucial part of it is actually staying as active as possible.
One of the most basic functions you will constantly need to attend to is, of course, expanding your camp. Unlike most base-building strategy games, The Walking Dead: Survivors starts you off with 2 builders. There are plenty of construction and upgrades to tend to and this will still be less than what you would want. Once you reach camp level 8, you will unlock an additional builder and the remaining 2 can be unlocked through raising your elite rank and spending real money, which costs only a dollar by the way.

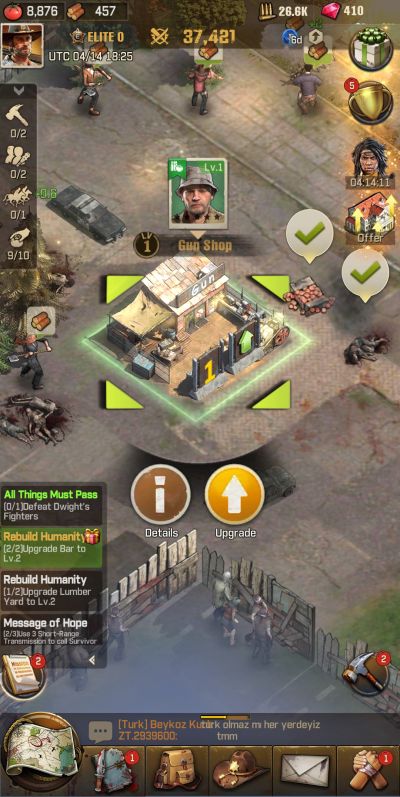
In any case, strategy can be applied as well on how you utilize your builders. There are naturally missions to follow as building and upgrading forms part of the usual objectives, but at some point you will have to stray from the objectives as it does not cover upgrading of all structures. Likewise, some objectives are dependent on the accomplishment of other upgrades, so there will be plenty of opportunities when you can be plenty of opportunities to upgrade a building inconsistent with what the tasks require.
What we recommend is to focus on the construction needs that can be completed within a shorter amount of time. If there are ones that take long to complete but are likewise critical necessities, you should be ready to spend speedups on them to finish quickly. In general, you would want to save long construction times for when you are ready to take a long break from the game and progress more rapidly while you are online. In any case, do not hesitate on spending speedups when you need them as the first days of developing your town are the most important ones.
Activities you can engage in are represented by distinct icons at the left side of your screen and construction is just 1 of the 6 icons on the list. Ideally, having all icons active is the most efficient way to go but there will always be instances that warrant leaving some activities idle. These icons serve as shortcuts to the different production lines you need to tend to so make it a habit early on to keep tabs on it.
There are 3 different training facilities you will have in your camp. These are for melee units, ranged units, and cavalry. It is recommended that you continue to train units across all these facilities as even the lowest level units can be promoted later on once you unlock the next level of units to train.
Naturally, higher level units can only be acquired following specific milestones on the structure’s levels. As this typically do not form part of your quests, be sure to squeeze in an upgrade for these facilities whenever you can. You can simultaneously train units while the training facility is being upgraded.
Another important task you will have to keep running is research. Once you unlock the library, you can begin conducting research to improve the overall performance of your camp’s productivity as well as your troops’ proficiencies. Development will be the only option available at first and consists of research that boosts production capabilities.
At some point, research on combat and march queue becomes unlocked as well. As you can only conduct research one at a time, and given as well that research progresses through nodes where prerequisites stand at every turn, it is best to glance through the entire research tree before you decide on what to prioritize. This is yet again another instance where you may deviate from the main tasks in hand. Each of the different research disciplines are equally important so balancing across them is recommended.
3. Explore The Outside World Continuously
The world around your base camp in The Walking dead: Survivors is a very huge one. As you continue to expand your base camp with every new level reached, so too should your knowledge of the world outside. Initially, a lot of the time you spend online will largely be spend on developing your base camp. However, efficiency dictates that you multitask to the fullest, and this naturally includes venturing out in the open world to discover and gain as much as you can from it.
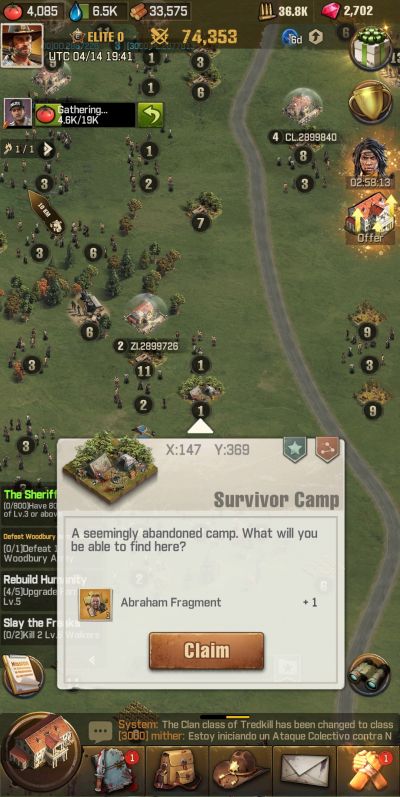
One feature in The Walking Dead: Survivors that elicits exploration is the cowl of mist that covers the entirety of the world map. You can only venture into areas where the clouds have been cleared and you literally need to send an explore out to do so. Once you have unlocked an exploration camp, you will be able to deploy one of your survivors to venture into the unknown and reveal the land beneath the masking clouds. Once your town hall reaches level 9 and 14, a second and third explorer will become available.
Simply clicking on the torch icon at the left side of the screen sends you to the exploration camp. You can tap on the “go” button and click on “explore” to send your survivor into the clouded area. In some cases, a location of interest will be discovered by your explorer and you will be notified through mail. Visiting the area and tapping on the gift box icon will earn you resources as rewards.
There are plenty of other reasons for you to scout the lands as well beyond sending out an explorer. The cavalry icons on the left side of your screen indicate squares or teams of survivors you can send out for various tasks. Initially, you will be sending out troops to hunt down walkers. This consumes stamina but earns you tons of rewards, including clay, which is an essential requirement for you to upgrade training facilities in your base camp.
Beyond simply hunting walkers, you can also take down stronger NPC threats like Woodbury Armies. This requires you to be in an alliance, though, for a guaranteed win. Although you can generate all the basic resources you need inside your base camp, the amounts you produce will never be enough to sustain your growing needs. You will have plenty of extra resources in stock via your inventory, but if you continue to expend them early on, you will definitely deplete your supply of resources quickly.
Like in any other base-building strategy game, it is important for you to keep track of your resource levels and which ones wind up emptying out more often. Different times may leave you with needing one resource more than the others and it can change quickly over time as well. To ensure that you will always have plenty of resources to sustain your camp’s operations, habitually send out troops to gather the resources you need the most from various resource spots around you.
Just like when hunting walkers, you can use the search function through its icon at the lower right side of the world map to search for resource spots. Higher levels of resource spots have higher amounts of resources and take much longer to empty out. Likewise, you need to defeat a walker of a specific level before being able to gather from a resource spot of the same level.
Another important info to keep in mind is that even while your town has a shield up to prevent other players from attacking you, this shield does not extend to your troops outside your city. This makes it important for you to consider resource spots closely situated to where your camp is as shorter travel time is always an advantage. You can always turn tail and leave a resource spot whenever you can.
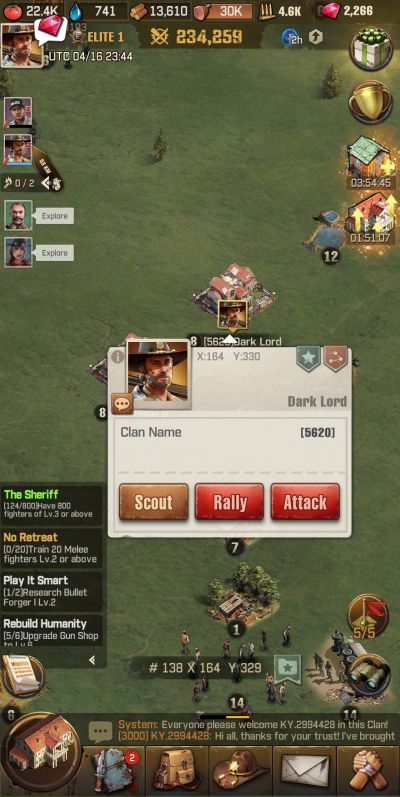
Relative to venturing out into the open world, be sure to check the surrounding base camps. Your primary intention for this is to determine which of the other players are potential threats and which ones are opportunities for you to pillage from later on. Of course, it is best to make great preparations first before launching an assault against any camp. Keeping tabs on these details should help you decide if you may have to relocate to a better spot when needed.
4. Keep Your Settlement Clean And Organized
Beyond the growing number of resources and troops you have, the survivors that you recruit, and the levels of the structures within your camp, progression can be felt by the ever-increasing size of your town as well. Every new level your town hall reaches unlock new areas to explore and uncover, and each one holds new or additional structures to clean as well as more space to clean up.
It is a zombie apocalypse after all, so the mess that you initially uncover as new patches of land become available to you is far from what is to be expected. Some of the survivors you recruit provide buffs to specific facilities when you assign them to it. Some are more proficient in combat and can boost your army’s strength. Once you have unlocked the scavenge center, some survivors can even be assigned at resource spots in the outside world. In any case, there will always be survivors who will remain idle within your camp. These survivors, as indicated by bottom icon on the left side of the screen, can be utilized to tidy up the camp.
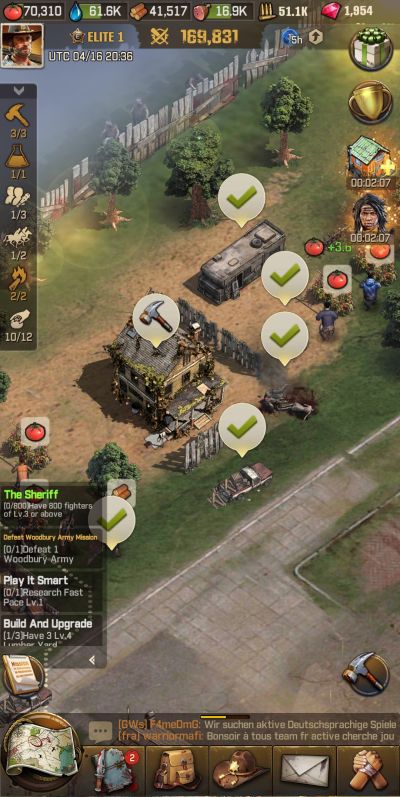
A lot of the items within your base camp may look like cool props at first. There are trees, shrubs, dead bodies, brunt cars, and so on. You should know that other than structures you can upgrade, everything else can be scavenged for resources. Every time you have idle survivors, make sure to clean up your surroundings to earn additional resources as well as free up more space.
Having more open spaces will leave you to work with the other half of the strategy, which is to adjust the layout of your buildings accordingly. As your town hall reaches new levels, the additional space you explore will naturally reveal additional structures to fix and utilize. Likewise, additional copies of some existing structures will also become available. This will result to scattered and unorganized structures within your base camp if unattended.
It should be okay to keep it that way, but to be more efficient, grouping similar or related structures together will make it easier for you to find what you are looking for and also tend to each one more effectively. Almost all of the structures can be relocated and there are only a couple of exceptions. Plan ahead what you want your camp to look like before relocating buildings. You can tap on a structure and then tap and hold on it as you move it to its new spot.
5. Manage Your Survivors Properly
A big part of what makes The Walking dead: Survivors a treat for fans of the franchise relates to the cast of characters you can unlock in the game. The survivors are based on the comic book incarnations, but some of these characters are also familiar to fans of the TV series. Survivors can primarily be recruited from the broadcasting station and there are plenty of free ways to recruit a lot of them fast.
To start off, levelling the broadcasting station unlocks a recruit up until level 8. Additional recruits can be earned through either short range or long range broadcasting. You have 5 free pulls per day from the short range broadcasting and 1 free pull from the long range one. Only common, rare, and epic grade survivors can be pulled from short range transmissions while only epic and legendary characters can be obtained from long range transmissions.
The gacha method in recruiting survivors may be randomized but every 10 attempts using the long range transmission guarantees a character pull. You can spend gems for extra pulls and you can also spend tickets that you earn through completing quests and events. We recommend saving gems for shield buffs, though.
Pulls from the radio transmissions are unfortunately not limited to earning new recruits or shards to upgrade them. You may also pull EXP books or skill medals that you need to upgrade your existing survivors. In any case, the rates are not bad at all and chances are that you will unlock a legendary and several epic-grade survivors in no time.
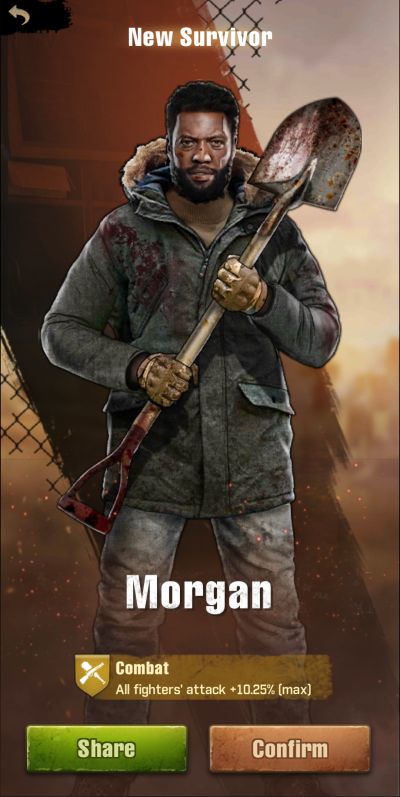
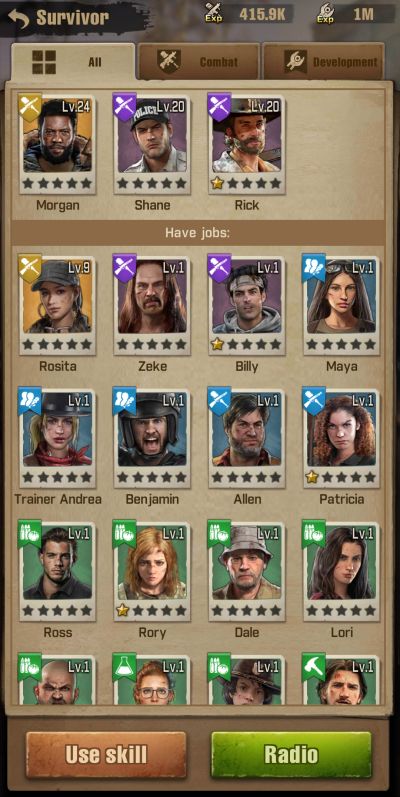
Unlocking a survivor is just half of the challenge in terms of managing them. Given that each one can further be upgraded and that you will always have less than enough resources to enhance every unit, carefully selecting the ones you will utilize the most should come first before expending any resource on them. Considering rarity grades, a legendary survivor does have much better stats and skills compared to their lower grade counterparts. In some cases, though, lower grade survivors can outperform legendary units following a series of upgrades.
The most basic way of upgrading a survivor is through levelling them up. Fighters used to slay walkers outside the camp earn EXP but you can also use EXP books to instantly level up a survivor. Reaching a new level increases the number of fighters the survivor can lead in combat. Every 5 levels reached unlocks a new skill for the survivor or levels up an existing one.
As much of a milestone this is, it comes with an extra requirement to pull through as every fifth level requires skill medals to initiate. Skill medals have rarity grades as well and you need a similar grade for each survivor. This makes it a lot more challenging to level up legendary survivors as legendary grade medals are the most difficult to obtain.
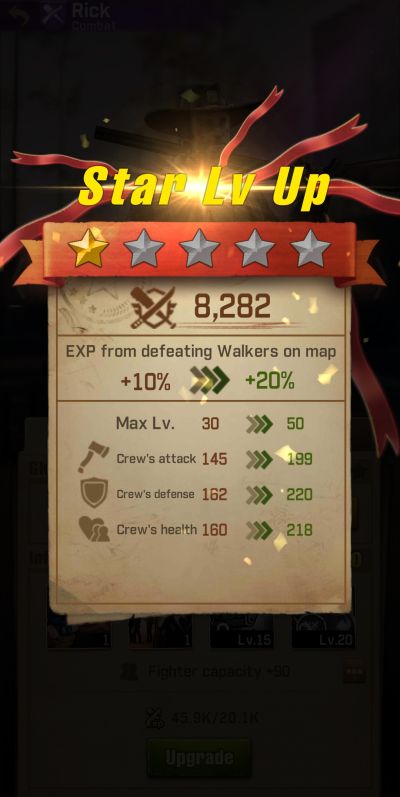
Beyond levelling up, a survivor’s star grade can also be ranked up through the use of extra shards of the same survivor. Increasing a survivor’s star grade will boost that survivor’s global effect. This goes on top of the additional stat boosts that the fighters within the survivor’s army receives. Again, considering the difficulty of obtaining legendary survivors and extra shards, you can expect it to take a long while and a lot of luck for you to be able to rank up a legendary survivor to star grade 2.
6. Join A Clan As Soon As Possible
Clans, guilds, alliances, factions, and other similarly-named player groups are to be expected from any online game. Every game that necessitates internet connectivity presupposes the idea of player interactions and while there are chat features that provide the social interaction promised, providing player groups extends the virtual world’s social aspect along with a ton of benefits and hardly any drawbacks at all.
While most games with clan systems outside of the RPG and strategy game genres are largely optional, playing on your own in an online RPG or a strategy game can be very difficult, impossible even for the latter. The Walking Dead: Survivors is not an adventure where you can pit your camp against all odds as it is not a player versus player per se, but rather a clan versus clan type of competitive and cooperative game.
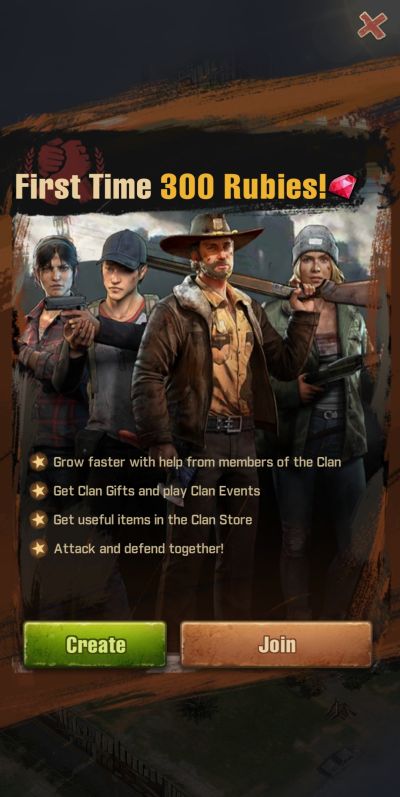
In this sense, it is not really a question of whether or not you should join a clan as you should definitely belong to one at the soonest. There is always an option to create your own, but as a beginner, we recommend sticking it out with any clan you wish to join. There are plenty of active clans with vacancies to find in the world of The walking Dead: Survivors. Be sure to apply to one as soon as the feature becomes available to you.
Immediately after being accepted into a clan, you will be prompted to teleport to where you fellow clan members are. Do not hesitate to do so as sticking closely together is one of the most basic necessities in base-building strategy games. Be sure to check and participate in the clan chat as well to be in the know as to what the clan’s plans and activities are.
One of the biggest benefits you can have when joining a clan comes with the aid that clan members can send to one another. Whenever you build or upgrade a structure, as well as conduct research, asking for help becomes the next available option for you after initiating the activity instead of speeding it up. Every clan member who offers an assist cuts down completion time by a minute, which is a huge help. You can likewise send an assist to fellow clan members through the hand icon at the lower right side of your screen.
Remember to donate needed resources to the technology being researched by the clan. Note that on top of the initial 20 times you can make a donation, additional attempts can be made after some time. These technology researches provide a buff to every member of the clan. Your clan’s prosperity value earns you resources over time as well. Be sure to check on the “territory” tab of the clan page whenever you visit.
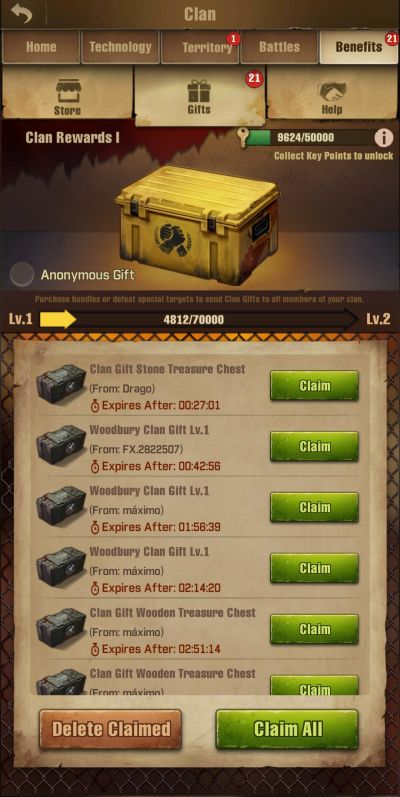
Whenever you, or any clan member initiates a rally against a Woodbury Army or an enemy player’s camp, the invite can be seen on the “battles” tab of the clan page. Be sure to check it out often and partake in rallies whenever you can. Activities you partake in as a member of the clan earns you solo points that you can exchange for a variety of resources at the clan store. You may also claim treasure chests as gifts from fellow clan members.
7. Check Your Inventory Regularly
Resource crates you earn as rewards from quests and events wind up in your inventory, being safe from potential plunderers and also do not form part of what your camp can store or hold. Although you are likely to use speedups from outside of the inventory, you can check the total number of what you have in stock through the inventory as well.
Beyond these two sets of commonly used items, however, the inventory holds other materials that you should peek into. These are either items you may not be aware of or familiar with, as well as items you would rather use sooner than later.
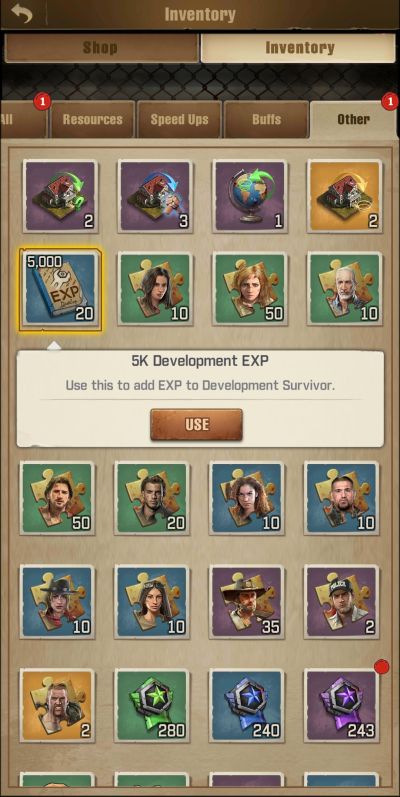
You can access your inventory through the bag icon at the bottom of your screen. The first tab simply shows you all the items you have hoarded. The succeeding tabs are easier to look into, diving all your items into their respective categories. As far as resources are concerned, leaving basic ones in crates is a good idea. Only expend these items in crucial moments.
The gems, however, ought to be used as they come as gems cannot be plundered anyway. You may have earned some buffs that you can use to temporarily boost your troop’s performance or earn a temporary shield. Under the “other” tab, you should consider consuming the XP packs sooner than later so you can begin levelling up your top survivors.
8. Prepare Well Before Launching An Attack
Everything you do serves as a preparation for your first attack. Again, while the hordes of walkers within and outside your base camp are your primary targets to test the strength of your army, the stronger and more fearsome enemies in the world of Walking Dead: Survivors lie within other base camps like yours. PvE in your adventure is nothing compared to what is in store for you relative to the PvP aspect of the game, and preparing to take any camp on requires a lot of careful preparation.
The developers behind The Walking Dead: Survivors are generous especially to beginners as the peace shield that prevents any players from attacking your camp stays on for a full week. Neophytes in strategy games are often discouraged by the presence of stronger, more experienced players in the game but in the case of this game, the 7-day peace shield is an excellent benefit that can help any newcomer catch up to, or even surpass, the rest of the fold.
While the peace shield that protects you from other players out looking for a camp to plunder is a great benefit, it also comes with its own set of restrictions. Having a shield around your camp also prevents you from attacking other players’ camps, or even scouting the. Shields only protect your camp and everyone within it so troops sent out are still prone to attacks.
Another important detail to keep in mind is that once your town hall reaches level 8, it will also instantly drop down the beginner’s shield. As much as reaching camp level 8 is a milestone in itself and comes with important perks of its own, you may want to consider enjoying the free shield and continue to develop your camp and army before finally deciding to reach camp level 8.
Another preparation step takes into account the resources in hand and what your storage facilities can protect from raids, just in case someone decides to attack your camp. For example, a level 6 lumber storage can hold 1.5 million units of lumber but can only protect 40,000 units from raids.
This means that if you want to minimize losses from potential raids, you have to keep your lumber supply well within the 40,000 mark. The same goes for your other resources on hand. If you have more than what you can readily spend, then make the necessary storage upgrades first.
It has become a basic strategy as well for strategy games to consider targeting open or unallied camps instead of those belonging to any clan. Whenever you attack a free or unaffiliated camp, the risk of retaliation will only come from that player. On the other hand, attacking a player’s camp belonging to any clan will likely result in a retaliation from the clan itself. It may happen that the camp you attack is weaker than you but that camp’s clan may be stronger than your own clan.
It is always a good idea to scout your target first before actually launching an attack. Scouting provides you with a lot of important details that can impact your decision on an attack. Likewise, when faced with a stronger enemy that you still wish to attack, you can launch a rally and attack along with your fellow clan members.
9. Take Advantage Of Freebies And Special Events
Resources you gather within and outside your camp, resources you generate on your own, and resources earned from killing walkers here and there can help you build up a healthy supply in the initial hours of your immersion within the world of The Walking dead: Survivors. Additionally, the extra rewards you earn from completing various quests count as an extra source of supplies you will constantly need.
As the resource requirements to sustain an extensively growing camp with an equally growing population tends to exponentially increase, it becomes more and more challenging to not exercise prudence every step of the way, relative to how you manage your continuous supply of resources. Spending a little more than what you are earning can be difficult to see at first but once you reach a high enough level, the challenge of managing limited resources adds up to all other concerns you hae on your hands.
Fortunately enough, there are extra freebies and a tone of events in The Walking dead: Survivors to help active players to constantly make ends meet. On top of the free daily radio transmissions to power up your survivors, there are also daily supplies you can receive thru the survivor store. You can access it via the package icon at the upper right side of the screen. Always check the daily supply tab as you can claim 3 sets of resources from it: one that provides free stuff once every 10 minutes; another once every 4 hours, and the biggest one can be claimed once a day.
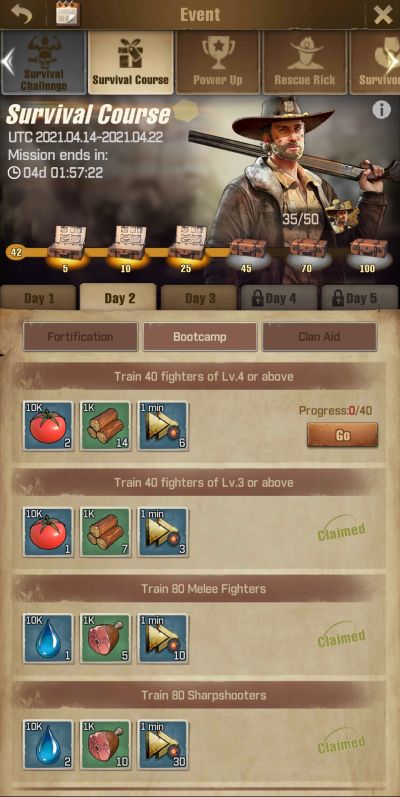
Below the survivor store icon is the events icon, which holds various ongoing events where you can earn a lot of rewards for staying as active as you can. One of the most important event is the survival course, which provides a set of daily objectives for the first five days of your dive into the game.
Each new day unlocks a different set of objectives although you do not necessarily have to accomplish all feats within the day. You can accomplish the tasks on the first day up to your seventh day in the game and the rewards you can earn from this event include rare items that are difficult or impossible to earn outside of events.
Be sure to take good note of each objective in these events as they almost always coincide with the usual quest objectives and normal activities you engage in on a daily basis. All active events are presented in tabs as well so be sure to scroll through its entirety to ensure that you will not miss anything.
The Walking Dead: Survivors certainly holds plenty more than what we can go through extensively in a single article. Some areas of the game also suggest future expansions waiting to be implemented in upcoming updates.
This wraps up our beginner’s guide for The Walking Dead: Survivors. Hopefully, you picked up a lot of nifty tricks and strategies from what we shared. If you have chanced upon something we have yet to discover or would like to share your experiences with this game, do not hesitate to drop us a message down below!
SevenOfNine
Monday 9th of May 2022
Is there a guide how the "Region Chief Appointments" works, does the buffs start automatically or do you need the buff before you start your task
Rob
Sunday 4th of July 2021
Hello how do a move an assigned person from the explorer camp back out to re assign them is this possible???? I can't find a way to do it. Thanks Rob
Craggy 20297
Thursday 8th of August 2024
@Rob, Click Camp. Click Assigned picture. Now you can do one of two things..Either Click one of the survivors below then hit Assign. OR Just click the down arrow to the right of the assigned survivor to remove him
ThePhatstaxx
Friday 21st of May 2021
Can you tell me two things? One, What is the best placement for the fence towers. Second, the puzzle pieces that you accumulate for different names what do they do with how many do you need to create that person if that’s the object of it thank you