Welcome back to the Grishaverse! In this last section of my walkthrough for Shadow and Bone: Enter the Fold, we’ll step into the shoes of Sturmhond, a Ravkan privateer and free spirit with a storied and sordid past, as well as back into the role of Aleksander Kirigan, the Darkling.

Let’s get right to it.
Sturmhond – Storm Landfall
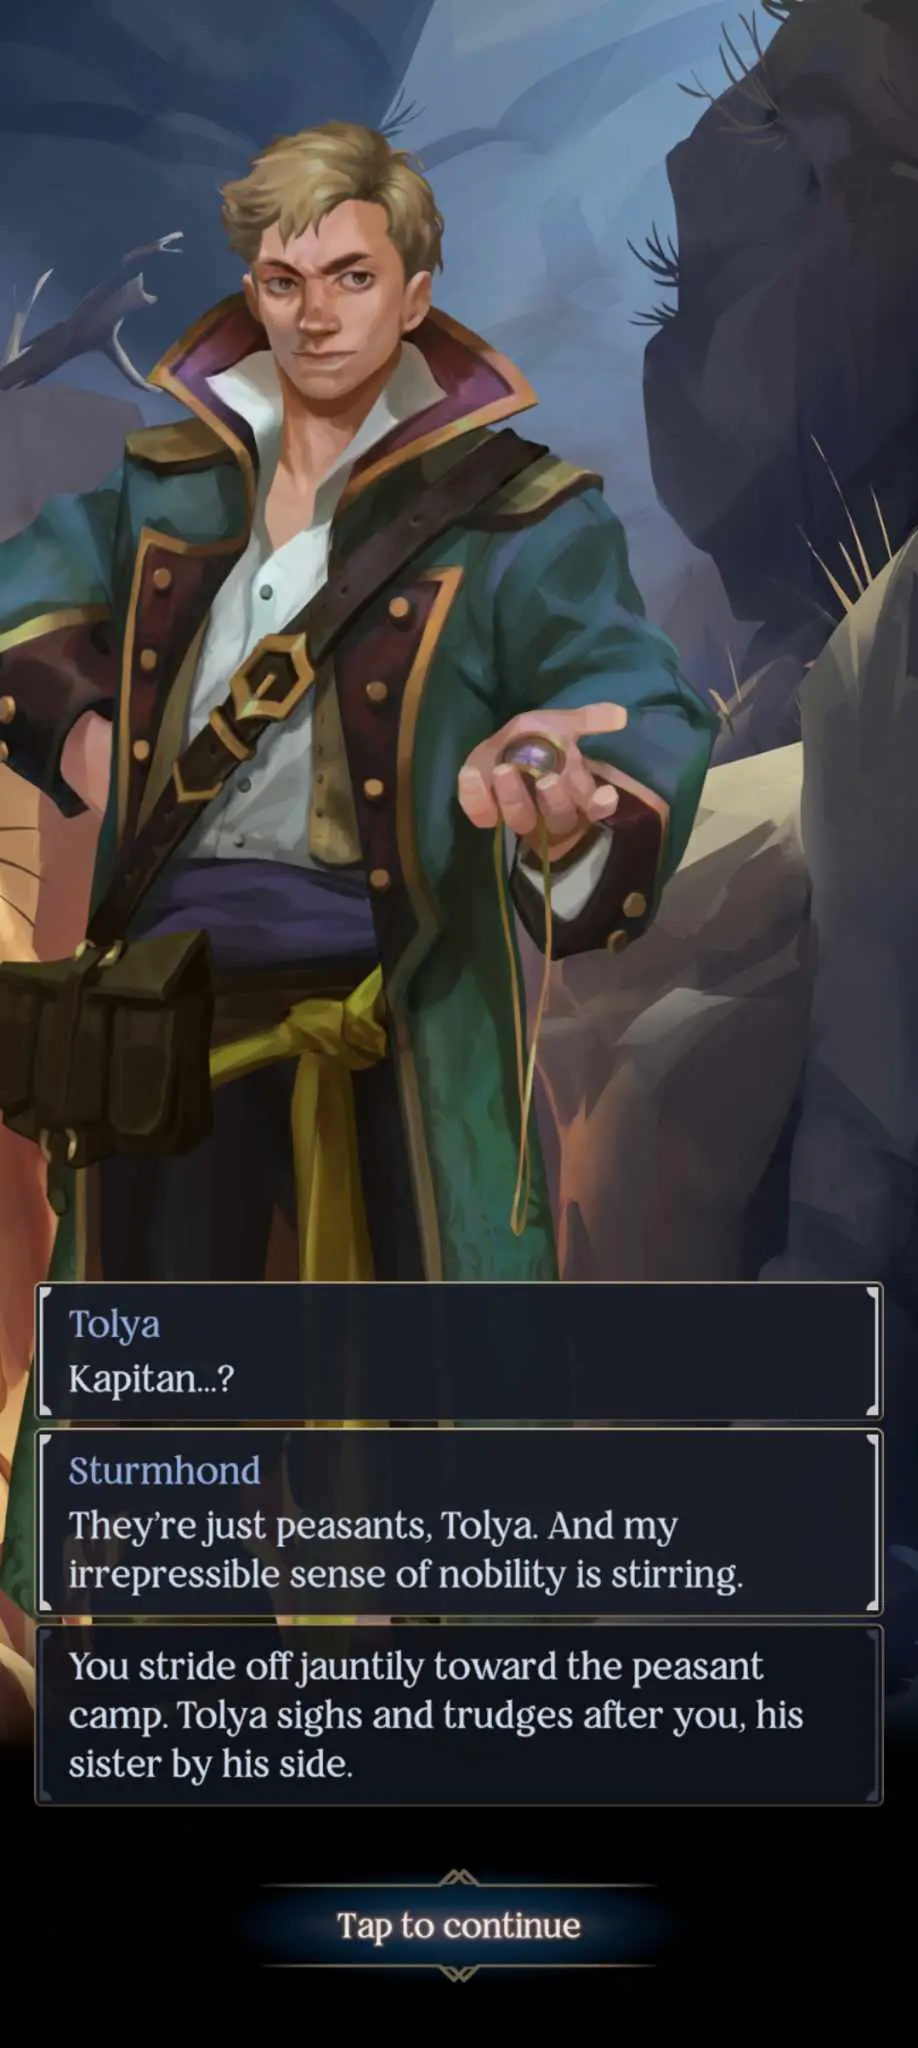
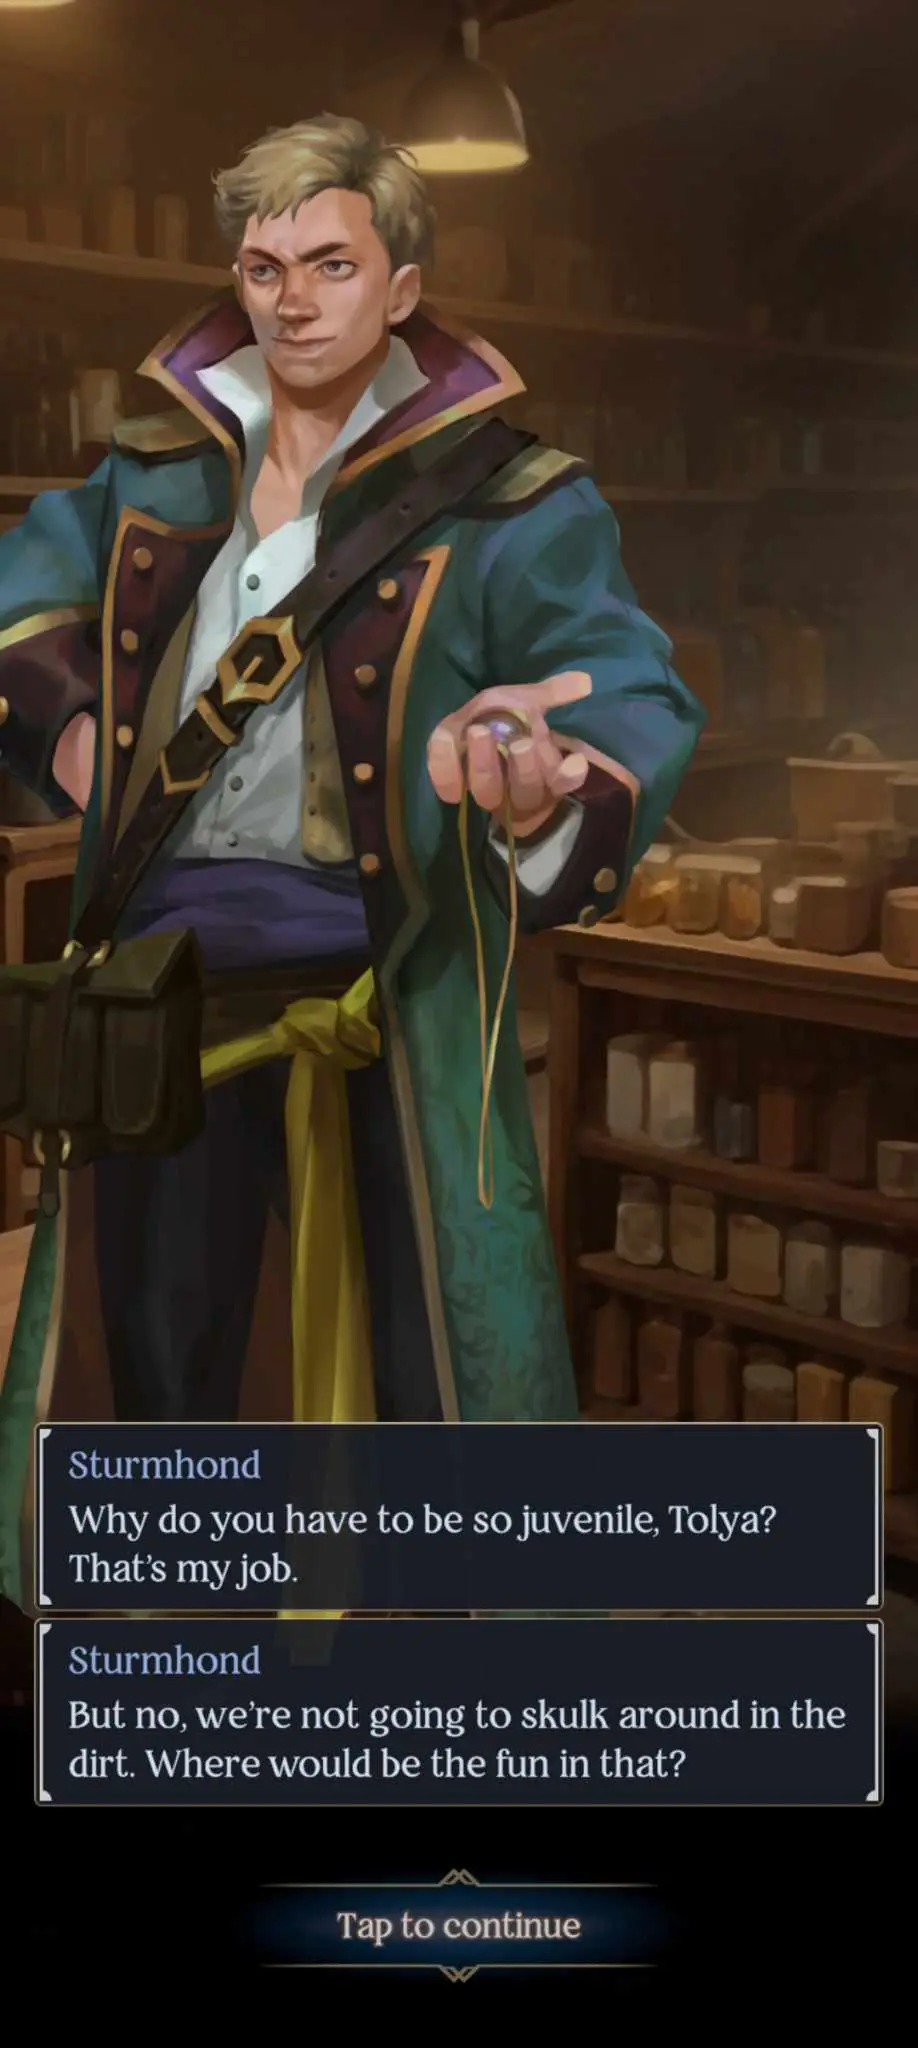
The sun kisses your skin and a gentle breeze drifts past you. Your sails are full and your spirits arehigh. But from the crow’s nest comes a cry – another ship off the port bow!
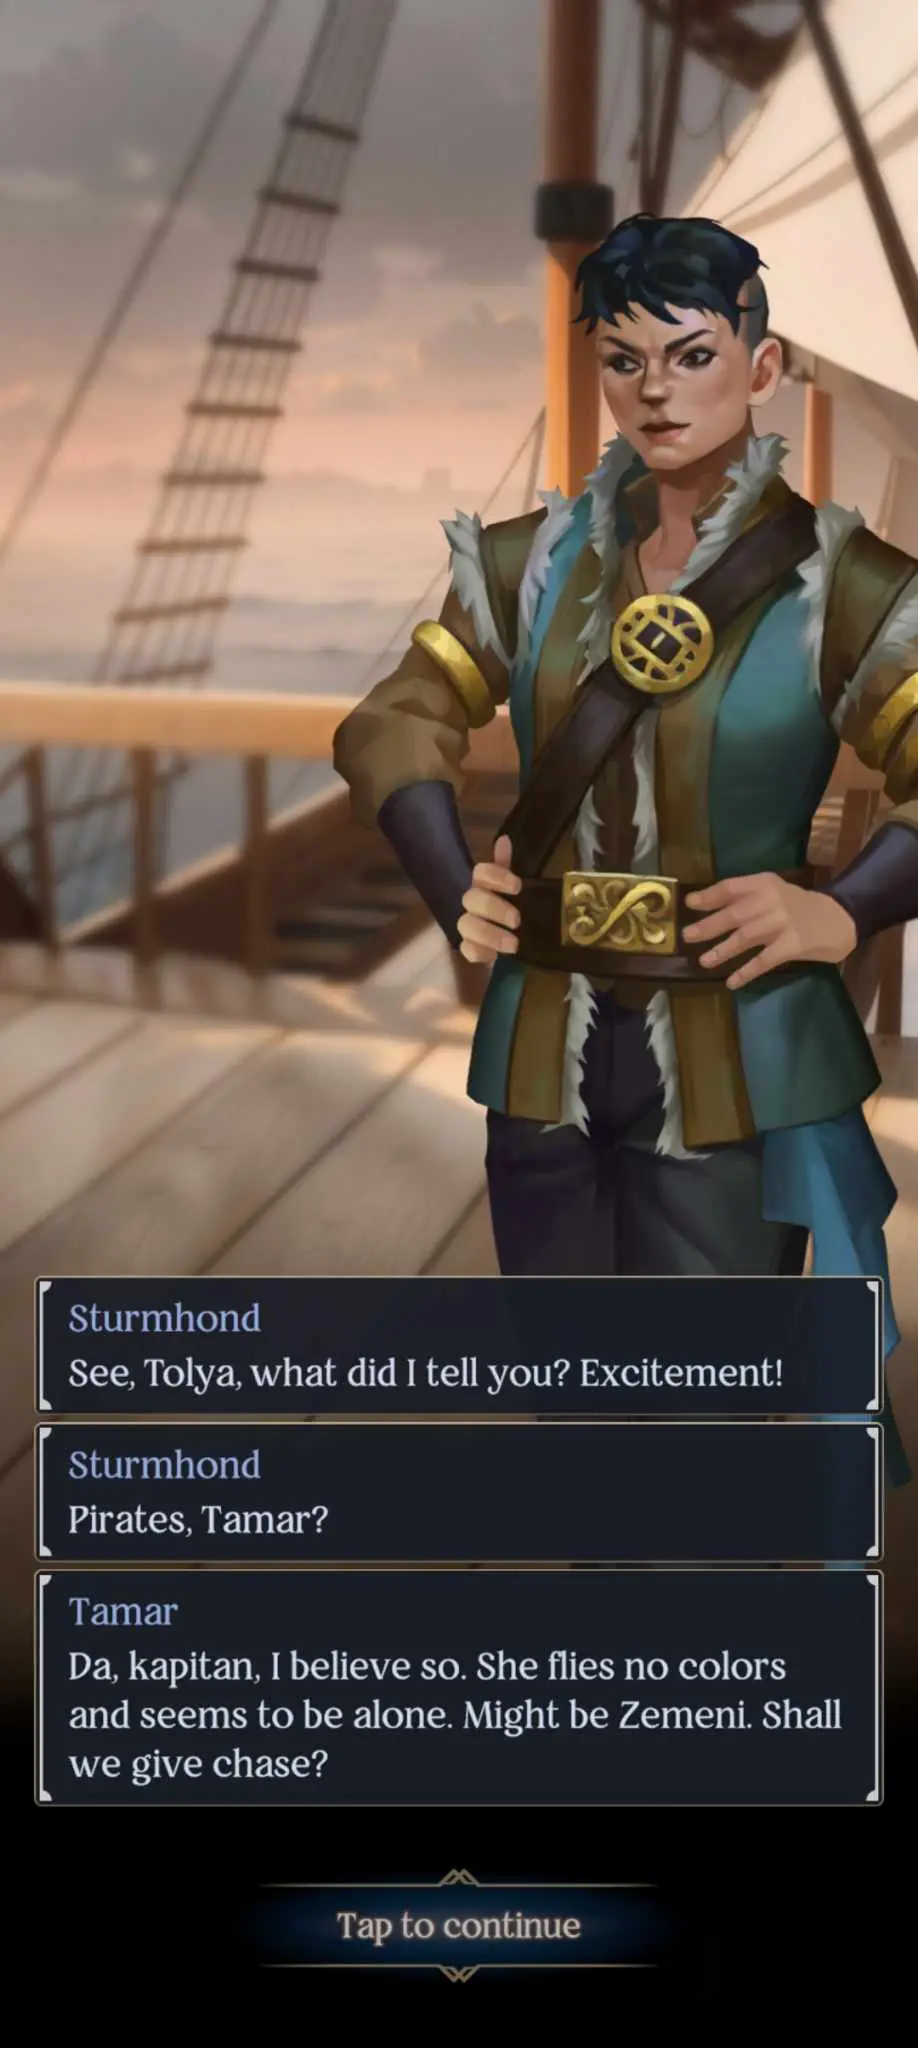
It’s your call whether to give chase or not. Tolya will advise caution as some of your men are still recuperating, and you don’t know how heavily armed the other ship is. Your call here, though I chose to let them go.
It won’t be long before your spotter catches sight of another ship heading toward you. Pass a Perception check here to view the second ship’s flag: blue and gold. A Ravkan vessel. Allies then.
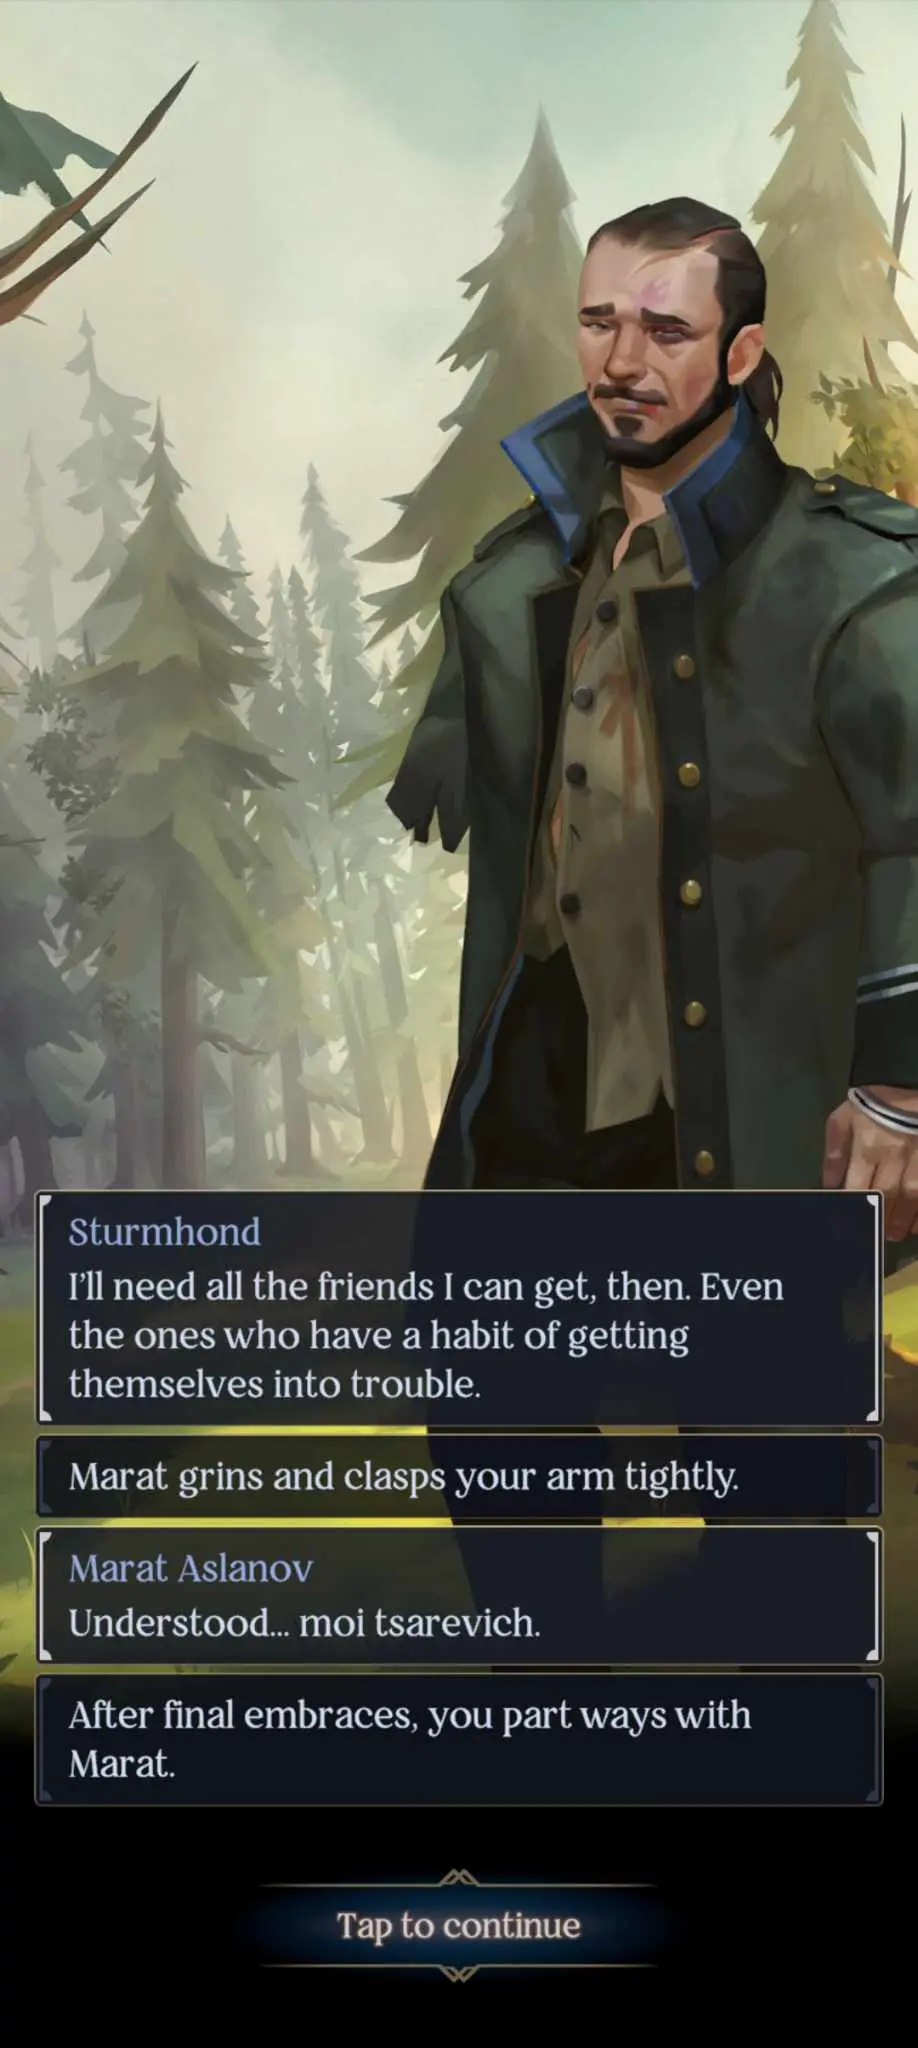
A skiff will detach from the Ravkan ship with a messenger from the First Army who’ll hand you a sealed piece of parchment. It’s a request for help from “a memorable ally”. To do that, you’ll need to dock and visit Artyom in Os Kervo. You can attempt a Mind check here to decipher the message and try to recall who this person is. Sturmhond’s musing will lead him to discover that the sender of this message is Marat Aslanov, a soldier who saved Sturmhond’s life at the cost of his arm.
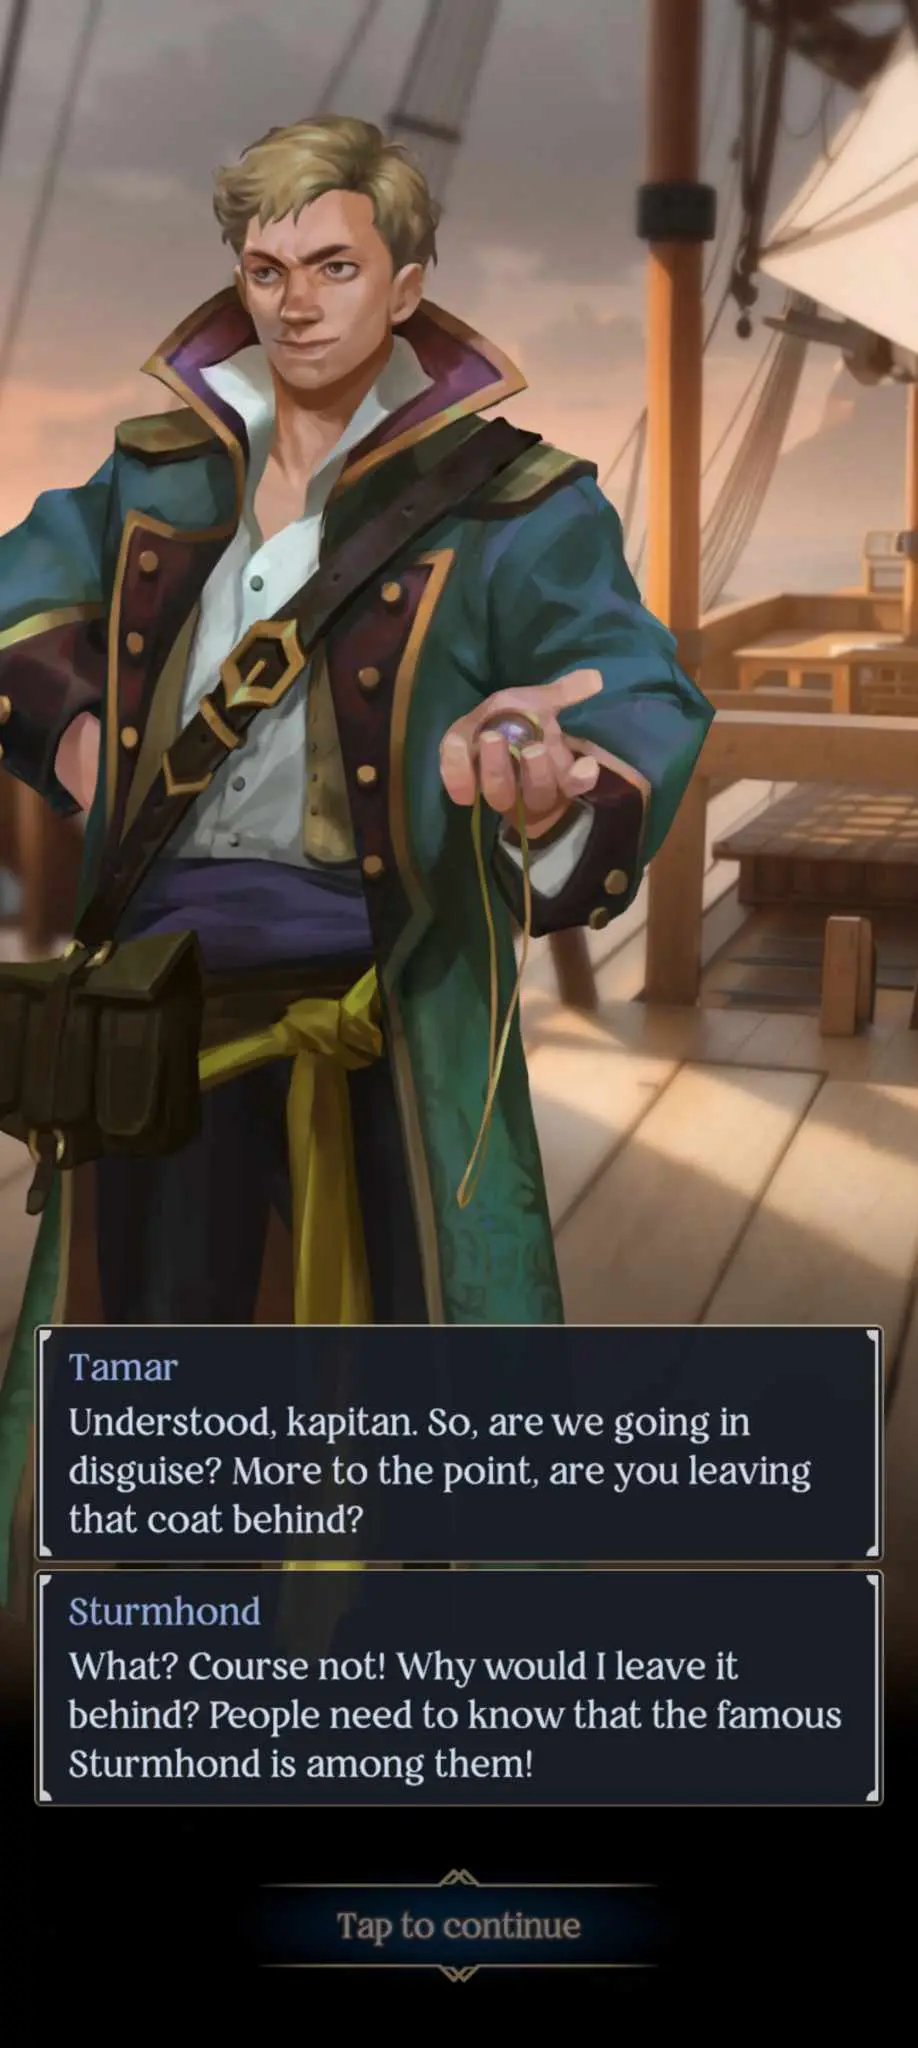
You’ll need to convince your lieutenants to let you go, but they have one condition – they’ll go with you.
Side Quests:
- Find a toy for Semyon.
You’ll make landfall just outside of Os Kervo. Head north to enter the city.
- Head to the docks first to get a Force skill check. Remember that we’re building up a new character here!
- The marketplace has a woman who’s willing to give you information…if you buy something from her first. The figure costs 5 coins, but you can haggle (and get a skill check while you’re at it). Ask her about Artyom and she’ll say she hasn’t heard the name – but she will mention that maybe he’s one of the beggars at the All Saints’ Church.
- Go to the side alley, where you’ll be accosted by thugs. Once again, get your skill checks in!
- The city hall has a bureaucrat from whom you can ask for information. You’ll need to bribe him or pass either a Charm or Perception check.
Once you’re done, head to All Saints’ Church to meet Artyom.
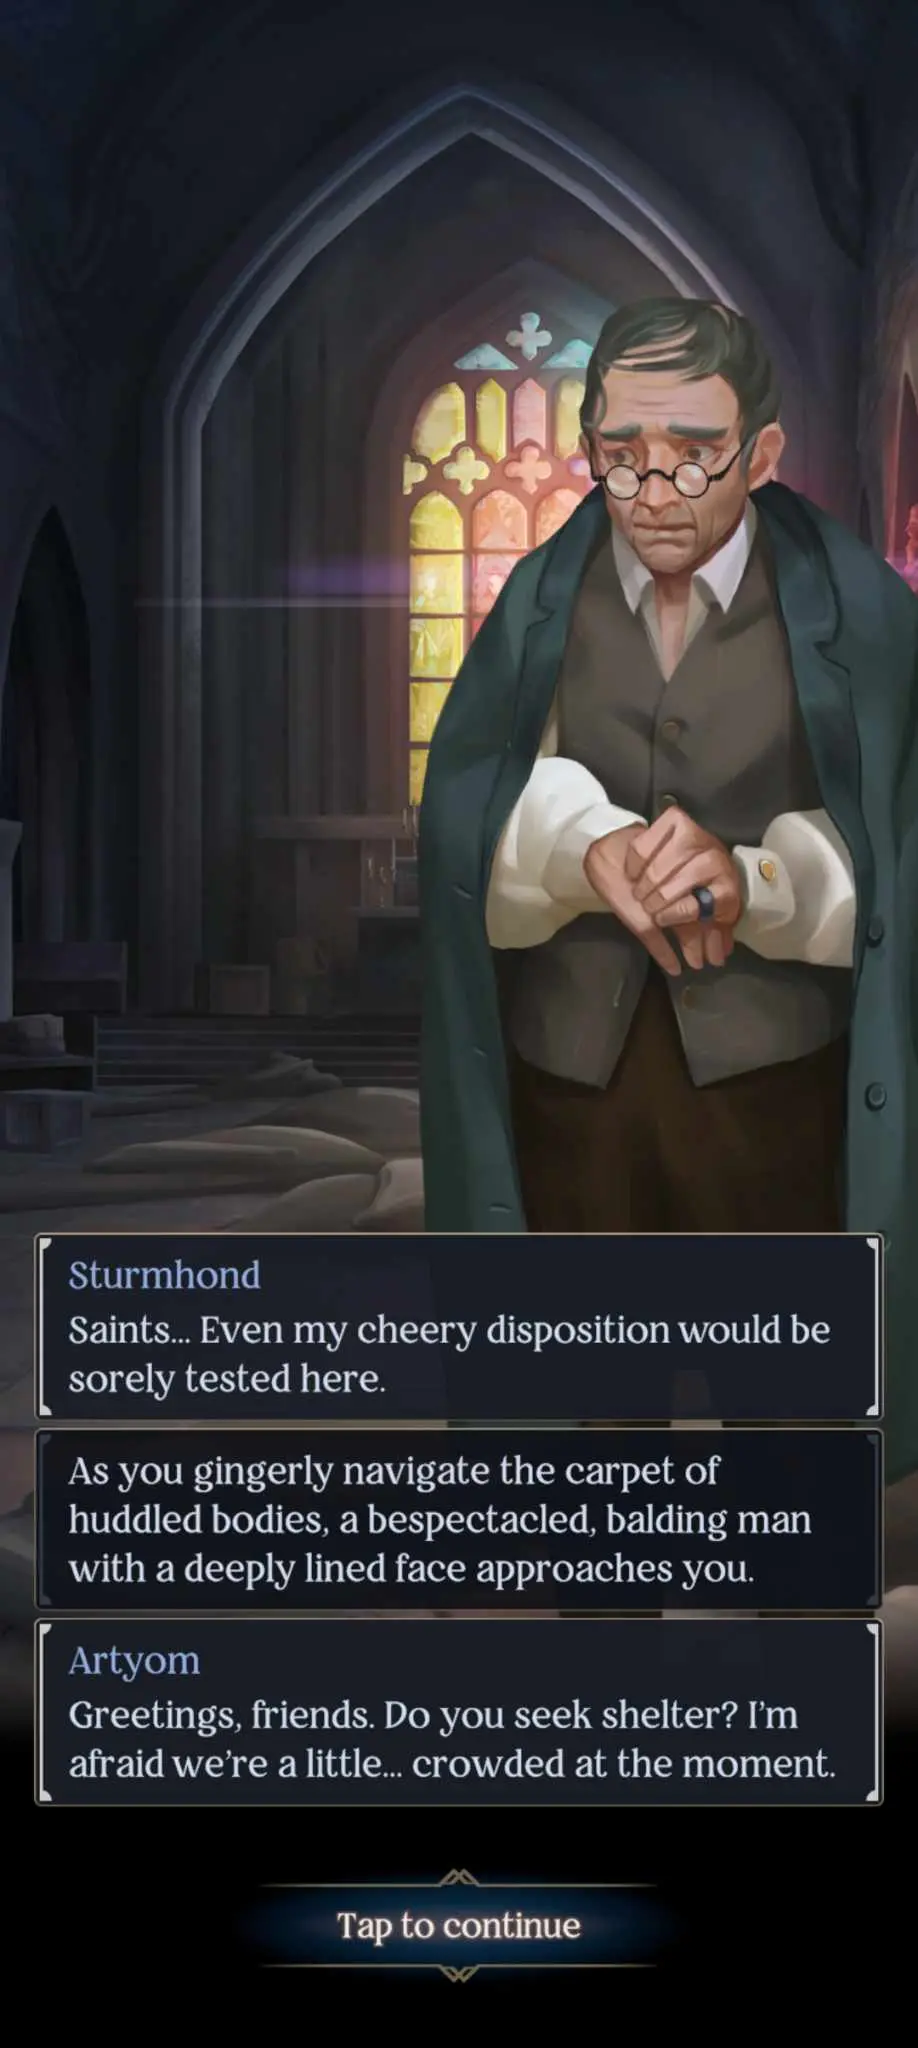
Artyom will be willing to help you find Marat, but you’ll need to help him secure food and supplies for the beggars at the church first, even if you pass the skill check. Of course.
There are three places you can look:
- A convoy was heading to Udova. Maybe you can get some supplies from them.
- Thanks to your First Army connections, you might be able to pull a few strings and get the beggars what they need.
- Finally, there’s a refugee camp in Udova, as well as Udova itself.
Before you leave, Artyom will give you his Imperial Pass.
Time to get to work. Before you go north, clear the combat encounter below Os Kervo. Maybe you’ll get lucky with the skill check!
Head north from Os Kervo back to the campsite where we dealt with Kalukov as Alina and spoke with Angelo as Jesper. You’ll be “attacked” by a young boy. Give him the wooden stag you bought from the marketplace to entertain him and complete the side quest. The woman will claim that Artyom is a greedy snake before you leave.
Next, to Udova. Unfortunately, we still have to take the long route, pass or not. Head south near the bridge to Os Kervo then head all the way west and north to Udova. Be sure to clear the random events and encounters along the way.
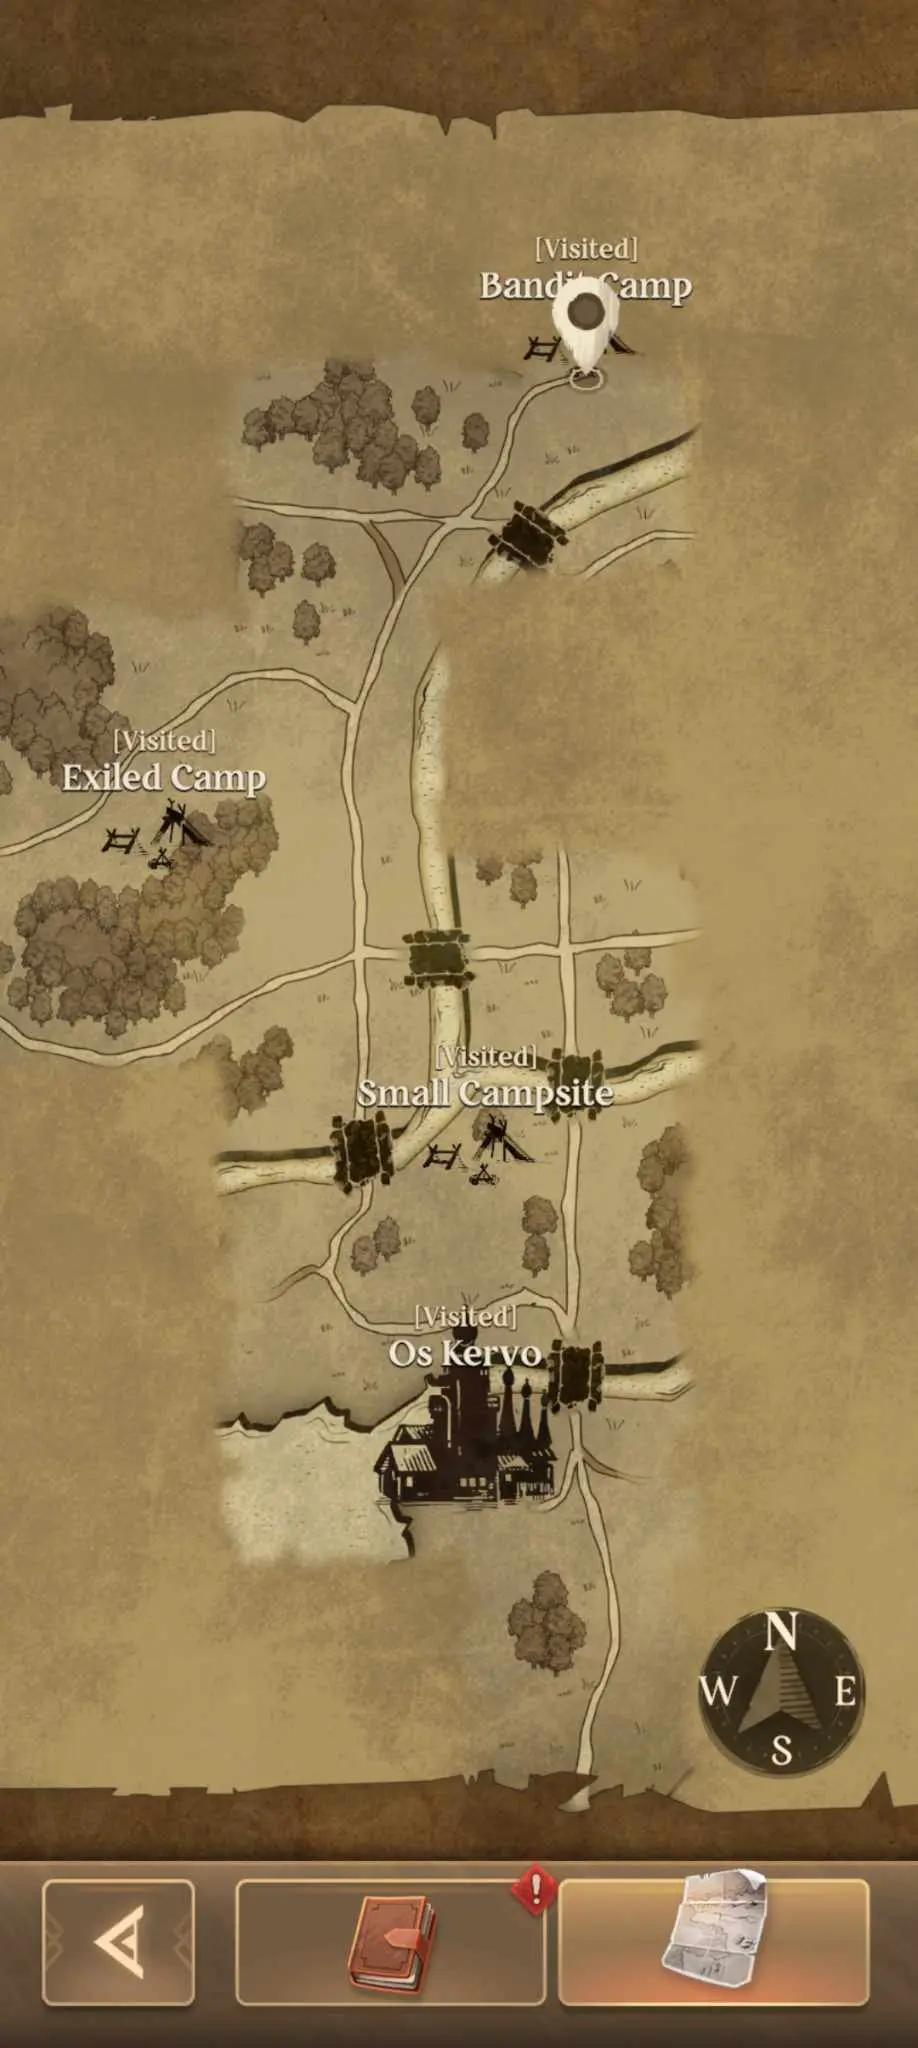
Once you reach a crossroads, head west then a little bit north (off the road) to find the Exiled Camp. The woman in charge here, Sofia, will say that their supplies were stolen by the First Army, bandits, and our old enemy Kalukov. You can also find out that her husband, Gerasim, has been missing since a recent bandit raid. Their camp is to the north.
If you remember where the refugees and Evalda were taken as Alina, it’s the same place. If not, it’s here:
You’ll discover the truth of Gerasim’s “kidnapping”. Use a Charm or Force check to get him to return to his wife. On the way back to the Exiled Camp, stick to the road for another encounter, this time with a wagon and a missing parcel. Returning the parcel nets you a few supplies. Get back to Sofia and she’ll reward you with some supplies for the All Saints’ Church beggars. We’ll need more than this though.
Follow the road west from the Exiled Camp to another combat encounter – these bandits won’t bother you for now. Head north to the First Army military convoy.
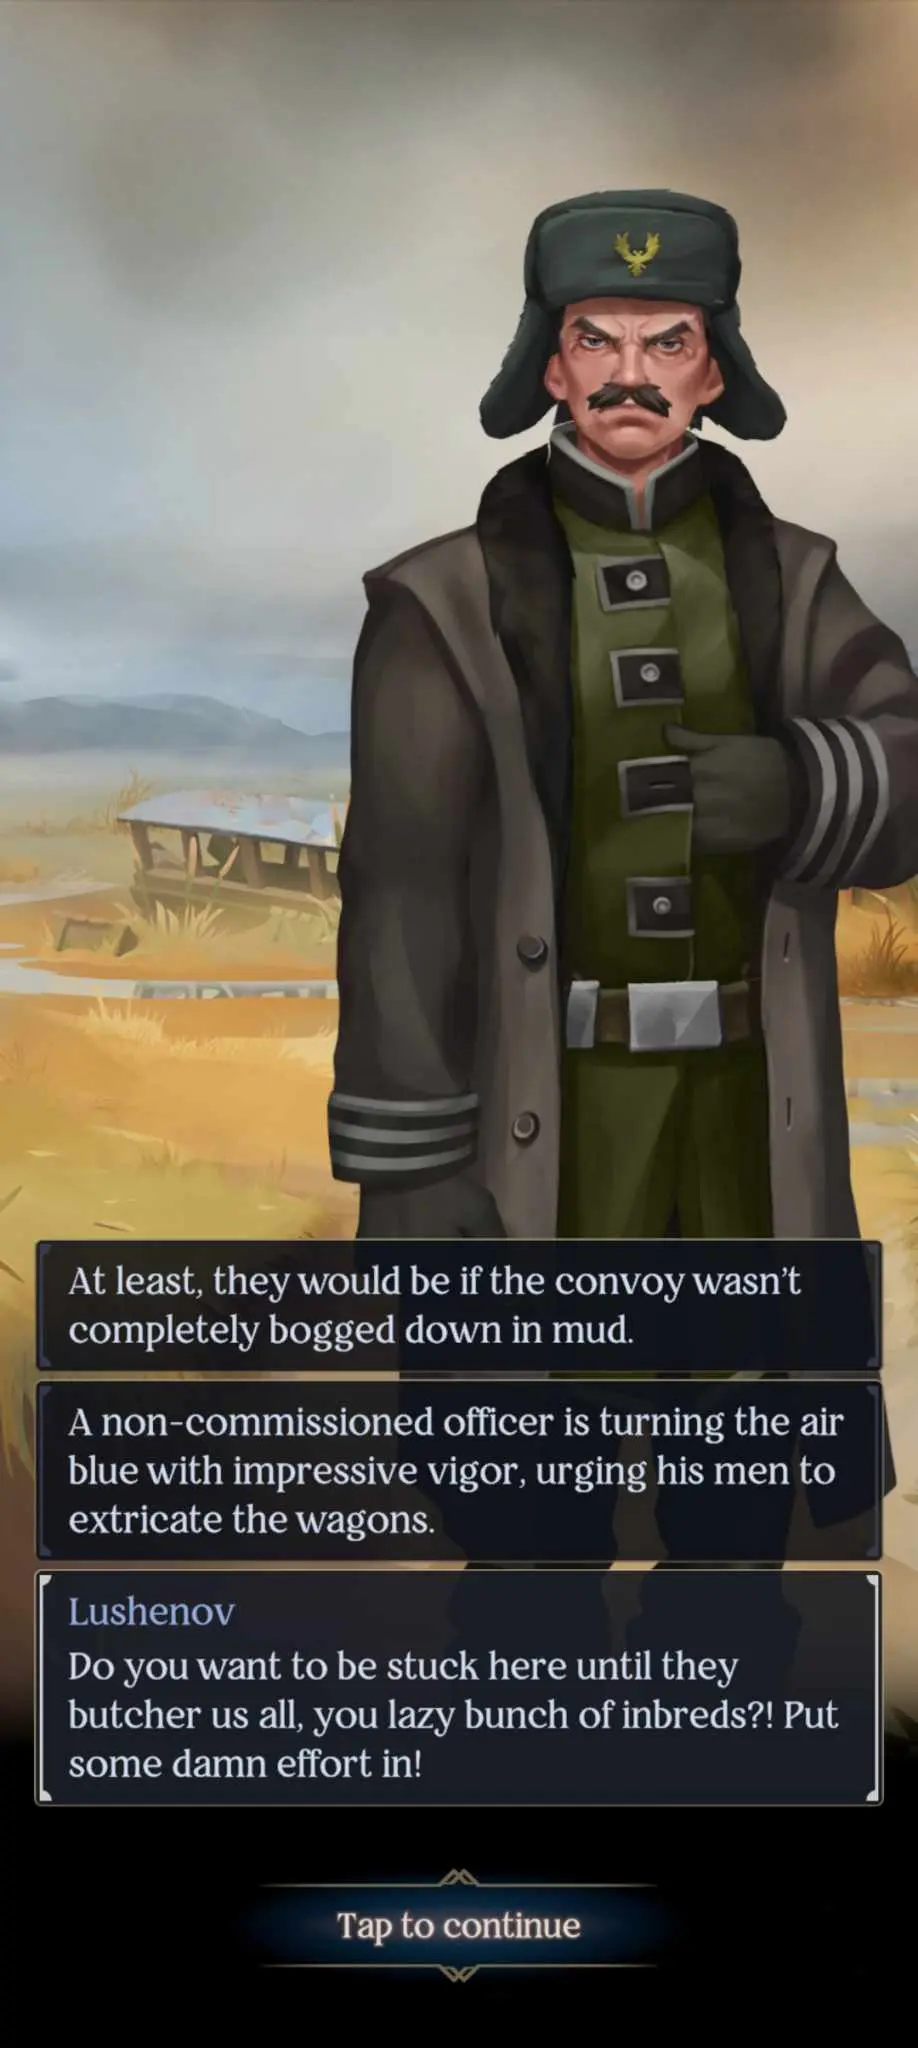
Help Lushenov out with the nearby problem. Take out 3 groups of bandits and he’ll be willing to part with some of the First Army’s supplies for the refugees. No problemo.
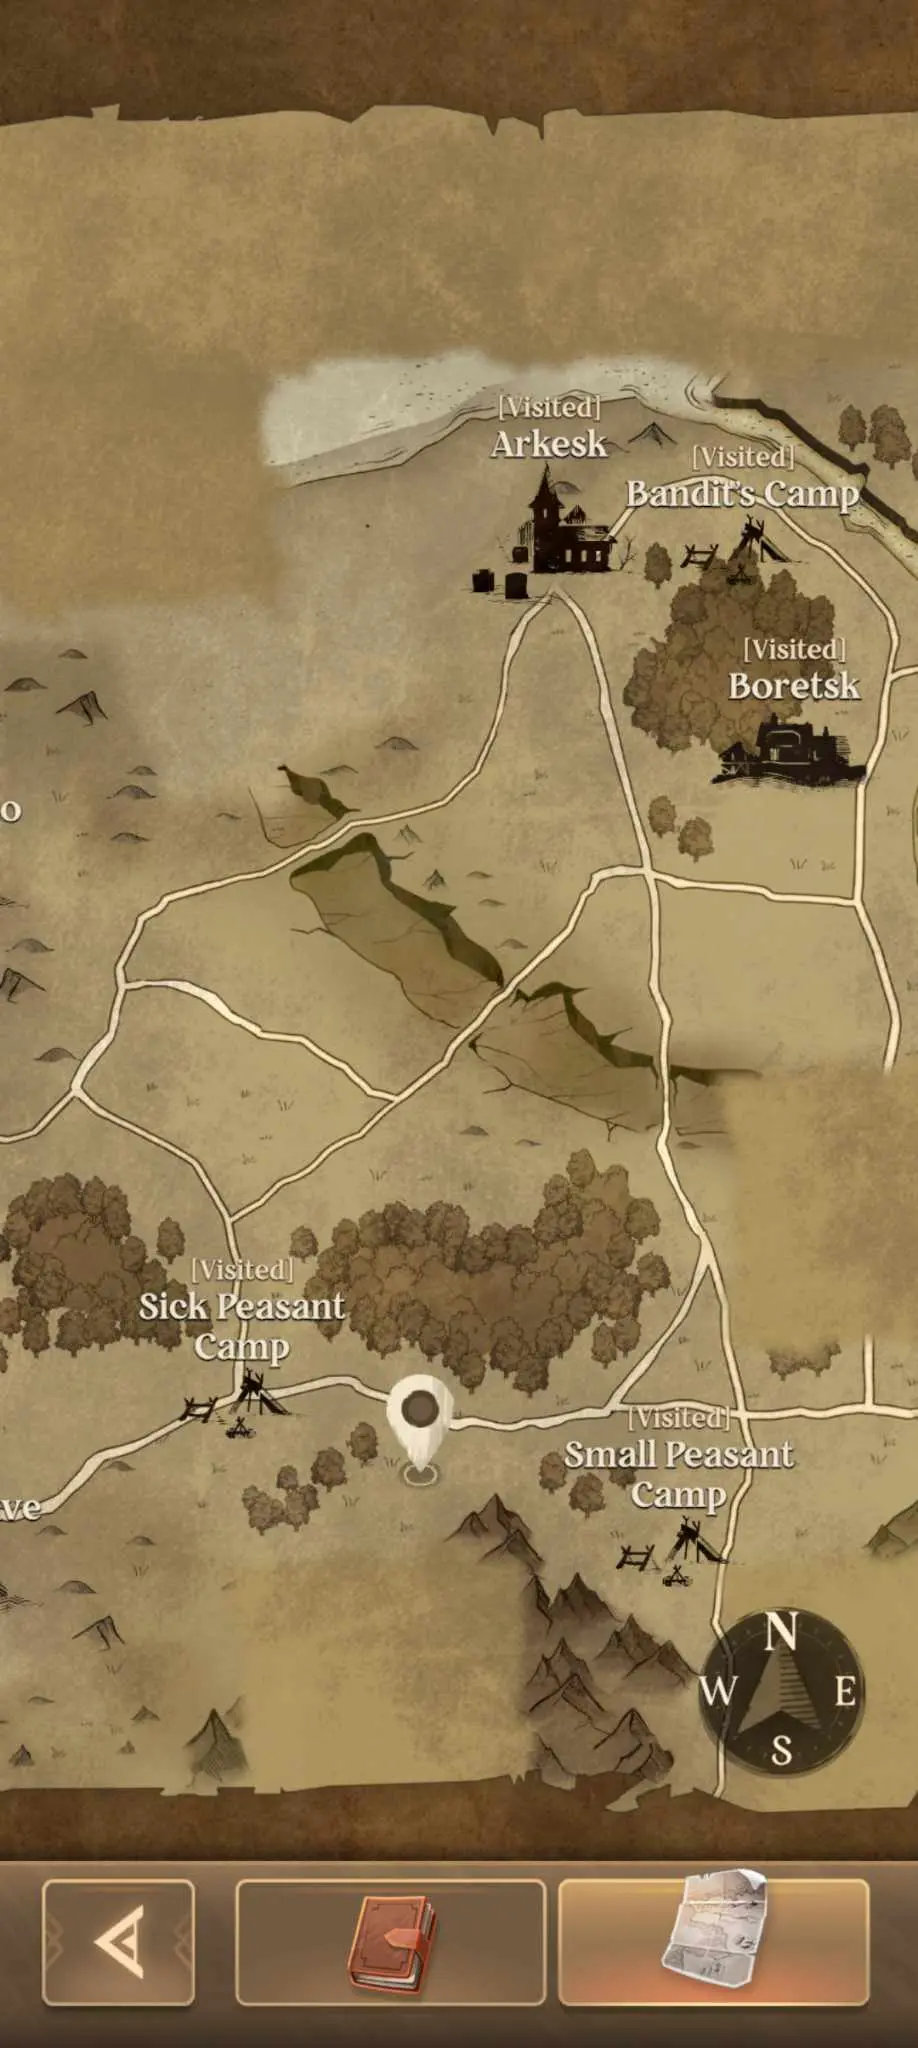
The first bandit group is directly below the convoy; you might have bumped into them on the way here. The next one is directly above the convoy – just follow the road. The last one is a little bit out of the way. To get to the third group, you need to walk through the forest to the Exiled Camp, then back up. Or you could also refer to this map:
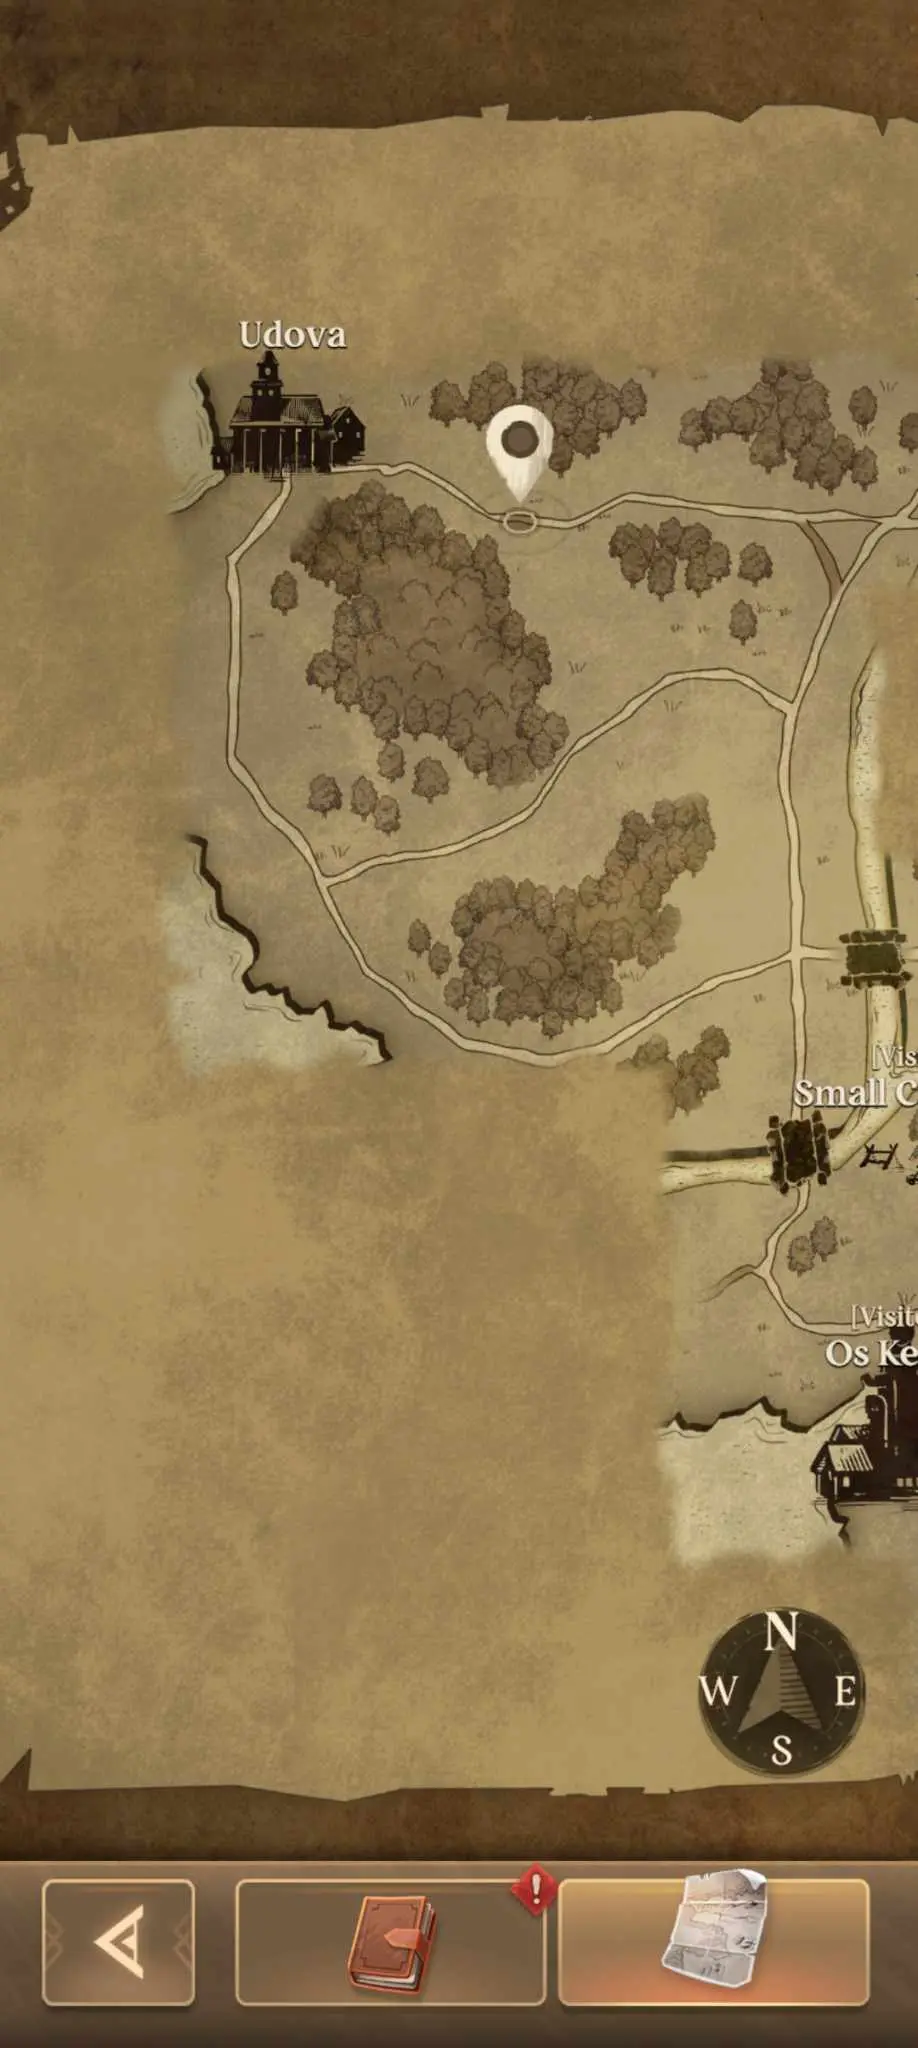
Note that you can attempt skill checks to get them to leave if you don’t feel like fighting, but killing each group of bandits also nets you 5 coins from their loot. Once the bandit cleanup is done, go back to the convoy and report to Sergeant Lushenov. That’s two supply bundles down. You can also attempt a Force to check to get the wagon out of the mud; succeeding will make Lushenov give you an extra 4 coins for your trouble. Score!
Let’s get the last supplies. Head north and follow the road to Udova.

As before, Kalukov is a businessman. You can try to convince or threaten him, but the long and short of it is he’ll sell you some supplies. Without modifiers, this will set you back 10 coins (5 coins if you pass the Charm check). At least we have the loot from all those dead bandits, right?
That should be the third bundle of supplies we need for the refugees. Head back to Os Kervo and Artyom, but make sure to attempt any skill checks you see on the way.
Now it’s time for Artyom to hold up his end of the bargain. He’ll tell you that Marat came to him, terrified, and sought refuge in the town of Arkesk, to the north.
Sturmhond – Plagued by Setbacks
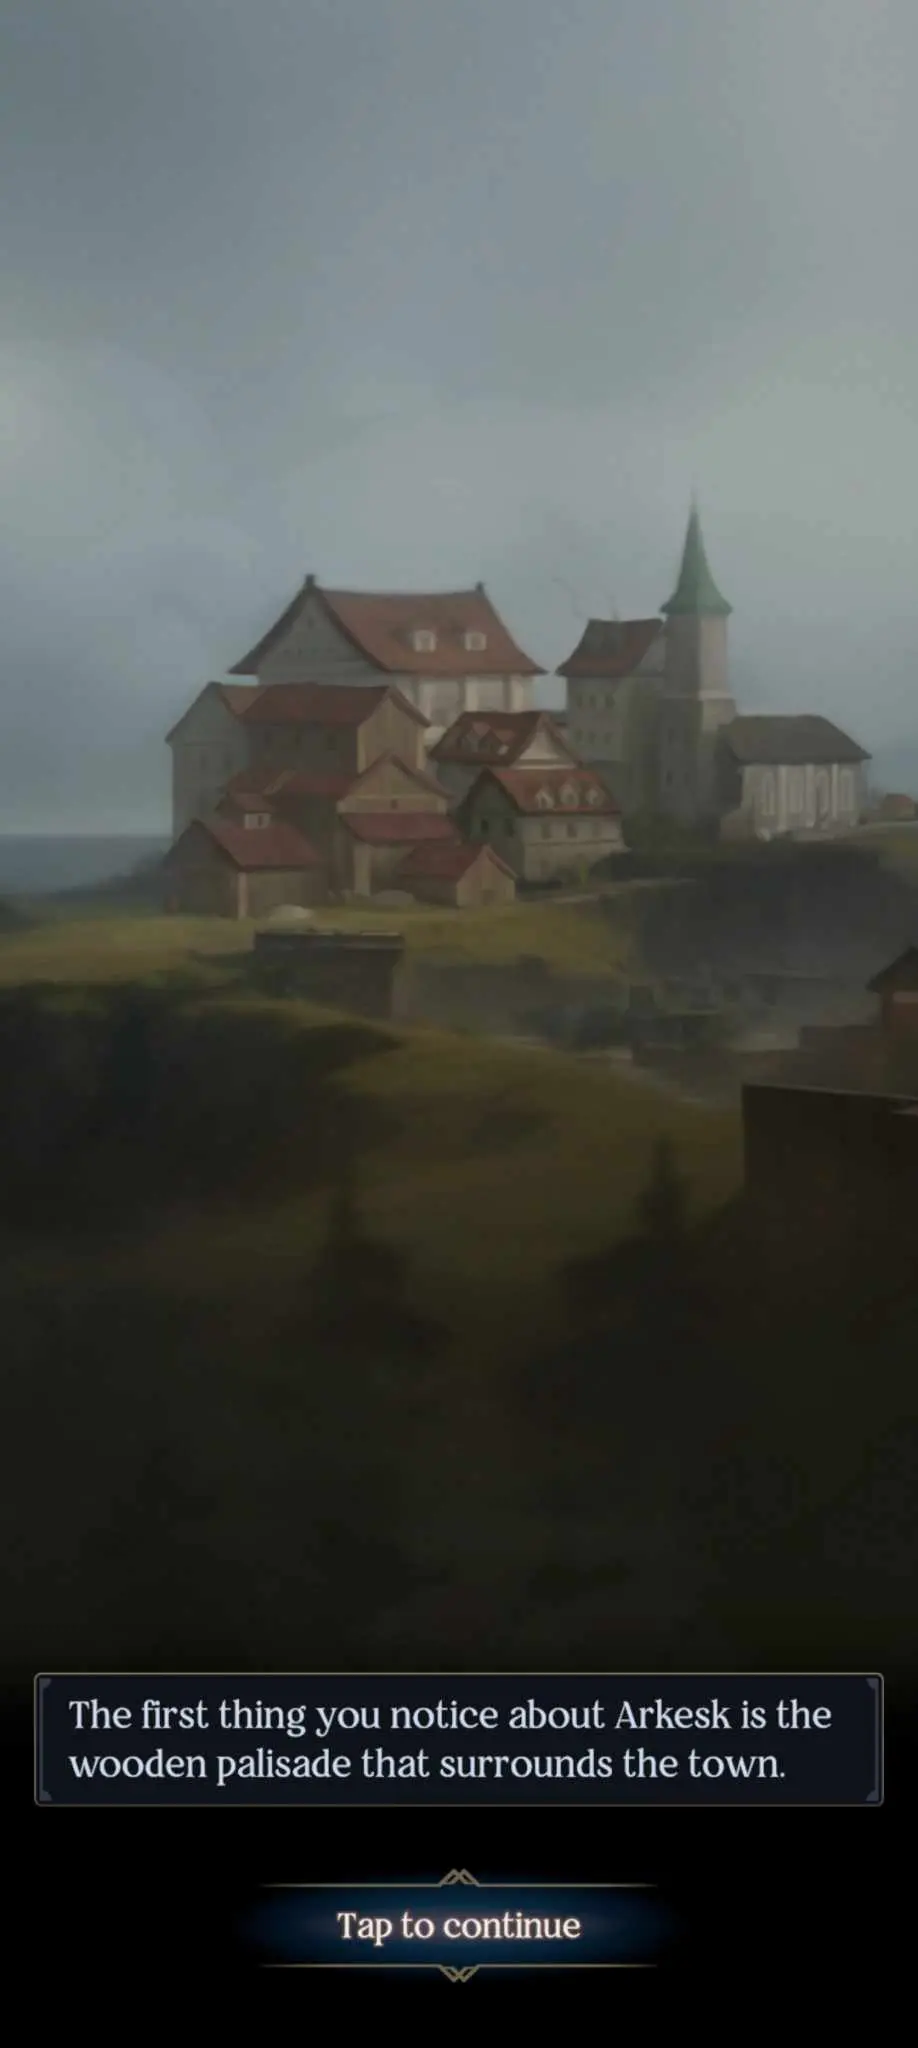
To the frigid town of Arkesk we go, and if Artyom spoke true, Arkesk is a grim town. Why would Marat flee so far north?
Side Quests:
- All side quests in this chapter are tied to the main quest.
Start by heading directly north to the peasant camp. No wonder they’re so far from civilization –there’s a plague going around.Worse, Arkesk is the center of the outbreak. Hopefully, Marat isn’t dead yet.
However, not all is as it seems. You can attempt a Perception check to see what’s going on or ask Tamar. Despite (purportedly) suffering from the plague and coughing, all these peasants are suspiciously healthy. And that spells a-m-b-u-s-h.
Deal with them as you see fit. The bandit leader will tell you that he and his men were paid by a First Army captain to waylay anyone attempting to enter or leave the region. He doesn’t know why, though. This bodes very ill.
We need to get to Arkesk and find Marat as soon as possible to understand what’s going on. But before you follow the northward cobblestone road, turn left at the intersection, and keep going until you see the Sick Peasant Camp. Visit it and agree to look for their healer, Sonechka.
Head back to the Small Peasant Camp and this time, follow the north cobblestone road. Clear the “combat” encounter (close combat minigame) to win a few coins from the merrymaking bandits.
Keep moving north and you’ll reach Arkesk.
The village of Arkesk is heavily fortified and the captain at the gates won’t let you in, claiming that there’s a plague. This is starting to sound a little convenient. Regardless, the captain will refuse to let you in unti you do something for him, because this is Shadow and Bone: Doing Everyone’s Chores. In this case, you’ll need to find a hermit by the coast who supposedly has a cure or a vaccine for the plague.
Before that, follow the eastern road out of Arkesk to find a bandit camp. Liberate the prisoners – among them Sonechka. She’ll make her way back to the Sick Peasant Camp.
Continue following the east road; it’ll loop downwards to the town of Boretsk. Here, visit the toy shop and buy the board. It’ll cost 8 coins, but you can drive the price lower with a charm check. We’ll need it later. You can also ask Yana, the shopkeeper and toymaker, about the plague, and she’ll say that thankfully, it hasn’t escaped Arkesk. Yet.
After that, visit the town square. You’ll notice that everyone here seems healthy. Press Alik on the matter, and he’ll reveal that Boretsk has a deal with the hermit you were sent to find. Yana, the shopkeeper, provides him toys and trinkets for his amusement. However, thanks to the bandit infestation, Boretsk can’t send any traders to the hermit and people are thus starting to fall ill.
Note that you cannot find the hermit without this information.
Leave Boretsk with the game board in hand and head all the way west to the coastline. Navigation in this region can be a bit tricky as the coastal road isn’t clear-cut, but essentially what you need to do is find the hermit in one of three caves:
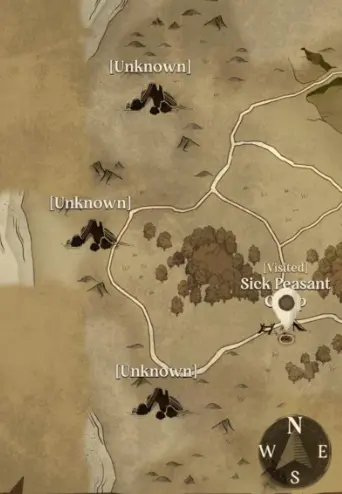
Before that, head back to the Sick Peasant Camp and get a bundle of consanol from Sonechka. Once again, we’ll need it later.
Go to the first cave on our map, directly west of the Sick Peasant Camp. Pass the Perception check and sniff about to find a fine handkerchief. Stick to the west coast and head north to find the second cave. The hermit will be here.
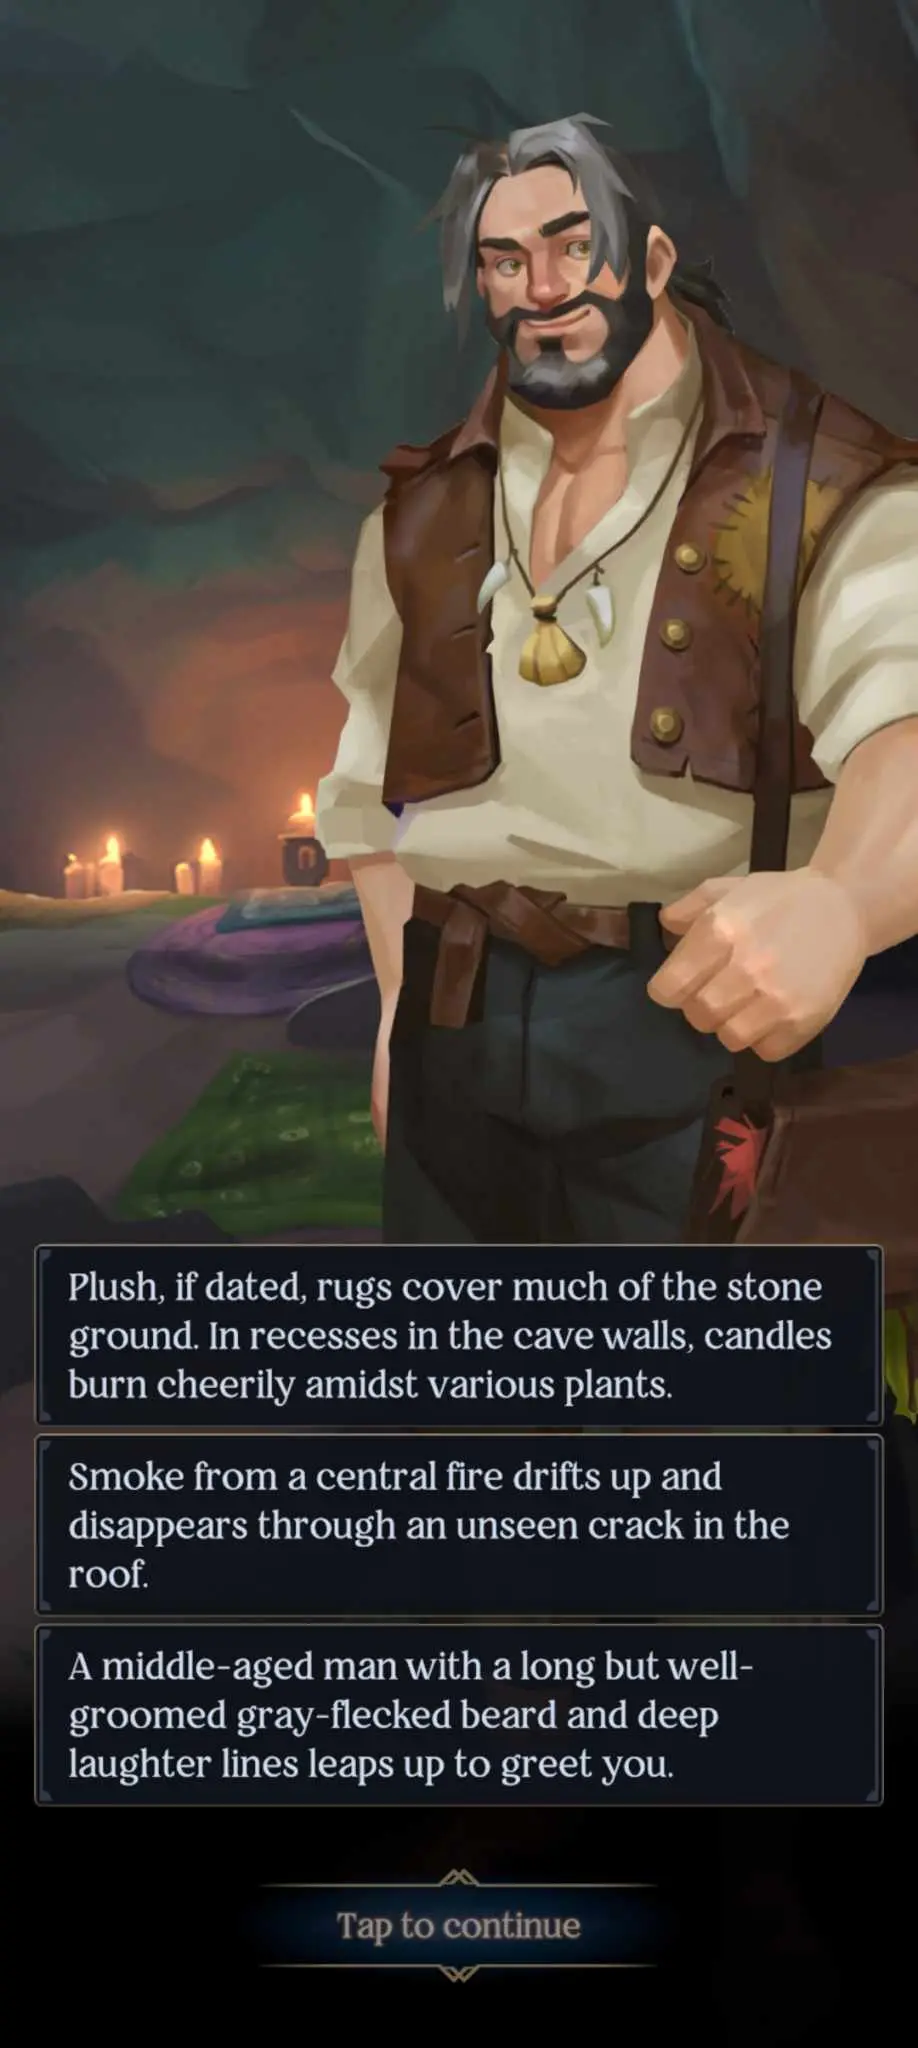
The hermit, Gavriil, may seem a little off, but it’s clear he knows a lot more about you, Tolya, and Tamar than he lets on. However, your secret – whatever it is – is safe with him.
To the point. Gavriil will happily make a vaccine for you if you provide him with some things: the herbs consanol and sanolum, of which we already have one. As for his payment, he’ll request for two things – a replayable toy or board game from Boretsk (which we have) and a dance with Tamar, which you’ll have to convince her to do. Naturally, this will prompt a dancing minigame. After that’s done, hand him the ingredients and payment you have on hand. This just leaves sanolum.
Before we look for sanolum, move east a little bit (to the road if you can see it) then directly north to the last cave. Refer to the map earlier in the guide if you need to. This cave houses some bandits, who you can fight directly or infiltrate by sneaking, which will earn you some coins.
Now for sanolum. As Gavriil mentioned, the herb grows in mountainous regions, so check around the southern peasant camps. Or just look here:
Return to Gavriil and he’ll make the plague vaccine. You and your companions will drink the foul elixir, and Gavriil will give you a little extra that can buy your win into Arkesk. Make your way back to Arkesk and give the captain the vaccine bottle. However, it’s not exactly what the captain is looking for. You’ll need to succeed at a Charm or Mind check or bribe him to finally enter the town.
- First, head to the town hall and ask the clerk if he’s seen a one-armed man. You’ll need to succeed at a Charm or Mind check here. The clerk will reveal that a few days ago, a group of well-armed men had a prisoner with them, though he can’t tell for sure if that’s the man you’re looking for.
- Next, pop into the infirmary. A plague victim will ask If you’re looking for a one-armed man. No matter how the scenario plays out, he’ll reveal that he saw the one-armed man hiding in the abandoned grain store.
- Head to the abandoned grain store and look for clues or ask Tamar to do it. Marat is no longer here, so sniff around here to see if you can decipher where he went. A careful examination (Perception check or asking Tamar to help) will reveal two tufts of fur from clothing. Fjerdan make!
You’ll automatically leave Arkesk and discuss your findings with your lieutenants.
Sturmhond – Mission Improbable
With Marat kidnapped and the Fjerdans responsible, it’s time for some action. After heading east from Arkesk, you’ll run into a First Army patrol. The smart thing to do would be to warn them of potential Fjerdan incursions into Ravkan territory. But something isn’t right – they’re Fjerdans in disguise!
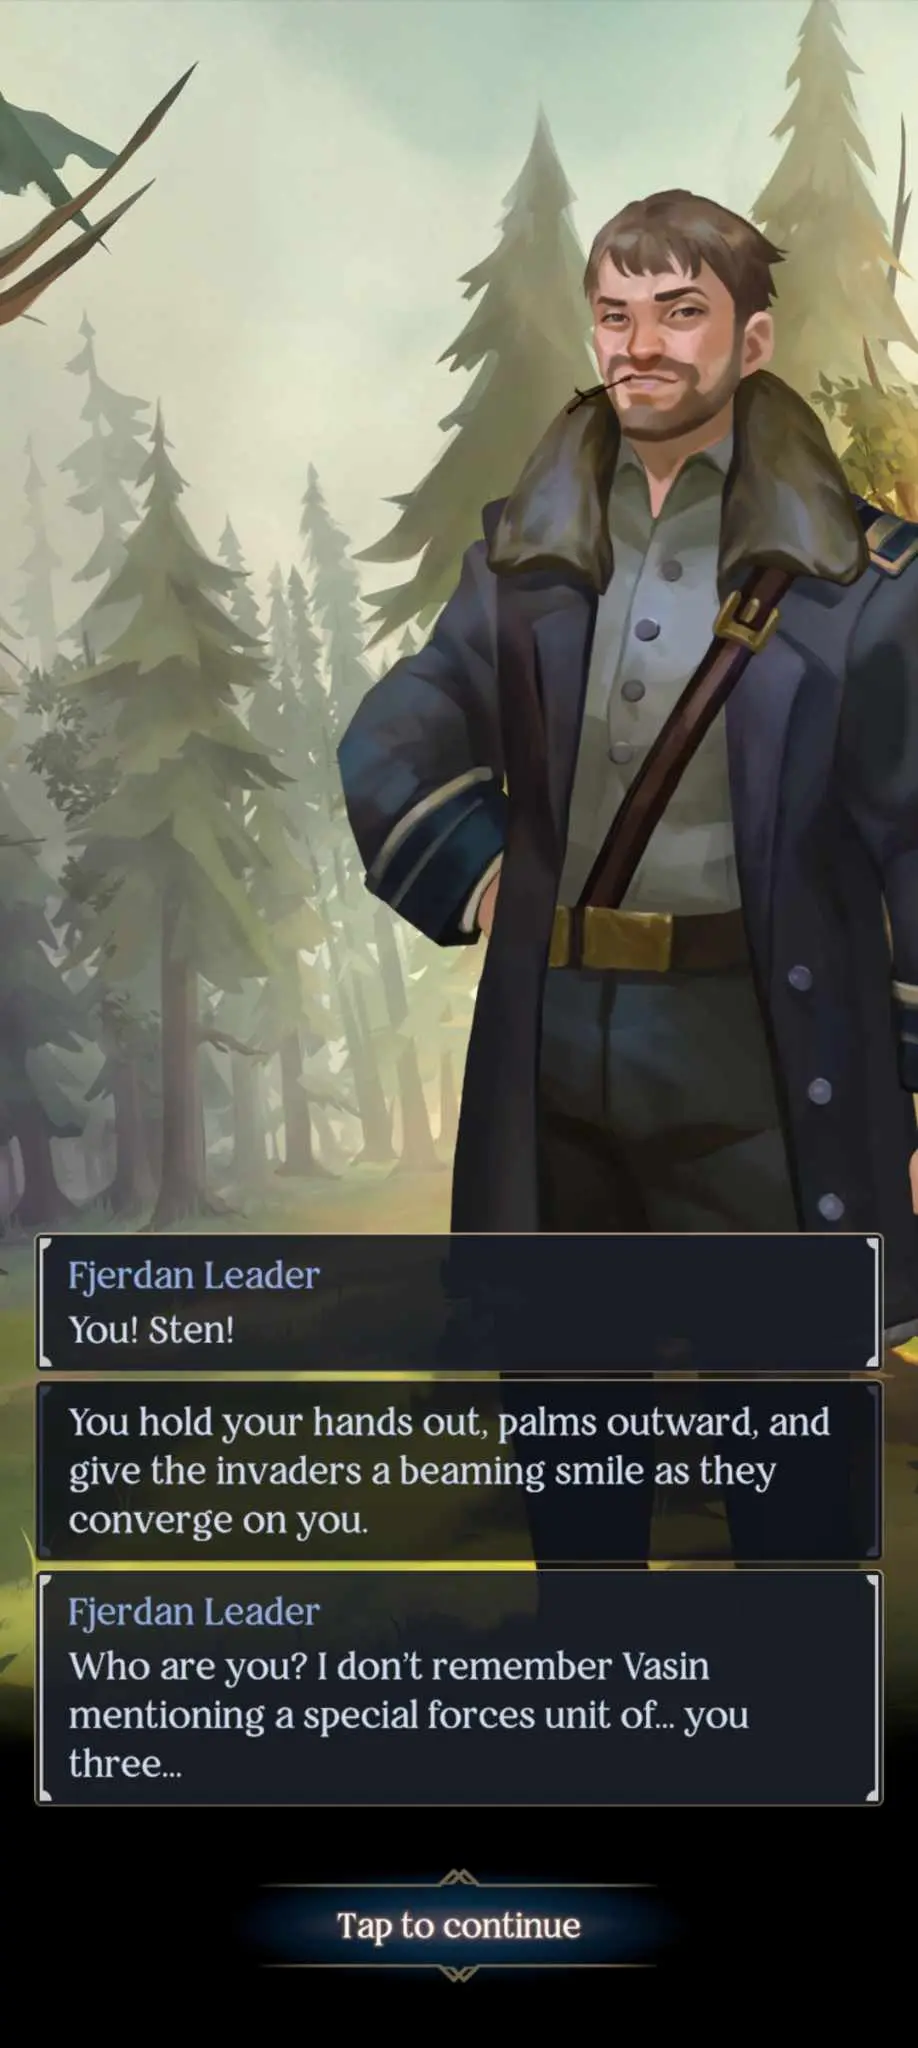
The Fjerdan leader will mention a name – Vasin. You can try to recall it, which will bring back a memory of a Captain Vasin, a cold-blooded First Army officer. Deal with the patrol as you see fit; there are both violent and non-violent means of resolving the standoff.
This doesn’t answer the question of why a group of Fjerdans – armed Fjerdans, no less – are patrolling not just beyond their border but deep in Ravkan territory. Whatever the case, you need to act fast. And whoever Vasin is, he must be involved in this plot somehow.
Side Quests
- Deal with the deserter.
You’ll need to push towards Izolirev Base and report to the First Army. Fortunately, it’s nearby. All you need to do is follow the cobblestone road to the east.
You’ll need to convince the sergeant of your intentions before he’ll let you in, though Sturmhond will note that he seems quite weak-willed. Soon enough, he’ll open the gate for you even if you fail the skill checks. You get one guess as to who the base commander is.
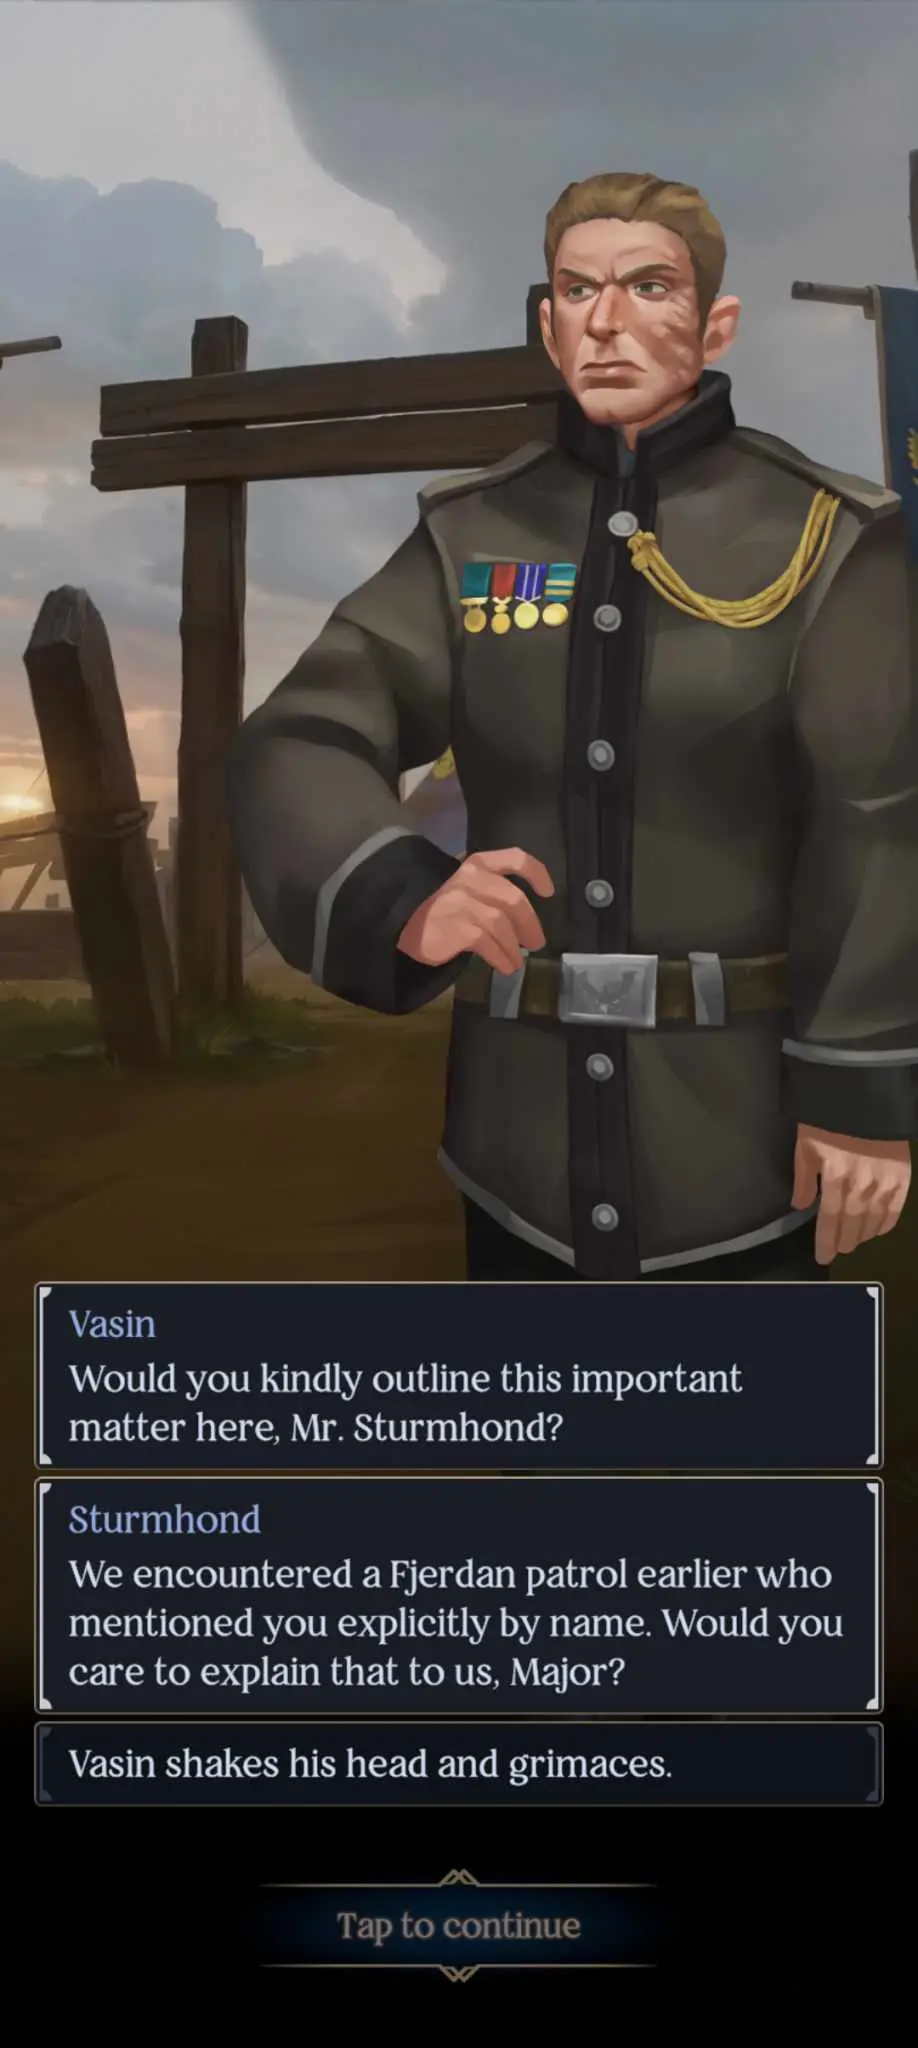
Vasin will listen to you, but he’ll deny entry to the base. You can mention that the Fjerdans mentioned his name, but of course, he’ll say he knows nothing. You can also bring up Marat, but Vasin will say that nothing can be done about his abduction.
Curiouser and curiouser.
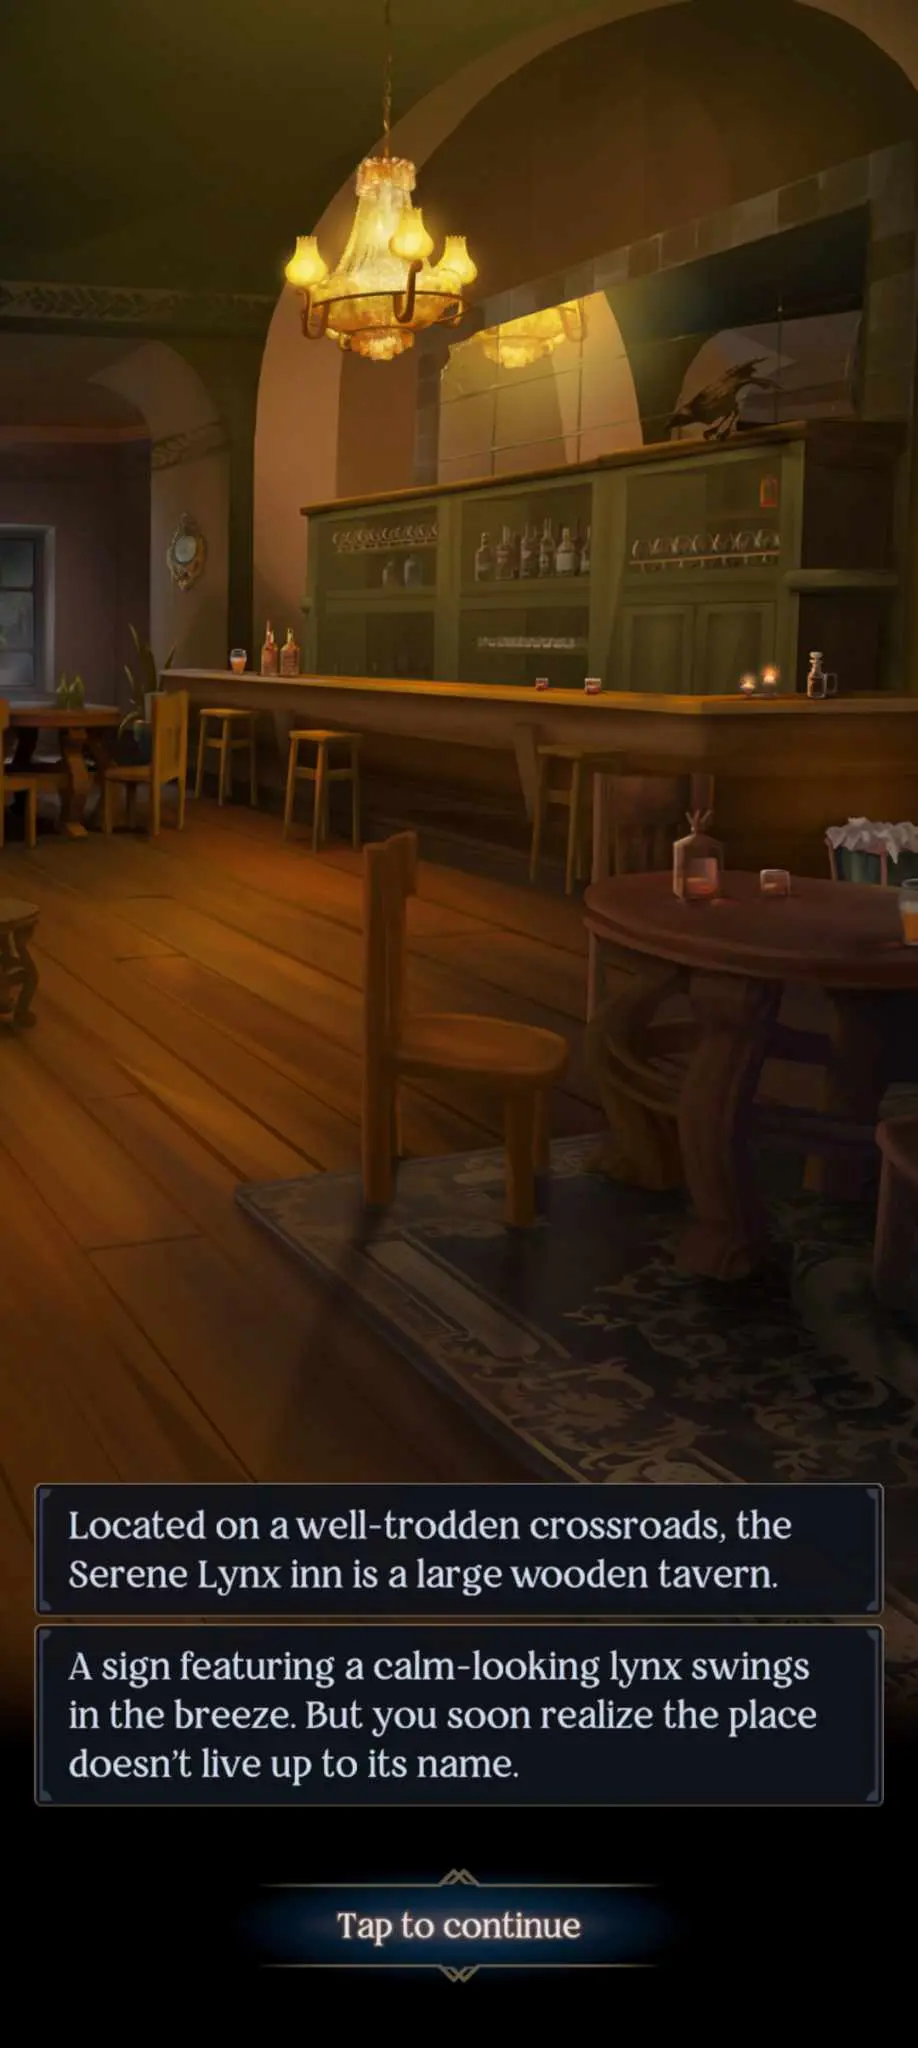
As Vasin won’t help, you’ll need to gather intelligence on your own. Head east from Izolirev and try to cross the bridge. Speak to the lieutenant to discover that she’s been left with a skeleton crew and that one of her men deserted and is now holed up in a ruined village to the southeast. Offer to deal with him, then return to Izolirev and take the road south. Once you can turn east (there’ll be some wooden fences) do so. You’ll end up at the Serene Lynx Inn.
- Head to the bar. Buy some ale from the innkeeper first as we’ll want it later. You can also ask her for information, though some soldiers will start giving her looks and she’ll say that nothing is going on. She will, however, write something on a piece of paper that you “misplaced”, and she’ll give it back to you when you leave.
- The note reads “Sergeant in Corner is thirsty, but the Cellar is dry”. Decipher it yourself or with Tolya’s help.
- Go back inside and head to the corner table. You can offer him the drink you bought earlier; one drink means one piece of information. He’ll say that Vasin puts a sour taste in his mouth, but he does respect Vasin’s conviction, and that while he doesn’t know anything about a kidnapping done by Fjerdans, he’ll say that a one-armed man was dragged into Izolirev a few days ago while he was on duty. Press him on the matter and he’ll mention that the one-armed man is still being interrogated in the base.
Finally, head down to the cellar to speak to the innkeeper. You’ll need to tell her your mission before she’ll offer you any information. Once you tell her your plan to infiltrate Izolirev, free Marat, and expose Vasin’s treachery for allying with the Fjerdans and letting them do as they please to Ravkan citizens, she’ll mention that her nephew om Simulsk village may have a way to get you. She’ll give you a copper coin that you need to show him.
Head south from the Serene Lynx, then turn left once the road ends to reach Simulsk.
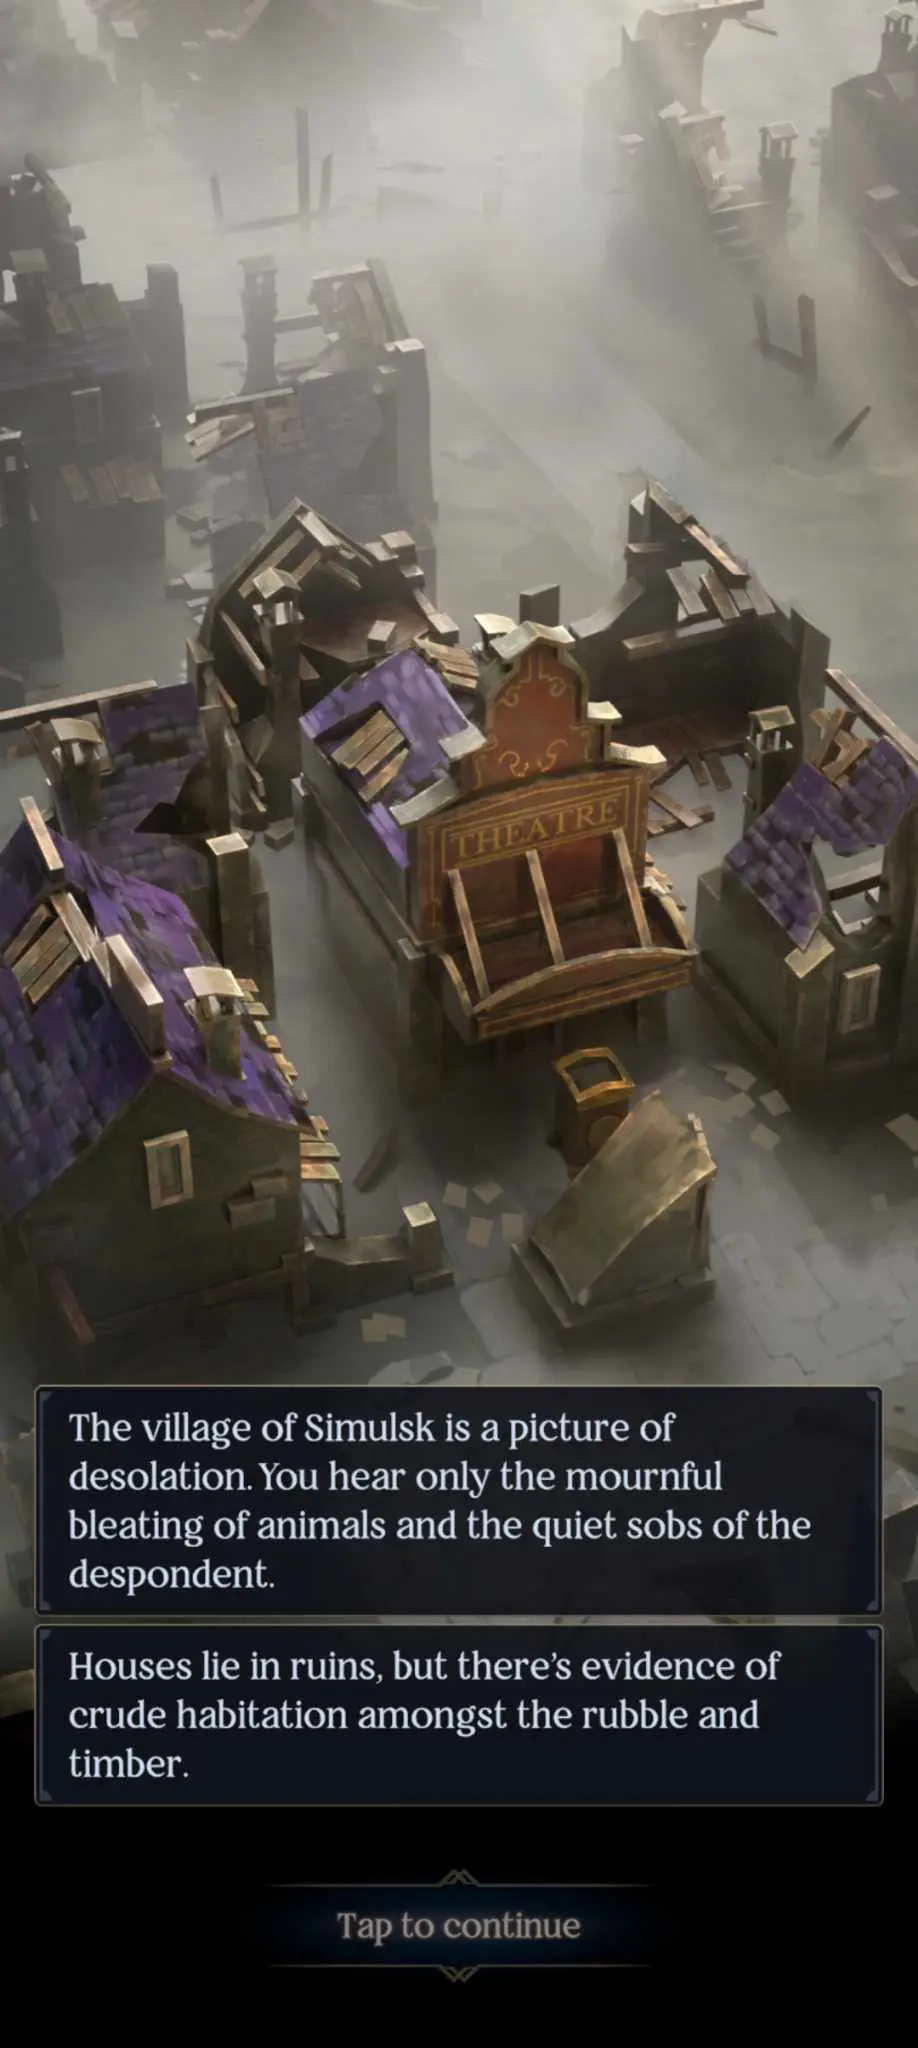
Visit the theater and show Rostislav the coin that the innkeeper gave you. Before you can talk, however, you’ll hear footsteps. Seems somebody sent Fjerdans after you. Deal with them and escape to the tunnels beneath the theater to continue your talk with Rostislav. Rostislav will agree to help you – no matter how small the chance – but (of course) you’ll need to do something for him. Destroy the Fjerdan encampment in the area and burn it to the ground to put an end to the looting and raiding. Rostislav will give you materials to burn the camp. As soon as he sees smoke, he’ll march on Izolirev.
We’re done here. Follow the road south but this time keep heading east to run into the desolated village inhabited by the First Army deserter.
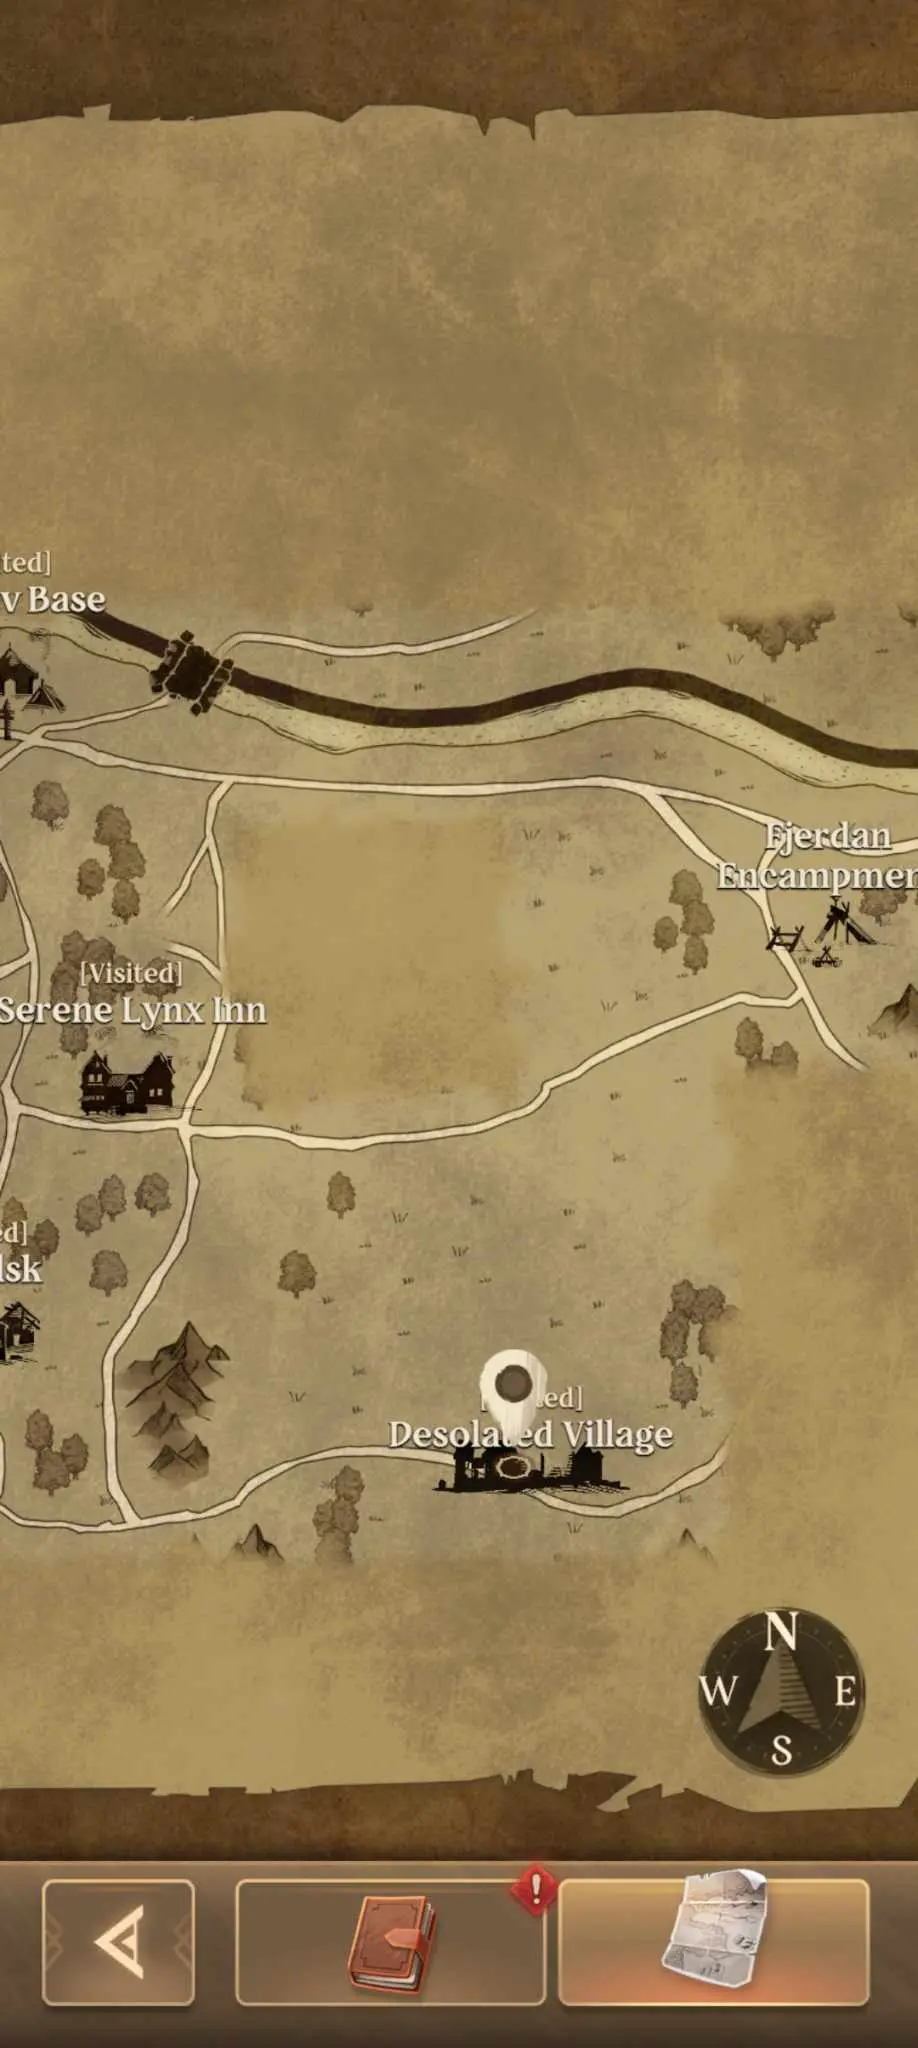
Deal with him as you see fit – I put him down. At least he won’t be a threat to anyone anymore. Once you’re done, continue traveling on the eastern road. It’ll swerve upwards and into the Fjerdan Encampment but watch out for the bear!
You’ll be drawn into an automatic Dodge check here and will need to pass a sneaking minigame to get the best results. Once you’re in, head to the munitions store and either sneak into the armory or fight the guards.
Once you’re in, you can opt to steal the explosives for your own use in making a distraction to enter Izolirev or fulfill your promise by razing the base. I chose to blow it all up. Note that if you choose to burn the place to the ground, you’ll need to visit the barracks and burn it down as well. This will also pull you into a ranged combat and escape minigame.
Leave the camp and head back to Izolirev by going north and following the west cobblestone road. It’s time to end this.
Rostislav will keep his word, and the angry mob of Simulsk commoners will help you get to the walls of Izolirev undetected. His contact will throw down a rope to let you in, though she will warn you that you’ll need to make your own way out.

Despite the mayhem at the gates, there are still some patrollers. You’ll be drawn into a sneaking minigame. Failure means you’ll need to deal with the soldier who spotted you.
Either way, once you’re in, get to the brig. You’ll need to succeed either a Mind or Charm check to get the brig guards to move or just shoot them. Take the key from them and you’ll open the cells one by one, and at the very end…
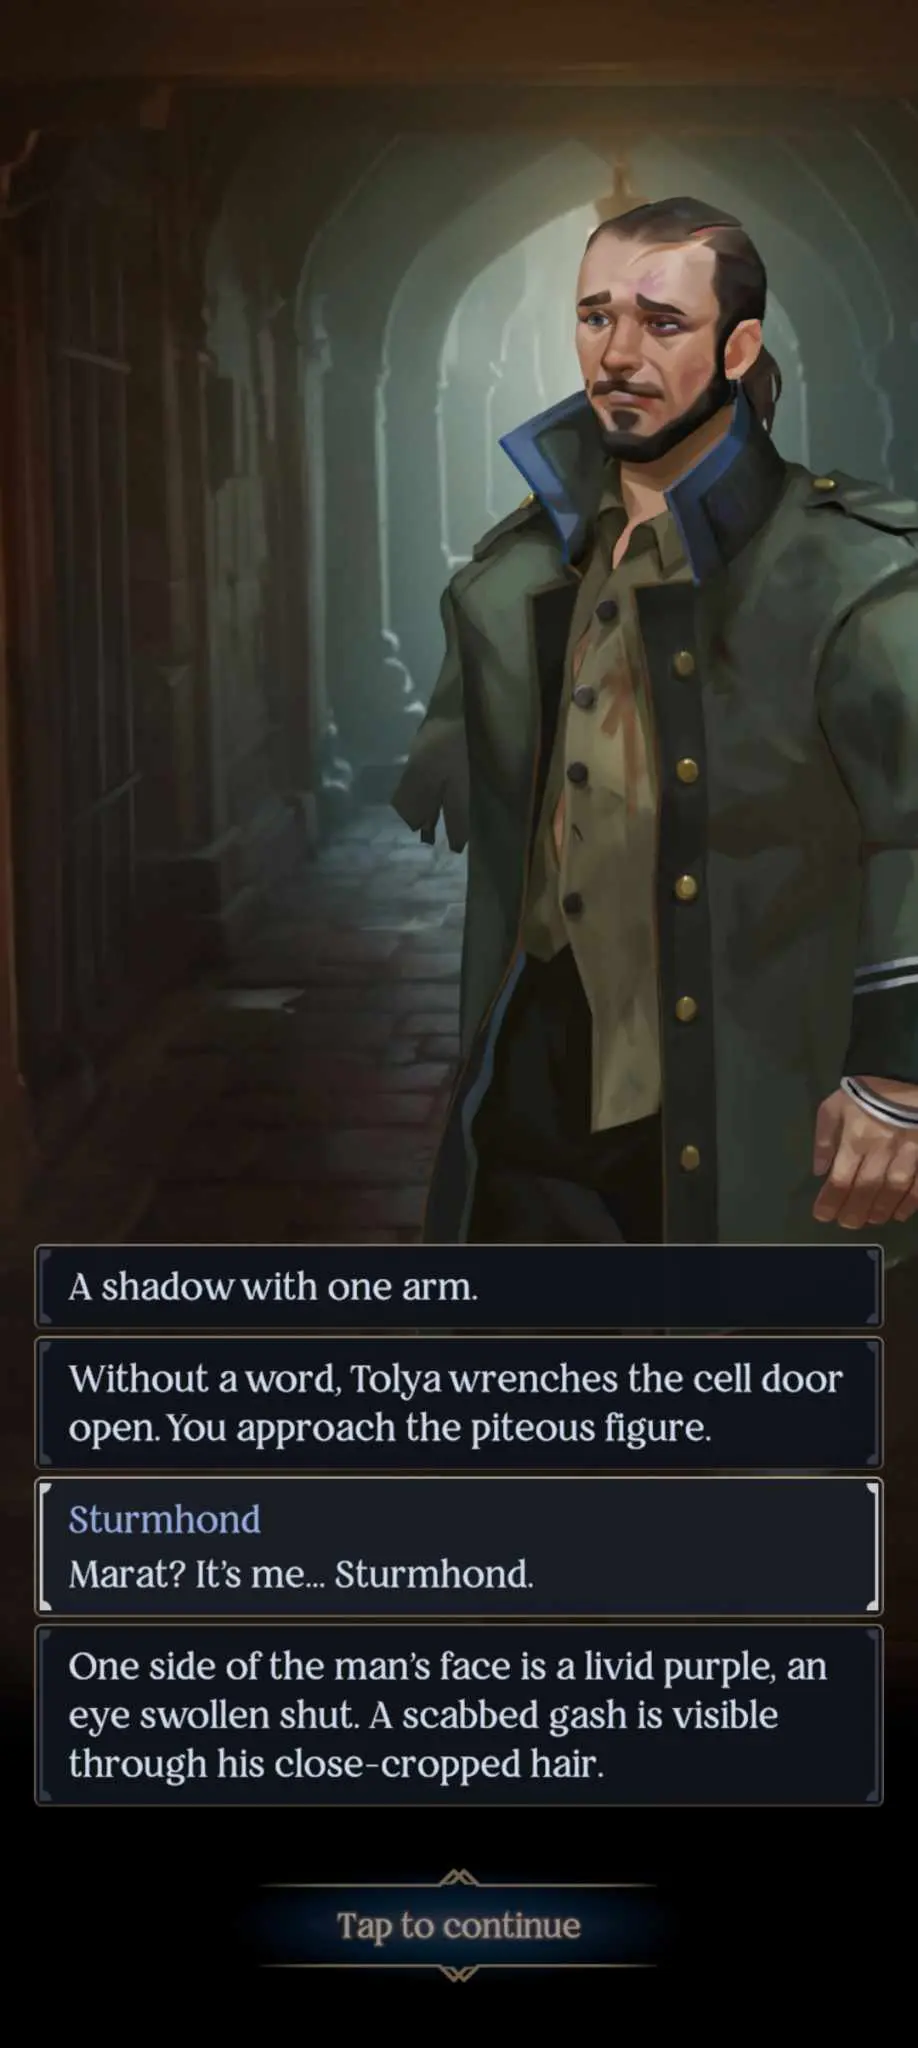
Of course, this isn’t the end. Marat will not only urge you to escape, but to put an end to Vasin’s treachery with an explosion. This time, head to the munitions depot, where he’ll reveal a homemade sticky bomb (if you didn’t steal any explosives from the Fjerdans) to use for the task. Marat will be detected by the guards, and you’ll have to cover him via a ranged combat minigame.
As the explosion rocks the camp and Vasin’s men scatter, a scarred figure lurches out of the smoke…
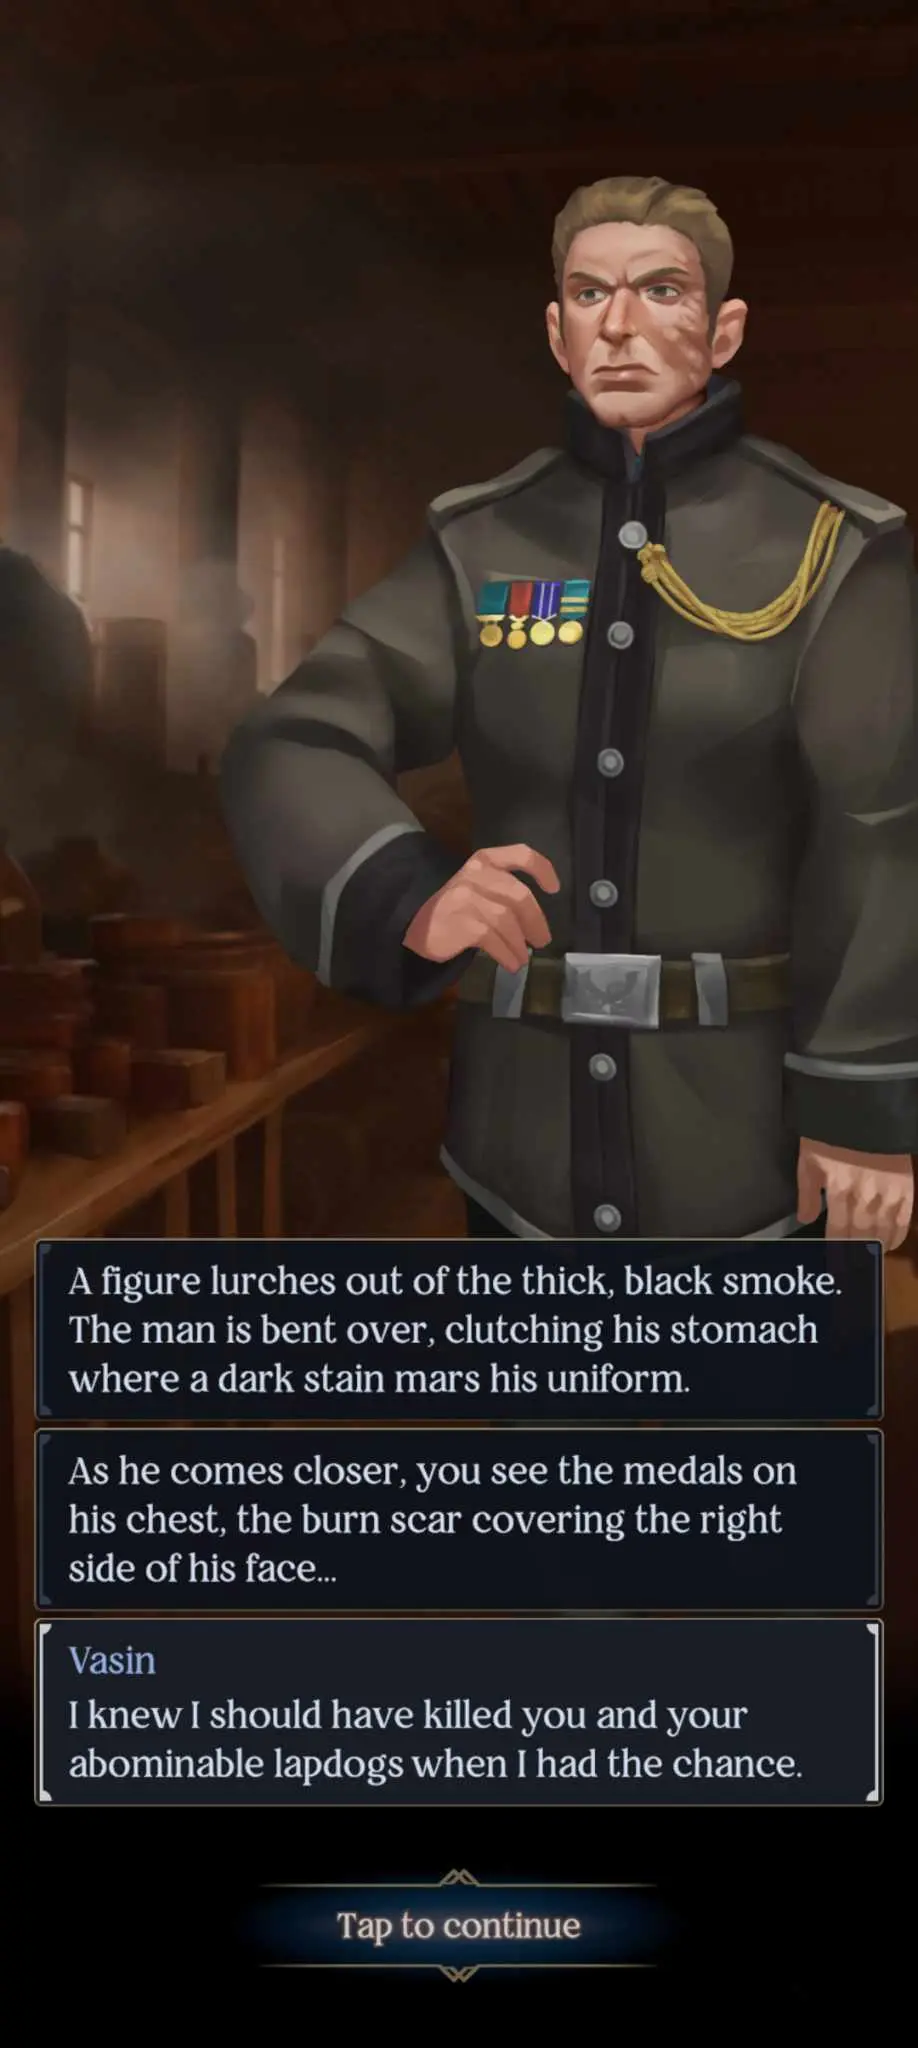
Your call as to how to deal with Vasin’s traitorous plan to exterminate the Grisha. Note that he’ll be defiant to the end and will attempt a last attack on you. I chose to chase him, knock him out, and let him die with his dream.
Now, with your friend back in hand and your debt repaid, it’s time to leave land and set sail again, for the next time that Sturmhond walks the land of Ravka, it will be for a particular purpose.
But until then, the seas await!
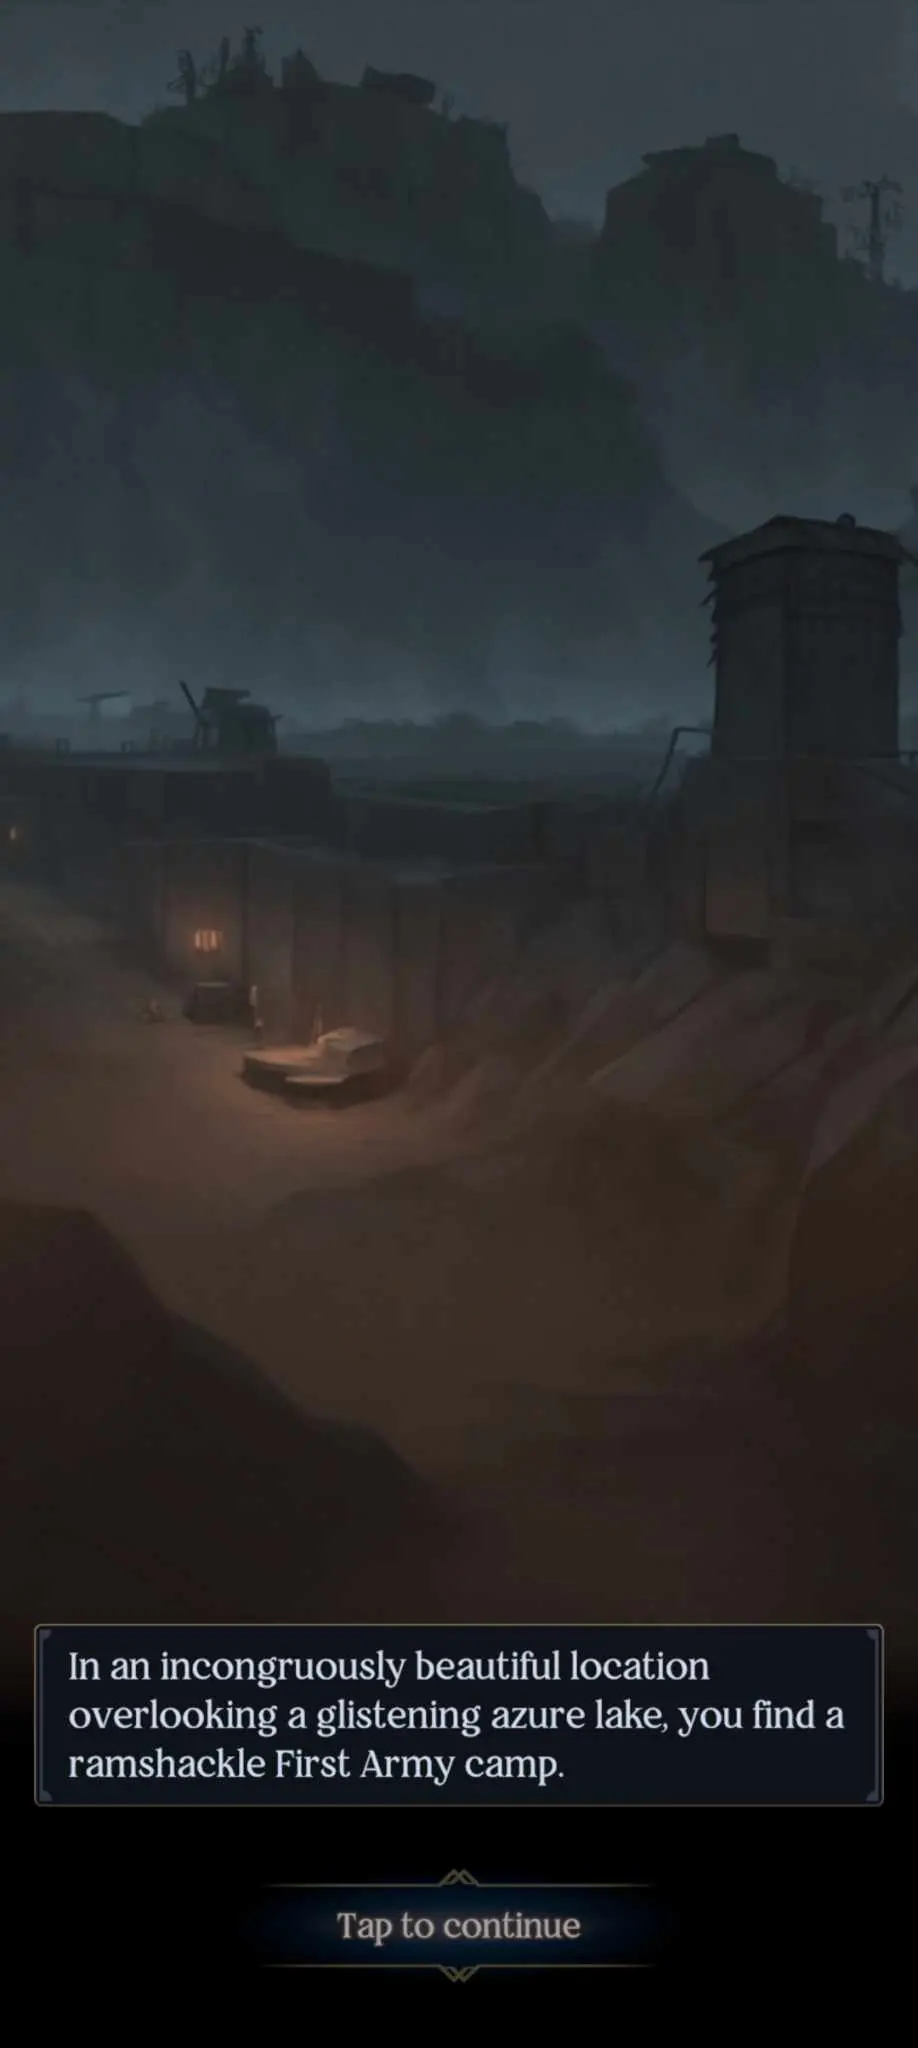
Aleksander Kirigan – Moi Soverenyi
When last we left the general, he was traveling north to Adena with Uwesi, a Grisha Squaller, in tow. Now that we know that most of the world despise the Grisha (and this is despite their powers), we now have a clearer view of who Kirigan is and what he wants to do.
Side Quests:
- Find the Fabrikator to help break the barricade.
Before we begin this chapter, note that there’s a lot of fighting involved, which usually takes place via Small Science or ranged combat minigames. Keep an eye on your health and rest up at your camp before any big encounter.
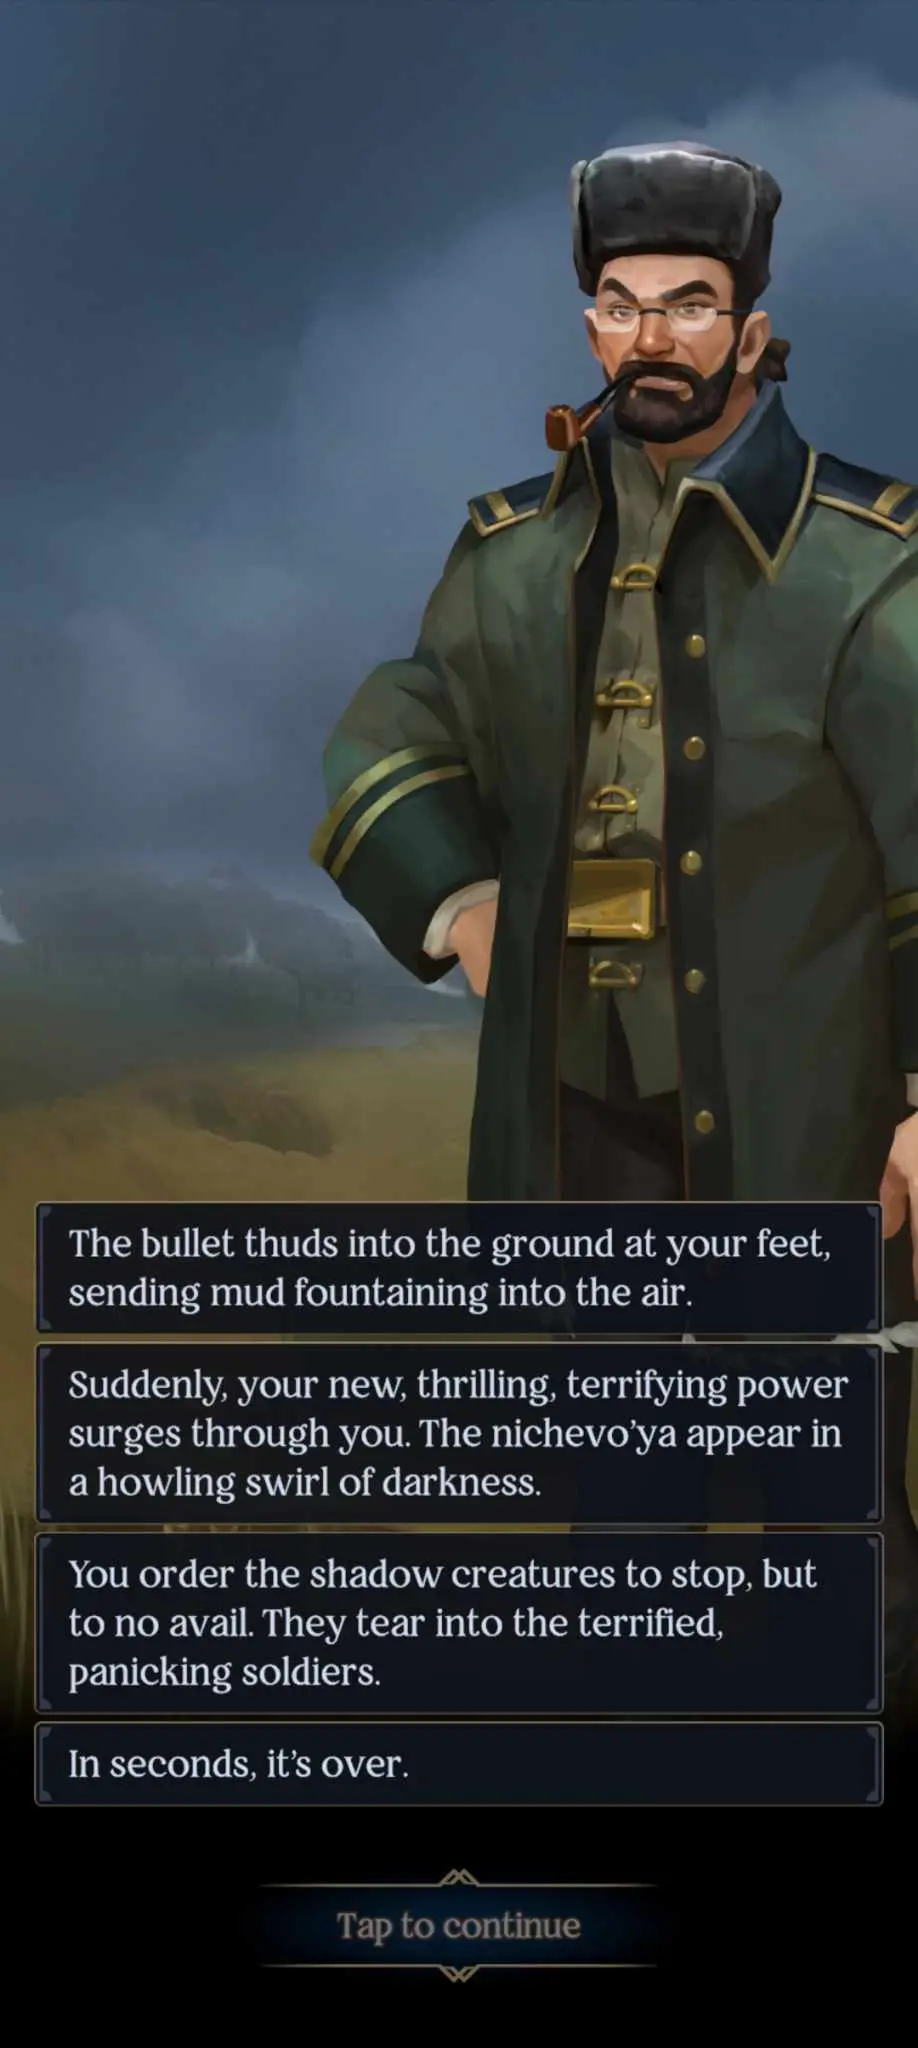
The chapter begins with Kirigan and Uwesi being spotted by a First Army patrol. Kirigan’s name precedes him, and you can show mercy by attempting a Mind or Charm check, or just killing the patrollers. The sergeant will mention that they’ve been arresting and moving Grisha to a camp – it’s located south of Adena, across the river.
Even if you choose to spare the shoulders, one of them will accidentally discharge his rifle, almost hitting you in the process. Infuriated by the attack, you’ll summon nichevo’ya (humanoid shadow creatures created through merzost, a corrupted form of Small Science), and while you’ll order them to stand down, and in a few seconds, nothing is left of the patrol.
Your injuries grow worse over time, and you’ll need to seek a person named Genya to help you.
First, head eastward to find a cave. You can use a Force or Perception check to move the suspicious boulders in the cave – remember, we need to build up our stats again. Note that failing the Force check will lock you out of the cave.
Move south from the cave to find a bear with its foot caught in a trap. Free it with a Force check to get an experience point.
You’ll notice a cobblestone road below you. Follow the southeastern road; when it forks, just stick to the road (it’ll eventually move downward) to Adena. Make sure to run into the encounters in the way to get some skill checks and/or loot. The road will eventually move southwest to Adena.
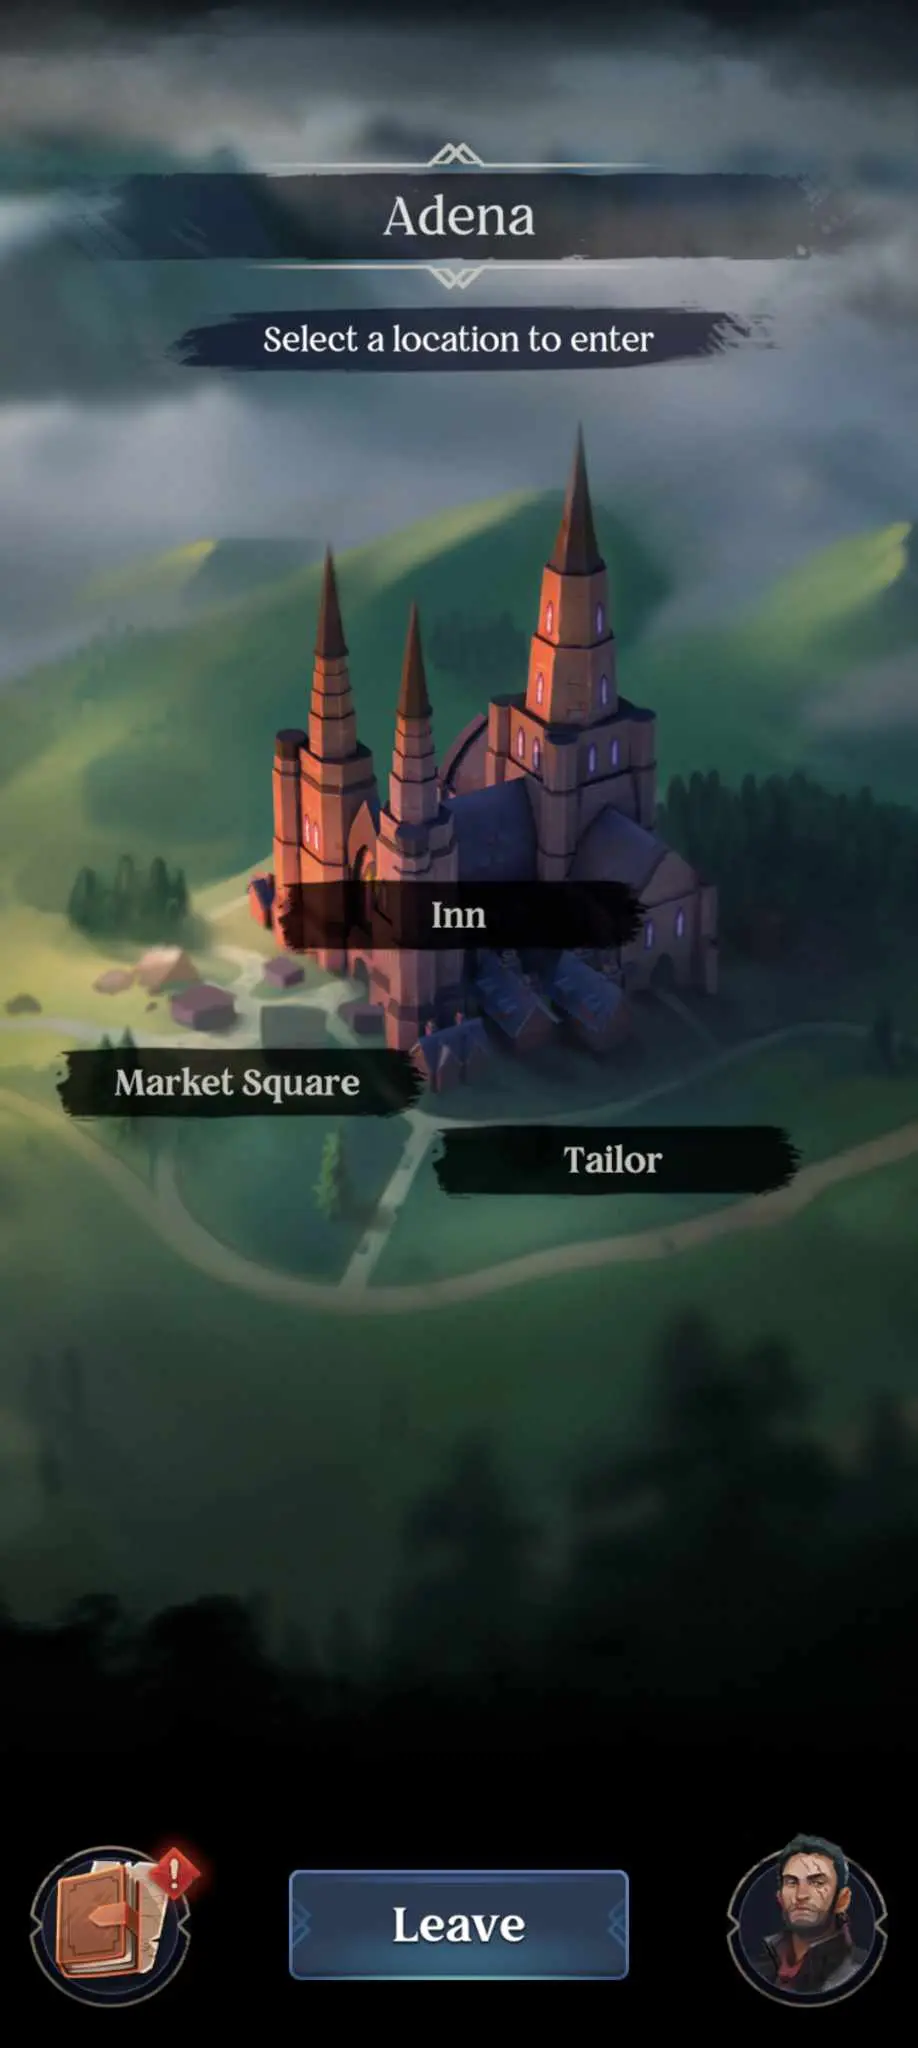
- Head to the inn first. Uwesi will have procured rooms for the both of you, but before you rest, you’ll notice a look of concern in her eyes that has nothing to do with your situation. A Perception check will reveal a little more but won’t start a side quest. Soon after you rest, assassins will try to enter your room, forcing you into a Small Science minigame and then a close combat minigame. Deal with Uwesi as you see fit; there are lots of Small Science minigames here if you choose to power through. Either way, you’ll lose her as a party member.
- The Market Square has a merchant who’ll sell you potions and supplies.
- Finally, head to the tailor and get a cloak to conceal your wounds – it’ll come in handy when freeing your Grisha. It’ll set you back 10 coins, though you can pass a Mind or Charm check to attempt to lower the price. Note that even if you fail the Charm check, you’ll get a discount of 3 coins.
We’re done here. Head south from Adena and approach the man to get a skill check in. Cross the bridge and head east, where you’ll see the Hillock and Prison Camp points of interest. First, go to the Hillock and attempt to survey the camp. Once you’re ready (be sure to camp and heal up if you lost HP from any encounters), prepare to assault the camp, and liberate your Grisha.
Thanks to your cloak, you’ll be able to get near enough to the guards before they open fire. You’ll be drawn into a Small Science and ranged combat minigame, after which there’ll be no one left to stop you.
- First, go to the officer’s tent and either pass the Perception check or interrogate him to find the First Army’s orders. They’re to move the prisoners to cages near Kribirsk as soon as the Zemeni Squaller – Uwesi – arrives. At least we know where to go.
- Now head to the prison tent to free the Grisha. Unfortunately, Genya isn’t among them. Free them and give them a speech to rouse their spirits. No matter what you do, there will be one among them that argues that civil war isn’t the only option you have left.
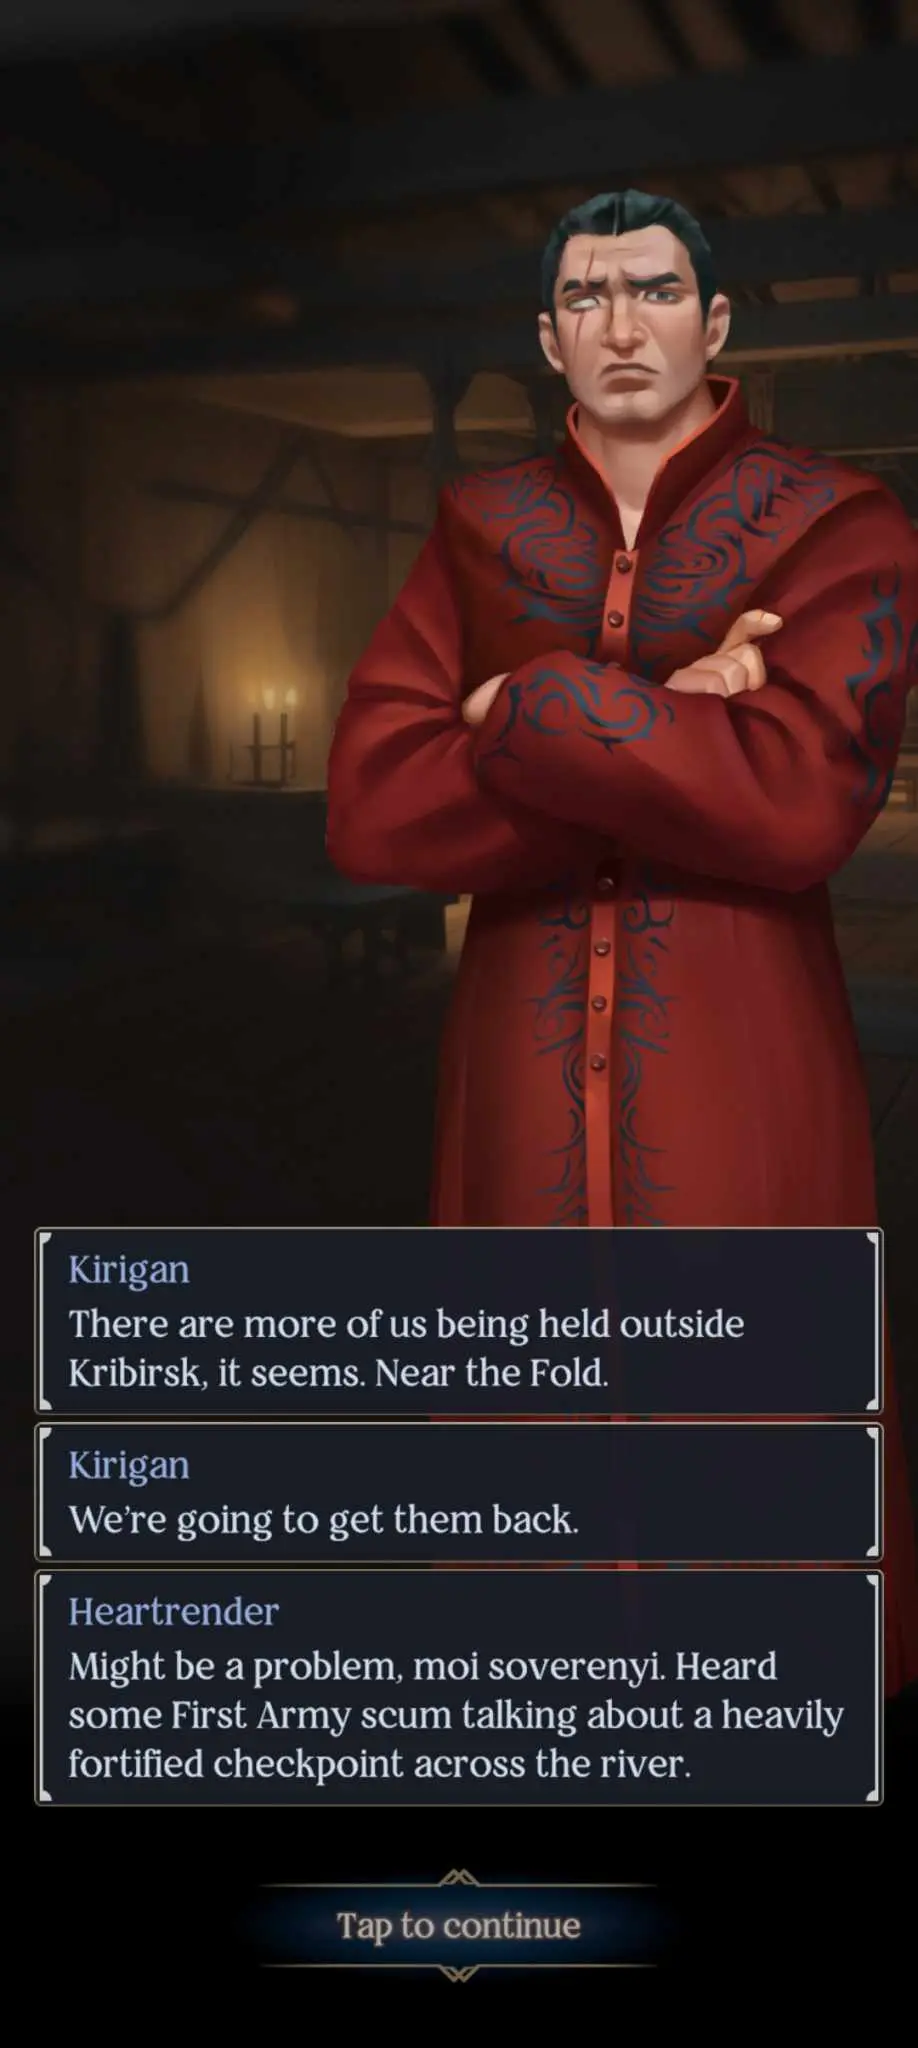
A helpful Heartrender will tell you that he overheard that the First Army is constructing a massive fortification, which they say that “not even the Darkling can break through.” A challenge, then. He’ll also mention a Fabrikator – an Alkemi – who might be able to craft something to help you.
We’re done here. Head back up the path to where we crossed the bridge from Adena, but this time, follow the western road. Ignore the west path to the First Army patrol for now; instead, head south and keep following the path. You’ll cross a wooden bridge and find the Forest Clearing.
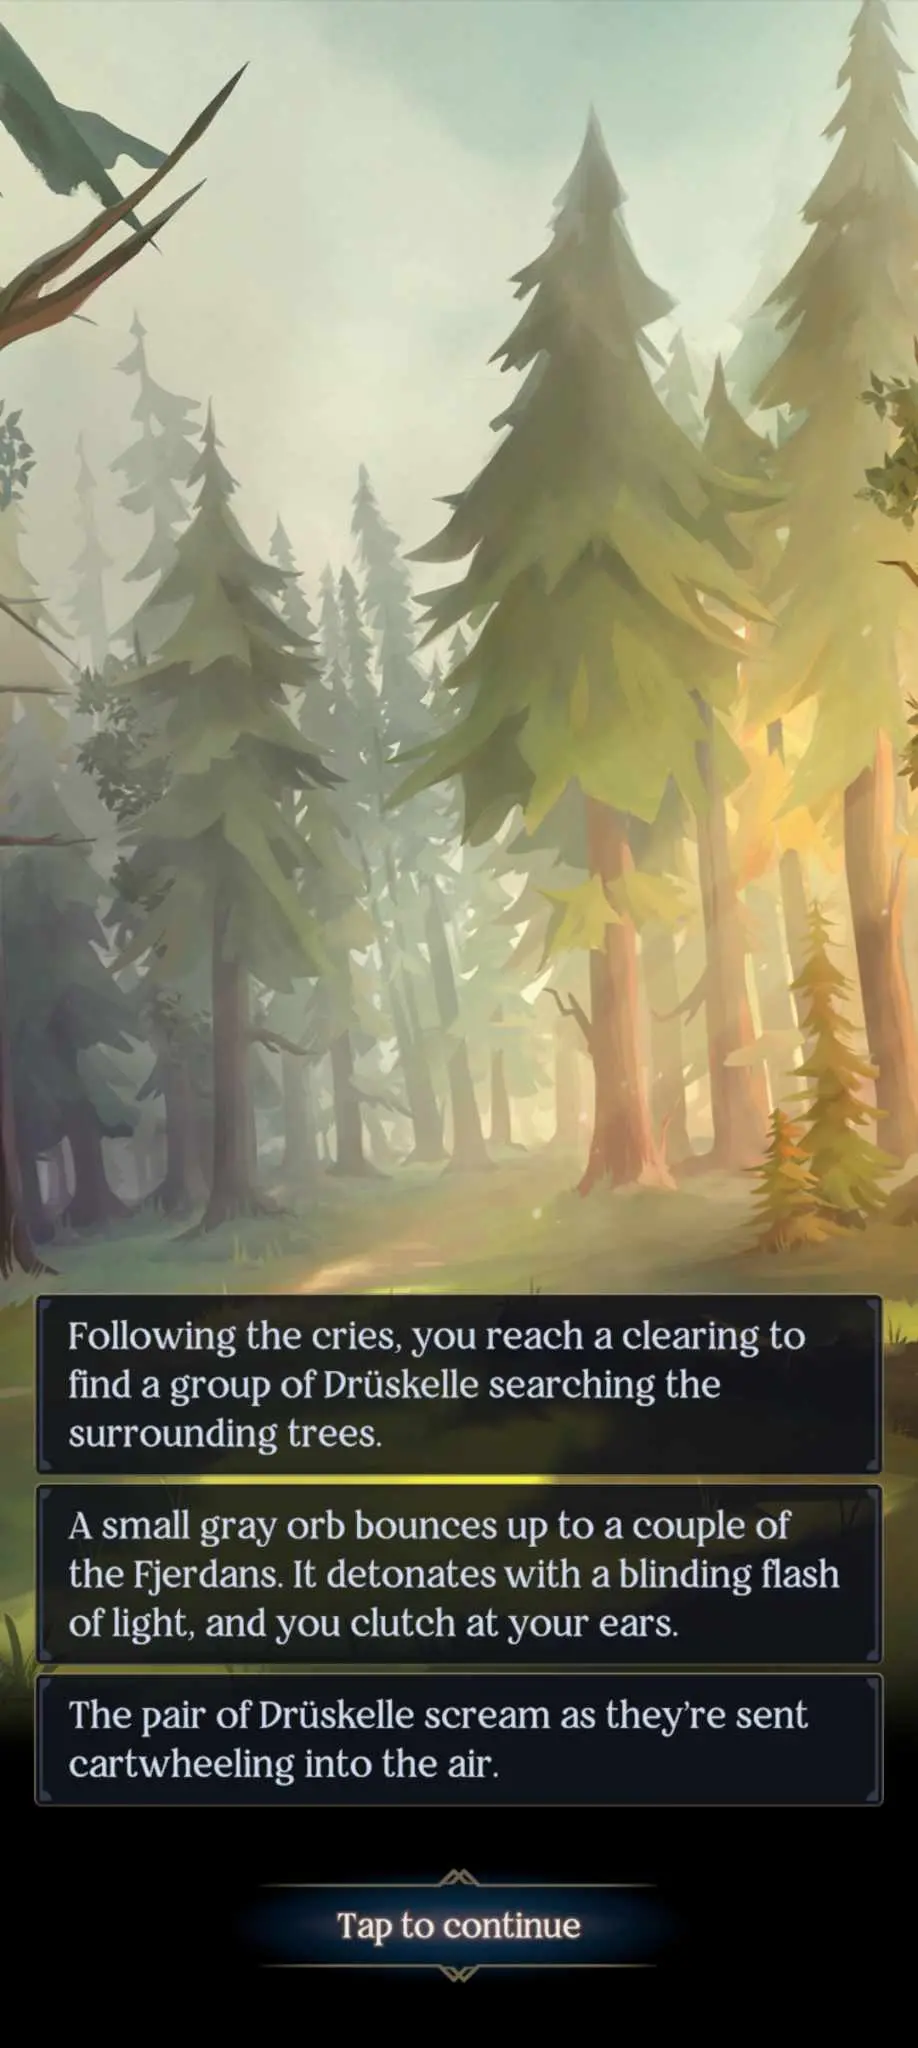
You’ll need to stop the Drüskelle from attacking the Alkemi. Note that failing here leads to the Alkemi’s death. Save him, and he’ll give you some of his bombs and will meet you at the bridge.
It’s time to end this. Once you’ve rested up (I suggest going in at full health), go back the way you came, but this time, walk left at the first intersection and attempt to cross the bridge. The rescued Grisha will be lying in wait nearby. Give them your orders and get ready for a fight – which means yet another Small Science and ranged combat minigame. Note that failure will cause you to lose health. Break through the barricades and push to Kribirsk (this is done automatically) and you’ll free Genya.
That will end the chapter!
The End, For Now
What’s next for our cast of characters? We won’t know until the next update.

Until then though, keep your wits about you and your spirits high, and I’ll see you again once a new update drops for Shadow and Bone: Enter the Fold!