Welcome, travelers, to the world of Shadow and Bone. In this dark, mysterious world of magic, treachery, deceit, and untold power, we’ll follow the tales of four heroes – Aleksander Kirigan, Alina Starkov, Jesper Fahey, and Sturmhond – as they journey through the shattered lands, each on a personal quest.
In this Shadow and Bone: Enter the Fold walkthrough, I’ll guide you through clearing each chapter in as much detail as possible. Note that there are some limitations to this – as the game has no skip function, it can be difficult to assess exactly what success or failure affects, especially in the later game.
This first walkthrough will cover General Kirigan’s prologue, as well as Alina Starkov’s first three chapters: Rude Awakening, That Which Was Lost, and No Time To Linger.
A few pointers before we dive in:
- You do not have to stop for the night if you don’t want to. If you don’t need to recover HP or hunt/forage for food, you can keep moving during the night.
- Supply problems are easily resolved by investing in either Perception or Force, with Force being the better choice. This lets you forage or hunt when you camp, which grants some supplies.
- The game is only over if you run out of health. Supplies are important for managing your health. If a new day dawns and you have no supplies to consume, you’ll take damage instead.
- Succeeding in skill checks gives you experience points. Gathering three experience points will allow you to add 1 point to one of your stats, so I strongly suggest attempting as many skill checks as possible.
Aleksander Kirigan – The Prologue
The first chapter in the game is a prologue that follows General Aleksander Kirigan as he attempts to recover his strength. This chapter will teach you the basic game mechanics and set the stage for a future story.

You’ll awaken to find yourself alone. Head upwards, along the path to the guy with the cart. The choices here aren’t consequential and serve as further information on the world of Shadow and Bone. The conversation will end with Kirigan deciding to continue along the road and heading to the farmstead.
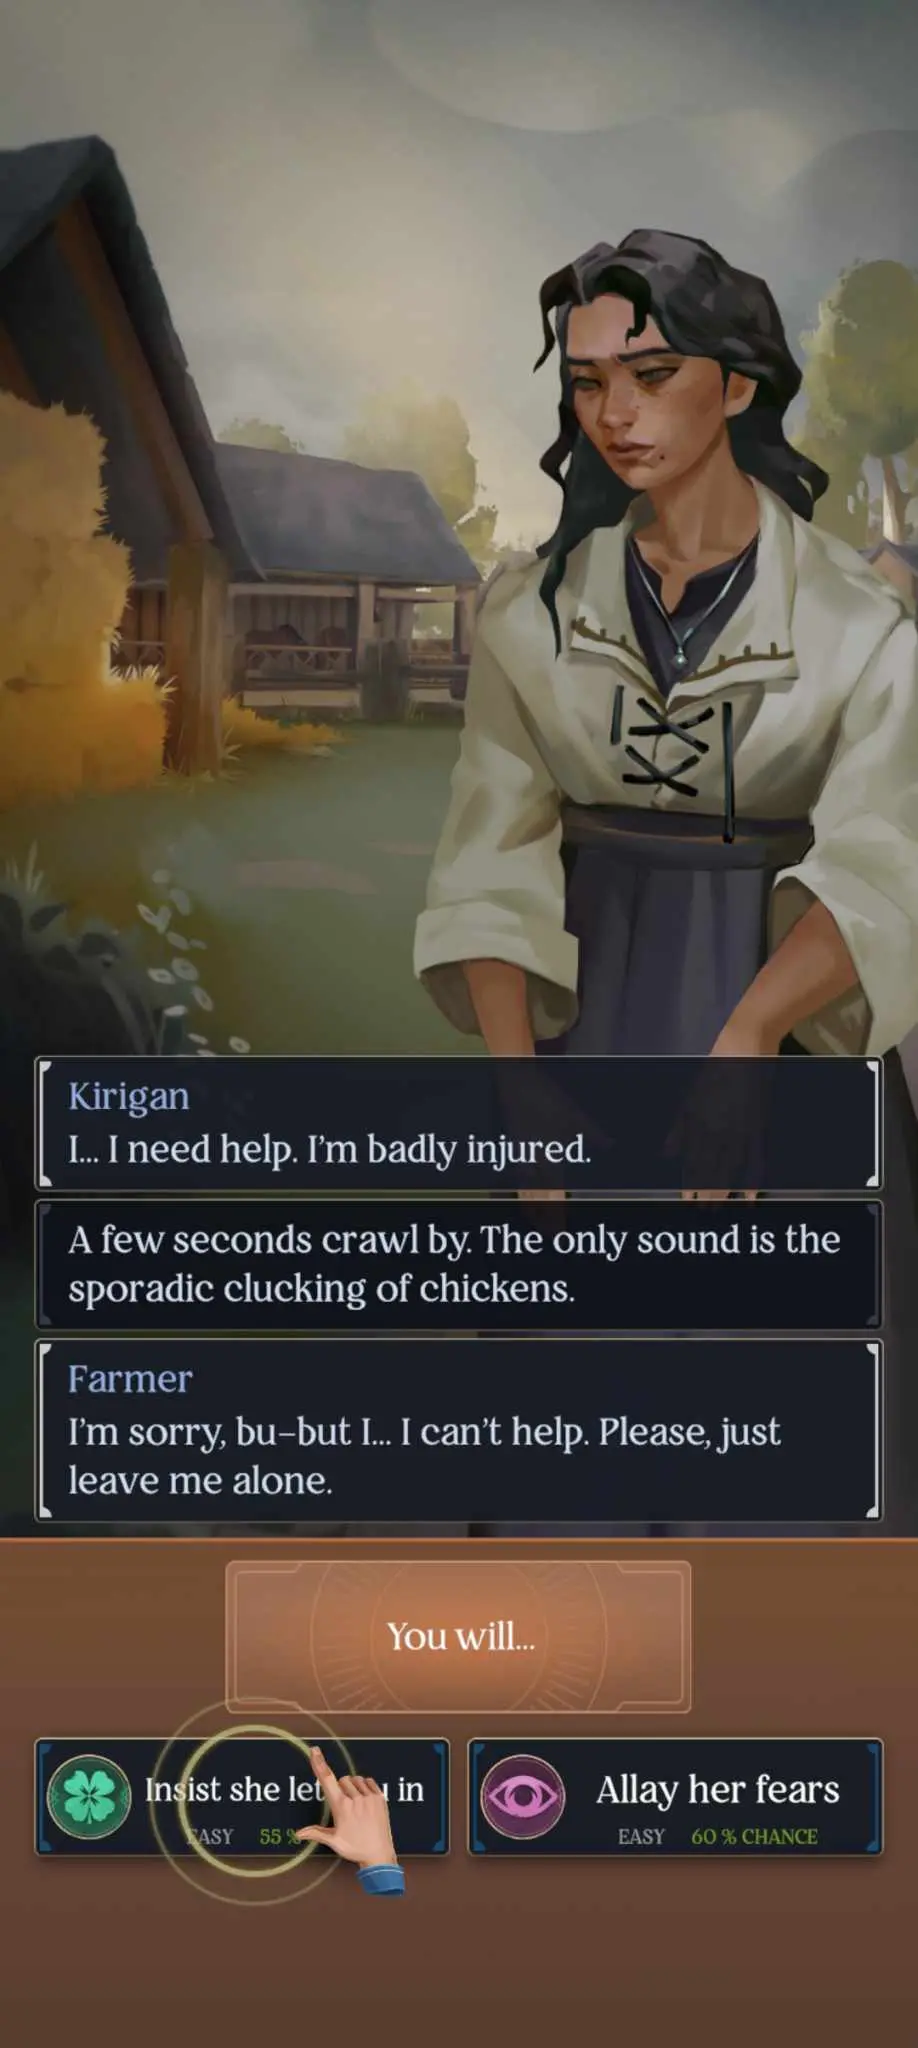
At the farmstead, Kirigan will ask for help from the farmer, though she’ll be unwilling to do so. You’ll need to convince her via one of the game’s many skill checks – be sure to pick whichever choice uses your strongest stats. This will also introduce you to the game’s attribute growth system, which encourages you to take risks and attempt skill checks as you’ll gain experience and thus, more stat points.
Continue talking to the farmer to receive a health potion (which you can either ask for or demand). You’ll discover more about her husband and recent First Army raiders that have made camp nearby.
This will also teach you about the three basic resources you’ll need in Shadow and Bone: Enter the Fold: coins, supplies, and health. Coins are used to buy and pay for things, supplies are consumed daily (and starvation causes health damage), and health needs to be kept above zero unless you want a quick and inglorious end.
Continue along the path to the old ruins. You’ll be introduced to the camp system here. Once you’ve rested up (hopefully, because I foraged for food and got nothing) continue up the road to the Ruins, where Kirigan will try to use his powers…and fail. You’ll need to improvise by attacking them instead, and this will bring you to your first minigame. Note that from here on out, any dialogue check that has no listed success rate but has an icon is a minigame!
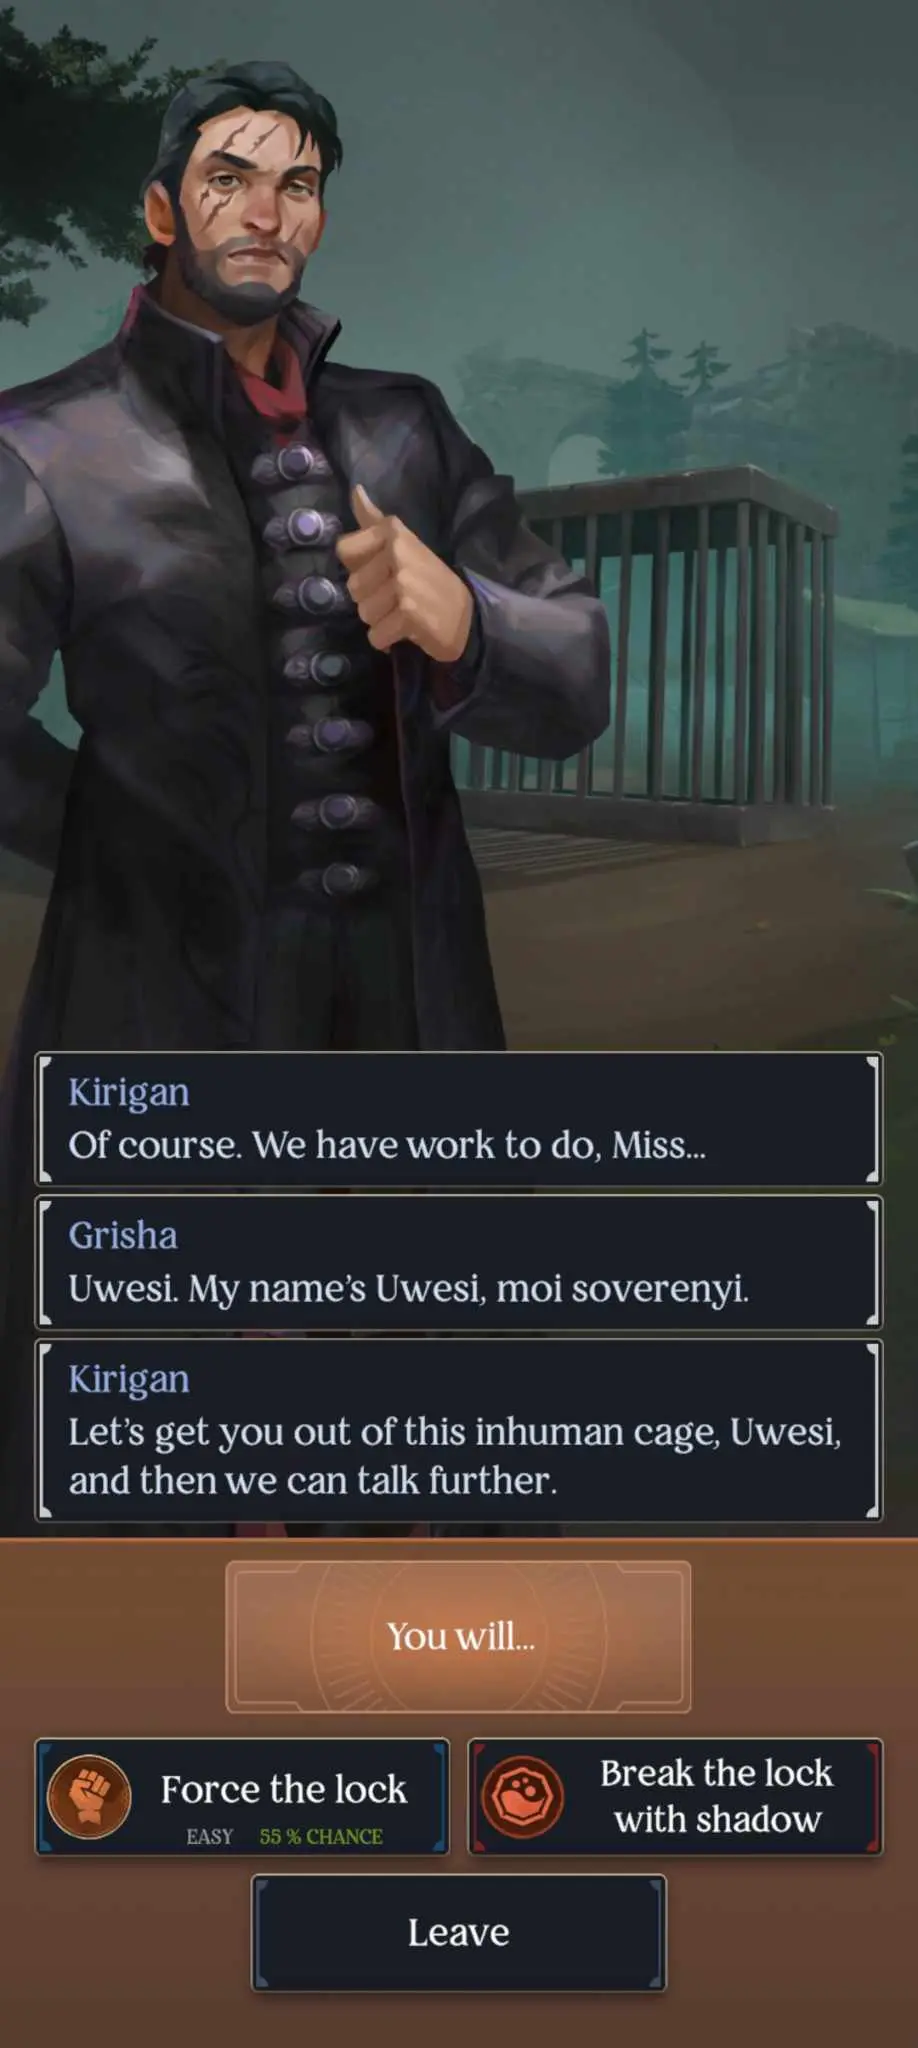
Clear the rabble and proceed to the cage to free Uwesi. You can either break the lock with strength or play the Small Science minigame to free her.
Once Uwesi is in your party, head to the Sergeant’s Tent for a “friendly chat”. You can either coerce him or use the hip flask that Dina (the farmer) gave you. I opted for force – I might want that drink later!
With some not-so-friendly encouragement, the sergeant will give you something to work with – “Adena”. It’s a start. Leave the camp for Adena. Once you cross the bridge, the prologue ends.
Return to the main menu and start Alina’s storyline.
Alina Starkov – Rude Awakening
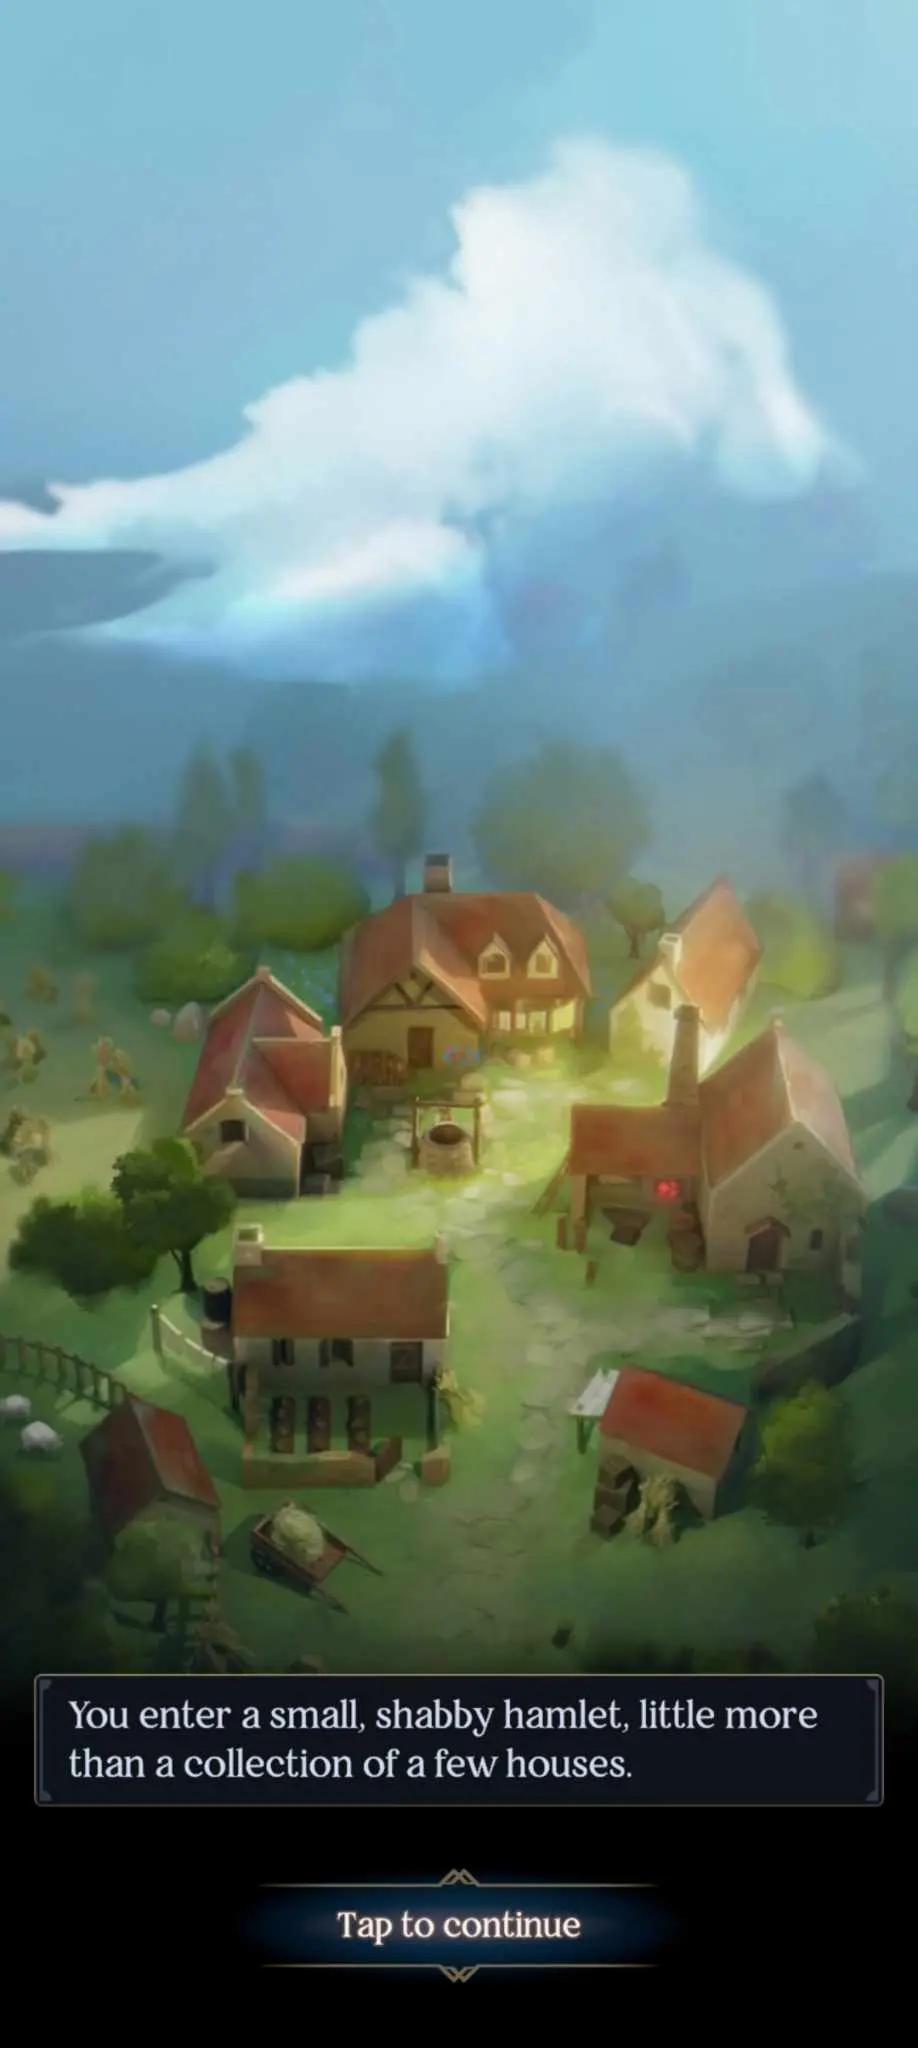
As Alina Starkov, you wake up in the middle of a giant crater. Your head pounds as you try to take in your surroundings and get your bearings. What happened here?
Side Quests:
- Repair the church.
- Get a cake for Galina.
- Find and return the blacksmith’s tools.
- Find Mika and reunite him with his mother.
You can try to recall what happened (though this does nothing, the experience points are very welcome), but you’ll end up searching the bodies regardless. You’ll find a Water Canteen on one of them.
Head south to the Devastated Village. There’s a lot to do here, so I’ll outline it in bullet form:
- The marketplace has a roadsweeper cleaning up, paying no mind to the devastation around him. You can attempt a Mind check to get more information out of him. Succeeding it will have him reveal that there was a terrible noise at night, and before anyone knew it, the village had exploded. He’ll also tell you about the witch, who he claims isn’t a bad sort, as well as Juri, who says he saw something. You can press the roadsweeper to reveal more about these two characters.
- The destroyed church has a woman praying to an idol of the Sun Summoner, who is you. She’s willing to talk more about what happened to the village, though you’ll first need to help her rebuild the church.
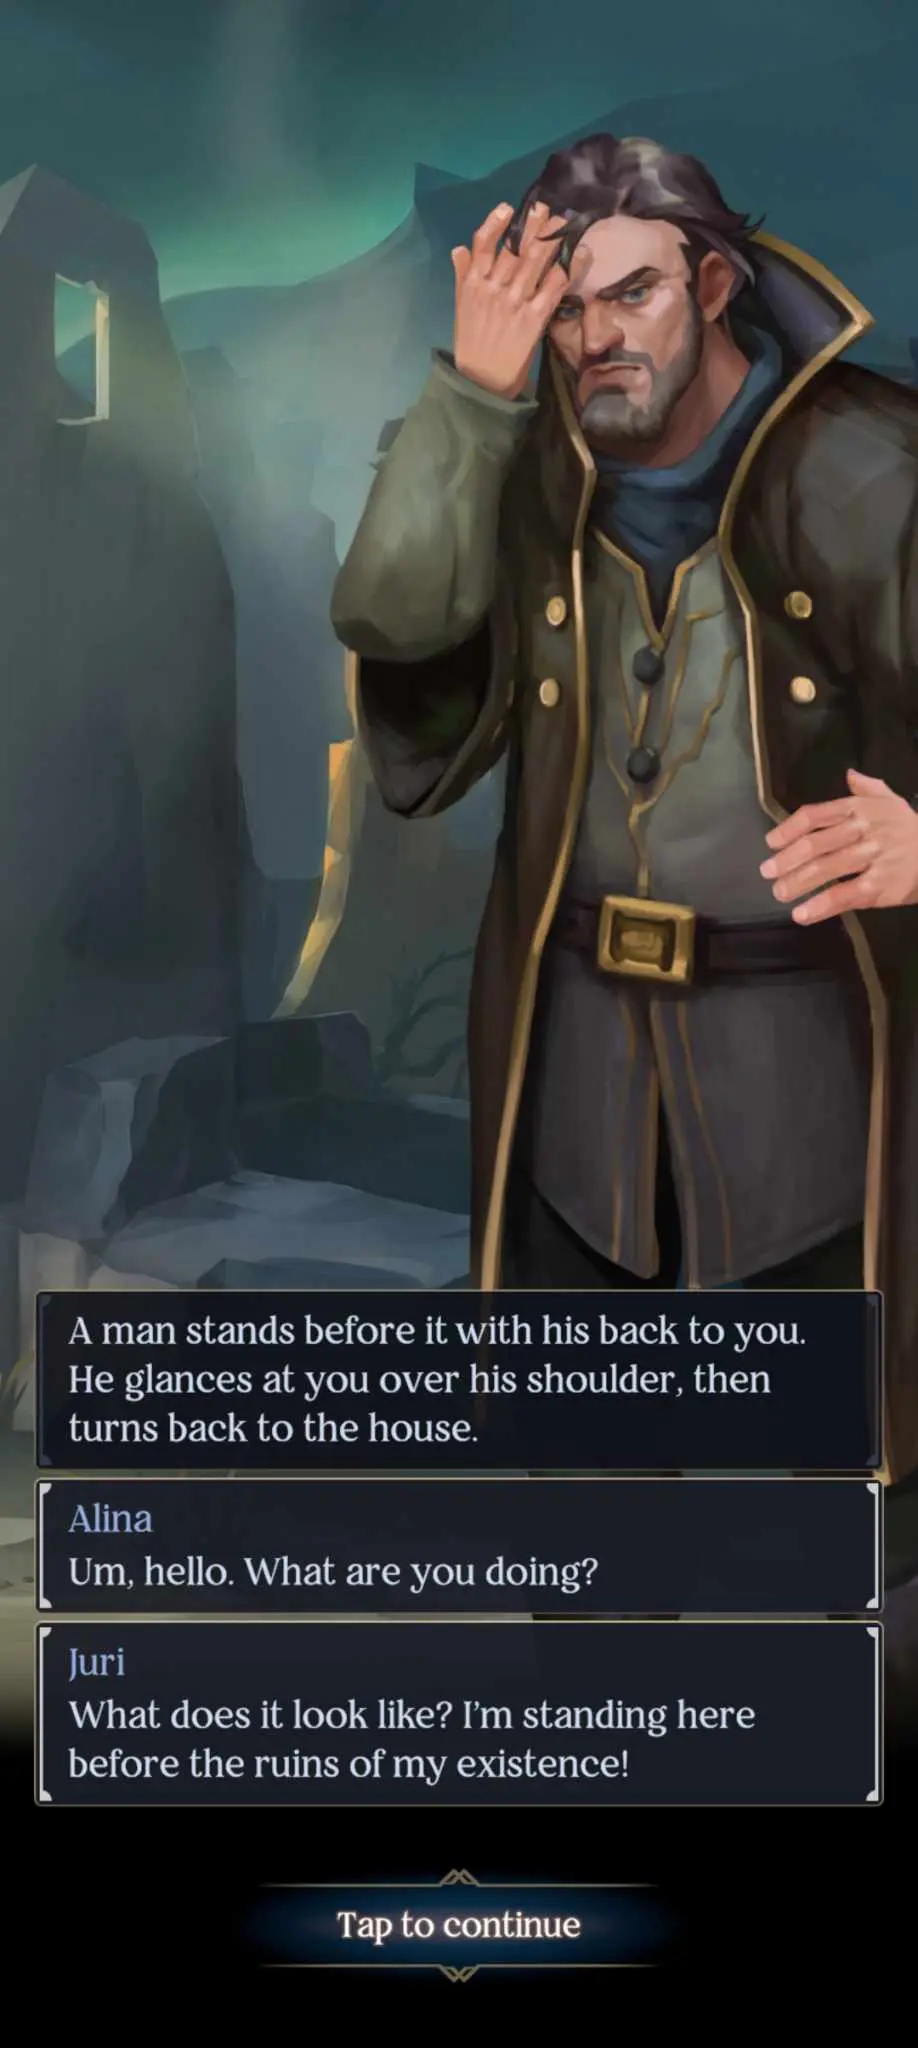
- The collapsed house has Juri standing in front of his house. He’ll reveal that the woman at the church is his wife.
- The craftsman’s house has a (surprise, surprise) craftsman attempting to rebuild his home. You can ask him what happened (Mind or Charm skill check), at which point he’ll reveal that he believes it was the work of a Grisha (essentially a spellcaster) – in particular, the “witch” that the roadsweeper mentioned. You can also bring up the crater you woke up in as well as details about the bodies (they’re Fjerdan), at which point the craftsman will remark that Juri was actually right this time. Finally, you can ask him about the church. He’s willing to help, but you’ll need to convince him with a charm check or offer him food – fish, in particular – so that he’ll do it. If you opt to take this path, you’ll need to visit a fisherman in the Riverbank Lodge.
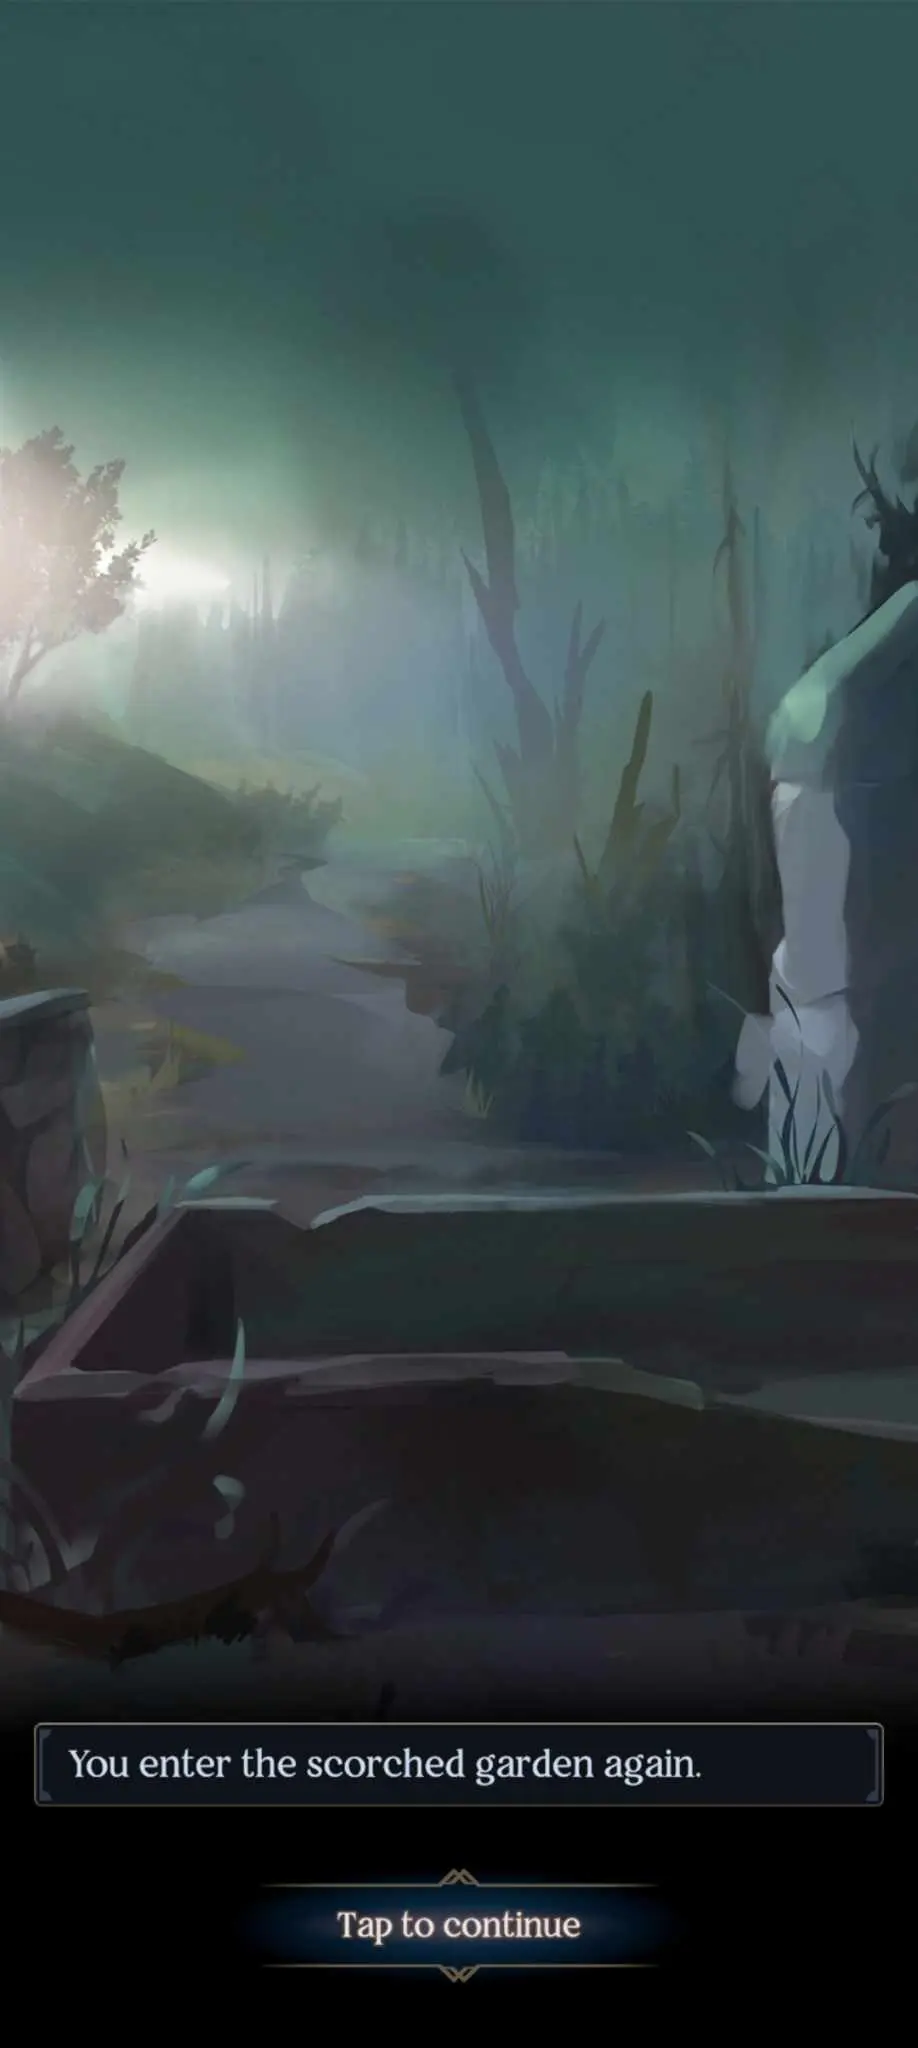
- The scorched garden has someone trying to avoid your attention. You can either force them to identify themselves or persuade them to come out (both of which are skill checks). Succeed and a small boy will emerge. You’ll need to pass a few more skill checks to get the boy to talk, and you’ll need to either offer him food or help him find his parents.
We’ve done all we could in the village. It’s time to move on. Leave the village and head to the east. There’ll be a fork in the road ahead – go south to the river so we can get some fish, then head to the jetty to speak to the fisherman.
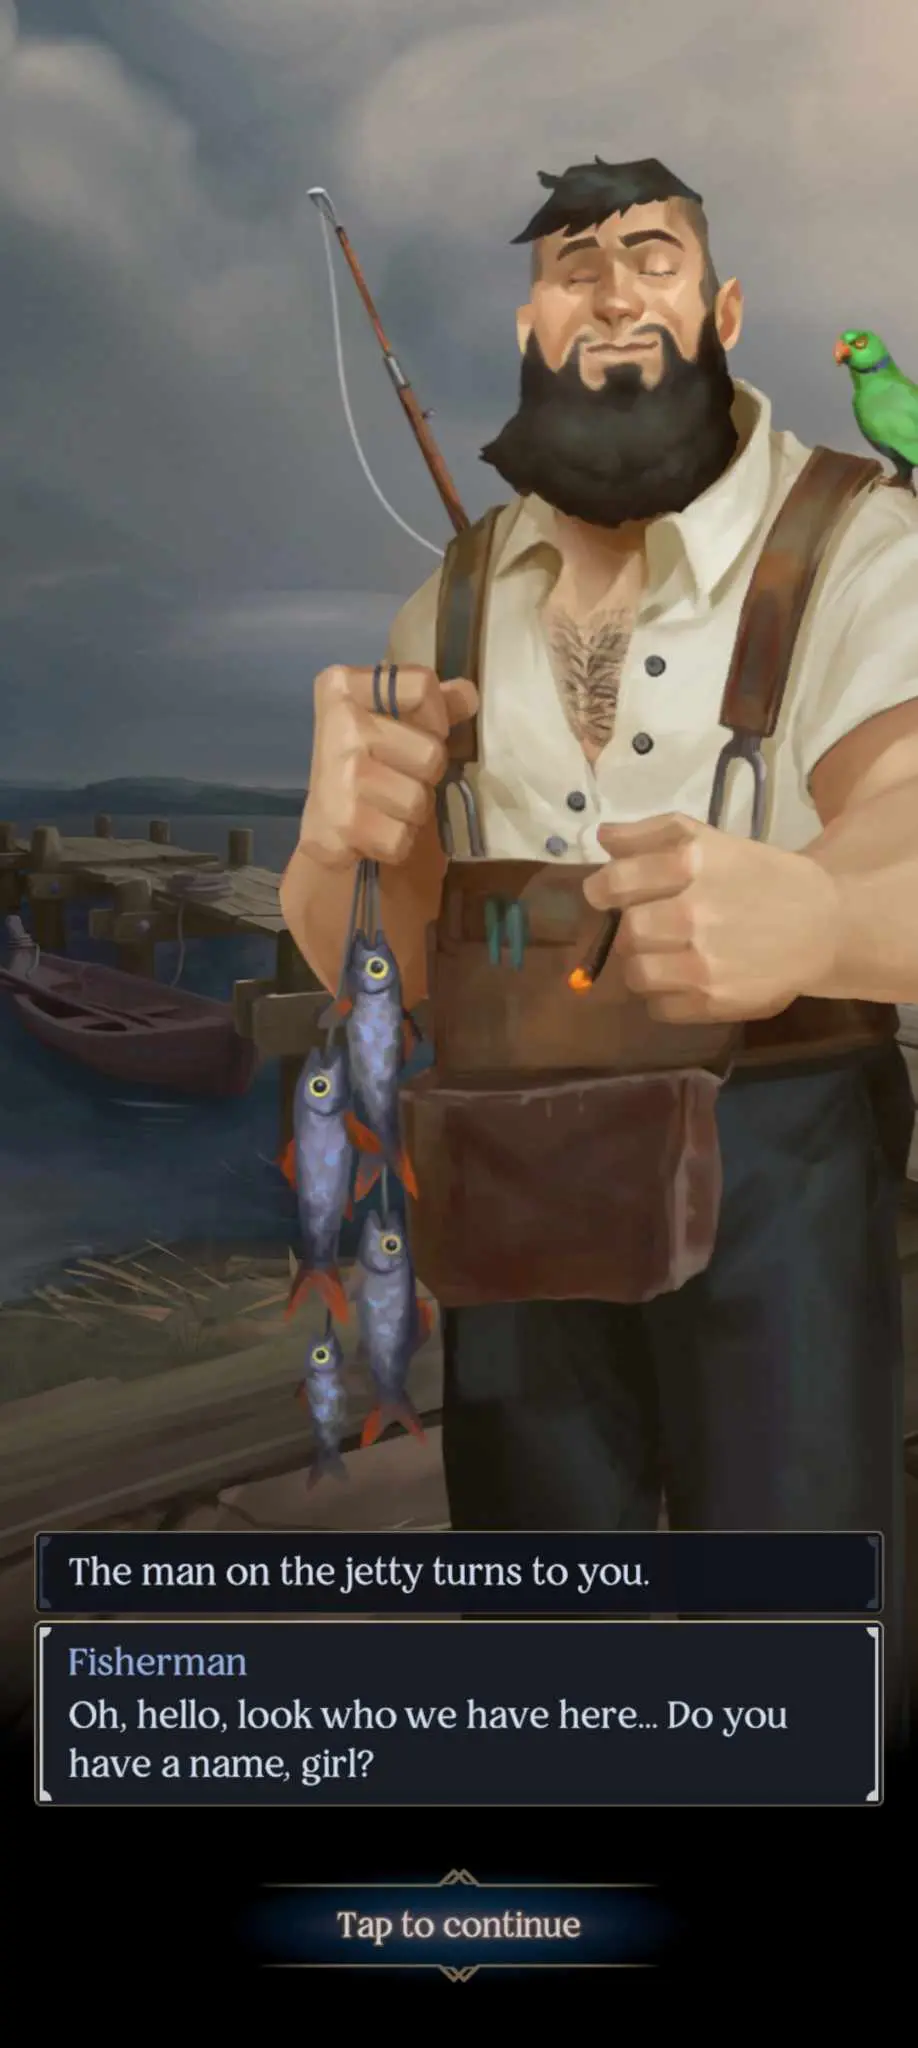
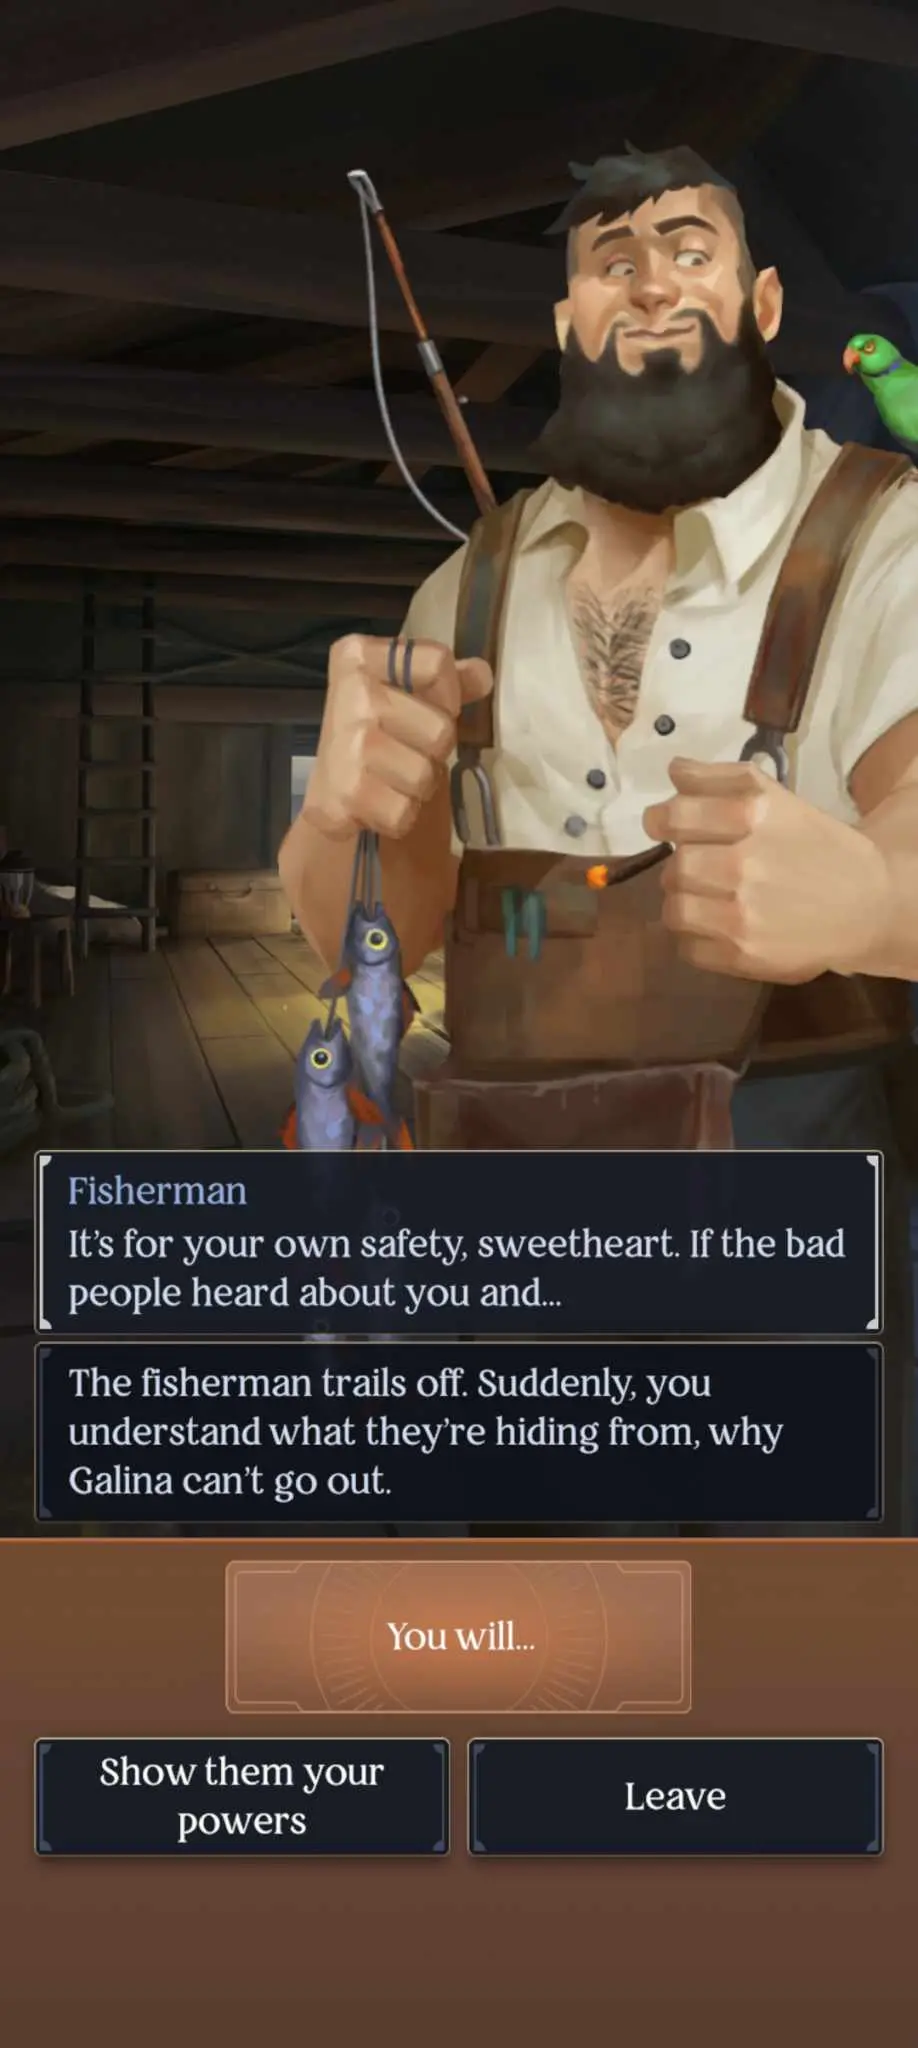
You can ask him about many things, though what we came here for is fish. Unfortunately, he can’t give you any as his village already has too many mouths to feed. Looks like we’ll need to use the Small Science to get our fish, though we’ll need to be rid of the fisherman. Fortunately, all it takes is a simple lie – tell him you heard something – to get him to leave, and the Small Science minigame will begin. Complete it to get some fish for the craftsman.
You can also stop by the lodge to talk to Galina, the fisherman’s daughter. She won’t be able to tell you anything new about the explosion, but she’ll ask you for information. I chose to withhold info – the less they know about Alina, the better, and Grisha aren’t welcome here. Asking about why she can’t go out triggers a skill check (Mind or Charm) and Galina will reveal that her father forbids her from going outside. She’ll be elusive about the answer and says she’ll tell you the real reason if you get her a cake from the old lady across the river. More to do on our fetch quest.
Head back to the village for now to deliver the fish to the craftsman. After he eats, visit the church again to see him hard at work. Speak to the woman again, who’ll say it was the Saints’ judgment that caused the crater. However, she’ll also direct you back to her husband, Juri. Maybe he’ll be more talkative now that the church is fixed. Visit the collapsed dwelling again.
You’ll need to persuade Juri to talk with a Charm check.
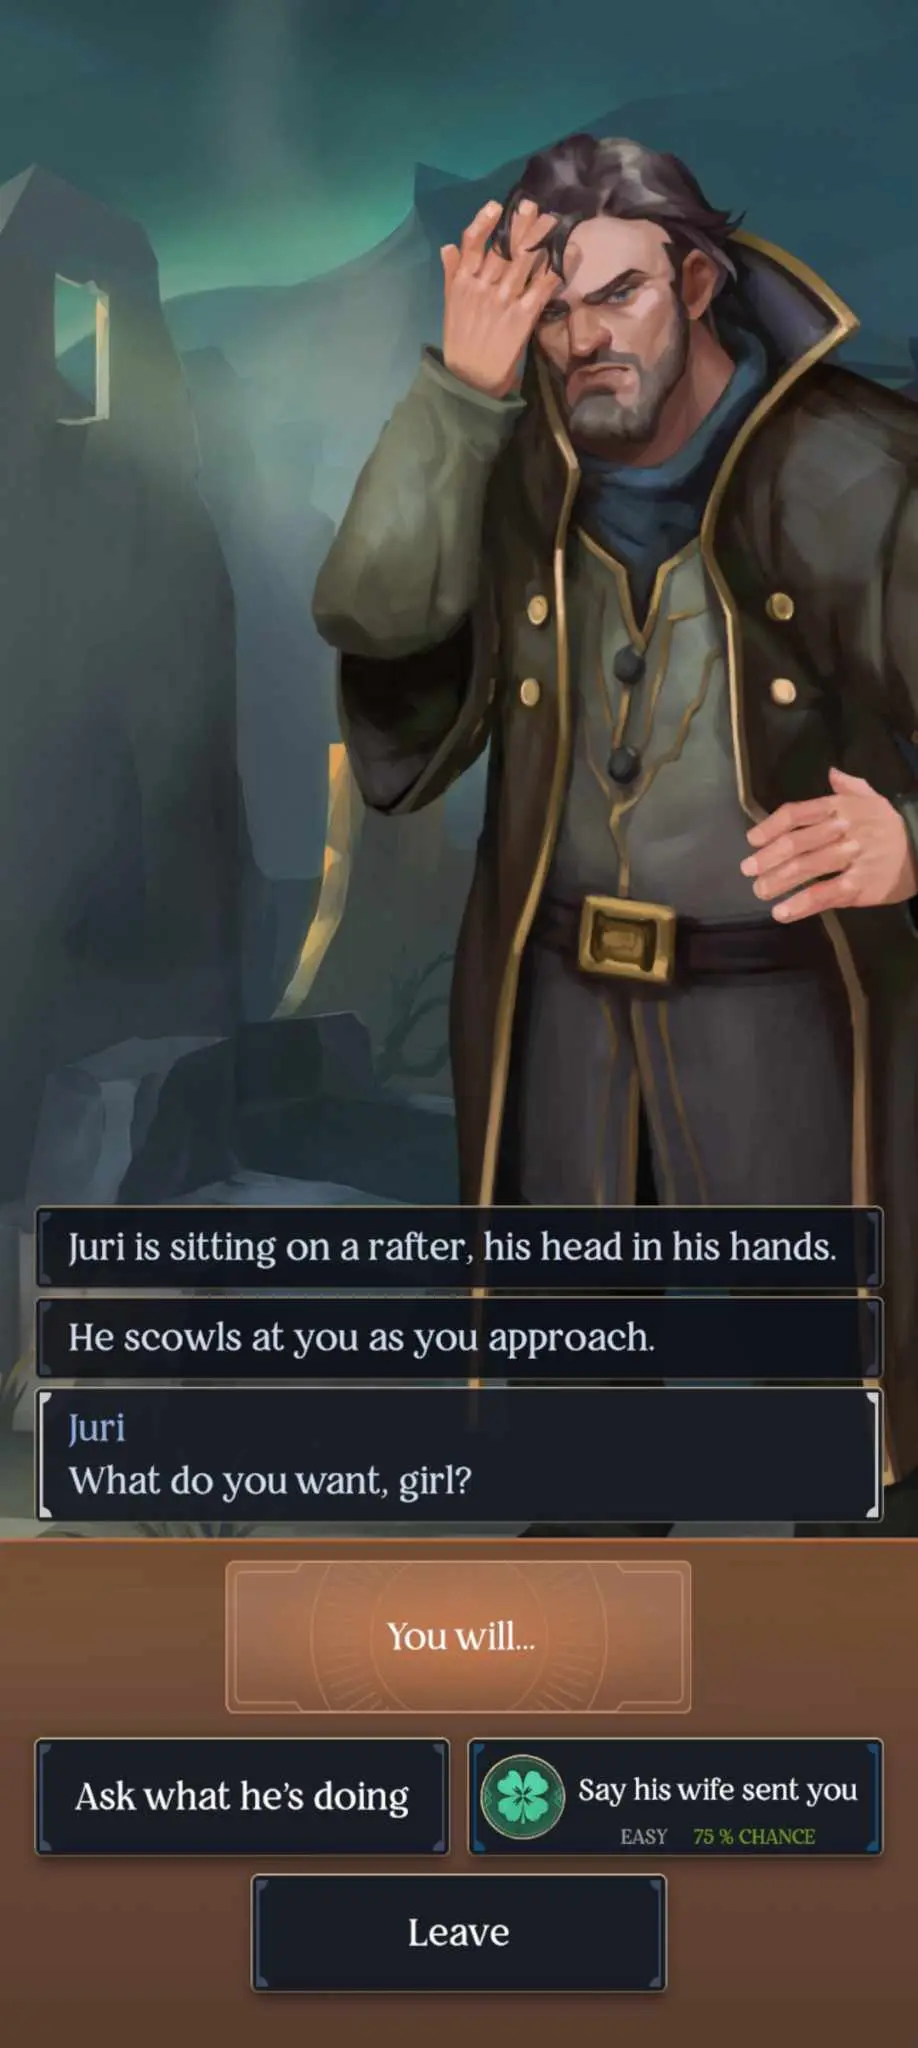
Succeeding will cause Juri to corroborate the story of the dead Fjerdans. Before the explosion, he noticed them camping outside the village, with one of them limping to the east after the flash. Finally, a solid lead!
Leave the village and head back to the fork in the road, but this time, continue past the River Bank and into the Old Farm, yet another scene of devastation.
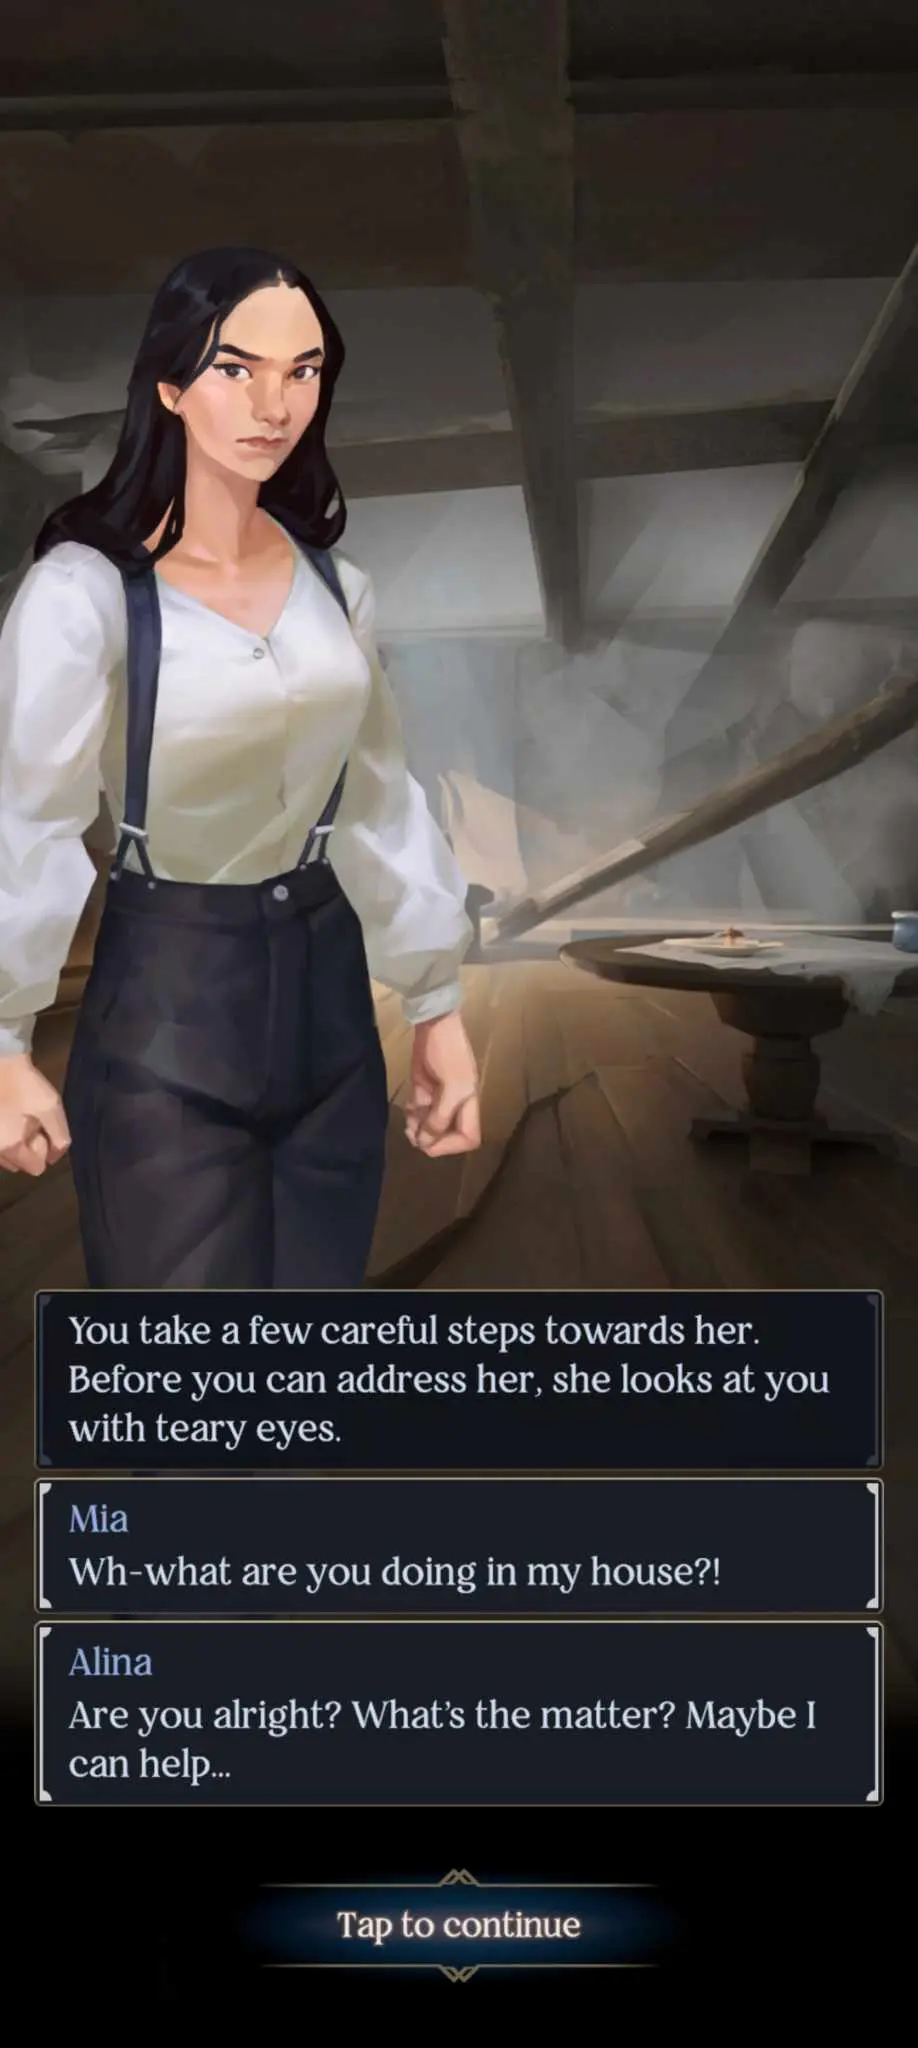
Enter the farmhouse to find Mia, whose son is missing. Pass a skill check to get a quest to find Mika, her son. You know, the boy in the scorched garden we passed on the way here.
Before you go back though, enter the ruined stables to find our missing Fjerdan. You can attempt to pass a hard Charm check to get him to talk, or you can offer him the water canteen you got from his dead comrades. You can ask him about what happened – this will cause him to panic as he can sense your ability to manipulate the light he fears so much. For good reason, as you’re the cause of the crater.
Terror will overtake him and he’ll try to run. You can attempt to catch him with a skill check (failing allows you to try again via a minigame) or let him go. Even should you catch him, though, he’ll hit his head on a rock and fall unconscious. Regardless of the explosion being caused in self-defense, you’ll need to find help. Perhaps the witch can teach you to control your power?
Return to the ruined village. First, seek out Mika in the scorched gardens and talk to him to get him to follow you. Next, return to the marketplace to speak to the roadsweeper, about the only person in this place that doesn’t despise Grisha. He’ll be a little suspicious of your motives, but he’ll help you nonetheless. He’ll reveal that the witch lives in a tower in the mountains to the north of Adena. Ask him for a map – he doesn’t have one, but he does have a pen and paper, which he’ll gratefully part with as thanks for repairing the church.
We’re done here. Head back to the farm to reunite Mika with his mother. Mia will give you some coins for your trouble. Leave the farm and continue east, crossing a bridge to find a merchant.
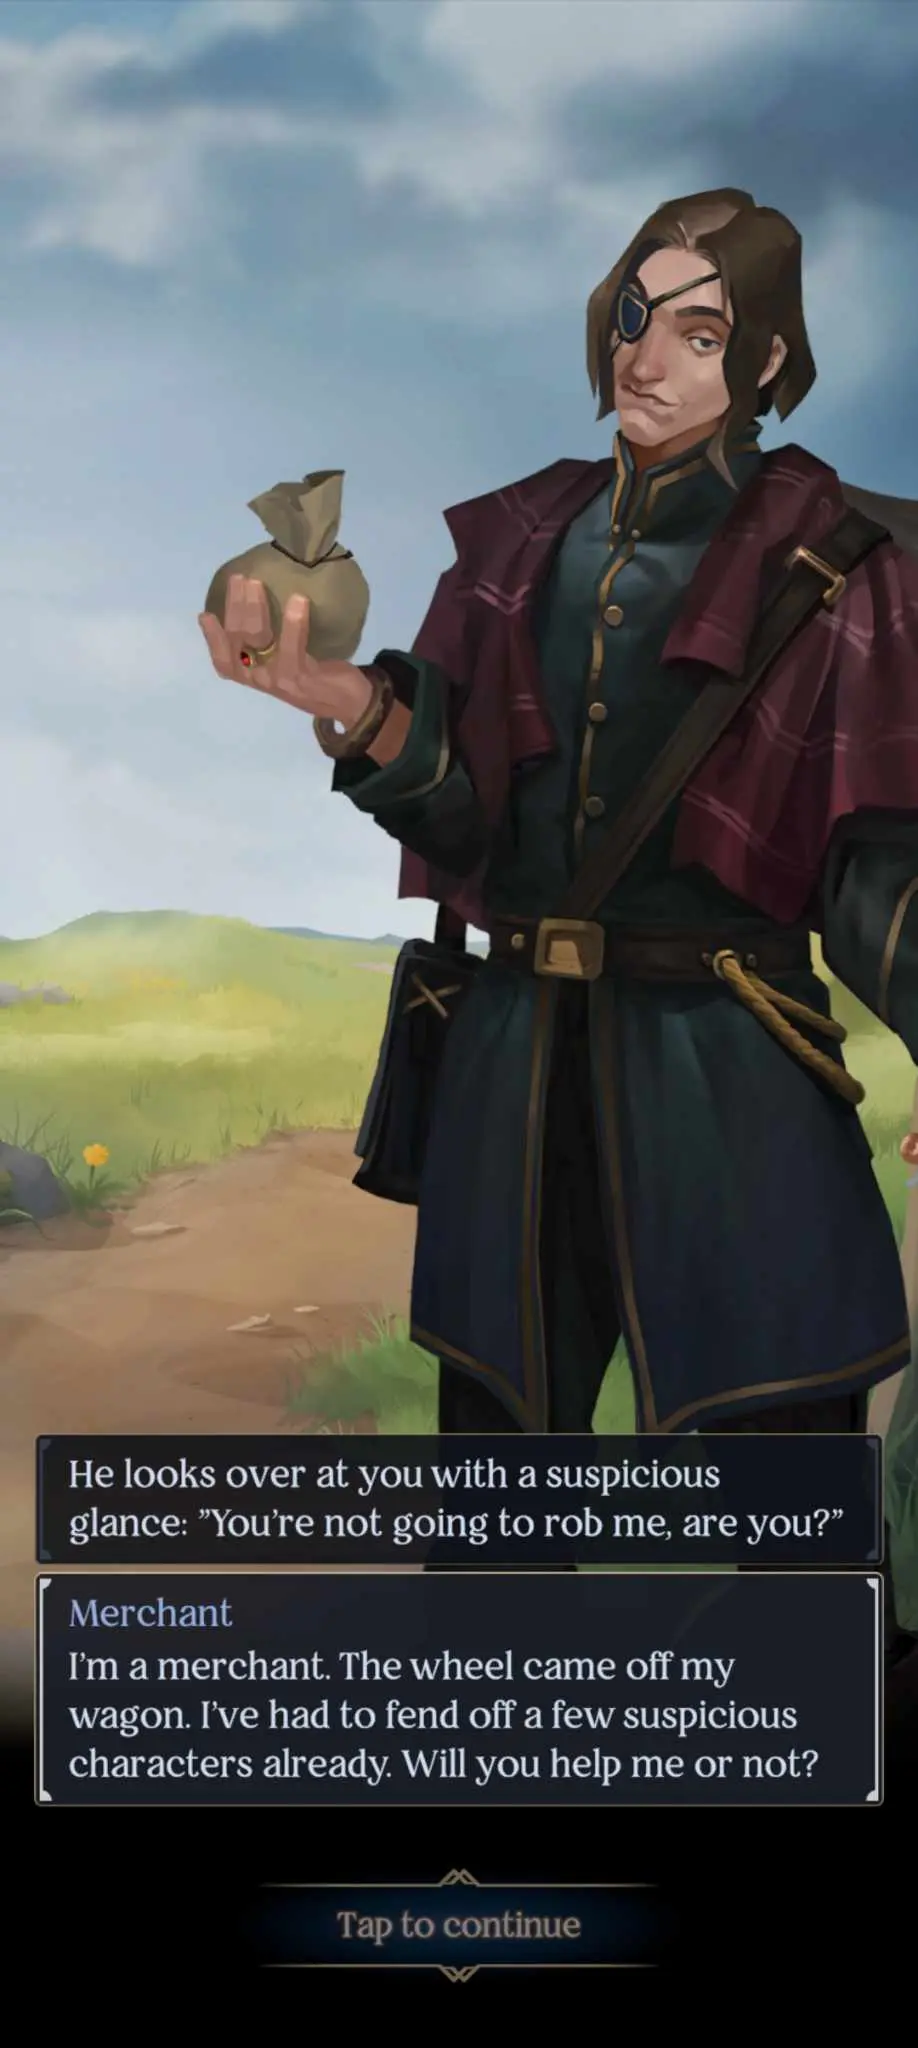
You’ll need to help him before he’s willing to sell you anything, which requires a Physique skill check. His selection is small but useful: a health potion for 3 coins and an unlimited stock of supplies for 6 coins each.
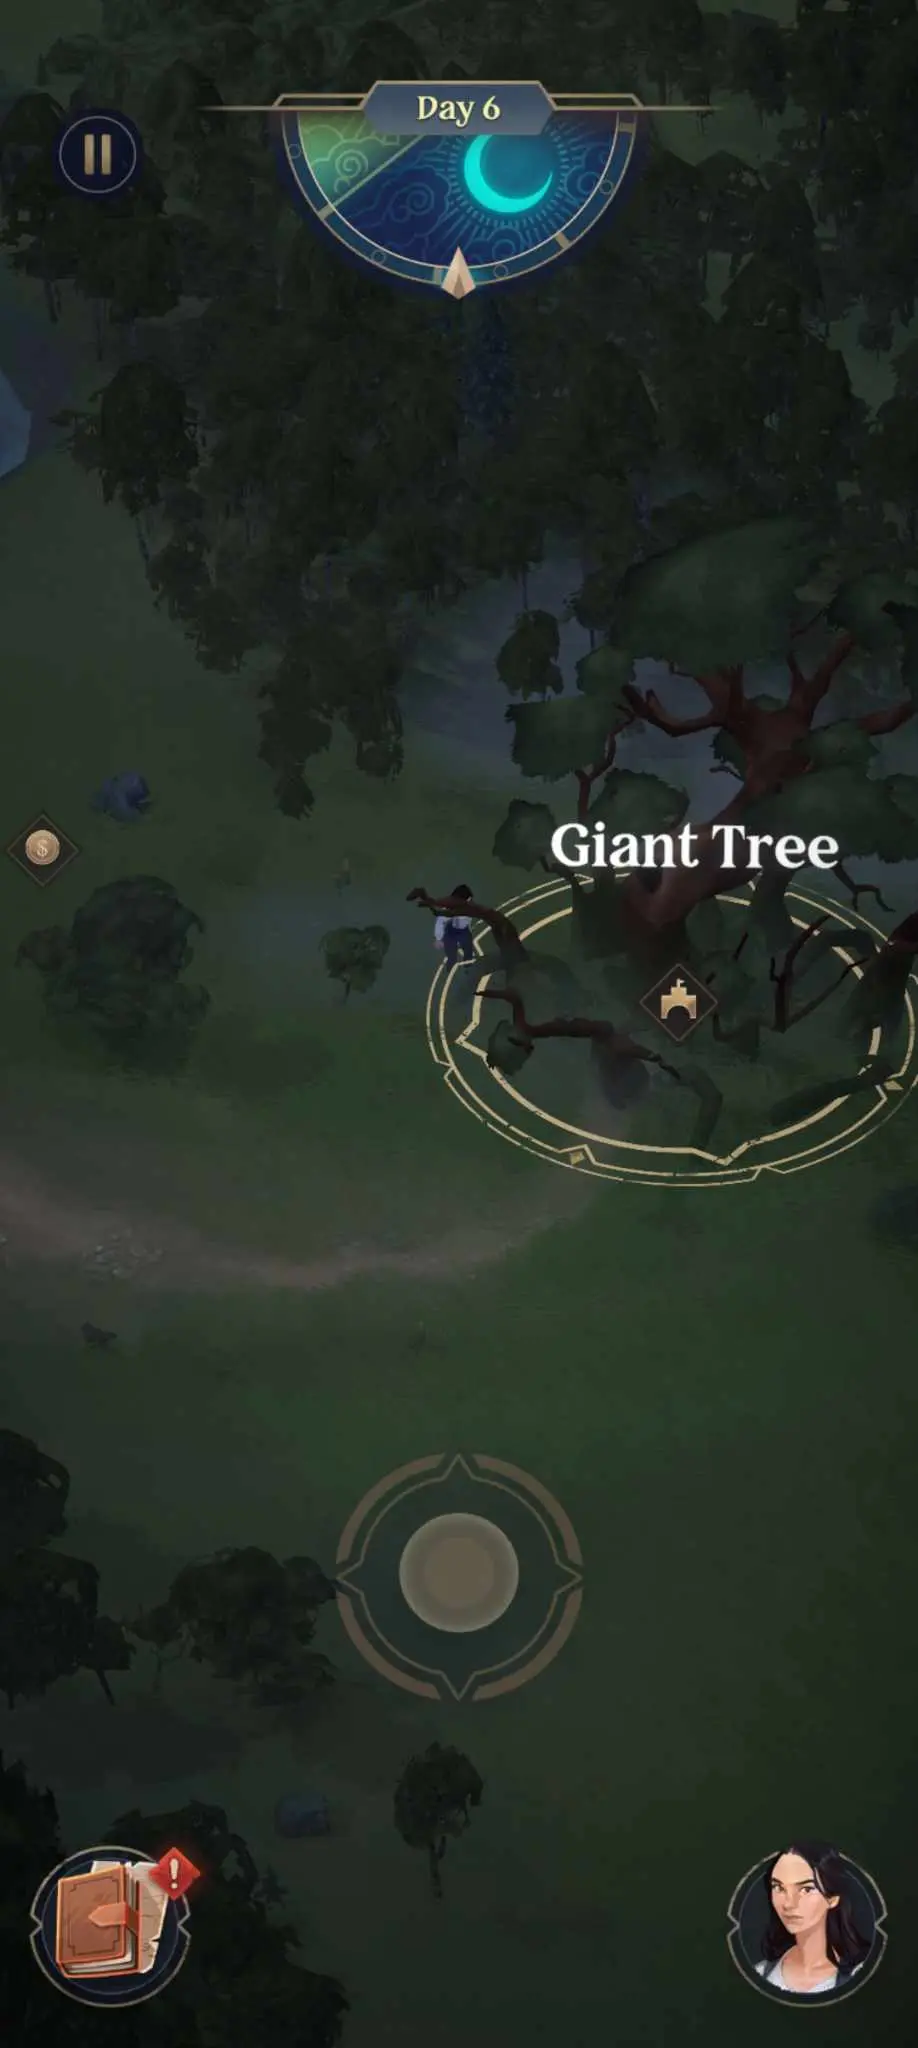
Before heading south, go to the right of the merchant to access the Giant Tree landmark. Visit it to add it to your map. Three landmarks to go!
Head back to the merchant’s crossroads and head south. Directly below us is the Abandoned Hermit Farm. A successful Perception check will allow you to find a note left by somebody, most likely bandits. Take the note and continue east, where you’ll run into more Drüskelle, like the Fjerdans who first captured you. Luckily, your clothes don’t immediately reveal your Grisha status, so let’s try diplomacy.
The Drüskelle will ask you about their missing comrades. You can either tell them or flat-out refuse them. Passing a Mind check will reveal that they’ll most likely appreciate cooperation and honesty – so long as you don’t tell them about the witch. You will, however, need to pass a charm check to ensure they leave you alone.
Continue eastward to find the Monolith. This formation of rock is clearly manmade, and so it will serve as a great reference point in your map. Be sure to stop by so Alina can commit the place to memory. You can’t go east just yet, so follow the road to the southwest to arrive at the Hillside Village.
First, visit Granny’s House to get a cake for Galina. You can attempt to buy the cake for 6 coins, haggle for less (Charm skill check), or ask for the cake directly (another Charm skill check). In my case, I managed to get the cake for free.
Next, drop by the Smithy. The smith is there but can’t work as he got his tools stolen. Looks like the letter we got was a bit too late. Talk to the smith some more to reveal that he was going to visit Mia and Mika. He’ll also refuse your offer of help, saying that it’s far too dangerous for one person to attempt. Good thing we have the Small Science, right?
Before we head back to Galina to get some sweet rewards, head west from Hillside Village to a farmer. His wagon is stuck, and he’d appreciate some help. You can use a Force or Perception check to help him, though note that both of these are medium difficulty checks, and you can’t try again if you fail.
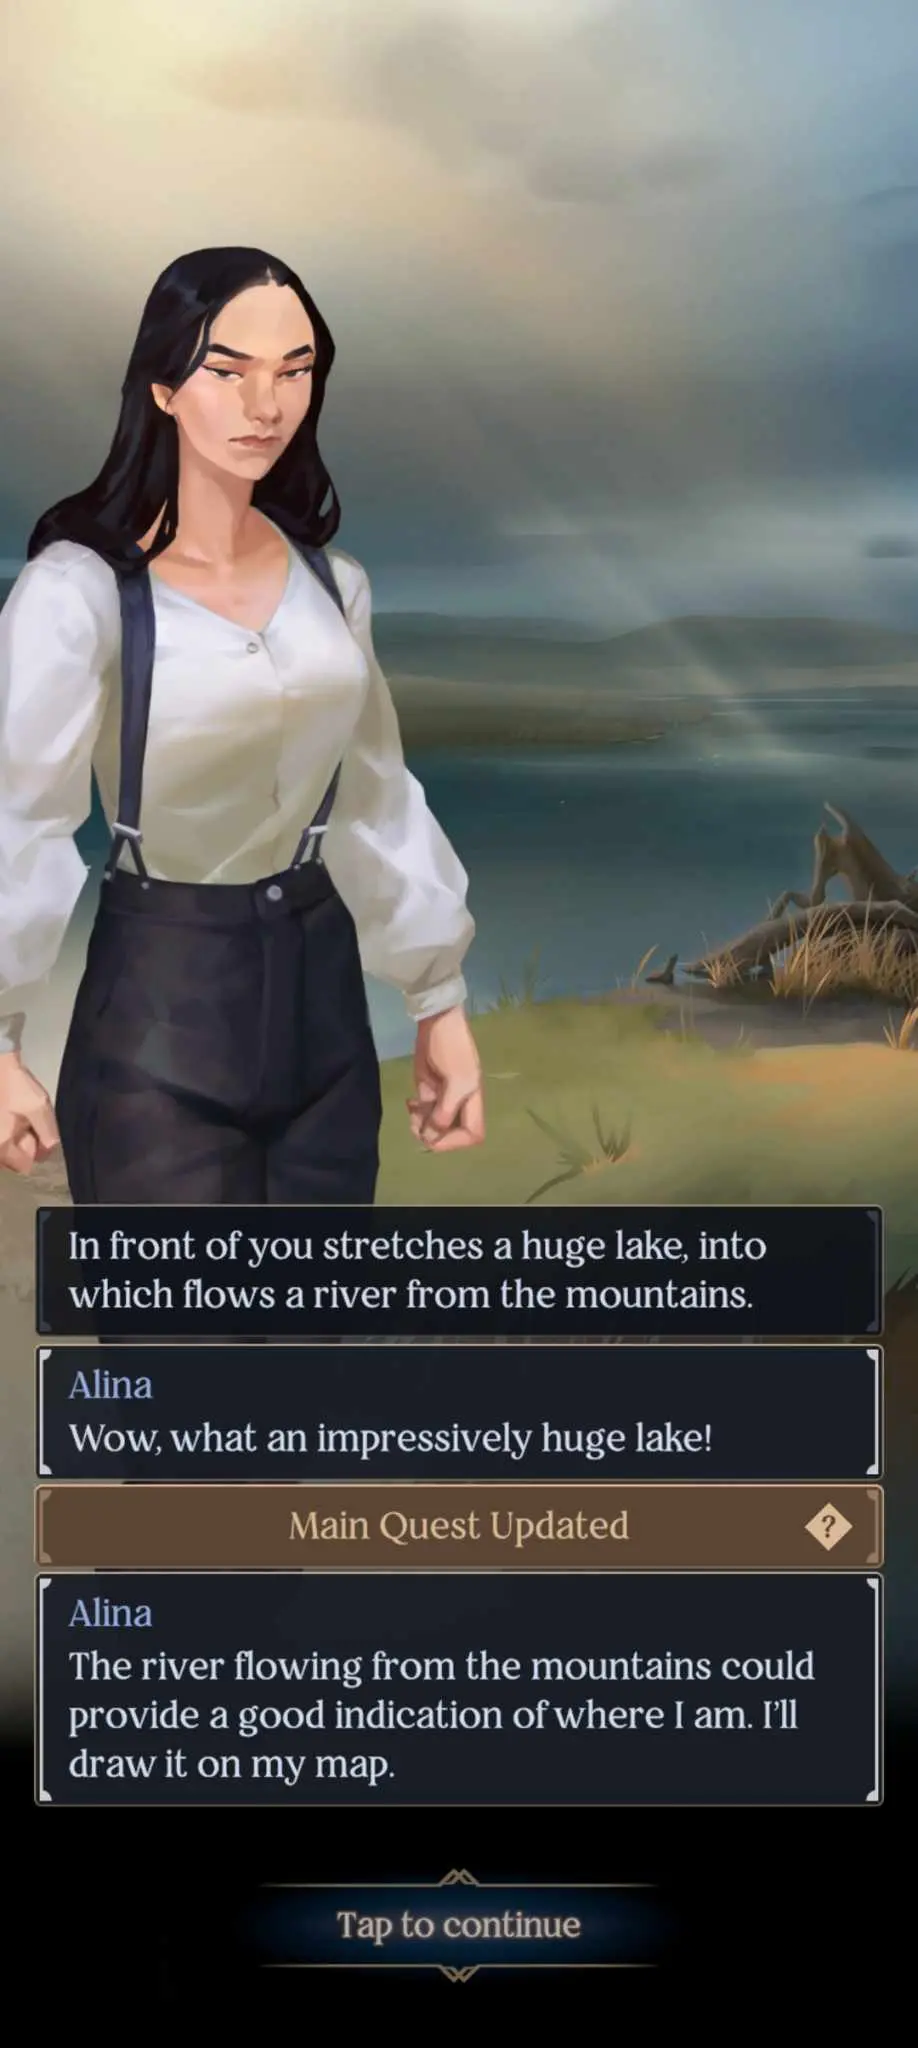
Further to the left is the shore of Lake Kalini. Visit it to have Alina add it to her map.
We’ve done all we can for now. Head back to the River Bank to deliver the cake to Galina, if you have it already. She’ll call her father in – turns out she wanted the cake for his birthday. The fisherman will ask how much he owes you for the cake; you can charge him 6 or 3 coins, or nothing at all. I went with charity.
Galina will tell her father that she promised she’d tell you her secret, to which the fisherman will respond angrily. Surprise, surprise, Galina can use Small Science too. You can assuage their fears by showing them your own Grisha powers or let them be.
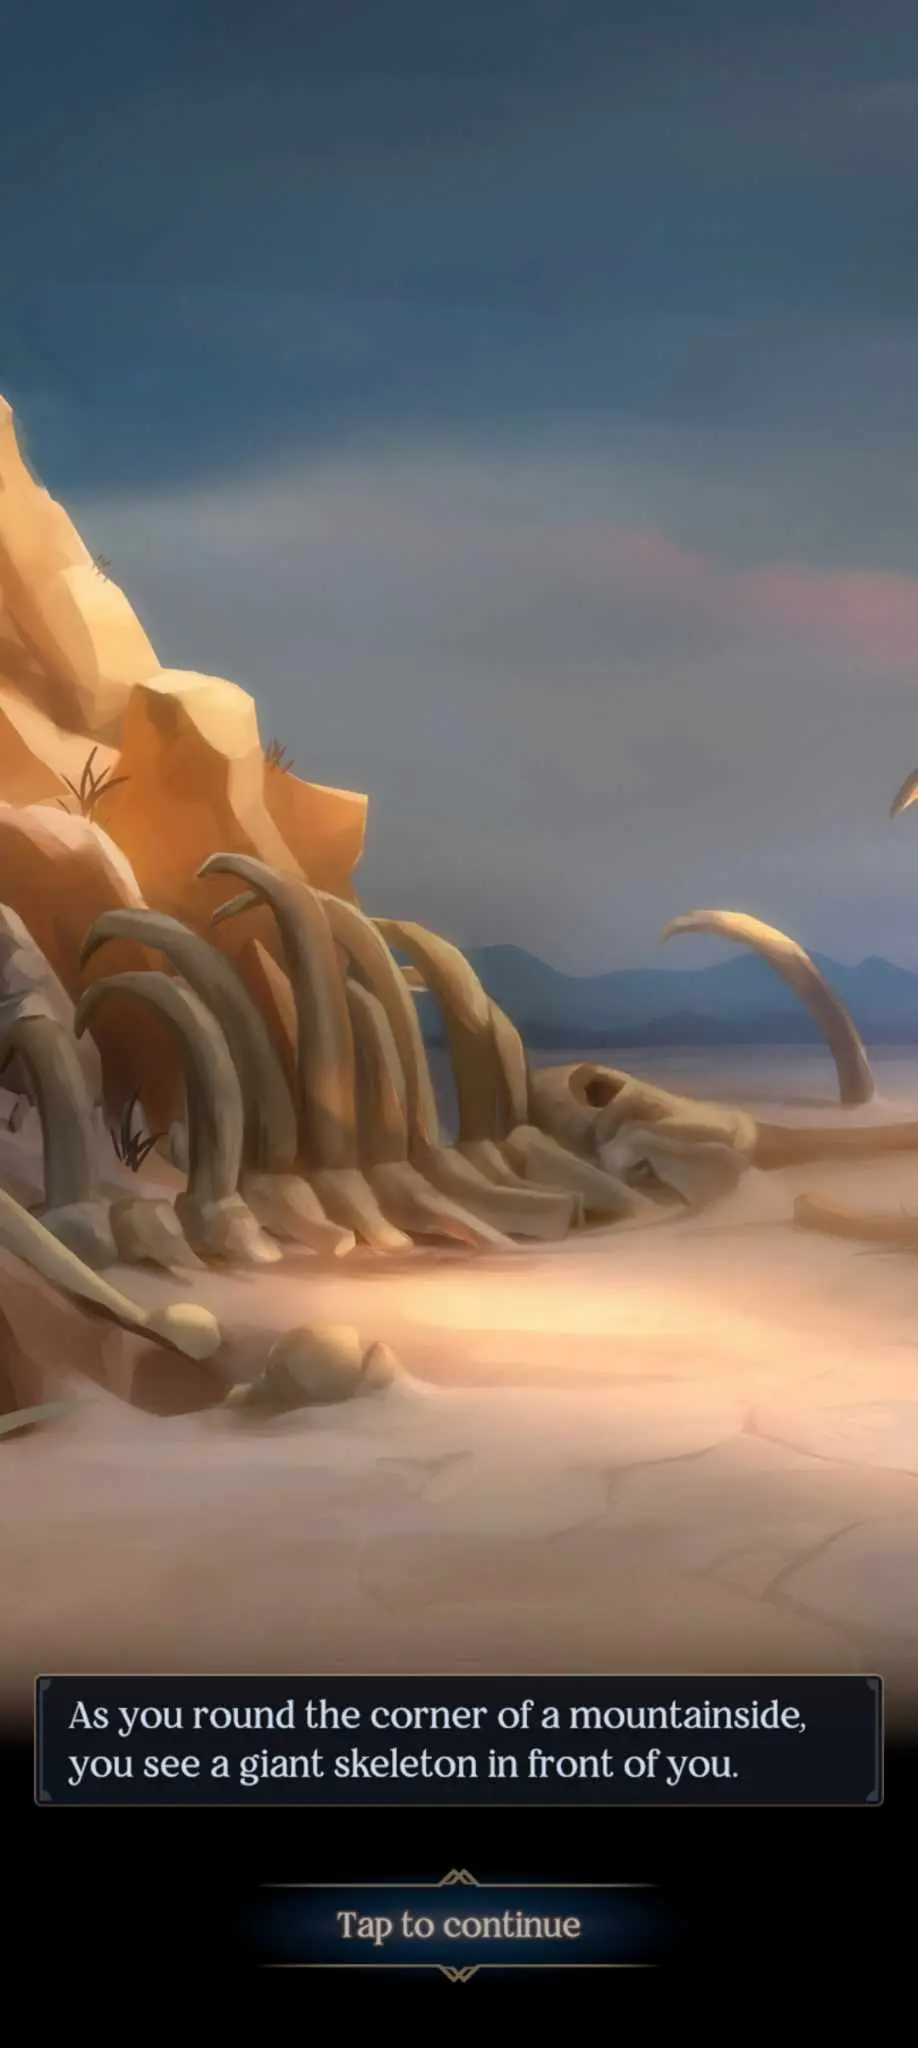
Head back across the bridge, this time going south and to the right of Hillside Village to the Murky Lair. We’ll confront the bandits here and get the smith his tools back. You can pass the Perception to check to verify that yes, these are bandits (as well as for that sweet experience point) and either barge in or sneak in. If you choose to sneak and succeed in the minigame, you’ll get some coins and a crate without a fight. Before you leave for Hillside Village, head a bit to the lower left to find the last landmark we need – the Giant Skeleton. Visit the landmark and try to identify it with a Perception check to get an experience point.
That makes our fourth landmark, and now we know where to go: the mountains south of Lake Kalini, to a hidden path. Before we go though, head back to the blacksmith in Hillside Village. He’ll offer you a necklace; you can ask who it belonged to, accept, or refuse the necklace.
Head all the way south, following the road until you reach the Ravine. That concludes Alina’s Rude Awakening chapter.
Alina Starkov – That Which Was Lost
The second chapter of Alina’s story has her in pursuit of the elusive “witch”, a particularly powerful Grisha, in the hopes of learning to control her own powers.
Side Quests:
- Find books for Vascha.
- Find Leri and bring him home to Dzmira.
- Get medicine for the baby.
- Pass Luda’s note to Juris.
- Rescue Anastasia, the Squaller.
Thanks to her cartography skills, Alina finds herself closer to the witch’s tower. However, the map has lost its usefulness and she’ll have to sniff out the trail on her own.
You’ll be given the option to call out (Perception check) and later find a big man roasting a bird. No matter which option you choose (please pick the one that gives you a skill check for those experience points), the man is friendly and will introduce himself as Vascha.
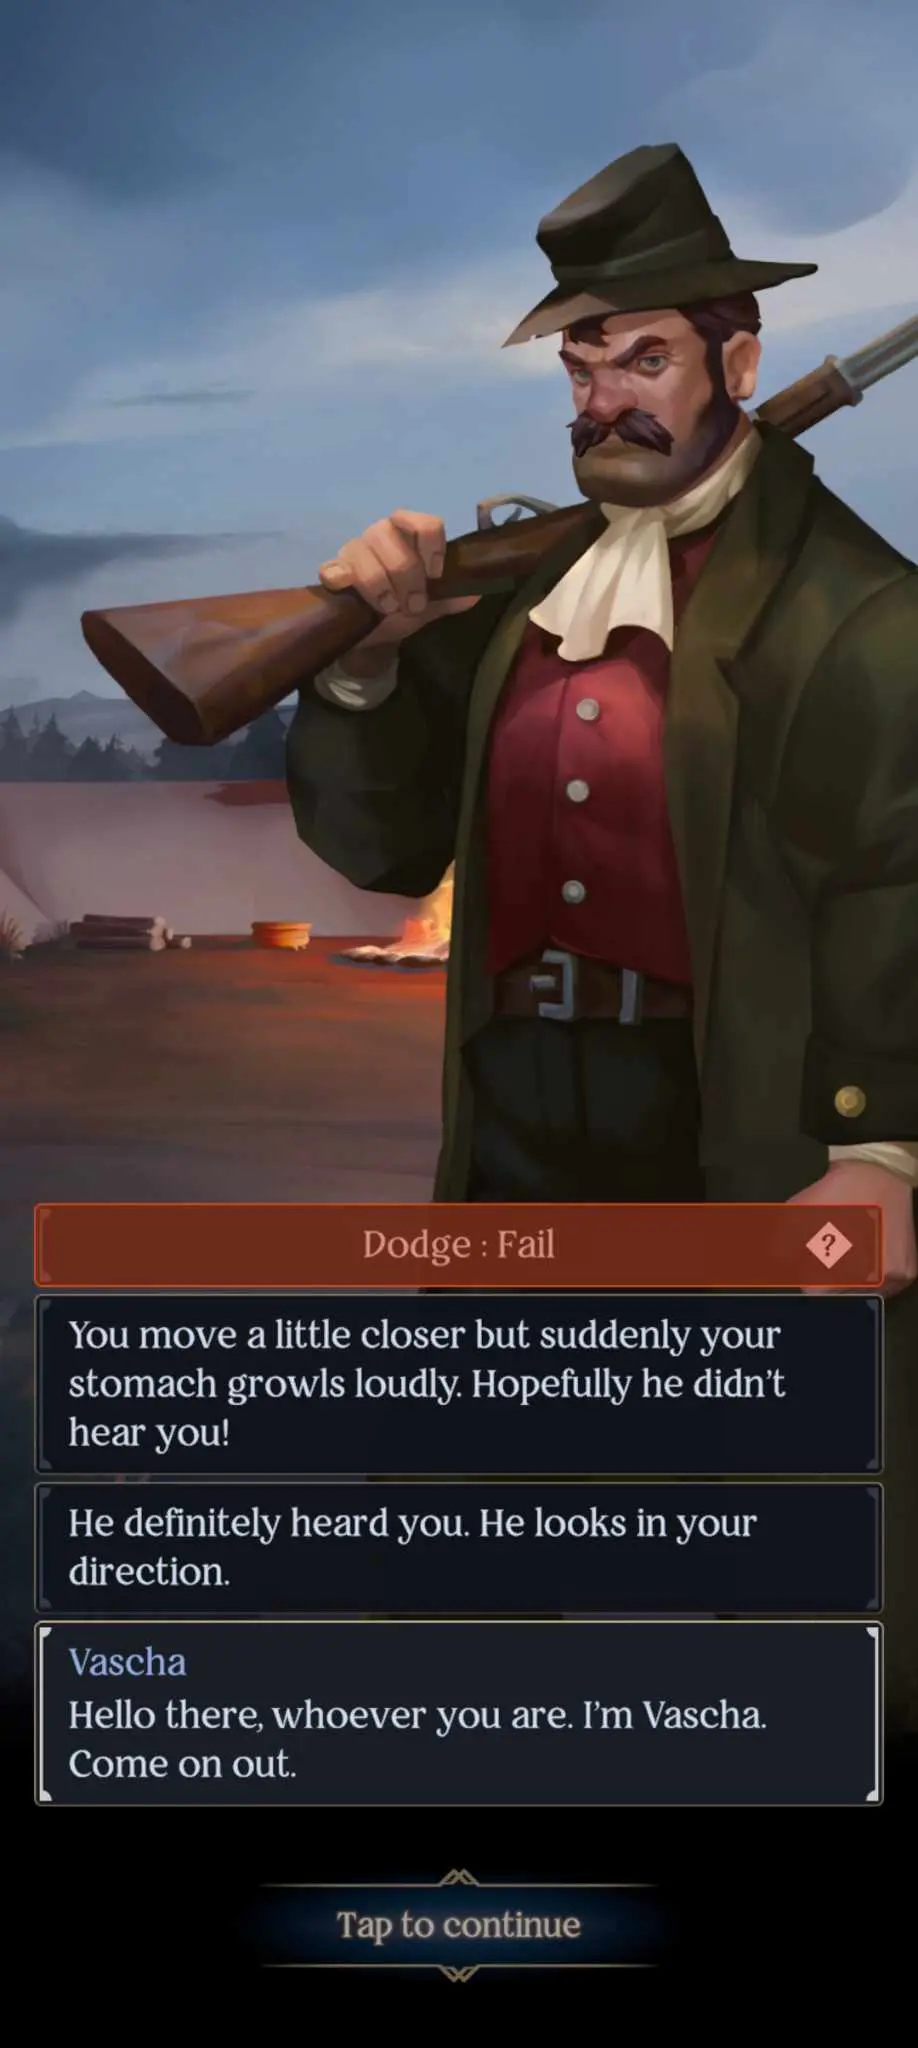
He’ll invite you to share his fire and food, which will give you 1 extra supply. Take the opportunity to ask him for intel, especially about the witch’s tower. He’ll tell you that her name is Zulfiya and that there are a lot of rumors surrounding her.
You’ll also be forced to ask Vascha about Mal, your companion, as well as any recent news. Before you leave, he’ll reveal that he knows you are the Sun Summoner, but he won’t divulge your secret. He will, however, ask for a favor – get him some books as he’s been reading the same one for quite a while now.
Head to the west from Vascha’s camp to find the Dark Tower.
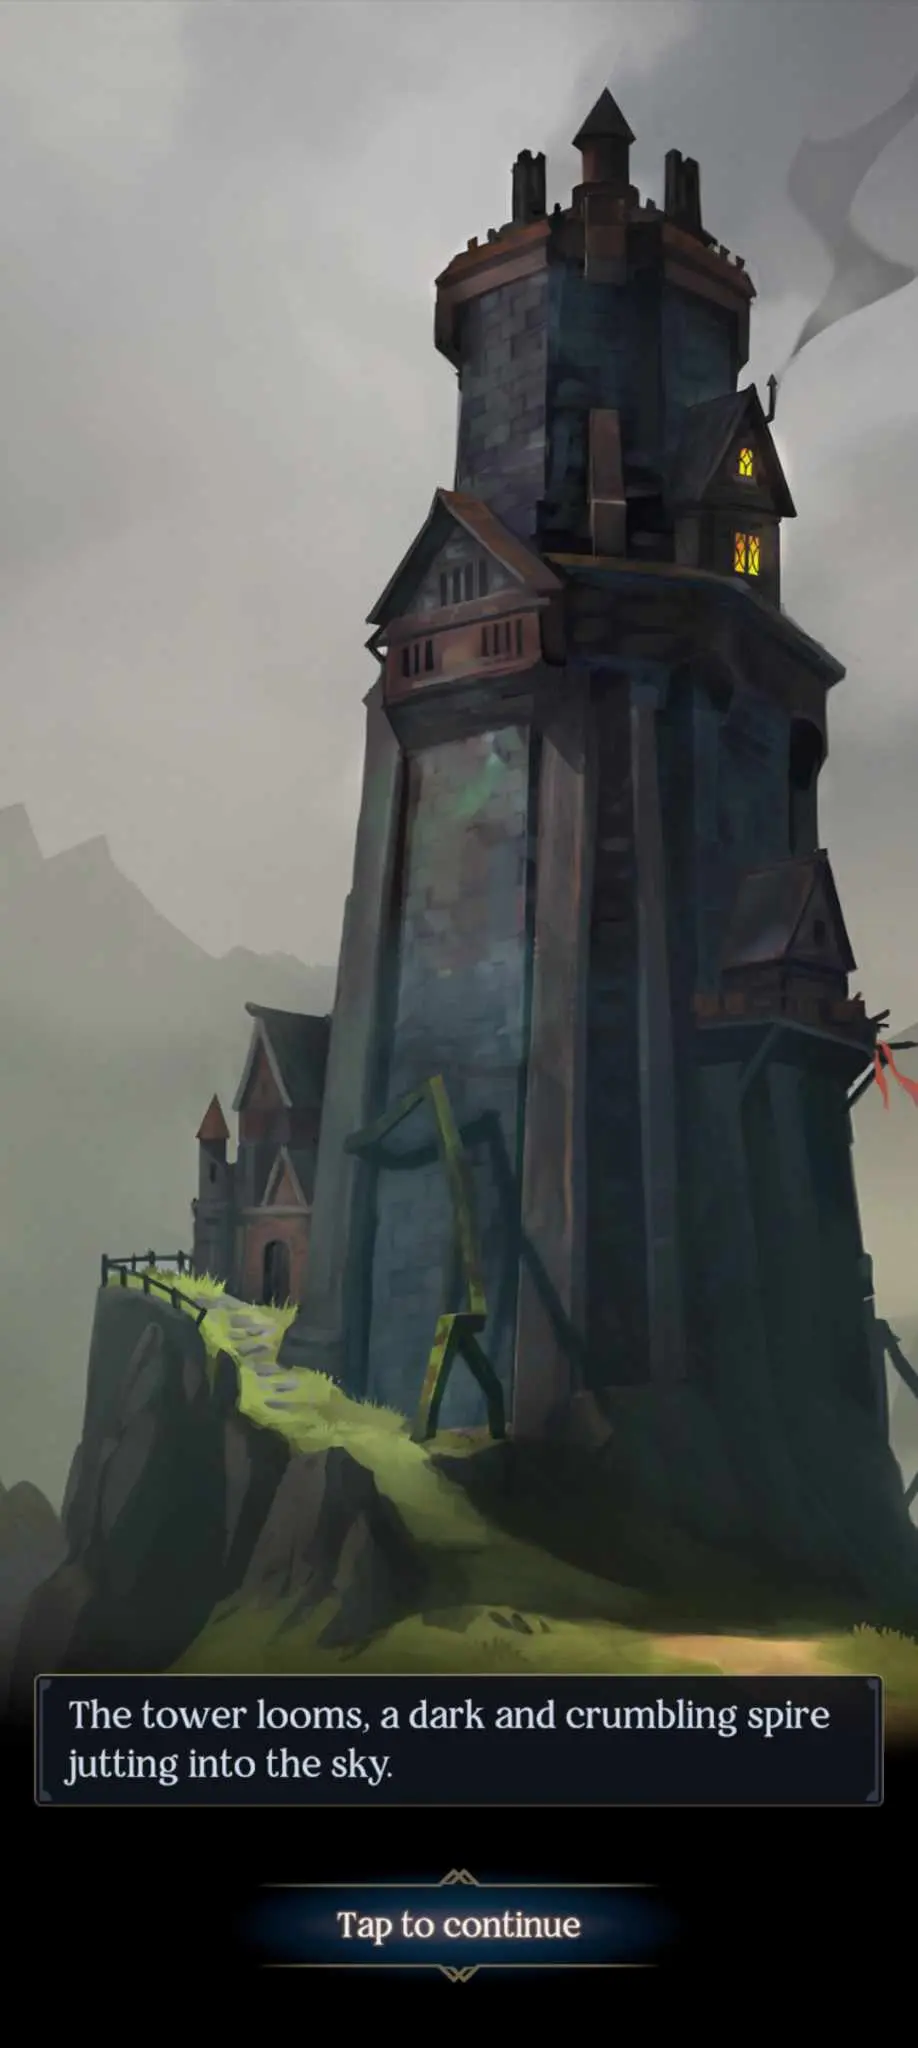
Well, that was easy. Too easy, in fact – the door’s been broken down and it’s evident that there’s been a fight.
- The courtyard bears signs of a struggle, with heavy bootprints in the mud. There’s a Perception skill check here that will help Alina determine that the First Army took away the Grisha in the tower. You can call out, but only the birds will answer.
- The graveyard is located within the tower and has a multitude of unmarked graves. Perhaps there was more than one “witch” living here.
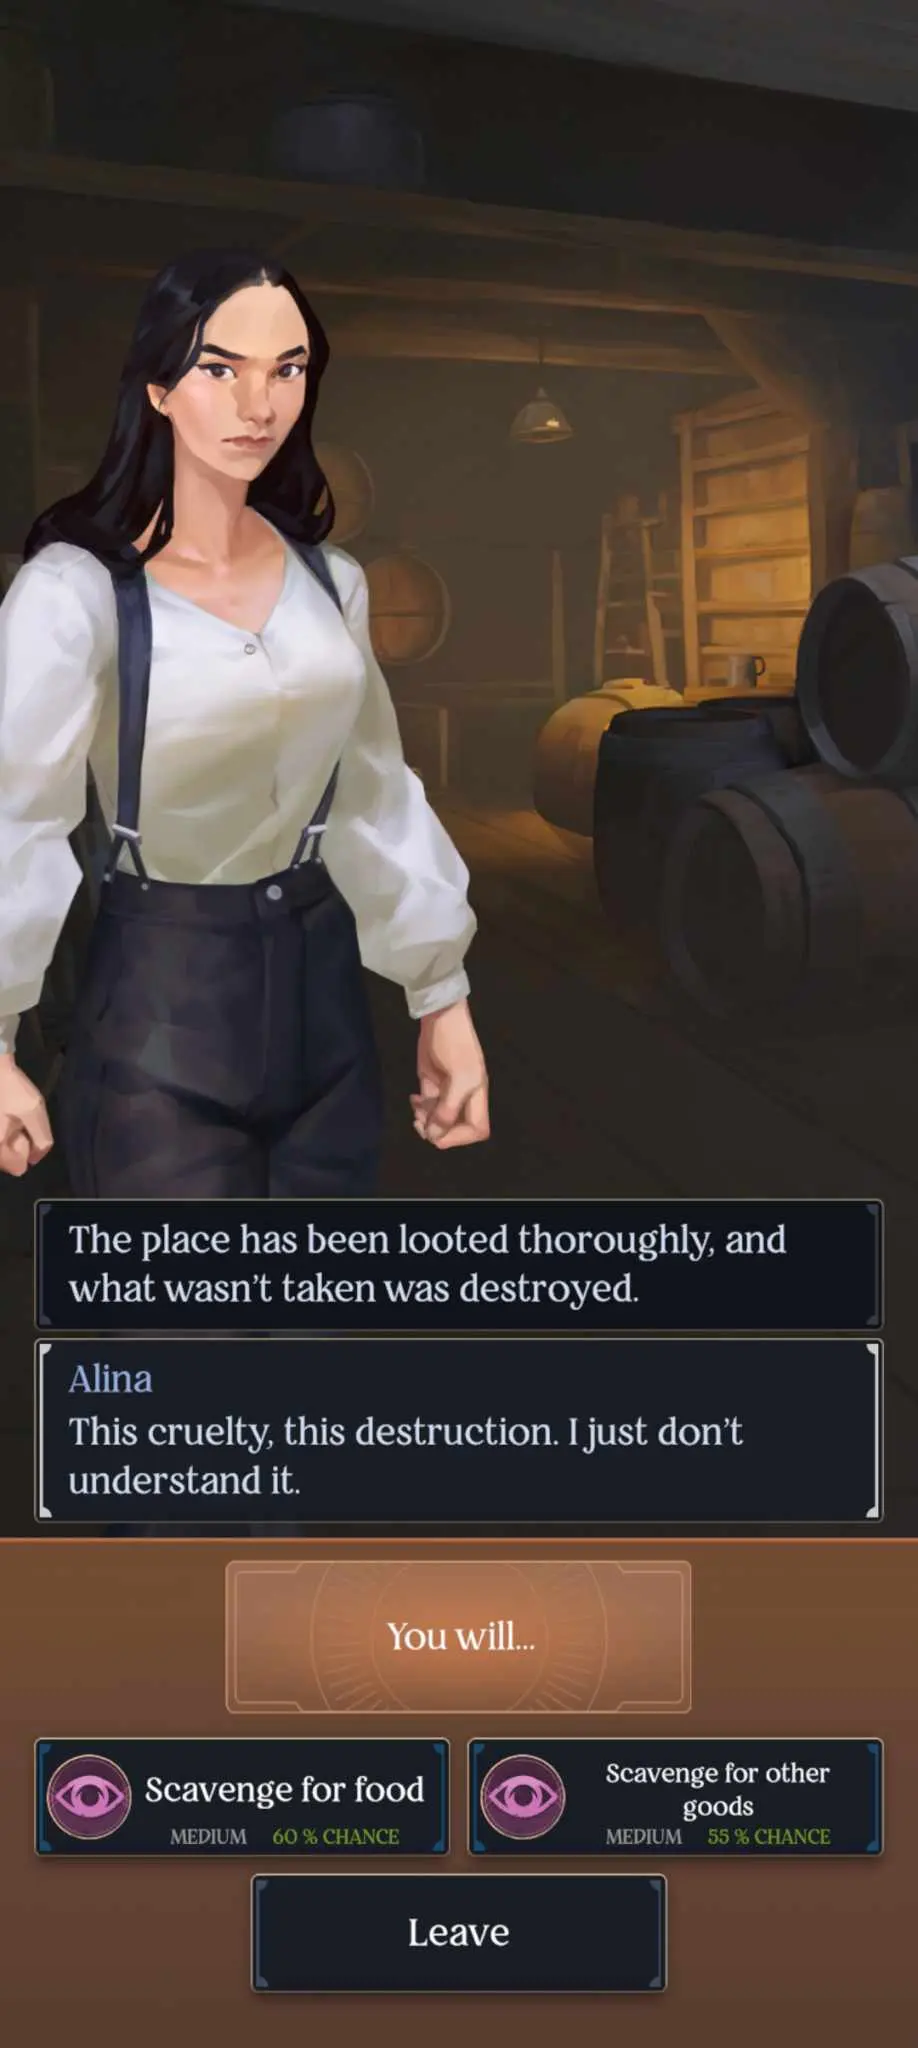
- The storeroom has been thoroughly ransacked, though you can make Perception checks to see if there’s anything you can use.
- The cells host the bedroom of the so-called “witch”. Her bedroom is small and quaint, and not anything at all like the monster the peasants make her out to be. There’s a Perception skill check here that will reveal some toys – one of them in your image, which you take. Did Zulfiya take in Grisha children who were hiding their powers?
- The Grisha Workshop holds Zulfiya’s workshop, a mishmash of alchemical tools and medical supplies. Perhaps she was a Corporalki, a Grisha who focused on the human body? You can look around with a Perception check or try to make something with a Mind check here. Succeeding the Perception check gets you a training manual for Grisha, while succeeding the Mind check nets you a health potion.
Where could the First Army have taken everyone, though?
Head south from the Dark Tower to a fork in the road. Let’s go left first. Continue down the path until some fences appear, then turn to Dzmira’s Farmhouse. Offer to help her find her son. You can also attempt a Perception skill check to attempt to find a trail to her missing boy – this will reveal that Leri went north.
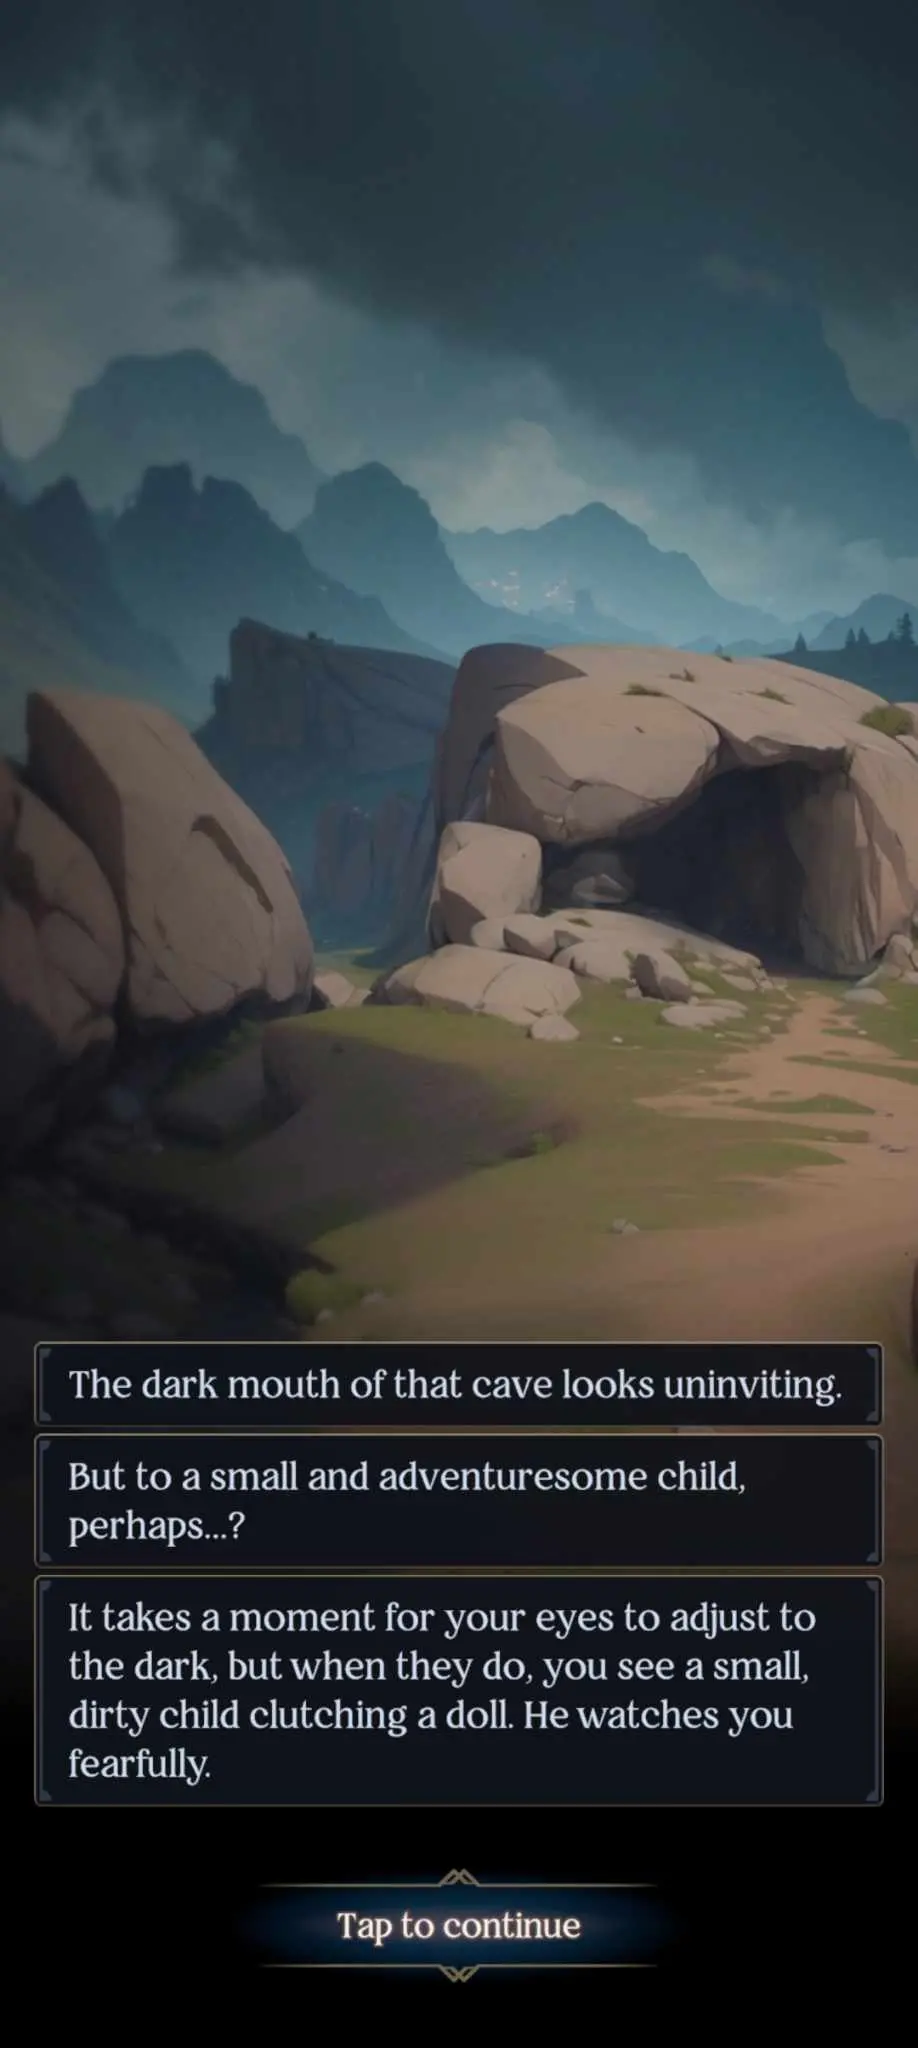
Leave the farmhouse and continue a tiny bit to the left, then upwards to the Cave. You’ll find a scared child here. Well, that was easy.
You can calm Leri down with a Charm check or you can give him the doll you found in the Dark Tower if you passed the skill check in the cells. After you get him to calm down, you’ll need to use the Small Science to light a path out of the cave. Bring him home to Dzmira to get a sack of grain, which we’ll need later.
Go south from Dzmira’s Farmhouse to find a beggar. You can give him money or food and ask him for information about the tower. He’ll tell you that he remembers some Ravkan soldiers raiding around the area, looting anything they see, and enslaving anyone they come across. More importantly, he’ll mention there’s only one place they’d be going – Uzhasny, an old ruin.
Continue down the path and you’ll be ambushed by a Ravkan patrol. You can attempt a sneaking minigame to get past them or pass a Force check.
Continue westward and up the road. You’ll notice that the road to the cave merges with the path we just took. Head to the left to the abandoned Farming Wagon to get a sidequest to find some medicine for her baby. We already know where to get the stuff – it’s in the workshop back at the tower, though we won’t go back there just yet.
Visit the Ruined Farmhouse to the upper left of the wagon. You can attempt a Perception check to see if anyone’s inside, which will then allow you to attempt to disarm the booby trap. Regardless, you’ll be able to speak to the woman inside: Luda, a deserter from the First Army.
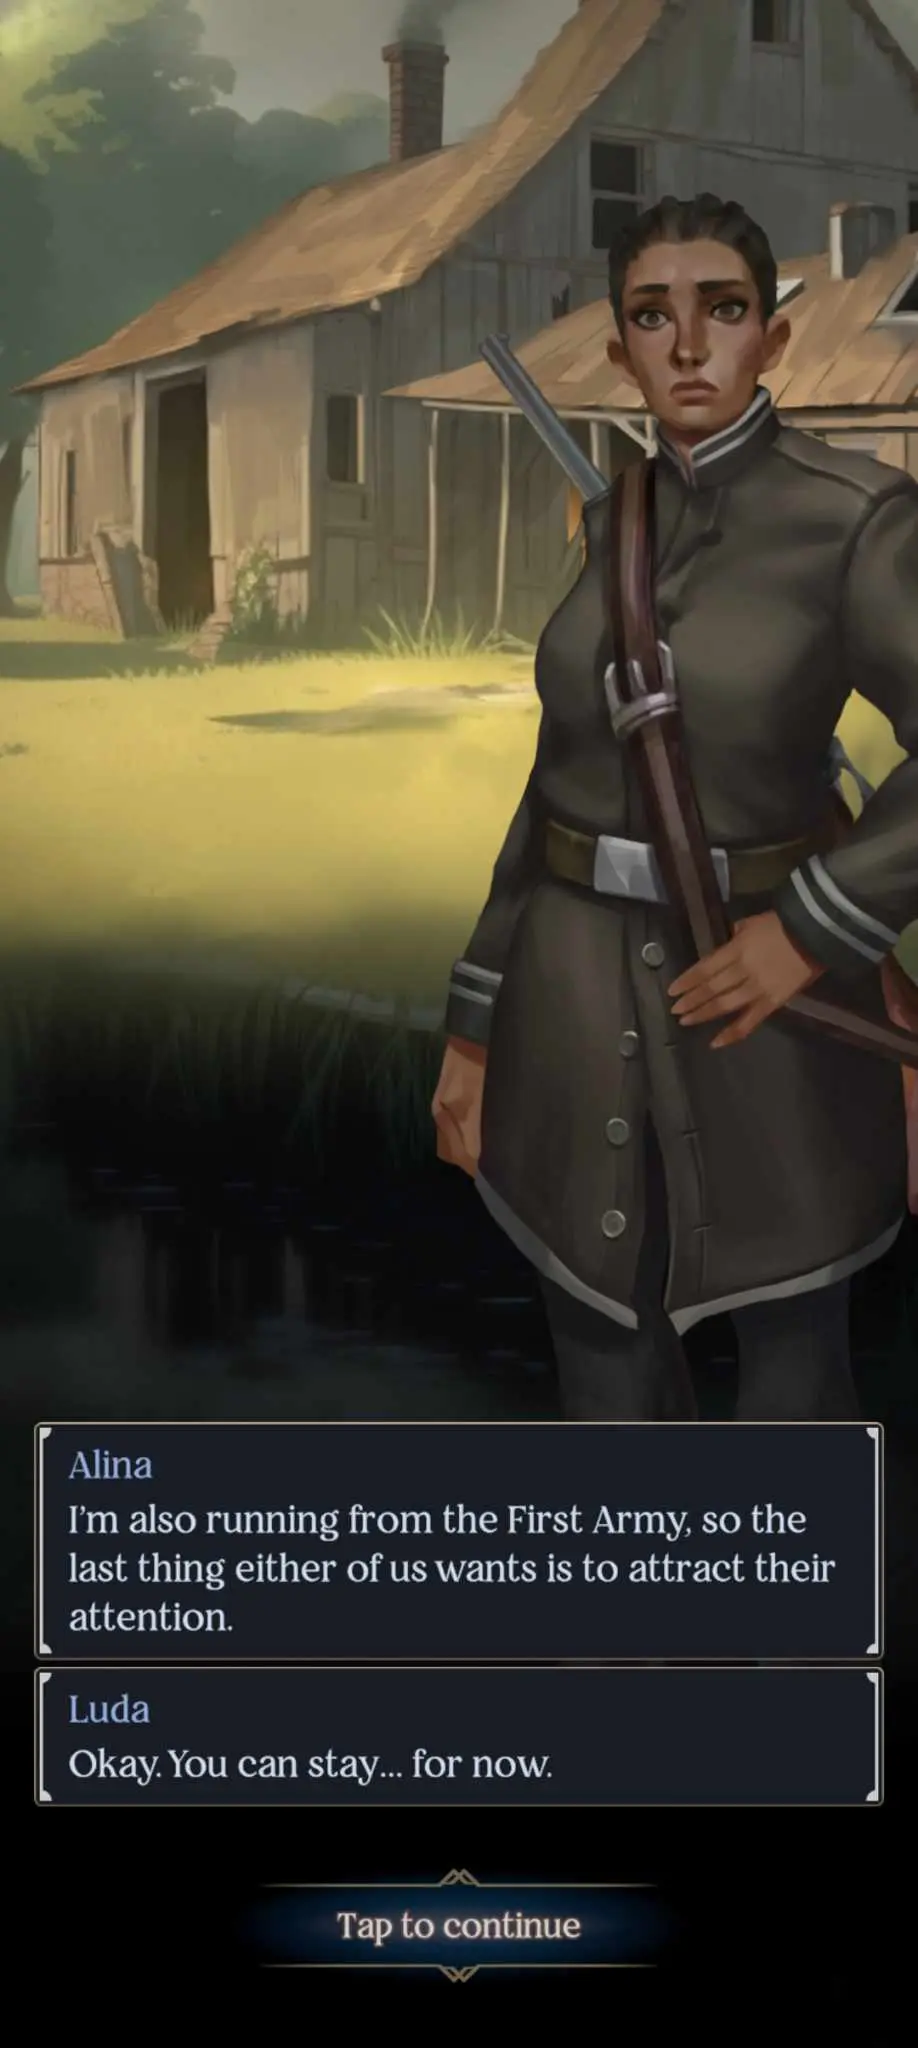
She’ll corroborate the beggar’s story – the First Army is running rampant here under their commander, Karonov. The once proud army degenerated into little more than bandits and raiders, with Uzhasny as their headquarters. She’ll also mention that there’s an “open” market in Uzhasny, so if we can pose as a trader, we should be able to get in easier.
Luda will also mention her brother, who’s looking for the right moment to desert. His name is Juris Kuralev. Keep his name in mind since we’ll be attacking Uzhasny soon. Before we depart, offer your help to Luda. She’ll give you a note with a code to let Juris know she’s safe and where she’s hidden.
We’re done here. Cross the bridge to the south and visit Sherkov’s Campfire.

There’s a man here, another deserter. He seems familiar, so try to identify him with a Perception and/or a Mind check. Regardless, you can join him or pass him by. If you choose to join him, he’ll identify himself and apologize for the way he treated you – it was out of jealousy for your partner, Mal. It’s all water under the bridge now, though.
From Sherkov’s campsite, go to the lower right to find Uzhasny.
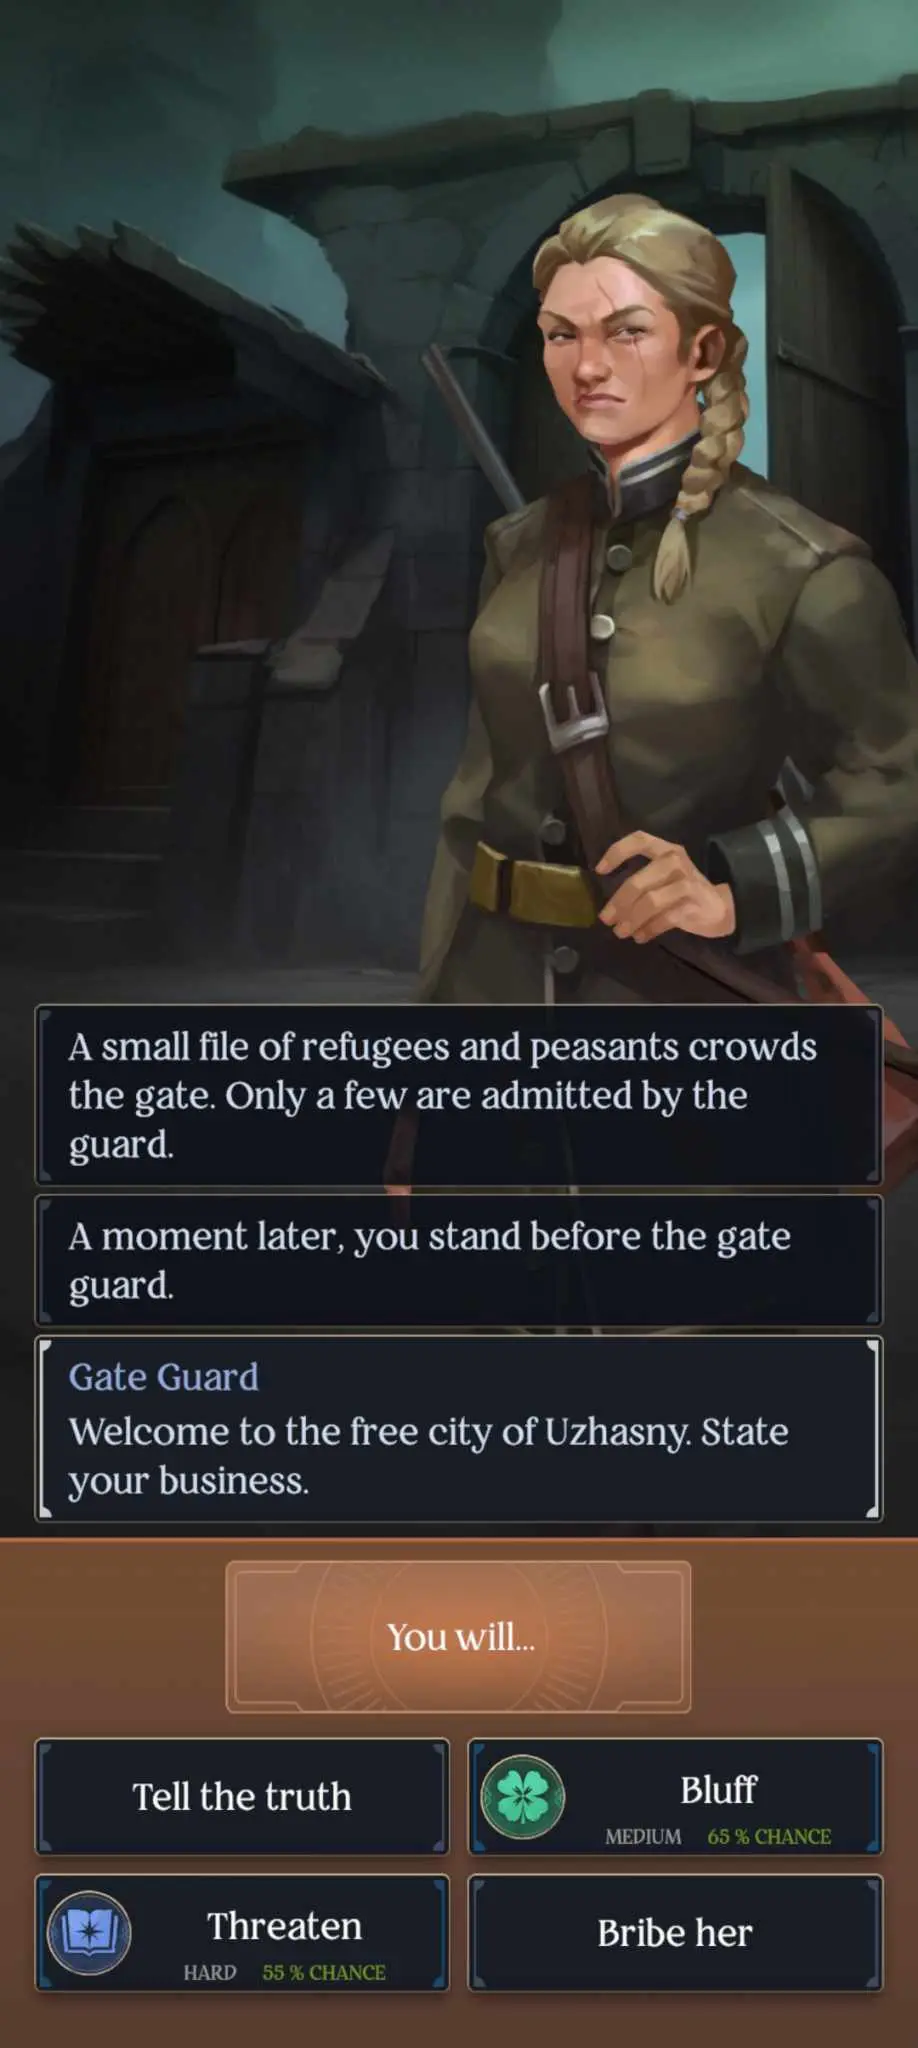
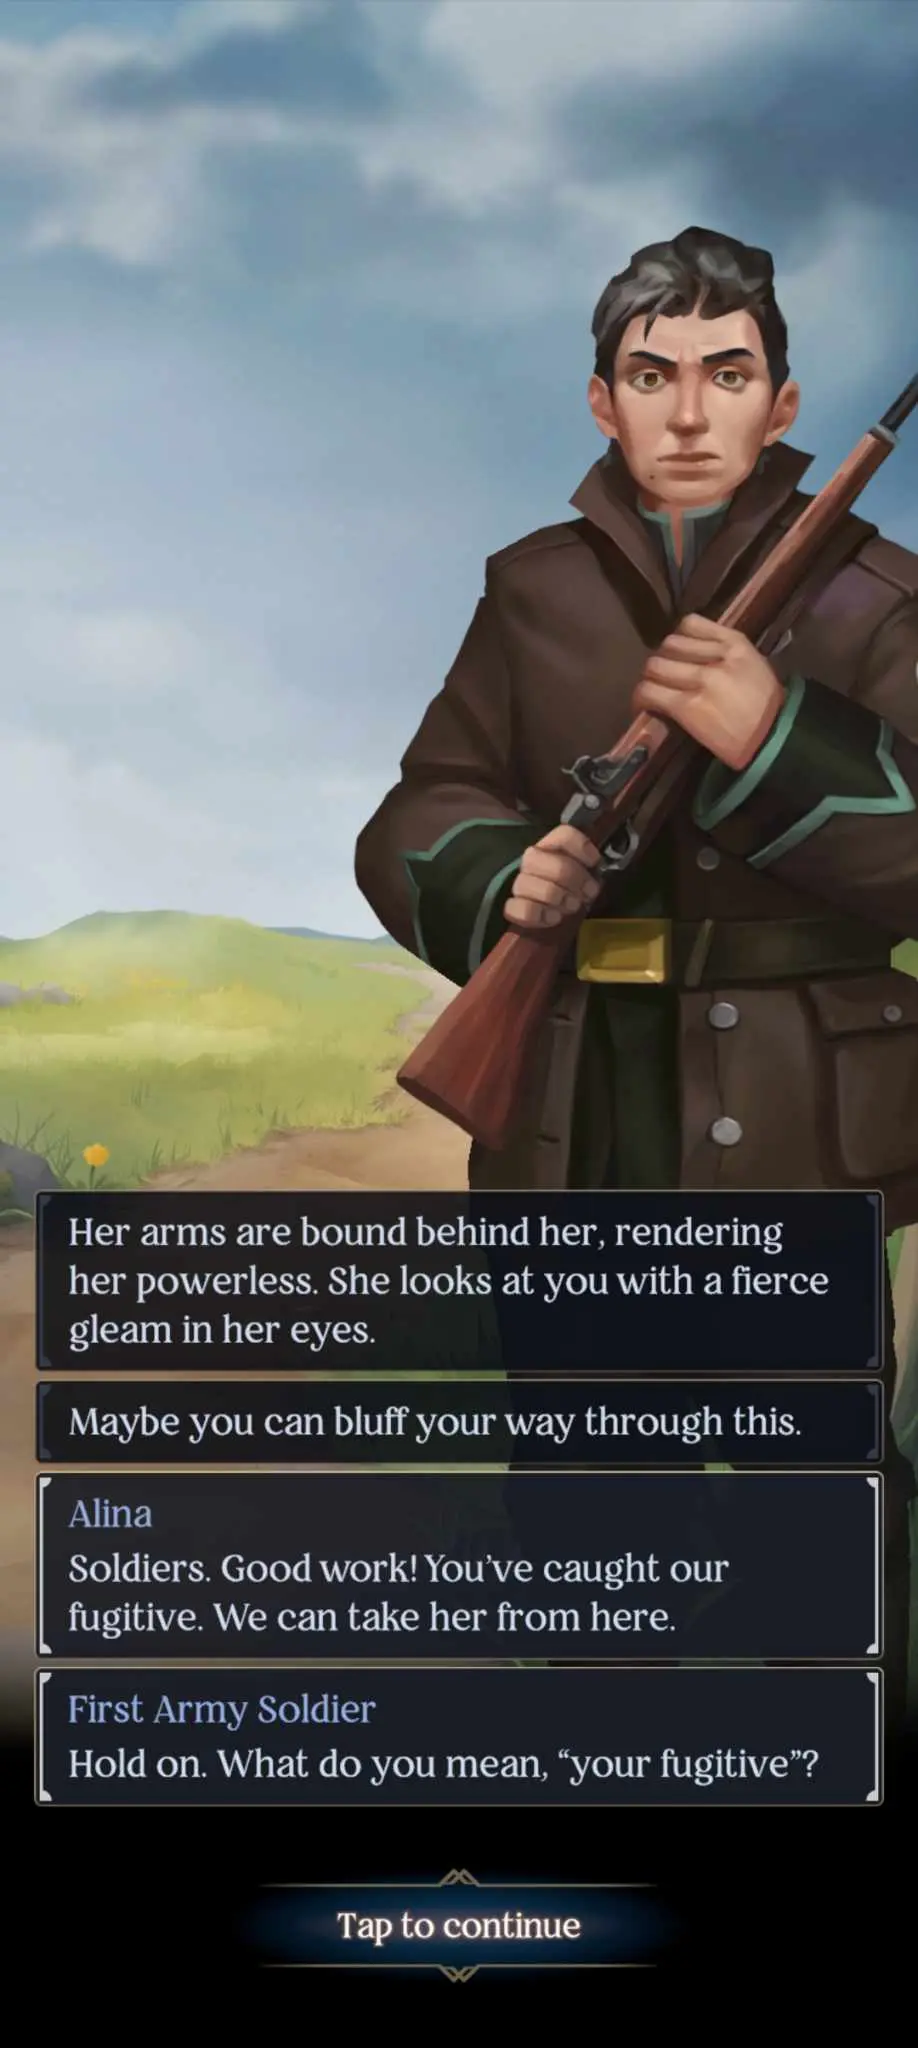
There are two ways to get in – you can sneak in via a minigame, or enter the main gate and deal with the guard (truth, bribe, or skill checks). Once you’re in, head to the barracks to pass the note to Juris. You’ll need to pass a Charm check to give him the note without trouble, though. As a reward, he’ll tell you that Karonov currently holds two prisoners – a young Grisha woman and a tracker, Mal. You can ask more about them, and you’ll also learn that they’re being held in the catacombs. Finally, ask Juris for help to get his key ring.
Head to the armory first and get Mal’s Rifle. You’ll want to be prepared for any eventuality when you break them out. Next, head to the Agora and purchase a book from the merchant for Vasha (you can haggle for a lower price with a Charm check). You can also buy potions and supplies from him.
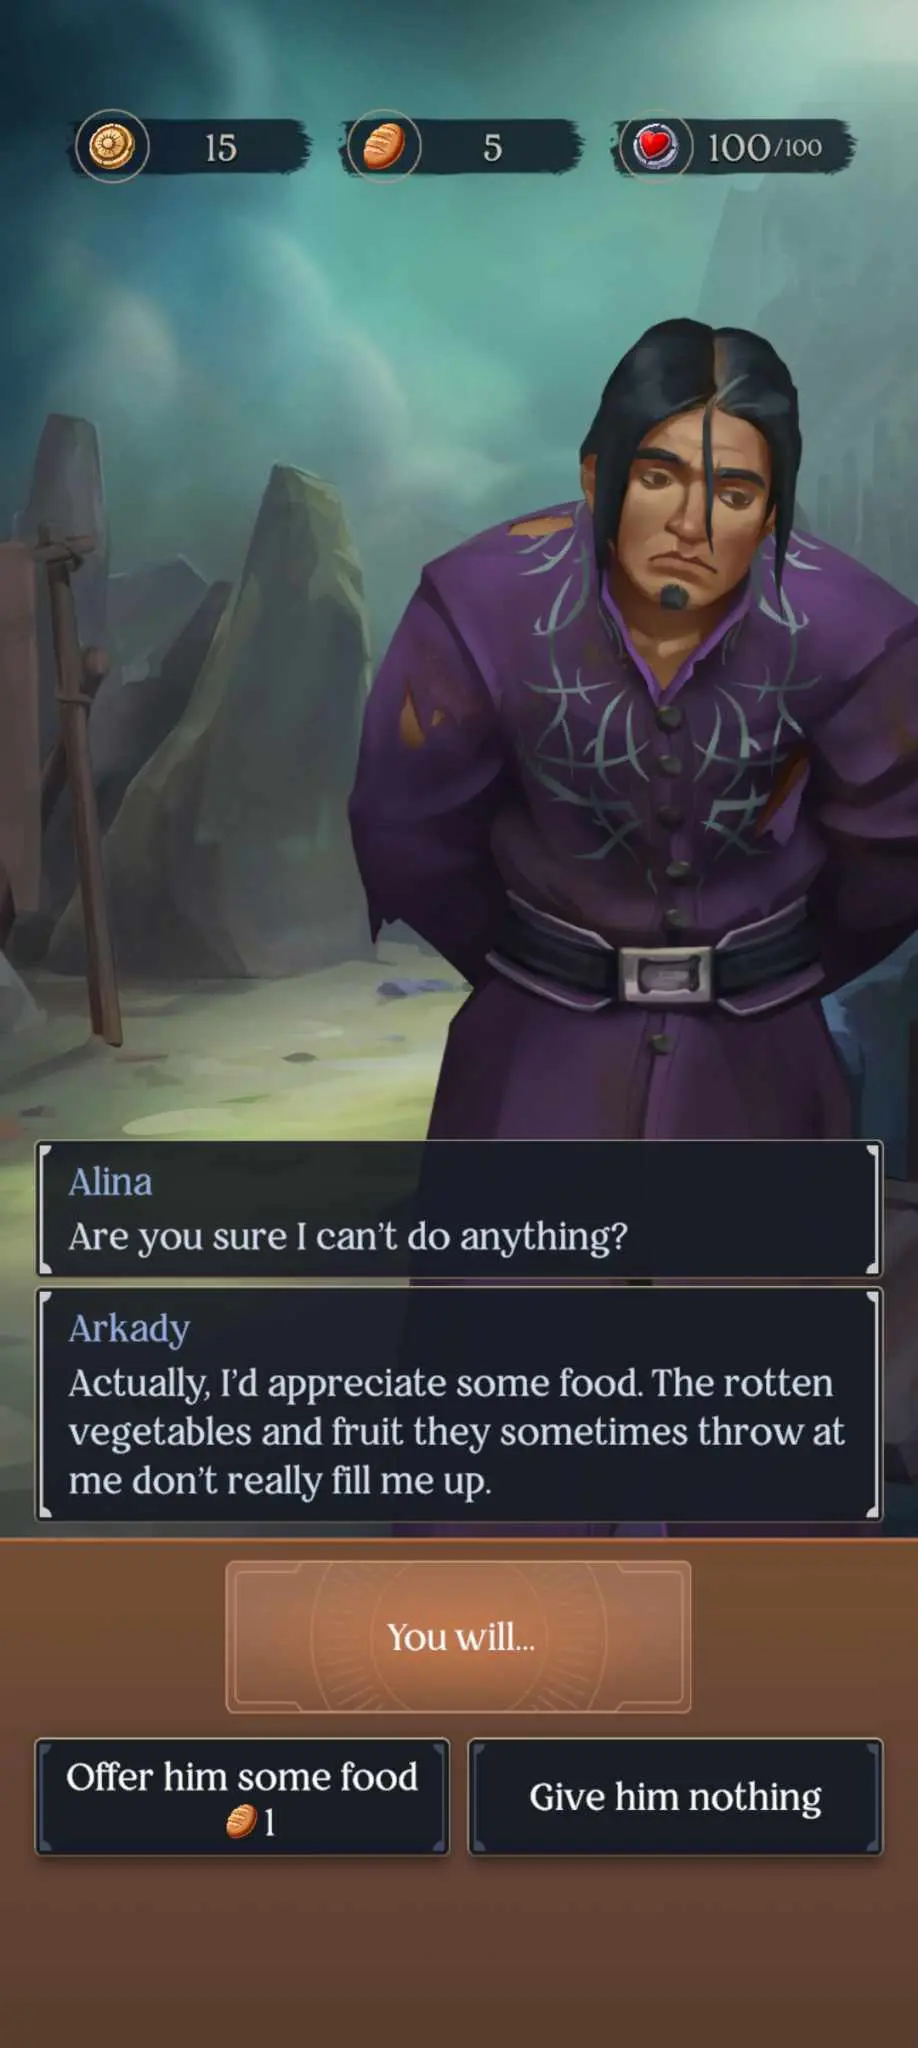
Next, head to the pillory to speak with Arkady, an imprisoned Materialki. Offer him some food if you want. If you offer him kindness, he’ll offer a way to craft one-use keys that will come in handy for freeing Mal and the Grisha. Go to the barracks and the stables to find some metal (a spoon and a horseshoe), then return to Arkady and craft two keys. Note that you’ll have to visit him twice.
If you want to, you can also head to the Throne Hall. Persuade the guard with a Charm check and Karonov himself will give you permission to head to the dungeons to speak with Mal.
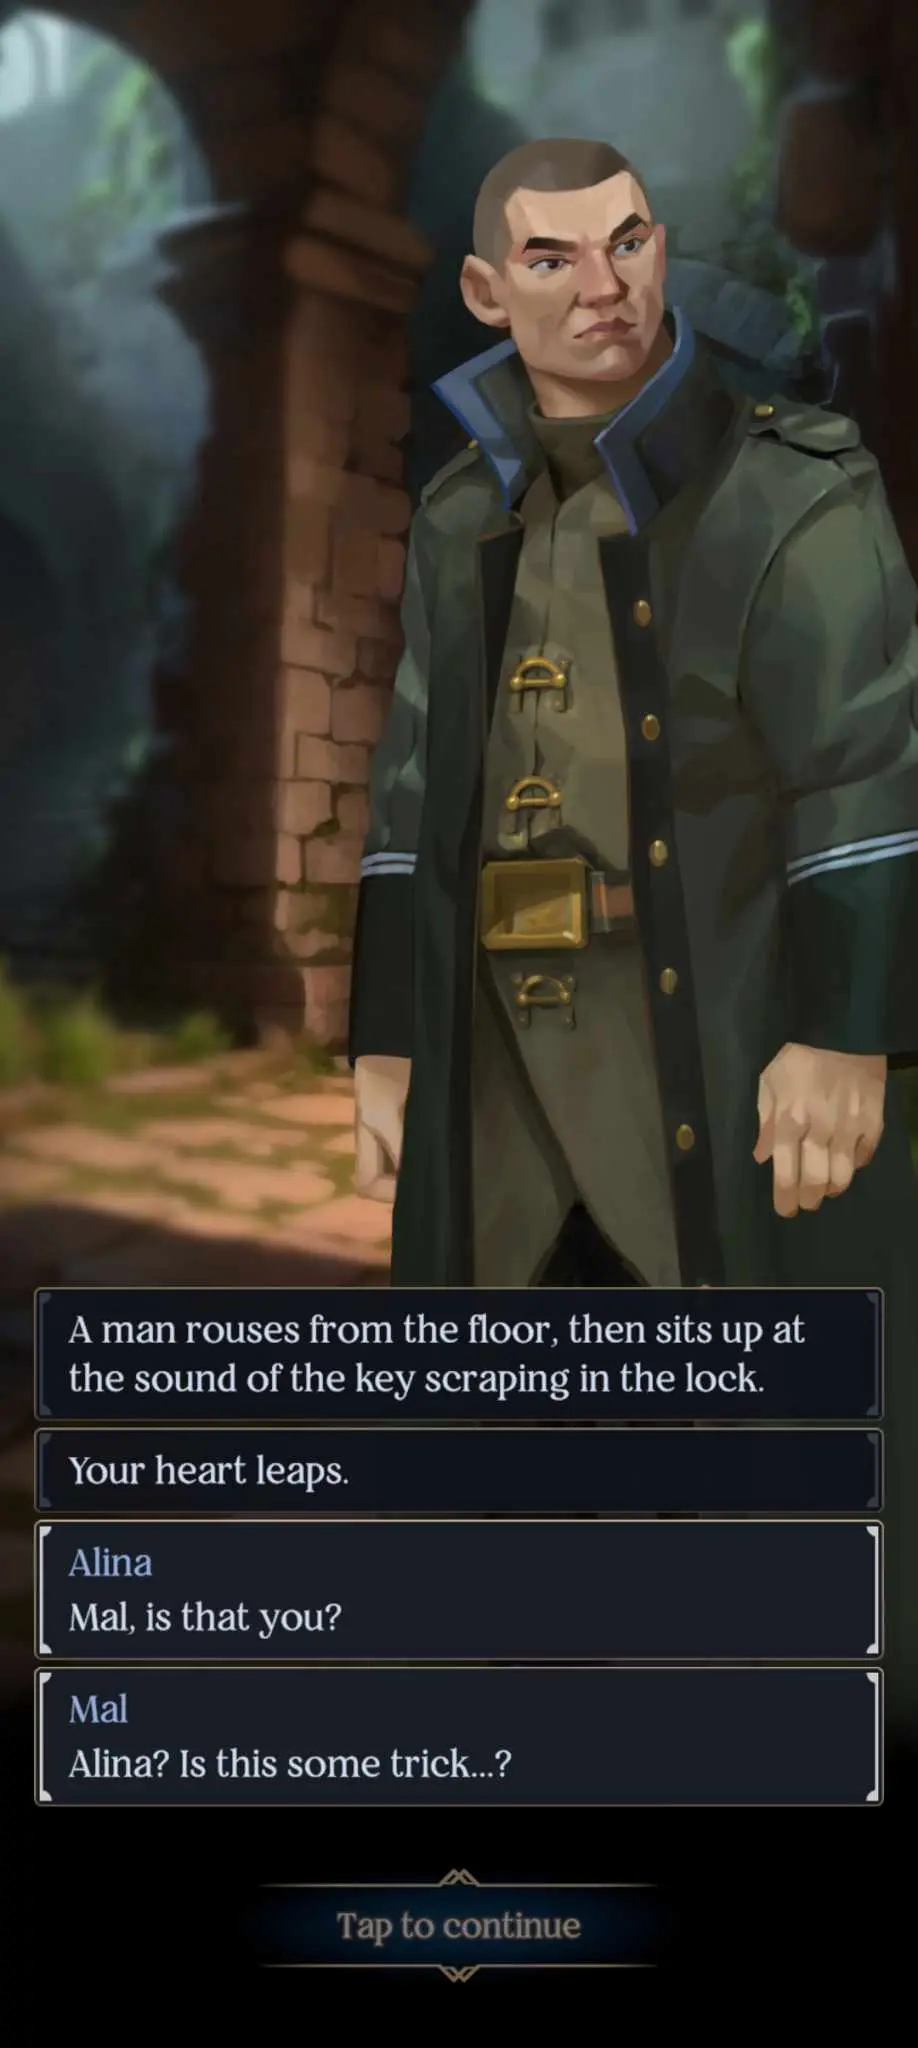
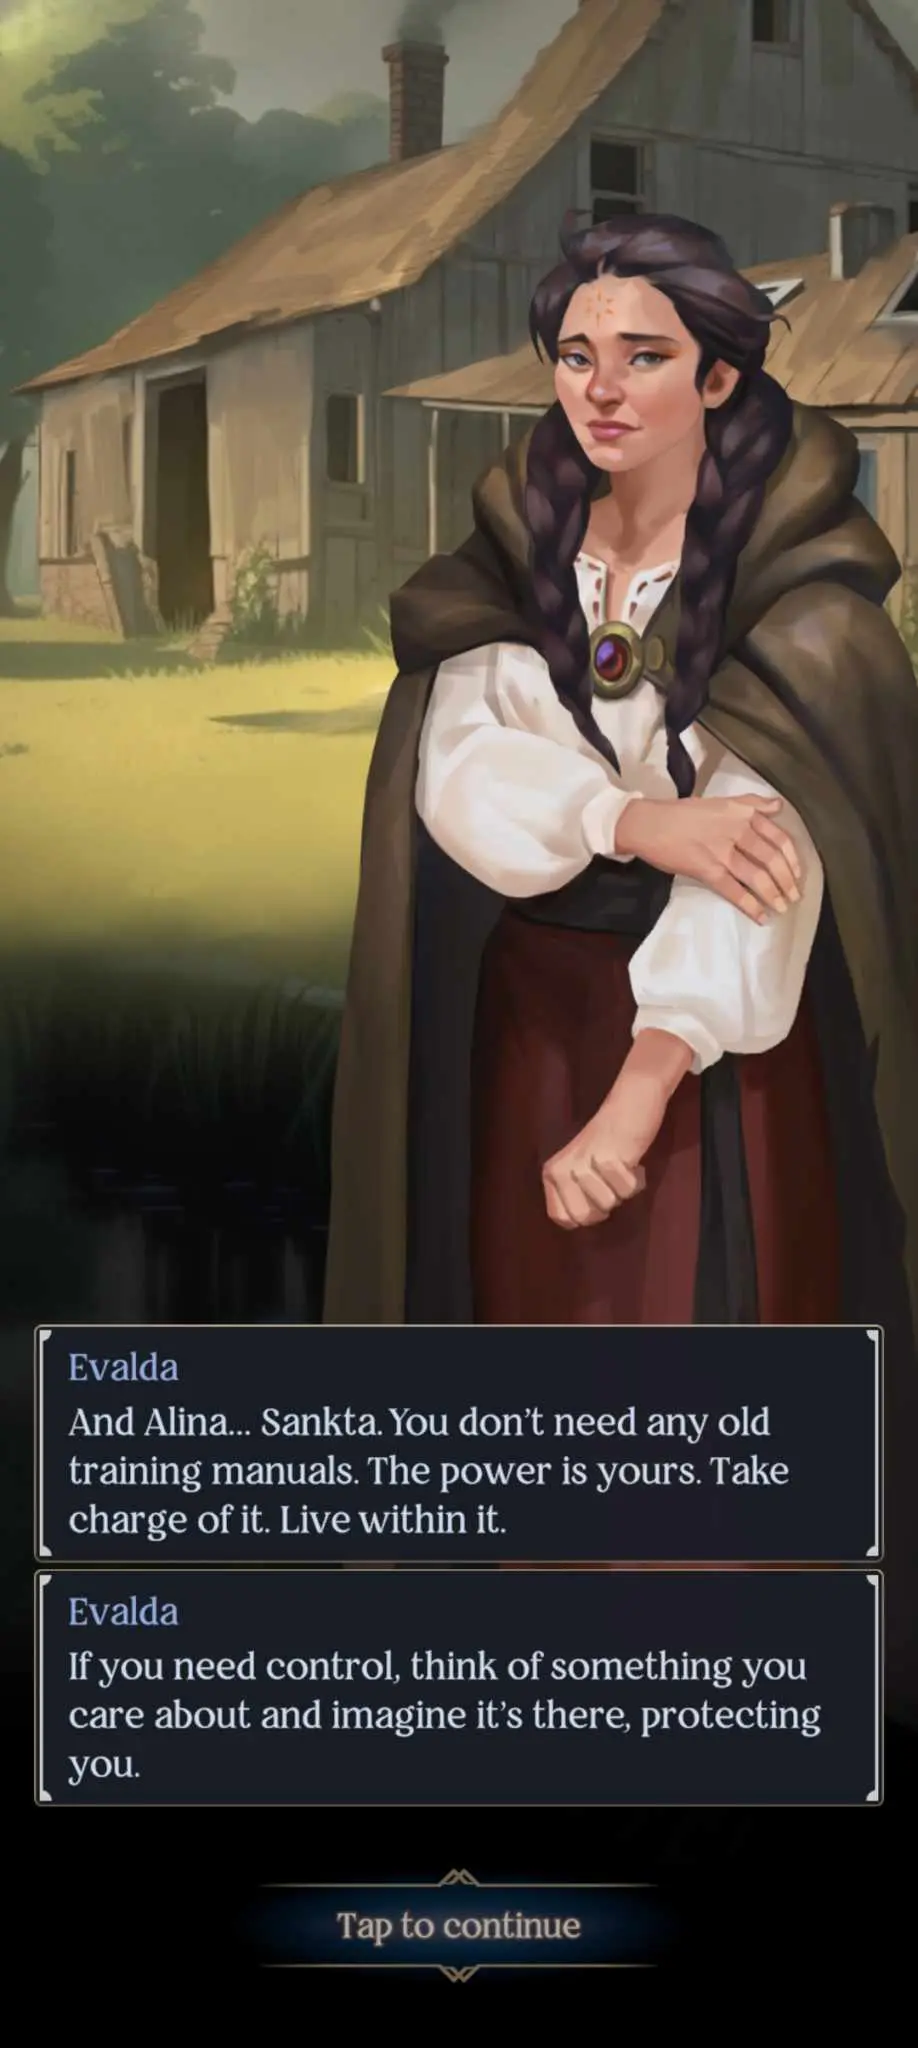
We’ve done all we can here. Head to the dungeons and either Charm the guard into letting you in or tell him that Karonov sent you if you passed the Throne Hall check. Free both Mal and the Grisha – Evalda, not Zulfiya, who knows how to control your powers – and agree to meet them at the Ruined Farmhouse to the north.
Our business here is concluded. Leave Uzhasny and go back to the Ruined Farmhouse where we met Luda. There, Alina will outline her plan to find a boat and an experienced sailor across The Fold to search for other Amplifiers. Evalda will help you by directing you to Tomsky, a smuggler with no love for the First Army.
Evalda will also briefly explain to Alina how to control the power within her.
You’ll need to escape from the First Army patrol. You can either attempt to leave via the back door (triggers a Force check), shoot your way out (shooting minigame) or sneak out (sneaking minigame).
Head back to the Dark Tower to get the herbs for the woman’s baby in the Grisha workshop. You’ll need aleurone to prepare the medicine. Good thing we have that bag of grain, right? And while you’re at it, head back to Vascha’s camp by following the trail to the east of the tower and give him the book we bought from Uzhasny. He’ll repay you with a health potion. Not that we need it, but it’s the thought that counts.
You can return to the woman with the baby if you want, though I suggest not doing it until later as the chapter will end in Kribirsk. You won’t get any prizes anyway, just the satisfaction of doing good.
From the Dark Tower, head south to the road and this time head east. You’ll see a hunter along the road who’ll offer you some supplies and the chance to rest if you pay him – do so if you really need it. Follow the road southwards then to the left to reach Adena.
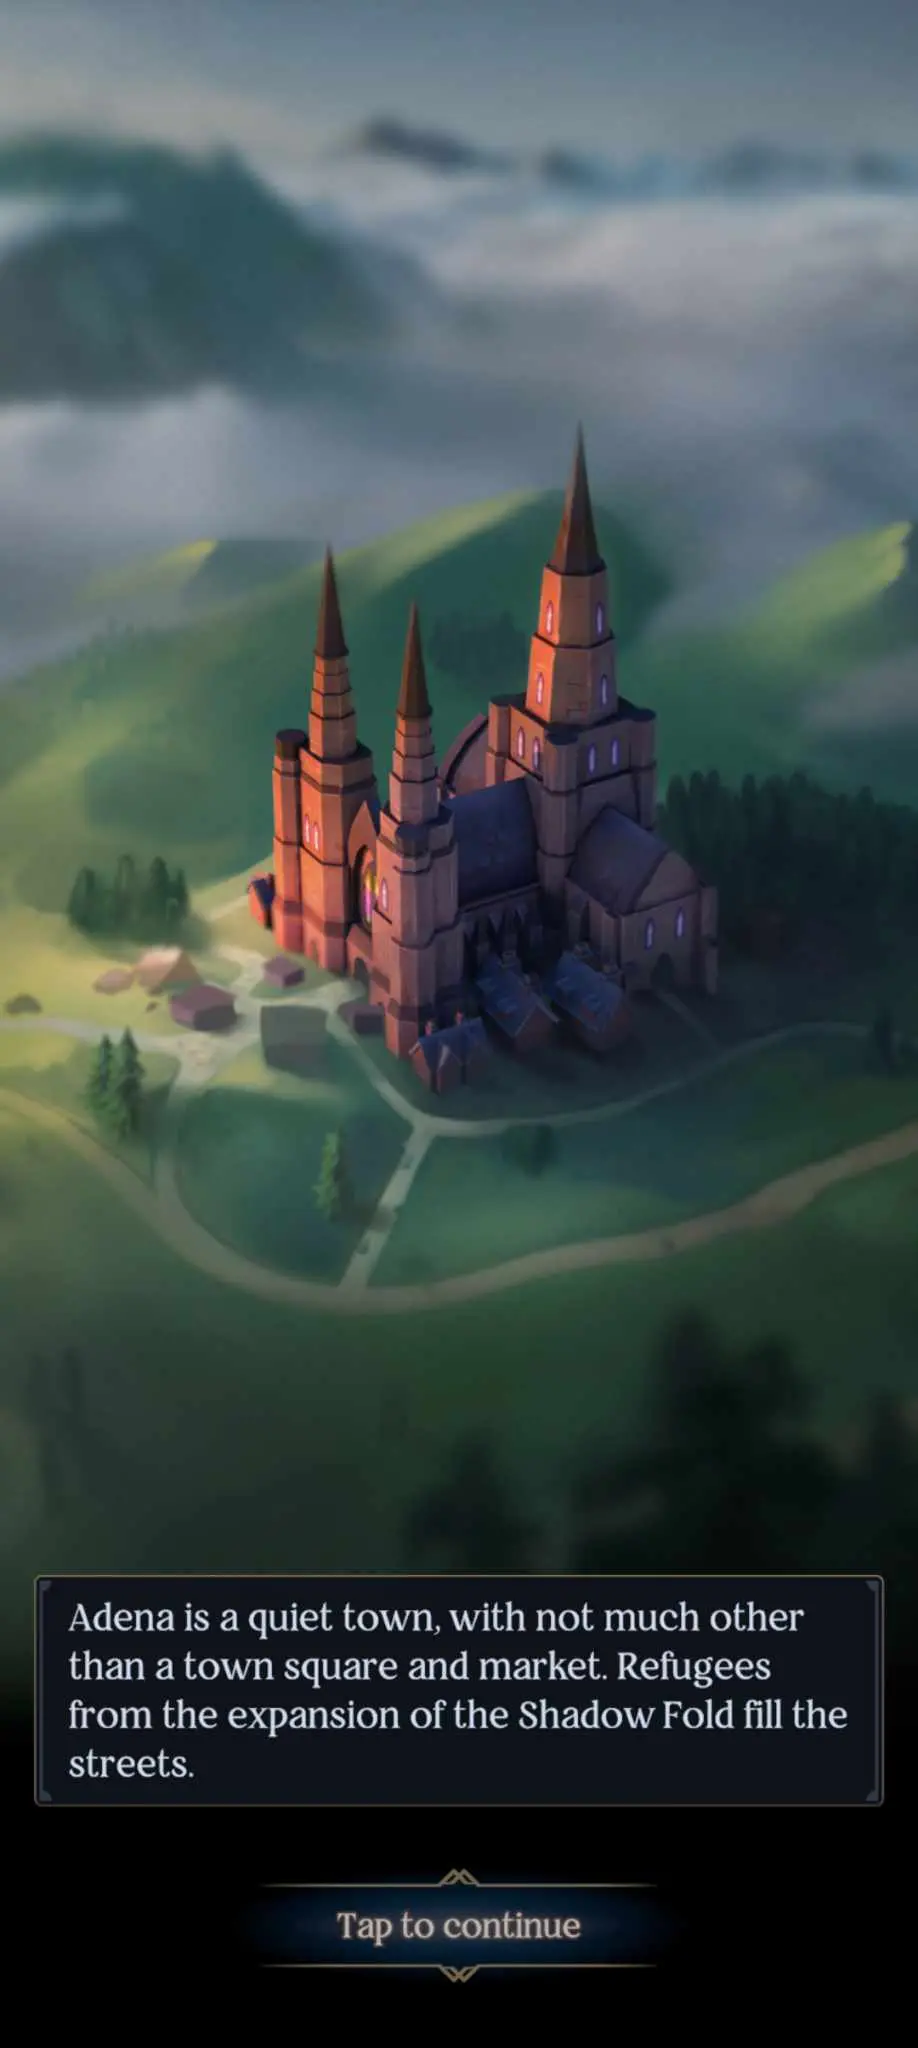
We’re looking for Tomsky, so head to the market square. You’ll need to bribe, persuade (Charm check), or threaten (Mind check) a merchant to get information on Tomsky. He’ll reveal that Tomsky is currently somewhere north of Kribirsk, taking on refugees.
If you head south from Adena, you’ll find a man on the crossroads who will rob you if you approach him. You’ll need to succeed in a chase minigame to get your stuff back. There’s also a cadre of First Army soldiers guarding the bridge, so you can’t cross just yet. Make your way back to the Ruined Farmhouse, cross the bridge, then hug the northern riverbank and head west until you reach the Smuggler’s Camp directly above Kribirsk.
While Mal will advise caution when dealing with Tomsky, there’s no need to lie as Evalda has already informed him of your situation. But while Tomsky is more than willing to take you and Mal across, he has a problem – his Squaller hasn’t returned yet, and worse, she’s somewhere in Kribirsk. If you visited Kribirsk previously, you’ll know that it’s chock-full of First Army soldiers. Getting in and moving around undetected is going to be a challenge.
Instead of trying to enter Kribirsk, look for a combat encounter that spawned in the area. This will reveal that Anastasia, the Squaller, has been captured by a group of First Army soldiers. Deal with them either with force or finesse and get Tomsky’s crewmate back.
Return to Tomsky’s camp.
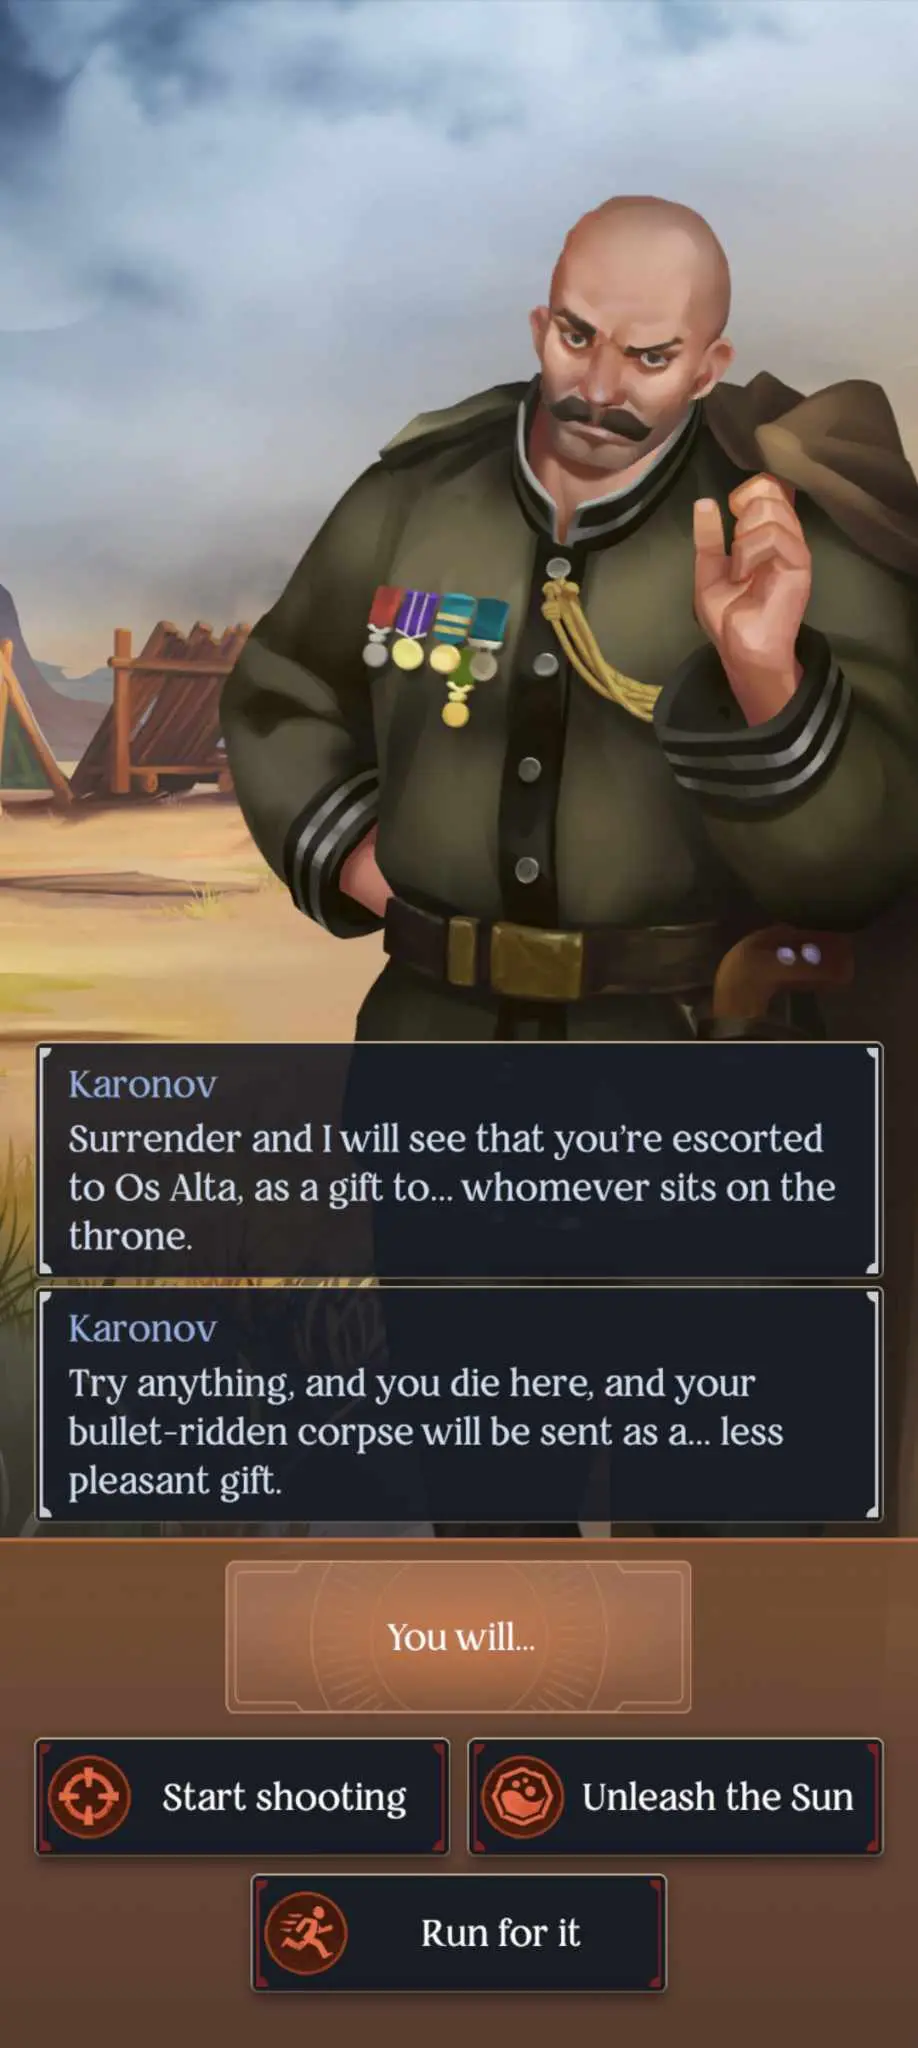
Deal with Karonov as you see fit but remember – you need him out of the way if Tomsky and his crew are going to get anywhere. Once he’s been dealt with, you’ll cast off, and the chapter ends.
Alina Starkov – No Time to Linger
As you and Mal cross the Fold, memories of Kirigan assault you. Perhaps it’s because he’s tied to this place.
Side Quests:
- Rescue Evalda and the refugees.
Once you land on the docks, you’ll be beset by thugs.
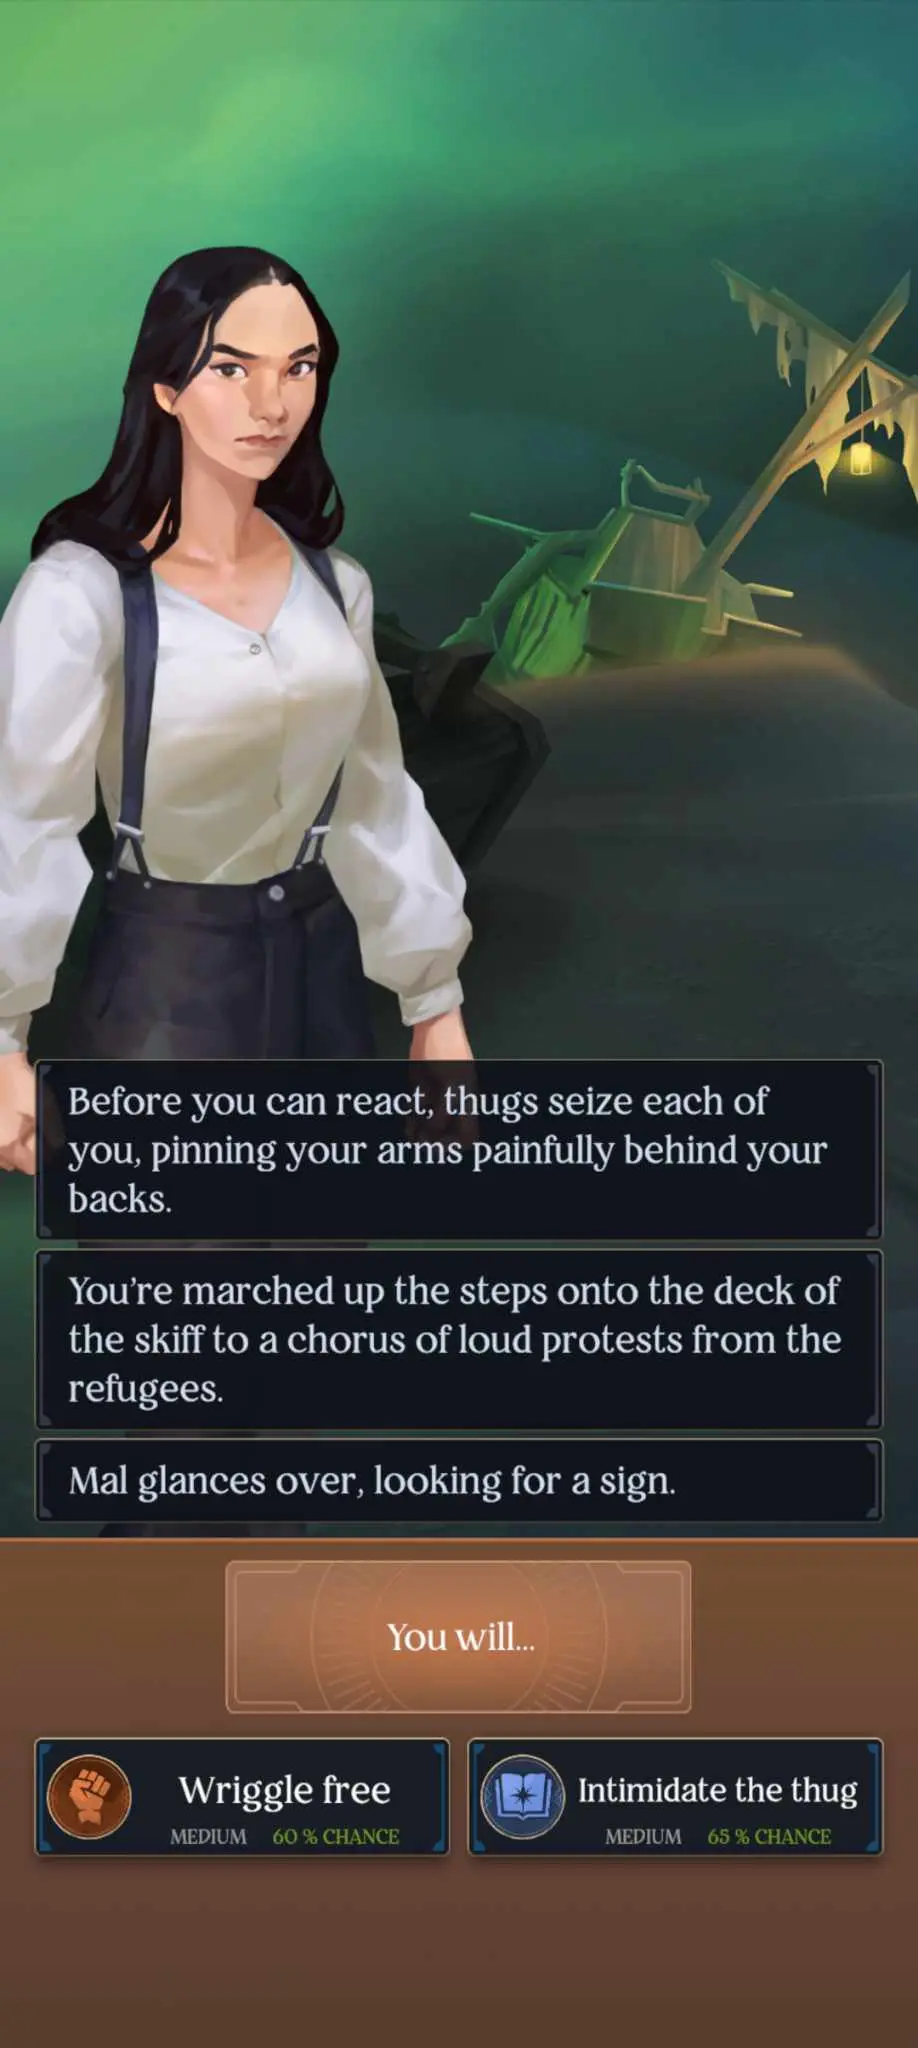
You’ll need to choose whether to leave the refugees or run off. I chose to run – Mal does have a point in that they’re interested only in you. Head west to Valesk to report what happened at the docks, and maybe help the refugees and Evalda. You’ll meet the “village leader”, Varvara, and she’ll mention a bandit camp to the north.
You can’t go to the bandits just yet though. If you want some money, you can head north, across the bridge, then east to find an injured soldier. Pass a Mind check to get some coins, then head directly west from Valesk to reach the city of Os Kervo.
Visit Os Kervo’s docks to reunite with Inej, one of the Alina’s old comrades. She’ll do some sniffing around and reveal that it’s impossible to leave Ravka as the First Army has complete control over the coast. She’ll suggest gaining the favor of the mayor of Udova, who very likely has a way to bypass the lockdown.
Before you can leave though, you’ll be attacked by guards. Either run or use Small Science to escape.
Udova can wait for a little bit. After you escape the guards and leave Os Kervo, head south to a wagon and try to help the farmer find his way. Once that’s done, head across the bridge north of Os Kervo and stick to the left path. Follow the cobblestone road to the north until you reach an intersection. You can go left to Udova or head north to the bandit camp. Let’s go to the camp first. To get there, follow the road north, and once you hit a fork, head upwards and right.
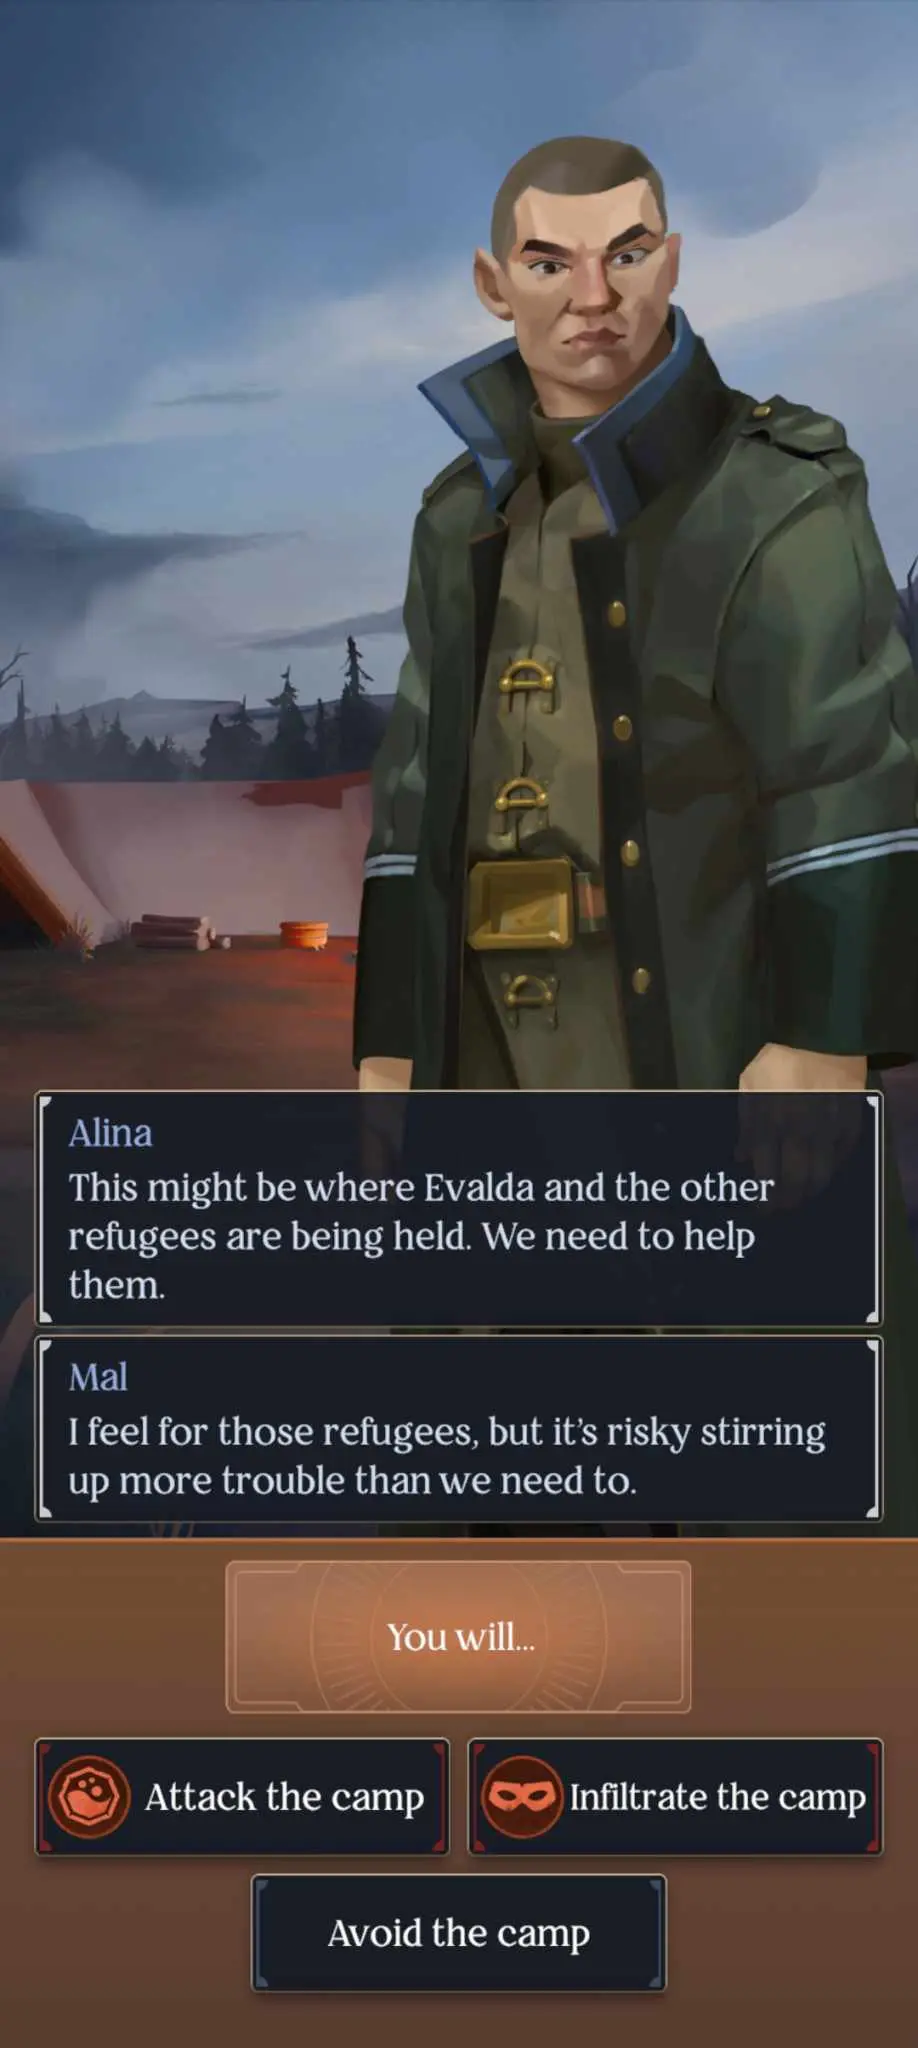
You can opt to attack the bandits directly or sneak inside. Once that’s done, you’ll find Evalda and the rest of the refugees, who’ll make their way back to Valesk. On to Udova. Head back to the fork on the road and west to Udova. On the way, you’ll find a group of children who’ve lost their mother. Help them with a Perception check.
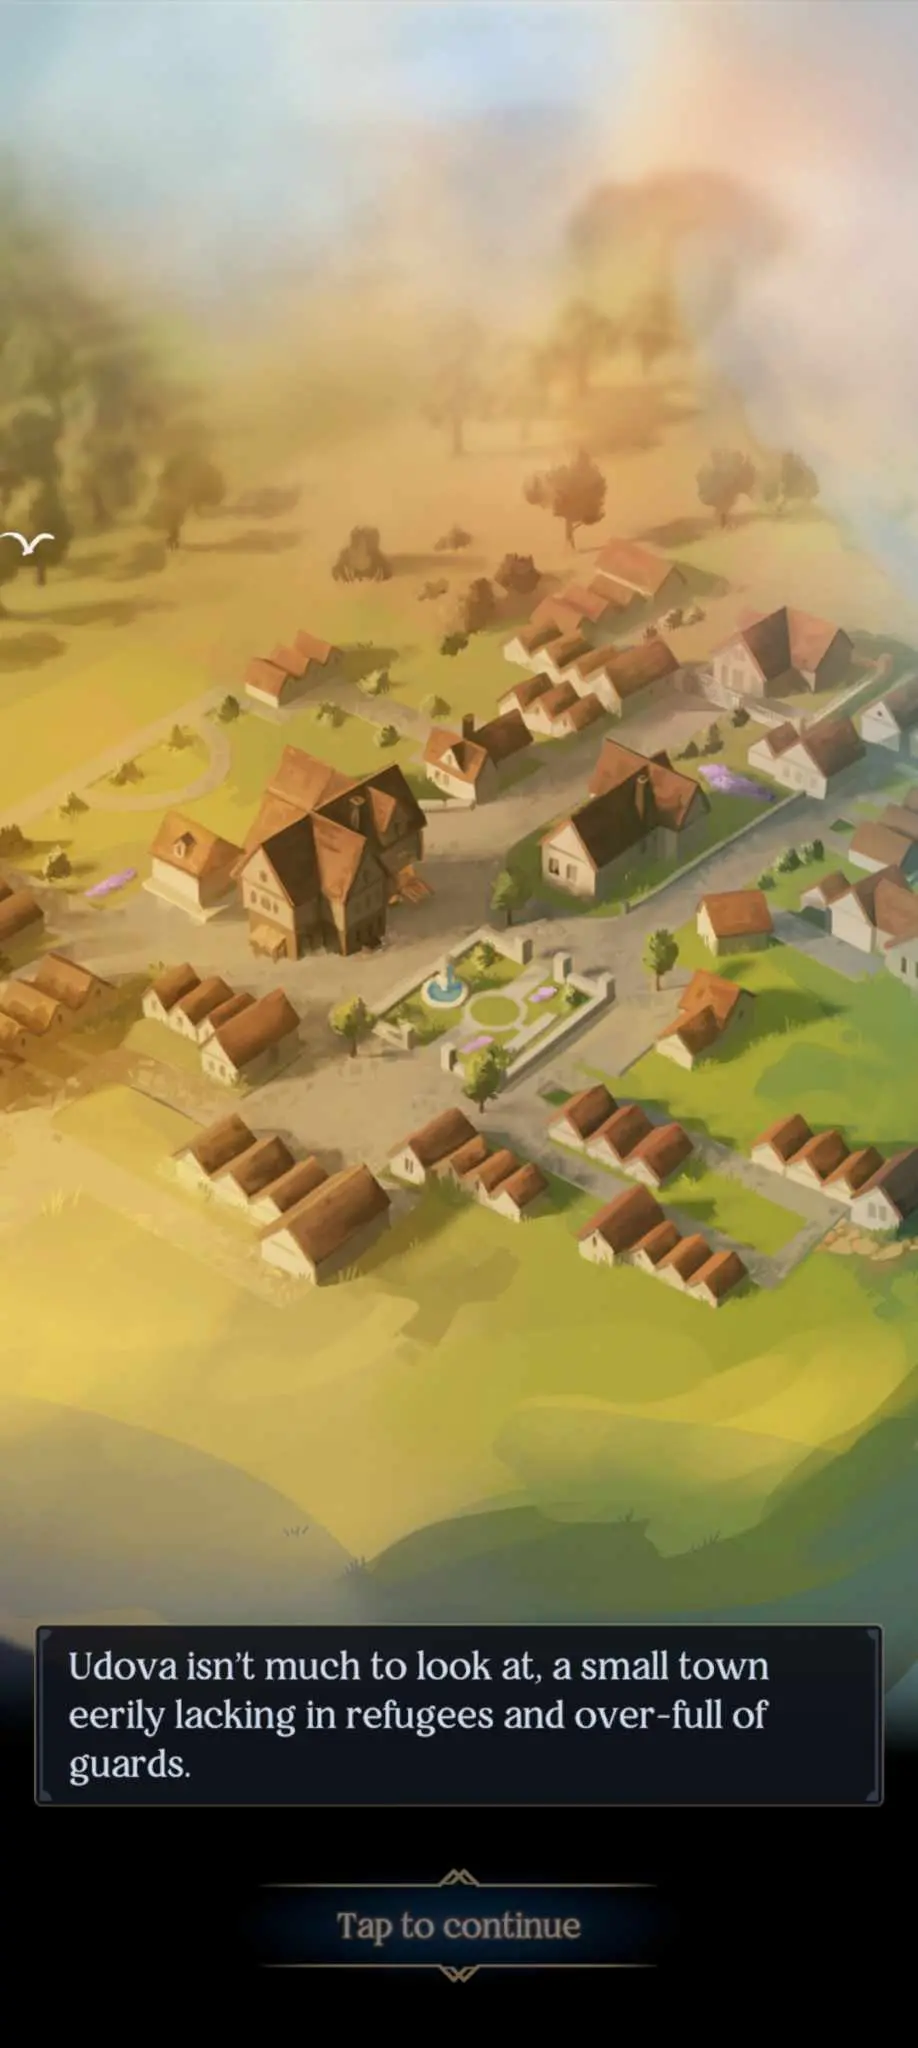
…friendly place.
Udova offers you two options:
- The village square houses a merchant who’ll offer you potions and supplies. You can try interacting with the locals but you’ll quickly discover they’re deathly afraid of the guards.
- The Mayor’s house is where you want to go. The mayor, Kalukov, is a smarmy, business-like sort. He’ll trade tickets to the boat you need…if you go to Os Kervo and get him a certain book from the library. Simple, right? Of course not.
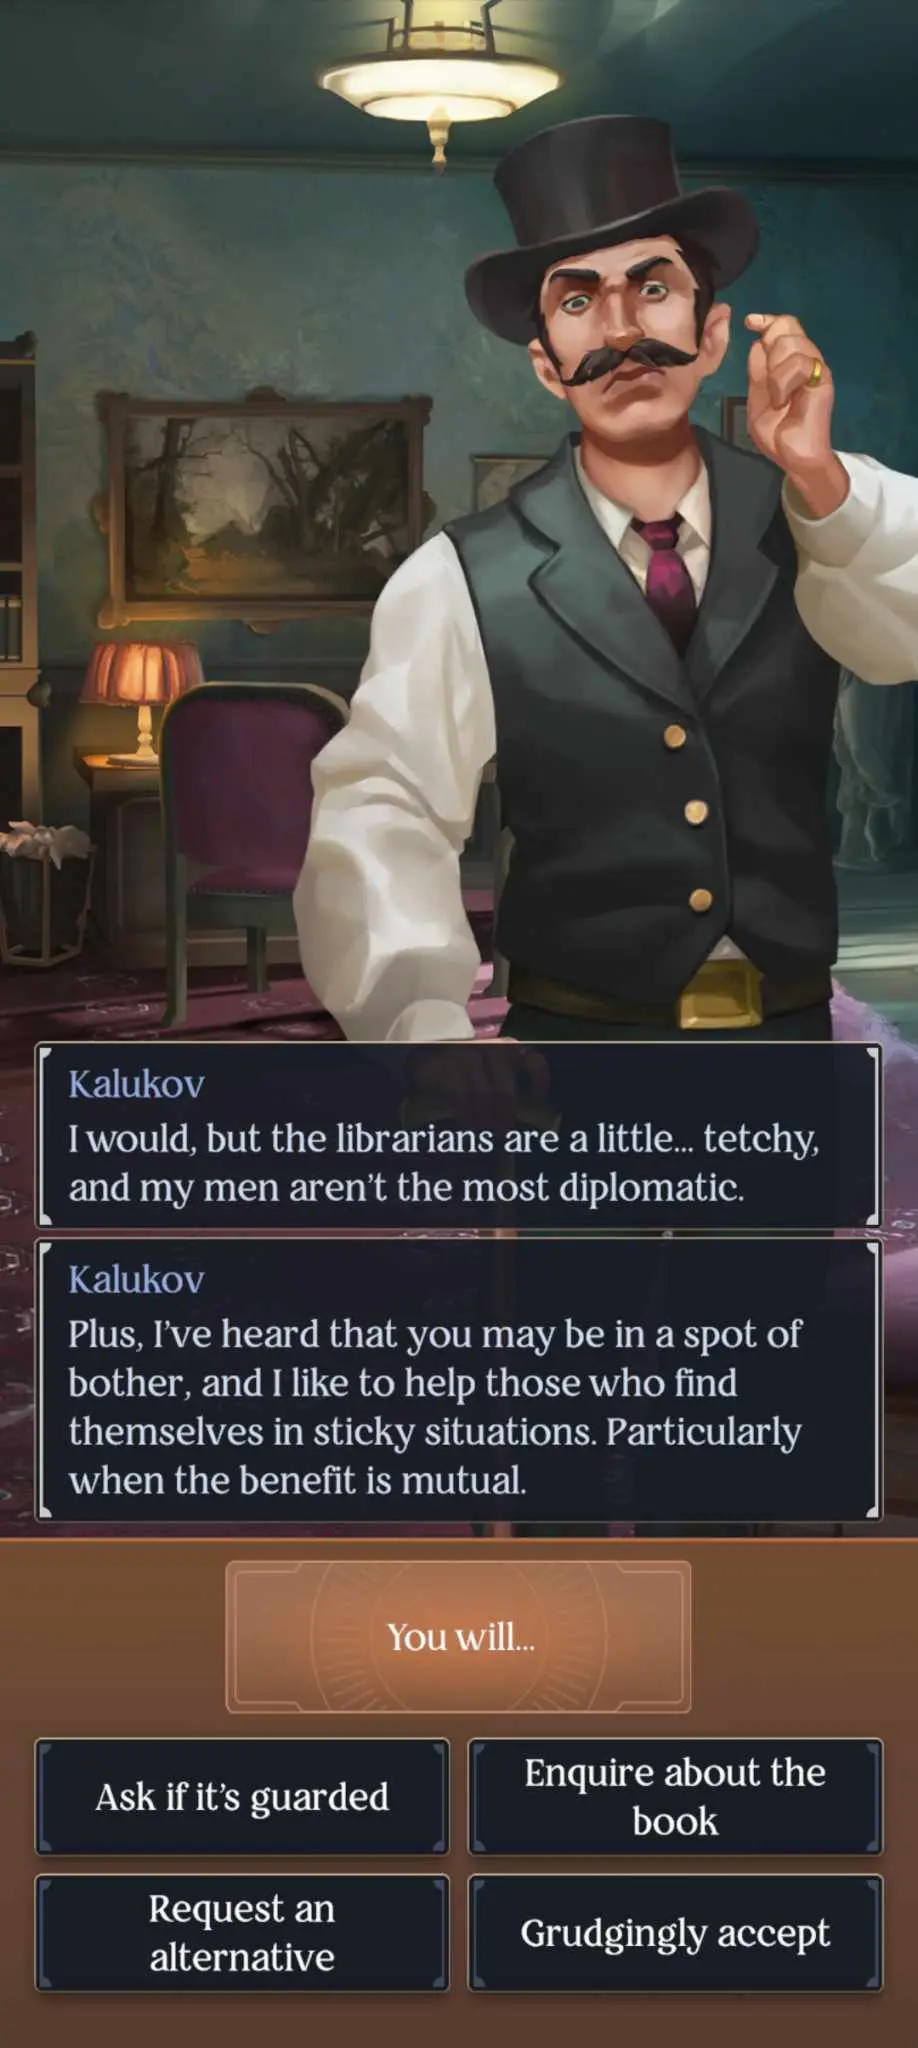
We don’t really have a choice here. Kalukov will give you more information – the book he wants is called Etovost Sankt’ya, or “Uniqueness of the Saints”. Once you get the book, drop it off at the Abandoned Campsite just north of Os Kervo.
At least we know where to go now. Head back south to Os Kervo. You’ll find a soldier along the way; if you pass the persuasion check, you’ll be able to take some of his loot, which translates into coins and supplies.
Go to the Os Kervo library to find it absolutely infested with the First Army. No wonder Kalukov didn’t want to use his own for the job…
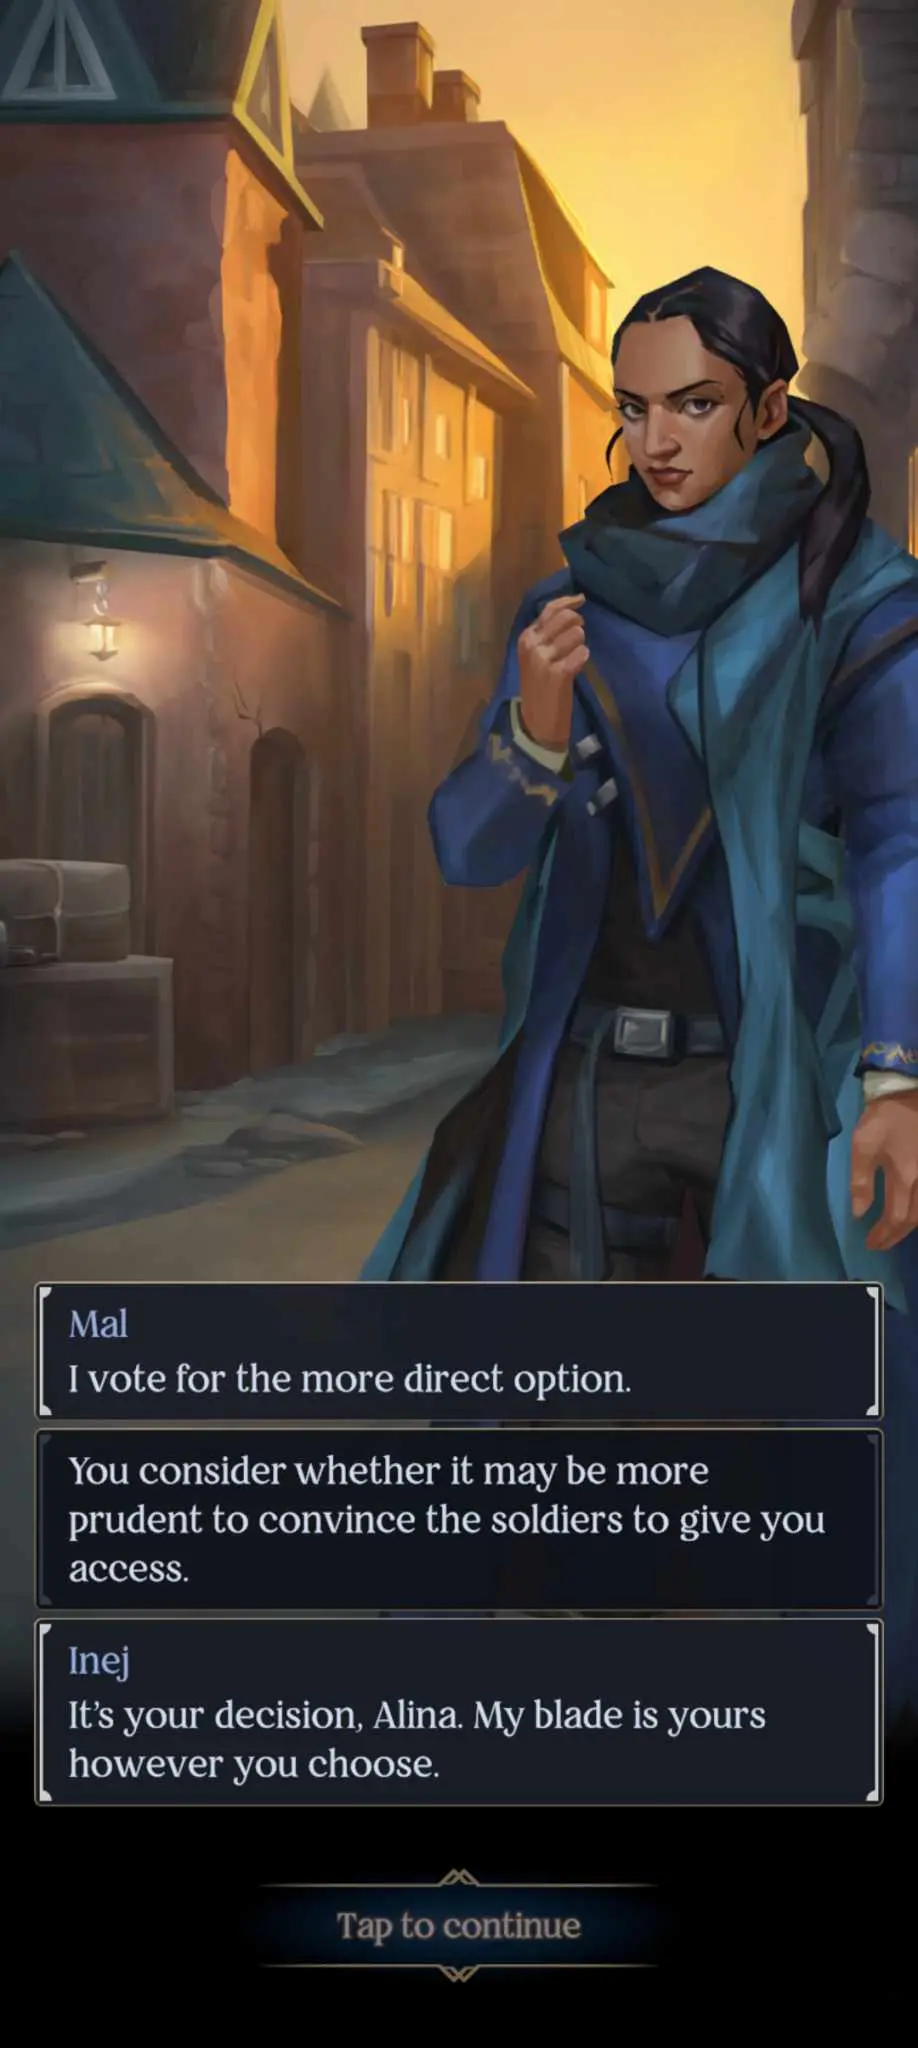
There are 3 ways to get in – barge in with brute force, bribe the guards, or ask Inej to find an alternate entrance (a Perception skill check though note I didn’t get an icon here). Once you’re in, you’ll only have a small amount of time to search for Etovost Sankt’ya, which triggers an automatic Perception check. Failing this causes reinforcements to come in, though you’ll also automatically make some more checks to see how the scenario plays out.
Once that’s done, Alina will open the book and discover the existence of another Amplifier – the sea whip’s scales. However, Inej will bring up an important point – as you’re on the quest for Amplifiers, can you really afford to give such a useful tool to Kalukov?
Good point. Time to make a fake.
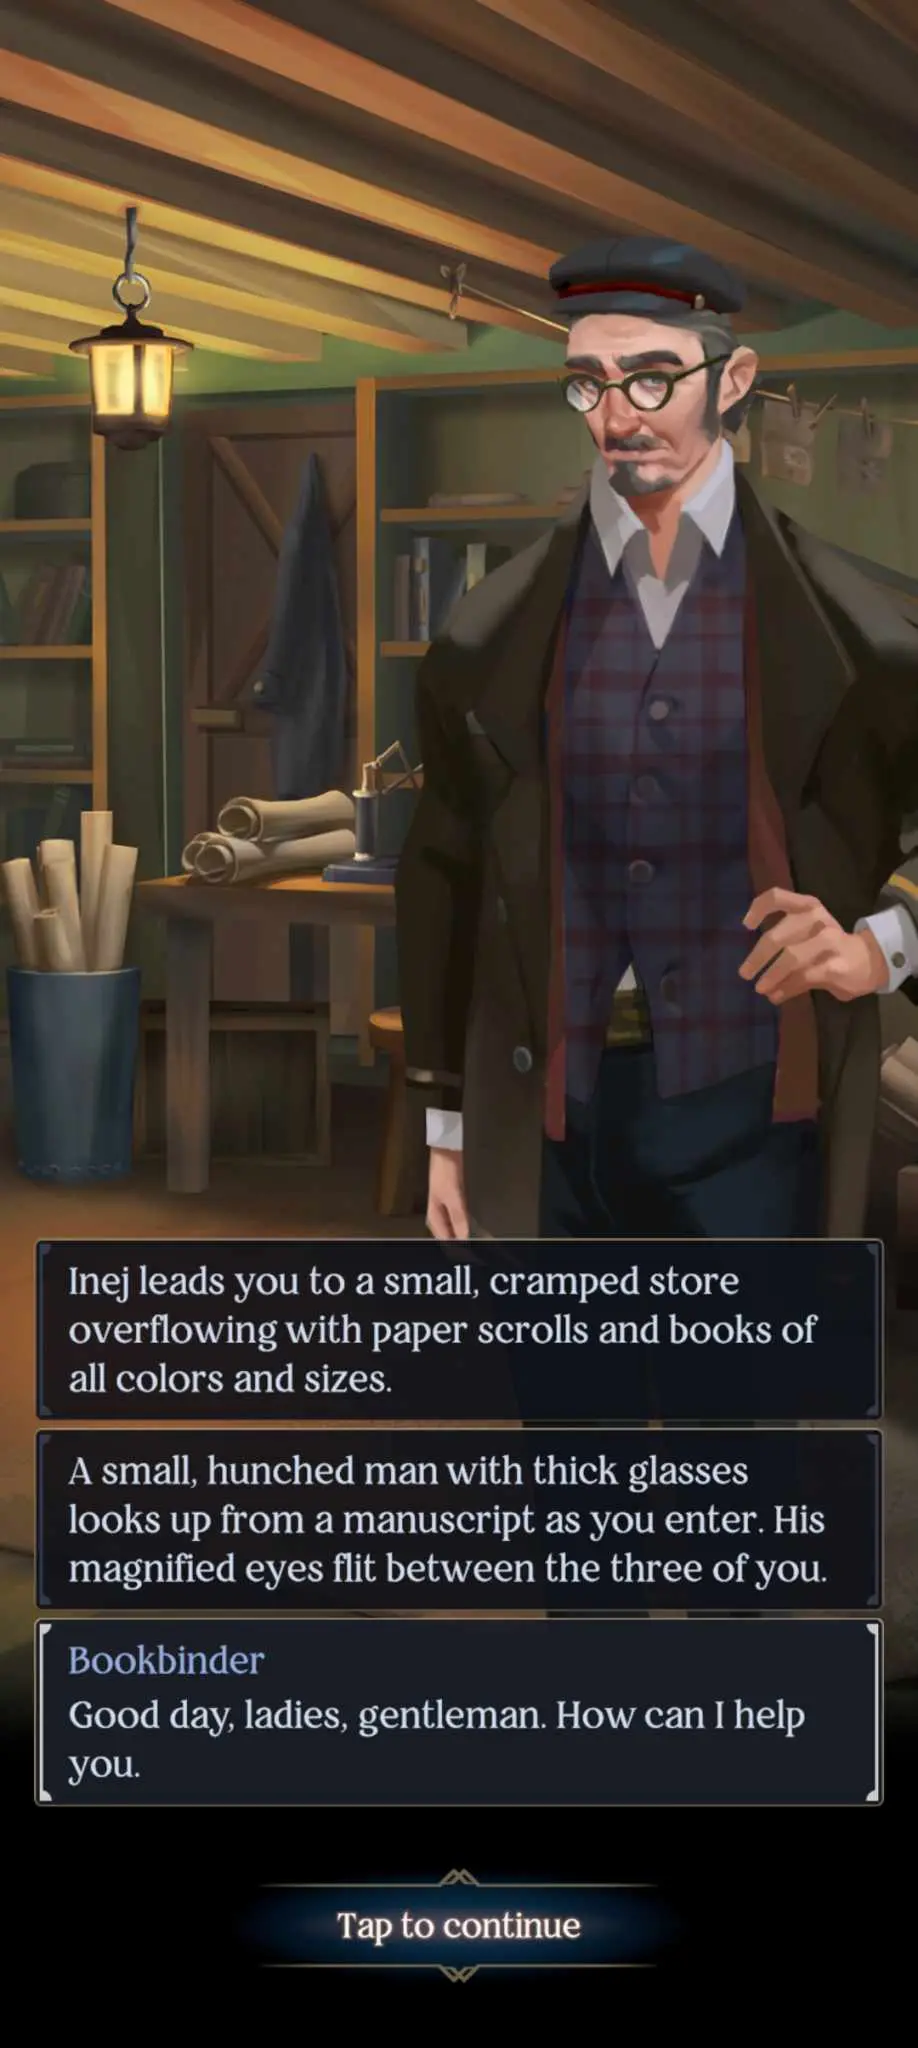
Head to Inej’s contact in the Os Kervo scriptorium to make a fake version of Etovost Sankt’ya. As he is quite busy, you’ll need to either convince him (Charm check), coerce him (Mind check), or pay 9 coins.
We’re done here. Go to the Abandoned Campsite to the north of Os Kervo, across the bridge, to meet with Kalukov and make the exchange.
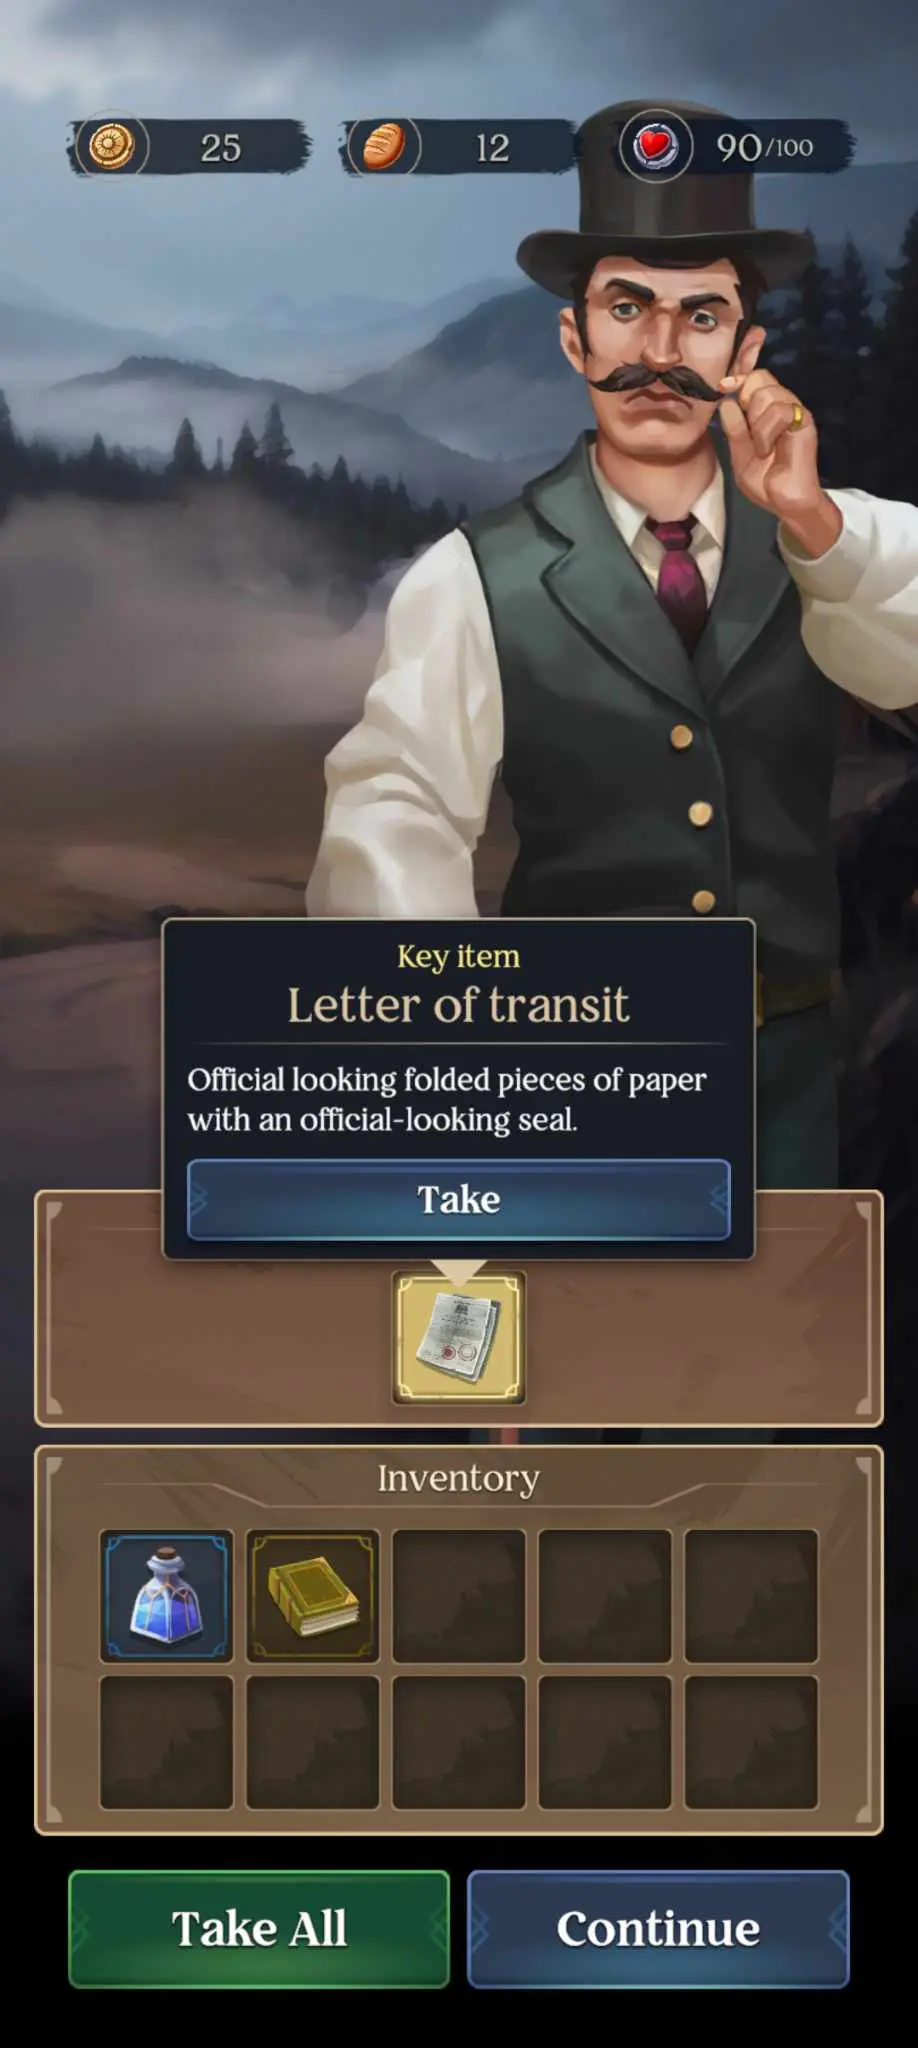
Just when the trade seems to be finished, you sense rustling from the tree. Of course, it isn’t over…
Deal with the Drüskelle as you see fit – fight them, blast them, or run. Kalukov will discover that the book you gave him is fake and orders his men after you. This will lead to another automated check sequence like in the library and you’ll play your first close combat minigame.
Return to the Os Kervo docks with your tickets in hand. Congratulations! You’ve completed Alina’s chapters.
A New Perspective
Now that Alina and her comrades are well underway across the True Sea, it’s time for someone else to take center stage. What new things will we discover? What new friends and foes will we meet? And can Alina find the Amplifiers she needs to drive back the darkness once and for all? Only time will tell.
I’ll see you in the next part of my Shadow and Bone: Enter the Fold walkthrough which will cover Jesper Fahey’s three chapters!