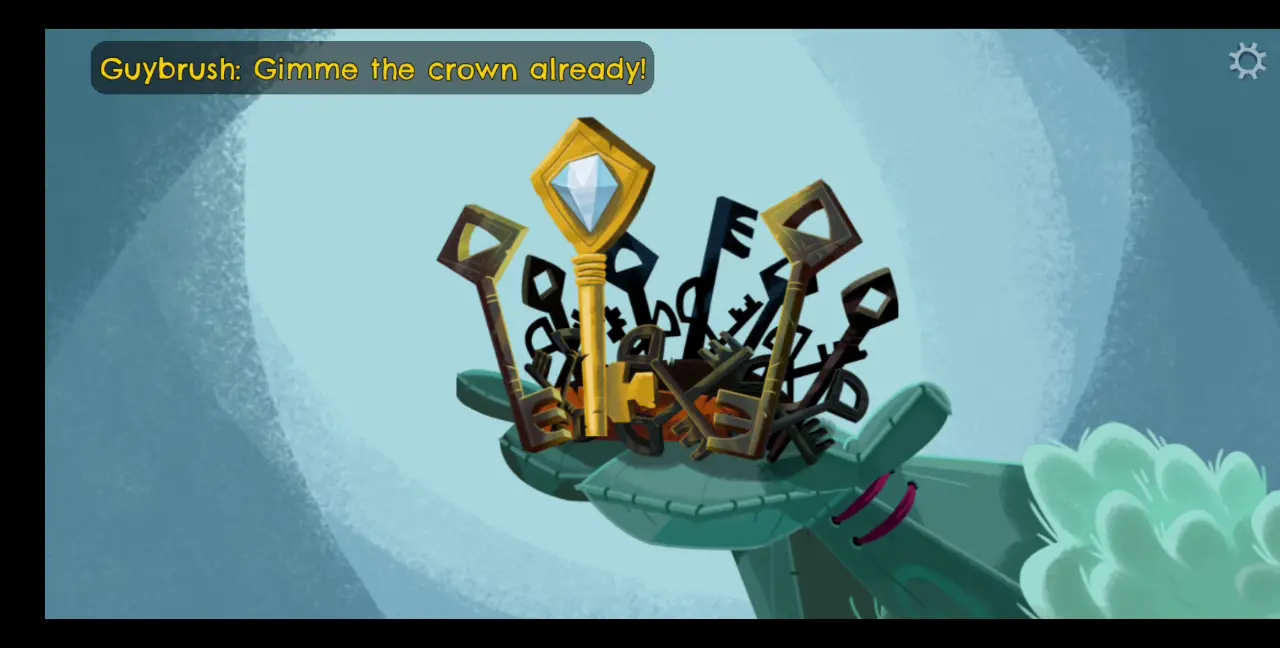
After years of swashbuckling and puzzle-solving, the iconic Guybrush Threepwood of the Monkey Island series returns for another adventure to finally discover the elusive secret of Monkey Island, except this time, he finally succeeds…
Or does he?
Published by Devolver Digital, Return to Monkey Island seems to finally close the book on what the secret truly is—but does it really?
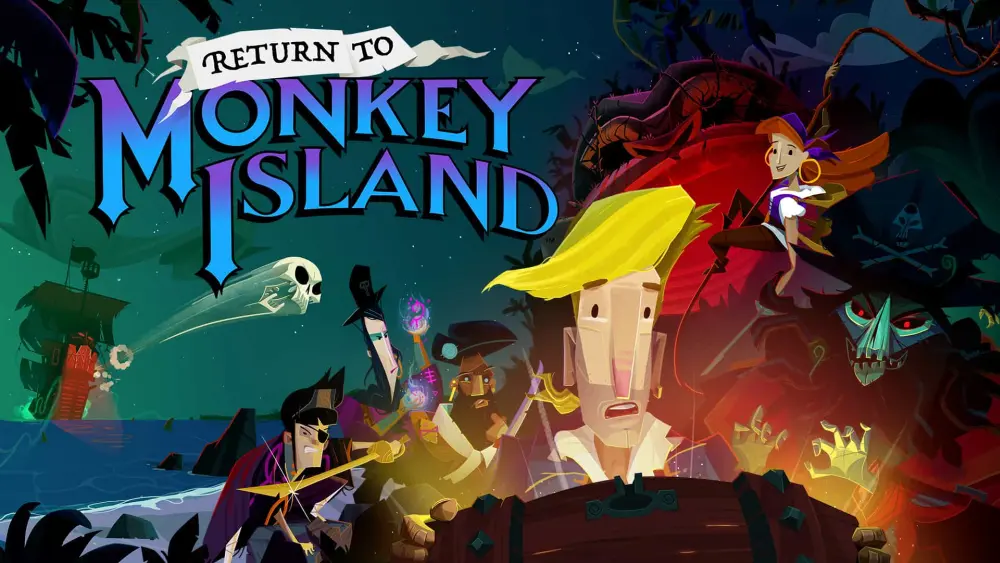
As a game, Return to Monkey Island caters to old and new players alike as the story brings back familiar characters while also introducing new ones. For those who have followed the series, they’ll surely get a kick out of seeing old faces like Elaine Marley, Guybrush’s wife, and the zombie pirate LeChuck, Guybrush’s sworn nemesis.
New players, on the other hand, can still get into the story without having to play the old titles as this installment can still be considered a standalone adventure in the lore while making references to past events. Three new pirate leaders are also introduced, though the old pirate leaders will still appear, except they’ve moved on from piracy and are in another business altogether.
As for the puzzle-solving, there’s still a lot to get through, many of which are interspersed with dialogues that are well-delivered and fully voice-acted. How challenging these puzzles are will, of course, depend on whether you’re playing Casual Mode or Hard Mode, which you can select at the beginning of the game.
Naturally, older players may have the advantage of hindsight, but suffice it that some of the puzzles can still prove to be challenging even for veterans of the franchise. And this is what exactly this walkthrough for Return to Monkey Island is for—we’ll help you solve all the puzzles, get achievements, and even unlock the multiple endings this game has to offer.
Without further ado, here’s our walkthrough for Return to Monkey Island!
Prelude: An Unexpected Story Begins
Two friends, Boybrush and Chuckie, are playing around in the Big Whoop amusement park. As they pretend to be pirates and look for the next thing to do, they see a man and a woman standing around. The two boys decide to pretend the couple are their parents. They follow the couple around for a bit and when the couple walks past the flowery arch, they ask the boys not to follow them.
With nothing else to do, the boys decide to get some Scurvydogs.
Getting Scurvydogs
- Go to the shop selling Scurvydogs, which is the building with the red roof and the yellow door.
- Inside is the vendor. You can either make fun of his glasses or ask him for stuff. If you choose the latter, he’ll ask you to pay for Scurvydogs.
- You’ll be asked what you want so choose the option that asks for Scurvydogs. The shopkeeper will tell you that you need to pay with money. You can try to convince him to give you free stuff, but he won’t budge.
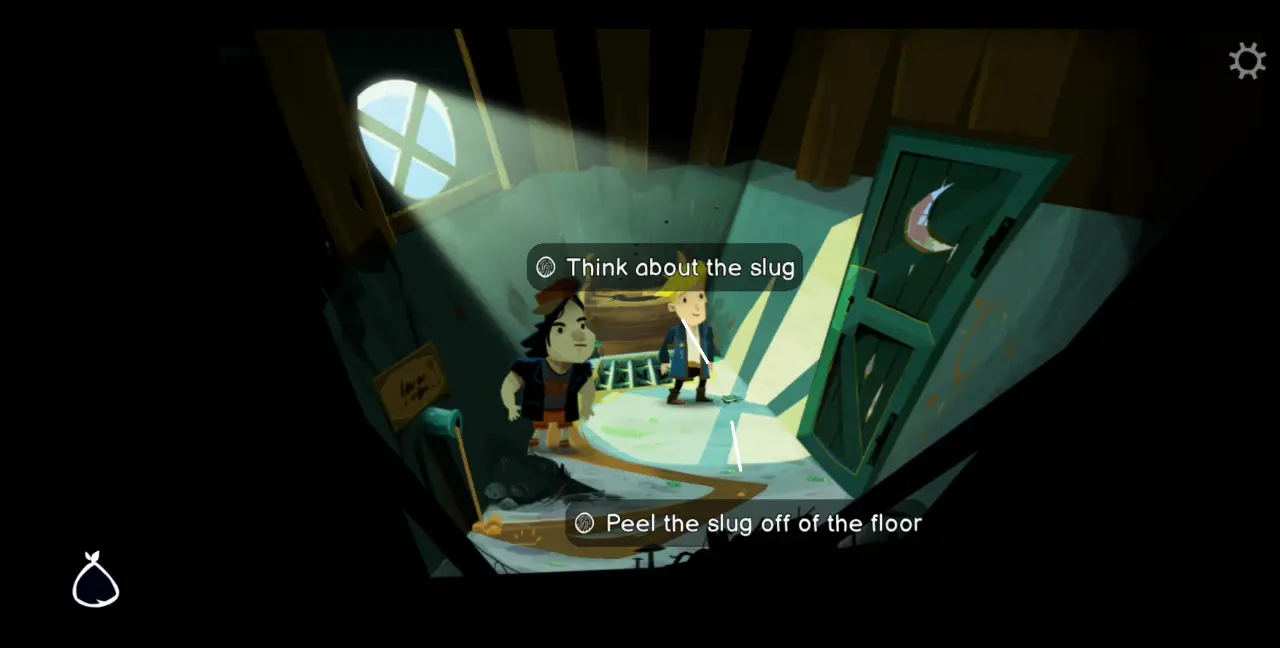
- Chuckie suggests looking for change in the outhouse, reasoning that coins can fall from people’s pockets.
- Go to the outhouse, which is right across the Scurvydog shop. It has a red door with a white crescent moon symbol on it. However, you’ll discover it’s locked.
- Return to the Scurvydog shop. Near the entrance is a pegleg with a sign on top of it. Read the sign, which will tell you that the key to the outhouse is underneath it, on the pegleg. Take the key on the pegleg.

- Go to the outhouse again. Use the key to unlock the door and go inside.
- Look around the outhouse, but more importantly, check the little metal thing on the floor. It turns out to be a slug, which resembles a fake coin. Take the slug then leave the outhouse.
- Go back to the Scurvydog shop. Return the pegleg and key to where you found it. This should give you the Fulfilled Your Restroom Obligations achievement.
- Give the slug to the shopkeeper and he will give both Boybrush and Chuckie a Scurvydog.
The two boys run outside and eat their Scurvydogs. They ask each other what they want to do and decide to go past the flowery arch of the amusement park. They meet Chuckie’s friend, Dee. Boybrush tells her that he’s making a list of things to do and Dee writes several things on the list, which is called Jr. Mighty Pirate’s TODO List.
Completing Jr. Mighty Pirate’s TODO List
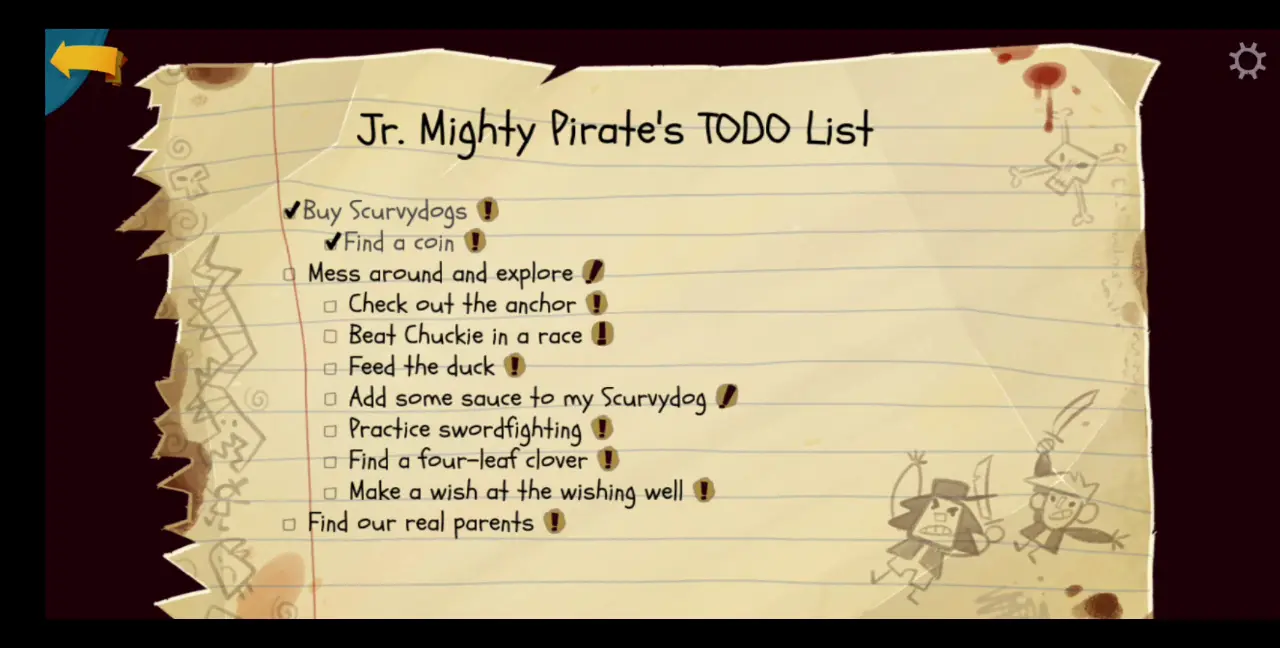
- Check out the anchor: Go to the anchor right next to Dee. She will tell you several facts about the anchor. Chuckie listens but Boybrush falls asleep.
- Beat Chuckie in a race: Go to the short racetrack near the site of the anchor. Beat Chuckie in a quick running race.
- Feed the duck: Talk to the couple in front of the pond. Choose the dialogue option that asks for bread to feed the duck on the pond. The couple will refuse to give you bread. Check the basket next to the old man, which will distract the couple. Take this opportunity to steal some bread.
- Add some sauce to my Scurvydog: In front of the pond, next to a bush, is some red goop on the ground, which turns out to be ketchup. Pick this up. In your inventory, combine this ketchup with your Scurvydog.
- Practice swordfighting: Go up the stage that’s decorated with the mast of a ship. Practice swordfighting here.
- Find a four-leaf clover: Next to the bush where you found the ketchup is a sign with a four-leaf clover symbol. After reading the sign, search for a four-leaf clover. Once you find one, go back to the pond and feed the four-leaf clover to the duck. This will earn you the Shared achievement.
- Make a wish at the wishing well: Walk past the four-leaf clover sign and you’ll see a well. Pick up the coin near the well, then toss it in the well to make a wish. You will be given 5 dialogue choices, from which you can choose any.
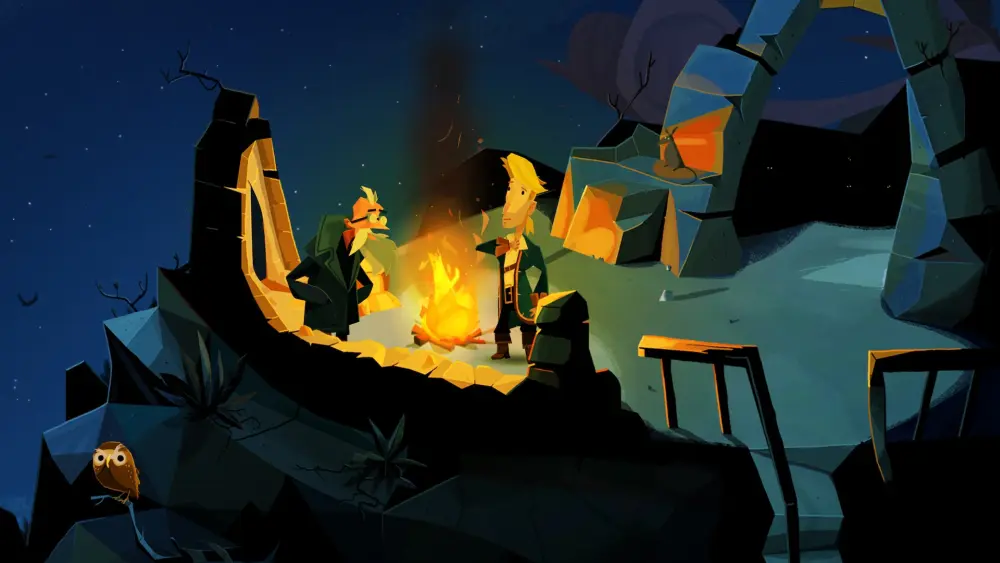
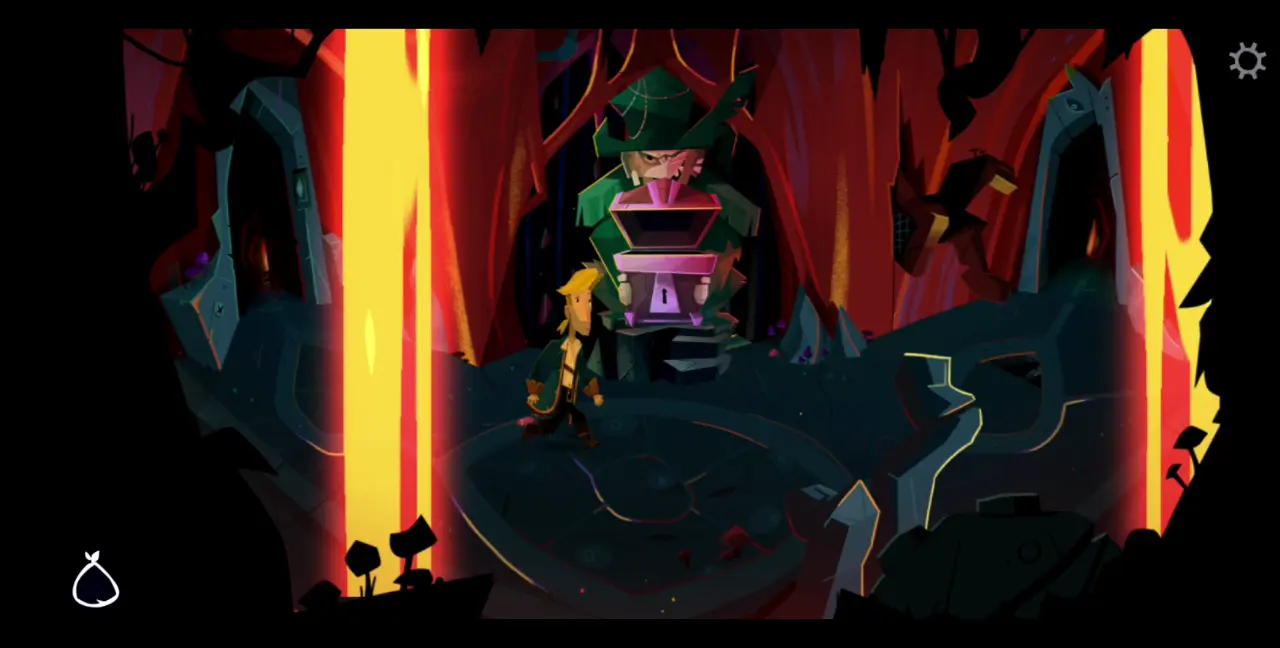
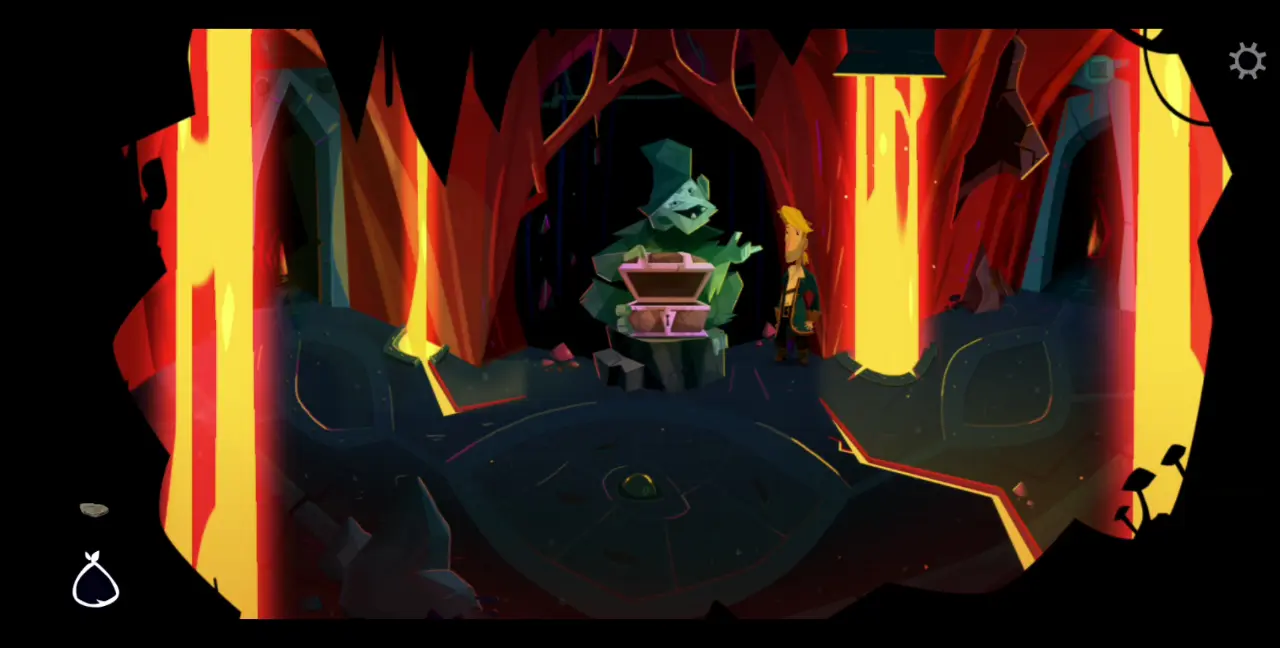
- Find our real parents: Open the gate and walk past it. You’ll see a man sitting on the bench. This turns out to be Guybrush Threepwood, the father of Boybrush.
Gubrush, the protagonist of the Monkey Island stories, starts telling the kids a story. Chuckie and Dee manage to excuse themselves from hearing a long story, but Guybrush convinces Boybrush to stay. He begins to tell the young man about the story of Monkey Island. This concludes the Prelude.
Part I: A Friendly Place
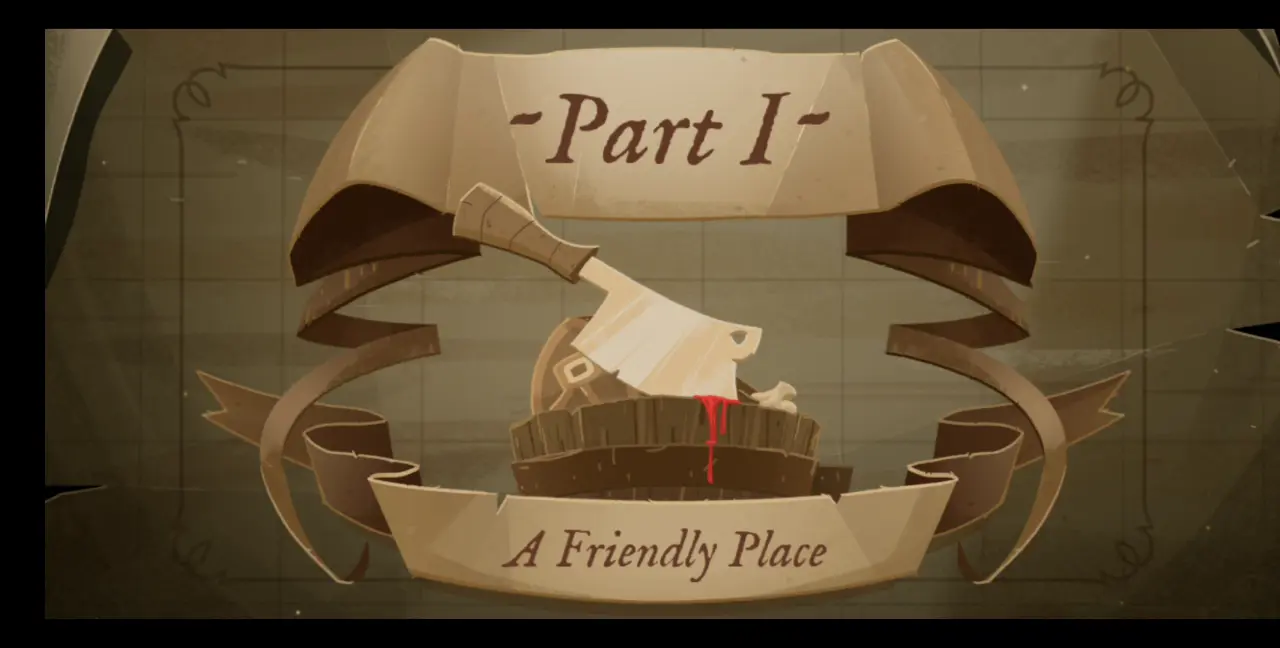
Upon starting this part of the game, you will automatically earn the achievement Started Part One.
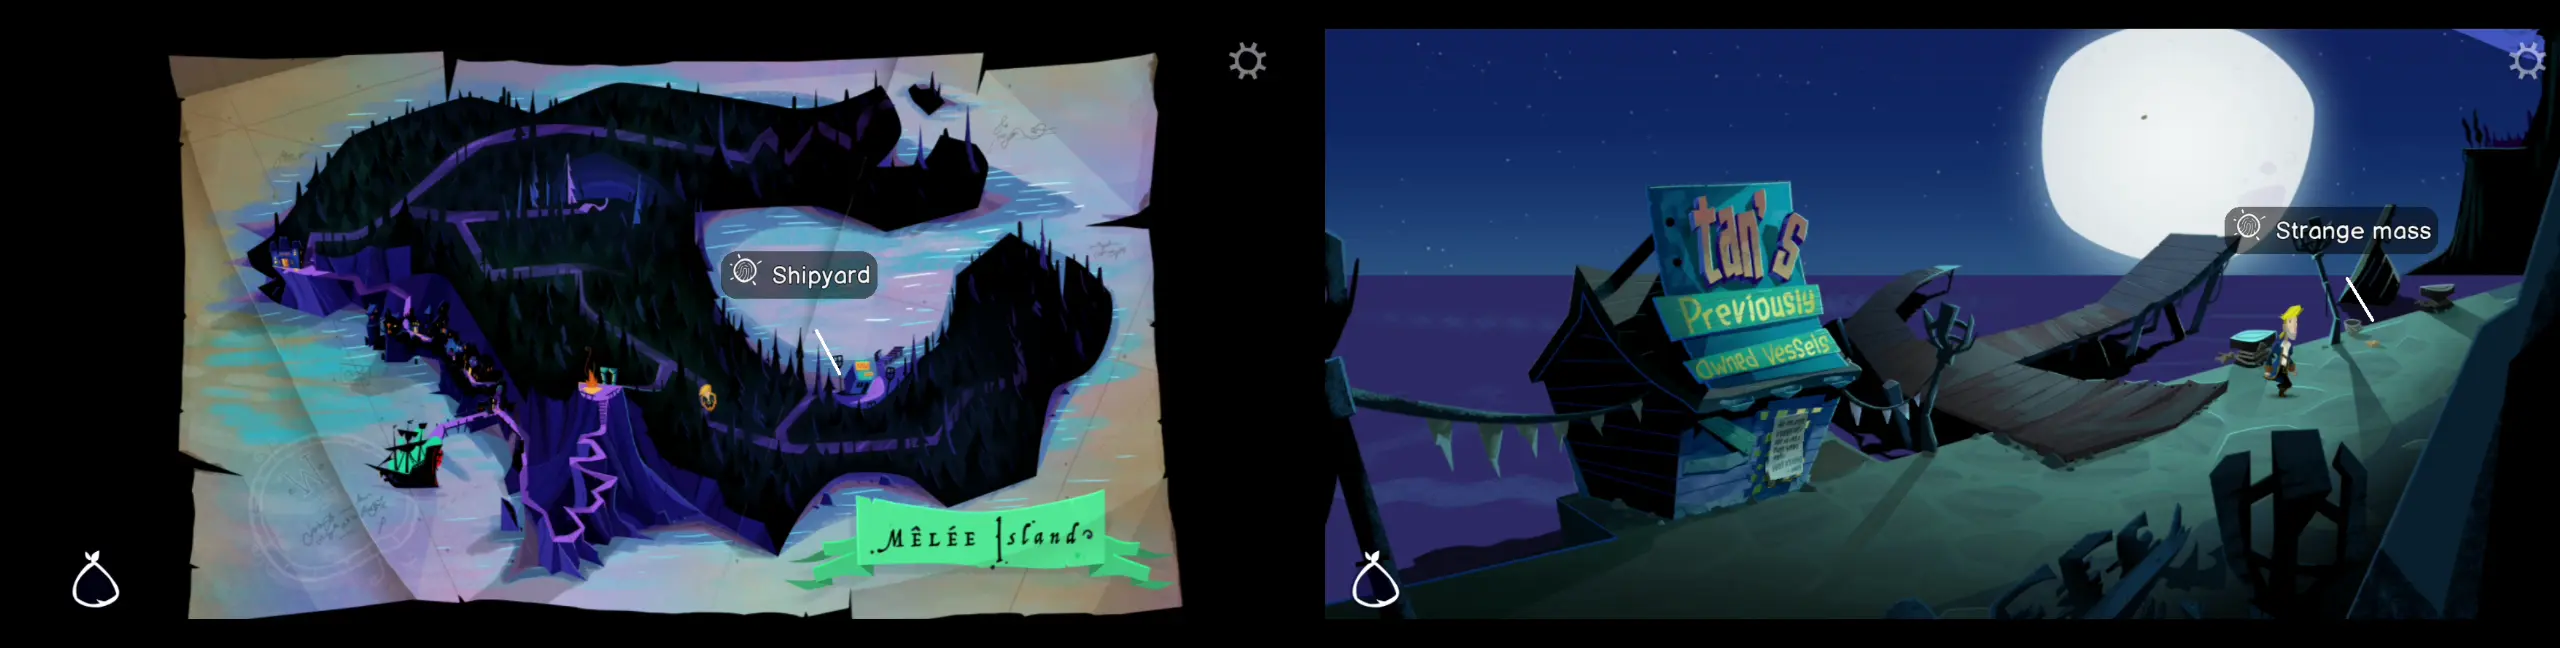
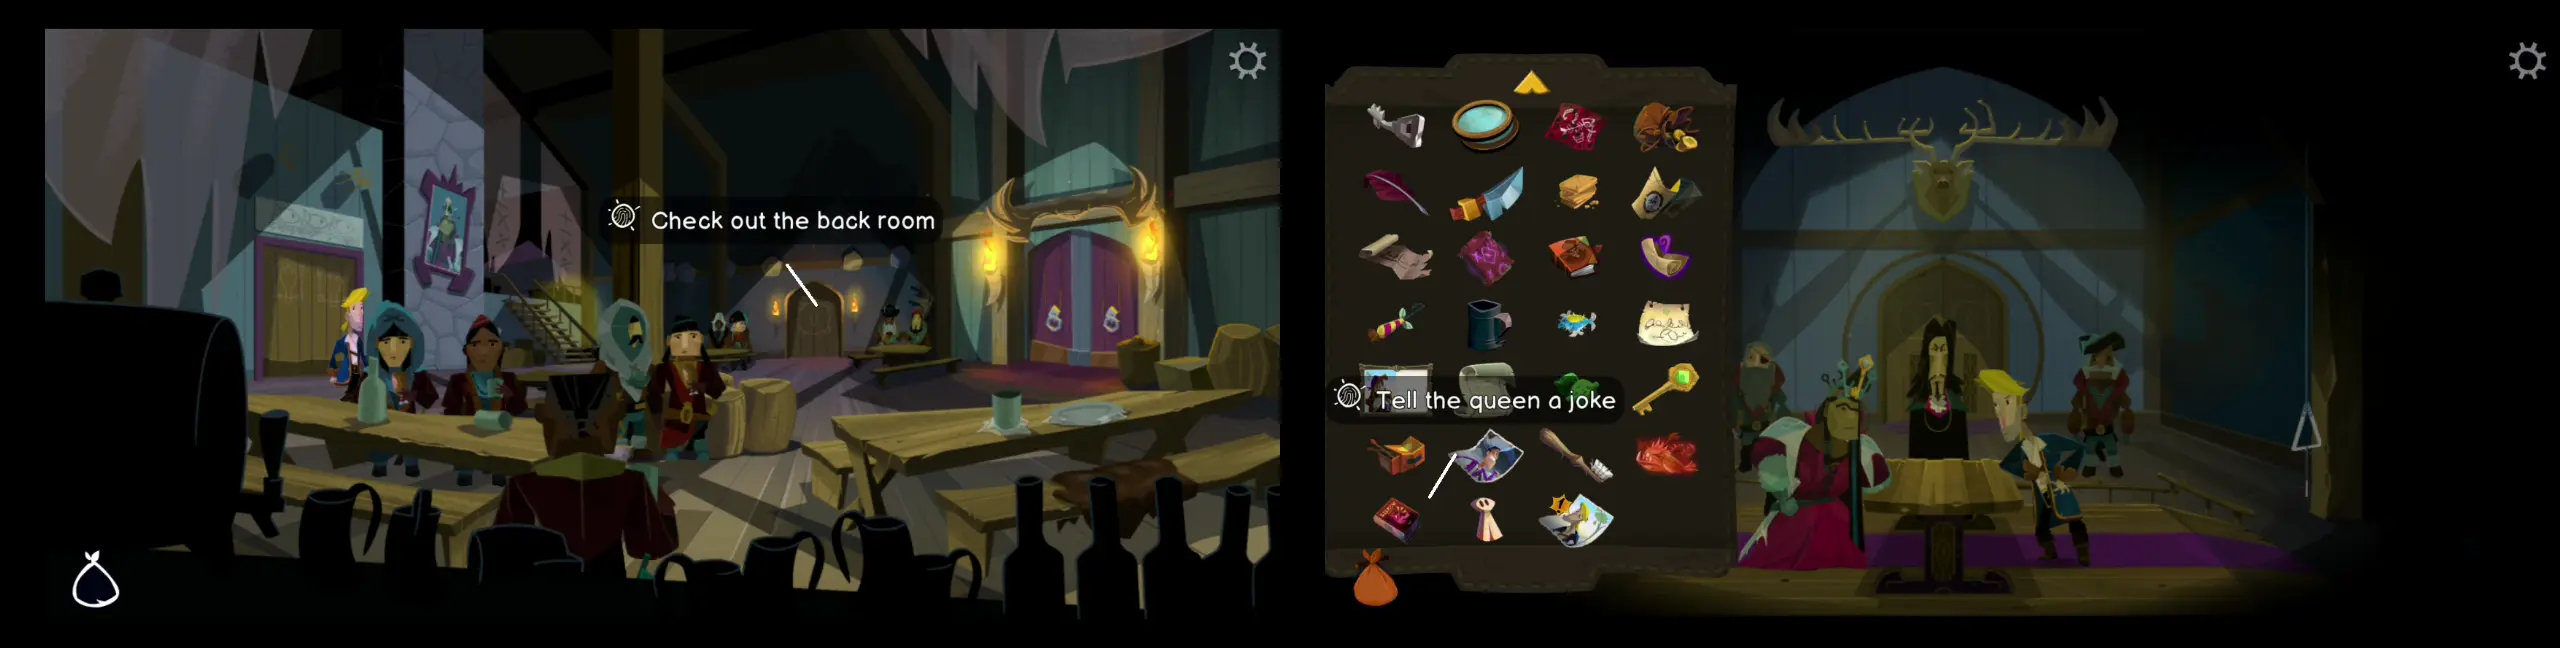
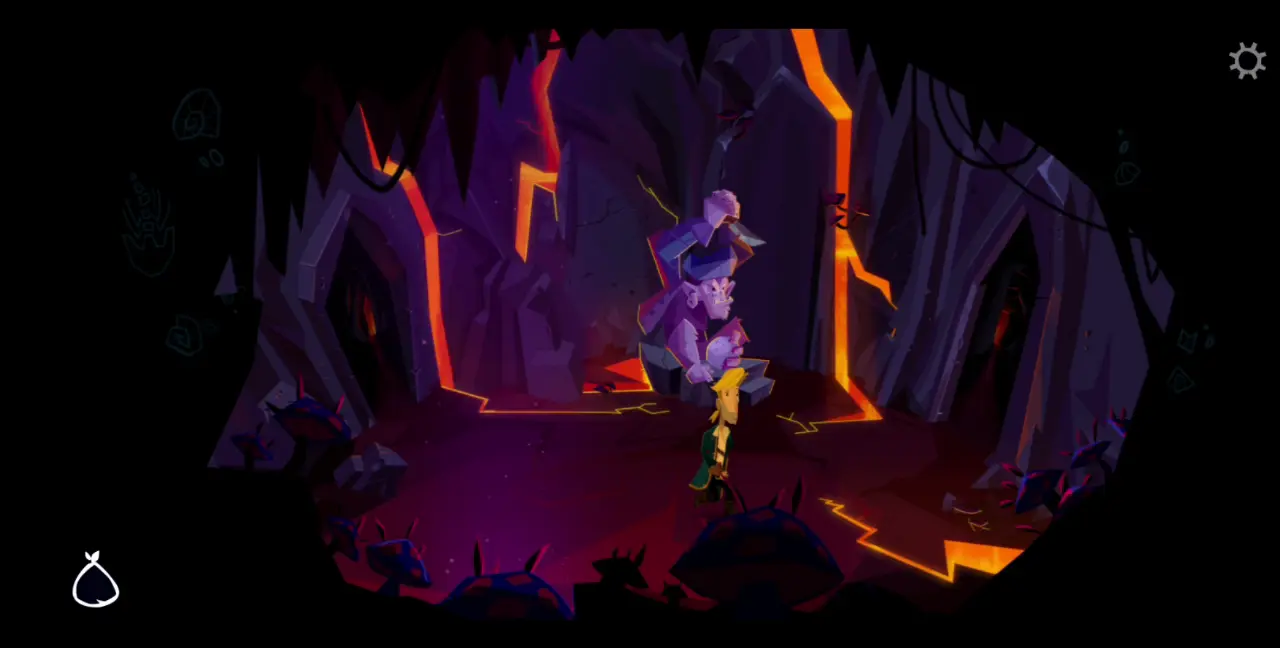
In this segment of the story, Guybrush finds himself in Mêlée Island. He encounters The Lookout, who tells Guybrush that LeChuck, Guybrush’s mortal enemy, is in Mêlée and is preparing to set sail for Monkey Island. You’ll get to talk to The Lookout and have several dialogue options, which will ultimately conclude to you needing a ship and funding for the expedition. The Lookout suggests that you speak with the three pirate leaders at the Scumm Bar at the long table at the back.
Finding a Ship
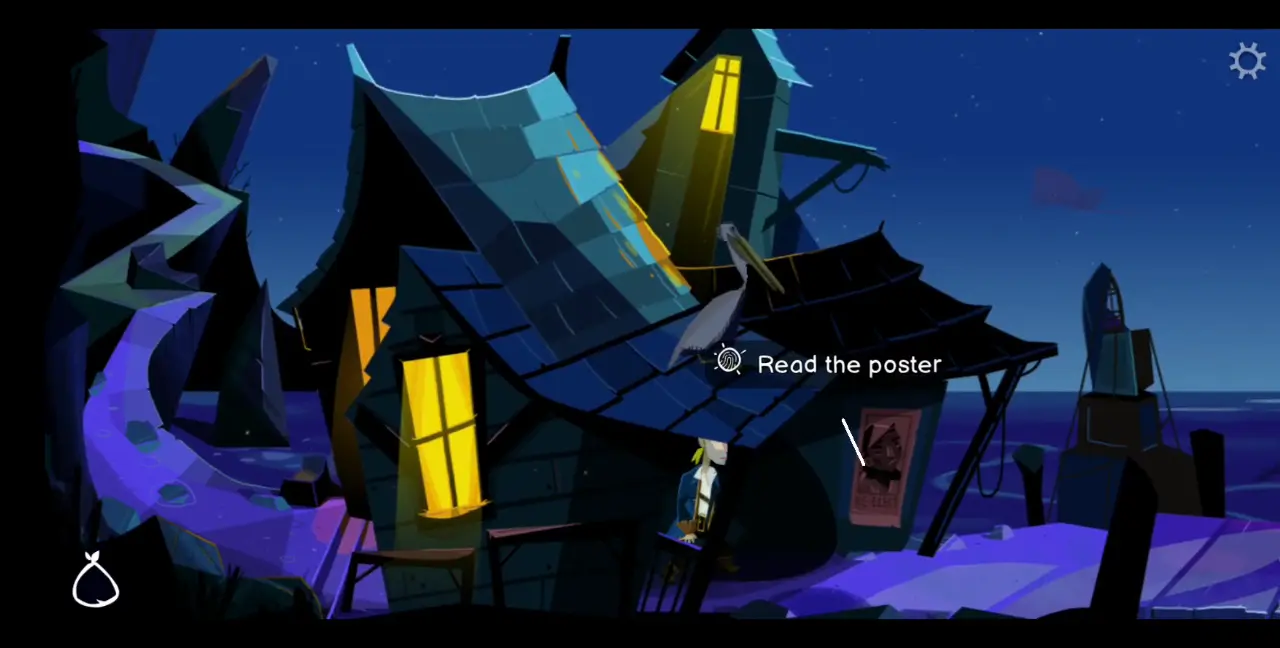
- After speaking to The Lookout, go down the hill and walk right to the docks.
- On one of the houses is a poster. Read it, which should be a poster calling for the re-election of Governor Carla. Remember what’s written on the poster as this changes every playthrough. This detail is necessary in penning a heartfelt apology for Carla later on.
- To the left is the docks and to the right is the Scumm Bar. Go to the Scumm Bar first.
- There are a few other pirates inside, all of whom will point you to the back of the bar if you talk to them.
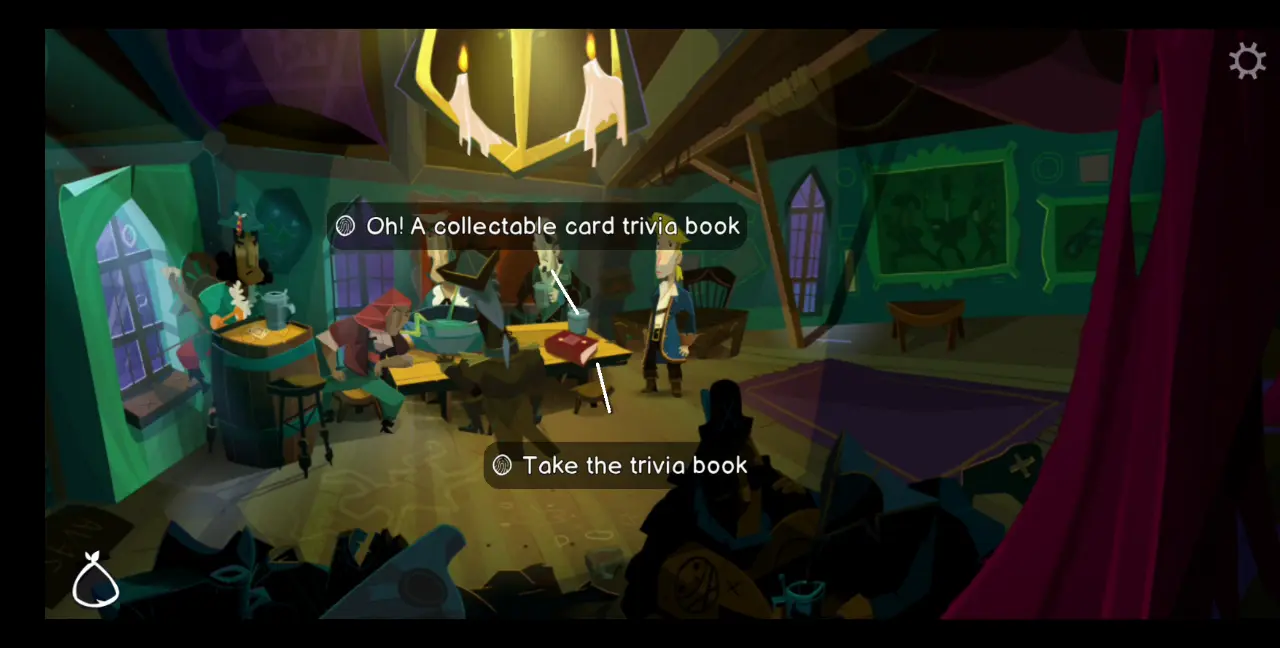
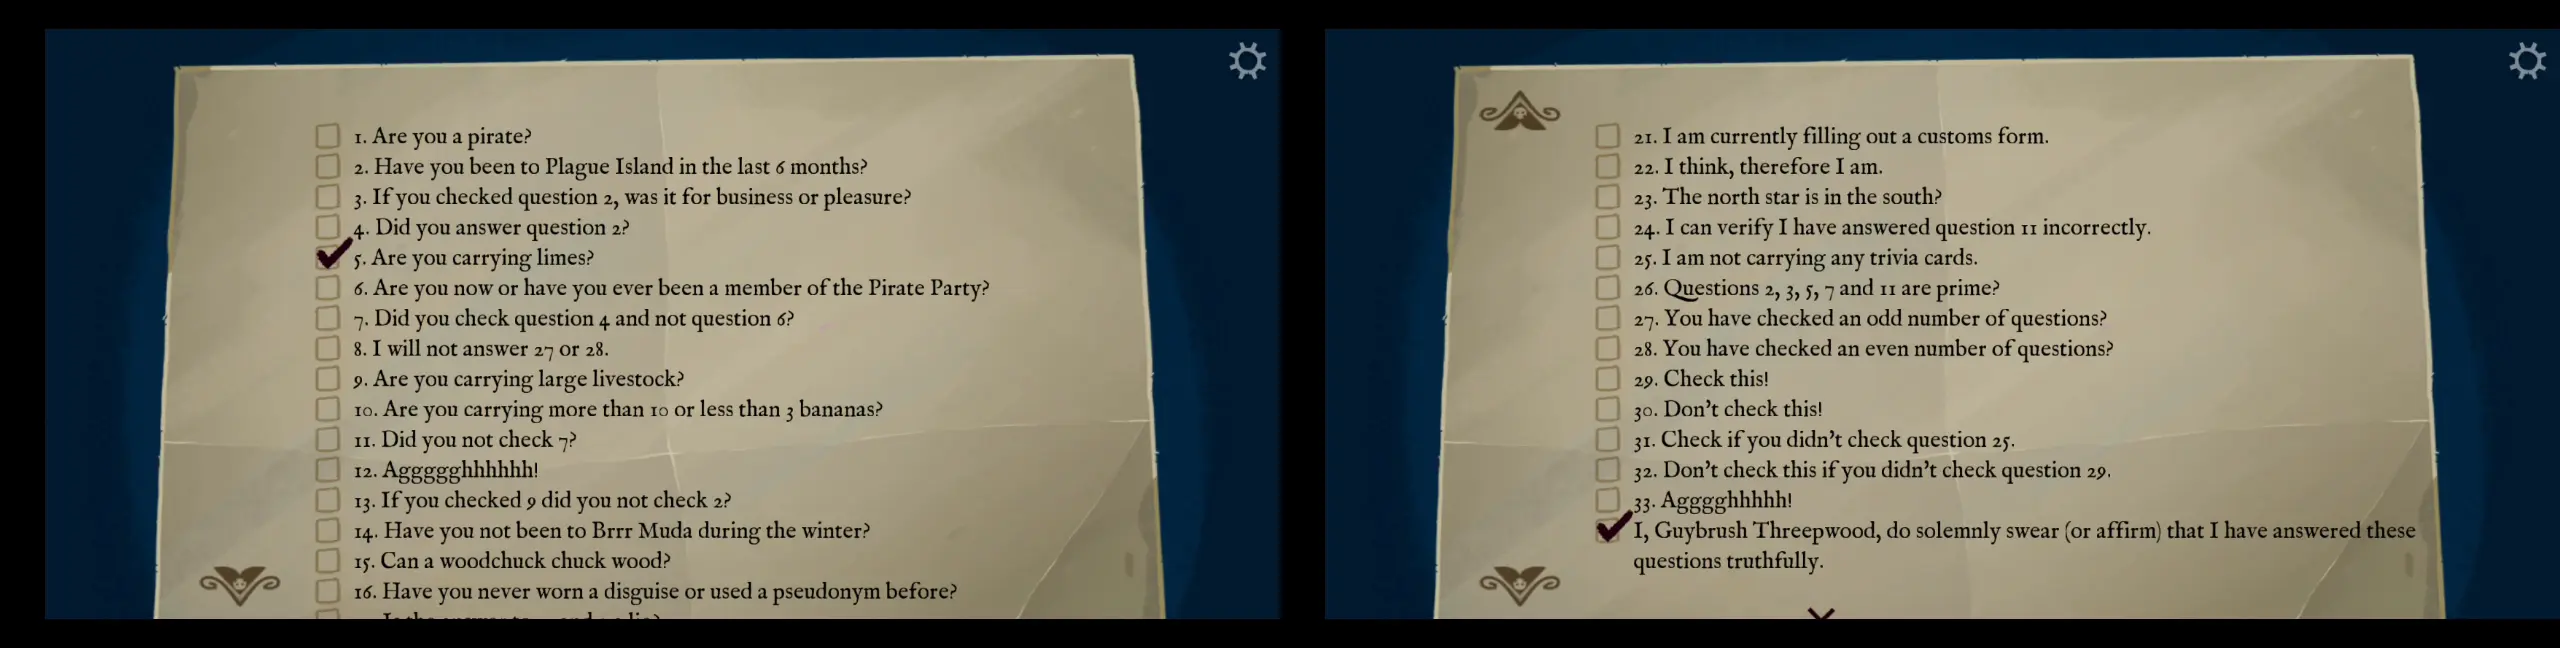
- On the table is a red Trivia Book. Collect this Trivia Book. This will let you collect Trivia Cards that you can answer.
- Head to the end of the bar where you will see three pirates, but these are not the pirate leaders you were expecting.
- Talk to them to try and convince them to fund your expedition. However, they won’t be convinced and will even mock your attempts. After a long dialogue, they will suggest that you join LeChuck’s expedition instead since it’s heading to the same destination anyway.
- After talking to the three new pirate leaders, go back inside the Scumm Bar and talk to all the other pirates inside to tell them that you’re going to find the secret of Monkey Island. This should earn you part of the achievement Told Everyone on Mêlée Island You are Looking for the Secret. To complete this achievement, you need to tell everyone on the island you encounter that you’re looking for the secret.
- You won’t be able to complete this achievement during Part One, but this is where you can start. That’s because there will be new people on the island come Part Four, and you also need to tell them that you’re looking for the secret.
Looking for a Mop
- Head left of the docks, which is where LeChuck’s ship is. After speaking to the Quartermaster about job openings, she will tell you that the crew is short a swabbie. The only requirement for the job is that you bring your own mop.
- You try to get in as a swabbie to join LeChuck’s expedition, but discover that you’re banned. You can try to convince the Quartermaster but she won’t budge.
- Your objective should be to find both a mop and a disguise to get into LeChuck’s ship.
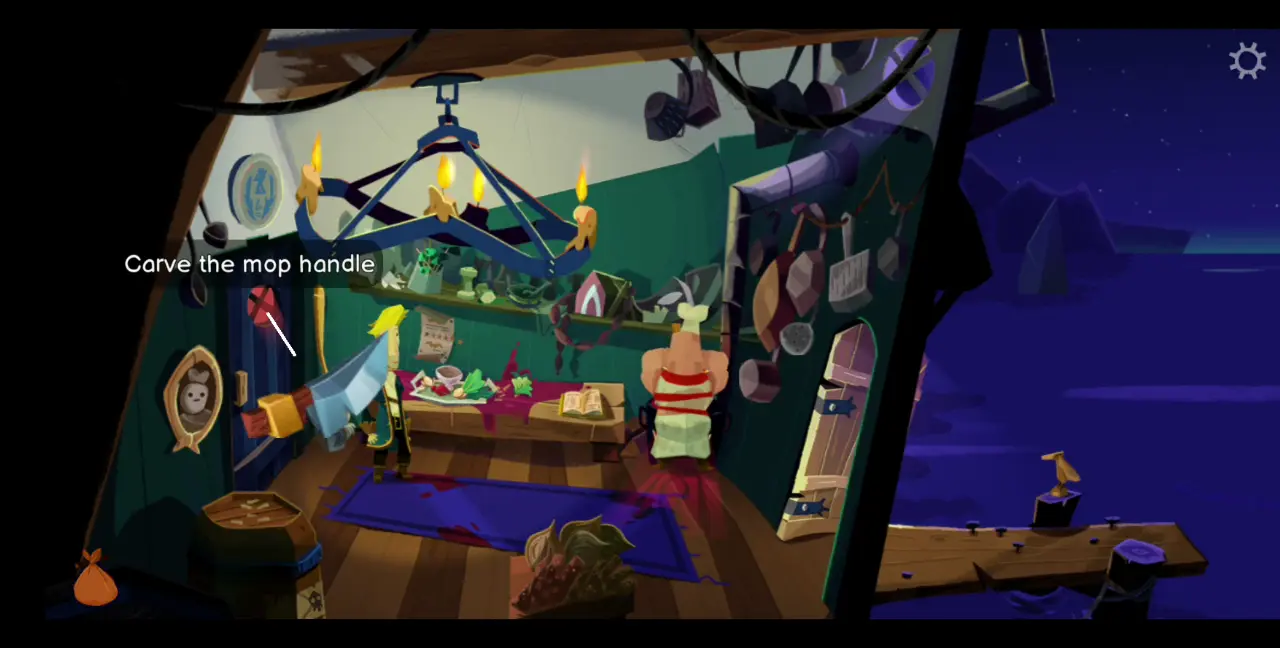
- Head back to the Scumm Bar and at the back of the bar, near where the three pirate leaders’ table, is a door. Inside is the cook. Talk to him and he will tell you that getting a mop is all about making a good handle. Any mop head can be used but the most important part is the handle, which you can carve from a rare mop tree.
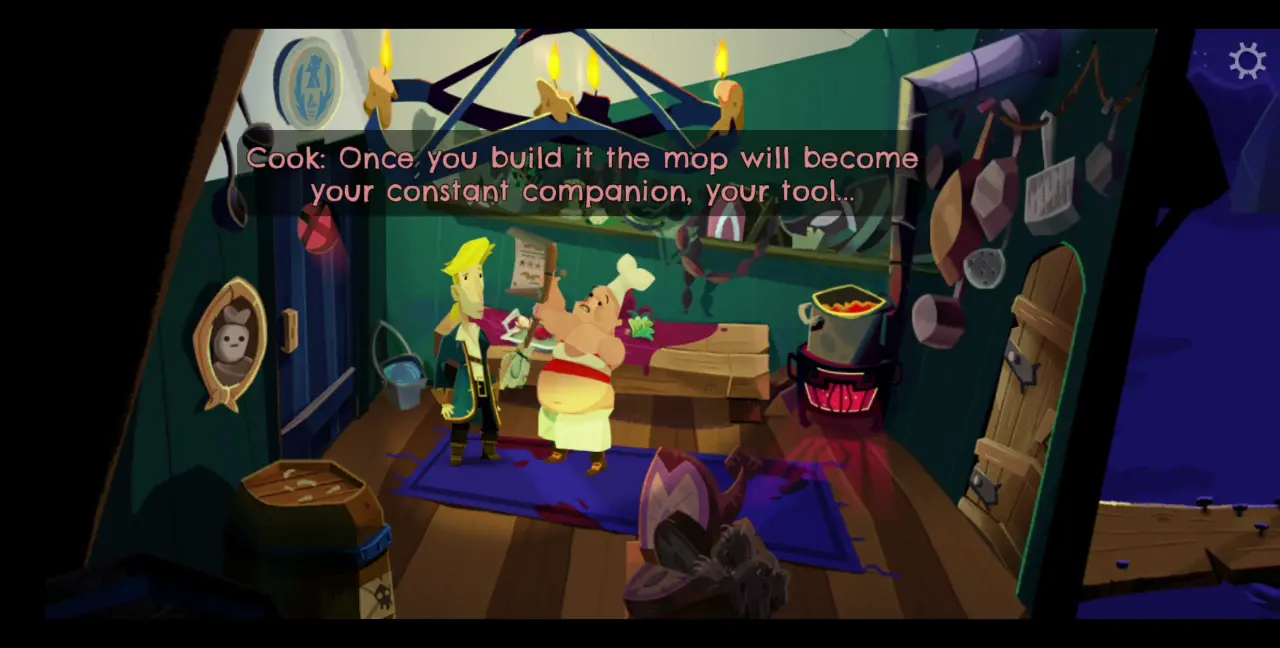
- Unfortunately, the cook can’t tell you where this tree is and you will need to find this yourself.
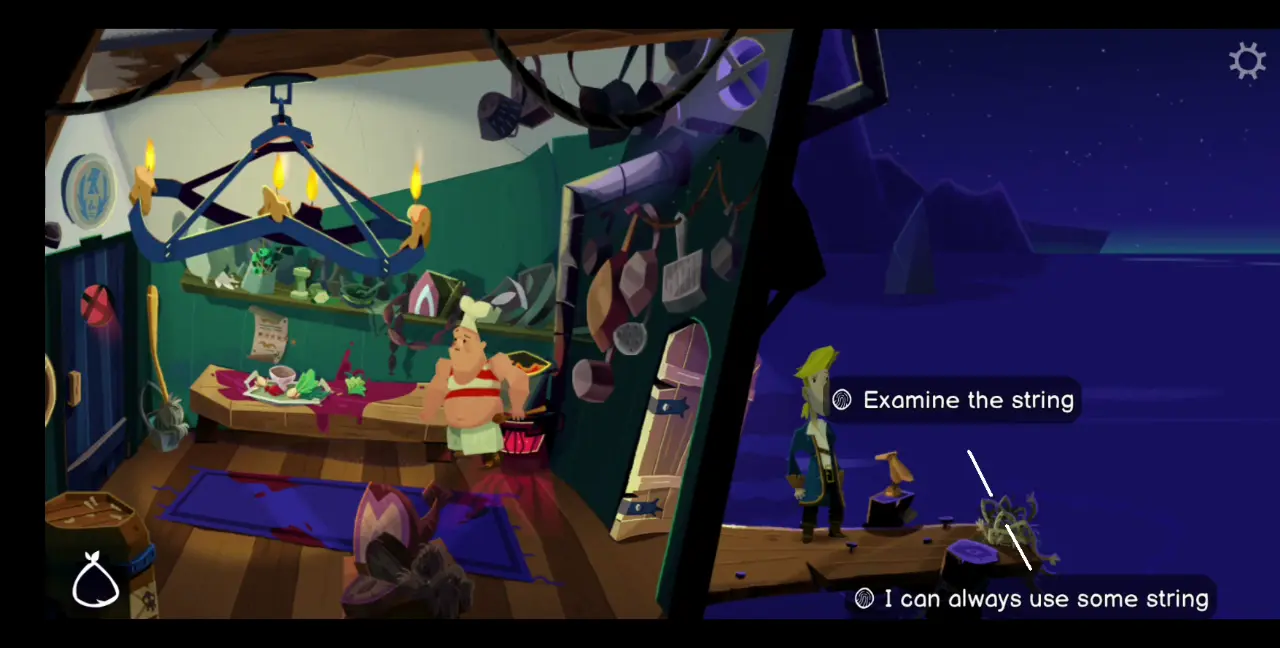
- At the end of the kitchen is another door. Open it and collect the string, which is one of four things that can be used as a mop head. This will earn you part of the Got Hired with All Four Mop Heads achievement. To get this all in one playthrough, you need to save and load your game when making the mop with a different mop head.
- From the bar, head right, to Low Street.
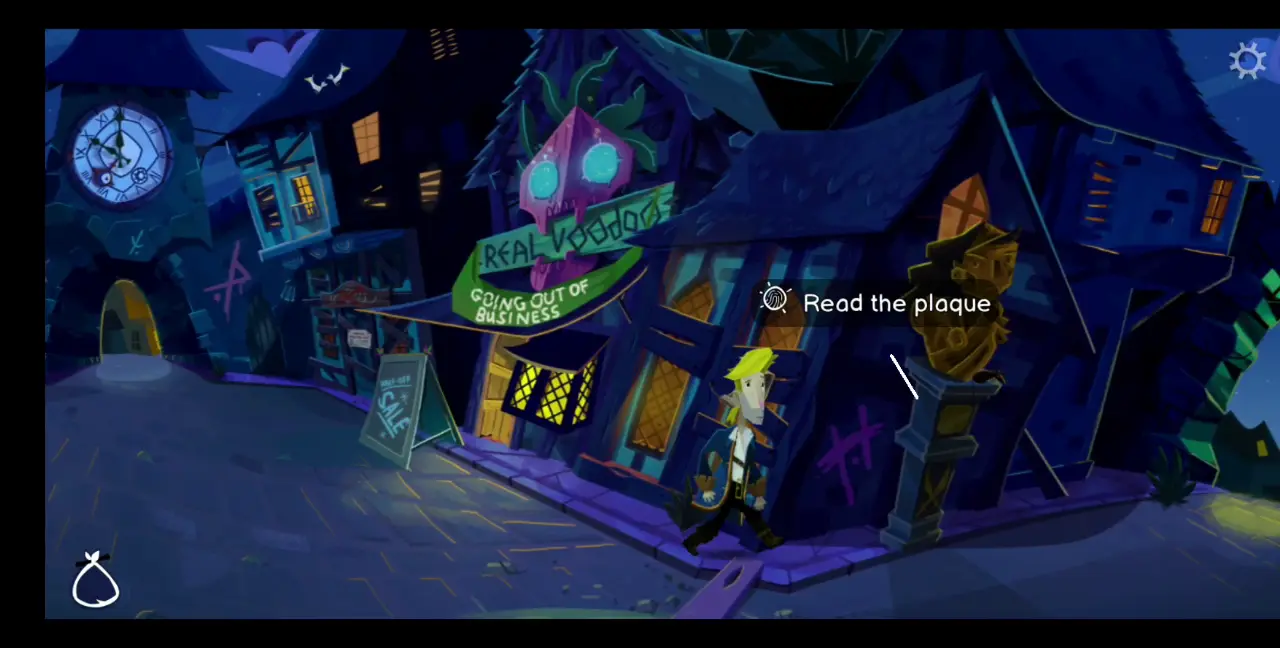
- There’s a Plaque near one of the shops. Read what it says, which should tell you where Governor Carla fought bravely. Like the detail on the poster, this changes every playthrough and is necessary for the apology later.
- Then, you’ll encounter Elaine, who happens to be your wife, and hold a conversation with her about her scurvy prevention project.
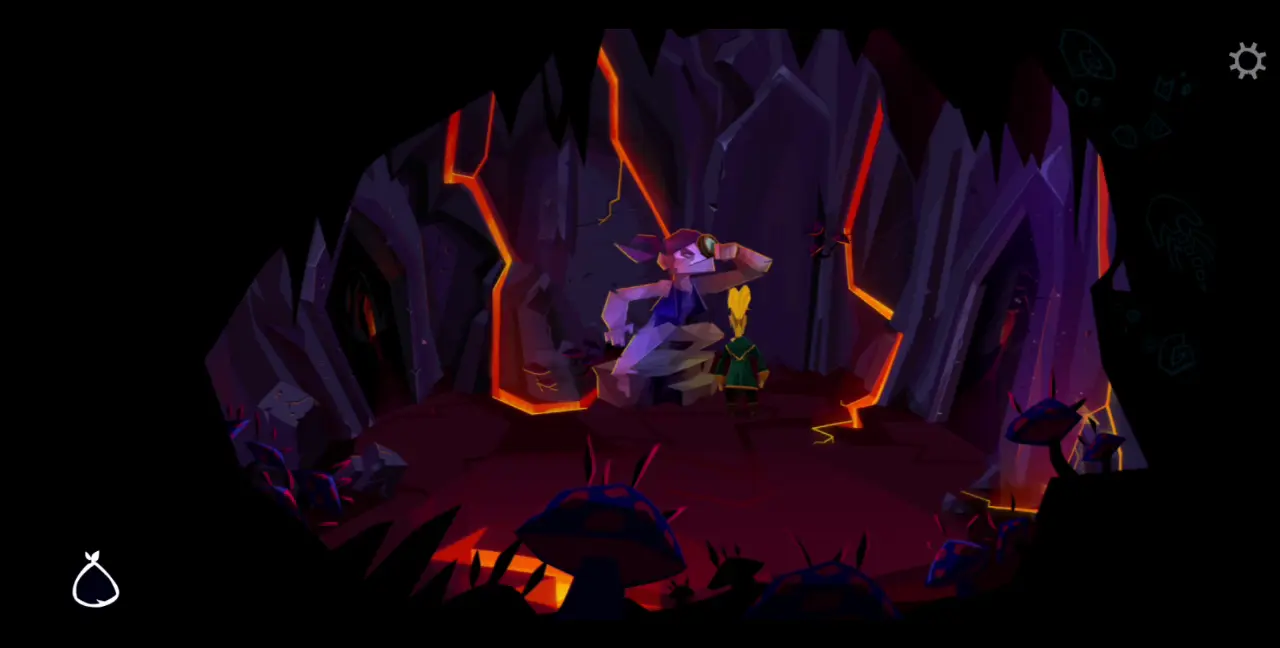
- After parting ways with Elaine, head to the voodoo shop, the International House of Mojo. The voodoo lady predicts your future and gives you a Hint Book.
- After her predictions, grab the knife and the forgiveness frog from the wooden table. Also grab the shrunken head from one of the shelves.

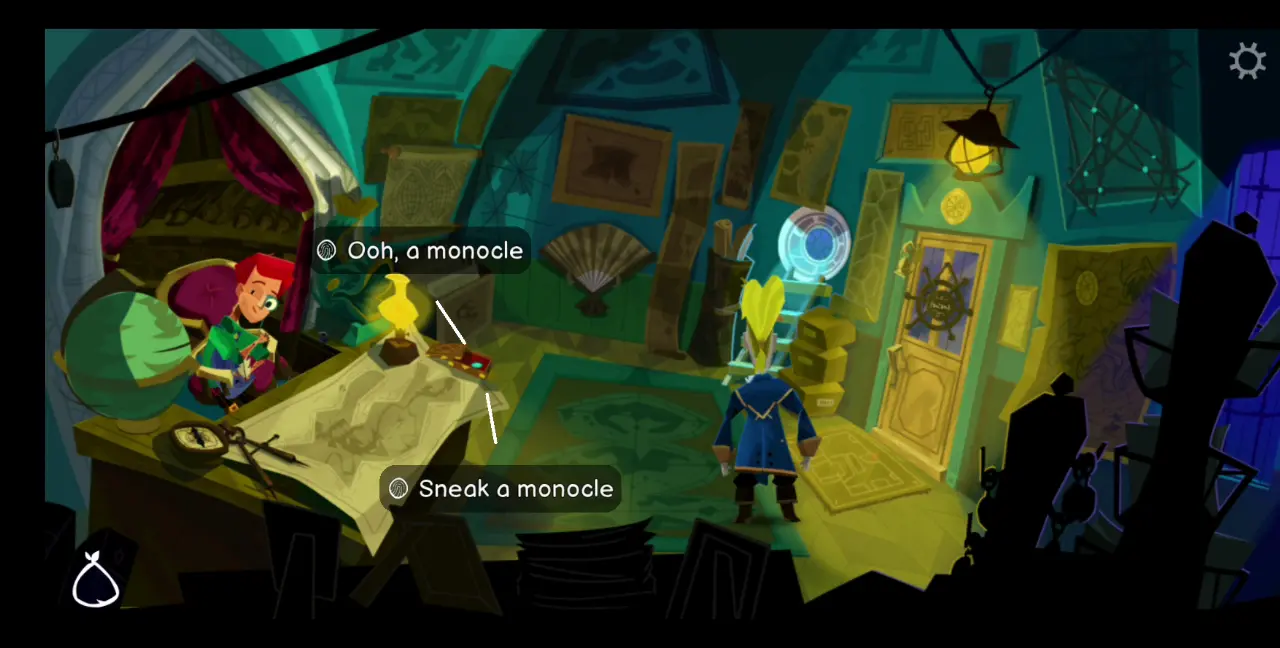
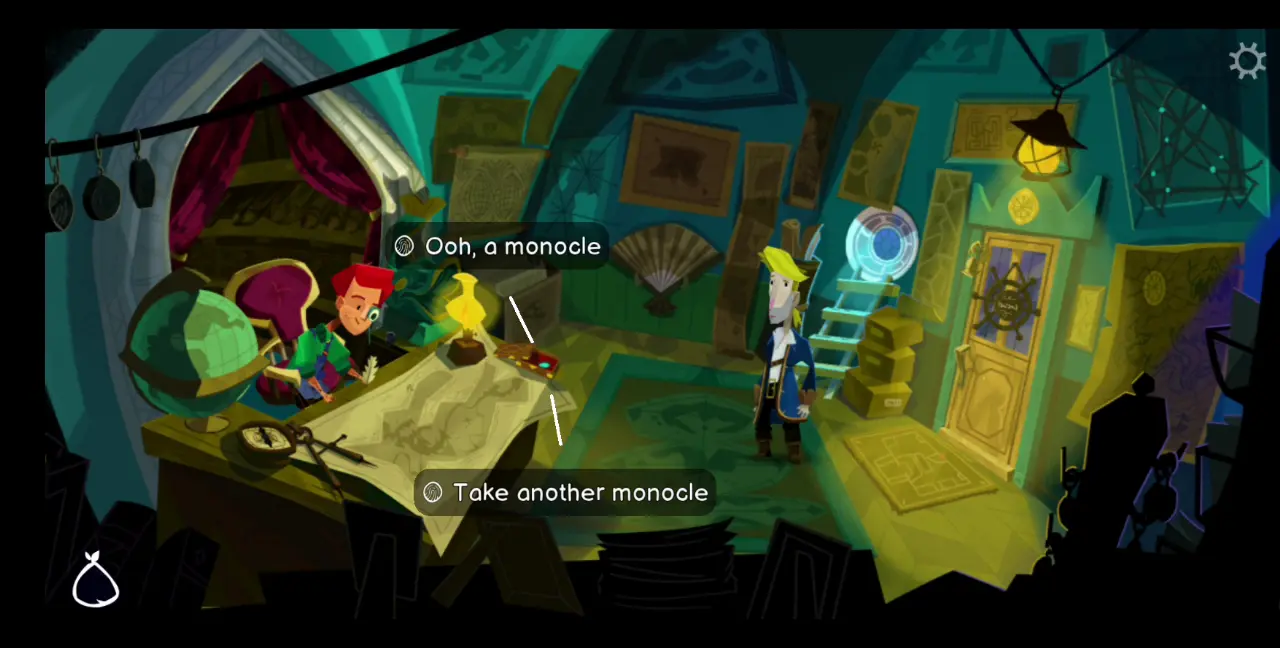
- Next, go to Wally’s Maps-N-More across the International House of Mojo. Talk to Wally to ask if he can make a map to the rare mop tree. Wally agrees, but only if you can bring him a sample of the mop wood.
- Explore Wally’s shop and look at all the available maps inside. This should earn you the achievement Thoroughly Examined All of Wally’s Stock. This can also be done in Part 4 if you missed it in this part of the story.
- There’s a monocle on Wally’s desk. Take it.
- Return to the Scumm Bar. You’ll notice two new people inside sitting on their own tables. One is Cobb, who will only appear there after you’ve spoken to LeChuck’s quartermaster. The other is a nightmare customer who will only appear once you’ve talked to the cook.
- Talk to Cobb and ask him to tell you about Loom until he gives in. This should earn you the Convinced Cobb to Tell You about Loom achievement.
- Talk to the nightmare customer. He tells you that he had been previously served hot food at the governor’s mansion, and that this food had “ingredients” in it. Apparently, he told the cook that this was the dinner he wanted, but hasn’t received it yet.
- Talk to the cook, who will tell you that the nightmare customer is Marlon Marlin, the only seller of yak fat on the island that the cook needs to keep happy. But since Marlon Marlin can’t remember the meal he’s been served at the governor’s mansion, you need to give the cook a recipe book so he can have a shot at it.
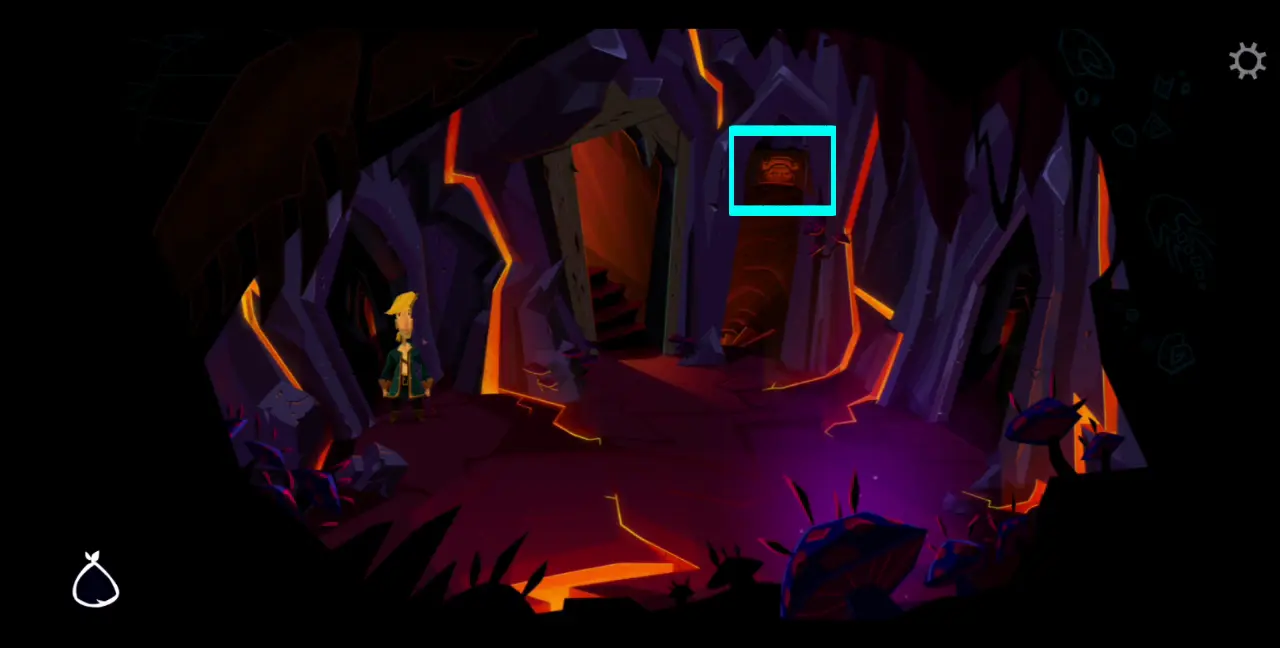
- Head to the governor’s mansion, which can be reached by passing Low Street, then going to High Street and walking past its arch.
- Upon reaching High Street, don’t go to the governor’s mansion yet, but rather, pass through the jail first. There are two cells and inside are Otis and Stan, who are acquaintances. Talk to them and don’t forget to tell them that you’re trying to look for the secret of Monkey Island.
- Inside it is a person named Otis, who happens to be an old acquaintance of yours. Use the monocle you swiped from Wally to read the tiny writing beneath the cell’s lock. This should give you a serial number.
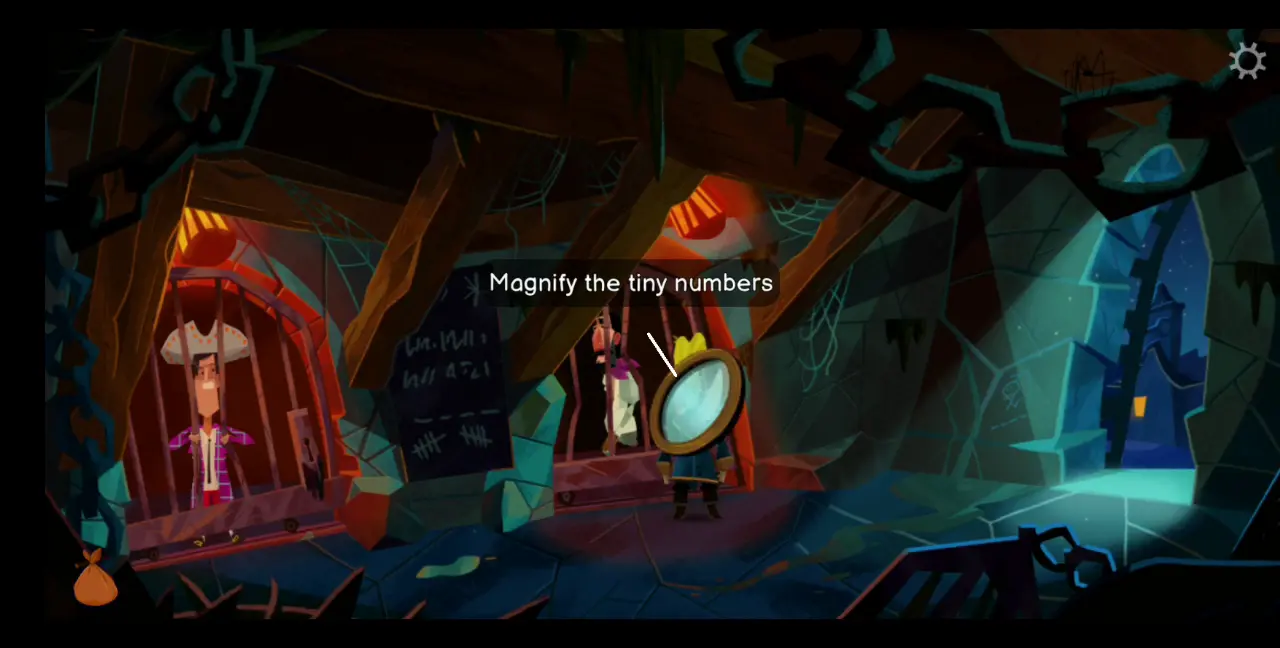
- Right across is the locksmith (with the shopkeeper’s name being Locke Smith). Give them the serial number and they will give you a key to the prison cell.
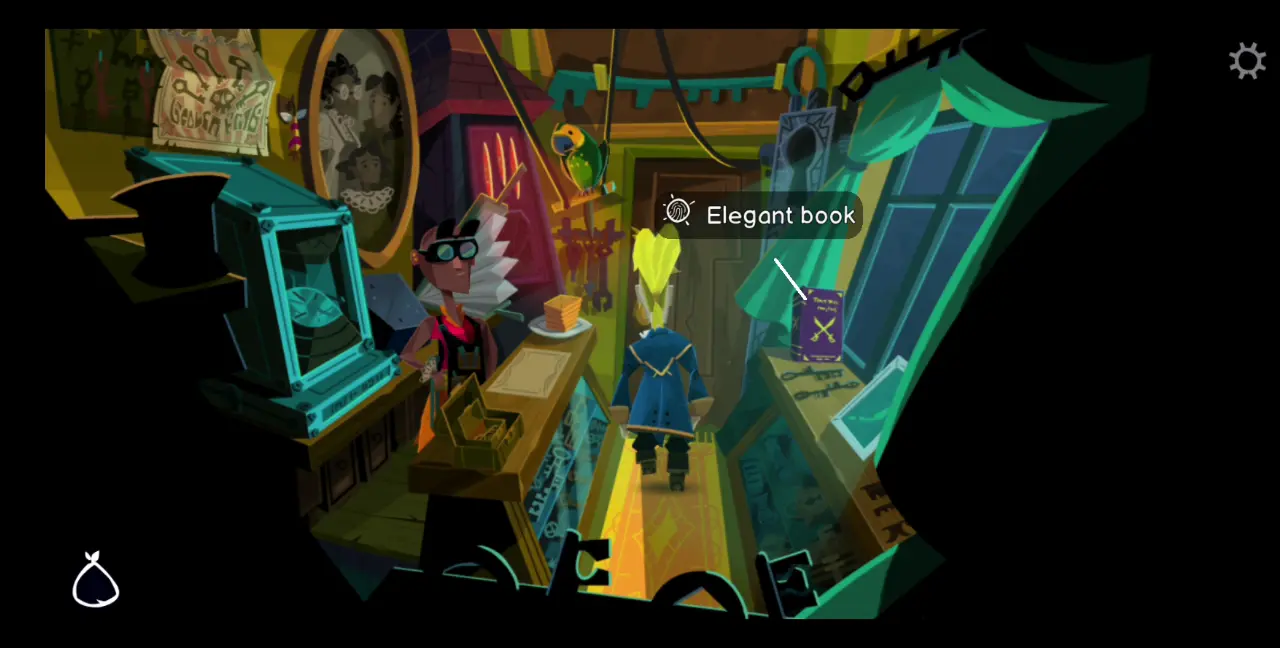
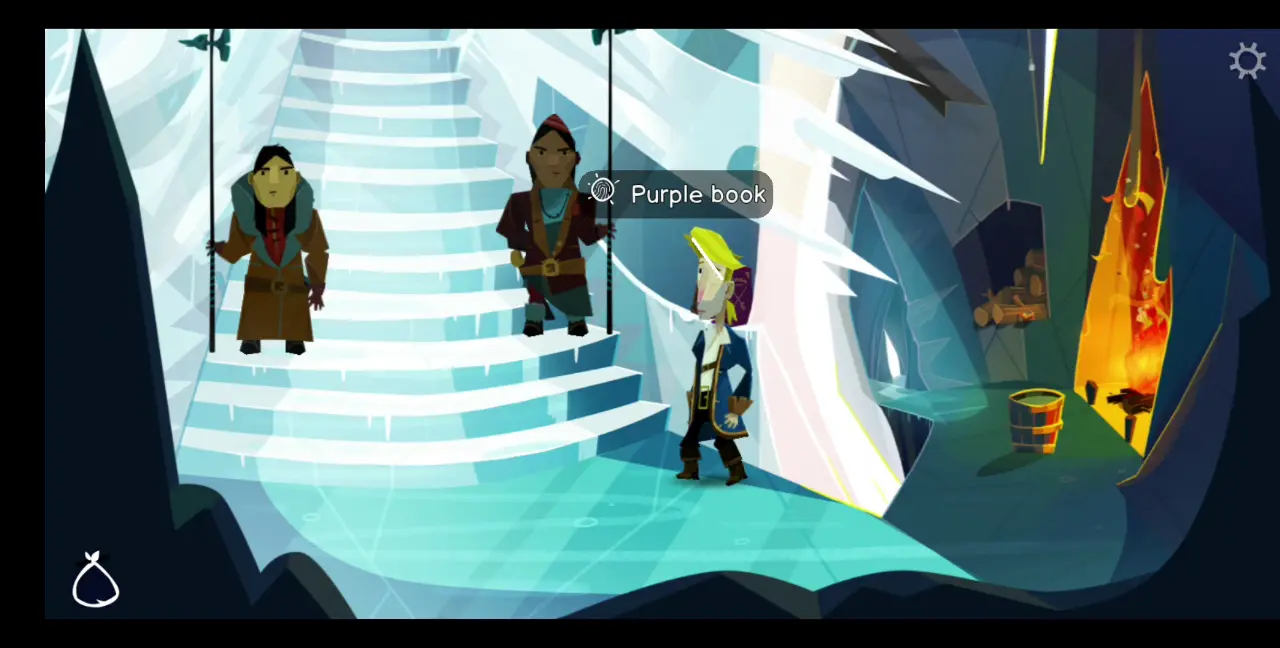
- On the shelf opposite the locksmith is a purple book by the window. Interact with this book, which is the first of five copies of At the End of the Plank that you’ll find in the game. If you missed this during Part One, you can see it again in Part Four. Keep in mind that you can’t take the book.
- With the prison cell key on hand, return to Otis’ jail cell and use this to free him. This should earn you the Freed Otis achievement.
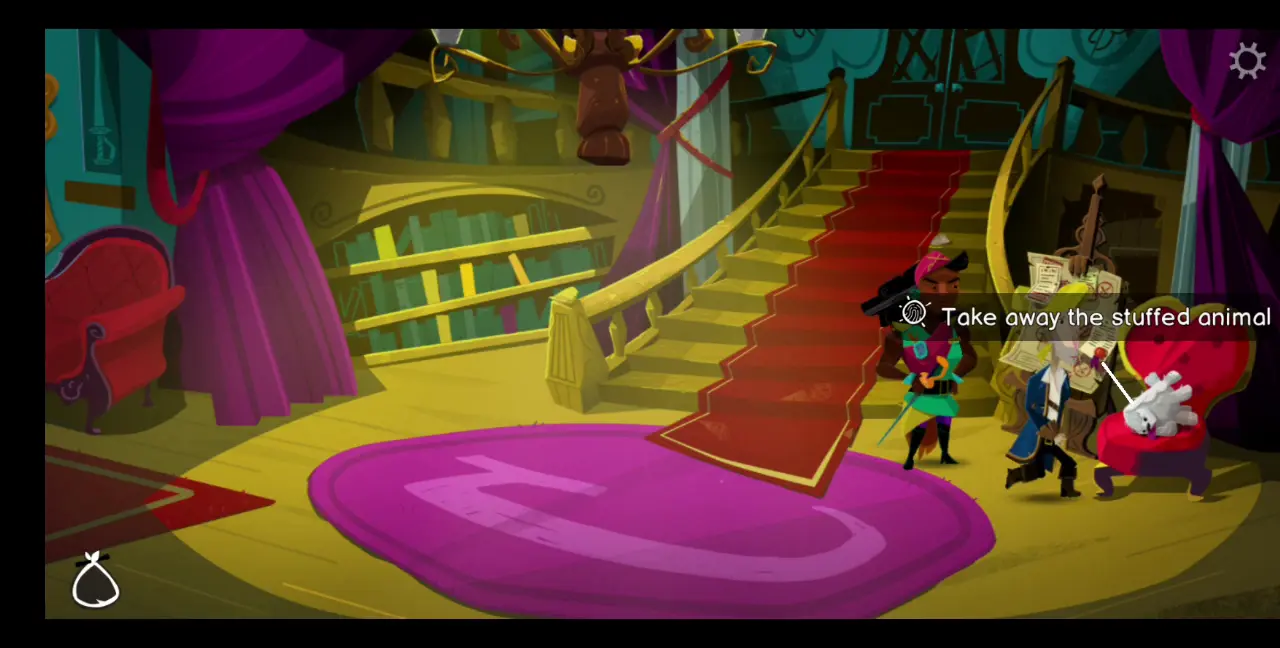
- Head to the governor’s mansion by passing through the arch and walking uphill. Inside, you will meet Governor Carla, with whom you will duel in a swordfight. After the swordfight, ask her if you can have the stuffed animal toy on the chair to her right.
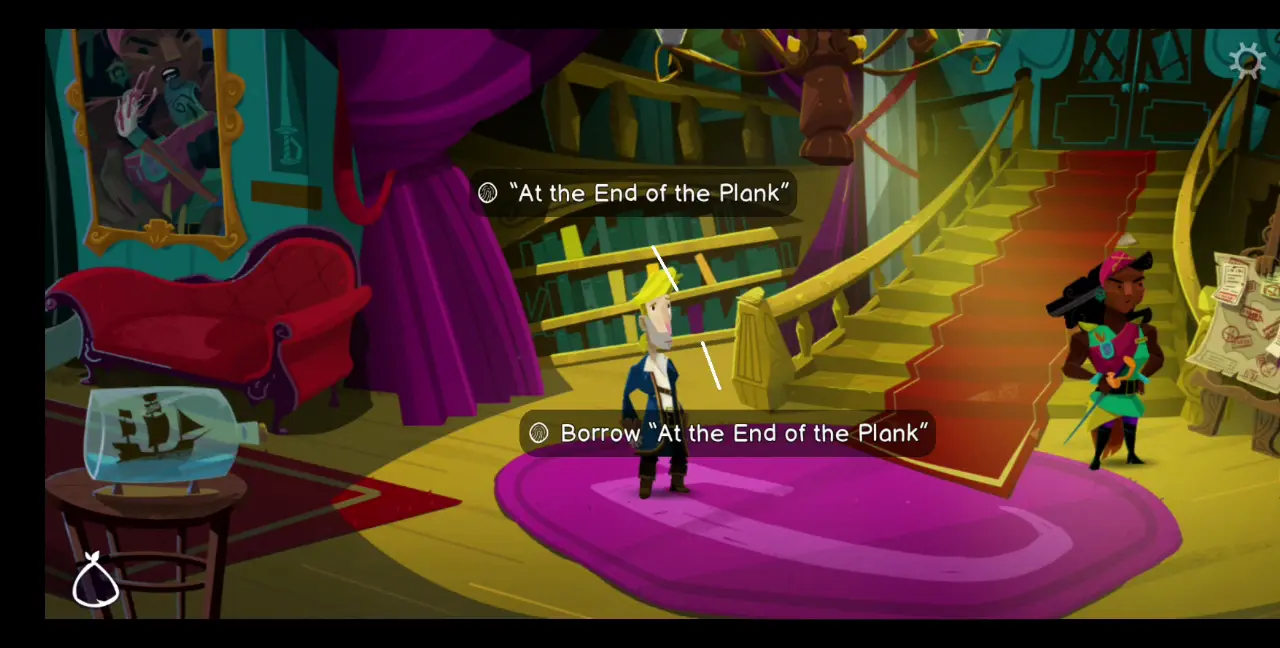
- To the left is a bookshelf. Ask Carla to borrow the yellow “Ingredients” book. However, Carla will not readily agree to you borrowing the book as she’s still mad about the last book you borrowed and failed to return. Borrowing any book from the bookshelf will trigger an angry response.
- To gain Carla’s forgiveness, combine the forgiveness frog at the state-of-the-art pen in your inventory. This will allow you to write a message intended to appeal to Carla so she can forgive you. A prompt will appear and you need to choose the following options in order:
- Dear Carla,
- Sorry for losing the book I borrowed.
- I admire that you are [what’s written on the re-election poster by the docks].
- … as shown by your actions at [the place indicated by the plaque under Carla’s statue on Low Street].
- I’ve implemented a reminder system for myself.
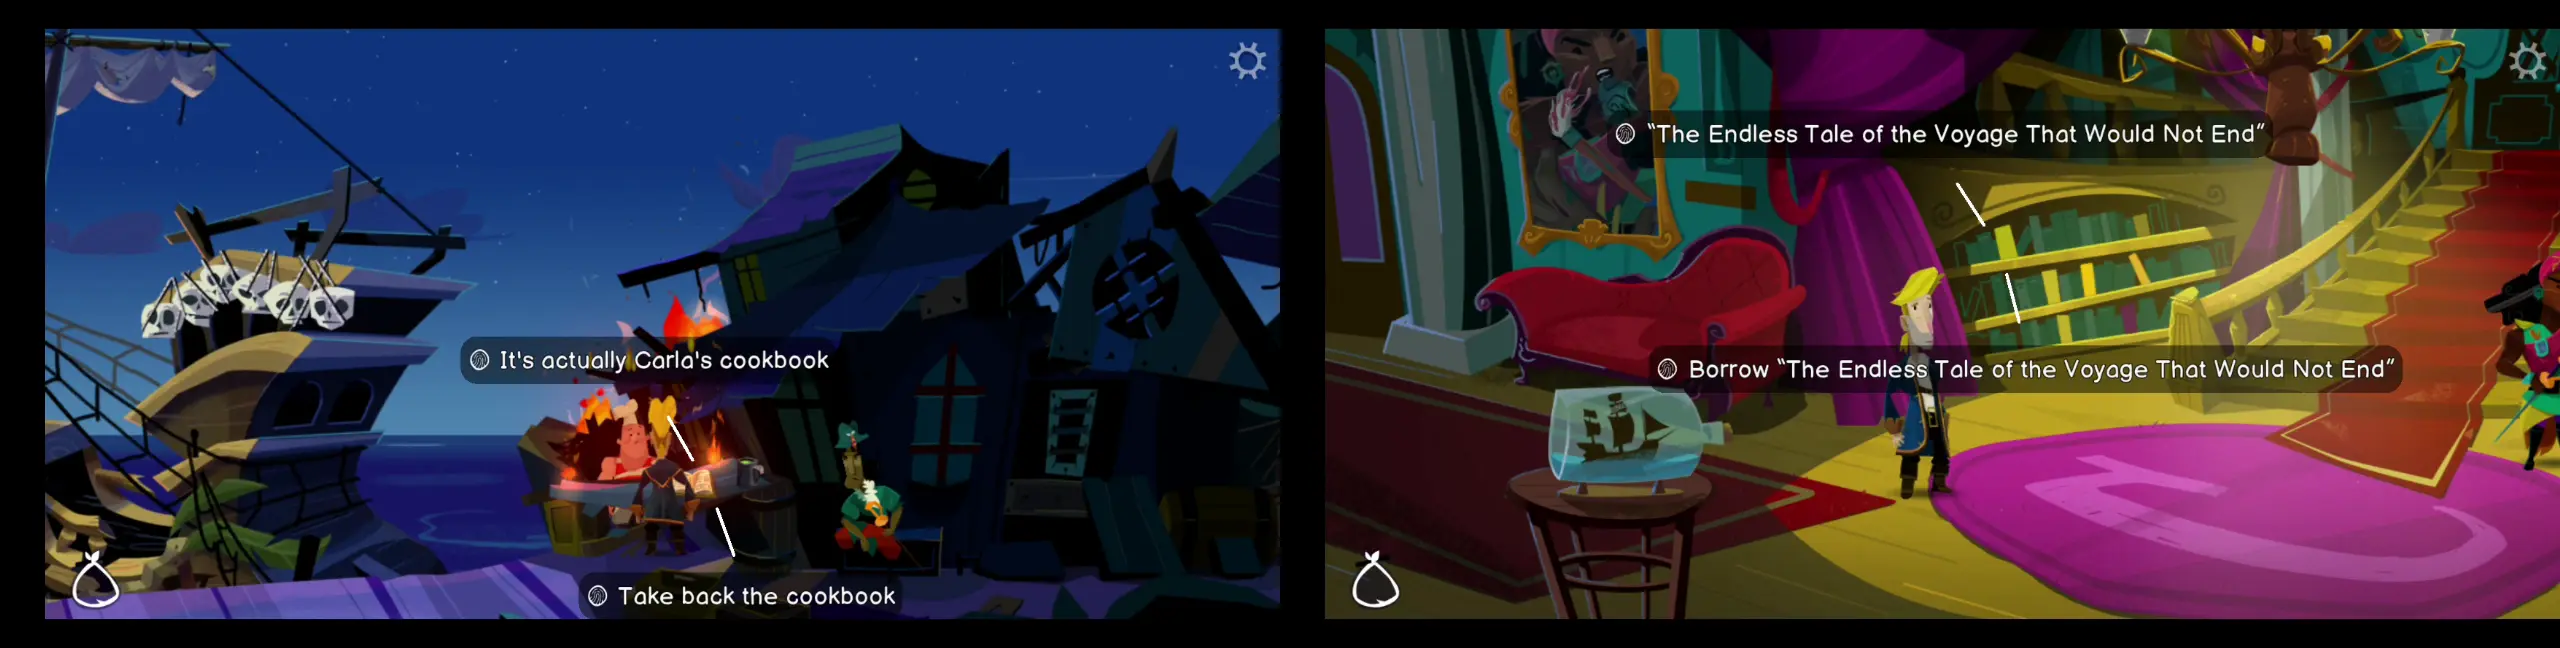
- Aside from varying depending on what’s written on the poster and plaque, choices 3 and 4 will only appear when you’ve actually read the poster and the plaque. Once you’ve penned a satisfactory apology note, Carla will forgive you and let you borrow her cookbook.
- Keep in mind that Carla will only let you borrow one book at a time. We suggest borrowing all the other books you can interact with first then returning them to the bookshelf before borrowing the cookbook. In particular, borrow the purple book, which should be the second of five copies of At the End of the Plank. You may read the books when you click them from your inventory.
- Once you’ve read all the other books, borrow Carla’s cookbook. Exit the governor’s mansion. If you go to the back of the mansion, you’ll be able to access a map of the island and instantly travel to different places. One other way to access this map is via the lookout point, where you pass the arch behind The Lookout.
- One of the places you can travel to via the map is the shipyard formerly owned by Stan, the used ship salesman who was also in jail next to Otis. Explore the shipyard and take the sponge.
- Thereafter, return to the Scumm Bar and hand the cook Carla’s cookbook.
- While the chef is busy cooking, use the knife you took from the voodoo lady to carve a sliver of wood from the chef’s mop handle.
- You can also try to steal the chef’s mop, which will earn you the Attempted to Steal the Cook’s Mop achievement. However, you won’t actually be able to steal the mop as the chef will always take it back whenever you attempt to leave with it.
- With the sliver of wood on hand, go back to Wally’s Maps-N-More on Low Street and give him the wood sample. With this, he’ll be able to make you a map to the mop tree as agreed upon.
- There’s another monocle on the desk. Take it before leaving the shop. Combine the two monocles in your inventory to get the double monocle, which will allow you to read even smaller writing that you will encounter later on.
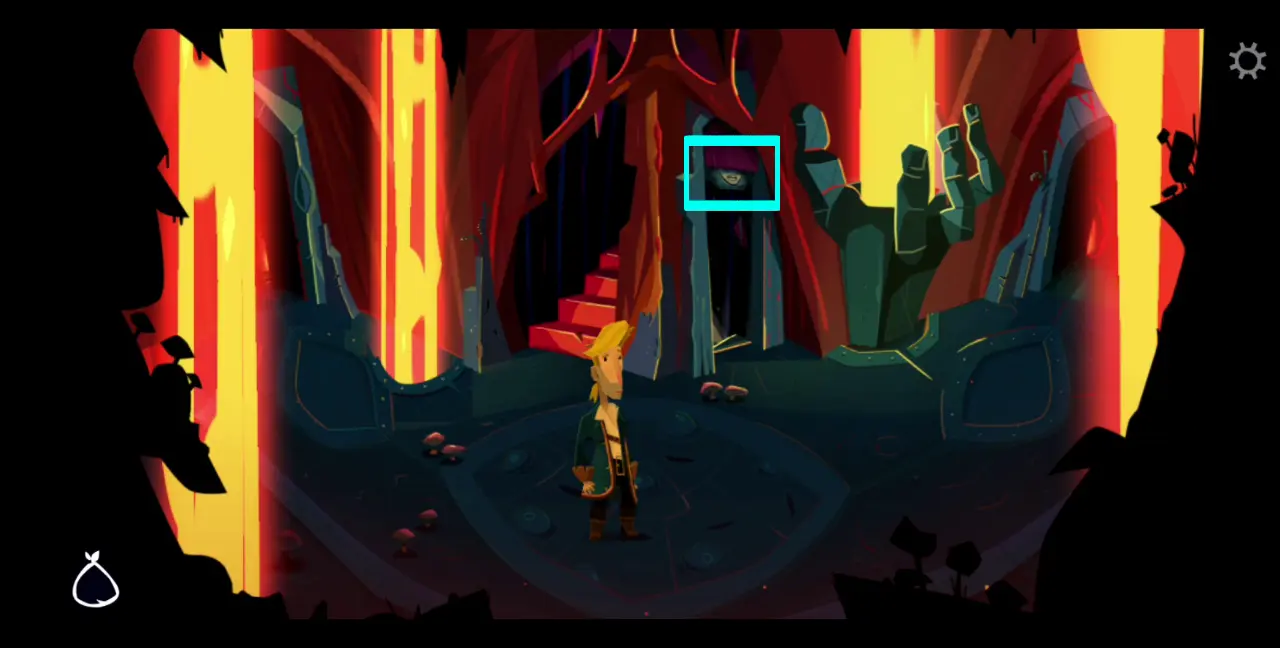
- With Wally’s map on hand, go to the back of the governor’s mansion to access the main island map screen. From here, head to the forest area.
- To the right of the forest is the Museum of Pirate Lore. To the left is the deep dark forest, which is where you should go. From here, you will need to navigate the path using Wally’s map. If you end up picking the wrong paths and getting lost, you will be reset to the beginning, wherein you’re about to enter the deep dark forest.
Intermission: How to Use the Mop Map
- Depending on the mode you’re playing in, using the mop map Wally gave you may prove to be challenging. Since we’re playing in Hard Mode, reading the map will be rather difficult and you’ll spend a while trying to navigate the forest in vain if you don’t know how to decipher it properly.
- It’s also important to note that the map’s appearance may vary from one playthrough to another. During our playthrough, this is the map we received:
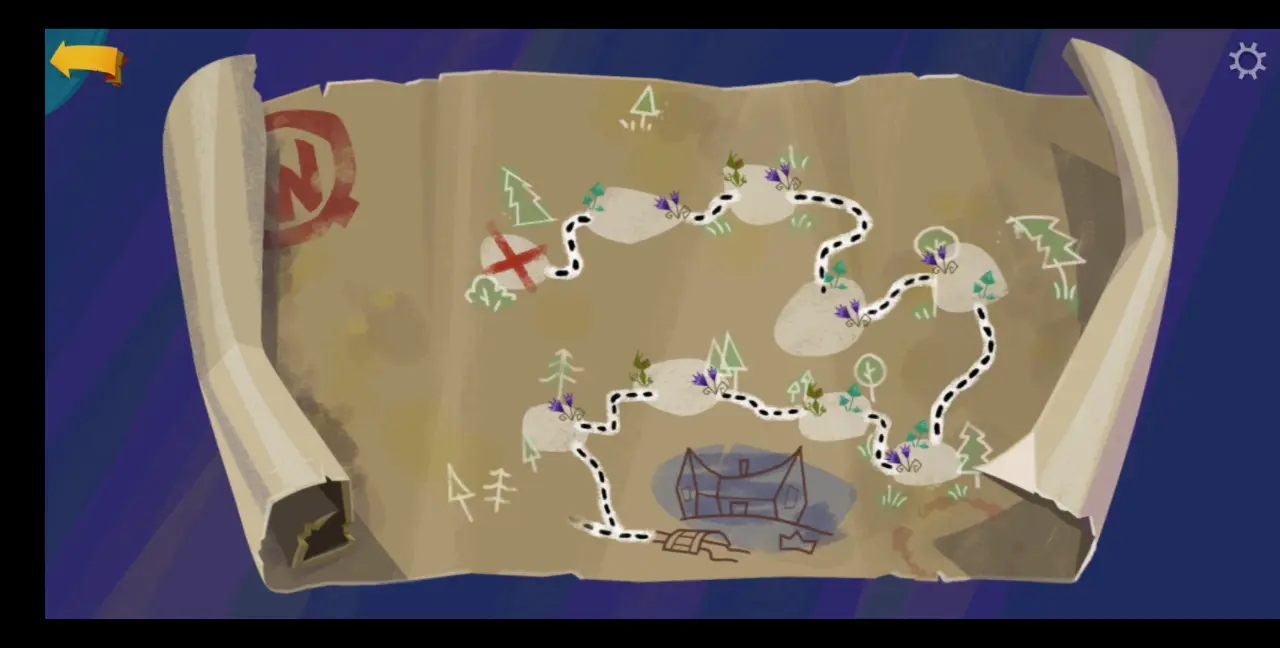
- As you can see, the map has dotted lines and three kinds of plants that serve as landmarks: the carnivorous plant, the purple flowers, and the green glowing mushrooms. Don’t bother trying to figure out what the dotted lines are for as their purpose is to only distract you.
- Instead, pay attention to the plants serving as landmarks. Basically, you begin at the area of the map next to the Museum of Pirate Lore. What you need to do is pick the paths with the correct plant landmarks corresponding to the path laid out on the map. Depending on your location on the path, one plant denotes the entrance while the next one denotes the exit. Below is an illustration of how to read the map where we’ve marked the entrances in blue:
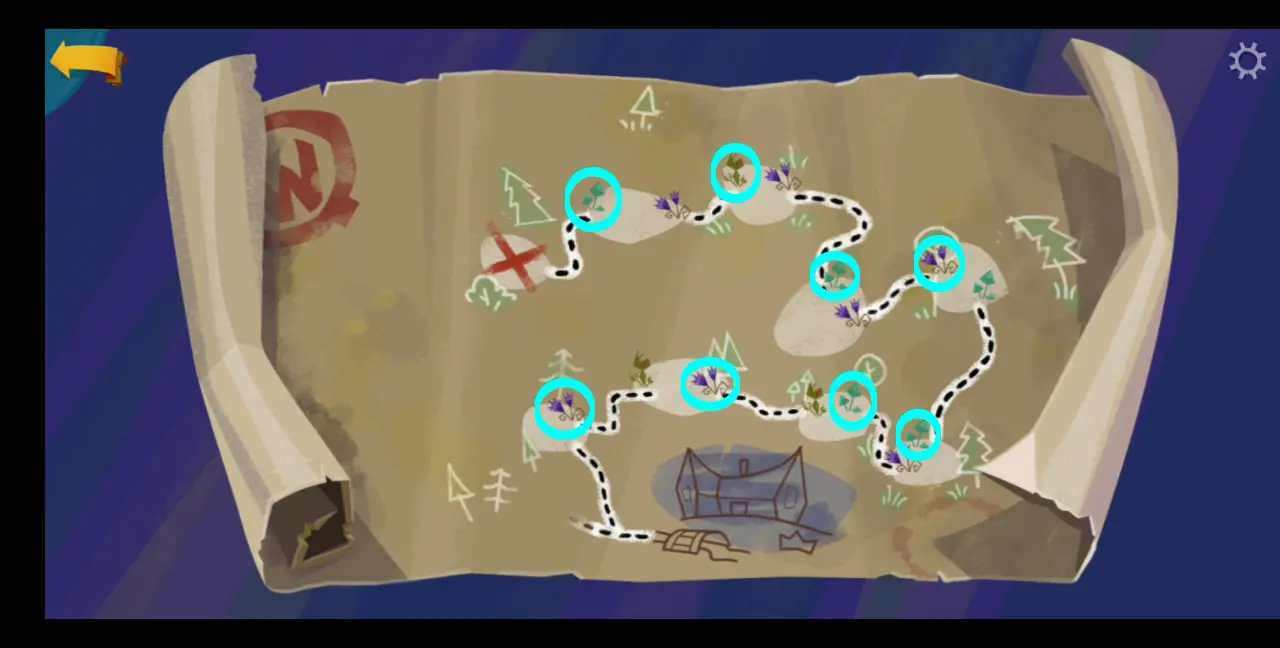
- Entrances are the paths you need to choose while exits are the paths you’re coming from before choosing another entrance. As you navigate the forest, you will notice that after choosing an entrance, you’ll come out of the exit with a different plant in that specific path.
Looking for a Mop (Continued)
- Once you’ve emerged from the maze of the deep dark forest, you’ll reach the mop tree. Use the knife to carve the mop handle.
- After carving the mop handle, you may combine it with any of the mopheads you’ve obtained along the way, namely:
- The string from the back of the Scumm Bar’s kitchen.
- The shrunken head from the voodoo shop.
- The stuffed animal from the governor’s mansion.
- The sponge from Stan’s shipyard.
- As mentioned earlier, using all four mop heads will earn you the achievement Got Hired with All Four Mop Heads.
Using a Disguise
- With a proper mop, you’ve now completed one of two objectives that will allow you to join LeChuck’s crew. All you need now is a disguise.
- To do this, first go to the Museum of Pirate Lore next to the forest. Talk to the Curator there and explore the items in the museum. Interacting with some items may lead to you discovering spoilers and the game will flash a “Spoiler Alert” sign while the dialogue is ongoing.
- In any case, after speaking to the curator and exploring the museum, use the double monocle to read the serial number on the display case showcasing Jon Laney’s eyepatch.
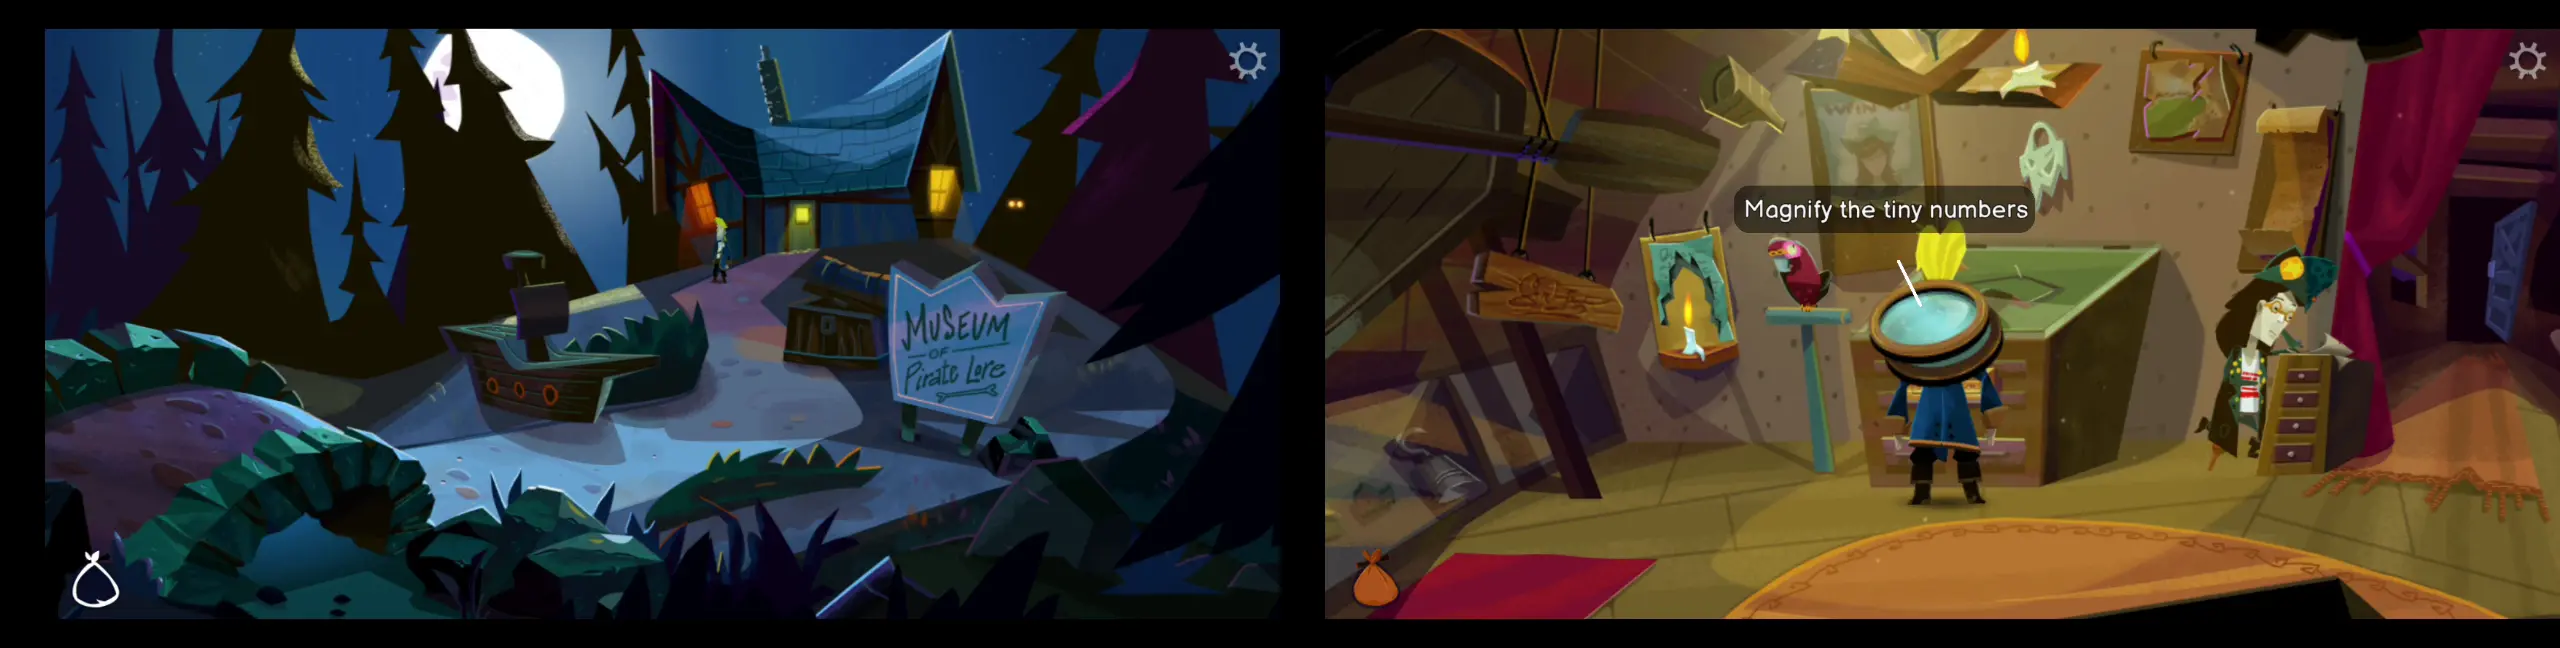
- Before leaving the museum, head to the storeroom at the back and grab the box of cracker mix on the nearly empty shelves.
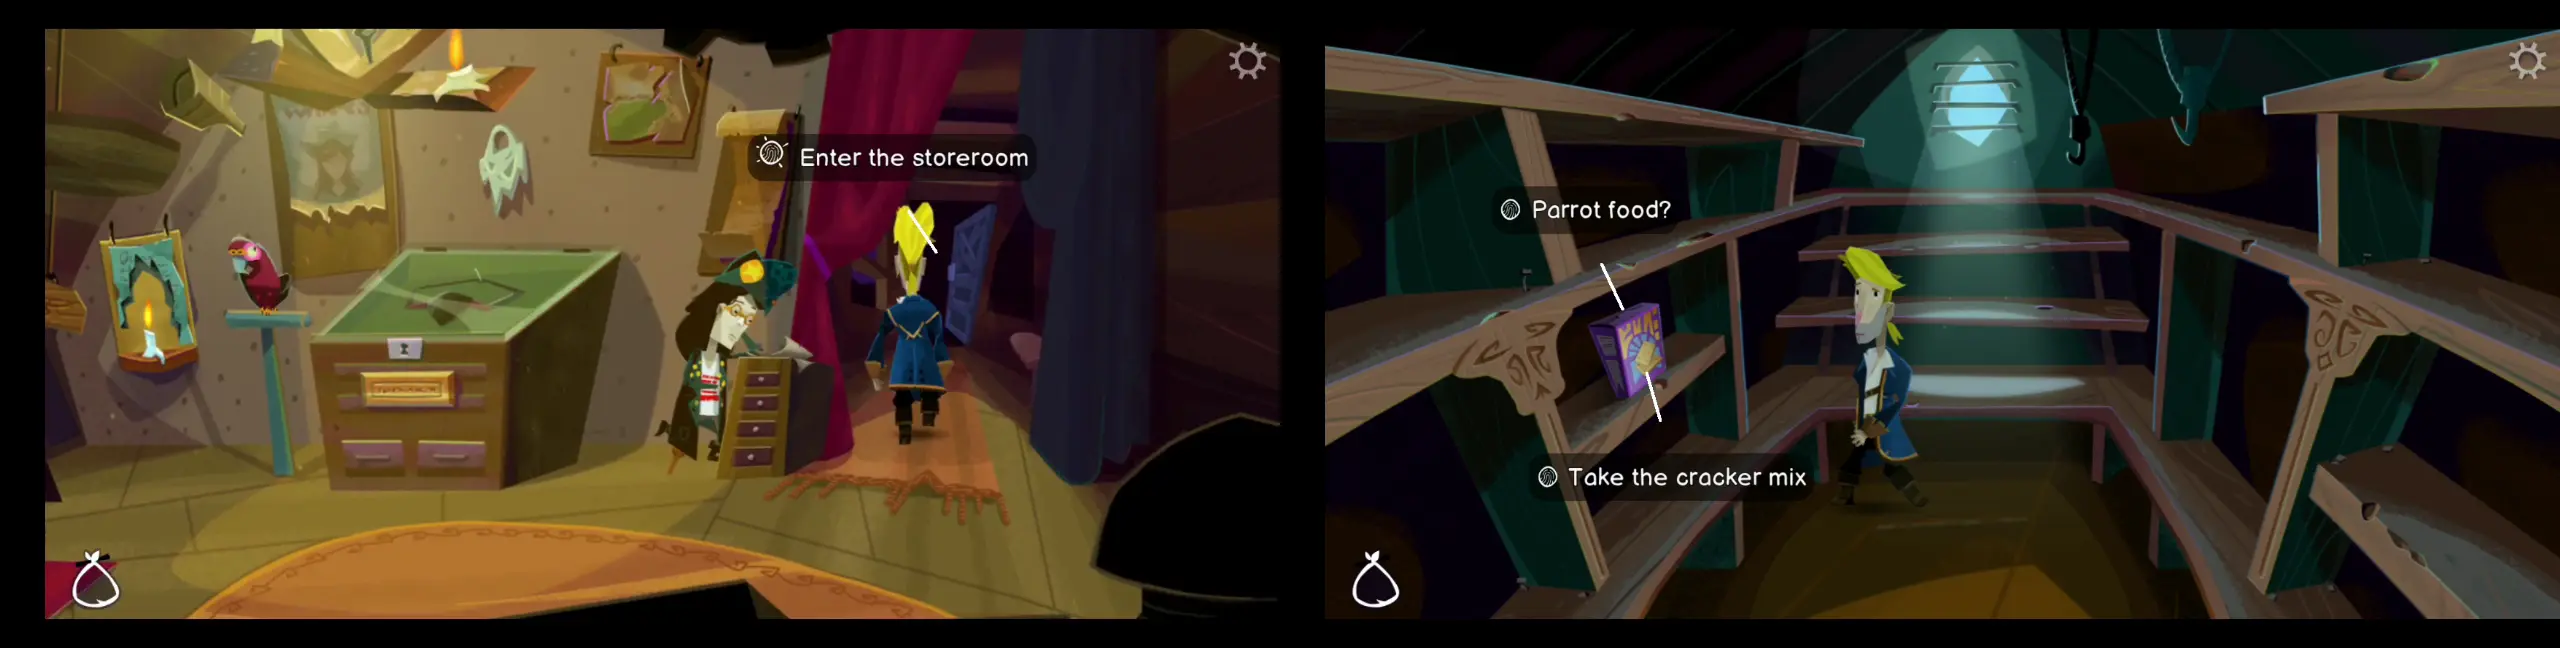
- With the display case key’s serial number in hand, go to the locksmith on High Street. Ask her to create a key using that serial number.
- Additionally, give the locksmith the cracker mix and she’ll offer you the crackers on the plate beside her parrot.
- Take the key and the crackers, then head back to the museum. Give the museum parrot the crackers. While it’s distracted, use the key to steal Jon Laney’s eyepatch from the display case.
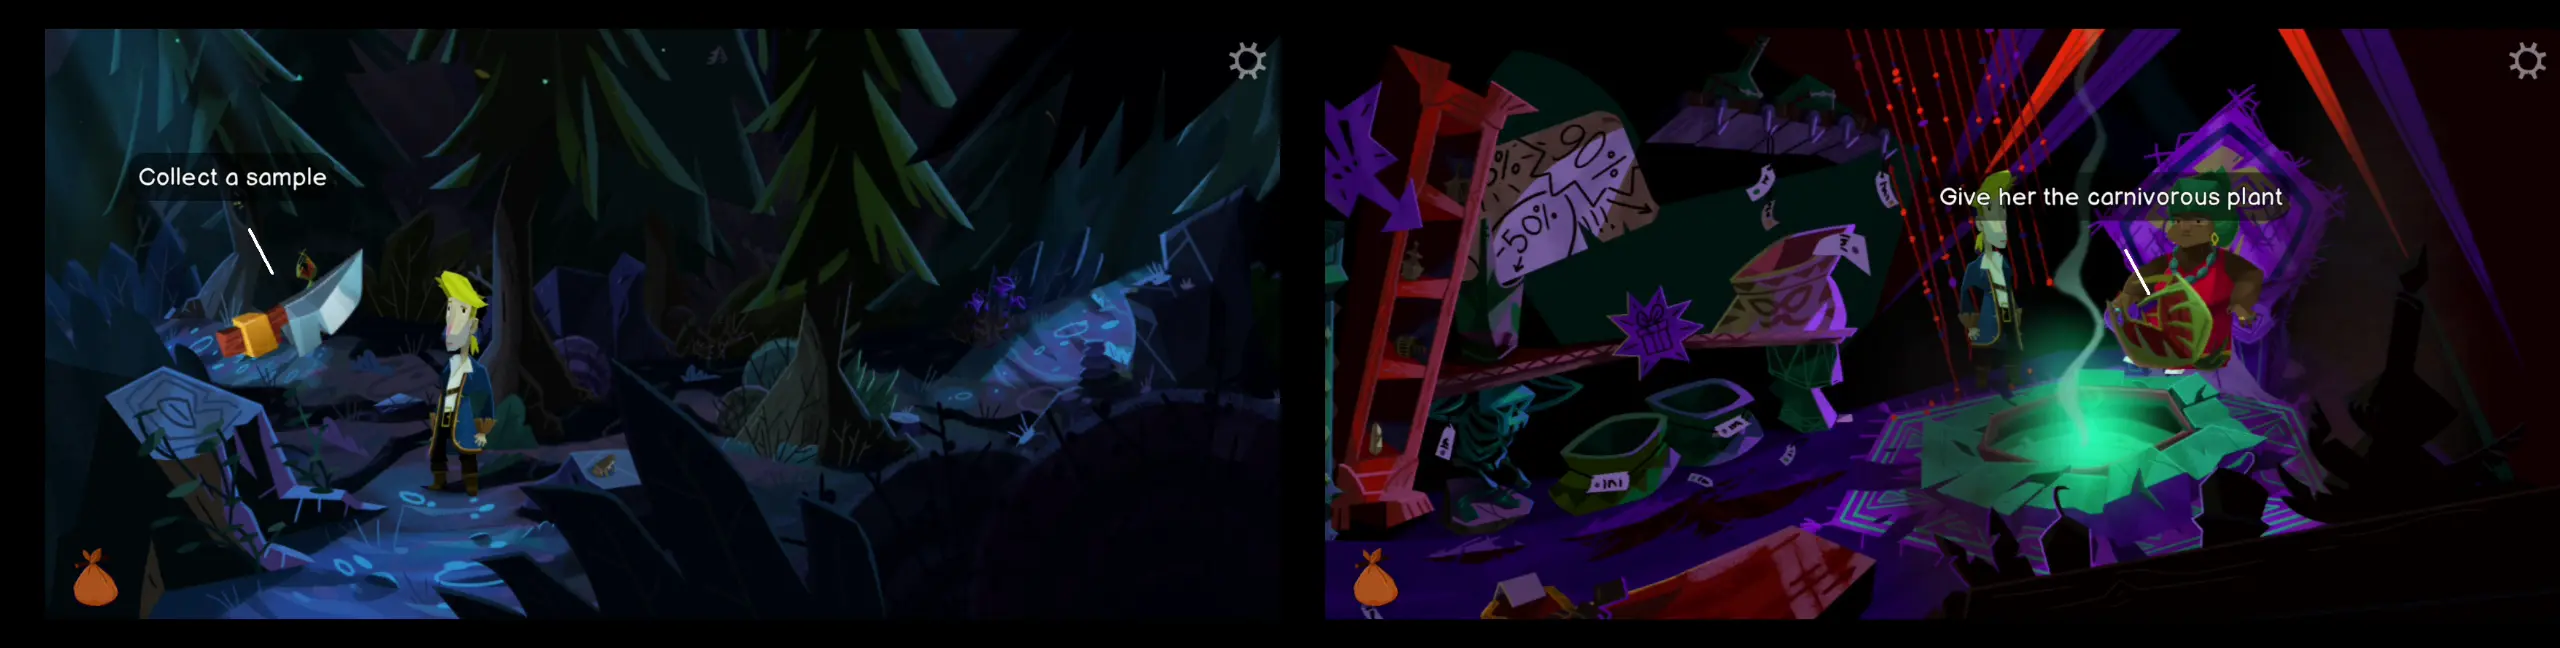
- If you try to use the eyepatch, you’ll discover that its magic is gone. To remedy this, go to the voodoo lady on Low Street so you can ask her to recharge the eyepatch’s magic.
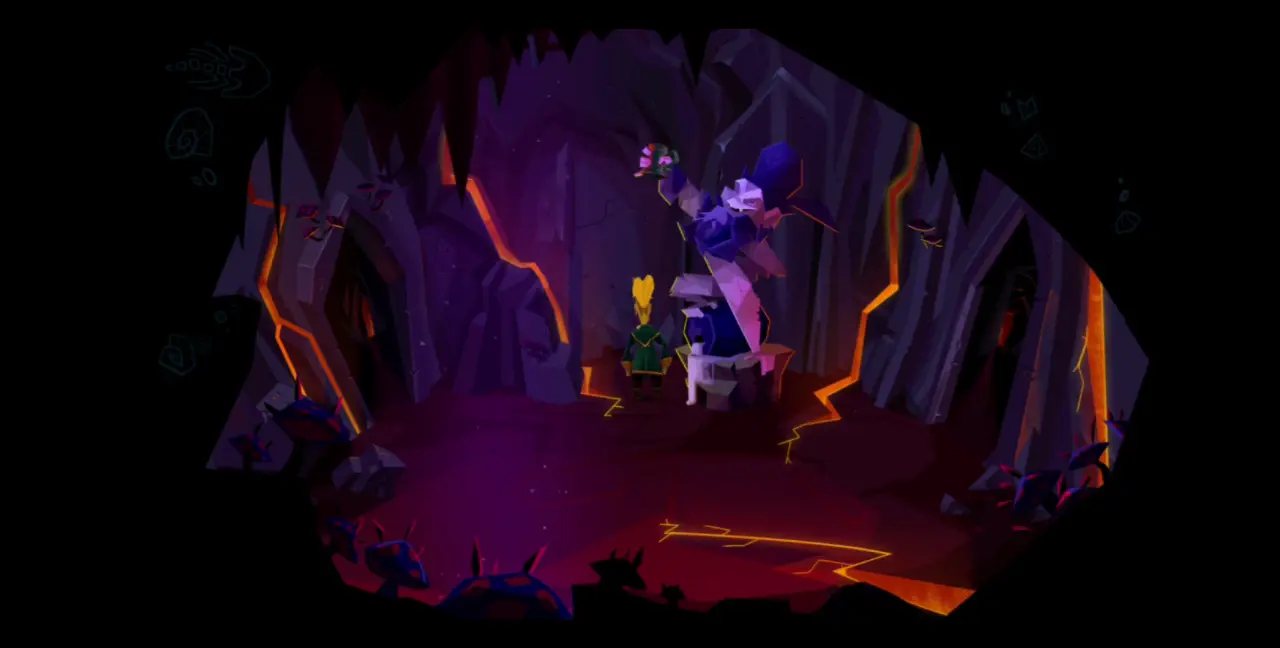
- In exchange, she’ll ask you for a supposedly mystical charm she calls the “bite of the thousand needles.” Give her the carnivorous plant you found in the forest, which she’ll deem as good enough. With this, the voodoo lady will work her magic on the eyepatch. Guybrush will exclaim that he’s now ready to set sail.
- Go to the docks. Wear the eyepatch, which will turn you into a zombie. With this disguise, talk to the quartermaster and show her your mop. She won’t suspect a thing and will immediately hire you.
As you set sail, the three pirate leaders—Captain Trent, Captain Madison, and Captain Lila—are conspiring against you. Through a cutscene, it’s revealed that they’re going to follow you to Monkey Island. This concludes Part One of the game.
Part II: A Dangerous Journey
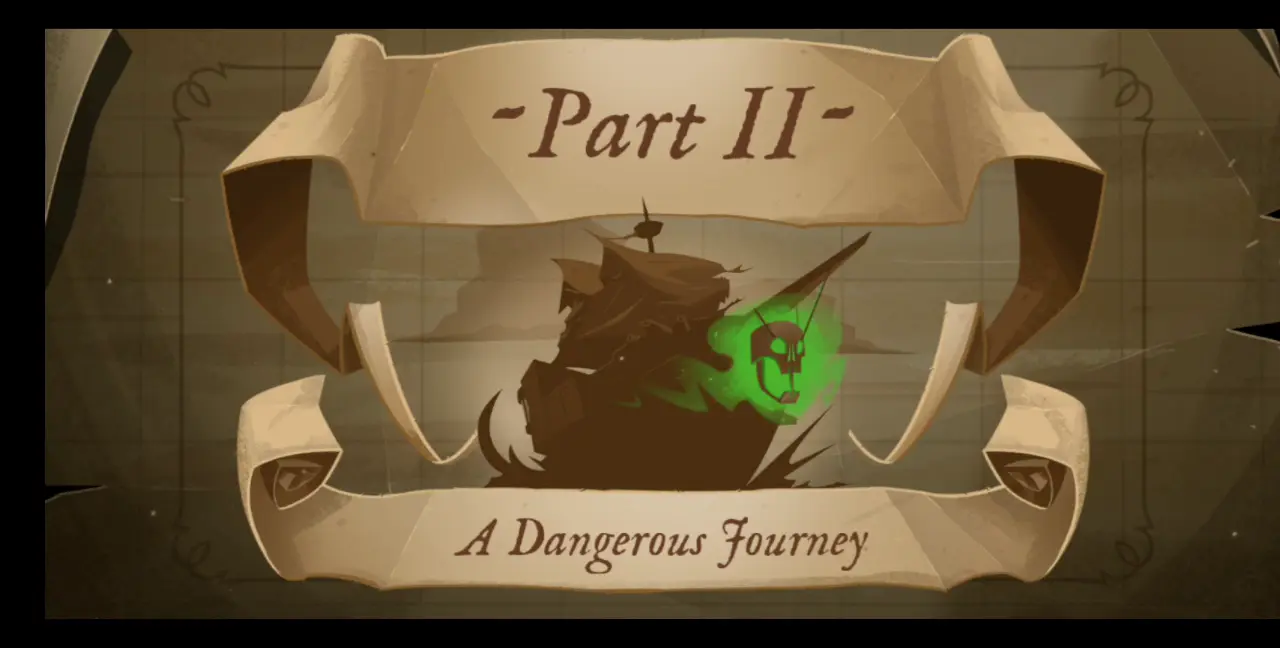
Beginning this part of the game will automatically earn you the achievement Started Part Two.
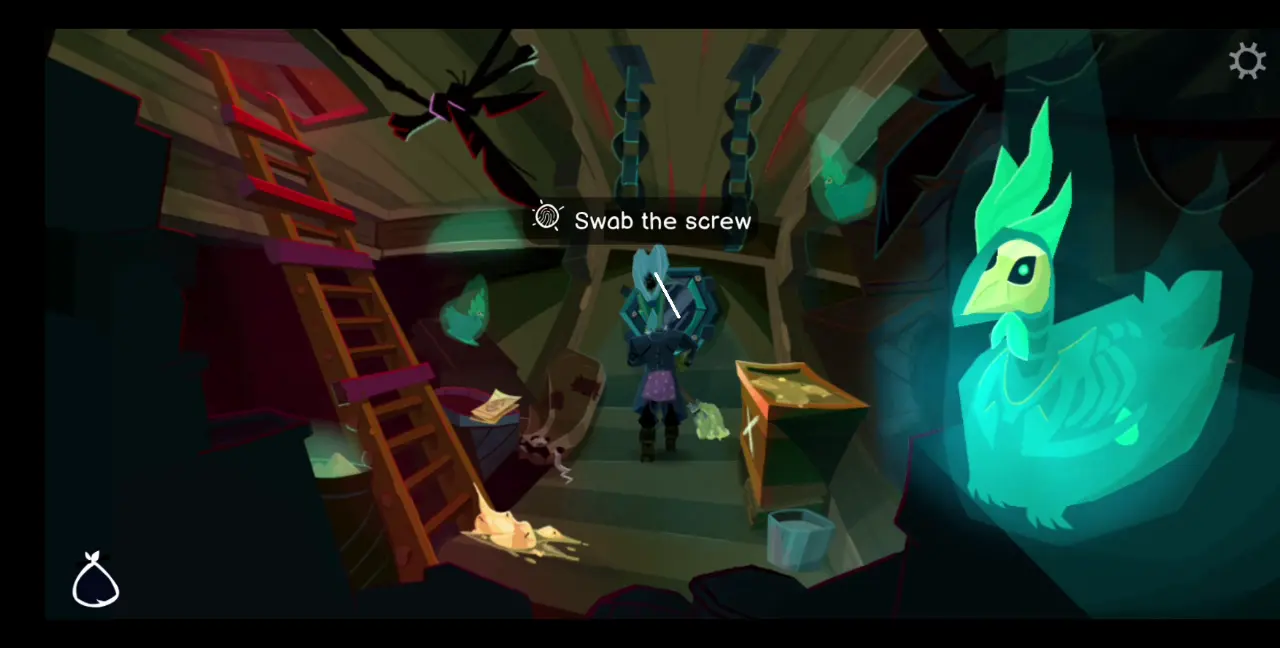
In this part of the game, you, as Guybrush, have successfully infiltrated LeChuck’s crew as a swabbie. The ship is now sailing out at sea. Unfortunately, you’re trapped in the ship’s hold, no thanks to Gullet, the so-called First Swab. If you try to climb up the ladder out of the hold, Gullet will be there to make sure you stay put and clean the hold. On top of that, every time you attempt to mop the hold clean, Gullet will promptly drop a blob of grease, dirtying up the hold once more.
This cycle seems to repeat endlessly, but don’t worry, there’s a solution to this.
Escaping the Ship’s Hold
- First, pick up the pamphlet on the bed.

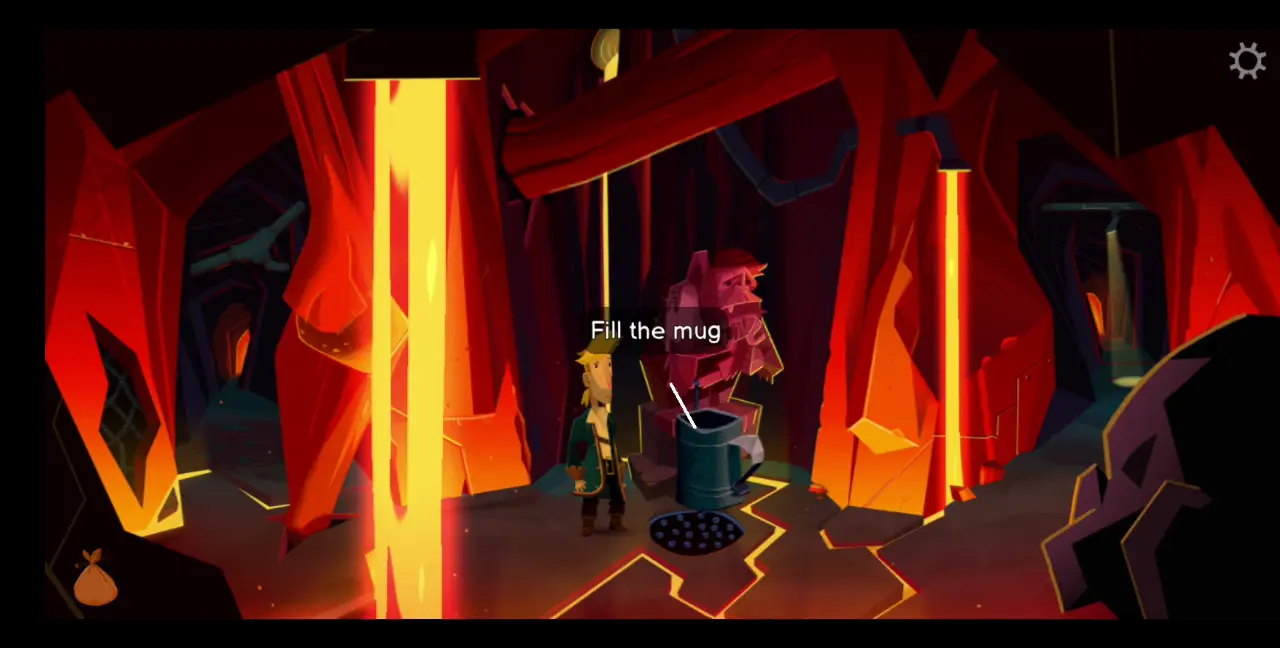
- Whenever Gullet throws a glob of grease on the floor, you can use the mop to swab the grease away (but expect another glob to be thrown down the hold again). You’ll notice that the grease will stick to the head of the mop. Use this to loosen the screws on the porthole. You have to do this thrice (once for each screw), keeping in mind that you need to “re-grease” the mop every time you want to loosen a screw.
- Once a screw is loose, use the knife to remove the screw. You’ll also have to do this thrice.
- The window of the porthole will fall out, giving you an avenue to escape. But before that, you can earn the Swabbed the Hole Twenty Times achievement by spreading grease all around the hold and cleaning it up 20 times.
- Back to the porthole, you can try to go through it but you won’t be able to unless you grease the porthole itself for three times. Don’t forget to “re-grease” the mop every time.
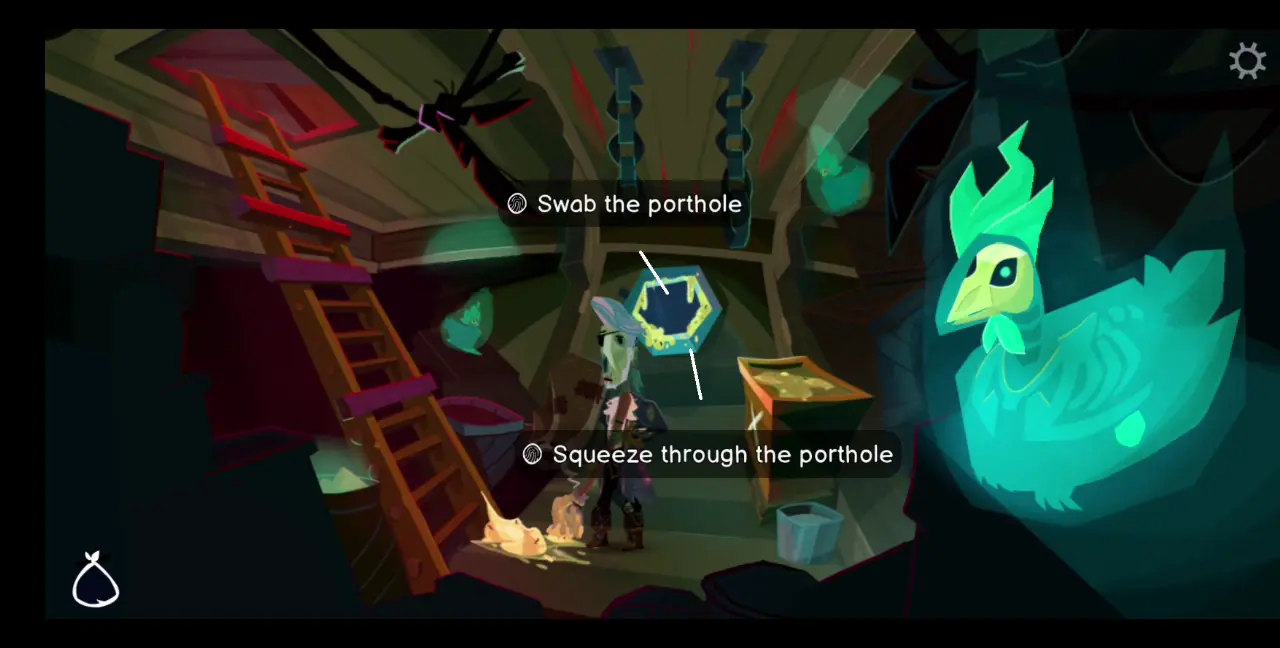
- Once the porthole has been greased, you can squeeze yourself into the porthole and will find yourself at the side of the ship. Walk right and climb the ladder at the very end. This should lead you to the deck.
On the deck, you’ll catch LeChuck berating his crew. After his tirade, he’ll assign you to find a flattened skull for a special potion you need to reach Monkey Island.
Finding a Flattened Skull
- Depending on whether you’ve encountered this in the early part of the chapter or not, the flattened skull you’re looking for is actually in the hold. Thus, from the deck, return to the hold by going down the ladder, walking down the side of the ship, and sliding back the greasy porthole.
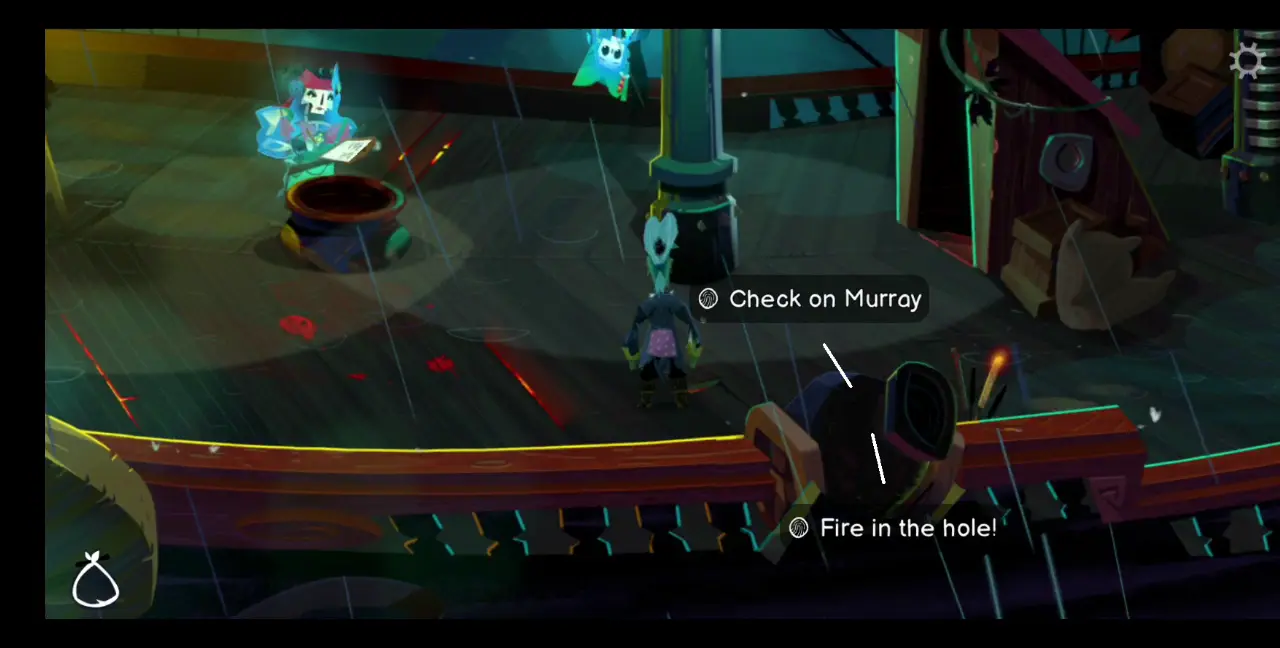
- In the hold, you’ll see a crate with an X. Open the crate and you’ll find Murray, the talking skull, inside.
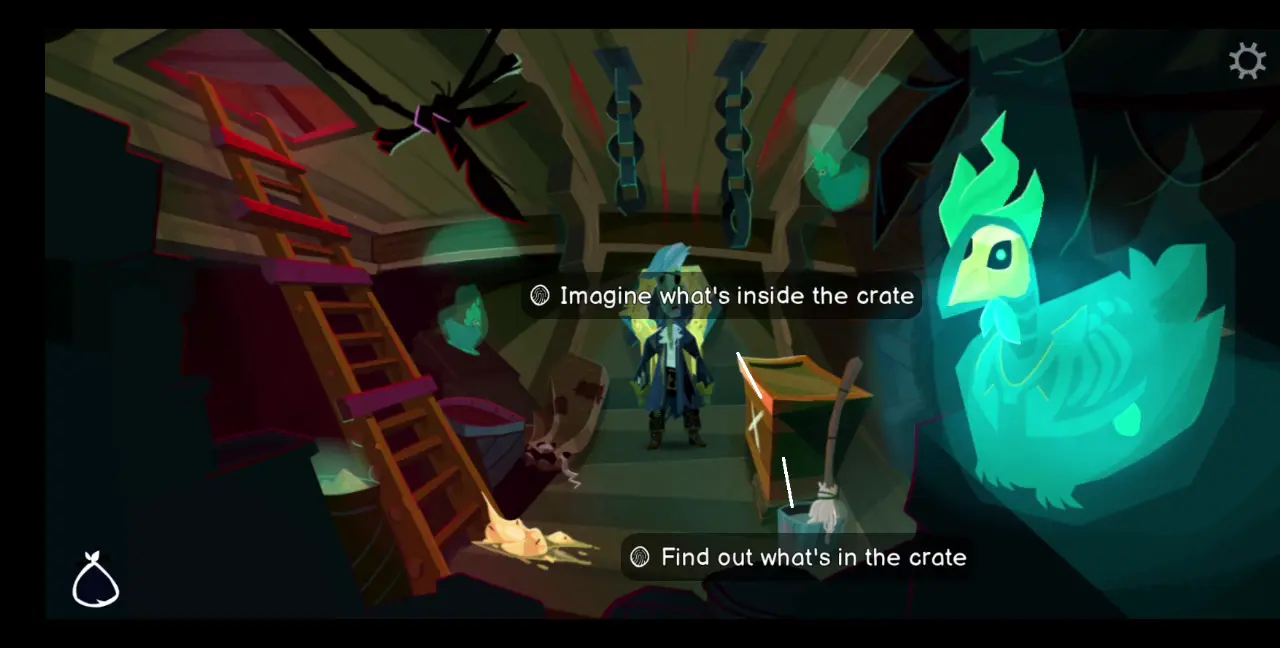
- Murray is apparently a spy sent by Captain Madison, one of the three pirate leaders you spoke to at the Scumm Bar. Since your objective is to find a flattened skull, you can either:
- Talk Murray into going with you.
- Take Murray against his will.
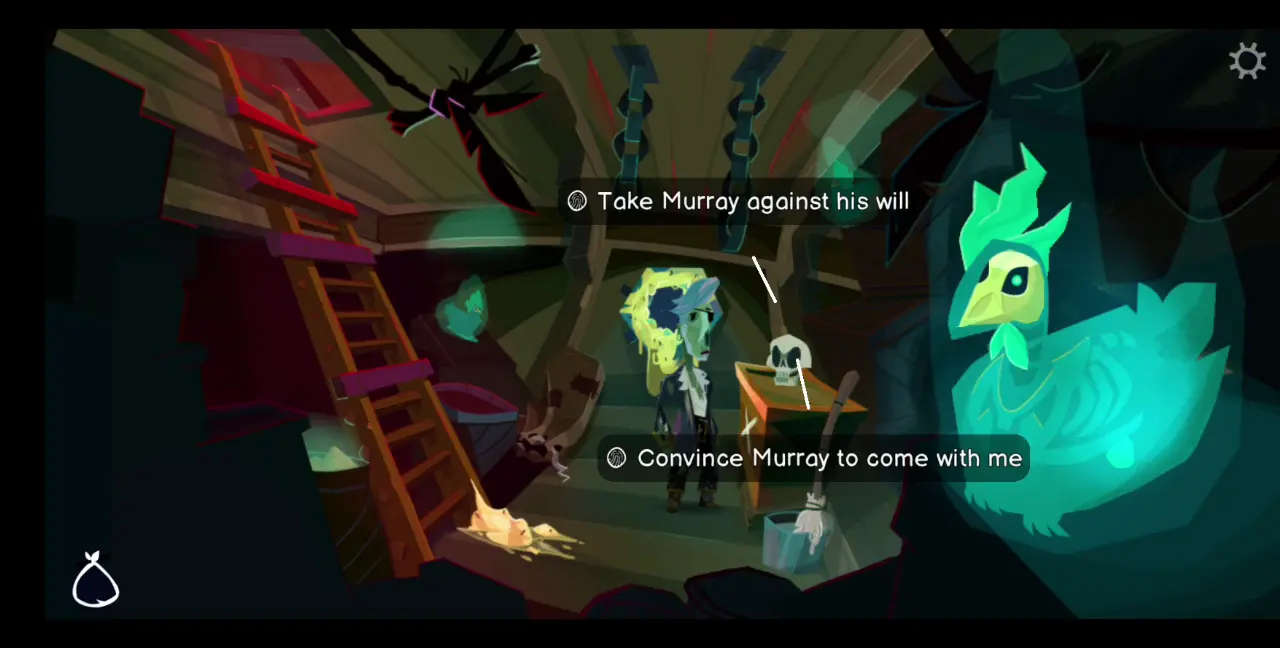
- Either way, you’ll end up with Murray in your inventory.
- From the hold, return to the deck then go down into the ship via the stairs near the crow’s nest.
- To the right of the stairs is a laundry machine or a clothes press that breaks down the minute you step close to it. Repair this machine by using the screws you loosened from the porthole.
- To turn Murray into a flattened skull, use the clothes press to flatten him out.

- Head back to the deck again and place the flattened Murray into the cauldron to complete the potion. Unfortunately, Gullet will see you and, in his anger, tip over the cauldron containing the potion before its effects take place. Gullet is thrown overboard by a furious LeChuck and you’re promoted to First Swab.
The New Plan
- With no more ingredients left to brew another potion, getting to Monkey Island seems to be a bust. To find an alternative solution, head to the crow’s nest and use the spyglass on the right.
- Look toward the east and you’ll see that the three pirate leaders from the Scumm Bar have been tailing LeChuck’s ship all along. It appears that they, too, are heading toward Monkey Island (despite how they mocked you for it at the bar) and are brewing their own dose of magic potion.
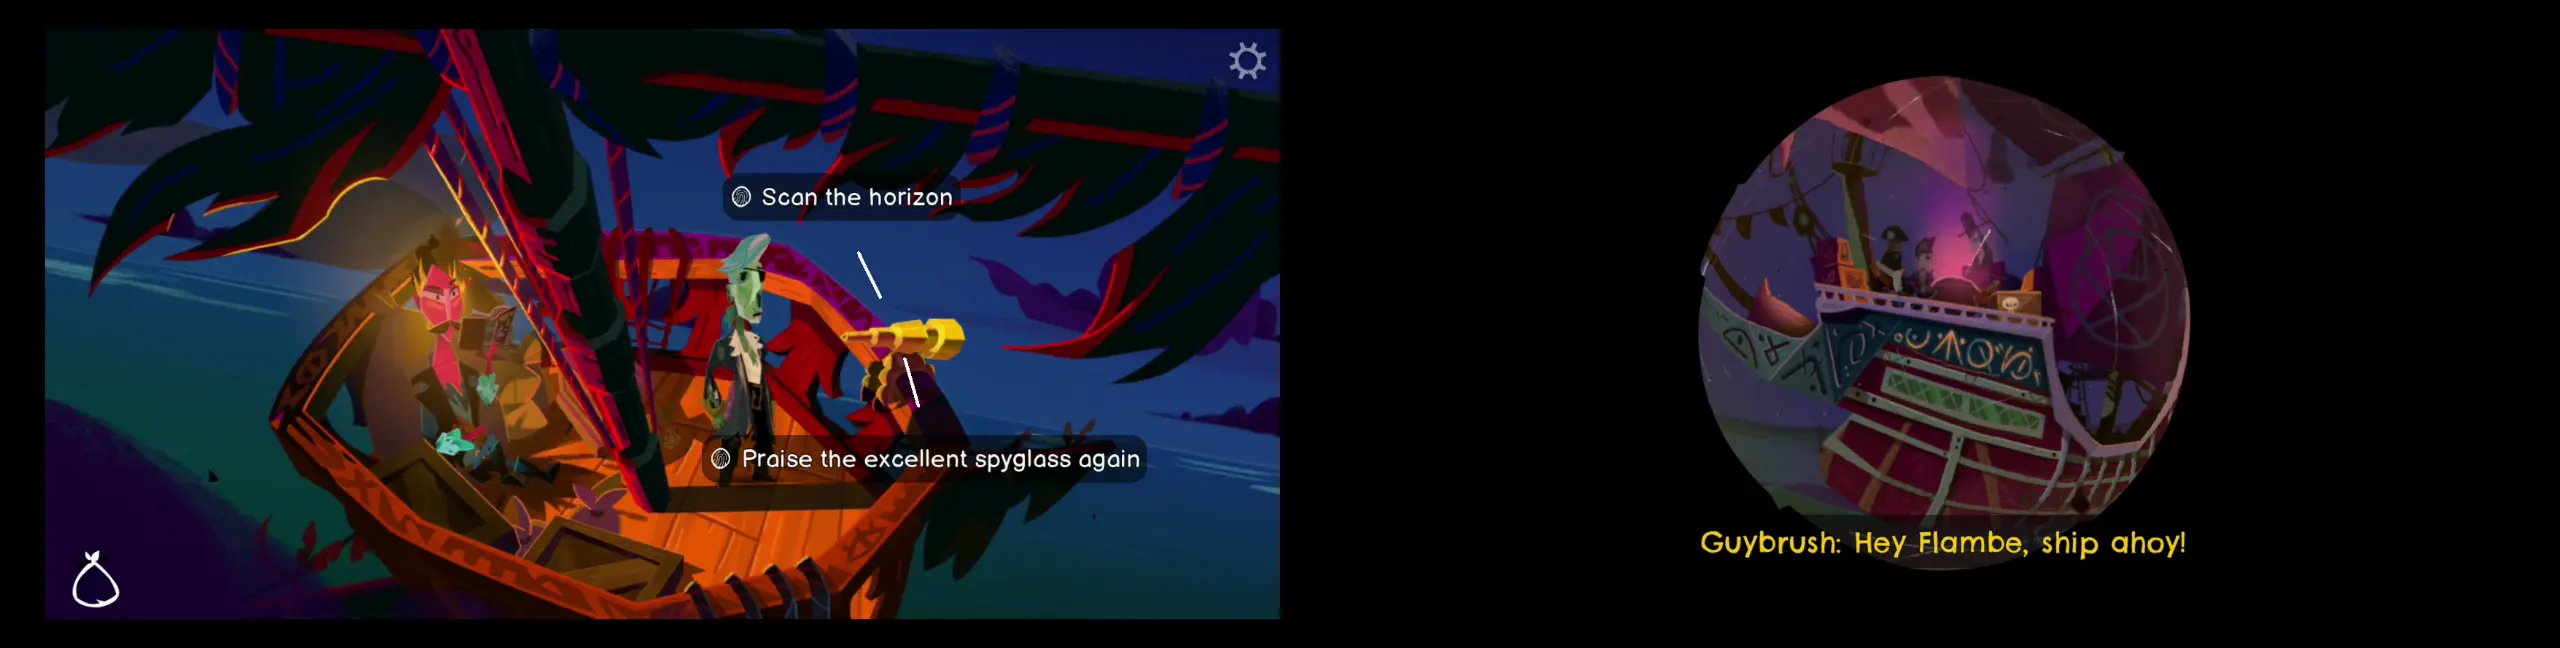
- You, as Guybrush, see the opportunity to follow the three pirate leaders so LeChuck’s ship can still manage to go to Monkey Island.
The problem is, none of LeChuck’s five-member crew actually wants to go and have unanimously voted against following the three pirate leaders.
Getting LeChuck’s Crew to Change Their Minds
Since you’re dead-set on going to Monkey Island to discover its secret, you need to change the minds of all the crew members and get them to agree with your scheme. This part of the story will require you to individually speak with each of LeChuck’s five remaining crew members, convincing them to change their initial vote. Keep in mind that some crew members will affect the vote of other crew members so it’s best to speak to them in the order we’ve listed below.
Convincing Iron Rose
- This part begins on the deck and Iron Rose, the quartermaster, happens to be the crew member there. You may see Apple Bob nearby as he hangs from a mast, but he’ll be the last crew member you’ll convince so talk to him later.
- Upon speaking to Iron Rose, you’ll discover that she’s having a crisis of faith and has lost her motivation to follow LeChuck.
- Give Iron Rose the pamphlet you’ve collected from the hold to remind her of why she followed LeChuck in the first place. This will convince her to change her vote.

Convincing Putra
- Go to the galley, which is to the left of the hold’s entrance. Here, you will find Putra, another member of LeChuck’s crew.
- Talking to her will reveal that her vote is always the same as Iron Rose’s, assuring you that you will get her to overturn her vote, just as Iron Rose did.
- However, you need to win Putra over and do her a favor because her help is needed in changing another crew member’s vote.
- To find out how you can help her, ask Putra why she isn’t called chef by the rest of the crew. This, in turn, will get her to reveal that she isn’t a chef but a cook, despite having repeatedly requested for a promotion for quite some time now. Offer to help her and she will hand you a document indicating her request for promotion that needs to be approved by LeChuck.
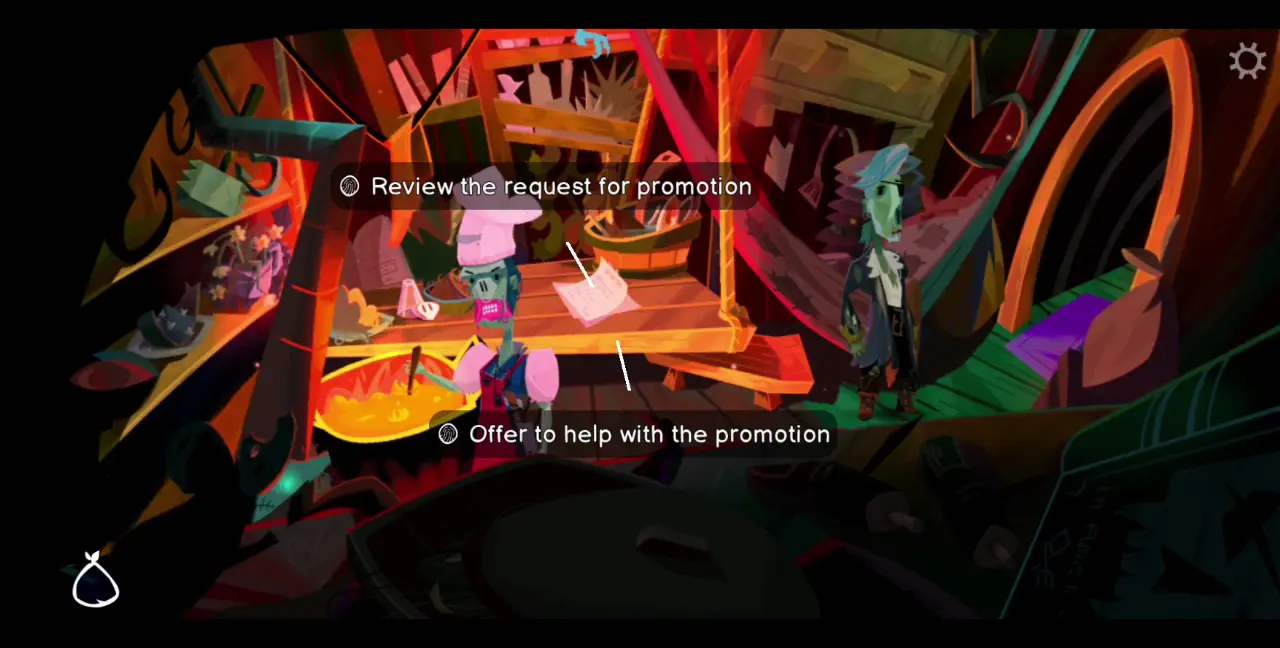
- With this document on hand, leave the kitchen and go to LeChuck’s cabin to the right.
- Instead of straight up asking about Putra’s promotion, tell LeChuck that you’ve potentially found another way to go to Monkey Island. However, LeChuck will remind you that he’s in charge and will instead give you the First Swab’s Report, uninterested in listening to your suggestion.

- Splattered ghost chicken glop in the hold.
- Filling out the First Swab’s Report means listing down instances in the ship where you find health and safety protocols being breached. Altogether, there are a total of eight instances, but you can only list down five in the report. Listing down all eight instances will earn you the achievement Listed Every Mess in the First Swab’s Report. To list down all eight, you may have to do this throughout multiple playthroughs, or save and reload your file after changing up some items. Below are the eight instances that you can list in the report:
- The vermin outside LeChuck’s cabin.
- The entire galley is a health and safety hazard.
- Potion stains on the deck.
- Used up potion supplies on the deck.
- An unsightly obstruction in the ship’s rudder, aka Gullet, who got stuck there after being tossed overboard.
- The greasy porthole in the hold.
- The grease stains left in the hold.
- Splattered ghost chicken glop in the hold.
- For the last instance, you have to get chicken feed from the sack near the ladder and feed them to all three ghost chickens. After feeding them, leave the hold then go back inside again. You should find the glob scattered everywhere.
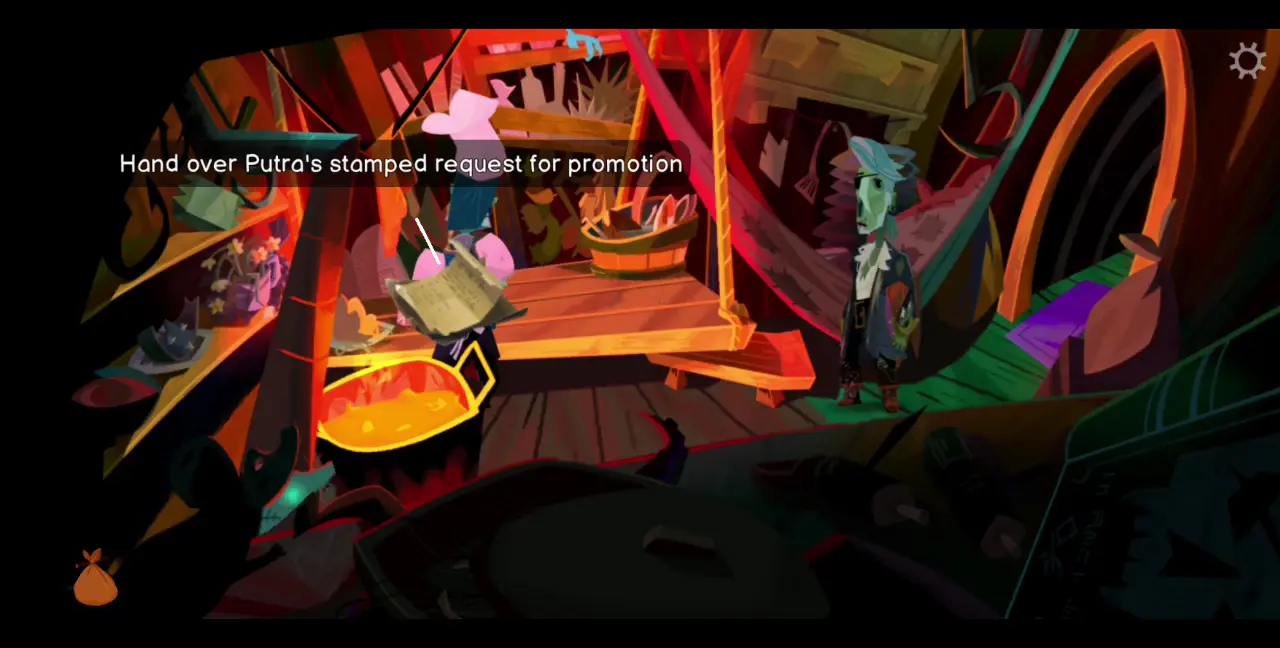
- Once the First Swab’s report has been filled out, take it to Iron Rose on the deck. Along with the report, she’ll give you more papers that you need to take to LeChuck.
- Before heading to LeChuck, combine Putra’s request for promotion with the papers Iron Rose gave you. This will result in combined papers, which you can hand over to LeChuck for his approval. The next time you check your inventory, you’ll see that Putra’s promotion request has been stamped and approved.
- Give the stamped promotion request to Putra. She tells you that she’s grateful for your help and owes you one.
Convincing Flair
- Near the entrance to the galley is Flair. When you speak to her about changing her vote, she’ll reveal that she’ll only do that if you help her find her grandmother’s knife, which she left stuck in Gullet’s back.
- Since we know that Gullet is in the rudder, slip through the porthole and take a left. Going down to examine the rudder means going underwater. You only have 8 minutes to stay underwater.
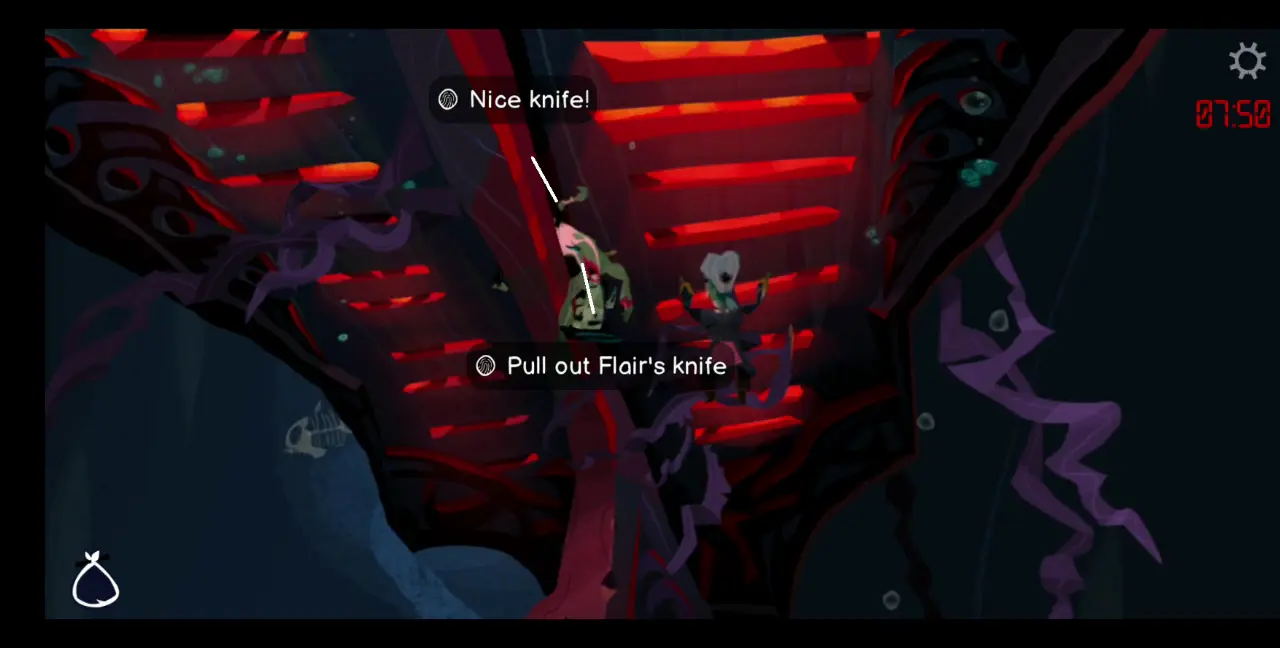
- Grab the whale knife in Gullet’s back and give it to Flair, effectively changing her vote.
Convincing Flambe
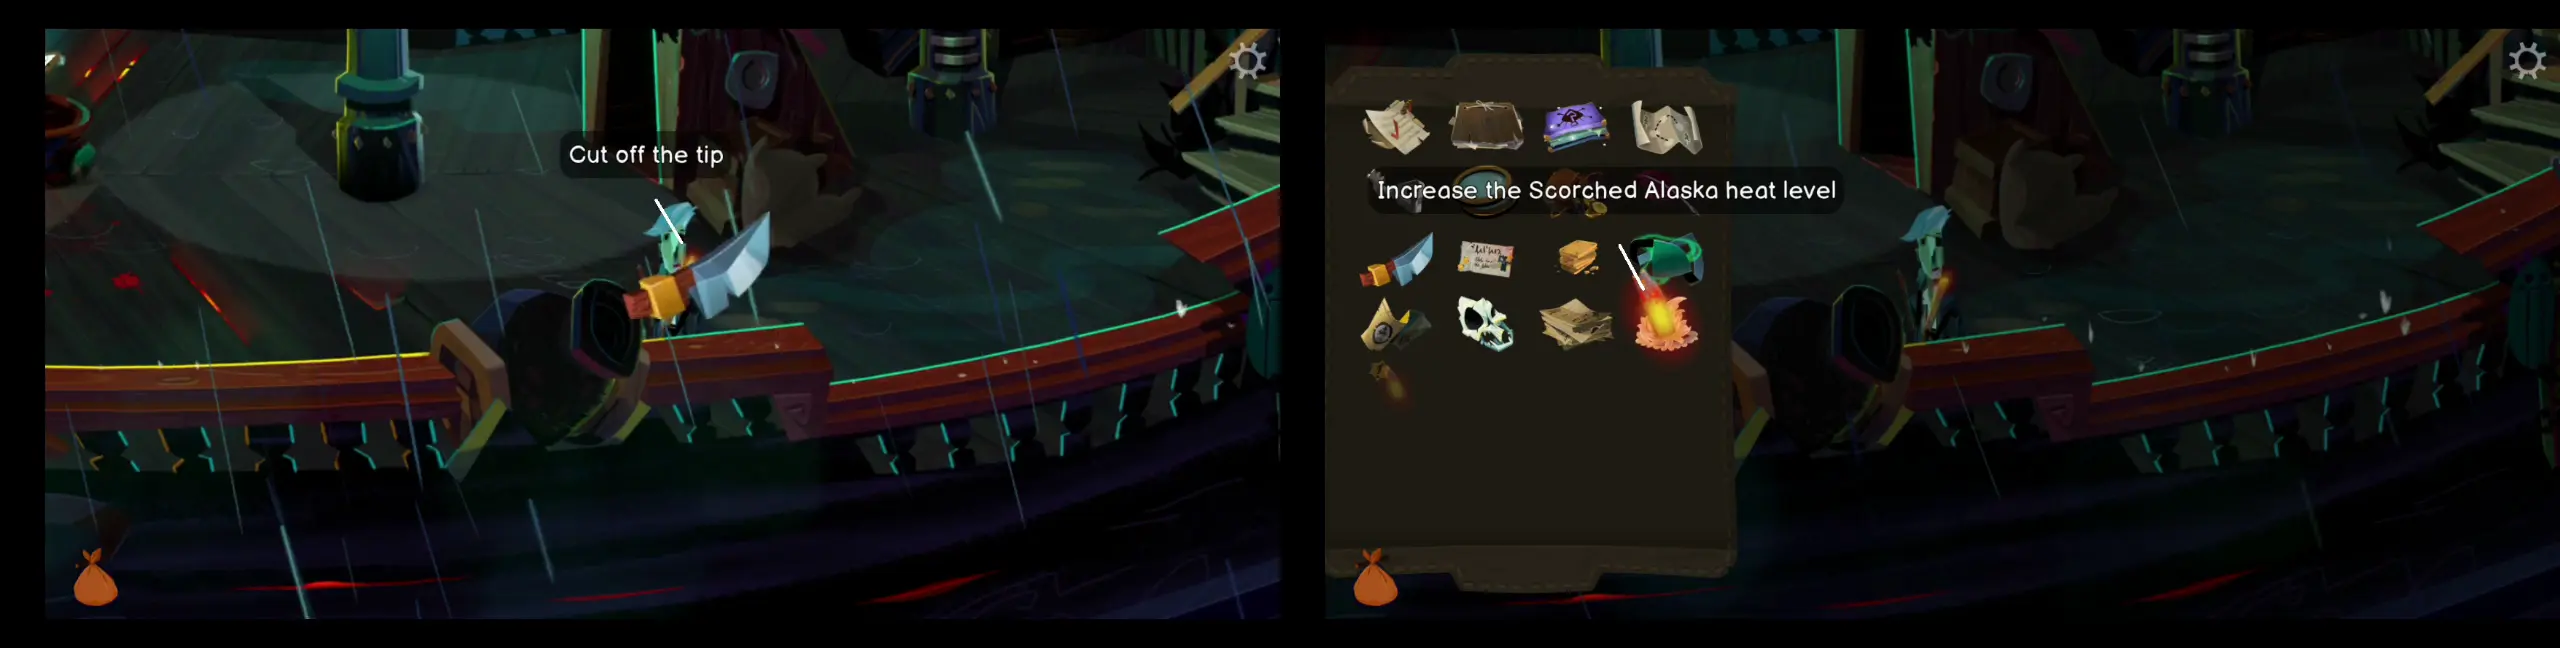
- For Flambe, head up to the crow’s nest of the ship. He’ll tell you that he’ll change his vote if you give him some scorched alaska. He’ll mention that Putra’s scorched alaska is always mild, which he doesn’t like.
- To get this dessert, go back down to Putra in the galley. Since she owes you a favor, she’ll gladly bake the scorched alaska for you.
- Remembering what Flambe said, you need to spice up the scorched alaska the way he likes it. You can do this by heading to the deck and going to the canon. On it is a glowing stick. Use the knife to cut off the tip of this glowing stick and combine it with the scorched alaska. If you give Flambe the scorched alaska without this extra spice, he’ll refuse to accept it.
- Before handing over the spiced-up scorched alaska to Flambe, click it from your inventory to get Guybrush to try it out. Do this for times until he gives in so you can earn the Braved the Scorched Alaska achievement.
- Take the spiced-up scorched alaska to Flambe, which will convince him to change his vote.
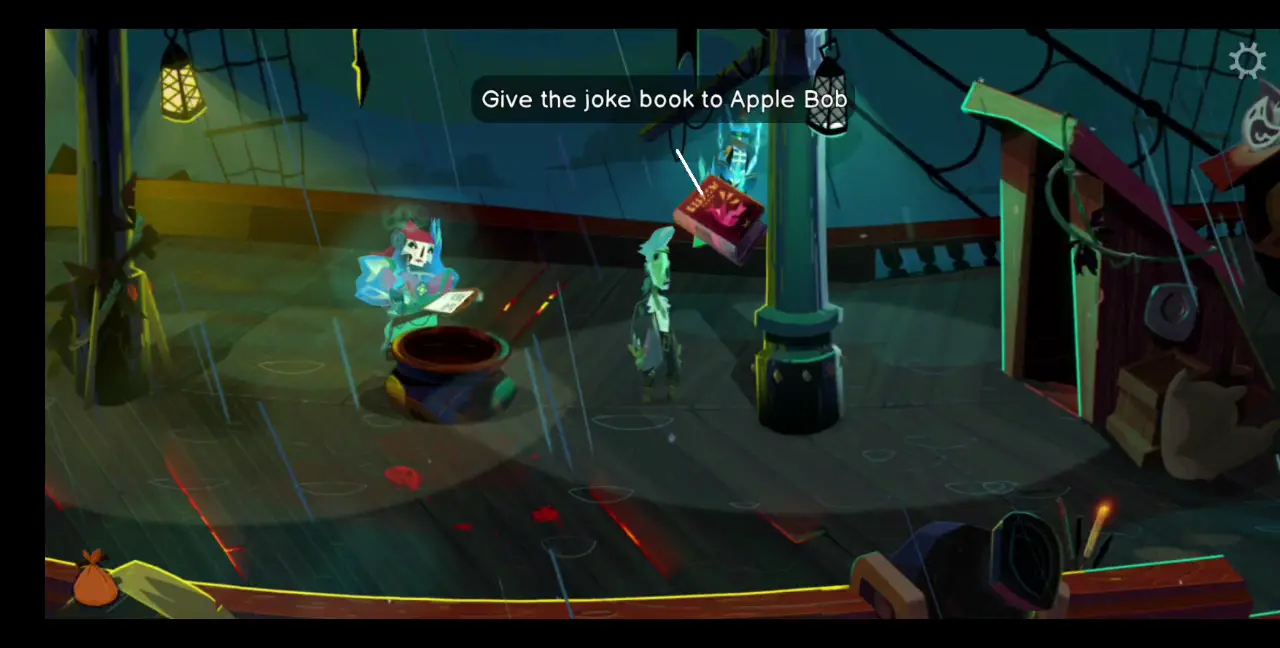
- Take Flambe’s joke book before leaving as you will need it shortly.
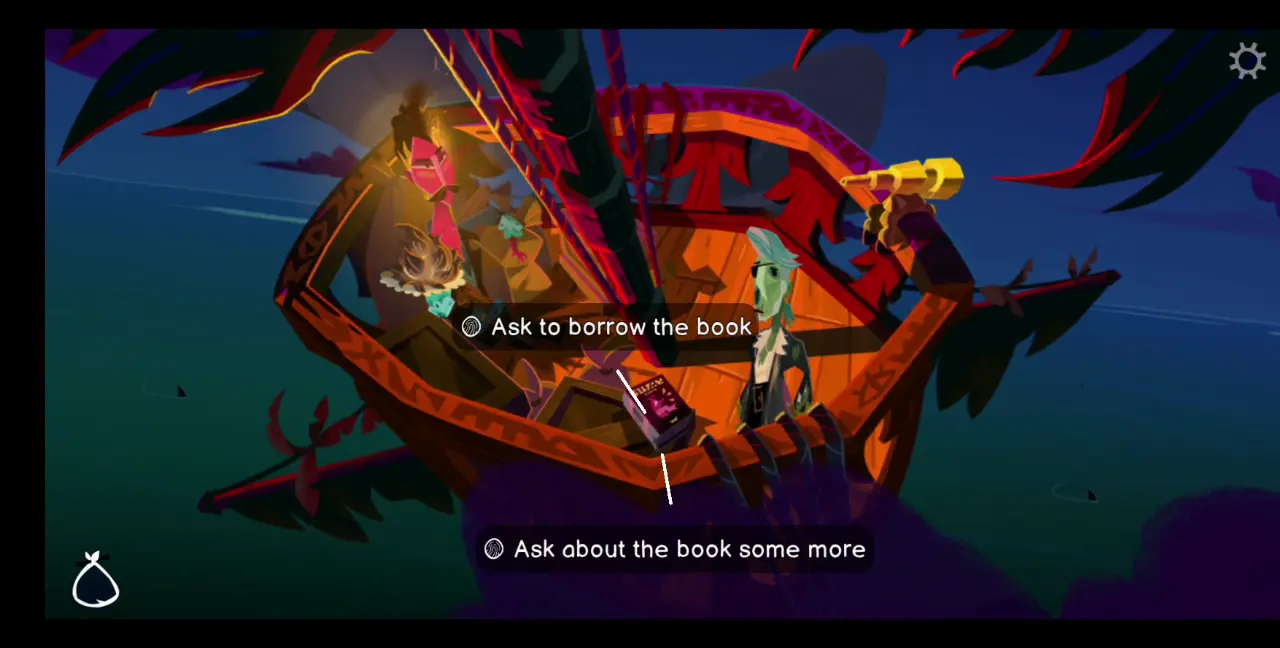
Convincing Apple Bob
- Apple Bob, the sixth and final crew member, is just on the deck near Iron Rose, hanging upside-down from a mast.
- Upon speaking to him, he’ll tell you he’s bored so hand over the joke book you got from Flambe. This entertains him and changes his mind to support your scheme.
Calling for Another Vote
- Now that you’ve secured all the crew members’ votes, head to the far right of the deck and ring the bell to call for another poll. According to the note next to it, one ring calls for a poll while two rings call for LeChuck’s scheduled shouting.

- Your efforts to convince all the crew members will be rewarded, with every last one of them agreeing to support your plan.
With the entire crew behind you, you now have the opportunity to steal LeChuck’s map to the secret of Monkey Island.
Stealing LeChuck’s Map
- On the far left of the deck are shackles. Use the double monocle to view its serial number as this should come in handy later.
- To get LeChuck out of his cabin again, go to the bell and ring it twice. This will summon LeChuck for his daily scheduled shouting. While he’s on his tirade, walk to his cabin, which should now be empty.
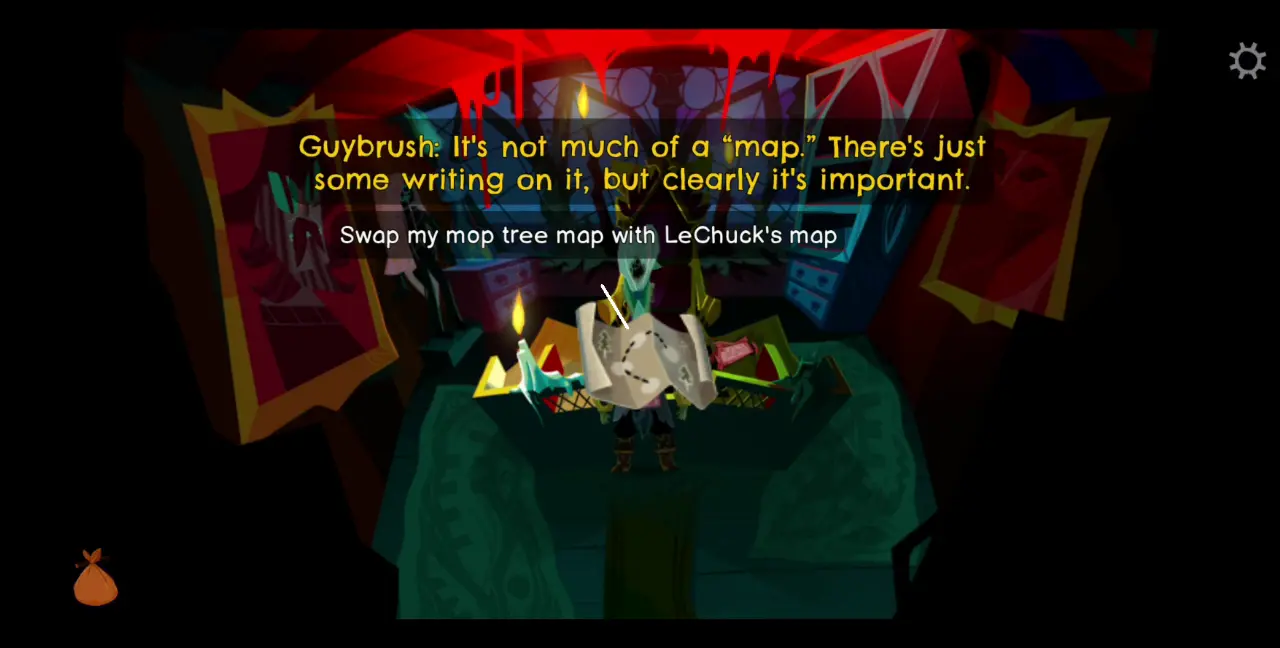
- Go to LeChuck’s desk. On it is the map to the secret of Monkey Island. Swap this with Wally’s mop tree map.
Getting to Monkey Island
- To see your plan come to fruition, you need to follow the pirate leaders’ ship as they have the potion. The problem is that they’re missing a key ingredient—the flattened skull—which you, fortunately, have.
- Load Murray into the canon and blast him over to the pirate leaders’ ship. This will allow them to complete the potion and allow your ship to follow them to Monkey Island.
Days pass and, with your plan successfully enacted, the crew cheers as they’re about to reach Monkey Island. Amid the celebration, you accidentally toss your eyepatch on the ground, thus losing the magic of your disguise. You and LeChuck get into a swordfight similar to the one you experienced with Governor Carla. Unfortunately, you’re outmatched by LeChuck and thrown overboard. This concludes Part Two.
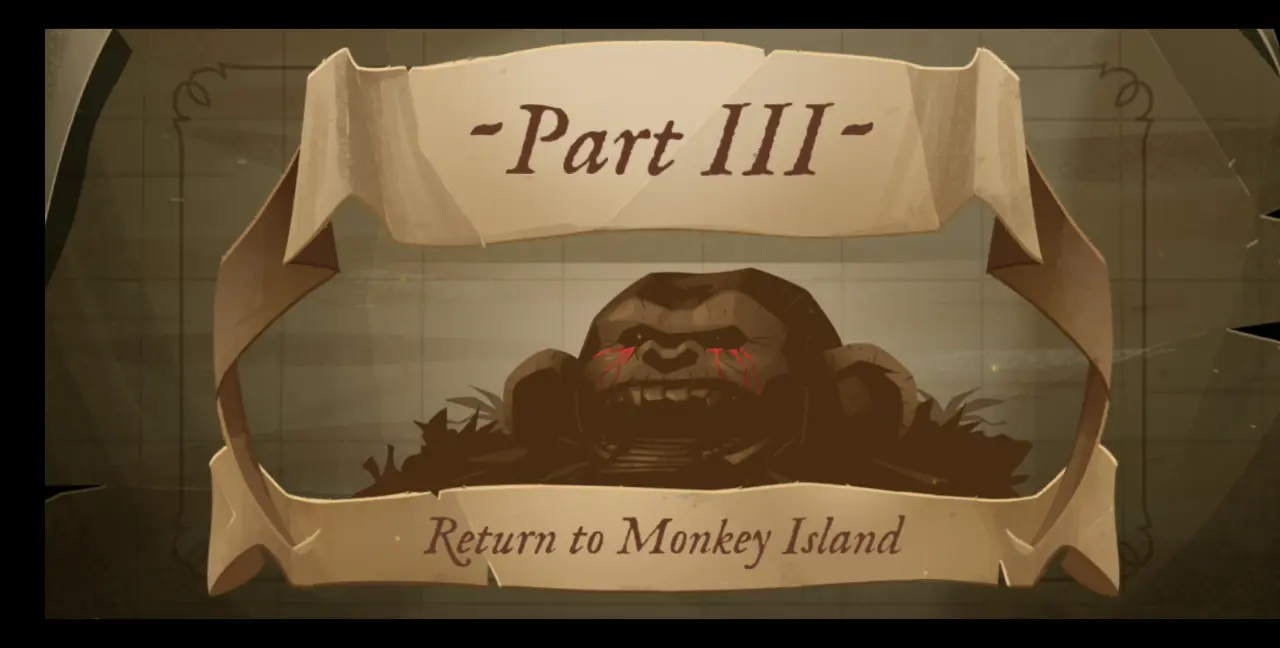
Part III: Return to Monkey Island
Beginning this part of the story will automatically earn you the achievement Started Part Three.
Having been bested by LeChuck in a duel and thrown overboard the LeShip, you, as Guybrush, find yourself on the seafloor. As we previously mentioned with the segment involving Gullet, you can stay underwater for 8 minutes, which is more than enough time for you to reach Monkey Island.
Don’t forget that you also have LeChuck’s map to the secret—but that doesn’t guarantee that everything will go according to plan.
Following the Map to “The Secret”
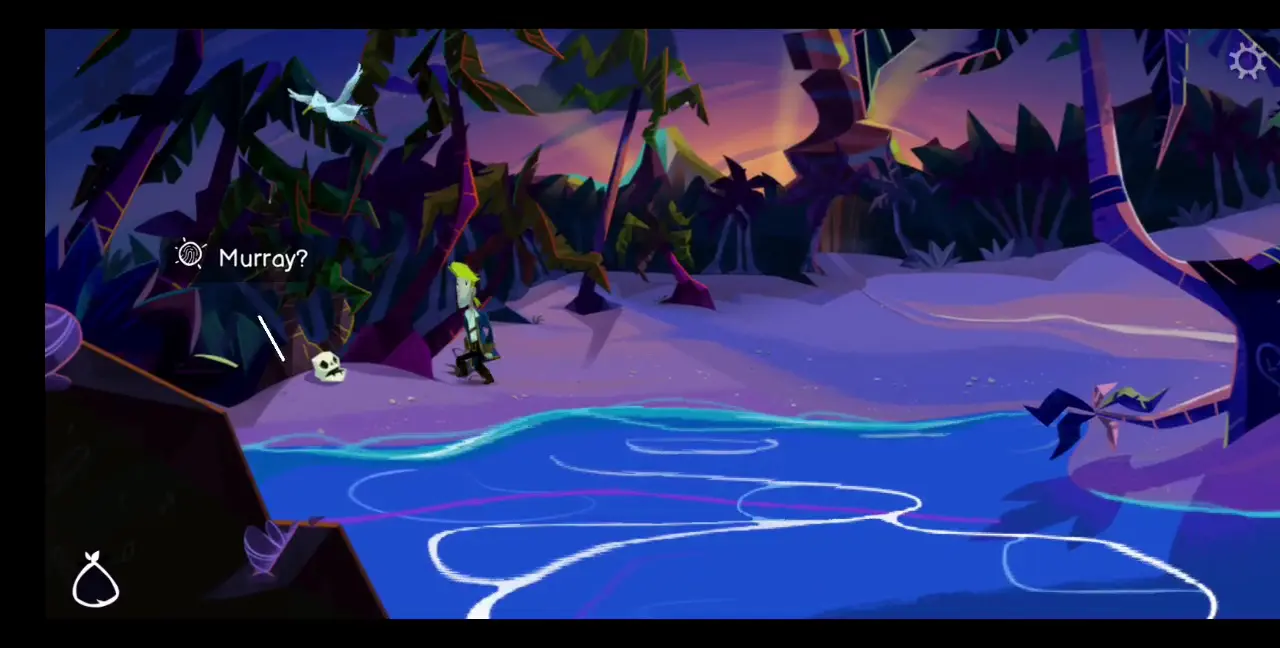
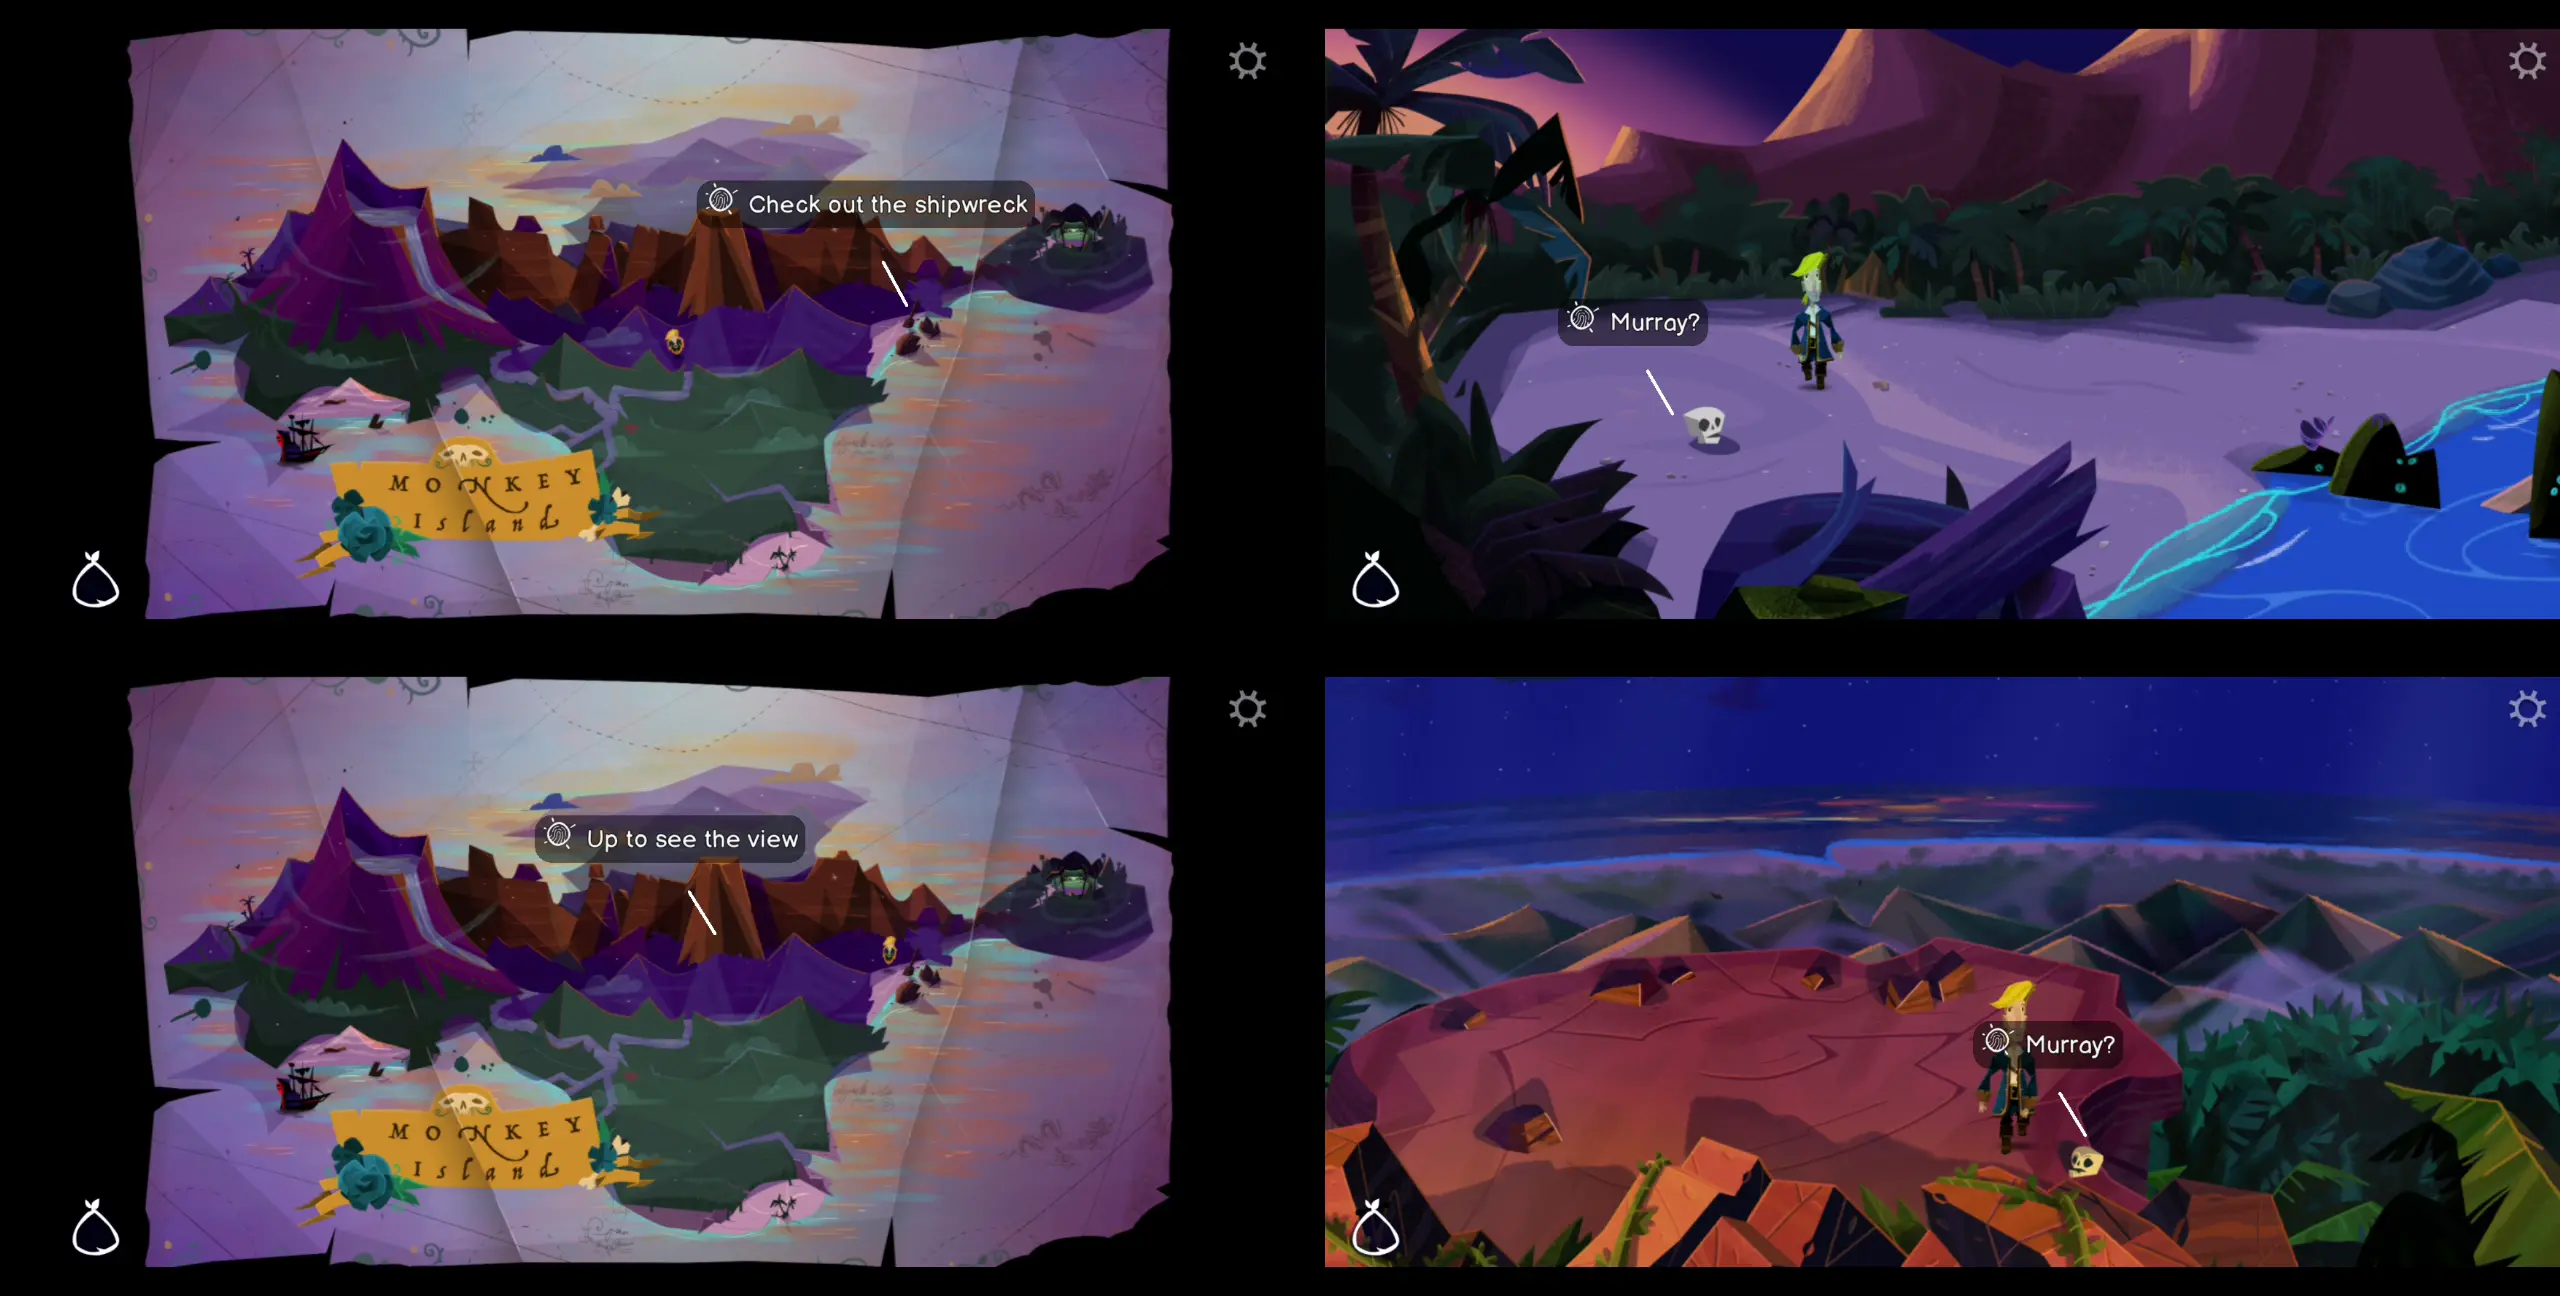
- As mentioned, you’re on the seafloor and can only stay 8 minutes underwater. Keep walking right until you reach the shore of Monkey Island.
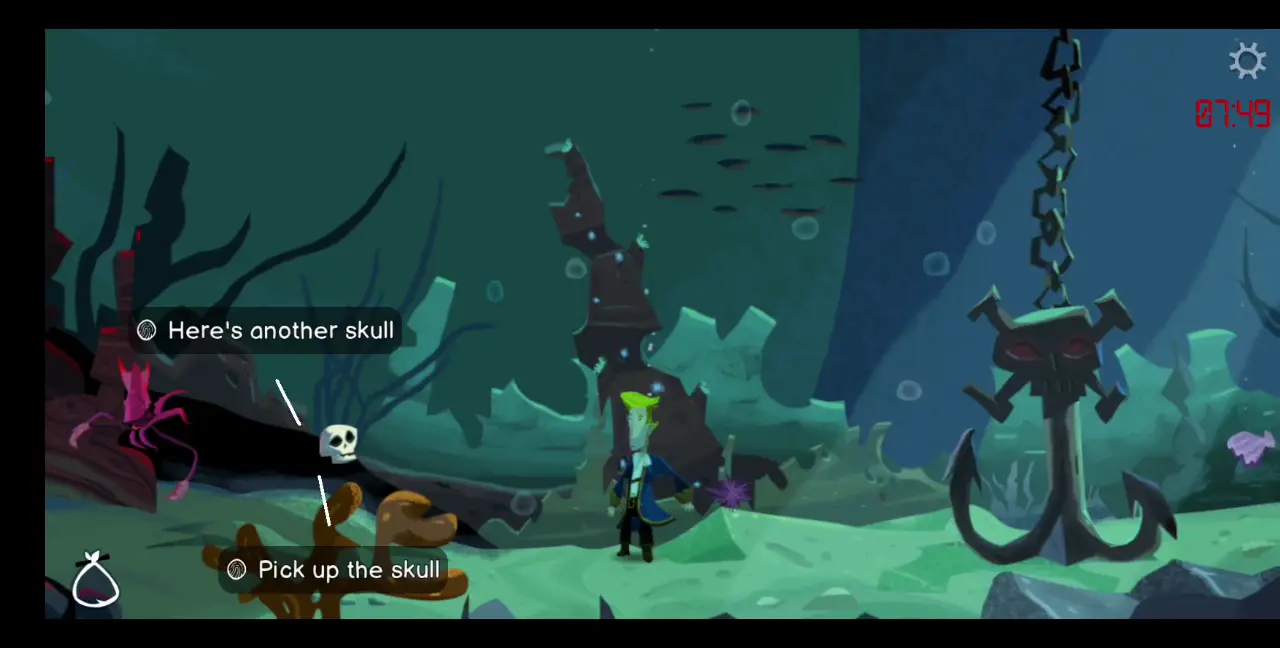
- Upon reaching the shore, take the skull at the leftmost area. This is the first of six skulls you have to collect on the island.
- At the center of the shore is a tree with an engraving on the branch. Upon examining this engraving, which is a heart with an L+E in the middle, you realize that this is a romantic engraving that stands for LeChuck + Elaine. Kick the engraving five times to earn the Got to the Heart of the Problem achievement.
- Next, head onto the jungle area, which will take you to a map screen of Monkey Island.
- Go to both the Shipwreck and Up to the View areas on the map to take the two skulls that can each be found in those locations.
- Afterward, open the map that you stole from LeChuck. This tells you to begin your search at the Red Berry Bush area, which you can also find on the Monkey Island map screen.

- Follow the rest of the instructions on the map, which are to:
- Follow the stone monkey hand.
- Stick to the path by the wooden chicken.
- Sneak past the bees and heed the sign.
- Take the paths marked by the three landmarks indicated above. At the end of the path should be an X that marks the spot and a shovel.
- Pick up the shovel, which would, unfortunately, catch you in a trap set up by the three pirate leaders. Supposedly, LeChuck was their primary target, but you fell into it first.
- It turns out that the map you have to the secret is a fake as the real one has been intercepted by the pirate leaders. The real map that LeChuck owned is in the pirate leaders’ possession, but it’s encrypted and only shows a blank piece of paper. To decrypt the map, the pirate leaders need information about LeChuck to decipher its true contents.
- This brings us to your overall objectives for this part of the game. To decode the real map, you need to:
- Play LeChuck’s music.
- Say his catchphrase.
- Eat his favorite food.
- But before you can accomplish all this, you need to convince the pirate leaders to release you. You can do this by suggesting that they ask LeChuck’s crew for the information they need. Of course, you’re aware that they’ll double-cross you, which is no surprise, but you make the deal anyway.
Getting Back Onboard LeChuck’s Ship
- After convincing the pirate leaders to free you, follow them to the giant monkey head.
- Pick up the skull on the path just before heading to the gate.
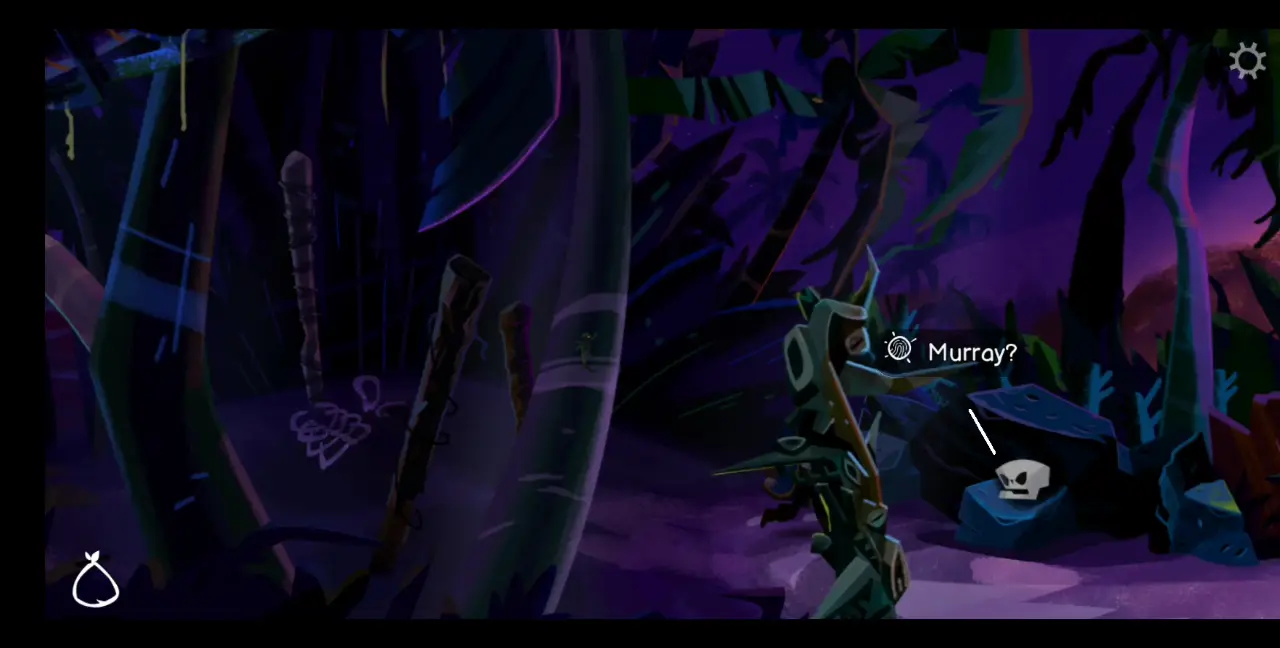
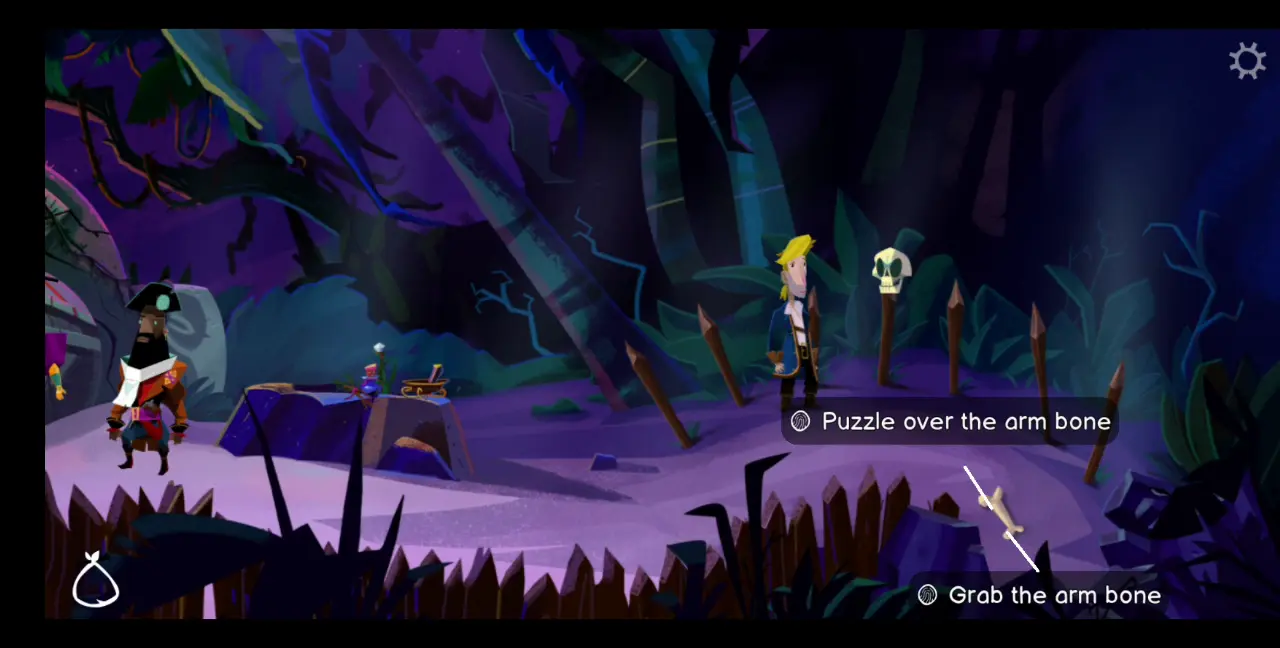
- Grab the arm bone on the far right of the inner area.
- In this same inner area are spikes, one of which has Murray impaled on it. Remember this for later.
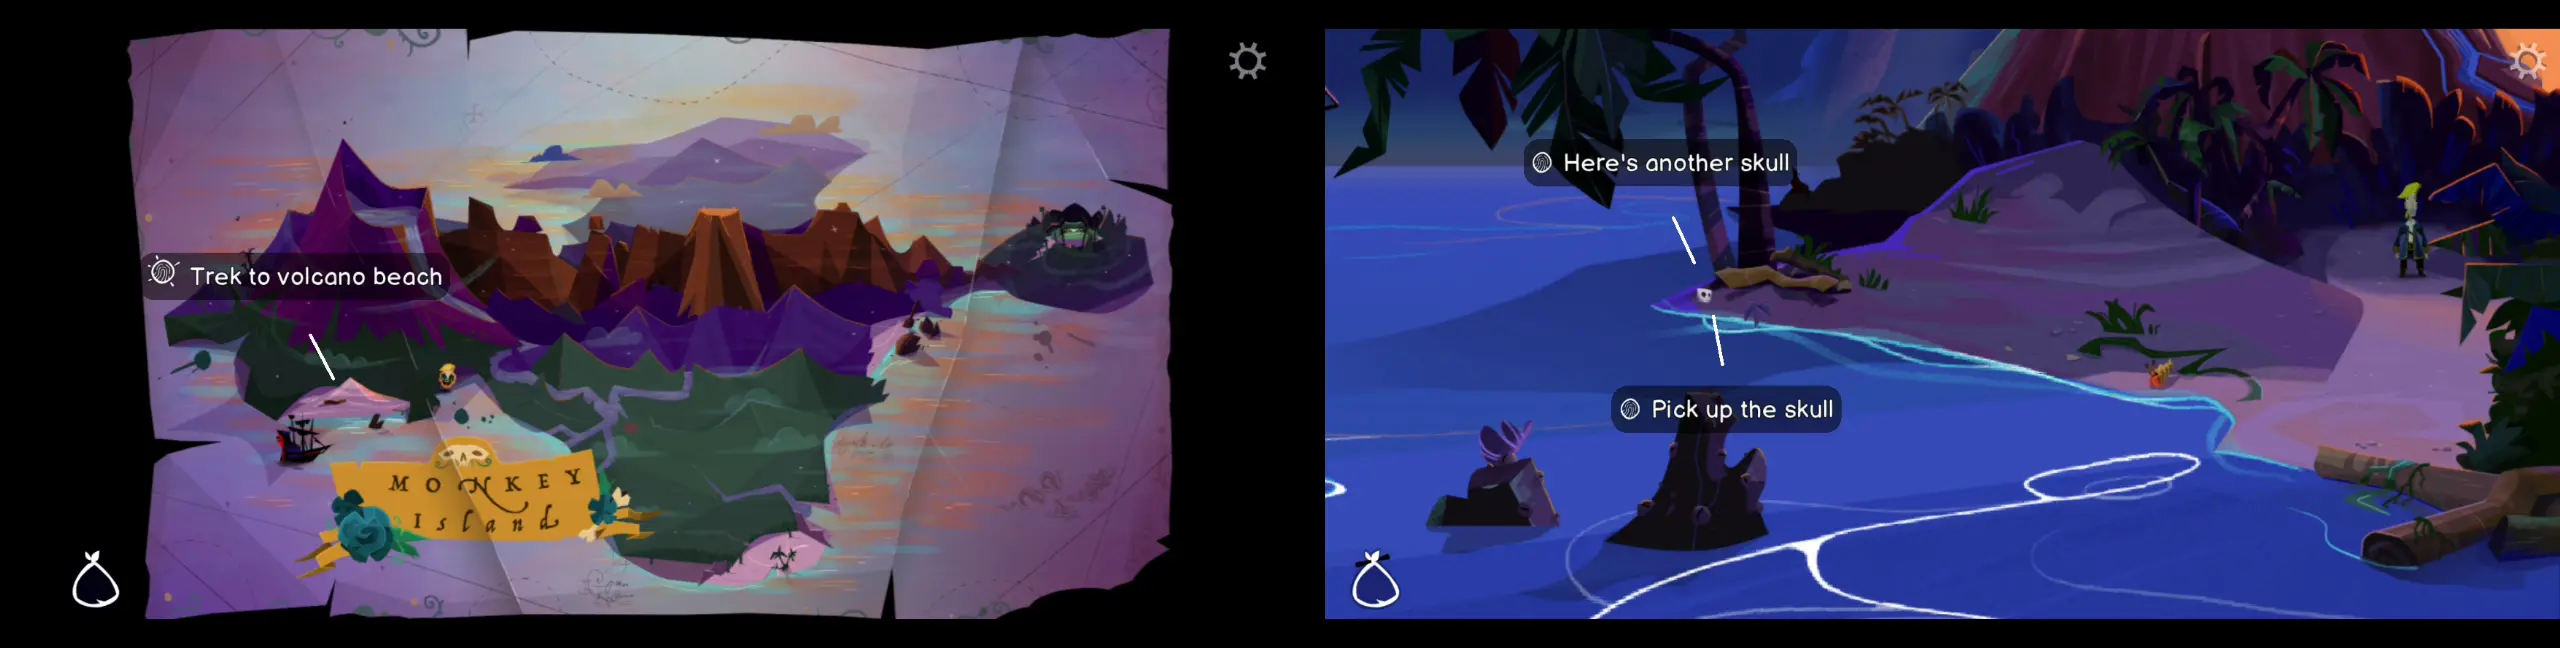
- In the meantime, return to the map screen and head to Volcano Beach. Grab the skull near the water’s edge.
- Head left into the ocean until you come across a giant anchor that you can use to climb up LeChuck’s ship.
- Before climbing the anchor, head further to the left and collect the sixth skull.
- With the last skull collected, climb up the anchor and you’ll find yourself back on the side of LeChuck’s ship. If you try to enter through the greasy porthole, you’ll see that it’s locked shut. To go up the deck, you need to climb the railing. Unfortunately, you’re no longer welcome on the ship so Flair will throw you overboard.
- Go back up the anchor again but, this time, take a left and head down to the rudder, where Gullet is.
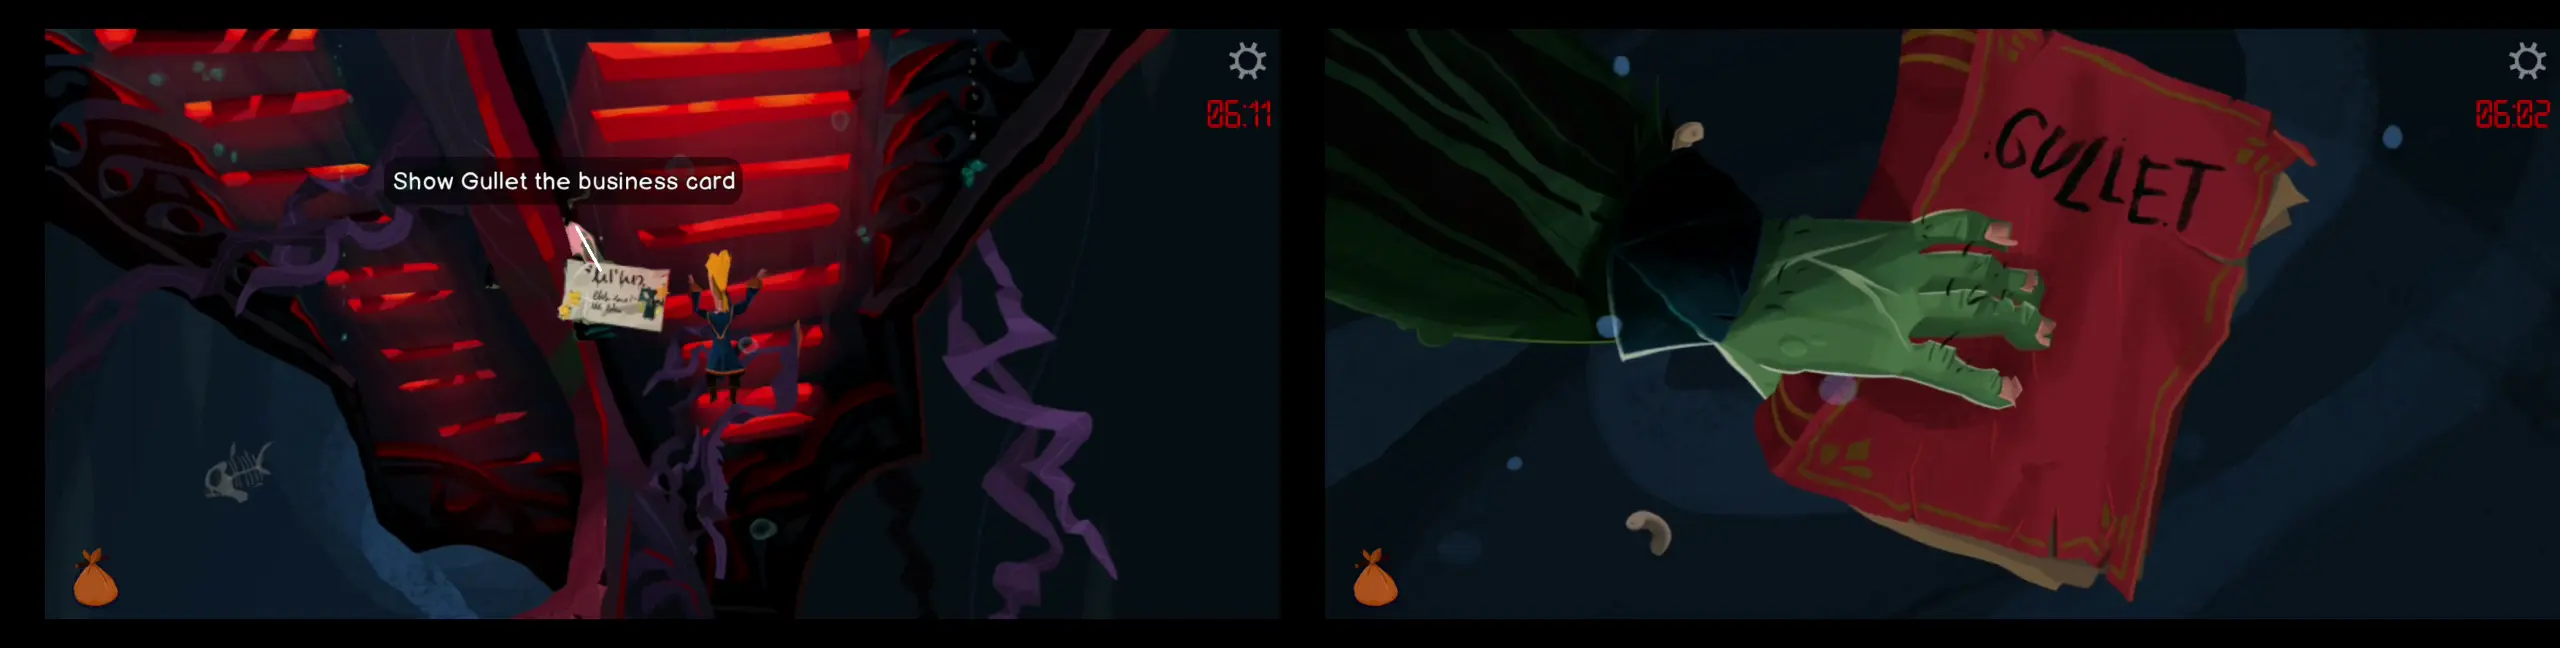
- Talk to Gullet, which will lead you to a discussion about his poetry. After helping him with some lines, ask to see the finished poem but Gullet will refuse.
- To convince Gullet to give you his book of poems, give him the business card you received from the museum curator.
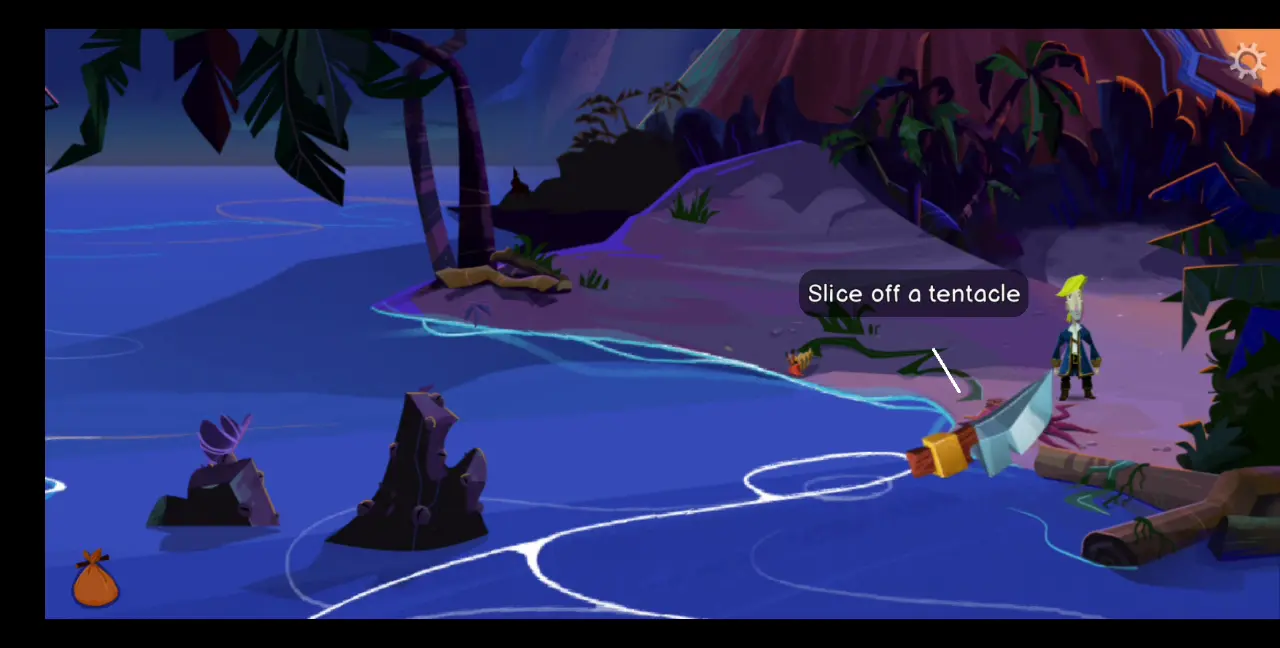
- With this book of poems on hand, return to the shore. A little to the right, you’ll notice a dead squid. Use the knife to slice a tentacle off. This will come in handy when you’re trying to find LeChuck’s favorite food.
- Return to the three pirate leaders at the giant monkey head. You explain to them that you need a disguise to get back onboard LeChuck’s ship. Captain Lila will then suggest using dark magic to disguise your appearance, but to make the transformation successful, you need a deeply personal item from any of the crew members you’re going to transform into. That said, hand over Gullet’s book of poems and let Captain Lila work her magic, transforming you into Gullet.
- Take note that on your first try, you’ll transform back into Guybrush so as not to waste the disguise’s magical effect. The best time to transform into Gullet is when you’ve already climbed the anchor and are at the side of LeChuck’s ship.
Finding LeChuck’s Theme Song
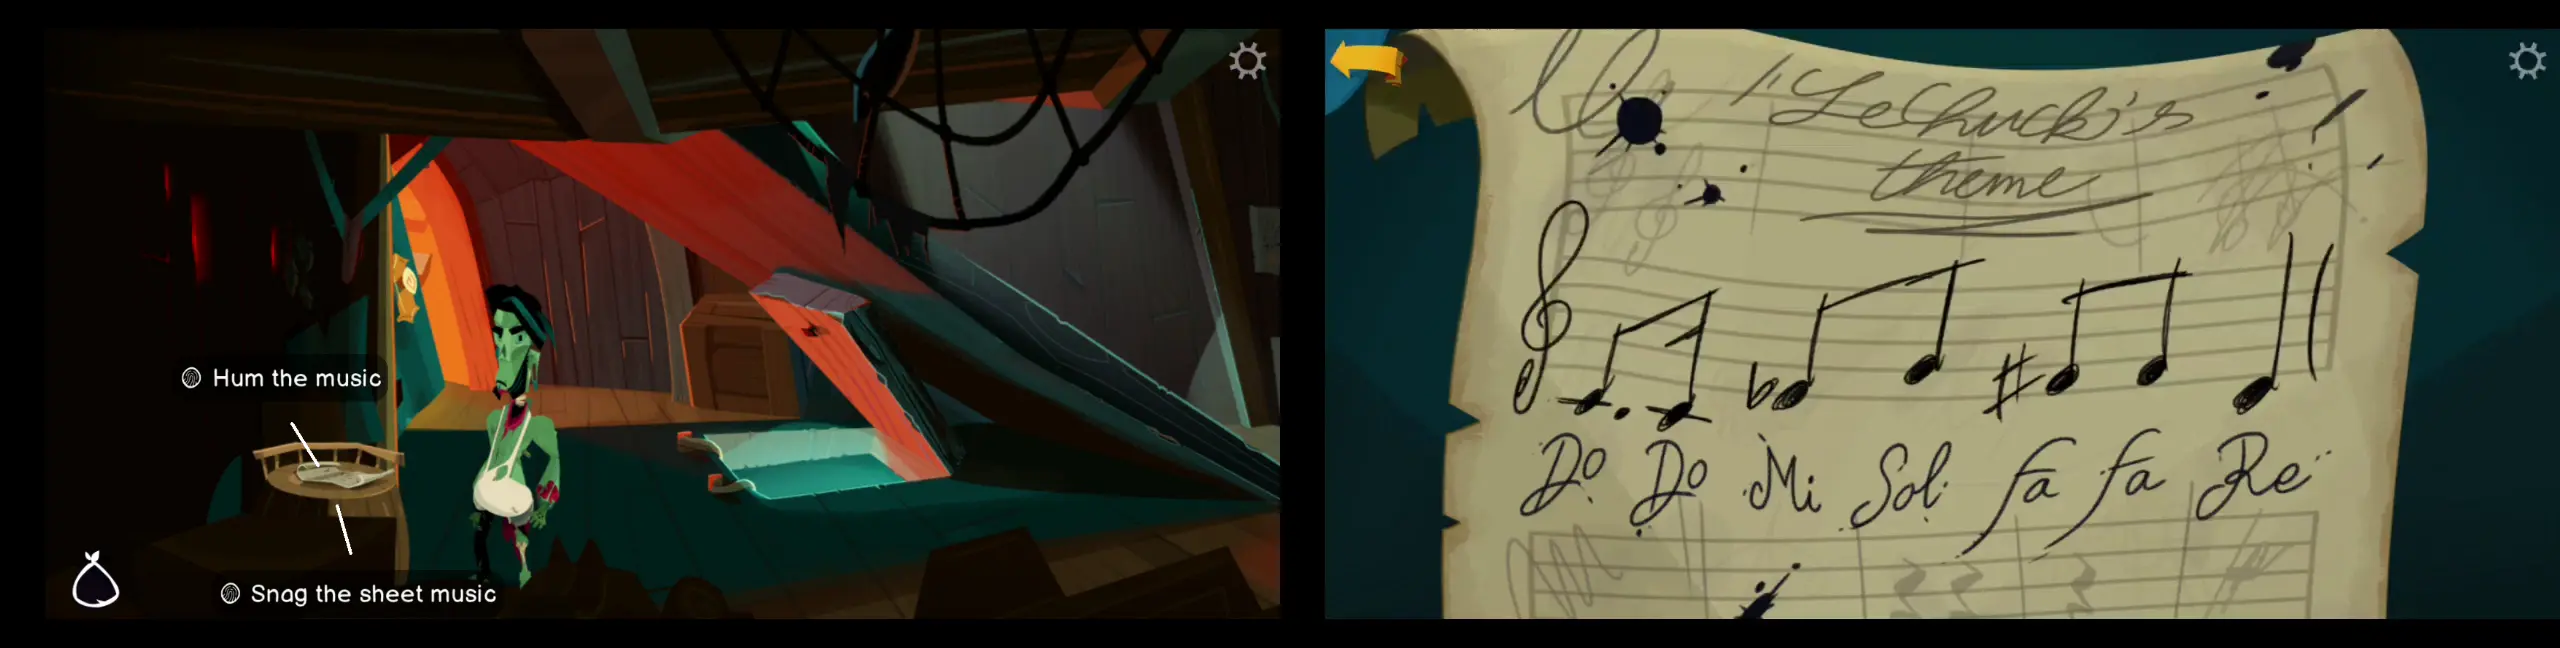
- Head back onboard LeChuck’s ship disguised as Gullet. After a brief conversation with Flair, talk to Apple Bob. you’ll discover that LeChuck recently commissioned someone to make him a theme song. If you head below deck, you’ll discover that the person LeChuck commissioned was Flair.
- Head to the far right of the deck and ring the bell once to call for another vote. Use this opportunity to go below deck again and find sheet music on the barrel Flair uses as a table near the entrance of the galley. On the sheet music, you’ll see that LeChuck’s theme song is Do-Do-Mi-Sol-Fa-Fa-Re.
Finding LeChuck’s Catchphrase
- To find LeChuck’s catchphrase, head straight to his cabin after finding the sheet music.
- Pick up the diary on the shelf to the right.
- Flip through the pages until you come across the entry dated February 17. This will reveal LeChuck’s current catchphrase. The catchphrase changes for every playthrough so remember what is stated as his catchphrase in this entry as you will need it for later.

Finding LeChuck’s Favorite Food
- Head back up to the deck first to get the crew to return to their original stations.
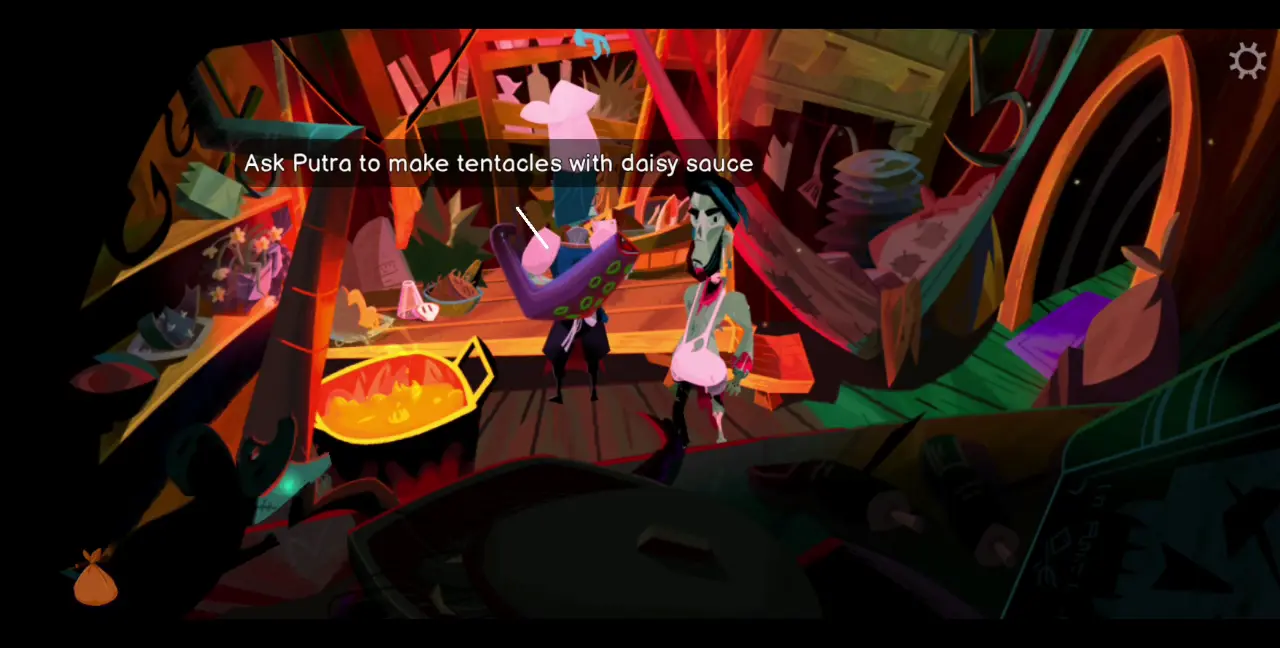
- From here, still as Gullet, head to the galley and ask Putra about LeChuck’s favorite food. Make a point to select the dialogue option where you call her chef. She becomes so flattered that she’ll reveal LeChuck’s favorite food is tentacles with daisy sauce.
- Hand over to Putra the tentacle you’ve sliced off the dead squid from Volcano Beach and she’ll instantly make you LeChuck’s favorite food.
Discovering the Real Contents of LeChuck’s Map to the Secret
- Return to the giant monkey head as you’re ready to decrypt LeChuck’s map.
- Begin the ritual by heading to the far right. Place all six skulls you’ve collected on the spikes to the left and right of Murray. Now, these skulls all represent the notes Do, Re, Mi, Fa, Sol, La, and Ti, with Murray serving as Fa.
- To make things easier, place all the six skulls on the empty spikes and conk each of them with the arm bone. This should reveal which note they represent. Then, take off the skulls and rearrange them back into the spikes so you have Do, Re, Mi, Fa, Sol, La, and Ti in order.
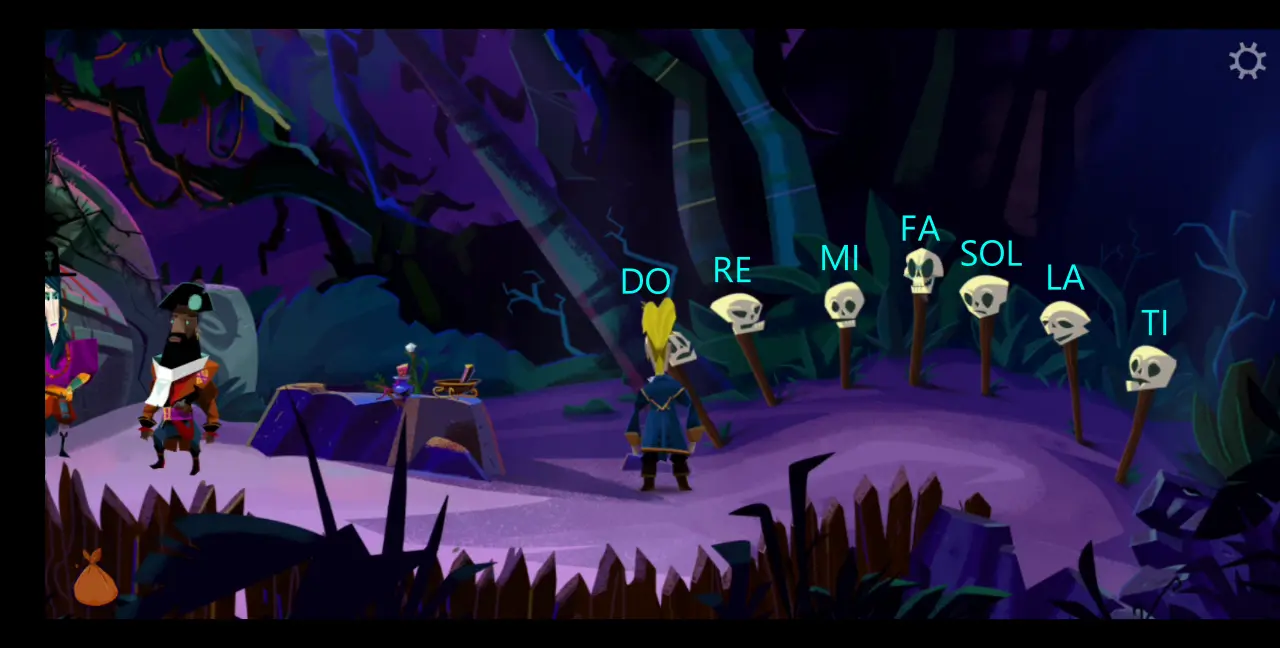
- With the skulls arranged, conk the appropriate skulls to play LeChuck’s theme song, which is Do-Do-Mi-Sol-Fa-Fa-Re.
- Dialogue choices will then appear, from which you need to pick LeChuck’s catchphrase, which is whatever is indicated in the February 17th diary entry. Keep in mind that if you choose the wrong options for the catchphrase, the ritual won’t work and you have to do it all over again from the top.
- When you’re asked to eat LeChuck’s favorite food, select the dialogue choice “Okay…”
- WIth this, the ritual is complete. The map will reveal the real location of the secret, but the dark magic used for it has caused an earthquake to shake all across the Caribbean. Thereafter, the map will vanish, causing the three pirate leaders to double-cross you (as you’ve predicted) and throw you off a cliff. Murray is also thrown off the cliff after.
Escaping Monkey Island
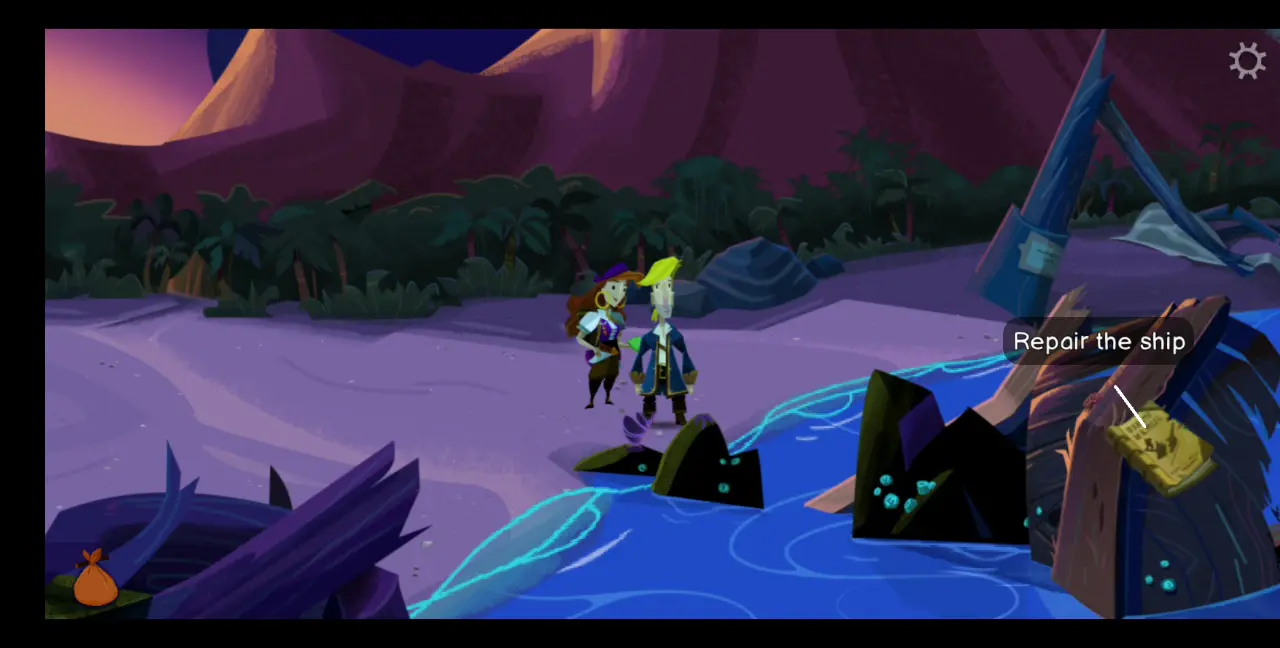
- Having fallen from the cliff, you become discouraged about finding the secret but Elaine arrives just in time. She’s come here specifically to repair your old ship, the Sea Monkey, which is actually the wreckage you saw on the Shipwreck area of the map.
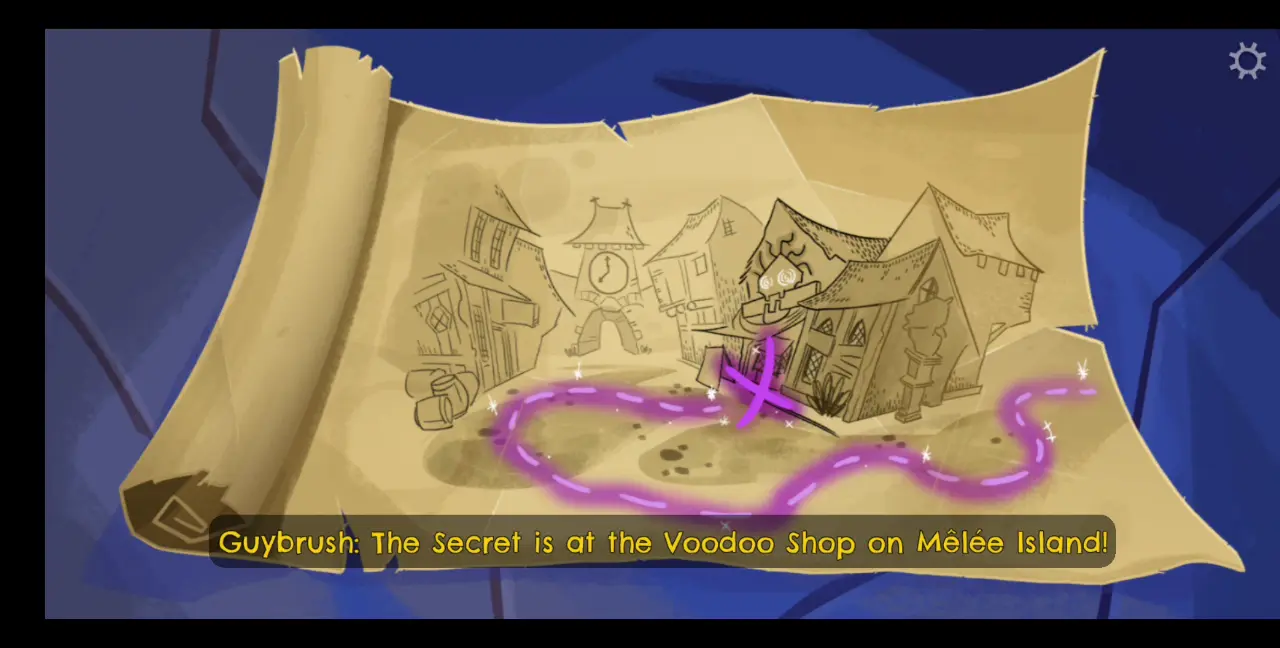
- Elaine also finds Murray, who managed to snag the map from Captain Trent before being thrown off the cliff.
- With the map in your hands, your drive is renewed. View the map, which will reveal that the secret of Monkey Island is found in the voodoo shop in Mêlée Island’s Low Street all along.
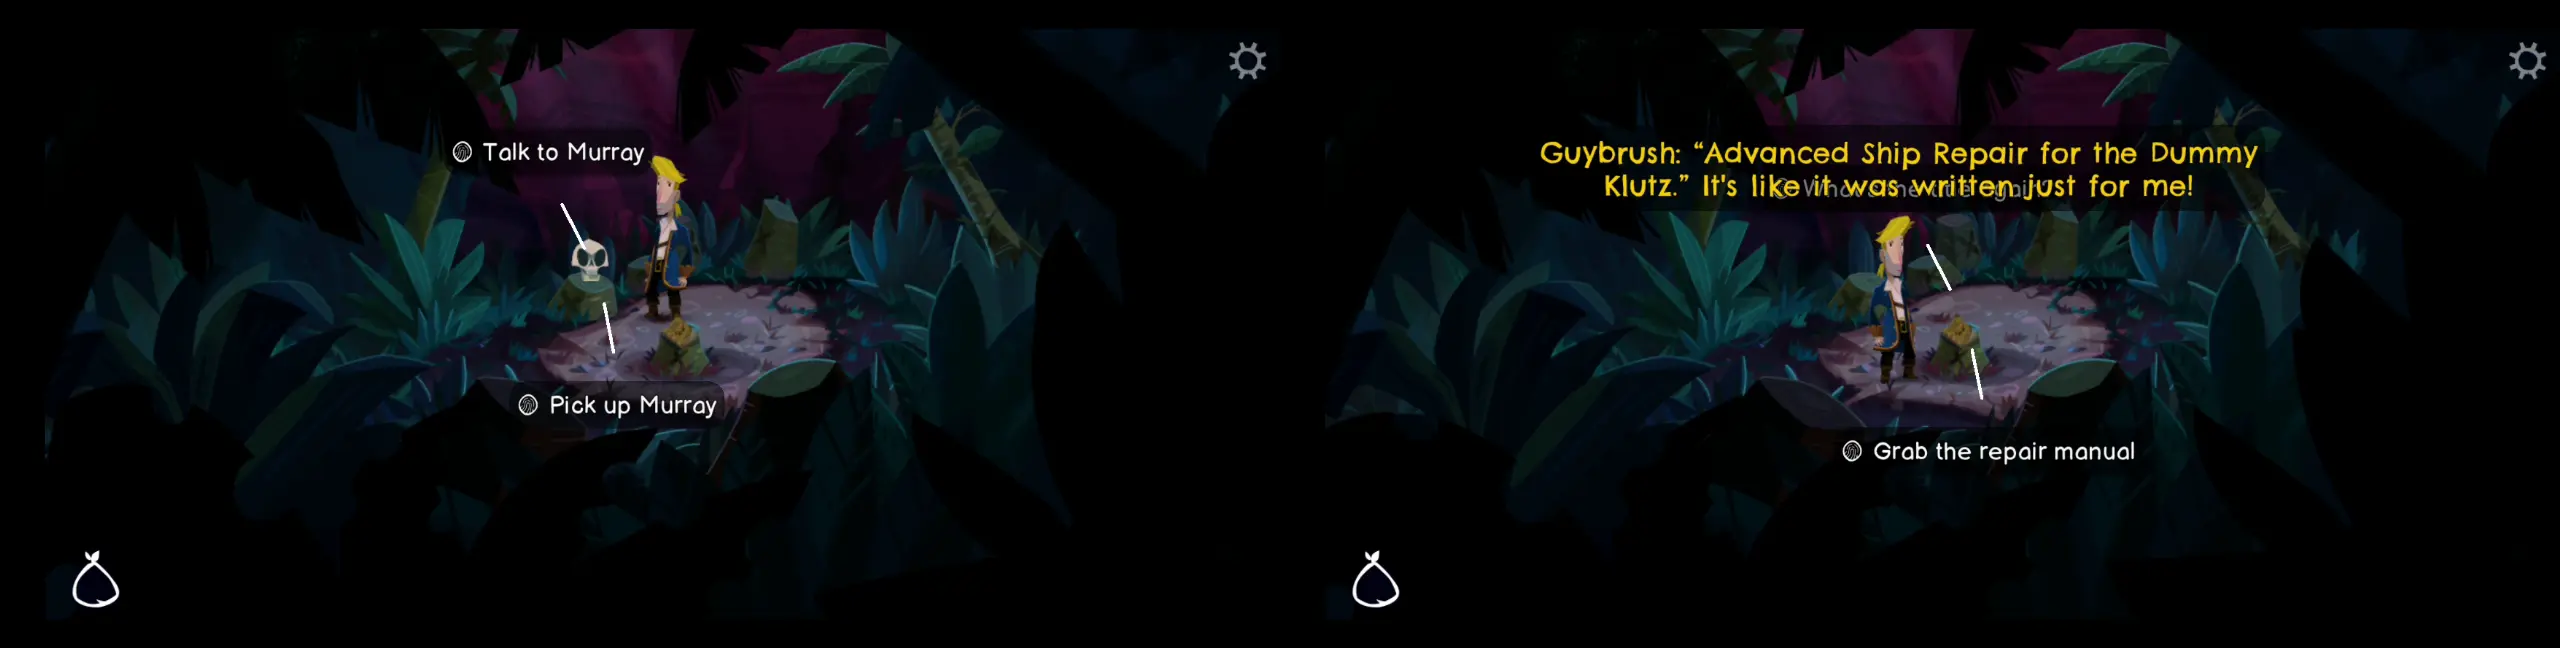
- Elaine challenges you to a race to the wreckage of the ship. Pick up Murray and the repair manual.
- Before heading to the site of the wreck, return to the giant monkey head area and grab all the six remaining skulls from the spikes. This will let you earn an achievement shortly.
- After collecting all the six skulls, return to the Shipwreck area on the map, which is where you can find the wreckage of the Sea Monkey.
- Use the repair manual to fix the ship, allowing you and Elaine to sail back to Mêlée Island. When you arrive, you should earn the Decked Out The Sea Monkey II with Spooky Skulls achievement as the ship used them for decor. This concludes Part Three.
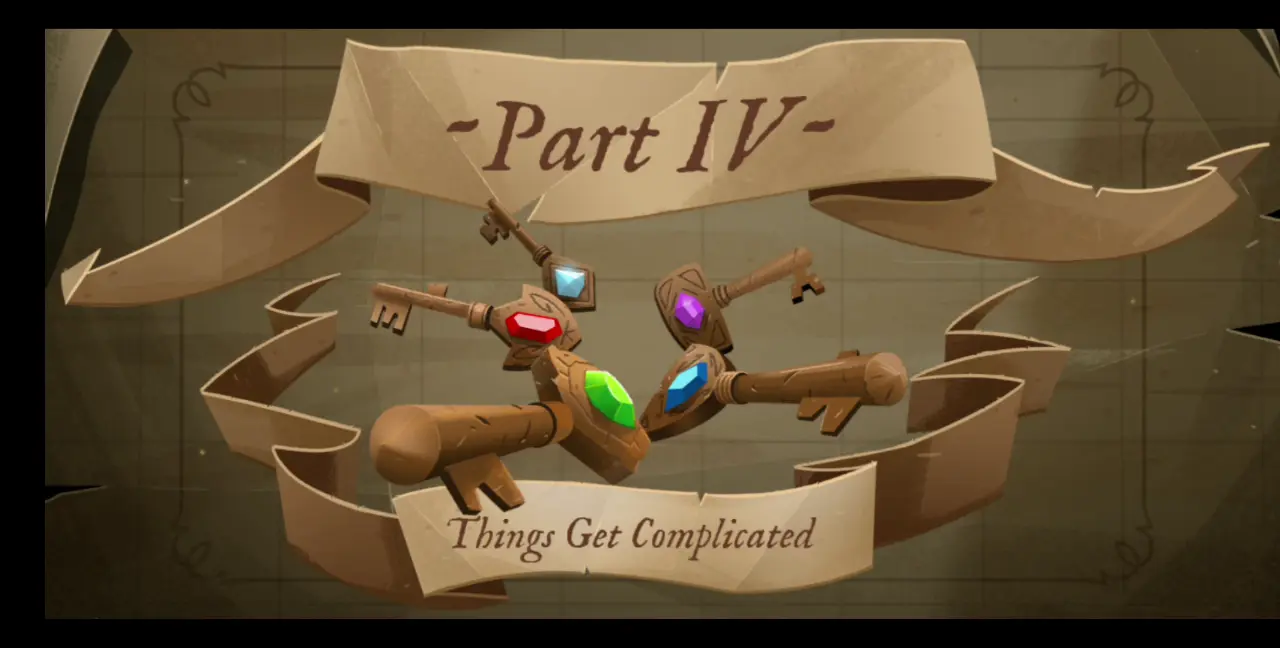
Part IV: Things Get Complicated
Upon beginning this part, you will earn the achievement Started Part Four.
After escaping Monkey Island, you find yourself back on Mêlée Island. Because of the earthquake resulting from the dark magic ritual, Mêlée Island has sustained damage that left many buildings and streets in disrepair.
In this part of the game, you’ll be searching for five Golden Keys that will open the safe supposedly containing the secret. You’ll also get to travel to places beyond Mêlée Island in search of these keys.
Golden Key #1: Old Mrs. Smith’s Golden Key
- Upon landing on the docks, speak to the cook of the Scumm Bar. Click on the cookbook beside him and ask the cook if you can take it back. Unfortunately, he won’t return it yet so this is something you’ll just have to come back for later.
- Since you already know that the secret of Monkey Island is actually at the voodoo shop, head on over to Low Street and talk to the voodoo lady about it.
- Once you’re done talking to her, go outside and you’ll come across Widelene “Widey” Bones. You might have seen her previously as the old woman on High Street peeking out of the window of her two-story home. She’ll tell you where you can find the five Golden Keys needed to unlock the secret. In fact, she also has one, but she won’t give it to you unless you’ve proven yourself by finding two or more of the other keys.
- Since Widey mentioned several places necessary for your quest, head on to Wally’s Maps-n-More first and ask him for a map of the sea. Take note that you can only open this map when you’re on your ship.
- After obtaining this map, go to the newly opened fish shop on High Street. This is the building just below Widey Bones’ house and right next to the arch upon entering the area.
- Here, you’ll see a shelf with books. Click on the purple book as this is the third out of five copies of At the End of the Plank.
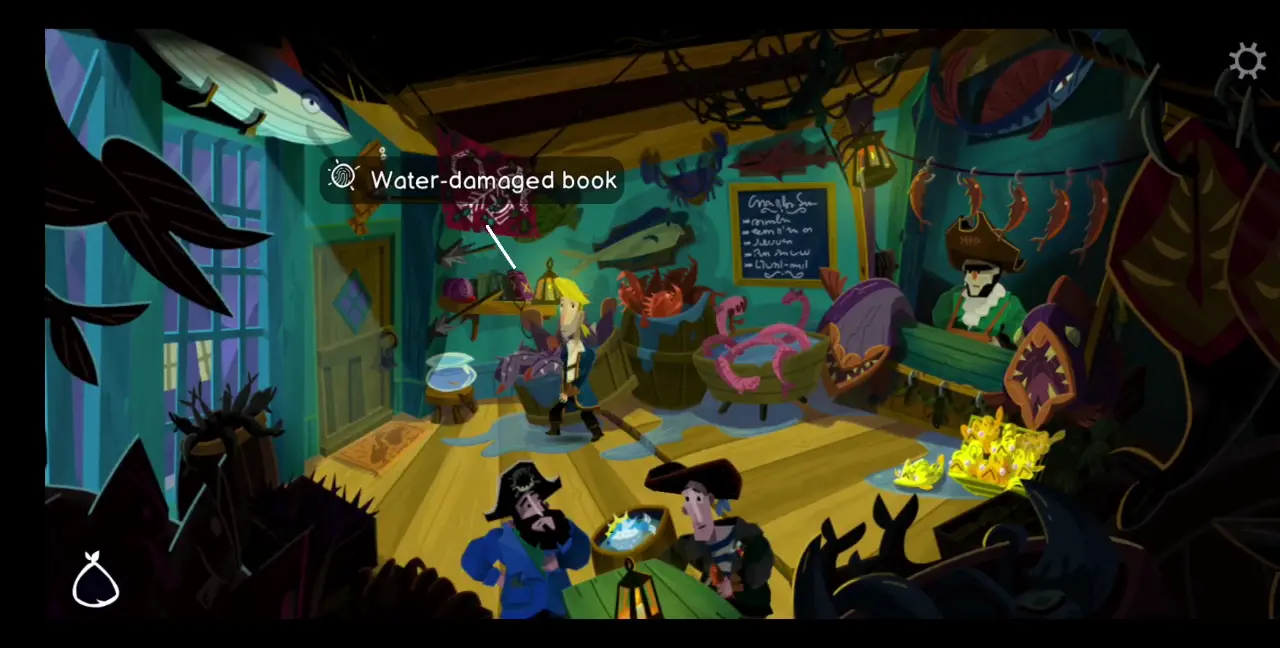
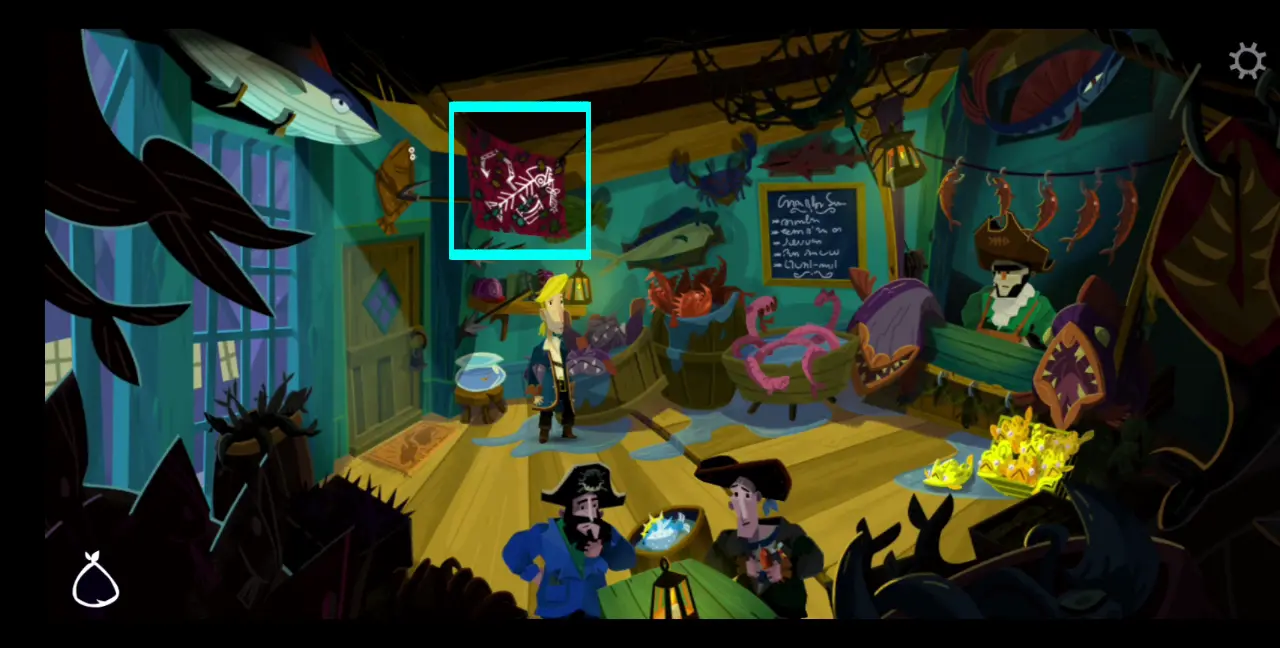
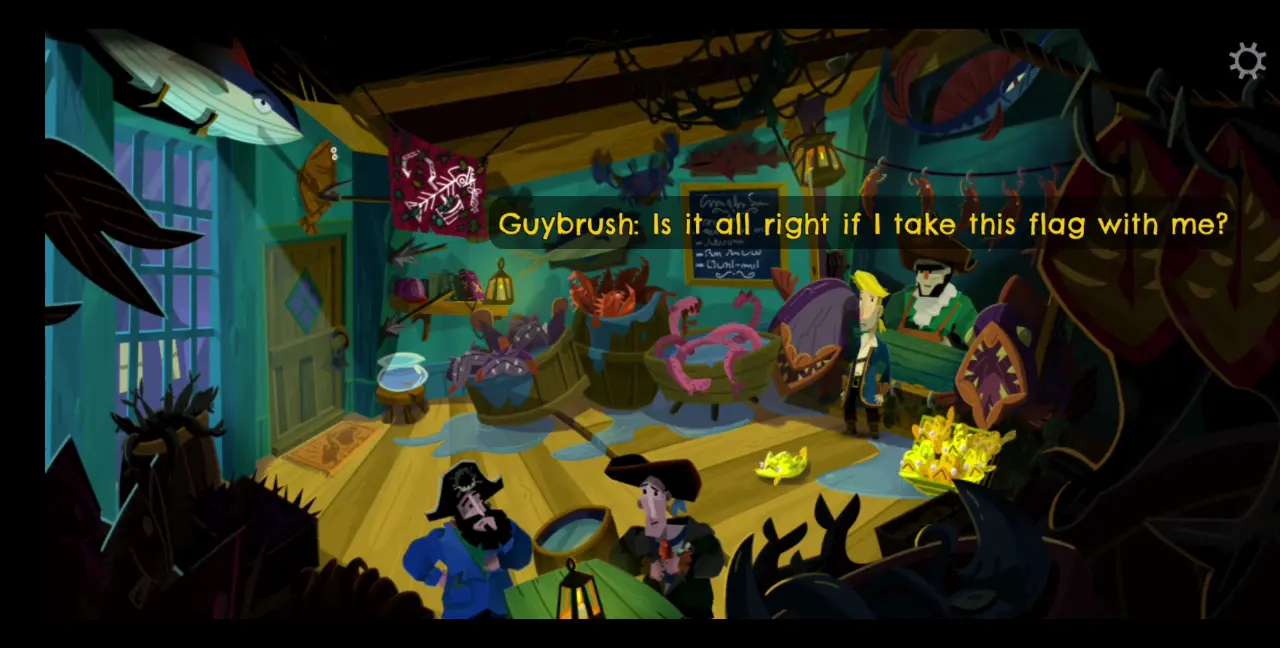
- At the fish shop, you’ll see some old acquaintances, specifically the old pirate leaders. More importantly, you’ll also see a red flag hanging from the ceiling. It appears to be owned by a certain Bella Fisher, one of the Golden Key holders. Ask about the flag and you’ll learn that it now belongs to a group called Chums, who are a secret society of anglers.
- Ask to join the Chums group and you’ll be given a special fishing lure and some advice on storytelling. You need to show the fishing lure to five Chums members and share a story with each of them. Doing so will give you more advice on storytelling, as well as elevate your ranking in the group, which will then give you the privilege to take the red flag later on.
- The first Chums member you should talk to is the pirate outside of the Scumm Bar. Show him the lure and he’ll offer some advice about setting the stage.
- One thing to note about the storytelling segment with the Chums is that you have to be consistent with the story you’re telling. As you gradually talk to more Chums members, more story options will be offered, but make sure to choose the same ones you’ve already chosen when talking to other members previously.
- Grab the exotic drink to the left of the pirate then return to the fish shop.
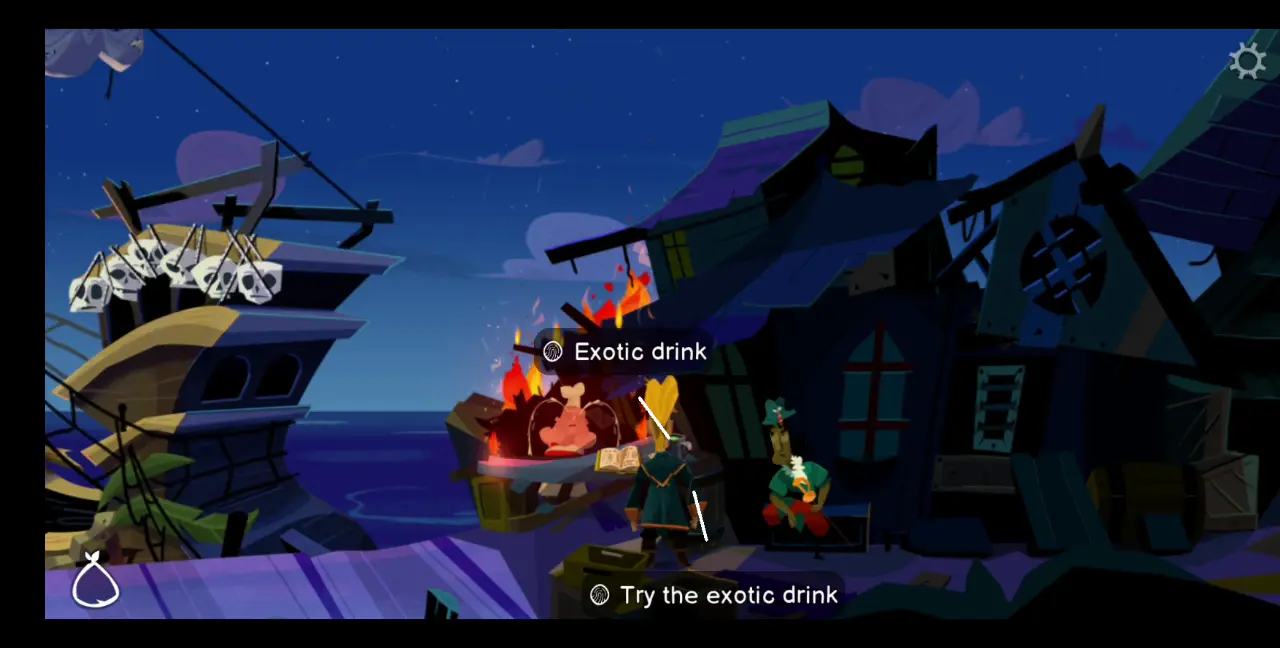
- Take the exotic drink (click it from your inventory) then ask the two pirates at the table about the blowfish nearby. They’ll explain that these are used for belching contests, which Guybrush can join.
- Join the contest and, having already taken the exotic drink, you should be able to easily win the contest and earn the blowfish. Keep in mind that the exotic drink can go bad if you wait too long before drinking it. When this happens, just head to the docks to get another one.
- After winning the blowfish, head to the locksmith. As it turns out, she’s also a member of Chums so show her the special lure, for which she’ll offer advice on dramatic endings. Look around and chat with her some more, and you’ll discover that her mother was Old Mrs. Smith, who happened to be the owner of one of the five Golden Keys.
- Apparently, the locksmith inherited the Golden Key from her mother but never bothered collecting it. Unfortunately, the key is scheduled to be destroyed, according to the probate order you receive from her.
- After speaking to the locksmith, head out of her shop and drop by the jail. Ask Otis about what happened to Stan as you’ll need his help down the line.
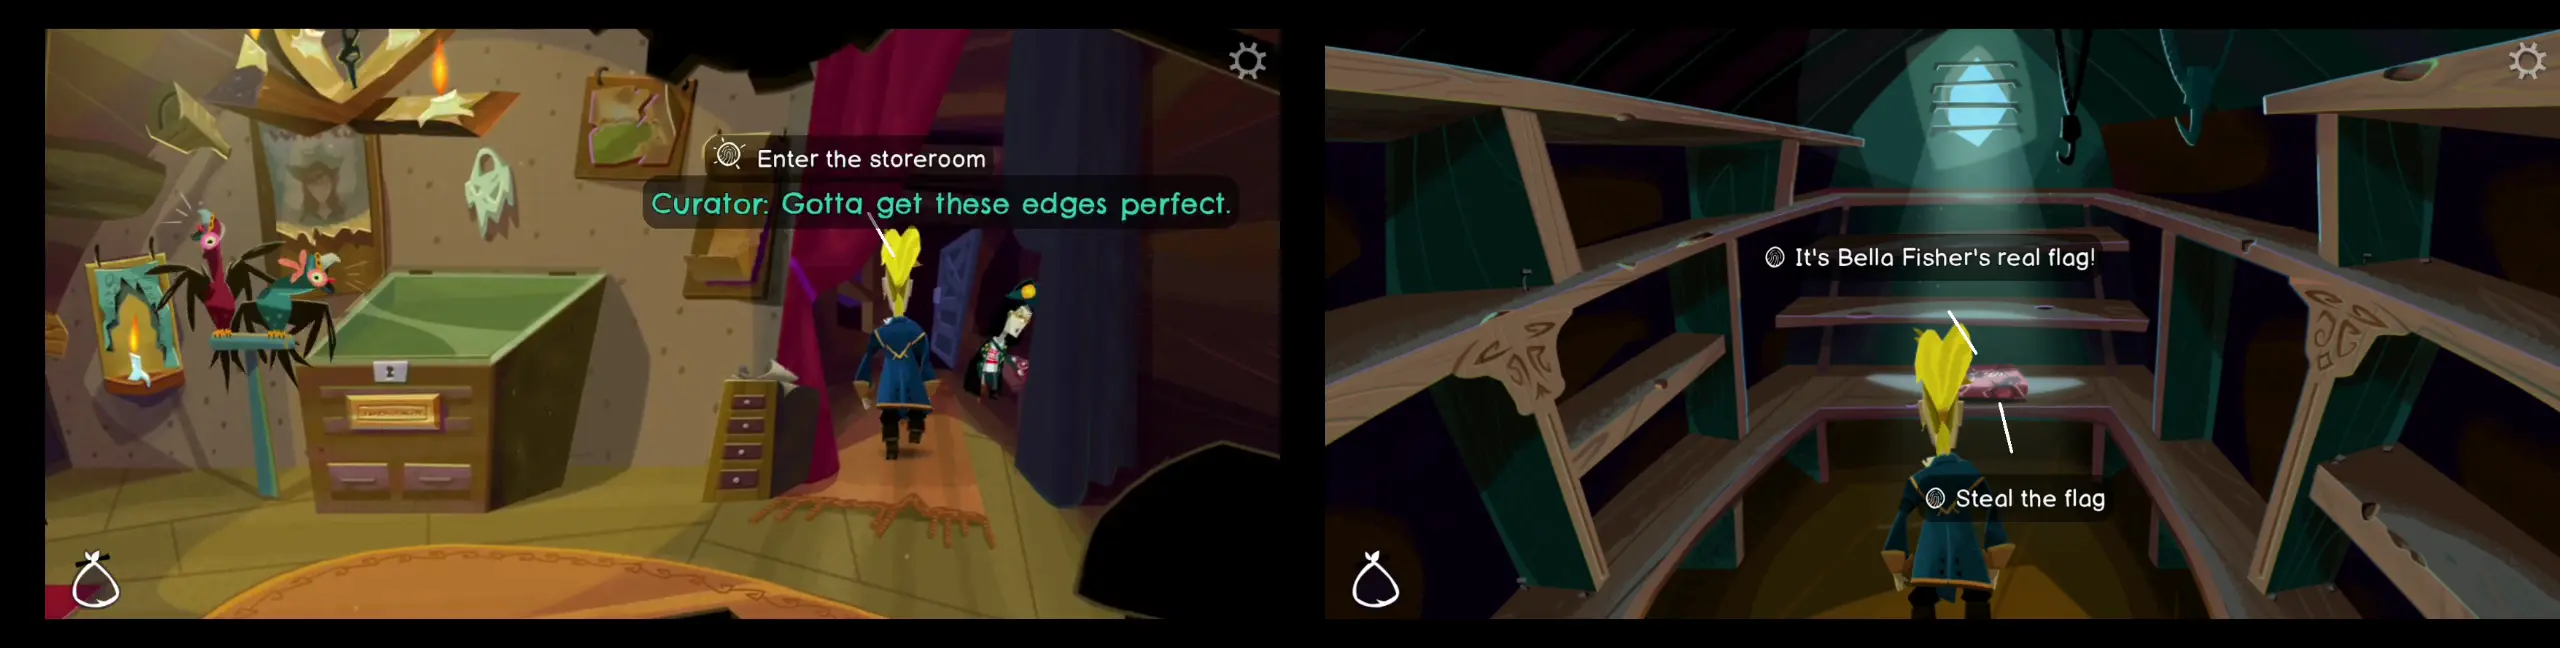
- Next, go to the Museum of Pirate Lore. You’ll see that Jon Laney’s eyepatch in the display case has been replaced by another one of Bella Fisher’s flags.
- Before anything else, give the curator Gullet’s book of poems to earn the Did Gullet a Favor achievement. If you don’t give the book of poems now, you’ll miss your chance later.
- Back to the display case, there are now two parrots next to it. Feed them both some crackers then use the display case key you still have in your inventory to steal the flag. The bad news is the flag is a replica so you need to head back to the museum to find the real one.

- This time around, don’t feed the parrots and unlock the cabinet. They’ll make noise and alert the curator. The curator will then take the new replica from the case and fold it right outside the storeroom. As soon as she’s distracted, make a beeline for the store room while the door is open. Swap the replica flag for the real flag and walk out of there. You need to move fast or else the curator will lock the door to the storeroom before you can even enter.
- At this point, head to the docks and set sail to Scurvy Island.
- Head to the campsite north of the island and search for Elaine. You won’t find her there but, instead, you’ll find a painting and a note on her desk. Examine the note to discover where her location is. The painting will come in handy later. Elaine’s location may vary from one playthrough to the next, so refer to the note in your inventory if you want to find her.

- Once you’ve found Elaine, talk to her about her scurvy project and she’ll offer you a scurvy flyer.
- Nearby are a few limes. Grab them as well.
- Show Elaine the special fishing lure and she’ll offer you advice on how to include additional details to stories.
- With that done, head to the island of Brrr Muda, which is found north of the map.
- Before entering the island, you’ll have to go through a scurvy inspection checkpoint. Show the customs officer that you’re carrying limes and you’ll get the first stamp of approval.
- You also need to fill out a customs form. You only really need to check the fifth and last boxes as these are the items that don’t reveal you’re a pirate. Once done, sign the form to be allowed entry into the island.
- At Brrr Muda, make your way to the left and into the courthouse. Show the judge the probate order you received from the locksmith. With this accomplished, you’ll receive Old Mrs. Smith’s Golden Key.
Golden Key #2: Brrr Muda Island Queen’s Golden Key
- Travel to the Ice Quarry, by walking down the island center of Brrr Muda. The island center serves as the map of the island.
- At the Ice Quarry, show the guard the special fishing lure and he’ll offer you advice on how to use special angling lingo to make your stories more exciting.
- Additionally, ask the guard if you can visit Stan in the hard labor camp. To be allowed entry, you need to give the guard physical proof that you and Stan are actually friends—which you don’t have at the moment.
- From the Ice Quarry, go to the Ice Castle on the map’s west side. Keep walking upward the path until you reach the very top of the mountain. Upon entering, you’ll find some firewood and matches. Take them.

- There are also a handful of books nearby on the ice shelf. Approach the purple book as this is the fourth copy of At the End of the Plank.
- In the Ice Castle, you’ll be received by the Queen of Brrr Muda and learn that Brrr Muda has a Golden Key that belongs to her. If you ask about it, you’ll discover that you need to beat the incumbent queen in three different contests:
- The Contest of Heartiness: An eating contest where you need to eat raw fish.
- The Contest of Seriousness: Contest where participants must keep a straight face and the first one who laughs loses.
- The Contest of Intelligence: A twenty-second algebra test.
- You can’t win all the challenges in one go and will need to be extra creative and wily to achieve victory. But for now, challenge the queen anyway for the sole purpose of gaining access to the Town Hall.
- Challenge the queen in any challenge—it wouldn’t matter which one as the outcome would be that you would lose. The good news is, you’ll have other chances to challenge her again. Head to the top of the stairs to the left, where the Contest of Intelligence is held.
- Put the firewood in the fireplace and light them using the matches. The nearby icicles will melt, which will give you an edge later during the contest.
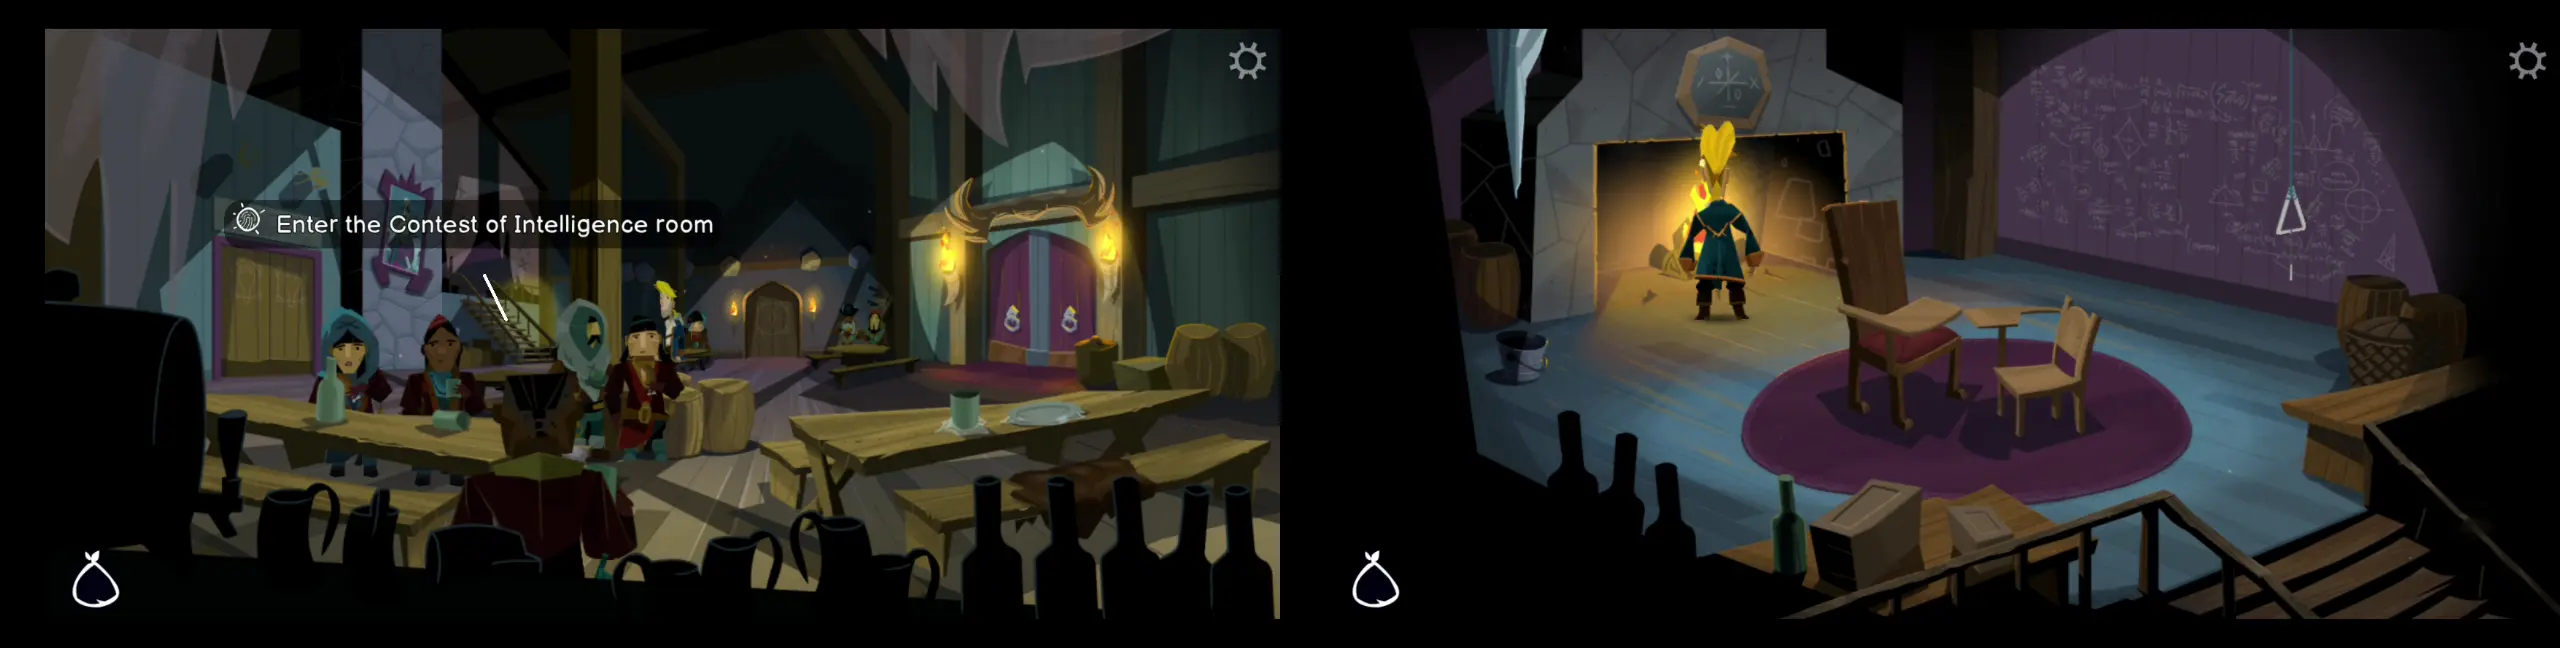
- Ring the triangle to begin the Contest of Intelligence. During the test, a drop of water will fall into the bucket, which will distract the queen and make her look away from her test paper. Take this opportunity to swap the test papers. This will get you to win the challenge.
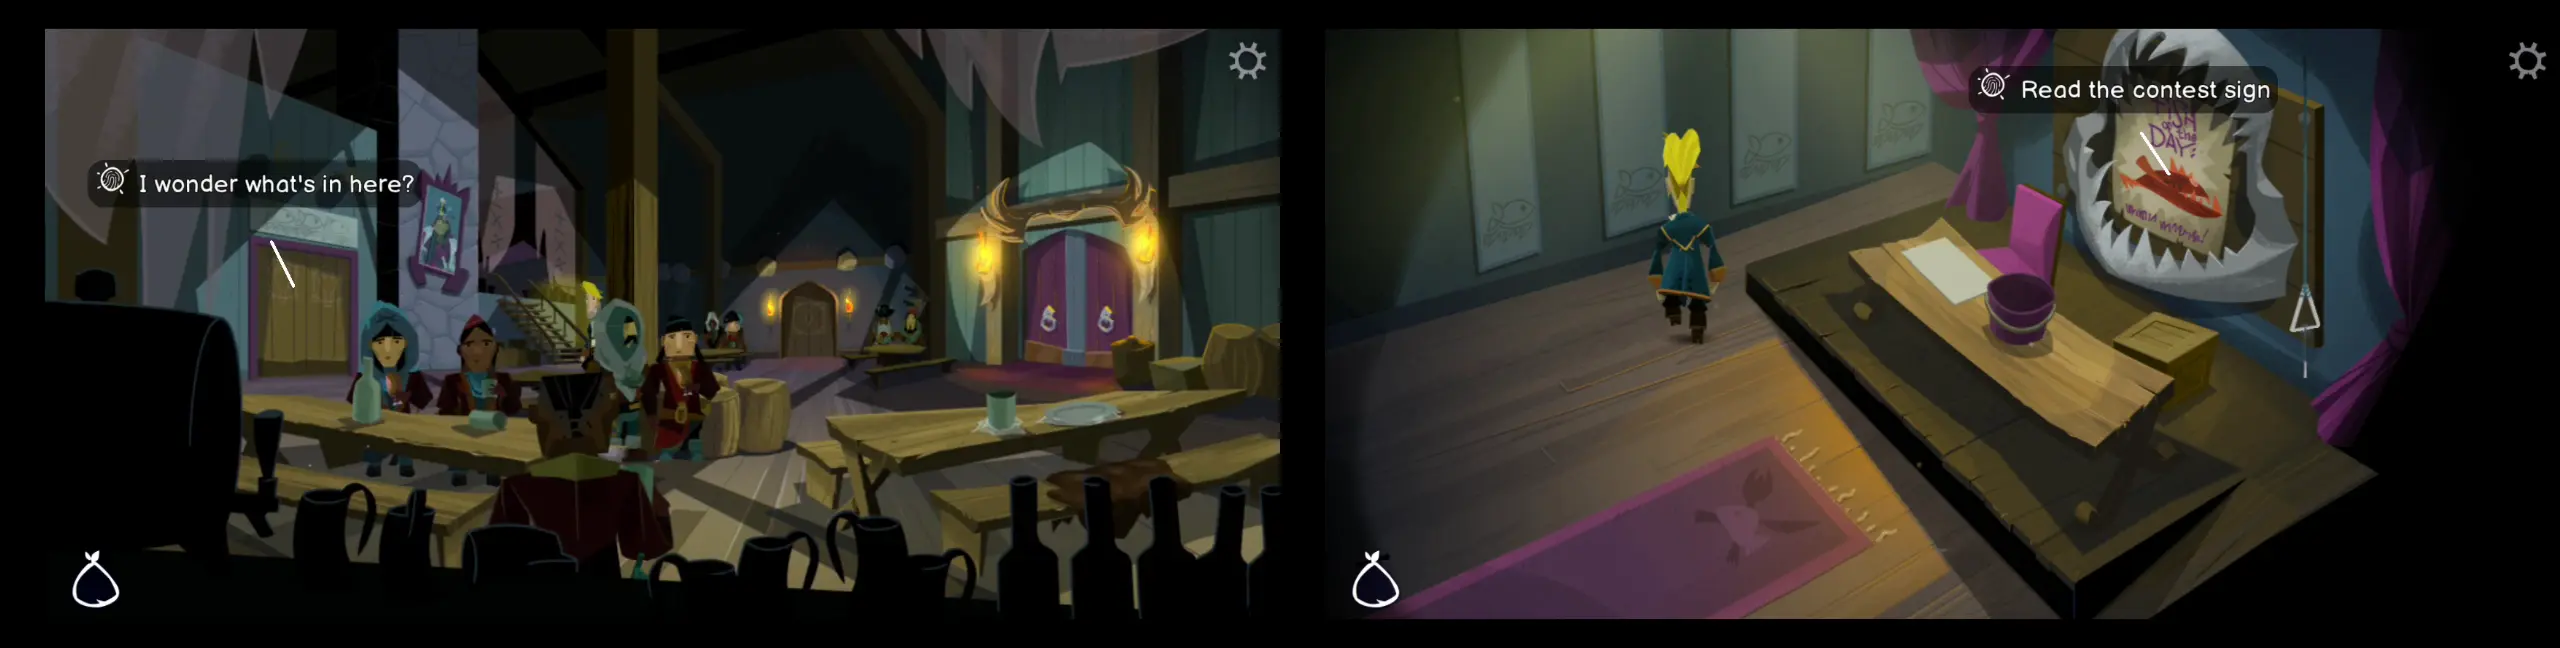
- You’ll have a chance to beat her in the two other challenges later, but for now, visit the room where the Contest of Heartiness takes place, which is the room to the left.
- Read the contest sign behind the table and remember what’s indicated as the fish of the day. This varies from one playthrough to another so make a note of what’s stated in your current playthrough.
- Next, head back to Mêlée Island and access the map. Go to the Shipyard, where Stan’s used ship business is located. This is where you’ve previously found the sponge.
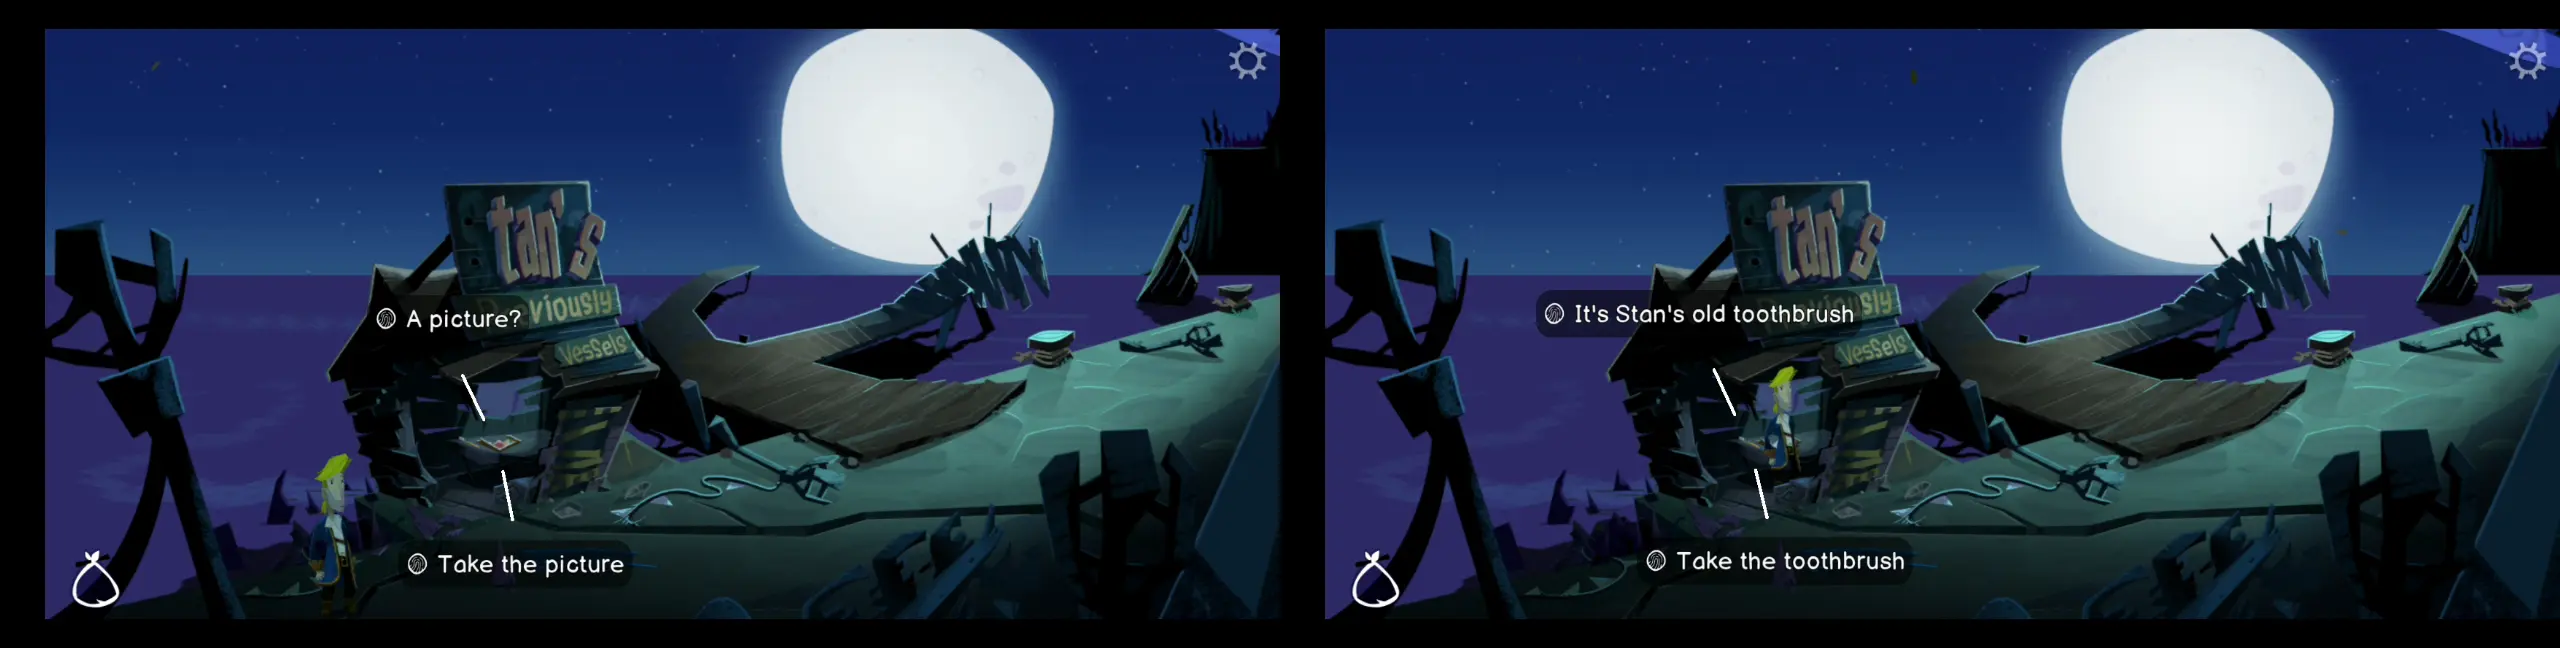
- You’ll notice that Stan’s shack, which was boarded up just a while ago, is destroyed thanks to the earthquake caused by decrypting LeChuck’s map. Take the toothbrush and the picture, which are on the table inside the shack.
- Next, head to the fish shop on High Street. Ask the shopkeeper about the fish of the day you saw on the contest sign, for which he will give you a box of fish.
- From here, go to the governor’s mansion. A long line of people wishing to see Carla will be queued up outside the building. Go to the back of the line and wait for five minutes to earn the Waited Patiently to See Carla achievement.
- Once it’s your turn to speak to Carla, she’ll reveal to you that the government is completely broke. Ask her about a disaster relief IOU then select the dialogue option that says “I want to rebuild local businesses” to get an IOU from her.
- When you get the IOU, hand this over to the cook at the Scumm Bar and he will return the cookbook you lent him. Thereafter, return this cookbook to Carla and she’ll allow you to borrow another book. Get the copy of The Endless Tale of the Voyage that Would Not End.
- With this book on hand, return to LeChuck’s ship. Show Apple Bob the special lure and you’ll receive your last piece of storytelling advice where he’ll suggest returning to the fish shop so you can tell the former pirate leaders a grand story.
- Give Apple Bob the copy of The Endless Tale of the Voyage that Would Not End in exchange for Flambe’s joke book. This will help you later when facing the Contest of Seriousness in Brrr Muda.
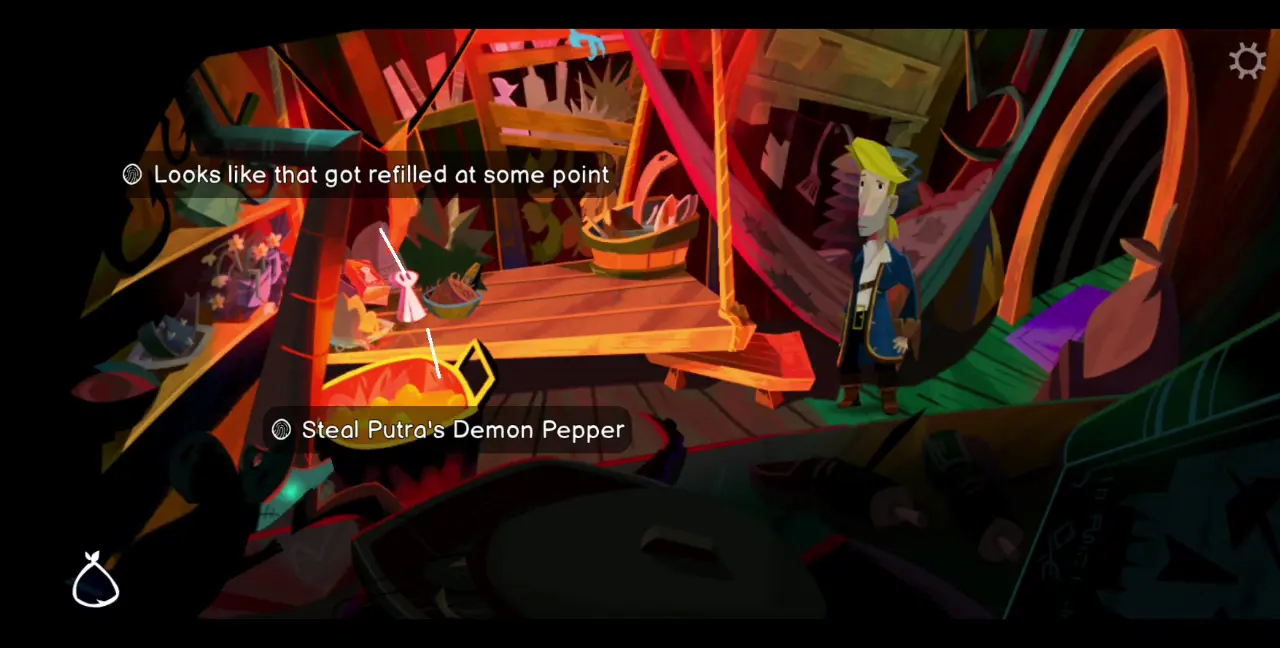
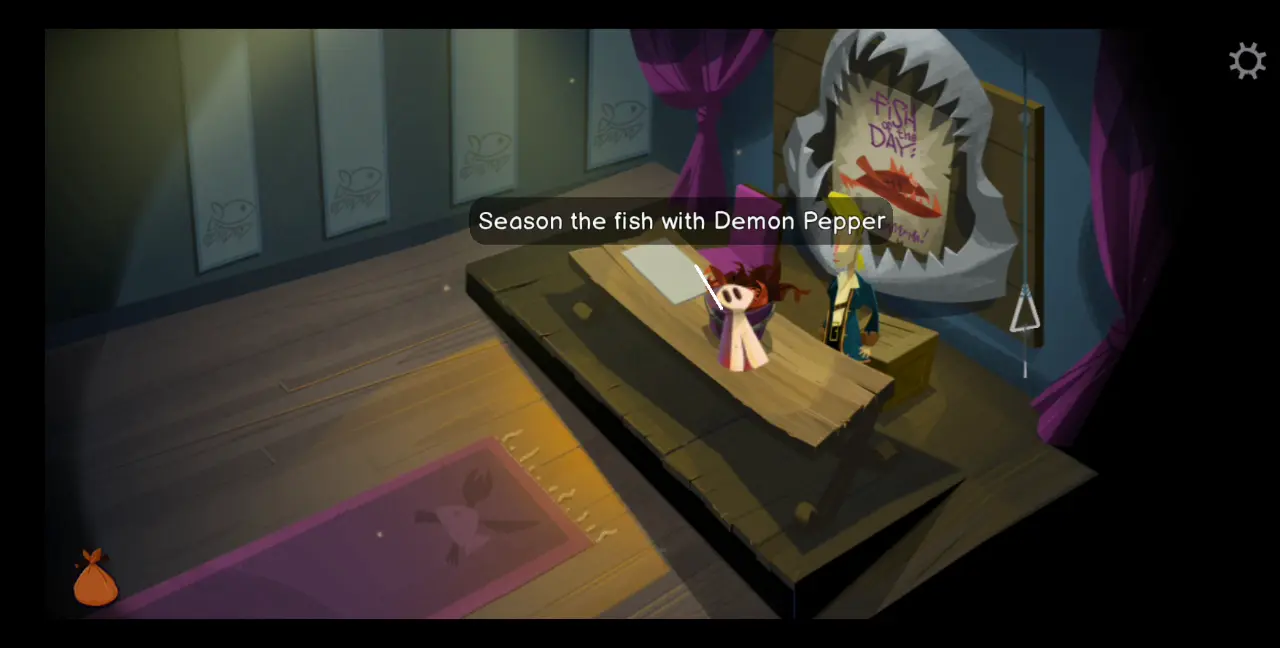
- Before leaving the ship, go down to the galley and steal Putra’s shaker of demon pepper.
- Head to Scurvy Island and travel to the area with the seagull near Elaine’s camp. Combine the demon pepper and the box of fish, which will give you spicy fish. Toss a chunk of the spicy fish to the seagull, causing it to leave. Then, collect the picture that the seagull had been keeping.

- Head to Bermuda and go to the Town Hall. Enter the door to the north. This will bring you the room where the Contest of Seriousness is held. Ring the triangle to begin the contest.
- In this contest, your goal is to make the queen laugh. After hearing her joke, select the dialogue option that provides a sarcastic reply. When it’s your turn to make her laugh, use Flambe’s joke book on her and select any of the options.
- After winning the contest, go back to the Ice Quarry. In your inventory are two photos: one of Guybrush and one of Stan. What you need to do is replace the framed photo of Elaine with Stan’s picture on the left and Guybrush’s on the right. Then, show the guard the framed photo to prove your friendship with Stan and gain entry inside the labor camp.
- Upon speaking to Stan, show him Elaine’s scurvy flyer. Then, ask him about escaping so you can get the judge’s order. Don’t forget to give Stan his toothbrush to earn the Gave Stan His Toothbrush achievement.
- Return to Mêlée Island and head to the fish shop. As Apple Bob suggested previously, share a story with the old pirate leader behind the counter. This will make you a high-ranking Chum and earn you the Became a Prize Chum achievement.
- After this, ask for Bella Fisher’s flag. Additionally, trade your box of fish for a new one.
- Access the sea map and go to the small island to the northwest, which is Barebones Island.
- Here, you’ll meet Ned, Stan’s former accountant. It turns out that Ned really hates Stan and if you show Ned the judge’s order stating Stan will only be in jail for one month, Ned freaks out and gives you a satchel full of evidence against Stan to increase his sentence.
- Leave the island by boarding your ship then enter the island again. Ned should be gone. Take the picture of Ned tacked to the tree.
- Return to Brrr Muda and head to the courthouse. Rummage through the satchel and specifically take Stan’s financial records and Ned’s license. Combine Ned’s license with the picture frame, with the license on the left and Guybrush’s picture on the right.
- Show Stan’s records to the judge, then the framed license, which will get the judge to think that you, as Guybrush, are actually Ned.
- You’ll be asked to confirm your identity then the judge will give you the documents to Stan’s new extended sentence, where he’d have to serve ten years. With this, he’ll finally agree to your plan to escape.
- Since you’re in Brrr Muda, make a trip to the Town Hall for the final challenge with the queen. Visit the room where the Contest of Heartiness is held.
- Before beginning, place the fish of the day inside the bucket then sprinkle demon pepper on it. Keep in mind that the fish in your inventory shouldn’t be spicy or mixed with demon pepper.
- Ring the triangle to begin the challenge.
- While the queen will take one of the spicy fish from the bucket, you should use the fresh box of fish in your inventory and place some on your plate. The queen won’t be able to handle the spicy fish, making you the victor in all three challenges.
- At the end of the contest, you’ll be crowned the queen of Brrr Muda in a public ceremony. Once you’re given the crown of keys, tear it to pieces so you can get the second Golden Key.
- The people of Brrr Muda won’t be happy with this, but after explaining that you’re ending the monarchy by giving all of them their keys, they’ll let you off the hook.
Golden Key #3: Widey Bones’ Stolen Golden Key
- Don’t leave Brrr Muda just yet. Instead, visit Stan and show him the judge’s new order. Discovering that he’s been sentenced to a decade of hard labor, Stan finally agrees with your plan to escape.
- Use the double monocle to get the serial number of Stan’s shackles.
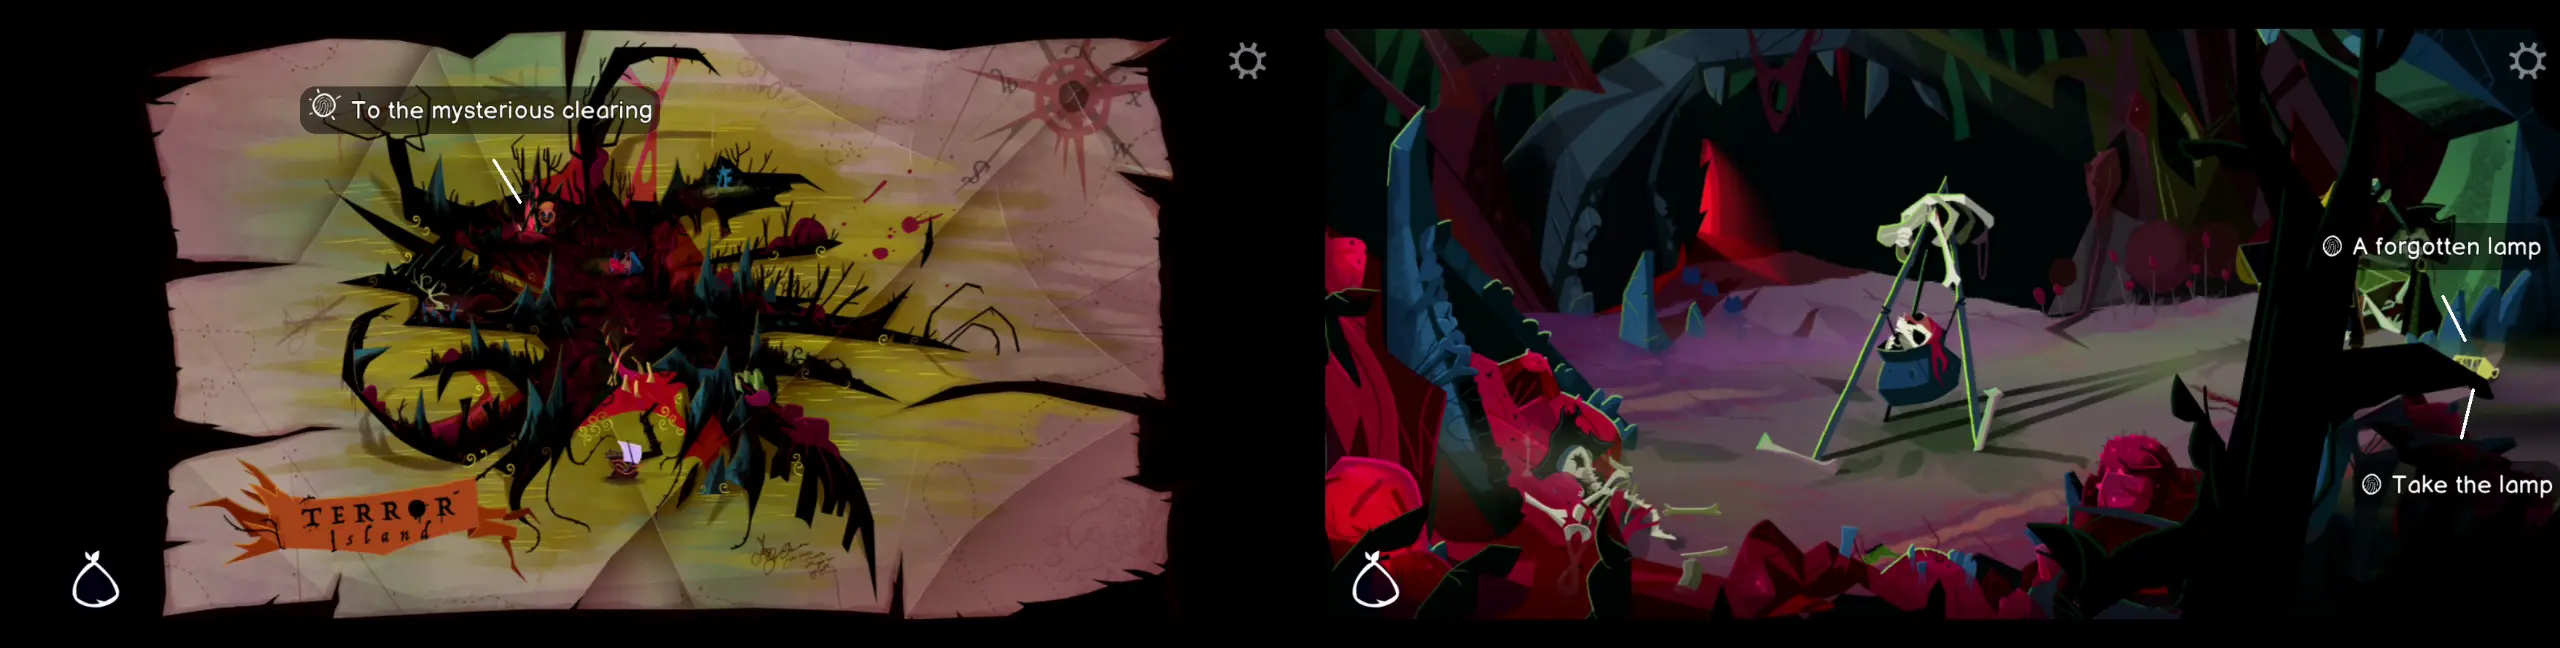
- Next, go to Terror Island and head to the Mysterious Clearing area. Grab the lamp.
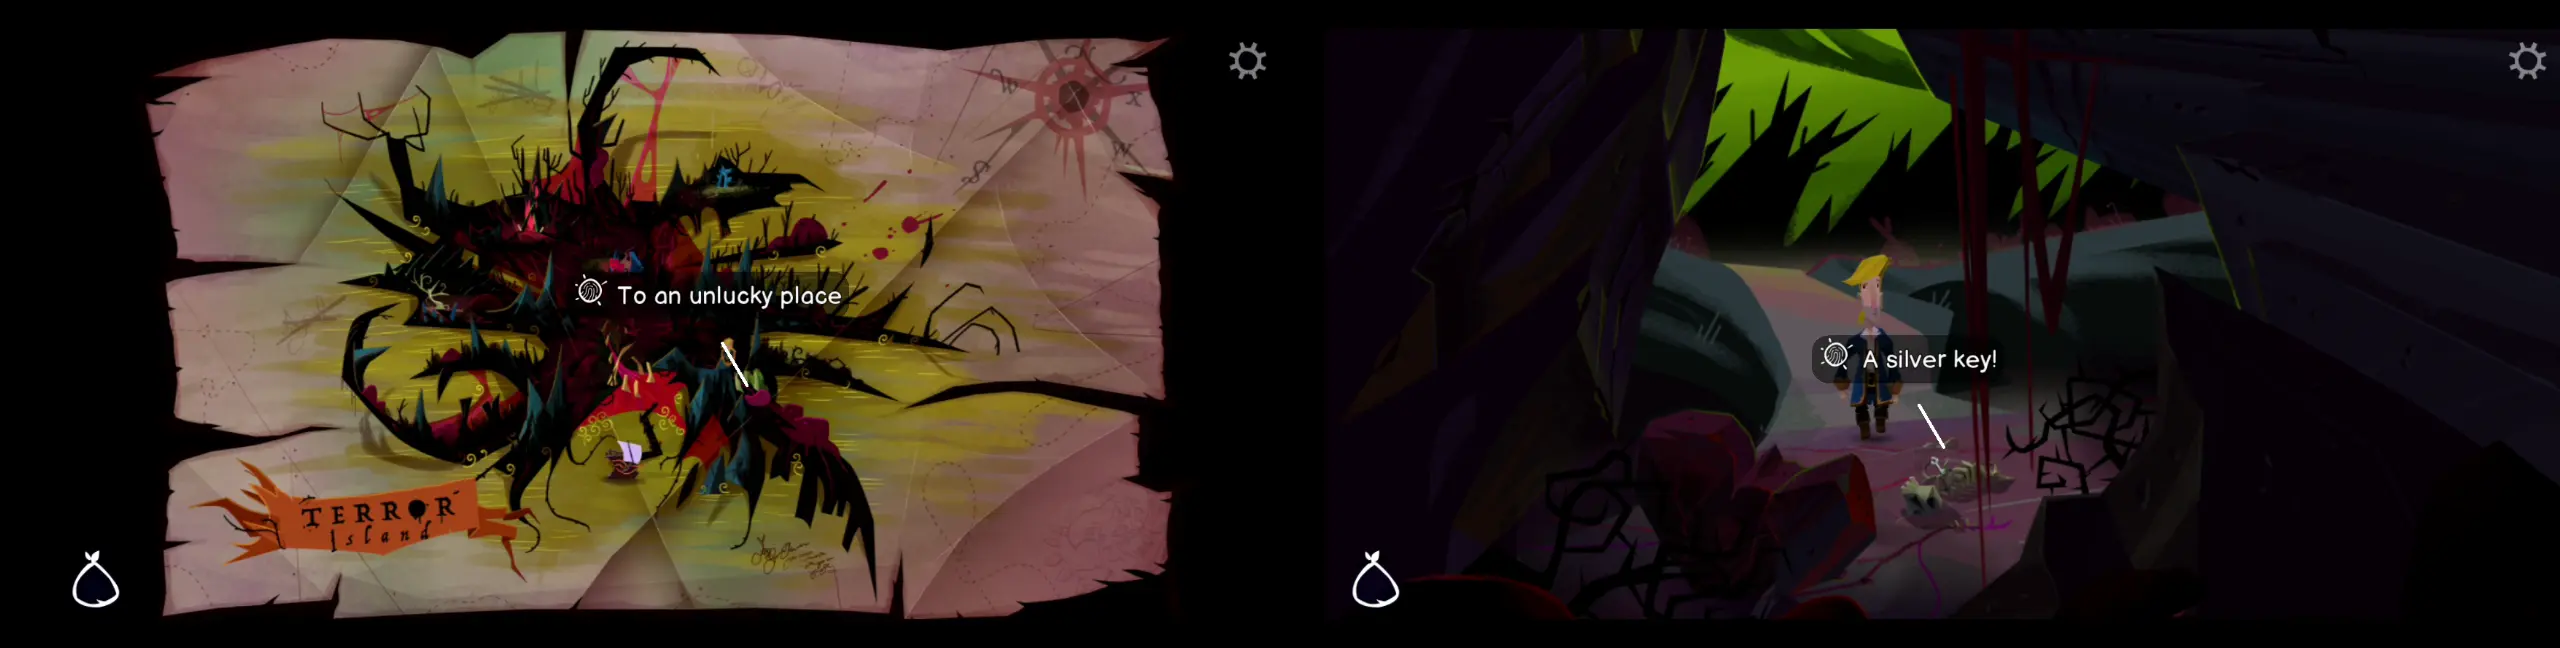
- Then, visit the Unlucky Place and take the silver key from the skeleton.
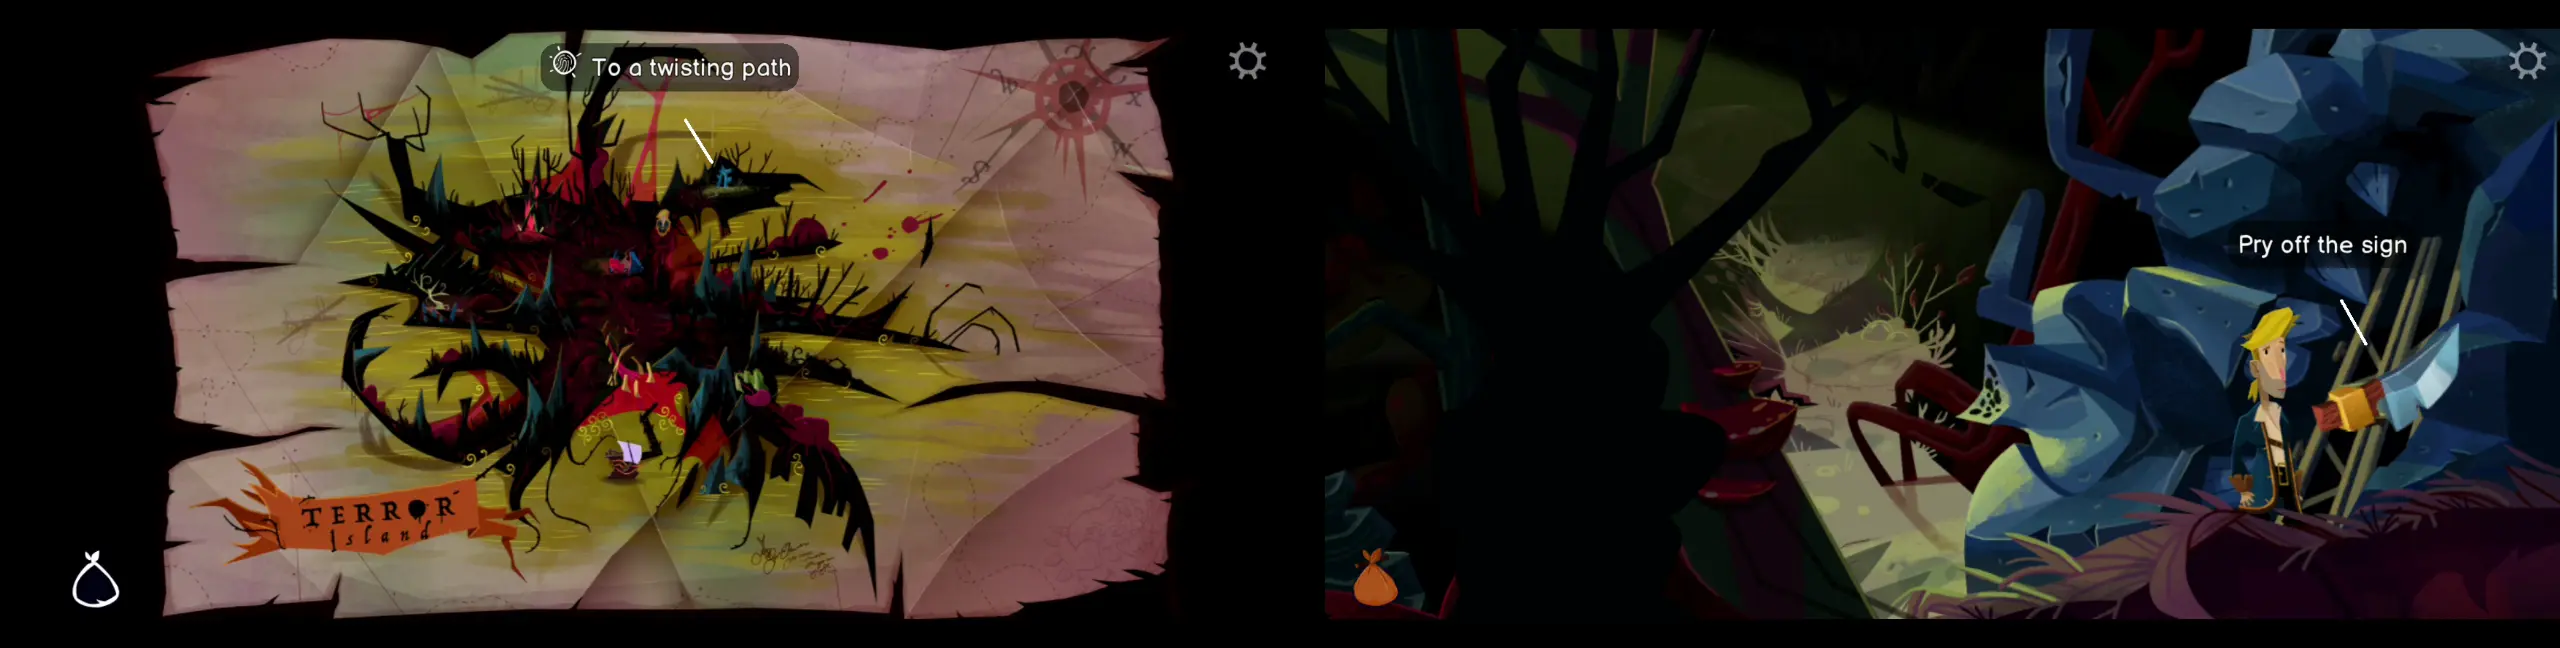
- Go to the Twisting Path. Use the knife to remove the sign from the locked gate.
- Once the sign has been removed, use the silver key to open the gate. Use the matches to light the lantern and see beyond the dark and maze-like paths. The objective in this segment isn’t to find your way out of the labyrinth, but rather to find the five curious notes that tell you how to get out of there. There’s no definitive location for these five notes so you have to go through the maze yourself until you find all of them.
- Once you’ve found and collected all the five notes, read the writing on the sign to teleport yourself back to the gate. You can do this by clicking the sign in your inventory.
- Keep in mind that each note has a symbol representing the four seasons, with one note also specifically indicating that spring is coming again. Read through the notes, bearing in mind that they should be understood in chronological order, which should be Spring > Summer > Fall > Winter > Spring again. Don’t forget to take note of the symbols. In our playthrough, this was the set of notes that we got:
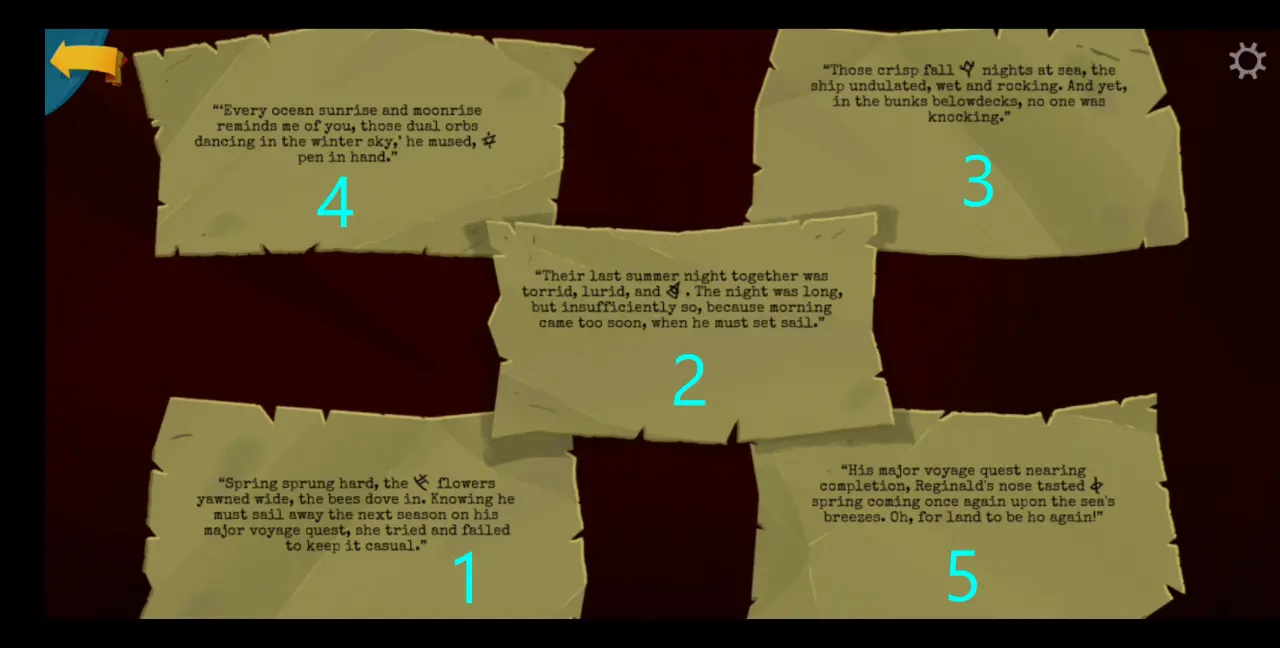
- Head back inside the gate and find your way out of the labyrinth by using the symbols next to each tunnel as guideposts. Enter tunnels based on the order corresponding to how the notes are rightfully arranged. Keep in mind that the symbols will vary between playthroughs so refer to the notes in your inventory to solve this puzzle.
- Once you’ve found your way out of the tunnels, you’ll come across the Pit of Agony, where you need to take a leap of faith. Unfortunately, you’ll fall into a deep body of water that puts out your lamp, enveloping you in total darkness.
- Return to the entrance by reading what’s written on the sign.
- Since regular flames can be extinguished, you need something else to light your lamp. Thus, head to LeChuck’s ship and go up the crow’s nest. Here, you’ll find Flambe sleeping. Use the flames on his head to light your lamp.
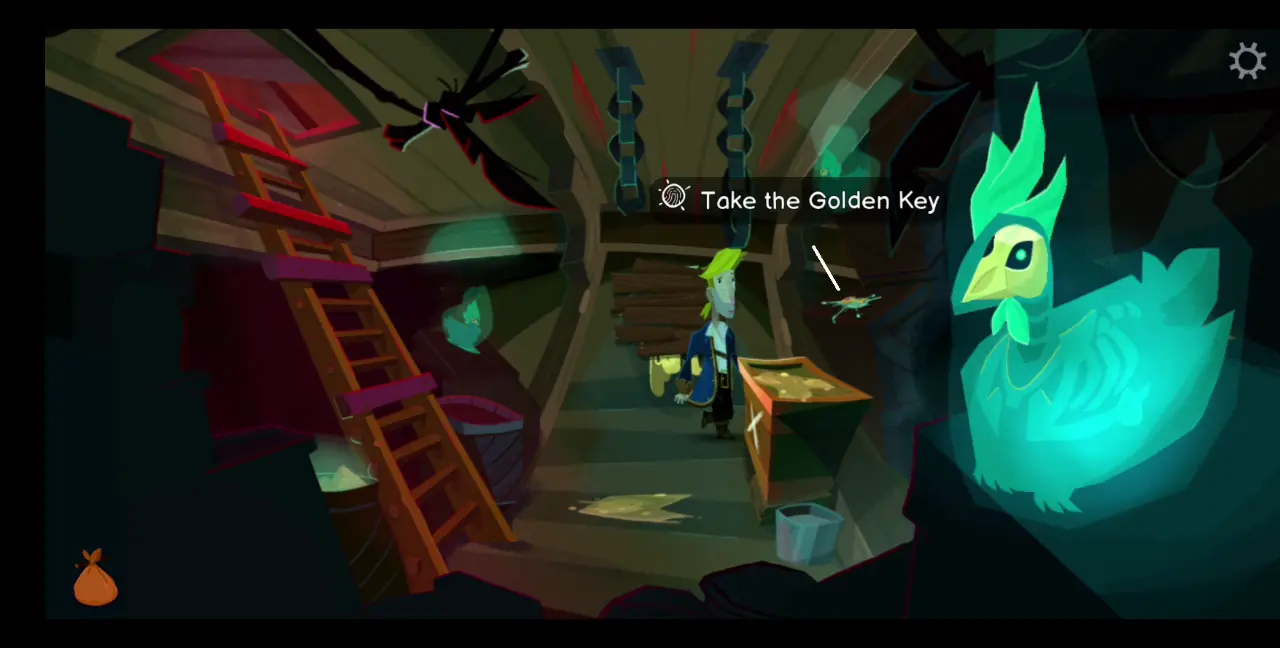
- Still in LeChuck’s ship, take this opportunity to go to the hold, which is where Iron Rose kept the Golden Key she stole from Widey Bones. Since she hid the Golden Key in one of the chickens, feed the chickens with chicken feed near the ladder. Leave and re-enter the hold, and you’ll discover that the ghost chicken has pooped out the third Golden Key. Take the key.
Golden Key #4: Bella Fisher’s Golden Key
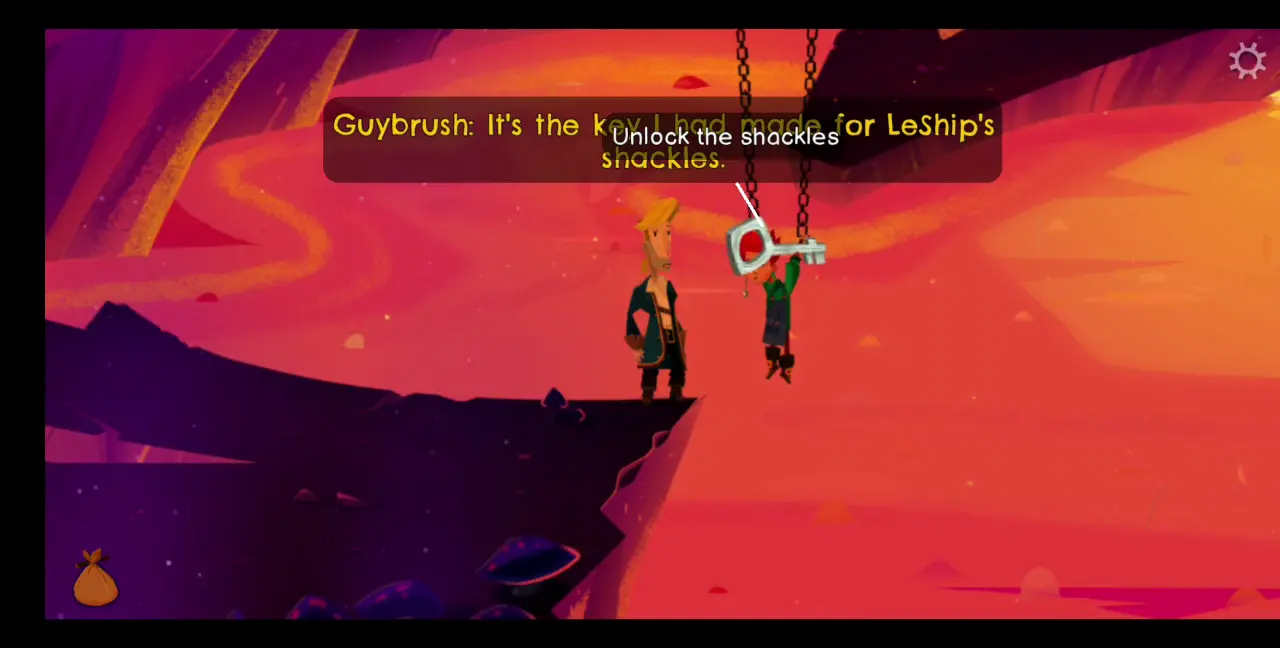
- Leave LeChuck’s ship and head to the locksmith. Give them the serial number for Stan’s shackles so they can make a key for it.
- You have another serial number for another pair of shackles, which you took from the deck of LeChuck’s ship. Have the locksmith make a key for this as well.
- Now that you have the key for Stan’s shackles, go to the labor camp at Brrr Muda so you can free Stan and help him escape.
- You and Stan will end up at Scurvy Island with Elaine. Choose the dialogue options prompting Stan to help Elaine redesign her scurvy flier. When both Elaine and Stan leave, take the new scurvy flier.
- Access the map and go to the bottom right-hand corner, near where LeChuck’s ship is docked. Here, you’ll see a small ship that’s been adrift. Apparently, the pirates in this vessel all have scurvy and won’t let anyone onboard. Give them the new scurvy flier and some limes. They’ll let you climb onboard. Take the third and final Bella Fisher flag from this ship.
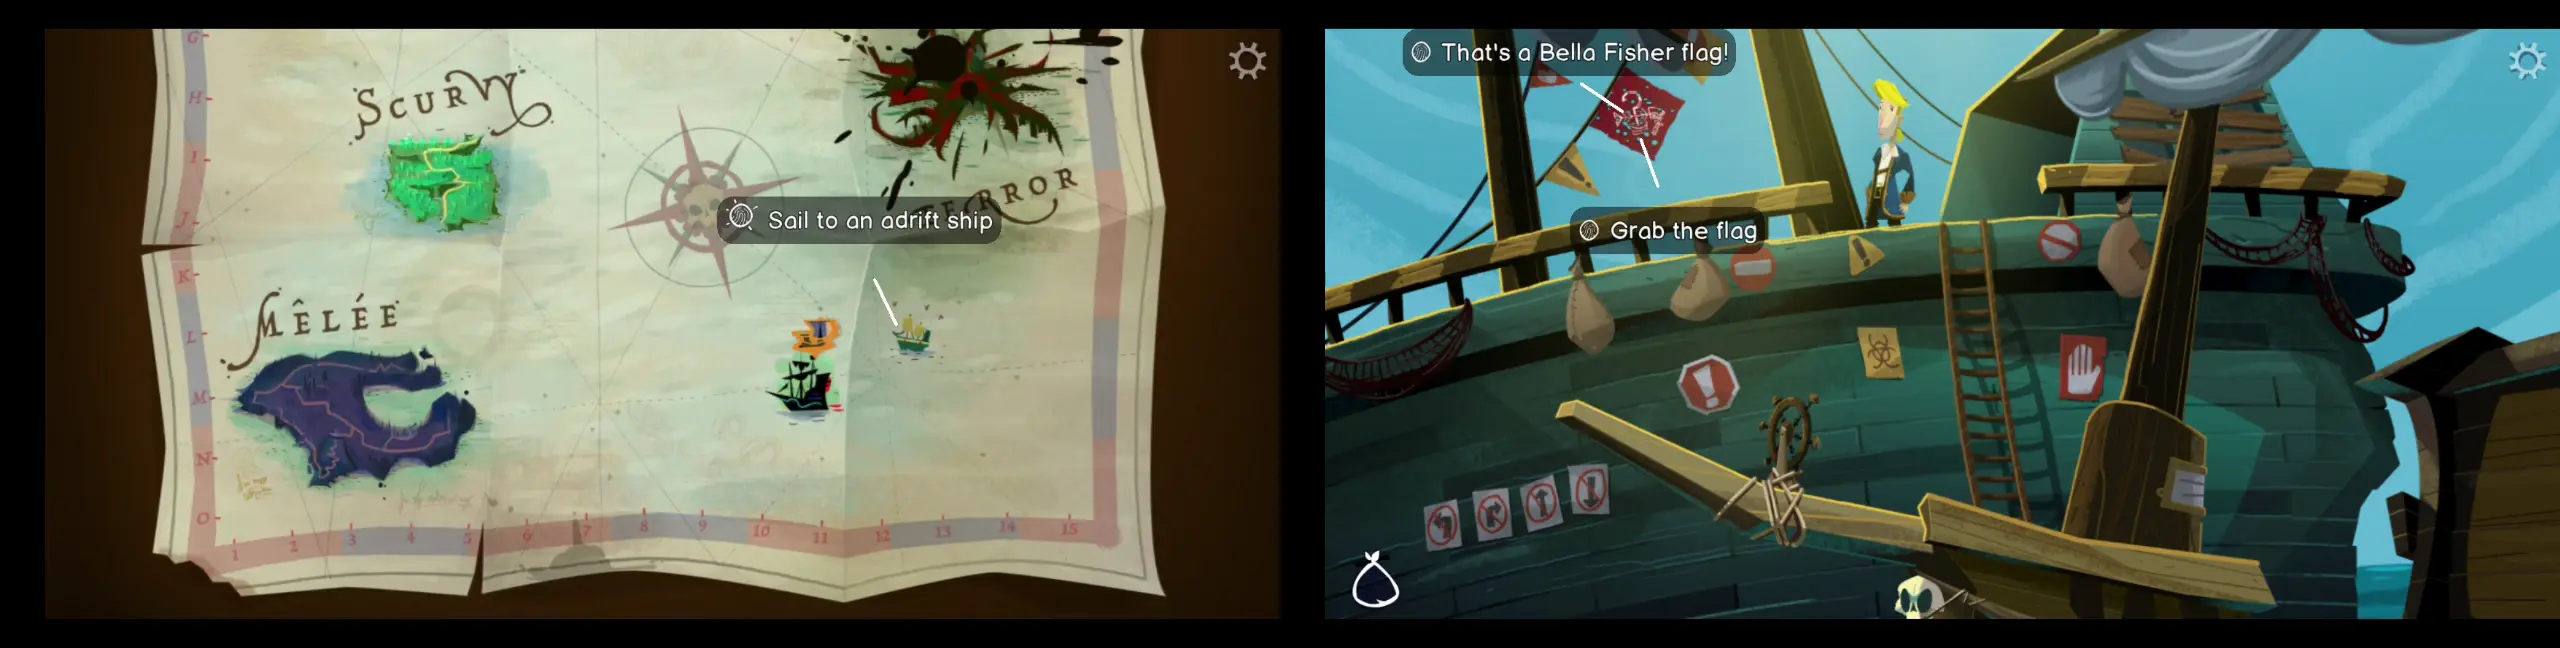
- Combine the three Bella Fisher flags in your inventory. This will reveal a new location you need to travel to, which will be marked by an X on the map. Fortunately, it isn’t too far from the ship with the scurvy pirates.
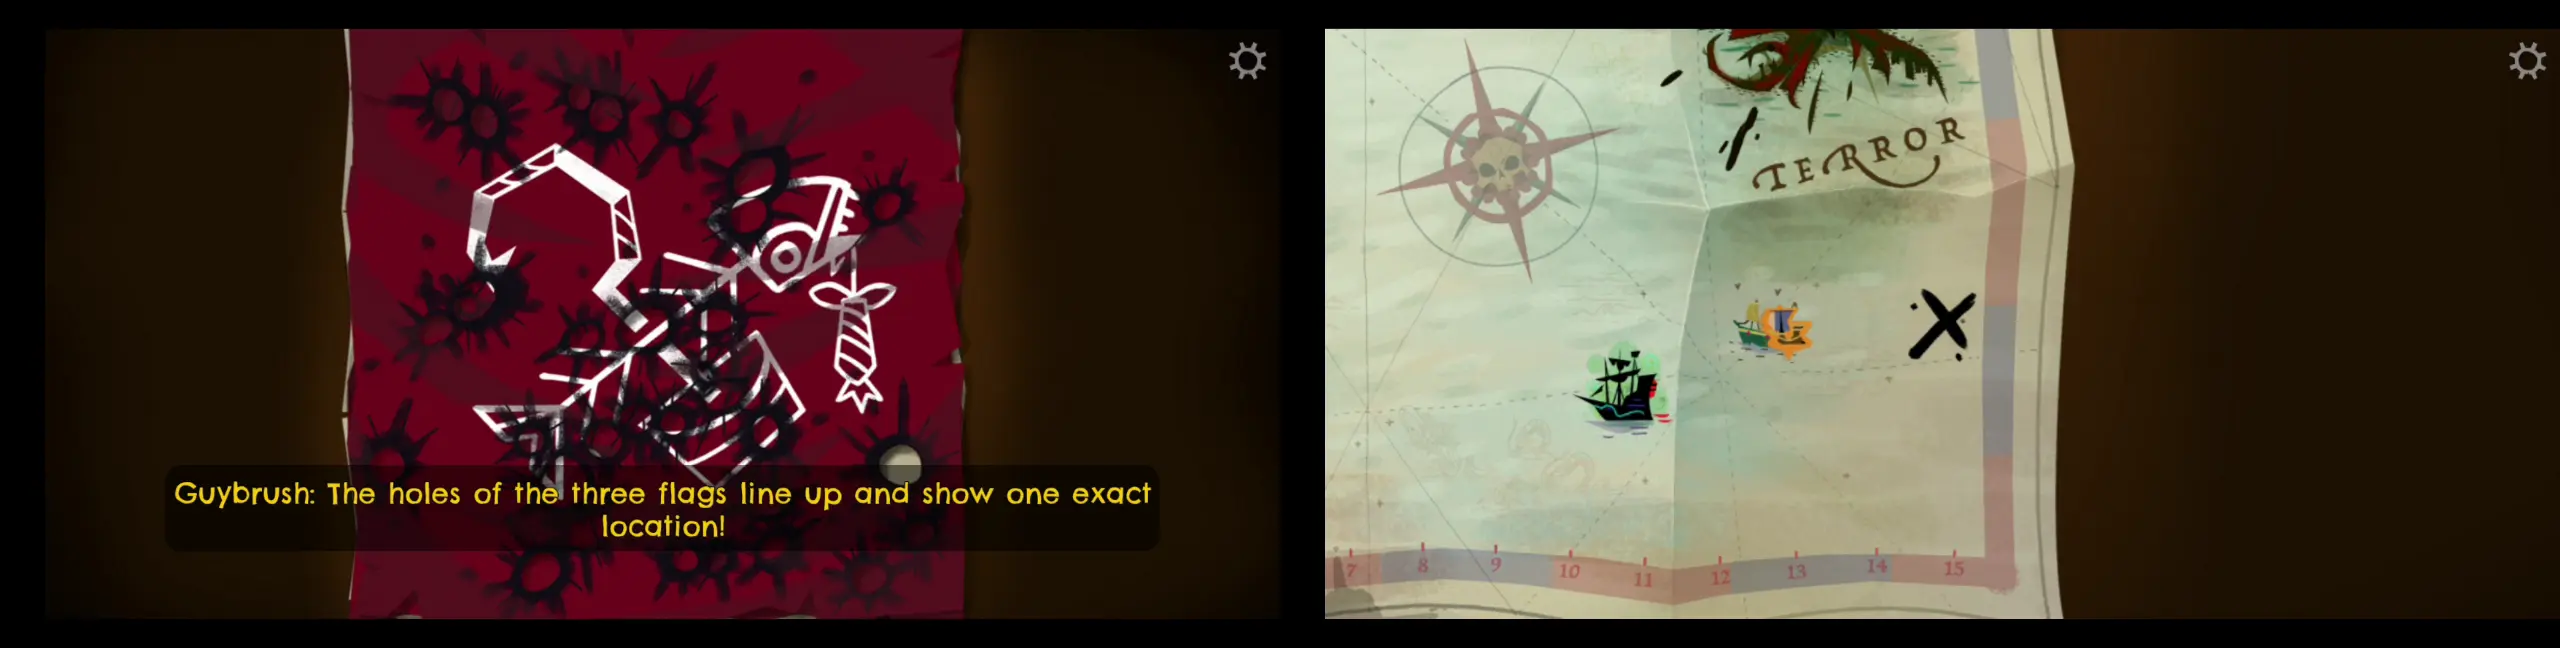
- Once you’ve arrived at the location, lower the anchor. Before going down the deep, inflate the blowfish in your inventory.
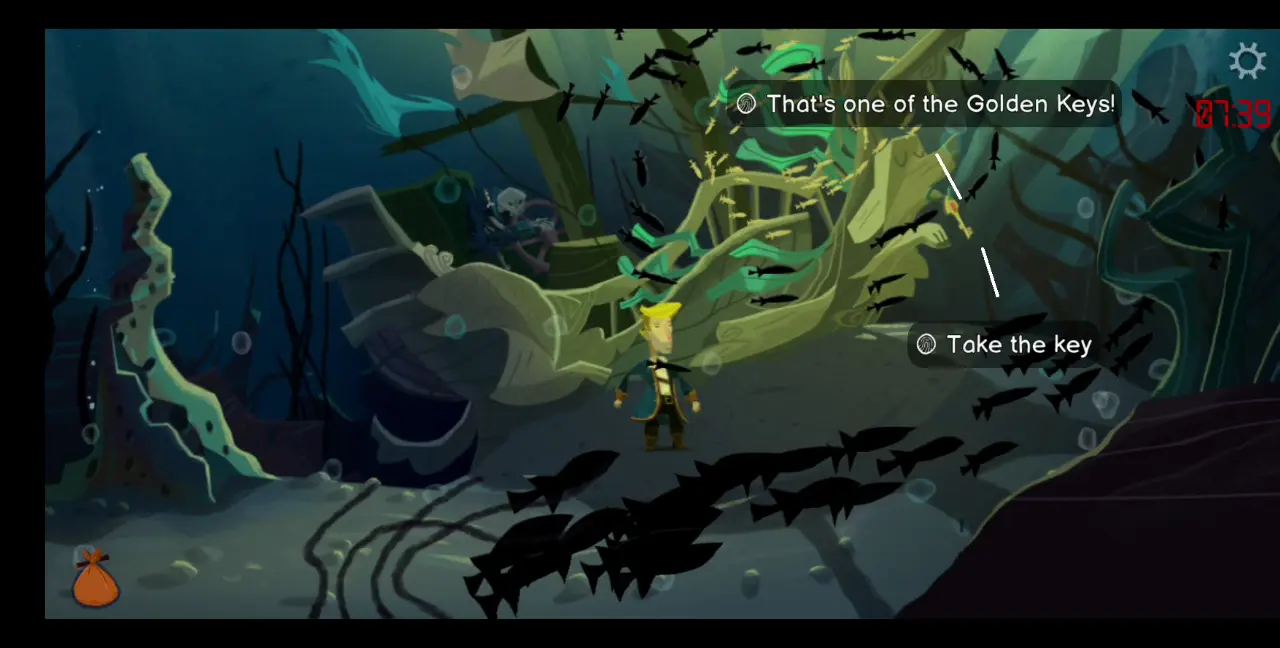
- Dive into the water. You’ll soon realize that you might not make it down, but if you inhale the air in the blowfish, you’ll manage to reach the ocean floor. This is where you’ll come across Bella Fisher’s Golden Key, which you can find at the front of her sunken ship. Take the key and go back up the anchor to reboard your ship.
Golden Key #5: Terror Island Golden Key
- Go back to Terror Island to pick up where you last left off: go to the Twisting Path area then pass through the gate. You’ll encounter the Pit of Agony once more, but thanks to Flambe’s waterproof hair lighting your lantern, you can walk to the right and emerge from the water without being engulfed in darkness.
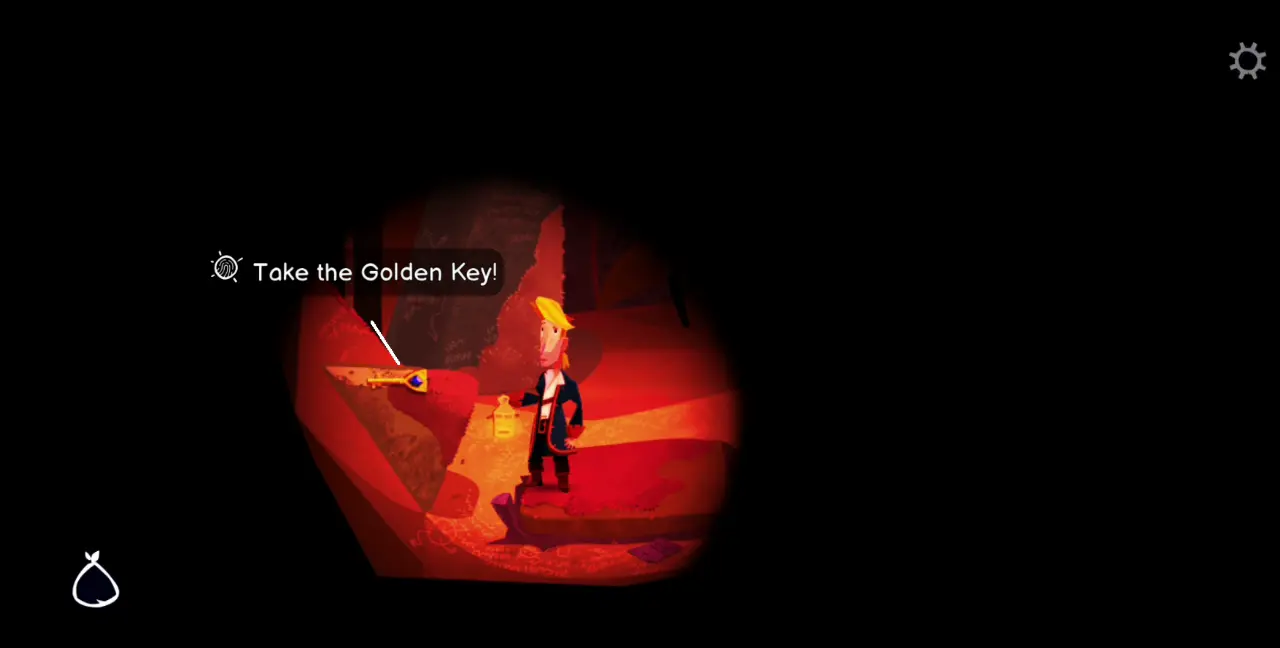
- Keep going right until you fall off a ledge and into a deep cave. In this cave is Herman Toothrot and the fifth Golden Key.
- After talking to Herman a little bit, you’ll see a purple book just beyond the flat rock in the middle of the cave. Click on the book—this will be the fifth and final copy you’ve found of At the End of the Plank, thus earning you the achievement Found all the Copies of At the End of the Plank.
- To the left of the cave is the Golden Key. If you try to take it by force, you and Herman will end up fighting, causing the lantern to break. Amid the darkness, use the magic sign to teleport back to the gate, leaving Herman stuck in the cave.
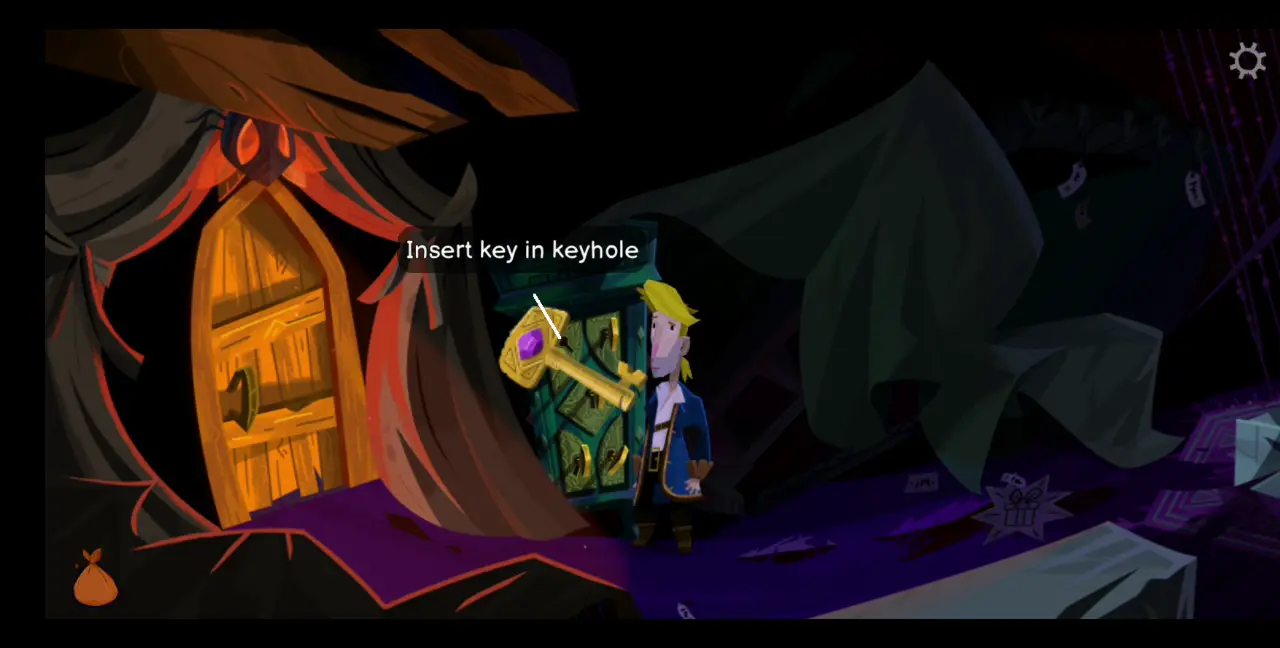
- Back at the gate, head back from the Twisting Path and return to your ship. Sail back to Mêlée Island and go to the voodoo shop on Low Street. Drag the five keys one by one into the cabinet. Inside, you will find a locked chest containing the secret.
- Unfortunately, since the chest is locked and you don’t have the key for that lock, you won’t be able to open it regardless of your best efforts. Eventually, LeChuck and the three pirate leaders will show up and take the chest for themselves.
- Before you can follow them and retrieve the cabinet, Elaine will talk to you and agree to accompany you to Monkey Island as this is where the safe with the secret must be opened. This concludes Part Four.
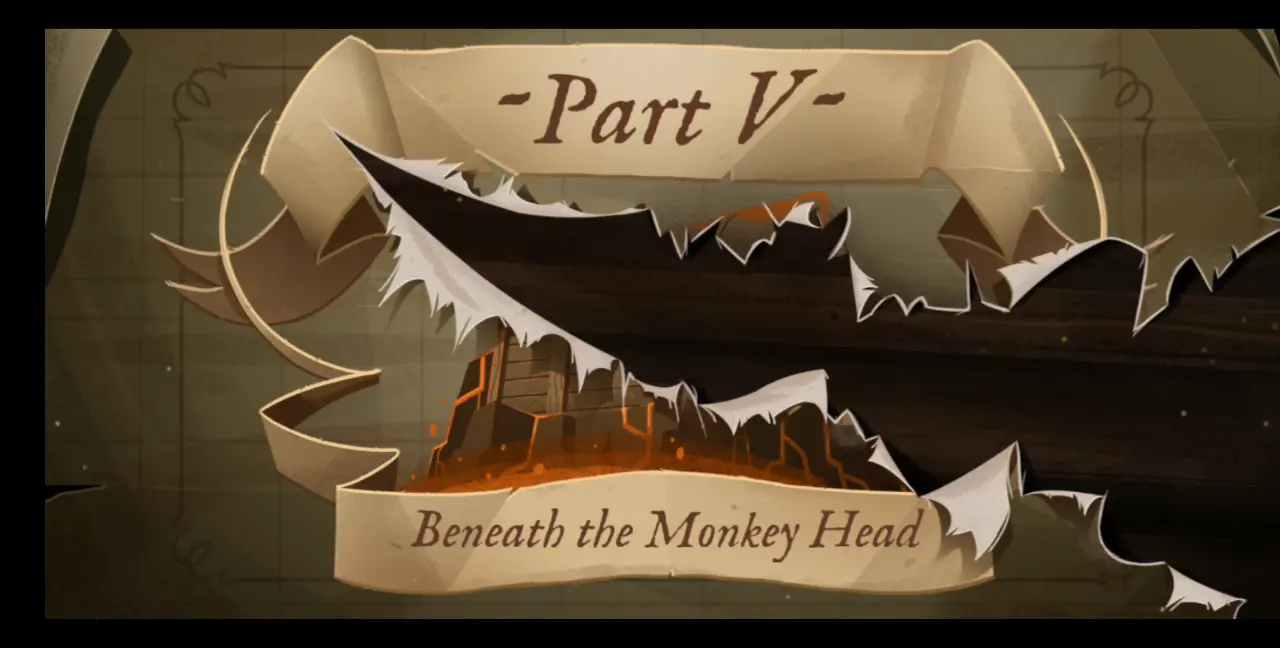
Part V: Beneath the Monkey Head
Upon beginning this part of the game, you will earn the Started Part Five achievement.
After failing to open the chest containing the secret of Monkey Island, you find yourself back in Monkey Island itself as this is where you need to open it. In the beginning of this segment, you’ll be trekking through the jungle with Elaine and hold a conversation with her. Elaine, being the only constant voice of reason in this, tries to temper your expectations about the secret. After your conversation, you eventually reach the giant monkey head, where a lava-like cave or portal has opened up. Flair tries to stop you from entering, but Elaine hangs back to fight Flair so you can go ahead and enter the portal.
Freeing Wally
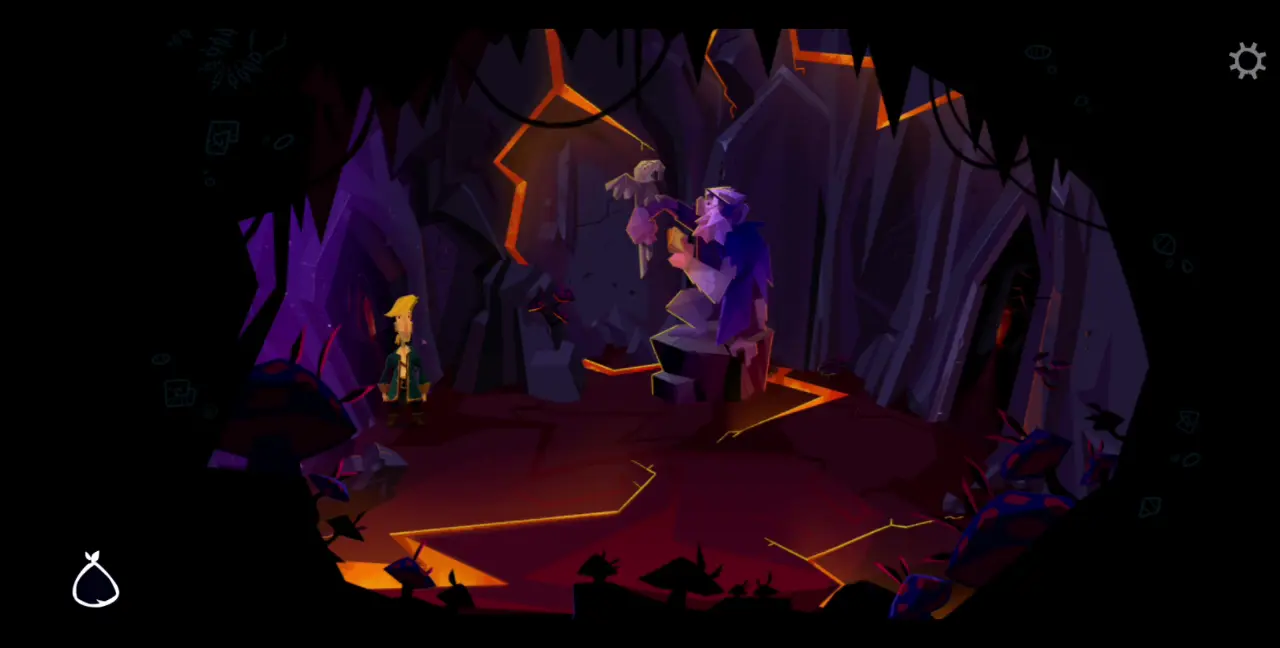
- After entering, you’ll reach an underground cave with narrow passages and lava all around. Along the way, you’ll encounter Wally the mapmaker hanging above a lava pit.
- This is where having keys made for the shackles on LeChuck’s ship will come in handy: if you’ve given the locksmith the serial number for the shackles you found in LeChuck’s ship, you can now use the key to free Wally. This will earn you the Rescued Wally from Monkey Island achievement.
- If you haven’t gotten the serial number for the shackles or did not have a key made for it, you won’t be able to rescue Wally and you have no choice but to leave him and move forward.
- After passing Wally, keep going down the path and you’ll encounter Flambe, who warns you about LeChuck’s obsession with the secret and tries to convince you to turn back. You ignore this, of course, and continue to the right until you’re asked to take a leap of faith into the lava. Fortunately, you land on a platform with an entrance.
Solving the Organized Pirate Puzzle
- After a brief cutscene of LeChuck trying to block your passage, head down the tunnel to the left since the right has been sealed off.
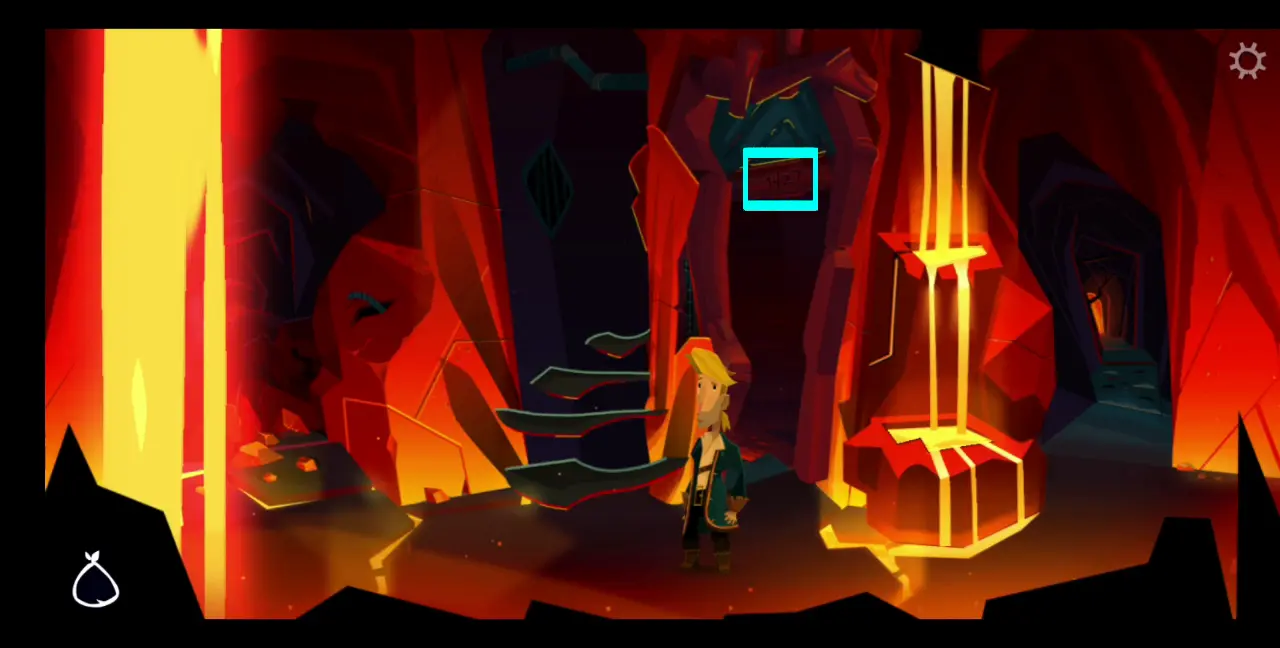
- This is where you will find the first monkey statue with a parrot. Place a cracker on the monkey’s hand.
- Keep going left. You’ll find another monkey statue. This time, give it the knife. On the ground to the left is a pebble resembling a coin. Pick it up.
- Take note that the locations of the pebbles may vary. Keep an eye out for them and pick them up whenever they appear in a certain room with the monkey statues.
- In the next room is a statue of a monkey gazing off into what should have been a telescope. Since you don’t have one, use the double monocle instead. In our playthrough, we found a pebble here.
- In the last room is another monkey that looks like it’s celebrating. Place the grog mug from your inventory on its hand, which will complete the puzzle. In this room, we also found a pebble.
- The door that had been previously locked will open up into a stairway. Before descending the stairway, grab all the four items you’ve placed on the monkey statues.
- Take note of the symbol above the door for reference as you’ll need this later. This varies from playthrough to playthrough so you’ll have to consult your own notes.
Solving the Observant Pirate Puzzle
- After entering the door, another door will close no thanks to LeChuck. For this puzzle segment, you’d need to place an appropriate number of coins (or pebbles) in the boxes of the three monkey statues you’ll encounter. However, how many you need to put in depends on their rank:
- Captain: 3 coins
- First Swab: 2 coins
- Cabin Monkey: 1 coin
- Enter the tunnel to the right. Drop two pebbles into the captain’s box and the one last coin from your purse.
- Head right, which will lead you to the first swab’s statue. Here, we picked up a pebble, giving us two remaining pebbles. Place the two pebbles in the box.
- Head right again for the last room. In here is the cabin monkey statue. On the ground, encircled by mushrooms, is a pebble. Place this in the cabin monkey’s box.

- The door that had been closed will open up. Take note of the symbol above it.
Solving the Bloodthirsty Pirate Puzzle
- After going down the stairway, another door will close again because of LeChuck.
- Since you already have the mug and the knife (if you haven’t grabbed them, you need to get them from the first floor), head to the tunnel to the right.
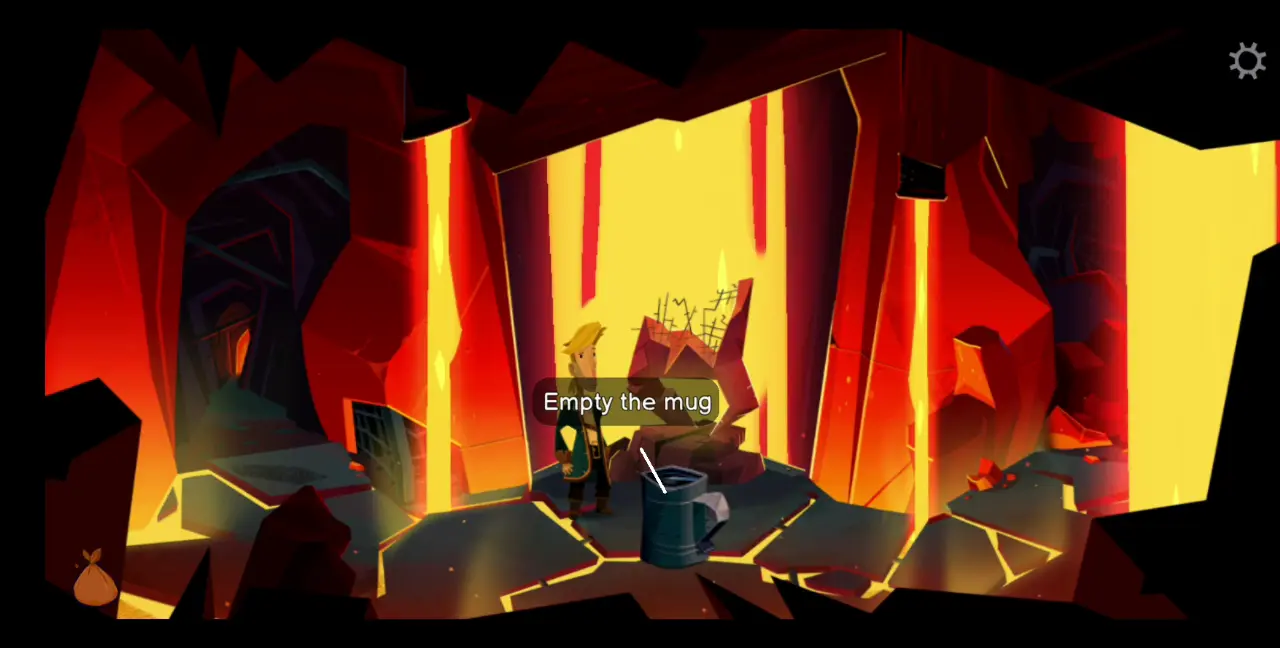
- Stab the first monkey statue in the arm using the knife.
- Use the grog mug to collect the black ooze seeping out of the gash.
- In the next room to the right, stab the monkey statue in the leg.
- Go to the next room to the right again. Here, you’ll see that whatever statue was supposed to be here had been destroyed. That being the case, empty the mug into the grate fronting the original location of the statue.
- Above the door to the exit is a four-digit number. Like the previous symbols, take note of this as well.
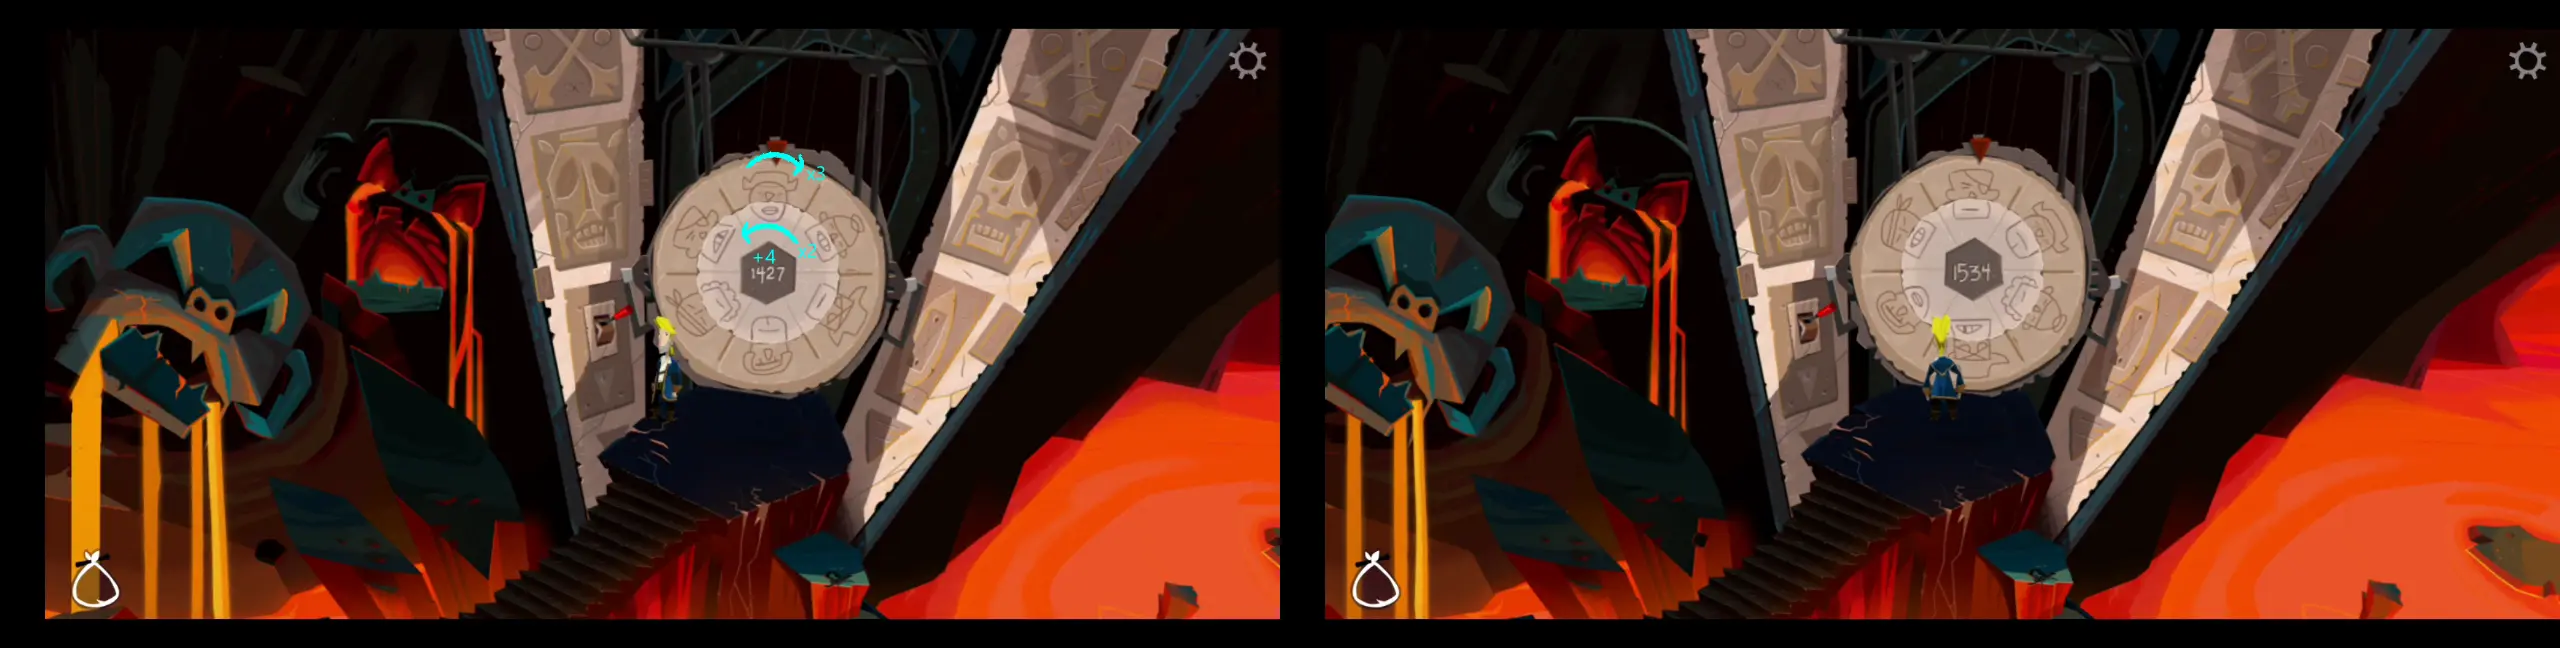
Solving the Stone Wheel Puzzle
- After a brief cutscene involving LeChuck, the stone wheel puzzle (which he’d been working on for quite some time now) will be reset.
- Before changing anything on the giant stone wheel, first check the stone slab sticking out of the lava at the bottom right-hand corner of the screen. On it is an inscription that reads:
- “After 4 extra years out at sea, their peglegs grew weak in the knees, 3 steps right but 2 left, till they fell off the deck and they met Davy Jones for some tea.”
- This inscription is the clue to changing the number and symbols on the stone wheel. The stone wheel has three parts: the outer wheel, the inner wheel, and the date. You need to first reset the three parts by changing the date into the four-digit number you saw on the previous door, and the two other wheels into the symbols you’ve found on the other two doors.
- Once you’ve done this, refer to the inscription for the clues. basically, what this means is that:
- Add 4 years to the date on the date wheel.
- Move the outer wheel 3 times.
- Move the inner wheel 2 times.
- Below is how we solved the stone wheel puzzle in our playthrough:
- Once done, the giant stone wheel will ascend and reveal a door behind it. Enter the door.
Finding the Secret of Monkey Island
- The door, apparently, leads to an amusement park version of Mêlée Island where the key characters of the series are depicted as animatronics. You realize that you’re in the back alley of Mêlée Island’s High Street.
- Grab the popcorn on the ground. This is the perfect time to make a manual save if you want to try experiencing the game’s multiple endings.
- For this ending, leave the alley and Stan will give you a set of keys, reminding you to lock up the park.
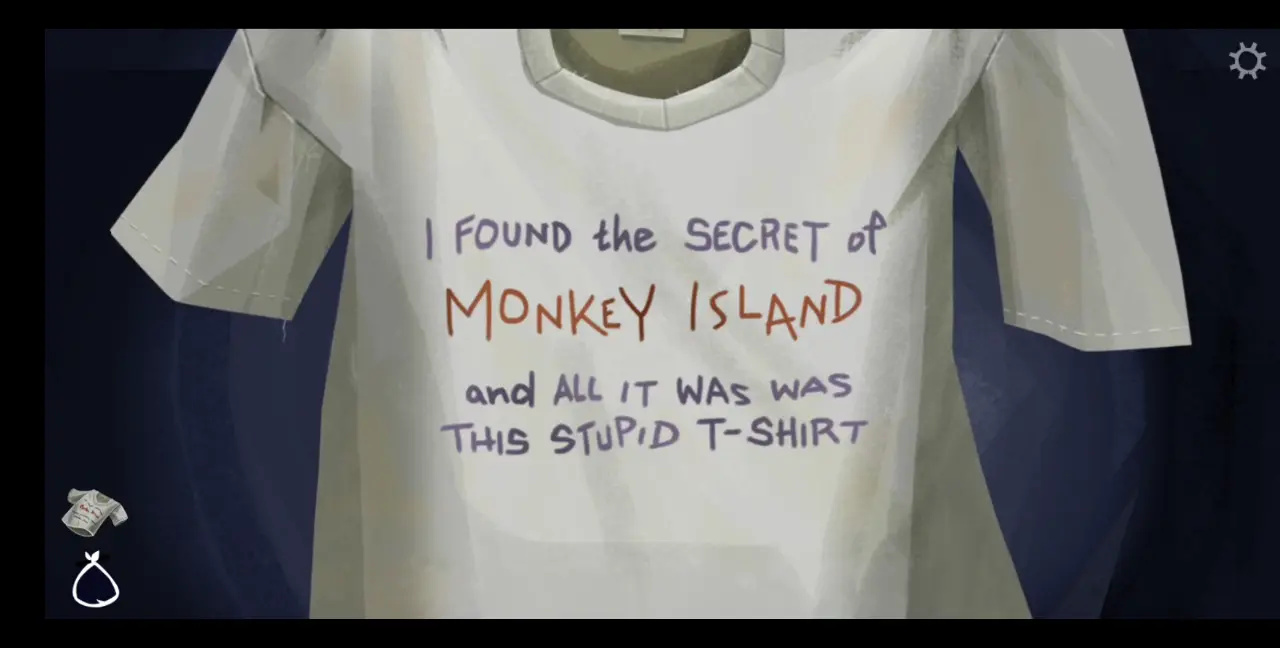
- Once Stan leaves, head to the left and take the key from the animatronic locksmith’s hand. Open the gaudy chest nearby, which contains the secret—a t-shirt.
- Use Stan’s keys to unlock the switches to turn off all the shops’ lights. There are multiple switches around the park so shut them all off until the park is dark. Talk to Elaine when you’re ready to leave.
- You cut to a scene talking to Boybrush in the present. You have multiple dialogue options that will elicit multiple endings. After which the credits start rolling, signaling the end of the game.
Return to Monkey Island Multiple Endings
As mentioned, there are multiple endings to Monkey Island and you can unlock them depending on whether or not you’ve decided to take the key and open the chest to the secret. There’s also the darkest ending, which you can unlock as early as Part Three if you meet the conditions. Below, we list down the conditions to unlock the multiple endings. Take note that you can see these as post-credit cutscenes. You can’t fast-forward the credits and will have to wait until the end to see the various post-credit scenes. We kept this part without screenshots so you can see the post-credit scenes for yourself!
Secret Endings
If you want to experience the multiple endings with the secret discovered, you may go back to your last save file at the alley of the final chapter. From here, you can select the alternative dialogue options when talking to Boybrush at the end, each of which will show different post-credit ending scenes.
- The chest was filled with gems, rubies and gold! Boybrush will be shown playing on a pile of gold and gems.
- The secret was really the friends we made along the way. Guybrush and other characters from the game will be shown in a small boat.
- Your mom was right, it’s better not to know. The chest with the secret will be shown being buried on the ground.
- I wasn’t making anything up, that was what really happened. A hand will give Guybrush, Elaine, and Boybrush three tickets to the amusement park.
- There isn’t any one answer to what the Secret is. You’ll be shown a banana balancing on a rock, referencing the dialogue Guybrush told Boybrush on the bench.
No-Secret Ending
To unlock this ending, grab the key from the animatronic locksmith but don’t open the chest. Leave with Elaine. The post-credit scene will show Guybrush tossing the key into a pool of lava.
No Key Ending
For this ending, don’t get the key from the animatronic locksmith and don’t open the gaudy chest. In the post-credit scene, you’ll see Chuckie chasing Dee around the park. She happens to be holding the key to the secret.
Never-Ending Ending
This ending has different versions depending on whether or not you took the key or opened the chest. What is constant is that instead of leaving with Elaine, you can use Stan’s keys to open the door in the alley, thus allowing you to backtrack through the cave from which you came. This will earn you the Returned to the World You Know achievement.
Here are the conditions for getting the different post-credit scenes of this ending:
- Go to the backdoor of the alley without getting the key to the chest: Guybrush and Elaine will be shown sailing on a large ship around the Caribbean.
- Take the key but don’t unlock the chest, and head to the alley’s backdoor: LeChuck and Lila end up fighting over the locked chest.
- Take the key, unlock the chest, and go through the alley’s backdoor: After returning from a long lunch, the voodoo lady will return to her shop to find it destroyed.
Darkest Ending
If you want to get the worst or darkest ending, the best way to do this is to let Guybrush drown upon reaching Chapter 3, while he’s underwater and searching for Monkey Island. Avoid going right to find the shore of the Monkey Island beach—instead, go right, then left, then right again, until such time he runs out of air as moving left and right will deduct 2 minutes from your time limit underwater. Though Guybrush will die and you’ll unlock the darkest ending, you’ll also earn the Died for Real achievement.
And with that, we conclude our walkthrough for Return to Monkey Island! Do you have a favorite ending? What about a favorite character? Which puzzle did you find most difficult to solve? Share your thoughts in our comment section below!