An 18th birthday is supposed to be a happy occasion…except for you, a nameless orphan at the Blooming Hearts orphanage. With a heavy heart, you back your bags and get ready to set out into the world on your own…
But wait! What’s this? Your Uncle Mort sends someone over to the Blooming Hearts orphanage, asking you to assist him in his investigations?
Sure, why not? What’s the worst that could happen?
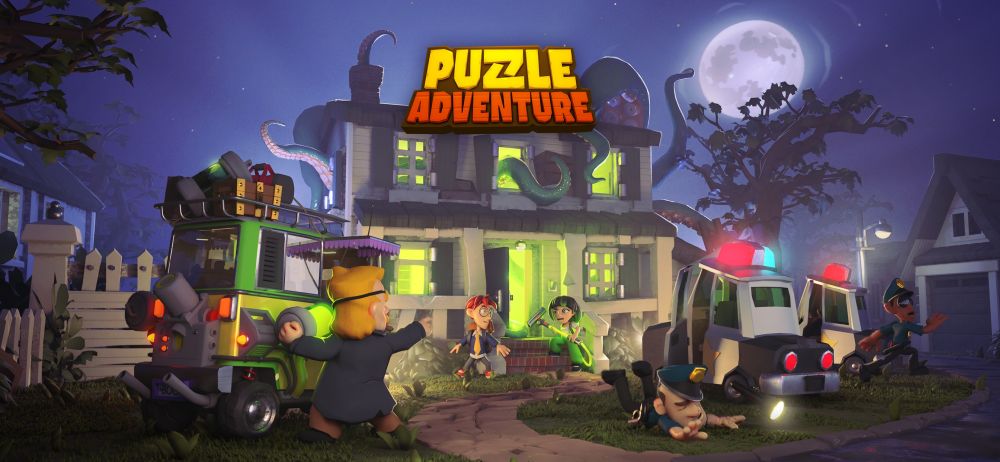
Pixel Federation Games’ new mobile title Puzzle Adventure combines the classic point-and-click gameplay of mystery games with devious puzzles and intuitive exploration gameplay. As the nameless sidekick of your new Uncle Mort, you’ll solve supernatural crimes and dig up mystical treasures while building up a name for yourself at the Supernatural Detective Agency.
As mentioned earlier, the gameplay is very intuitive, but if you’re feeling stuck, we’ve put together a comprehensive beginner’s guide to help newer players dissect the world of Puzzle Adventure, as well as some tips and tricks if you just can’t seem to find a way to progress.
Investigation Basics
As your Uncle Mort’s new hireling, you’ll join him and his assistant Keisi in solving supernatural mysteries, which mostly involves running from the police and sniffing out the truth, in that order.
Investigations are the meat of the game, and while they’re very intuitive, here’s a rundown on what you should expect from them.
Objectives
The basic objective of each stage is usually given to you via dialogue or exposition. While that’s the only goal you need to accomplish to complete a level, you’ll need to solve many puzzles – some simple, others devious – to get to your goals and acquire treasures.
The bottom of your screen details your objectives for the current stage. Technically speaking, you only need to fulfill the objectives to complete a level, but where’s the fun in that?
If you want a more detailed look into exactly what you need to do to fulfill the objectives, you can tap the icons on the lower screen.
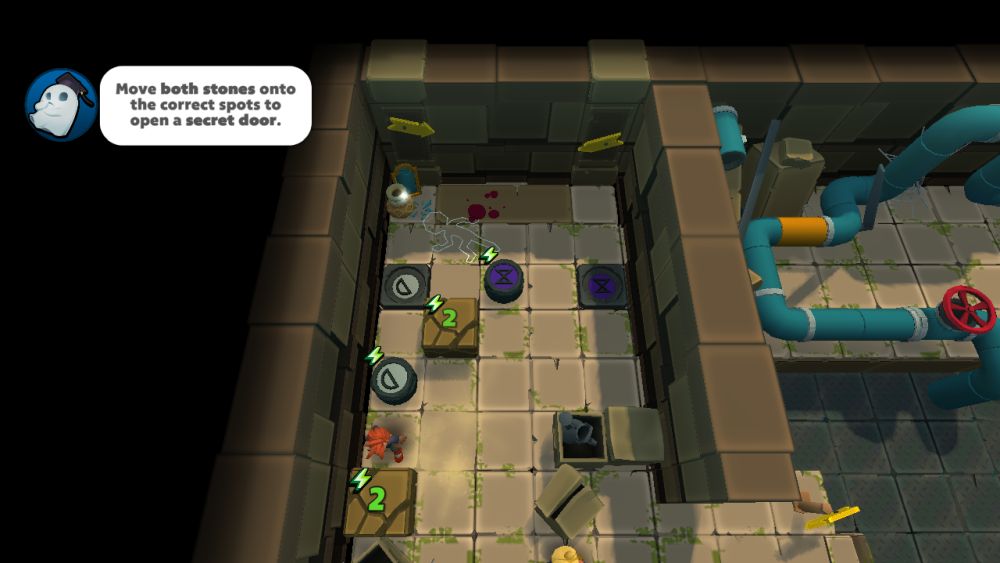
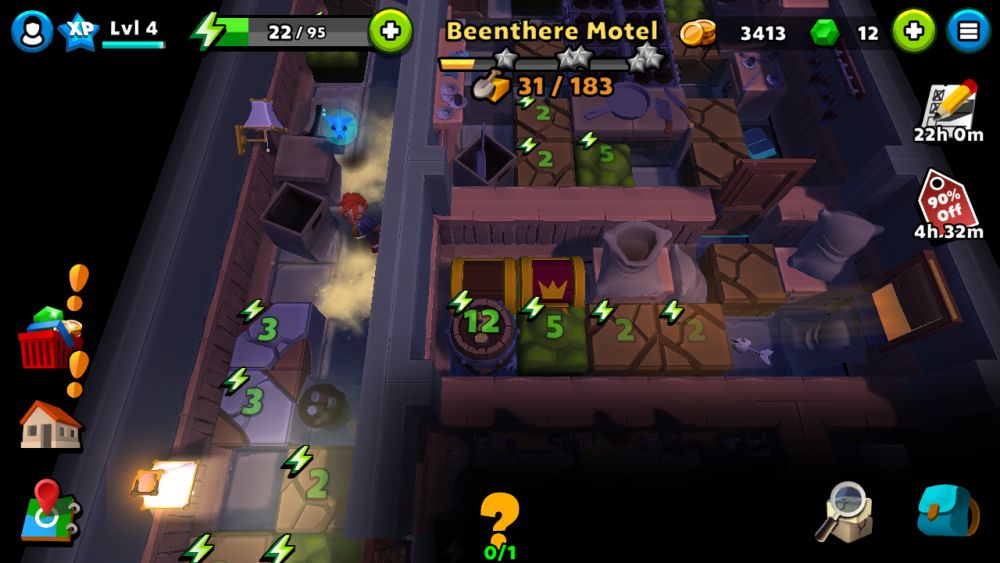
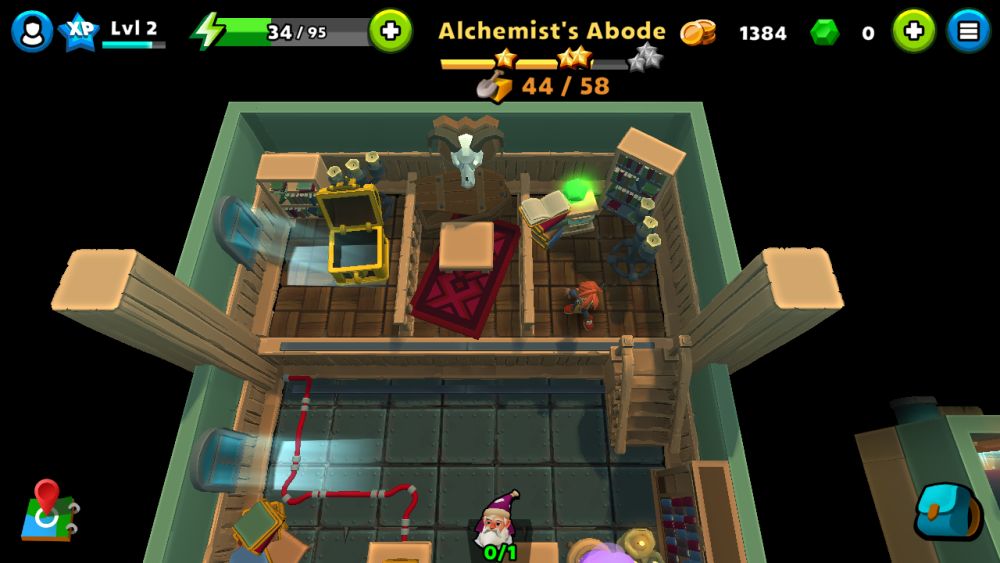
Blocks
Blocks are the most common obstacles you’ll find during your paranormal investigations. Simply tap on a block to destroy it. Blocks cost energy to destroy. In general, the more solid the block (stone vs. grass, for example), the more energy it takes to break.
Buttons
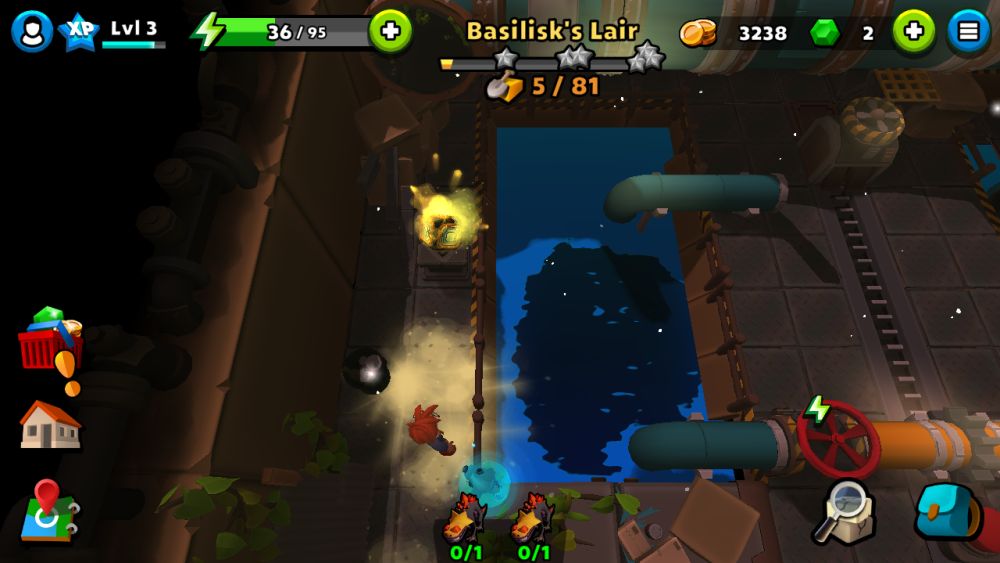
Buttons are one of the primary mechanics in stages. Buttons are always linked to another piece – whether that’s a rotating pipe, a platform, or another kind of switch. While pressing a button does cost stamina, you should definitely press a button multiple times just to see what exactly it affects; you may discover that it can move a platform in an unexpected direction, for example.
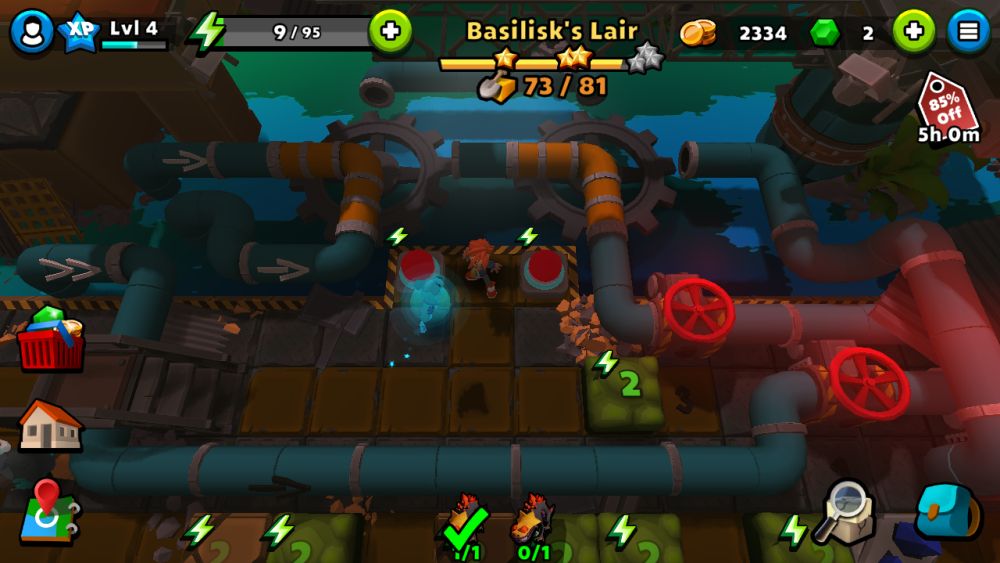
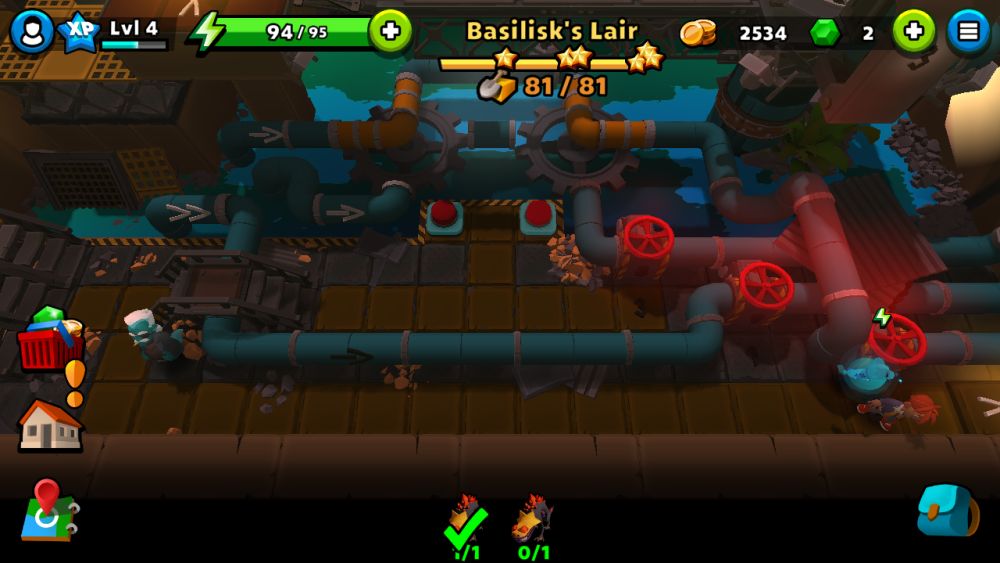
For example, in the last room of the Basilisk’s Lair, a button triggers the movement of the water intake pipe into either pipe network 1, 2, or 3. Tapping the button moves the pipe in the order of 1-2-3-2-1, and so on. Experimentation is key, especially if an object that a button moves has several possible directions.
Levers
Levers are switches that toggle an on/off trigger in whatever they’re connected to. Most, if not all levers have a wire running through them and into whatever it is that they trigger – this usually serves as enough of a clue to figure out exactly what pulling the lever will do.
Pushing and Pulling Objects
Movable objects are one of the obstacles you’ll face in your investigations.
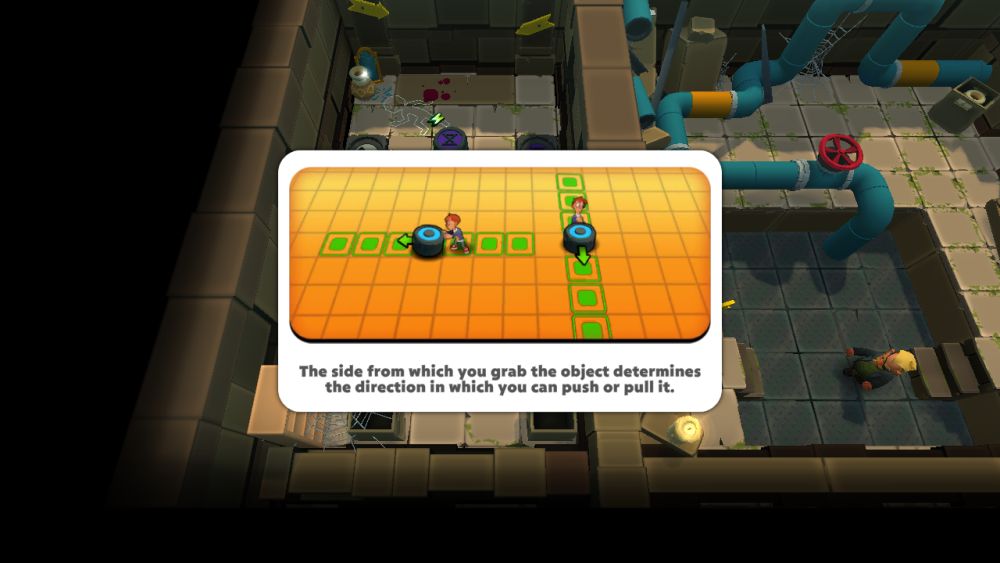
These objects can either be pushed forwards or pulled backwards. Where a block can be pushed or pulled depends on where you place yourself. When grabbing a block, you can either push it in the direction you’re facing, or pull it back. More often than not, you’ll need to realign yourself several times to solve puzzles. Explore and get creative!
Economy of Movement
Every action consumes energy in Puzzle Adventure, so it’s in your best interest to minimize the amount of movement you actually do.
It’s not just smashing blocks and cutting grass that costs stamina. Even flicking valves, pressing buttons, and flicking switches takes a toll on your energy, so careful analysis of a room’s puzzles before committing energy to it is a good approach. This also serves as a visual clue of what to do next; for example, water valves that have water running through them will have an energy icon above them to indicate energy consumption – which means something has changed.
Pathing

If you’re not sure if you can path to a particular tile, you can try tapping on it anyway – if there’s a route, the game will allow you to move there anyway. This is great for puzzles that have multiple vertical levels where it’s easy to lose track of ladders and stairs. However, if the tile flashes red, there’s no possible path to it. Try exploring and experimenting in the room some more.
Room Layout
And while we’re at it, pay careful attention to the room’s layout, particularly the height of objects as they can obscure elements that are needed to solve puzzles. Some areas can be difficult to analyze due to the amount of stuff on the screen. The very large UI on top of the screen doesn’t help, either, and neither can you rotate the camera to get a better view of your surroundings.
With all that in mind, the best way to get a feel for each room is to move the camera around and study the room from different areas.
Pets
If you’re really stuck, you’ll be able to summon a friendly, otherworldly companion (not you, Uncle Mort) to guide you towards suspicious objects.

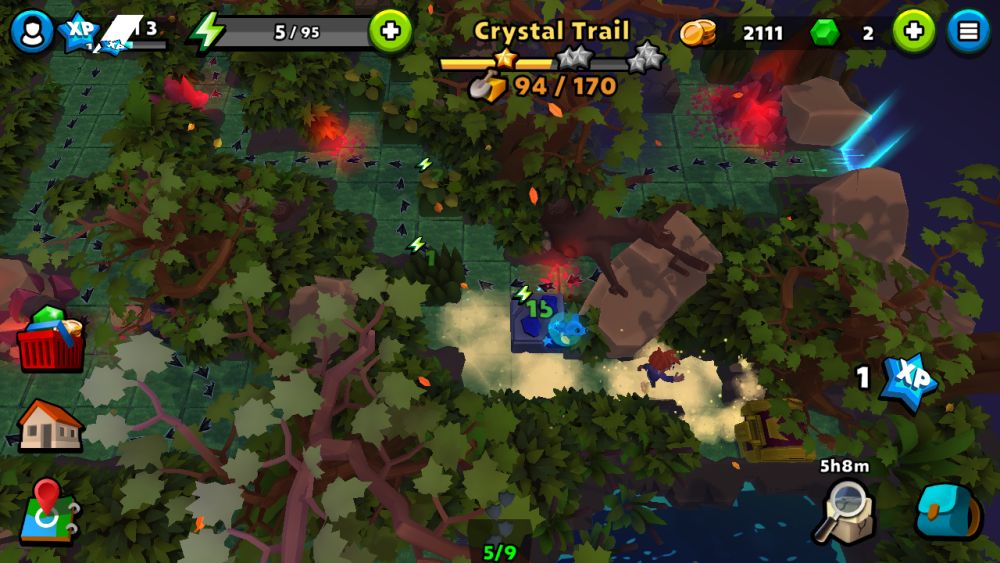
You’ll gain access to the ghost dog in the third level, the Crystal Trail. This helpful spirit lets you suss out suspicious spots by flying to the location of hidden blocks and items that you might have missed. This doesn’t come cheap though; you can only send your ghostly familiar out once every 6 hours unless you skirt the cooldown by paying Gems.
Cat people (like me) might want to change their pet skin. You can do this by tapping the upper right button beside your experience bar. In this menu, you’ll be able to change the skin of your pet for a rather hefty sum of either coins or Gems. This is purely aesthetic, and won’t impact how your spectral friend behaves.
Stages and Stars
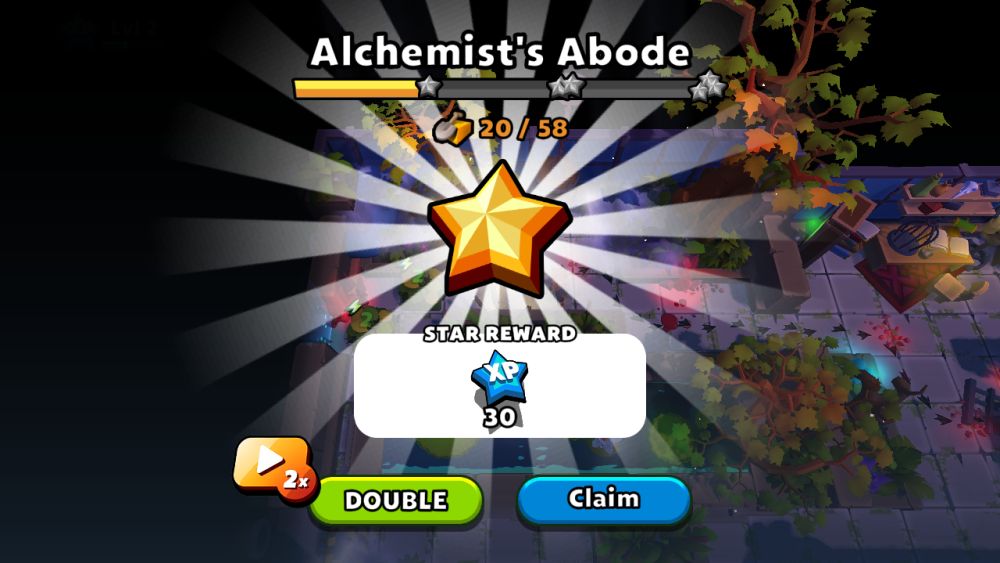
While I advise against needlessly spending energy, doing this does net you with stars. These stars are a rough representation of the progress you’ve achieved in each level.
Each stage has a maximum amount of stars (represented as a fraction). However, you still receive rewards just for filling the bar up.
If you have nothing better to do with your energy, it’s well worth going back to stages you’ve already completed and go for the maximum star rating as this nets you invaluable blue shards. Your progress is retained when you return to a previously-completed stage, so you don’t have to do it all from the beginning. And since these prizes are a one-time thing, I strongly urge doubling your prizes by watching the ads.
Note that you can switch stages at any time – your progress is tracked separately per stage. Just tap on the map icon in the lower left if you’d rather tackle a different investigation than the one you’re currently in.
Fame
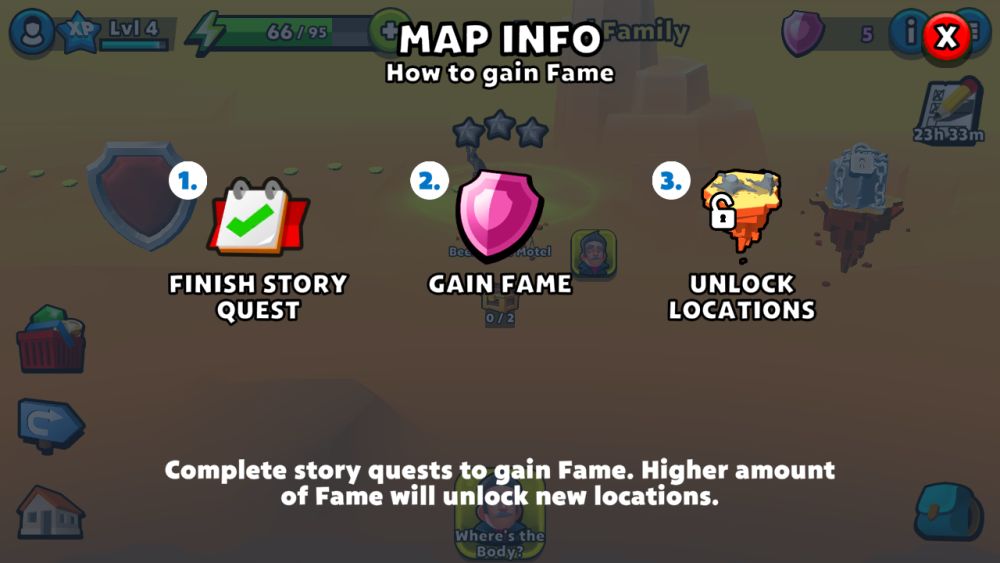
Fame is indicated as a pink shield icon, and serves as a representation of your investigative prowess to the Supernatural Detective Agency. By amassing fame, you’ll unlock new stages and be able to progress further in the story.
You gain fame from completing story quests. While I haven’t encountered any branching paths while playing Puzzle Adventure, keep in mind that you really should push forward with the story at all times.
Energy Sources
If you’ve played the game for a while, you’ll notice how quickly you can burn through your energy bar. As the ghost points out during the tutorial, there’s lots of ways to gain energy so that you can keep playing.
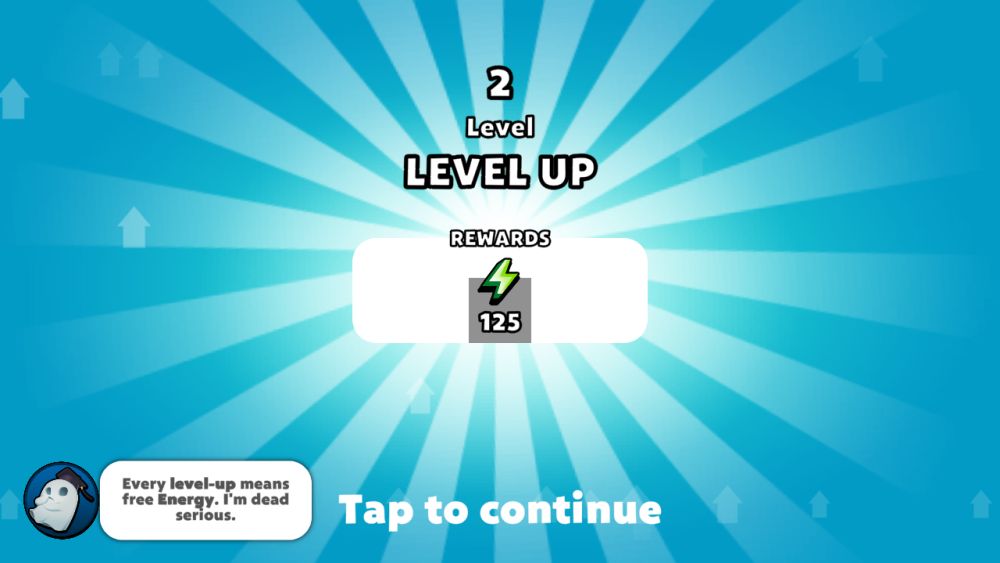
Any time you level up, you get a large lump of sum of energy. Don’t worry about overflow either, as any extra energy gained this way will be added on top of whatever energy you have, surpassing the cap. The downside here is that you’ll no longer be regenerating energy passively, so be sure to drain your energy down to standard levels before closing the game.
Performing actions in a stage gives you experience, whether that’s breaking blocks or pursuing the objective. As a general rule of thumb, breaking blocks nets you an amount of experience equal to the amount of energy an action takes.
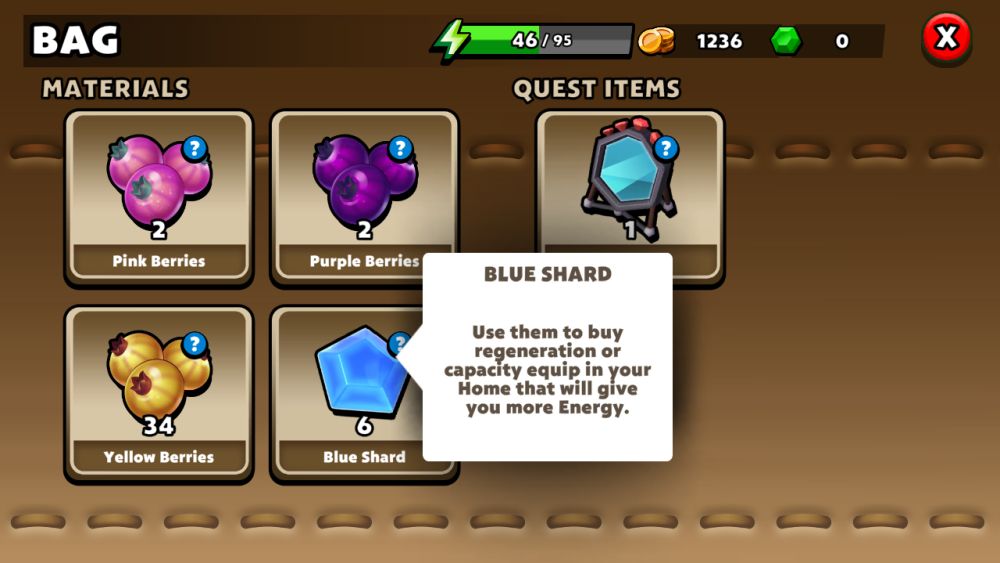
Be on the lookout for blue shard blocks – while they may not look like a good investment at a whopping 10 energy to break, they always drop blue shards. Blue shards are very valuable items that allow you to purchase and upgrade items that either increase your maximum energy capacity or its regeneration rate!
The materials you gather from breaking blocks and opening chests can be experimented with in the laboratory in your home menu – more on that later. You can also choose to watch an ad for quick burst of 50 energy. You can only do this once every 8 hours, and only when you don’t have energy to perform an action.
Finally – though I don’t recommend it – you can just buy energy with Gems.
Familiarize Yourself With Your Home
The home menu becomes available after completing the second level. As you might have guessed, the home serves as your base of operations and contains multiple facilities that you can visit even in the middle of an investigation to help you get a leg up on your detective work!
The Laboratory
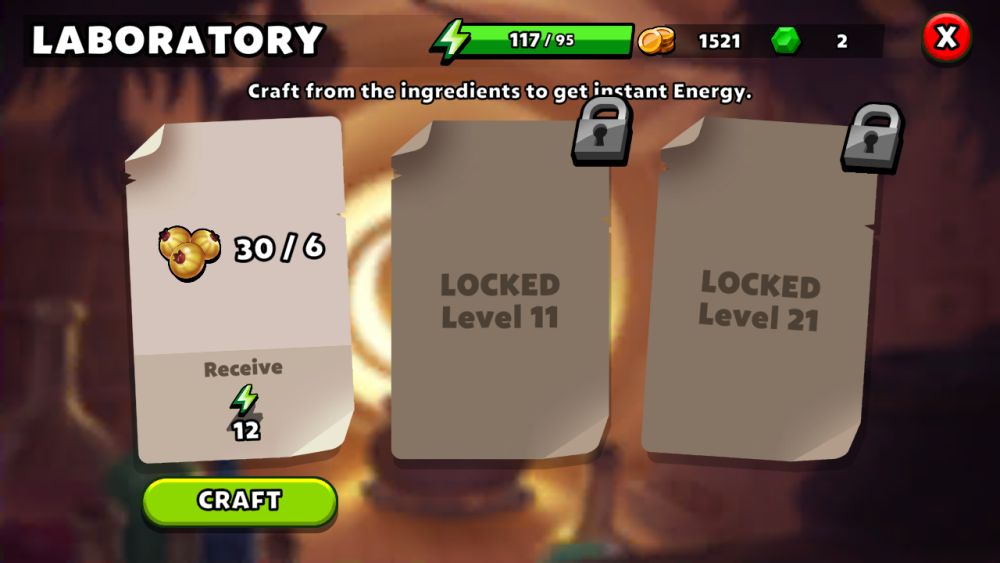
The laboratory is where you can synthesize those random items you find while snooping around other people’s houses. Upon entering the laboratory, you’ll be presented with up to 3 recipes that you can mix from whatever you have at hand, with each recipe providing a different amount of energy. If you don’t have enough ingredients, you can also choose to buy what you’re missing with gems, though I don’t recommend doing that.
Although there’s no limit to the number of recipes you can make per day (barring the amount of ingredients you have), each time you complete a recipe, that recipe slot goes into cooldown for a little while.
Do note that you’ll need to reach certain levels to unlock new recipe slots. The second slot becomes available at level 11, while the third and final slot requires you to hit level 21.
Your Ghostly Greenhouse
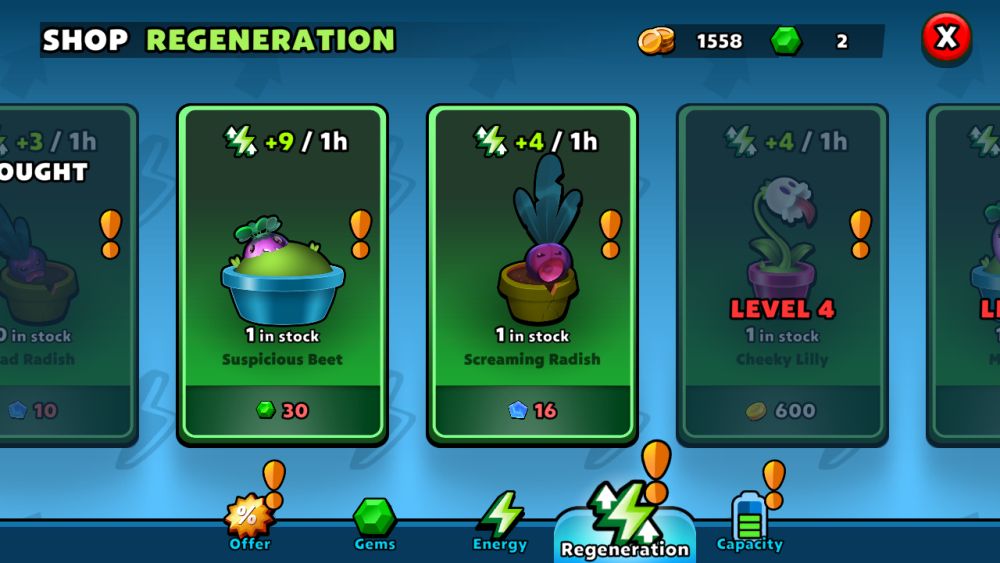
The greenhouse is a very important building as itserves as your energy regeneration hub.
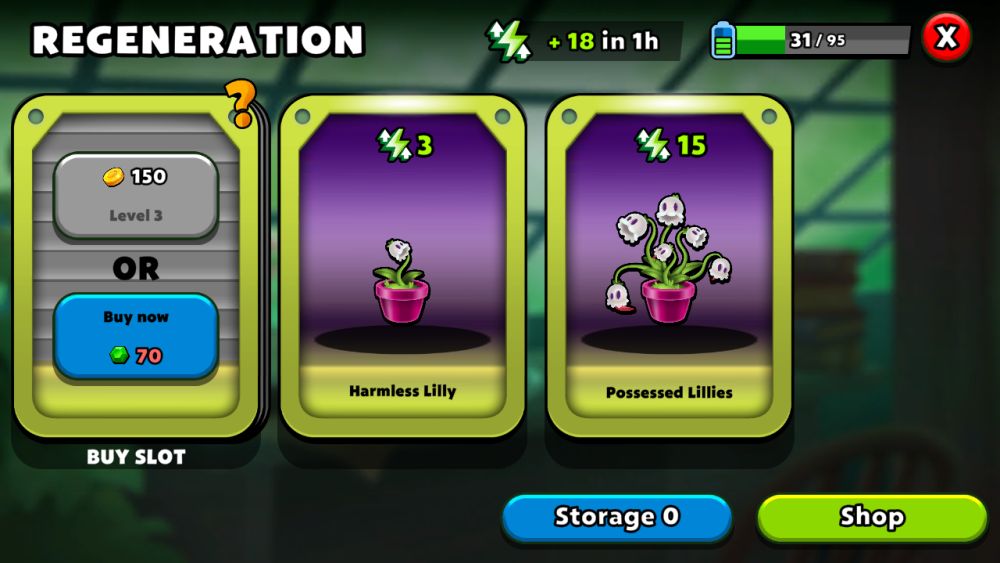
It’s here that you can spend your hard-earned coins and blue shards to purchase new plants that will boost your passive enery regeneration rate. However, before you tap those buttons like mad, there’s some things you should be aware of.
All players start with the Possessed Lillies, which gives a generous 15 energy per hour. But upon your first visit to the greenhouse, you’ll find that your other options in the plant shop aren’t quite as good. On top of that, you only have one extra slot for another plant.
Both the selection for your ghastly garden, as well as the number of slots, improves as you play the game and gain levels. Whenever you gain a new level, visit the greenhouse to see if you’ve unlocked a new purchaseable slot. If there is, you can shell out some coins to permanently unlock that slot for another plant. If you’re feeling rich, you can also spend Gems to skirt the level requirement for a new slot.
You can’t spam the same plant over and over, either. There’s a limited stock of each plant, so diversity is key. By buying plants that cost different resources (gold, blue shards, and Gems), you can massively increase your passive energy output.
The Garage
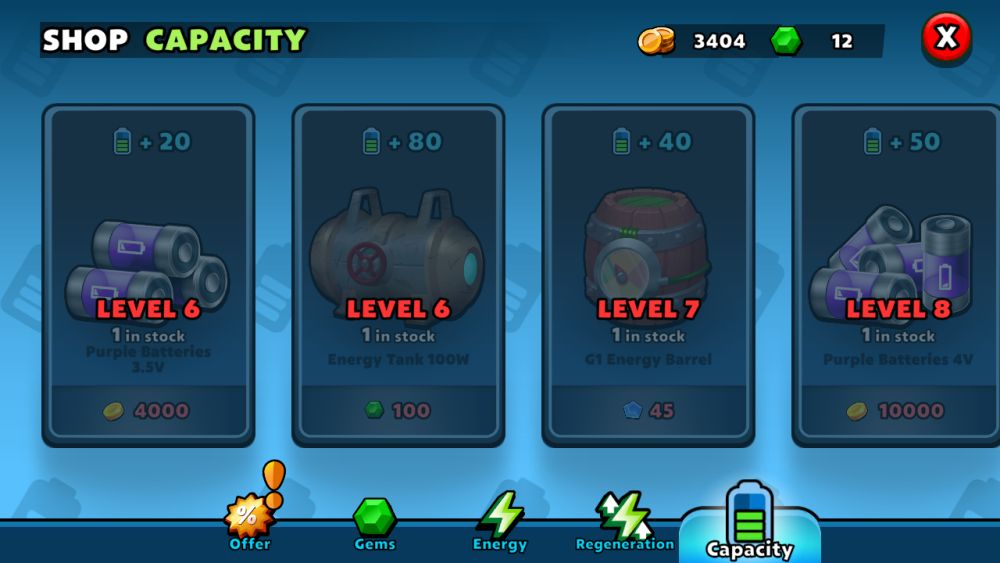
The garage is the rightmost building in the home screen, and serves as a counterpart to the greenhouse. Where the greenhouse increases your passive energy regeneration rate, the garage provides boosts to your maximum energy capacity. Just like greenhouse plants, diversity is key – so be sure to buy anything and everything that’s available to increase your energy cap.
Free Blue Shards
While we’re on the topic of blue shards and boosting your energy, there’s a quick and easy way to net some extra blue shards, and if you’re thinking “it’s going to be ads”, then you’re right on the money.
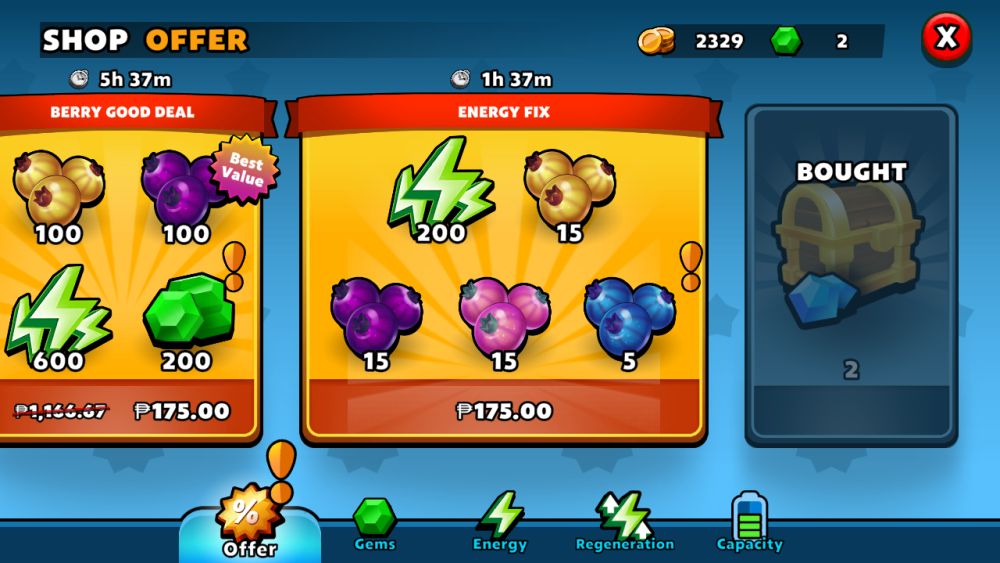
Go to the shop and tap the Offer button. This will guide you to a menu where you can opt to watch a 30 second ad for some blue shards. This is only available once a day, so be sure to do this whenever you log in.
The Museum
The museum is where you can view your artefacts – completed or not. Coincidentally, it’s also where you can redeem rewards for completing artefacts.
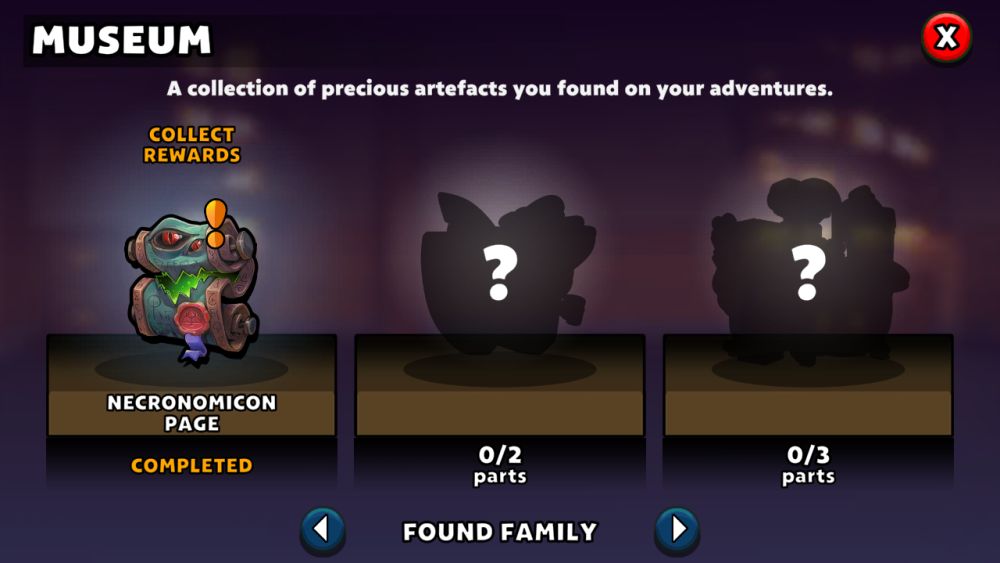
The museum also offers off-hand hints as to where you can find artefacts. In the image above, you’ll notice the text “Found Family” at the bottom – meaning that these artefacts can be found in stages that belong to the Found Family chapter. If you’d prefer more direct clues, you can tap on the silhouettes of artefacts you haven’t completed and the game will helpfully point you towards what stages those pieces are located in.
The Rewards Board
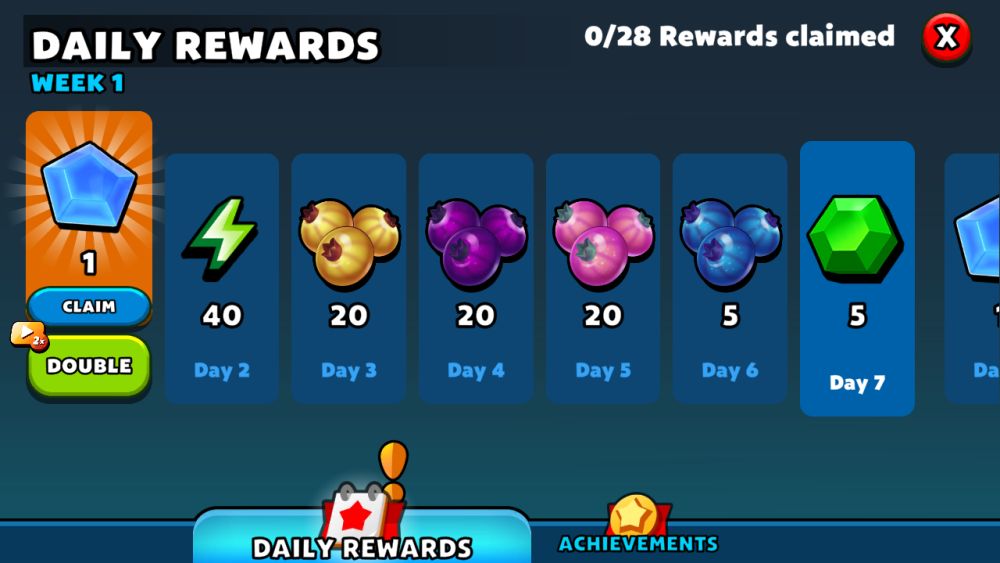
The rewards board is at the leftmost of your home menu, near the police car.
This board is where you claim your daily login reward, which I highly suggest you pay close attention to as the rewards get better with each login, culminating in 10 Gems at 28 days.
The rewards board also details achievements that you can complete for a burst of resources, ranging from coins to Gems. Each achievement has multiple levels denoted by the stars on top of each progress bar, and the rewards (and requirements) increase each time you complete the achievement.
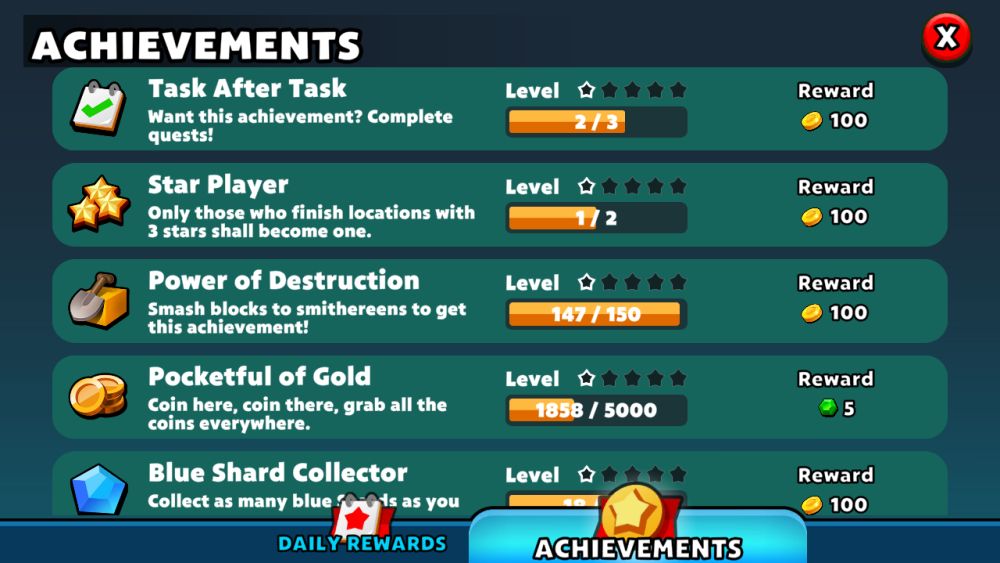
Once an achievement has been completed, you have to return to the rewards board to claim it…or, if you’re so inclined, you can watch an ad to double your gains.
Search For Hidden Treasure
What kind of puzzle and exploration game would be bereft of treasure? Puzzle Adventure has a lot of hidden goodies stashed away in each level, and it takes a curious mind and a persistent attitude to sniff them out.
Chests
Levels in Puzzle Adventure can also contain chests laden with goodies to help you in your investigation. In general, there are two kinds of chests – red ones that give a smaller payout, and blue ones where you can double your gains by watching an ad.
As your playtime is limited by your energy, it’s worthwhile to watch these ads. Not only will you be able to get more coins for your trouble, but you’ll also earn much more blue shards.
Goodies
If you thought that there might be hidden goodies in this game, you’d be right.
While exploring in stages, be on the lookout for things with a blue glow. A scanner-like glow indicates items that can be interacted with – and will also highlight items that can be picked up for bonus resources. All switches and items for quests will be glowing this way, but it’s worth your while to prolong your investigation – particularly in suspicious rooms – as you can find coins, items, chests, and most importantly, Gems lying around.

You can find bonuses even if you’re just pushing the objective. Some puzzle rooms can have alternative solutions which can uncover unexpected treasures. Still other bonuses are hiding in plain sight, and will require attention and an observant eye to unearth. Once you’ve found your goodies, I’d highly suggest watching the ads, especially when opening blue chests – those are one-time things, after all.
Artefacts
Artefact pieces can be found in stages – some are hidden in plain sight, others require a dedicated sussing out. As I mentioned in the museum section, you can get a clue in which chapters the artefact pieces are located. These mystical treasures are very much worth seeking out as they give a very hefty payout of resources, but only when completed.
To help you assemble get started with assembling your first artefact, the Necronomicon Page, I’ll list the locations of the 2 pieces.
The first piece of the Necronomicon Page is found in the Crystal Trail. You’ll need to cut grass and blocks to find a side path, where the artefact piece will be resting on a pedestal.
The second half is found in the Basilisk’s Lair, hidden in plain sight on the left part of the first room.
Ads and Doubling
At the risk of sounding like a broken record, I’m going to repeat this line one more time: double your rewards via ads whenever you can. Most of the rewards that you can double are one-time payoffs, so seize the opportunity to double them as you won’t get the chance to do so again.
Enjoy The Journey
In games like Puzzle Adventure, every step of your investigations is a treat, and you need to savor the journey, rather than the destination.
With that, our Puzzle Adventure beginner’s guide comes to an end. We hope you learned something from our guide to help you get past those oh-so-tricky levels. If you have anything you’d like to add, or if we missed something, let us know in the comment area below!
Amy
Thursday 4th of July 2024
What if I’m just stuck? No hints??
Chris
Sunday 18th of February 2024
I’m on level 10 and can’t find the werewolf. Can’t find any helps.
Pat
Sunday 24th of December 2023
my capacity is showing two orange arrows circling. How do I correct that please.
Terri
Monday 27th of November 2023
What’s the best option? Museum or claim? Can’t seem to find any info on it.
Judy
Friday 10th of February 2023
How do you increase your quest points? The game will not let me progress because I am stuck on 65 and the game needs 66. What do I do?