An adventure can start with anyone.
It doesn’t matter how the adventure goes—whether it’s big or small, long or short, dangerous or safe, involving monsters or not, an adventure will always be an adventure and only those experiencing it are beholden to its story. Regardless of who we are, an adventure changes based on the perspective of the narrator.
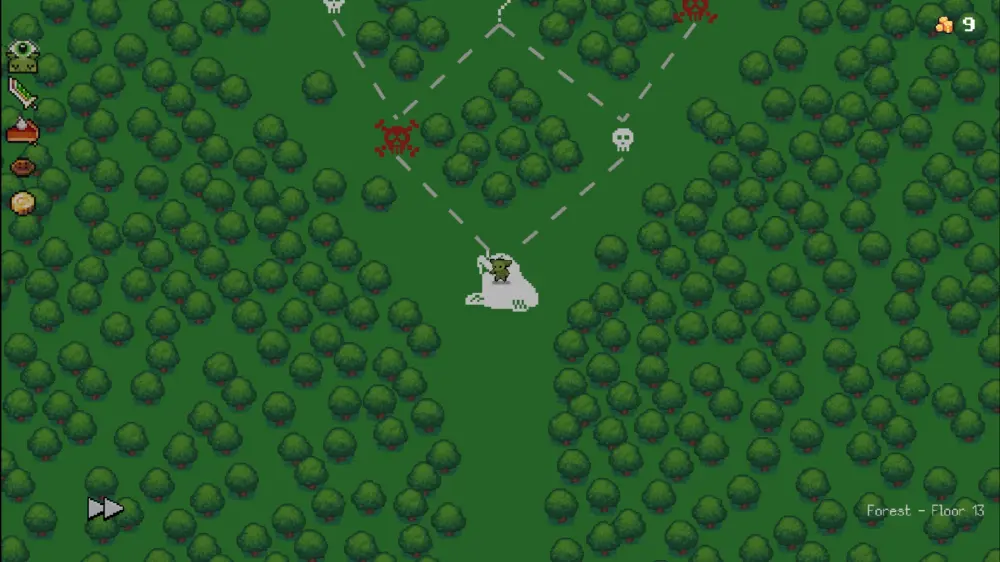
For most adventures set in a fantasy world, it would be of heroes fighting for their cause or stopping a world-ending evil, but what about if the story comes from the smallest of creatures? This is the adventure and the story of a little goblin; a Peglin, if you will.
Red Nexus Games’ entry into the RPG genre, Peglin – A Pachinko Roguelike, is a unique little game. While it has its own share of monsters and bosses to fight, what makes it stand out from most is its combat system.
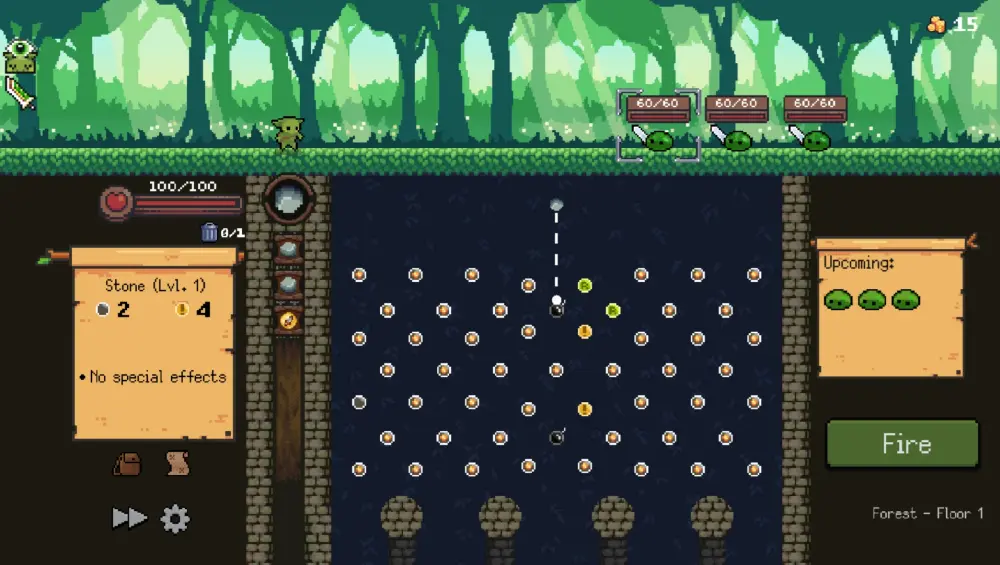
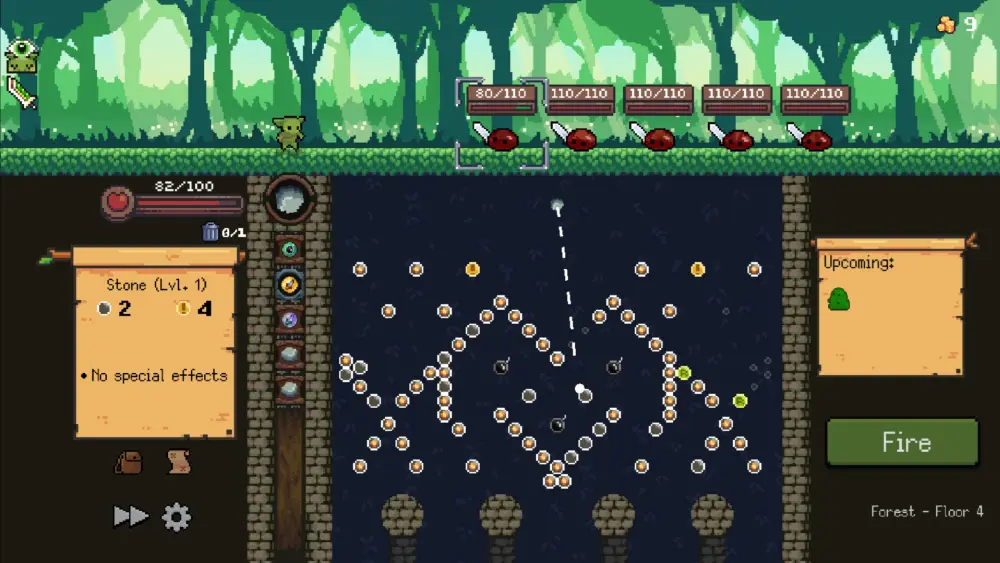
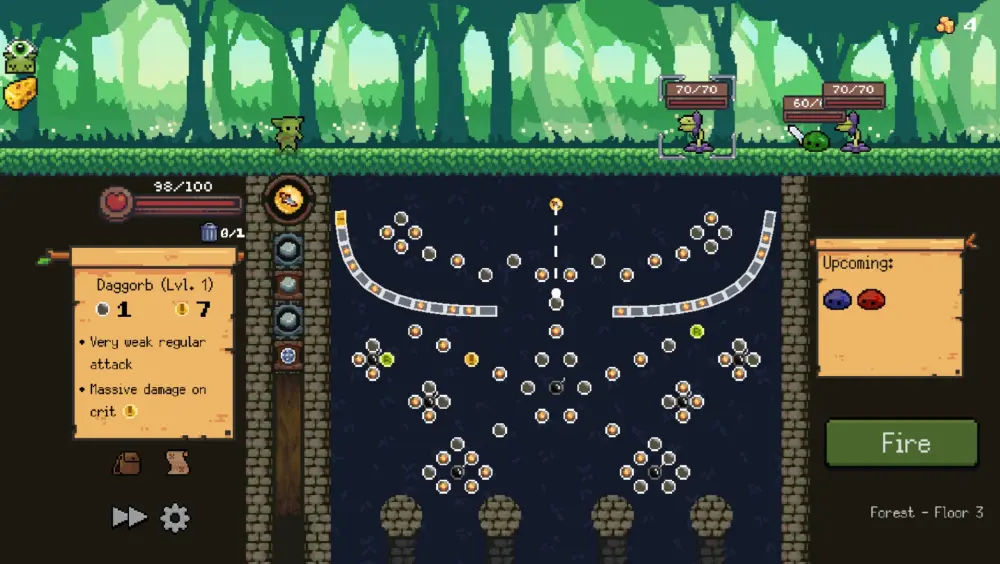
The combat involves a pinball-like mechanic wherein the player drops a ball (or Orb, in game terms) down an alley full of different Pegs that are arranged in various patterns and shapes. The number of Pegs hit along the way builds up the strength of the player character’s attack; the more Pegs hit by the Orb mean higher damage and an enemy dead sooner.
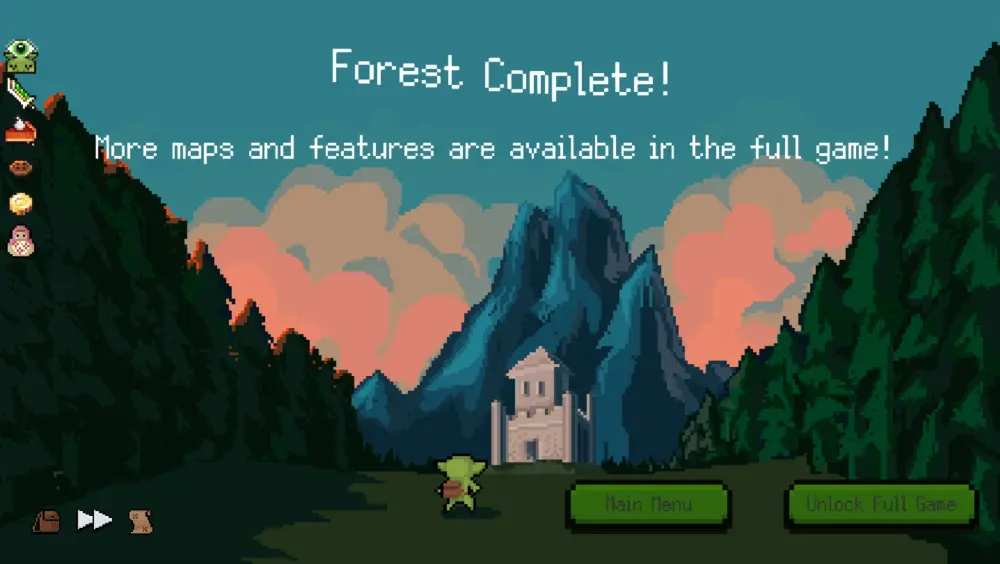
We are aware that this game is not a game that is entirely for free, but if you’ve picked up the free version and are contemplating buying the full game, this guide might give you a head start. Have you just begun your Peglin journey? Are you curious to know how you can overcome the end boss of this free version? Look no further, dear reader, and take a gander at our Peglin beginner’s guide below!
The Way of the Peglin
As simple as it seems, Peglin’s mechanics become even more challenging once the player notices that physics are greatly involved.
The angle at which an Orb is dropped, the behavior of the Orb itself, and the types of the Pegs that the Orb hits all contribute to the end result of the attack’s strength. Occasionally, players might end up with extremely low damage or no damage at all due to a badly-aimed shot down the alley. Orbs will bounce from Peg to Peg and they could make a dive into the pit below prematurely. Most Pegs can be struck twice before vanishing from the board completely, but certain Pegs can bring them back. This can be taken advantage of as we will discuss soon.
The Orbs that the Peglin carries are limited in quantity. Should the Peglin lose all their Orbs, they will reload at the cost of the enemy acting. To further explain this, after each Orb is launched down the alley, the enemy will act, meaning they will come closer to the Peglin or attempt to attack. Therefore, once the Peglin runs out of Orbs and reloads, the enemy will act immediately, making it quite dangerous. Taking your enemies out as quickly as possible is tantamount since the enemies approach the Peglin as they act. The only time the queue of enemies stops is when the board is full.
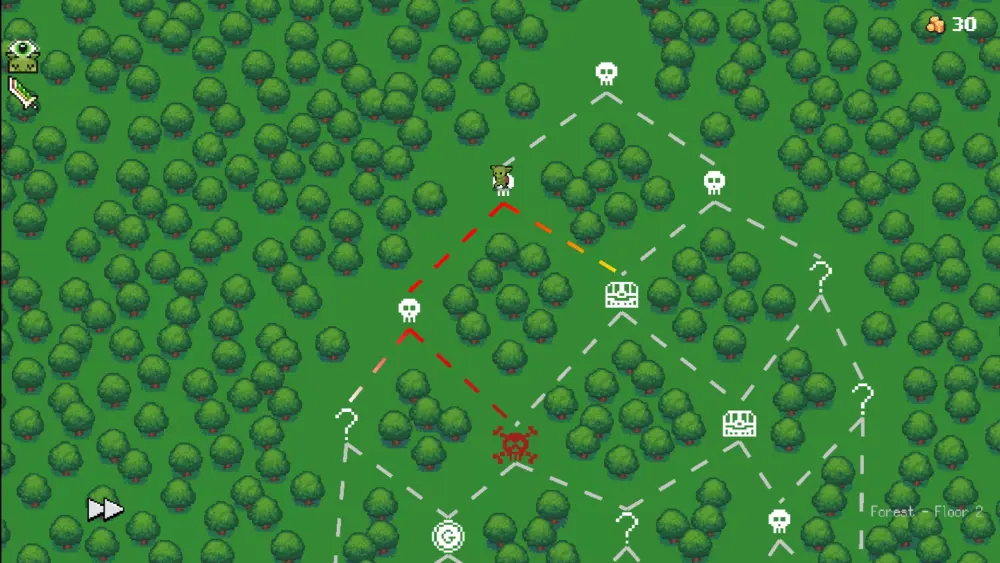
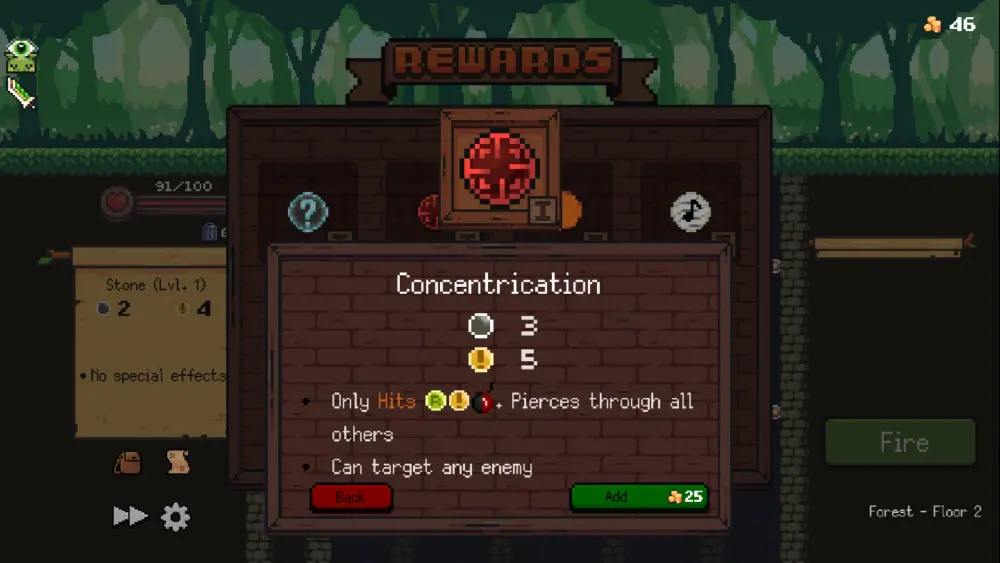
Once all enemies have been defeated, the Peglin will get a choice among a few power-ups and/or healing, each of which at a price. Depending on what you’re gunning for, it won’t hurt to give the Peglin a new Orb or an upgrade to an old one (but we’ll discuss this very soon). After making your choice, the board will slightly change. Some pits would be ablaze while others would have symbols on them. Landing the Orb in a flaming pit will hurt the Peglin, so be careful. As for the symbols, here they are, briefly explained:
- Skull — This is a regular encounter. The Peglin will fight a couple of enemies here.
- Skull and Crossbones — The monsters in this encounter are more difficult. It also gives better rewards.
- Question Mark — This is a random event that could involve trading HP for Relics or Orbs. Occasionally, it could even be a battle with regular or powerful enemies.
- Treasure Chest — Landing here will bring you to an empty clearing in the map with a treasure chest in it.
- Coin — If you happen to take this path, this is a shop. You’ll be able to buy various Relics and Orbs for the gold that you’ve earned throughout your travels.
There is a last symbol and it’s the boss of the level. For the free version of the game, there are only two bosses: Avogadro, the Mole Boss, and the Slime Boss, which is… well, a giant slime that is a boss. Both have particularly different mechanics, but we will discuss that soon.
As it’s hinted in the game’s title, Peglin is inspired by the Japanese pinball game called pachinko. Just like Pachinko, Peglin relies a little bit on luck since your orbs get reshuffled each time the Peglin reloads. You can choose which Orbs to discard, the order of these is always indeterminate. That said, your victories and defeats in Peglin as a whole can result from your luck being good or bad. What can turn this around would be the Orbs that you pick from the end of each encounter as well as the ones that you upgrade.
There are many more ways to win in this seemingly simple game, but as they say, you make your own luck. Are you ready to send the Peglin on an adventure that they surely won’t forget? Read on for a more detailed strategy guide!
1. Understand How Your Orbs Work
Contrary to what you might think at first, each and every Orb behaves differently.
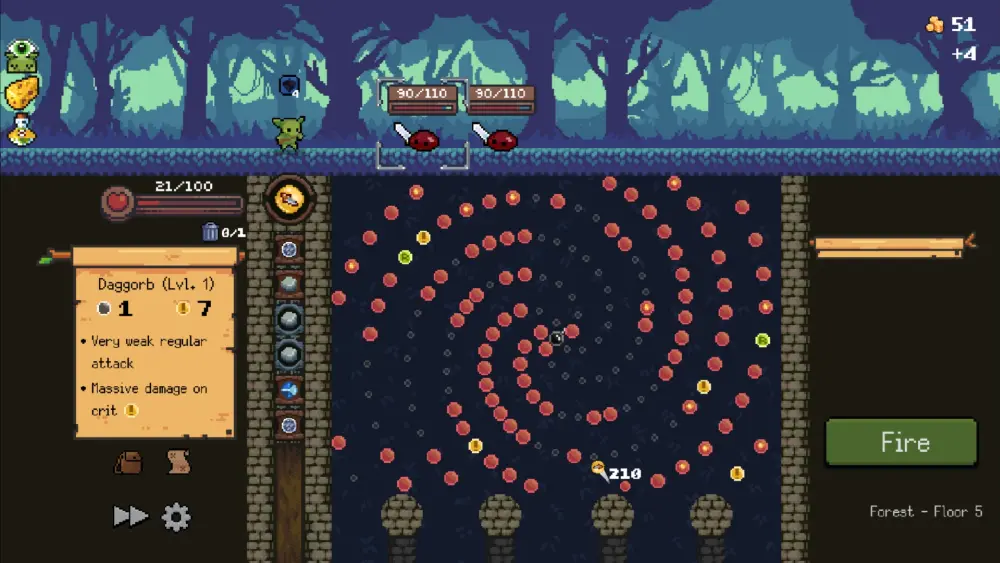
Each Orb has its own strengths and weaknesses. Let’s take a look at the humble Stone, for example. The Stone is the Peglin’s basic Orb. While it might look like it doesn’t do so much, it’s a jack of all trades and it can be used in any situation. In comparison, the Daggorb has an unfortunately low attack of 1, but rises greatly in damage when it hits a Critical Peg.
Some Orbs also have their own weights. The heavier an Orb, the less it will bounce around the Pegs. Lighter Orbs will fly down the alley much faster and are more likely to bounce off of Pegs better. Compare and contrast the Fireball and the Worbhammer. The former is lighter and the latter is heavier. This means that gravity will pull the Worbhammer down the alley sooner than the Fireball, so launching the Worbhammer at Pegs in a vertical pattern could help it score more damage.
There are also even more gimmicky Orbs out there such as the OMGorb or the Orbelisk. The OMGorb can attack all enemies and destroys some Pegs with one hit (it’s already quite strong in attack power) and the Orbelisk works best against enemies aligned in columns since using it calls a massive obelisk from the sky. For example, if the current round has spiders or bats present and the Orbelisk is your Orb at the ready, target the enemy with a spider or bat above it to make the most out of the Orbelisk’s power.
There are also some stats that the Orbs tend to buff once in a while. Each stat stacks, and each stack of that stat is equal to 1 point. Here is a list of what these stats are:
- Ballwark — A protective layer on the Peglin that absorbs damage based on its number. For example, a Ballwark of 5 will absorb 5 damage.
- Blind — This gives the enemy a chance to miss. The number of stacks denotes the percentage of chance that the enemy will miss.
- Bramble — Enemies affected by Bramble will be unable to move from their positions. If an enemy tries to pass through a Brambles enemy, the passing enemy will take damage.
- Durable — This affects Pegs. Durable will increase the amount of times a Peg can be bounced off of.
- Echo — This deals bonus damage based on the amount of damage you dealt previously and the number of Echo stacks. If you dealt 100 damage with your last shot ji and the next Orb with the Echo stat has Echo 50, it will deal 50 damage because Echo 50 means it will deal 50% of the damage dealt previously.
- Morbid — This causes certain Orbs to bounce from deleted Pegs. Morbid Orbs will gain damage from regular Pegs as well.
- Multiball — This will make some Orbs duplicate themselves when fired, when hitting a Peg, or otherwise. The higher the number of Multiball, the more duplicates the Orb will create.
- Muscircle — Muscircle grants stacks of non-critical damage to an Orb. To illustrate, if you have 2 stacks of Muscircle on the Peglin, your Orb’s next attack will deal 2 extra points of damage.
- Spinesse — This works just like Muscircle, but adds to critical damage instead. To clarify this statement, having 2 stacks of Spinesse on your Peglin will allow your Orb to deal 2 extra points of critical damage upon hitting a Critical Peg.
- Spinfection — This is poison. Spinfection decreases the enemy’s HP by 10 with the number of stacks acting as a multiplier. If the Spinfection is at 2, then the enemy will lose 20 HP during its turn (10 × 2). Each turn that passes decreases the Spinfection stack count by 1.
The best way to study your Orbs is by reading the text prompt on the left side before firing them. Some Orbs, if you aren’t prepared, will require a small amount of your Peglin’s HP to be fired. This means the Peglin will get hurt upon the Orb’s launch (e.g. the Fireball does this).
That said, it never hurts to take your time before firing an Orb.
2. Aim Carefully Before Firing
The board’s Pegs can make or break your shot! Where should you aim, exactly?
Should you shoot anywhere with reckless abandon? Is firing down any part of the alley ideal? How about shooting directly at any of the shiny-looking Pegs that may or may not activate certain things on the board? Take aim first and then fire. It really helps in any situation!
The key to scoring good damage is to first understand that most Orbs raise their damage stat upon hitting any Peg on the board. Though, based on what we told you in the first number, this depends from Orb to Orb. There are a couple of ways you can take advantage of this.
The first is understanding the physics behind the game. Think of it this way: if you shoot at the right side of the board, the Orb will travel to the left and vice versa. Since Orbs have the tendency to bounce around when they hit different Pegs, it helps to also imagine the trajectory of the Orb. For instance, if you aim at a certain Peg and try to draw in your head where the Orb should be headed, this could play in your favor. Though, be warned that most ordinary Pegs only get destroyed if an Orb hits them twice.
Another reason why you should aim before firing is because some boards have the tendency to shuffle the position of their Pegs. To elaborate, a Peg you are saving a special Orb for might change its position the time that special Orb comes around. It’s a wasted opportunity and it could make racking up damage even more difficult. You can still make the most out of this by scoring as much damage as you could by taking advantage of the Orb’s physics as we mentioned in the earlier paragraph.
There are but a few Pegs that do stand out, however, and we will discuss them one by one. Get ready to think of more ways to show the enemy who’s boss.
3. Blow Your Enemies Up

Trust us when we say that there’s nothing more satisfying than blowing the enemy up.
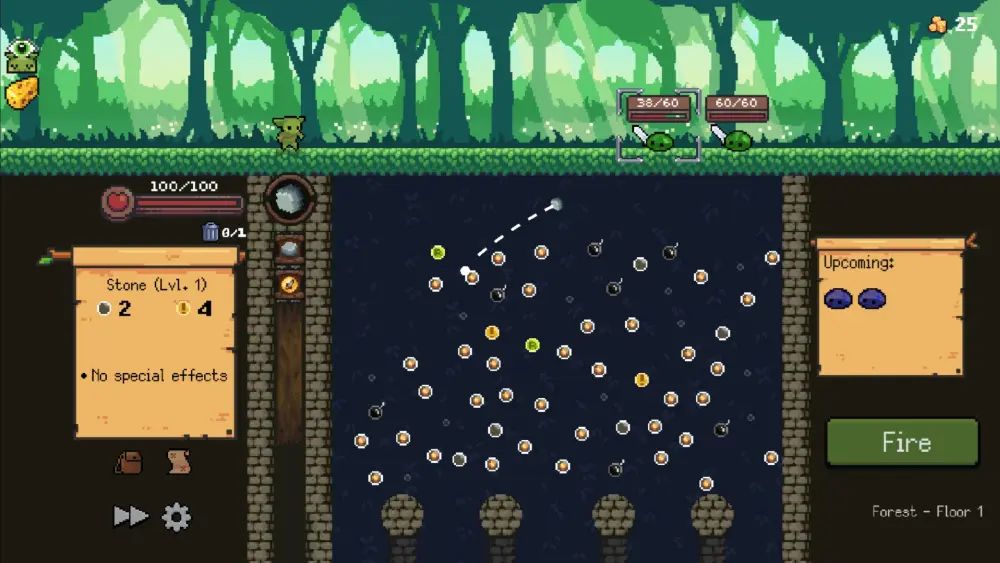
See those bombs on the board? Yes? Good. Now throw your Orb at it. Bomb Pegs require 2 hits to detonate (though some Orbs like the Fireball can detonate it with one hit). When the bombs explode, your Orb will be flung forcibly in the opposite direction. This can chain into hitting a lot of other Pegs or, even better, more bombs.
After the Orb finds its way down the alley, the Peglin will first chuck a bomb at the enemy and damage all enemies present for 50 points before hurling the Orb you fired for the damage the Orb scored. We’re not trying to sell you highly durable sealing tape, but that’s a lotta damage!
The beauty of scoring multiple bomb explosions is that you can clear an entire level with these. If your Orb happens to detonate more than one bomb, the Peglin will throw the amount of bombs you detonated, all of which will deal 50 damage. Imagine detonating 4 bombs in 1 shot and there are no more enemies waiting to appear from the background, that’s a grand total of 200 damage.
Any sucker left standing will be unfortunate enough to feel the wrath of your Peglin as it throws the Orb you fired for, we assume due to all the violent bouncing, a massive amount of damage. This also works for bosses, so get those bombs alight.
You might even be able to ramp up your damage scores by hitting a Critical Peg. It gets better—oh, so much better.
4. Critical Pegs Make All the Difference
You make your shot down the alley and all of a sudden, all the Pegs turn red! What does this mean? Well, you’ve hit a Critical Peg.
The Critical Peg looks like a yellow Peg with an exclamation point in the middle. Once hit, all the Pegs on the board turn red and begin adding the damage of your Orb by its critical stat. As we’ve mentioned earlier, each Orb has its own characteristics and two of its stats are its base attack and its critical damage. Imagine how high your damage will get once you’ve hit a ton of Pegs while the Critical Peg has been made active. The best thing that could happen is that you’ll kill the enemy in front of you with a single shot.
That said, once a Critical Peg is made active, it only stays active for the rest of the shot. This means that once the Orb has made its way down the alley, all the Pegs will no longer glow red. It can get difficult with how this is rather short-lived, but once you’ve figured out how to properly utilize Critical Pegs, you’ll be scoring damage like crazy. Be warned that on some boards, the Critical Pegs will move between shots.
If you think you’d like to rack up even more damage through hitting Critical Pegs, then wait until you plan out your shot to hit Refresh Pegs.
5. Refresh!
While you watch your Orb bounce about, it might occasionally hit a green Peg with an R inside. Suddenly, Pegs that disappeared have come back. What happened?
This is what happens when your Orb hits a Refresh Peg. The Refresh Peg will instantly restore all of the Pegs that you’ve destroyed during the encounter. This can be triggered multiple times since a typical board would have a couple of these present. Though, by having certain Relics, you can increase the number of Refresh Pegs that the board starts with.
Refresh Pegs can be used to bring back regular Pegs that could be advantageous to your next throw. For instance, if you decide to take a shot at a Refresh Peg and you have a Matryorbshka lined up next, you’ll be giving the Matryorbshka a chance to raise its damage because it’s an Orb that has low attack and critical stats.
The Matryorbshka makes up for this by duplicating itself, thanks to its Multiball stat, as it hits its first Peg (it can duplicate more times if you upgrade it). Essentially, you’ll be hitting more Pegs with it—this wouldn’t work if you hadn’t hit a Refresh Peg before launching the Matryorbshka because it won’t have anything to hit at all.
As you can see, Refresh Pegs are quite versatile. They’re great for almost every situation. The only time they aren’t so great is when you choose to hit them when the board still has all its Pegs on. As we’ve stated in item number 2 in this guide: aim first before firing. You wouldn’t want to hit a Refresh Peg early.
Pegs aside, let’s talk a little bit more about Orbs. But this time, instead of focusing on their attributes or their abilities, we will focus on more practical ways to use them.
6. Discard Orbs Don’t Need at the Moment
Remember when we said that the order of the Orbs you have is completely random?
Sure, you’ll start with a couple of Stones and a Daggorb, but when that Daggorb comes up and there are no Critical Pegs nearby (or at all), will you still give it a shot? You shouldn’t. Keep in mind that Daggorbs work best when they hit Critical Pegs. Otherwise, you’d be left to tickle the enemy. This is why you should discard the Orbs you don’t need at the moment.
To do this, you can simply tap the Orb itself on the left of the screen or tap the tiny trash can icon near your Orb lineup which is also located on the left of the screen. Doing this will allow you to skip the Orb in queue. However, you’ll only be able to do this once unless you’re carrying a special Relic with you which may allow you to discard more than 1 Orb at a time.
Do know that this is a double-edged sword. It’s dangerous to reload because the enemy will act twice and so discarding the last Orb isn’t always advisable. There is a Relic that can protect you while reloading, but just like most Relics, this one is hard to find. Depending on what the board currently looks like, always think twice before discarding an Orb. Ultimately, if the Orb currently has no use, then just discard it anyway. The right Orb at the right time can save your hide.
With this in mind, it also pays to upgrade your favorite Orbs.
7. Upgrade Orbs Wisely
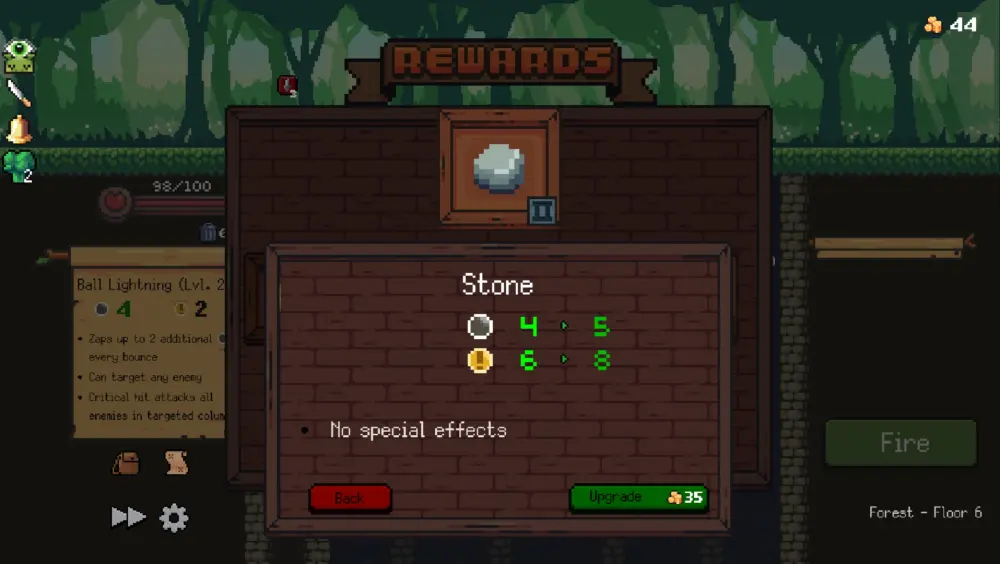
You can carry a lot of Orbs with you, but sometimes, this could be a hindrance.
After each encounter, you are given the choice of buying a new Orb with the gold you gained or upgrading an existing one. A certain martial artist turned movie star once said: “Fear not the man who learned a thousand techniques, but fear the man who practiced a single technique a thousand times.” This saying applies to having fewer but more refined Orbs.
We recommend at least bringing two of your Stones to Lv2 (or one of them to Lv3 and the rest at Lv2) since these are the most common Orbs you’ll have. That way, any time you make your shot, you’ll be guaranteed to deal a good score of damage (of course, this still depends on how many Pegs the Stones hit on the way down).
While having many other Orbs to diversify your attack patterns, nothing beats boring practicality for the most part. The time you should probably get a new Orb is if all of your Stones have hit Lv3. Though, we would recommend taking some Orbs that “can attack any enemy” just in case.
Now that you know what to do with your Orbs, it’s time to give the enemies some hell.
8. Kill the Right Targets First
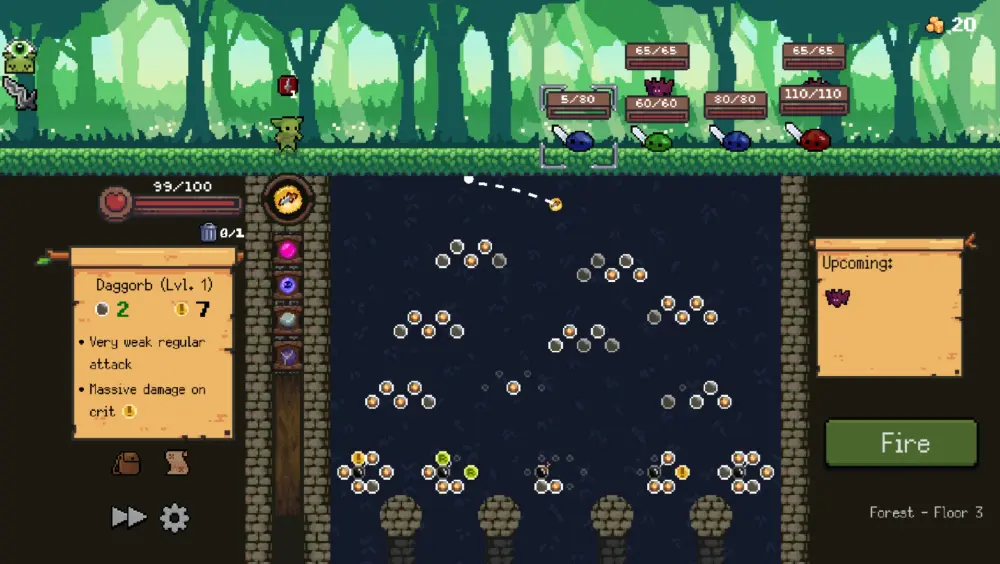
You’ve fired enough shots down the alley and you soon find out that you’ve got slimes and bats in your face! What do you do?
The enemy has two lanes: top and bottom. The bottom lane is reserved for enemies that walk the ground whereas the top lane is for enemies that fly or are suspended like spiders. By default, the Peglin will attack the enemy closest to them. If there are two enemies on both lanes in front of the Peglin, you will have to choose. Though, we do recommend killing the one with less HP between them.
If there are any enemies you should prioritize, these should be the ones that can attack you from afar. We’re talking mostly about plants and spiders. Both types of monsters will spit at you from a distance and can get quite annoying rather quickly. There is a slight caveat to this, unfortunately, especially concerning the spiders.
The spiders may try to seek refuge behind their ground allies by lowering their bodies closer to the ground. You won’t be able to target them this way unless you have a special Orb like Ball Lightning or the Orbelisk or if they simply come out of hiding.
You can also go one step further by taking out all enemies at once. Remember what we mentioned earlier about bombs? Hit as many bombs as you can and watch the enemy disappear. You might also want to use Orbs that attack all enemies as well. This should solve your problem of picking a target. Some Relics might even help you whittle down the enemy’s HP or hit top-lane enemies more easily.
We’ve been talking about Relics for the past few bullets on this list and we’re sure you’re wondering why we value them so highly. Don’t worry; our next item talks exactly about that!
9. Choose Relics According to Your Playstyle
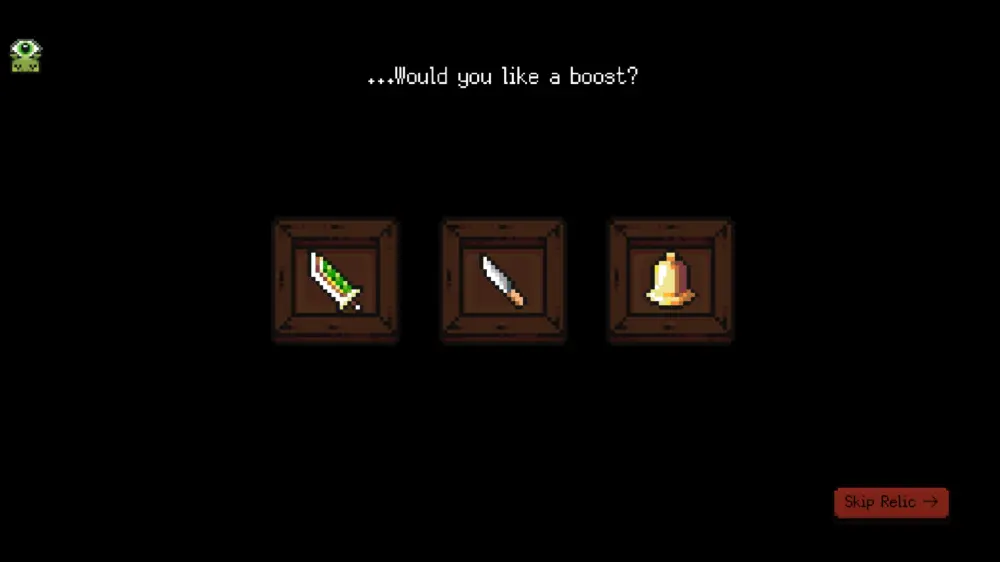
From the moment you start your game, you will be presented with at least 3 Relics.
But what is a Relic, you ask? A Relic is a powerful item that could change your run for good. While its bonuses seem small at first, they directly affect certain things as you play the game. To simply put, Relics are items you can collect and they could make your run better. Though, this greatly varies depending on your playstyle as a player.
Relics can affect the following elements throughout Peglin:
- Bombs — Certain Relics can affect how many bombs there are on the board or cause interesting things to happen when bombs explode.
- Gold — Some Relics can affect your gold gain or what you can do with your gold.
- Orbs — Relics that affect Orbs may slightly change how Orbs behave when they’re shot. Sometimes, they can be as plain as just increasing an Orb’s attack stats.
- Pegs — Relics that affect Pegs may cause some Pegs to be more durable, or create more of a certain Peg (e.g. extra Critical Pegs extra Refresh Pegs, etc.).
- Player Stats — These are possibly some of the most powerful Relics. Such Relics can directly affect the Peglin’s health, healing, offense, or even defense. Occasionally, some of them might even harm the Peglin directly albeit while providing an insane bonus.
- Others — These types of Relics can affect miscellaneous elements of the game such as shot accuracy, taking no damage from landing your Orb into a fiery pit (misnavigation), becoming invincible while reloading, etc.
Getting Relics is purely at the roll of the dice. They’re often handed out at random, so it’s impossible to get a combination of Relics that truly works. Though, your best bet here is to put together a set of Relics that complement the way you play the game.
Take for instance, if you are an aggressive player, consider taking Relics that could make the most out of scoring damage. Some Relics that give out offensive bonuses are:
- Bomb Baton — The board always starts with 3 extra bombs.
- Basic Blade — Adds +1 to all normal damage.
- Refilibuster — Deals damage to all enemies when the board gets refreshed. Damage scales with the number of Pegs restored.
- Suffer the Sling — Stones get +1 to normal damage and +2 to critical damage.
If you have been taking care of your Stones as we mentioned in an earlier item, just imagine how much damage you’d be dealing to your enemies with these! Just remember that reading the Relics information is what will help you decide on what to pick.
Now, if you made it far enough into the game, you’re bound to encounter a boss. The question is, how do you beat them?
10. Know the Boss’ Tactics
Fighting a boss in any game can be trial and error.
Some bosses have a weakness while others have an attack pattern that requires studying. Thankfully, here in Peglin, the bosses you fight in the free version of the game aren’t difficult to understand. Here, we will show you how to defeat the two available bosses:
- Avogadro
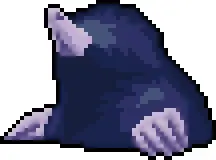
This giant mole is situated behind a large tree. At first, you will only be able to attack the tree, but Avogadro will dig towards you after a few turns. It will be directly in your face after attacking you for 10 damage and each time it leaves it’s old spot, it will spawn a plant monster to attack you with seeds. Each time it returns behind the tree, it swaps places with the plant monster.
The key to killing Avogadro is to make minimal-effort shots when it is not in firing range. The moment it appears in front of you is the moment you go all out with your shots. Make them count by hitting Critical Pegs or Refresh Pegs and you’ll have Avogadro reeling in no time.
- Slime Boss
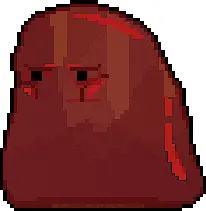
This boss is slightly easier than Avogadro, although disorienting. At the first phase of the fight, your Orbs will only be able to fire outside the Slime Boss shape on the board. The Slime Boss shape is covered in slime Pegs which will cause your Orb to slither downward when they catch the Orb. The Orb will still gain attack strength from the slime Pegs, but it won’t be able to score a lot of hits inside.
Each turn, the Slime Boss will slither toward you and the second phase begins when it swallows you whole. This time, the Orbs will spawn inside the Slime Boss shape. This can be taken advantage of since there are bombs inside the shape. Be sure to give this boss a spicy meal it’ll never forget.
While Peglin may seem like a game that requires luck and skill intertwined together, it’s not as difficult as it seems. All you need to do is remember what you’ve learned from reading this list:
- Pay attention to how your Orbs work. They all work differently!
- Don’t fire all willy-nilly. Take aim first and make the shot count.
- Bombs are your best friends.
- Critical Pegs rack up a ton of damage with the right Orbs.
- Refresh the board for even more damage and more bounce.
- Got an Orb you don’t need right now? Discard it for the next one.
- Be practical when upgrading your Orbs. The humble Stone can be more powerful than the other Orbs you can obtain.
- Be selective when attacking the enemy. Some Orbs can attack any enemy or all enemies!
- Choose Relics that complement the way you play. Otherwise, get ones that complement each other!
- Always observe how a boss behaves. This is key if you want to know how to take them down.
And this wraps up our beginner’s guide for Peglin — A Pachinko Roguelike. Aim well, make your shot, and get ready to bounce. May you hit as many Pegs as possible!
Are you an experienced Peglin player? Do you have other tips that you can give newbies? Did we miss anything in this guide? Shoot us your thoughts in the comment area below!