You’ve probably heard this phrase a couple of times: “Don’t judge a book by its cover.” The same can certainly be said about games: Just because a game looks adorable doesn’t mean it’s a walk in the park. In fact, many cute games with colorful and charming visuals can be surprisingly challenging.
One moment, you’re gushing over the stubby little characters with their cute widdle hands and toes. Then, before you know it, you’re turning over strategies in your head, cranking your skull for the best raid unit combinations, and feeling just a tad anxious every time your party heads out for battle.
That’s exactly the kind of experience you can expect when you play Merge Stories: Merge Games.
Hot off the press from Playtika, Merge Stories is availabe on iOS and Android platforms. On the surface, it’s everything a casual game might look like: cutesy art style, playful music, and simple game mechanics, with witty writing to boot. But make no mistake: Merge Stories can be a challenging, sometimes even brutal, game that will compel you to play hard and play smart.
As its name suggests, Merge Stories is played by, well, merging two things that look identical. You drag them together and voila!, a better item or stronger unit emerges.

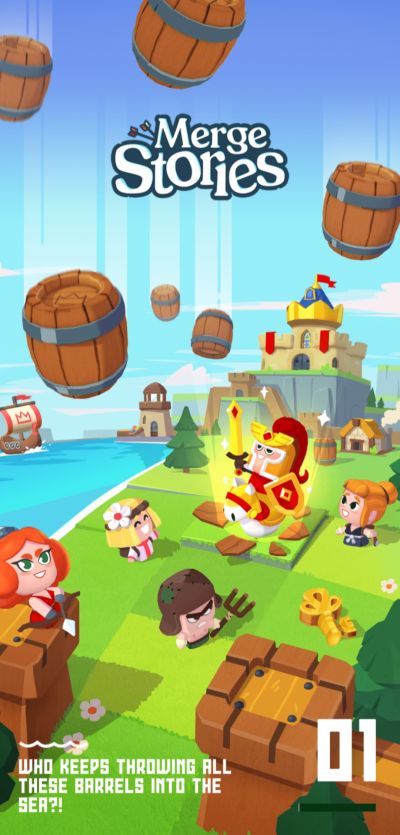
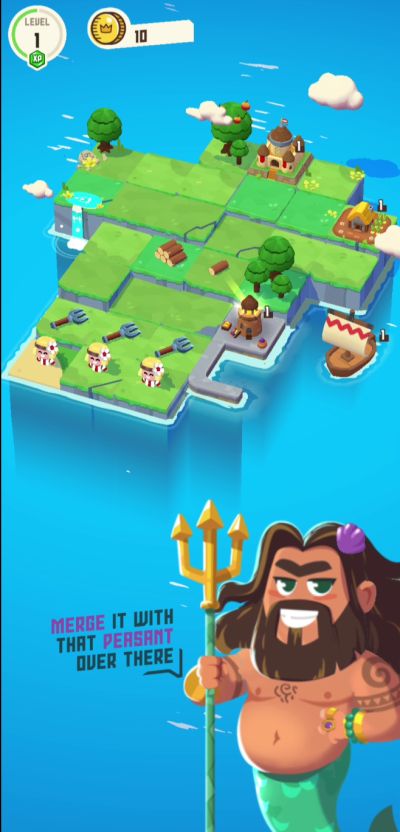
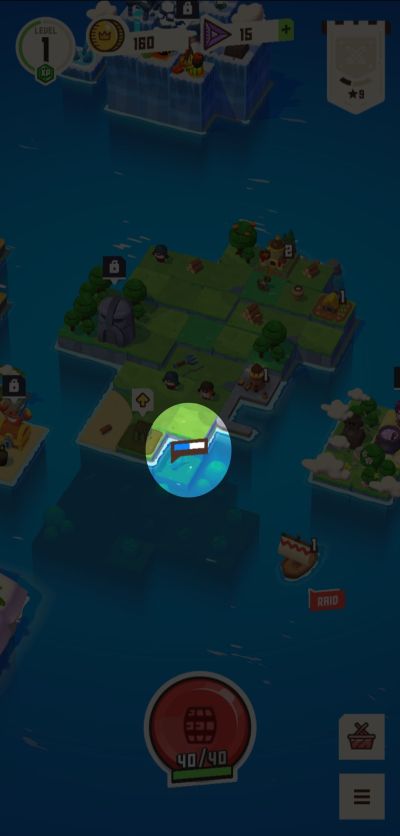
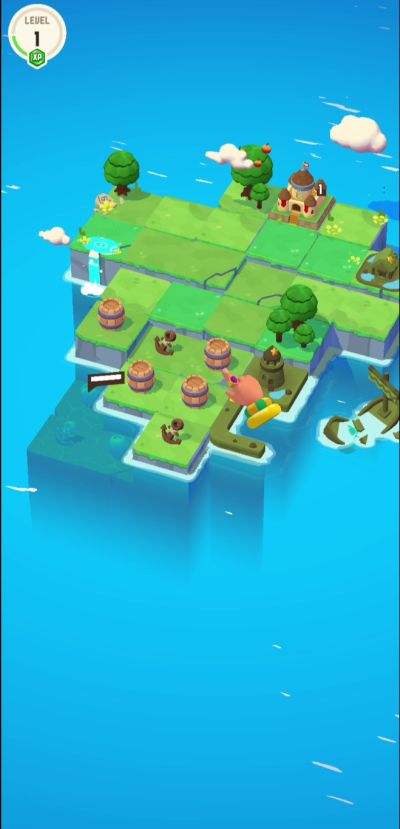
As you can see from the image above, you begin on a small patch of land with some wood logs. Where did you get these wood logs? From floating barrels, of course!
Where did these floating barrels come from? That’s beside the point. The point is that you got them for free (enjoy this moment) and these barrels are going to be an integral part of restoring a sunken kingdom, a task which you, a Guardian, have inherited from this fabulous, trident-wielding merman who looks a lot like typical depictions of King Neptune (or Jason Momoa with fins).
Though from totally mysterious origins (even the game asks who keeps throwing barrels into the sea), these barrels contain everything you’ll need, from resources to weapons and, you’re not gonna believe it, even people! Barrels are, indeed, somewhat of a godsend: they seem to fall from the sky or float up the waters, but they have everything you need. And if you don’t need what you get, you can always sell it.
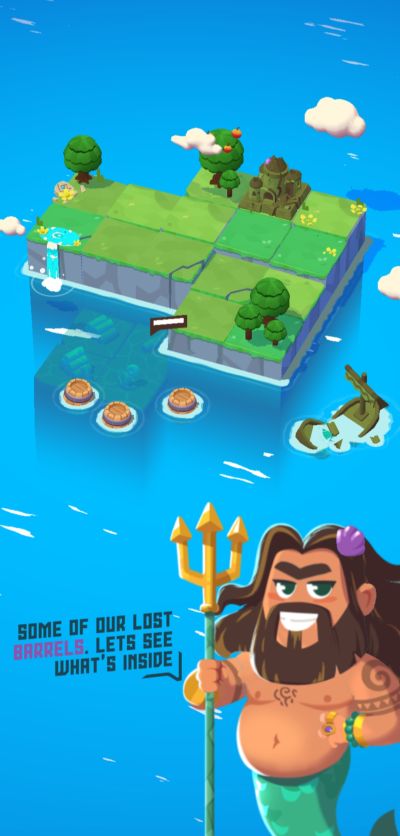
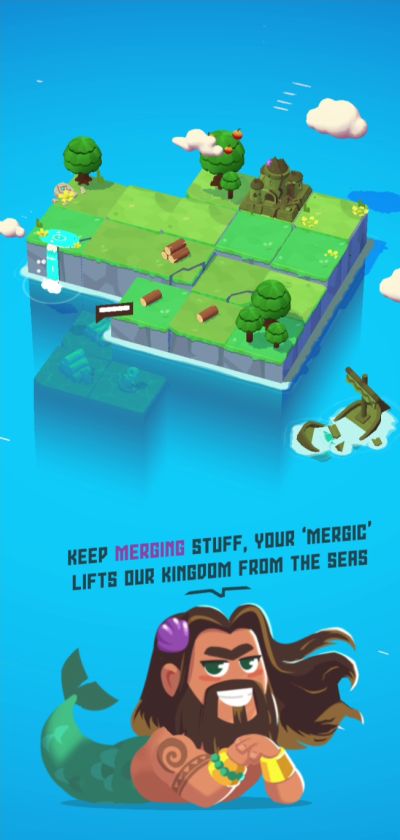
Following the merman’s tutorial, you will be taught to open barrels and merge identical items, but that’s not all. Because of your “mergic,” the simple act of merging can help raise sunken lands that will add more areas to your kingdom’s territory. Sometimes, these sunken areas will be accompanied by an item or an ally unit that you can collect or use. In short, the more items you merge, the more sunken lands you can raise from the waters.
As you collect barrels and wood, you will eventually have enough wood to restore important buildings in your island.
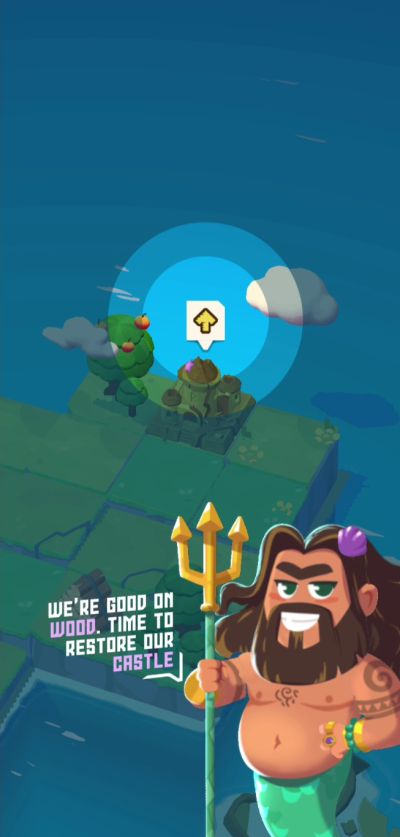
The first 4 buildings are free, though for the last one, you will need to spend coins. But don’t worry, at this stage everything you need will be provided for you by the game. Here are those first 4 buildings (levels indicated in the images below are for illustration purposes only as buildings will all start at Level 1):
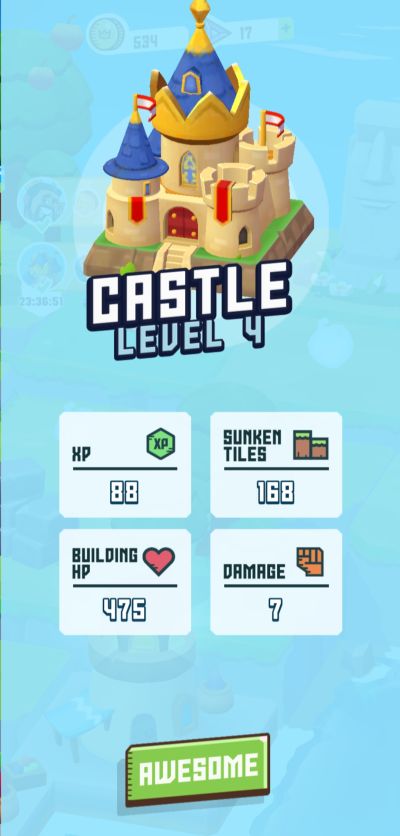
- Castle: This is the heart of your kingdom. Without it, you won’t have a formidable kingdom. Upgrading the Castle opens up more sunken land areas to raise, as well as unlocks neighboring islands that have more quests and rewards. A higher-level Castle also gives you access to other buildings that you can repair and upgrade.
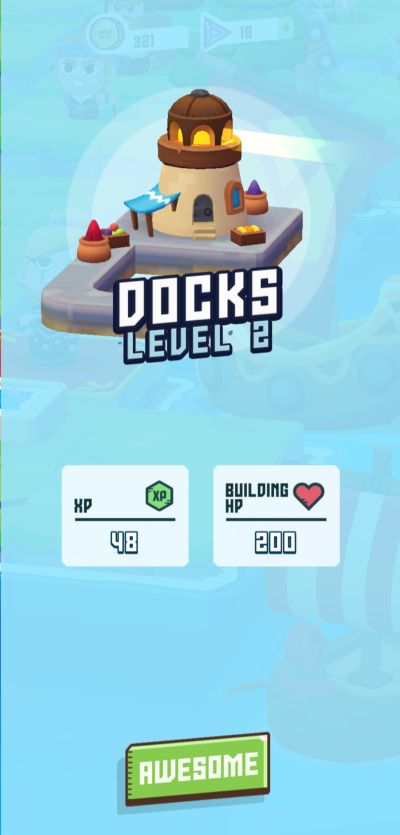
- Docks: Remember how we said that barrels just randomly appear? If you think that’s a little too whimsical, then the good news is that you can get barrels from the Docks instead of simply waiting for them to emerge out of nowhere. Once you’ve restored the docks, you can get a limited number of barrels that you may use at your discretion.
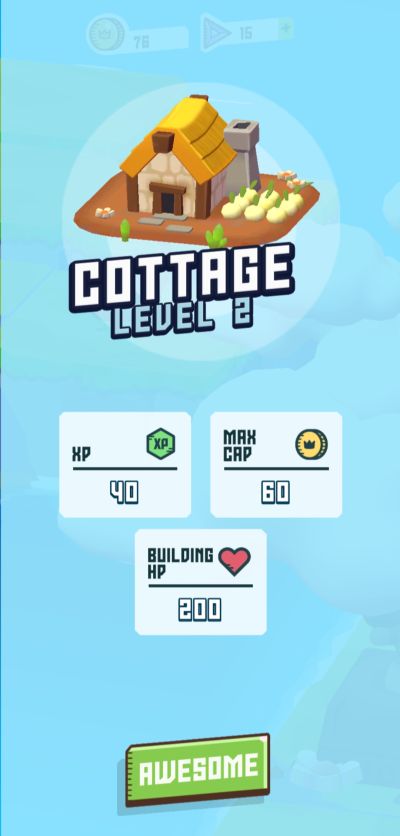
- Cottage: The Cottage is where you can collect a number of coins after a certain amount of time has passed. Coins are the game’s basic currency, and you will primarily need them to upgrade buildings and buy items or units from the shops, among other things.
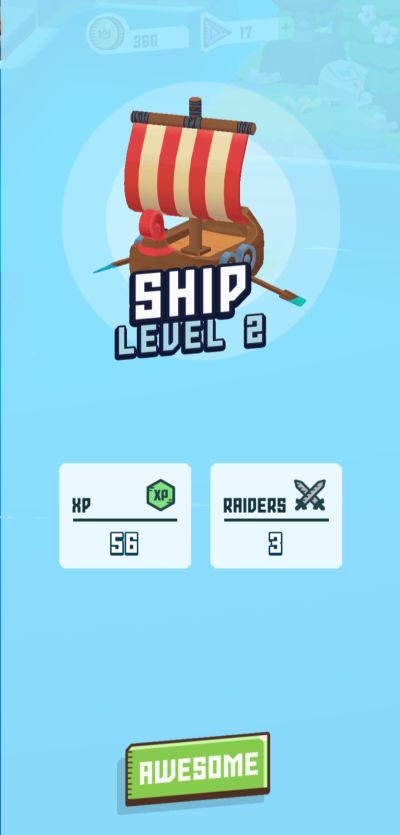
- Ship: Okay, so your Ship isn’t a building, but it is one of the first 4 “structures” that the game will allow you to restore. Unlike the first 3 buildings mentioned, restoring your Ship will cost 20 coins aside from the required resources. The Ship is your ticket to raiding, which is an extremely important part of the game as it’s another way to get more items and resources aside from opening barrels (more on this later).
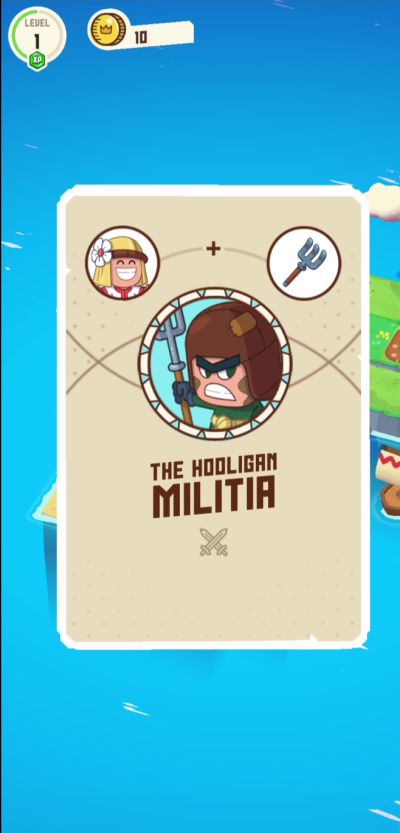
With the basics of your kingdom in place, you’re just about ready to expand and conquer other islands. But since no man is an island themselves, the game is generous enough to give you your first few ally units, as well as a weapon they can use. With this, you now have your own little army! The first 3 units you will get are Peasants accompanied by pitchforks.
Peasants are the base unit for all ally units. The type of ally unit you will get will depend on the weapon you will merge with your Peasant. In this case, merging a Peasant with a pitchfork will give you a Level 1 Militia unit.
Of course, there are many more unit types to discover as you play. The same applies to other items that can be merged (there are some that cannot be merged, such as weapons), with each one taking on a different and more valuable form than the last. You’ll also be unlocking other buildings, which will help you expand and explore, strengthen your army, fortify your base, go on successful raids, and amass more resources.
Yes, you will definitely get to do all those exciting things but fair warning, Guardian: the tutorial is just about the only time the game will give you a somewhat of a pass. It can get progressively difficult from here, unless you have an idea of what you’re doing or what you should be doing.
However, keep in mind that the game is still fairly new and there may be changes to the progression difficulty in the future. But as it stands, you’re definitely going to need a beginner’s guide for Merge Stories, and that’s exactly what we’re here for! With our tips and tricks, you’ll be able to skip some of the costly trial and error involved, as well as consider clever strategies that can increase your chances of winning, especially when it comes to raids and territorial defense.
Without further ado, let’s dive right into our beginner’s guide for Merge Stories!
Make “Mergic” Happen
Let’s start with the basic principle of the game: merging. Again, merging is putting together two identical things to achieve a more valuable item or a stronger ally unit. You may also merge Peasants with weapons to unlock a different ally unit with its own unique set of skills and stats.
In the case of resources, merging two resource items with the same number won’t just double the number of that resource unit. It will also give you a small bonus to the total. To illustrate, let’s take a look at the total number of stones you can get each time you merge identical stone piles:
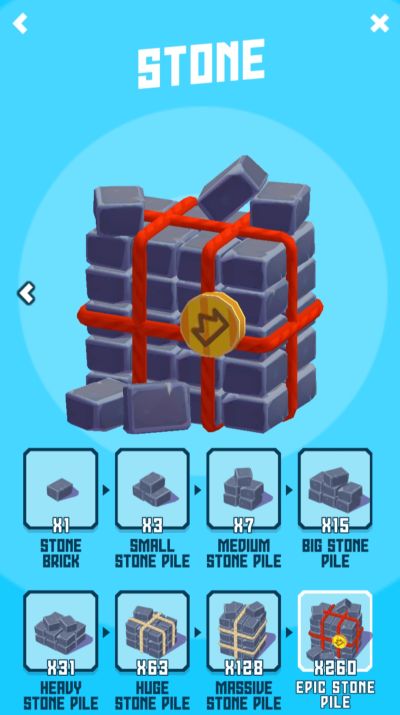
Based on the image above, you will notice that you get a +1 bonus to the total for all stone piles until the Huge Stone Pile, then a +2 bonus for the Massive Stone Pile and a +4 bonus to the Epic Stone Pile. If you put it in formula form, it’ll look something like this:
Huge Stone Pile = (31 x 2) +1
Massive Stone Pile = (63 x 2) +2
Epic Stone Pile = (128 x 2) +4
Though it may seem like a small bonus, you actually get 10 extra stones when you add all the merging bonuses. That’s still a fairly significant number that makes it easier for you to gather the amount you need to upgrade buildings.
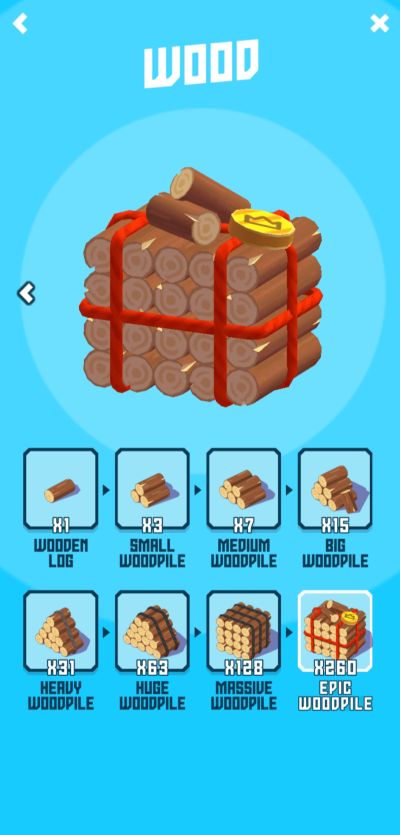
With merging, you will also get to unlock the “completed” form of a resource unit, which is the maximum number of resource units you can possibly merge. For instance, as you can see from the image below, the Epic Woodpile, worth 260 wood (same maximum number as stones), is its complete form.
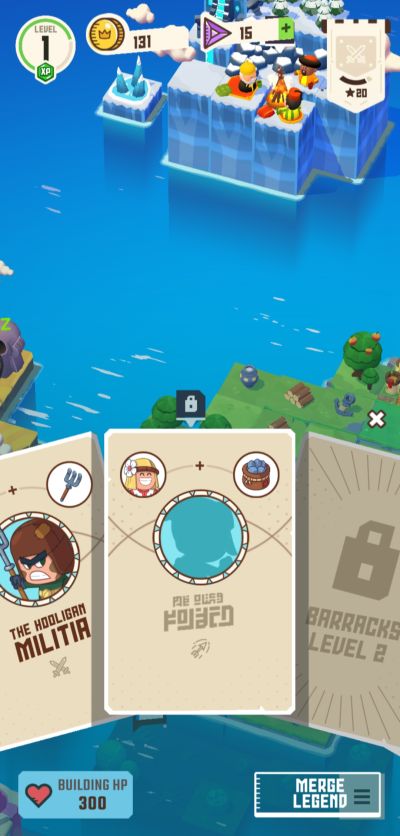
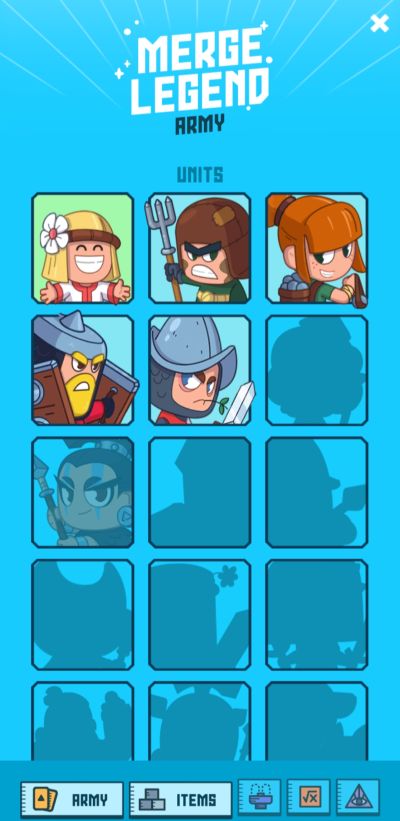
Continuous merging also allows you to unlock different types of units, decor, and other special items. For instance, if you merge 2 Level 1 Militia units, you will get 1 Level 2 Militia unit, and so on. You can check the Merge Legend tab to see ally unit stats and possible combinations between units like Peasants and weapons, or even established units and other weapons.
Keep in mind that unless you’ve unlocked the merge legend for a specific unit, you won’t be able to merge weapons and allies together even if you have the requirements on hand. For instance, unless you have a Level 3 Barracks, you won’t be able to merge Slingers with bows to form the Fiery Archer unit. Upgrading your Barracks to Level 3 will allow you to access the recipe for this merge.

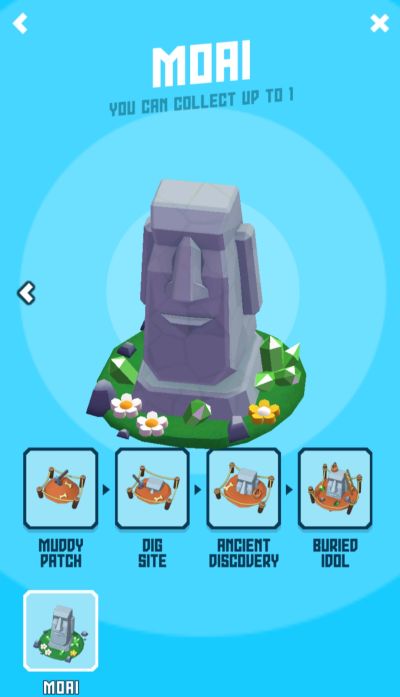
With merging, you will also be able to unlock decor like the Fountain or the Moai, as well as special items like keys, anchors, vases, horns, etc. These will all have their “completed” form so keep merging until you’ve reached it. Take note that you can only own 1 complete decor item but you can own multiple completed forms of special items.
All special items start with wood, then progress to metal, orange, red, azure, and so on. The image below illustrates what the complete form of Moai decor looks like. Decor items offer no bonuses but they do look like nice accent pieces for your island.
Special items, on the other hand, may sometimes be needed to complete building upgrades. Higher building levels may require a more valuable special item. For instance, in the image below, a Level 2 cottage will require you to make an orange vase to complete the upgrade.

You can get an orange vase by merging:
2 wood vases = 1 metal vase
2 metal vases = 1 orange vase
Other than perhaps satisfying your curiosity, completing the merge forms of items, decor, and units will also give you bonus coins for every form you’ve unlocked. This definitely comes in handy since you’re going to need all the coins you can save up.
Another important benefit to merging is that it also fills up the meter required to lift a sunken piece of land from the sea.
Every time you see this meter, it means a sunken piece of land can arise when you’ve filled it up. As mentioned, these sunken land areas may or may not contain free items or units when they emerge from the waters.
Additionally, merging also clears up your space. From time to time, you will find your island littered with weapons, items, allies, decor, etc. If you go on raids (more on this later), you may not have enough space to accommodate the loot you will gain from your trip. You can always sell surplus items by dragging them to the big red button at the bottom of the screen, but we highly recommend merging instead since this has more benefits than just selling and gaining gold.
Barreling Your Way to Victory
As mentioned, barrels are really important since they contain pretty much everything you need to build your base and your army. The thing is, what’s inside these barrels will depend a bit on your luck (or the game’s RNG for that matter). You won’t really know what’s inside these barrels and you can’t specifically choose the kind of items or units you will get when you break one open.
There are about 3 kinds of barrels you will encounter as a beginner:
- Regular barrels: These can contain anything, from weapons to resources, ally units, etc.
- Decor barrels: These are limited only to items needed to unlock and complete decor. Decor barrels are white with a green stone at the top.
- Silver barrels: These contain soldier units of varying levels and types. Silver barrels are often gained as a reward for completing challenges or answering prayers (more on this later).
By the time you unlock the Docks, you will be given a limited number of barrels that can be replenished after waiting for a certain time period. You can find this in the big red button at the bottom of the screen.
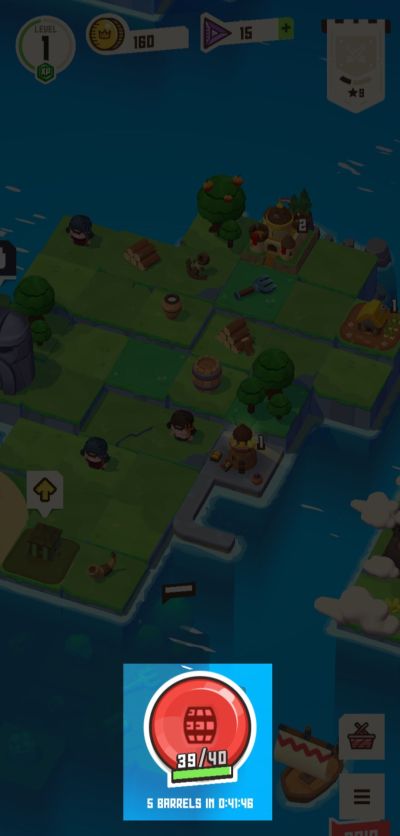
At the start of the game, you will be given a maximum of 40 barrels. If you’ve used any of them, you will gain back 5 barrels every 45 minutes. Upgrading the Docks will hasten barrel production and increase the total amount. If you’ve used up all your barrels, you have to wait for approximately 4 hours before you can restore the max amount back to 40. On the other hand, you can continue playing the game until you manage to restore a couple of barrels.
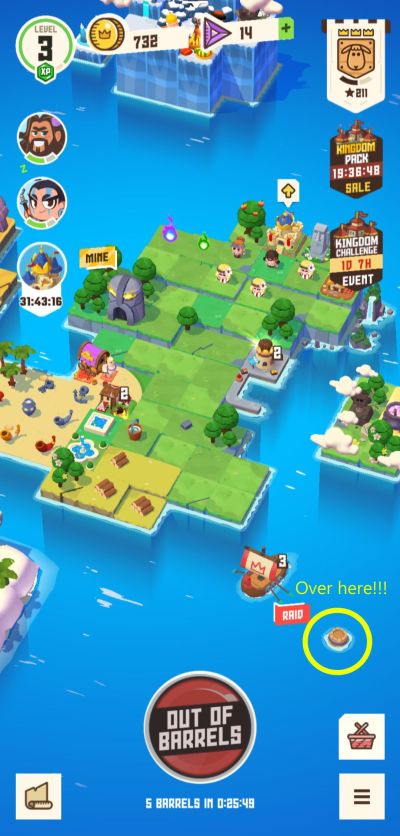
While this can sound like a long and tedious wait, the game, fortunately, lets you get a few free barrels when you stay logged in even if you’re not doing anything. From time to time, you will see barrels suddenly float up the surface of the water. These typically come in the form of regular barrels or decor barrels.
You can click these floating barrels so you can claim them and open them up on your island. However, don’t wait for too long as floating barrels can sink back into the sea when unclaimed. Always be on the lookout for floating barrels by zooming out the screen as some may appear quite a distance from your island, which you won’t be able to see when zoomed in.
The only caveat to getting floating barrels is you won’t know when they will appear. There’s no set time for when they would emerge, you simply have to be alert for their presence.
Aside from clicking the big red button, some other ways you can earn barrels are by going up the Raid Leagues, completing challenges, and answering prayers.
Now that you know how barrels work in the game, you may choose between 2 approaches:
- Approach 1: Open all barrels in one go. Depending on what you get out of opening them, you may go on raids, upgrade buildings, and continuously merge to raise sunken lands, complete items and decor, or get different ally units.
After this, you may choose to let the game idle and come back after about 4 hours, or hang around a bit before logging out if you want to get a few free floating barrels. - Approach 2: Open all barrels gradually. This approach will still depend on your luck as the items you get may very well dictate how your current session will progress. This method, admittedly, will feel a lot more grindy as it requires more patience, though the game will still keep you preoccupied, especially if you manage to go on raids or accomplish challenges.
Merging may also take up some of your time, though perhaps not enough to replenish a round of 5 barrels. However, you will come across floating barrels along the way, which can feel like you’re slowing down on spending all the barrels you have.
There isn’t really a one-size-fits-all approach and both methods are perfectly fine to do. It’s simply that one method can feel faster and the other can feel a bit slower. Consider these while playing so you get to enjoy the game no matter the difficulty.
Expanding Your Kingdom
We’ve talked about the first 4 buildings you will get for free at the start of the game, but as your island expands and your EXP and building levels go up, you will get to unlock more. Let’s discuss a few more of the buildings that are just as important and useful in the game:
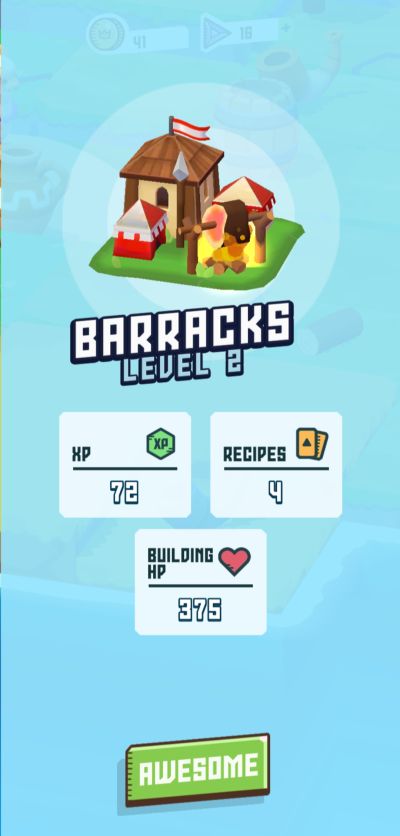
- Barracks: Your Barracks are primarily for your soldier units. Upgrading this building will allow you to unlock recipes that will open up more unit types for merging. With a strengthened Barracks, you will get access to more improved soldier unit types and levels, which will greatly increase your chances of going on successful raids and defending your Castle from invaders.
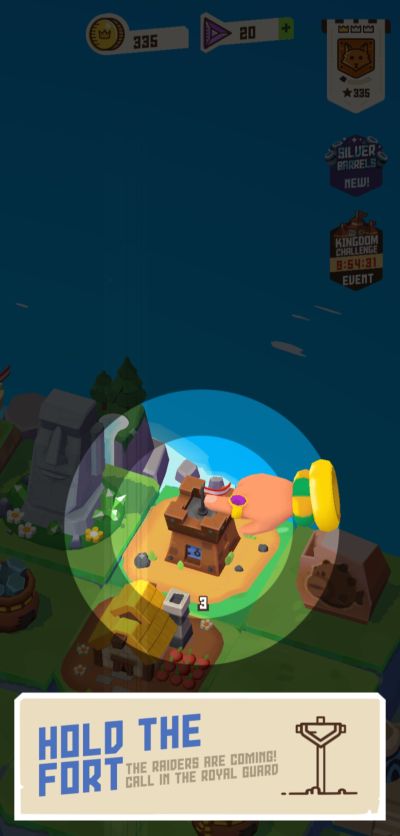
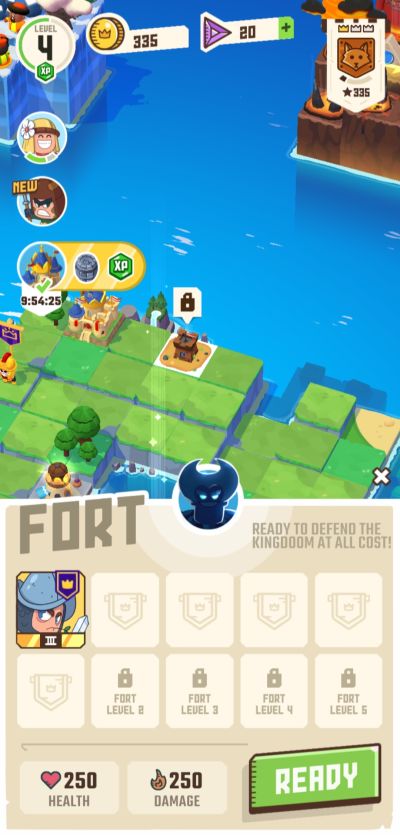
- Fort: The Fort is for defending your Kingdom. Just as you can go on raids, so can your kingdom be raided as well. Accessing the Fort will allow you to choose soldier units that will ward off attacks from invading enemies and upgrading the Fort will increase the number of soldiers you can appoint as your defending party.
We will discuss the specifics of castle defense in another section, but for now, suffice it that upgrading your Fort should be a priority or else you risk putting your kingdom in harm’s way.

- Mine: Sailing on your Ship is but one way of going on raids to amass resources. Ship raids will get you mostly wood resources while going down the Mine will get you stone resources. The Mine is definitely another important building since stone will be a common requirement in later levels.
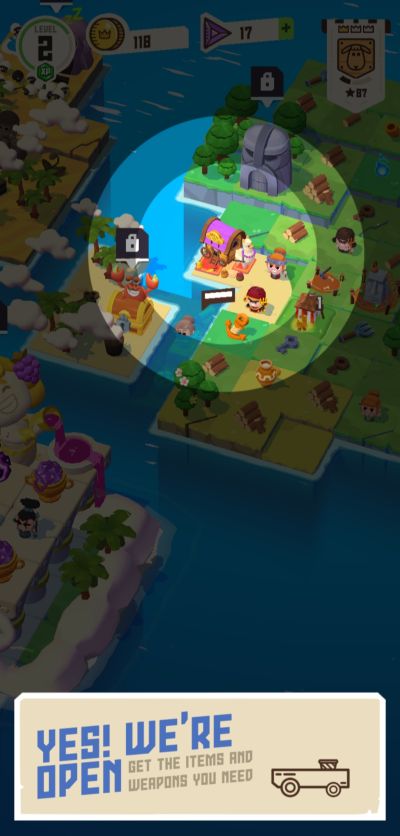
- Caravan (Shop): The Caravan is where you can spend coins, crystals, and even wood or stone in exchange for items or units. Check the Caravan every day as the game will provide you with one freebie every 24 hours. The Caravan may also change its item selection every couple of hours.
- Other Islands: Surrounding your kingdom are other islands inhabited by other people or even talking animals (we’re looking at you, Greedy Crab). Though these aren’t exactly buildings, we thought to add this bit about other islands in this section since unlocking them will lead to more discoveries and activities in the game. Unlocking islands will require you to get your Castle to a certain level.
For instance, a Level 2 Castle will unlock the island with the Greedy Crab and a Level 4 Castle will unlock the island with the sorceress named Baba Yaga. Often, the owner of these other islands will require you to provide them with items, resources, and even units. When you complete these requirements, they will give you their island, thus adding to your current land area.
Make an effort to upgrade buildings and unlock other islands to expand your strength and territory. Having extra space will also come in handy since you’ll be able to accommodate as much loot as you can!
Raid, Raid, Raid!
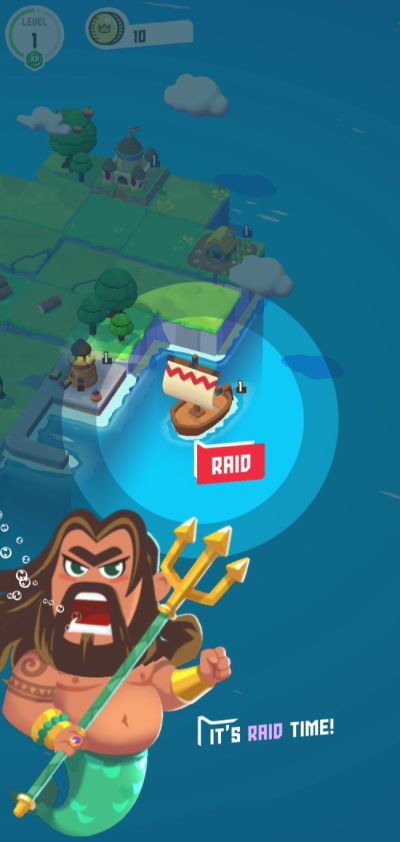
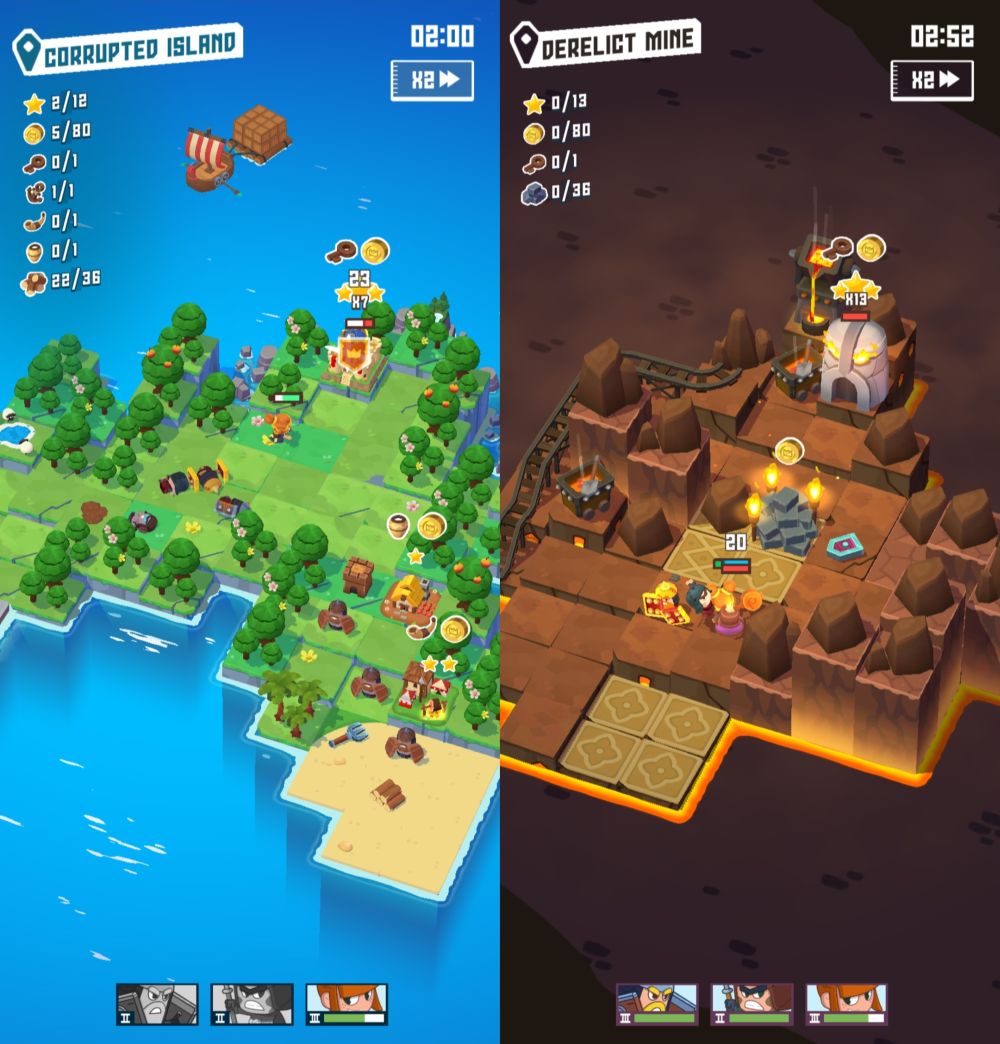
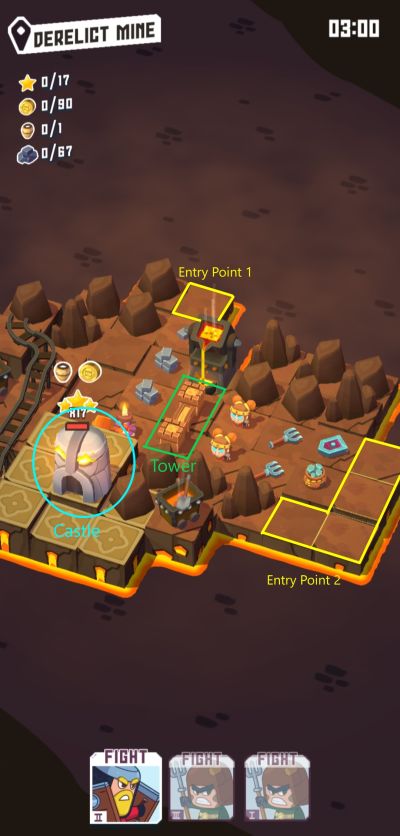
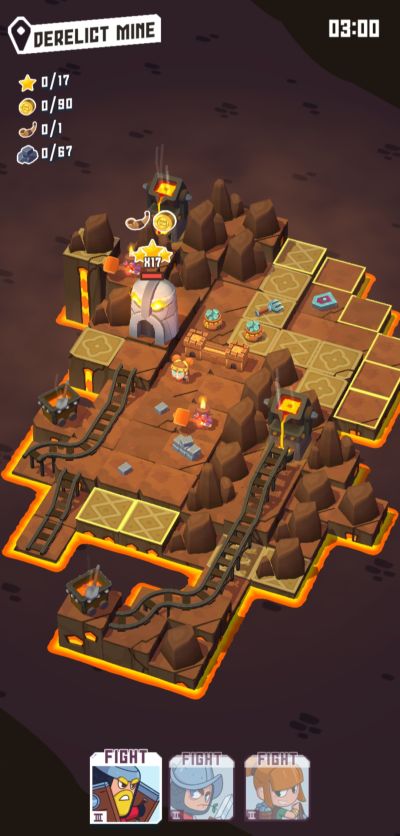
Now it’s time for the exciting part: raids. As mentioned, raiding can happen either by sailing your Ship or digging down the Mine. Though the battle arenas for each one may look different, the same strategies can apply (we’ll get to that in a minute). Here’s a quick side-by-side comparison of what a Ship raid and a Mine raid looks like:
Before getting into the nitty-gritty of raiding strategies, how does this feature of the game actually work?
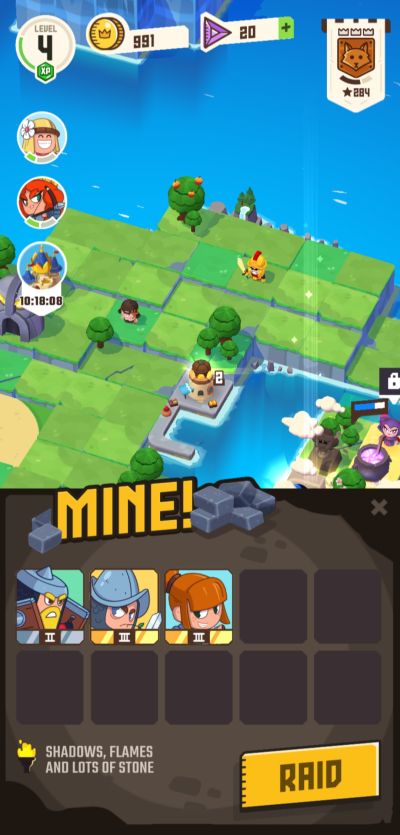
First, you get to select your raiding party. Ship raiding by default will allow you to choose 3 soldier units while Mine raiding will allow you to choose 2. Upgrading the Ship and the Mine will increase the number of units that can be taken to a raiding party.
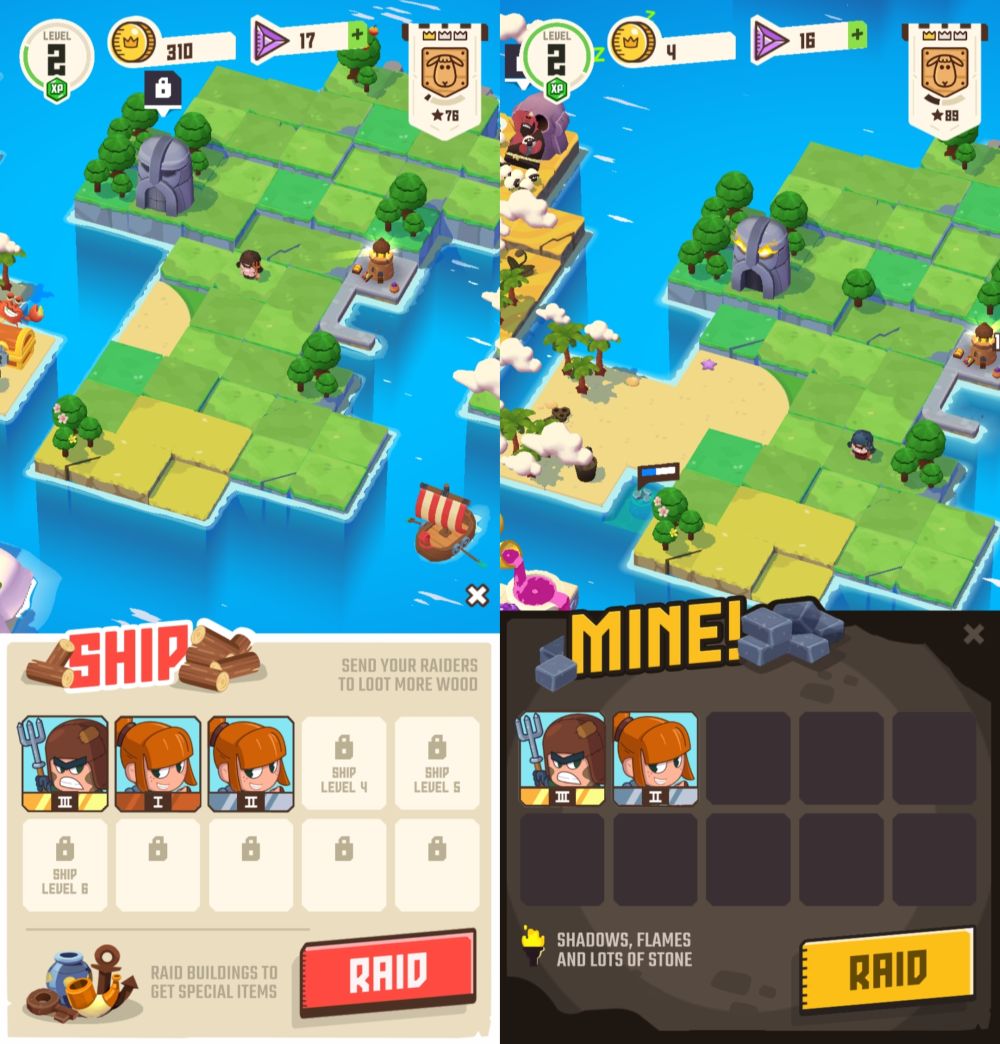
Upon entering an island or a mineshaft, you will be given choices for entry points, which are highlighted by glowing yellow squares. These entry points are where you can deploy your soldiers. Their order of deployment will depend on how you’ve arranged them when appointing your raiding party.
Let’s take the image above for example: for the Ship raid, we’ve chosen a Militia unit (1st to be deployed), and 2 Slinger units (2nd and 3rd to be deployed). Meanwhile, for the Mine raid, we have a Militia unit (1st to be deployed) and a Slinger unit (2nd to be deployed).
Once your units have entered the island or the mineshaft, they will proceed to collect the nearest resources or attack the nearest buildings unless you specifically click on a resource item or building upon which they will focus their attention.
Enemy units will be automatically triggered when you’re within a certain proximity. They will attempt to block your attack, in which case your ally units may redirect their focus on enemy soldiers instead of buildings.
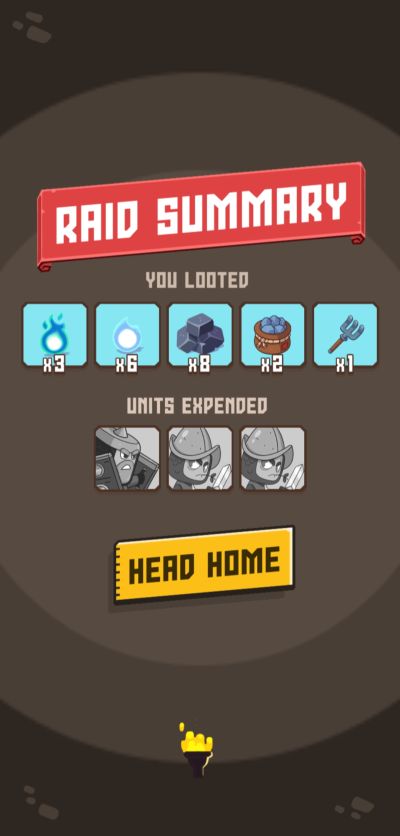
A raid will be considered successful if you manage to destroy the “Castle” (aka the main base) of an island or a mineshaft. However, the real challenge here is that, when you go on a raid, you won’t be able to know how many enemy units you will face, and neither will the game tell you what kind of obstacles will be present.
You also won’t know exactly what rewards you may acquire from a successful run. There’s no way to cancel out of a raid if you ever find the odds stacked overwhelmingly against you.
Indeed, raids can be difficult, but not impossible to overcome. Even when facing probable or certain defeat, you can still make a raid count if you manage to at least get resources out of it.
That said, here are some tips you might want to consider before and during a raid so you can increase your chances of winning while minimizing losses:
Order Up!
Selecting the right soldier units and arranging them in proper order for deployment is a crucial first step to succeeding in a raid. It’s a good idea to always choose high-level units, though this, admittedly, won’t always be possible. But even if you only have lower-level units available, a good slot order may tip the scales in your favor.
Keep in mind that, as you play, you will unlock more unit types, which will broaden your choices and offer a better chance for mixing and matching. But as a beginner, some units you may unlock are the Shieldsmen, Militia, Soldier, Slinger, and Archer. Similarly, upgrading your Ship and Mine will allow you to pick more than just 2 or 3 units to bolster your offense.
When choosing soldier units for any raid, we recommend putting melee units in the first few slots followed by ranged units. Let’s take for example the early soldier units you can unlock as a beginner.
Here’s how you can arrange them in your slots in order:
- Shieldsmen: With their great defense, Shieldsmen can be excellent buffers for your team. Since they also move slowly, deploying them first during raids will divert the enemies’ attention, thus allowing your offensive units to flank attackers.
- Soldier or Militia: Soldier or Militia units use melee weapons and have decent enough defense and speed. They become even more effective with a Shieldsman in front of the party since these melee units specialize in attacking.
- Archer or Slinger: Ranged units have a basic attack range of either 1 or 2 tiles depending on their type and level. These units should be positioned at the rear of your party since they typically have the lowest defense and make up only for it with their attack range and speed.
Of course, this is an ideal arrangement but you may not always have these unit types available when going on raids. Overall, though, the basic principle that works best is deploying defensive units first, then melee attackers, then ranged at the very end. If you only have 2 slots available, you may pick between a melee or ranged unit for the 2nd slot if you have a defensive unit for the first.
Moreover, take note of the levels of units you will choose for a raid. It’s a good idea to deploy higher level units first if you find yourself left with the same unit types. For instance, if you only have Soldier units, a Level 3 Soldier should be deployed first, then a Level 2 Soldier.
Now this doesn’t guarantee a victorious raid, but it does put your party at a somewhat advantageous position and will work in conjunction with the other strategies outlined below.
Timing Is Key
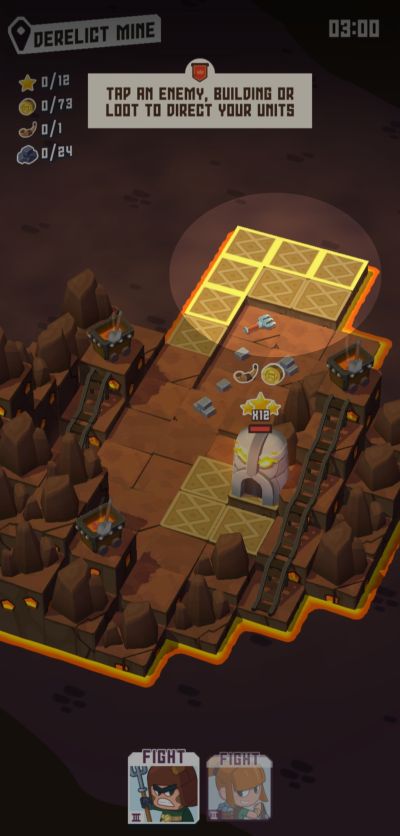
When you’ve managed to pick your raiding party, you will now travel to an island or mineshaft. As mentioned, entry points will be highlighted by glowing yellow squares. Entry points may vary per raid and will depend on the size and makeup of the island or mineshaft. Sometimes, you will find only 1 entry point on small raid locations, as seen on the image below.
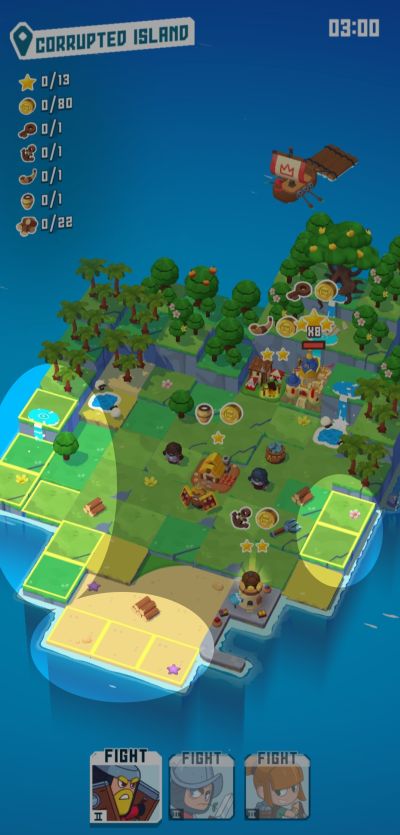
Other times, you may find multiple entry points in larger raid locations. An example is this island, seen in the image below.
Ally units are individually deployed and you can choose where exactly to deploy them among the highlighted squares. You can deploy units quickly in succession, or wait for a few seconds before deploying units following the 1st one. Delaying the deployment of 2nd or 3rd units may work best when the 1st unit is a Shieldsman, to which enemies may focus their attack.
However, don’t wait too long or else the game will select a random entry point. If you haven’t deployed at least 1 unit to a particular entry point after a long delay, the game will start a 10-second countdown so you can select your entry point of choice.
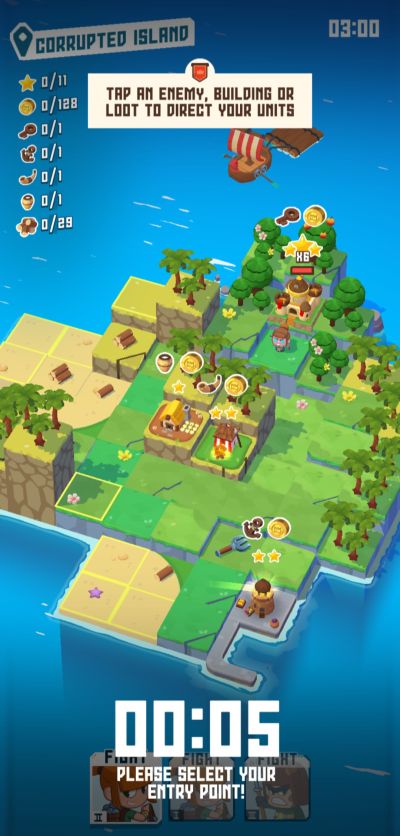
Otherwise, it will just pick one at random, which is something you should avoid as you can’t leave victory to chance alone.
Pick the Path of Least Resistance
Further to Entry Points, you won’t really have a problem choosing if there’s only one available. But what happens when you are presented with 2 or 3 entry points? How do you choose the best one? Here are some vital tips to consider:
- Observe the map. Take note of where buildings, resources, and enemies are positioned. Also check if there are towers present as they can be used to block your path or hinder your attack, especially when rangers are positioned behind them.
An ideal Entry Point would be one that has lots of resources along the way or that which doesn’t have blockades to the Castle. Even if you are defeated by losing all your ally units, you can still take home the resources you’ve picked up during the raid. - Spot your enemies. Gauge whether you’re outnumbered or outclassed. Take note of where enemies are positioned, and if it’s possible to actually avoid confronting them (though you have a very slim chance to do so).
Keep in mind that some enemies may come out of nowhere and are not available on the map upon initial observation. Pick an entry point with the least number of enemy units or weaker ones. - Make a beeline for the Castle. It’s extremely important to quickly locate the Castle on the map as destroying it is what will make a raid successful. Making a beeline for the Castle will not just automatically get you all the rewards when you manage to completely destroy it.
This may also minimize troop casualties the faster you destroy this building. Pick an Entry Point that leads the quickest and least troublesome way to the Castle.
Keep in mind that raids are a case-by-case basis and the factors involved in each one will differ from others. Generally, it’s best to pick the path of least resistance. To further understand how you can best apply the tips above, let’s take an actual example from this image below:
As you can see, we’ve highlighted some important elements in the map that can help you decide which Entry Point to take considering the path, enemies, resources, and Castle location, Here’s what can happen when you take either Entry Points:
- Take Entry Point 1: This Entry Point is the fastest way to the Castle. You can also pick up a few stone resources along the way. However, your units (Level 2 Shieldsman, and Level 3 and Level 1 Militia) may be outclassed, and it’s possible that one other enemy is hidden from sight. The silver lining is that there’s a tower dividing this side of the map from the other.
Thanks to the tower, the Slingers on the other side will not be able to attack you since they only have a range of 1 tile. In this case, you can proceed to attack the melee enemy units then go straight for the Castle without worrying about any interference from the Slingers, as long as you don’t command your units to start attacking the tower. Though you may be outclassed, there’s still your chance a consolidated attack will prevail without any of your units dying. - Take Entry Point 2: This Entry Point appears like the harder route to take as you have to face a pair of Level 3 Slingers and destroy the tower in the middle to get to the Castle, then fight the rest of the enemies on the left side of the map.
Though there are more resources you can pick up, you have a greater chance of destroying the Castle and getting all the resources anyway when you take Entry Point 1. By taking Entry Point 2, you also risk more troop casualties since you’ll likely sustain some damage from the Slingers before you fight off the remaining enemies.
It can take a while before you can find your footing in raids as it’s difficult to pick the proper raiding party when you don’t even know what kind of enemies or terrain you’re up against. The best you can do is be prepared as much as you can.
Other times, your luck also figures into the equation. Fortunately, there are instances when the game seems to feel generous by giving you a straight up path to victory, if you’re observant enough to see it. An example is this image below:
If you look closely enough, the Entry Point at the top of the map is the most open path to the Castle as you only get to fight one enemy (hidden on the left side, just behind the Castle) and immediately proceed to destroy the main base without much interference from other enemies thanks to the tower blocking their way.
All things considered, such a scenario is an easy victory. But while this isn’t always the case, we still recommend raiding often as you can as this will let you go up the Raid Leagues. By raiding, you can earn stars and increase your rank.
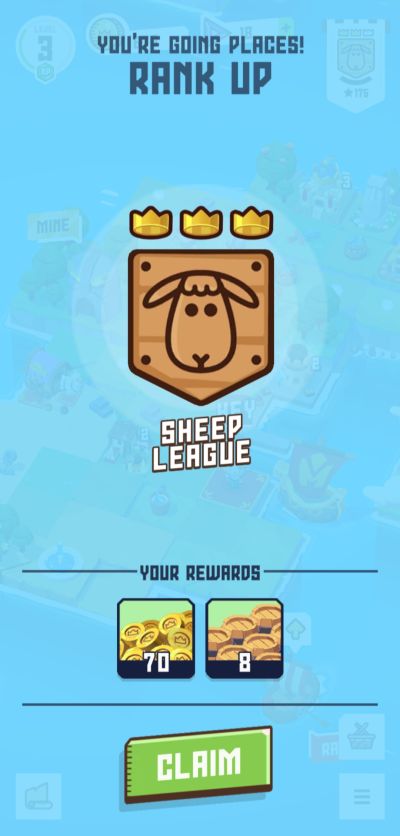
With more stars and a higher rank in the Raid Leagues, the better the rewards you can get!
Invade This, Bro
Raiding other kingdoms isn’t the only thing you can do in Merge Stories. You need to defend your territory, too!
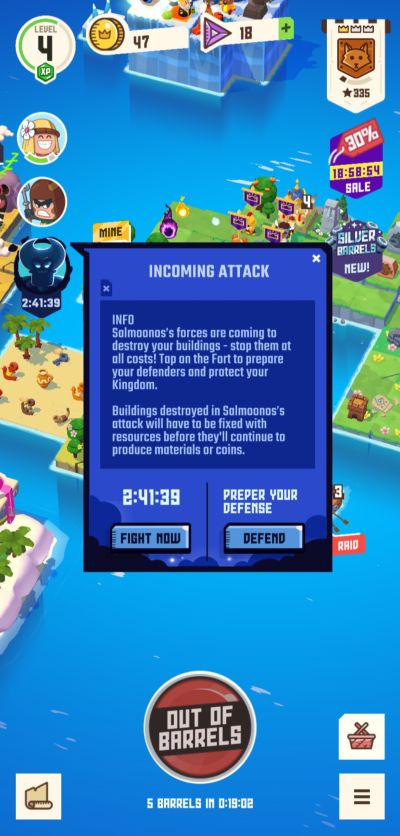
That’s right, you’re going to have to ward off attackers, starting with Salmoonos’ invading party.
You’ll get acquainted with Salmoonos, “bringer of the night and wooer of the moon,” at around the same time you unlock the island to the right side of your kingdom, which is owned by the sorceress named Baba Yaga. We’ll get into detail about these characters later, but for now, the important thing to remember is that Salmoonos has threatened to destroy your kingdom, just as he did before. With this, he will send his own attacking party to try and make a mess of your kingdom.
Fortunately, you will be given more than 2 hours to create the units you need to put up a decent defending party. By default, you are allowed to appoint 6 of your strongest units for defense. Increasing the level of your Fort will add more units that can be chosen for your defensive force.
The good news is that those appointed to defend your kingdom can still be sent off to raid, but when they die in the raid, they can be replaced by other units. The game will automatically appoint your strongest or highest level units for your defensive force, but you can manually change which units to appoint for defense if another arrangement works better in your favor.
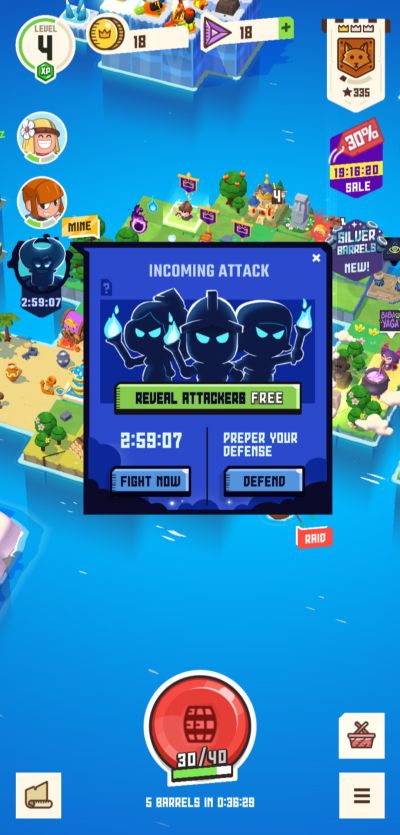
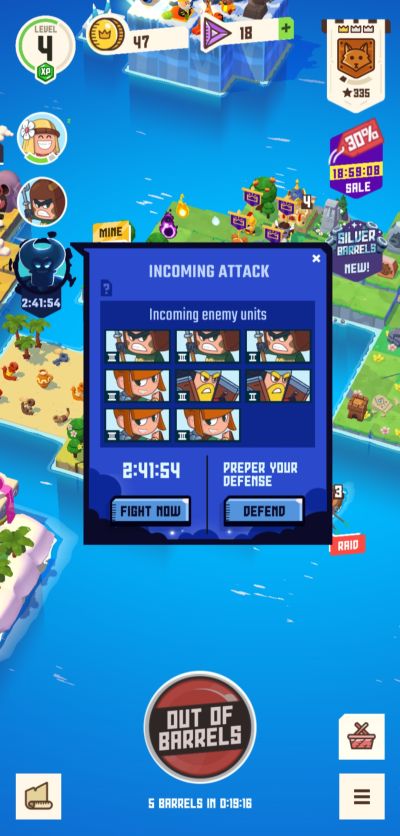
You don’t necessarily have to wait for the timer to expire before you can start engaging Salmoonos’ invaders as you have a “Fight Now” option. You may also discover the party your forces will be up against by clicking the “Reveal Attackers” button. The thing is, the game will allow you to reveal the attackers for free only during the very first fight. For succeeding fights, you will have to spend crystals to find out what kind of units will be sent to attack you and how many.
Similar to raids, these attackers will succeed when they’ve managed to destroy your Castle. Buildings that will be damaged during the skirmish will also need to be repaired with the use of resources.
Ultimately, your goal is to annihilate the invading party before they can reach your Castle and do any more damage to your kingdom. Here are some tips you can apply when it comes to territorial defense:
- Use your time wisely. Don’t rush headlong into battle. Instead, you can go on raids to gather more resources so you can upgrade buildings and fortify them. At the same time, open barrels so you can acquire more units and stronger ones at that. This way, you may also get towers and unlock recipes that will strengthen your defensive party and fortifications.
- Max out unit levels as much as you can. When building up your defensive party, it’s a good idea to have a mix of defenders, melee attackers, and ranged units, but your setup will depend on the enemy units you’ll be facing, as well as how you arrange defensive fortifications around your Castle like towers.
The kind of units you acquire through raiding and opening barrels will also be a factor, but, again, this is based on your luck. A good rule of thumb to follow is to max out unit levels as much as possible. Higher level units means better attack, defense, and speed. With this, you can push back the invading party and minimize damage to your kingdom. If you’ve unlocked more recipes, combine unit types to form stronger ones. - Take note of positioning. This applies to units, fortifications, and buildings. You will discover that some buildings like the Cottage or Shop can be moved, so move them away from the edges of the map, which can be potential Entry Points. Similarly, try to install towers and units in strategic locations.
For instance, put a pair of towers in the middle of the map as a blockade and reinforce these with ranged units behind them or defense and melee units in front of them. - Spot possible Entry Points. Entry Points are often pieces of land that are closest to the sea. You will notice that some areas are more elevated than others.
At this point, you would already have acquired a piece of land from both the Greedy Crab and Baba Yaga aside from the main land area for your kingdom, thus giving you at least 3 possible Entry Points: one each to the east, west, and south of your map. Station at least 2 units each near these Entry points to ward off the invading party.
The challenge here is that the attackers might only choose 2 Entry Points and the units left in 1 Entry Point might not be able to engage the attackers. In this case, make sure all units are close enough to the Castle since that is the enemy’s main target.
Think of kingdom defense as a reversal of raiding. Salmoonos will attack multiple times so you will eventually get the hang of defending your territory and will be ready for bigger, stronger forces in the future.
Defeat is a Learning Experience
We hate to say it, but defeat is a normal experience in this game. You will often find yourself losing all your units to raids and kingdom defense. However, this isn’t something that should discourage you from playing. The good news is that when your troops have been annihilated in battle, you can still collect Wisps, which you can merge to gain units to replace those you have lost.

The more Wisps you merge, the bigger the chances you summon stronger units. Higher level Wisps will also get you more than just one unit. For instance, if you use a Divine Wisp, you can get as many as 4 units of varying types and levels.
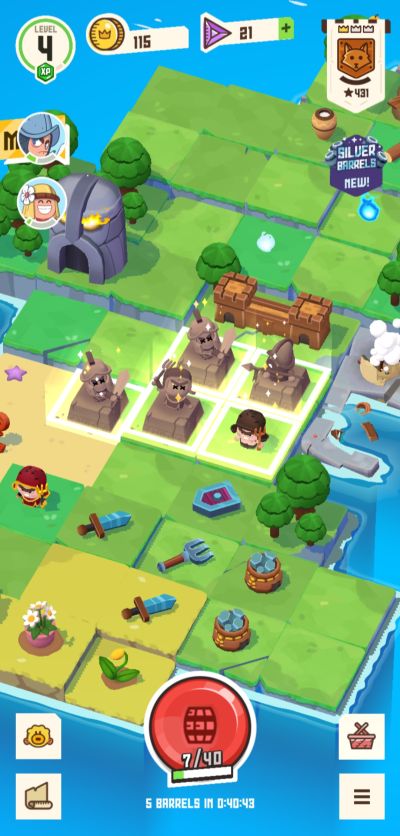
Units summoned from Wisps will initially take the form of statues, much like those you can gain from lifting land areas from the sea. Thus, keep merging all the Wisps you’ve acquired so you can replenish units without having to open barrels. Through this, you might just form a stronger party than the ones you’ve lost.
Overall, defeat is a learning experience that will help you polish your battle strategies and approach. It can make the game feel like a bit of a grind, but whatever victories you achieve will always give you a satisfying sense of triumph.
Grant Prayers and Complete Challenges
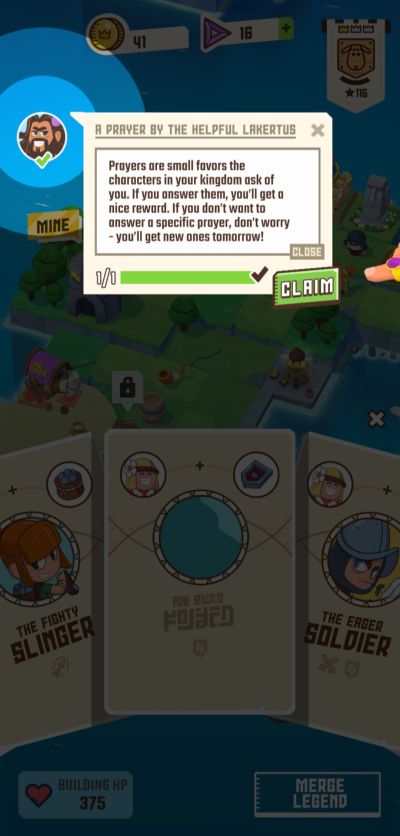
Granting prayers and completing challenges are a facet of Merge Stories that can get you extra rewards, resources, and even more land areas for your kingdom! You can access ongoing prayers and challenges through the icons located at the left side of your screen.
Prayers and challenges are similar in that you can complete them under a particular time limit by accomplishing requirements. For instance, a prayer might ask you to gather 100 pieces of wood or make multiple ally units of a specific type.
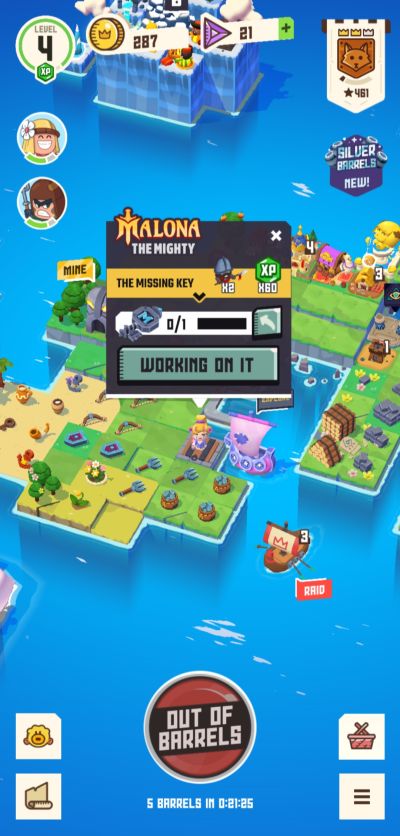
Sometimes, you might encounter “visitors” in your island who will also give you challenges to accomplish. An example is Malona the Mighty, who will ask you to sail to the dungeon so you can get the missing key to her Castle.
Of course, you will also meet other characters from other islands who have their own set of challenges and rewards. Here are three of these characters:
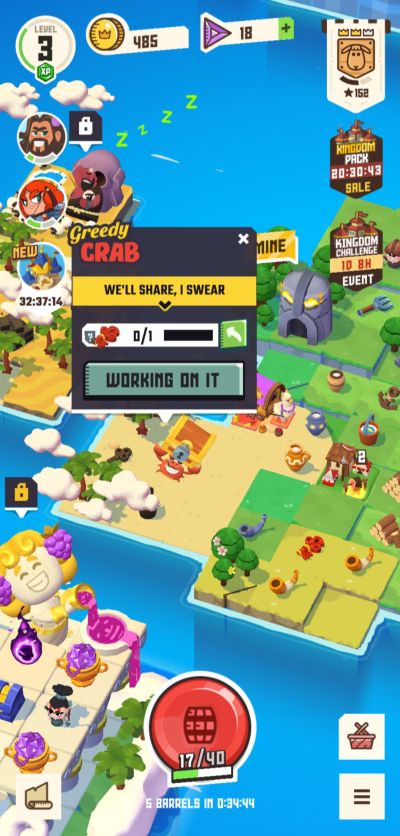
- Greedy Crab: The name alone screams dubious! The Greedy Crab will tell you that they have treasure to offer if you manage to make the key that will open their chest. News flash: there’s no treasure. When you make the key and give it to them, they will simply give you their part of the beach.
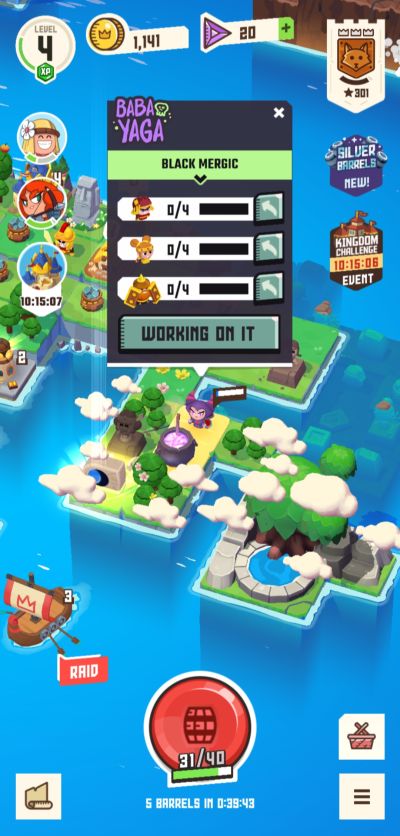
- Baba Yaga: This sorceress will ask you for help to complete her spell, but for a pretty steep price: you have to sacrifice different unit types for it. It will be worth it, though, since she will give you her island, which can still be expanded. Moreover, it has a piece of the portal needed to complete Salmoonos’ challenge.
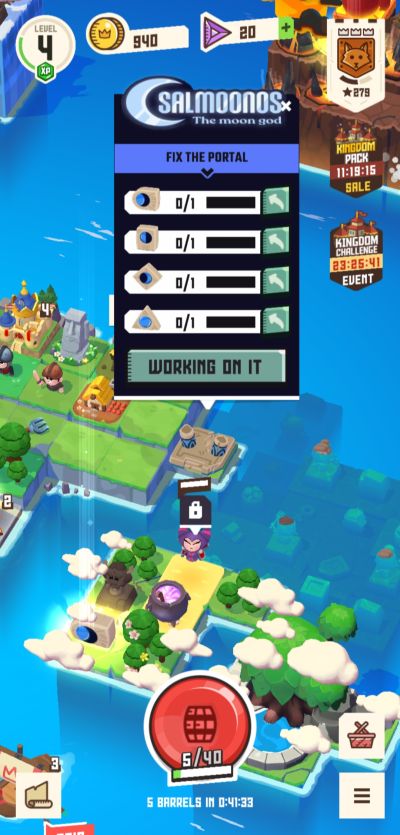
- Salmoonos the Moon God: We’ve previously mentioned this vengeful, genie-looking character who’s out to destroy your kingdom. The challenge he presents is to find all the pieces of the portal he broke. This is a long-term challenge that requires you to access all the other islands as each one, like Baba Yaga’s, has a piece of the portal. What’s in it for you, you might ask? Well, that’s something we won’t spoil.
If anything, discovering what Salmoonos has in store for you is one good reason to keep playing, raiding, defending, and expanding your kingdom! With that said, this concludes our beginner’s guide for Merge Stories.
Hopefully, our guide has helped you plan how to spend your barrels, approach raiding and kingdom defense, build a decent army, and emerge victorious and wiser even in occasional defeat! If you have more tips and tricks to share, don’t forget to write them down in our comment section below. Godspeed, Guardian, as you restore the glory of your kingdom at sea!
Sherry
Tuesday 13th of December 2022
What is the little yellow face on the bottom left of the screen when you tap it it says drag g drop to sort items. Nothing happens with it.
Patrick
Saturday 26th of November 2022
Awesome read and advice on such an excellent game to play. 👏🏻👍🏻👊🏻