Greetings, general! I know you’ve been called here on short notice, but the city of Southport is under attack by goblins, orcs, ogres, bandits, and all sort of troublemakers. As ordered by our liege, King Denas, we are to move to Southport immediately to bolster its defenses and repel all invaders.
I’ve prepared these instructions for you. This manual contains tips and strategies for vanquishing the evil Vez’nan’s forces and eventually taking the fight to him. We’ll do this by playing Kingdom Rush, a tower defense title from Ironhide Games, that’s available on both Google Play and the App Store. Here, you’ll be tasked to build towers to prevent monsters from reaching their goal at the end of the map. It will require strategy, planning, cunning, and maybe some luck to win.
Our soldiers, wizards, dwarves, and rangers are ready, general. They know that the road that awaits them is long and arduous, but they – and I – have full confidence in your abilities and know you can lead us to victory.
So with that in mind, let’s delve into our Kingdom Rush beginner’s guide for some much-needed tips, tricks and strategies!
Know Your Arsenal
As with any tower defense game, your goal in Kingdom Rush is to prevent enemies from reaching the end of the path. If they do, you lose lives. Lose enough lives, and you lose the level. To help you achieve that goal, you need to familiarize yourself with the tools that are at your disposal.
Introducing Your Towers
Towers are the core of any tower defense game. You’re allowed to build 4 kinds of basic towers: Archers, Barracks, Mages, and Artillery. Each one of these towers has a role to play in your defense as well as its own strengths and weaknesses.
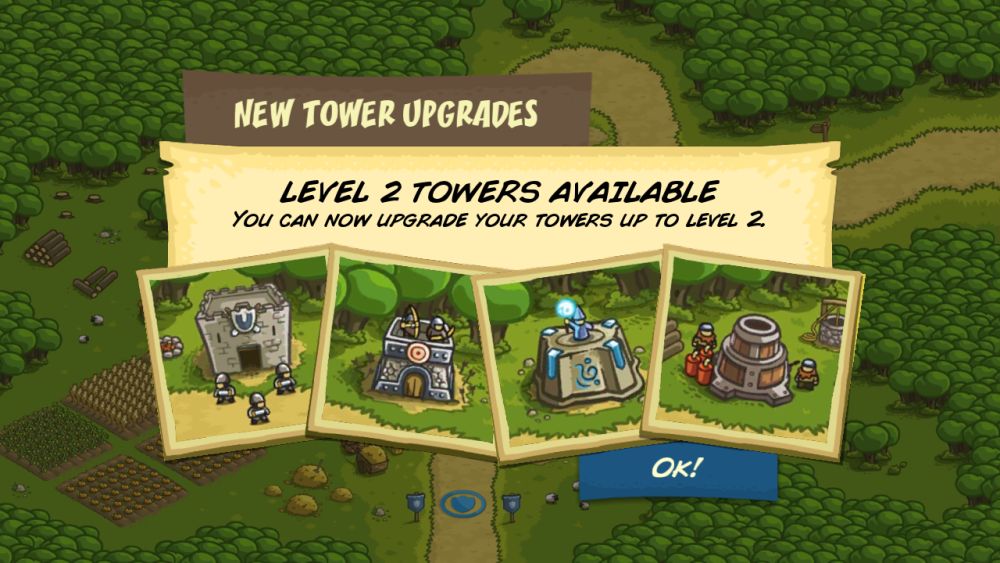
Towers can also be upgraded as you progress through the campaign. These upgrades are, by and large, direct upgrades to their base stats. Tier 4 towers, however, also come with abilities that can be both passive and active.
It’s important to note that these upgrades aren’t global; you’ll have to buy them for each tower of that type. Tier 4 towers can also have very different roles from their previous iterations, such as the Musketeer Garrison and the Barbarian Mead Hall.
The Archer Tree
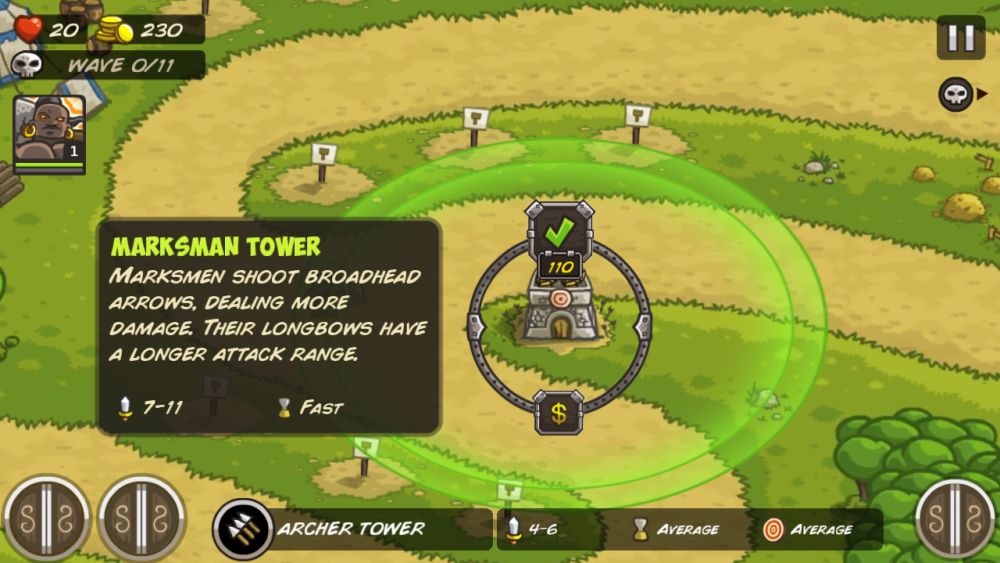
Archer Tower: Lightly-armed archers with a swift and consistent attack. These archers can output a constant stream of damage that allows them to fit almost any niche. “Almost” because armored enemies are the bane of archers, due to physical damage resistance on top of archers’ low base damage.
Marksman Tower: For the price of 110 gold, you can level up your basic archer tower into the Marksman tower. Boasting almost double the damage, better attack speed, and longer range, Marksmen are a huge improvement over their predecessors.
Sharpshooter Tower: Sharpshooters are directly upgraded from a Marksman tower. While their attack damage upgrade isn’t as drastic from Archer to Marksman tower, their great range and 0.5 second attack speed allow them to mop up unarmored units with ease.
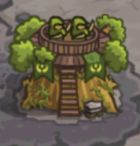
Rangers Hideout: One of the Archer tower’s two possible tier 4 upgrades, the Rangers Hideout continues building on the archer trademark of good damage at lightning-fast attack speeds. They can be outfitted with Poison Arrows, which does 5 damage per second per level, and can also unleash the Wrath of the Forest on your foes, locking them in place and causing them to take damage over time.
Musketeer Garrison: The Kingdom’s musketeers follow a different philosophy than their lower level comrades. Musketter Garrisons are the other choice of tier 4 archer. Unlike their previous iterations, Musketter Garrisons have a whopping 35-65 damage and a range that exceeds any other archer. While their attacks are powerful, they’re also slow.
These gunmen can be trained to take carefully calculated Sniper Shots at faraway foes, dealing immense physical damage with a chance to instantly kill. Tightly-packed Shrapnel Shots are used by musketeers to deal area-of-effect damage against enemies that get too close.
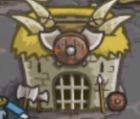
The Barracks Tree
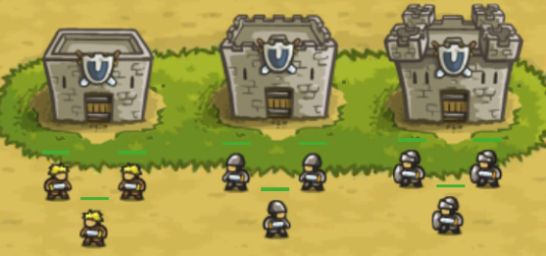
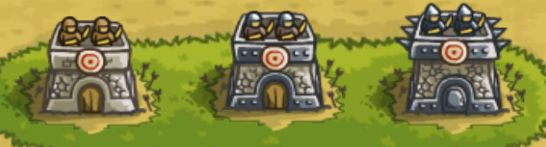
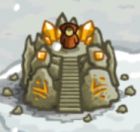
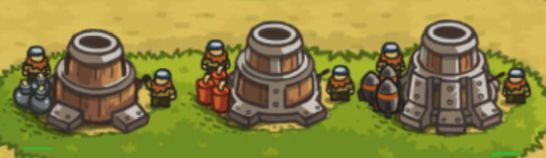
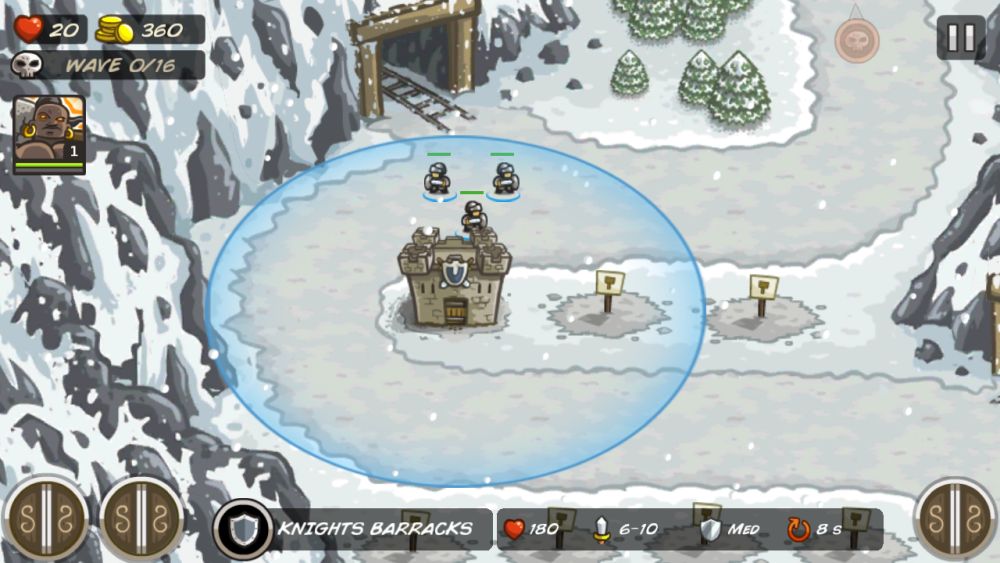
Militia Barracks: An unorthodox tower that houses up to 3 soldiers at once. Barracks can be assigned a rally point where trained soldiers will move to. These fighting men will bravely block and engage any enemy that comes into their aggro range, even at the cost of their own lives. Don’t worry about that though – there are always more recruits willing to fight for the kingdom.
Barracks have an internal “training time” counter; when this counter fills, another soldier will be deployed if any of the 3 on the field have already fallen. While these infantry don’t do much damage on their own, they’re invaluable for tying enemies up and exposing them to other towers’ attacks. It’s worth noting that upgrading a barracks instantly retrains its 3 soldiers.
Footmen Barracks: Footmen trained from here are better-equipped and heartier than peasant militia. Their low physical armor provides some protection against monsters, but their damage is lackluster.
Knights Barracks: Tier 3 barracks provide knights, with even better physical protection and higher health. They also do almost double the damage of footmen, though their job is still tying enemies up.

Holy Order: This keep trains mighty paladins, defenders of the weak and beacons of righteous justice. Their durability in combat is unmatched, with at least 200 health and 50% physical damage reduction. They have the ability to heal themselves with their Healing Light, improving their longevity even in the middle of combat, while their Shield of Valor passive skill further increases their resistance to physical damage. When faced with foes, a paladin can channel his energy into a Holy Strike, causing splash damage in an area.
Barbarian Mead Hall: These savage warriors laugh at the idea of defense and prefer to fight head-on in glorious combat. Their lack of armor is slightly mitigated by higher base health than even the paladin. Barbarians eschew the idea of blocking enemies until they die and use their high attack damage to make quick work of monsters coming their way.
When armed with Throwing Axes, even flying enemies aren’t safe from a barbarian’s fury. Their unbridled rage causes them to occasionally lash out when struck, with a Whirlwind Attack that deals damage in an area. Finally, they can be given even More Axes to gain a huge amount of damage per upgrade level.
The Mage Tree

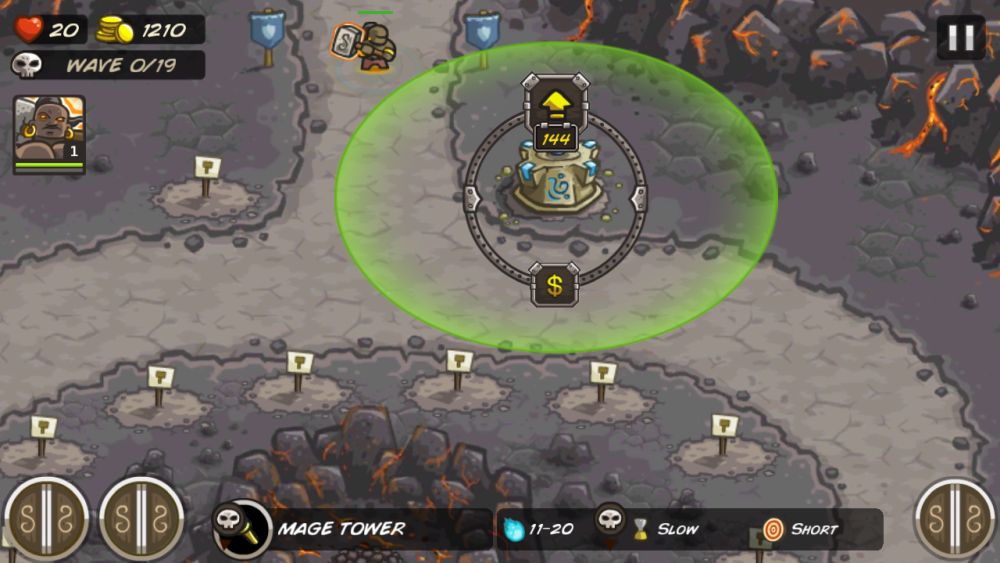
Mage Tower: Hit hard, hit once. These students of the arcane arts boast very high damage but at the cost of their attack speed. Their magical attack type means that they completely bypass physical armor, but don’t do well against enemies resilient to arcane assault.
Adept Tower: While adepts have substantially increased damage, they are still plagued by their ponderous attack speed. Their increased range helps them in their role of dispaching heavily-armored foes.
Wizard Tower: Wizards deal staggering amounts of magic damage to anything in their way. Their attack speed remains the same, but their is once again upgraded, allowing them to snipe enemies with greater ease.
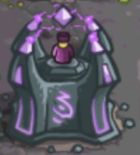
Arcane Wizard: This master of the arcane is one of two possible tier 4 mage upgrades. While these spellcasters take even more time to prepare their incantations, their damage per shot is peerless and they’ll make quick work of anything that isn’t equipped to handle their spells.
Further studies will unlock their Death Ray, a beam of pure destruction that instantly kills anything that isn’t a boss. When faced with a crowds, an Arcane Wizard can cast Teleport, forcing enemies back down the lane and exposing them to tower fire once again.
Sorcerer Mage: The studies of these arcanists take them dangerously close to darkness itself. Their attack is barely increased from the Wizard Tower, but Sorcerer Mages gain a passive and unique cursing attack, which causes foes to take damage over time for 5 seconds as well as halving their physical armor.
Serving a more supportive role than the Arcane Wizards, Sorcerer Mages can strike foes with a baleful Polymorph spell, turning them into a sheep permanently and stripping them of any armor or skills, but making them unblockable.
The spirits of the land can heed the call of the Sorcerer Mage, giving them the ability to create great golems of dirt and stone through the Summon Elemental ability. These golems work just like barracks soldiers, except there can only be one of them at once.
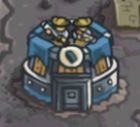
The Artillery Tree
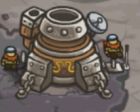
Dwarven Bombard: No self-respecting tower defense shuns the splash damage tower. This massive war machine fires explosive projectiles at enemies, dealing damage in a circular area around the point of explosion and diminishing with distance from the center.
These expensive war machines make quick work of enemy hordes with their area of effect attacks, and the explosive nature of their attacks allow them to bypass 50% of enemy armor via splash. The downside is that they’re slow to reload, forcing them to rely on good chokepoint construction or slowing effects, and that they are the most expensive towers in the game.
Dwarven Artillery: This expensive upgrade to the Dwarven Bombard offers no increase in attack speed nor range. Its damage, on the other hand, is more than doubled.
Dwarven Howitzer: More powder for bigger booms. The Dwarven Howitzer simply increases damage dealt per blast.
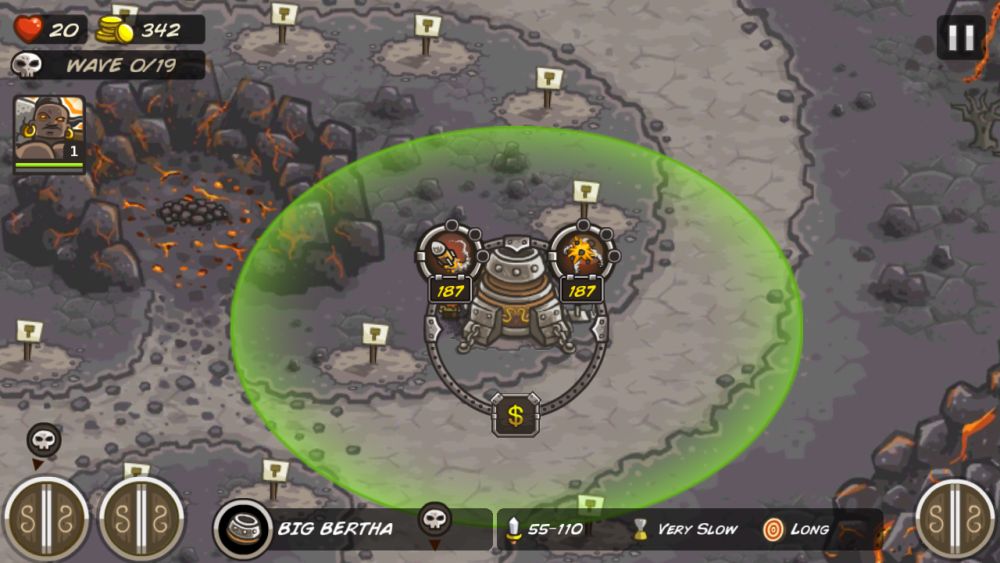
500mm Big Bertha: This monster of a cannon is one of the Dwarven Bombard’s tier 4 upgrades. In terms of range and attack speed, not much has changed, if at all. Damage has received a very hefty boost, with the tower being able to deal 100 damage at the point of impact.
An optional Dragonbreath Launcher can be installed on the Big Bertha, allowing it to fire heat-seeking missiles at the enemy closest to the exit. Dwarven science has also unveiled the Cluster Launcher Xtreme module, which gives the Big Bertha the ability to rain bombs in an area.

Tesla x104: This tier 4 artillery tower takes a different approach to dealing with mobs. Instead of firing explosive shells, it fires chain lightning that jumps to up to 3 foes at once. In spite of its apperance, the electrical attacks of the Tesla x104 still count as explosive and will therefore bypass 50% of armor.
These contraptions can be Overcharged, dealing damage in around the tower whenever they attack. Its conductors are also modifiable to fire a Supercharged Bolt, increasing the number of jumps the chain lightning makes.
Your Spellbook
Your spellbook comes with two handy spells: Rain of Fire and Call Reinforcements.

Rain of Fire does exactly what it says. After selecting an area, 3 meteors will rain down from the sky, heavily damaging any enemies unfortunate enough to be caught in the blast. It’s worth noting that there’s a slight delay from the time you cast Rain of Fire to when the meteors hit.
Planning in advance and positioning is key to maximizing the destructive power of this spell. While Rain of Fire is incredibly strong, it has a very long cooldown of 90 seconds.
Call Reinforcements summons 2 reinforcements wherever you cast the spell. These reinforcements act just like Barracks soldiers, fighting and blocking any foe within their range. While their stats are lower than even basic Barracks infantry, their ability to tie up enemies at any part of the map is invaluable.
Some good examples of reinforcement use are blocking the last few enemies at the final part of your defenses, giving your towers a few precious seconds to stop monsters from leaking, or using them to delay a horde of enemies, setting up a Rain of Fire cast.
Heroes
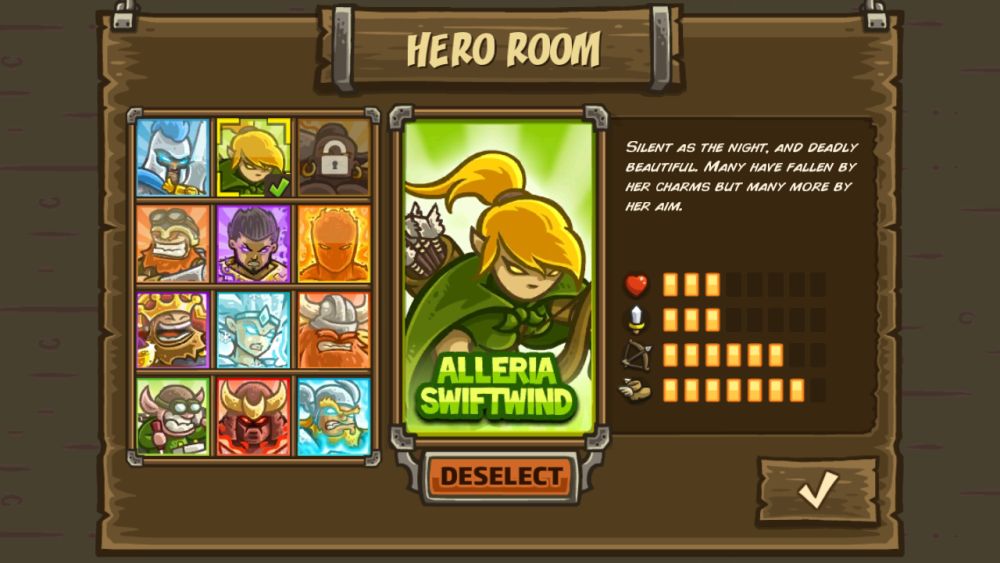
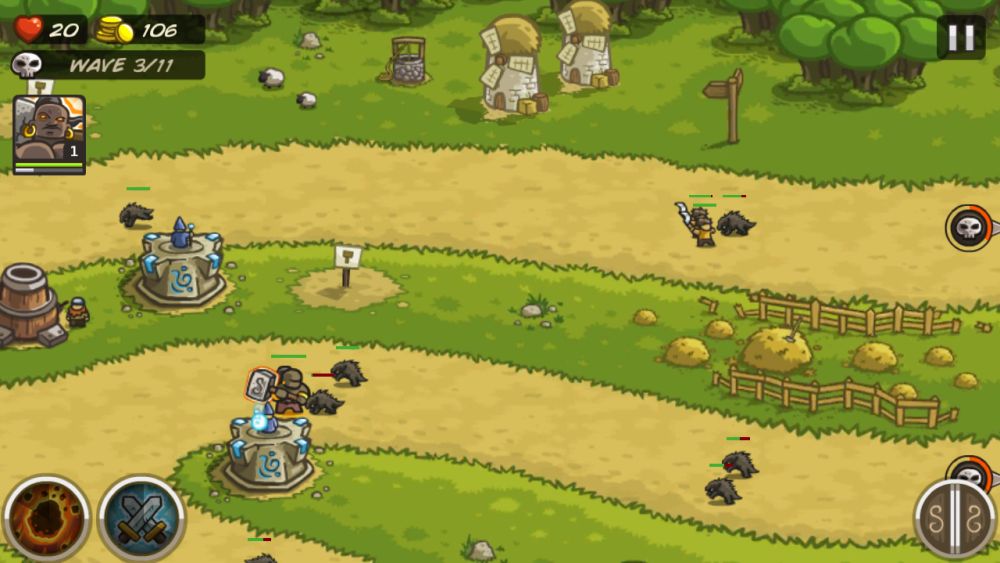
Heroes are powerful units that you can command to move around on the map. By tapping on their portraits in the upper left of the screen and tapping on a location, you can order a hero to move there.
Their array of skills and special characteristics make them key players in your overall strategy, whether for blocking enemies or using their high damage skills from a safe distance. And if they fall – don’t worry, they’ll respawn after a while.
Playing through Kingdom Rush’s campaign mode will grant you access to 3 heroes. Other heroes can be purchased from the item store for real-life cash.
The Gem Store
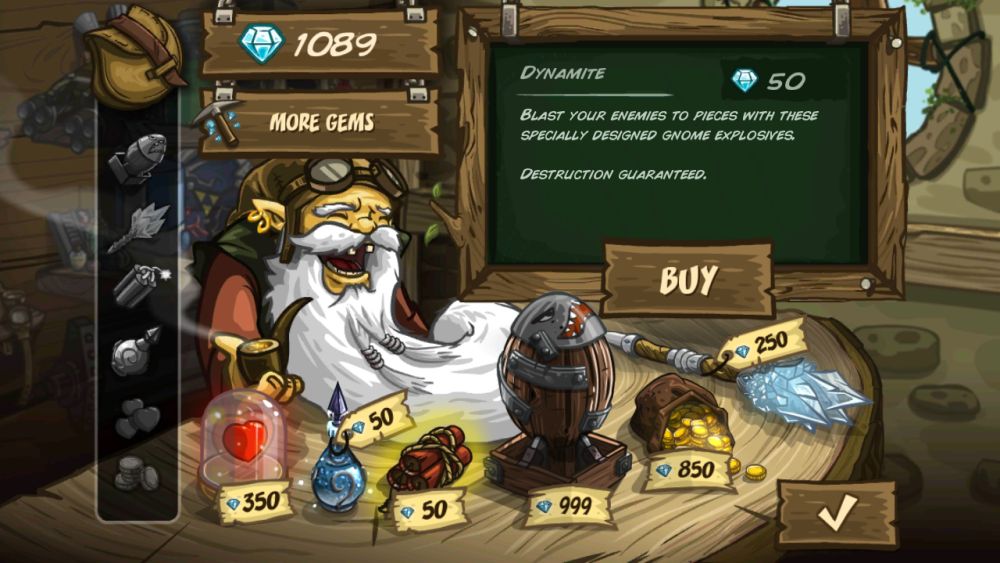
If you’re having difficulty in a particular level, you can use gems to buy powerful items in the gem store. These are gamechanging items that can turn the tide of battle on their own. Take note that gem items aren’t usable in either Heroic or Iron Challenges.
Gems can randomly be acquired from killing enemies. You can also buy gems directly, if you want to.
Upgrade Your Army
Towers and spells can also benefit from the passive upgrade tree where you can buy permanent upgrades and reset them at any time. This doesn’t cost money though; it uses the stars you’ve been getting as currency!
Stars and Where to Find Them
Now that you know that stars aren’t just an indicator for high scores, you’ll want to know where to get more of them.
In campaign mode, you can get up to 3 stars per stage, depending on how many lives you have left at the end of the level. 18-20 lives will award you a perfect 3 stars, 6-17 lives will give 2 stars, and 1-5 lives give one star. If you can’t get 3 stars in a level off the bat, don’t worry – you can come back and try them at any time.
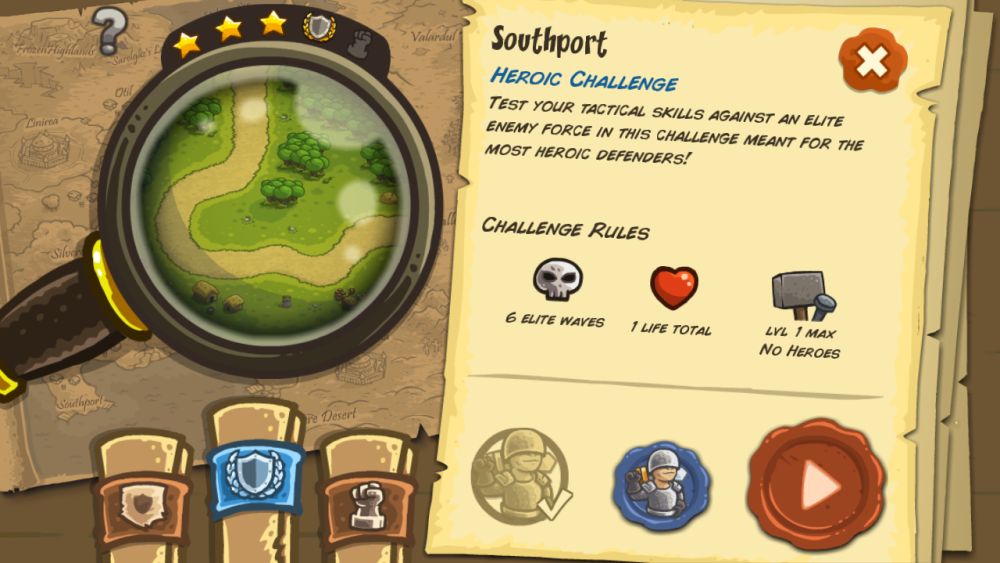
You can get another star from completing each level’s Heroic Challenge. This trial will have you begin at 1 life, locks your technology tree, and limits upgrades to a certain level. Enemy wave compositions are also different and more difficult than they are in normal mode.
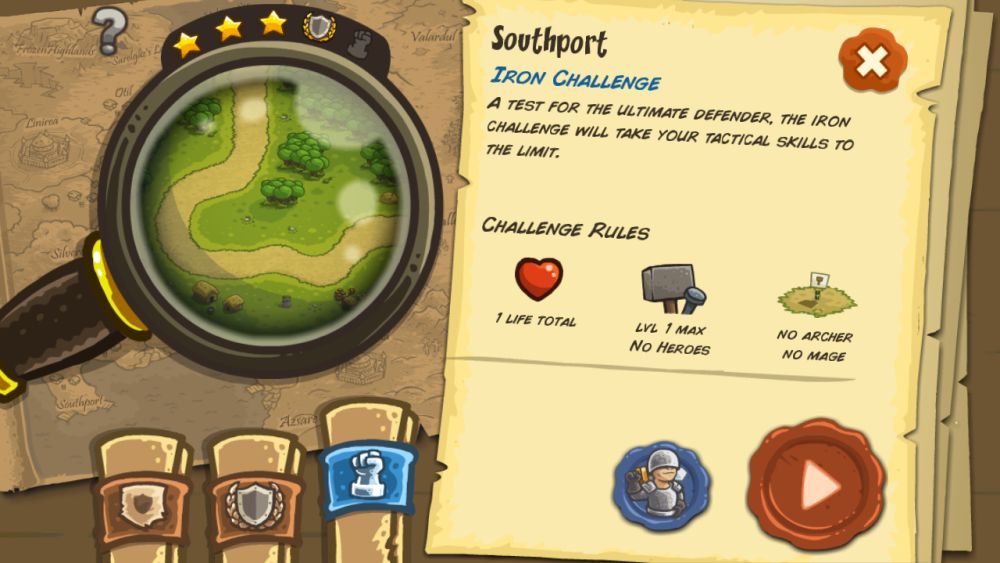
Iron Challenges are the greatest trials Kingdom Rush has to offer. Not only do they impose the same restrictions as Heroic Challenges, but they also ban you from building certain towers. Iron Challenges aren’t divided into waves either – there’s just one very long wave of an indeterminate amount of enemies of different types.
These challenges are meant for skilled commanders, so don’t be frustrated if you can’t get them on the first go. Completion of each stage’s Iron Challenge awards one star.
The Upgrade Tab
The upgrade tab is accessible by tapping the hammer icon at the lower right of the screen when you’re on the world map.
There are six columns of upgradeable skills. Four of these are for your towers, and the other two are for your two spells. You’re free to experiment with different upgrades, since you can reset this the upgrade tree for free at any time.
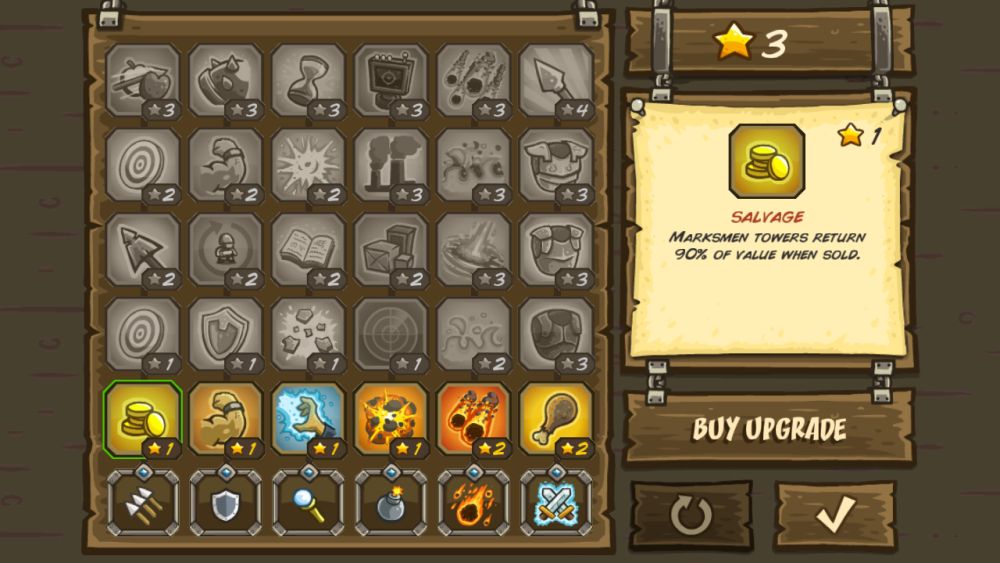
Archer Upgrades
Salvage: Costs 1 star. All Archer Towers are now sold for 90% of their original value, instead of 60%. This allows you to put up Archer Towers for quick reinforcement at a much lower hit to your purse.
Eagle Eye: Costs 1 star. Increases the range of all Archer Towers by 10%. More range = more damage.
Piercing Shots: Costs 2 stars. All Archer Towers ignore 10% of armor. While this sounds good on paper, in practice you really should be using Mage Towers to counter armor as enemies with higher armor will just laugh off a 10% piercing effect. The fact that you can’t skip this upgrade makes it even more chafing. It’s not bad, but there are better upgrades.
Far Shots: Costs 2 stars. Increases the range of all Archer Towers by another 10%. This must-have upgrade stacks with Eagle Eye for a total of 20% increased range!
Precision: Costs 3 stars. All Archer Tower attacks have a 10% chance to deal double damage. More damage is always good, but look at your overall strategy before you commit to this upgrade. Ranger Hideouts have insane attack speed but low damage, so they’ll get good mileage out of this. Musketeer Garrisons, on the other hand, won’t get as much out of this due to their slower attacks.
Barracks Upgrades
Toughness Training: Costs 1 star.Increase soldier health by 10%. More health means they can take more hits before going down.
Better Armor: Costs 1 star. Barracks soldiers have 10% increased armor. Anything that improves soldier longevity is a good thing.
Improved Deployment: Costs 2 stars. 20% increased rally point range. Faster soldier training. This is the Barracks upgrade that you must get; the rally point range bonus lets you use a single barracks to block 2 paths with careful micromanagement and the reduced training time helps Barracks block areas faster.
Endurance Training: Costs 2 stars. Another 10% soldier health increase is great in my book.
Spiked Armor: Costs 3 stars. 10% of damage taken by soldiers is returned to the attacker. This upgrade affects reinforcements and heroes. This upgrade is a low priority – it barely improves soldier longevity and costs 3 stars that would be better spent on offensive upgrades for other towers. Even Barbarians, the most offense-oriented soldier type, rely on their attacks to kill enemies, not damage reflection.
Mage Upgrades
Spell Reach: Costs 1 star. 10% increased attack range for all Mage Towers. Longer range means better performance, so go for it.
Arcane Shatter: Costs 1 star. Mage Tower attacks destroy 3% armor when hitting an enemy. Good if your mages aren’t dealing enough damage to kill mobs.
Hermetic Study: Costs 2 stars. Mage Towers cost 10% less gold to construct and upgrade. Less gold spent on mage towers means more gold for your other towers.
Empowered Magic: Costs 2 stars. +15% increased damage for all Mage Towers. Helps mage towers do what they do best, and 15% is a sizeable boost.
Slow Curse: Costs 3 stars. Halves the movement speed of enemies hit by any Mage Tower. Great for Arcane Wizards as the slow helps them burst down slowed single targets at once. Good candidate for a 3-star upgrade.

Artillery Upgrades
Concentrated Fire: Costs 1 star. 10% increased damage for artillery towers.
Range Finder: Costs 1 star. 10% increased range for artillery towers.
Field Logistics: Costs 2 stars. Artillery construction and upgrade costs reduced by 10%. Like the mage tower upgrade, more gold to spend on your other towers.
Industrialization: Costs 2 stars. Tier 4 artillery tower abilites cost 25% less gold. This both saves a lot of gold and encourages you to push for fully upgraded tier 4 artillery towers with powerful skills.
Smart Targeting: Costs 3 stars. All artillery towers deal their maximum damage inside their blast radius; in the case of the Tesla x104, all the chain lightning’s jumps deal maximum damage. This will massively increase the efficiency of your artillery towers. Smart Targeting is definitely worth the investment if you prefer artillery towers.
Rain of Fire Upgrades
Blazing Skies: Costs 1 star. Adds 2 meteors to Rain of Fire and increases damage. The addition of 2 extra meteors provides a substantial boost to the spell’s damage. This upgrade should be high on your upgrade priority list.
Scorched Earth: Costs 2 stars. Meteors leave behind burning ground that lasts for 5 seconds. This along with Blazing Skies are always my first upgrade in any Kingdom Rush game. The burning ground deals significant damage over time, vastly improving your Rain of Fire.
The Fast & Furious: Costs 3 stars. Meteors do more damage and have 25% more area of effect. Cooldown of Rain of Fire is reduced by 10 seconds. Very good upgrade to get if you find yourself relying on meteors. The extra splash area is very nice, and the faster cooldown is the cherry on top of the cake.
Blazing Earth: Costs 3 stars. Doubles the duration and damage of burning ground. Cooldown of Rain of Fire is reduced by 10 seconds. Your mileage may vary on this one. Two instances of cooldown reduction brings Rain of Fire down to a 70 second cooldown, but the doubled damage and duration can be overkill.
Cataclysm: Costs 3 stars. Increases meteor damage. When casting Rain of Fire, 5 meteors will appear and target random areas. I’ve never gotten this upgrade because of overkill potential.
Call Reinforcements Upgrades
Well Fed: Costs 2 stars. Reinforcements now have 50 HP and deal 1-3 damage. 50 HP is a lot for the early game but will fall off quickly. The extra damage doesn’t really matter.
Conscripts: Costs 3 stars. Reinforcements now have 70 HP, 10% physical damage reduction, and deal 2-4 damage. The 10% armor is nice, but if I had 3 stars, I would spend them somewhere else first.
Warriors: Costs 3 stars. Reinforcements now have 90 HP, 20% physical damage reduction, and deal 3-6 damage. It’s much like the Conscripts upgrade – too expensive for what it does.
Legionnaires: Costs 3 stars. Reinforcements now have 110 HP, 30% physical damage reduction, and deal 6-10 damage. If you’ve been investing in this tree, you’ve now sunk 11 stars that could have gone elsewhere.
Spear Throw: Costs 4 stars. Legionnaires gain a spear throw attack that deals 24-40 damage that can target both ground and air units. This would be a fantastic upgrade if it wasn’t locked at the back of a tree. It’s also the only upgrade that costs 4 stars. 24-40 damage is nothing to brush off, though take note that if they’re pushed to melee range, your reinforcements will use their 6-10 damage melee attack again. The anti-air is also great for last-ditch defenses.
Know Your Enemy
Now that you know what your army can do and how you can upgrade it to its fullest potential, it’s time to have a look at our enemies. The minions of Vez’nan are many, from simple goblins to vile necromancers and infernal demons. The first time you encounter an enemy, the game will offer you a short briefing on that unit. These briefings can be found in the encyclopedia on the world map, if you’d like to read them again.
Enemy Statistics
An info tab will appear when you tap on a unit. If you tap on an enemy, you’ll see some of their vital statistics, as explained below.
HP is denoted by a heart and represents how much health a unit has. It dies if its HP hits or goes below 0.
Damage is represented by a sword. It indicates the minimum and maximum damage that this unit can do when it attacks. Take note that enemies cannot attack towers, and this damage comes into play when they fight soldiers, heroes, or reinforcements.
Armor and Magic Resistance are indicated by a gray and blue shield, respectively. They affect how much resistance this unit has to attacks of the respective type.
Speed is denoted by a boot. It’s a general measure of how fast this unit moves. While most beefy monsters move slowly, there are exceptions.
Lives for monsters is marked by a skull. This affects how much damage this monster will inflict to your lives, if they break through your defenses. Stronger monsters tend to do more damage than their smaller kin.
General Enemy Types
While each enemy has its unique gimmick, there are four general classifications that can apply to them. These are Armored, Magic Resistant, Flying, and Boss.
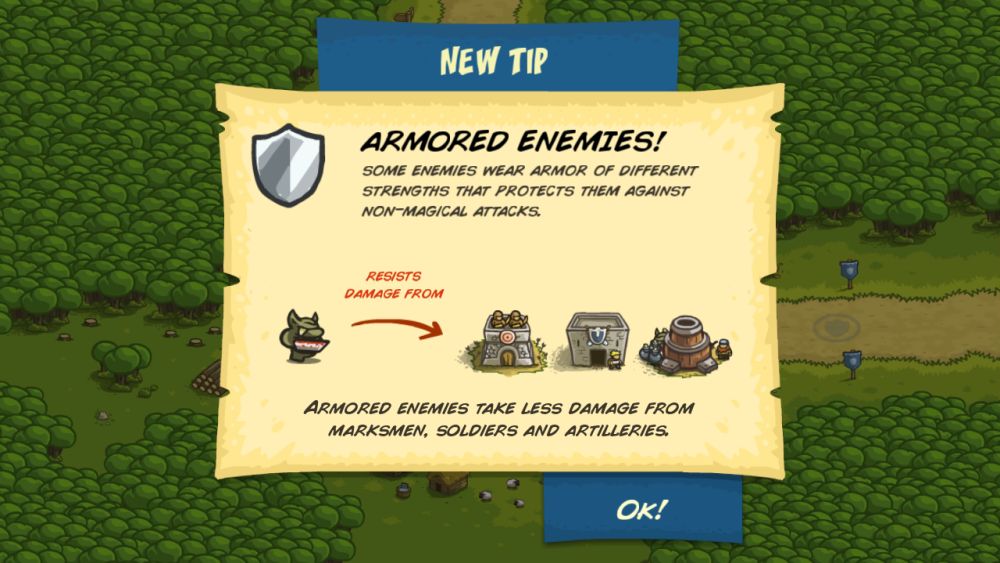
Armored enemies have varying levels of physical protection. Armor is denoted by a gray shield icon on a unit’s info tab. “Low” armor means they take 1-30% less physical damage, “Medium” is a 31-60% physical damage reduction, “High” is 61-90% physical resistance, and “Great” is 90%+. While you can eventually defeat armored monsters by spamming physical attacks, it’s much better to use mages to defeat them, as magic attacks ignore armor.
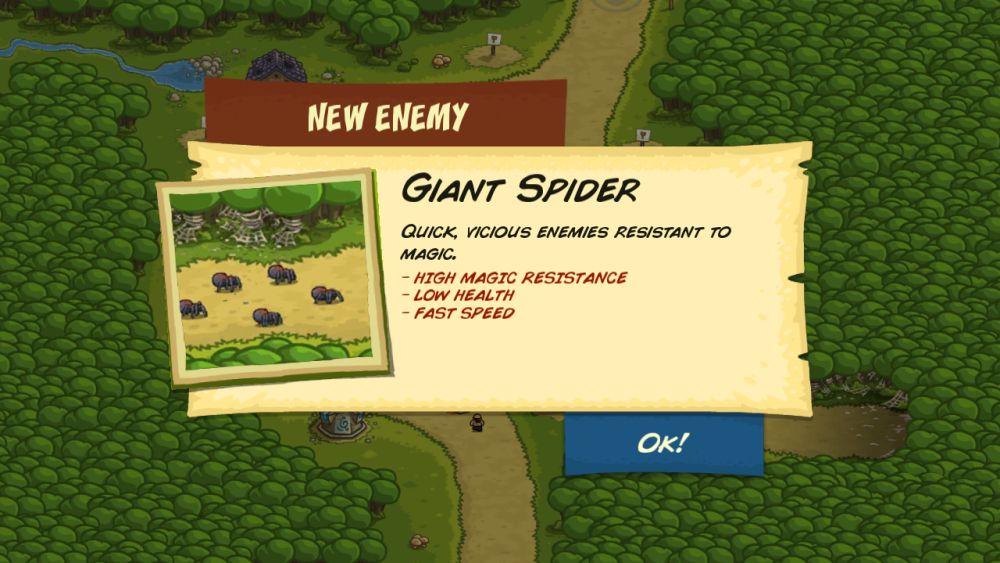
Magic Resistance is the counterpart to armor, denoted by a blue shield. The same terms are used when estimating magic resistance – low, medium, high, and great. These units are the inverse of armored enemies: they take greatly reduced magical damage but have no defenses against physical attacks.
It’s important to note that the game will always display the best protection type that a monster has. Also, outside of very specific encounters, monsters will only either have armor or magic resistance, never both.
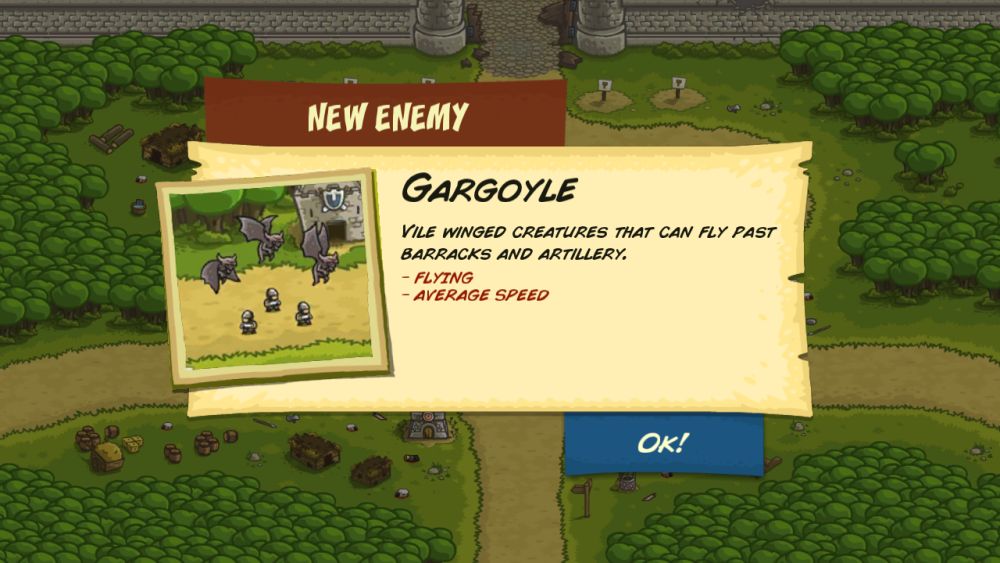
Flyers are a special kind of enemy that ignore your soldiers. While they tend to have less health and defenses than their ground-based comrades, no obtacles you place will give them pause. They must be shot down by archer and mage towers. Artillery towers cannot target them, but flyers will still take splash damage from explosions. And if push comes to shove, Rain of Fire will still work on them.

Bosses are special monsters encountered only in certain stages. They represent the greatest of Vez’nan’s forces and will require a lot of firepower to take down. Each boss has unique abilities that they will use to stop your towers and bring them closer to their goal. If a boss reaches the exit, you automatically lose the level.
Battlefield Tactics
Now that you know both yourself and the enemy, it’s time to have a look at the actual battlefield and see what you can do to guarantee victory for your forces.
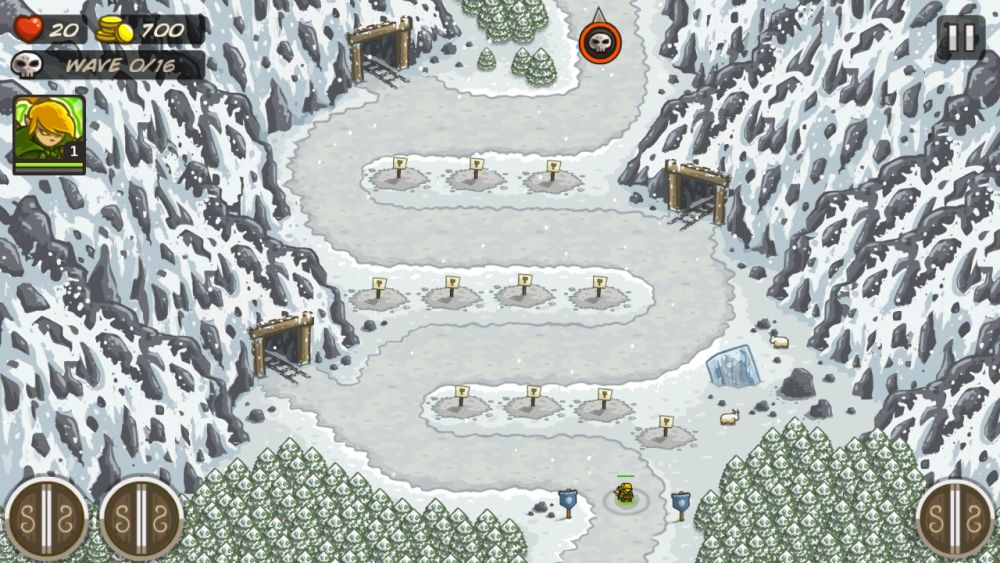
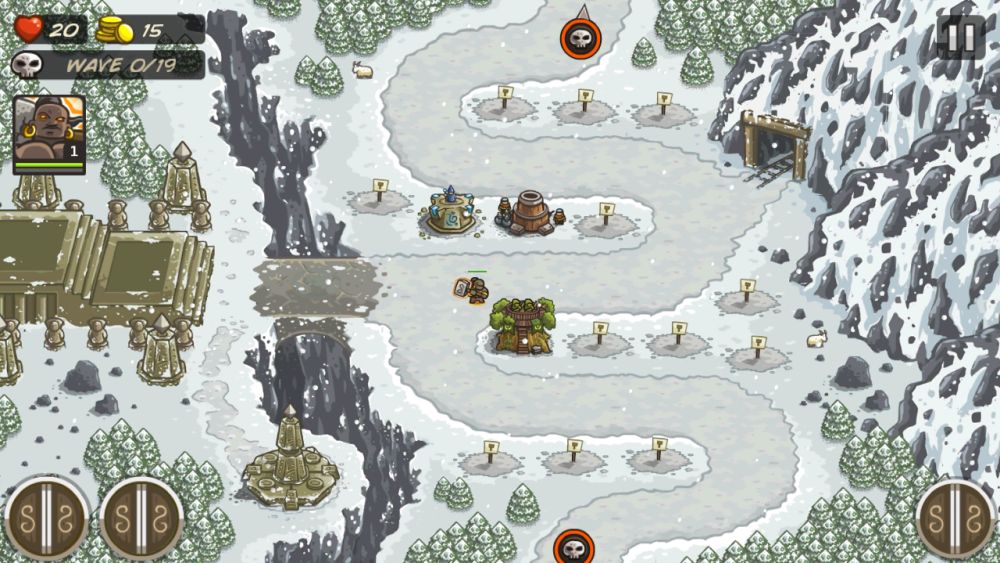
Analyze the Map
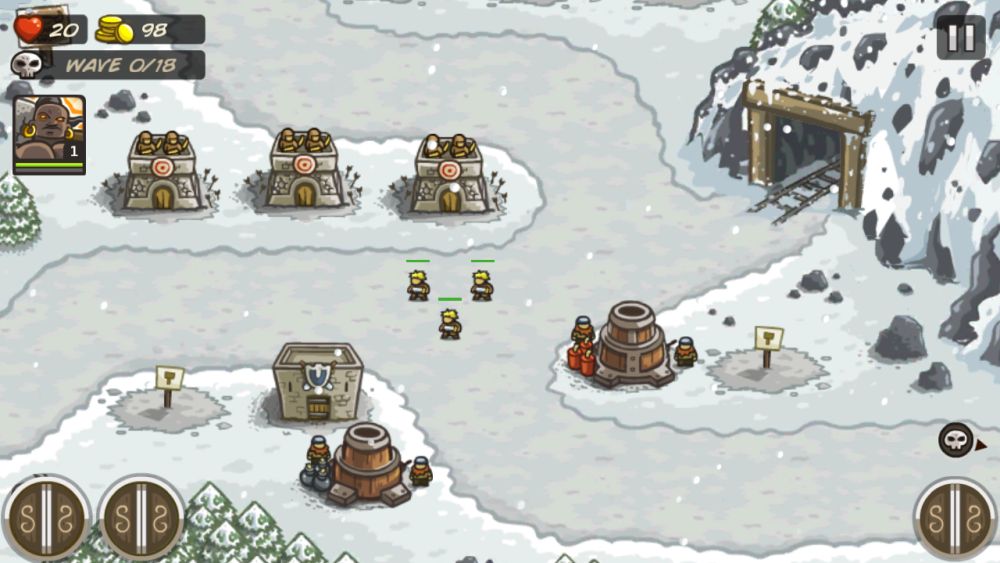
The lay of the land is different in each chapter. You might be able to build more towers in later levels, or maybe less. Chokepoints and spawn points need to be adapted to. There may be more than one road past your defenses, forcing you to spread your towers evenly and read the situation. The game won’t begin until you call the first wave, so feel free to spend as much time studying the map as you need.
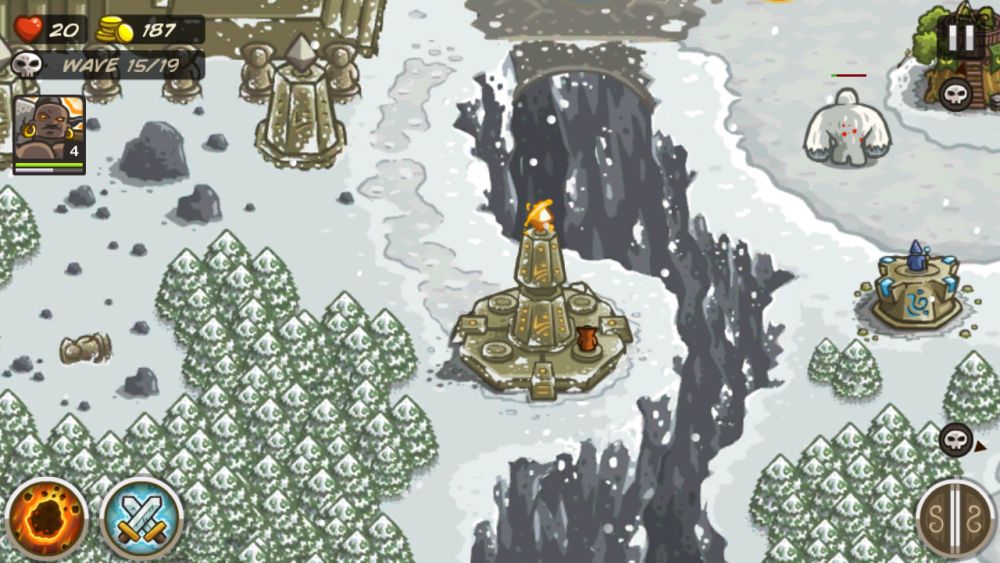
Sometimes there are special towers that are specific to some maps. You may want to use the pre-battle calm to check what they do. And if you decide your strategy isn’t going to work, you can sell towers at 100% of their price as long as the battle hasn’t already begun!
Each map may also have unique features that your enemies can use, which you’ll find out about as the stage goes on. Don’t be afraid to restart if things go south, and learn from your mistakes!
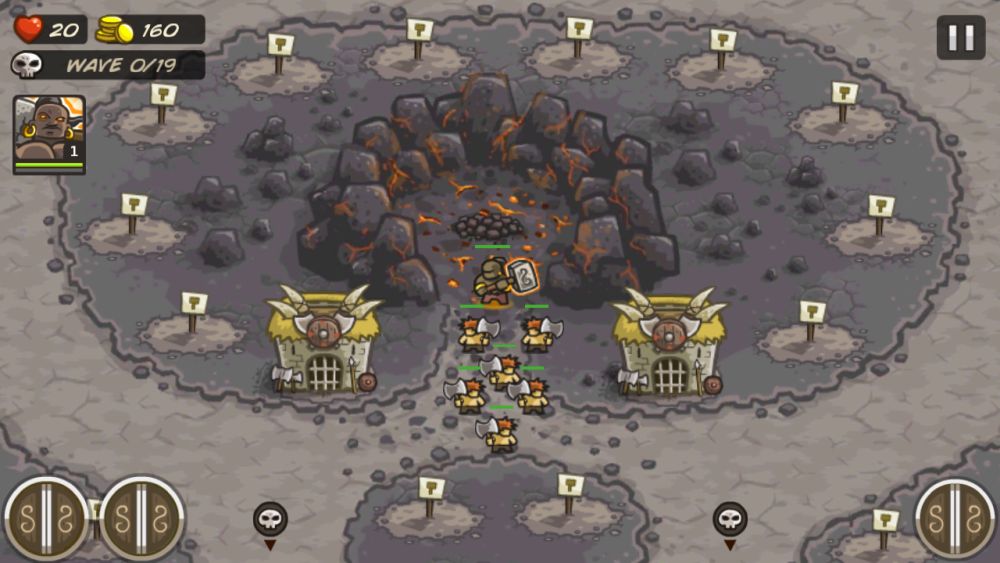
Chokepoints are Key
Utilize chokepoints to your advantage. Shore up your soldiers and defenses and find points where monsters will have to circle giving towers more time to fire on them. In particular, watch out for large locations where multiple towers can take advantage of Barracks and reinforcements.
One thing that new players often forget is that they can change the rally point of their Barracks. Switching the rally point around is essential to getting the most mileage out of your solders.
While we’re on the topic of chokepoints, look for spaces where all enemies have to pass, regardless of where they’re coming from. This saves you gold and can better optimize your strategy.
Separate Troublesome Foes
Speaking of reinforcements, they’re great at separating troublesome foes from the rest of the wave. Enemies like Shamans that occasionally heal all enemies around them are a good example of a foe that should be singled out by your reinforcements. By tying them up – even for a few seconds – you can disrupt the enemy’s formation and greatly hamper the effectivity of its healing skill!
More Towers versus Better Towers
In some situations, it’s better to have more towers than better towers. You’ll have to read the battlefield situation as it goes, as there’s no one situation where each case is strictly the better option.
A good example of this is the Barracks. More Barracks mean more chokepoint locations and more enemies delayed, while upgrading them means longer delay time in that Barracks’ rally point. Which do you need more? That’s a question only you can answer, based on your overall strategy.
One thing I will caution against here is too many low level Archer towers – level 1 archers are among the weakest towers in the game, and will massively benefit from being upgraded to at least level 2.
Use Your Heroes
Your heroes are powerful units that you can command directly. Their stats are way above what your standard units have, and more often than not, they’re capable of dealing respectable damage themselves.
It’s always a good idea to have your hero on standby to deal with urgent situations on the battlefield – whether that’s to block off a powerful enemy, or to assist a beleaguered wave that has too many enemies. And if nothing else, you can leave them by the exit to serve as a last line of defense.
Read the Wave
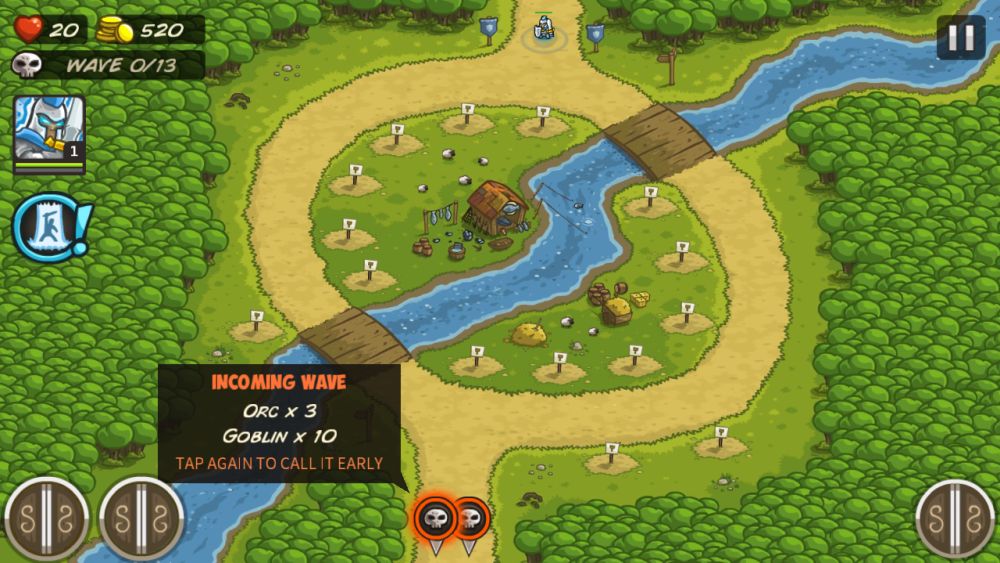
You can check the enemies in a wave by tapping the skull icon. This lets you prepare accordingly. On harder maps, waves can come from multiple directions or may even split up at forks in the road. As the game progresses, waves become harder to deal with and enemies will gain new gimmicks, so it’s important to know what you’re dealing with so you can prepare your defenses appropriately.
Who Dares Wins
You have the option to call a wave early in. Calling waves early is a risky move but it not only gives you bonus gold but also bonus cooldown to your spells. If you find that your defenses are holding up just fine with the current wave, then go ahead and call the next one. On the other hand, you may want to check what your next wave will call, as it’s possible that your enemies want you to call the next wave early to push their strategy!
In this part, I’ll show a small demonstration of how these tactics can be used in Kingdom Rush.
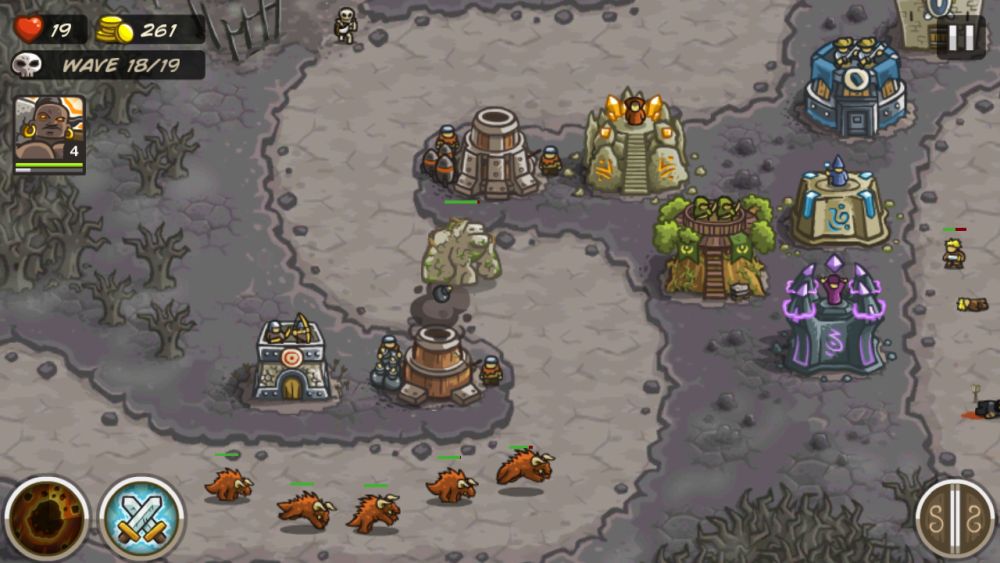
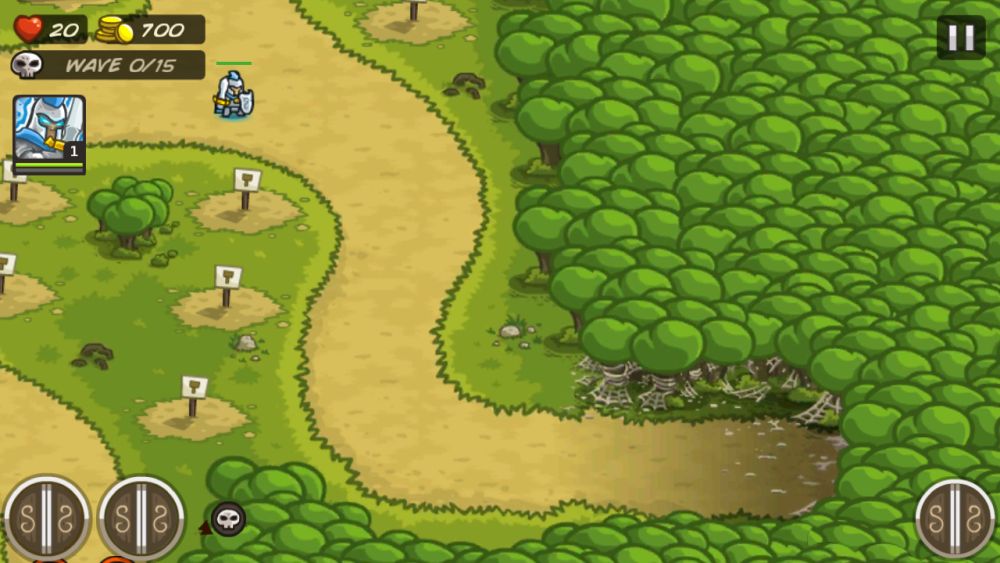
Level 1 – Southport Walkthrough
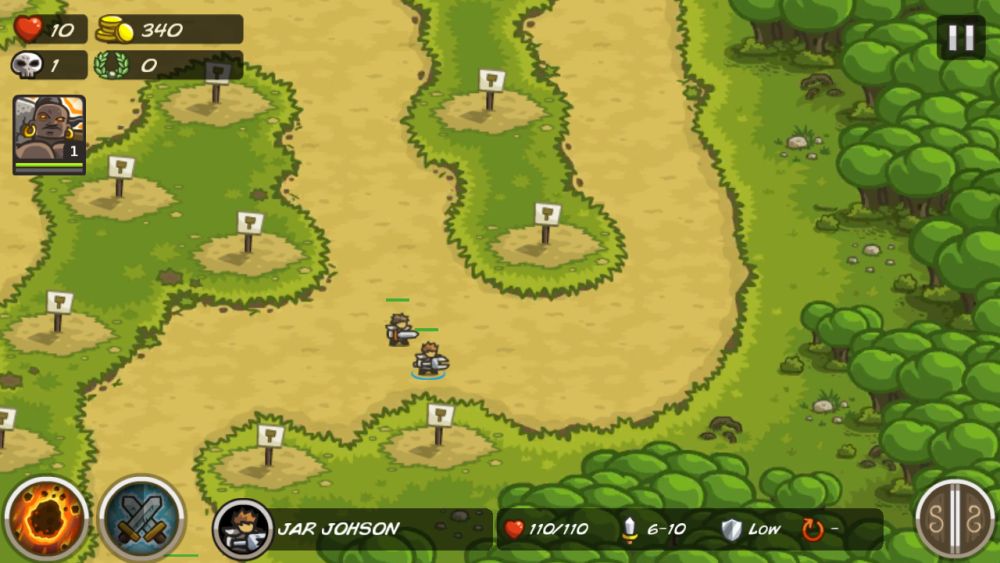
This is the first level of the game. I’m not allowed to remove my hero, so I’ll place him at the exit of the level where he’ll just sit. I’ve removed all my upgrades at this point for an even playing field as well.
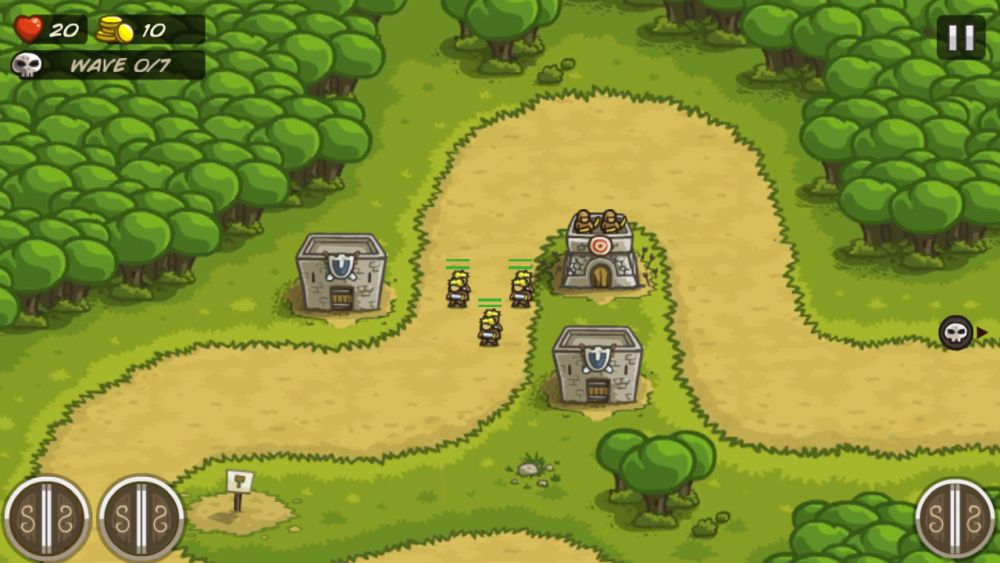
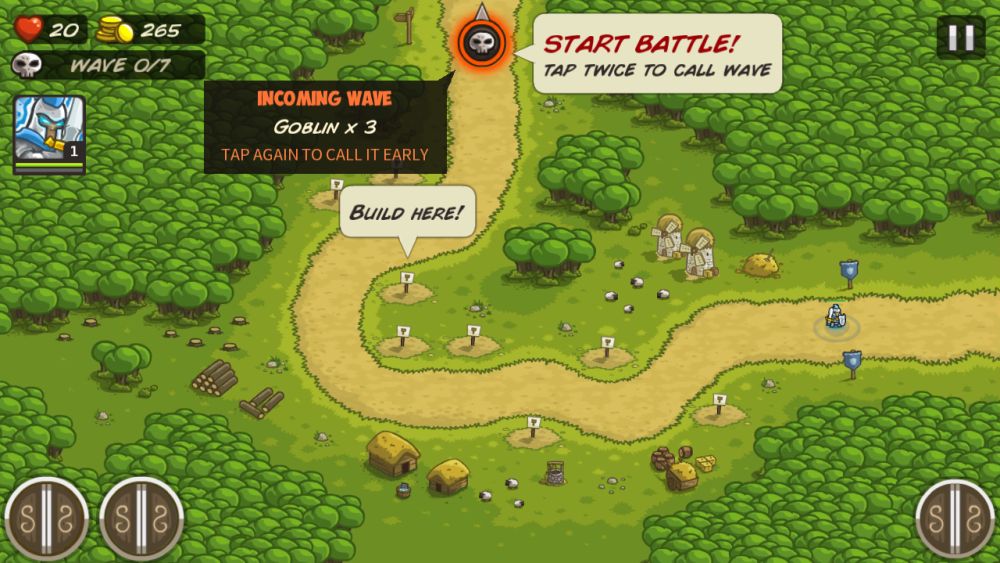
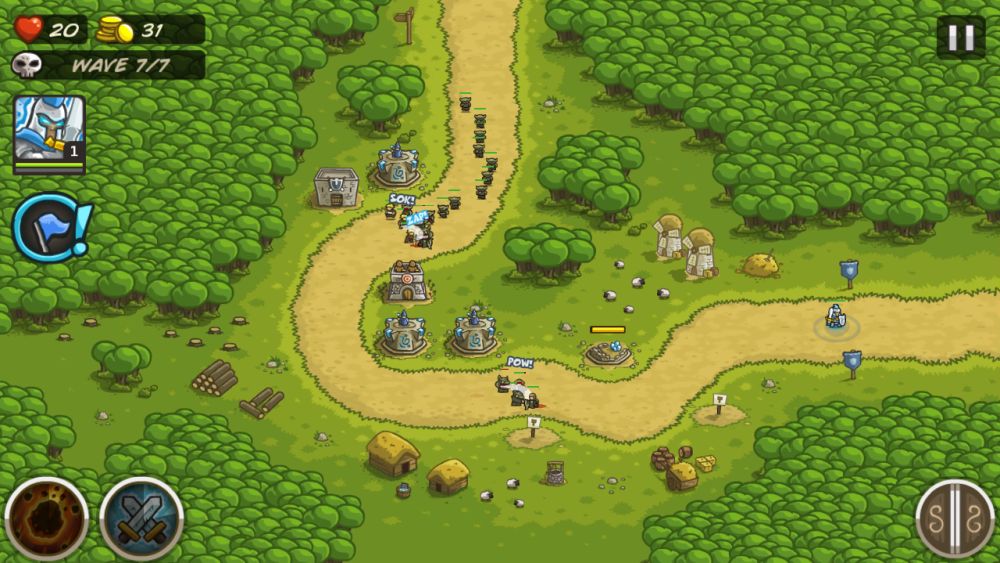
The game points to a specific plot to build a tower on – that area is a good recommendation because of the curve. The longer and more complex the path in a tower’s range, the more time that tower has to pepper enemies.
I tap on the skull icon to check what enemies I’ll be facing. It’s 3 goblins, which doesn’t sound very difficult. For my defenses, I put an Archer on the recommended plot and a Barracks and Mage Tower on the other side.

The goblins turned out to be really weak – they only have 20 HP, 1-4 damage and no armor, so I can make quick work of them. That said, the next wave is more goblins, so I’ll call the wave early for some bonus gold.
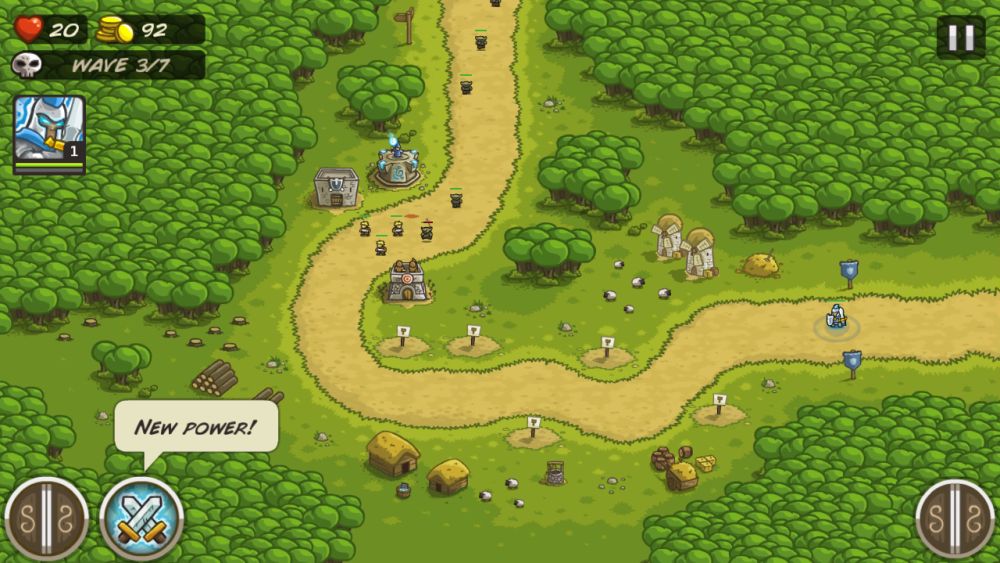
The Call Reinforcements spell has been unlocked, but I don’t see a reason to use it yet. Nor is there any need to build new towers, so I’ll hold on to my gold for now.
The soldiers from the Barracks are beginning to pull their weight, blocking goblins from passing that area and giving the Mage and Archer Towers time to do their work.
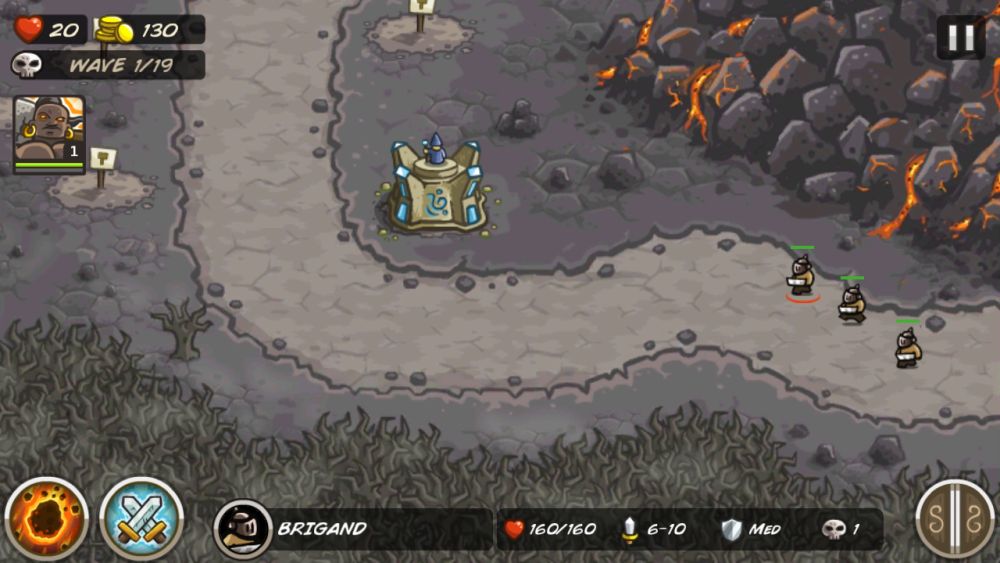
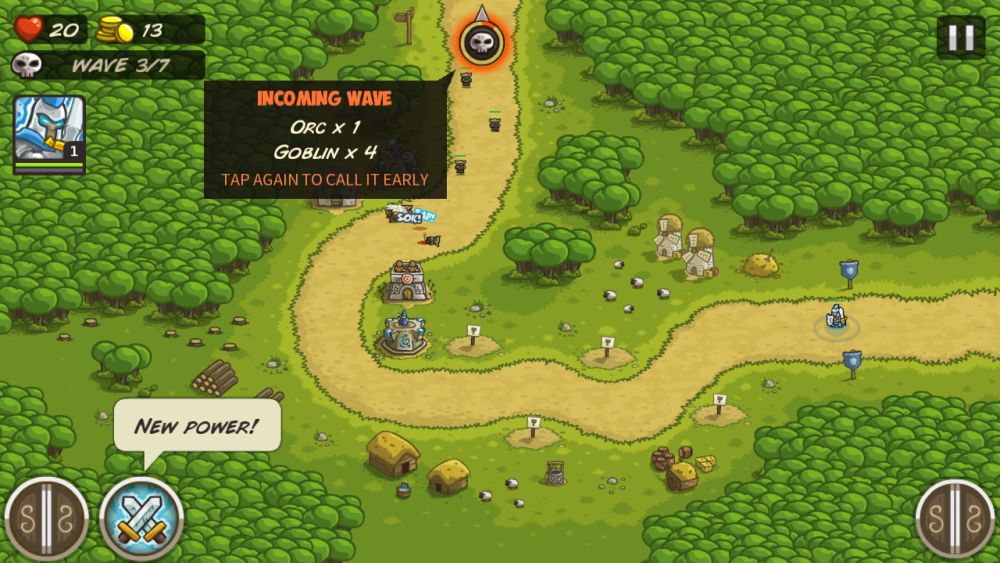
The next wave sounds more difficult – there’s an orc and 4 goblins. The goblins are easy, but I’m not yet sure what the orc can do.
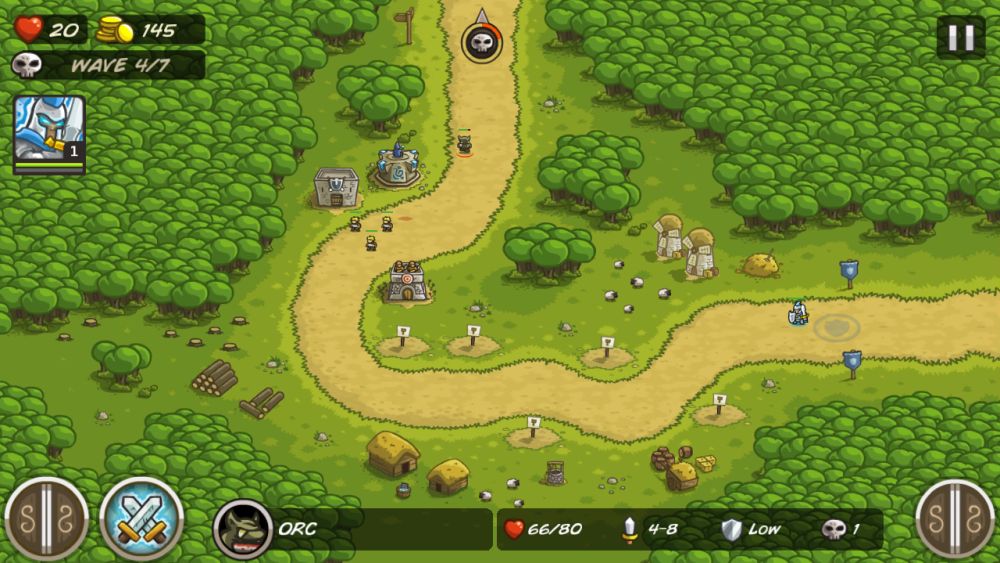
The orc is a slow moving unit, but it does significantly more damage, meaning that my soldiers won’t be as useful against it. It’s also armored against physical attacks, making both archers and soldiers less effective. It’s a good thing I put a Mage Tower near the entrance, who can greatly damage if not outright kill the orc.
I see that one orc isn’t a problem, so I call the next wave – a few orcs – early for some bonus gold.
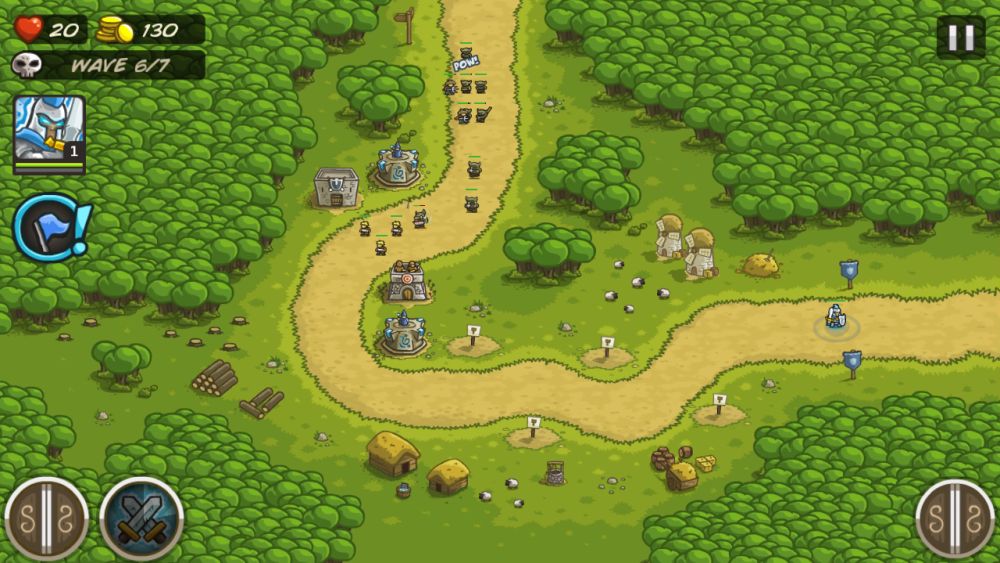
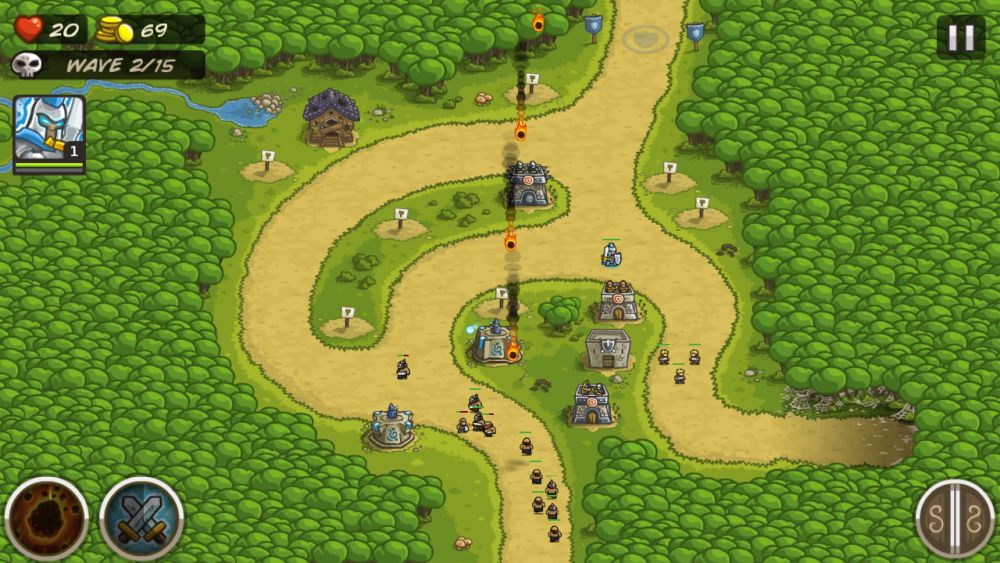
I got greedy and called the next wave early, which was a bunch of goblins. Now, I have two waves walking down the path. To mitigate this, I cast Call Reinforcements near the goblins to pull some of them away. I also build a Mage Tower below the Archer Tower, just in case.
It seems pulling the orc wave early wasn’t a wise idea. They’ve made quick work of my soldiers and are now advancing to the exit with a goblin in tow. I buy another Mage Tower further down the path.
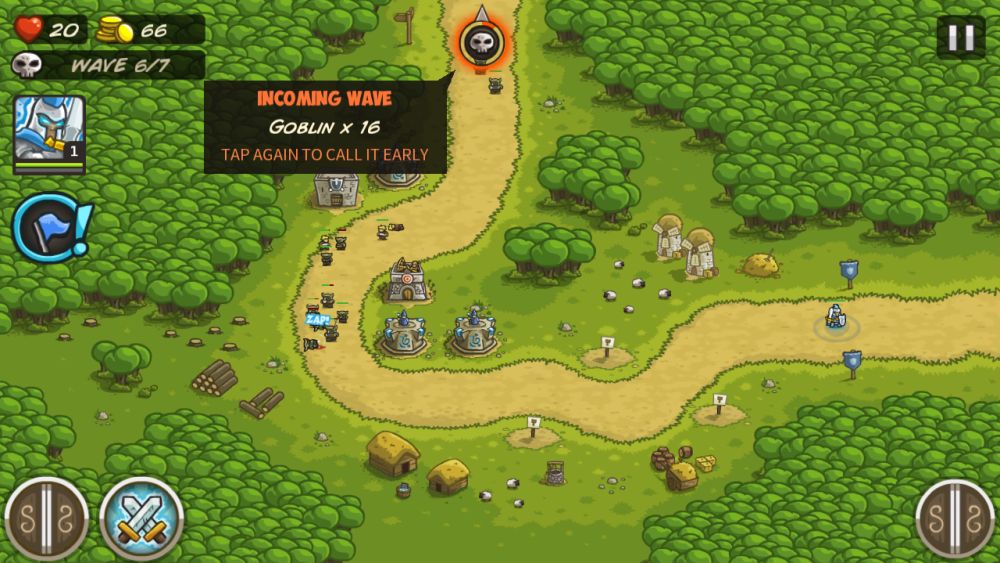
We’re now on wave 6 of 7, so the next wave is the last one. Thankfully, it’s just a bunch of goblins – 16 of them, to be precise.
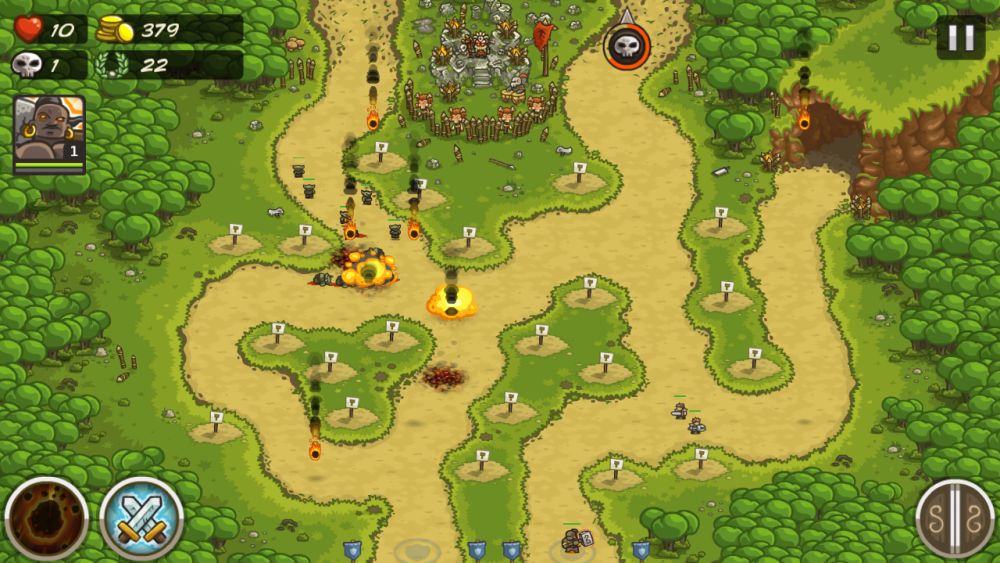
Rain of Fire is finally available to me, so I cast it near the monsters’ entry point to dispose of some of them. Meanwhile, the three orcs and the goblin are still making their way to the exit. The mages are doing what they can, but it’s not enough.
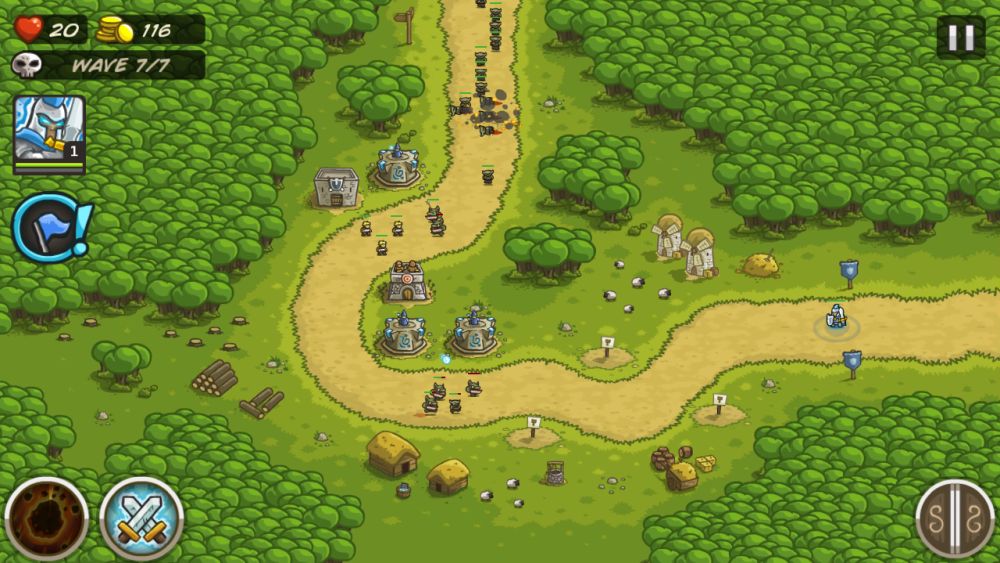
My soldiers in the upper lane are being overwhelmed, but that’s fine – they knew the dangers of the job they signed up for. My most pressing concern at this time is the small group of 4 at the bottom, so I build yet another Mage Tower to kill the orcs. I also cast Call Reinforcements near them to buy my mages more time.
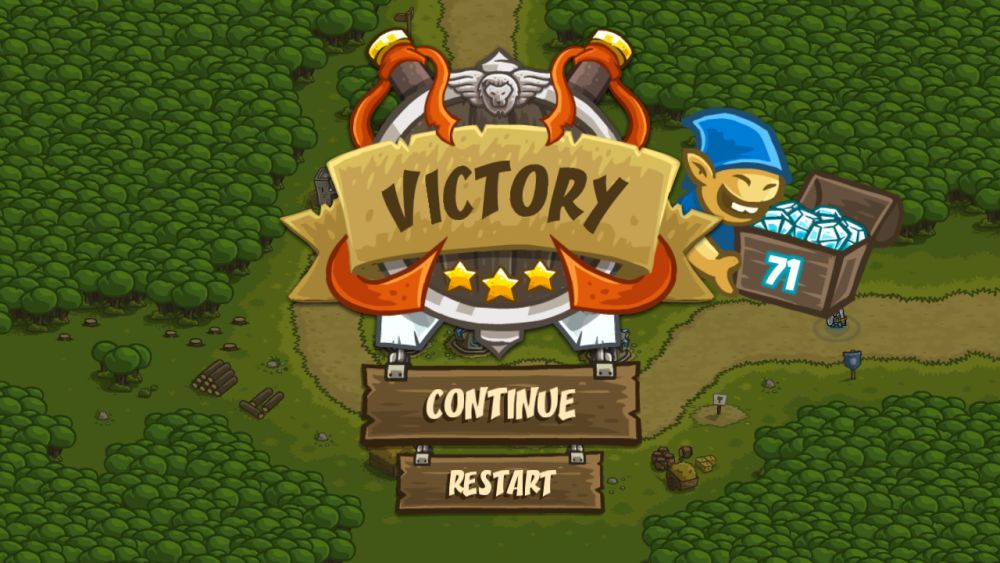
The third mage tower comes in clutch and wins the day! Since I lost no lives, I get a perfect 3-star score.
A Path’s End And Your Journey’s Beginning
We’ve reached the end of this instruction manual, general. I hope you learned something new from this that will help improve your Kingdom Rush – and tower defense tactics! We’re always open to new ideas though, so if you find new tips or tricks that you think can help new players, let us know in the comment section below. But for now, your trials are laid out before you, and Vez’nans forces won’t wait forever. Adventure awaits!