Hail, champion! The kingdom is once again under attack by goblins, orcs, demons, and all sorts of miscreants, and we need your tactical expertise to direct our forces to man the gates and hold the lines!
Developed by StormX and available on both iOS and Android platforms, Idle Kingdom Defense tasks players with defending their castle against numerous waves of merciless foes. To help in this endeavor, players have access to mighty heroes, stalwart archers, talented crafters, and hardy masons to shore up their defenses and repel enemies.
While the game is quite straightforward, there’s a lot that you can do to make your idle defense so much better. If you’re feeling a bit lost, particularly about how to get stronger and where to go to power up your defenses, our Idle Kingdom Defense beginner’s guide will help light the way.
Rush Through Content For Facility Access
Much of the game is gated behind completing levels that may seem daunting to new players.
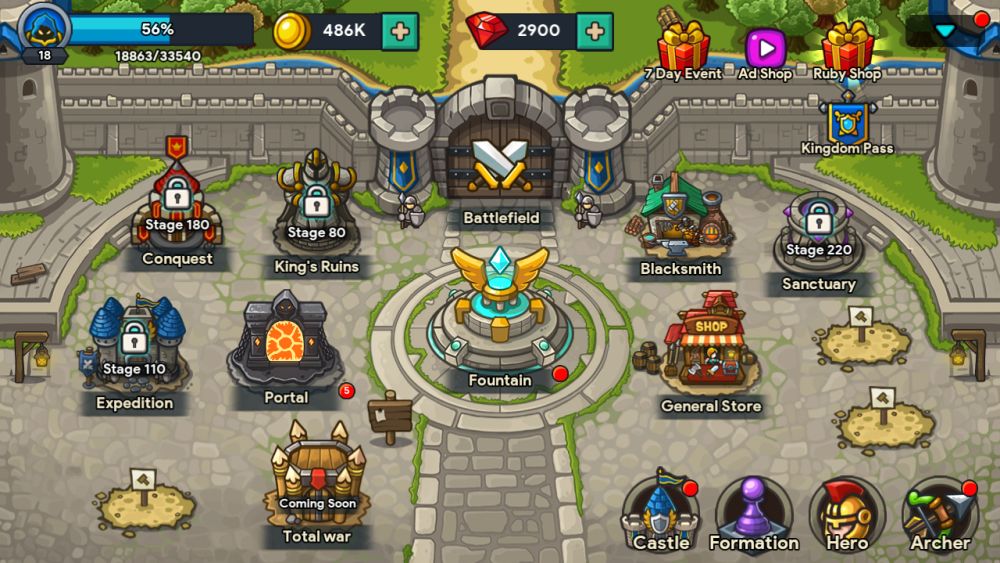
It’s in your best interests to rush the required stages as quickly as possible so that you can gain access to these vital facilities as soon as possible. To help you figure out how quickly you’re going to rush through stages, I’ll describe each of the earlier available facilities briefly.
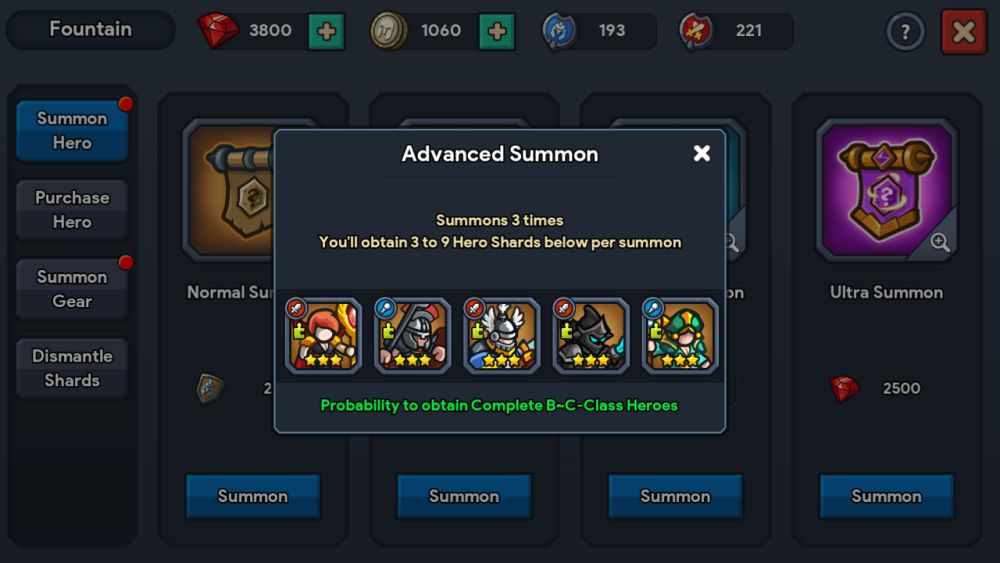
The Fountain
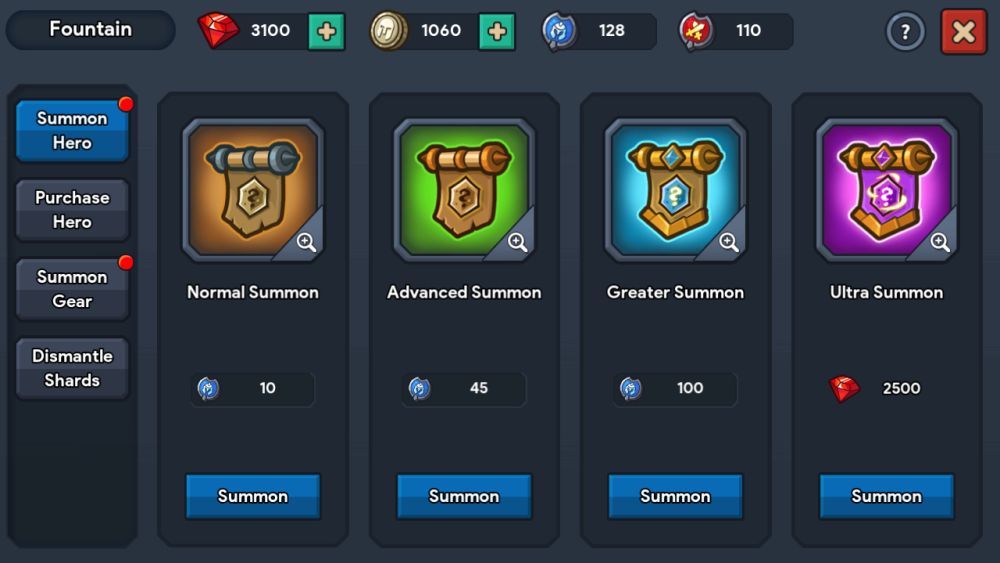
The Fountain is where you can roll for both heroes and equipment. There’s a lot of currency options when rolling at the fountain, from Hero Seals and Gear Seals to plain old Rubies (premium currency). The Fountain also lets you buy heroes or their shards directly by spending Ancient Coins, which you get from grinding up other heroes and shards. Shards can also be used to buy heroes directly, if you have enough of them. To summon via Shard, go to the Heroes menu, then tap Collection, then tap any hero you have enough shards for.
The General Store
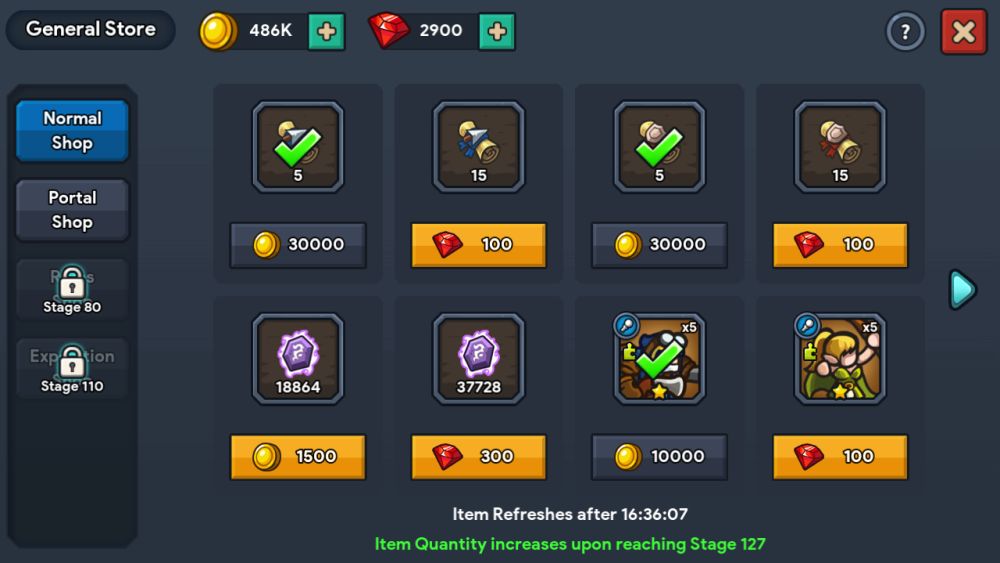
The General Store is…well, a store. Here, you can spend your hard-earned gold and Rubies buy items that will help you on your quest.
The store restocks every couple of hours. As you clear stages, the amount of items available in the store increases – check the bottom of the screen for info when your next quantity upgrade becomes available.
The store also sells items for different currencies. On the left panel, you can switch between the normal shop, portal shop, ruins shop, and expedition shop. These other shops use currency from those game modes, and offer even better items. The same restock rules apply to them.
The Blacksmith
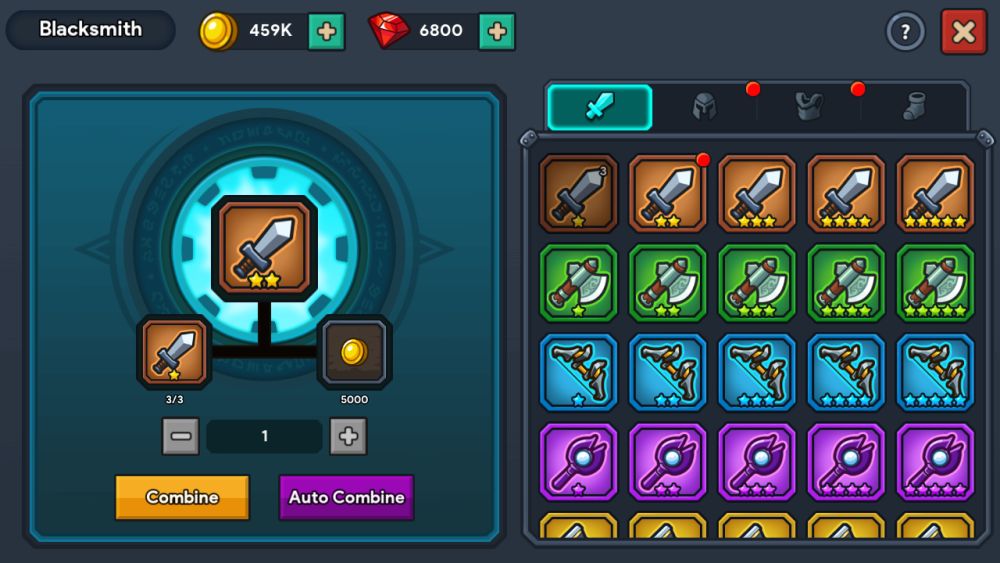
The Blacksmith, contrary to what you’d expect, is not required to craft items. Rather, this facility is used to combine hero gear of lower rarity to increase the number of stars they have, and eventually increase their tier. As you might have guessed from the image above, it’s a long, long road to top tier hero gear, so fuse whenever you can. Luckily, there’s an auto combine option that will fuse any gear you have that’s just lying around.
The Portal
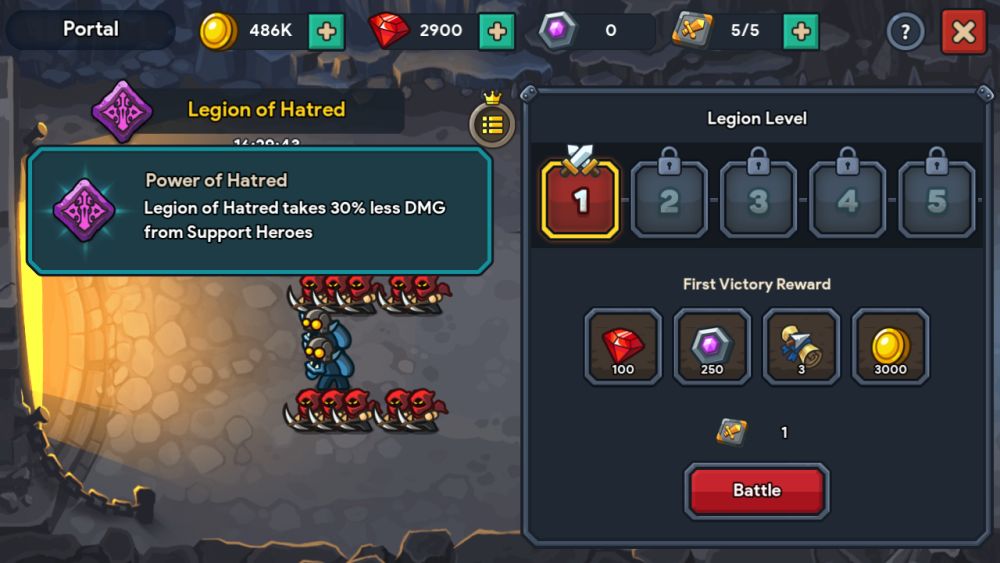
The Portal challenges you to a fight where enemies have special modifiers. These are tougher battles that pay out in Portal Coins that can be used at the General Store. The Portal trial changes after some time, so be sure to check what the challenge is when you log in on a new day.
As you clear Portal stages, you’ll gain progress in defeating their Legions and new stages with better rewards will become available to you, with 5 tiers of increasing difficulty. And yes, these are meant to be challenges, so they’ll be far tougher than regular battles. Don’t get discouraged and try again whenever you feel ready.
The Ruins
The Ruins are another set of trials similar to Portal mode. Ruins mode presents you with several stages that need to completed in succession to progress, with each level granting you rewards. Like Portal challenges, the Ruins reset after some time.
Unlike regular battles though, Ruins mode “only” requires you to survive for a certain amount of time to clear each level. While this may seem easy, it’s not. Ruins enemies are significantly harder, and the lack of a boss means you actually have to run down the clock to win. Compounding this difficulty is the fact that your castle doesn’t regenerate health in between Ruins stages.
Not all is bleak, though. You can purchase random but powerful buffs through the Ruins menu, as well as pay to repair your castle walls – but only up to 5 times. Judicious timing of your repairs and buffs will help greatly in completing Ruins mode.
Expeditions
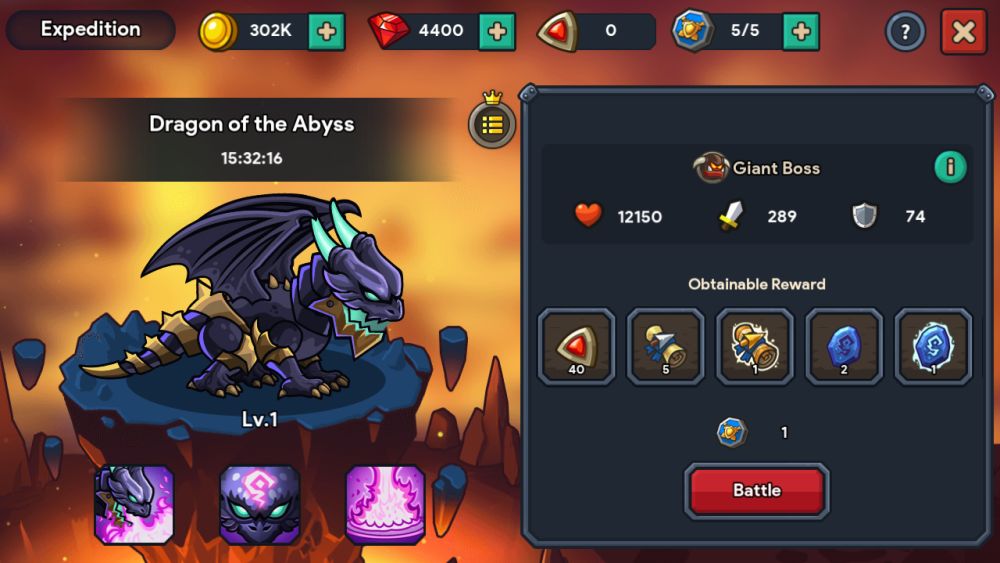
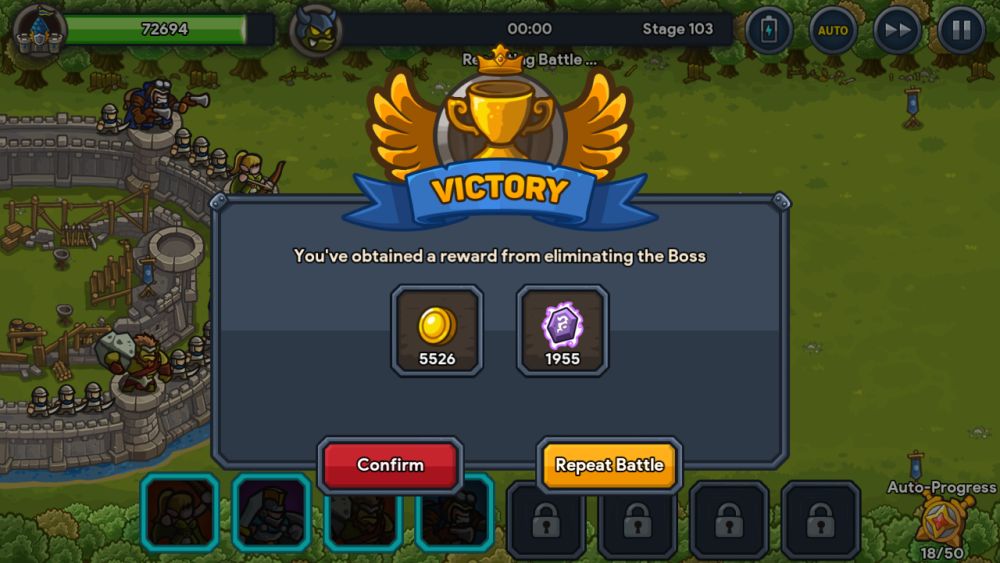
Expeditions let you fight difficult bosses for a bevy of rewards, including the all-important Expedition Coins for use at the General Store. These bosses have powerful skills that they will bring to bear against your defenses, and have stats far above what normal enemies possess. The raid boss changes over time, so challenge these titans whenever you can!
Defeating the boss will also drop a bunch of treasures that will promptly go into chests. You can select one chest for free, and can pay Rubies to open up to 2 more chests – the first chest will cost 100 Rubies, but the second one will cost a much bigger 500 Rubies. Make sure you actually want the prizes inside the chests (you’ll get a preview before they’re shuffled) and don’t shell out Rubies blindly.
Note that each time you defeat the boss, it gets stronger, and that you can only clear a boss 5 times per day.
Learn To Automate Efficiently
The game’s title itself tells you off the bat that idle grinding is the name of the game here. Gone are the days of pressing the same buttons over and over again to get the same results. But optimizing your automated grinding is a task that you’ll need to learn to make the most out of your AFK grinds.
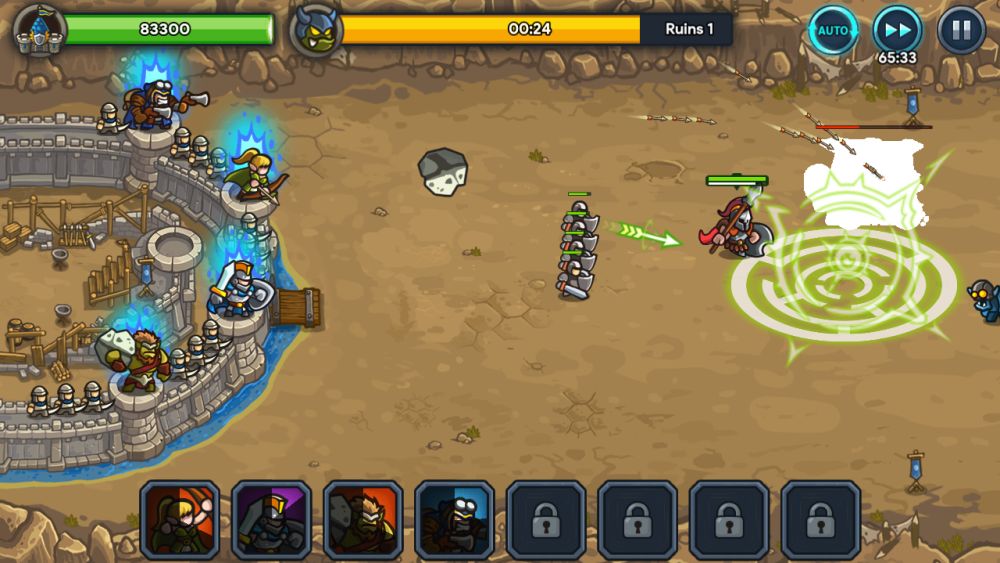
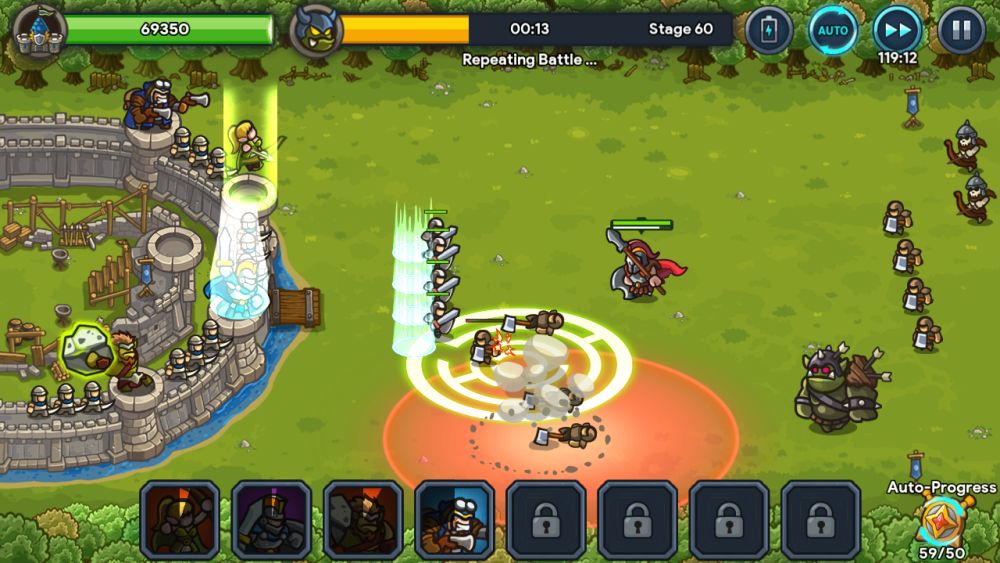
Use Auto Progress Mode
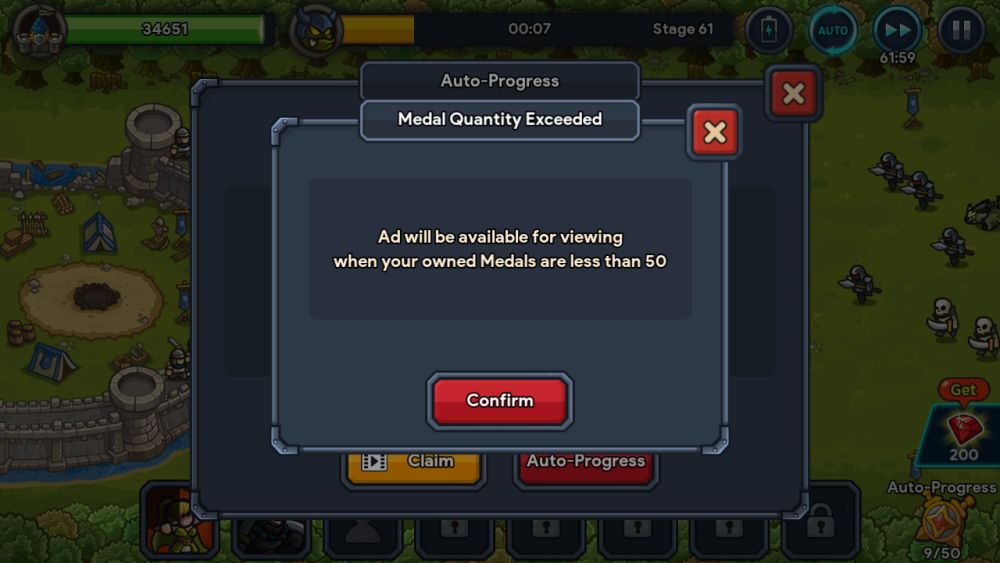
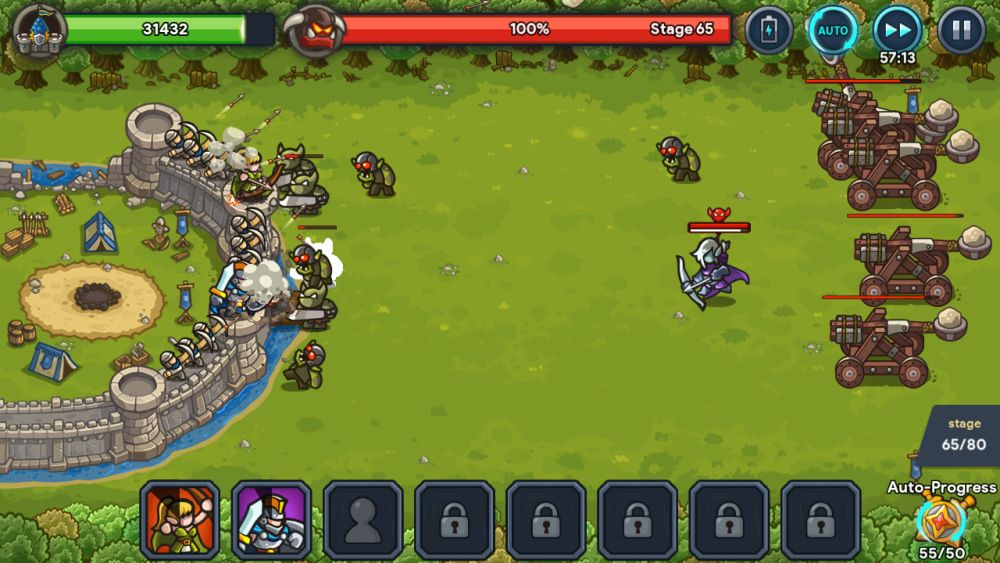
Idle Kingdom Defense allows you to automate playing stages and continuing to the next level via its Auto Progress system. To activate Auto Progress mode, tap the medal on the lower right of the screen.
The medal represents how many times you can use Auto Progress, with each battle consuming a medal. When you have less than 50 medals, you can watch an ad for some free medals. Before you start your auto grinding, be sure that the medal in the lower right is lit up – that means Auto Progress is on.
Tutorials will stop your Auto Progress because of their text prompts. If you’re using Auto Progress to blitz through the campaign, check back from time to time to make sure your progress isn’t being halted.
Speed Up The Game
To help you get the most of auto grinding, you can also speed up the game by tapping the fast forward button, located at the upper right of the screen. By watching an ad, you can make time go up to 2 times faster, letting you double your gains for the same amount of real time!
Trigger Auto Skills
In spite of all these speedups, your heroes still won’t use their skills until you tell them. To command them to use their skills whenever they’re off cooldown, tap the auto button on the upper right.
Switch To Low Power Mode
You’ll also find a battery icon on the upper right area. This represents low power mode, which is exactly what it sounds like. If you want to auto grind without taxing your mobile device’s battery too badly, you can just tap this icon and presto, you’re in low power mode!
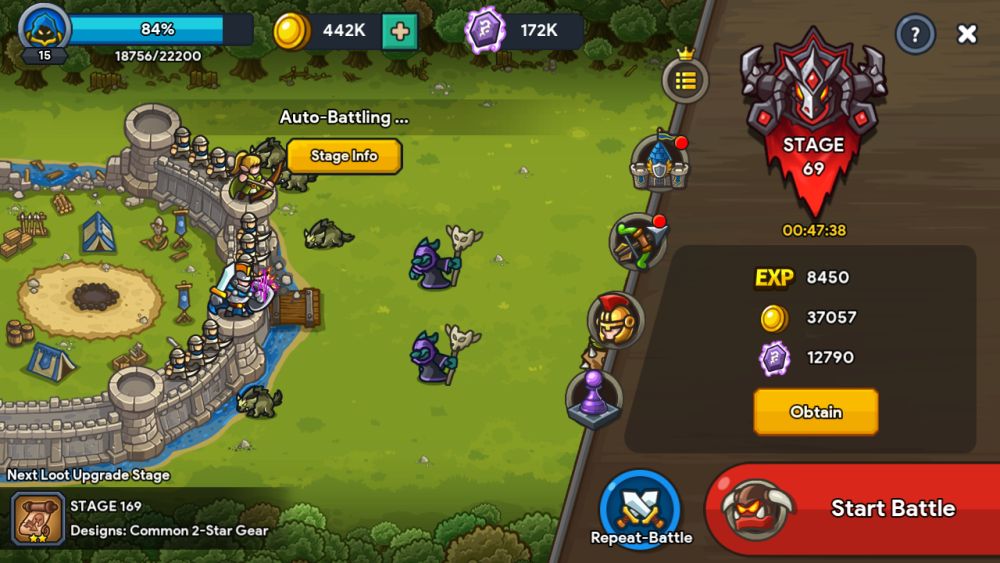
Select A Grinding Stage Via Repeat Battle
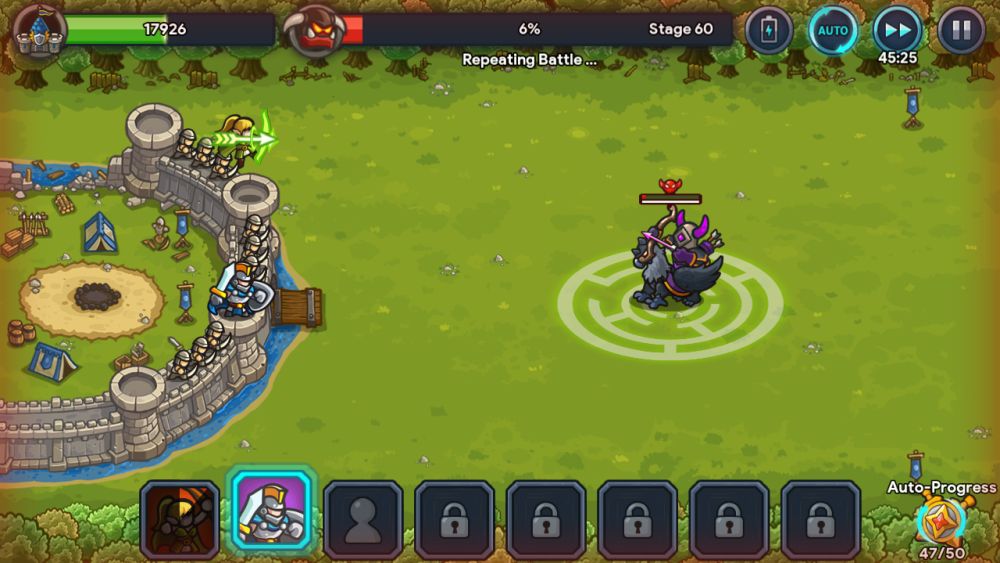
If a stage is too difficult for you to overcome, and you’re at an impasse because you don’t have enough resources to upgrade your defenses, maybe it’s time to go back and grind via Repeat Battle. This mode is accessed by tapping the Repeat Battle button on the Battlefield menu. Repeat Battle lets you select a stage you’ve already cleared, allowing you to fight it out once again and gain more rewards – gold, soul stones, and scrolls. Combine this with Auto Progress and speeding up to grind more efficiently!
Gather Your Freebies
Even when you’re not actively grinding, your armies passively produce resources and can even procure materials. Make sure you’re grabbing your freebies whenever you enter the Battlefield menu. The further you’ve progressed in the game, the better your passive income becomes.
Invest In Your Army
Eventually, you’ll hit a roadblock in the game, where the enemies are too tough for your defenders to take down or your castle gets flattened despite your best efforts. When that happens, you should start investing your resources into your army.
Upgrade Your Castle
Upgrading your castle is important, but shouldn’t be your absolute top priority. The higher the level of your castle, the more health it has, the more slots you have for heroes, and your upgrades will reach much further.
While castle upgrades are low on my priority list, it should be noted that if you’re close to a new hero slot, you should push towards it. Having an extra hero on the battlefield is a huge force multiplier and is well worth the gold investment.
Your castle upgrades are capped by a gold cost that increases each time you upgrade it. Before committing to spending gold on your castle, see first if you can spend that same amount of gold on more tangible upgrades, like hero equipment or archer gear.
Roll For More Heroes
With all the currencies coming in, you might forget to spend them at the Fountain to roll for more heroes. Heroes can give you the edge you need in battle, and having just one extra hero on your field can make a world of difference.
Strengthen Your Heroes
Getting heroes is only the first part of the equation. While heroes have skills and high stats at their disposal, without investment into their levels and gear, they’ll crumple just as easily as any other footman.
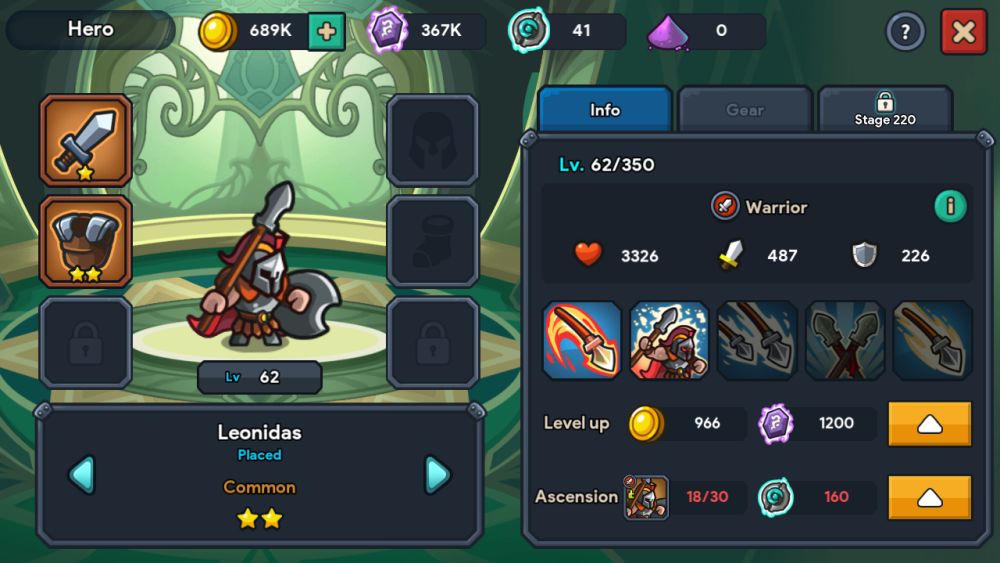
First off, heroes come in two types – Supporters and Attackers. Supporters remain on your castle walls, using their abilities and ranged attack, if they have one. Attackers take to the fields outside your gates, engaging enemies in close-ranged combat. Both are equally important in defense, but there’s a difference in stats, with regards to gear.
Secondly, heroes can both be leveled up and ascended. Leveling up heroes just uses gold and Soul Stones – but be warned that they use a lot of Soul Stones. Ascension uses Ascension Stones and hero shards and increases a hero’s star rating while providing a hefty boost to their base stats. Hero shards can be acquired from the various stores or by rolling for heroes – if you get a copy of a hero you already have, you’ll be given shards instead. That also means that you can’t have duplicates of any single hero.
Equipment For All
Heroes can carry equipment into battle, and they have six slots for different kinds of equipment, with the last 2 slots being locked away until you’ve progressed further. While you can’t directly craft hero gear, you can get it from the Fountain and other stores. To progress hero gear, refer to the Blacksmith section above. It’s also worth noting that hero equipment has a set bonus – if you equip multiple items of the same set on one hero, they’ll trigger a passive boon.
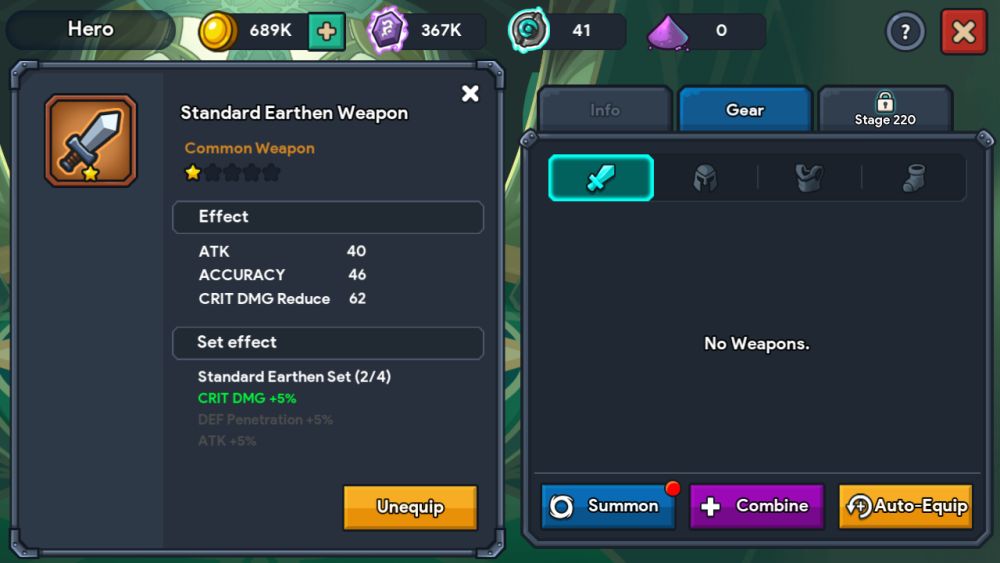
If you pay close attention to items, you’ll notice that they give bonuses to stats you might not have realized existed. However, not all stats are relevant to every hero. For example, Supporter heroes – who attack from the safety of your garrison’s walls – don’t utilize their HP and defense stats outside of skills that might use those as a basis for multipliers.
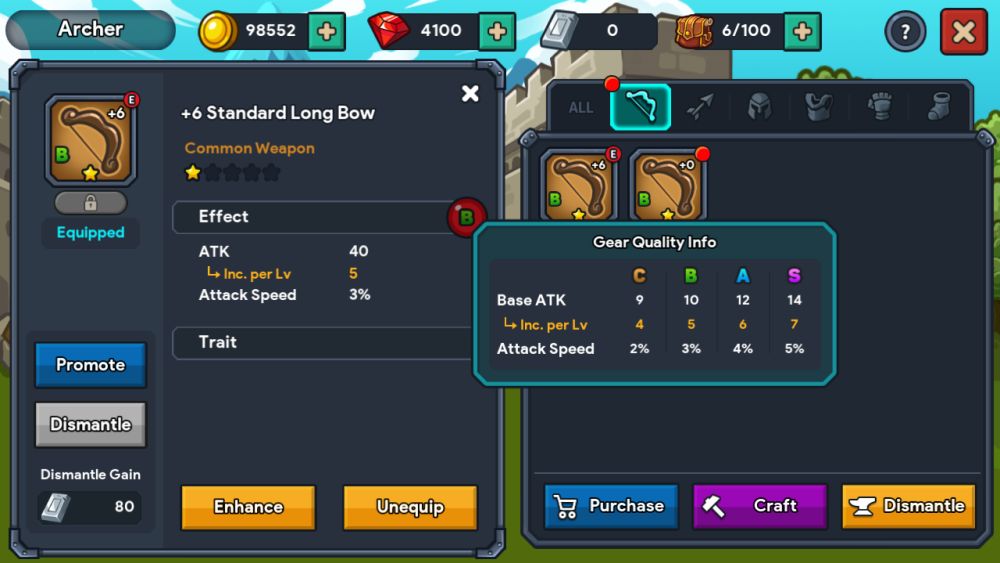
You can also make gear for your archers. This is done by going to the Archers menu, then hitting the Craft button. Archers have slots for six pieces of kit – a weapon, arrows, a helmet, body armor, gloves, and shoes. Each of these improve the offensive abilities of your archers by quite a bit, and the more archers you have, the more your equipment will help.
Crafting items requires crafting scrolls, with each scroll generating an item of a random grade, from C to S, with S as the highest tier. Naturally, there’s a lower chance to get S-rank items, but they have superior stats. Since crafting just requires scrolls and gold, it’s a good idea to spam these until you get at least A-rank items.
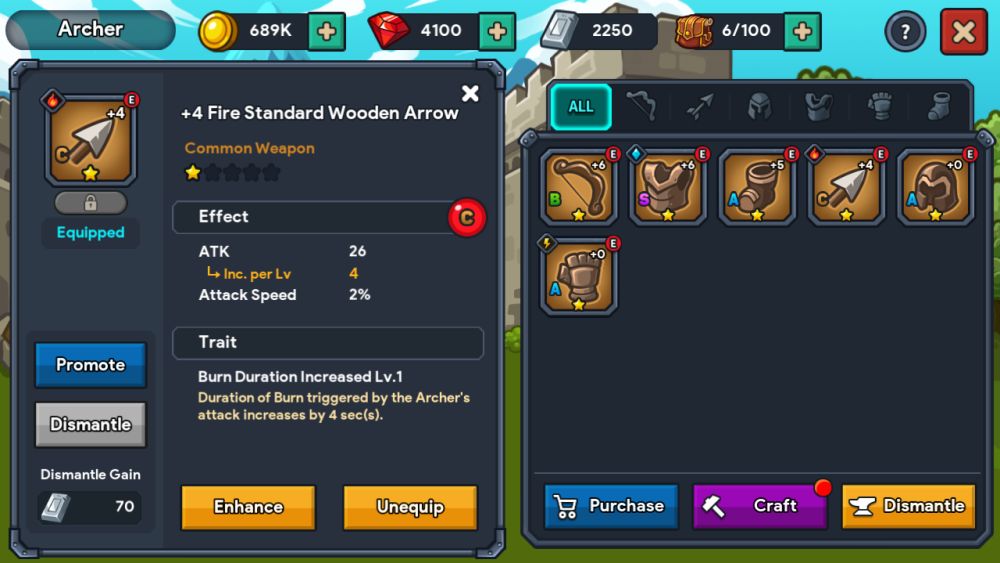
Crafted items can also randomly have an element, which adds extra effects based on what kind of equipment they’re found on. So yes, that’s another layer of randomness to crafting. If it hasn’t been planted in your mind, let me repeat myself here – craft whenever possible.
Once you’re satisfied with your fletchers, bowyers, tanners, and blacksmiths, you can further upgrade gear and promote it. Upgrading gear raises its base stats and consumes Weapon Upgrade or Armor Upgrade Scrolls. Promoting gear significantly ups the item’s stats, but will consume a hefty amount of Steel and will also reset the item’s upgrade level. To get Steel, you’ll need to scrap equipment, which is why I urge you to keep crafting.
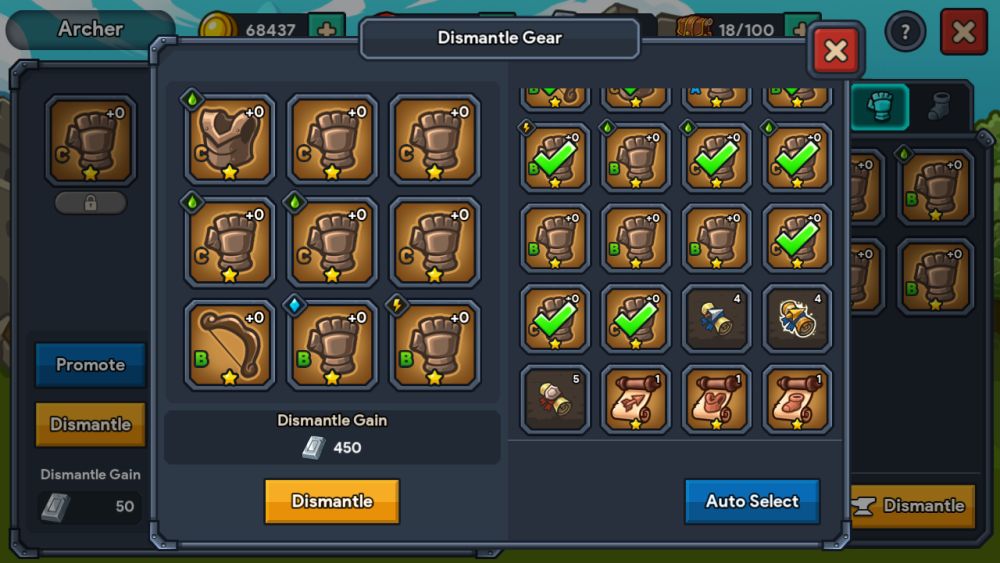
To scrap equipment, tap Dismantle in the Archer Gear panel. You can auto-select items dismantle, in which case the game will scoop up all unused B-rank or lower items and smash them into valuable Steel.
Overupgrading Archer Gear
Most importantly, Archer Gear can be overupgraded. This risky yet lucrative upgrade option pushes equipment far beyond its normal capabilities, with each overupgrade level having more impactful bonuses than regular upgrade levels.
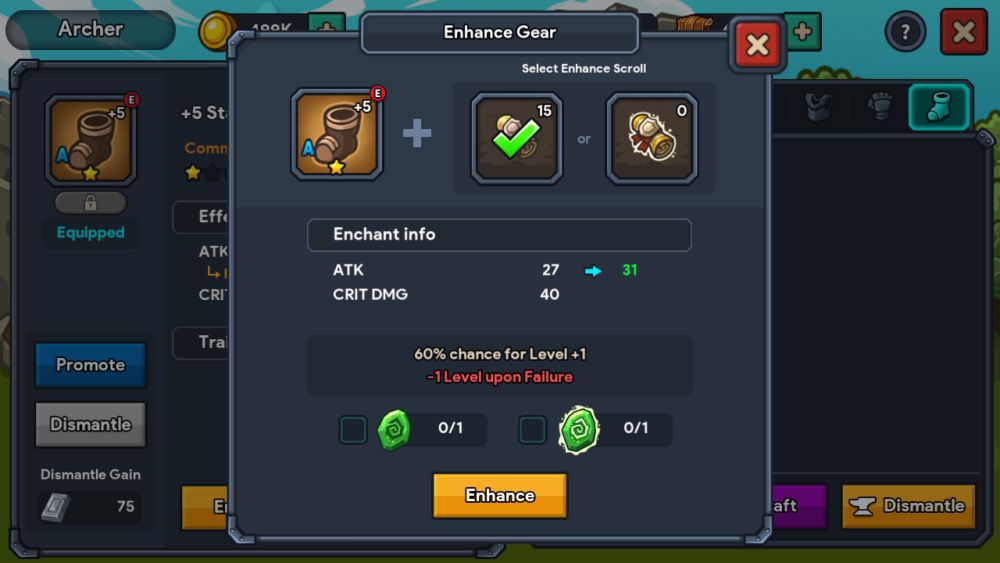
But yes, I did say risky – beyond +4, every time you attempt an upgrade, there’s a chance the upgrade will fail, reducing the equipment’s level by one. Early on, you can overcome this with sheer stubbornness; after all, 60% to +5 and +6 isn’t too bad of a deal. Later though, the success rates become so small that you’ll be left wondering what you were thinking when you decided to push the upgrade button.
To mitigate the risks associated with overupgrading, you can use protection stones. While these won’t guarantee an upgrade, they will at least remove the level loss from failures, allowing you to retain your progress at a price. I will however, advise caution here – these stones aren’t easy to come across, so ideally, you should save them for overupgrading your S-rank gear.
Do Your Dailies
Apart from the many modes that Idle Kingdom Defense offers, there are also some Event Dungeons to be completed every day. Once you’ve completed each difficulty of these Event Dungeons, you can also choose to Sweep them, auto-clearing that difficulty. You can enter each of these dungeons two times per day.
Gold Mine
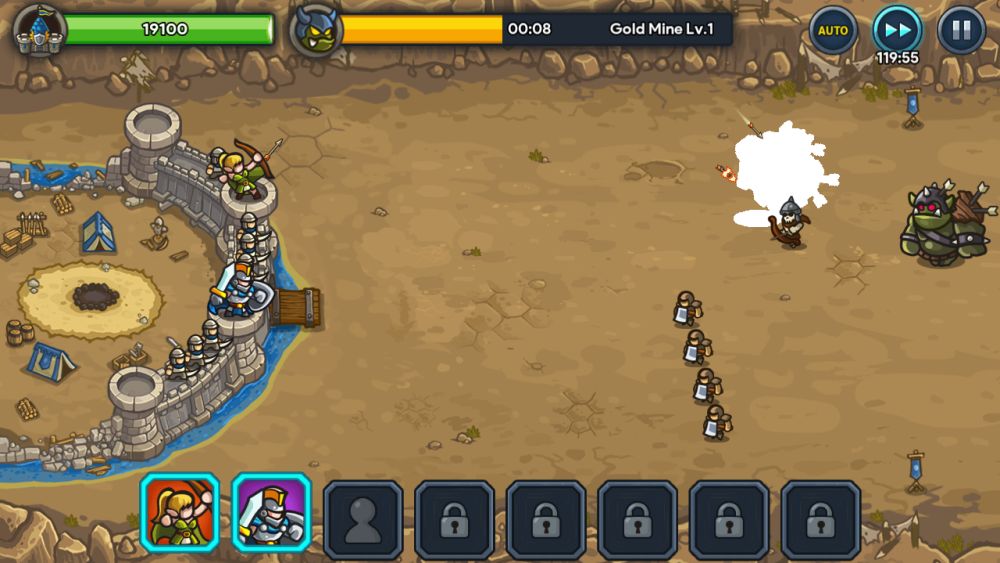
The Gold Mine lets you amass lots of gold quickly, and plays out like a standard battle.
Specter’s Ruins
The Specter’s Ruins drops a wealth of Soul Stones, which you’ll need to level up your heroes.
Hill of Heroes
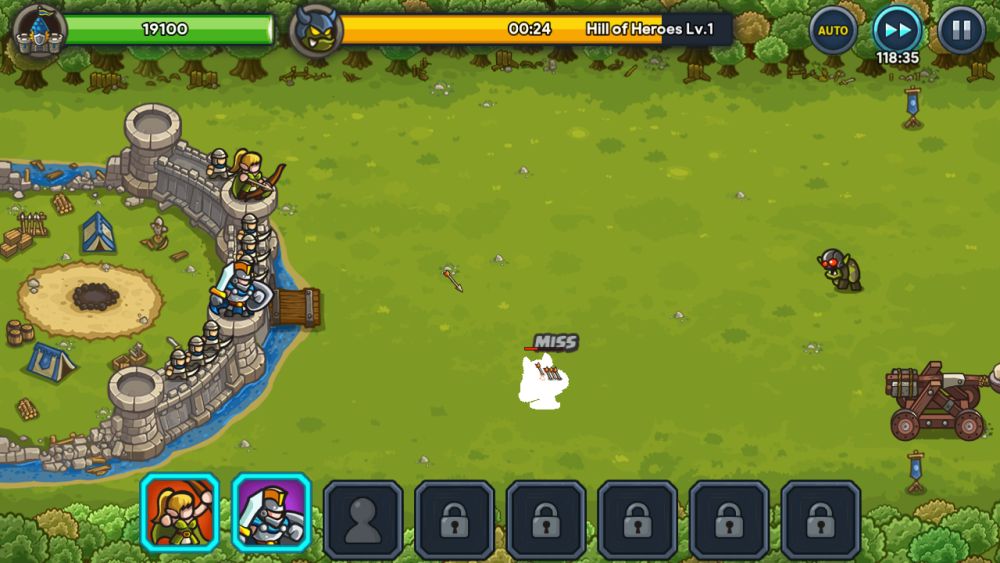
The Hill of Heroes gives both Hero Seals and a random shard to power up your heroes or assemble new ones. Be warned though – of the three daily dungeons, the Hill of Heroes is the most difficult one. Top up all your upgrades before attempting it for the first time.
The Ad Shop
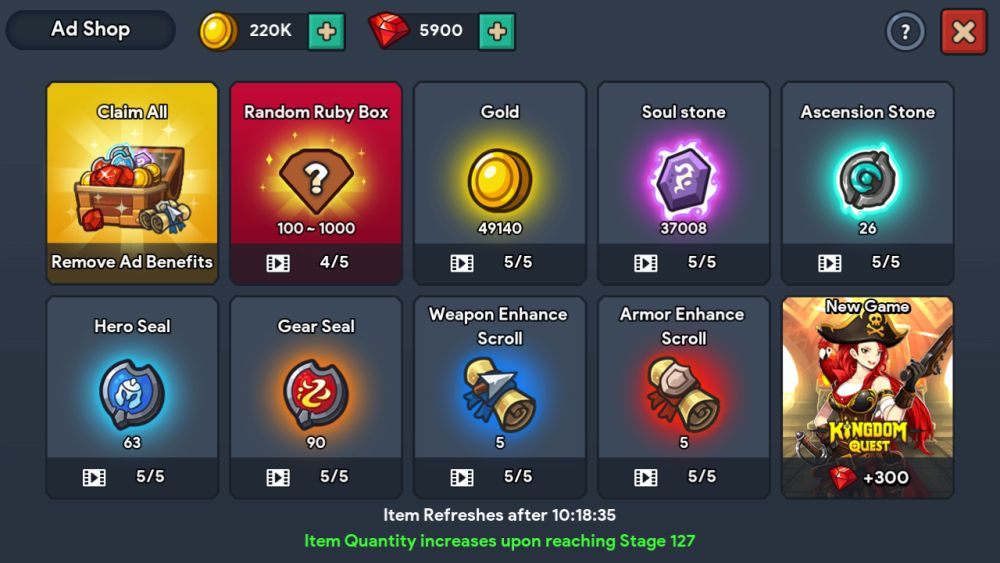
Yes, ads are a daily quest that need to be completed. You can do this by going to the Ad Store, then watching various 30-second ads to receive bonus resources. There’s a limit to how many times you can do this in a day, hence it’s important to be sure you finish all your ads. Be patient with ads – there are a lot of them, but there’s an equally large amount of gold, soul stones, upgrade materials and more that you can get with just a little time. These ads will also let you roll on the hero and gear gacha for free, although you’ll be restricted to the lower tiers.
Coincidentally, you can also choose to buy the full game from the Ad Store. This one-time payment removes all ads from the game and allows you to enjoy any feature without intrusive advertisements being shoved in your face.
Quests
What self-respecting game doesn’t have quests? In Idle Kingdom Defense, quests are divided into dailies, weeklies, and main quests.
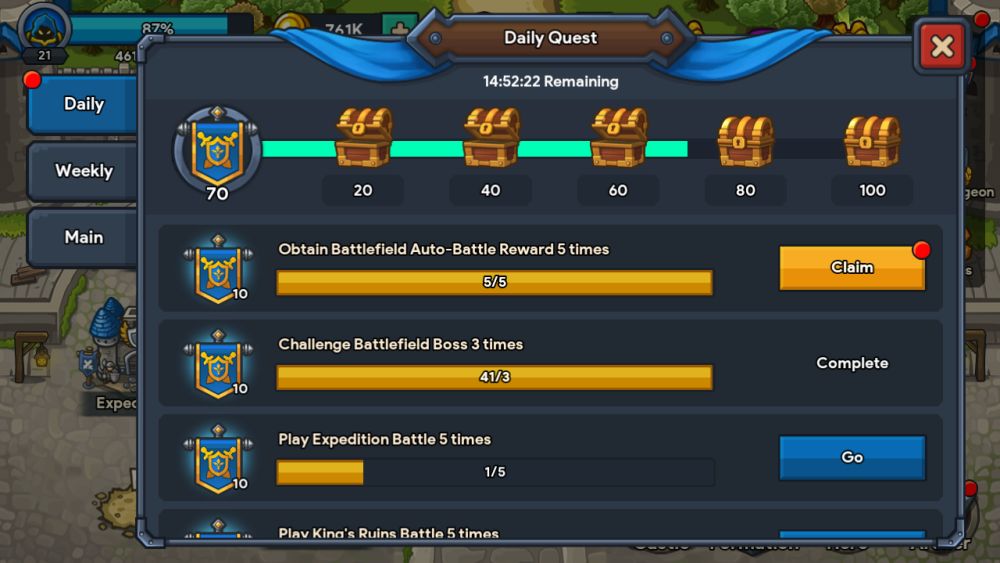
Dailies and weeklies are milestones that can be completed on either a daily or weekly basis. Main Quests represent large achievements in the game that offer sizeable rewards, but can only be completed once. In addition to the quests themselves, dailies and weeklies also fill up a bar that unlocks bonus chests as it gains progress. Make sure to check the Quest panel on the upper right of the main menu every so often!
We Will Not Break!
The challenges that lie before you in Idle Kingdom Defense are great, but with time, patience, and a solid plan, you can overcome virtually anything and everything the game throws at you. And if all else fails – you can always just grind away!
That concludes our beginner’s guide for Idle Kingdom Defense, and we hope you picked something up from it. If you have any suggestions or comments on our guide, or maybe some tips you wish you knew when you were just starting out, feel free to drop us a line!