RPG elements? What’s that? You must have hit your head pretty hard. Artifacts? Battle passes? Leveling up? No such thing here. Now come on, let’s go play dress up.
Gacha Life 2 is a sandbox game where you can create a variety of characters, put them in scenarios of your own making, and get your characters uploaded into a gacha pool curated by the developers, despite, you know, not having any stats or RPG elements. Gacha Life 2 is available on both the Google Play Store and the App Store.
Note that Gacha Life 2 is a sandbox game where you can dress up, pose, and share characters as you wish. There’s no competition here, no pressure to farm for those perfect artifacts, and no endgame mode – just play the game as you please. And while the game is still waiting on a lot of features, there’s plenty of fun to be had with the vibrant character maker and the studio.
Indeed, there’s really no goal in Gacha Life 2 but learning to navigate the many menus of the game can be a handful and it’s easy for new players to be overwhelmed by the wealth of options available to you from the start. Hence, I’ve prepared a beginner’s guide to walk you through the basics of Gacha Life 2 so that you can be your best, most stylish self in no time at all. And hey, maybe you’ll make the next gacha banner, right?
In this Gacha Life 2 beginner’s guide, we’ll be covering:
- The basics of making your own character – height and width, skin tone, cosmetics, and poses for the truly mad.
- Learning to navigate the studio – adding characters, text boxes, setting scenes, gradients, and saving templates.
- The gacha of Gacha Life 2 – or rather, the fun of the gacha, because it’s not *necessary* for anything.
Playing Dress Up
Admit it or not, we’re all a little bit in the fashion game. What we wear determines our self-expression, whether the message we want to convey to the world is “I want to stand out” or “I really don’t care about what I’m wearing”. In Gacha Life 2, your characters form the core of your experience and are how you’ll interact with the world – so let’s get you set up!
Quick Tips:
- You can create your own characters or use a premade one. It’s highly encouraged to make one of your own!
- You can edit a character’s basic physical characteristics in the first few body panels. These include height and width (x and y scaling), skin tone, head shape, ears, and so on.
- Color sliders are hue, value, and saturation. If all you’re seeing is white, turn the saturation (third slider) down.
- You can choose from a set of premade poses or build your own. You can edit body part positions and rotation when building your own pose.
- I very strongly suggest loading up a blank pose slot if you plan to cook with the pose editor as you might overwrite a default pose.
- You can also add default animations to certain clothing parts such as jackets and wings.
- You can fiddle with the opacity of your character and even change the layer that their face, hands, and feet appear in – very useful if you want characters to properly hold things.
- Cosmetics such as facial features, clothes, accessories, and so on can also be rotated and scaled.
- Don’t forget to add in your character’s details such as their name, birthday, and so on. Please don’t add any personal details here.
- Finally, ensure that you’ve saved your character to a slot. You can always swap slots out. Slots are how Gacha Life 2 remembers characters.
Loading Up A Character
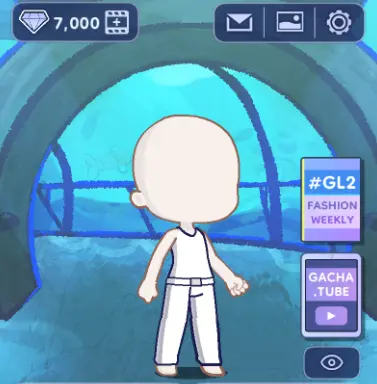
To start building your first character, tap on the home button at the bottom of the screen, then tap on the “Character” icon in the grid of nine to load up a blank character. Alternatively, if you want to hop straight into the game without a personalized character (but why?) you can select one of the premade characters.
This guide will assume that you’ll be building a character from scratch; if you’re fine with a premade one, feel free to head to the “Studio 101” section.
The Body Tabs
Note: I’ll walk you through each section in chronological order, but feel free to jump to whichever part of your character you want to customize first.
First up are the body tabs. These are where you can adjust the general physical features of your character.
The body tabs are divided into three.
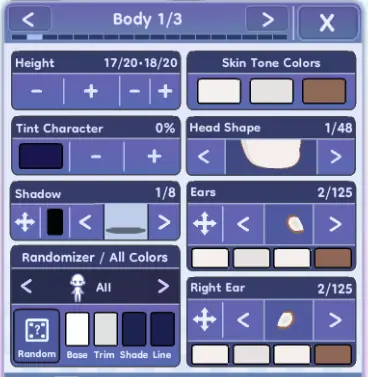
In the first body tab, you can configure:
- Height and width. The left +/- tab increases both height and width by 1, while the right +/- tab controls only width.
- Skin tone. Skin tone is divided into base (think skin color), trim (think shadows/near the edges) and outline. You can select any color you want for these fields.
Let’s talk a bit about the color interface. By default, it’s in slider mode. You can change this to palette picker by tapping the button on the upper left, but I’ll assume you want to stay in slider mode.
The first bar lets you pick what base hue to work with, the second affects how light (or dark) you want the color to be, and the third bar affects the saturation of that color. If all you see is white, turn the saturation bar down a bit!
You can also save colors by tapping on the star and then selecting a slot to overwrite. Don’t worry – you have 15 pages of color sets to save to. For easy convenience, Gacha Life 2 will also remember the most recent colors you’ve used. Be sure to save them if you’ll be using them a lot!
- Tint. Overall character shade. By default, this is at 0%. Useful for getting a nice overlay effect if changing skin color is too strong.
- Head shape. Self-explanatory.
- Shadow. Yeah, you can even change the color of your character’s shadow. Tap the color (black by default to change the color) and tap the arrows to sift through the different shadow types.
- Ears. Changes your ear shape.
Posing
The second body tab gets more complicated.
- Pose. You can select from several premade poses if “standing around with arm out” isn’t your thing.
Alternatively, you can build your own pose by using the part builder on the right side of the screen.
Warning: Before you start editing poses, I suggest using a blank pose slot, like this:
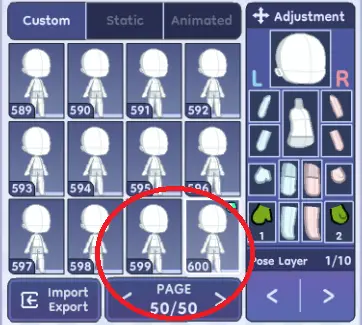
This is to prevent you from overwriting a premade pose.
On the right side of the second body tab, you’ll see a list of body parts as well as two hands. You can tap the hands here to select their pose…
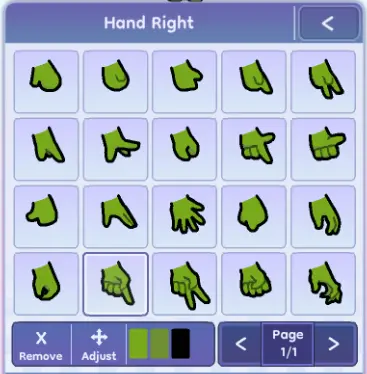
…before tapping anywhere else on that panel to bring up the custom pose creator.

In the pose creator, you have free reign over the parts of your character. You can adjust the X and Y positions as well as the rotation of any body parts, giving you absolute control over your character. While it can be tricky to figure out (hence my strong urging that you switch to an unused pose slot) you’ll be able to make truly customized characters once you understand how to work the pose creator.
Animations and Opacity
The last part of the body tab deals with animations and opacity.
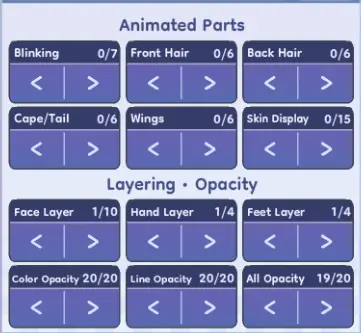
The top part is for animations. These will only apply if your character has that relevant part; for example, the “wings” section causes various animations to play for wings only if you have them.
The lower part of the panel is for opacity. Here you can switch the layers for your character’s face, hands, and feet (if, say, you want them to appear over your clothes rather than under them) as well as edit the opacity of your character’s colors, outlines, and general opacity, which are great if you’re going for an ethereal vibe. Let your creativity run wild!
Cosmetics Galore!
Next is the part you’ve been waiting for – cosmetics. These will cover not just clothes and accessories, but also hair color, eye shape, mouths, noses, and so much more. Remember that you can also change the colors of these parts by tapping on the color palette to the right of each option and that you can do asymmetrical designs by selecting only the “right” panel.
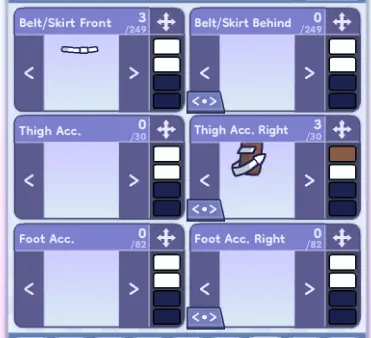
Note that you don’t -have- fill up every single panel. Sometimes the lack of an accessory can be the right distinction you want. Customize your character as you please, but please don’t forget to change the colors of all your cosmetics – few things look worse than a plain old white everything.
It’s not just colors that you can edit. Watch out for the adjust button when you add items…
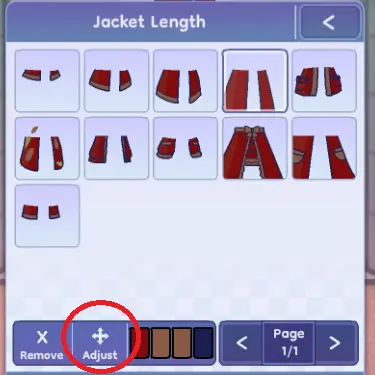
…as that button will also allow you to change the position, rotation, and scaling of your cosmetics. Want giant eyes? Go for it. Teeny-tiny mouth? Sure. Bell bottom jeans? Tough, but can do. The only limit is your creativity.
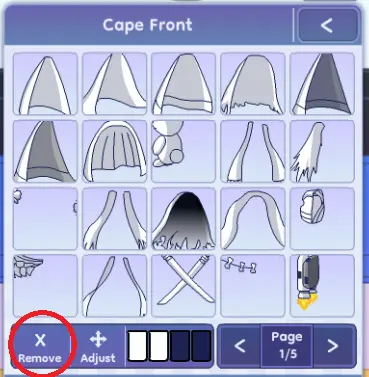
If you choose to add wings and accessories, don’t forget about the animations and opacity panel from the first set of body options if you want to animate your wings or capes. You can also switch up the layers on your characters’ hands to give them a better-looking grip on any accessories (such as tools or weapons) that you might want to use.
To remove an item, you can either toggle the left and right buttons on a panel and head to option zero. Alternatively, just tap on this button:
Profile
Once you’re happy with your character, it’s time to give them a personality. Head over to the last page to change their name, age, bio, and even add pronouns if you wish.
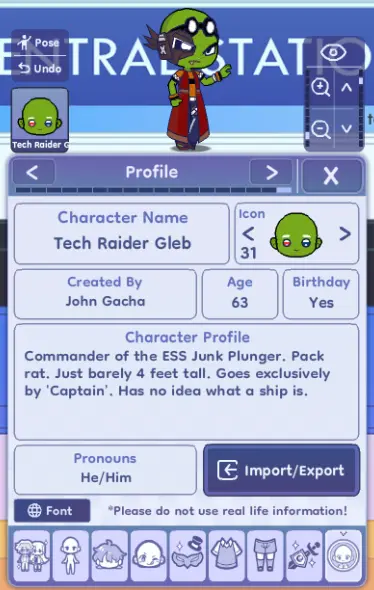
As the game itself warns, please don’t put any personal information in any of these info panels!
Saving Slots
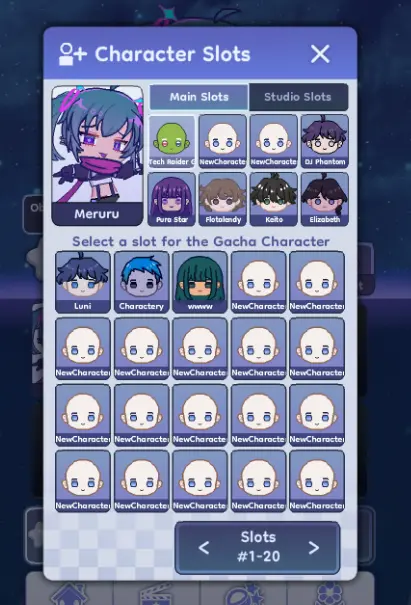
Gacha Life 2 can only hold so many characters in its memory at once. To keep your characters safe, we need to register them into slots.
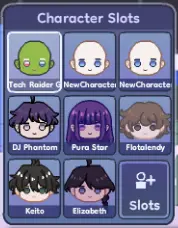
By default, there will only be one available slot for a blank character. If you want to make more custom characters without overriding the templates, you’ll need to swap slots. Tap on the “Slots+” button on the slot panel to bring up this screen…
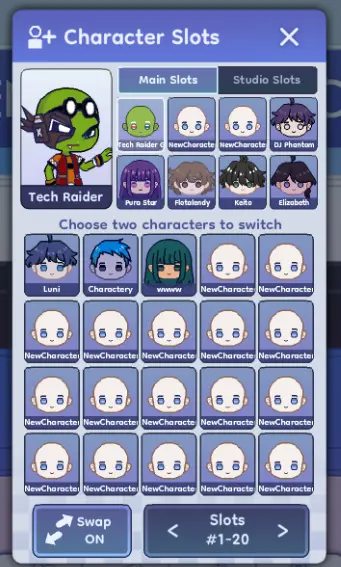
…then tap the “Swap” button on the bottom. Make sure it says “Swap ON”, then tap on the two characters whose slots you’d like to switch. This will help make room for your custom characters in both creation and studio mode!
Studio 101
You can also cook up scenarios for your characters via the studio.
Quick Tips:
- You can add any character in your slots to the studio. You can’t have more than one copy of a character.
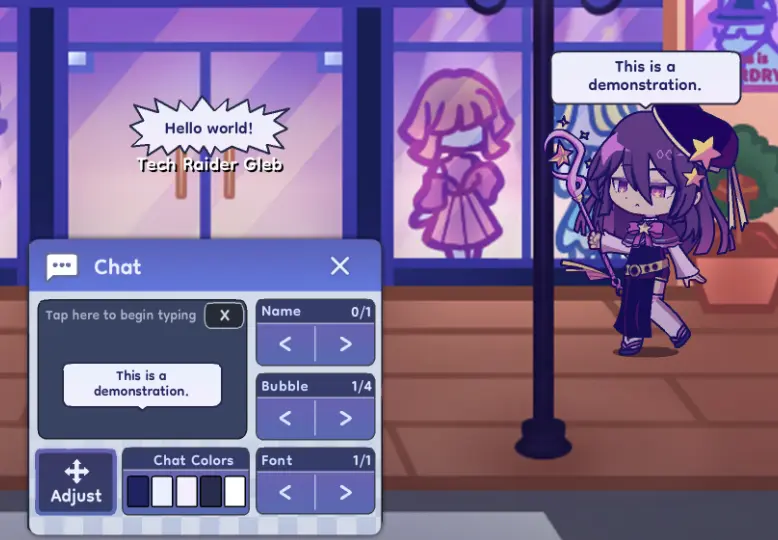
- Characters can be flipped, rotated, upscaled and/or downscaled, have their poses changed (this doesn’t overwrite their default pose), and have text boxes on top of them.
- Be sure to lock characters you’re done with, so you don’t mess the scene up.
- You can change the background and gradient colors of your scene.
- You can save and load scenes as well.
The Actors
Using the studio is simple. First, you pick a character that you’ve saved to one of your slots (either main or studio will work, just tap the arrow button at the bottom to switch between the two). Tap on a character’s icon to add them to the scene.
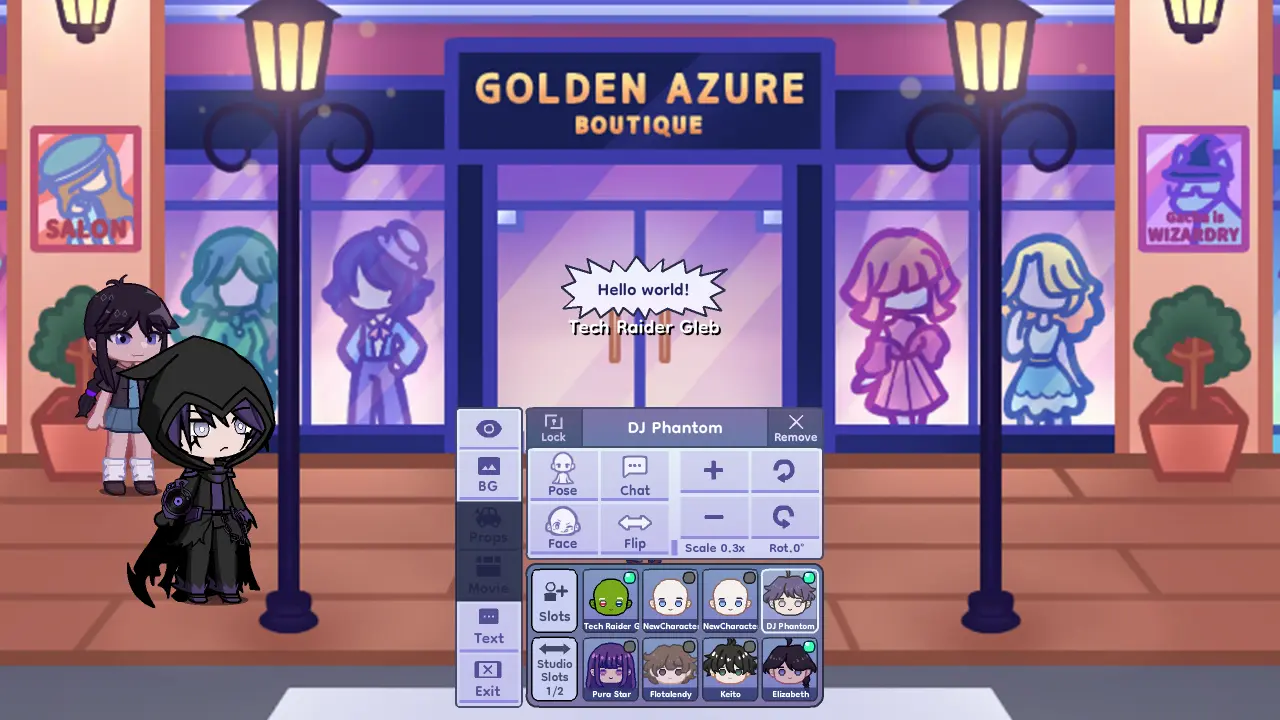
There can only be one instance of a character in the studio at once. To move a character around, select them by tapping on their icon then drag them around the screen. You can also change their pose (this does not override their default pose), flip them around, rotate them, and even add text boxes.
Finally, if you’re happy with a character’s placement, rotation, pose, and text, you can select “Lock” on the upper left of their panel when you tap them. This will make it so they can’t be edited without unlocking them, potentially undoing all your fine-tuning!
Spicing Up The Scenery
Even the best script and story fall flat when bereft of the proper setting. Fortunately, we can also edit the backgrounds of our studio scenes. Tap on the “BG” button when editing a scene in the studio to bring up the background panel.

Note that it’s not just the background itself you can change – you can also edit the x and y positions of the background image as well as change its rotation. Yes, you can even flip it upside down!
We’re not done yet though. You can also add a color gradient to your background if you’re looking for colors to help set or define the mood.
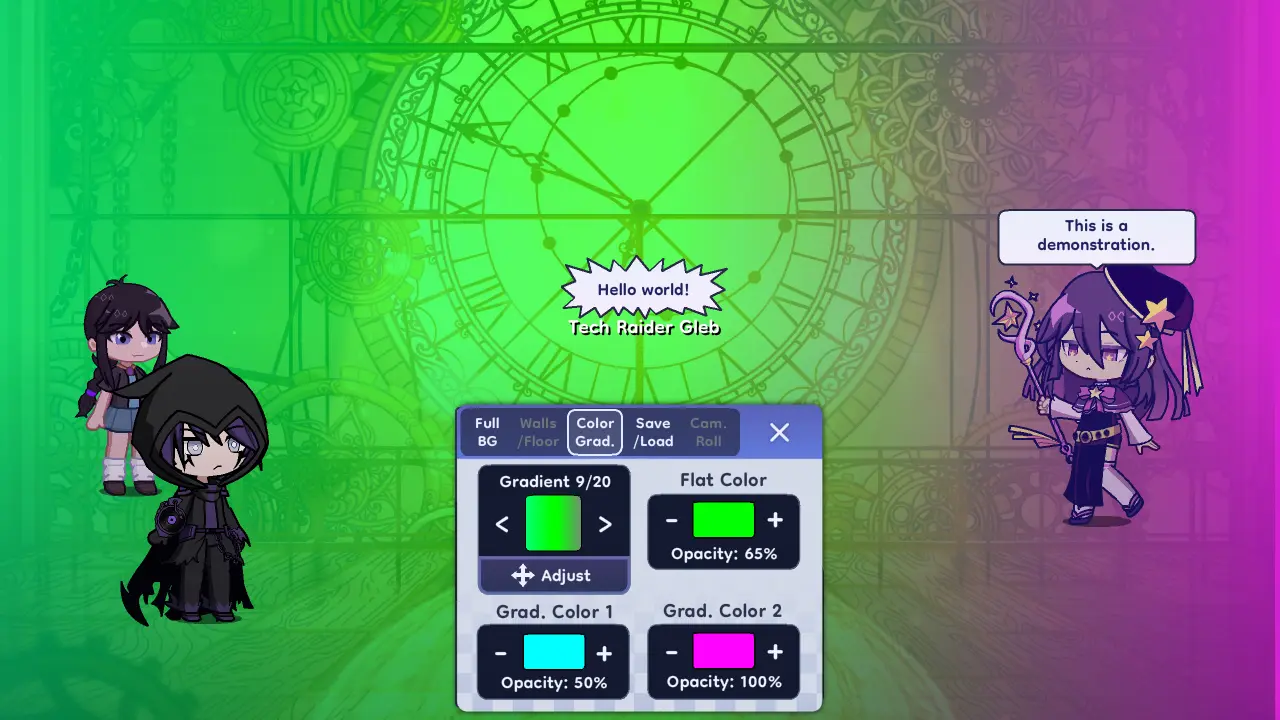
Tap on the “Color Grad” button when selecting a background to apply a gradient. There are 20 different patterns to choose from, and you can not only change the direction and intensity of each color but also pick the right colors to give your scene the exact color you want!
Saving Scenes
Just like our characters, scenes can be saved. By default, your studio autosaves into slot one.
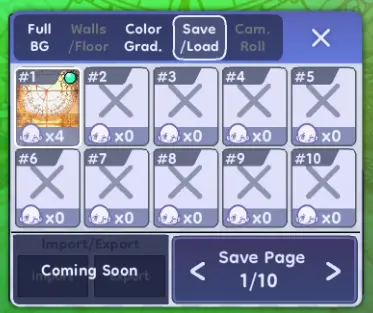
Don’t forget about this feature if you like playing around with scenes a lot – it will save you the hassle of manually setting up old scenes down the line!
The Inconsequential Gacha
Finally, let’s talk about the gacha in Gacha Life 2.
Quick Tips:
- The gacha in Gacha Life 2 pulls from a pool of characters curated by the developers.
- The characters you pull were created by somebody else.
- You can save any characters you pull to one of your slots if you’d like to study them or just admire them in greater detail.
- Pulling in the gacha also gives you stars, which come into play in the as-of-yet unreleased Life mode.
- You can watch an ad to gain 2000 gems; a 10-pull requires 100 gems.
- Be sure to update your data in the “Life” tab to keep your information up to date – and potentially get your characters added to the pool!
A Gacha for Fun
Yeah, you read that right. The gacha in Gacha Life 2 has absolutely no bearing on your ability to enjoy the game. No stressing out about tier lists, your pulls, rarities, utility, and so on. Every character you pull is one that someone else made, so essentially, the gacha is just a way to show off your creativity when it comes to character design.

Hence the reason it’s called a gacha simulator. In Gacha Life 2, you are the gacha – and if you’re lucky enough, the devs (or whoever curates the gacha pool) will like your creations enough to add them to the gacha banner!
A Practical Purpose
There are, however, practical purposes to the gacha. The first of these is that you can save any character you pull to one of your slots.
This will allow you to admire them in greater detail, but more importantly, you can see how the character was made. This in turn will (hopefully) refine your creation techniques and inspire your creativity.
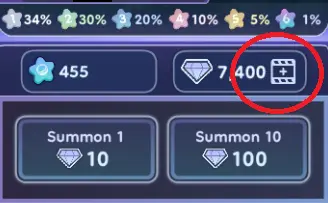
The second purpose of the gacha simulator is to earn you stars, which will come into play in the game’s as-of-yet unreleased (October 24, 2023) Life mode. The higher the rarity of the characters you pull, the more stars you get.
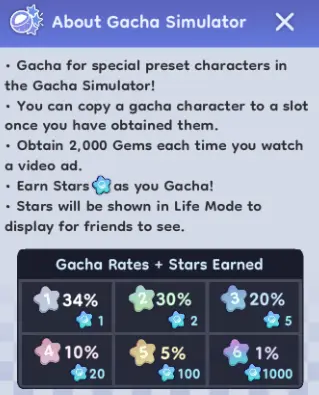
You might think that stars would be difficult to earn, but no. See, each ad you watch gives you 2,000 gems (not a typo) while each 10-pull sets you back 100 gems. That’s 200 pulls per 30-second ad you watch. If you want to watch ads on purpose, just tap the button beside your gems in the gacha screen.
The Next Star?
To ensure that the server has the most up-to-date information possible with regards to your characters (and thus possibly raising the chance that you’ll be chosen), make sure to go to the “Life” tab and tap “Update Data”.
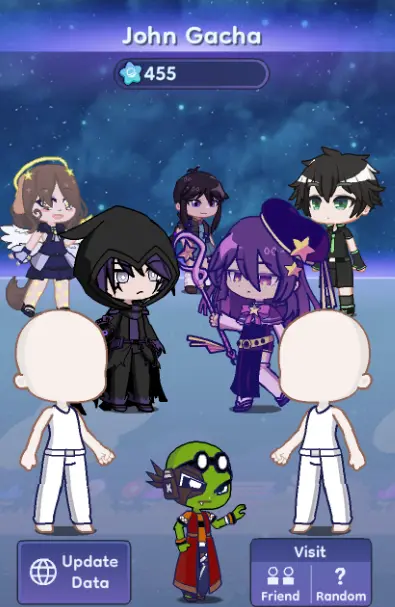
This will refresh your information on the server’s side to reflect your 8 main slot characters as well as your stars. Do try to fill up your 8 slots with original characters, yeah?
I Will Become Back My Gacha
With no pressure to succeed, no obstacles to face, no tier lists to consult, and no baddies to beat down, Gacha Life 2 is an excellent sandbox for anyone looking to sit down and relax with some clothing therapy. That, or make some Truly Awful Fashion™. I’m not judging.

That concludes my beginner’s guide to Gacha Life 2, and I hope I was able to help you get a better grasp of your options in the game as well as hopefully give you some creative direction. If you have any suggestions on how to improve this beginner’s guide or would like to share some of your tips and tricks, make yourself heard in the comment section below, otherwise, good luck and I hope to see your creations soon!