The once land of the free has now been taken by a red-colored army hell-bent on painting the country blood red. Your fellow companions are now in shambles, wondering how you could turn the tide when all that is left is nothing but you, metal, and the gun in your hand.
Your fight for America has just begun.
That aside, Fight for America is a top-down tactical and strategic tower defense game. The premise is simple: you must battle your way across the country in a quest for liberation, freeing one state after another from its enemies. With each victory in hand, you show your patriotism at its fullest potential.
While the underlying aspect is a tower defense game, do not be fooled immediately. This game has a lot more going on than just ‘placing towers’ and waiting for opponents to clamber toward your base. This game places more emphasis on immediate action and actions from the player character itself.
Not only that, a few mechanics that this game introduces will rock your understanding of this game. It will throw surprises around every state that you will liberate, up until they’ve decided that they’ve had enough and completely want to devastate you. Now we can say that the game will also force you to make decisions that will otherwise cascade on your playthrough’s next levels.
If you have just picked up this game yourself and hope to trudge through the barricades that the red army has risen up, fret not! With the help of this beginner’s guide for Fight for America: Country War, you will be able to liberate this once great nation once more! Not only have we detailed this guide with tips, tricks, and strategies but also in-depth statistics and data about what you have to face and what you are about to use.
Now that we have a good idea of what we’re dealing with let’s now delve in and face the enemies of this great nation!
Overview of Fight for America: Country War
Before we get into the nitty-gritty tips and strategies, we’ll look through how the game works. This is to ensure you use all of the knowledge and experience that you have obtained playing the game. There are only a few things to discuss overall, from the player character and its weapons to the enemies that you will have to face.
Aside from that, Fight for America: Country War gives you the luxury of having a player character in the field. This niche is only available in a few select games, such as Dungeon Defenders or Two Timin’ Towers. What it has, however, are far massive changes that you rarely see in games such as this.
Now, with that in mind, let’s jump right in. We’ll talk about currency first before the rest.
Currency
Currency is your resource in your Fight for America. They are instrumental in upgrading weapons, settings up towers, and healing your base (which will be discussed later). Without currency, you’ll struggle with the next levels and their ramping difficulty.
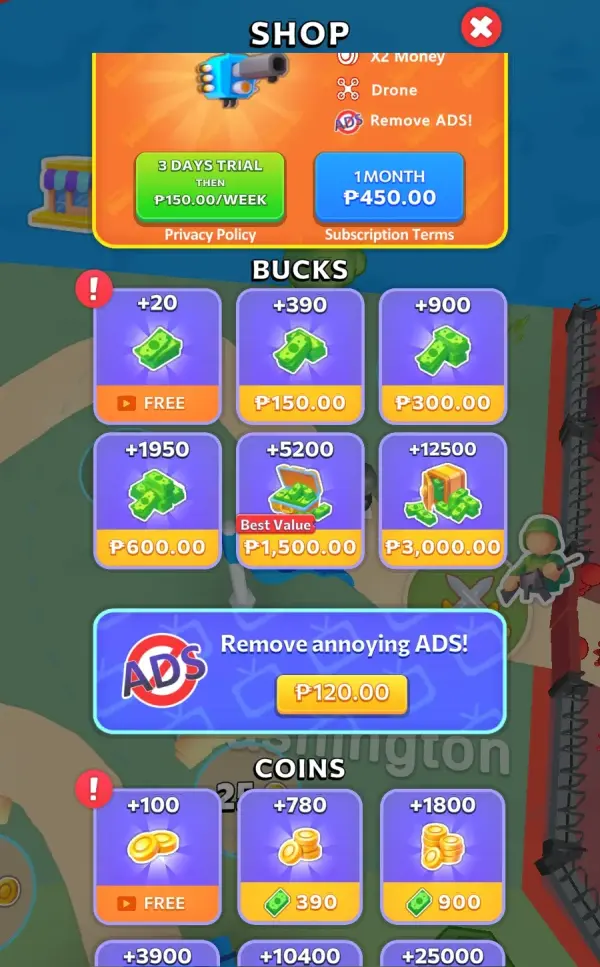
These currencies are dropped when killing an enemy, capturing a state, watching ads, or obtaining rewards from the shop (which will be discussed later). However, compared to other tower defense games, Fight For America has two currencies to deal with: coins and bucks.
Coins are normally dropped through the following stated sources, the same as for bucks. However, bucks rarely drop from enemies as they are the premium currency of the game. There are plentiful bucks in the shop, but we do not recommend buying them as the game gives enough for you to buy what you need.
Do keep in mind that enemies only drop a few of these currencies. While the game is long and you can obtain more bucks, there are only 60+ levels to contend with. There are strategies for how you can spend your hard-earned cash well, but we’ll discuss that later.
For now, let’s jump to the player character.
Player Character
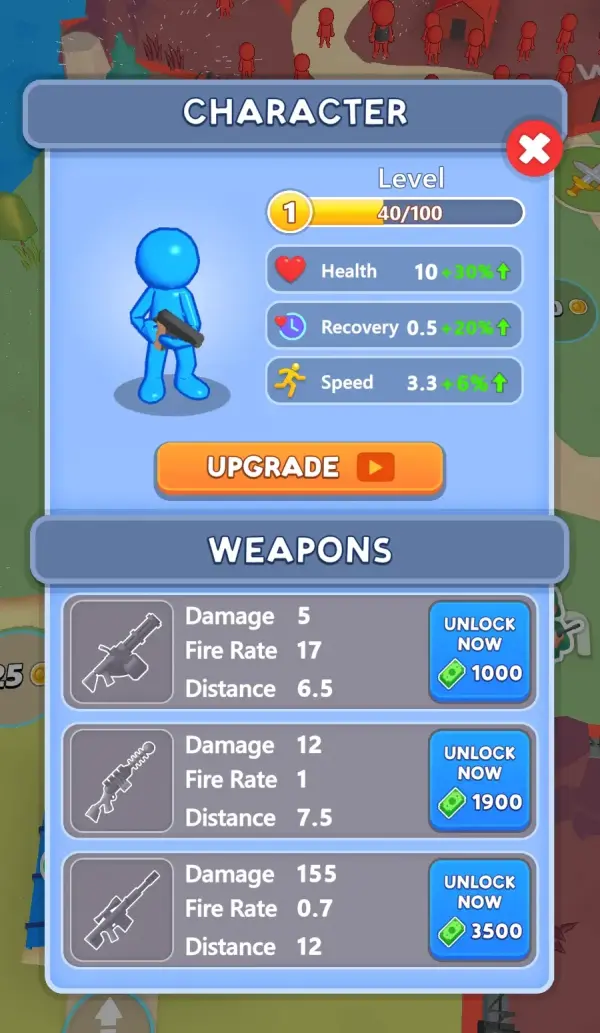
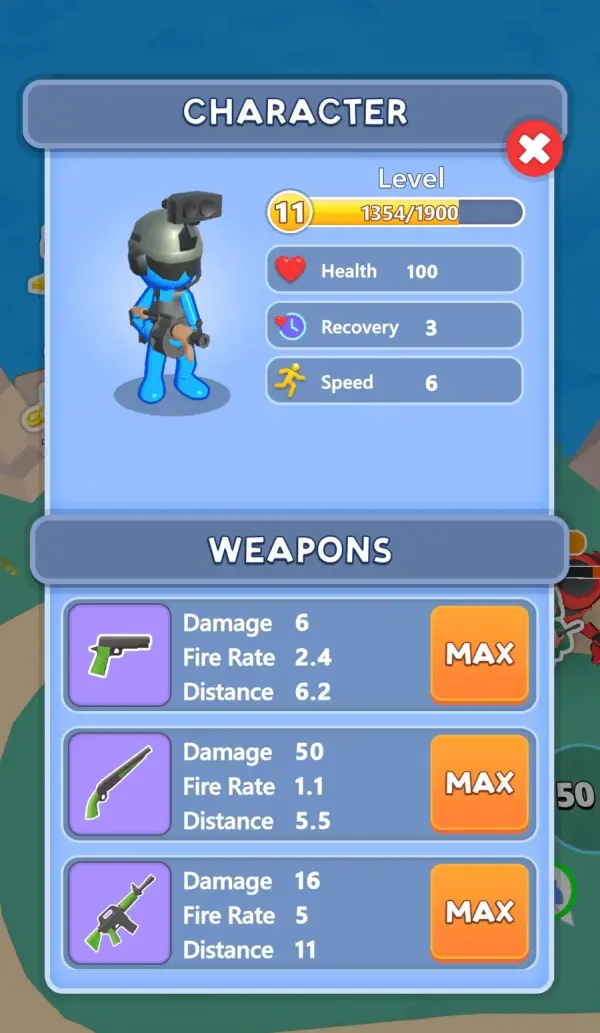
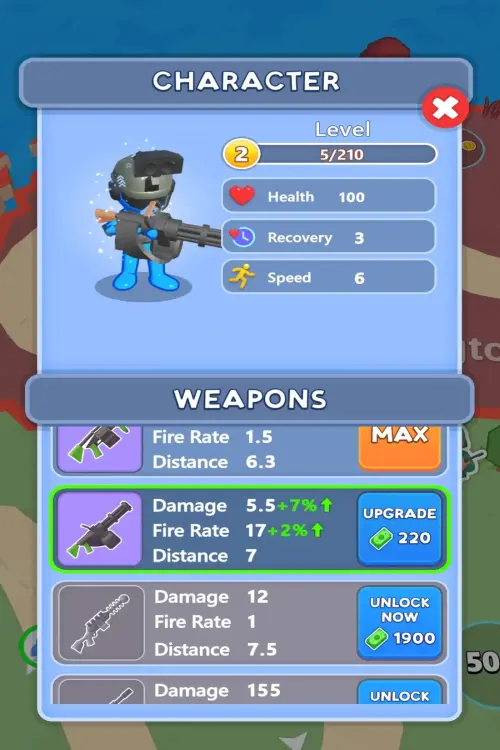
One of Fight for America: Country War’s defining features is that you have complete control over your actions, as well as an avatar that can shoot back at opponents. You can think of this player avatar as a moving tower, having more versatility and control compared to the other towers in the game. You have your arsenal of weapons, as well as your basic stats.
These stats are health, recovery, and speed. All of these stats are self-explanatory: health dictates how many blows you can take; recovery on how fast you can gain your lost health back and; speed covers how fast your player avatar can go. These stats can be upgraded further using coins or through playing 30-second ads to gain them for free.
The following table provides the stats of each level:
| Level | Health | Recovery Per Second | Speed |
| 1 | 10 | 0.5 | 3.3 |
| 2 | 16 | 0.7 | 3.7 |
| 3 | 30 | 1.1 | 4.5 |
| 4 | 35 | 1.2 | 4.7 |
| 5 | 45 | 1.4 | 5.1 |
| 6 | 50 | 1.5 | 5 |
| 7 | 60 | 1.7 | 5.2 |
| 8 | 70 | 1.8 | 5.4 |
| 9 | 75 | 2 | 5.5 |
| 10 | 80 | 2.2 | 5.6 |
| 11 | 85 | 2.5 | 5.7 |
| 12 | 90 | 2.7 | 5.8 |
| 13 | 95 | 2.9 | 5.9 |
| 14 | 100 | 3 | 6 |
We now know how your player character works, but what are we going to use for frying the invaders?
Weapons
One advantage the player has over its own towers is the ability to switch weapons on the fly. These 9 weapons are what you will use throughout the course of the game, and they come in different varieties. The next subsections will go through these ones, but we’ll talk first about a few quirks of these weapons.
On the Fly
As stated earlier, you can change your weapons on the fly during the heat of battle. However, there is a certain quirk to this mechanic. While you can swap to your next weapon, you have to do so by opening the inventory menu and switching to your weapon. It is a hassle to do this every time to adapt to your current situations, but it gives you an edge when it comes.
What is, however, not shown completely is that opening the inventory menu will force the game to pause the game after 2 seconds. While you open the menu, a few enemies may have already trudged through while you’re picking. While not as drastic, it may lead to complications when you are in a tight spot later on in the game. The following will be discussed in a later section of the overview.
Another quirk that we will have to address is.
Shooting Stops For A While After Moving
One of the easiest quirks to spot in this game is that moving after standing still and firing will cause the player character to stop shooting for a moment. However, after a moment, the player character shoots again. This quirk is present in all weapons, and it will not reset the fire rate that each weapon has.
Now that we’ve discussed the quirks let’s look through the gallery of weapons that you have.
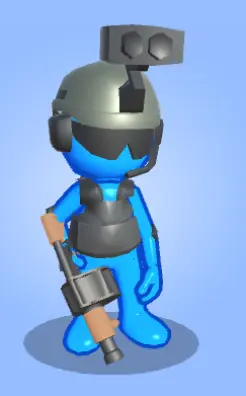
Handgun

Starting with a classic, the Colt M1911 never fails to be brought up in the heat of battle. The handgun (for the sake of brevity) is the first weapon that you will obtain in the game, as it is already equipped at the start. It’s simple, effective, and does its job well.
However, it falls off completely during the course of the game. That doesn’t mean it’s not completely effective at the starting parts of the game, where 6 damage is already great on its own. It has a relatively cheap overall upgrade cost and is an otherwise good investment at the start of the game.
For the statistics and cost of the weapon, the table below shows it:
| Level | Damage | Fire Rate (Shots Per Second) | Distance | Cost |
| 1 | 2 | 1.9 | 4.8 | — |
| 2 | 2.4 | 2 | 4.9 | 10 Coins |
| 3 | 3 | 2.1 | 5 | 30 Coins |
| 4 | 3.5 | 2.3 | 5 | 65 Coins |
| 5 | 4.2 | 2.5 | 5.3 | 75 Coins |
| 6 | 4.8 | 2.7 | 5.8 | 90 Coins |
| 7 | 6 | 2.4 | 6.2 | 100 Coins |
| Overall Cost | 370 Coins |
Shotgun

If one shot isn’t enough, make it three or more. The shotgun provides that powerful close-range damage that can melt enemies with ease. What makes this weapon exceptional is that the damage stated by the game is per bullet. As the shotgun gives about 3 shots, you can deal three times the damage in one go. Given that most of the enemies can be huge, it’s a constant stream of damage.
However, the obvious downside is its range and inability to stream more damage in a second. Despite that, it’s a good weapon to have early on.
It requires 60 Bucks to unlock early on. You may not need to spend that much to unlock it, as you can obtain it early.
For the statistics and cost of the weapon, the table below shows it:
| Level | Damage | Fire Rate (Shots Per Second) | Distance | Cost |
| 1 | 4 | 0.8 | 4.6 | — |
| 2 | 5 | 0.9 | 4.7 | 80 Coins |
| 3 | 5.6 | 1 | 4.8 | 100 Coins |
| 4 | 6 | 1.1 | 4.9 | 120 Coins |
| 5 | 6.5 | 1.2 | 4.9 | 155 Coins |
| 6 | 7 | 1.3 | 5 | 190 Coins |
| 7 | 8 | 1.4 | 5.2 | 220 Coins |
| 8 | 10 | 1.4 | 5.2 | 280 Coins |
| 9 | 20 | 1.4 | 5.2 | 300 Coins |
| 10 | 50 | 1.1 | 5.5 | 600 Coins |
| Overall Cost | 2045 Coins |
Assault Rifle

The assault rifle is one of the first bad boys that you’ll obtain early on in the game. Boasting high damage, high fire rate, and long-distance firing, the assault rifle never fails in its task. Out of all the weapons, it has the cheapest overall upgrade cost in terms of coins. While it may not compare to the previous weapon above, you’re more likely to use the assault rifle in situations where more bullets are better.
It requires 200 Bucks to unlock early on in the game.
For the statistics and cost of the weapon, the table below shows it:
| Level | Damage | Fire Rate (Shots Per Second) | Distance | Cost |
| 1 | 3.5 | 3 | 5 | — |
| 2 | 4.2 | 3.3 | 5.5 | 90 Coins |
| 3 | 5 | 3.5 | 6.5 | 110 Coins |
| 4 | 6 | 3.5 | 7 | 130 Coins |
| 5 | 7 | 4 | 8 | 155 Coins |
| 6 | 8 | 4.3 | 9 | 200 Coins |
| 7 | 9 | 4.9 | 11 | 230 Coins |
| 8 | 10 | 4.9 | 11 | 270 Coins |
| 9 | 16 | 5 | 11 | 600 Coins |
| Overall Cost | 1785 Coins |
Light Machine Gun

More bullet per bullet is an efficient tactic. The portable light machine gun allows the player to spew more bullets than the rifle itself at the cost of range. Despite this, its high volume of fire makes it a powerful weapon to use in combat. It also boasts the highest overall upgrade cost for all coin-based weapons. You can’t have a good weapon for free, after all.
It requires 390 Bucks to unlock early on in the game.
For the statistics and cost of the weapon, the table below shows it:
| Level | Damage | Fire Rate (Shots Per Second) | Distance | Cost |
| 1 | 3.5 | 6 | 5 | — |
| 2 | 4 | 7 | 5.6 | 120 Coins |
| 3 | 5 | 8 | 6.2 | 180 Coins |
| 4 | 6 | 8.5 | 6.2 | 210 Coins |
| 5 | 7 | 8.5 | 6.7 | 250 Coins |
| 6 | 9 | 10 | 7 | 280 Coins |
| 7 | 10 | 10.5 | 7 | 330 Coins |
| 8 | 13 | 11 | 7.5 | 700 Coins |
| Overall Cost | 2070 Coins |
Flamethrower
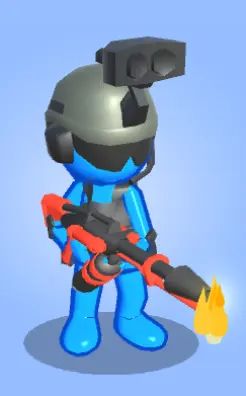
If the enemy shows no mercy, then you will show no mercy as well. The flamethrower is the pinnacle of cruelty in warfare. Spray gelled flames on your opponent, and watch them burn to the ground. It is also one of the few weapons that can only be upgraded via bucks—a trait that makes it a premium weapon similar to other buck-based gear.
It spews fire in a line. While other weapons can contest the damage, such as the LMG, the flamethrower has a little trick up its heating sleeve. It can give the enemies a lingering burning effect. As long as they’re hit by the flamethrower, they will always be burning until their untimely death.
It requires 480 Bucks to unlock early on in the game.
For the statistics and cost of the weapon, the table below shows it:
| Level | Damage | Fire Rate (Shots Per Second) | Distance | Cost |
| 1 | 3.5 | 30 | 5 | — |
| 2 | 4.5 | 30 | 5 | 80 Bucks |
| 3 | 5.5 | 30 | 5.5 | 100 Bucks |
| 4 | 6 | 30 | 6 | 150 Bucks |
| 5 | 6.5 | 30 | 6.5 | 200 Bucks |
| Overall Cost | 530 Bucks |
Grenade Launcher
One of the final coin-based weapons in the game, the grenade launcher spews out death in a radial manner. With its radius as big as its initial distance range, the grenade launcher is a viable pick for hordes of enemies clamped up together.
However, it is weak against stronger opponents. An oddity to such a powerful weapon.
It requires 700 Bucks to unlock early on in the game.
For the statistics and cost of the weapon, the table below shows it:
| Level | Damage | Fire Rate (Shots Per Second) | Distance | Cost |
| 1 | 5 | 0.7 | 4.5 | — |
| 2 | 7 | 0.7 | 5 | 150 Coins |
| 3 | 8.3 | 0.9 | 5.8 | 180 Coins |
| 4 | 9.4 | 0.9 | 5.9 | 280 Coins |
| 5 | 10.5 | 1 | 5.9 | 310 Coins |
| 6 | 15 | 1.3 | 6 | 350 Coins |
| 7 | 22 | 1.5 | 6.3 | 550 Coins |
| Overall Cost | 1820 Coins |
Gatling Gun
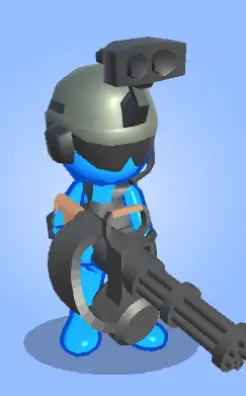
If you want to be like Heavy in Team Fortress 2, then the Gatling gun is a good start. One of the few buck-based weapons in the game, the Gatling gun fires an absurd amount of bullets in a matter of seconds. Even if it has such low damage per bullet, its fire rate is enough to compensate for its lack thereof. Superb on small packs of enemies and deadly against larger foes.
It requires 1000 Bucks to unlock early on in the game.
For the statistics and cost of the weapon, the table below shows it:
| Level | Damage | Fire Rate (Shots Per Second) | Distance | Cost |
| 1 | 5 | 17 | 6.5 | — |
| 2 | 5.5 | 17 | 6.5 | 130 Bucks |
| 3 | 5.5 | 17 | 7 | 170 Bucks |
| 4 | 5.9 | 17.4 | 7 | 220 Bucks |
| 5 | 6 | 18 | 7 | 290 Bucks |
| Overall Cost | 810 Bucks |
Tesla Gun
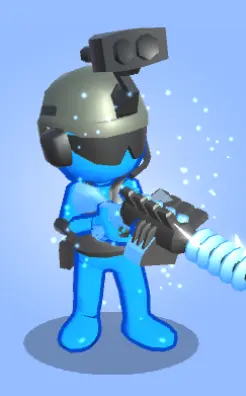
At first, you’ll be disgusted at the damaged output of the Tesla gun as you progress through the game. However, its main selling point isn’t the ability to damage opponents with just a singular shot. It is the ability to chain damage toward enemies that are either lined up or clumped up together. If ever you are going against a wave of fast yet delicate opponents, the Tesla gun gives them a shocking reminder.
It requires 1900 Bucks to unlock early on in the game.
For the statistics and cost of the weapon, the table below shows it:
| Level | Damage | Fire Rate (Shots Per Second) | Distance | Cost |
| 1 | 12.5 | 1 | 8 | — |
| 2 | 13 | 1 | 8 | 320 Bucks |
| 3 | 13 | 1.2 | 9 | 480 Bucks |
| 4 | 14 | 1.3 | 9 | 570 Bucks |
| Overall Cost | 1370 Bucks |
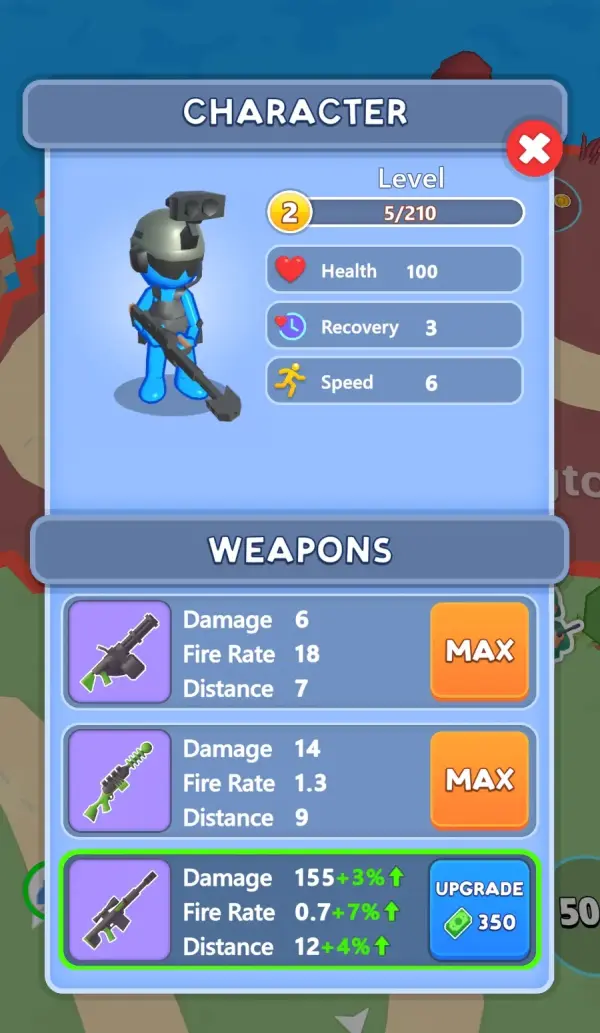
Sniper Rifle

The Barrett .50 Cal is a monster out of all the weapons, being a buck-based weapon to unlock. It deals massive amounts of damage in just one shot and has the highest firing distance than other weapons. Even if you don’t see the enemy in your portrait orientation, expect the player character to hit the opponent nonetheless.
However, it has a better trait unique to the weapon: the ability to one-shot opponents (colloquially known as a ‘lucky shot’). It doesn’t matter how much HP the enemy has or the level the Sniper is in; if you get shot out of an enemy, expect them to be dead. The damaging shot, however, only activates by chance. Fret not; it still is a better chance than most gacha games out there.
It requires 3500 Bucks to unlock early on in the game.
For the statistics and cost of the weapon, the table below shows it:
| Level | Damage | Fire Rate (Shots Per Second) | Distance | Cost |
| 1 | 155 | 0.7 | 12 | — |
| 2 | 160 | 0.75 | 12.5 | 350 Bucks |
| 3 | 170 | 0.85 | 12.5 | 490 Bucks |
| 4 | 170 | 0.9 | 13 | 580 Bucks |
| 5 | 180 | 0.95 | 13.5 | 690 Bucks |
| Overall Cost | 2110 Bucks |
We’ve discussed the weapons, their ins and outs, and their viability. Even then, the player character isn’t enough to stop the oncoming onslaught of the invader. There are still more options to the table for the player, which is…
Towers And Base
In your campaign against the invaders, your base is your headquarters of operations. The same goes for your towers, stopping any approaching enemies in the game from ever assaulting your base. For now, let’s focus on said base.
Base
If you lose your base or you die, you respawn in it or restart to a nearby wave before the next. More of the enemies and their waves will be discussed in the next sections.
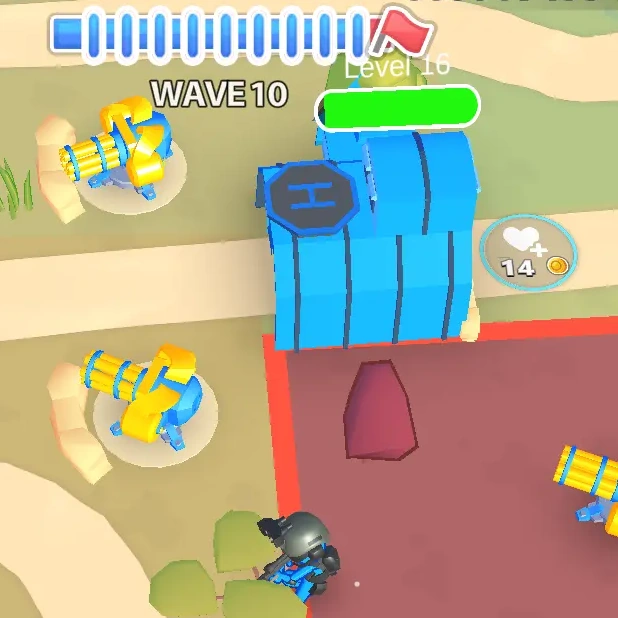
The base takes damage whenever an enemy reaches it (or touches it). The base can be repaired for coins based on the damage that it has taken. You can also upgrade it with coins, increasing its health and thus making it take a few more blows. It also has its own set of tower emplacements, but that’s for another section as well.
As for the cost of upgrading the base, here is a table that details the cost for each level.
| Level | Cost |
| 1 | — |
| 2 | 12 Coins |
| 3 | 30 Coins |
| 4 | 45 Coins |
| 5 | 60 Coins |
| 6 | 80 Coins |
| 7 | 100 Coins |
| 8 | 130 Coins |
| 9 | 150 Coins |
| 10 | 170 Coins |
| 11 | 190 Coins |
| 12 | 220 Coins |
| 13 | 250 Coins |
| 14 | 290 Coins |
| 15 | 380 Coins |
| 16 | 450 Coins |
| Overall | 2557 Coins |
Towers
In the following section, we’ll be looking through the types of towers that can take you can place on the heated battlefield. However, Fight for America ramps up the difficulty by only setting the emplacements at specified areas. This means that you cannot freely place a tower wherever you want, thus forcing you to adapt and assess situations first before engaging the next occupied state.
Another aspect of the towers is that they will target the enemies closest to the base based on the path. If there is a conga line of enemies in the path, they’ll target the front first before going to the next. Mind you, they will target other enemies in the case that said enemy survives and steps out of their range.
With that in mind, we’ll be looking through all of the towers, starting with the base emplacements.
Base Towers
These towers are situated near the base, protected by sandbags. These towers act as the final line of defense if most of the enemies get past the other towers situated around the area. Because of this, they have the benefit of having less cost in building and upgrading these towers, with a lenient cost of 25 coins for building one.
However, they are Gatling towers, which will be discussed in the next section. For now, here are the stats for the towers and the cost of upgrading them in a table.
| Level | Upgrade Cost | Attack | Firing Speed |
| 1 | — | 4 Damage | 2.6 Shots Per Second |
| 2 | 35 Coins | 4 Damage | 4.2 Shots Per Second |
| 3 | 55 Coins | 4 Damage | 8.3 Shots Per Second |
| 4 | 80 Coins | 4 Damage | 20 Shots Per Second |
| Overall Cost | 195 Coins |
Gatling Towers
With more bullets per bullet, the Gatling Tower provides stopping power by endlessly barraging opponents with bullets. While they do not have the area of effect potential, that constant stream is enough to deal with massive enemies or any small fry in the dirt path.
They are also the second least costly of the towers, starting at 50 coins to build. For their price and power, refer to the table below.
| Level | Upgrade Cost | Attack | Firing Speed |
| 1 | — | 4 Damage | 2.6 Shots Per Second |
| 2 | 70 Coins | 4 Damage | 4.2 Shots Per Second |
| 3 | 110 Coins | 4 Damage | 8.3 Shots Per Second |
| 4 | 170 Coins | 4 Damage | 20 Shots Per Second |
| Overall Cost | 400 Coins |
Flamethrower Towers
The flamethrower towers cost 10 more coins to build than the Gatling towers, as it costs 60 coins. However, that cost is justified for the number of traits the flamethrower tower has. Similar to its weapon variant, it deals with a spew of fire that leaves lingering burning damage until the enemy’s death.
However, it has a short range. But given that it’s meant to be a close-quarters weapon, it can give enough damage to any pesky enemies in the way.
As for the upgrade cost and stats, look at the table below.
| Level | Upgrade Cost | Attack | Firing Speed |
| 1 | — | 0.6 Damage | 20 Shots Per Second |
| 2 | 80 Coins | 1.4 Damage | 20 Shots Per Second |
| 3 | 140 Coins | 2.5 Damage | 20 Shots Per Second |
| 4 | 200 Coins | 4 Damage | 20 Shots Per Second |
| Overall Cost | 480 Coins |
Tesla Towers
The final tier of towers, the Tesla towers, cost around 70 coins. It acts similarly to its weapon variant, but the Tesla towers give more damage and cost significantly less than its buck-based mobile counterpart.
With each upgrade, its damage and ricochet potential increase. At the base level, it can bounce off at most 5. At the highest upgrade level, it can bounce off 8 or more and instantly electrocute most of the enemies in the game.
As for its upgrade cost and states, look at the table below.
| Level | Upgrade Cost | Attack | Firing Speed |
| 1 | — | 4 Damage | 1.1 Shots Per Second |
| 2 | 120 Coins | 4 Damage | 1.4 Shots Per Second |
| 3 | 170 Coins | 10 Damage | 1.4 Shots Per Second |
| 4 | 240 Coins | 17 Damage | 1.4 Shots Per Second |
| Overall Cost | 600 Coins |
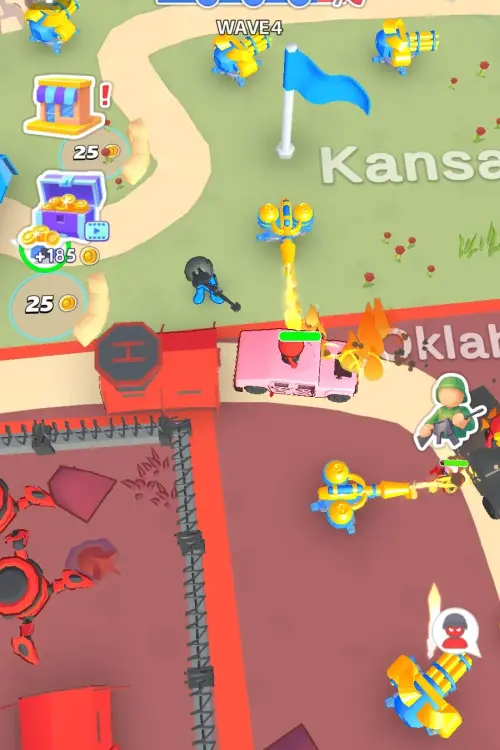
Enemies and Waves
If you know the enemy and know yourself, you need not fear the result of a hundred battles. In this section, we’ll be talking about the enemies and the waves that you will endure once you commence battle. Don’t worry much about any aspects, as they only want to destroy your base and nothing else.
Let’s go through the waves real quick.
Waves

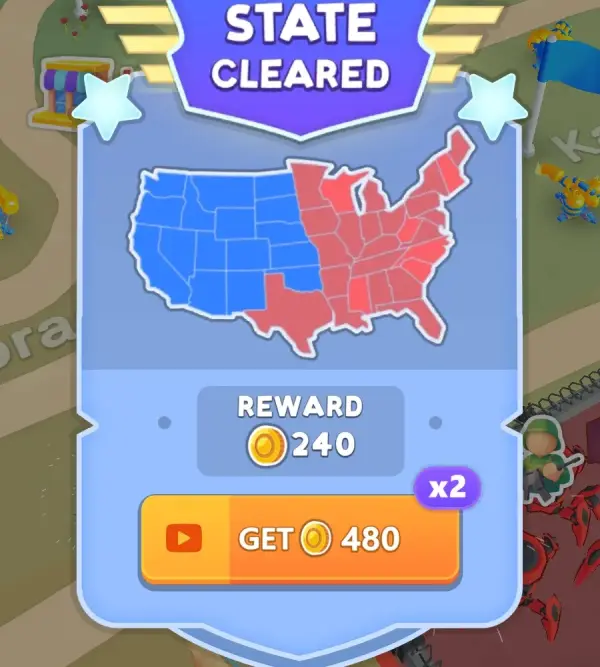
We won’t talk much about waves other than they increase more and more for every state that you have captured. Each wave gives out an increasing number of enemies until you have to deal with the tanky ones that will crush you in one hit.
In the game, the tents that you see (or carriers later on in the game) serve as the waves. Tents will disappear as soon as a wave is about to be done. This gives you a rough idea as to how many waves you have to deal with for the current invaded state.
Because of this aspect, there are a few things this game changes in terms of strategizing in Fight for America: Country War. We’ll go through them starting with the first wave.
First Wave
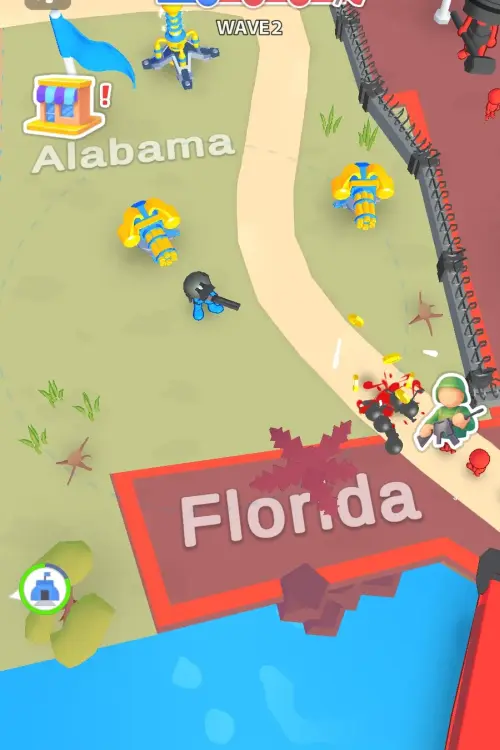
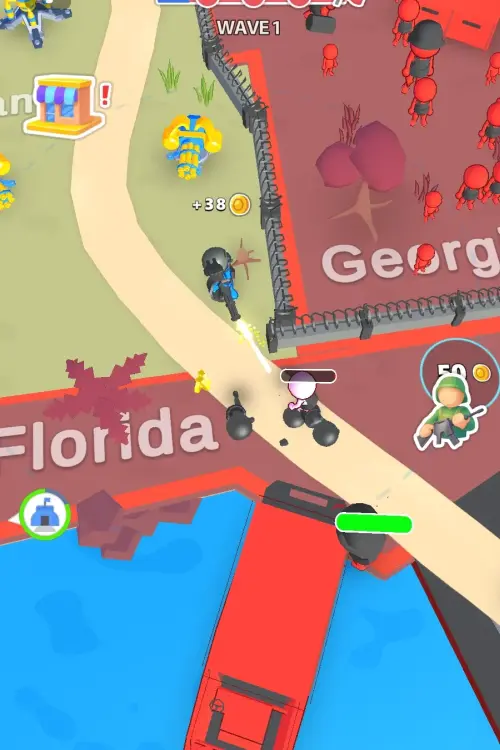
What you see is what you get at first. Before fighting an invaded state, you get to see the number of oppositions that you will have to blast through. These enemies will stand outside their tents and will immediately go towards the base. They will, however, follow in an orderly line to the nearest path they can get to.
However, do note that what you see will not always be what you get. New enemy types can pop out of tents at any time, so keep that in mind. This will be the case for a few enemies later on in the game.
We can skip the other parts of the wave as they are already discussed above.
Final Wave
The final wave is special, as well as a test of prior skills. It acts the same as in previous waves. The difference now is that it will also send another wave toward your player character. These enemies will stop at nothing until you are dead, even ignoring your base and trudging through the arena just to kill you. This won’t be the case for other final waves, which we will discuss later on.
Now that we have a rough idea as to how the waves work let’s go through what you have to deal with in the first place.
Types of Soldiers
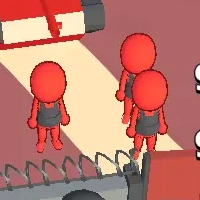
Every nation needs a soldier as the foundation of an army. Fight for America: Country War depicts its enemy soldiers as red blobs of hatred. Whether they be biological or mechanical, they hate you as much as you hate them. With that in mind, let’s know them a bit better so you can shoot them faster and better.
Soldier
This unarmored soldier is the mook of the red army. They only walk towards impending doom and nothing else. At most, you’re never going to bother dealing with these types of enemies, as a shot from your upgraded pistol is enough to stop a horde of them. They are nimble, but what’s to say if you’re accurate and they’re fragile?
They give off 1 coin and 1 EXP upon their death. You can safely ignore these types of enemies, as they will be changed with something much worse later on.
Armored Soldier
Growing larger and now donning body armor, the armored soldier learns from their predecessor to never underestimate what a bullet can do to their body. They’re slower than their previous counterparts, but they are tankier and much harder to kill. That’s not to say they are hard to contend with, as a few shots from your pistol are enough to put them down.
They give off 3 coins and 2 EXP upon their death. They’re not much of a threat, but they still mean serious business compared to the regular soldiers.
Large Armored Soldier
If bigger means better, then the large armored soldier takes the cake. Taller, beefier, and now wearing a combat helmet, these brutish soldiers need more pellets stuffed in their bodies to put them down. Considering that they are found at later sections where the path toward the base is short, they become one of the biggest threats you’ll encounter early on.
They give off 13 coins and 6 EXP upon their death. Put them down immediately before they can wallop your base in a single choke slam with their bodies.
Large Armored Soldier With A Hammer
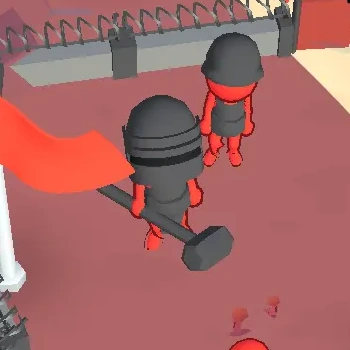
If the large armored soldier wasn’t enough, imagine that guy but now bigger and with a hammer. Sporting the Maska-1 helmet and a hammer larger than its own body, this large armored soldier variant means absolute business. It is now tankier than its predecessor and still as fast as its predecessor. Same as before, it’s a huge priority to take it down immediately.
To put into perspective, they have nearly 1000 HP—5 times larger than their predecessor. All the more reason to take it down immediately.
Putting these monstrosities down gives you 17 coins and 30 EXP. That alone is a measly amount compared to what you have to face in this soldier’s shape and form.
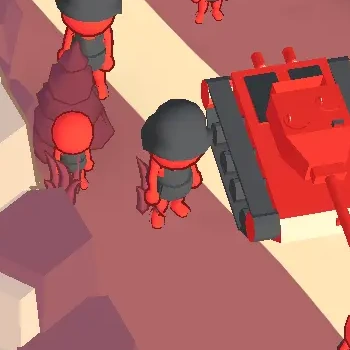
Tank
Once you advance through Wyoming, your enemies have decided enough is enough. If buffed-up soldiers can’t stop you, then an armored division will. They have feared one man all by his own, and they’ll throw metal at you if it means stopping you.
The tanks strike fear into every soldier’s heart. They are as fast as a large armored soldier and are way tankier—having nearly 2000 HP. Touching or colliding with these armored machines is enough to completely put you down and restart the level. And the same goes for the tank, as the game will not hesitate to send 3 or 4 in a single wave.
Putting these armored machines will give you 50 coins and 70 EXP. For something two times harder than its predecessor, the tank is a feared but rewarding foe.
Robot Walker
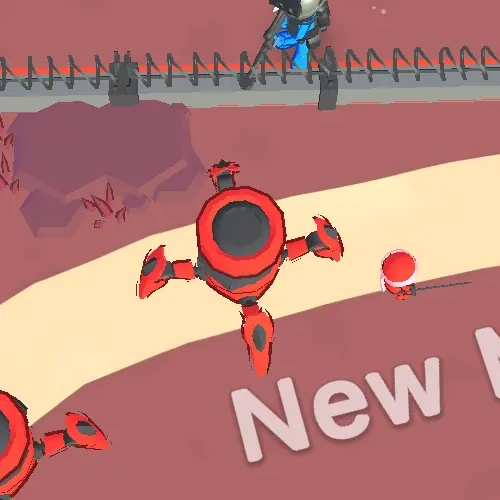
Once you breach through the state before Montana, you get to see these hulking machines with spider legs for actuators. They stand there menacingly on Montana, but the real threat isn’t just what’s outside but also what’s inside.
While the robot walker is a downgrade from the tank, it is frightening with what it has and what it can do. Faster than the armored soldiers, robot walkers become a major threat later on in future waves with the nasty surprise that lurks inside their bodies. Their tanky ~720 HP and spawning in groups is what will catch you off your guard.
They give only 1 coin and 18 experience. For something so tanky, you’d expect much more out of it. But you know what they say, be careful of what you wish for.
Mini Robot Walker
When you kill a robot walker, it spawns eight mini-versions of itself onto the battlefield. As frail as an unarmored soldier but faster than them, the mini robot walker is a bigger threat because how it can go out of your range almost immediately. As your towers only work when enemies are in range, they also fail as they will not switch targets until that enemy is dead. This is what this enemy will do to you in order to achieve such a scenario.
Killing these fast machines gives you 1 coin and 1 experience. Once you see them bursting out, kill them before they do anything to your base. If anything, they’re much worse if they do chase you in the final wave.
Kamikaze Soldier
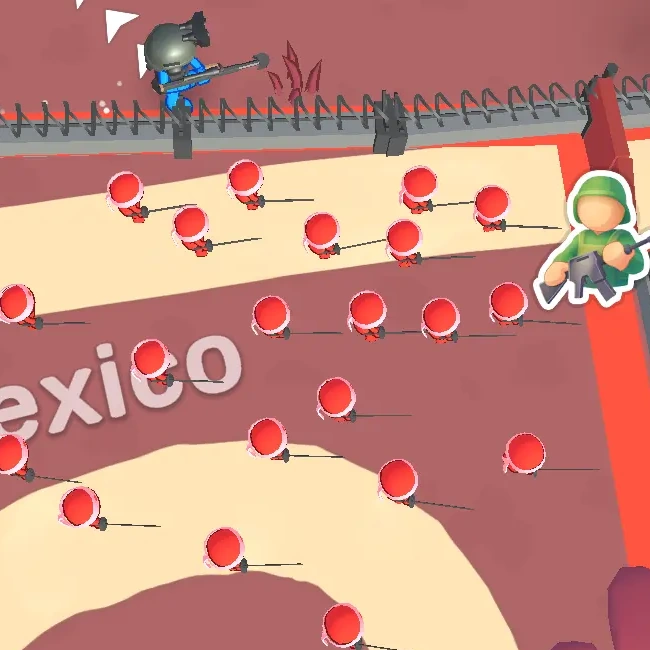
However, Murphy’s Law always exists. If you thought the mini robot walker was hellish enough, then the kamikaze soldiers defy all expectations. As fast as a mini robot walker but sturdier than it, the kamikaze soldier can ruin defenses the moment they are unleashed in battle. Even if they are the first or final wave, even if they’re not robust or tankier, give these Japanese-inspired maniacs the respect they deserve.
They are introduced in Dakota, standing outside of that invaded state’s tents. They give you 1 coin and 5 EXP. Kill them quickly before they can even make a ruckus in your territory.
Technical
One of the many things that you will never expect in the game is the sudden arrival of the technical jeep. Found in one of the tents in Colorado, this vehicle houses 5 armored soldiers when destroyed and is as fast as the robot walkers. Even if they only give out 5 armored soldiers on death, they are still a higher priority as they still ferry the same soldiers that are tankier than your average mook. And their absurd ~720 HP that you have to bust through.
They give out 3 coins and 15 EXP when killed. Kill them off immediately before they can even reach your base.
Helicopter
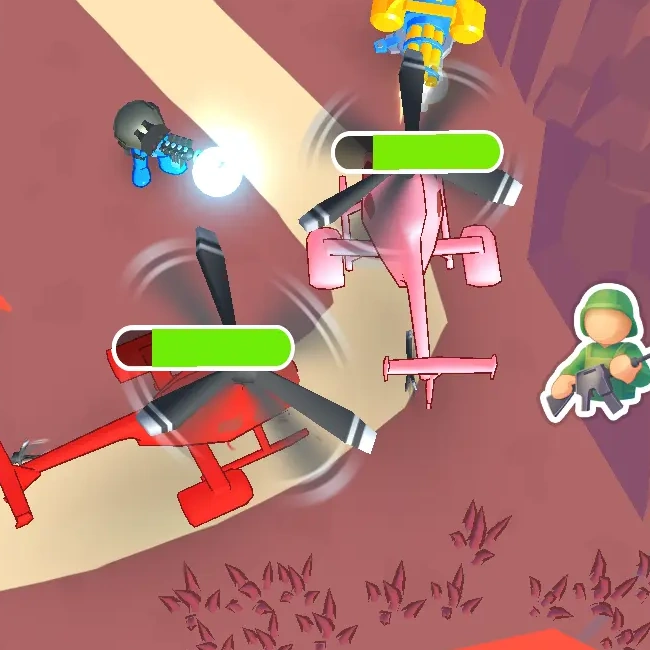
If your enemy didn’t have any sort of air superiority, they do now. The helicopters are one of the few enemies that you won’t get to see in first waves that are as robust as the tank, having ~2000 HP. What makes them more frightening is how bit faster they are than the tank, turning them into a bigger threat. More so when you see 3 or more busting out of a tent.
They give 15 coins and 150 EXP, a little downside compared to what the tank offered when you destroy it. That still doesn’t make it less of a threat, however.
Plane
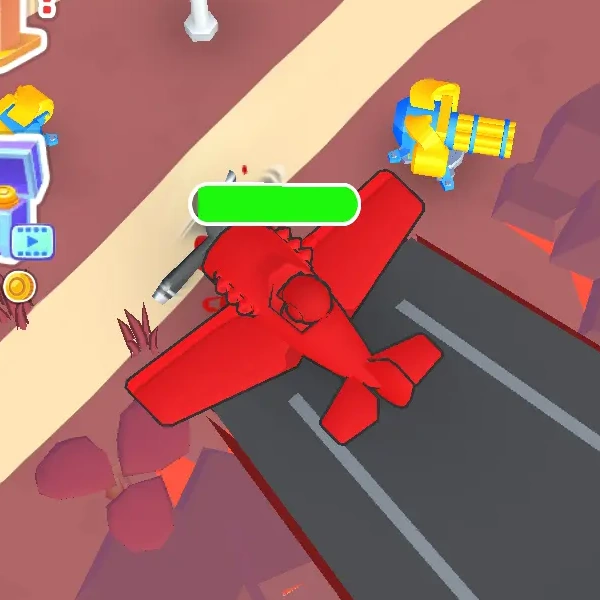
And finally, the plane is one of the last few enemies that you won’t see stationed outside of tents. In fact, it is stationed in a docked air carrier in Texas. The plane boasts higher health than a tank and is a far more valid threat than all of the previous enemies combined. How so?
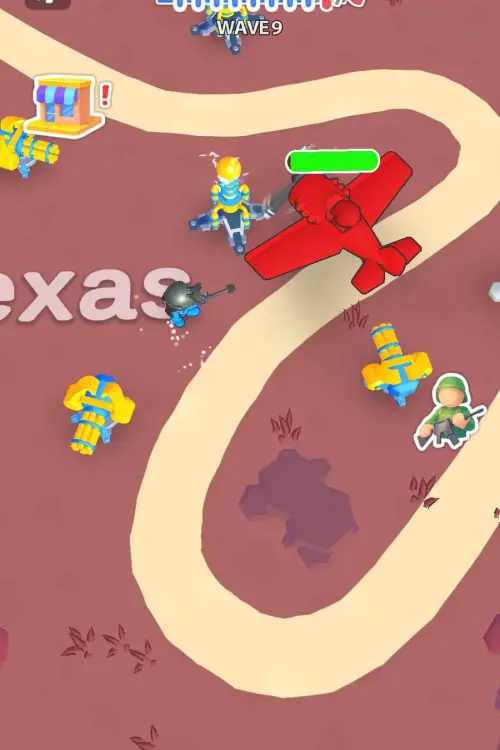
Because of this, it will ignore the path and go directly to your base and shoot it down. It doesn’t disintegrate when it comes into contact with your base. It will continue firing at it, circling around the battlefield until your base is turned to rubble. Ready yourself once a few more start to spawn as they hit hard.
This boss-like encounter gives 150 coins and 200 EXP when destroyed. Don’t worry much about other spawns. You’ll have to deal with it bombarding your base more than any other priorities.
Strategies

Now that we’ve discussed everything that we need to know about the game, we can now jump to how we can annihilate our foes in Fight for America: Country War.
We’ll also set a few grounds as to how we will conduct our strategies. First of all, this is assumed that you are playing this game from the ground up with no microtransactions involved. This guide also assumes the best possible course of action, min-maxing your available options and rewards. We’ll guide you through this game with our hands clamped on yours.
With that in mind, let’s get moving, then.
Setting Up Defenses
An aspect of Fight for America that has been noted earlier is that you have no freedom in placing your defenses on the map. However, that does not eliminate the freedom of choosing which tower to build overall. The range of the tower, the pathing of the enemies, and the cost are major factors to take note of in setting up your perimeter. Your player character’s equipment?
Depends on how you place your own value, which we will discuss later.
For now, we’ll have to shore up our defenses and try to see where we can place our stuff. Let’s start off with our cheapest option possible: base towers.
Base Towers and You
The biggest advantage that you get from Base Towers is how unearthly cheap they can get. A full-upgraded base tower is half of those outside of the base’s perimeter. That means for the cost of a territory tower, you can get two base towers. While the temptation of using base towers is strong, there are a few things that you have to remember when getting them.
Base towers are supposed to be the last line of defense, with you being the second. A good hypothetical situation would be in which a conga line of large armored soldiers ferry their way toward your base. Sticking to your base alone only result in failure, even so with the added firepower from your arsenal.
That doesn’t weigh down the fact that having two base towers is better than one outlier emplacement. Even so, that doesn’t change the fact that the first few levels don’t need that much use for towers. The first few invaded states allow you to save much-needed money for later engagements. You wouldn’t need to worry much up until the bigger enemies, such as the large armored soldiers with hammers, come into play.
We’ll discuss further what weapons to use. For now, we’ll go through what the rest we can do with the other emplacements.
The Rest of the Emplacements and Positioning
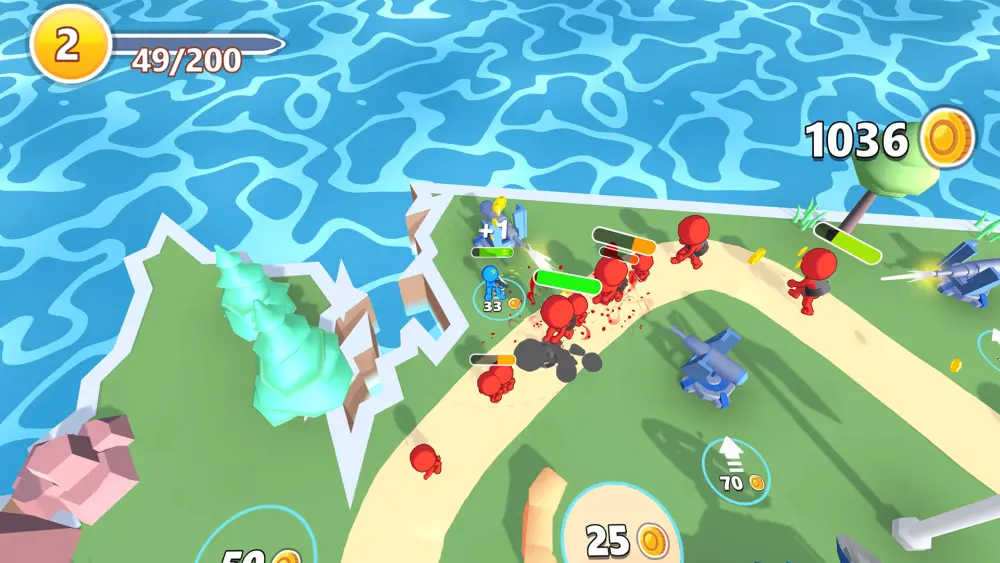
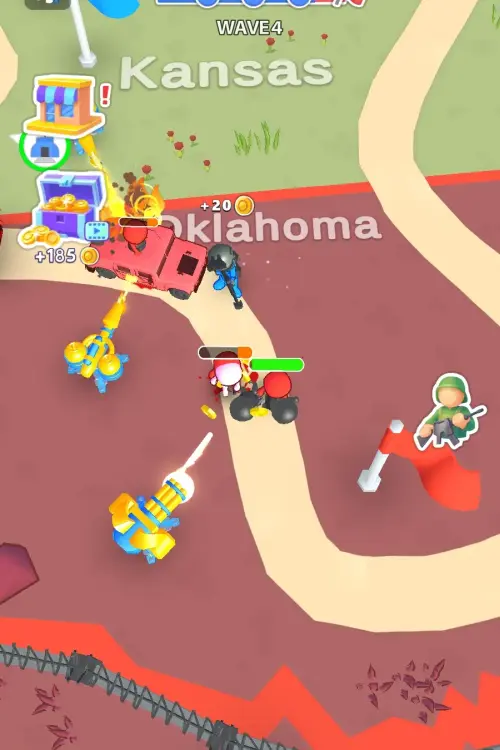
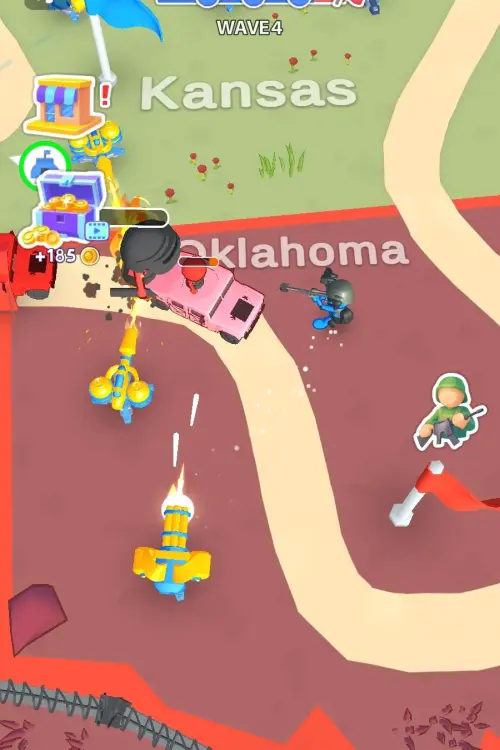
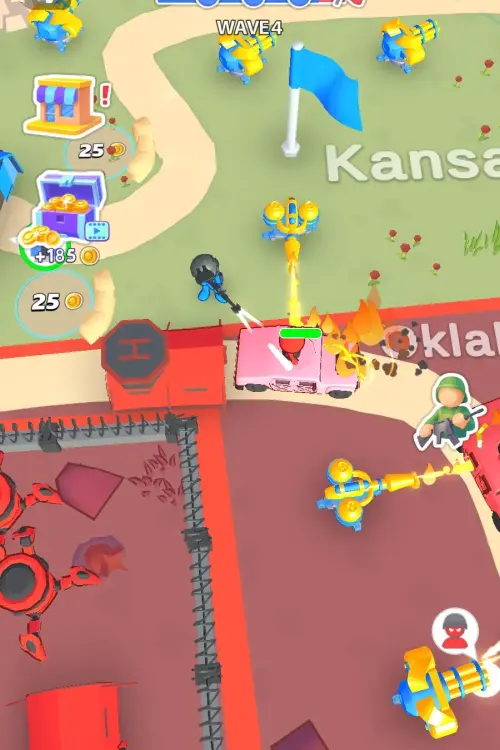
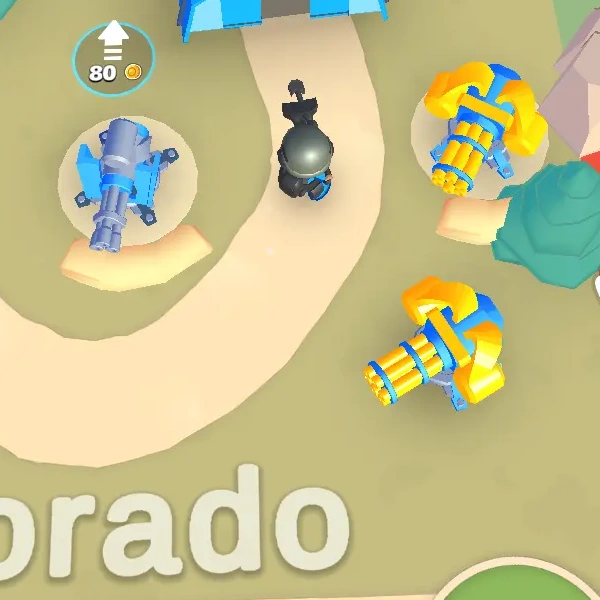
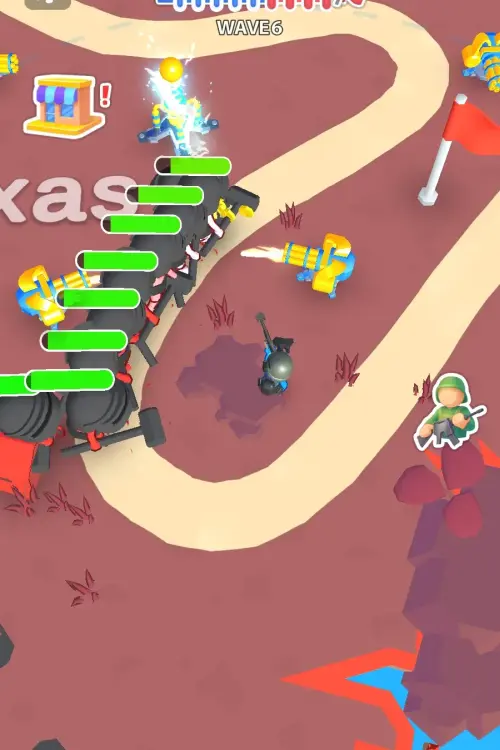
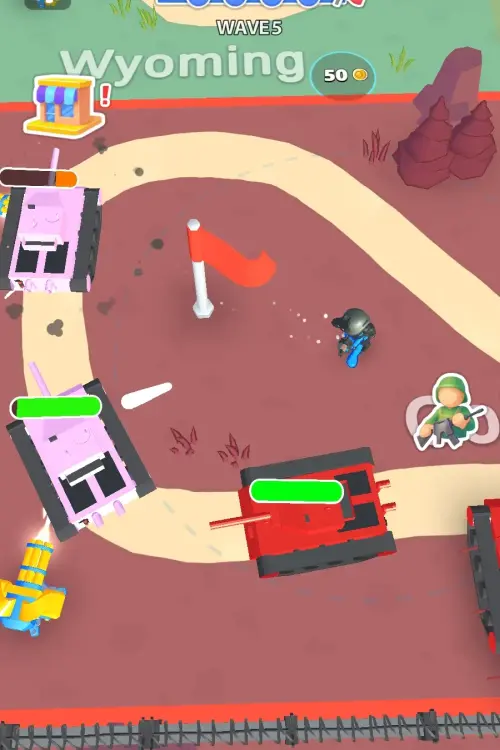
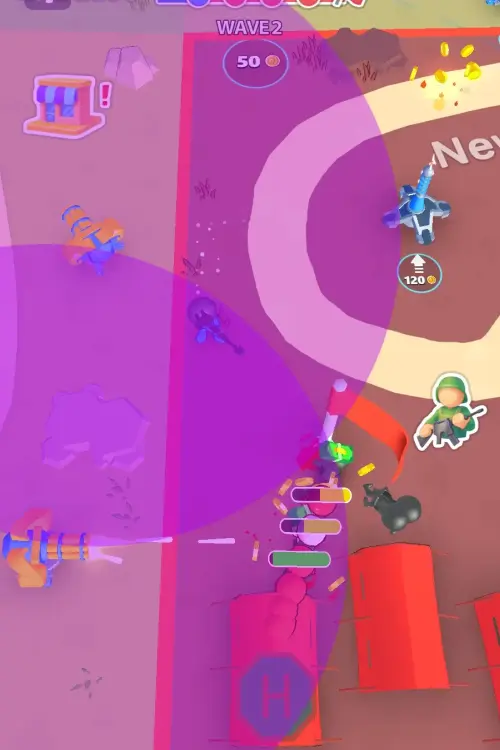
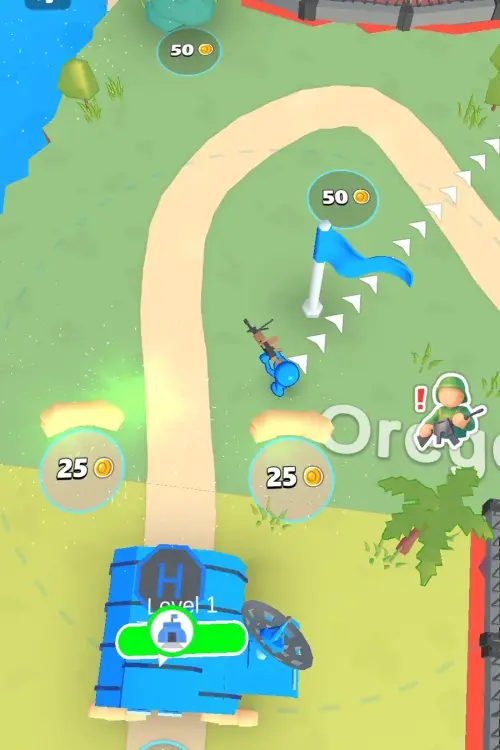
Because of the cost-value of base towers, the other emplacements rank low when it comes to usage. That does not, however, discourage their use. What base towers do not have that other emplacements do is location advantage. Consider the following images down below—we’ll be using a previous image from before.
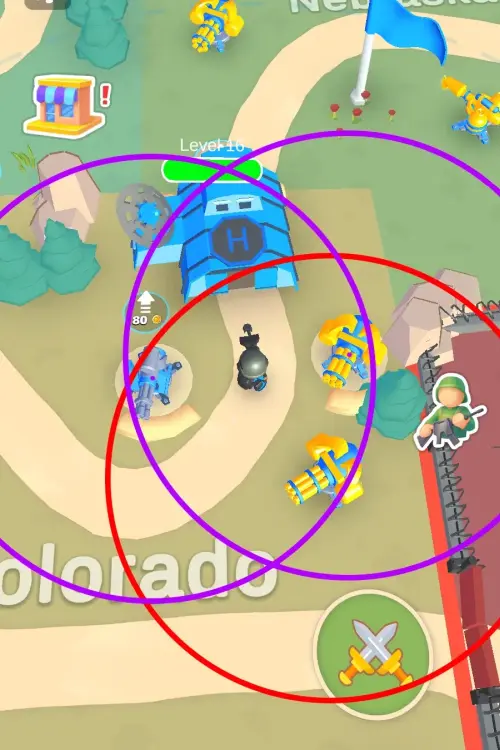
In the image, the base towers’ range is indicated with purple rings. An outlying Gatling tower has a red ring for its range. From here, we can see the intersections as well as the coverage of these three towers.
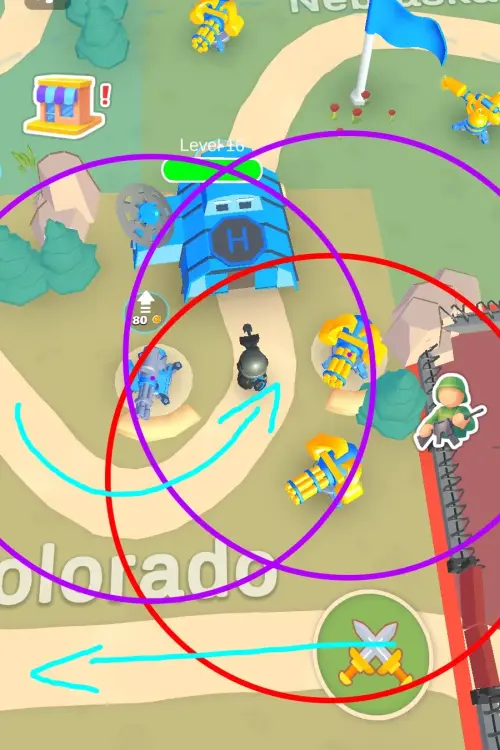
With the pathing as indicated by the light blue arrows, the outlying Gatling tower will be active most of the time compared to the base towers. The base towers are good picks on paper, but their limited range and placement are what makes them also bad picks, to begin with. Overall, the least effective emplacement is the rightmost base tower in the situation. No amount of cost is needed to verify what you need to spend to succeed.
Overall, the position of an emplacement matters more than the cost they give. However, there are also a few things we’d have to talk about when it comes to the viability of a tower.
Why No Flamethrower Towers?
Theorycrafting can only carry something so far, and putting them in actual use can change the outlook on an item. Towers are no exception to the rule, as well as a few weapons in the player’s arsenal that will be discussed later.
For now, we’d address the elephant in the room: why can’t we use flamethrower towers?
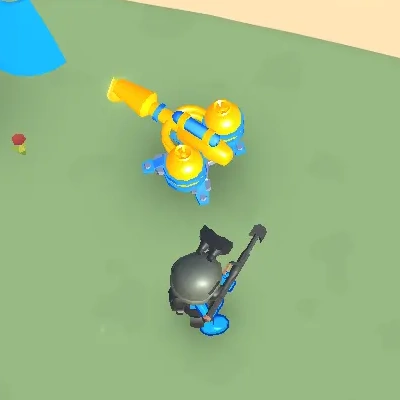
One of the reasons why flamethrower towers suck is not only their limited range but also their effectiveness in combat. While the stats indicate that a fully-upgraded flamethrower tower deals 80 damage per second, the Gatling gun does it better. The reasoning revolves around how it spews out its own attack.
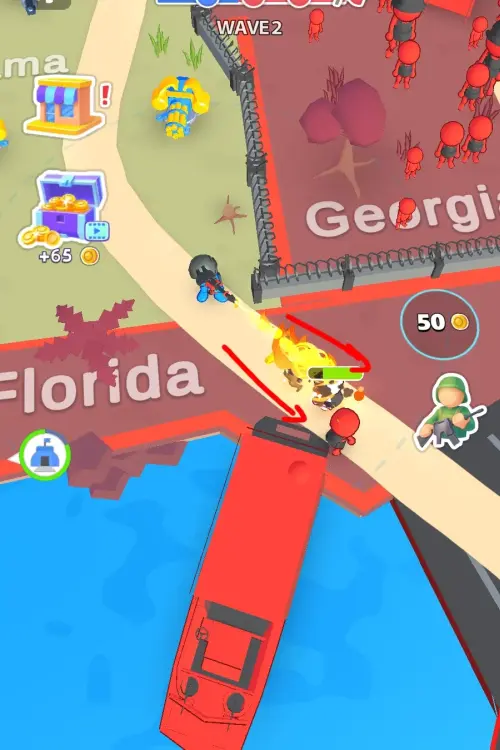
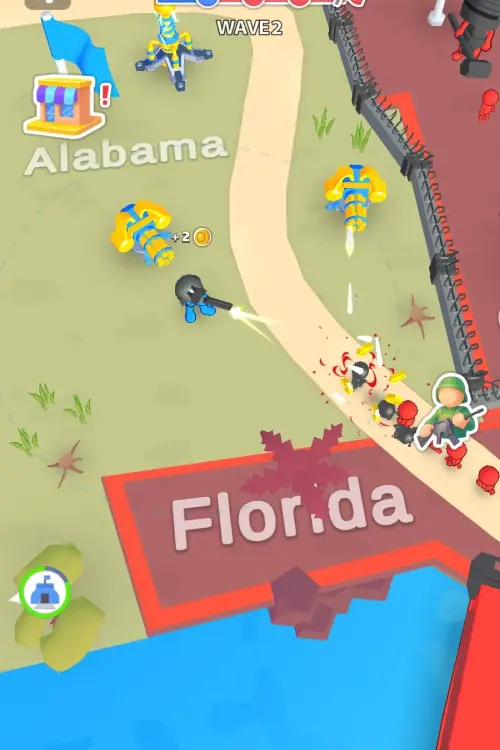
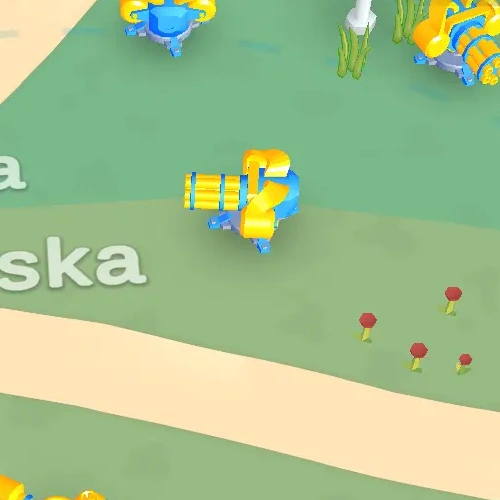
As both the flamethrower and the flamethrower tower function similarly to one another, we’ll use the player character’s arsenal for demonstration. In the image above, you can see that damage is only inflicted in a line where the player character is firing. Do not be deceived by the visuals of the flamethrower, as the hitbox of the weapon is a rectangle that aligns with the player character’s looking direction.
Now, apply that knowledge to the flamethrower tower. The result would be unsurprising: making a flamethrower an emplacement only removes the very power that makes it strong. It thrives on burning opponents that are parallel to its fire. As paths tend to be perpendicular to that of the flamethrower’s fire, there’s no point in using that type of tower even when lingering burn damage is still a great effect to use.
It’s saddening to see such a good weapon to waste, but there’s no need to fret about it. Continuing on, what do we do next? As opponents get tougher and tougher, and they’re suddenly encroaching on our gate, when do we upgrade?
When to Upgrade Tower?
While the player character requires only a few investments in order to power themselves up, the firepower they wield is not enough to completely stop a wave. Towers will be an essential asset that you will have to place sooner or later in the game.
However, the question stands. When do you need to upgrade a tower?
Only upgrade it if you can’t deal with a wave. The game restarts the current wave, respawning any killed enemies. This allows you to strategize and upgrade any of the towers that you need in the coming battles.
While there is a need to keep your base’s health up for future waves, there’s no shame in sacrificing some to finish a wave. Five times out of ten, you’re more likely to be stuck in a state if you don’t have the necessary funds to move on.
This may seem like an obvious tactic, but it’s still a habit that players can fall into. Now that we have an idea as to how emplacements work and when we upgrade them, we can look over to the future.
The Long Game
One gruesome aspect of this game is that the towers that you have used cannot be recycled or salvaged. This means that the choices you make will dent you in the future, decreasing the amount of money that you have in the future waves if you are not careful with your spending. This does not, however, decrease the chances of other towers being used in future states.
As towers cannot be recycled or salvaged, they are also functional even when you have left them for another state. There are emplacements that are well-positioned such that when we enter the next state or two, they are still active. They can still shoot, and they can still cover the area they’re supposed to defend. We can take advantage of this in order to cover areas that current emplacements can’t otherwise use.
However, be sure to know if you’re going to commit to doing this. Once you reach another state, you cannot upgrade towers from former states. While they are operational, you cannot do anything on the fly with them for the next states or two.
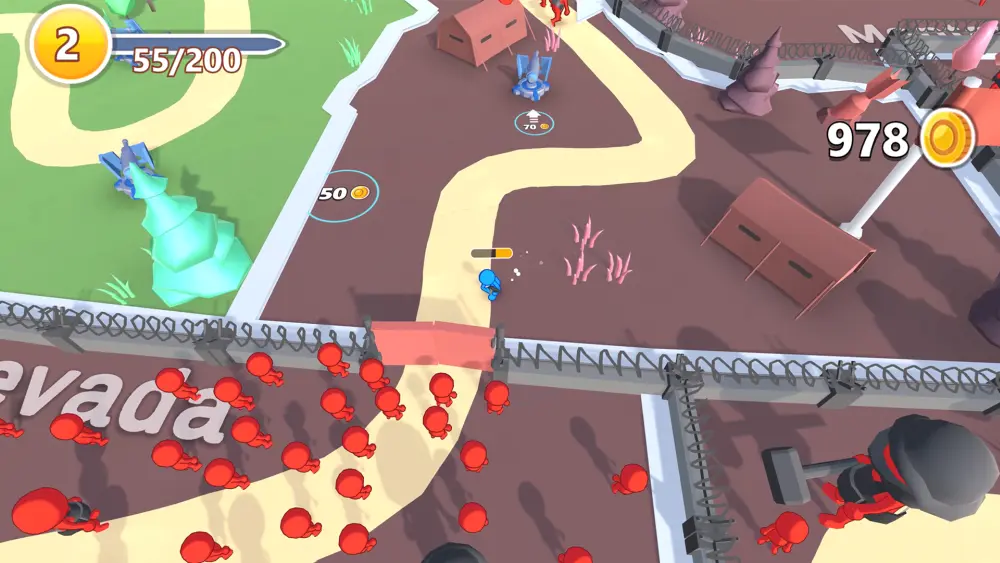
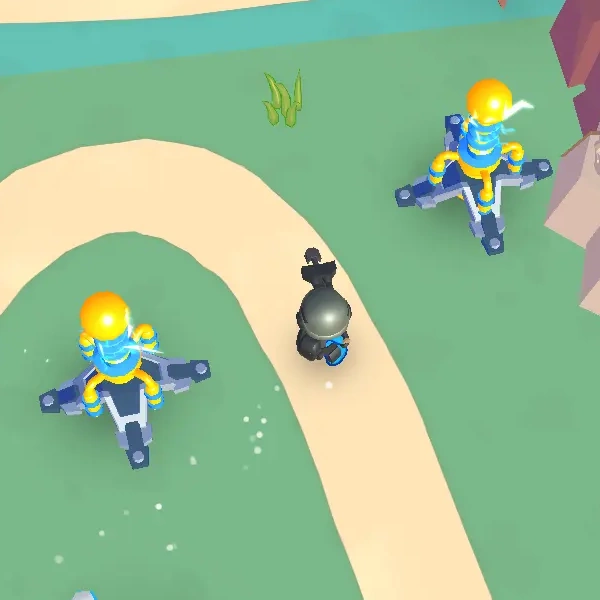
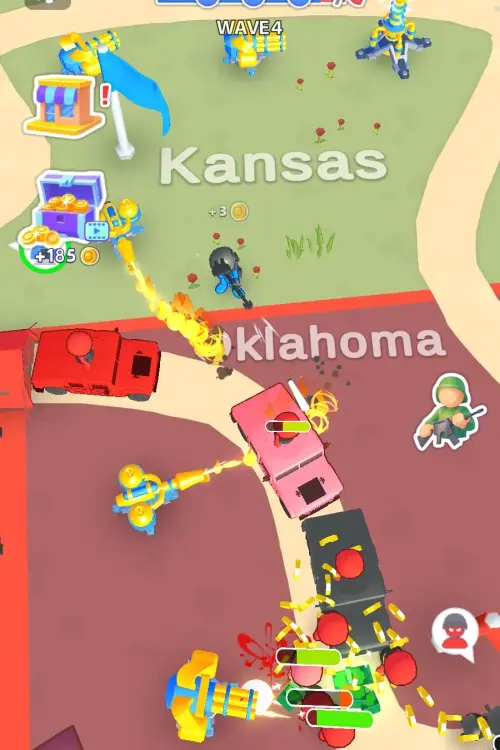
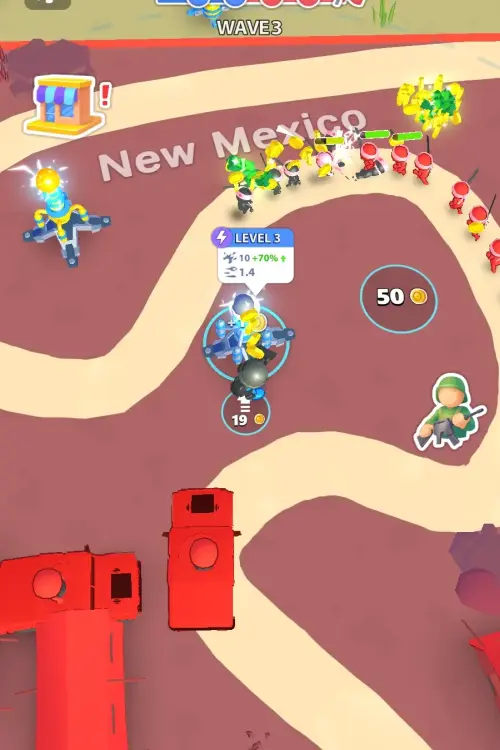
A good example of this case is the following image.
As we can see, the base is far above the north, with New Mexico being the next state to liberate. The previous state, Arizona, still has fully upgraded Gatling towers that will lock on to any targets within its range (as indicated by purple rings). This shows that previous investments can still hold up to themselves as long as the emplacements are close to new states.
With that in mind, you now know how to correctly assess a future situation and make the right decisions with your towers. No other questions stand in our way—what about your player character?
The Right Weapon for the Job
Your arsenal is diverse. You can pellet the enemy with multiple bullets. You can burn them all down to a crisp. You can electrocute them without a chair. While you have all these options, that does not equate to them being perfect for a situation. No weapon is created equal, after all, and some trump over the other.
In this section, we’ll be covering the right tools for the right job. This acts as a guide as to what you will be choosing in the near future. This is also to stop any waste on spending in order for you to be efficient in the future. With that in mind, let’s go through what you should be picking early on, in the middle, and in the late game.
Early Pick: Shotgun
The shotgun is a powerful weapon that can be immediately picked up after a few states. Its damage per bullet is absurd, with it being fully upgraded, allowing you to check more damage at close quarters. You can still handle enemies as you are still faster than them at the early stages of the game, allowing you to take massive potshots at close range.
The shotgun is much more effective once you reach the large armored soldiers, allowing you to deal damage without getting overwhelmed. Their size alone allows you to hit all of your shots.
And as the game progresses, you’re left to ditch the shotgun… which leaves you to use an automatic weapon.
Middle Pick: Light Machine Gun
While the assault rifle is a viable pick, the light machine gun has a low overall upgrade cost. It delivers more power at the start, scaling relatively simply to its more damaging maximum upgrade. 11 bullets per second means a lot more than 6, with a relatively lower cost. This means this weapon is extremely strong at later stages, especially when mini robot walkers and kamikazes come in groups.
We can pick the flamethrower, the grenade launcher, or the Tesla gun—but these extraordinary weapons are locked behind bucks. We can try, but they are otherwise useless as their per-upgrade cost efficiency is lesser compared to other weapons.
It does beg the question. What would be our last pick?
Late-Game Pick: Sniper Rifle
It is a buck-based weapon, but its primary function is too much to pass off. Boasting 150 damage initially allows it to be completely effective against tanky foes. Its main use doesn’t lie in its ability to deal damage at once—as other weapons already fill that role.
The sniper rifle’s role is one-shotting tanky foes. Later on in the game, Fight for America will not hesitate to send huge waves of tanky foes that will require more than 3 more fully-upgraded towers to deal with. If you have seen the conga line of large armored soldiers early on in the guide, you’d understand the use of this gun in general.
Not only that, the sniper rifle is the antithesis of the biplane which will come up sooner or later in the game. Having a powerful weapon that can one-shot these fast monsters at a long range allows you to prioritize more upgrades in the future. In fact, you don’t need to upgrade the rifle more from its base stat.
As soon as you get the lucky shot, you will always see your enemy slumped on the pavement, drained of the color red.
Speed Matters

While not a weapon in your arsenal, it is your foundation. Unlike all the towers that you place, your player character is the only one capable of moving in and out of the tower. If you don’t have any other weapons to upgrade, then it is your speed that you have to consider. Final waves at later stages can be a huge problem as they will send mini robot walkers or kamikazes flying straight toward you.
Outrunning them is far a bigger option than tanking their hits.
What’s next after all of that?
Weapon Swapping
A question comes to mind. How does weapon swapping come into play in a game where you:
The game does have its own weapon swapping ‘feature.’ How weapon swapping works is this:
Of course, you have to fire the next weapon while the previous weapon is on cooldown, or else the effectiveness of the technique will not work.
How you do this in the game is very simple. The following steps are:
This type of gameplay, of course, is tedious as it requires you to navigate through a fading menu all the time. However, having consistent damage of 300 per second in waves where heavy hitters arrive is a welcome addition to your gameplay. Be sure to only use this with the specified weapons, as stated above, as it is painstakingly hard to switch weapons all the time if their cooldown is low.
Tips and Tricks

Now that we’ve got our strategies and ideas laid out, it’s time we talk about a few more things before we end this guide. These small tidbits will help you level up your game more to win your future engagements. We’ll go through them one by one, starting with the following.
1. Get the Sniper Rifle Early On
Before going to Texas, save all of your bucks in order to buy a sniper rifle. The temptation to get the area of effect weapons (i.e., flamethrower, grenade launcher) seems good, but they are otherwise useless once the heavyweights come into play. The sniper rifle allows you to take potshots at long range and has the ability to one-shot foes. Save your hard-earned bucks for a rifle that can do its job.
2. Ignore the Buck Weapons
The tip above already states this—in fact, the strategy guide outright does—but this still deserves its own mention. Do not buy buck-based weapons.
The flamethrower, while having burn damage, is inconsistent in dealing with damage. You have to constantly be on the ground of a wave in order to be effective, a tactic you will have to ditch later on as faster enemies appear. Not only that, using the flamethrower and keeping it for upgrades runs the risk of tankier opponents overwhelming your base. That is also to say its abysmal range, one you have to keep in mind in later stages.
The same goes for the Tesla gun. The tower variant is far more powerful than its portable variants; the former has better range and enemy bounces compared to the latter. The price also doesn’t justify its use, as other specific weapons fill its niche without having to sacrifice your hard-earned bucks.
Lastly, the grenade launcher. It’s viable, yes. It has a more pronounced area of effect damage. But once you reach the later stages of the game, you’ll be handicapped into using only the grenade launcher, and certain enemies can run out of its range. Good on paper but bad in execution.
Now that we see how bad these weapons can get, what else can we do to alleviate our problems?
3. Watch Ads
Ads are the bane of your existence, but they give rewards that are grueling to get otherwise. If you want to get free upgrades, you can take the option of watching a 30-second ad for your pleasure. Think about that for a moment. For 30 seconds, you get a free upgrade that would otherwise require you a few waves or two. Now that, my friend, is efficiency.
This also applies whenever you conquer states and random popups. Having double the amount is far better when you finish a state. The popups, that occasionally come to your left side, appear a few times often in waves. They also give you 100 or 200 coins at most, depending on your current level. More money for upgrades than towers? No problem.
There’s no shame in watching these ads. It’s also a good way to support the developers, after all.
4. Get Your Dailies and Freebies in the Shop
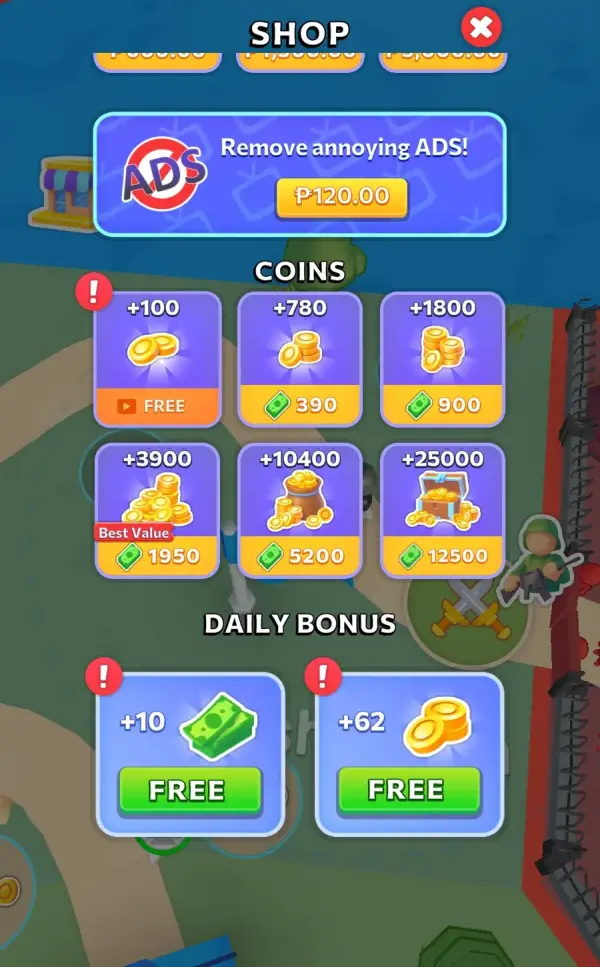
Another thing that you can get in the shop is free coins and bucks. Disregarding the ones that require ads (as they are already stated in the tip above), you can get dailies here that scale with your current level in the game. They require 24 hours before you can obtain them again. While a significantly long time, having a few more sources of income is far better than having none.
Be sure to check the shop from here and there. You never know if there are a few things that you have left out in your playthrough.
5. Do Not Get Hit

While the game advises you to not get hit, there is a far larger consequence to getting hit. Aside from losing health, you also lose the chance to get money, bucks, and experience from enemies. If you decided to tank the hit of, say, a large armored soldier, chances are the 13 coins that you don’t get will ripple throughout your run.
So whatever you do, never let these enemies collide with your body. Especially once the final wave starts, as enemies that do spawn from it never respawn.
6. Check Your Surroundings
Before entering an invaded state or other future states, you have the option to look around and scout whatever problem is there to deal with. Knowing is half of the battle, after all. Once you know what you have to deal with, you can firmly assess the towers that you need, the weapons that you have to use, and what upgrades you require. Be sure to keep a close on your foes; you never know what hits you unless you check.
7. Be On The Move, Constantly
Your player character has the advantage of moving around the map in order to shoot around and place towers. Use that to your advantage. Standing still ensures that enemies come out of your range, forcing you to reposition in order to hit the one in the front. The moment your player character starts moving also stops it from shooting for a while. That’s a minuscule difference that will ripple throughout multiple levels.
You also have to match faster opponents once they start coming out of the field. This also applies when you have to deal with the final wave. This may come as a complete surprise in a genre where you have to stay completely still, but not Fight for America: Country War.
Always be on the move before they come right at your face.
8. Only Upgrade Your Base When the Planes Come

One of the biggest wastes you can make is upgrading your base. What you could use to shower up your defense, you wasted your money on hardening a base. Once a wave comes and you have no turrets but yourself, you’ll end up losing harder than you can count. That’s a situation you have to avoid at all costs, as it tends to be an easy rookie mistake to indulge in upgrading for something that will not happen.
However, that does not mean you shouldn’t upgrade your base. Once Texas comes at you in full force, you should start upgrading your base to the point that a single shot from the biplane doesn’t destroy the base entirely. If it can hold off for about 10 shots or so from a group of biplanes, then you are ready to face Texas and the rest of the states later on.
9. Don’t Repair Your Base At All
And finally, never repair your base at all. Why exactly is this case, you may ask?
It’s simple. Once your base crumbles, it patches back up to full health depending on the base’s current level. Now, imagine you repaired it for 50 coins. That also depends, given that using 50 coins to repair means having a higher level base, to begin with. That aside, failing or dying can mean your base completely healing itself back up.
With all of that in sequence, you have wasted 50 coins all for nothing. 50 coins that could’ve gone to having another defensive emplacement or two base towers. That amount alone can already ripple through the later stages. While there are still ads and the shop to mitigate the loss, 50 coins lost will still be 50 coins wasted.
Conclusion
And that’s all there is to Fight for America: Country War! For a tower defense strategy game, it is well-built to become a genre of its own. You never see games like this where the player can have a bigger impact than the towers that the character places. Much fewer games where you have a limited amount of freedom yet otherwise force you to think about future strategies.
In the end, it’s still up to you, the player, to do whatever it takes to take back America from these red-colored invaders.
We hope that you have enjoyed reading this guide! If there is anything else that you may add to this guide, please bring it up to the comments section down below so we can add a few more tips, tricks, and strategies for other players to indulge in.
Go out there and take back the land of the free, soldier!
Dave Vant Haaff
Monday 23rd of December 2024
How do I get past level 27? Or are there no more levels?
Courtney Jack
Sunday 8th of September 2024
I just finished Ukraine and I'm wondering how will I know when I've reached Level 100
Nemesis1634
Monday 5th of February 2024
You forgot about Europe, there are Bombers in there, including new enemies such as generals, APCs, MLRS tanks, and mortars.
Strange Armour
Wednesday 31st of January 2024
Why do none of the levels have names after the Ukraine level is complete?
Nemesis1634
Monday 5th of February 2024
But honestly, they need to add names to the post-game levels.
Nemesis1634
Monday 5th of February 2024
You don't get to see the bomber planes or the APCs from that point.
Nemesis1634
Monday 5th of February 2024
@Strange Armour, This is because it is post-game. After Europe, you have infinite levels with just one peice of land to liberate.
Cliff
Tuesday 19th of December 2023
I have searched everywhere and cant figure out what the circle on the ground with a button is for. I cant seem to activate it but i see them from time to time.
Antoinette
Saturday 6th of January 2024
@Cliff, Yes, I have the same problem. The cicle with the bomb image, cost 50. I can't activate it at all