Days After is a survival game developed by Reactgames Studio, that’s available on both iOS and Android platforms. Set in the aftermath of a zombie apocalypse, you play as one survivor who finds safety in the wild, and decides to set up camp after their car breaks down. With only the clothes on their back and a makeshift weapon, your character sets out on surviving the apocalypse. It is not just the undead you have to worry about, as both wildlife and raiders will make themselves known as you venture deeper into the once-thriving town.

As a survival game at its core, expect to visit locations where you will scrounge up supplies to build up your base and stockpile food. Carefully avoiding any would-be fights and knowing when to pick your battles, you will have to deal not only with the thirst and hunger of your character but also the likelihood of getting infected by certain zombies. It is not an immediate death sentence, but it might force you to hold off on scavenging runs while the infection is flushed out.
Your tools and clothes will break with enough use, so expect regular crafting of replacements to keep your character in top shape. You are not alone in this world, as other people (and the occasional dog) can be found and interacted with. Some of them may even be convinced to join your base and even tag along in your excursions, providing a much-needed force multiplier in more difficult locations. Just remember to build them some lodgings of their own.
The early game of Days After can get rough, especially since you have buildings that require certain resources for restoration to take place. But with survival comes experience, and with experience comes the knowledge of building the means to improve your odds of surviving this world. Stay with us to learn how to live in the world of Days After and survive the zombie apocalypse!
1. Building For Your Own Safety
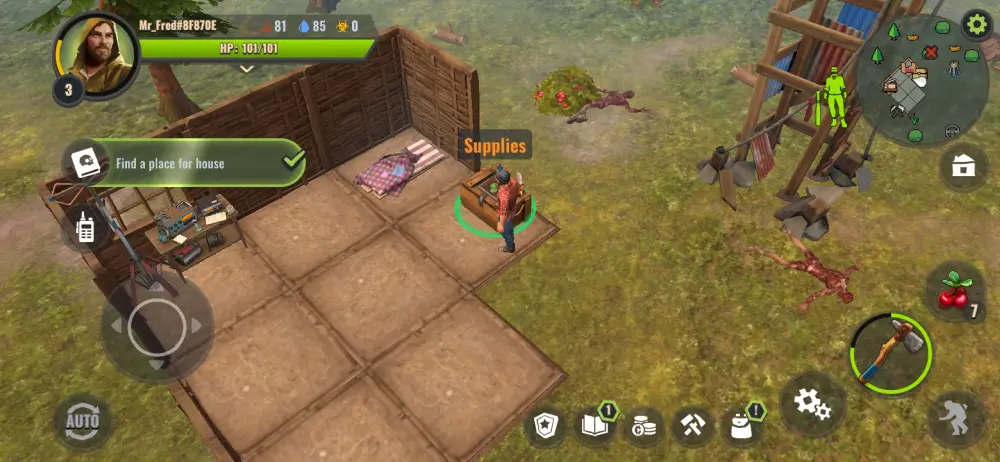
After naming your character, the game opens with your car breaking down in the middle of the forest. With no other options, your character decides to set up a shelter in the area. The game gives you an objective to build your own shelter, but fortunately, there should be a partially-broken house you can refurbish. Your car can be repaired, but it requires resources you can only find in difficult areas and your character is simply unprepared for the time being.
Days After works like most overhead survival games, with touch screen, and controls for movement and combat. You gain experience mainly by killing zombies or gathering resources, and at the start of the game, the latter will be preferable for the sake of early survival.
All your clothes and weapons have durability meters and once they run out, they break which necessitates regular replacements. For now, aside from the clothes on your back, you are armed with a pair of makeshift brass knuckles for self-defense. The durability of your equipment is indicated by a diagram of your character at the upper right corner of your screen, just below the minimap.

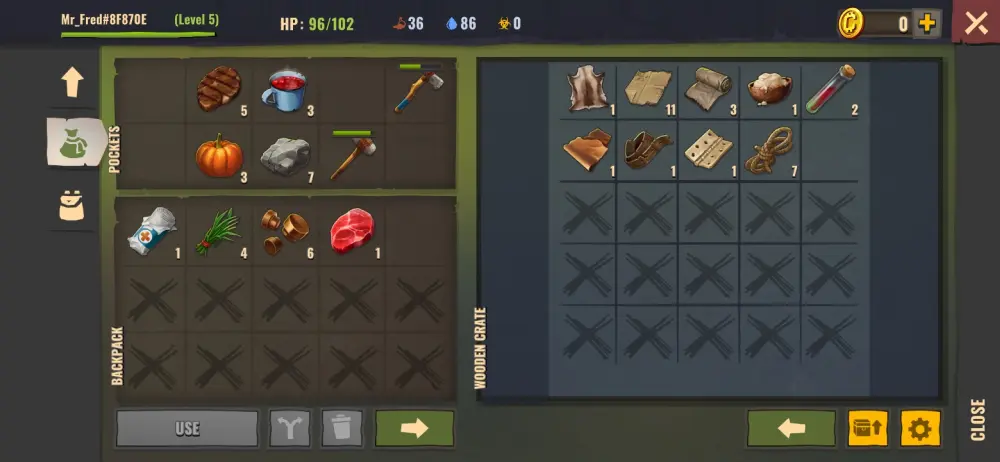
Your character has a limited number of inventory slots to hold items, and until you can build proper storage crates, you will have to either prioritize what resources you have to bring back to base or drop “trash” resources to make room. At the start, you only have your pockets, which can only hold up to 10 stacks of items.
The game lets you craft a crude backpack to get five more inventory slots, but it will not make early scavenging runs very profitable unless you bring the bare essentials to maximize slots. For now, you can just forage the basics to keep yourself satiated and prepare to refurbish the house. Here are some of the resources you can find that are vital to your survival early in the game:
- Pine Logs: A basic resource you can find lying on the ground at times, Pine Logs are more readily available by chopping down nearby trees.
- Stone: As with logs, you can find this as is on the ground, but you can get more by breaking down larger boulders.
- Grass: An easier resource to harvest, Grass can be found as tightly-wound bundles for you to pick up.
- Berries: This is a survival game, so managing hunger and thirst is important. Berries do not restore much of both but can be stacked in groups of 20. Berries can be found in bushes.
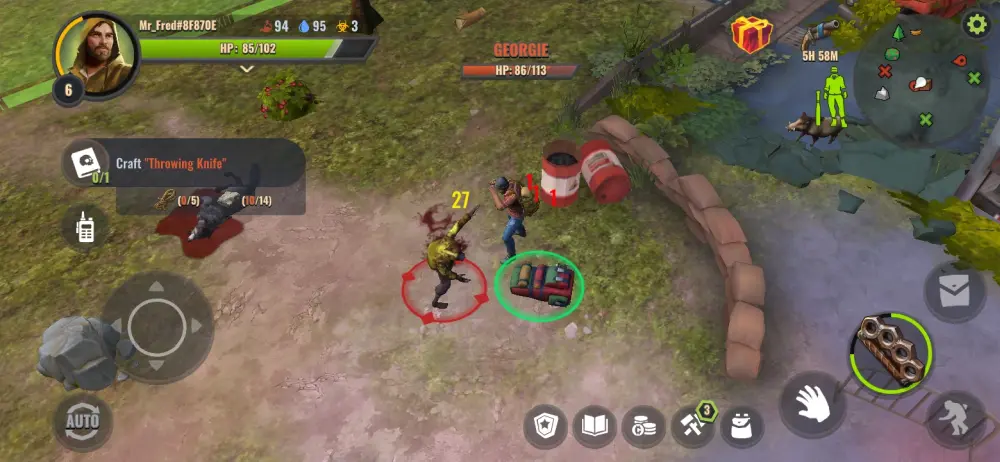
The resources you collect can also be used for crafting tools, used mainly for more efficient ways of harvesting resources as opposed to just picking them off the ground. You will start with the blueprints to build a stone axe and a stone hammer, perfect for cutting down trees and breaking down rocks for their resources. You can use them as weapons if needed, but this essentially doubles the rate their durability decreases.
Thankfully, you can easily access them through the hand icon just below the weapon icon on the main screen. As long as you have the relevant tools in your inventory, the hand icon changes its context depending on what is nearby, whether it is scavenging abandoned containers or harvesting resources. Resources collected this way are also transferred directly to your inventory if you have room for them.
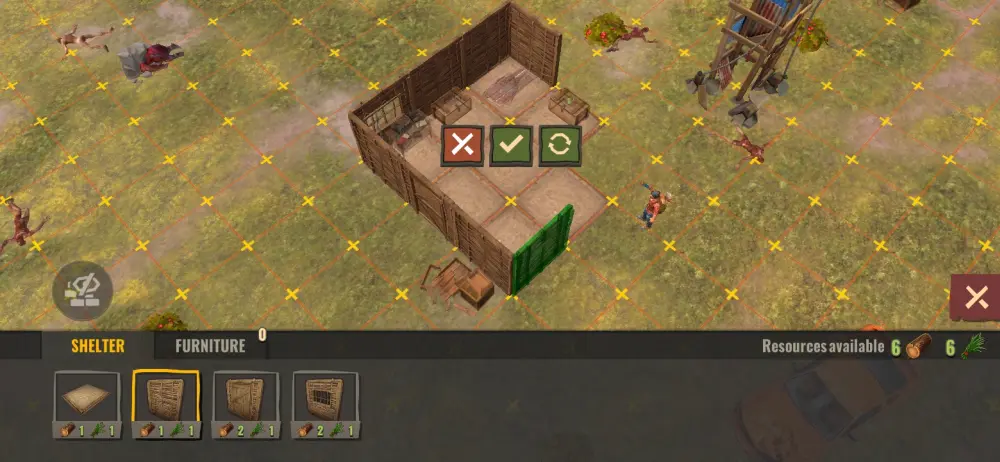
When it comes to constructing new workbenches, such as for cooking food, refining resources, or storage crates to hold your supplies, you access this through your inventory and select the construction icon just below your backpack. Then, you simply place them by selecting the House icon just below the minimap, then selecting the Furniture category.
Meanwhile, the Shelter category lets you expand your foundations with walls, flooring, and the like. Both categories let you rotate your selection on a grid, which can get a bit confusing with walls. Feel free to restore that run-down shack to your liking. In our case, we simply expanded the shack to a proper 3×3 grid and added a couple of windows.
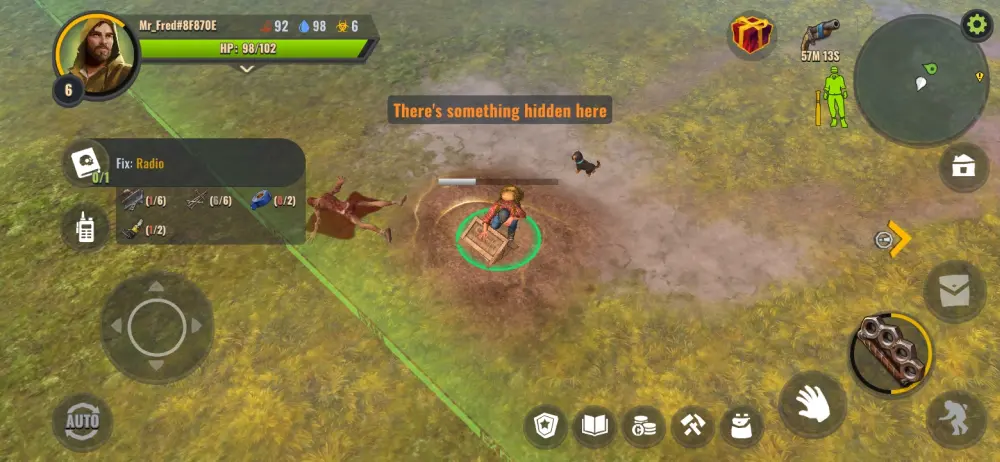
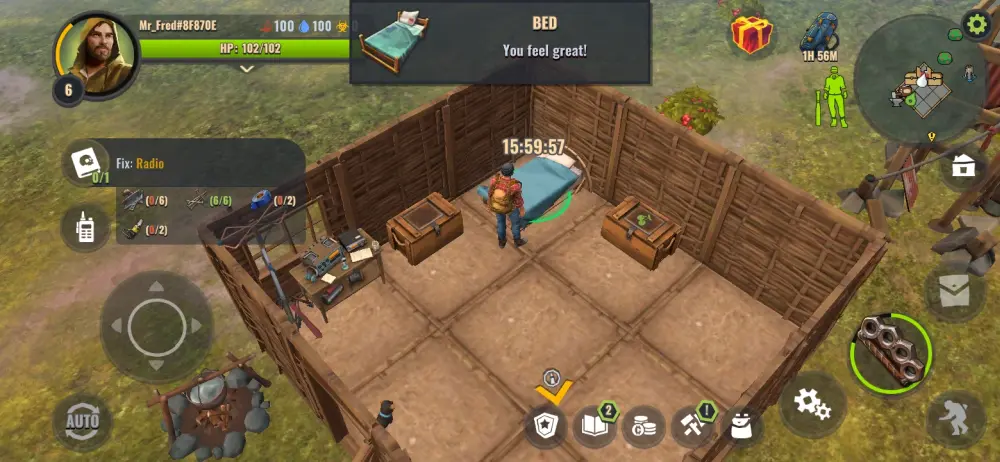
The shack should also have a chest containing crafting materials you normally cannot obtain until later in the game, which should be used to repair the nearby bed. There is also a radio you can repair to join alliances with other players, or trade supplies if you are running low on something and need it now.
Just like the car mentioned above, the radio requires resources you will not be able to gather until much later. Both equipment and workbenches can be upgraded, improving their performance and, in the case of the workbenches, offering new resources to be refined or cooked. Refining and cooking take time to complete, affected by whatever resources come up short.
2. Fighting Off the Apocalypse, One Zombie at a Time
Naturally, you have to keep track of your health, along with your hunger, thirst, and level of infection. These are all displayed in the upper left corner of the screen, along with an experience meter. These can be restored as follows:
- Health is restored mainly by finding and using healing items like bandages, but eating food also provides brief regeneration in a pinch.
- Hunger is naturally restored by eating food, preferably cooked. However, raw food like berries also works. Luckily, food does not seem to spoil at all in this game, so feel free to stuff that raw steak in a chest and leave it for a week.
- Thirst is restored by drinking regularly, though food can restore a small amount of thirst. Later on, you get the ability to craft Water Storage that naturally generates potable water for you to drink.
- Level of Infection is increased by taking damage from certain zombies or imbibing certain substances like their blood. As far as we know, the only reliable way to reduce it is by resting in the bed we mentioned earlier. The bed also restores the four stats above, but it can only be used once per day.
- While not restoration per se, experience is obtained mainly by gathering resources and killing enemies. Leveling up unlocks new blueprints for more furniture and equipment.
If any of these stats get too low, or too high in the case of Infection, your character dies and respawns back at your home base. You can return to where you died to try to recover your lost gear, but most locations in the game refresh regularly to respawn hostiles and supplies. If a refresh ticks over, your corpse is lost along with any loot on it.
In case you were killed by something, you will also have to contend with whatever killed you the last time as it will still be lurking about. That said, your home area does not refresh its resources or its enemies. While this means you will pick that area clean of provisions, you will learn ways to build renewable sources of things like food and crafting supplies.
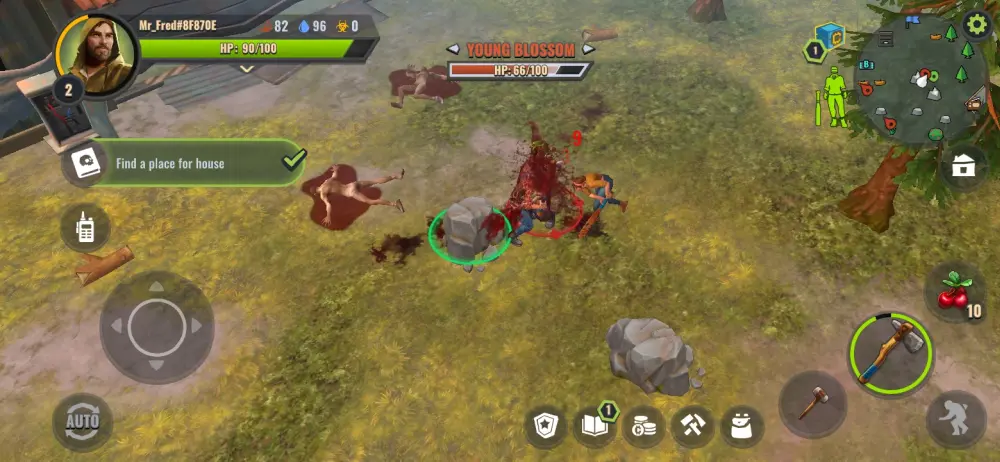
Combat in Days After will typically consist of locking onto a selected target and trying to get into range. The weapon icon we mentioned earlier is a dedicated attack button for whatever you are locked onto. As long as you are in range, you can attack it. Since most of your enemies tend to be zombies, and your starting weapons are mostly melee, fights usually consist of one-on-one matches with attackers, resting to heal for any lost health, and continuing. Zombies tend to have strange names.
Your basic, shambling flesh-eater is named “Simon” for example, but they help indicate which zombies are bigger threats aside from their designs. Depending on your current location, you might have to face off against the local wildlife such as wolves or wild boars, which do not respect the natural order of things and will attack you specifically along with the zombies.
Later on, you get ranged options for dealing with threats, starting with craftable throwing knives and moving up to bows and eventually firearms. Note that most enemies can also be looted for supplies, so keep your eyes peeled for what you need. Over time, you will encounter raiders looking to ambush unsuspecting scavengers, so be prepared for fights against more well-equipped opponents.
If you do not feel like fighting anything, or you are running short on healing supplies, you can always crouch by tapping the crouch button on the lower right corner of the screen. Crouching reduces your movement speed but decreases the likelihood of getting spotted by enemies. This is great if you need to leave the area immediately and cannot afford to take another hit, or if you are trying to preserve the durability of your equipment.
3. The Places You Will Go To, and The People You Will See
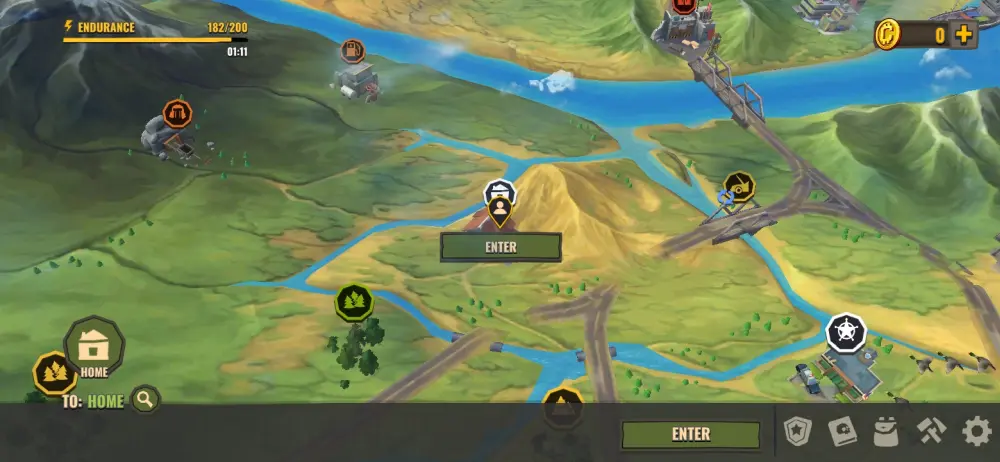
While your starting area has a decent number of corresponding starting resources, they do not regenerate naturally. You will have to explore other locations to scavenge for resources. There are about 14 locations you can visit to collect various supplies, but for the time being, you can only access about six of them. You can select a location by moving toward the edge of the current area and loading up the map. All locations have icons with colors denoting the overall difficulty of the location.
As a rule, the resources you can find in those locations will generally be things you can expect: a forest is more likely to get you natural resources like stone, clay, or wood, while more urban locations will have things like scrap metal. Outliers will exist depending on what was generated, but you can expect resources to be logically placed.
Visiting a location takes time, though you can spend Stamina to instantly travel to the location. Stamina usage is proportional to the distance traveled and naturally regenerates. However, this has a maximum cap of 100 units. You can bypass the regeneration by spending Coins, the premium currency of Days After.
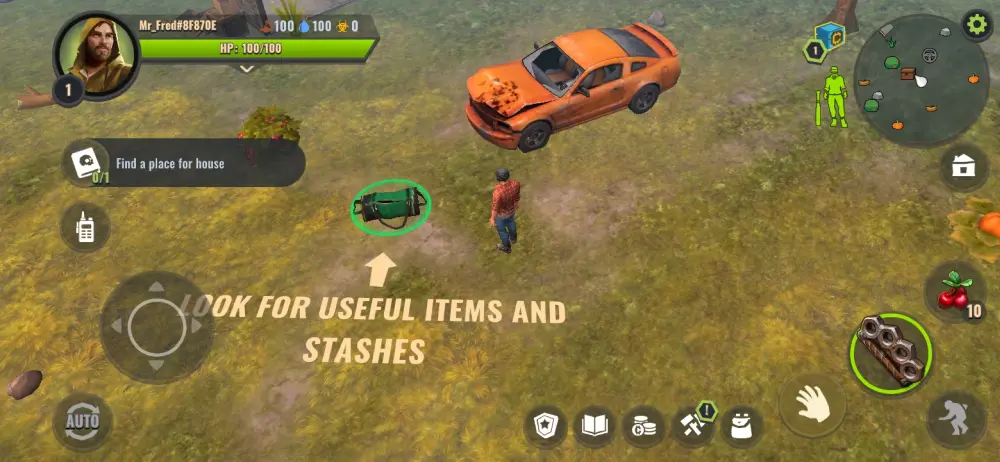
Aside from natural deposits and fallen enemies, you can also find stockpiles like abandoned cars or misplaced backpacks to get more loot. As we mentioned before, locations reset themselves on a timer to provide a constant source of threats and supplies.
If you have cleared an area of enemies, you can tell your character to “auto-collect” any resources they can find, storing them in their inventory if they have room to spare. You can interrupt this automation if needed but remember to clear the area of enemies before activating as your character will perform this without question.
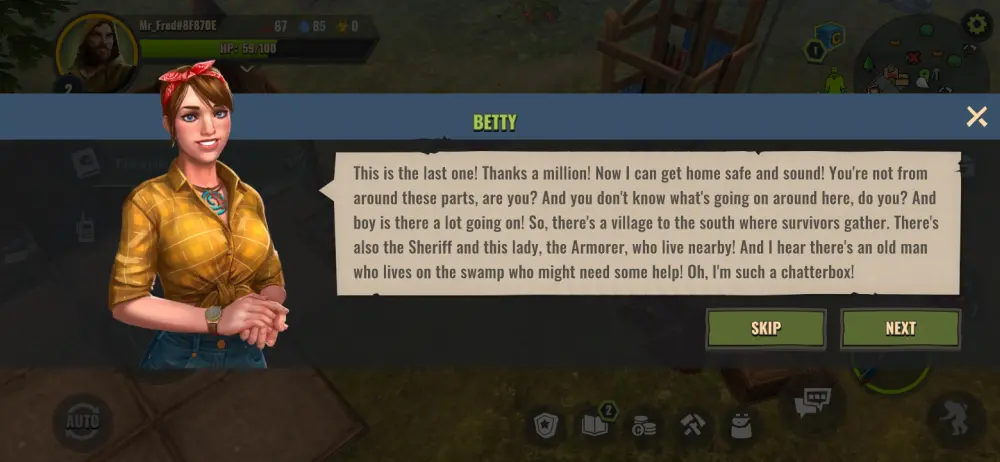
You are not the only survivor trying to eke out a living in the post-apocalypse, and you can find a variety of NPCs to interact with and complete quests for. The first NPC you will generally meet is Betty, a fellow survivor found in your home area. In exchange for some goodies, Betty will ask for assistance in beating down some zombies to secure her hiding spot.
Some NPCs can even be convinced to join your base as followers, which you can bring along during scavenging runs for some added firepower and inventory space. Betty herself can be recruited as a follower after completing some quests, but you will need to construct a place for her to rest in.
If you are having trouble with what to do next, the game has a journal that covers the current quests, if any, and what you have to do next. Tasks can involve gathering specific resources to craft certain equipment or furniture. Completing a task gives you some extra experience, and completing the current quest simply advances the story.
As you progress through it, you will learn about the various people that inhabit the world of Days After, and how they are taking the collapse of civilization. Some of them remain fairly considerate and cooperative, while others will view you as just another place to raid.
4. Apocalypse Survival 101
To survive the start of Days After, it is important to establish a solid base.
One task the game recommends you do is craft a Bonfire. This will let you boil berries to make berry tea. This tea restores hunger and thirst much better than eating the berries raw. This requires both berries and some pine logs to start the fire with. This can help a fair bit in keeping your character sated but be careful not to waste too many logs for tea, as they are also used to craft tools and base expansions. Berry tea remains a more efficient way of keeping your character quenched and full.
Another building you can unlock through the level ups are Garden beds, which let you naturally grow both Grass and, as another source of food, pumpkins. However, one of the resources you will need to build it is clay, which you can only find in the forest and can take a few visits. Once you have one built, this makes stockpiling those resources much easier in the long run and provides a steady source of food and health regeneration. Pumpkins in particular require seeds to grow, which you can find by picking loose pumpkin plants in the wild.
Just remember to build up that bed as soon as you can, as full restoration is far more efficient than wasting lots of food to heal yourself back up to full before jumping right back into a scavenging run. It will also be the only way to purge your Level of Infection if it gets too high, though you will unlock better means as you progress. Bear in mind that you can only use the bed once a day, so choose the time to rest carefully.
Building additional storage crates can get a little costly, but they let you offload unneeded resources to free up space in your inventory. Aside from the starting crates in your home base, your storage crates can hold up to 10 stacks of items, and can even have preset icons displayed on top for further organization. Build a crate or two and start arranging your stuff as needed, but just remember that constructing anything requires the related resources to be in your inventory for easy access.
When scavenging for supplies, it is important to know which tools to bring to maximize inventory space. Going to the woods usually means finding more logs, so the axe works best here; keep the hammer back at home. Conversely, more urban areas mean fewer trees and rocks in general, so you can leave both tools back at the base. If there are deposits that require tools, you can always go back to your base, offload whatever you could bring back, and head back to the area with the tools in your inventory. As long as you beat the reset timer, you can pick a location dry.
Since this is a survival game, it can be better to just sneak past enemies rather than try to fight them head-on. Zombies will always outnumber you, and this does not account for other threats. Since you only have melee weapons, you are losing some health during a fight so it may be wise to crouch past a zombie and keep out of sight. Fights will also deplete your clothing durability, and it will be a while until you can build workbenches to craft new clothes.
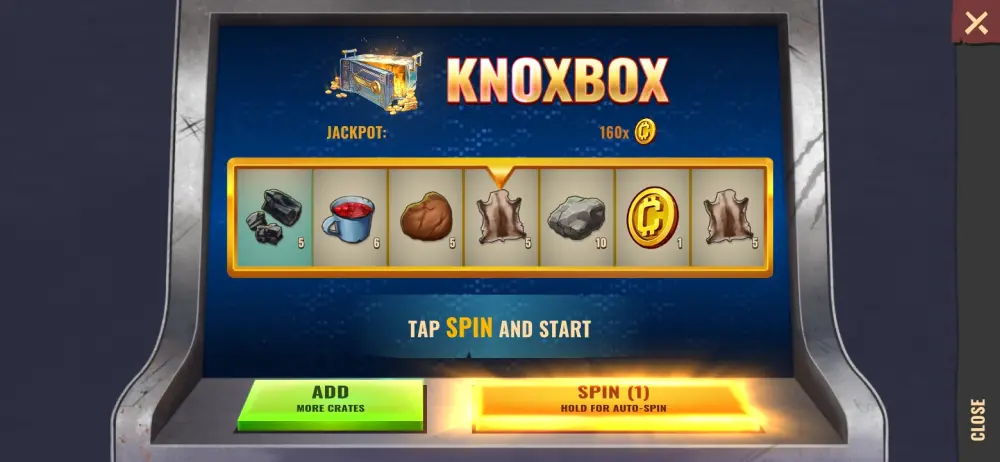
Aside from spending real money, Coins can also be earned in small amounts via the Knoxbox Jackpot, which can also award resources well before you have unlocked the locations that drop them or at least are not fully prepared for.
Do note that the Knoxbox Jackpot can only be rolled for free once a day. There are also periodically available reward boxes that give a small number of resources or Coins in exchange for watching an ad. These are not much, but an unexpected windfall from these might let you build something earlier than anticipated.

And that concludes our beginner’s guide to Days After. We hope that you can build a thriving base in this zombie-infested world, ready to fend off any threat to it. If you have any tips you would like to share, please let us know in the comment area!
kraig
Monday 21st of July 2025
how do I get synthetic fibre
Duke
Thursday 26th of December 2024
How do I use the Books of survival that I have been collecting I don’t know how to apply them to anything? I have Books 1 & 2 but I just keep collecting them
Kent
Saturday 30th of December 2023
Where can I find more advanced tips like how to get air drops?
BuckyBarnesfan
Sunday 4th of August 2024
Where can I like, find blue tape? I NEED 1 more blue tape to build the workbench! I can't find one.