Here we go again: something something ANCIENT EVIL, something something GODDESS OF LIGHT, and something something CHOSEN WARRIOR. That’s all well and good, but I just want to build a house, kick the tar out of monsters, and eat good food. And whether you want to fulfill your destiny as a chosen warrior of the goddess of light by vanquishing the ancient evil or faff about in Dawnlands, the choice is yours.
Dawnlands is a cross-platform open-world sandbox game where you assume the role of an awakened warrior attempting to cleanse the world of evil residue from an ancient conflict. In practice, it’s more along the lines of building a house and crafting cool gear. In that sense, Dawnlands is very close to the smash hit Valheim, and if you’ve played the latter title, you’ll find a lot of common elements between the two and thus be able to intuit certain game mechanics.
As a mobile sandbox title, Dawnlands is very ambitious if a bit rough around the edges – the translation could use some polish and the movement is weird, floaty, and prone to some bugs. Still, there’s a lot of fun to be had especially if you’ve got friends playing it too – and the game will only get better as Seasun smooths the bumps and improves performance.
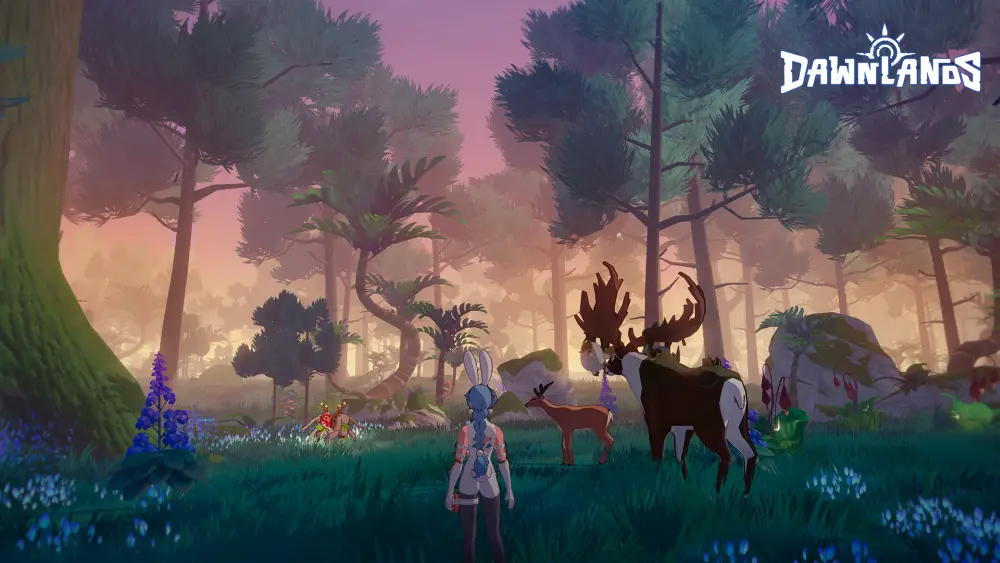
As with Seasun’s other game Snowbreak: Containment Zone, Dawnlands sports gorgeous graphics. The downsides are the same too – this game runs very hot on most phones even at the lowest settings, including my own. Those with powerful mobile devices can explore the Dawnlands on the Google Play Store or the App Store, while those who’d rather use their stronger hardware to handle the game can get Dawnlands via a standalone client or on Steam. Just to be clear, I’ll be using the PC version of the game for this guide, but if you’re playing on mobile, you should be able to follow along just as well.
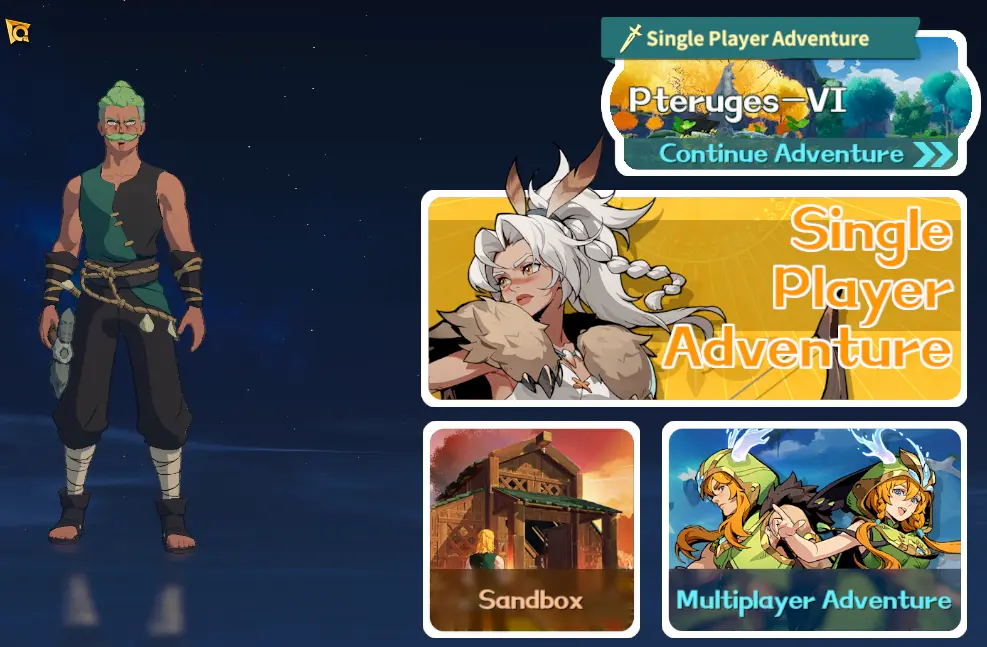
Dawnlands is a sandbox game, meaning that you’re pretty much free to play the game however you wish. It does, however, rely on progression to unlock better weapons, more efficient tools, and prettier, more varied home decoration. Thus, this beginner’s guide will walk you through the basics as well as how to unlock new tiers of development. Players should also note that Dawnlands is very F2P friendly, with cash shop purchases leaning towards cosmetics and convenience.
This beginner’s guide to Dawnlands will walk you through:
- Building your first base – gathering materials, building structures, and crafting stations.
- Keeping yourself alive by eating, making equipment, managing buffs and debuffs, and so on.
- Combat – picking a weapon, the damage types, your movement options, and how to not get the crap beaten out of you.
- Exploration: the various landmarks, the map system, and fast travel.
- The game’s progression system – what you’re supposed to be doing and how to get certain key resources.
Your First Base
Yes, you may be in a hurry to explore the world, and I don’t blame you. The wilderness of Dawnlands is beautiful and inviting, but before you run away and get crushed by an ogre, let’s take a few minutes to go over the basics of building your base so that you can stake your claim on the world.
Quick Tips:
- Build a bed and basic shelter as soon as you can to facilitate easier respawns and a relatively safe place to rest and resupply.
- Your first shelter will require healthy amounts of wood and thatch. Wood is acquired from chopping trees and then chopping the fallen logs while thatch can be picked up in the wild.
- Don’t forget to stay away from falling trees!
- Buildings must be placed on flat ground, or better yet, foundations. Without support, building pieces can collapse.
- There are two building modes – simple and advanced. The only difference between the two is that advanced mode lets you rotate the angle of the piece you’re placing.
- Sleeping in a bed requires a campfire. Do not place your campfire on flammable foundations. Either look for entirely flat ground or create flat ground by using a pickaxe if you’ve unlocked it.
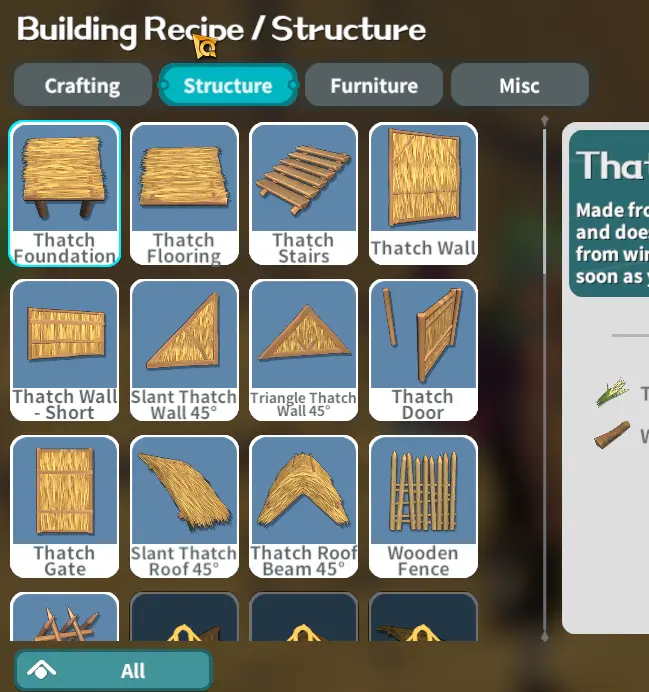
- You’ll need walls and a roof for a building to count as shelter and give you the powerful Resting regeneration buff. Unlock new building pieces via the recipe menu – tap the scroll on the upper-right menu.
- You can demolish building pieces if you don’t like their placement or want to renovate. You get a 100% refund on spent building materials.
- Note that all building pieces must have a solid foundation either via a foundation piece or by being on the ground. Foundations are always safer.
- Pieces that lack support will collapse and be destroyed, though they will still drop resources.
- Building pieces can be attacked by monsters if not protected by a roof. You can repair them at no cost via the building menu.
- Crafting stations are vital to your progress in Dawnlands. Always place down at least one of each crafting station in your base.
- Don’t forget to upgrade your crafting stations. The higher their level, the better the stuff you can make.
Shelter 101
Minecraft, Terraria, Valheim, 7 Days to Die, Dawnlands. Any time you play a survival sandbox, the first thing you should do is determine where to set up so you can get a basic base going. This way respawns will be more convenient and you’ll be able to experiment (read: die in dumb ways) more. Note that you can have many beds, but only the one you’ve interacted with last will serve as your respawn point. Thus, you can set up multiple outposts in the world.
While the tutorial villagers will let you set up shop in their town, you may find that the small space cramps your freedom (although this bed does serve as a good fallback point if you haven’t set up yet). You are an -architect-, after all, and the world is the canvas through which these artless goons will behold the wholeness of your soul, so let’s walk you through setting up shop beyond the village walls.
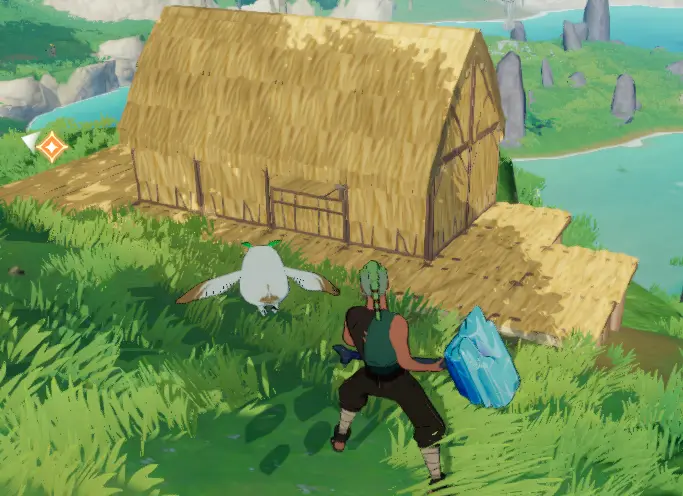
Before you set up your base, you’ll need to gather a healthy amount of resources. For the lowest tier of buildings, you’ll need two main resources: wood and thatch. Wood is easy – craft an axe just like the tutorial shows you, then whack a tree until it falls.
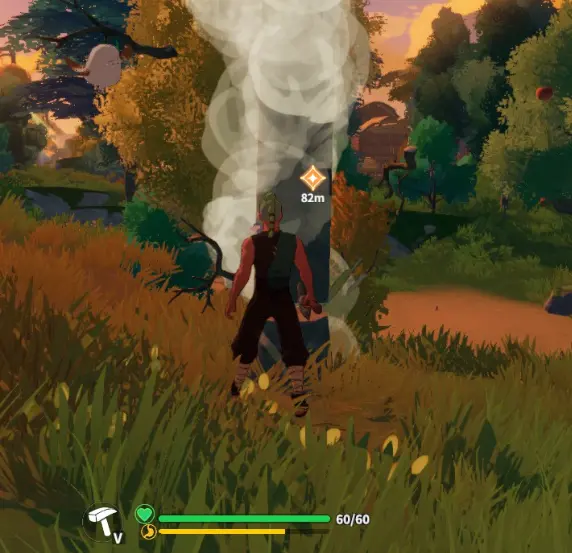
Note that you need to chop the log that falls to turn it into usable lumber. Also, try to cut away from yourself – falling trees can and will kill you!
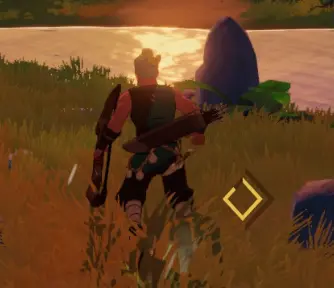
Thatch is technically easier to get, but it’s annoying. To gather thatch, you’ll need to run around the world to find patches like this:
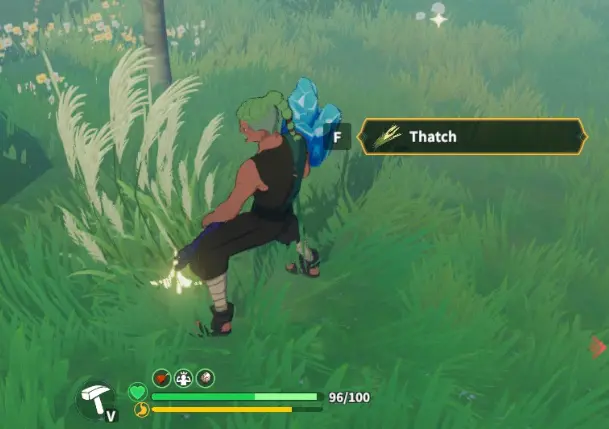
Just interact with the thatch and it’ll be placed directly in your inventory.
Once you have around 100 of each, it’s time to find a place where you want to set up shop. Anywhere is fine, really, and in games like this, you’ll probably end up making several outposts.
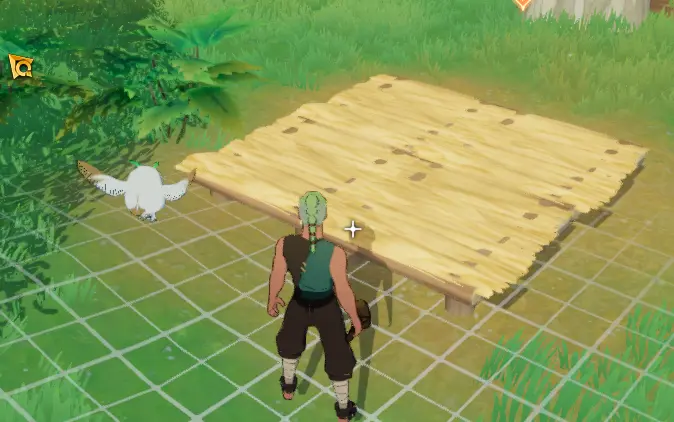
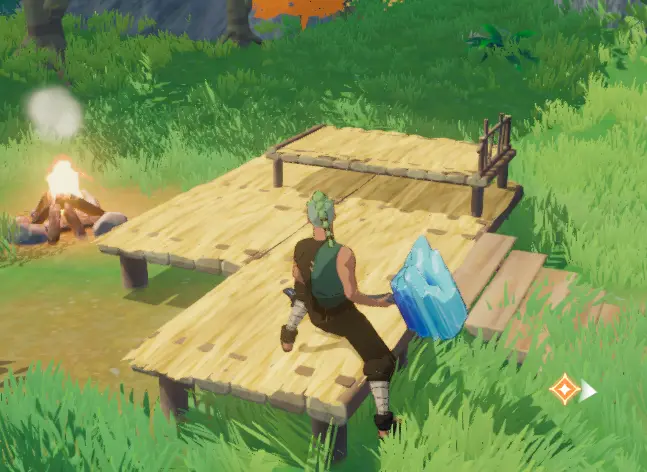
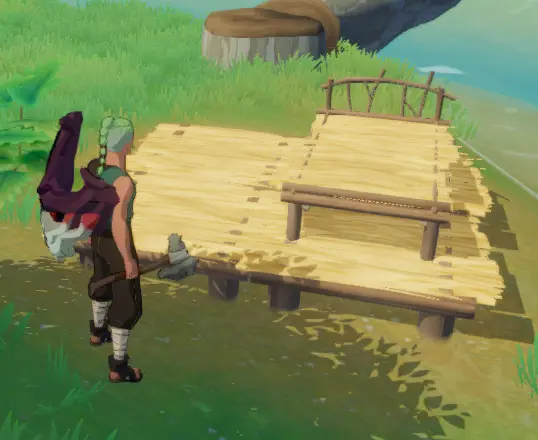
The first thing you need to do before you build anything is to place a foundation. This block denotes the start of a building and serves as flooring. Foundation can be placed anywhere there’s even ground, though there is some leeway. Strictly speaking, you don’t need to place a foundation, though it does make building considerably easier by serving as a base to which you can add.
To build foundations, open the build menu by tapping on the hammer beside your HP bar. Select which building piece you’d like to construct (architectural pieces reside in the “Structure” tab) then tap on the world or build button on the side to make it so.
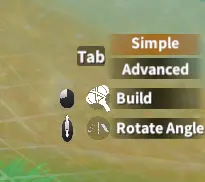
You may have also noticed that there are two building options: simple and advanced. Simple building mode is point and tap – just face where you want to put down the building piece and tap. Advanced building is much the same, except you now have control over the angle of the building piece. Each rotation moves the piece by 22.5 degrees, essentially giving you 16 different ways to place the piece. Regardless of which building style you choose, I find that it’s a good idea to directly face the piece you want to attach your held piece to – that makes building much easier.
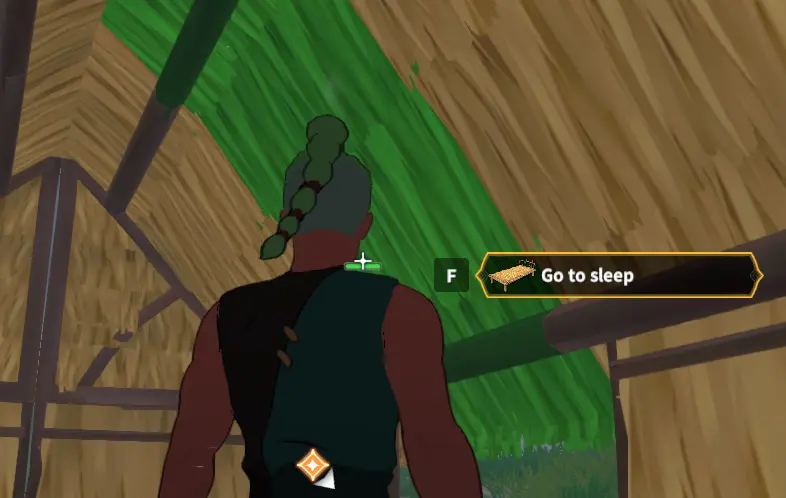
Our next task is to place down your bed. Once again, open the build menu but this time go to the “Furniture” tab. Select the bed and plop it down anywhere (though preferably on your foundations). Voila, new spawn point. Once again, you can have multiple beds but only one can be set at your spawn point. Don’t forget to trigger your nearest bed if you’re camping at an outpost.
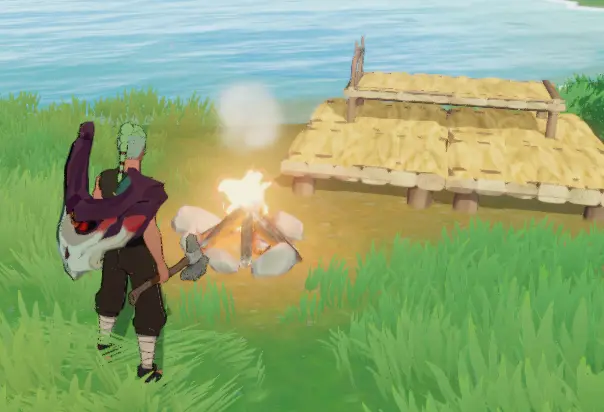
While you can set any constructed bed as a spawn point, you’ll need to place a campfire if you want to sleep through the night. Campfires are placed via the build menu in the “Misc” tab. Campfires must be fed with wood or other fuel to keep themselves alive. These can be tricky to place as you can’t put them on flammable foundations (since the fire destroys them) but still require you to place them on perfectly flat ground to avoid breaking due to physics. Either experiment with various positions or use a pickaxe to dig a fire pit by hitting the ground.
This is technically enough for a shelter, but if we’re going to build a house, we’ll do it the right way (walls and a roof) so that you’ll be protected and get that nice Resting bonus to boost your recovery. To build a home, you’ll need to unlock more building pieces via the recipes menu. This menu can be accessed via the scroll icon on the upper right.
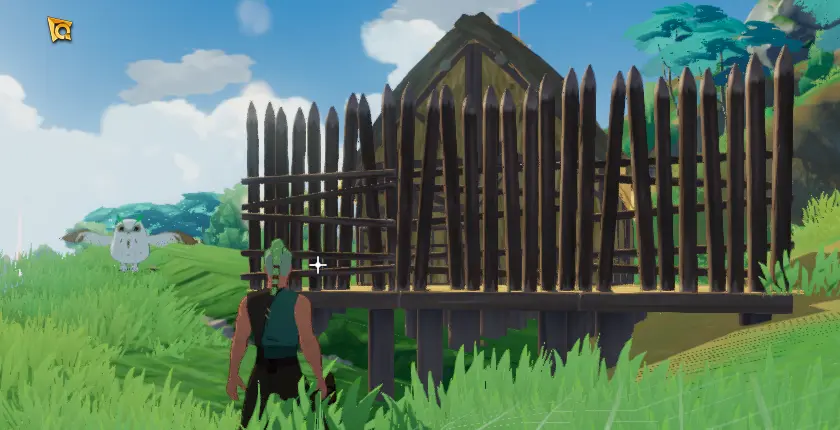
Take what you’ve learned from setting up your bed and foundations to build any form or size of house you want. The only limit is your creativity!
Renovations and Repairs
While constructing your house, you’ll probably end up misplacing a piece or two. Maybe the interior wall is flipped with the “wrong” side facing inwards. Maybe the angle is bad. Maybe you have a flying roof somewhere. Don’t worry – it happens to the best of us. To remedy this, you’ll need to demolish the offending piece.
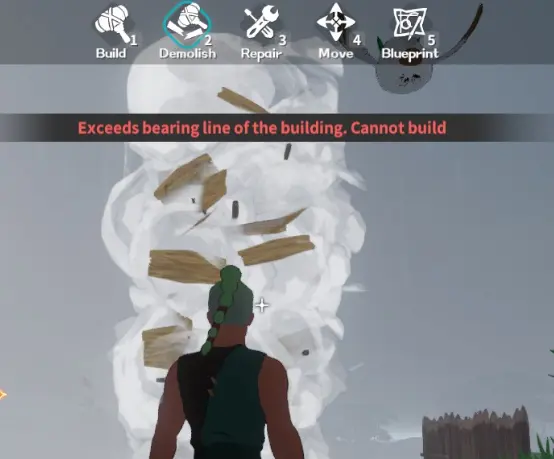
You can switch to demolish mode via the build menu. Open the build menu, then tap “Demolish” at the top of the screen. In this mode, you can destroy building pieces and get a refund on the materials spent. Don’t be afraid to smash things if they displease you or if you want to expand your house.
Be careful when demolishing though. Structures need to be on a solid foundation either by being built on a foundation piece or having direct contact with the ground. Destroying all of a piece’s foundations will result in those pieces – and those dependent on them – collapsing!
You may have noticed a “Repair” button when you went to the demolition menu. That’s because monsters and some other events can and will damage your structures if they hit them.
Repairs are done in the same way as demolitions – open the menu then tap the piece you want to repair. On a side note, the repair menu also shows you the overall health of the piece – green is healthy while red means it’s about to break.
Crafting Stations
Now that you’ve got a place to sleep in, it’s time to plop down some crafting stations so you can make your own stuff to help your quest in the Dawnlands.
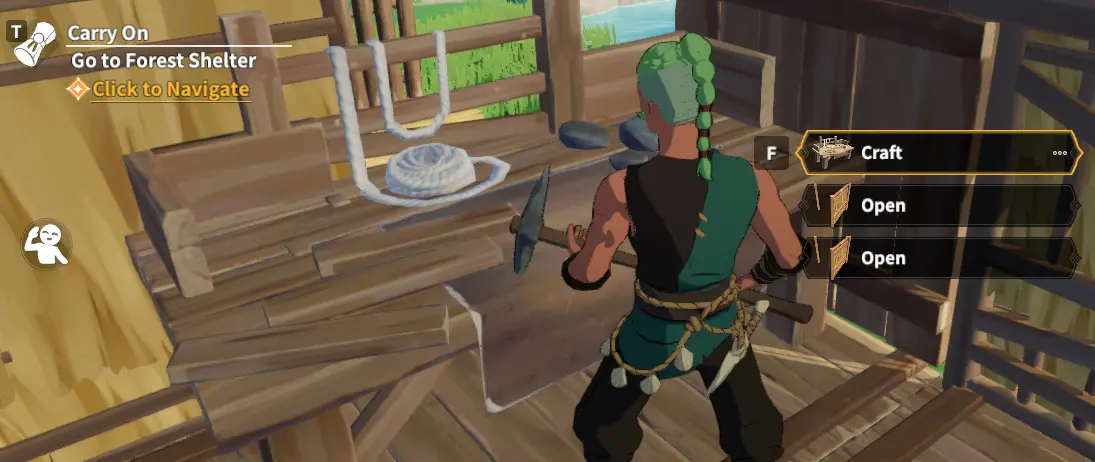
You can craft things on the go via your quick crafting menu, and that’s very handy. But let’s face it – the stuff you can make by hand isn’t particularly noteworthy. To make really good items, you’ll need to set up a Workbench (capitalized because that’s the name of the crafting station) or mooch off the ones in town. Since this section is about building your base, let’s get to making one for you. Luckily, it won’t need much, just 10 pieces of wood.
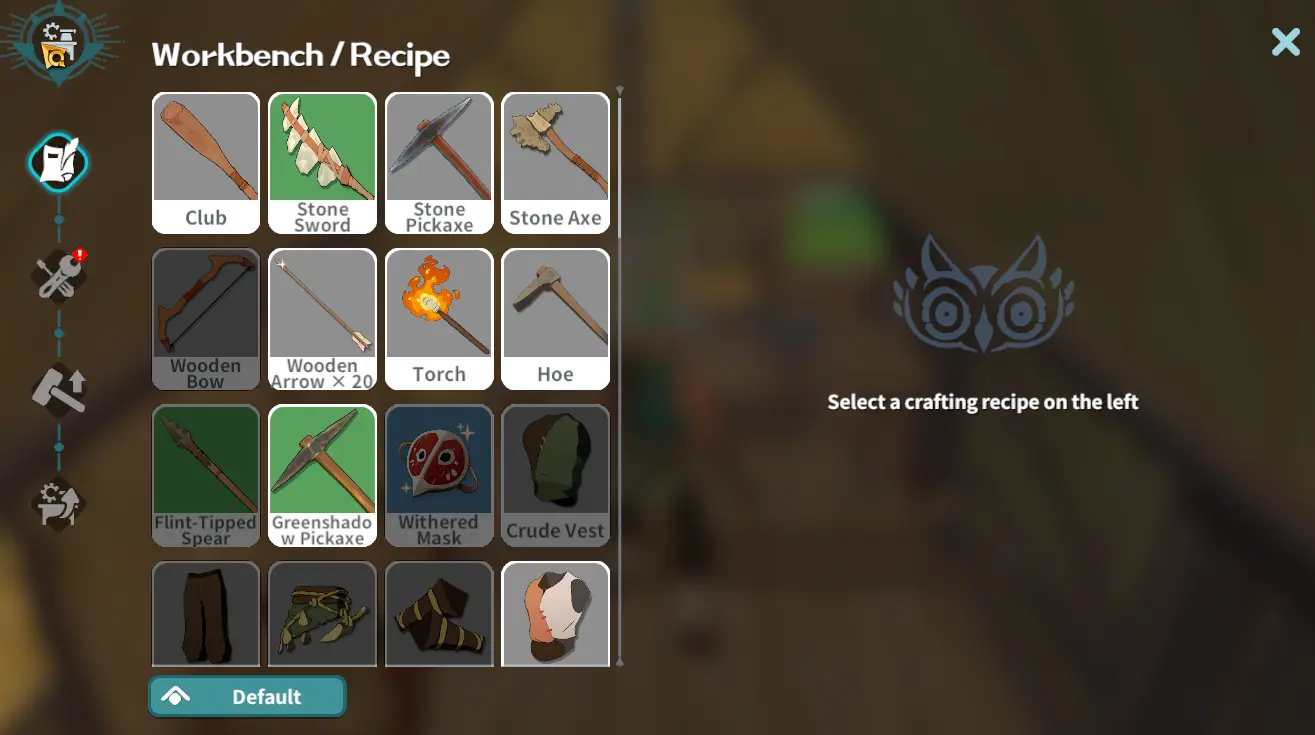
Activate your newly placed workbench to bring up the Real™ crafting menu. Here you’ll be able to create more complex items such as advanced arms, tools, and armor, as well as repair and upgrade the stuff you have. We’ll discuss this in greater detail in the “Survival Basics” section.
As you progress through the game, you’ll unlock more and more workbenches. Be sure to place at least one of them down in your base as it sure beats running back and forth from town!
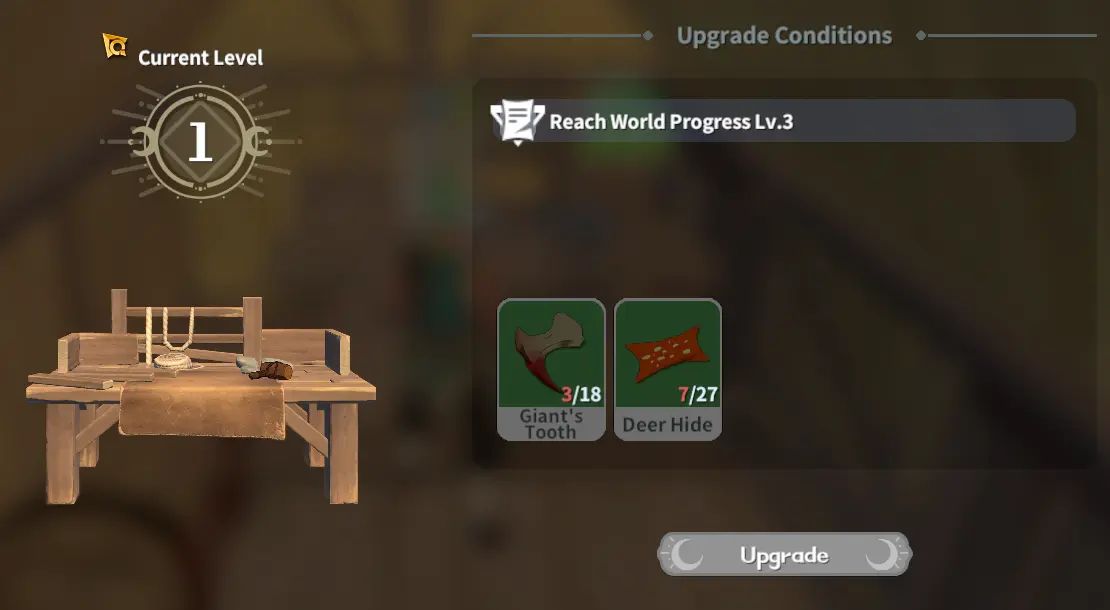
One thing you should pay attention to is the level of your crafting stations. This is accessed via the fourth button on the left when you open the Workbench (memorize that icon, it shows up a lot). You’ll need to sacrifice quite a bit of materials to upgrade a crafting station. While it may seem like a major pain in the butt, it’s always worth doing this as an upgraded station allows you to make better, more effective stuff.
Survival Basics
Dawnlands is a sandbox game, so naturally, there are survival meters. It’s not just the monsters that can kill you – you can starve, drown, freeze to death, and so on. Thus, the first thing you need to learn is how to take care of yourself, from keeping yourself well-fed and sheltered to equipping yourself with decent gear.
Quick Tips
- Your character needs to eat food regularly.
- You cannot starve to death, but having no hunger prevents you from sprinting and massively drains your stamina.
- You can eat raw food but it’s more efficient to cook it via a roasting spit in the early game.
- Food not only keeps you alive but also imparts powerful buffs such as more health and stamina. You can benefit from multiple food buffs at once (limited only by how full you are) so a varied diet is highly recommended.
- Pay attention to Dawnlands’ various buffs and debuffs. Getting caught by a bad debuff at the wrong time can spell your demise.
- Combat is an inevitability. Make sure to always have at least a basic weapon when wandering the world. An even better idea is to have a full repertoire of tools at hand.
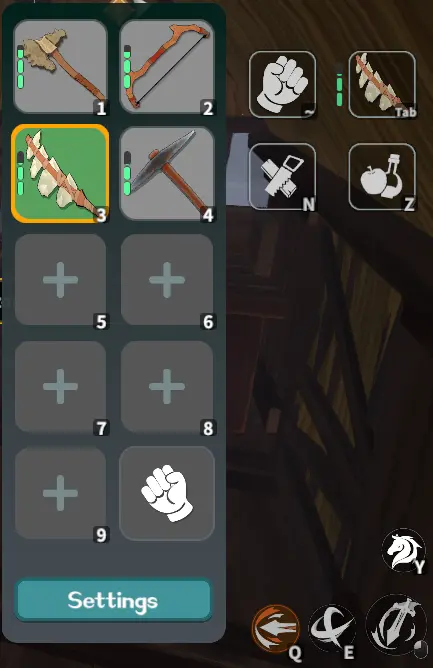
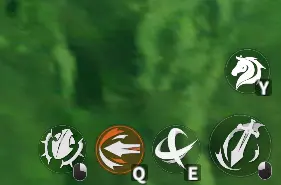
- All tools go into your right-hand slot, all off-hands go in your left. You can freely swap between anything you’ve saved in the quick slot by tapping the left and right hand icons on the upper right.
- Every bit of defense helps. Make sure to equip not only armor but also the rings and amulets you find in chests.
- Non-stone weapons, tools, and armor can be repaired and upgraded at a workbench.
- The more you do a task, the better you get at it. Your progress is logged via proficiencies.
- When you die, you’ll drop your unbound inventory items and leave a grave marker in the world. You can return to get your stuff back but watch out as whatever killed you is likely to still be in the area.
Food
By this time, your character is very likely hungry. You probably killed a few (read: a hundred) boars during your quest to gather housing materials. It’s time to get cooking!
Your character in Dawnlands gets hungry as you perform exhausting actions. Running, fighting, logging, mining – all these drain your hunger bar as you continue them. Luckily, there’s a wide array of food we can use to fill your character’s belly and get them back to whatever they were doing before their lunch break. This hunger bar can be found just below your HP, where hunger is indicated as the black part of the bar:
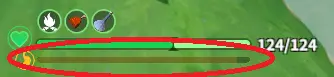
While you can’t starve to death, having a low or empty hunger bar both forbids you from running and adds a massive stamina penalty to almost everything you do, so stay fed.
Chowing down is easy. If you’re in the wild, you can always hunt animals and eat their raw meat (barbarian!) or pick berries, fruits, vegetables, or mushrooms. However, it’s almost always more effective to return to a base or set up a cooking fire as cooked food is exponentially better than raw food.
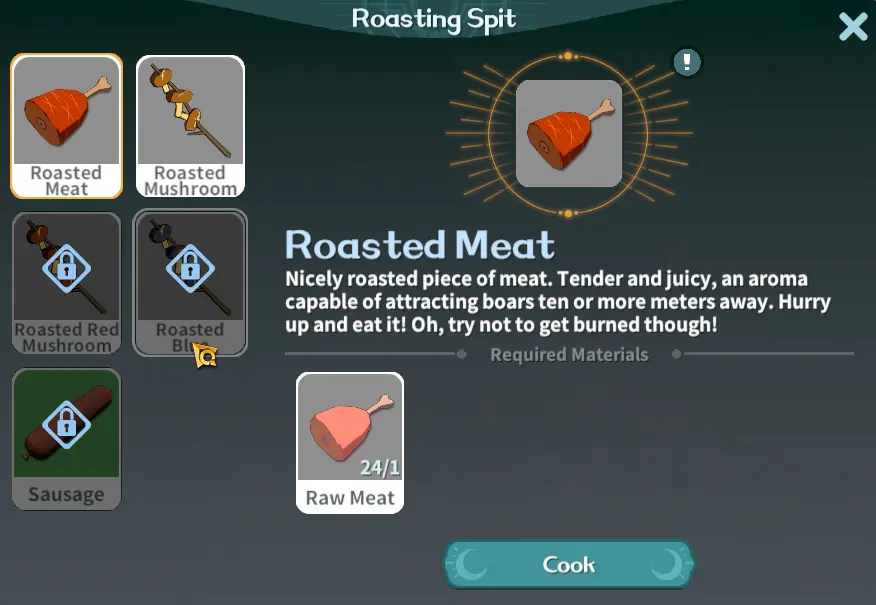
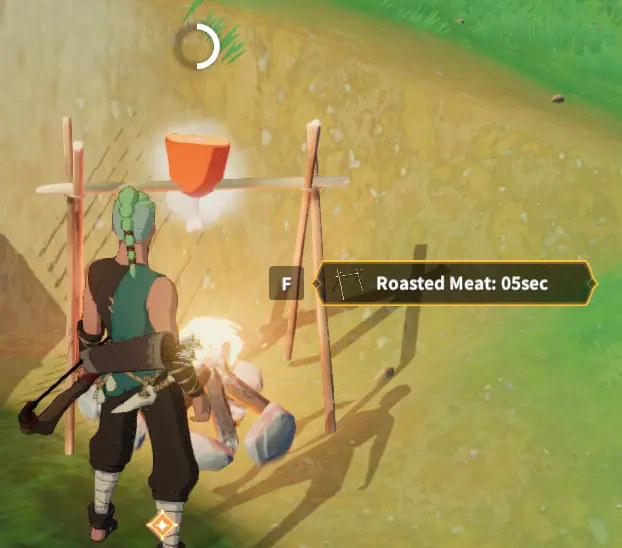
To cook on a fire, you’ll need both a campfire and a roasting spit. Place the campfire, then place the roasting spit (build mode -> “Crafting”) above it. After that, interact with the roasting spit and select what item to put in it. Note that not all foodstuffs can be roasting – at the beginning of the game, it’s only raw meat and mushrooms – but as you progress through the game, you’ll not only be able to roast new food but also unlock new food crafting stations to prepare more complex and effective meals. Be careful not to leave something on the spit too long as it’ll burn into charcoal!
Food isn’t used just to fill your hunger bar. Several food items provide both instant and residual healing on top of powerful buffs.
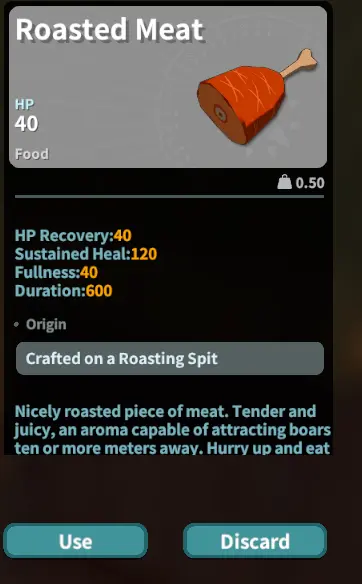
Food stats are as follows:
- HP Recovery: how much instant and maximum HP consuming this food item gives you.
- Sustained Heal: bonus HP regen over time. Only applies if you’re injured, and in small ticks. Any leftover unhealed Sustained Heal vanishes if the food’s duration runs out.
- Fullness: how much of your hunger bar this food fills up. For reference, the maximum hunger is 100.
- Duration: how long this food’s effects persist.
Note that buffs from multiple food items do stack. The only limit here is that you can no longer eat if your hunger bar is full, meaning you’ll need to pick and mix your food buffs carefully. This also means that while food is good for small healing ticks, you can’t rely on it entirely to keep yourself alive in a fight. You’ll need potions for that, which are crafted via a different crafting station.
Buffs and Debuffs
Buffs and debuffs can make or break you in Dawnlands, so it’s a good idea to keep tabs on both these status effects.
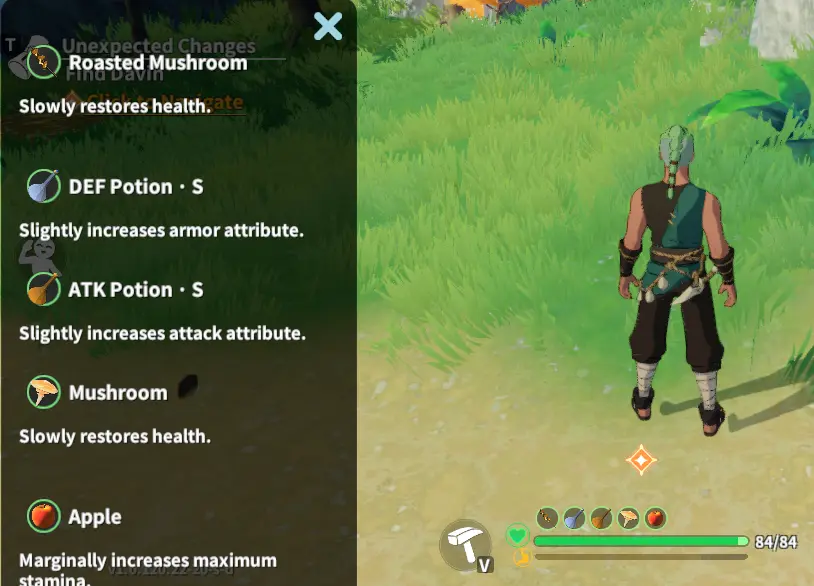
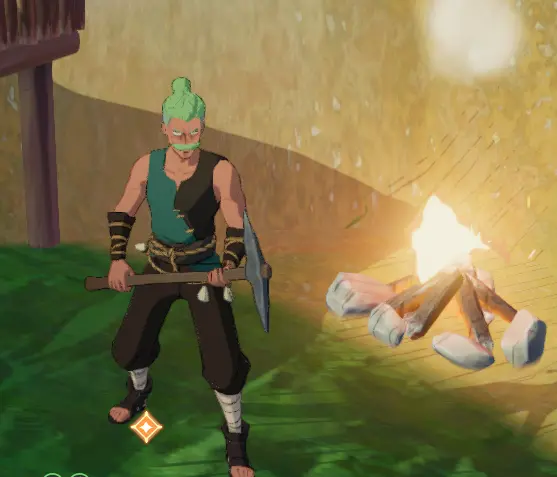
To view what status effects are affecting you, tap on any status effect icon directly above your health bar. This will bring up a more detailed info panel that shows exactly what each of your buffs or debuffs does. Food, potions, poison, environmental effects, and more will show up here.
It’s good to familiarize yourself with common buff and debuff icons. A fire means you’re warm and regenerating faster, snowflakes mean you’re cold and regenerate slower, while drops of water mean you’re wet and have a massive regeneration penalty. Not even all “buffs” are entirely beneficial – roasted red mushrooms, for example, show up as a buff as they raise maximum stamina but they also poison you. Remember: knowledge is power!
Equipment
All adventurers need gear to survive, and you’re no different. As the hero of prophecy, you’re not only suggested but expected to always have a veritable arsenal on hand. Danger lurks around every corner, and to thrive in the Dawnlands, you’ll need to be ready.
Your first foray into Dawnlands’ equipment system will be via the hand-crafting system. Here you’ll be able to craft a basic axe and sword to defend yourself and harvest resources. As you unlock new recipes and items, you can expect to add several new items to that list – a bow for attacking from afar, a pickaxe for mining and flattening land, a hoe for farming, spears, clubs, or whatever your weapon of choice is, and so on.
Fortunately, swapping between items in your hands is easy. Just tap on the left and right hands to the right of the screen. The left hand holds your off-hand items, such as shields, while the right hand holds weapons, tools, and the like.
It’s not just weapons and tools you need to make. You can also craft armor to protect yourself better from the various threats found in the wilderness. As with equipment, try to keep your armor up to date to have a better chance of survival. Every point of armor really helps!
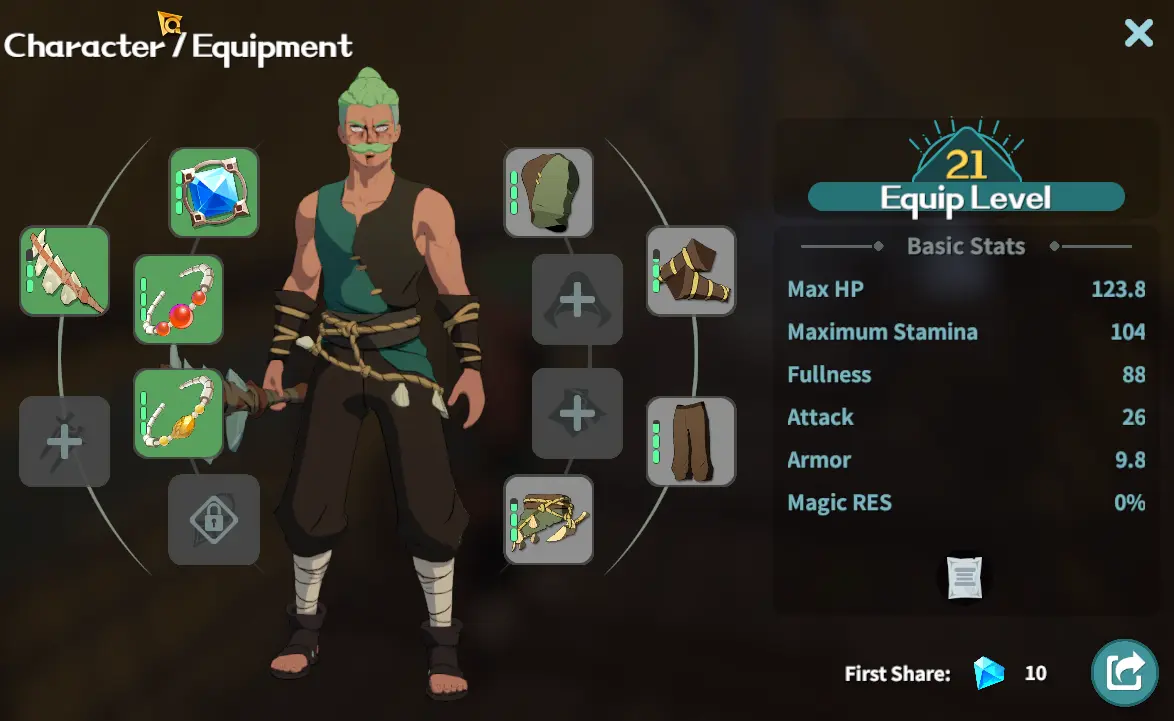
Finally, each character also has 3 equipment slots for accessories, such as rings and amulets found in treasure chests.
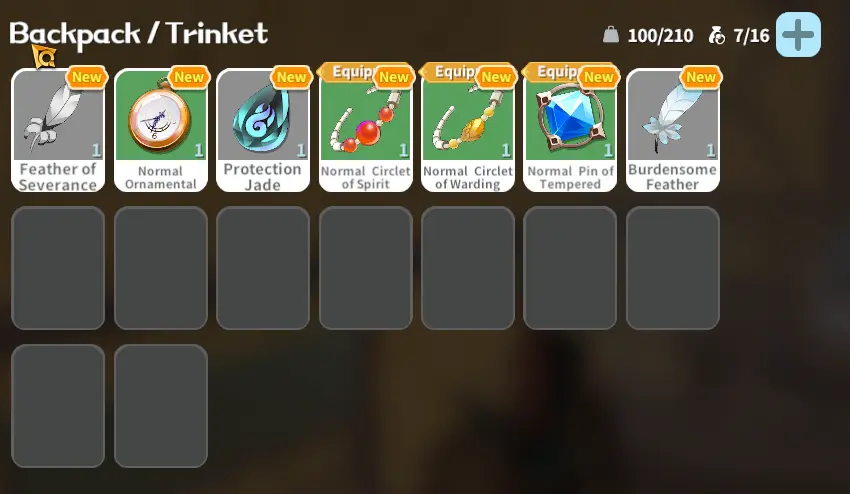
These can be found in their own special section in the inventory screen. Alternatively, you can open your character screen (the head in the top right menu) and add accessories via the 3 slots directly to the left of your character.
Repairs
While hand-crafted equipment such as stone swords, axes, and pickaxes are breakable and expendable, tougher tools made of metal and armor are more durable and need to be repaired instead of replaced.
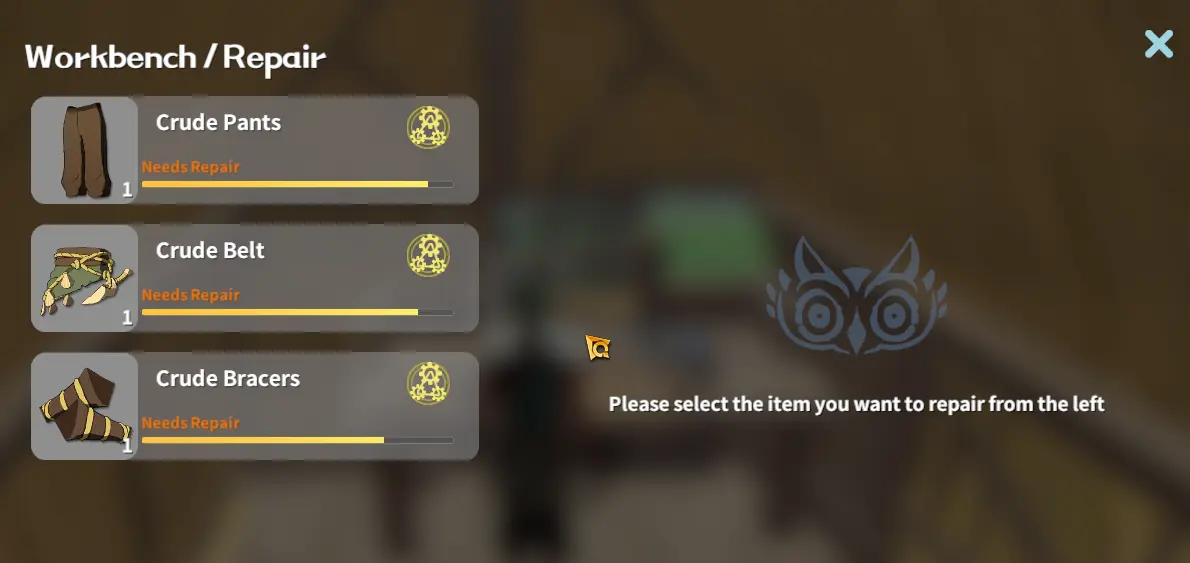
Repairs are done at whatever crafting station you used to make the item in question. Fortunately, repairs are free, so there’s no excuse for you to not repair your gear whenever you duck into your base!
Upgrades
Permanent equipment can also be upgraded to increase its performance. By upgrading your equipment, you’ll be able to squeeze a bit more performance out of it.
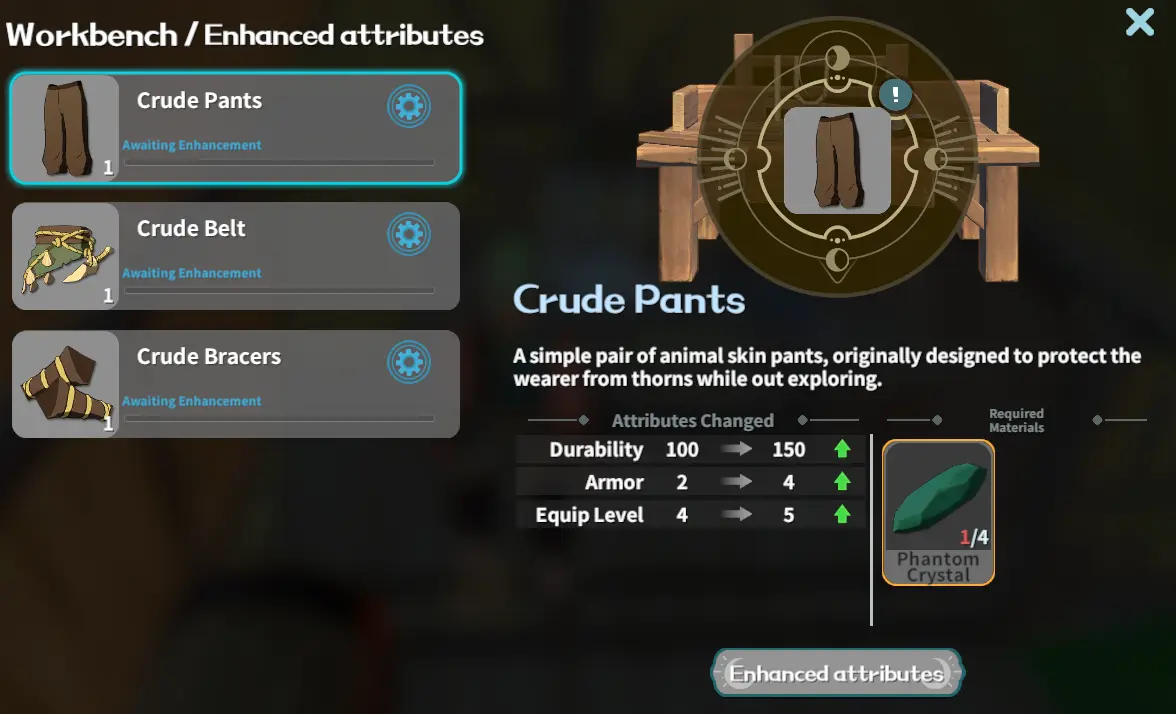
Upgrades are done on the crafting station where you first made an item – hide and leather vests, for example, are upgraded on the Workbench. Each upgrade level also requires a different set of materials; expect to farm a ton for upgrade materials. In return, upgrades are guaranteed, though because of the time and effort involved in harvesting these materials, don’t upgrade something that you’re going to replace in short order.
A word of advice – before venturing into a new biome, it’s wise to fully upgrade all your available gear to as high as you can go. That way you’ll die less.
Proficiencies
The more you do certain activities in Dawnlands, the better you become at them. This is tracked through the game’s proficiency system, which you can view on your character page.
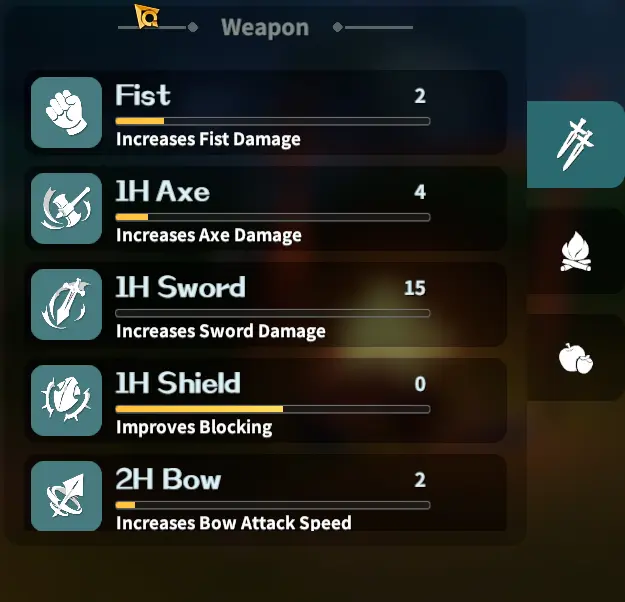
Proficiencies aren’t just for combat. Sprinting more increases your sprinting proficiency, making dashing more stamina efficient. Jumping a lot raises jumping proficiency, letting you go higher for less stamina. The more you play, the better you get!
Death
Let’s make one thing clear – the Dawnlands are a dangerous place. Sure, they’re full of wonder and excitement, but they’re also rife with monsters and other threats.
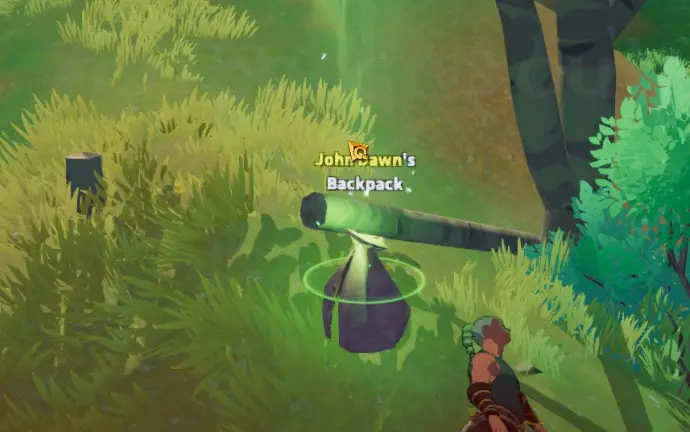
Run out of HP in Dawnlands and you’ll drop anything that isn’t bound to you – that is to say, any inventory items that aren’t food or cash shop/quest rewards. Your equipment stays safe though, but if you’re in multiplayer, watch out!
Getting your stuff back is simple – run back and activate your death bag, then choose to loot everything. However, watch out. If you didn’t die in an accident, whatever killed you is probably still in the area!
Combat in the Frontiers
No matter which way you want to play the game, you’ll have to fight. From rambunctious rocket boars to sluggish but powerful giants, here are the basics you need to know to survive combat in Dawnlands.
Quick Tips:
- Because of the proficiency system, it’s good to stick to focus on a few weapon types. I would recommend either a slashing or blunt weapon plus a bow.
- You can dash, jump, and sneak in Dawnlands.
- Dashing does not give you invincibility frames.
- If you’re not sure about weapon types, you can always build the cheapest version of that weapon you can and practice with it. Movesets are similar or very close for the same weapon model.
- Shields can completely negate damage at the cost of movement speed and stamina.
- Some weapons have skills that are found in the lower right. Practice these skills and incorporate them into your combos.
- Monster spawn rate and mob density are greatly increased at night. While dangerous, nighttime is a great way to get a lot of proficiency training and mob drops.
Selecting A Weapon Type(s)
So many weapons, so little time. Because of Dawnlands’ proficiency system, it’s a good choice to focus on only a few weapon types at a time – this way, you’ll get your practice in and become inherently better at wielding those weapons. When selecting a weapon, it’s a good idea to look at its damage type.
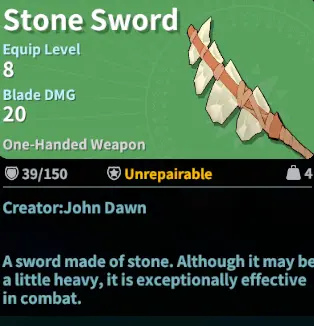
There are three main damage types in the game – blade, blunt, and pierce. Blade damage comes from sharp implements, like swords and axes. Blunt damage comes from clubbing weapons like hammers or mauls. Pierce damage comes from pointed tips, like spears or arrows. As different enemy types have different resistances (if this is anything like Valheim, you’re in for a treat later), it’s prudent to have access to at least 2 damage types so nothing can stonewall you. In practice, what that means is you bring either a slashing or blunt weapon plus a bow. This way you always have 2-type coverage.
Take the time to try out the different weapon types, too. While both a mace and a maul do blunt damage, they handle very differently in combat, and it’s important to find a weapon that you’re comfortable with.
Movement Options
No matter what weapon you go with, you’ll need to master your movement options. Dawnlands has three major ones: dashing, jumping, and sneaking.
Remember: you can use these options, but monsters cannot. Jump on high rocks to gain a height advantage and attack with long-reach weapons; dash to get out of danger or place yourself in a better position (note: dashing does not give you invincibility frames) or sneak to get a good first hit in. Just remember – dashing and jumping consume stamina, so move tactically!
Shields
If you decide to go with a one-handed weapon, you may as well slap on a shield.
Using a shield is easy. Just equip the shield in your offhand and pull it out. You’ll know it’s working when your character’s movement speed slows to a crawl. While your shield is equipped, you negate weaker physical hits (this seems to depend on your armor), but each hit you block drains some stamina, with big hits absorbing a ton of stamina and potentially breaking your guard.
Weapon Skills
Certain weapons have skills tied to them. These can be seen in the lower right of the screen.
These skills operate on a cooldown and can make up for their base weapon’s deficiencies. Mauls, for example, have a powerful leap slam that remedies their low range as well as a spin attack for dealing with lots of mobs. Be sure to practice the skills that your chosen weapon type has, as they can really make a difference!
Night Combat
As with most survival games, nighttime is particularly dangerous. In Dawnlands, both mob density and spawn rate are vastly increased at night, and protracted fights until sunrise aren’t uncommon.
On the other hand, all that combat is great at building proficiency, and there’s no better time to hunt for mob drops. High risk, high reward.
Exploring The Dawnlands
Dawnlands gives players a massive world to explore. Because of the sheer vastness of the wilderness, you may get lost, both figuratively and literally. Here’s a rundown on exploration basics in Dawnlands and what to expect, at least from the early game.
Quick Tips:
- Use your map markers! Put icons indicating where your base and outposts are so you can safely return home. You can also use markers to denote interesting locations if you don’t have the resources to explore them at the moment.
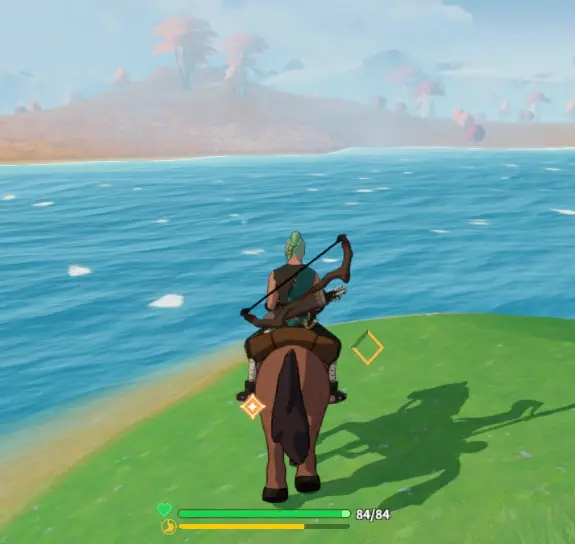
- Use mounts to get around quickly and efficiently. There’s mounted archery in Dawnlands, so go nuts.
- NPC settlements provide various services and can be teleported back to at no cost.
- Biome changes are marked by a stark contrast in the land: the grass and soil look different, there are new tree species, and the rocks may change. New biomes present a significant difficulty spike, so if you’re going to explore them, be ready to die.
- Biome progression is tied to defeating certain bosses.
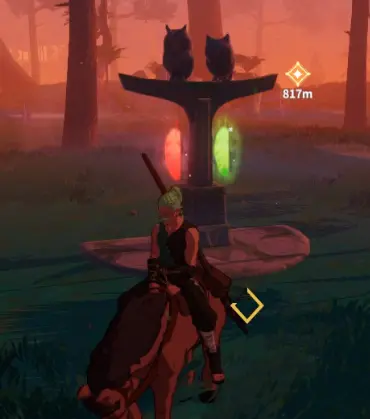
- There are multiple landmarks in the wild, such as balloon puzzles, owl statue puzzles, corrupted resource nodes, and more. Interact with them all – they’ll reward you handsomely. Probably.
- You can teleport to many important landmarks, such as settlements and teleportation beacons. You can also teleport to other, less important places such as your bed or puzzle statues, but this will cost a teleport potion.
Map Markers
The first and most important tip is this: use your map markers!
You can plop down a large (if not unlimited) amount of map markers. Use these to denote where your base is, where your camps and outposts are, as well as any interesting landmarks you may want to go back to. The world of Dawnlands is huge, and if you don’t keep tabs on where you’ve been, you’ll easily get lost!
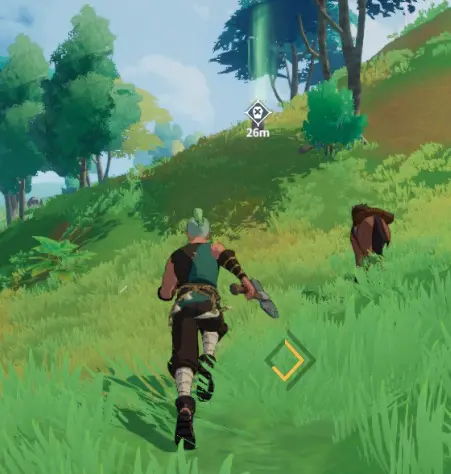
Mounts
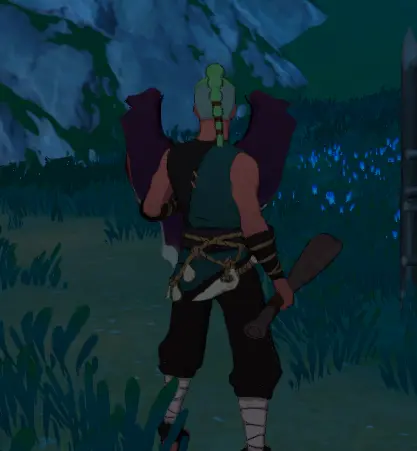
Yes, you can run around and train your sprinting efficiency, but the further out you range, the sparser landmarks become and the more terrain you need to cross. That’s where mounts come in handy.
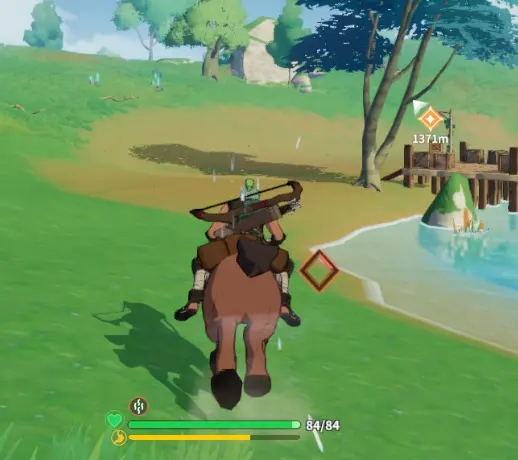
After you make some headway into the tutorial, you’ll be prompted to capture a horse for your own use. While basic, this horse presents a huge improvement to land travel as it both walks and sprints much faster than you. The only restrictions to being mounted are that you can only use certain weapons while mounted (mounted archery is a go) and you automatically dismount if you enter deep water. Other than that though, your horse will serve you well for the first part of the game. Or until you find a better mount.
Riding is tied to a proficiency (don’t laugh), so the more you travel with your mount, the faster it can go.
Settlements
NPC settlements are among the most distinct landmarks you’ll find while traveling the Dawnlands.
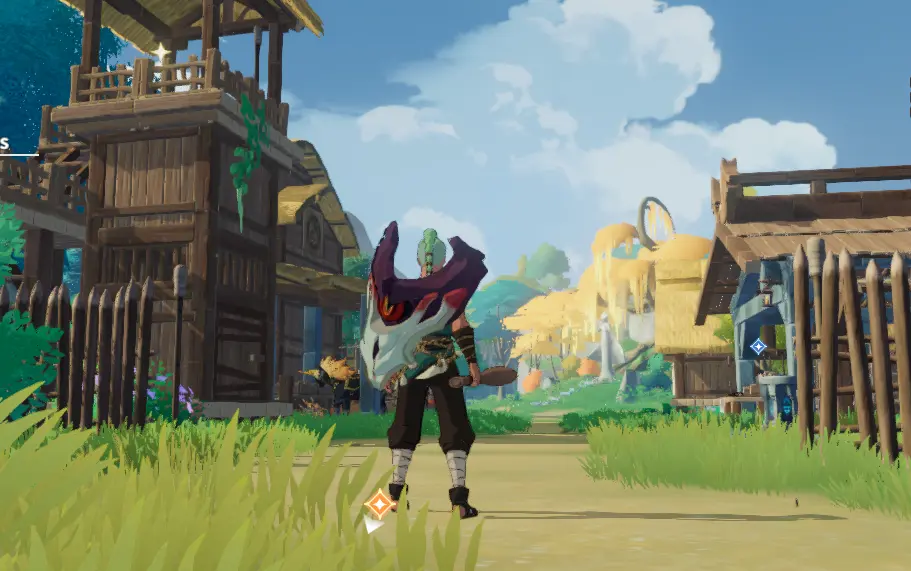
Settlements are important for several reasons:
- Settlements are safe zones. Monsters do not spawn inside settlements at night, so they’re a safe place to hunker down if you get caught out.
- They have shops where you can trade your coins for more useful supplies. This includes backpack upgrades so you can carry more stuff, so be sure to check in at every shop!
- Villagers may have quests for you that provide resources and give you experience points.
- Quest boards containing daily quests can be found in villages, though you can also build one yourself.
- You can fast-travel to any settlement you’ve visited.
Biomes
During your travels, you may find places where the land seems a little different. These are Dawnlands’ different biomes. Each new biome presents a considerable change in difficulty and may not be arranged in ascending order from the middle of the world. Explore if you wish, but be cautious, and don’t bring anything that you can’t replace if you die.
Each biome offers new resources, but you’ll be hard-pressed to gather them if you don’t have the appropriate tools. Biome progression is often gated behind bosses, which we’ll talk about in greater detail in the “Progression” section.
Sanctification Sites, Puzzles, and More
You’ll find lots of oddities as you roam around the Dawnlands. Many of these are profitable, while some are dangerous. You may find floating balloons, strange landmarks, corrupted resource nodes, and more. Interact with them all.
Puzzles and challenges provide experience points and resources, while dungeon diving and miniboss fights can offer rich rewards. A good general rule is if you can easily survive in the biome you’re in, you’re more than ready for its challenges and landmarks.
Teleportation
With all the exploration you’ll be doing in Dawnlands, you’ll be happy to know that there’s a fast travel system.
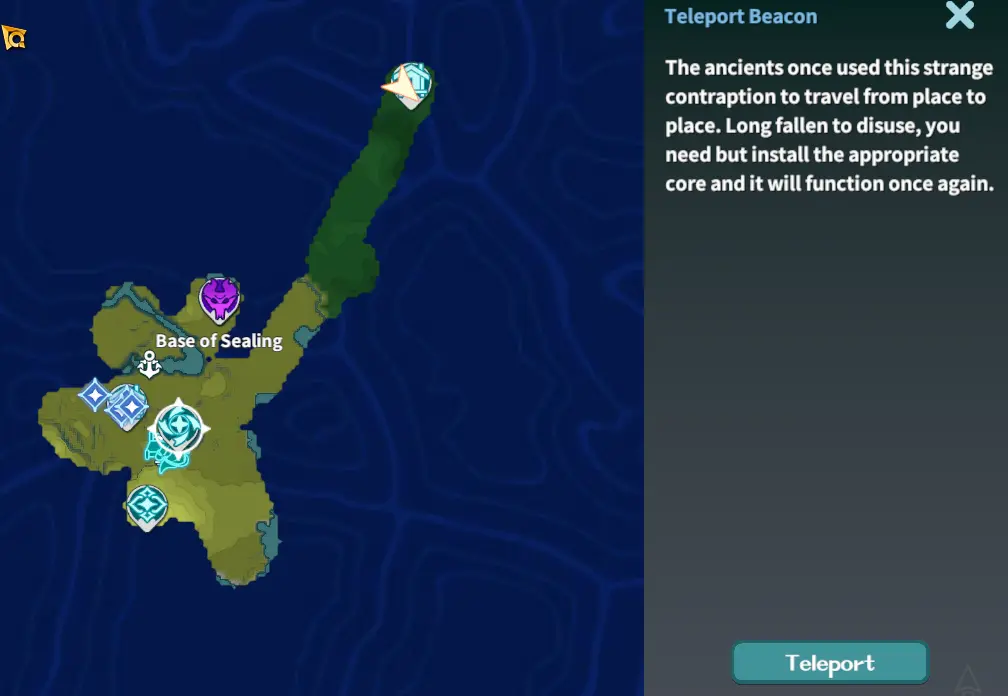
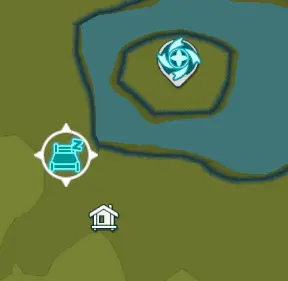
As mentioned earlier, you can teleport to any NPC settlement you’ve previously visited. You’ll also unlock Teleport Beacons in your travels, which look like this…
…and serve as free teleport locations. Thus, it’s a good idea to set up your outposts and main base near a settlement for quick and easy access.
You can also opt to teleport to any bed or point of interest (except markers placed by you), but this will cost a teleport potion each time you do it.
Progression
So now you have a functional base, can keep yourself well-fed and equipped, can defend yourself in combat, and know the basics of exploration. The only thing left is how to progress further in the game.
Quick Tips:
- Gather and offer Sanctified Dust to raise your Rousing level. This nets your resources as well as the all-important Recipe Pages.
- Recipe pages can also be found in chests, by doing puzzles or just buying them from the shop.
- To summon a boss, you’ll need to find its Base of Sealing in the biome where it resides and offer items from that region.
- Bosses give you the necessary materials and recipes to progress in a new biome.
Rousing and Sanctified Dust
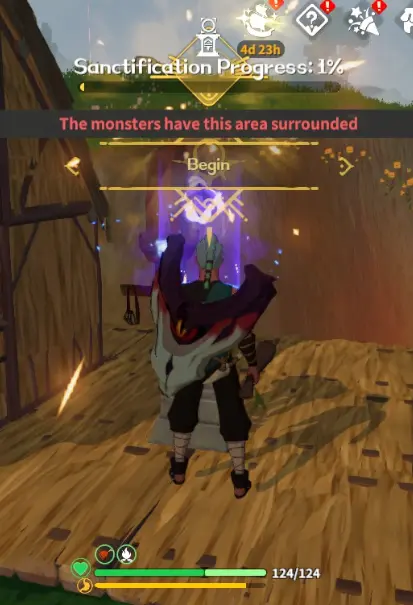
Your progression can roughly be tracked via the Rousing system. This indicates how much progress you’ve made in cleansing the land of evil.
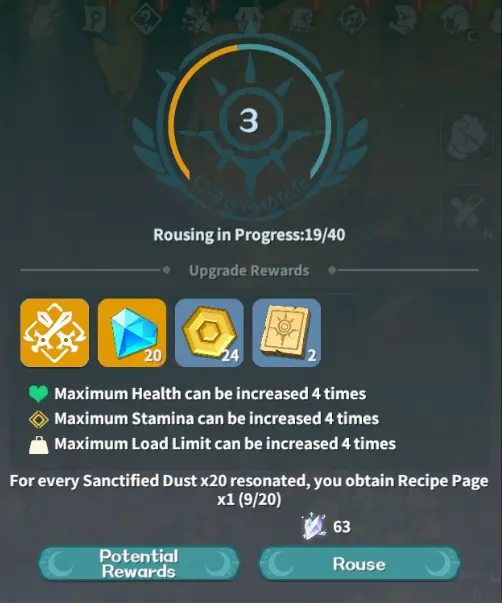
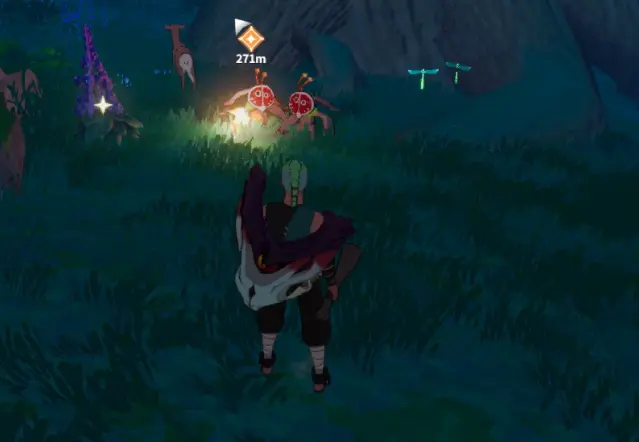
Rousing is done via the Goddess Statue, like the one in Belsa’s village. To Rouse the Goddess Statue, you’ll need to offer Sanctified Dust. You gather this stuff by sanctifying evil spots in the wild (anything with a black-purple aura can be sanctified) or by performing a major sanctification ritual via the platform. To perform the ritual, you’ll need a monster’s Grudge and some other materials. Offer them at the altar, then get ready to defend yourself from the hordes of monsters that will spawn!
Offering Sanctified Dust to the Goddess Statues nets you some Rousing experience. Net enough experience and you level up, getting you a nice reward package as well as new passive skills that can be activated via the statue.
Recipe Pages
The main reason you want to go through the whole Rousing rigmarole is that it’s the best and most consistent way to earn Recipe Pages. As you may have learned by yourself, you need Recipe Pages to learn new things, with more complex items and structures requiring more pages. Thus, it’s important to hoard the stuff and gather as much of it as you can.
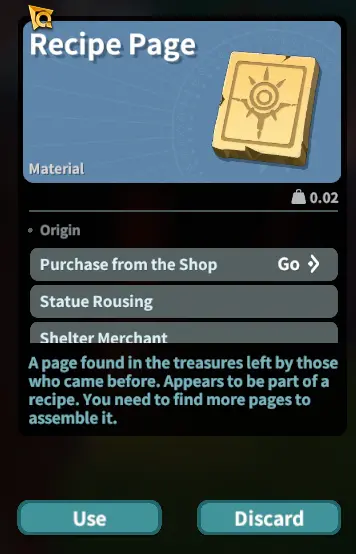
Rousing isn’t the only method of earning Recipe Pages, though it is the most consistent. Chests in the wild can sometimes contain them, wild puzzles can give you some (via chest) and if push comes to shove, you can always buy them at a rate of 10 diamonds to one page at the cash shop.
Bosses
Progression in Dawnlands, much like Valheim, is reliant on you defeating certain powerful bosses to unlock the way forward. Each of these bosses drops loot that you’ll usually need to craft the next tier of items required to unlock the resources of a new region.
To fight a boss, you’ll first need to find its Base of Sealing in the biome it lords over. You’ll then need to offer some items to summon the boss. The first boss in Dawnlands is Kenda, and to summon it, you’ll need to offer Withered Masks that come from goblin camps (purify the corrupted poles).
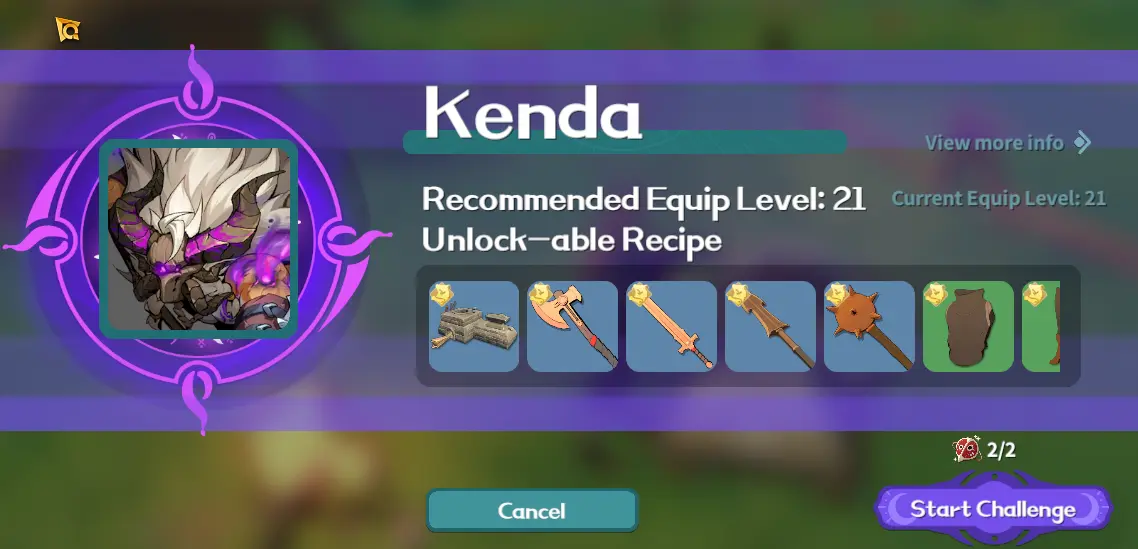
Bosses often guard core materials or recipes that you need to make progress in the next biome. Kenda, for example, gives you the Greenshadow Pickaxe recipe the first time you beat him – you’ll need this pick to harvest copper in the forest!
Into The Breach!
The world of Dawnlands is huge, and with so many systems in play, you’re sure to find a playstyle that suits you. Whether that’s expunging the darkness from the ancient curse, bare-knuckle boxing the various bosses, or building a sky tower, the choice is yours in Dawnlands.

That concludes my beginner’s guide to Dawnlands, and I hope I was able to lay out the basic concepts you’ll need to survive the ordeals laid before you. If you have any tips or tricks you’d like to share or have any suggestions on how to improve this guide, make yourself heard in the comments section below!